Leaderboard
-
Captain Obvious
Free Member6Points10,081Posts -
.JPG.cfcada9cf1c1b502df3f5f2f2ca3ff36.JPG)
SteveJ
Free Member4Points9,646Posts -
zspert
Free Member4Points382Posts -
Barefootdan
Free Member3Points275Posts


Popular Content
Showing content with the highest reputation on 02/04/2023 in all areas
-
Did someone say V-3 kit - final installment So, for the next two plus years we tried very hard, at least I did, to make those 73, 74 & 74.5 Z cars run properly. I paid careful attention to each and every service bulletin ignoring those that didn't make sense and trying those that I thought had a shot. I found that as time passed less and less of the affected cars ended up at the dealer. Where did they go? Fast forward to my post dealer days. I was getting a fair number of mostly second owners who weren't aware of the faulty induction system but knew something just wasn't right and wanted very dearly to make the damn thing run properly. Of course the fix was to backdate the induction system, the entire system. Everything from the cylinder head out. This operation turned the undriveable into pleasurable. Most of these second owner cars had low mileage, often less than 15k. It seems that most of these cars were parked by the original owners after their patience ran out. In about the year 2000 I did the backdate to a 73 with only 8K miles. Uemura-san's book drew a detailed picture of the extensive real-world testing that was done before the 240 was introduced to the US market. It's clear to me that Nissan did ZERO real world testing before introducing the 73 240 to US market. What a colossal foul-up! Interesting postscript - 10-15% of the cars in these model years, according to the original owners, ran just fine! In my view these chaps weren't being completely honest or they only used their Zs in the cooler months. Some time in the future I'll go into the other 74 & 74.5 big problem - loose crankshaft pulley bolts, oh yea! Cheers
 4 points
 -
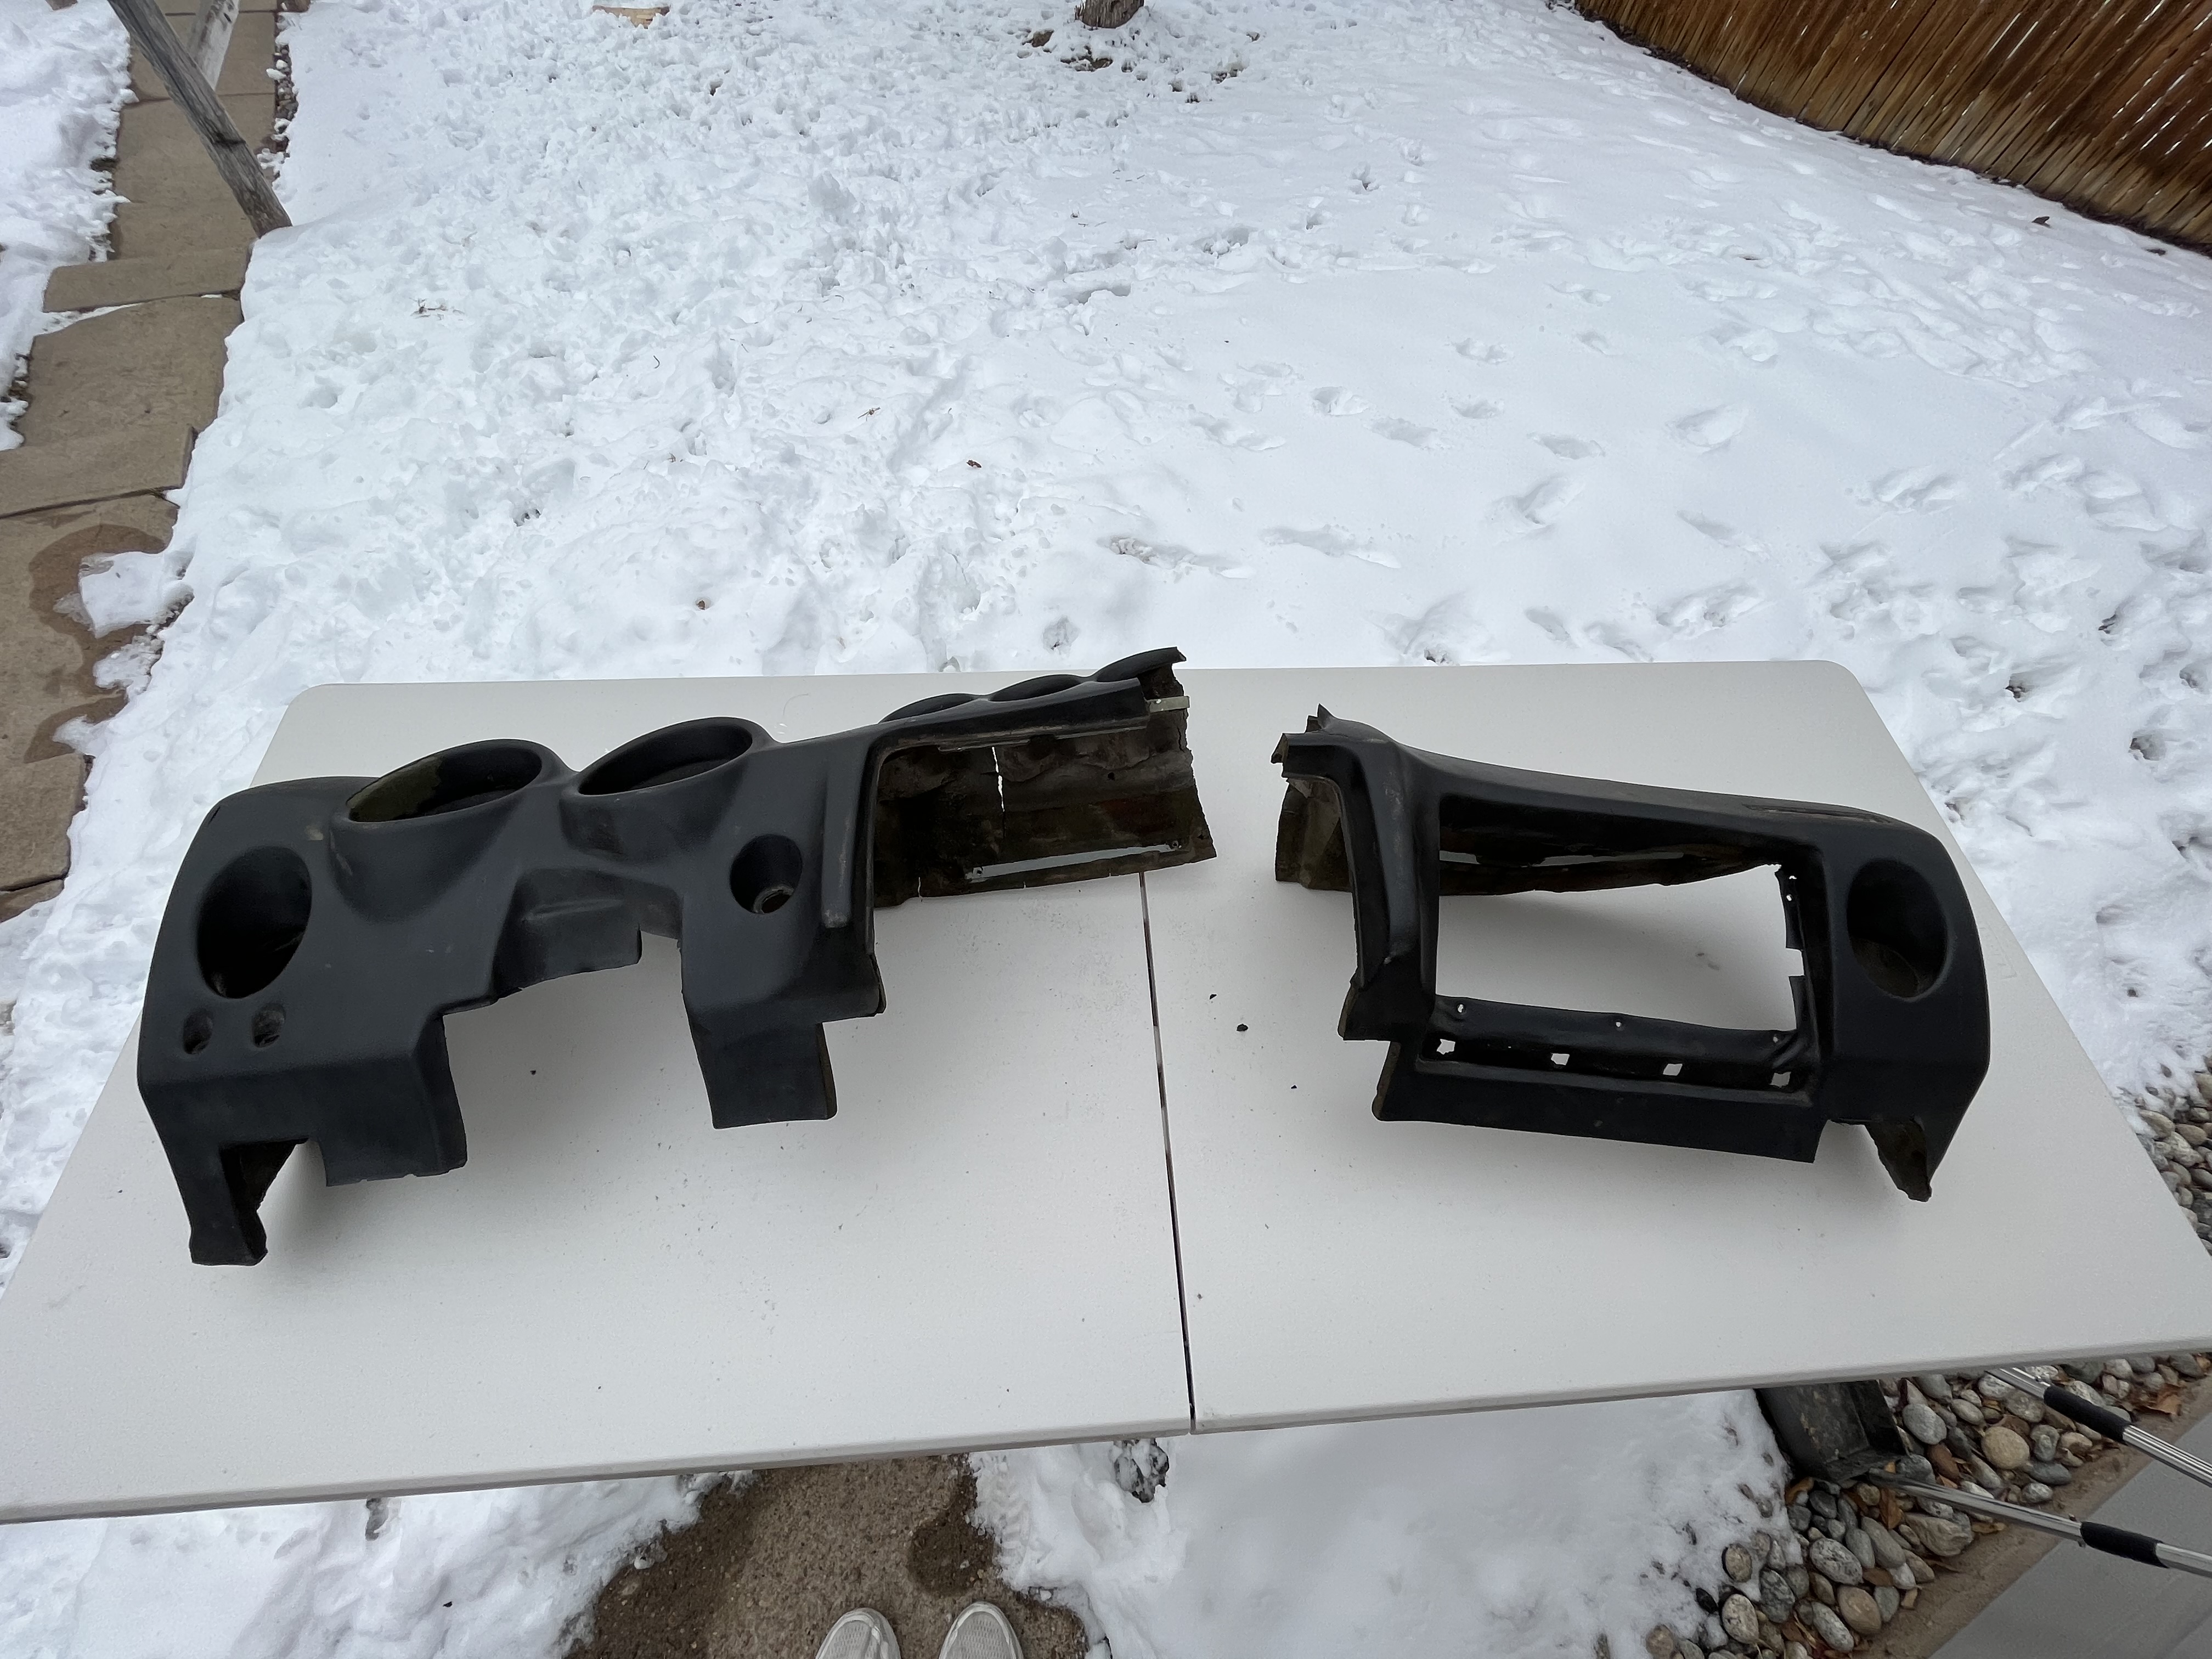
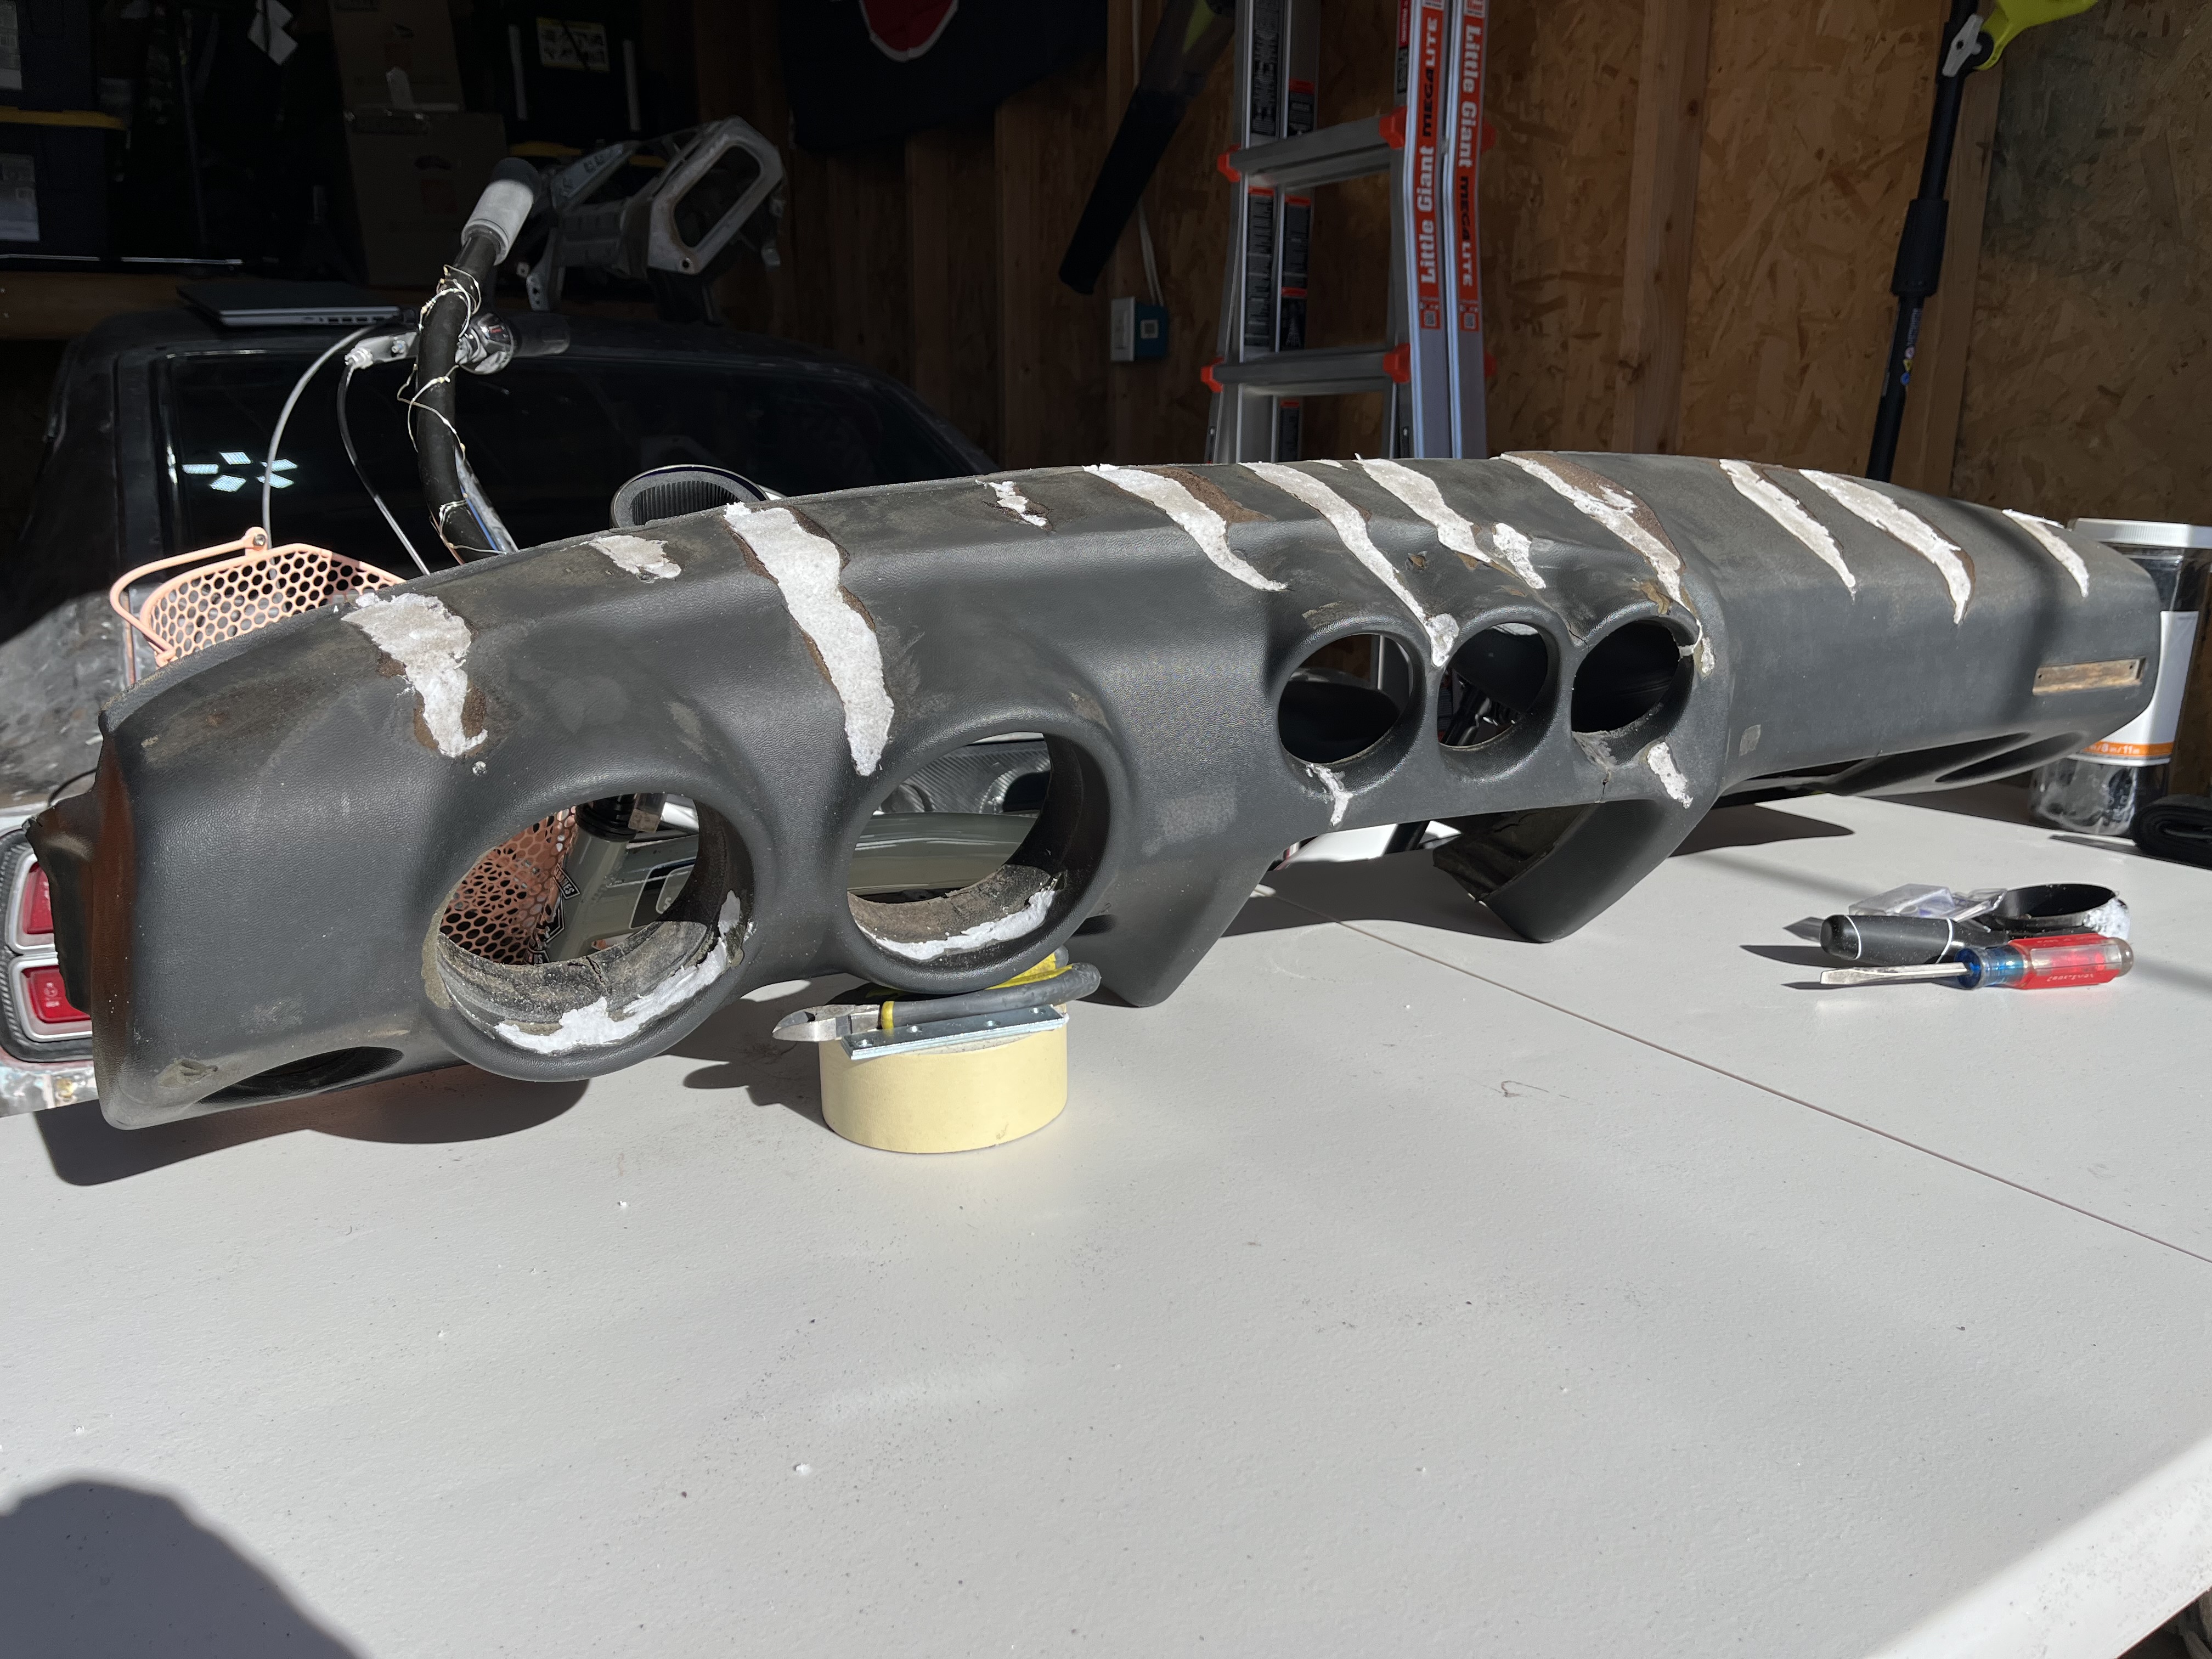
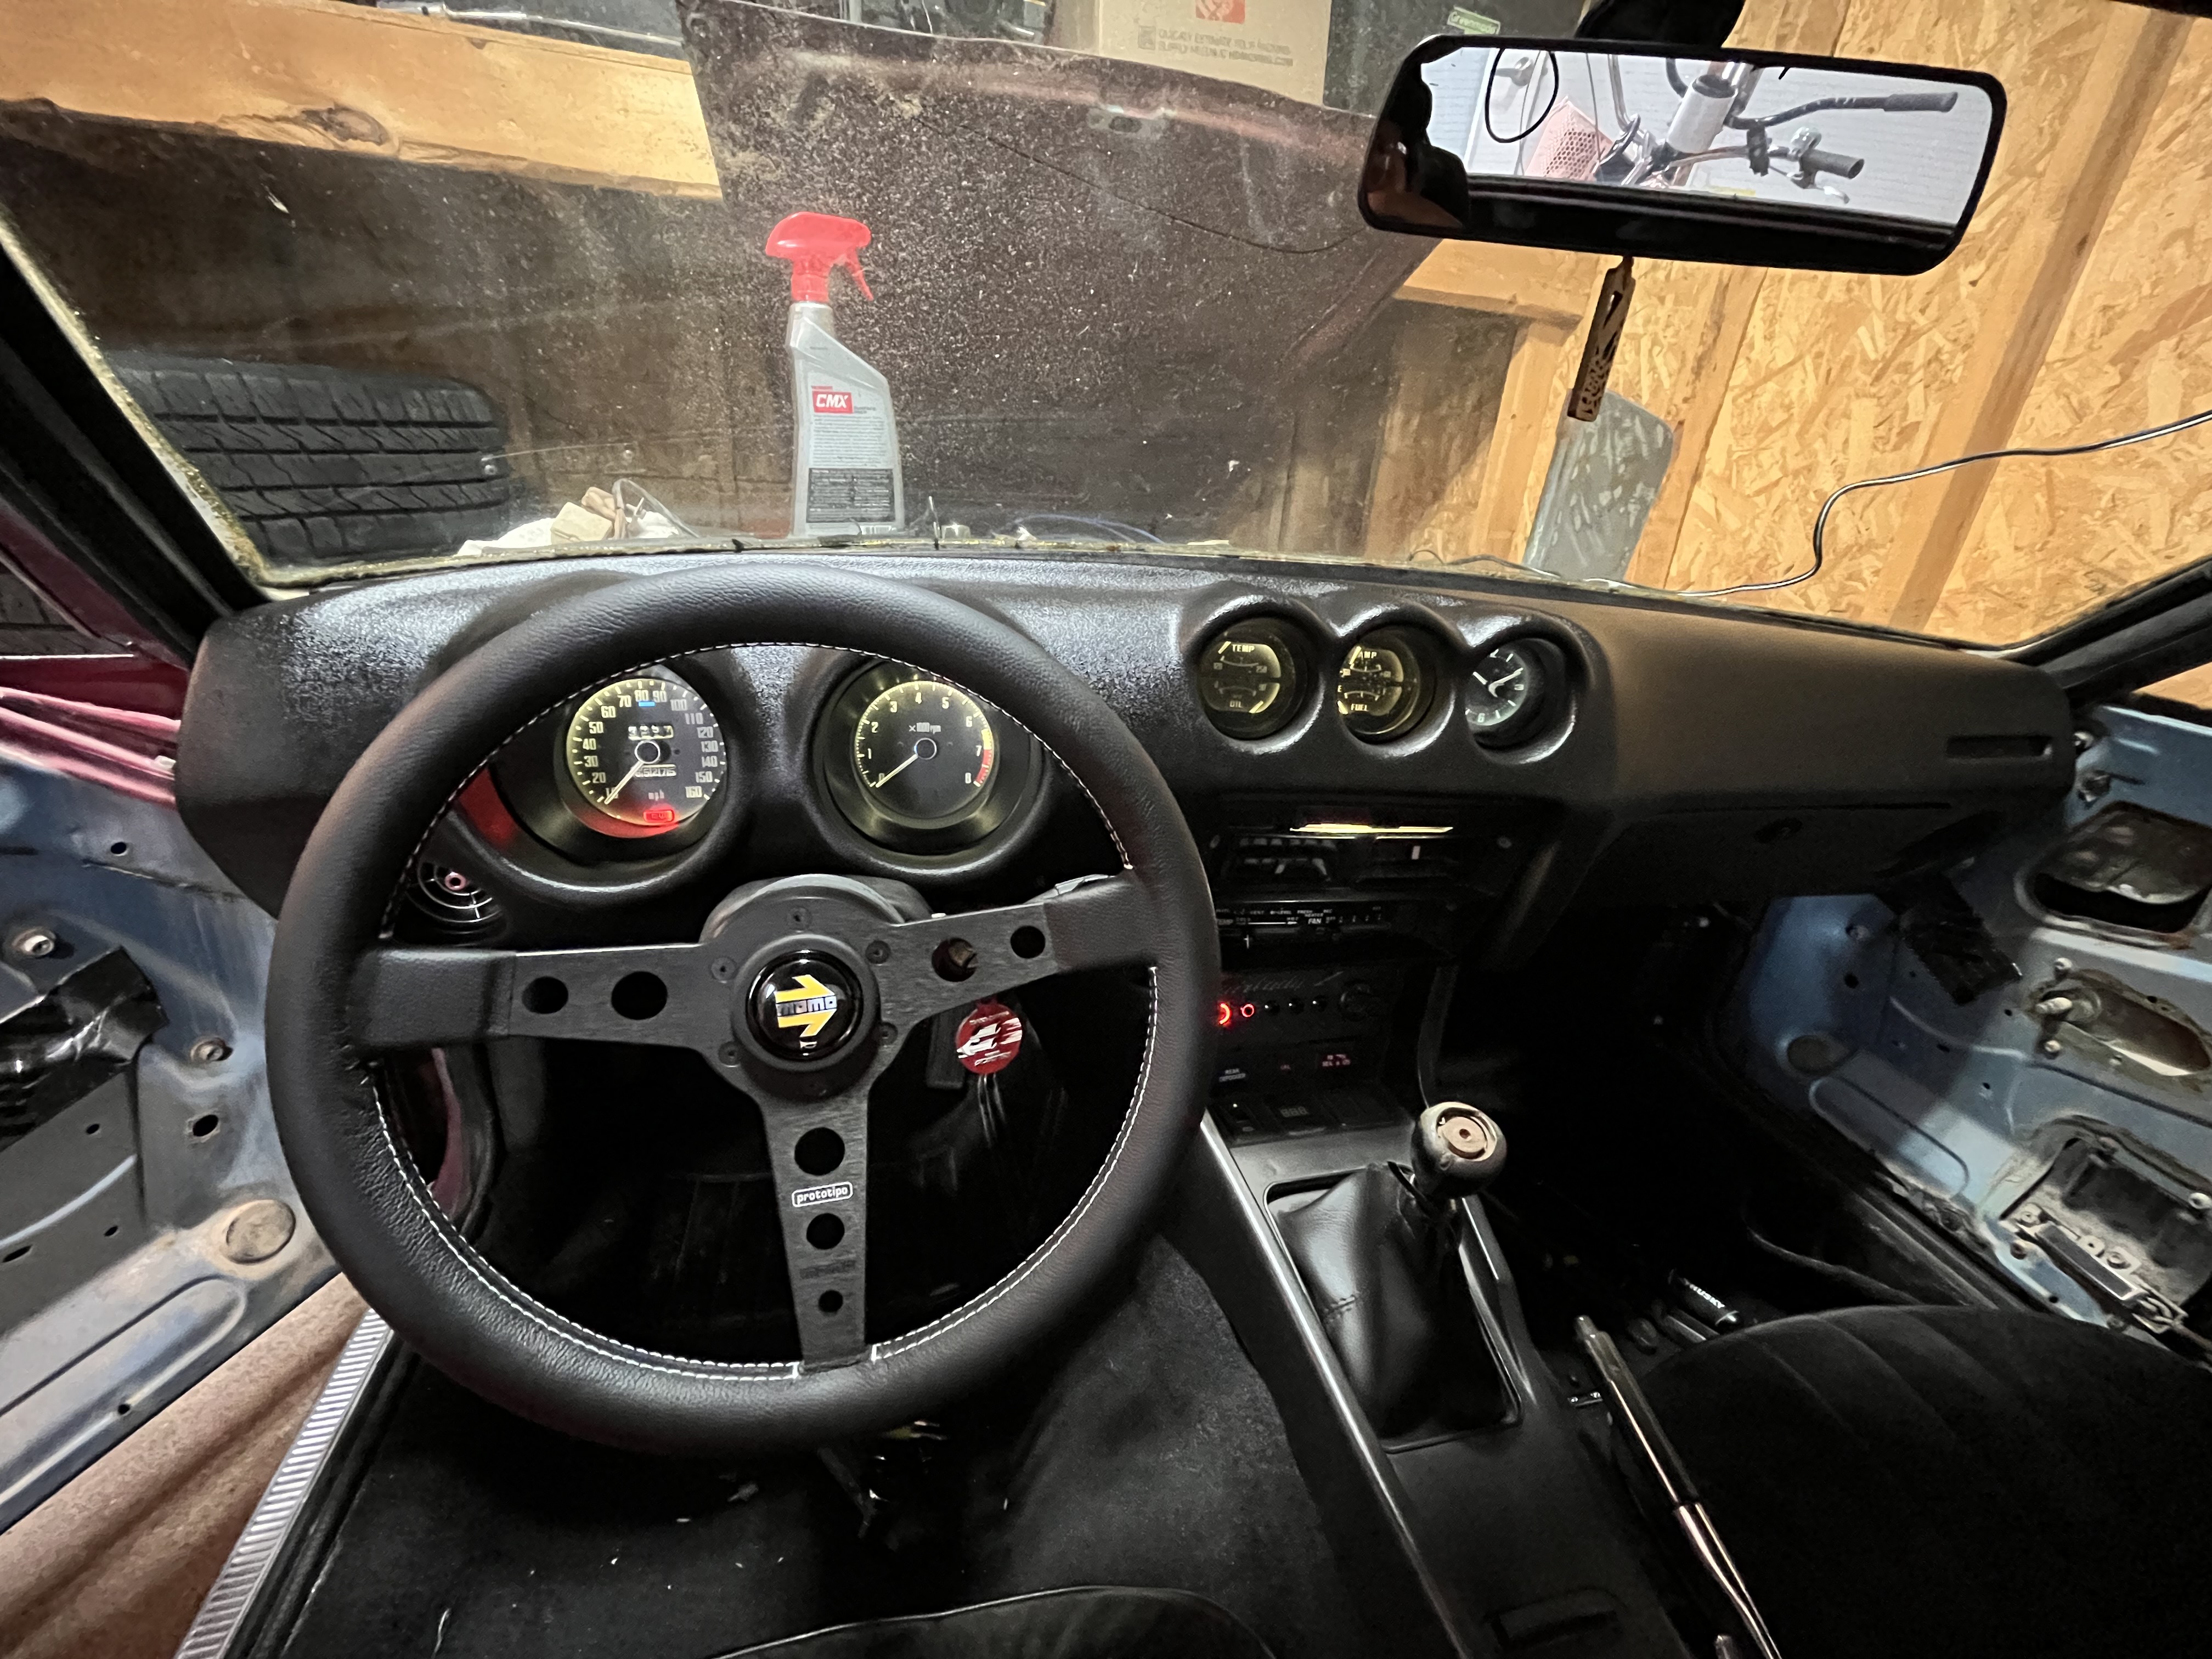
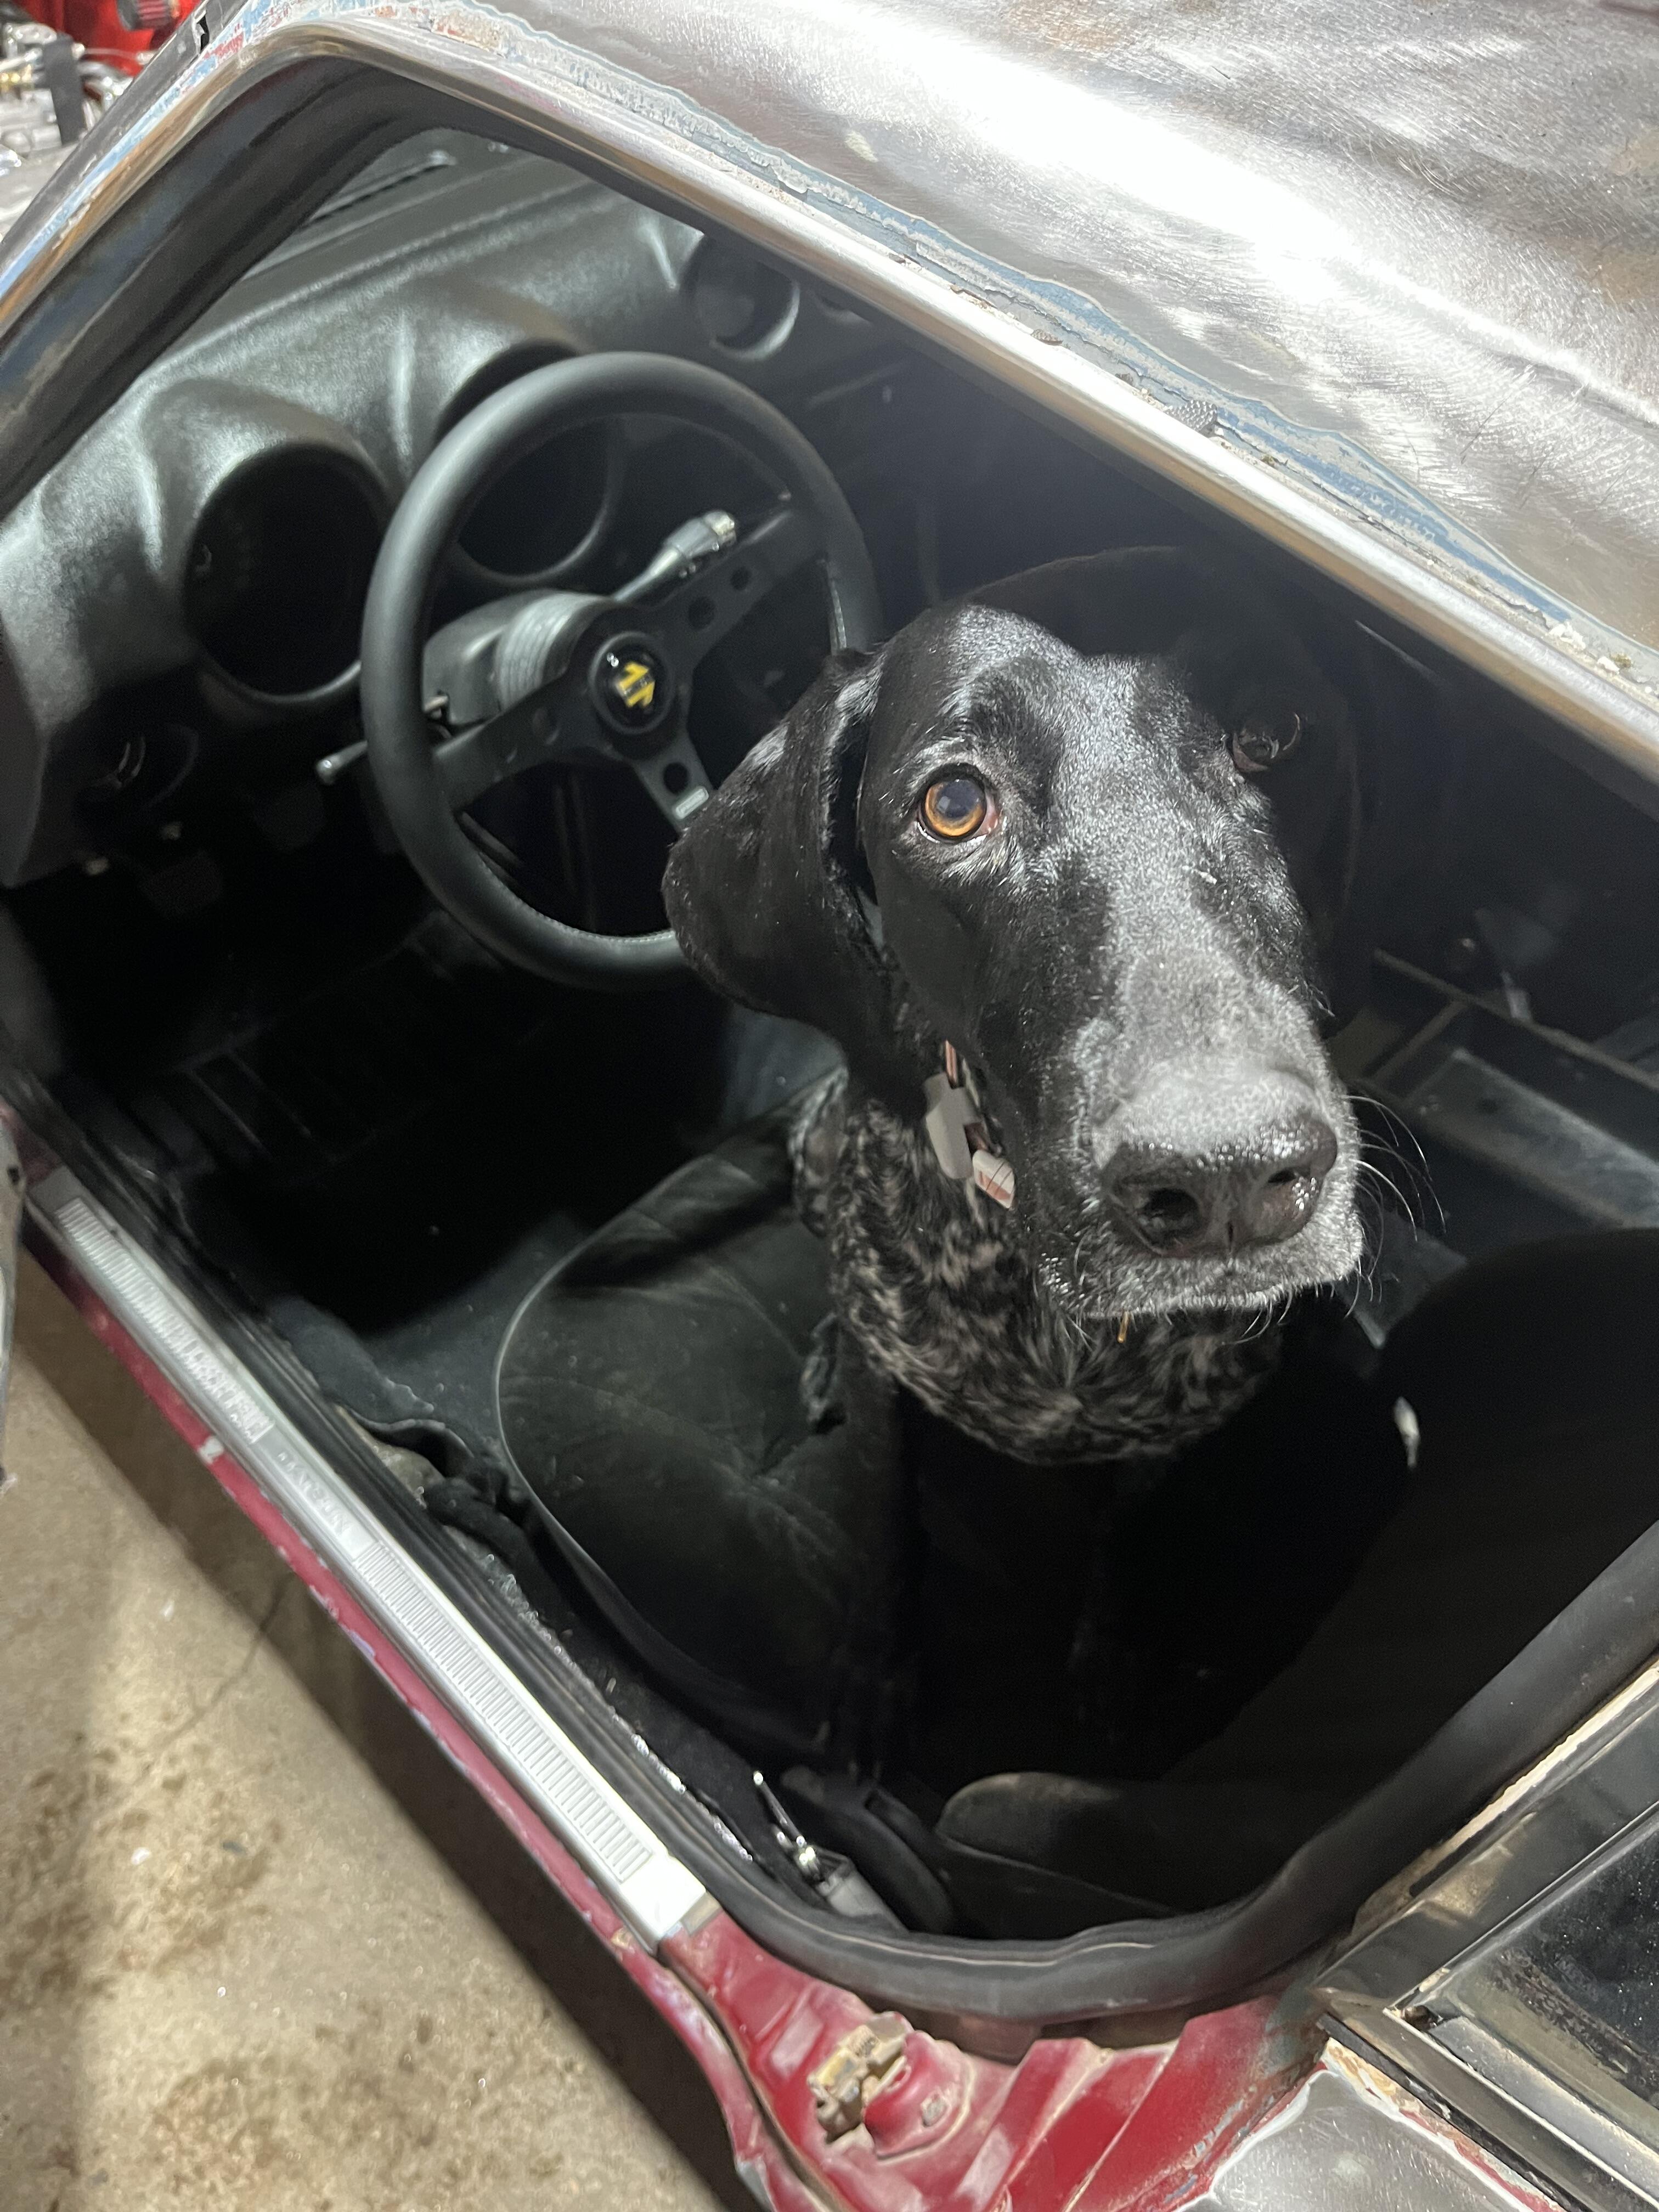
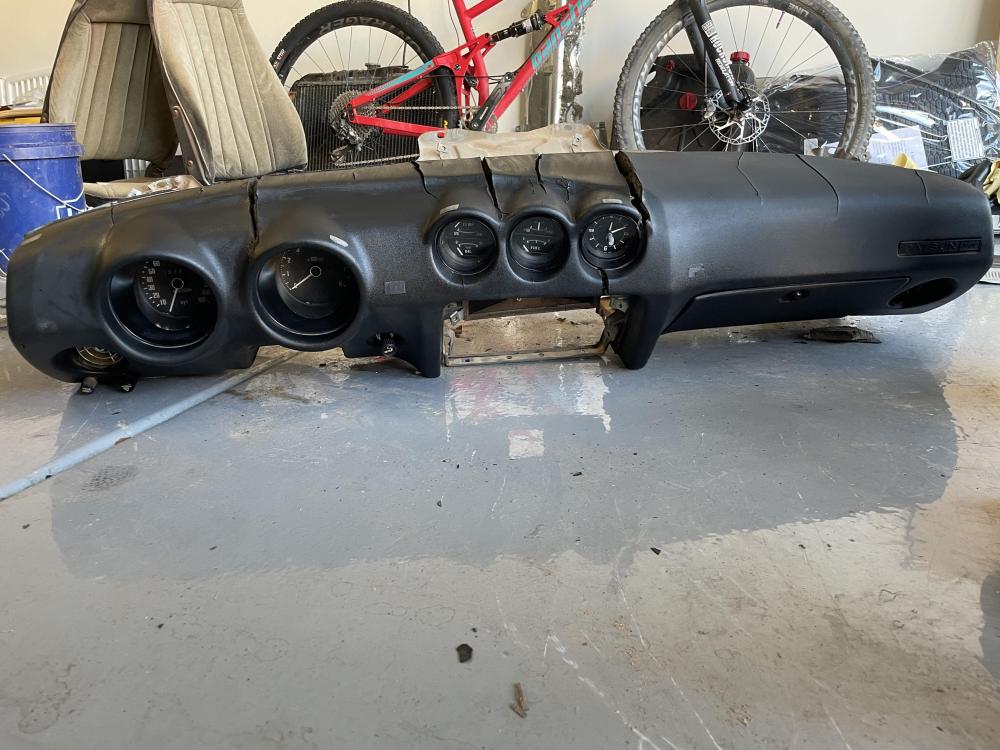
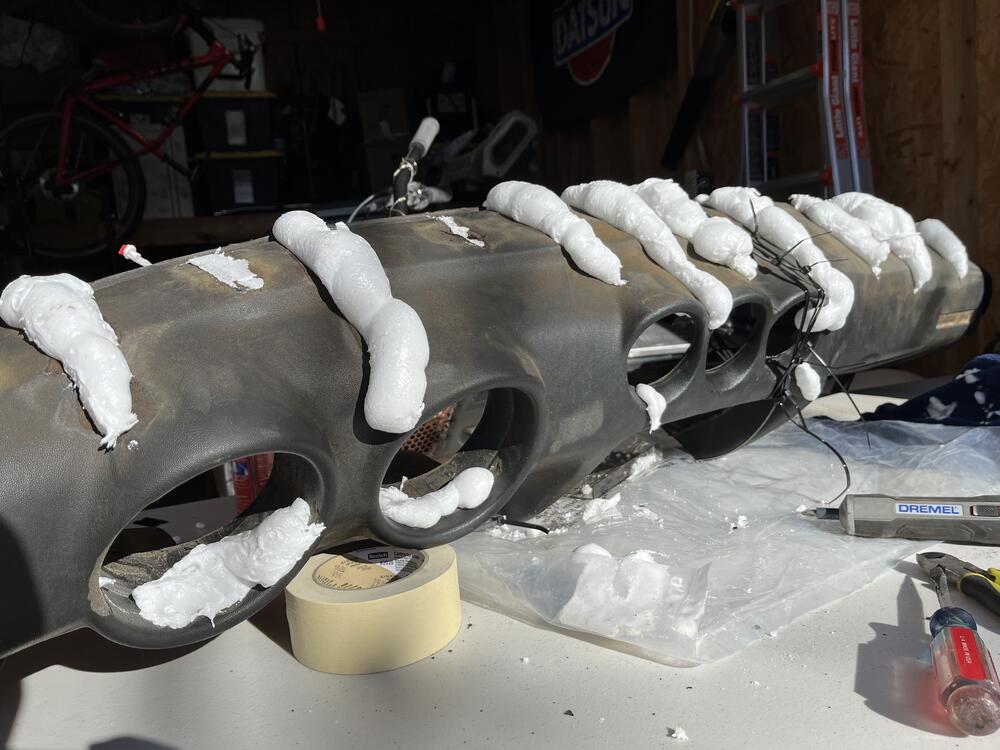
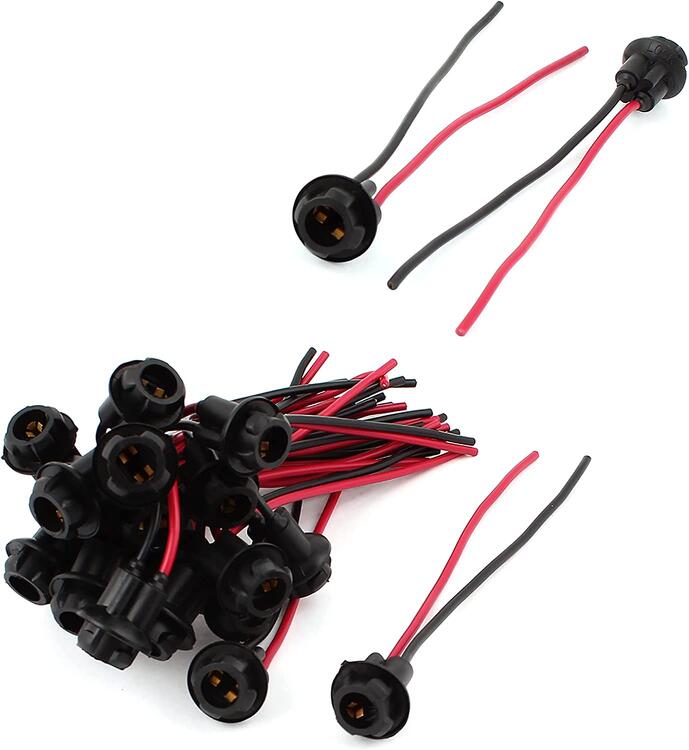
3 pointsDove into restoring the dash this past couple of weeks. It was destroyed by the Arizona sun. I didn't photograph the process too much because, honestly, I didn't have high hopes on it turning out well. Here is an old photo of what we were starting with: Typical cracking for a Z dash, but boy was it brittle. My initial plan of attack was to get it off the frame and smooth out the ridges and cracks. But I was in for a nice surprise once it came off the dash frame: Little did I know, the frame was holding together my now two piece dash 😅 The crack near the third gauge pod made its way entirely through the dash. Now I needed to fuse these back together before I could start any sort of work. I also looked into vintage dashes or other reproduction/professional repair options but the cost was just too much at this time. I told myself to try fixing what I have first, then if all else fails, a reproduction dash is always an option. I grabbed some spray foam (loctite brand) and a couple strips of plastic to act as a "stitch" beneath the foam for the two pieces of dash to become one again. After "v" shaping all the cracks and smoothing out the ridges, I foamed everything together and used a jig between a couple of the mounting points to hold the two pieces of the dash in the correct spot. Note all my zipties in the photo below trying to make sure I didn't move the critical bond. After a good 36 hours of drying, I finally mustered up the courage to undo the zip ties and see if everything held. And surprisingly, it did! Sturdy enough to bear the weight of itself from one side even. Success! I now had a dash and no longer had dashes. I began to cut away at the foam and sand smooth with an orbital sander. It came out surprisingly well. The foam feel is excellent. Soft to the touch but firm enough to hold shape. I imagine this is how a good condition Z dash would feel. Unfortunately, this wasn't the end of my road blocks. If you look closely at the crack near the third gauge pod, my jig didn't take into account the transition between the two dash pieces. So while they are the correct distance from each other, the expanding foam must've made its way between the jig and the right piece to cause it to flare up slightly. Not a huge problem as I could sand, filler, and smooth it out. But something to note for future me. I started to work the dash to ensure all nicks and minor cracks were taken care of. But it was endless...I would fix one, but the stress would cause another. I could cause a crack by just pressing down on the old foam fairly easily. Pricing out the cost of materials for filler, skim, paint, etc. I started to look into dash caps. I know, dash caps are not a good permanent solution. But who's project car is ever permanently done? 😉 I did some research on peoples horror stories of warped caps or il-fitted gauges, glove box, etc. Some don't even match the OEM color. Luckily, every time someone brought up American Dash Caps, it was always positive. So that is the route I went here. Ordered up their full face deep cut cap and optioned to paint it satin black with SEM. Overall, it was a fairly decent cap. Some of the trimmings were rough, but easily cleaned up. They provided the silicone and an 18month warranty if you follow their steps. Simply apply the silicone 1/2" away from all edges and openings. It feels weird not applying silicone to the middle, but I bet this helps with expansion and contraction. I did need to sand a couple edges down for a snug fit. And here we are now! So much better than before. The photo makes it look very glossy, it is from the garage lights and just wiping it down after install. The true finish looks much more like the right side, satin. It is very close to the OEM finish in my opinion. While the dash was out I updated my gauge lights to white LED in a T10 socket. Almost half of my original plastic sockets were broken or missing tabs. Picked these up and the rubber socket allows for a snug fit with minimal trimming (of the socket itself, not the gauge). I also cleaned up the dash wiring harness, installed a momo wheel I picked up while visiting in Japan! Cleaned up my gauges inside and out while I was removing the green lenses. Couldn't get that darn clock to work.... Everything is slowly coming together for the interior. Next up is some door cards and a new carpet kit. Not a huge fan of the one piece molded carpet. Going to look at Newark or Chester and Herod for my next kit. I'll leave you with a pic of my helping hand in the garage. She's much more willing to be out here in 40 degree weather as opposed to the 100+ degree Phoenix summers 🙂


 3 points
 -
3 pointsWhat he said. And it doesn't matter whether you are tightening or loosening. The mechanics of the static friction are the same. I'm not trying to cast dispersions on your work, but what I'm saying is don't get all caught up in the absolute numbers you think you are seeing. I'm saying that just because YOUR wrench doesn't click until 50 ftlb on a fastener that was supposed to be torqued to an upper limit of 40 does not convince me that bolt was originally torqued higher than the spec. So you've got an engine with a bunch of time and heat cycles on it. And when you used your torque wrench (with some unknown accuracy), it took more torque than spec to move the bolts that have been in there for some time. No surprise there.3 points
-
3 pointsI'm not a mechanical engineer, but I have serious reservations about using the torque required to crack a bolt loose to determine what said bolt was originally torqued to. I mean... I bet it's proportional (like the more it was torqued to, the more it would take to break it free), but as far as determining absolute value... I'm very skeptical. @Wally, You just torqued your main bolts to 38 ft-lb, right? Put your wrench back onto a couple of them and see what torque it takes to remove them. See if it takes 38, or if it takes more than that. I bet it takes more. Static friction is higher than sliding friction and all that?3 points
-
3 pointsThere are many opinions on distributors. However, keep in mind that you'll need to learn about how your car is wired now before you start to load the parts cannon. Otherwise, I can pretty much guarantee you'll have other problems you'll be chasing. ZX distributor: Easy to implement, but conventional wisdom says you'll have tach issues. (Running this in my 260Z. Keep in mind it has a different tach than the 240Z.) Also need 280ZX distributor mount. Stock 240Z distributor: Easy to implement, but you'll have to learn how to set gap and dwell. I'm not sure about the reliability of dwell meters currently available on the market. May need a 240Z distributor mount. Stock 240Z distributor with Pertronix: Easy to implement, but some people question reliability. (Running this in my 240Z.) 280Z distributor with HEI: More knowledge needed for wiring. Need to have a heat sink on the HEI. Easy to replace failed modules. May have tach issues. Also need the 280Z distributor mount. 123 Ignition: Higher price. May need to tweak the spark curve. Just don't expect to swap out anything quickly.3 points
-
1 pointThe oil pressure numbers look good. I wouldn't be worried about those! The burning you see is probably oil from running the engine with the valve cover off. It will burn off. Shouldn't be a problem. Dipsticks are not a super precise measuring instrument. If the oil is on the dipstick it will be fine IMHO.1 point
-
1 pointOrder this “T” fitting from Glow Shift!!! Run both gauges at the same time. GS-FA-05.1 point
-
1 pointDid you turn the Nissan gauge by the body and not by the nut at the base? You can twist the wires off inside. Sounds like an electrical problem. At least you have good numbers. Mystery unsolved. Cause not found.1 point
-
1 point
-
1 pointHe said he checked it in post #55. But that would not cause his system pressure problem. It just bypasses the oil filter. Won't be a surprise if the problem remains when it's all back together. Here's a question for the engine builders. Maybe it's in Monroe's book. Are there oil galley plugs that could be loose or missing? Of course, they would have to be internal since there are no huge oil leaks. I just did a quick Google and found a reference. Different engine, still Nissan. https://www.311s.org/phpBB3/viewtopic.php?t=100241 point
-
1 pointNot what i did. Here is what i did. I put my torque on something low like 20. i tried to tighten the bolt. It clicks. so i move it to 21, click and so on until it doesnt click anymore but begins to tighten a little. I know that is odd way to do it but that is what i did1 point
-
1 pointFastener torques. A great topic for deep reading. Here's a starting point: Lubrication Effects on Fastener Torque Specs - EngineeringToolbox.com Lots of interesting links at the end of the article. Another good source of information is the late Carroll Smith's book, 'Nuts, Bolts, Fasteners and Plumbing Handbook'. Smith was manager of the Shelby American race team back in the day and specialized in bridging the gap between engineering theory and real-world motorsports reality. It's an old book, but I don't think too much has changed.1 point
-
1 pointThat's an old original Mallory Unilite. I don't know much about them, except that I think that Mallory sold a complete distributor but might also have sold a conversion kit. I think that you have the original light triggered Unilite. The black disc on top has a vane that breaks the light beam. I think that Pertronix might have converted the "light" trigger (hence Unilite) to magnetic. Here's an old thing I found. https://www.zhome.com/ZCMnL/tech/MalloryDist.htm Since you're in there you might as well check your mechanical and vacuum advance mechanisms. See what shape the distributor is in before deciding how to fix it.1 point
-
Blessed be the parts hoarders for they shall provide the used parts to keep our Zs alive.1 point
-
Well zKars was kind enough to send me what he had and I was to get one of them to kind of work, so I'll be installing that one. It never did completely close off but did reduce flow thru the valve. Maybe that's the way it's supposed to work. It took a temperature higher than 175 degrees F to change state, but it is what it is. Hopefully performance won't be too greatly affected.1 point