Leaderboard
-
HS30-H
Free Member5Points5,509Posts -
RIP260Z
Free Member2Points364Posts -
Careless
Free Member2Points446Posts -
Terrapin Z
 Subscriber
 2Points1,333Posts


Popular Content
Showing content with the highest reputation on 10/27/2022 in all areas
-
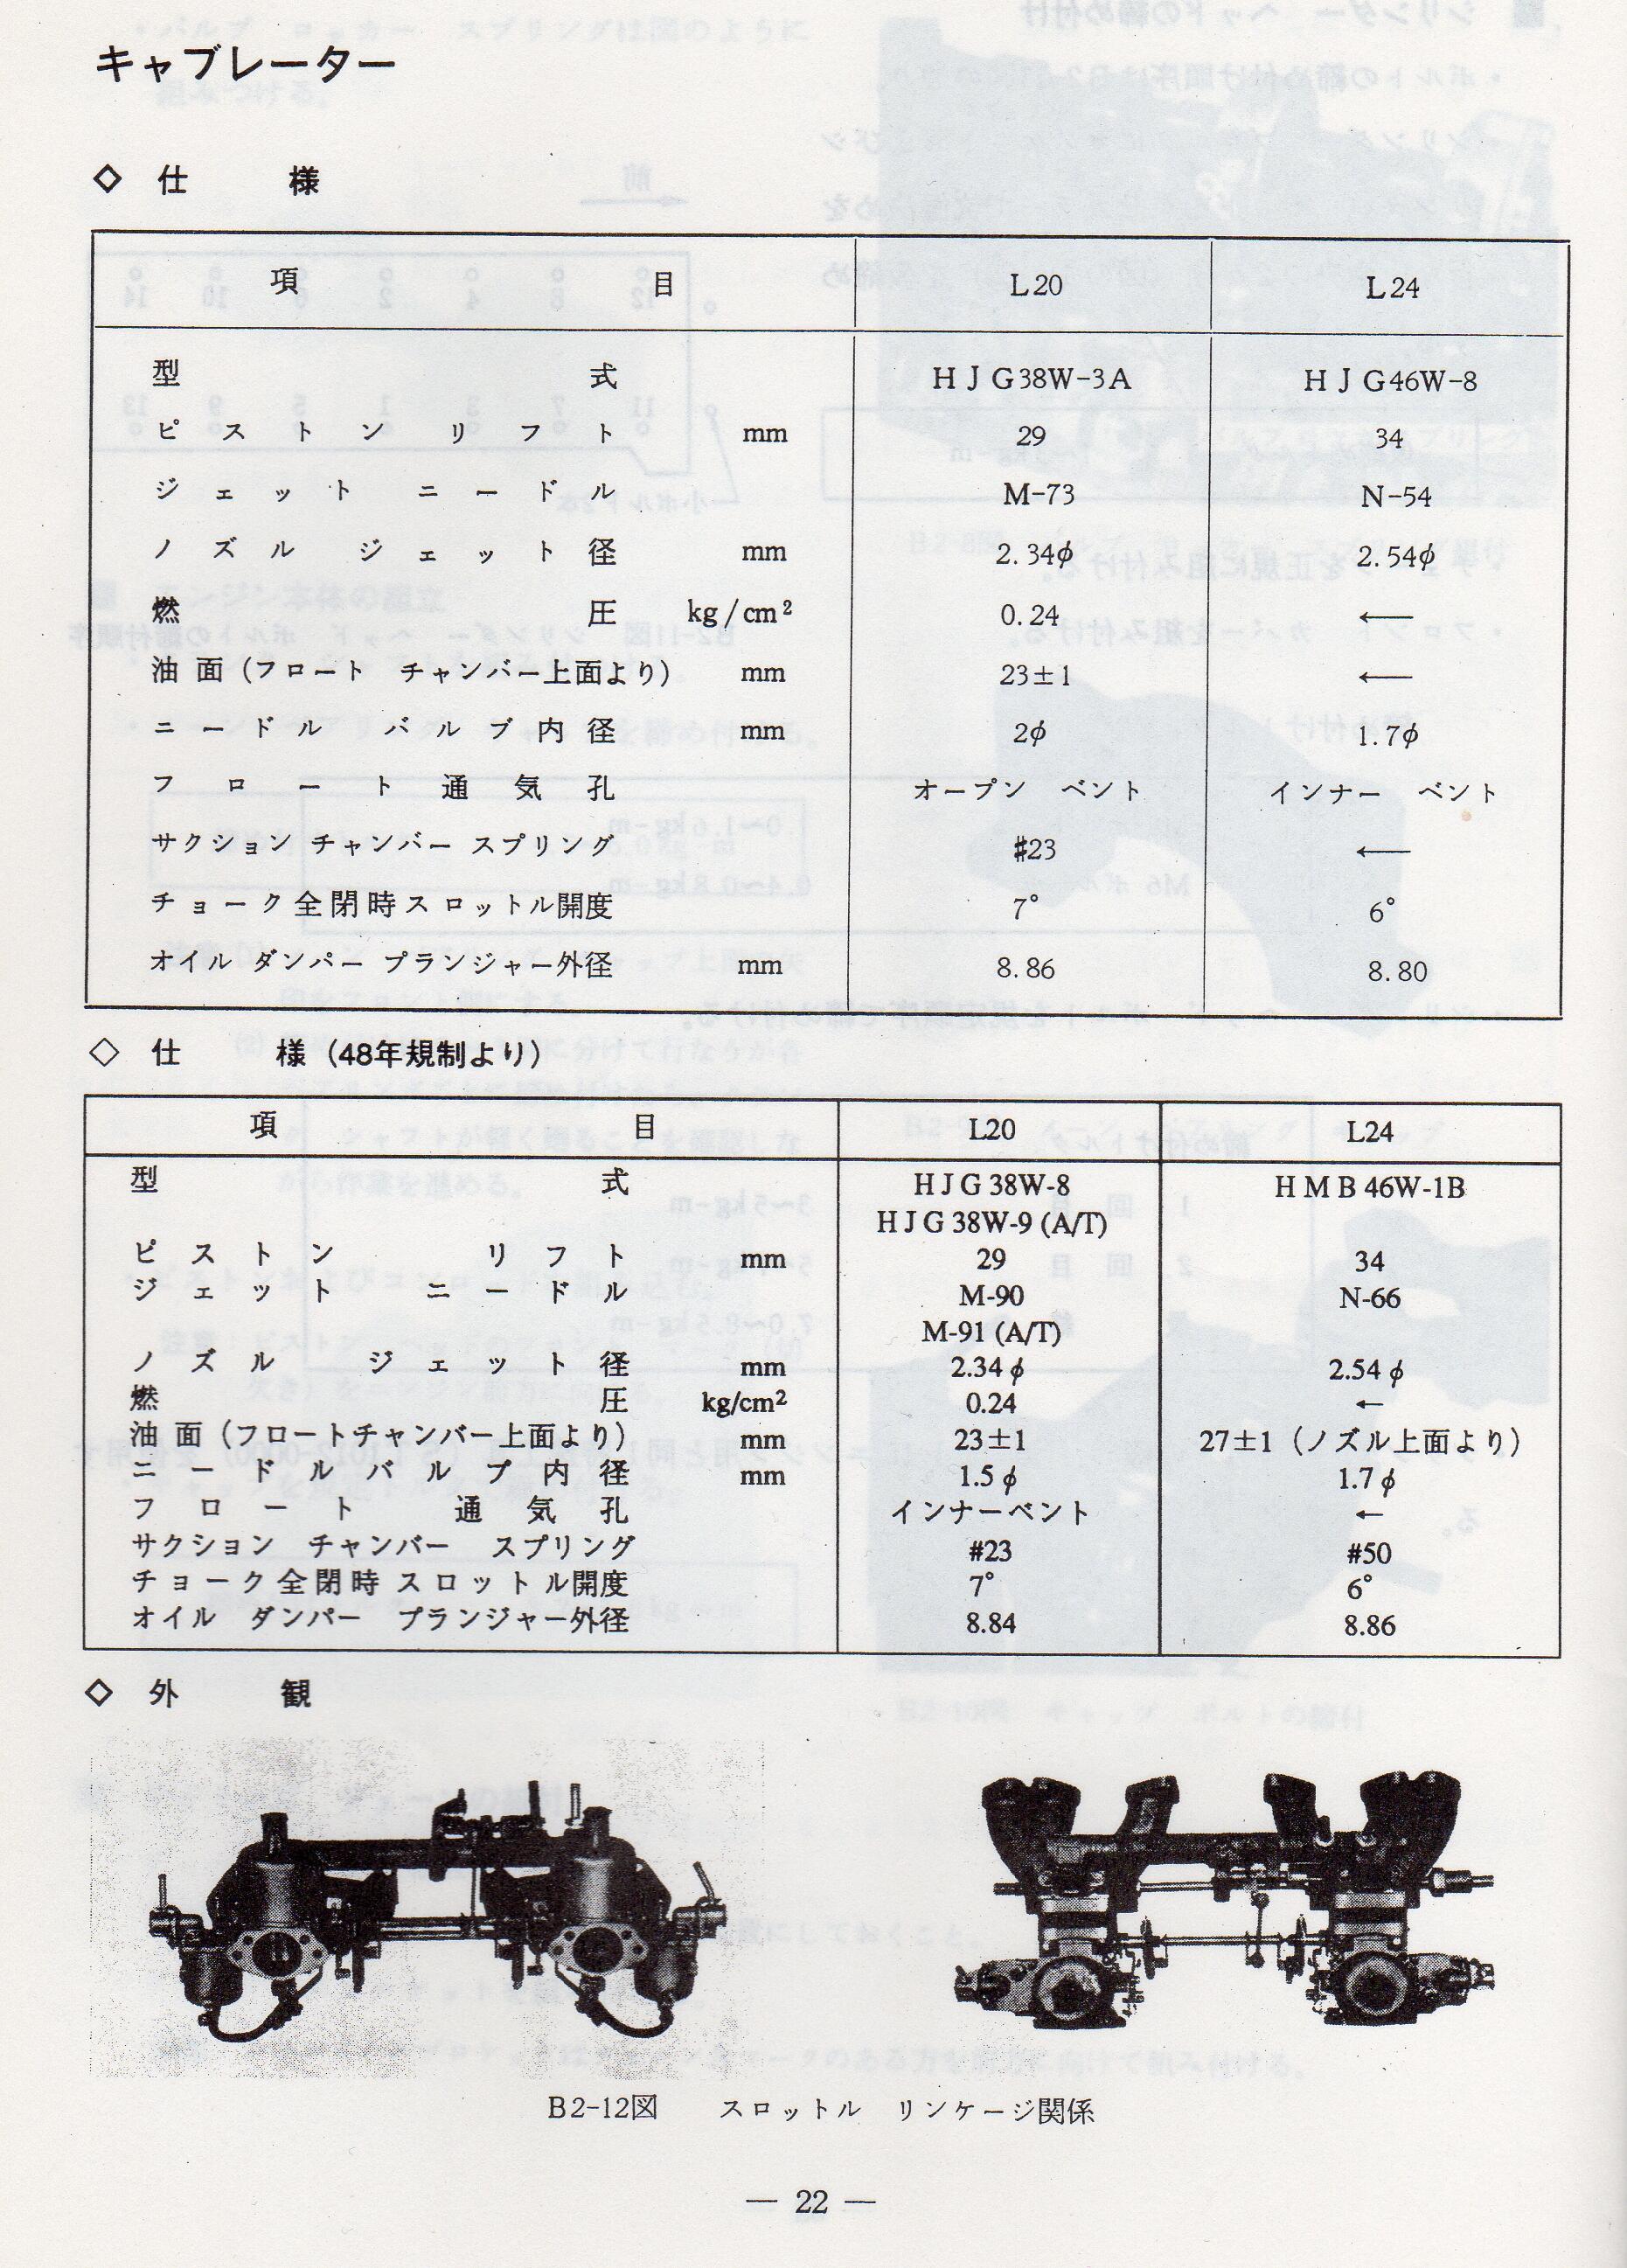
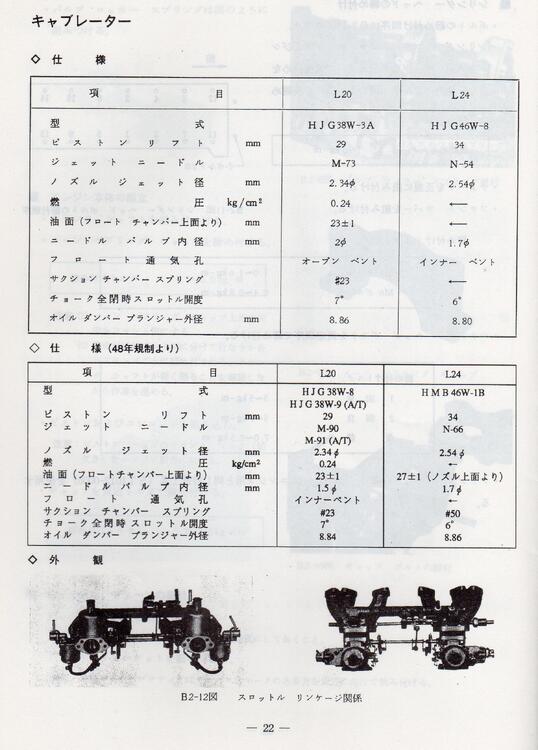
Hi Ian, Very late 1972 and then 1973 year L24-engined Fairlady 240Z, Fairlady 240Z-L and Fairlady 240ZG got the HMB46W-1Bs as part of Nissan's drive towards reducing emissions. Specs here, in bottom right box: ...which says the jet needles were 'N-66'.
 2 points
 -
A Saab (Ford Taunus) V4 with quad SUs? That would be more over-carbed than Carby McCarbface.1 point
-
That seems likely, and logical, to me. I have no idea what these minor differences were, and Nissan doesn't seem to have been too forthcoming with data to explain them either (possibly in line with their 'Do Not Fiddle!' stance?). That difference of '-8' suffix on manual trans '73 L20 and '-9' suffix for the Auto trans version does indeed seem to point to differences being minor. Yes. Pretty much. The top boxes are up to very late '72 whilst the bottom two are the 'Showa 48' (1973) versions. I don't know enough about that to comment, except that it seems - again - likely and logical. I've been sifting through factory parts lists to see if I can see any corresponding (full) part numbers, but no dice so far. I wonder if that too is part of a 'Leave Them Alone!' thing?1 point
-
1 pointHere is a prime example of something different that comes up on Yahoo that some would like on their Nissan, that is likely not to have been sold outside of Japan?; https://www.jauce.com/auction/p10685254291 point
-
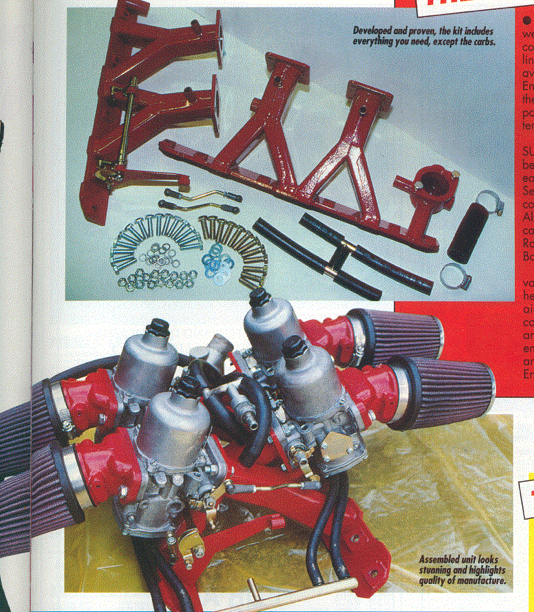
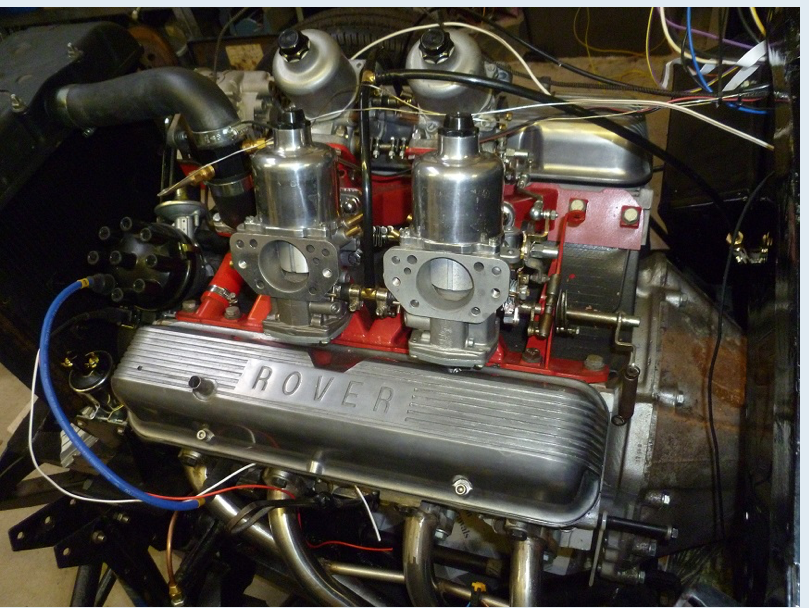
This is the only set up I found so far, the overall configuration looks close.
 1 point
 -
That's a 'Boxer Quad SU' for the Rover V8, an aftermarket setup created here in the UK by a guy called Martin Goodwin. You can read more about it here, towards the bottom of the page, in blue: https://www.mez.co.uk/ms12-new.html1 point
-
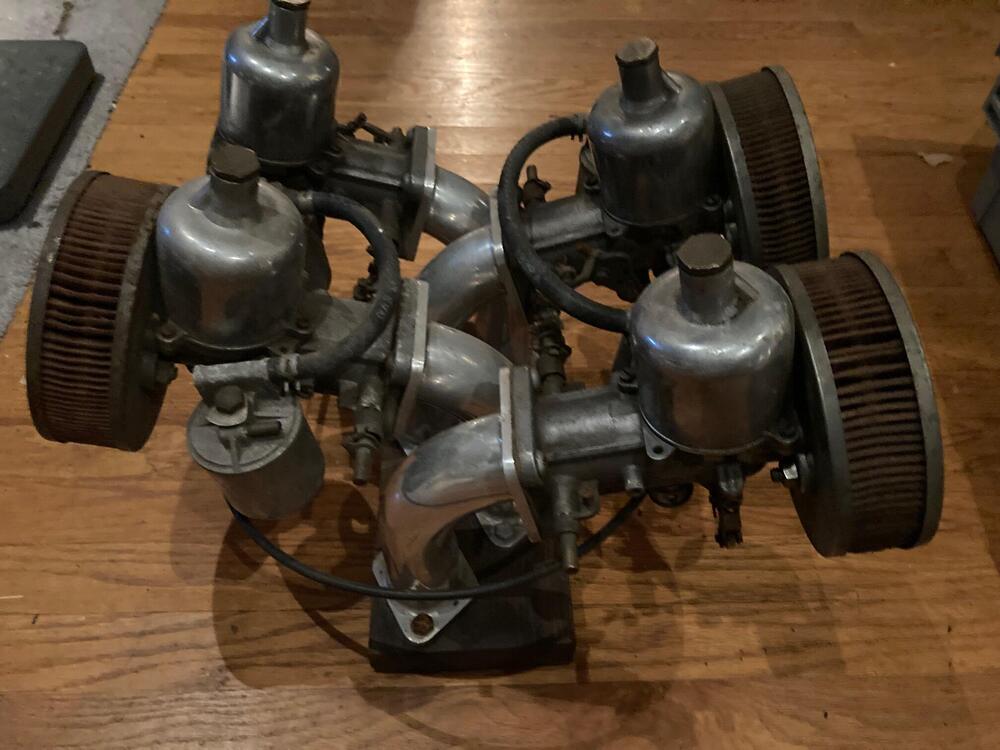
I did end up getting this lot, The car buyer did take a lot of good parts, but we did find some extras that were not in the BAT lot, so it worked out. I did end up with this SU carb array. I know it is not for a Datsun, but I can't find any comparable set ups on google images. Anyone here know what it is for? Closest was a Range Rover V8 but not the same manifolds.
 1 point
 -
1 point
-
1 pointGoing to gather more info this weekend when I get a chance to work on it again1 point
-
Sorry for the later reply, busy season with work. I intended to restore an RS30Q, and had the car, but the CSP took its place, and the RS30Q was sold, so I never got to try I found/modfiy/stock set up. It's been a while since I was in Flat top carb world. A quick look/thought. On my parts microfiche, there is only two needles listed, 16354-N3500, N-86A and 16354-N3310 and listed as applied model is L26 Australia. Mentioned above is HMB46W -1 to -10, looking in the 240z/260z fuel system modifications plus booklet, mentions on page 18 "note: HMB46W-5 and -9 carburetors have the improved choke valves (no stamped number)." On the previous page (17) is mentions F1 and R1 as the second type, the third type F2 and R2, where Fand R are front and rear carbs. This corresponds to choke part numbers, 1st type, no part number (and that page is missing from my microfiche), second type 16188-N3300 and third is 16188-N3310. The power valves also correspond to F/R1 and F/R2, (16059-N3314 and 16059-N3313 respectively, with the later having a green blob of paint on the valve, which I have seen. So, what I am trying to say, point to, is I think the -1 to-10 covers small modifications/tweeks, with the HMB46W's as there production progressed. It also on what model the carb was on. I am unsure if any JDM market had the HMB46W fitted (HS30-H?), apart from their recalled Fairlady Z with the 2.6L fitted. It could like the Hitachi HJG38-11, NOS I have, this having an -11 suffix. This carb was I think, ran as singles or twins on various models, the P510, Fairlady Z, B110, N10 Cherry, all these models. I very much doubt ran exactly the same carb, cc would mean that needle valve would differ. The fuel inlet pipe on the NOS one I have differs in orientation than others I have seen, does this warrant a -* number change? The HJ38 has its number etched on the side of the fuel bowl. Which brings me back to needles...I haven't seen anything with 1A to 1C (probably as the 1st page of my copied microfiche is missing), but I think it is lining up with changes to other modifications/tweeks to the carbs. I did send a needle off to be matched with an SU Burlen one, and it was pretty close. I completely stripped a pair of HMB46's years ago to try to get a better understanding of these "boat anchors" work. People can run these carbs successfully, and some can. It's only fuel air and vaccum...! The key I think is they have to set up just so, and are a little less forgiving than the HJG46W. Some of these set up points are in the fuel modification system. What I found on stripping them if I recall is the nozzle kit (16496-N3311) is very easily worn, where the needle cuts a groove/makes the nozzle oval, rather than a centred fit. I found the power valve assembles clogged up with carbon, the valves are made up of 3 or 4 plates, with the centre one has little set brass nozzles set into the aluminium housing. These power valves run off a separate curcuit if I recall, giving an extra shot of fuel at a certain level of throttle, so have to be clean. I think there is a knock on affect if things are just set up just so. The throttle shafts like the HJG46 could do with bearings inserted like Z therapy do. Also, if I remember rightly, the HMB46W's there is only one idle mixture screw that does both carbs, linked to both via hoses. This makes tuning difficult, as there has to a happy medium (or unhappy) to get it to run as best it can. I did come up with a mod that gives you individual adjustment to each carb, which I think would help. Fuel level, very crucial, they eye level glass is a faff to see. The volume of the fuel bowl, which is under the carb is quite small, so getting that fuel float set is crucial,which is linked to fuel pressure. I did think of a large fuel bowl (cut a slice off a spare carb and make it into a spacer) to give you more volume, but I never thought it all the way though and see if it would work. I seem to remember a very small inset fuel filter in the carb body, another thing to keep clean. Also, there are devices on the air filter box that need to be kept in working order too. Right cup of tea time. I hope that helps. Cheers Ian1 point
-
1 pointThird time's a charm... so the first one had a bad diode (or two or three) and caused the battery to drain.... the second one had a bad voltage regulator... and the third one finally appears to be working properly. Remy/BBB definitely has some quality assurance issues and I would highly recommend getting a "NEW" one instead of re-manufactured if you have the chance. If I had to do it over again, I would NOT go with a re-manufactured alternator. Thanks all for your help!1 point
-
1 pointSteve, That auction was a Yahoo auction brokered by Jauce - Nichido Logistics which is an agent for international shipping. They charge a fee, of course. My latest purchase through them was for a $11.24 item that cost me a total of $48.93 to get it. DSL is usually the shipper and other than the cost, I found the service real good. Jauce sends e-mails periodically to announce local delivery, packaging and shipping with a tracking number. It works but it is expensive.1 point
-
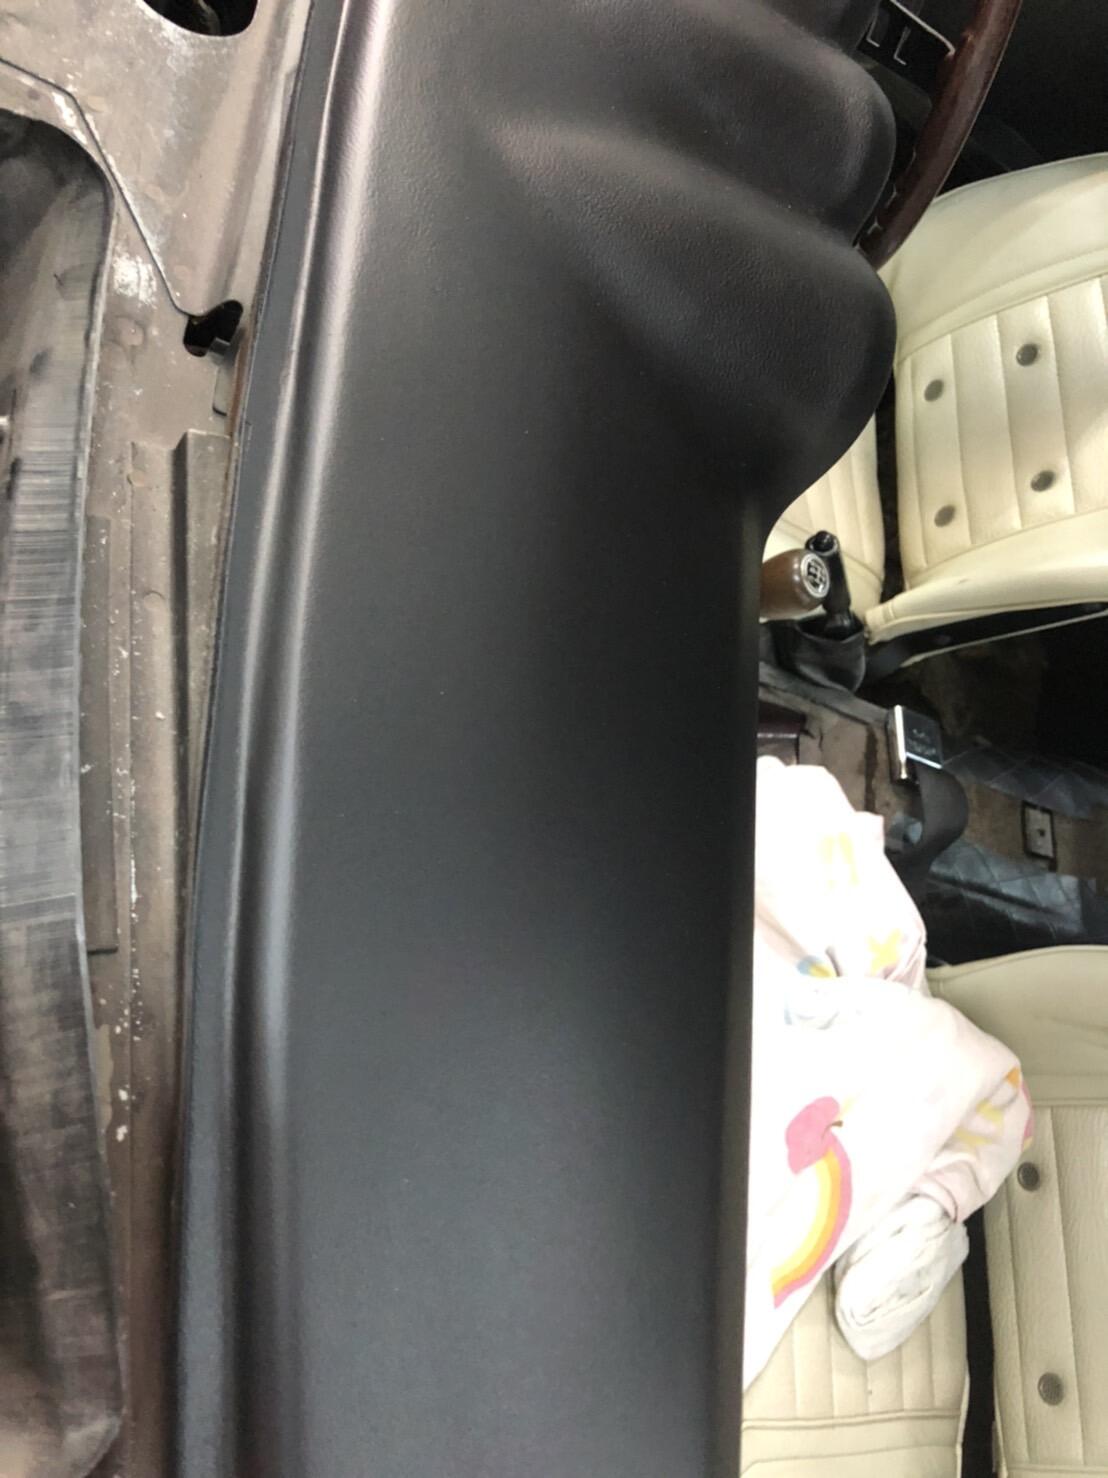
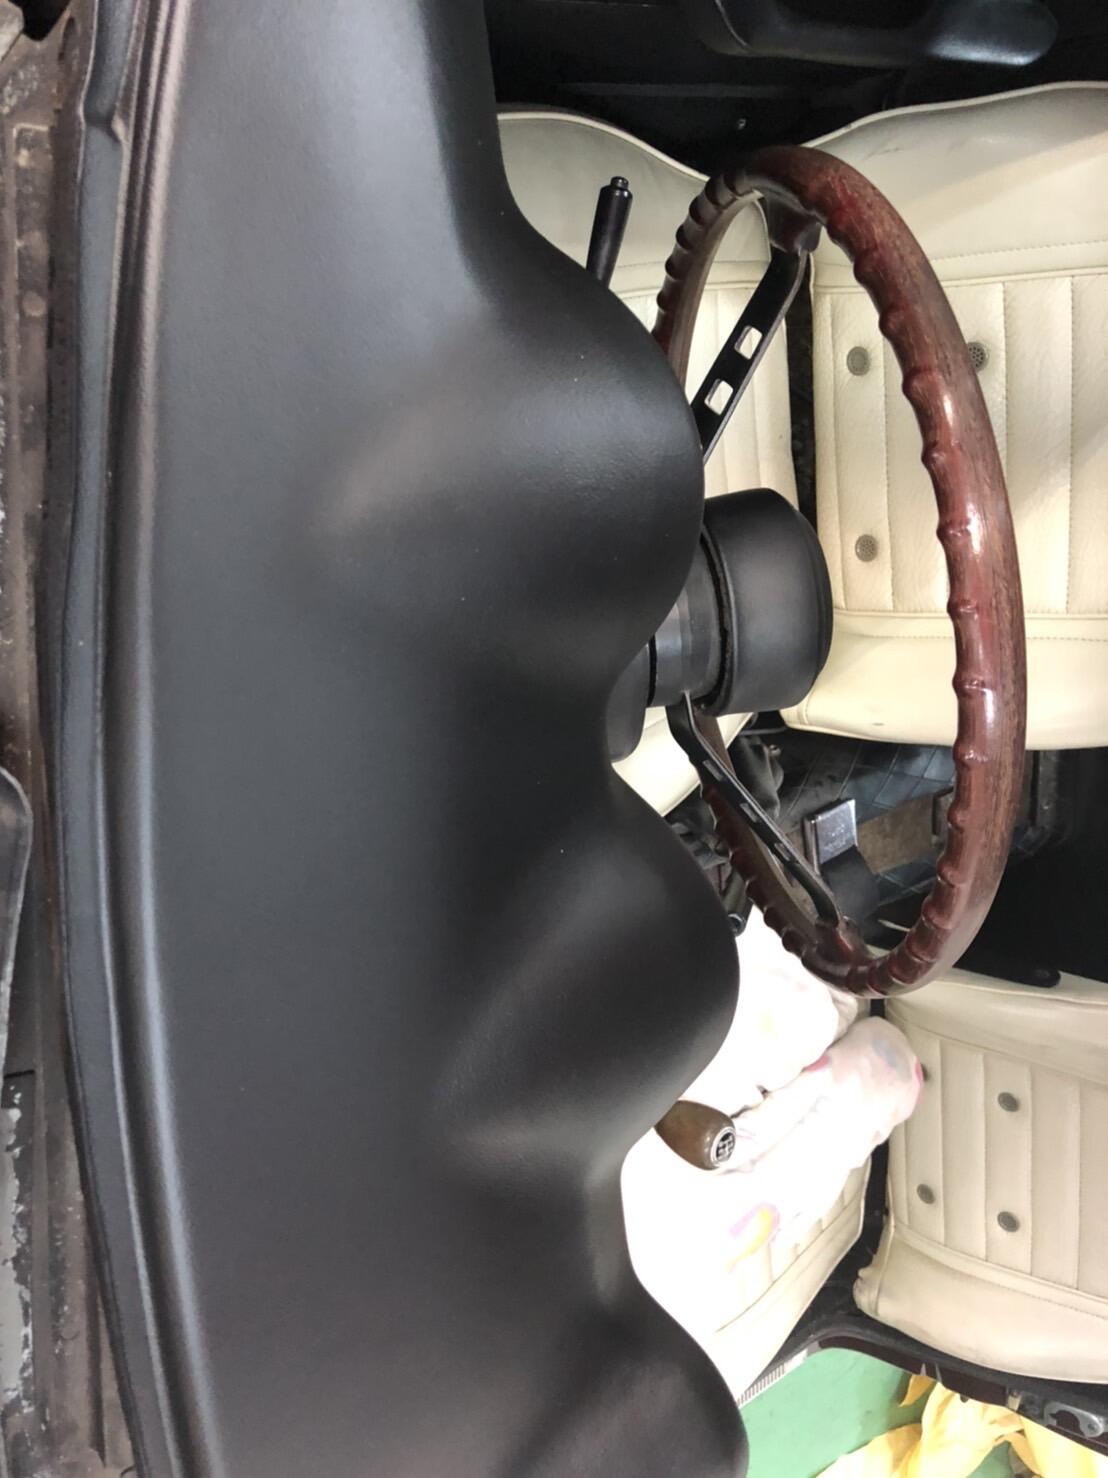
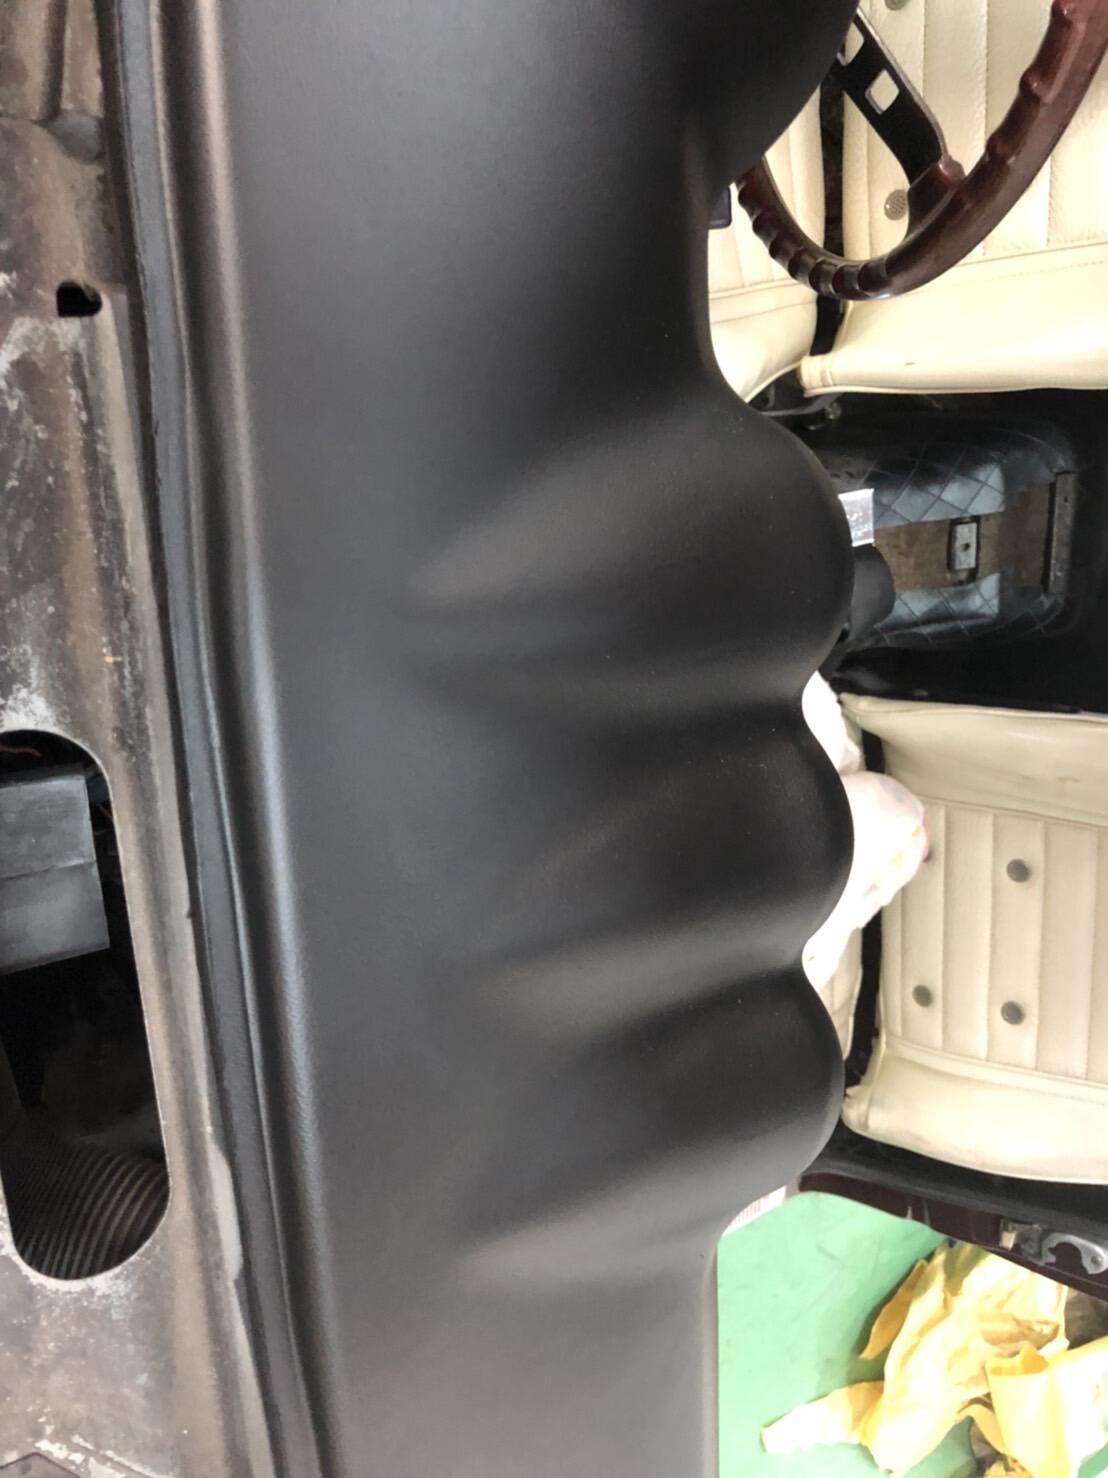
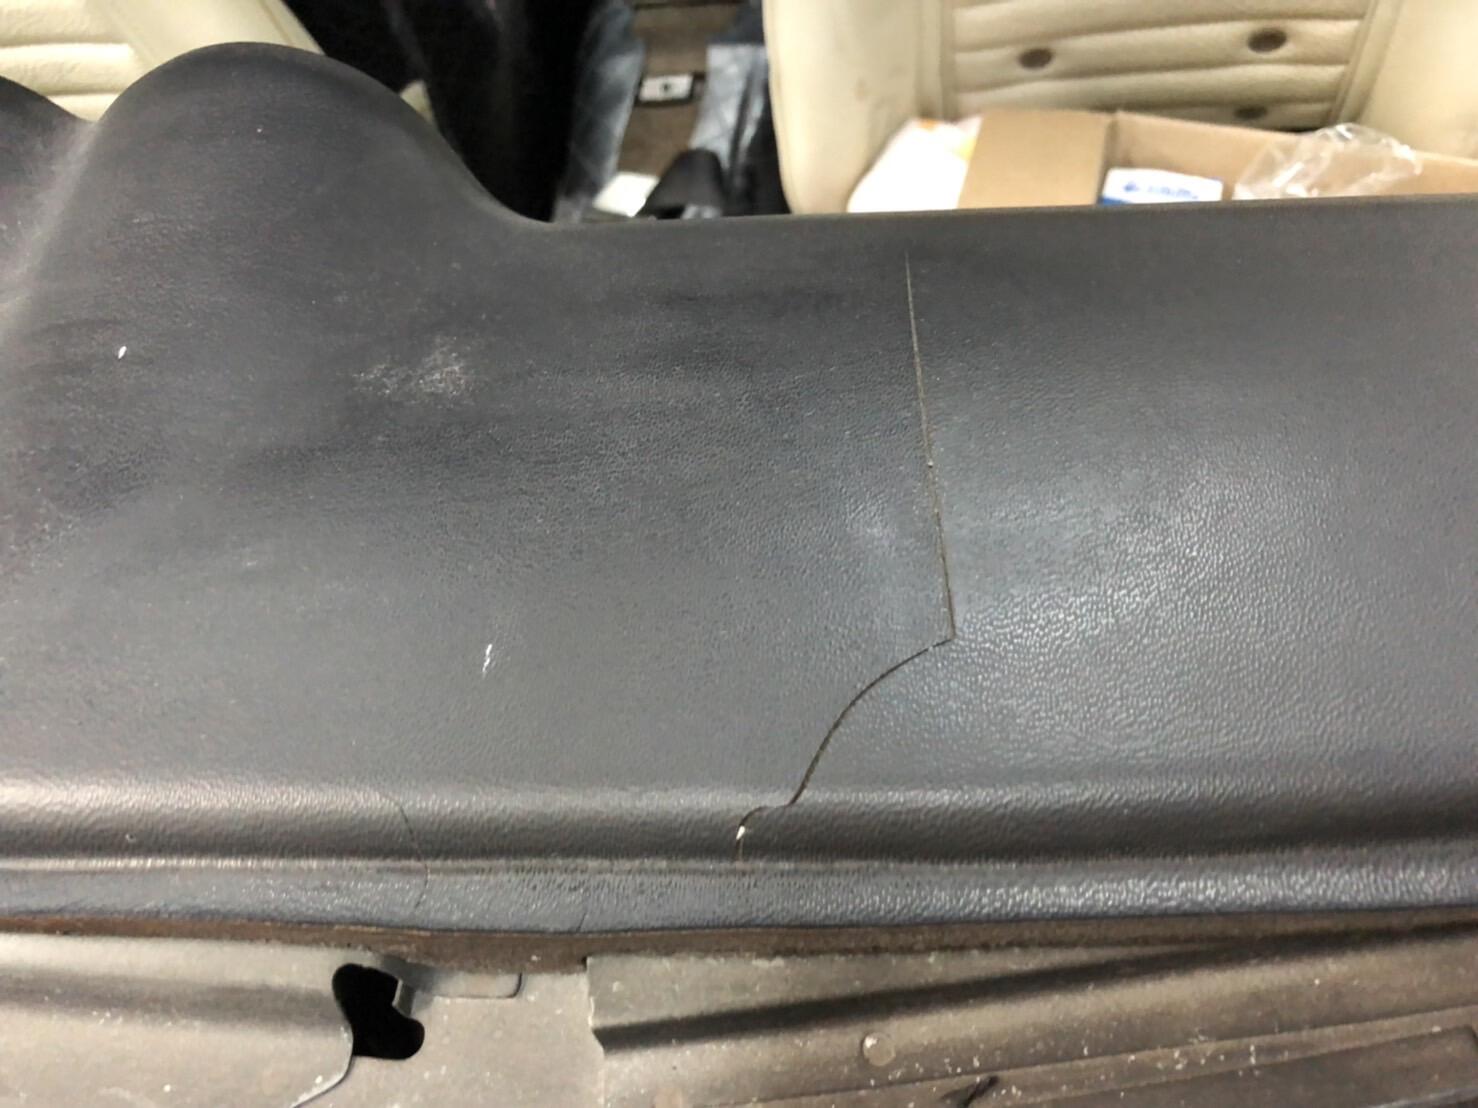
1 pointThanks Gavin, xs10shl, Namerow, I will think and think before starting the repair job . A good thing is I have a very bad 240Z dashboard to start with , I can do anything and no worries if I do stupid things. Here is an example which was repaired recently by Tasaka san . He is offering to teach me how to. But as Tasaka san said , he is still learning and seeking what is better and this example is just a test bed. We have to wait until we see something happens on the surface . Or hopefully don’t see any defects after passing one year, two years, and more , that will be wonderful. Kats
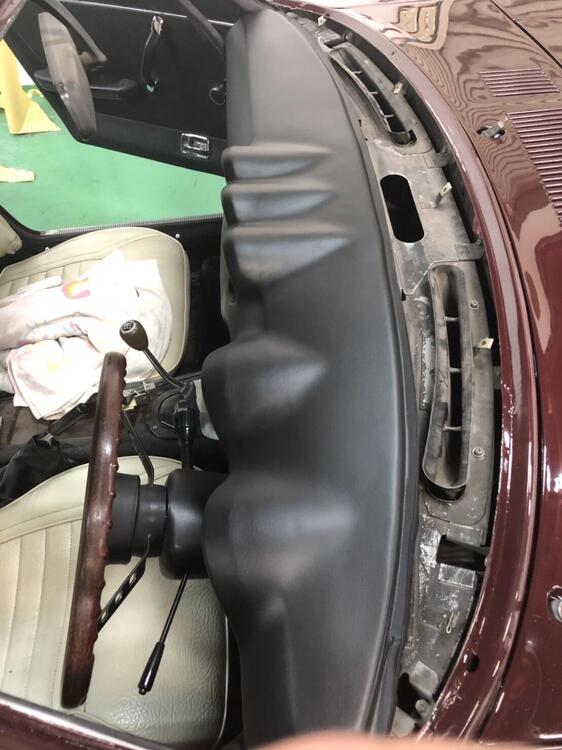


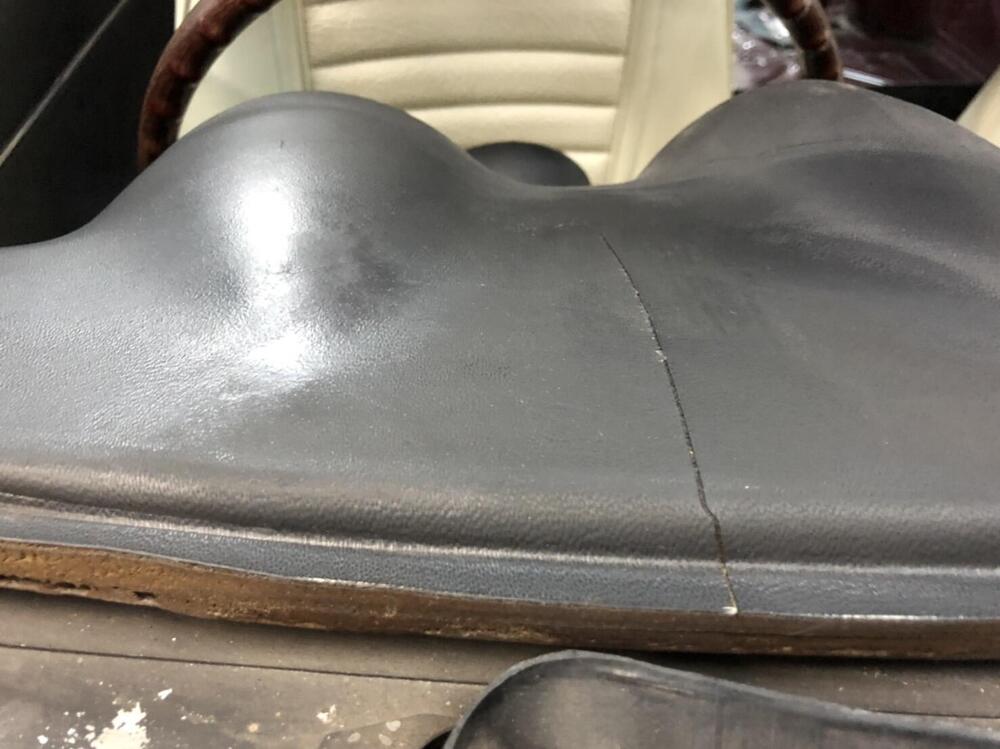 1 point
 -
1 pointUpdate (In Words) - I got the parts back from vapor blasting, done by rocketperformance.ca. Brian Holmes took his time to do them well, and the price was absolutely great, and the results speak for themselves. Way cleaner than bead blasting, smooth to the touch, and looks just like the inside of the timing cover. The only thing I need to do is clean them up with some aluminum brightener (aka, phosphoric acid, concrete etcher, etc.), and then wipe them with some baking soda + warm soapy water to neutralize. Once that's done, they're ready to put the where they need to go. Once installed, a little bit of grease & wax remover (or acetone), and let it evaporate. Then apply Sharkhide when it's on the engine, and she'll look like new for minimum 5 years, provided no fuel gets on it. Right now they might have some finger prints or a little dirt. But they're soooooo nice. - Acid dipped parts didn't come out like that. I had to scrub the ever loving s**t out of them with phosphoric acid and a mix of wire brushes, scotchbrite pads, and steel wool. I didn't like how they came from the acid dipper, as they were dunked in a caustic solution- not an actual acid based solution. There were some deep scratches that I sanded down with 120G pad on an orbital, then moved on up to progressively finer pads. I am just going out the door after this post to drop 'em off at the powder coater with the exact-match paint codes I got for the fan and the plenum that I took a week to hunt down. Will post results and side-by-side with the 71 parts car intake when I get to the shop in a weeks time. The issue with scratches on the intake that were just on the paint ended up being more than just scratches on the paint. There was a ton of little specs of rust that I didn't want to powder coat over. The phosphoric acid and scotchbrite took care of that real quick. I really wish I had taken a before and after. It's a little trick I learned from way back when I had my 260Z. I removed paint and coated the doors with phospho, and they were left bare in my garage for 2 years and never rusted, even on days when I would go in there and everything was covered in moisture/dew during humid weeks. - Hardware that you see so far is just a bit of the clear zinc plated stuff. Mostly oil pan bolts and wire-clamp bolts and washers. I think I'm missing a string of the small washers. Hopefully they can be replaced with some M4 or M5 washers, or maybe they're all there- or still some at the platers. Not sure, but it doesn't look like I got them all back. There was an issue with "bleed out" on the yellow zinc stuff. Essentially, anything with blind holes traps caustic fluid or plating solution, and when they are removed from the plating bath, they end up leaking out the trapped fluid and washing off the dichromate finish coating. So it looks like a very poor plating finish. Not anything like the previous items I had done (brake lines, and transmission plate). Thankfully, they have a muriatic acid solution that they can dip them in for a couple of minutes to remove the plating and try again without damaging anything. I would have done muriatic acid stripping in my garage- but while the chemical itself removes rust and previous finishes, the fumes will rust everything in the garage that's not coated. And I have a couple of expensive 370z/350z transmissions and some engines that I'd rather not test that theory with- so no muriatic acid in the garage. I haven't had that happen with phosphoric acid, so that's why I use that.1 point
-
1 pointI've been looking at this as well, and have come to the conclusion that there are many (most) parts that are to be chromate finished, but that is rare finish to come by nowadays. The best thing to do is find a local plater that can match a yellow zinc plated finish to the chromate finish as close as possible, as chromate finishes are almost impossible to get (at least one that matches the datsun kind). A word of advice from myself and my plater who advised me on this: Buy a tumbler. An 18lbs one from eastwood or harbor freight is ideal. You can dump some fasteners in there and do something else while it chugs away for 4 hours. I told my plater that I have ordered one, and he was ecstatic (probably because he knows I'll have buckets of hardware for him to plate in the near future). With the larger 18lb bowl versions, you can even toss the hood hinges in there, or anything about 4 inches wide and 10 inches long, or even 6x6ish in flat size. The different media and different times alotted to each type will provide a nice base so that the zinc finish that is applied doesn't come out "sparkley", which is what sandblasting will provide you with, as it does not even out the surface. I've found that sandblasting pits the surface very finely and the peaks and valleys left from the process produce a very slight "metalic" look. If you see a NOS plated part from datsun, it's not quite polished, but it's a very subdued plating colour. My plater here in Toronto can match the colour pretty close from what I've seen, but the end result is all in the pre-process finish that you provide them. Some things they will not do (i.e. -remove paint from all your little nuts and bolts). I will post an update on how they turn out soon. I have just refinished all the brake line and fuel line hardware and capped them off with custom M10 flare fitting caps and rubber caps with crimp caps to have those plated- so I can post photos when they come back. I'm dropping them off in 4 hours. For anyone wondering... my plater uses a 7 foot tank, and some lines are longer. You can gently bend a wide arc into the longest portion of the lines that are outside of that dimension, and straighten it when you get it back- which is the only solution I've come up with. If need be, I will purchase a line straightener at some point- but I am going to try and get it as close to straight as possible with my current tools.1 point
-
To remove gunk and stain from my fuel rails, I submersed in pure Muriatic acid ($8.00 per gallon) for 3 minutes, then washed thoroughly in hot soapy water....blow out the rails with air. 35 years of crud disappeared immediately!! I used this procedure on all the plated parts. When they came back from the plate shop they looked like brand new. Whatever you do, don't use steel wool or sand-paper as it will screw up the plate work. Great job. Guy1 point
-
The only glitch in the process was trying to take the smog tubes out of the manifold. They are rusted in. I could only loosen two, so I have applied Liquid Wrench to the threads and will let them soak and try to loosen them again tomorrow. I use Aero Kroil -that is Kano Lab's penetrating oil in a spray can - it is the only product that I've seen break the air injection tube nuts loose. Given enough time, and repeated applications - you might get them out with Liquid Wrench... http://Kanolabs.com After soaking them with Kroil - I put a line wrench {brake line wrench} on the nuts - then a swift blow with a brass hammer - and they usually break lose. You want to assure that the line wrench is a good tight fit - otherwise you can round the nuts off... If they don't break lose... then you have to heat the manifold around the nuts... FWIW, Carl B.1 point