Leaderboard
-

Zed Head
Free Member3Points19,238Posts -
Patcon
 Subscriber
 3Points11,142Posts
 -
Matthew Abate
Free Member2Points1,204Posts -
Mark Maras
Free Member2Points3,719Posts


Popular Content
Showing content with the highest reputation on 08/21/2022 in Posts
-
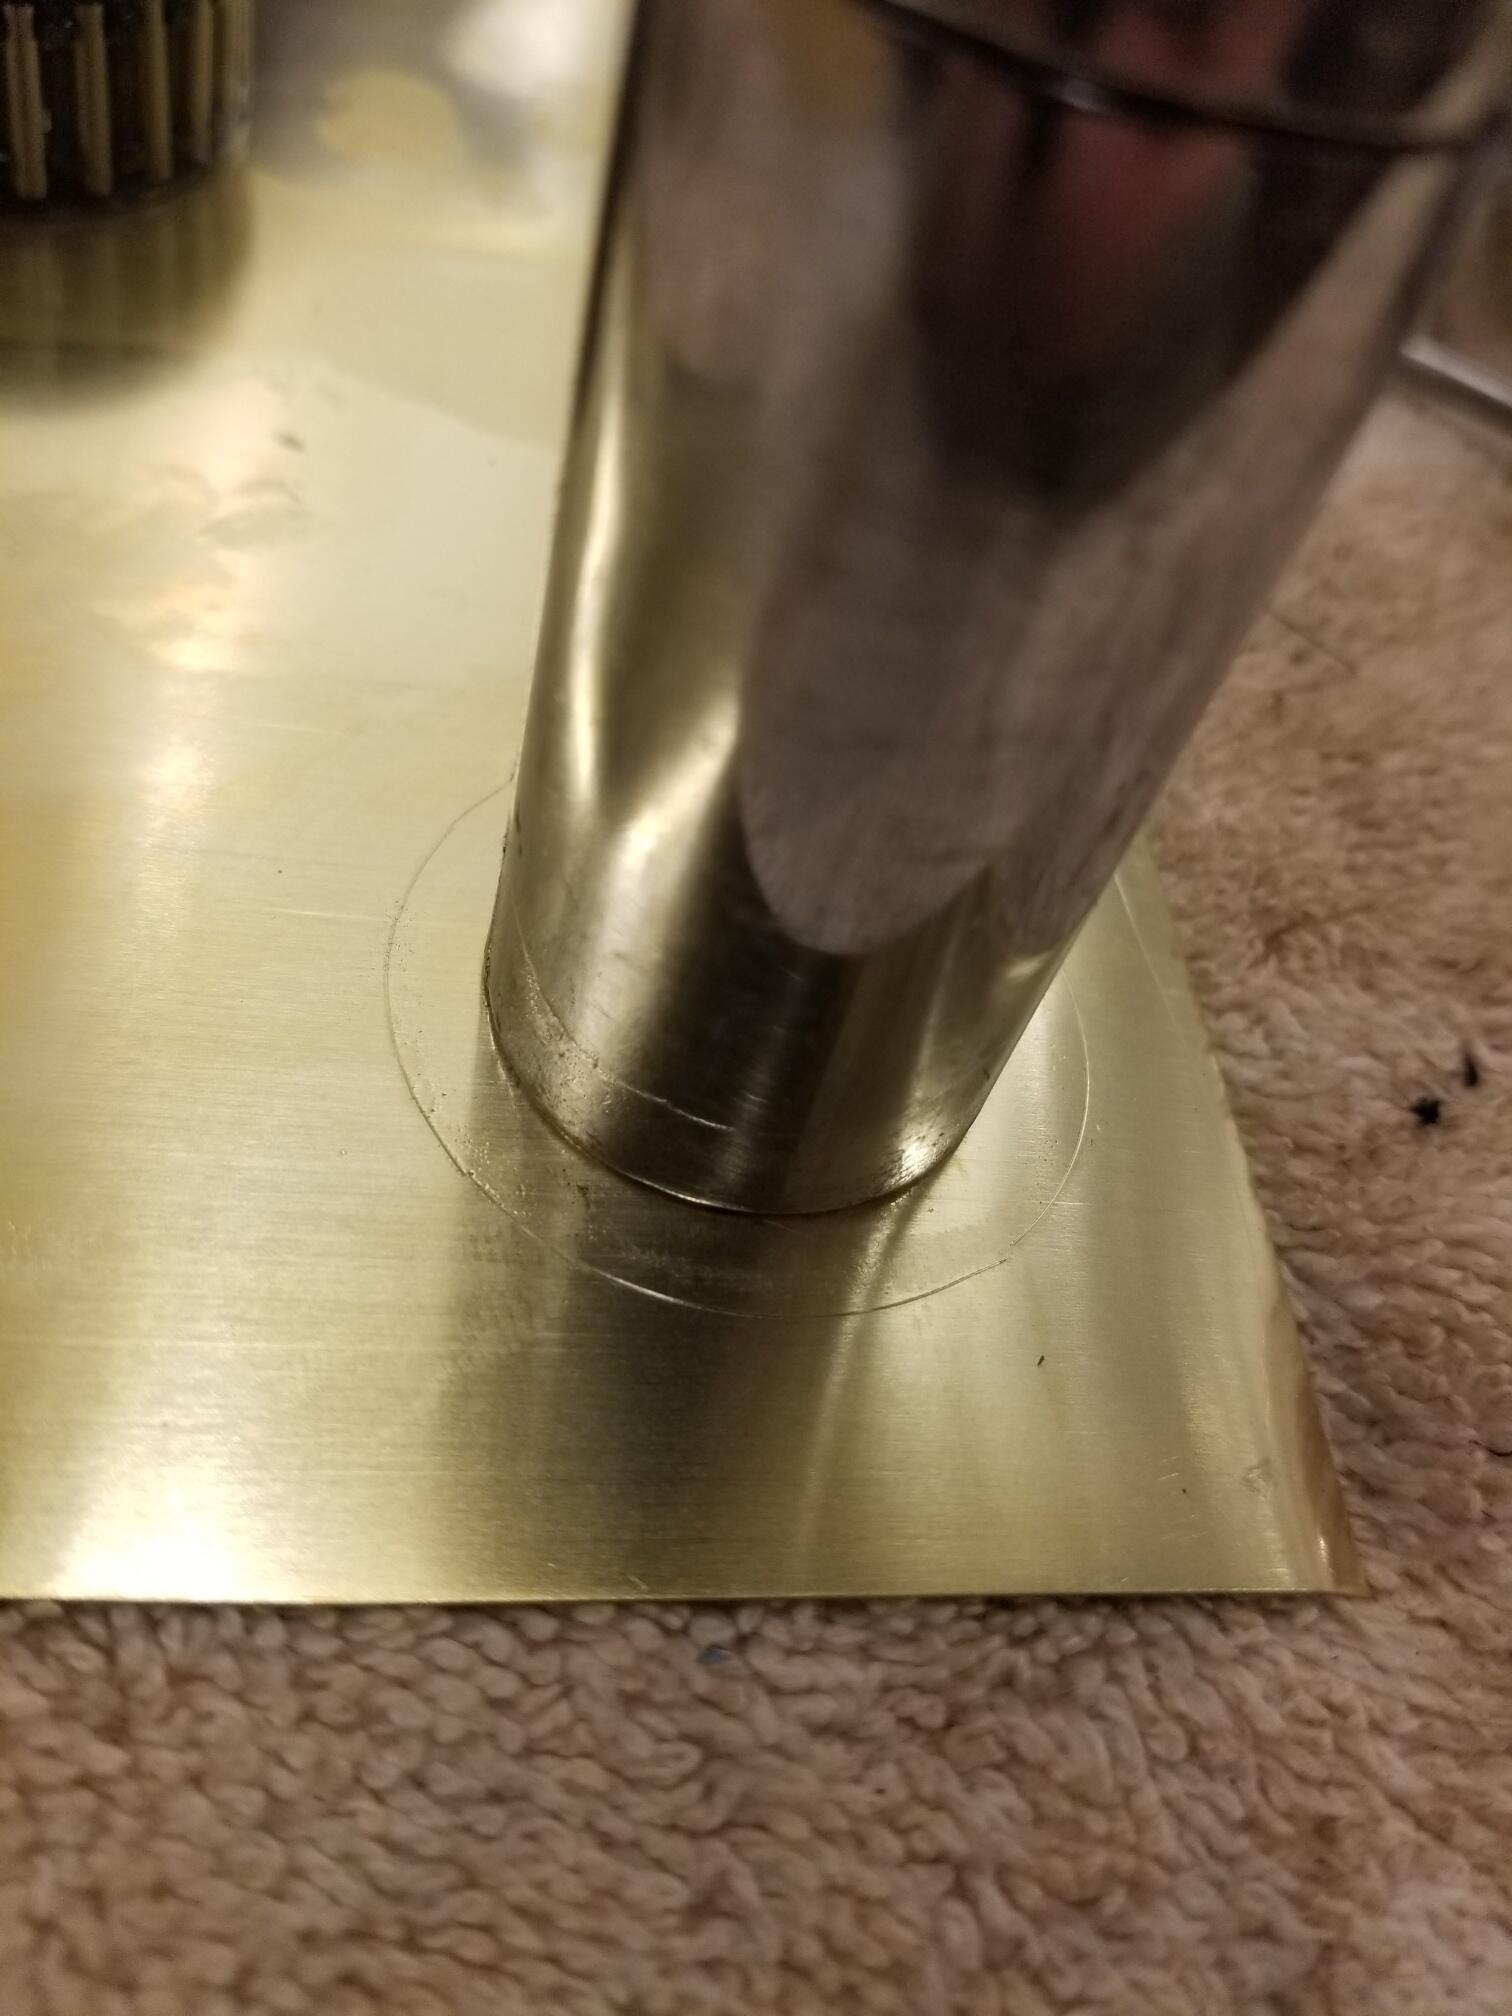
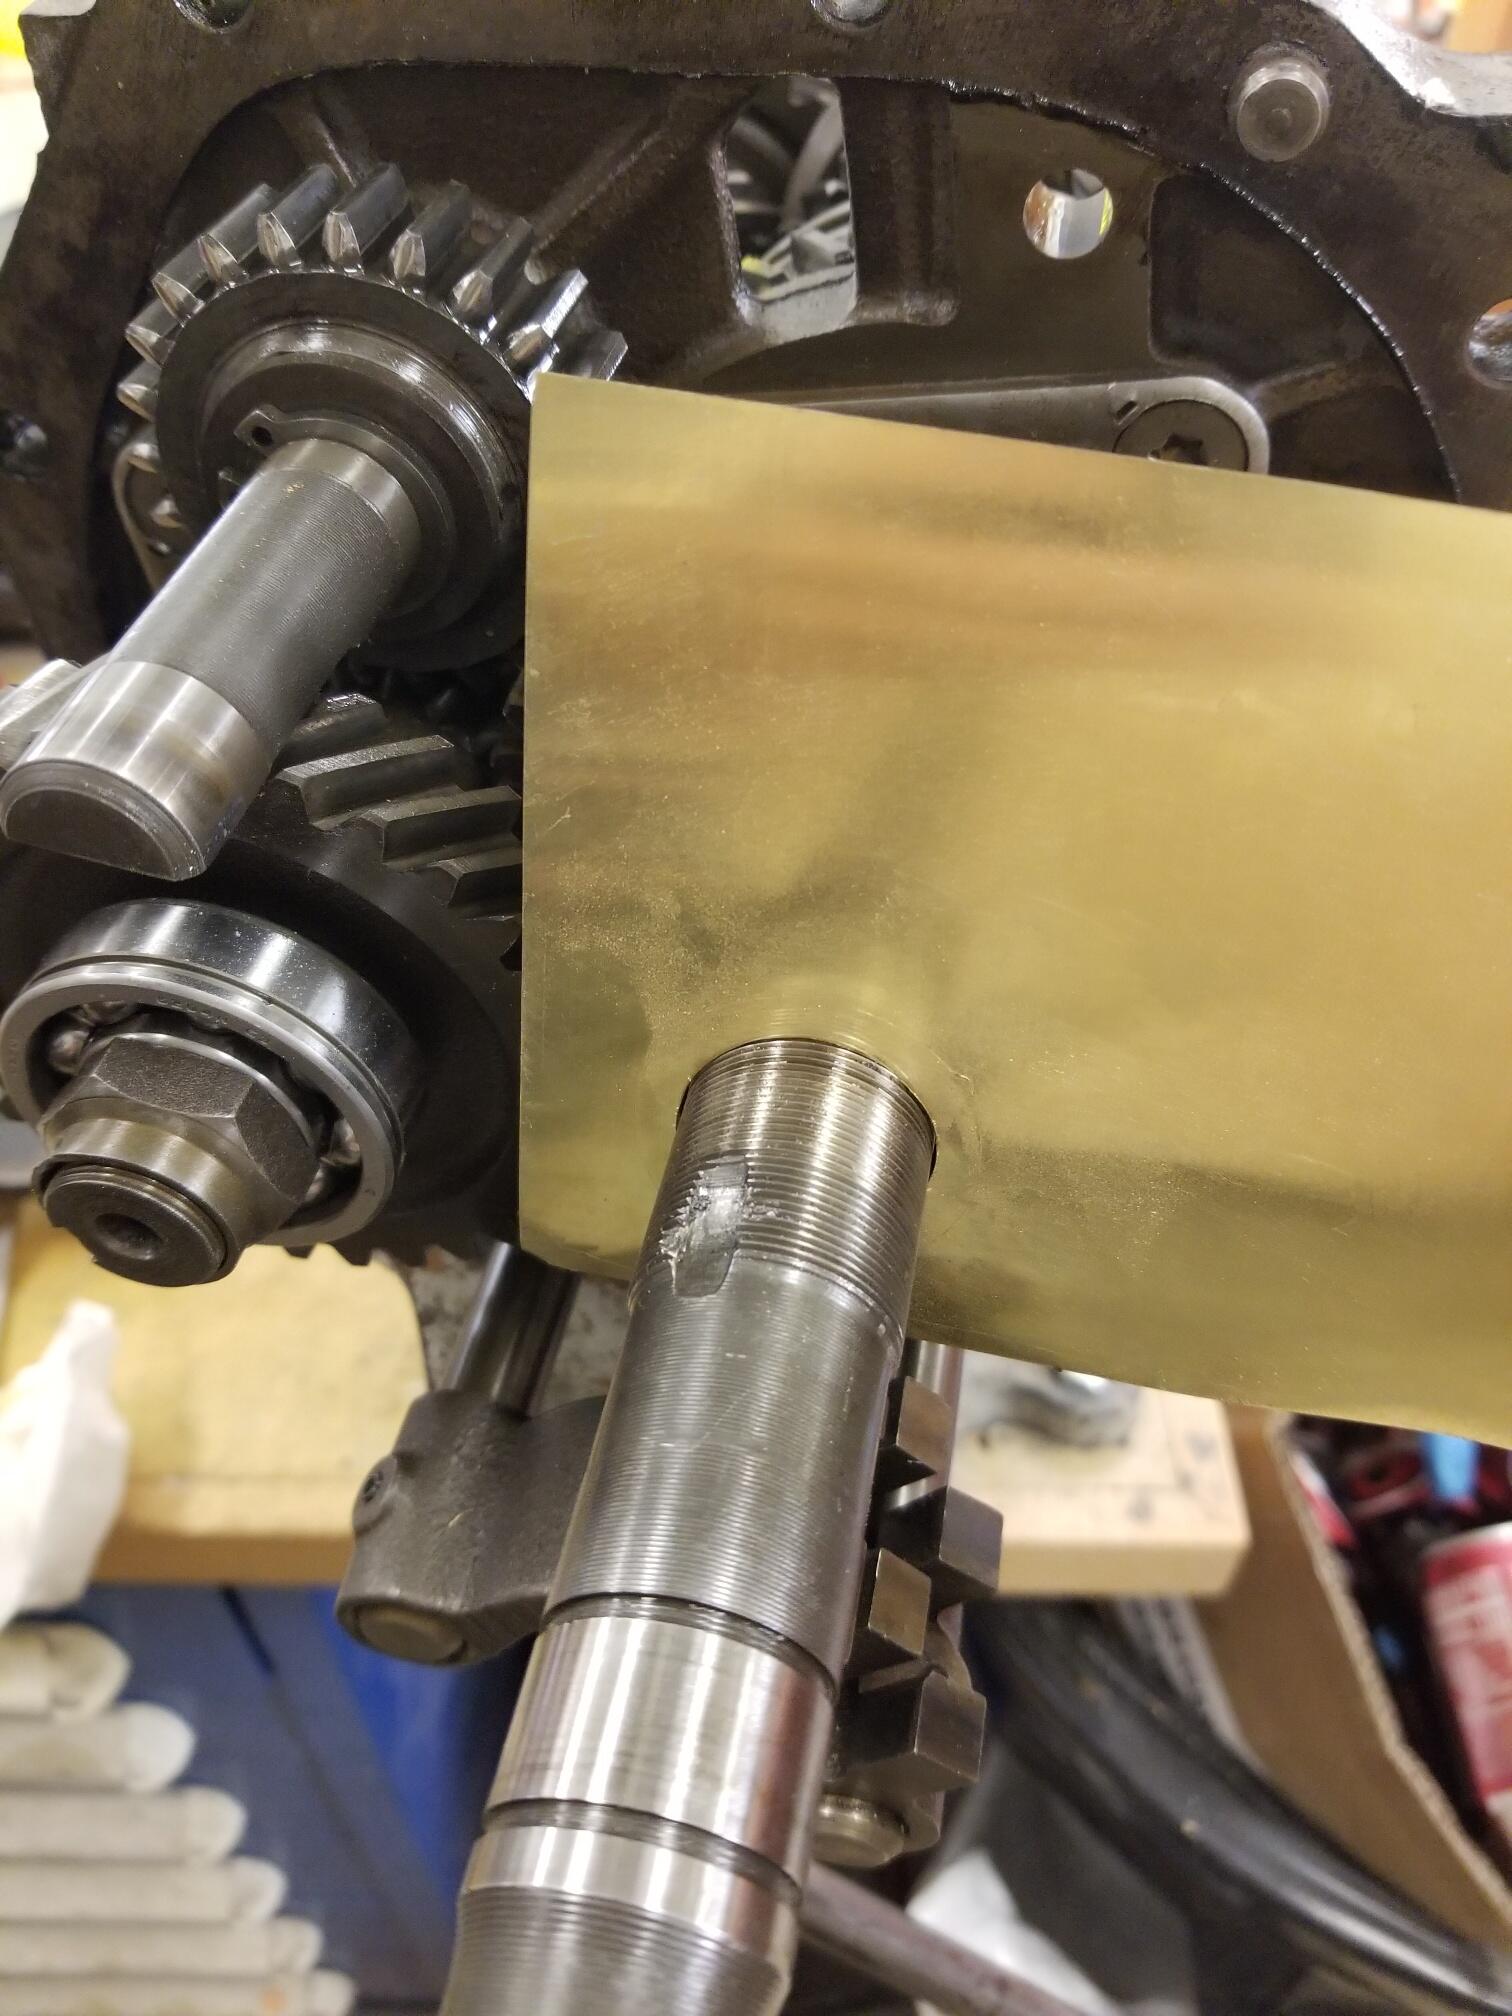
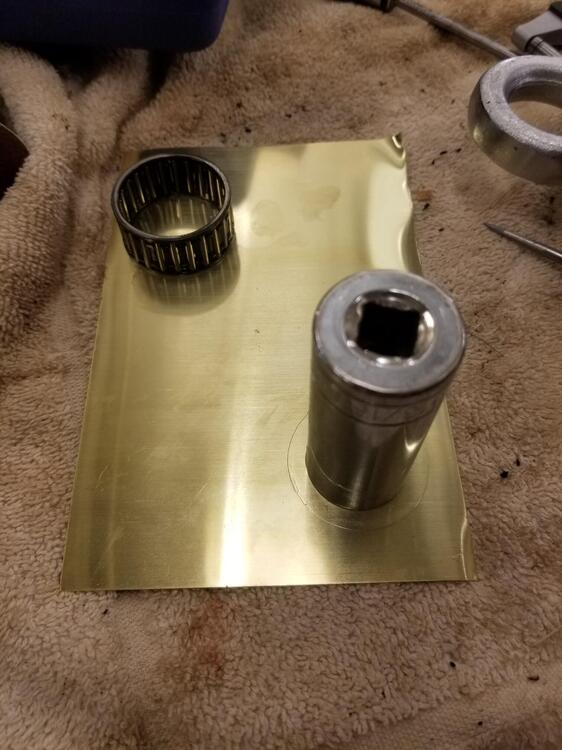
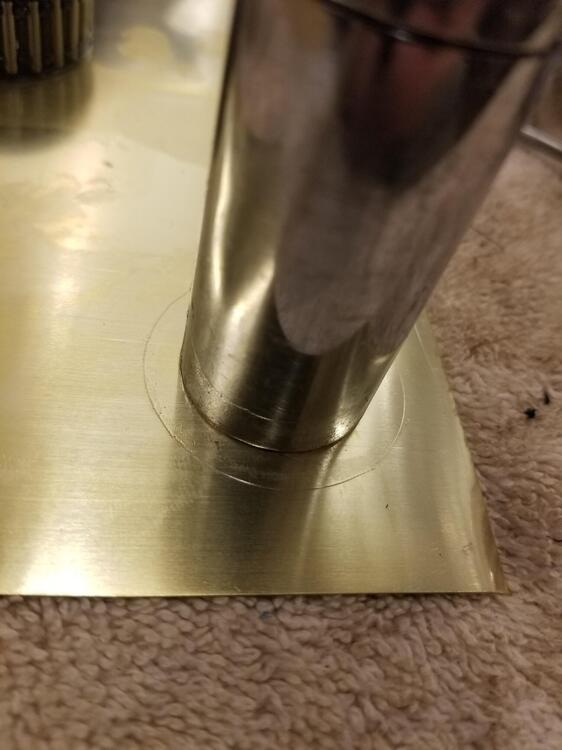
3 pointsSo I ordered some brass shim stock from amazon (0.001,2,3,5 & 0.010") We used the 0.010" sheet. The really thin stuff is like tin foil thin. Traced the outside of the needle bearing for OD and used a socket that was about the right ID Various methods to cut the ID. Little die grinder, a dremel tool, etc. I eventually got a hole that worked Then I cut the OD with scissors. All torqued back down and just inside the low spec number. Waiting on a new oil gutter and a new front case seal to check that and then hopefully we will be all good

 3 points
 -
2 pointsI've run into this problem in the past. The clutch alignment tool I used was a bit sloppy. and allowed the clutch disc to drop down a bit before I tightened it. Trans wouldn't go in that last little bit. I loosened the pressure plate just enough to be able to move the disc into the truly centered position, tightened it down and the trans slid right in.2 points
-
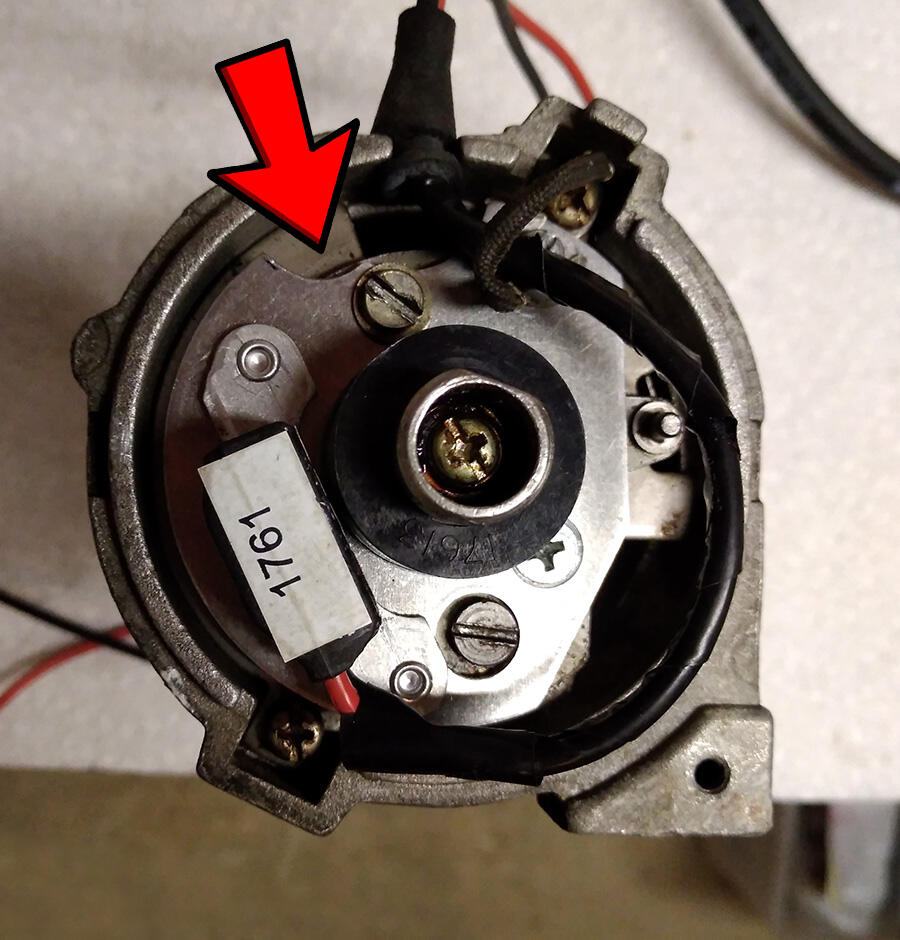
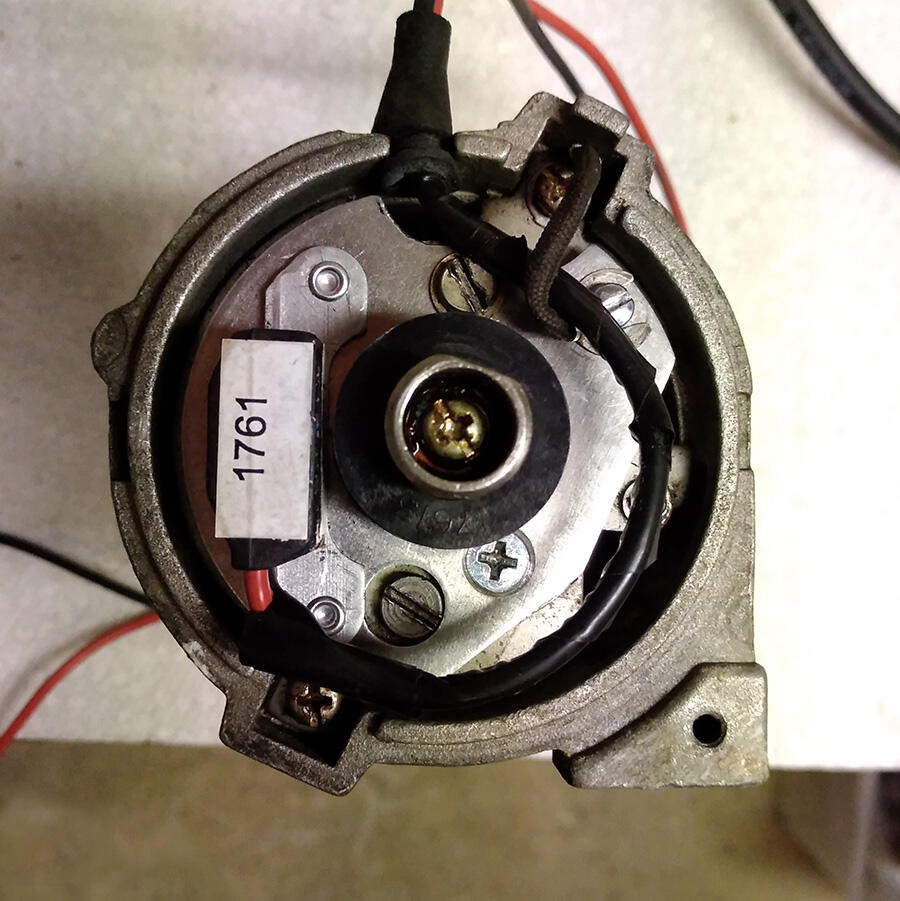
Final solution: Got one of the machinists at work to notch out a clearance recess in the plate. Retarded: Advanced: Not sure why this wasn't present from the get-go. Also, I had to trim off about 1/2 of the grounding wire screw since it extended all the way through the plate. And as mentioned above, the grommet for the wires exiting the distributor housing doesn't fill the oval-shaped hole, raising the very real possibility of water ingestion if I'm not careful. Again, not impressed with the attention to detail in this kit. I shouldn't have had to make all these modifications just for it to fit and work properly.

 2 points
 -
2 pointsOh, I should add that I tried just having strips of dynamat, but it showed through the headliner. If you’re going to use any you have to cover the entire roof, and you have to get it on as smooth as possible. The headliner is surprisingly bad at hiding bumps and ridges under it, despite the thick foam backing.2 points
-
So spending all that time in the shop with the car was OK with your serpent friend?2 points
-
1 point
-
1 pointIn your situation with possible fuel dilution, I was thinking that going w a heavier oil to start with could be a good idea until you get that cleared up. In my day to day drive vehicles I go with the recommended oil weight. My understanding is that newer vehicles have gone to lighter oils for better fuel economy and that’s a good thing for vehicles I put significant miles on. I also have heard newer engines have tighter tolerances to go along with that lower weight oil. The engine I’m rebuilding came w a set of Ross racing piston that called for using 20w50 to coat the rings for installation. I already use 20w50 VR1 in an 70 Buick Riviera 455 engine because of some oil pressure issues common to that engine. I live in a hot climate and don’t think that’s a bad choice for the Z if nothing more than to just not having a lot of different oils around. Also I understand that muti-weight oil is base weight plus polymers to got the second weight. (20w50 is 20 weight oil w polymers to make it act like 50 at high temps.) I suppose it’s overkill, but I kind of like that if you get polymer failure you still have 20w oil. Just my two cents.1 point
-
I am ok, i found the 3rd nut behind the plastic wheel wells.1 point
-
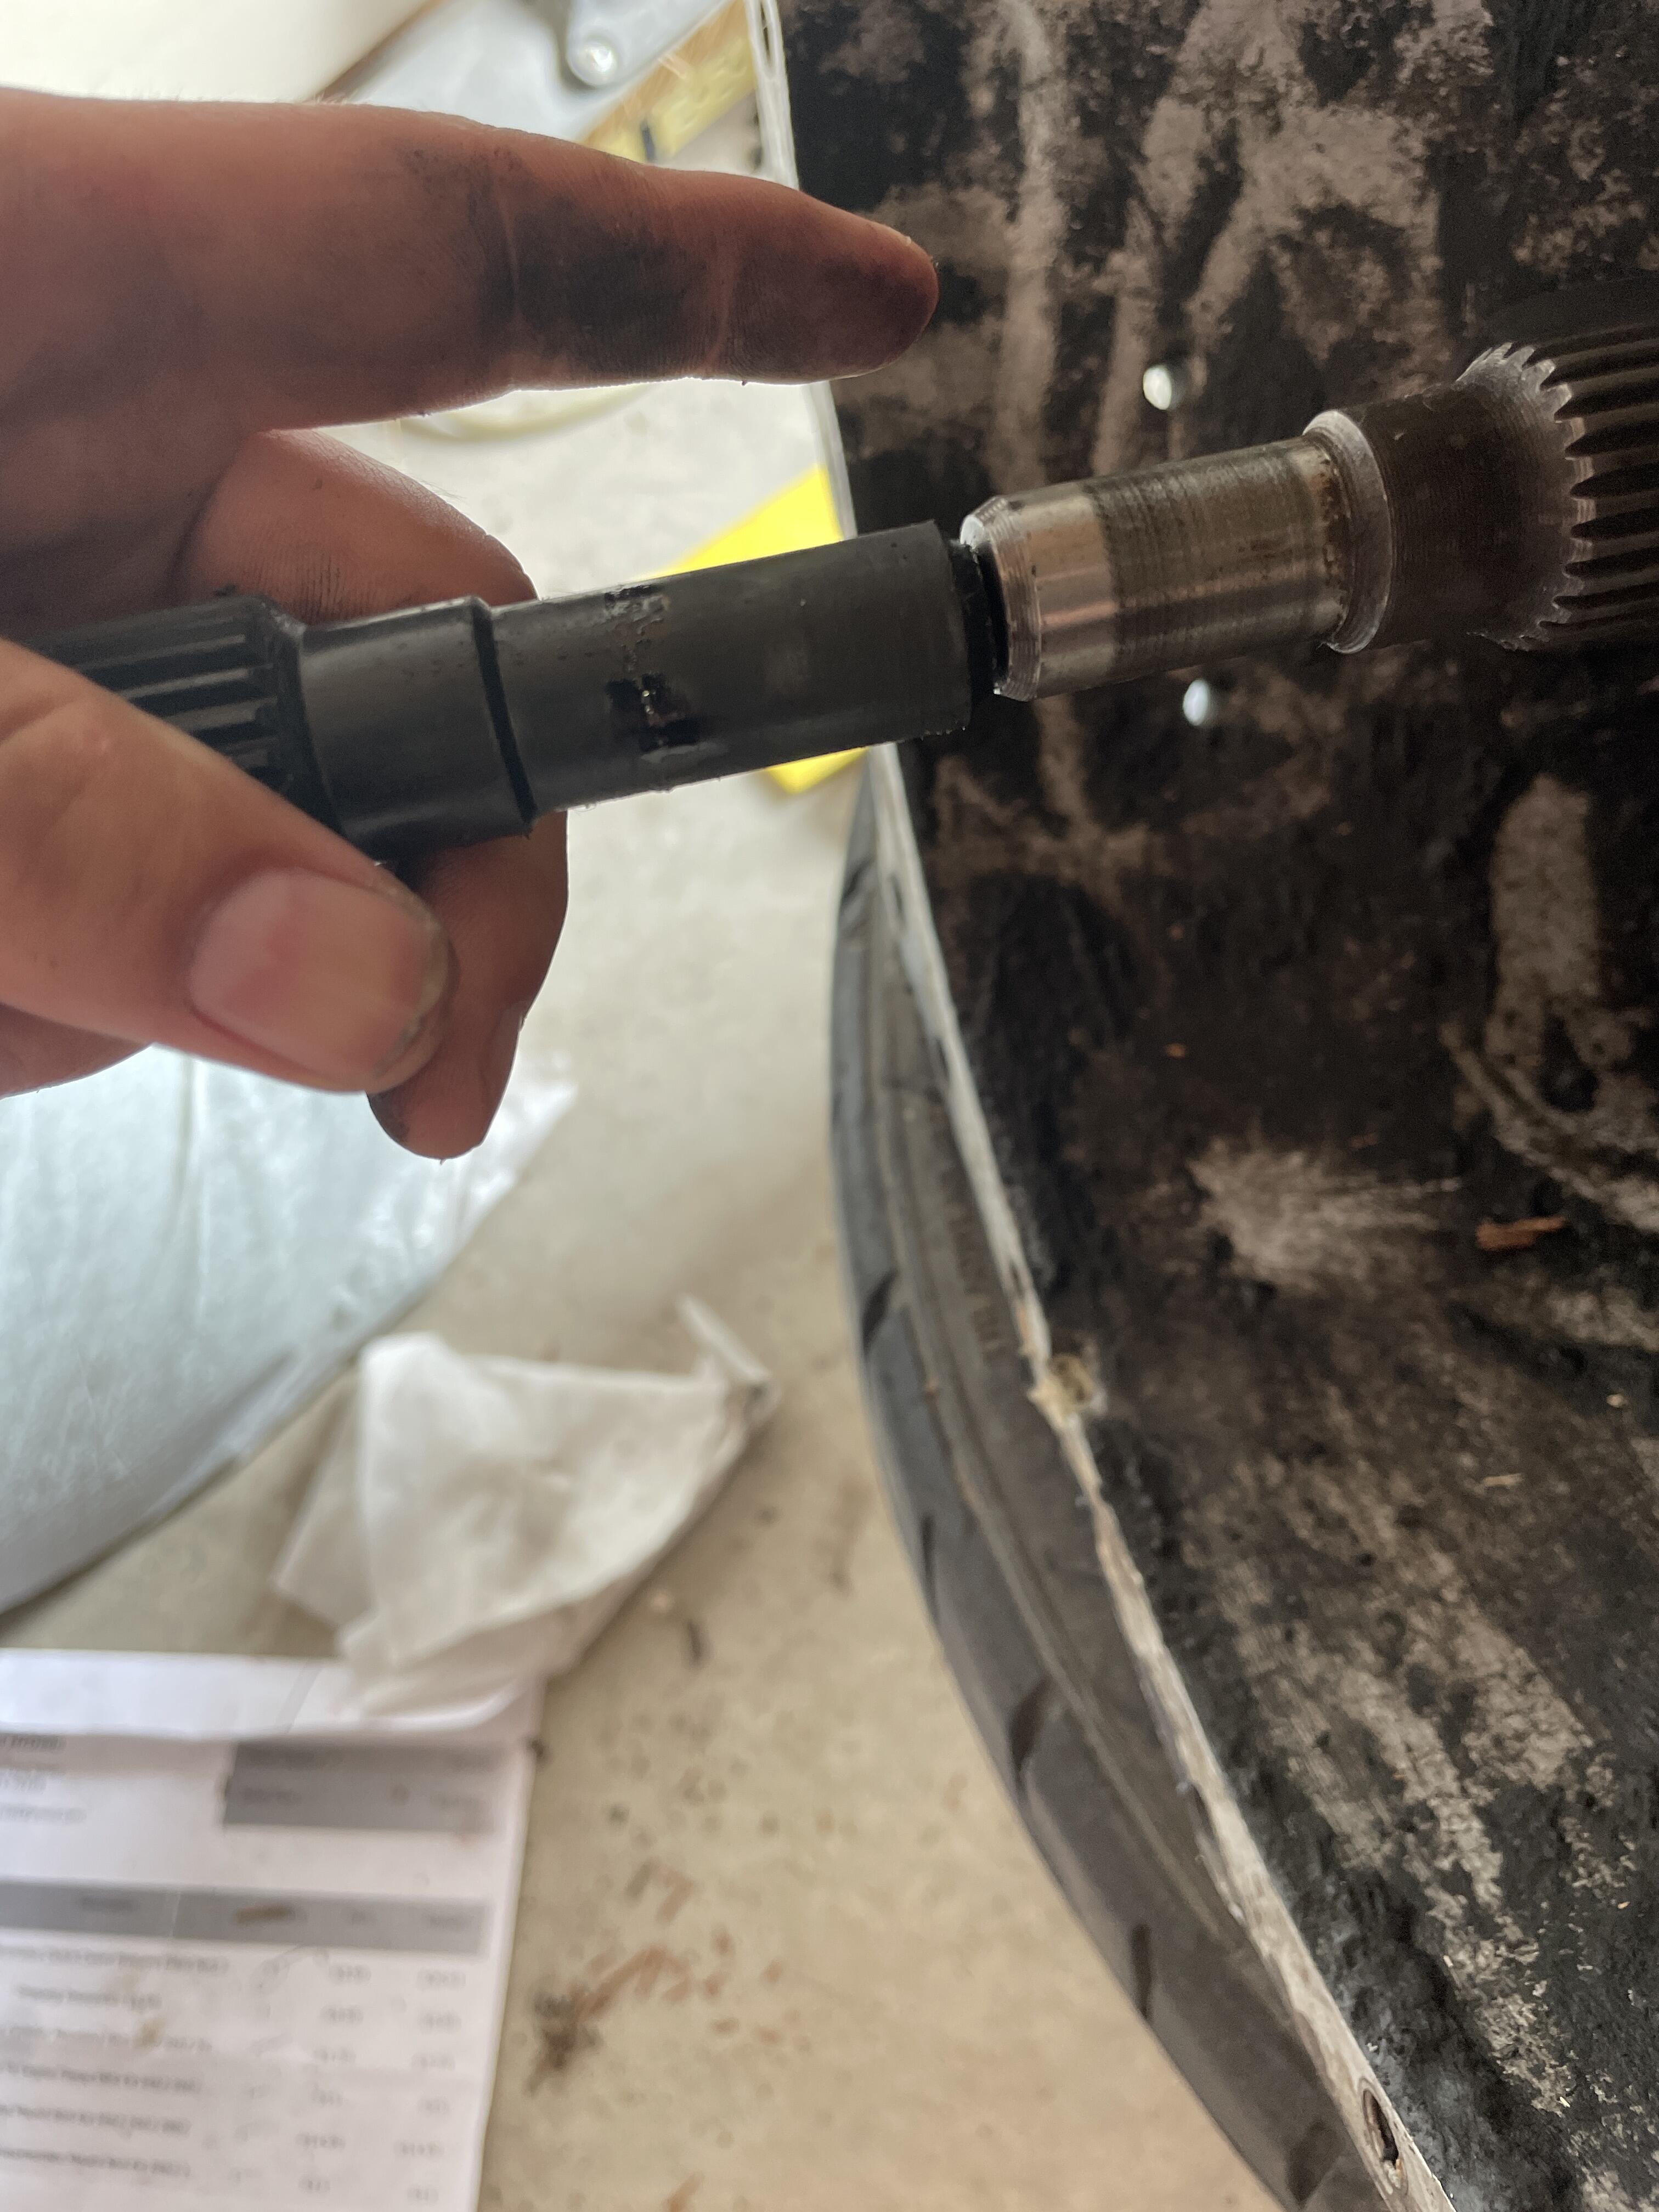
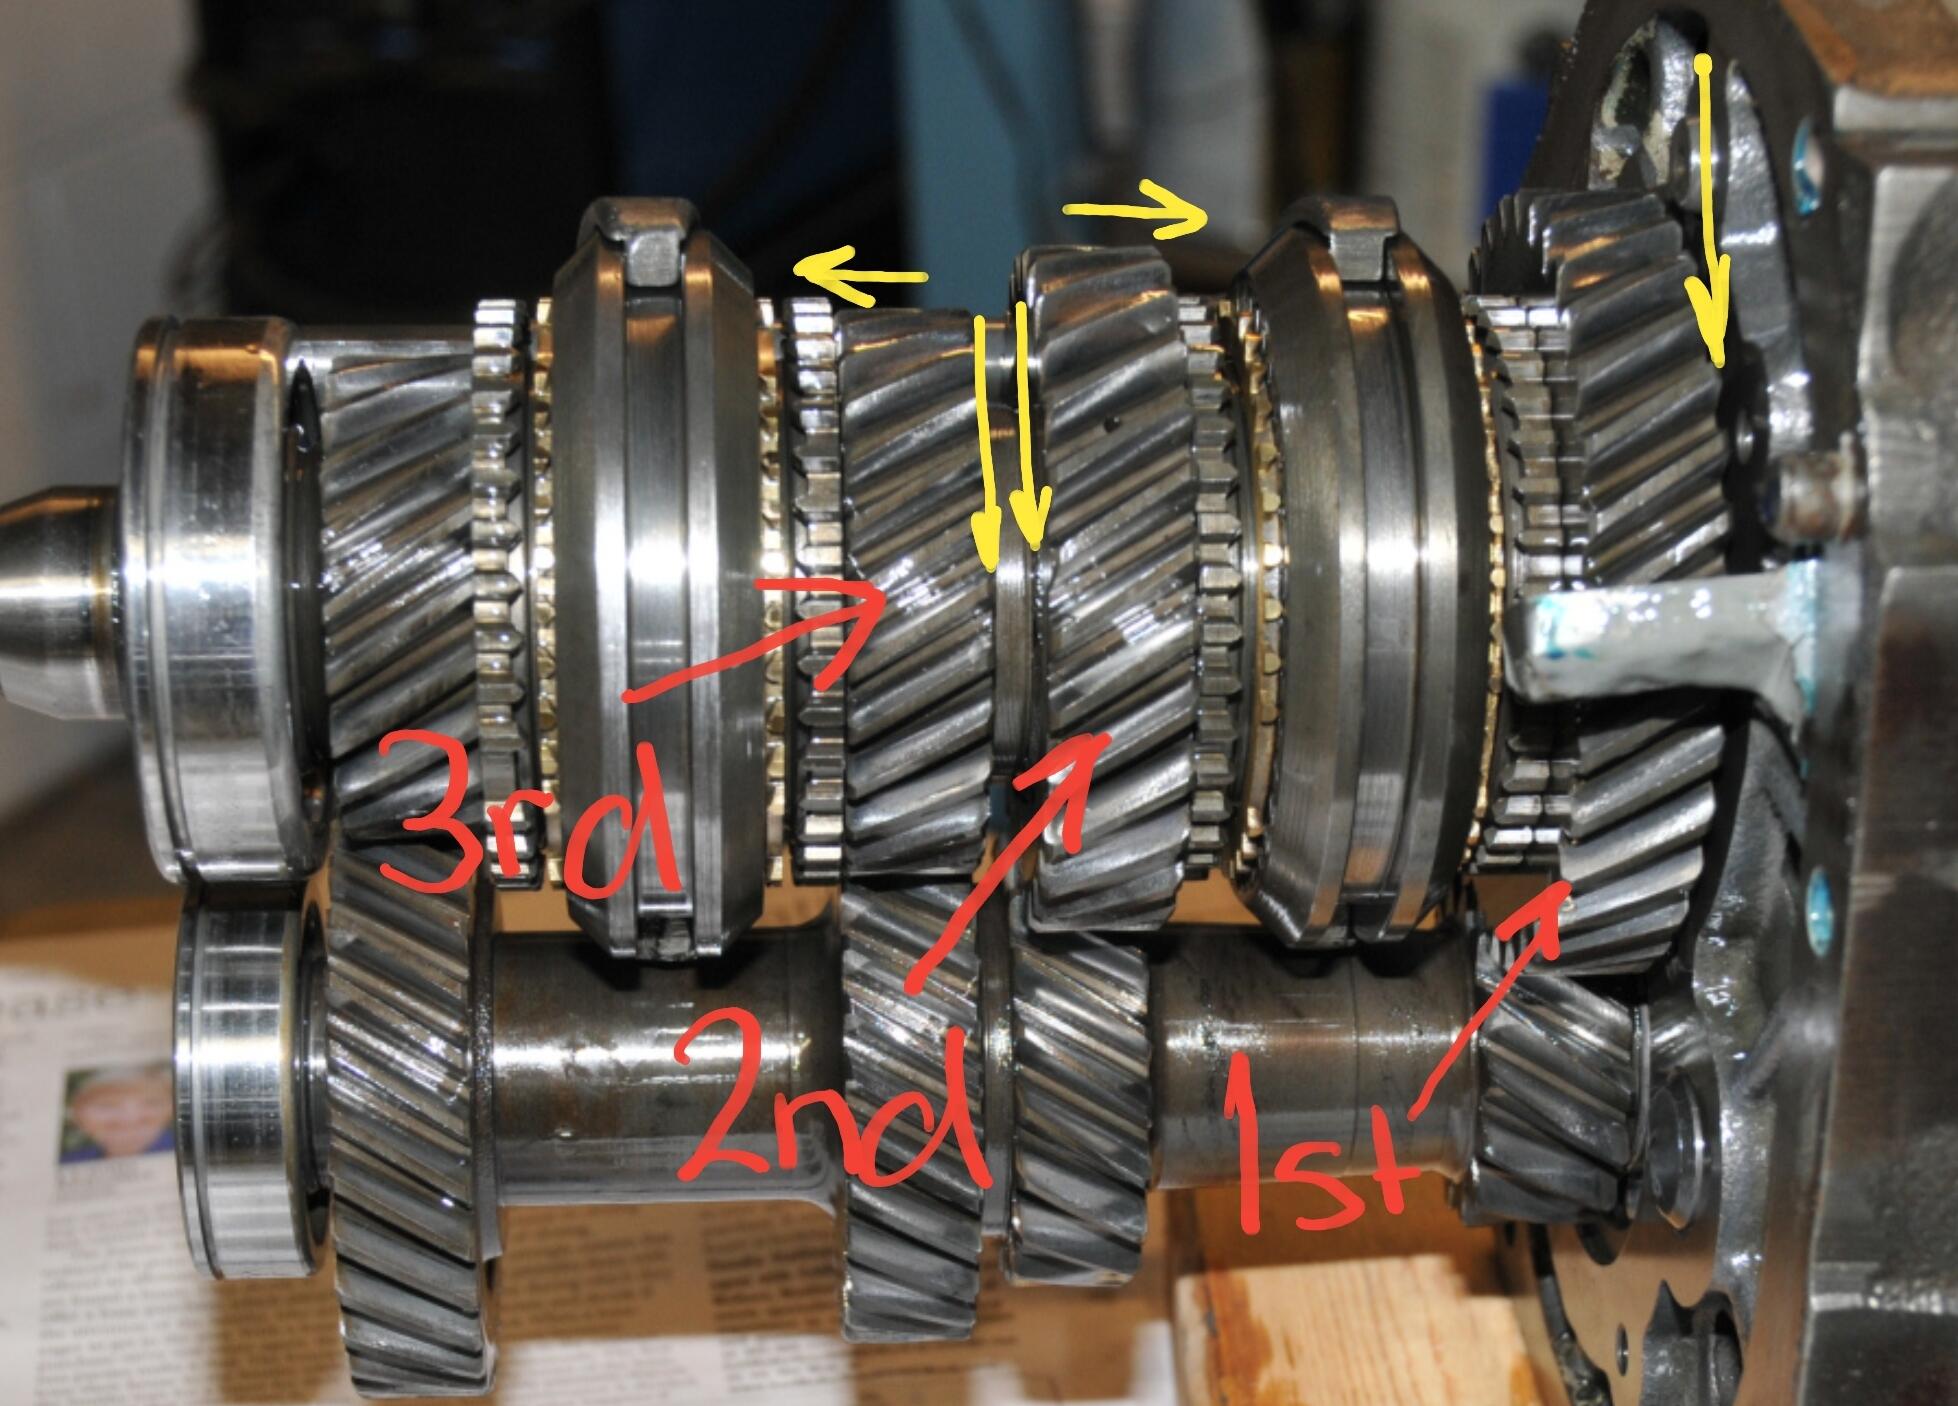
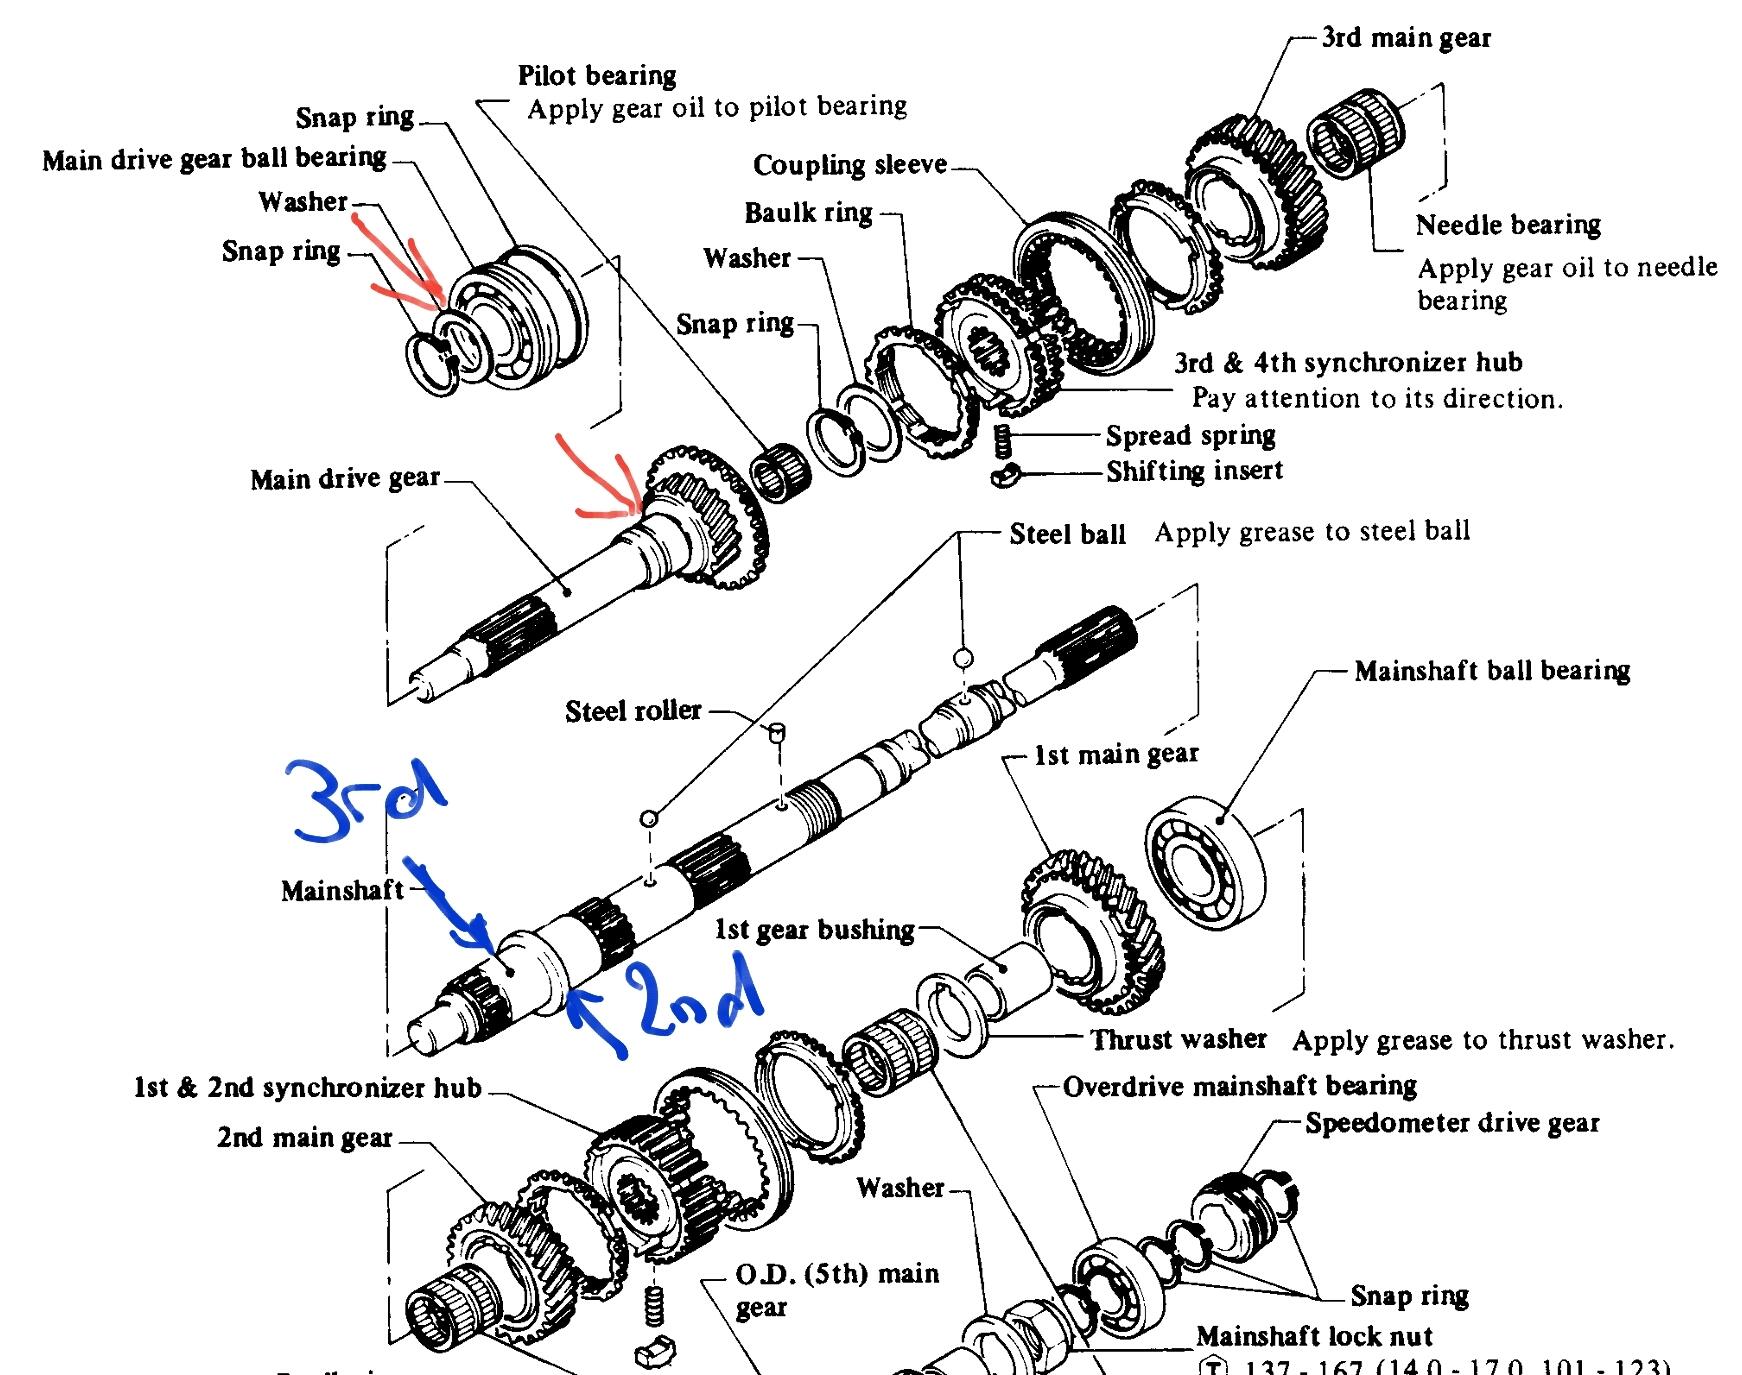
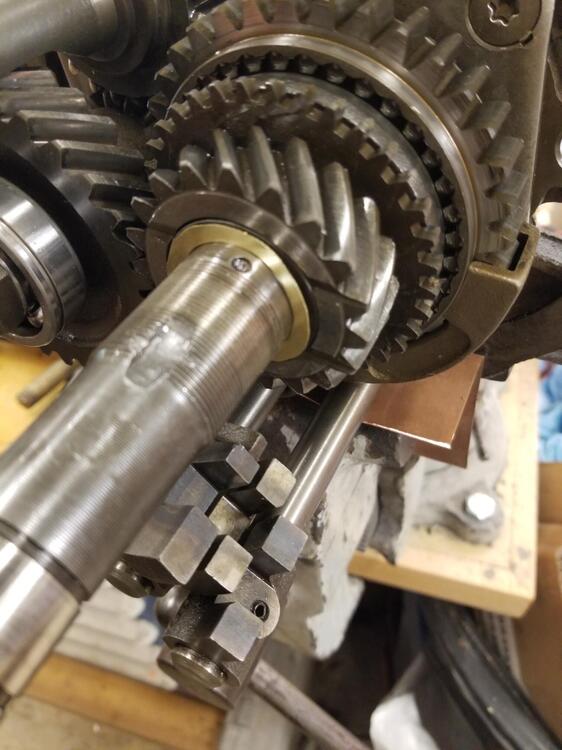
1 pointHi Charles, Your photos are showing the input shaft or main drive gear. Looking closely at your 2nd gear measurement, you might be meauring 3rd, it's hard to tell. The 2nd and 3rd clearances are next to each other. You actually measure the gears clearance between the gears and the shoulder on the main shaft, in the same area. I hope that makes some sense. In the photo the feeler gauge should be in the same area for 2nd and 3rd, just either side of the shoulder. Push the 3rd gear forward to check its clearance and the 2nd gear towards the back of the transmiassion. I marked the exploded view in blue where the clearance is measured. The red arrows are the measurements in your photo. Hope my artistic scribble is clear. I'm on a tablet, well that will be my excuse😁 Your fab work on the shim looks great.👍

 1 point
 -
1 pointOpen the AFM vane before you open the throttle it should rev because of the extra fuel if it's a fuel problem. You didn't say that the vane actually moves with air flow. Maybe it moves a little and stops. Might be that the AMF is not right now. Work and work right are not the same thing.1 point
-
@mailnome detailed before pictures. It is SS over SS with a very light dusting of primer in between. I don't know what's going at the bottom. A mess. Maybe a dealer or dock fix before it was first purchased? I'm the second owner, purchased in 1975 and painted around 1980. @Patcon A major disservice indeed! It is single stage, so clean repair is probably not possible. I'll get an estimate, if I can find someone to give me one, and then talk with the shop to see what we can work out.1 point
-
1 pointIf anyone is looking for the stock expansion valve o-rings which are NLA, for the outside sealing ring use a 1-1/2”id x 1-11/16”od x 3/32”cs also known as AS568-128 HNBR. The inside ring is 1-1/2”id x 1-5/8”od x 1/16”cs also known as AS568-029 HNBR. I purchased mine at www.Theoringstore.com . It took a few tries. Hope this helps somebody.1 point
-
Too add more info from my experience today. I've realized what I thought was a long time sitting problem where I have to tap my float chambers with a rubber handled screwdriver to get mine to crank after a month or so turns out my lids were loose, not terribly loose but the 4 screws needed a few rounds to get them snug again. That could be the reason the bowls were empty, evaporation from not snug lids? I know @dutchzcarguy said he had to pop his to. Maybe this would be helpful to you Mart. Everything is back to normal now. I had leaking lids on start up which could be disastrous out on the freeway. I assume the new filters gave me better psi and caused the constant dripping of fuel onto my 6to1 header runners. Thank you all for the help over the years. Couldn't have been a better team effort from all of you. I'll always be in debt to CZCC members.1 point
-
1 pointI left something out in the post above. It's confusing. The MAP reading is the pressure left over in the manifold after vacuum is pulled. So, to make a new table of MAP pressure readings from a vacuum reading table, you have to subtract the vacuum reading from absolute pressure. We all live under approximately 14.7 psi all the time. 760 mm Hg. 100 KPa. 123ignition's web site actually has a tutorial on it. But if you read too much of it the subject gets even more confusing. It's basically physics class stuff. https://123ignition.com/support/create-curve-tutorial/ " Regarding the vacuum curve, this is a little bit more complex. 123ignition works with absolute vacuum in stead of relative vacuum. The advantage of absolute vacuum is, it works also when you drive the car on high altitudes. In case of relative vacuum, you have to adjust the ignition manually. The values in the original Bosch graph are given in mmHg, 123ignition works with kPa. First we convert the values to kPa and crankshaft degrees instead of distributor degrees. You can type in Google: 80 mmHg to kPa 0 deg @ 11 kPa 10 deg @ 27 kPa Now we have to convert the relative values to absolute values. Atmospheric vacuum at see level is 100 kPa. So 100 kPa is our base point. Al values below 100 kPa is vacuum all values above 100 kPa is pressure. in this case we have a vacuum curve, so our result will be: 0 deg @ 100 – 11 kPa = 89 kPa 10 deg @ 100 – 27 kPa = 73 kPa"1 point
-
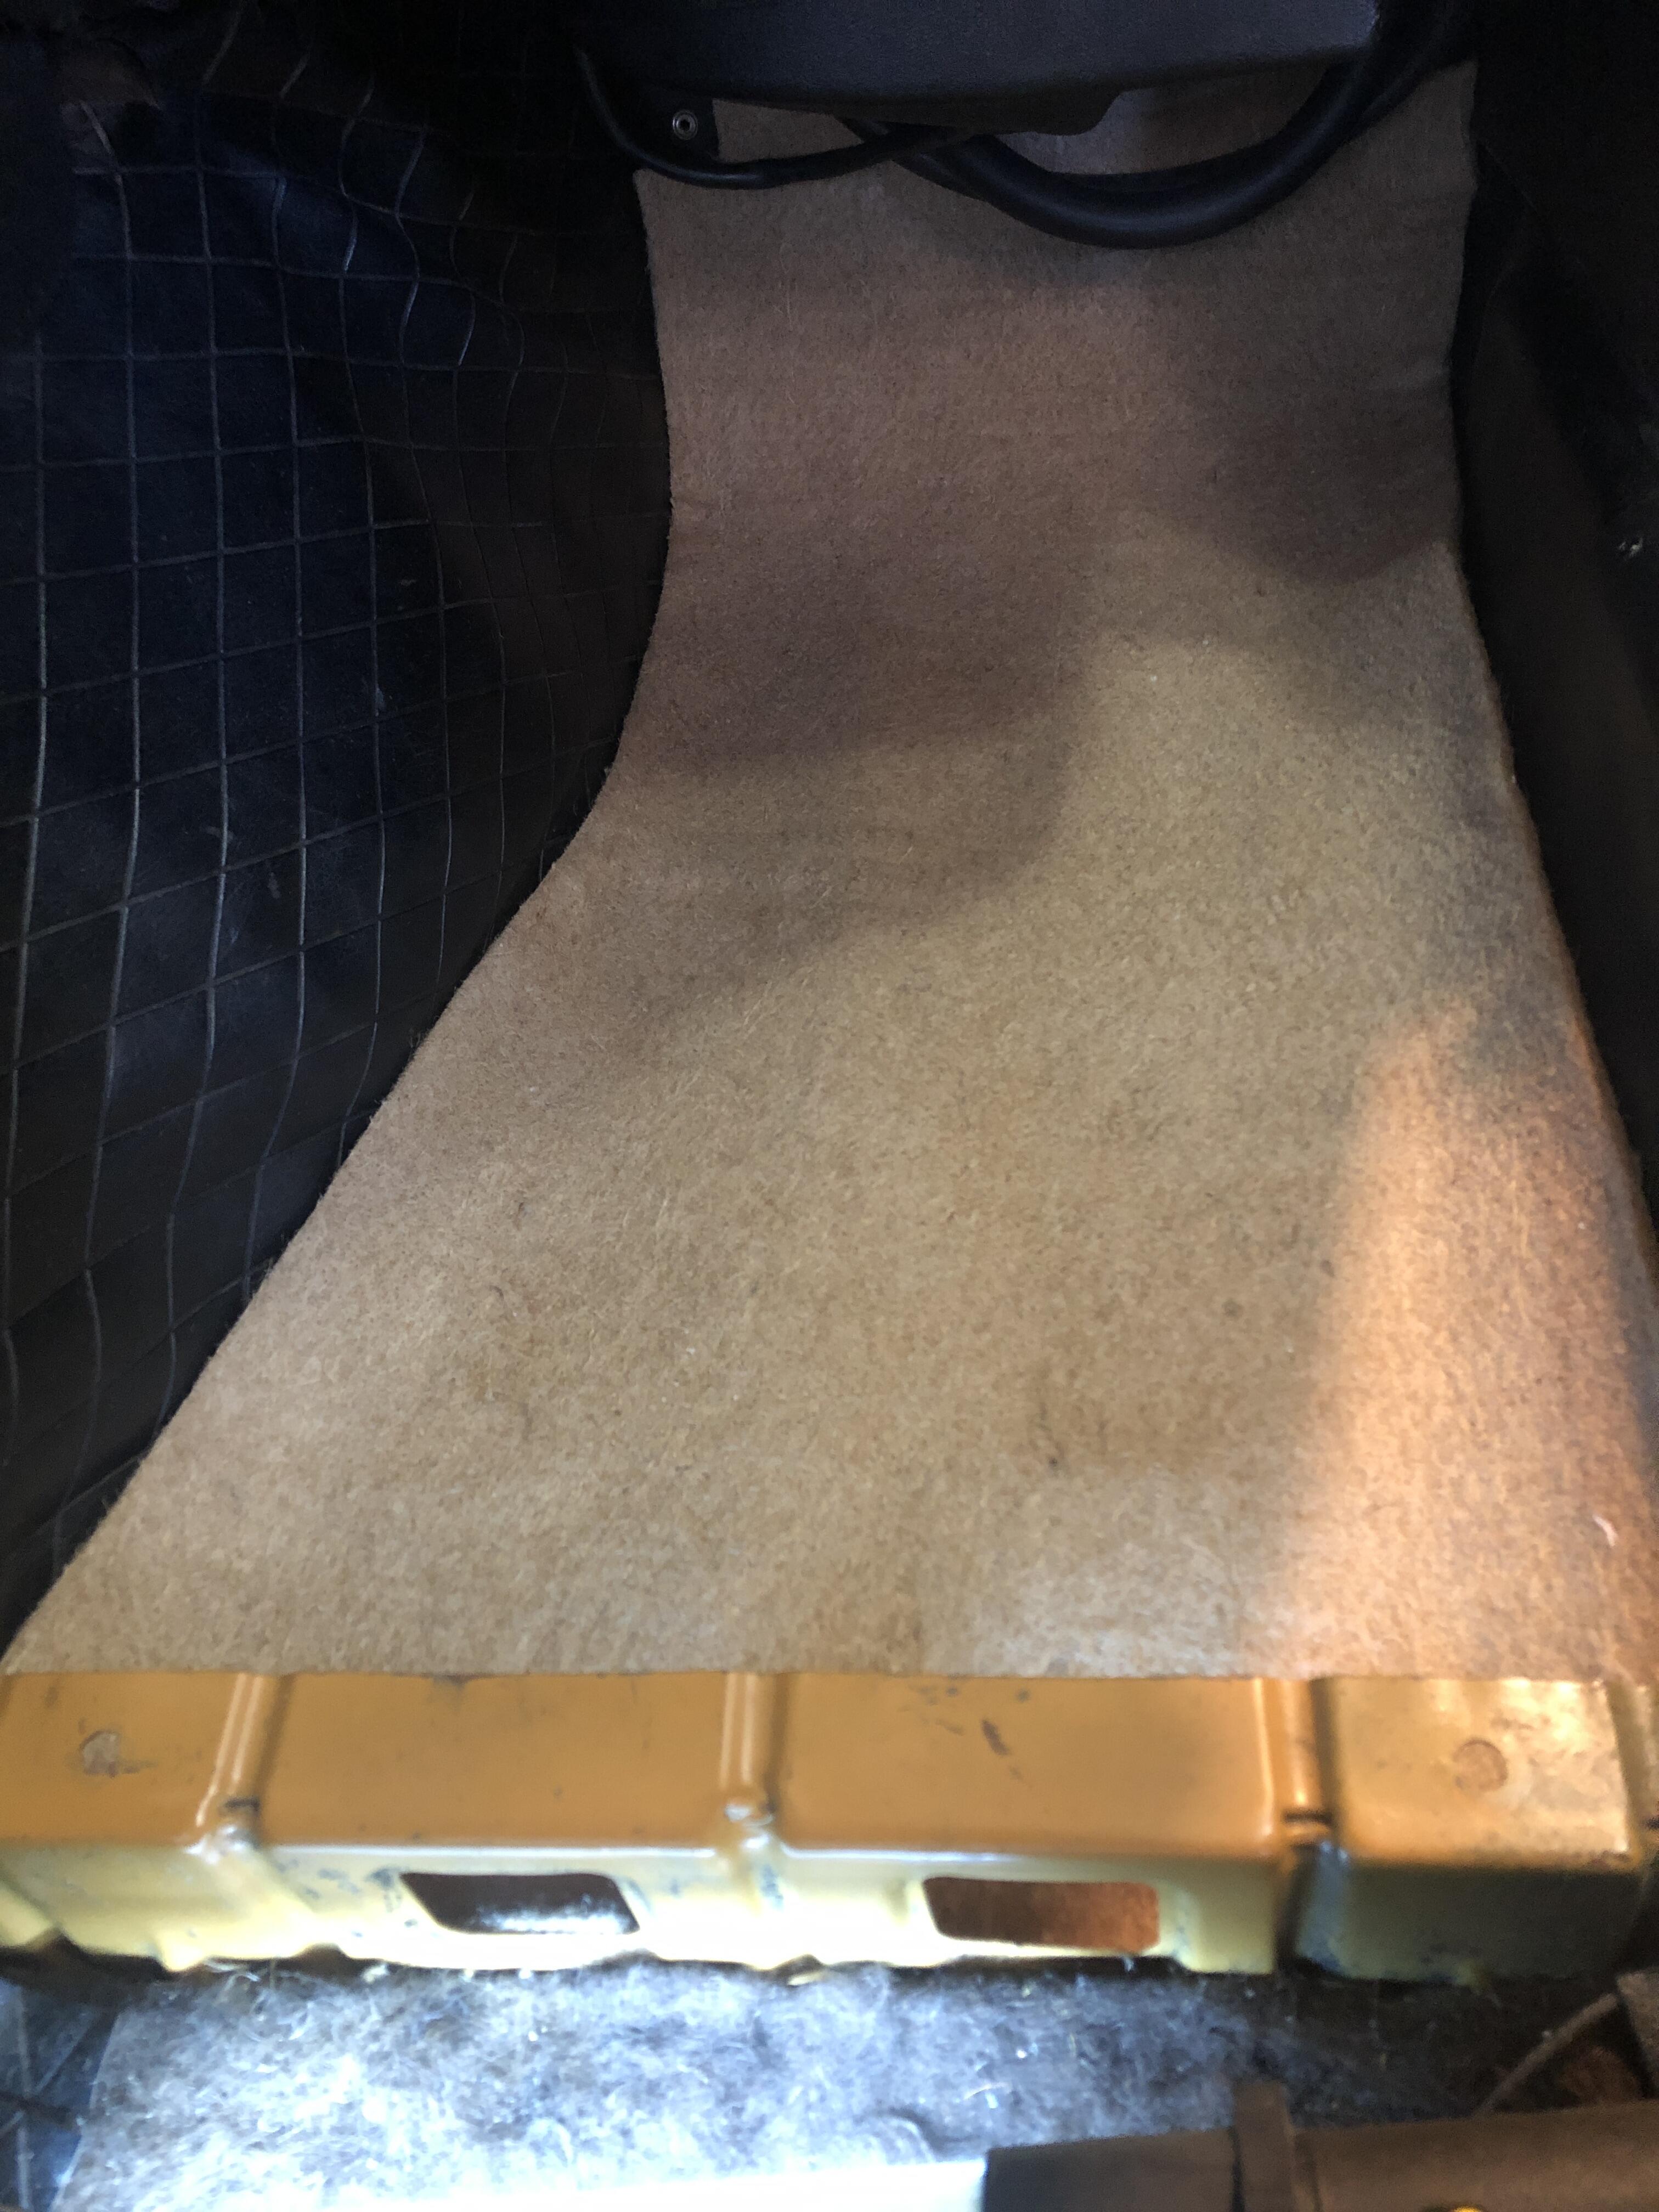
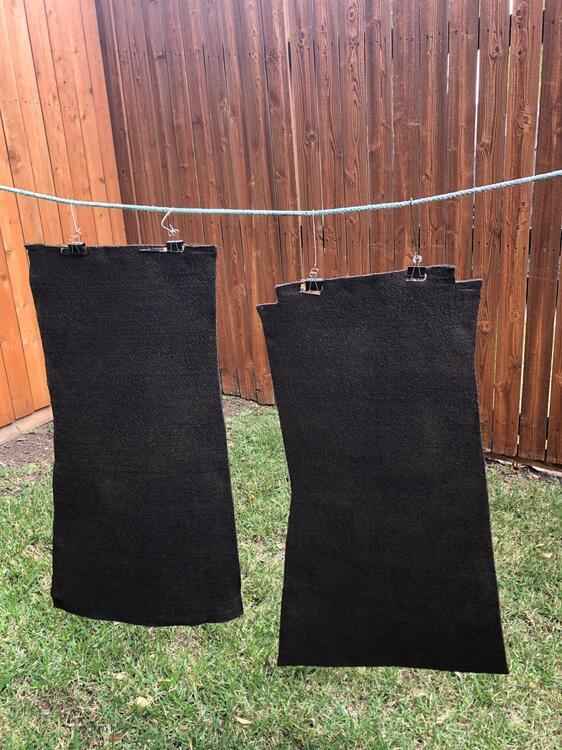
1 pointPrototype: Natural color Final color: I have not yet trimmed the cutouts….I am still attempting to confirm the actual cutouts based on my 240Z production date. The material I source is 39+/- 1" in width, currently I can purchase 10 yards, imported from overseas. I then have to have the material color matched. I then have to hang the material outside to reduce the fumes. The materials, chemicals, and labor for the two front mats shown above are approximately $450 all in (this is a set I plan to use). As I have discovered on some samples, the color did not penetrate 100% of the material, leaving some of the original uncolored material evident. Therefore, I may have to have the material color matched after cutting to pattern. I have not tested the color for colorfastness, off-gassing in an enclosed vehicle, and water repellency or absorption. Therefore, I consider any sample and my set a prototype. At this juncture, it is not feasible to offer large pieces to others. I want to get some samples to Z owners for their feedback. Once I have confidence in the process and product I will make it available to the Z community. Keith
 1 point
 -
Received the bracket today. Bent, no rust, easily straightened, but the first thing I did was drop it off at a custom rubber stamp vendor to have a stamp made to replicate the part number on the bottom of the bracket. Once that is complete I will straighten, sand blast, powder coat, and stamp the part number back on it. It will then be ready for the NOS pump. Will post more once project moves along.
 1 point