Leaderboard
-

Mike
Administrator10Points23,065Posts -
.JPG.cfcada9cf1c1b502df3f5f2f2ca3ff36.JPG)
SteveJ
Free Member5Points9,646Posts -
Captain Obvious
Free Member3Points10,081Posts -
240ZBUILTBYME
Free Member2Points237Posts


Popular Content
Showing content with the highest reputation on 08/05/2022 in Posts
-
1 pointIt looks like the clutch pucks bed in after a bit more of driving. Thanks everyone for the help.1 point
-
1 pointThat's what makes this forum work so well. A lot of experiences thrown at the problem and 1 or two stick, also known as the shotgun approach.1 point
-
1 pointI would also suggest getting the FSM for an earlier Z, say the 72, to compare the setup for the earlier round top carbs.1 point
-
1 pointGlad to help. So for the vacuum advance thing... The ported vacuum will have a sharp narrow peak just above idle. At idle, there will be very little advance, and above light cruise, there will also be very little advance. In contrast, the direct manifold vacuum will be highest at idle and gradually drop from there to zero advance at WOT. The profile is very different than the ported source. That said, there are plenty of people who think that direct manifold vacuum is actually better, and plenty of other people who think that all the vacuum advance can be removed completely and just set the base timing higher instead. Here's a discussion we had a long time ago about such things. Quickly went over my head: https://www.classiczcars.com/forums/topic/41935-ignition-timing-theory-port-source-vs-manifold-source/#comment-3774161 point
-
1 pointOh, and here's a pic of what the carb mounting surface is supposed to look like. Without the grease lube holes:
 1 point
 -
1 point1st off tic is gone, pulled the pivot, reassembled under oil bath, all good. Now the odd stuff. installed T stat, put funnel in rad, made sure it was the high point, filled to the max, no instant overflow. as the engine heated up I got a slow expansion and push out of coolant but no bubbles. by the time it hit about 185f it was just a bit of water coming out. Not sure I understand how that could happen unless there is gas filling somewhere, but decided to do the chem test again, before draining coolant (with it still running) I just pulled some garage air thur the test kit, opps blue is starting to turn green.... So before ANY more messing the engine is going out to the sidewalk for the next test. I cant imagine that enough exhaust gases were accumulating inside an open garage, but before any more moves, its going WAY out in the open air. Perhaps some of my recent decisions may be explained by the garage air test......... ZH I will add that to the list of to do IF i get another L after an OUTDOOR test of the chem test.1 point
-
1 point
-
1 pointIt may be that the current vacuum advance from the intake manifold is okay. Should be able to tell how the advance is working that way with a timing light. If it's working okay this way the hole in the carb could just be plugged (with a nail 😁, not really).1 point
-
1 point
-
Mine have been in since September, I daily drive my 260Z, and I've actually driven quite a bit using them at night (I have LED replacements for my H4 bulbs in my headlight housings now and they are BRIGHT) - even a couple of 3 hour night trips up in the mountains. After changing all the gauge bulbs, I replaced all my turn signal and brake lamps with LED bulbs as well. Probably should do the same in my side markers... The ones I bought are "short" enough to fit well inside the green lenses of the gauges. If you remove your gauges, it pays to disassemble them and re-paint the inside of the gauge body with flat white paint. I tape over the green lens and shoot the inside of the "can" - that bounces a lot more light out of the can and onto the gauge face and needle. Made a big difference even while I was using incandescent bulbs.1 point
-
Why are you concerned with dimming the bulbs? I haven't found a need to dim the gauge bulbs in any car I've driven since I can't remember when. If you REALLY want to be able to dim the lights, you can use a PWM or search for dimmable LEDs. Just throwing in brighter incandescent bulbs can give you other issues. The power for the dash lights comes from the same circuit as the running lights. It's not difficult to burn up the connector on the headlight switch for that circuit. You need to minimize the current flowing through it to extend it's life.1 point
-
1 pointAnd can I just point out that when I said "I'm thinking that something within the carb itself is keeping that front throttle butterfly from closing completely"... I nailed it! HAHAHAHAHA!!!!!1 point
-
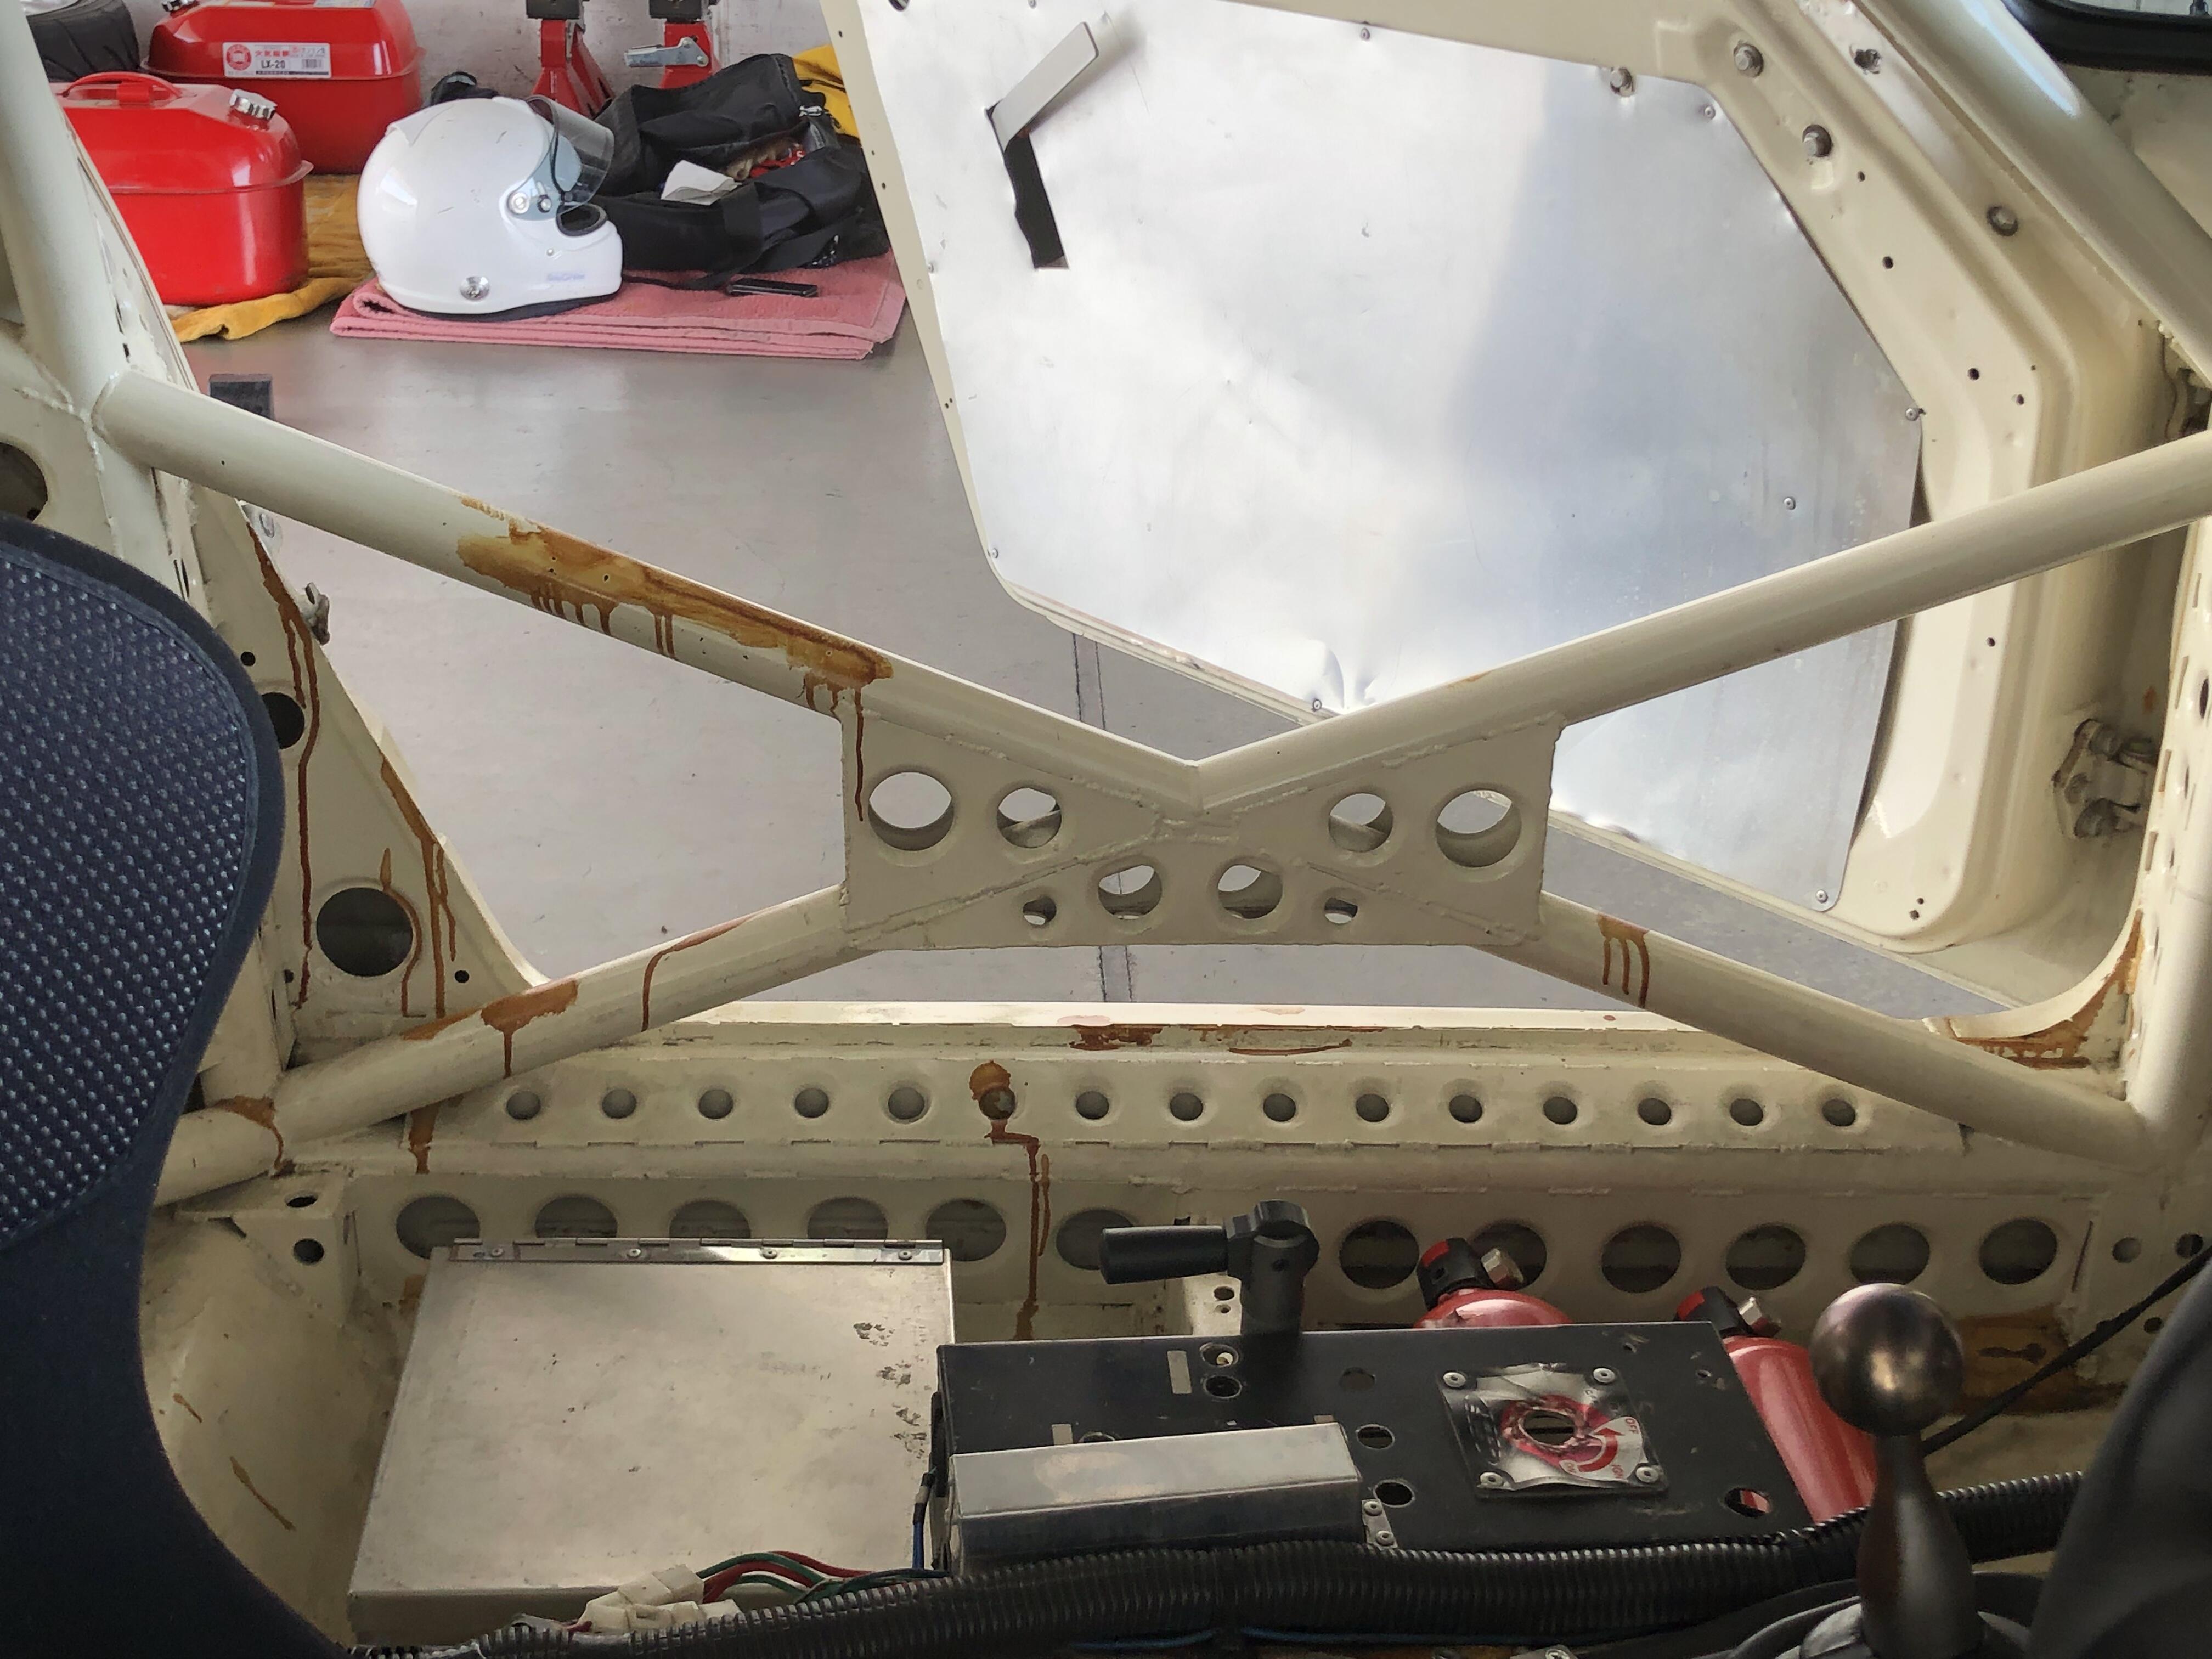
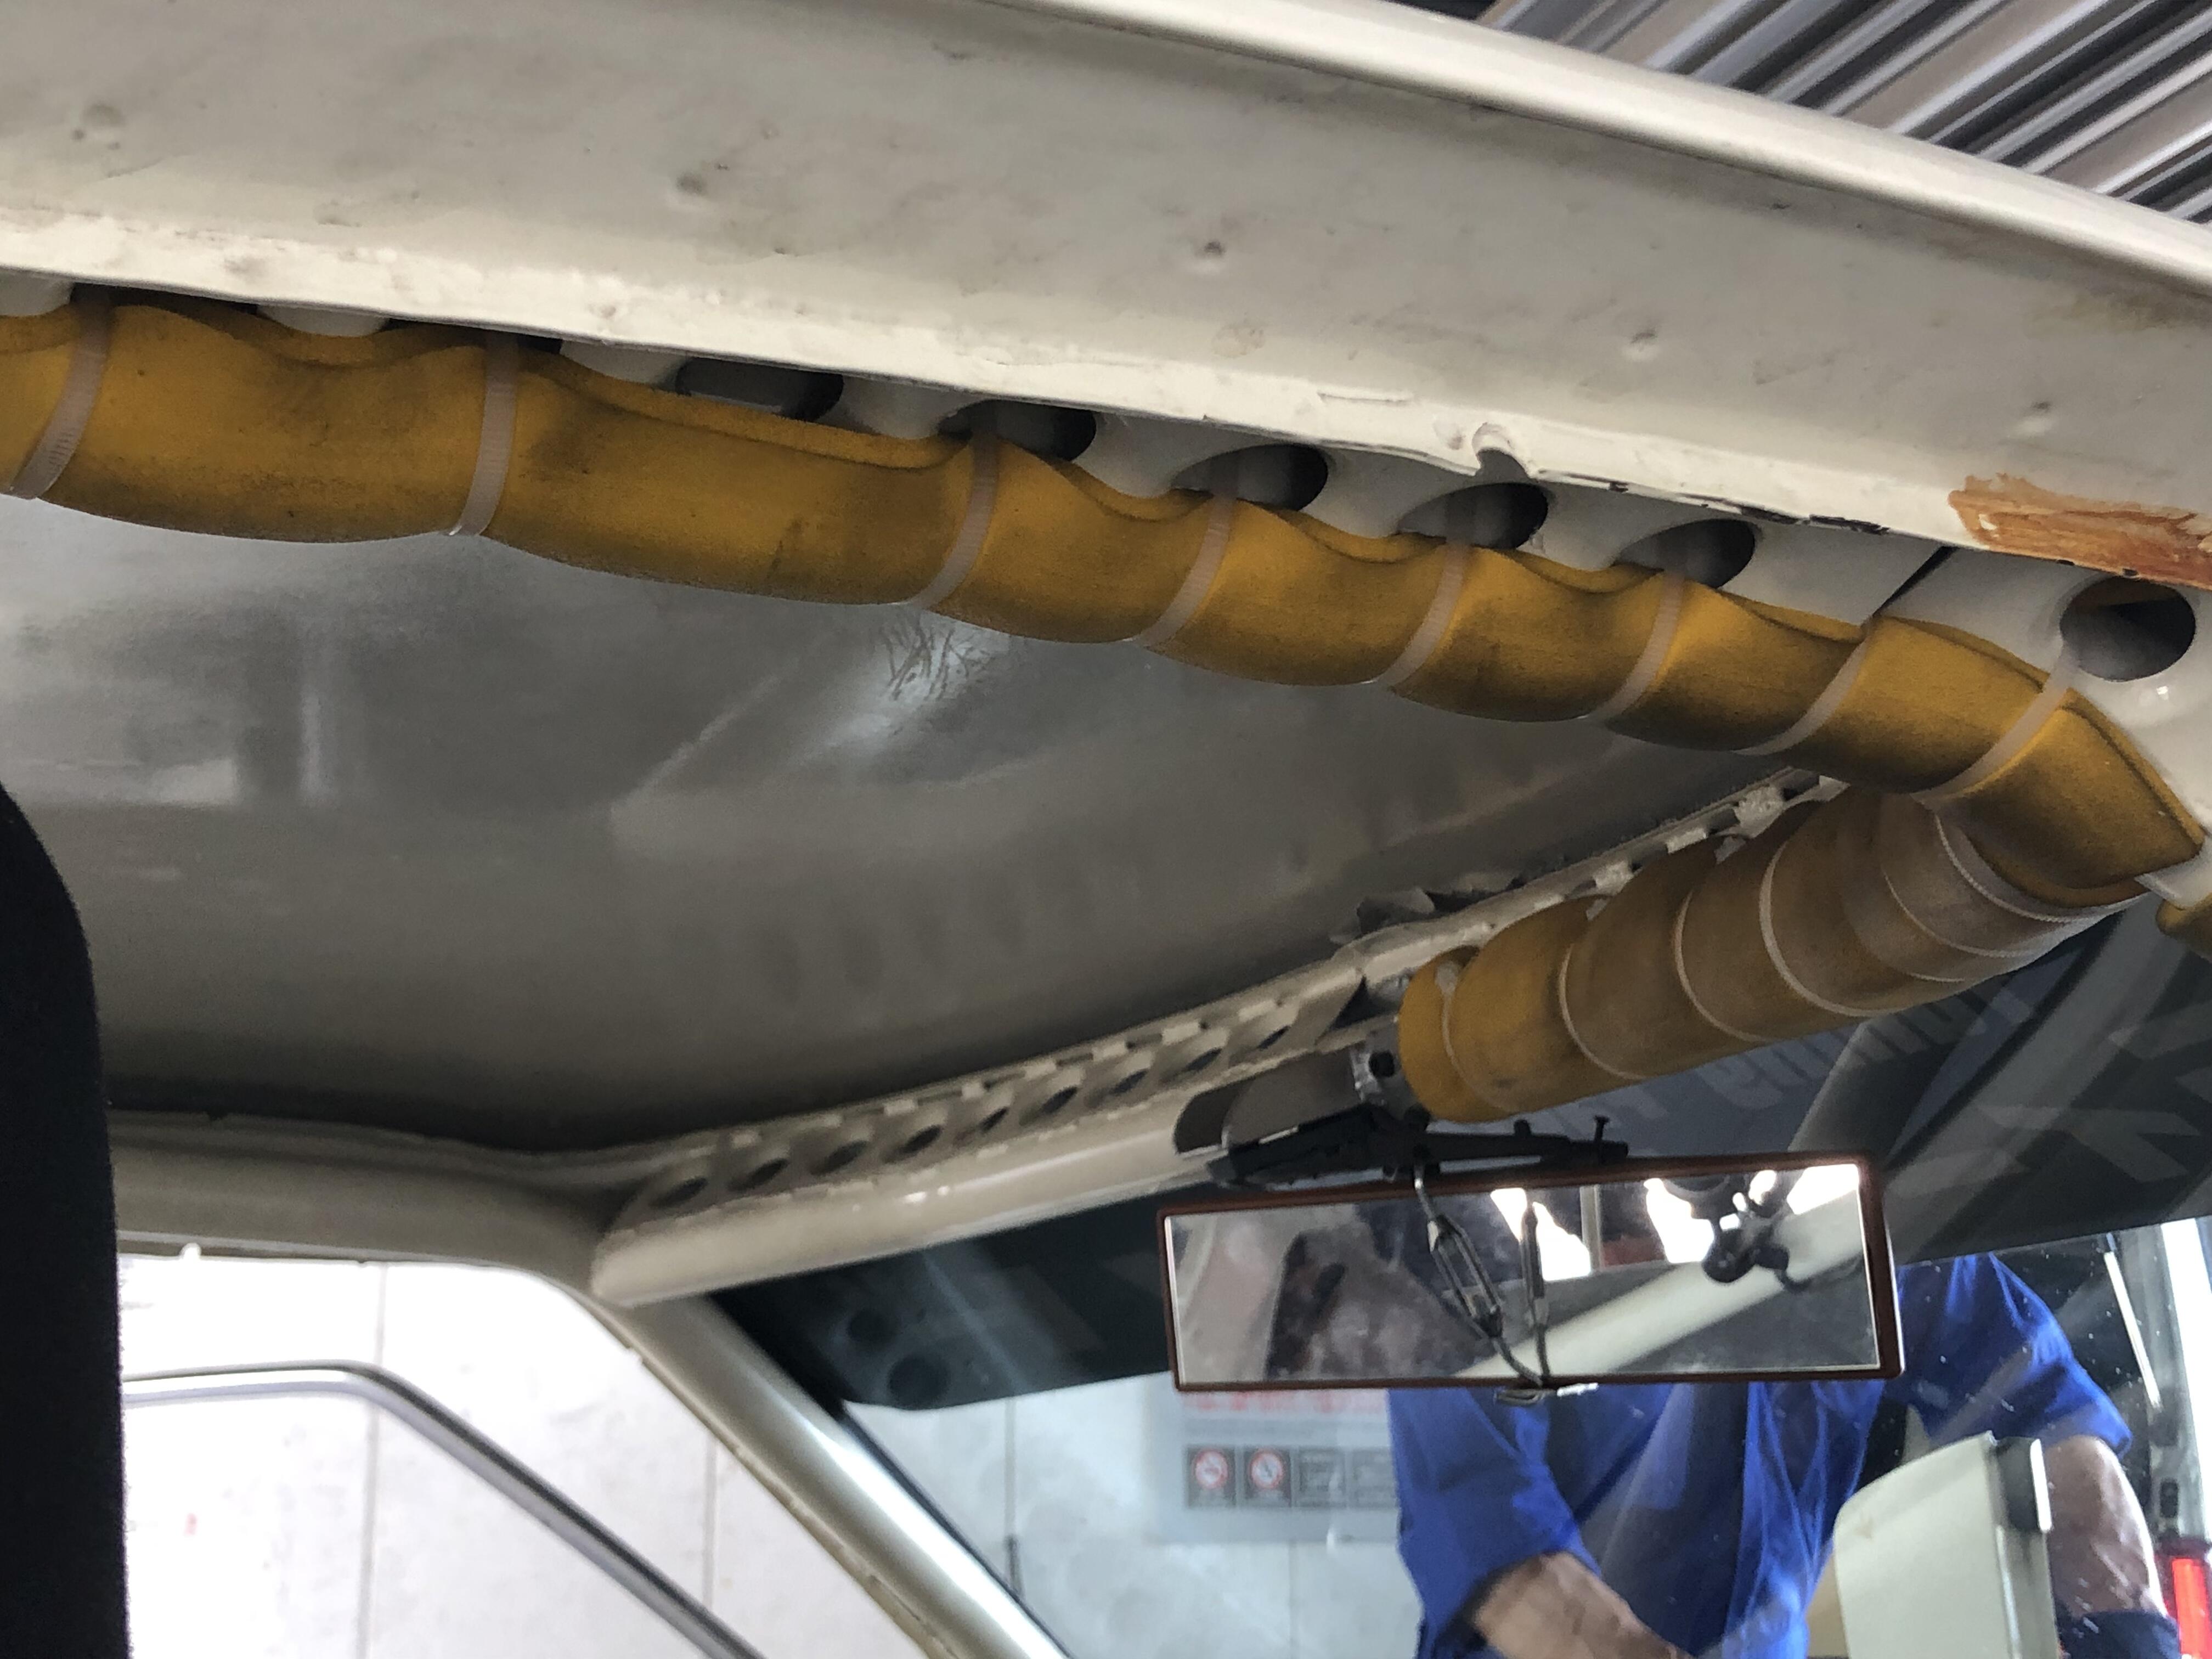
Meeting with the blaster went well, he can take care of the undercoating for me. I just have to remove the sound proofing from the trans tunnel and rear cargo space. he only blasts cars and is a huge car enthusiast himself so this pleases me. He’s booked out till march which is a bummer…. But has mentioned if I get the car ready to go if someone else isn’t ready he can slot me in early. So now I have to get the car ready to go. She’s waited long enough….if I wait any longer there won’t be a car left to restore…. I want to remove the rear quarter panels, remaining rear valance and roof skin and a portion of the outer rockers so the internals can be blasted. So first I’m going to add some bracing so that A) movement is restricted as I remove body panels and when the car is lifted up for the underbody to be blasted there’s a bit more structural rigidity to prevent any bending of the chassis. This thing is rusty AF and I just don’t trust it. I’m probably being over cautious. First I decided to ditch the gasless wire and start learning with gas. I wanted to practice on 1mm first and then practice welding my 25x25x3mm shs bracing onto 1mm sheet. Was very happy with the results for my first time. Turns out watching all those YouTube videos may have helped… first tacks My unimig for some reason has no setting guide for 0.6mm solid wire so I had to guess the settings. I ended up finding 14 volts and 4.5 m/min worked well. Does this seem about right? And can anyone tell me what the brown discoloration is? all stitched up rear of the join, seem to be getting penetration, does this look right? and after some dressing. I got warpage as I wasn’t trying to manage heat, but not too bad for a first go me thinks… Next welding 25x25x 3mm thick shs to 1mm sheet. no blow throughs, great success… I felt ready to weld in some bracing. Decided to go from the rear strut towers to the dash. the welds weren’t pretty, they were awkward spots though, didn’t want to do full welds as I wasn’t confident I could remove the bracing later without damaging something so I went with decent sized tacks. Seems to be enough strength in the tacks as the bracing feels solid. any feed back and thoughts on what I’ve done are welcomed. I really have no clue what I’m doing lol I’m planning to tie in the roof to the bracing and I think that should be enough?1 point
-
1 pointGenerally speaking, adding more fuel rarely increases the rpms unless the mixture is way too lean. Air is the most common cause of increased rpms.1 point
-
1 pointMost people use 20wt oil in the dampers. You should check the level in the carburetors. Also, with the car off, try to lift the piston in each carburetor. The damper oil should provide a fair amount of resistance. I'm wondering if the front carb has enough resistance. Ace Hardware stores typically carry 3-in-One brand oil that is 20wt.1 point
-
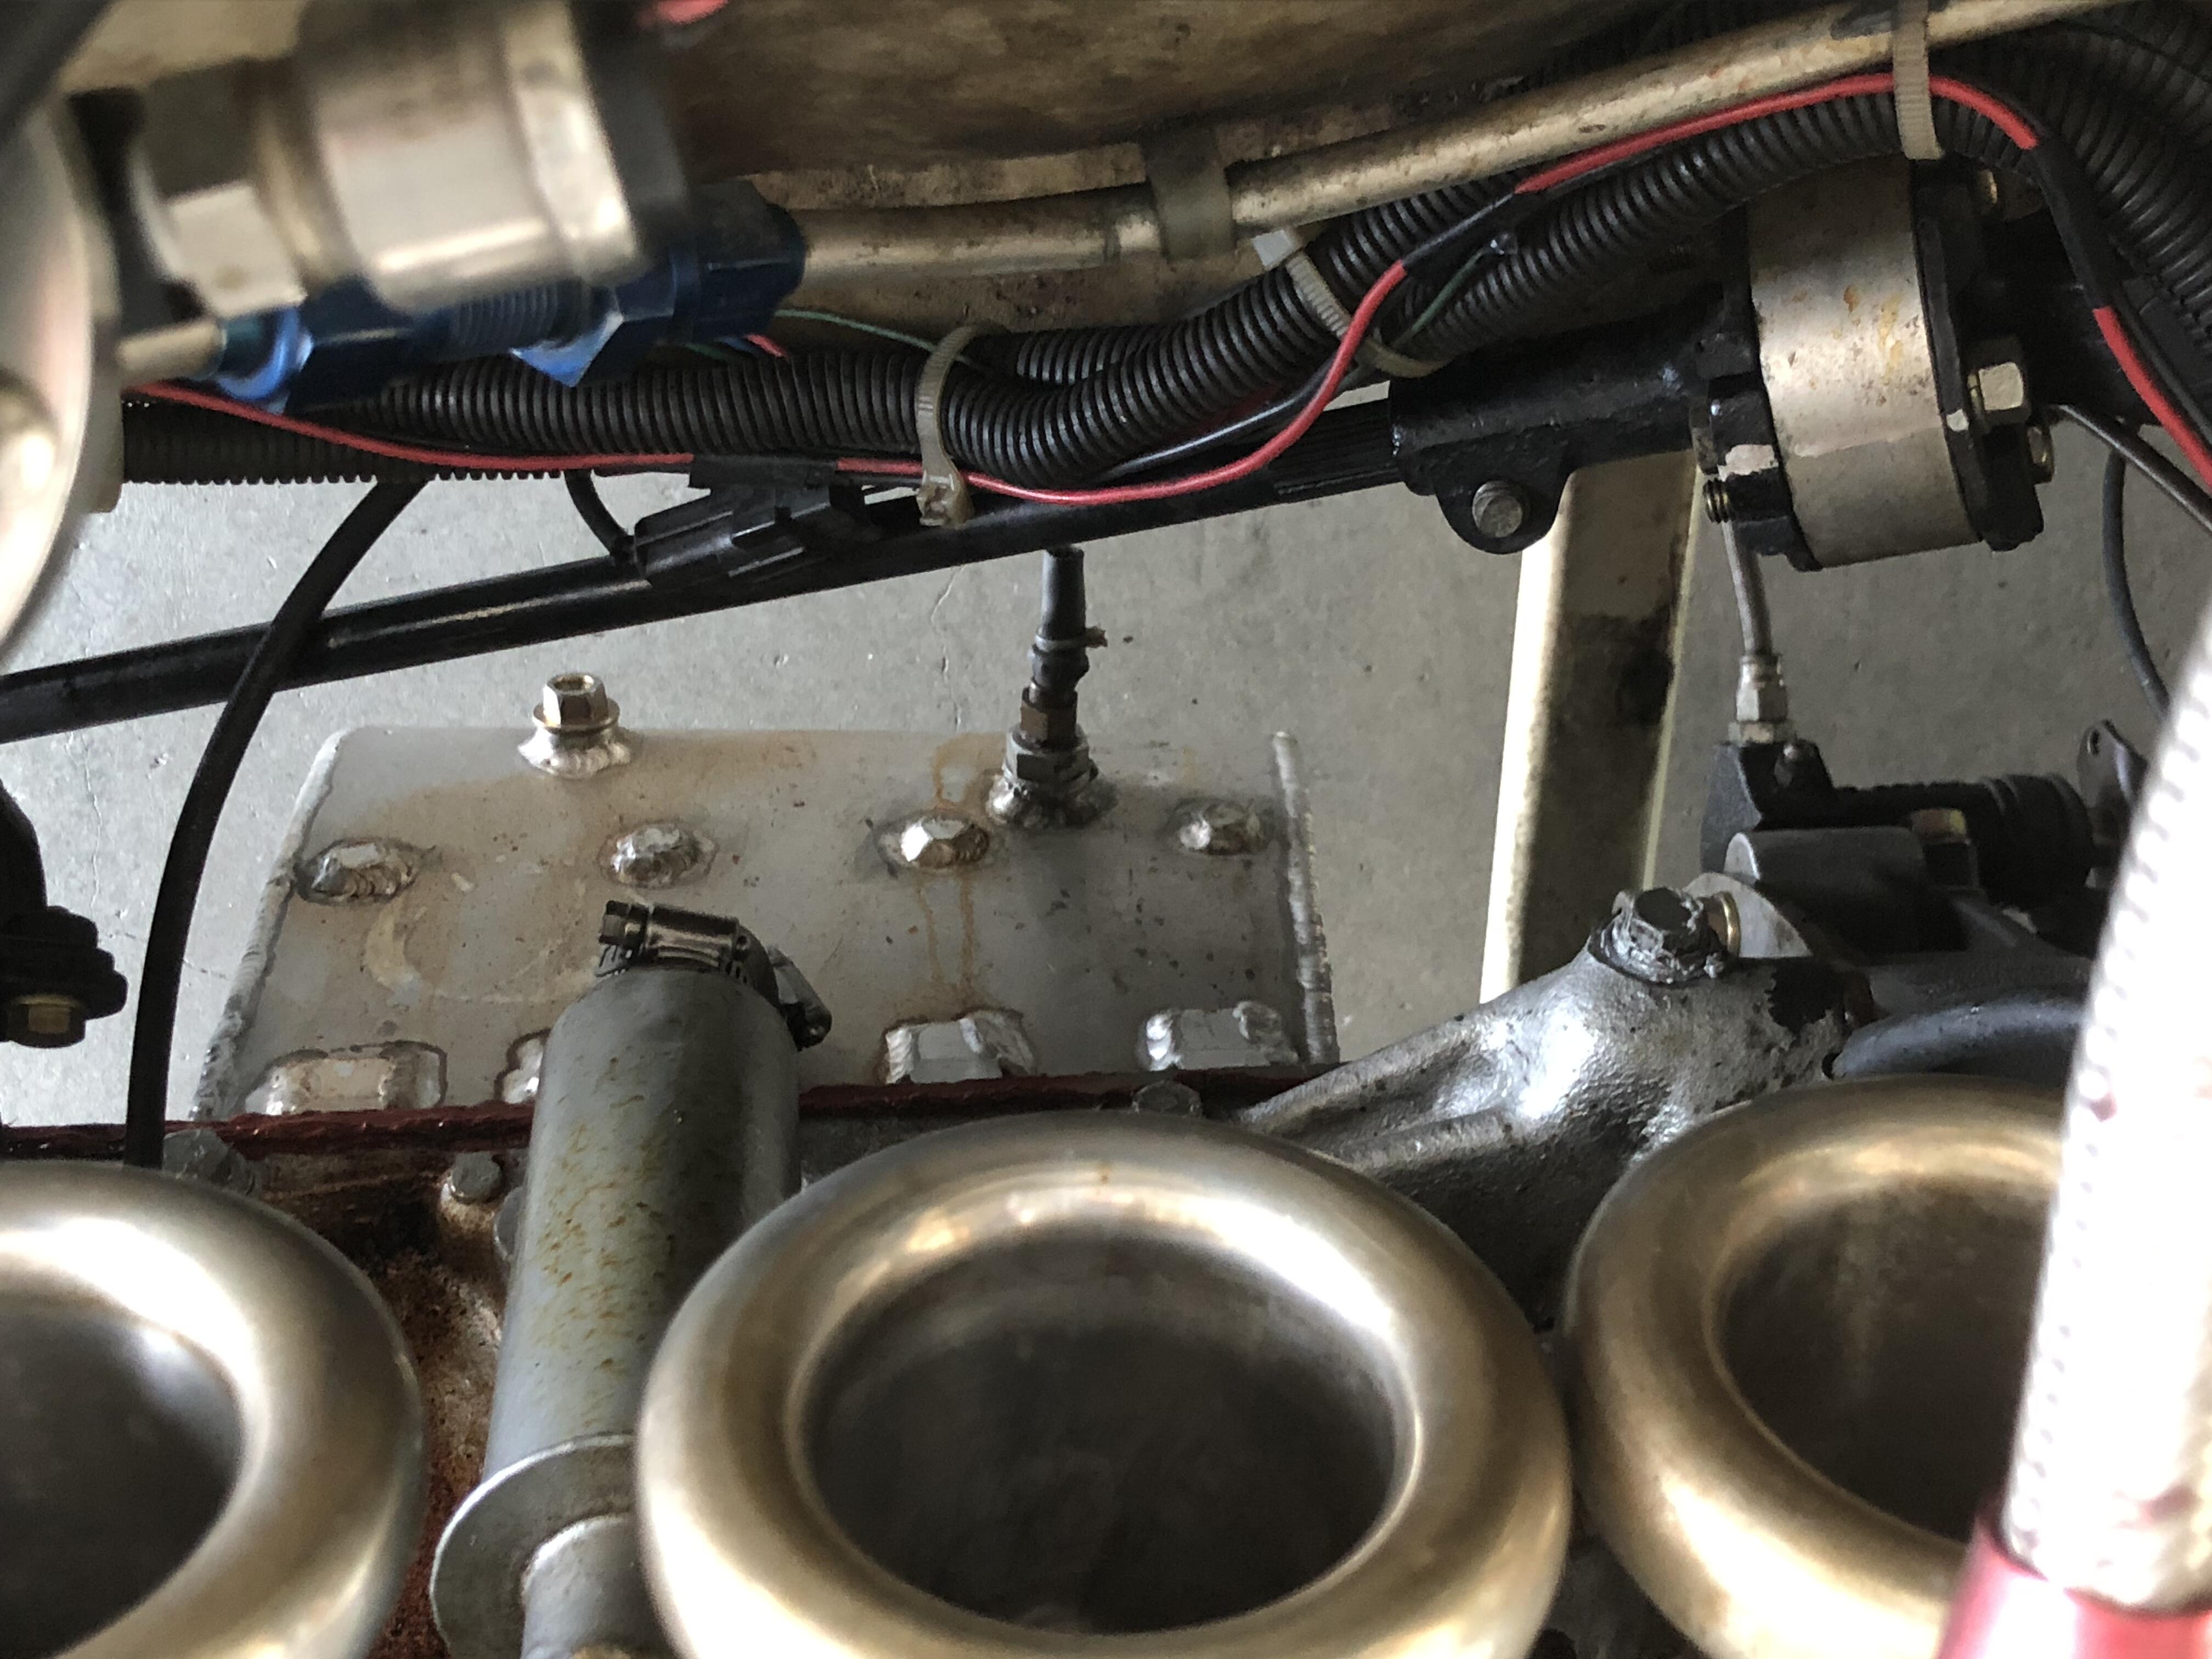
1 pointI worked on a friends 240Z a few years ago after he bought it and it had a similar problem. What we discovered was that even with the idle screws completely unscrewed the idle was still too high (between 1000-1500 RPM). The throttle plates were not being allowed to fully return to the "idle" position (ie. nearly closed) because the throttle linkage from the gas pedal was keeping them "opened" even when the gas pedal was not being pressed. He had a '73 240Z with round top carbs. The 1973 240Z's and the 1974 260Z's came with "flat top" carburetors and not the "round top" carburetors so someone has replaced the original "flat tops" with "round tops" from a 1970-72 240Z, similar to yours (ie. a '74 260Z with '70-72 carbs). From what I've seen, the flat top carburetors have a thinner insulating spacer (the reddish brown plastic looking thing) between the carburetors and the intake manifold) than the round top carburetors and this was affecting the throttle linkage and keeping the throttle plates partially open even when the idle screws were completely out. I would start by disconnecting the main throttle linkage rod that connects the main throttle bar to the carbs (the little 4-5" or so rod with the 2 plastic end pieces). That should disconnect the carbs from the gas pedal and allow the throttle plates to fully close. You should now be able to use the idle screws to adjust the idle speed of the carbs. Once you get that set, you can start to figure out where the problem is in the throttle linkage that is keeping the throttle from returning back to "fully" off. I'm guessing (because I've never worked with the flat top carbs before as I have a 240Z with round top carbs) that the throttle linkage from the flat top carb setup is slightly different in some way from the throttle linkage from the round tops and I'm guessing that you may have the the throttle linkage setup from the flat top carbs. Let me know if this helps. I just took a second look at your video and it looks like someone has modified the little throttle rod (with the plastic ends) and yours only has one plastic end. That's the part you want to remove to get the carbs disconnected from the throttle linkage. On the round top carb setups there is a main (or fast idle) screw above that linkage and yours appears to be missing that entirely.1 point
-
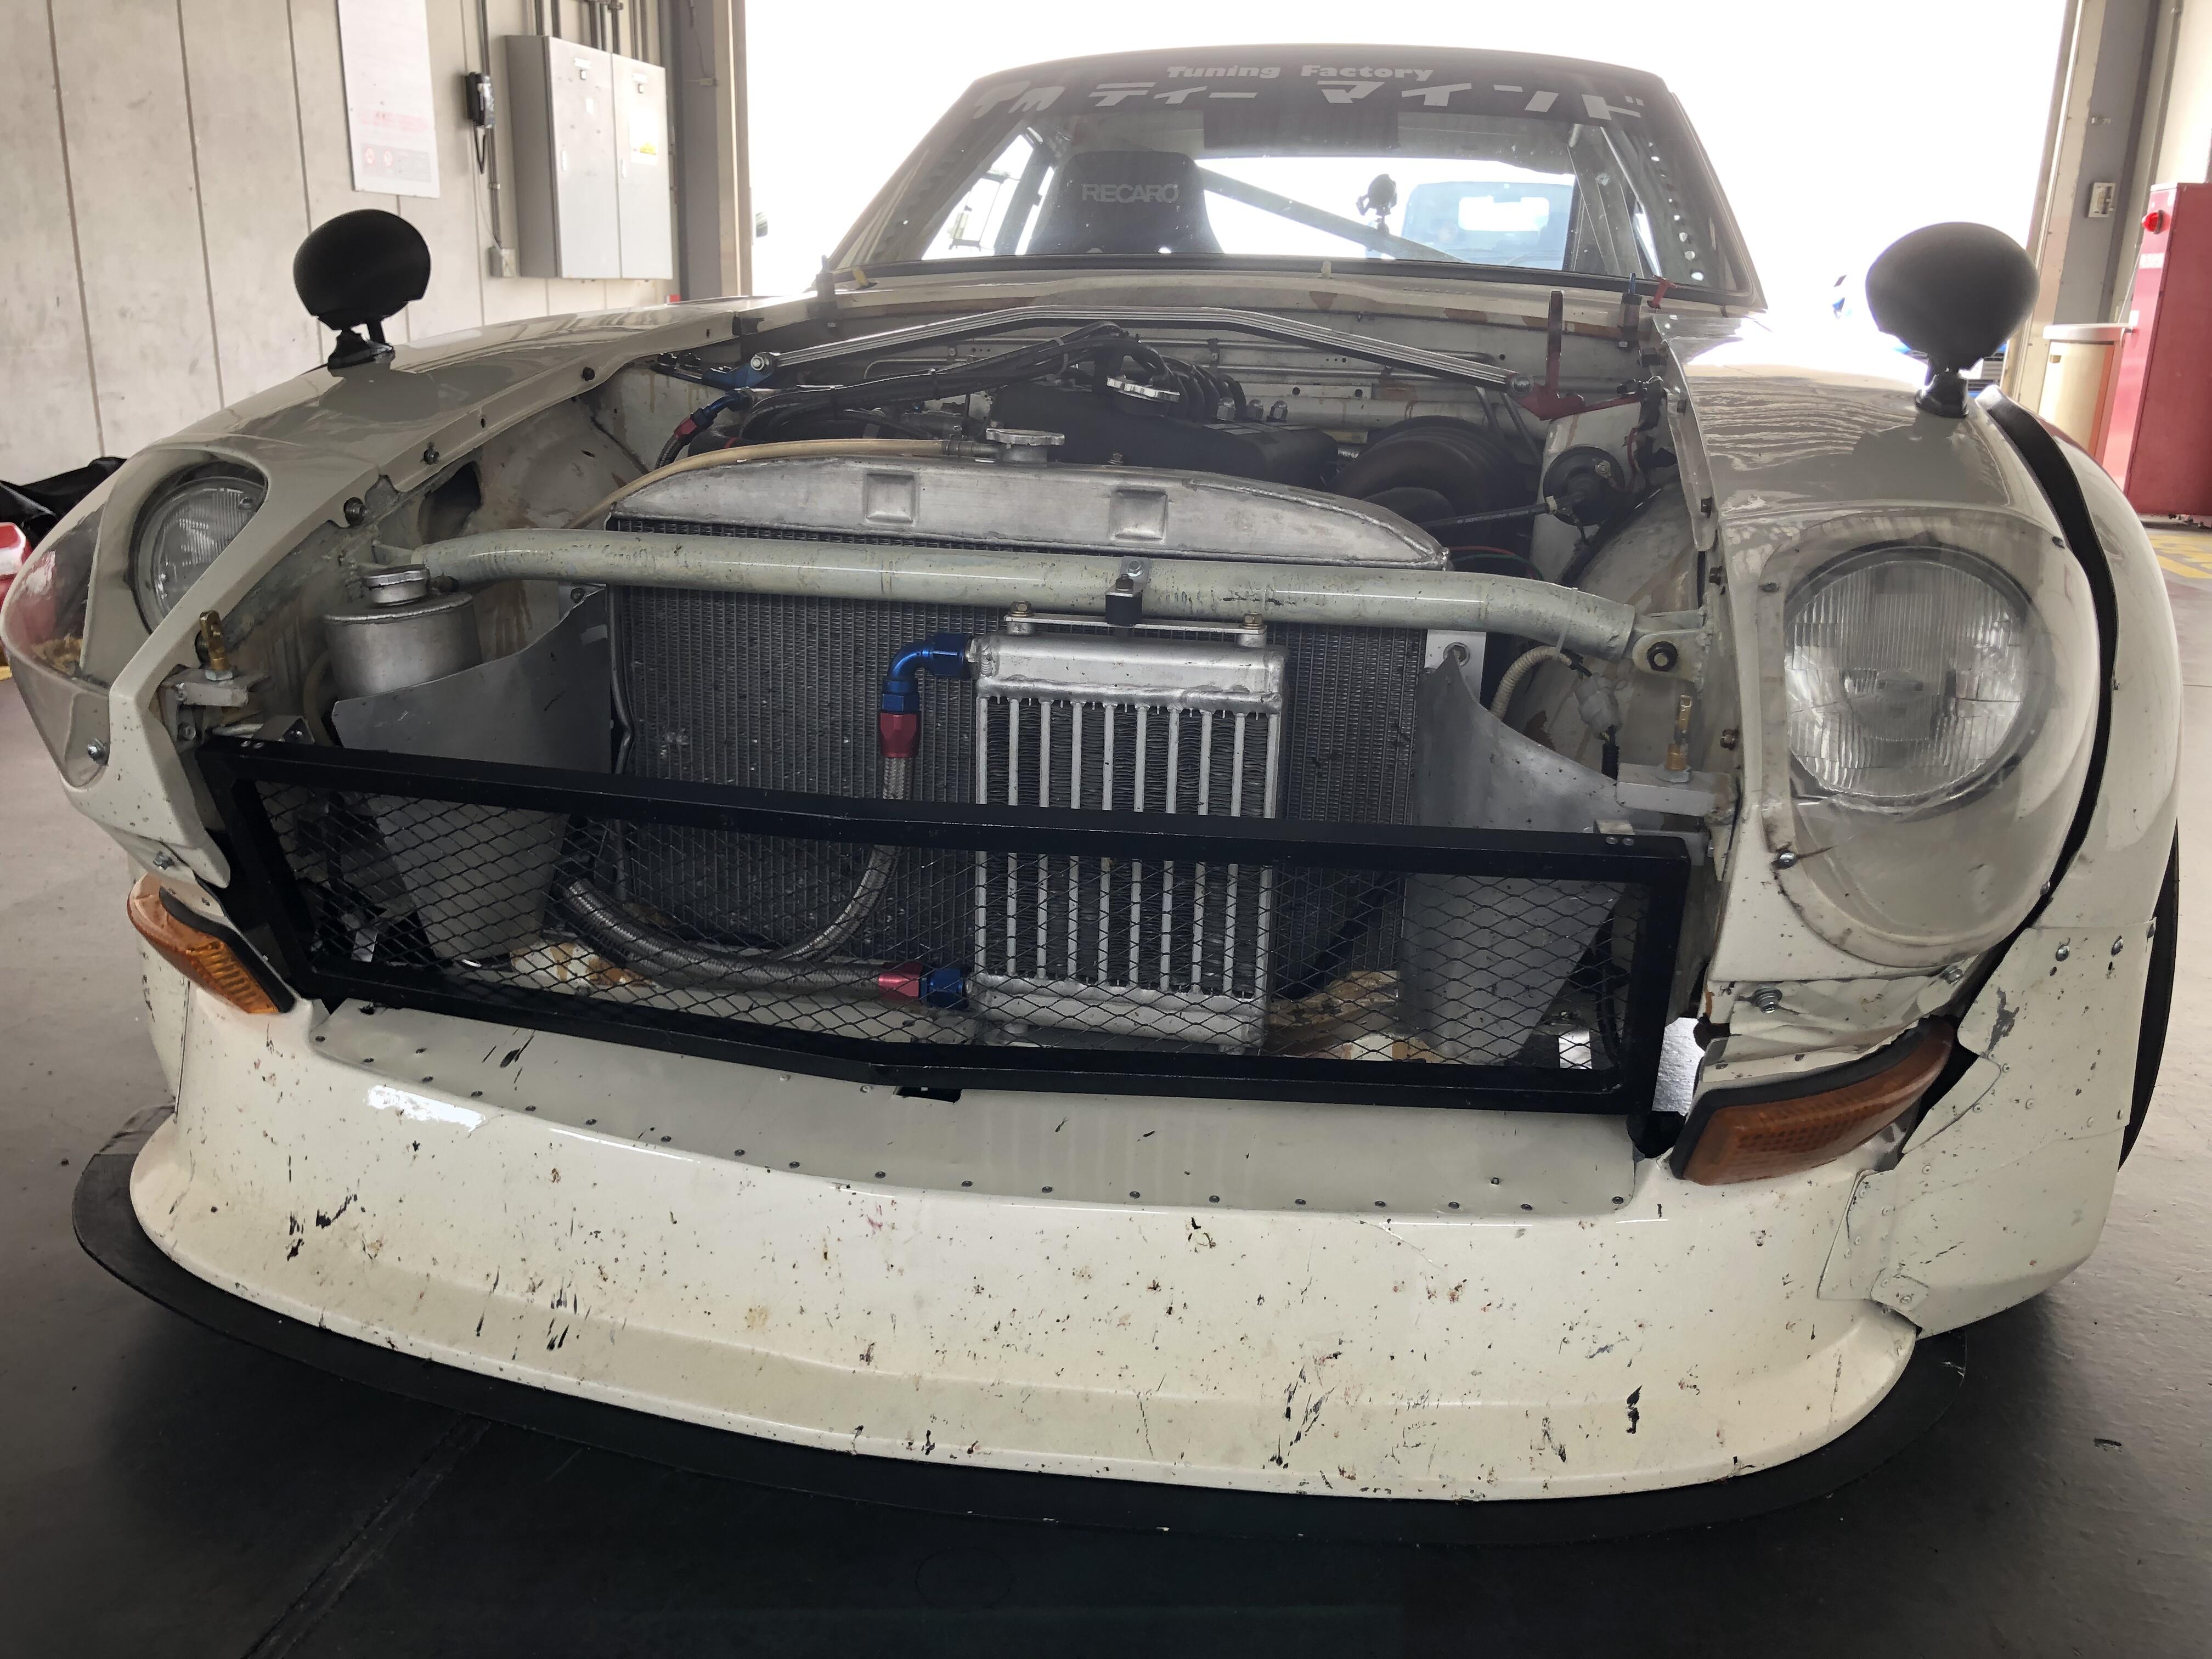
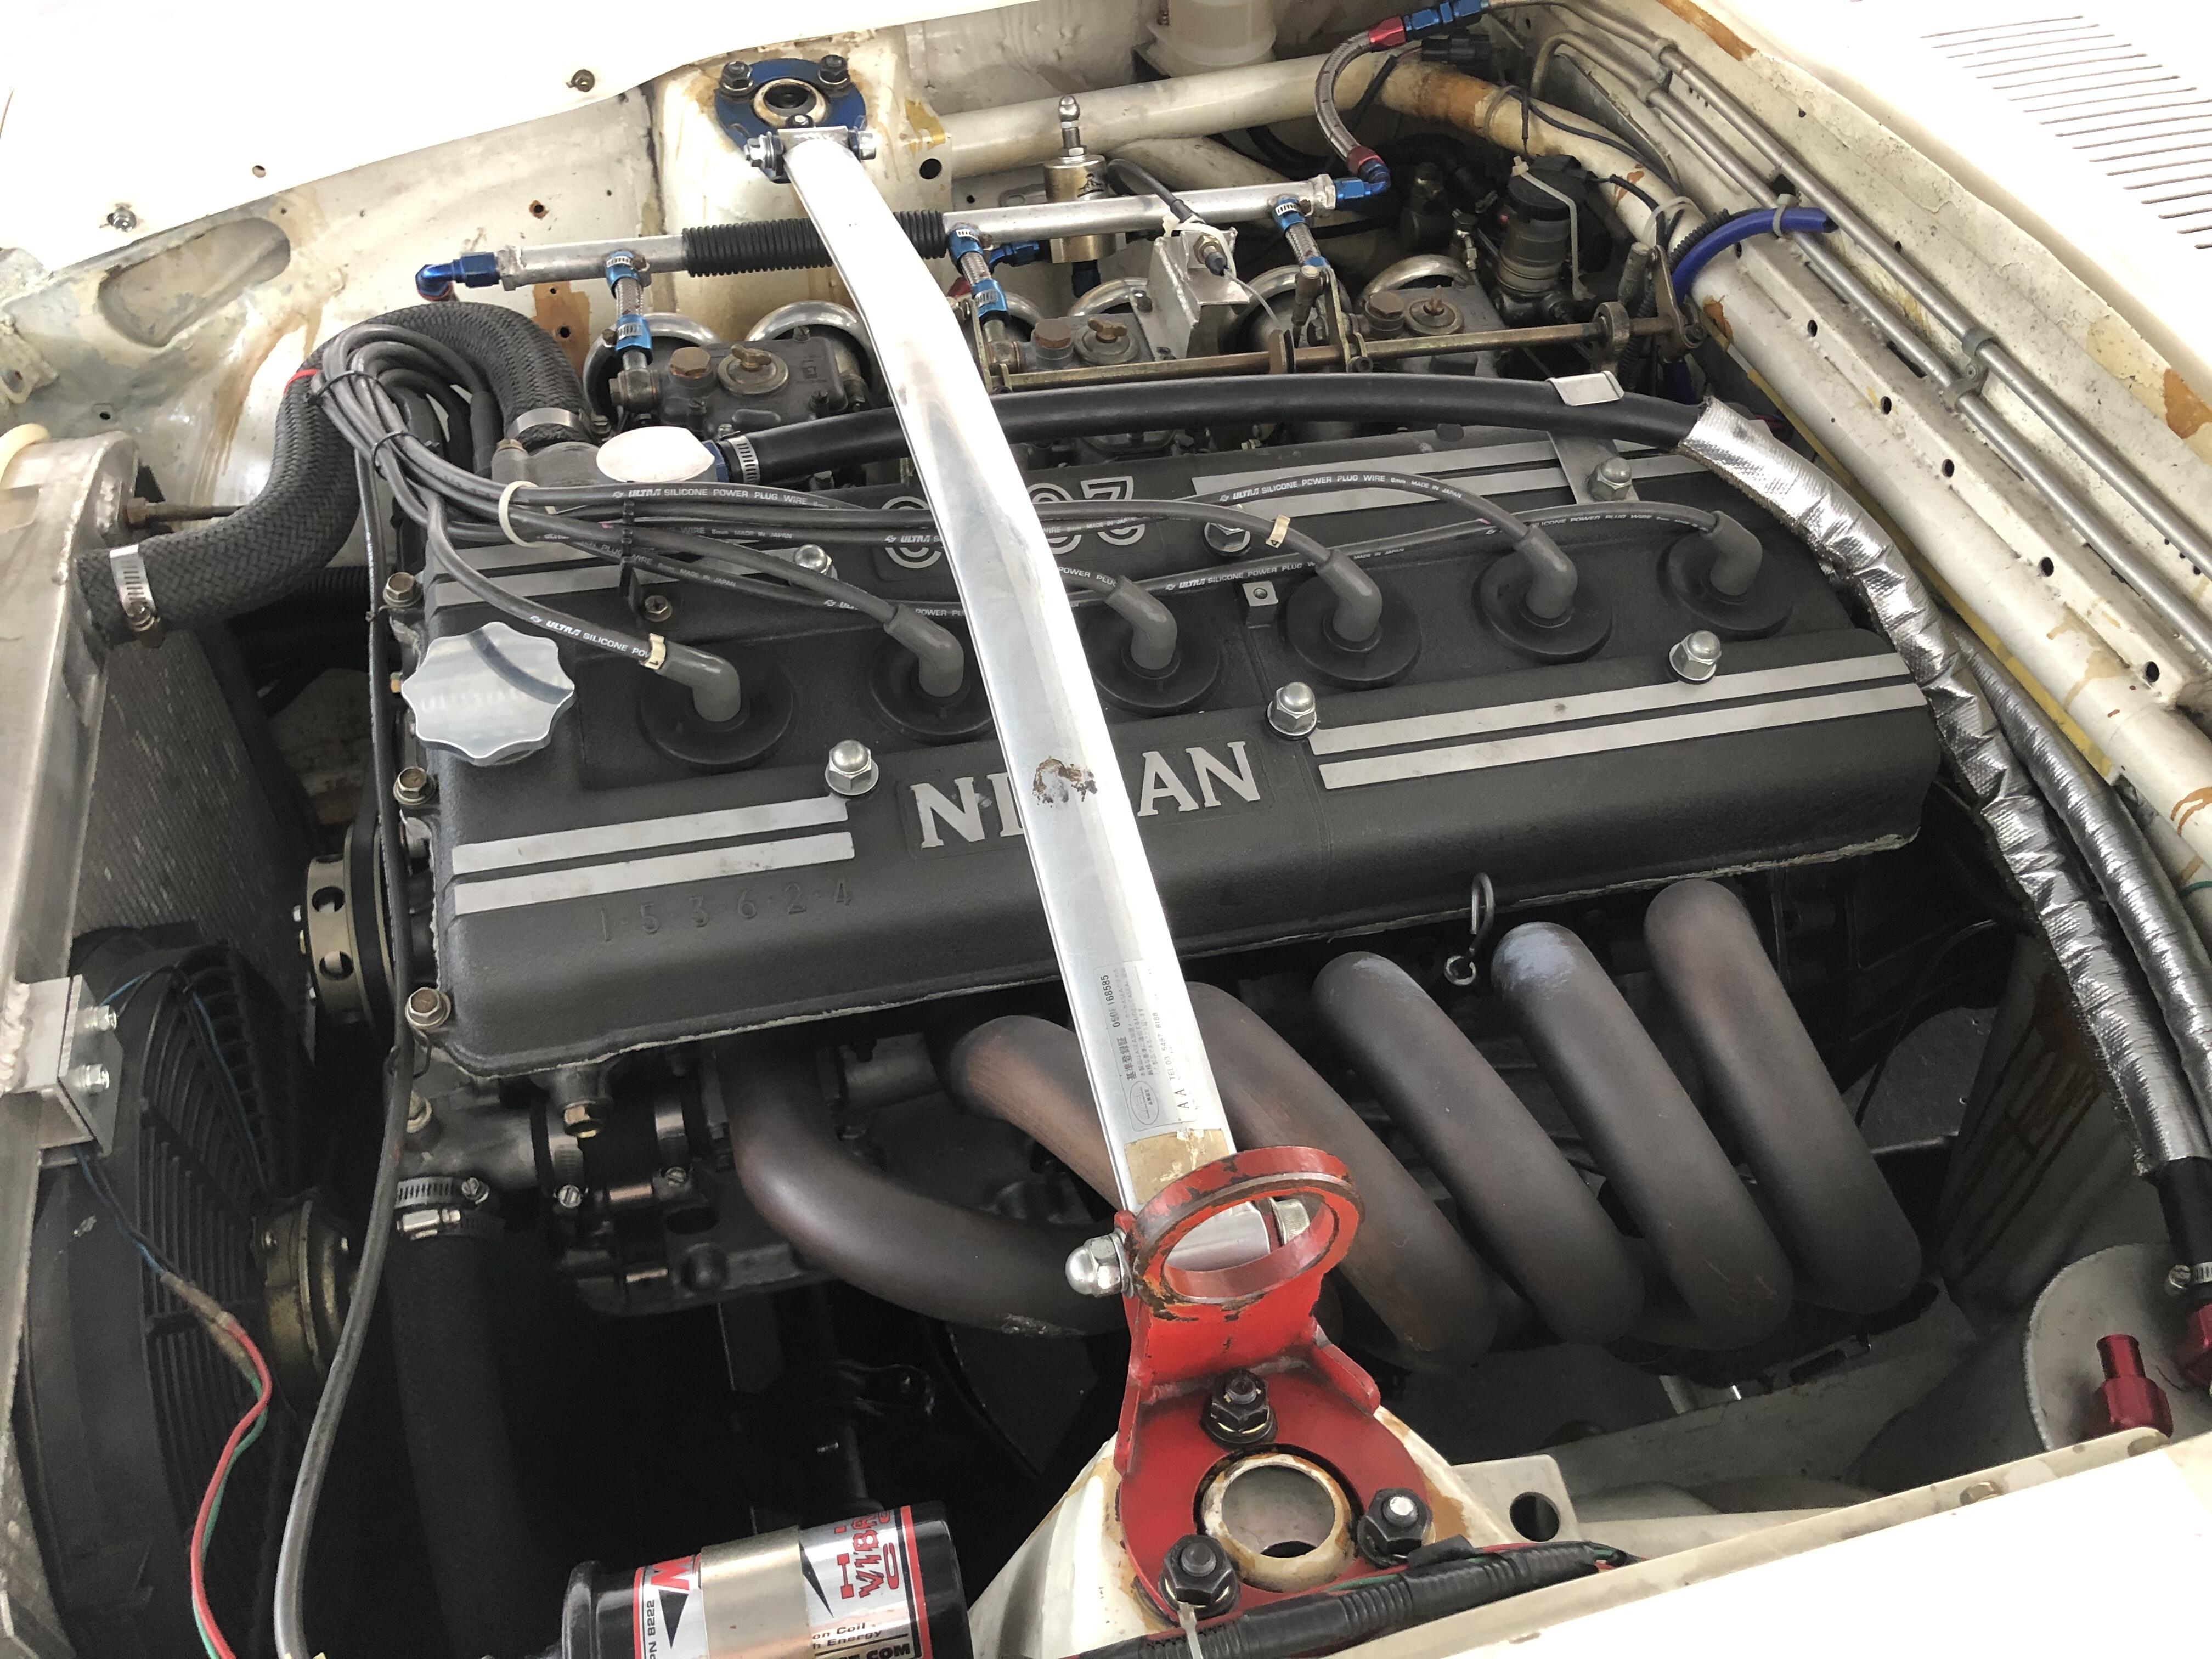
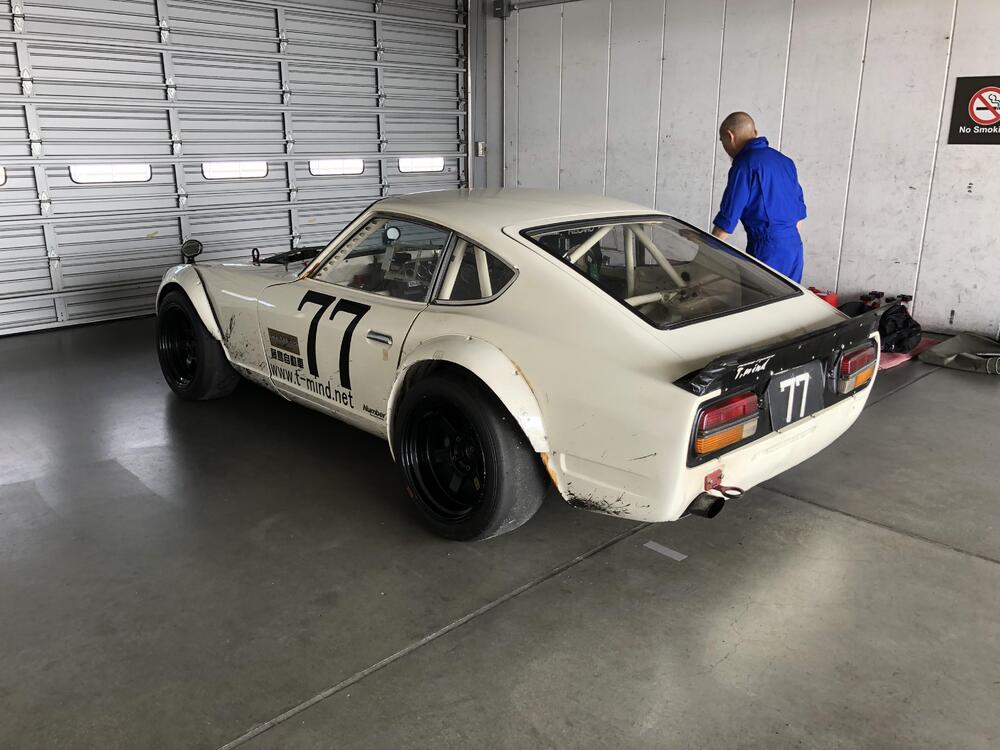
1 pointHi, yesterday I was at Fuji Speedway to see a practice of a racing Z432. Hayakawa san did 30 minutes test run for two sets , the car runs fantastic. We have some popular S20 engine builder in Japan , but today I don’t know there is a serious racing Z432 fighting on a track except Hayakawa san . Built and Tuned by Toyozumi san , he is doing my spare S20 too . I can’t wait the engine finished. Honestly, the Z432 was the best of sound among the circuit yesterday. It is true . There were many modern super fast monsters like AMG GT300 , Ferraris , Porches etc . But none of them were making fantastic sound . Maybe Ferraris? But not even close. Kats FullSizeRender.MOV IMG_7012.MOV IMG_7006.MOV


 1 point
 -
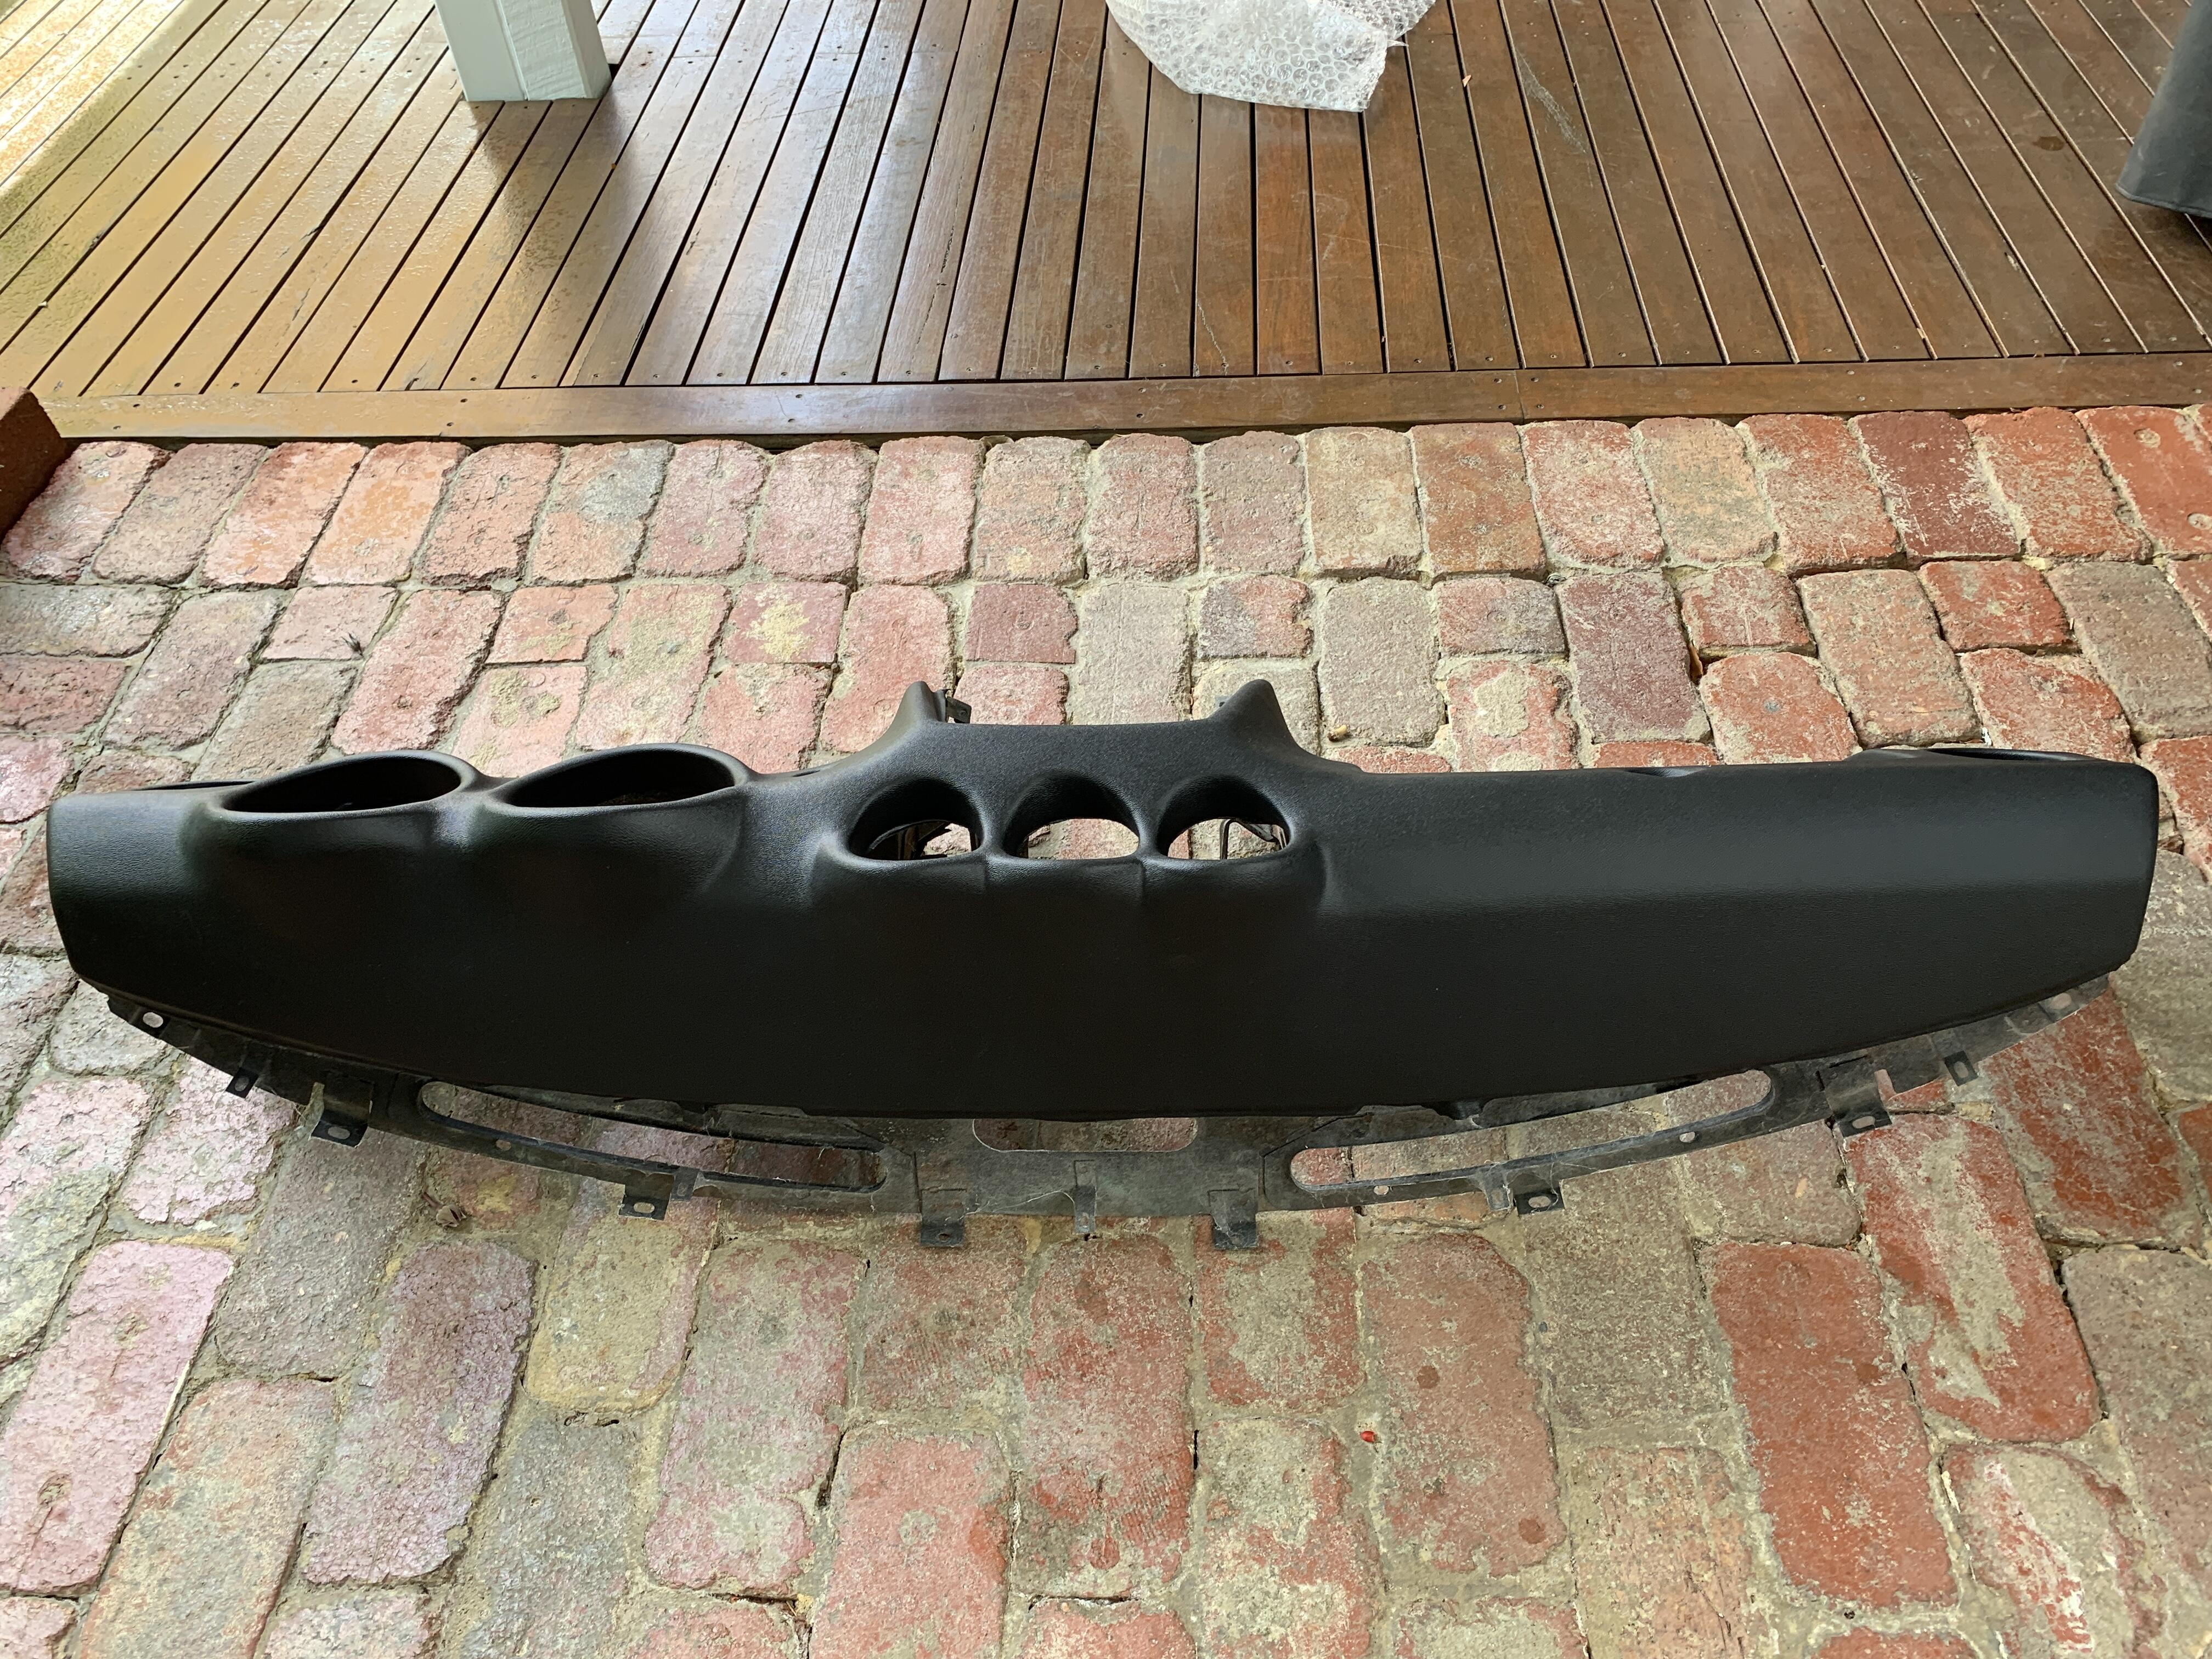
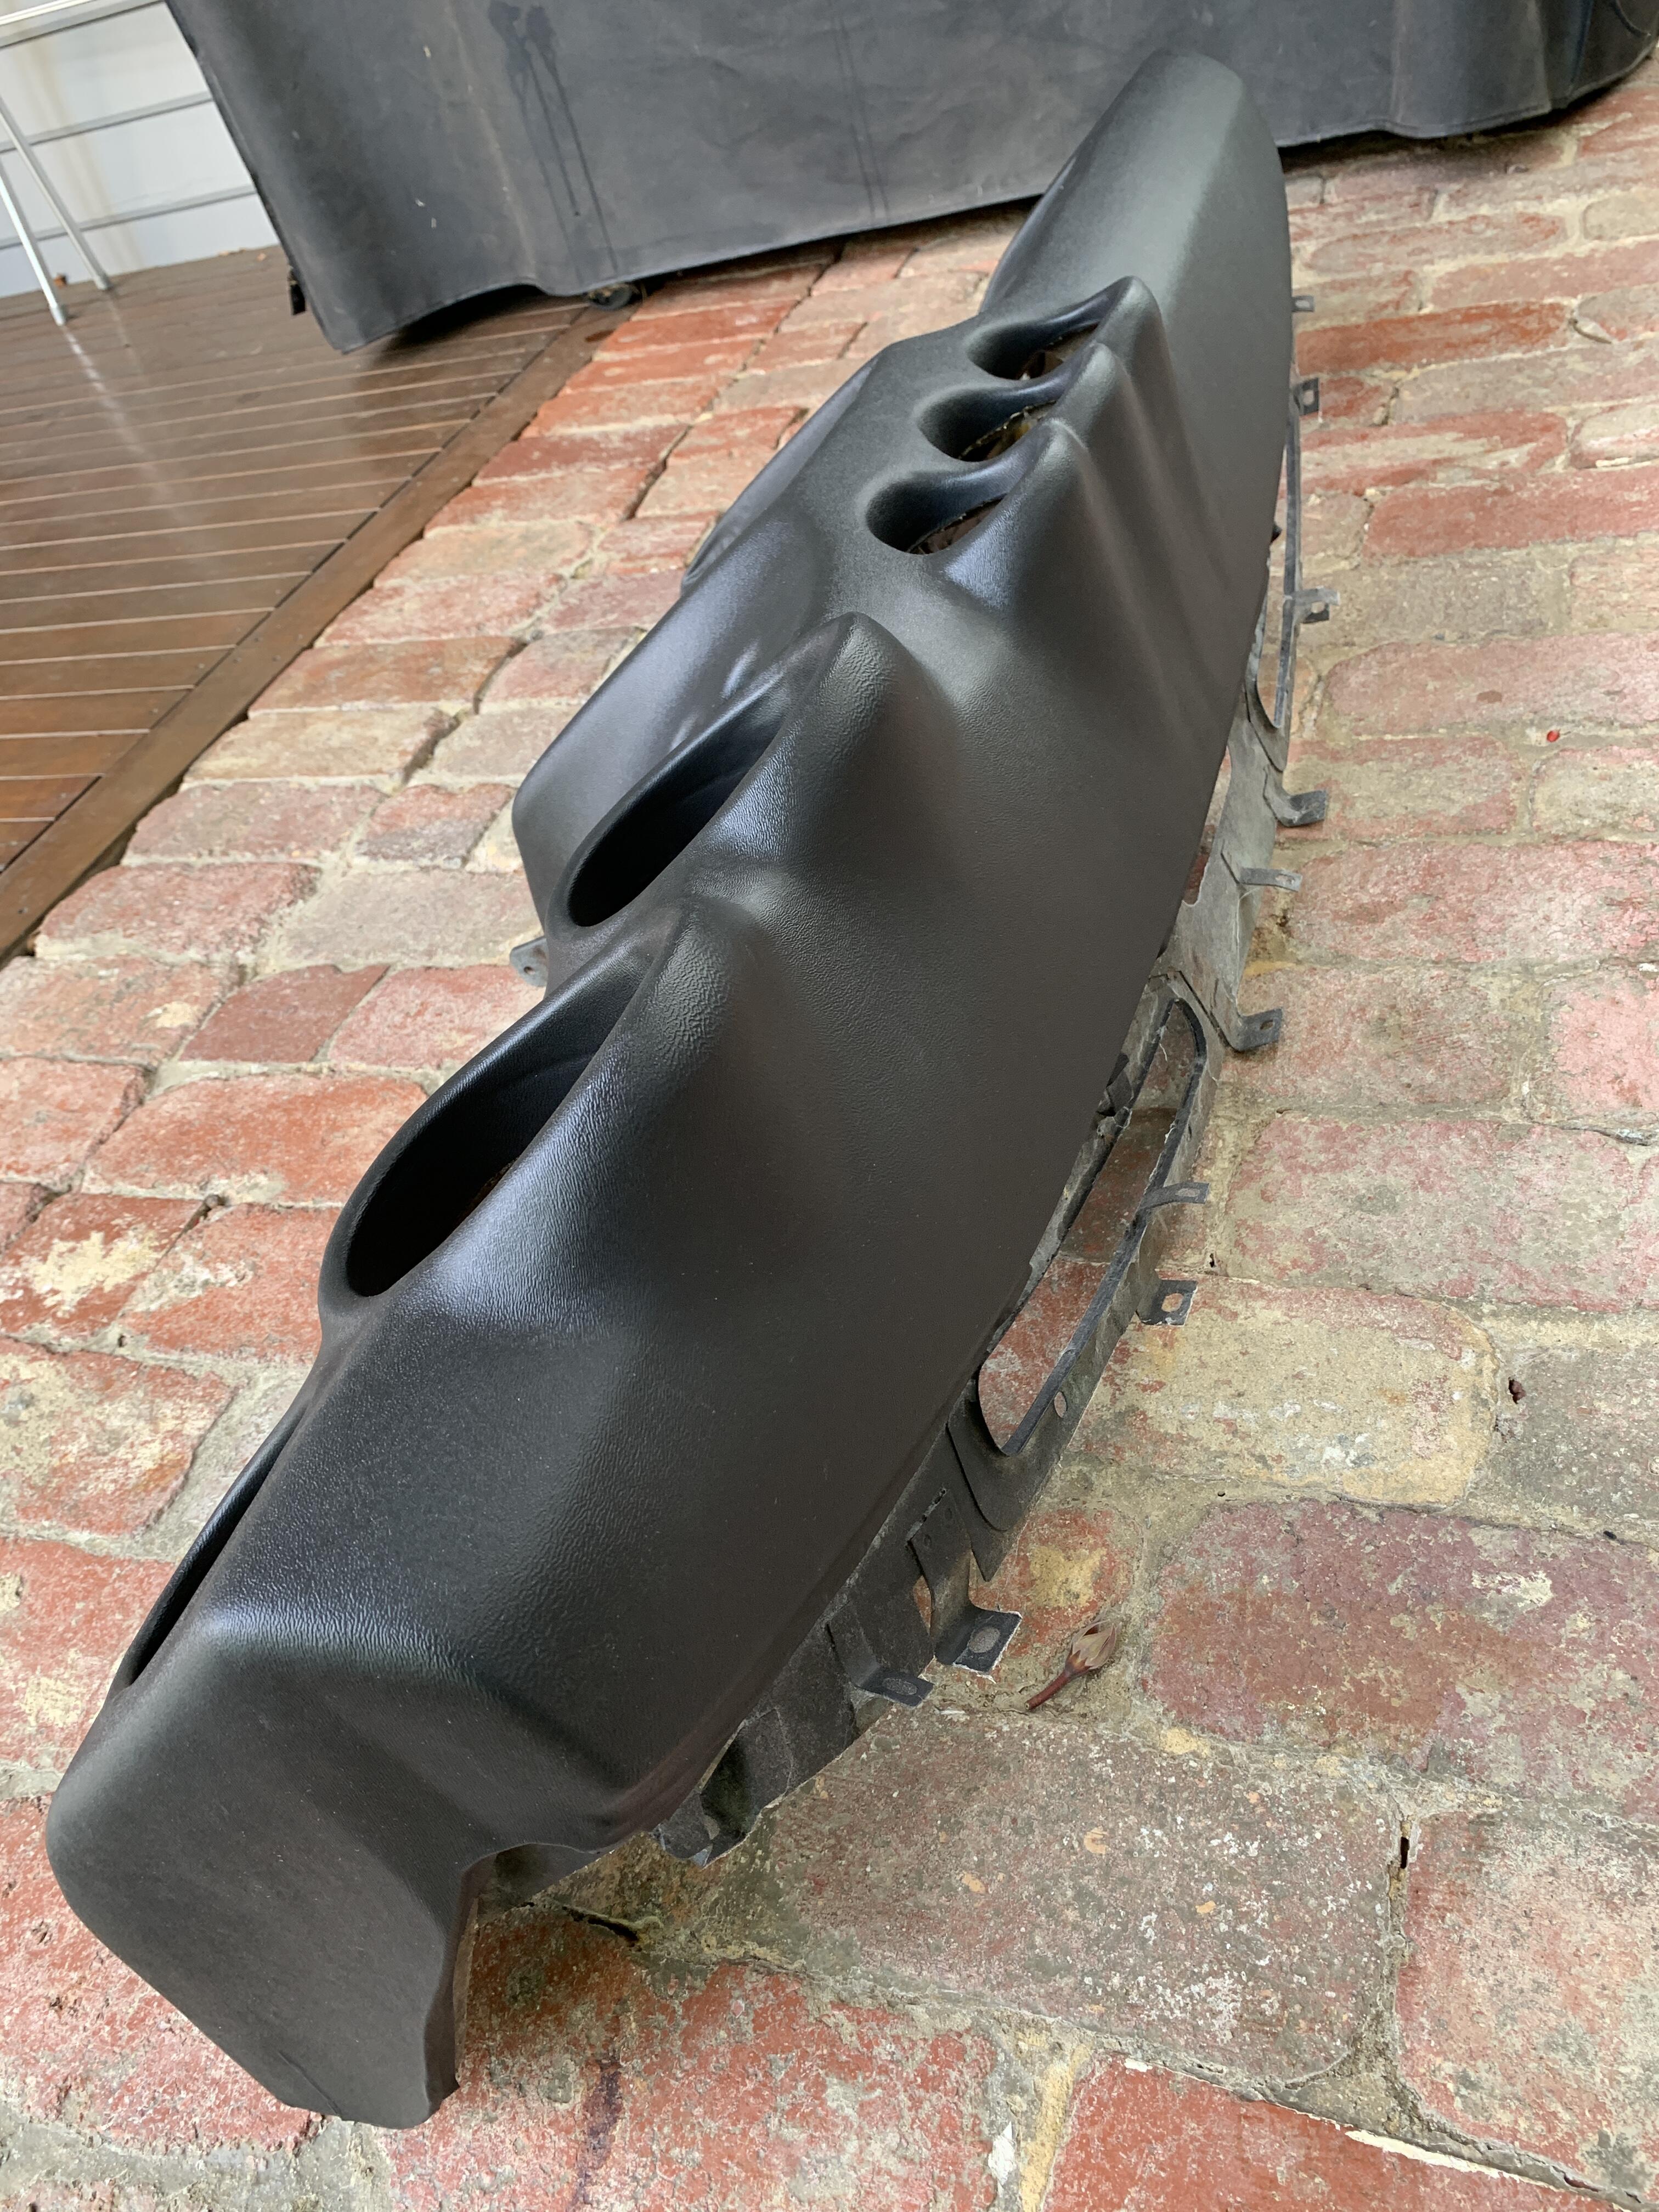
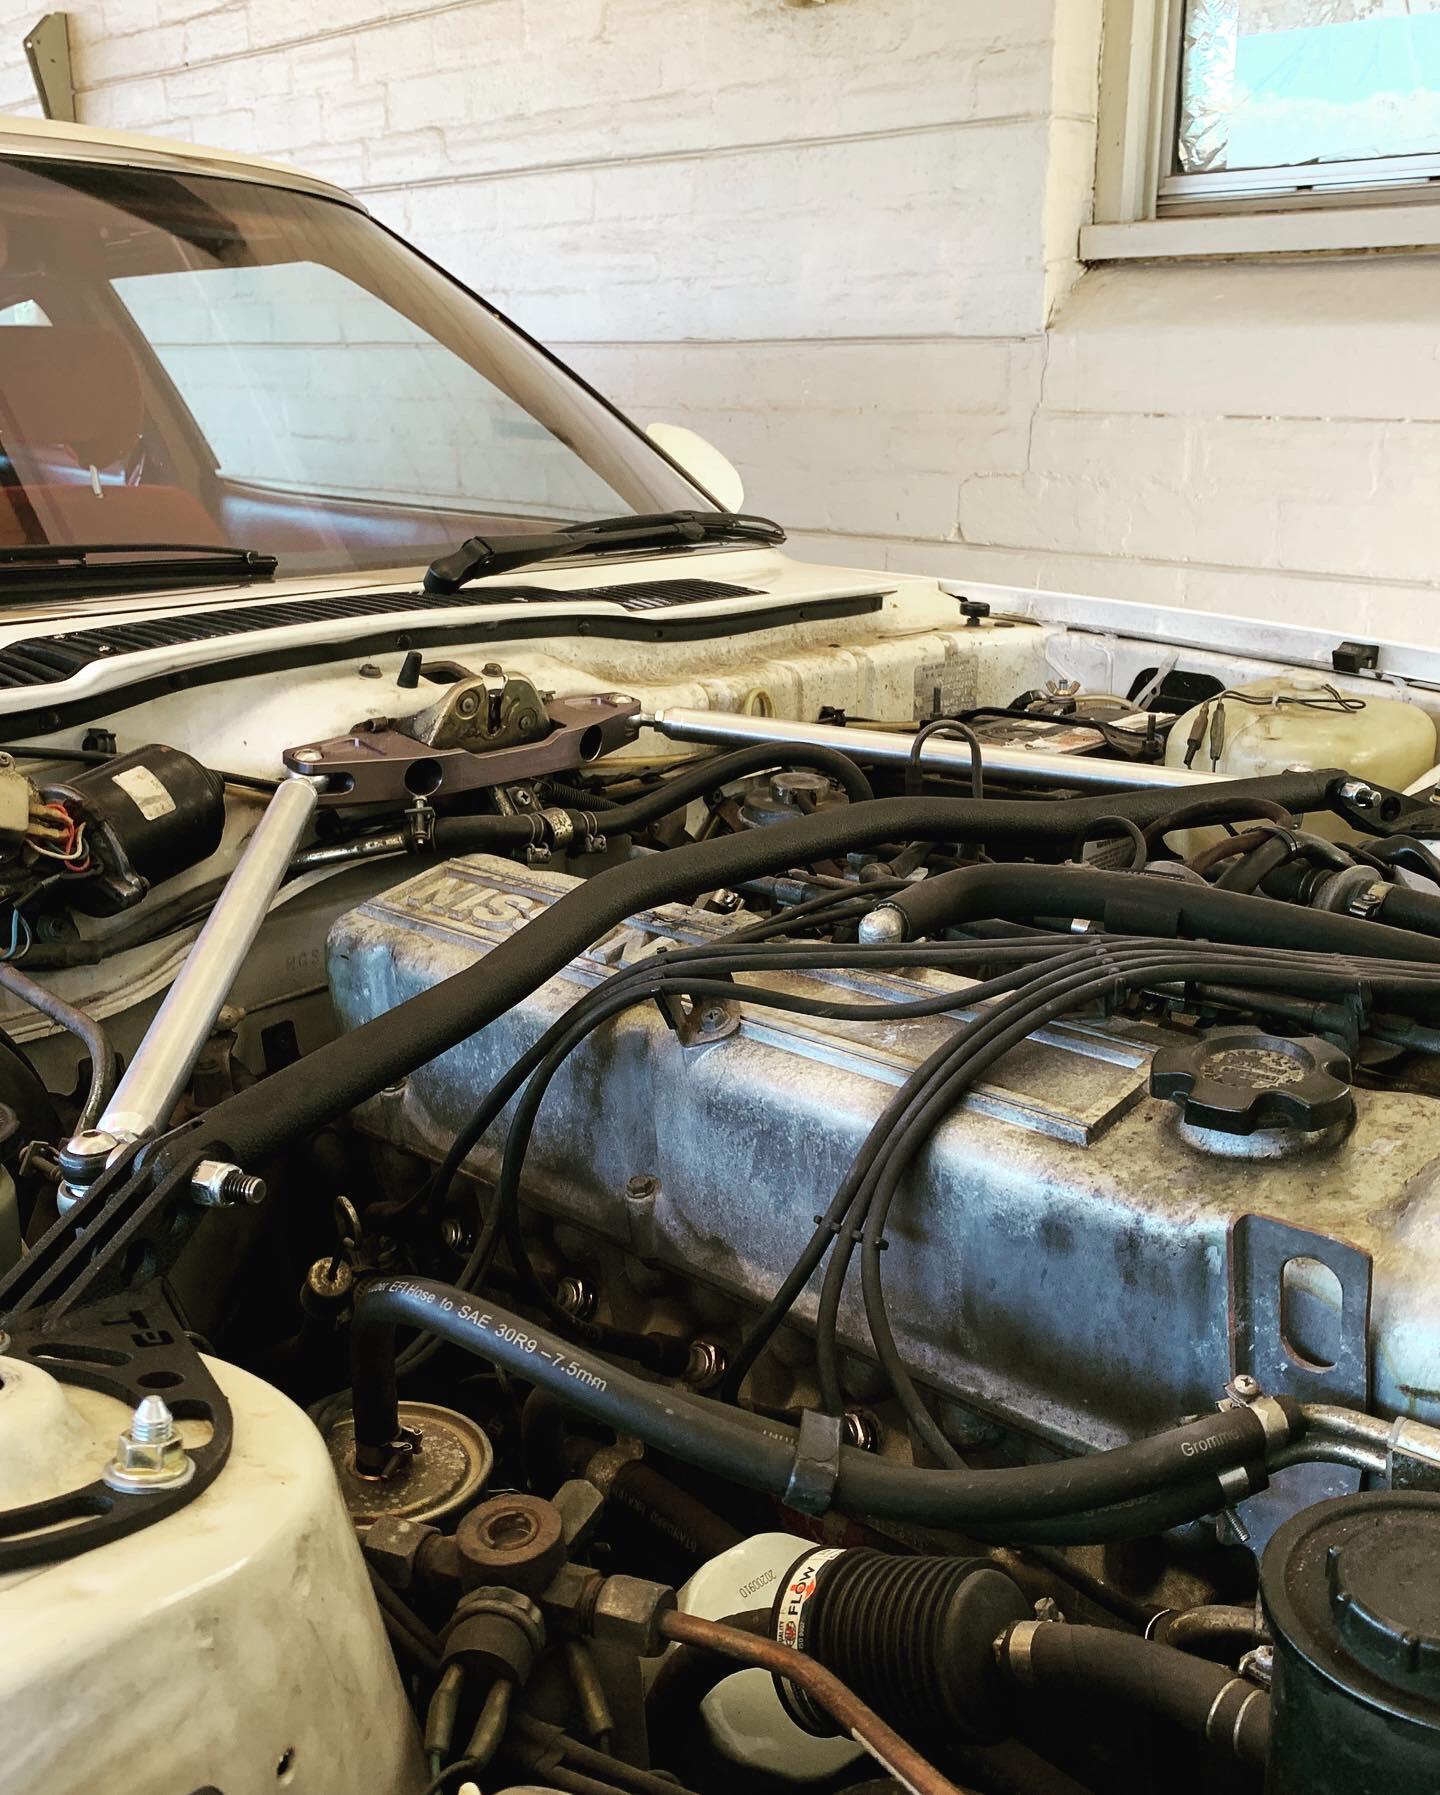
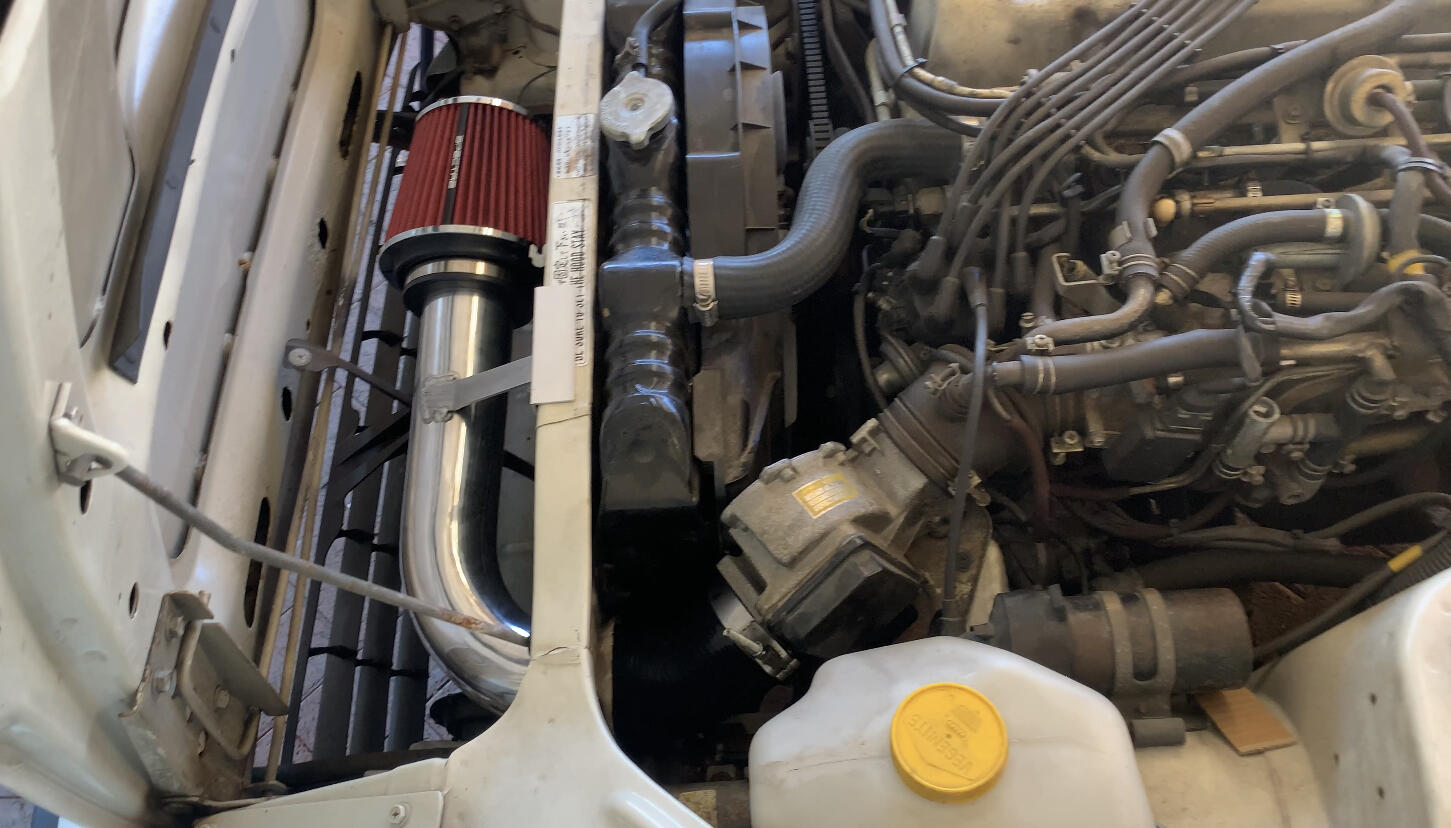
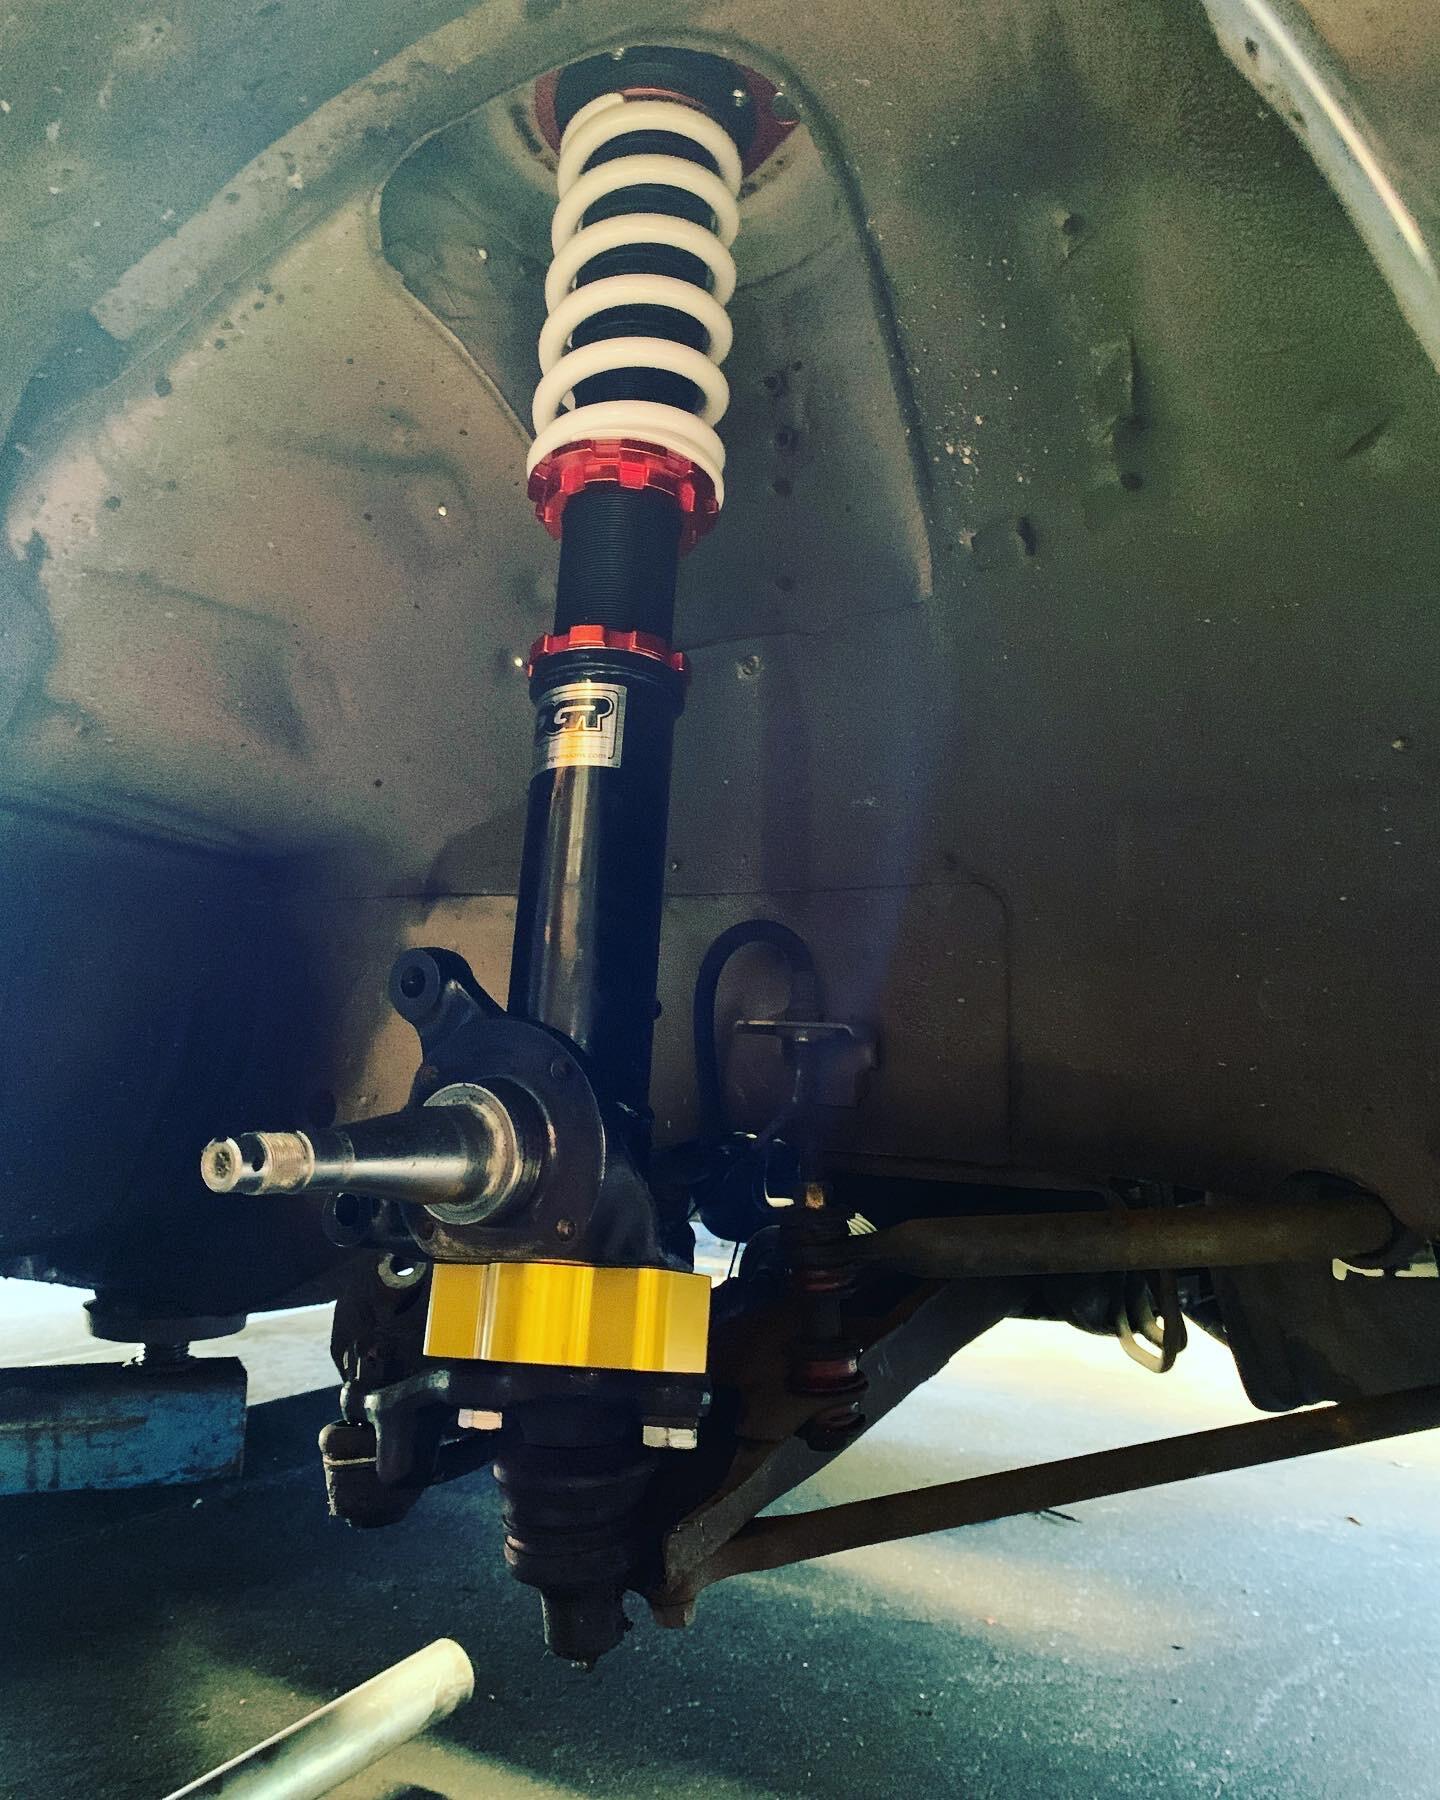
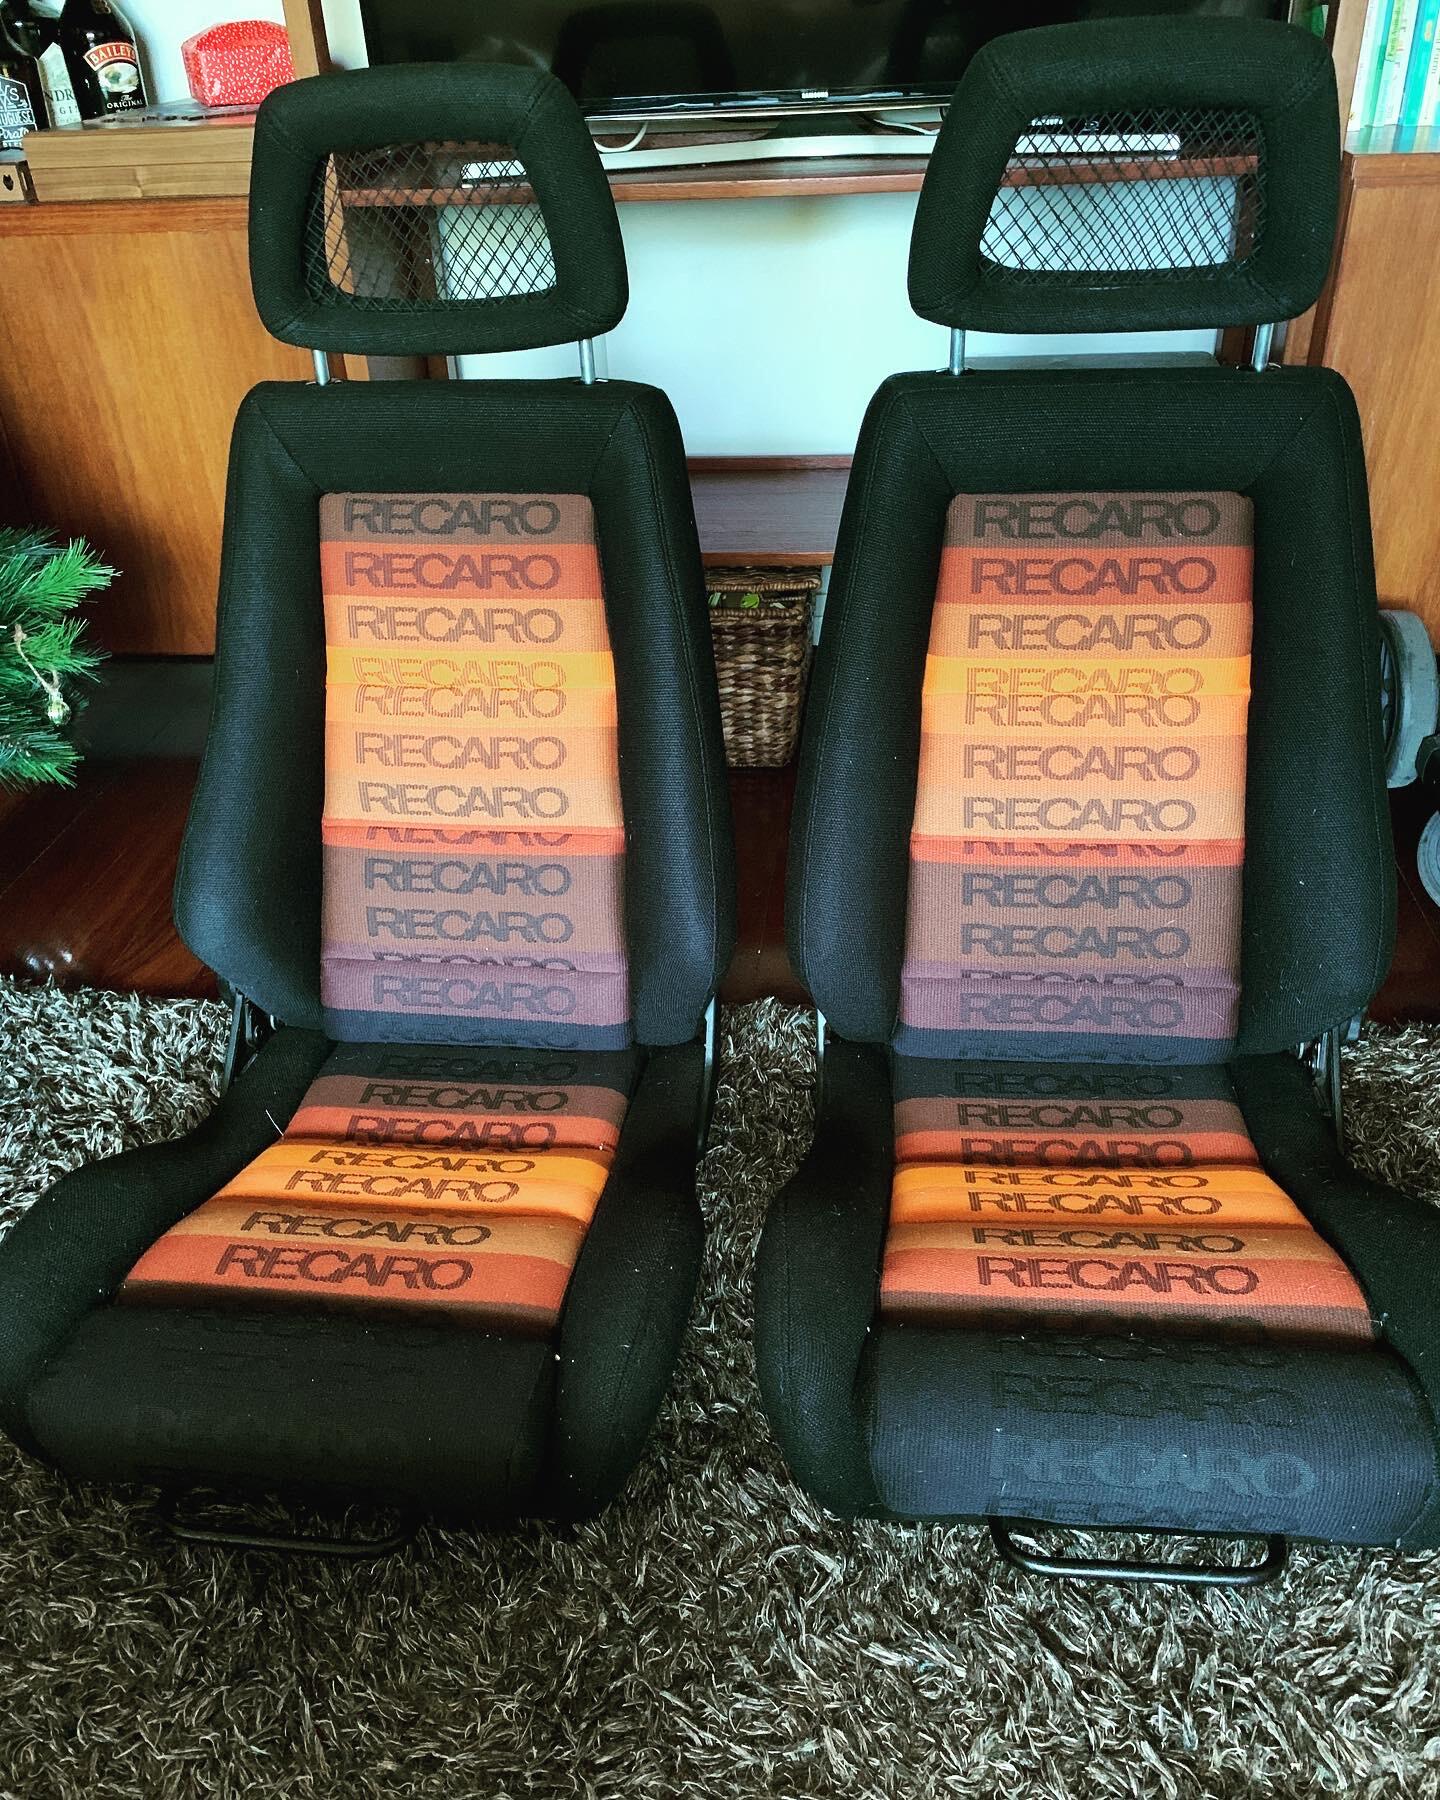
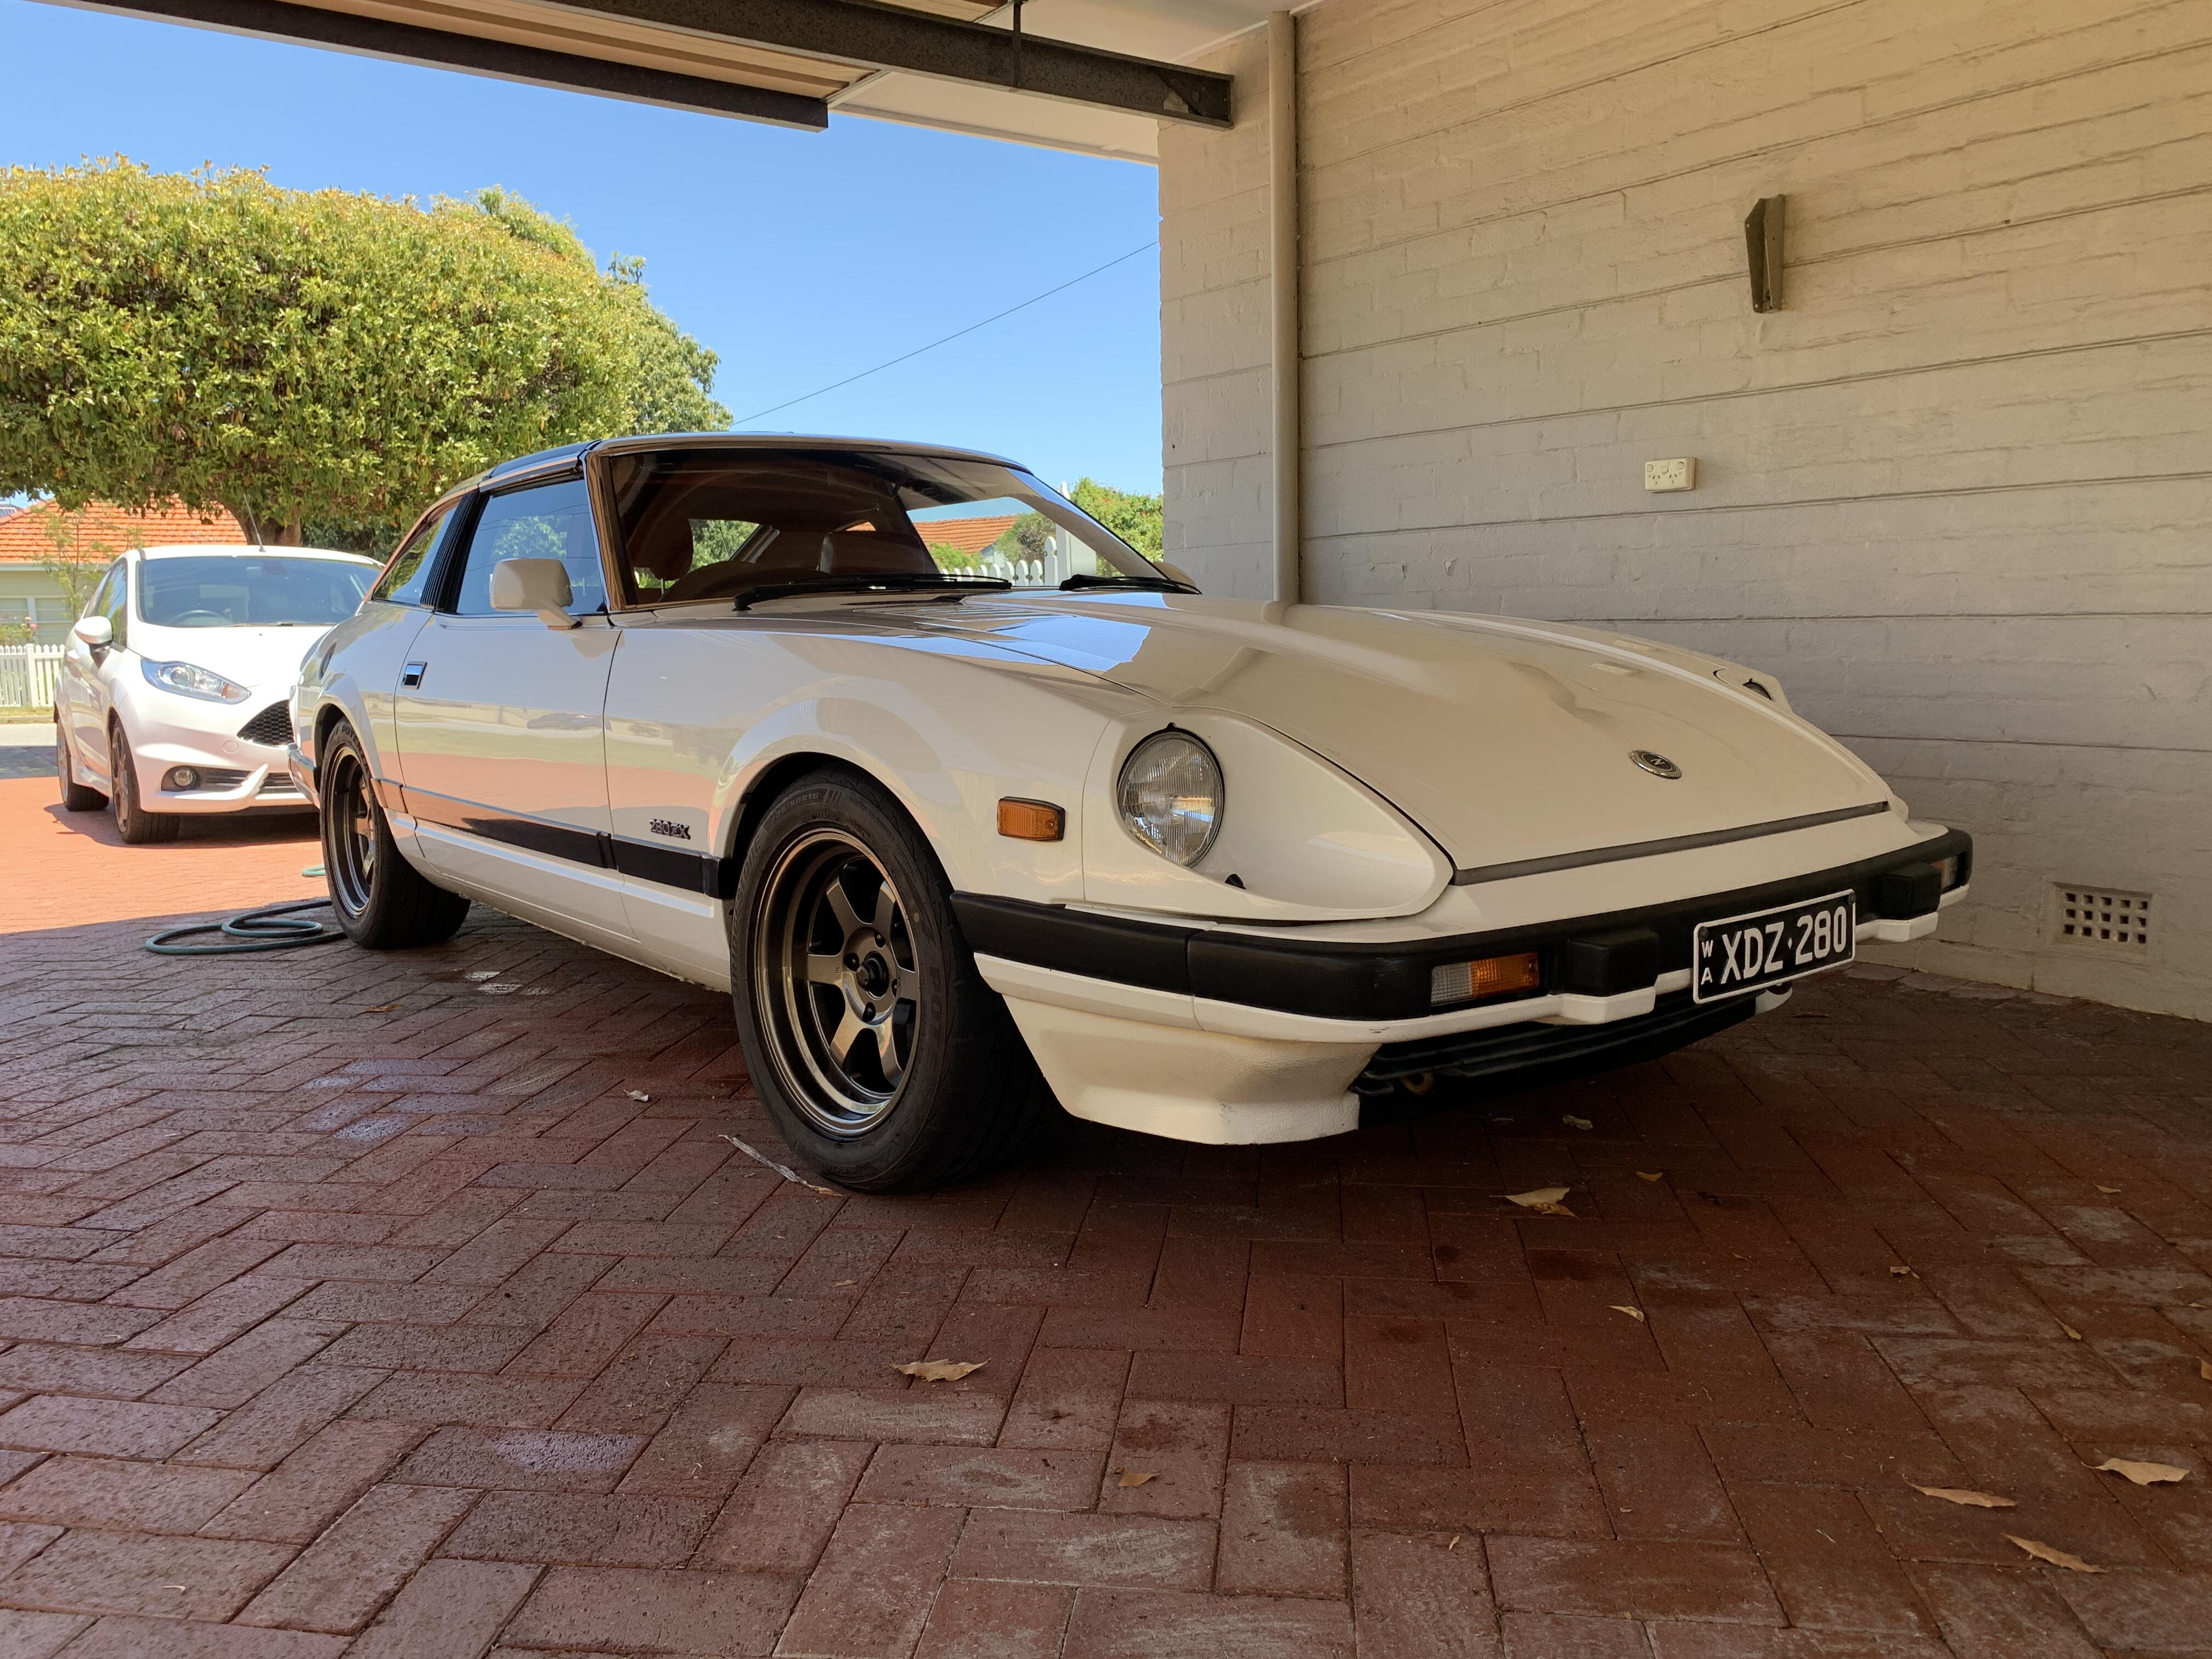
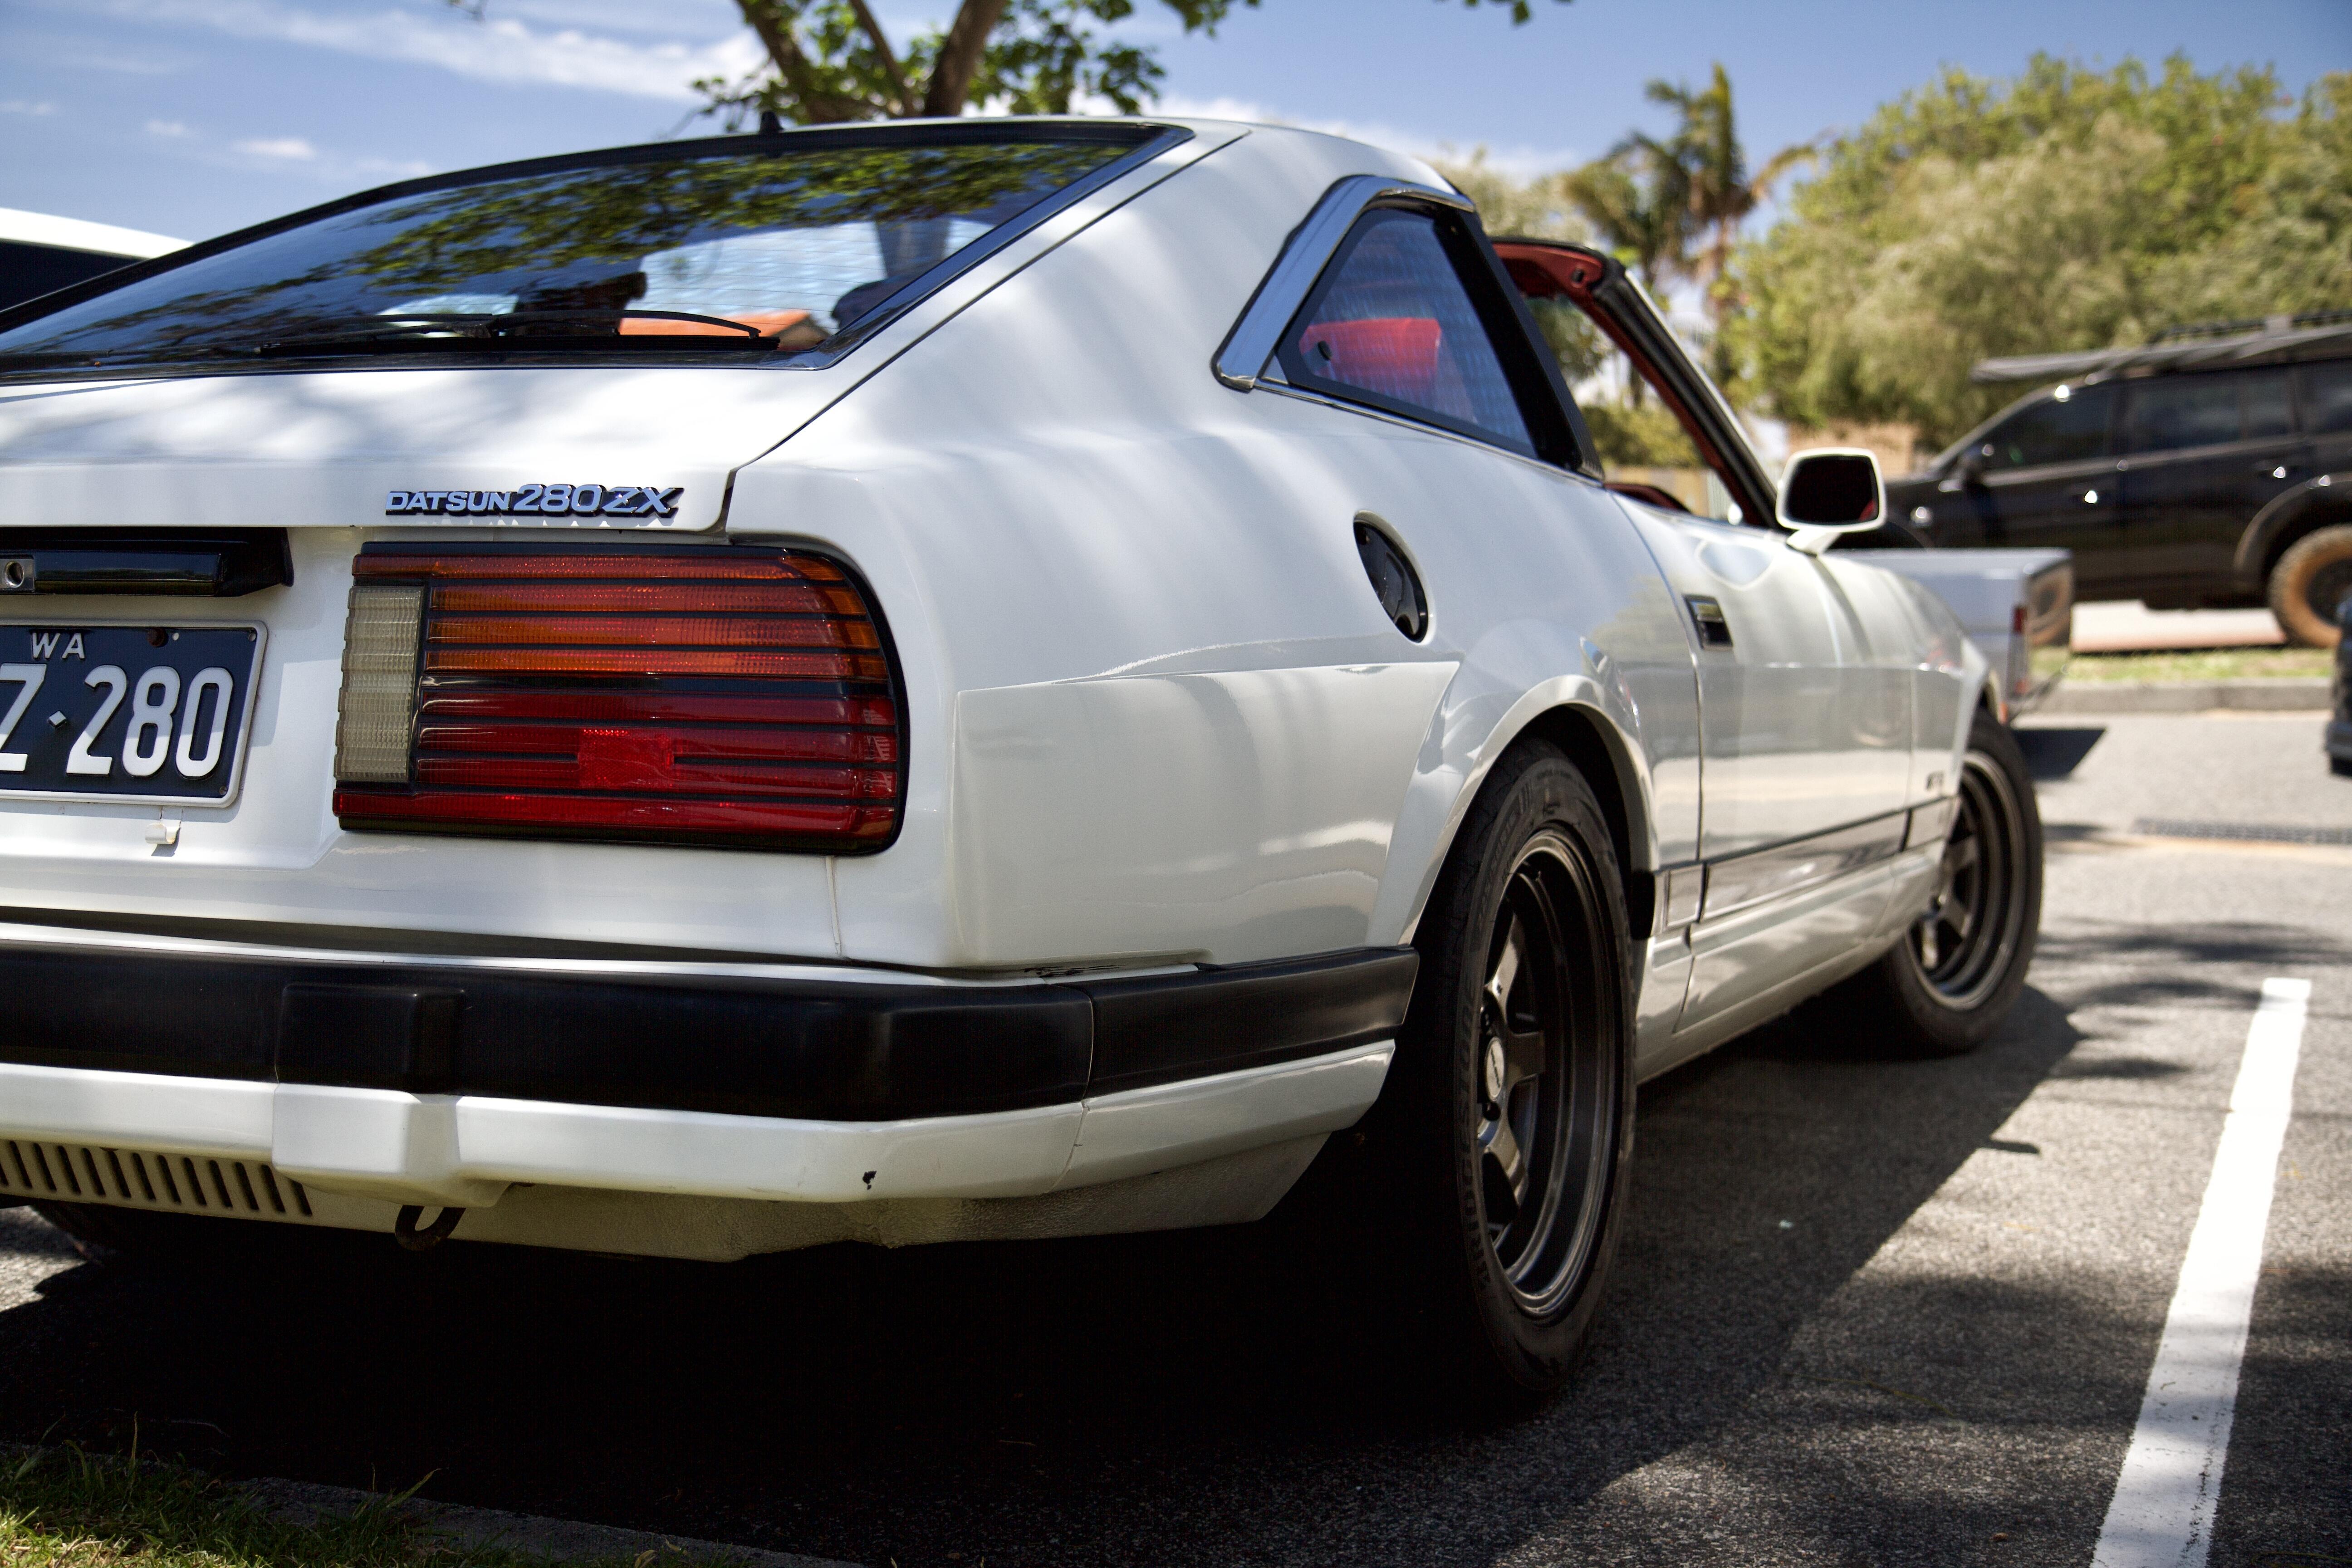
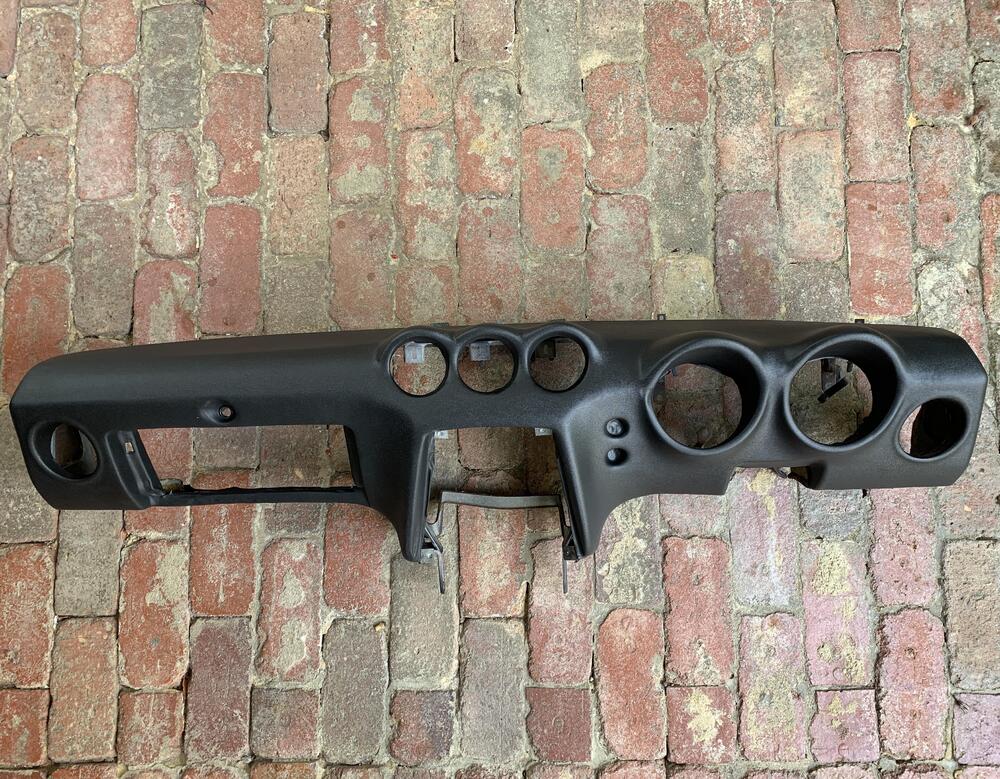
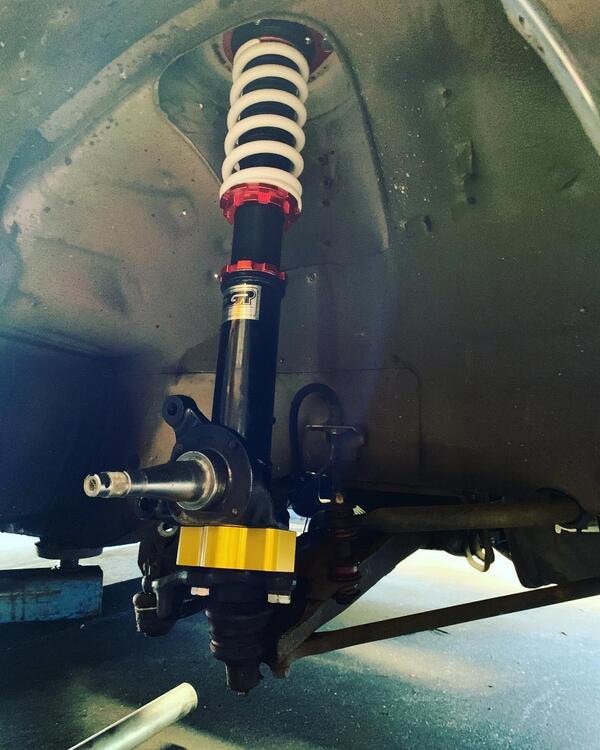
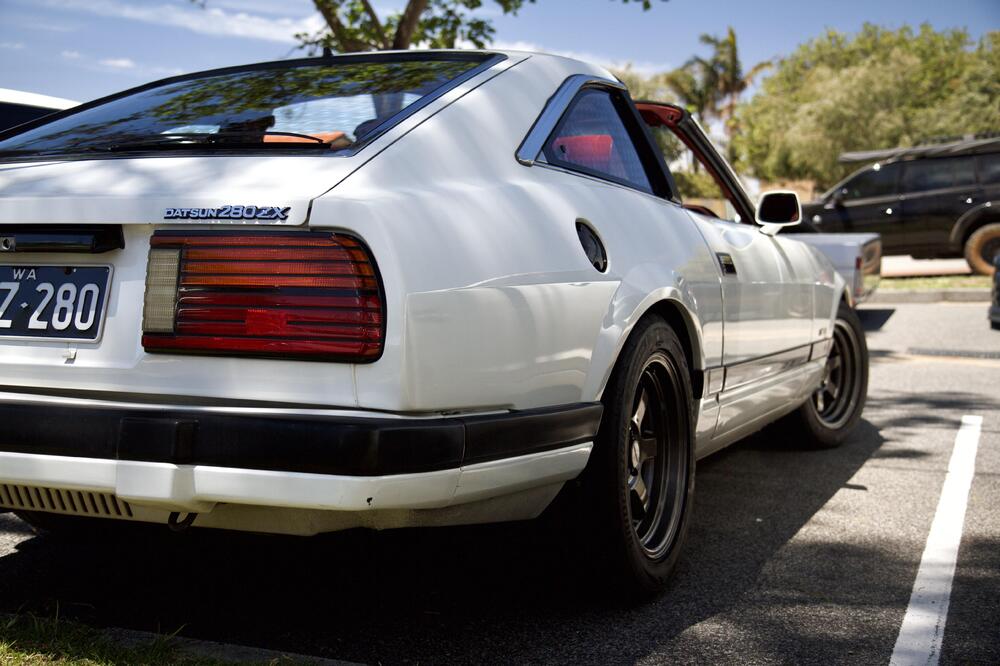
Thanks all I haven’t had any further progress on the 240z. I’ve been umming and ahhing about how to proceed. once I get some time I will head to where the car is and do some thinking. I did get my dash back from the shop. It looks fantastic, has been reskinned. @dutchzcarguy the 280zx however has had some love, it’s just so much easier to get stuff done when the car is with you unlike the 240z… I installed new Rota grid classic wheels and DGR coilovers with some T3 Negative camber roll center adjusters, T3 tri point strut bar in the front, T3 billet steering coupler and the Godzilla raceworks Cold air intake, also bought a set of recaro LXs, but am only installing the drivers seat as I love the stock velour seats but they’re horrible for spirited driving. The recaro LXs are beautiful period correct seats that really hold you in place. I’ve been collecting all the parts for a manual conversion and should be starting that shortly, I have a heavier duty clutch, fidanza aluminum flywheel to go in, only thing I haven’t been able to source is a R180 3.9 or Subaru LSD R160 3.9. But I can do the conversion and put a new diff in later. I’m in love with the zx, loving having a z to drive while I’m restoring the 240z. Can’t wait to be able to shift my own gears though, the auto box is horrendous.


 1 point
 -
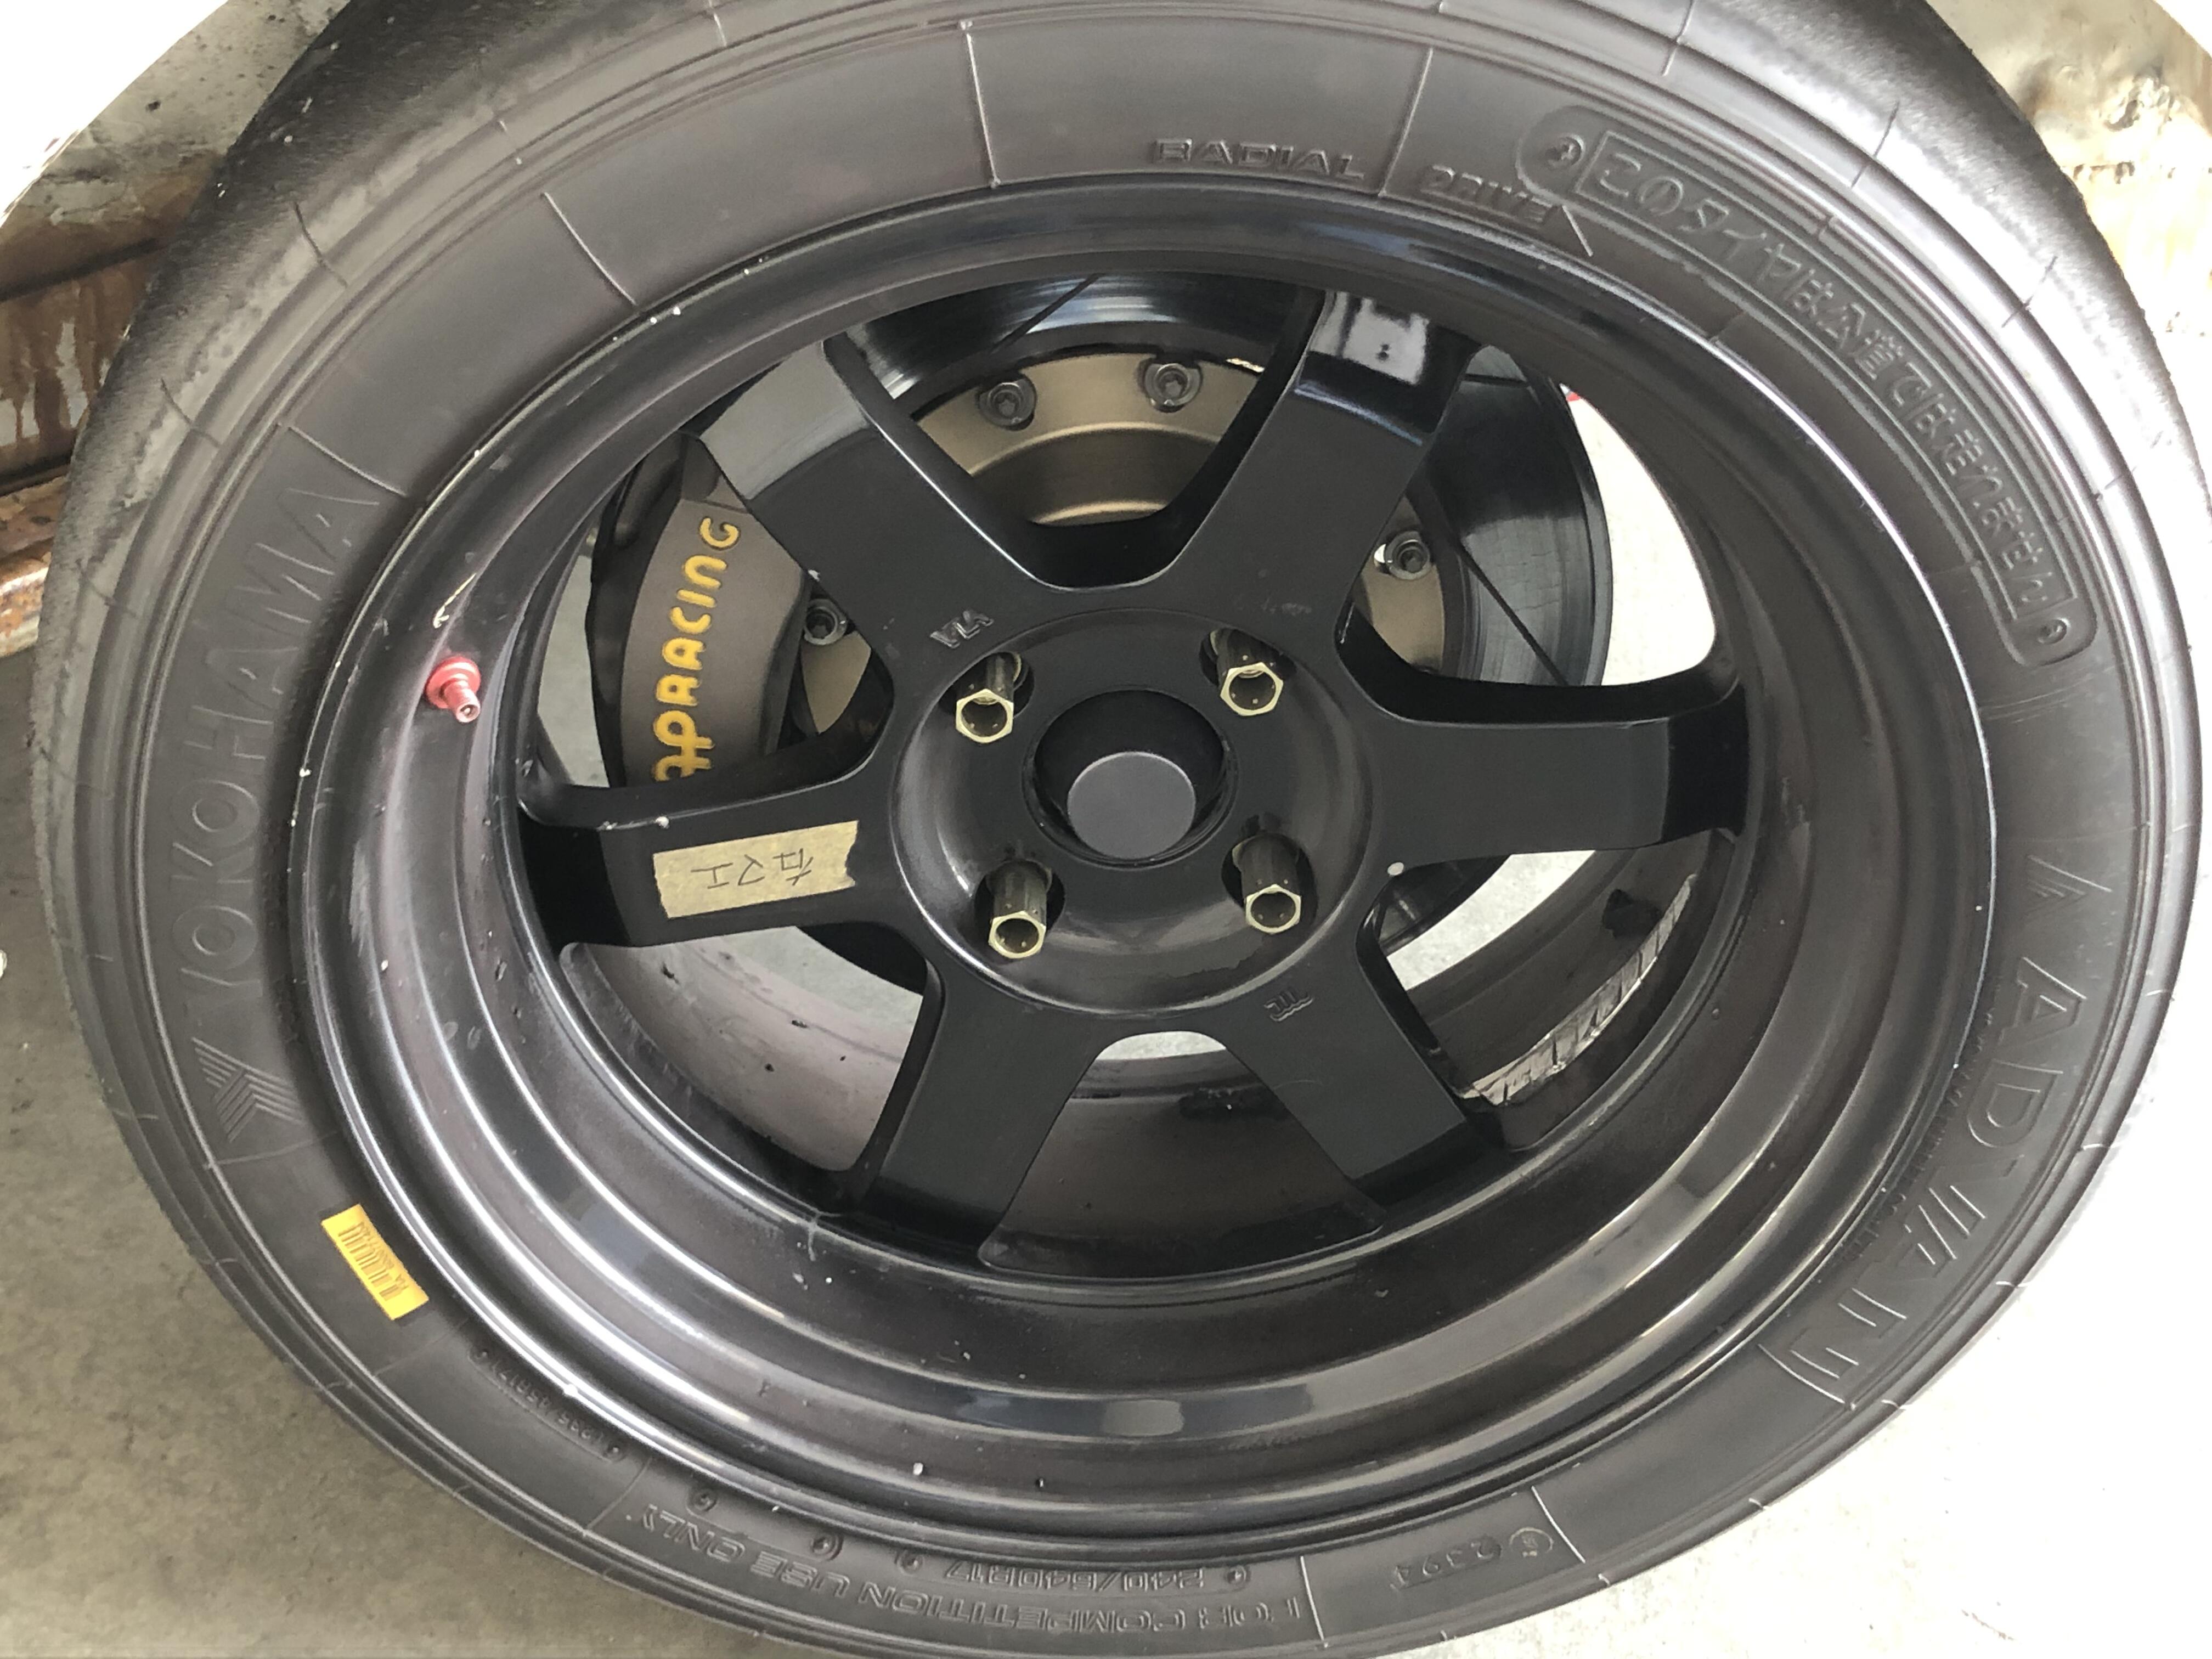
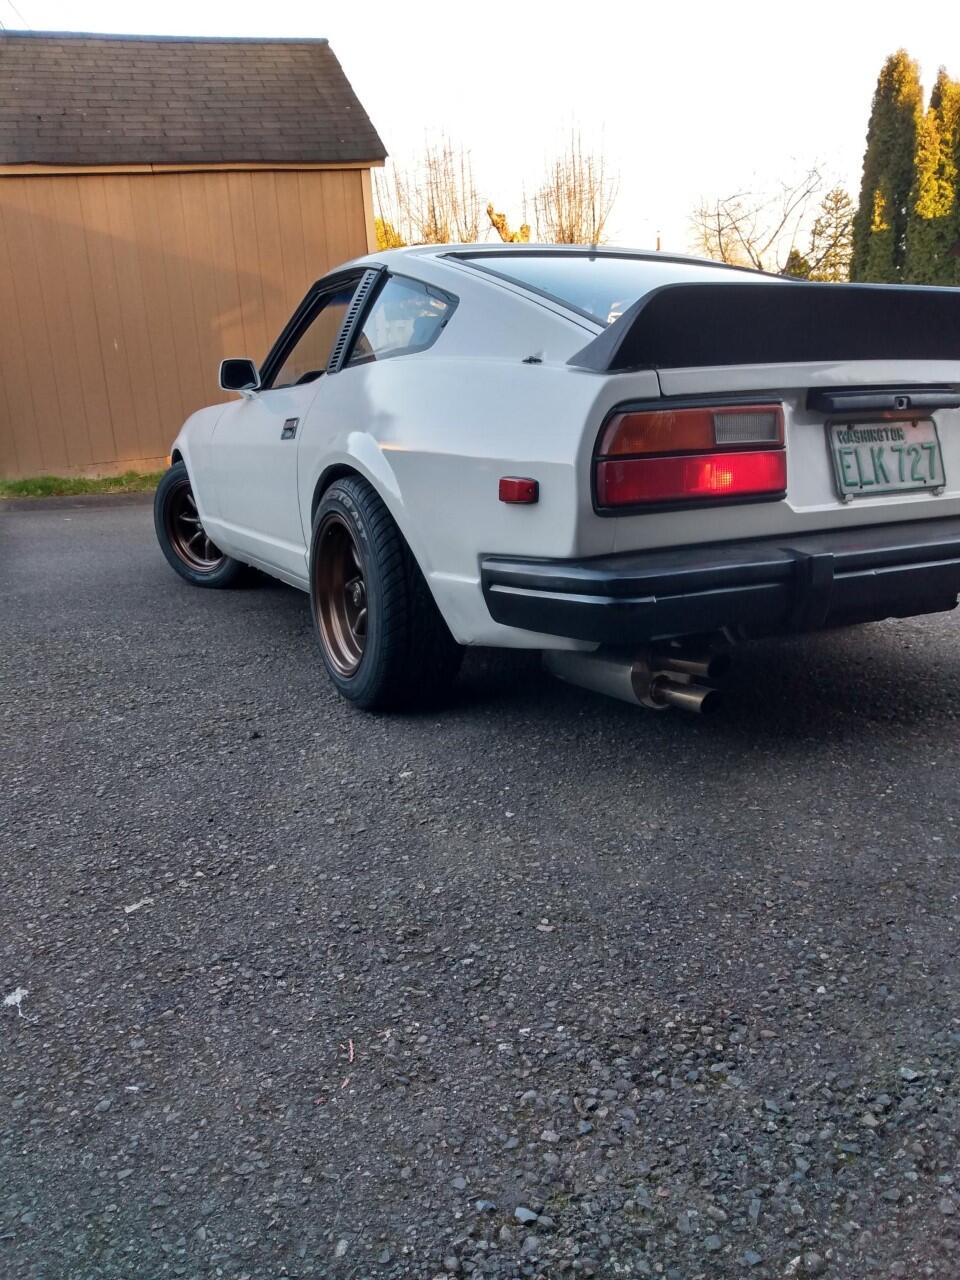
I run 15x8 zero offset on the front and 15x9 -15 offset on the rear with 1 inch spacers on my ZX. I have T3 coilovers. It is my understanding that most fitment specs are the same across the S30-S130 range.
 1 point
 -
So it’s been a long time since I have worked on the car. 2021 proved to be a the worst year I’ve experienced so far in my short life. My dear mum suffered complications during surgery in January 2021, she fought the good fight but ultimately we had to let her go last year in September. I have never suffered such pain. 6 months on though I’m in a much better place. During her stay in hospital I was still working on the car and it was a welcome distraction for me and a stress release, or maybe more of a stress replacement? I’m not sure. So I will be dedicating this project to my dear mum and will change it to Project Georgia In loving memory of her. then in February we bought a new house and have been flat out preparing the old place for sale and moving into the new place. Bonus is the new place has an awesome man cave two car garage! have made small progress on stripping the dash in preparation for reskinning. It’s a very rough dash so I’m letting the pros deal with it. hopefully get back to working on the car once all this house business is sorted.0 points