Leaderboard
-
Captain Obvious
Free Member5Points10,081Posts -
zKars
 Subscriber
 3Points3,770Posts
 -

siteunseen
Free Member2Points15,115Posts -

CW240Z72
Free Member2Points229Posts


Popular Content
Showing content with the highest reputation on 02/17/2021 in all areas
-
The recent 75 that I just parted out displayed quite conflicting “usability” or should I say “re-usability” in many components that come in twos. The car had sat outside for I’d estimate 10-15 years at least. 95000 mi on the clock. 195000? Maybe.... 1. Spindle pins. Right side came out easily with my usual simple air hammer technique. Left side, no such luck. Even after upgrading my air hammer to the best one available (ingersol-rand 123KMax) and heating with dual MAP gas torches to 600C +, not even a micro-millimeter of movement. Off to the machine shop we go. I even cleaned out the cross pin area, although it came out without a fuss. Haven’t had to seek outside help for quite a while. 2. TC rods. Right side is near new, left side again not so much. Significant corrosion under the sleeve at the bushing end. Just enough to make me not want to re-use it. 3. Drum brakes. Unlike the usual drum to hub corrosion, this left side came loose with only a few hundred mild blows from a 5 lb, but then had to literally pry the drum off, the totally worn out brake shoes where bonded to the totally worn down steel liners and actually peeled off parts of the liner when it finally gave up. Right side? Just came apart..... 4. I previously shared my struggle with the lug nuts on the left rear side. One that had to come off with a ridiculously long snipe and a left hand thread lug remover socket So its no mystery to me that the car sat more on its left side in a damp spot. There were also many pleasant surprises. The gas tank interior was sparkling clean, as well the fuel level sender. The filler hose is still soft enough to re-use easily. The tank itself has some dents, which I will chronicle the removal of here later. Going to try one of the hot glue slide hammer dent puller thingamadooees. The hinges are like new, pin play and roller detent wise. How is this possible? The e-brake cables are free to move in the sheaths, which are in great shape! Again, Huh???? The rest of the linkage is dirty and seized some, but un-seized with little fuss. Even the lousy M6 threads on the adjusters just cleaned up with a wire brush and PB Blaster and the nuts move just fine. The little rotten cotter pins all came out with a fuss, as did the the square C clips that hold the brake sheaths to the brackets under the car. The tar mat sound deadening came off in huge sheets with my fingers. ok, the floor under them was mostly gone, that ones not fair. The steering wheel, the infamous sponge rubber “rotten on top where the sun shine, not bad the rest of the way around” was EVENLY rotten all the way around. Spooky. Actually feels nice high grip in use. The wiring is totally un-molested and in pretty good shape. No the clock was not working. I was sure it would work given the other nice surprises. Wiper linkage and motor. Primo! Even the 6 little M5 bolts that hold the linkage to the cowl came off without much fuss. Sun roof. too bad..... Front clip from in front of the shock towers forward, near perfect. Remember the hood prop clip still in place and unbroken? Still is. Saved it. Battery tray and surrounding body is nearly rust free!!!!!!! Saved it Now the rest of the body from the rockers down, actually bottom of doors down, was GONE. It was neat to see the seat rails still attached to the sills and trans tunnel, but half gone on their bottom where the floor was.....
 2 points
 -
2 pointsHaha! I'm a former Alfa owner, and while not currently part of that community, I can tell you that there are two things that really get under the craw of Alfa owners... "Alpha", and "Romero". Just poking a little fun at Bill's typo. Hopefully good natured.....2 points
-
2 pointsI'm confused... A real Alfa owner would never, ever, never, ever, ever call their car an Alfa "Romero". Ever.2 points
-
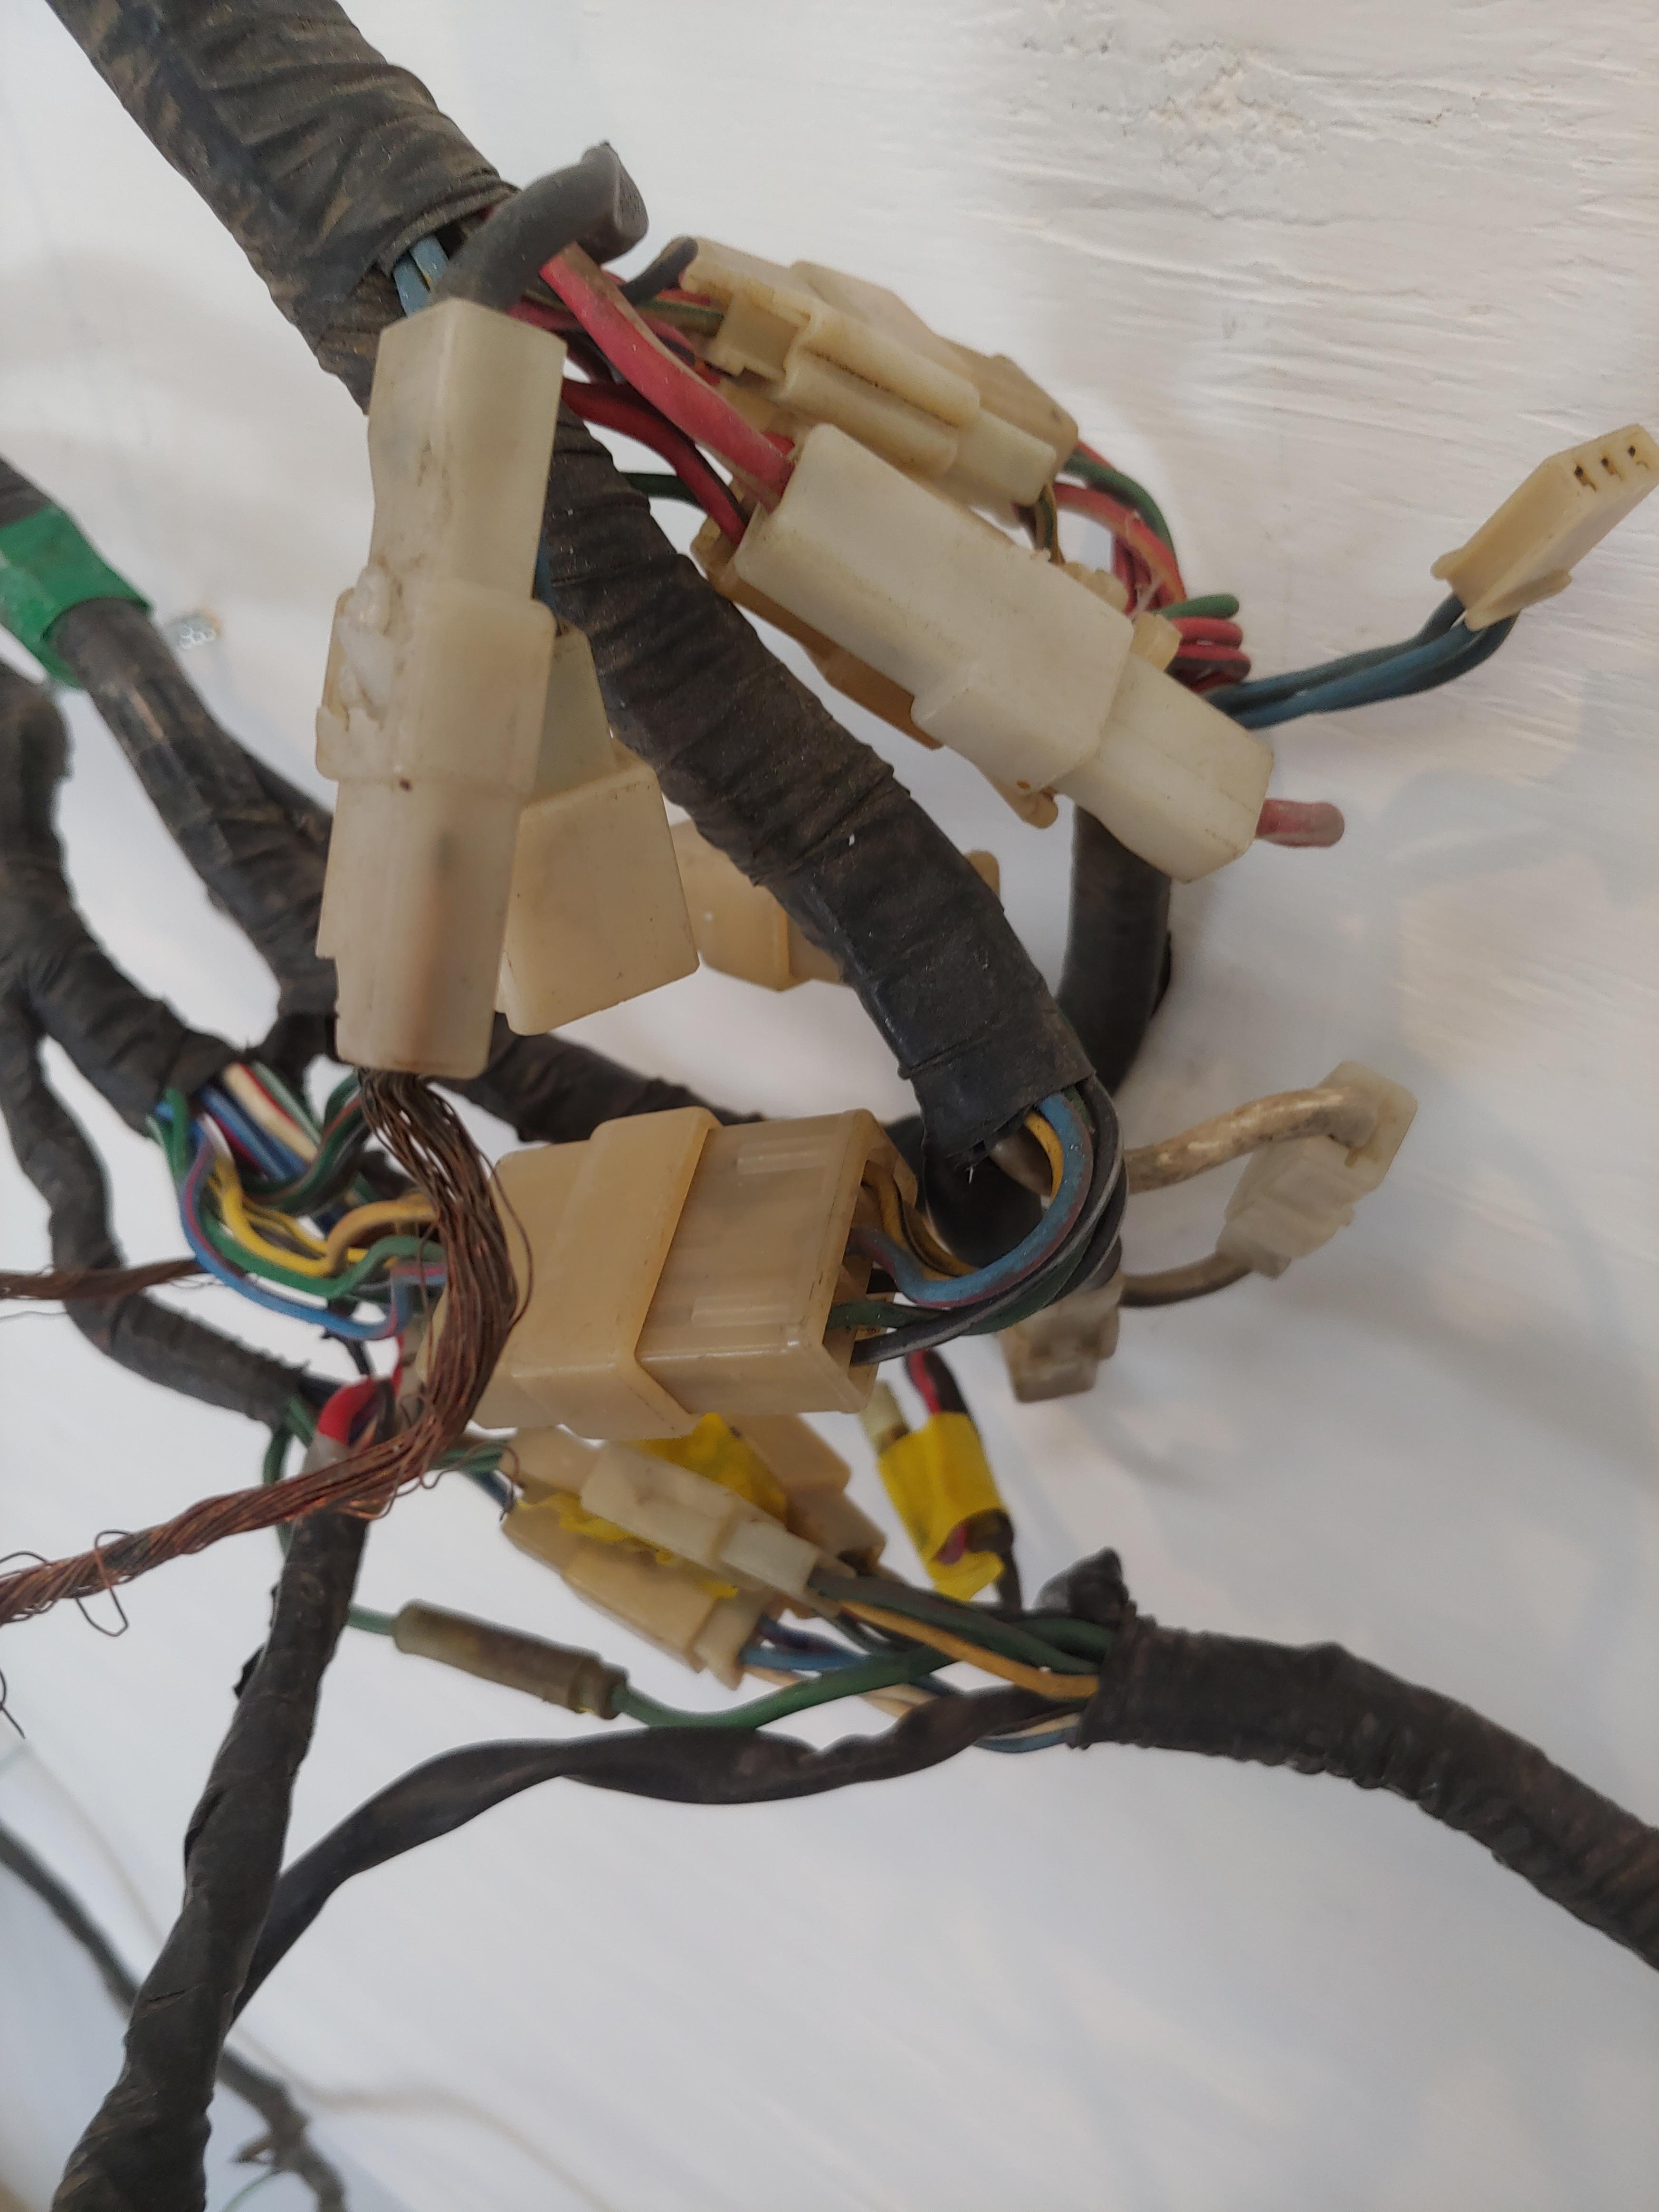
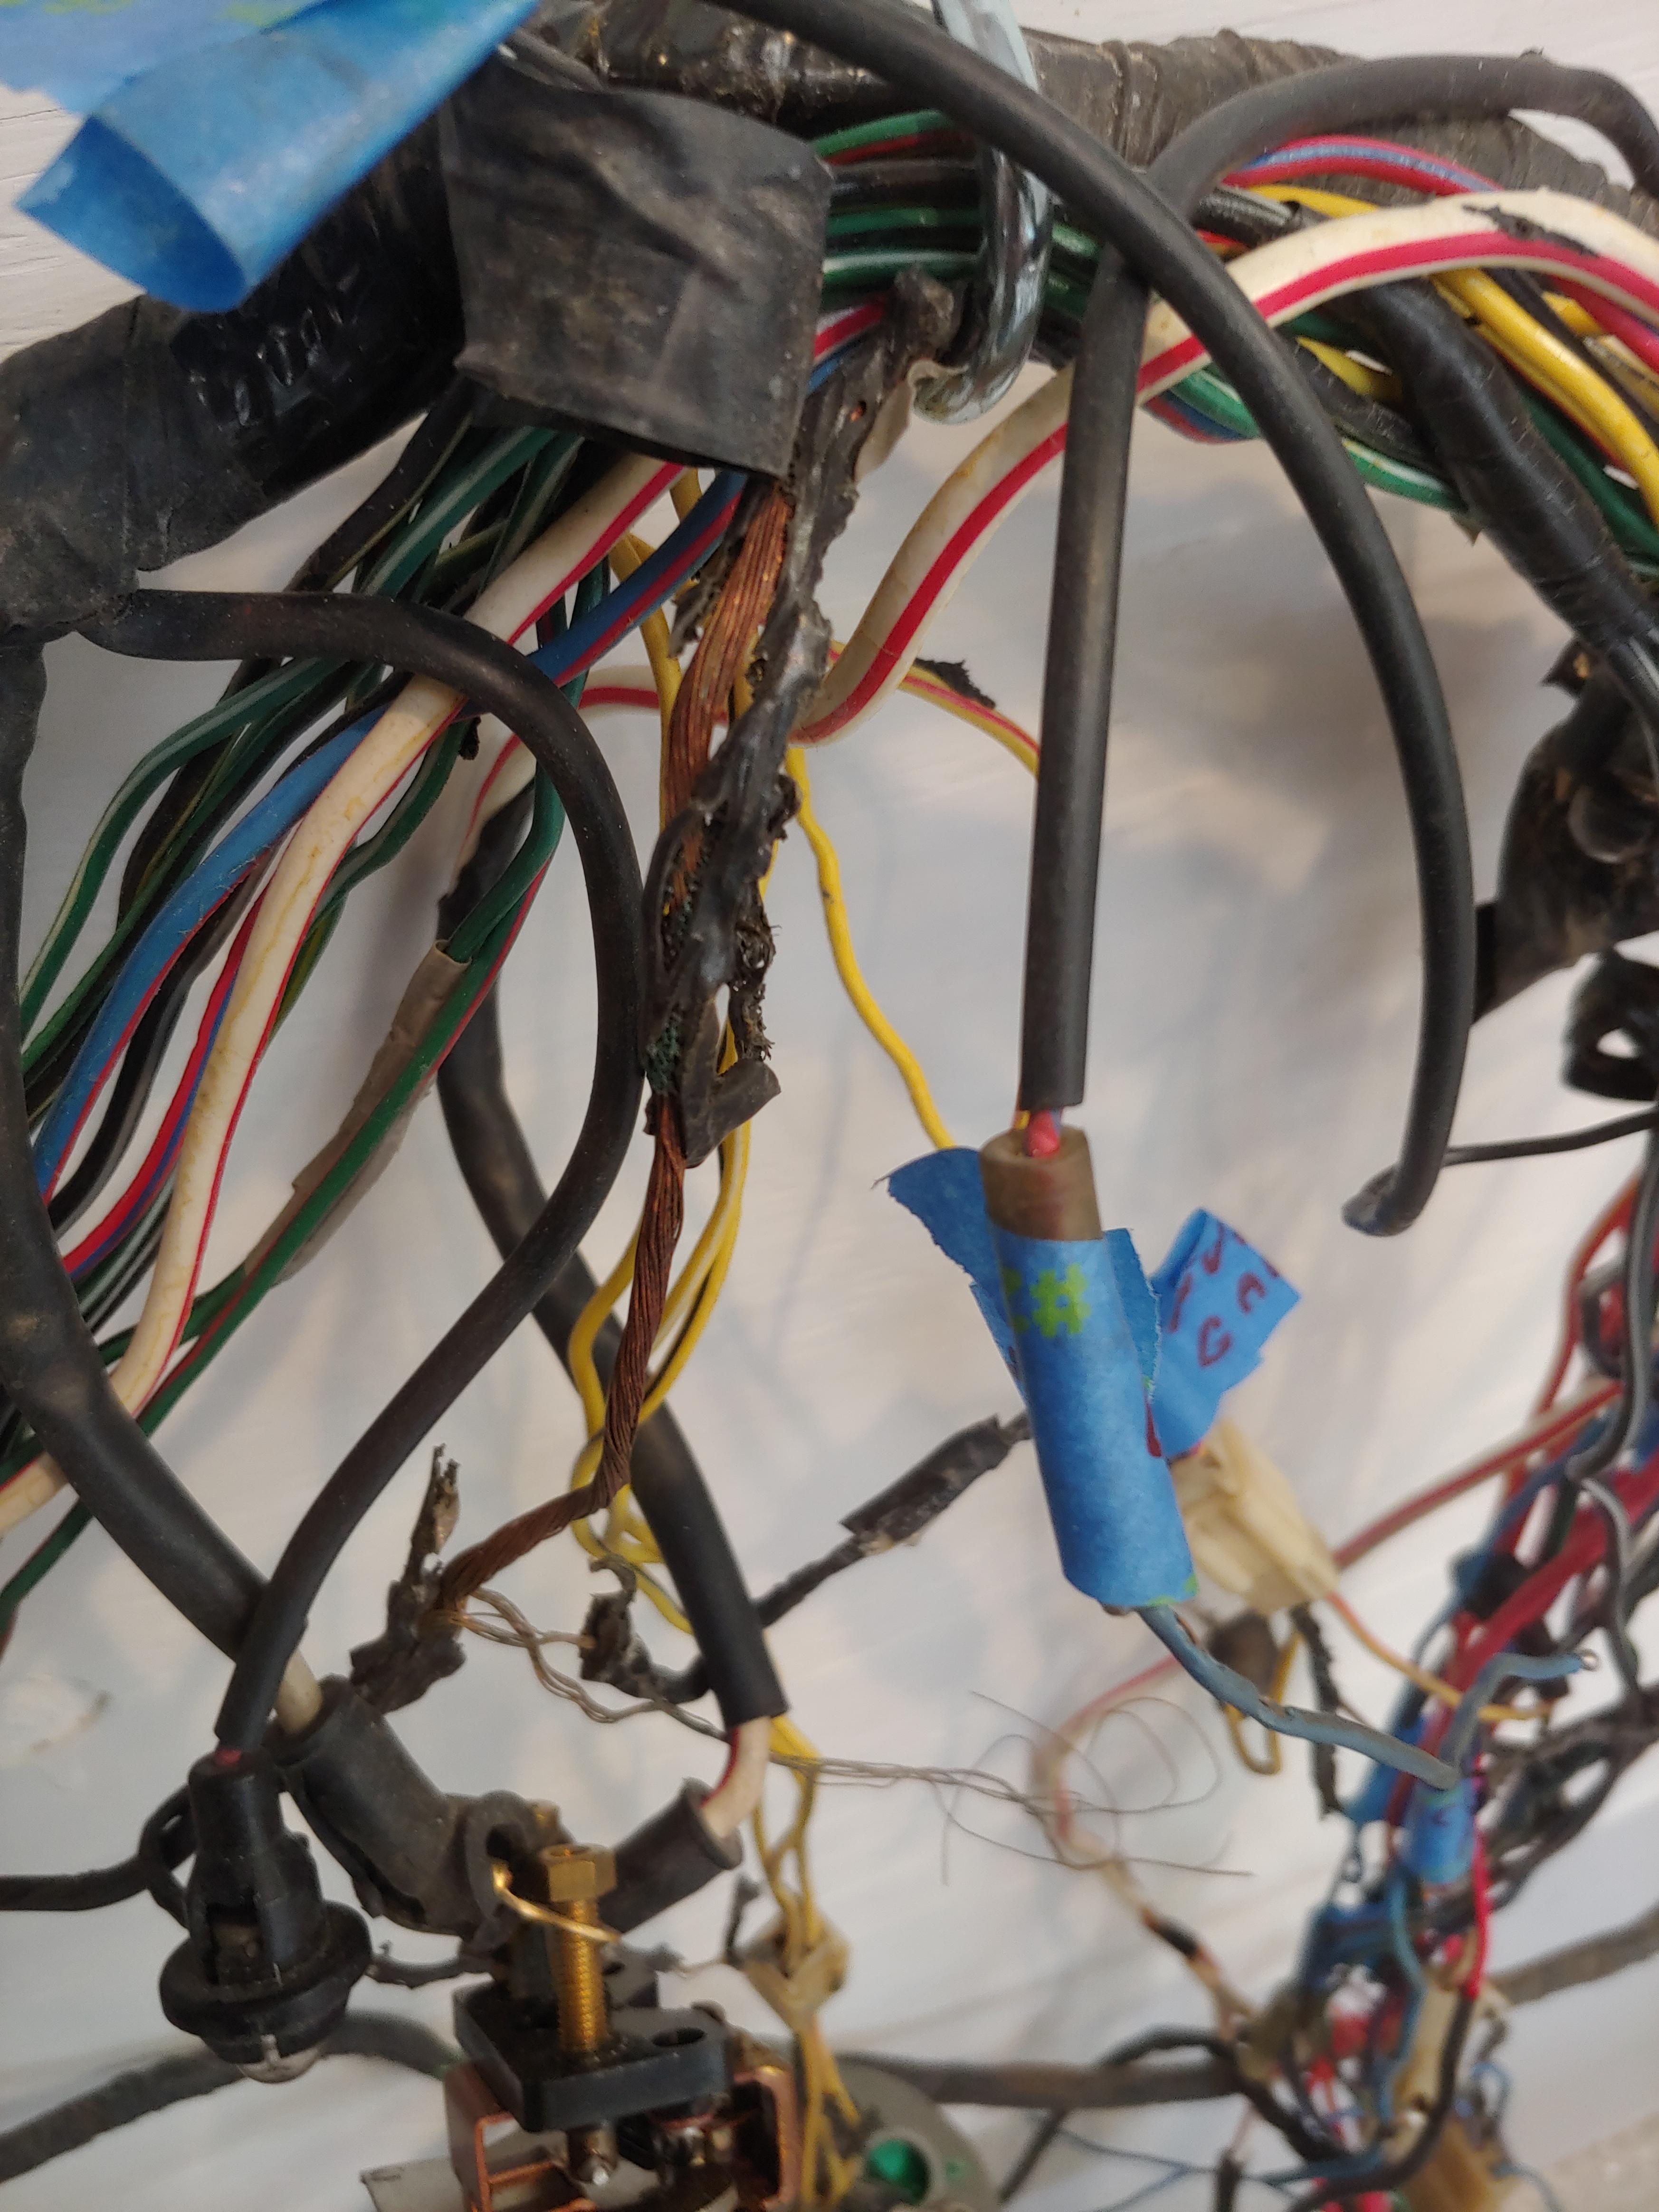
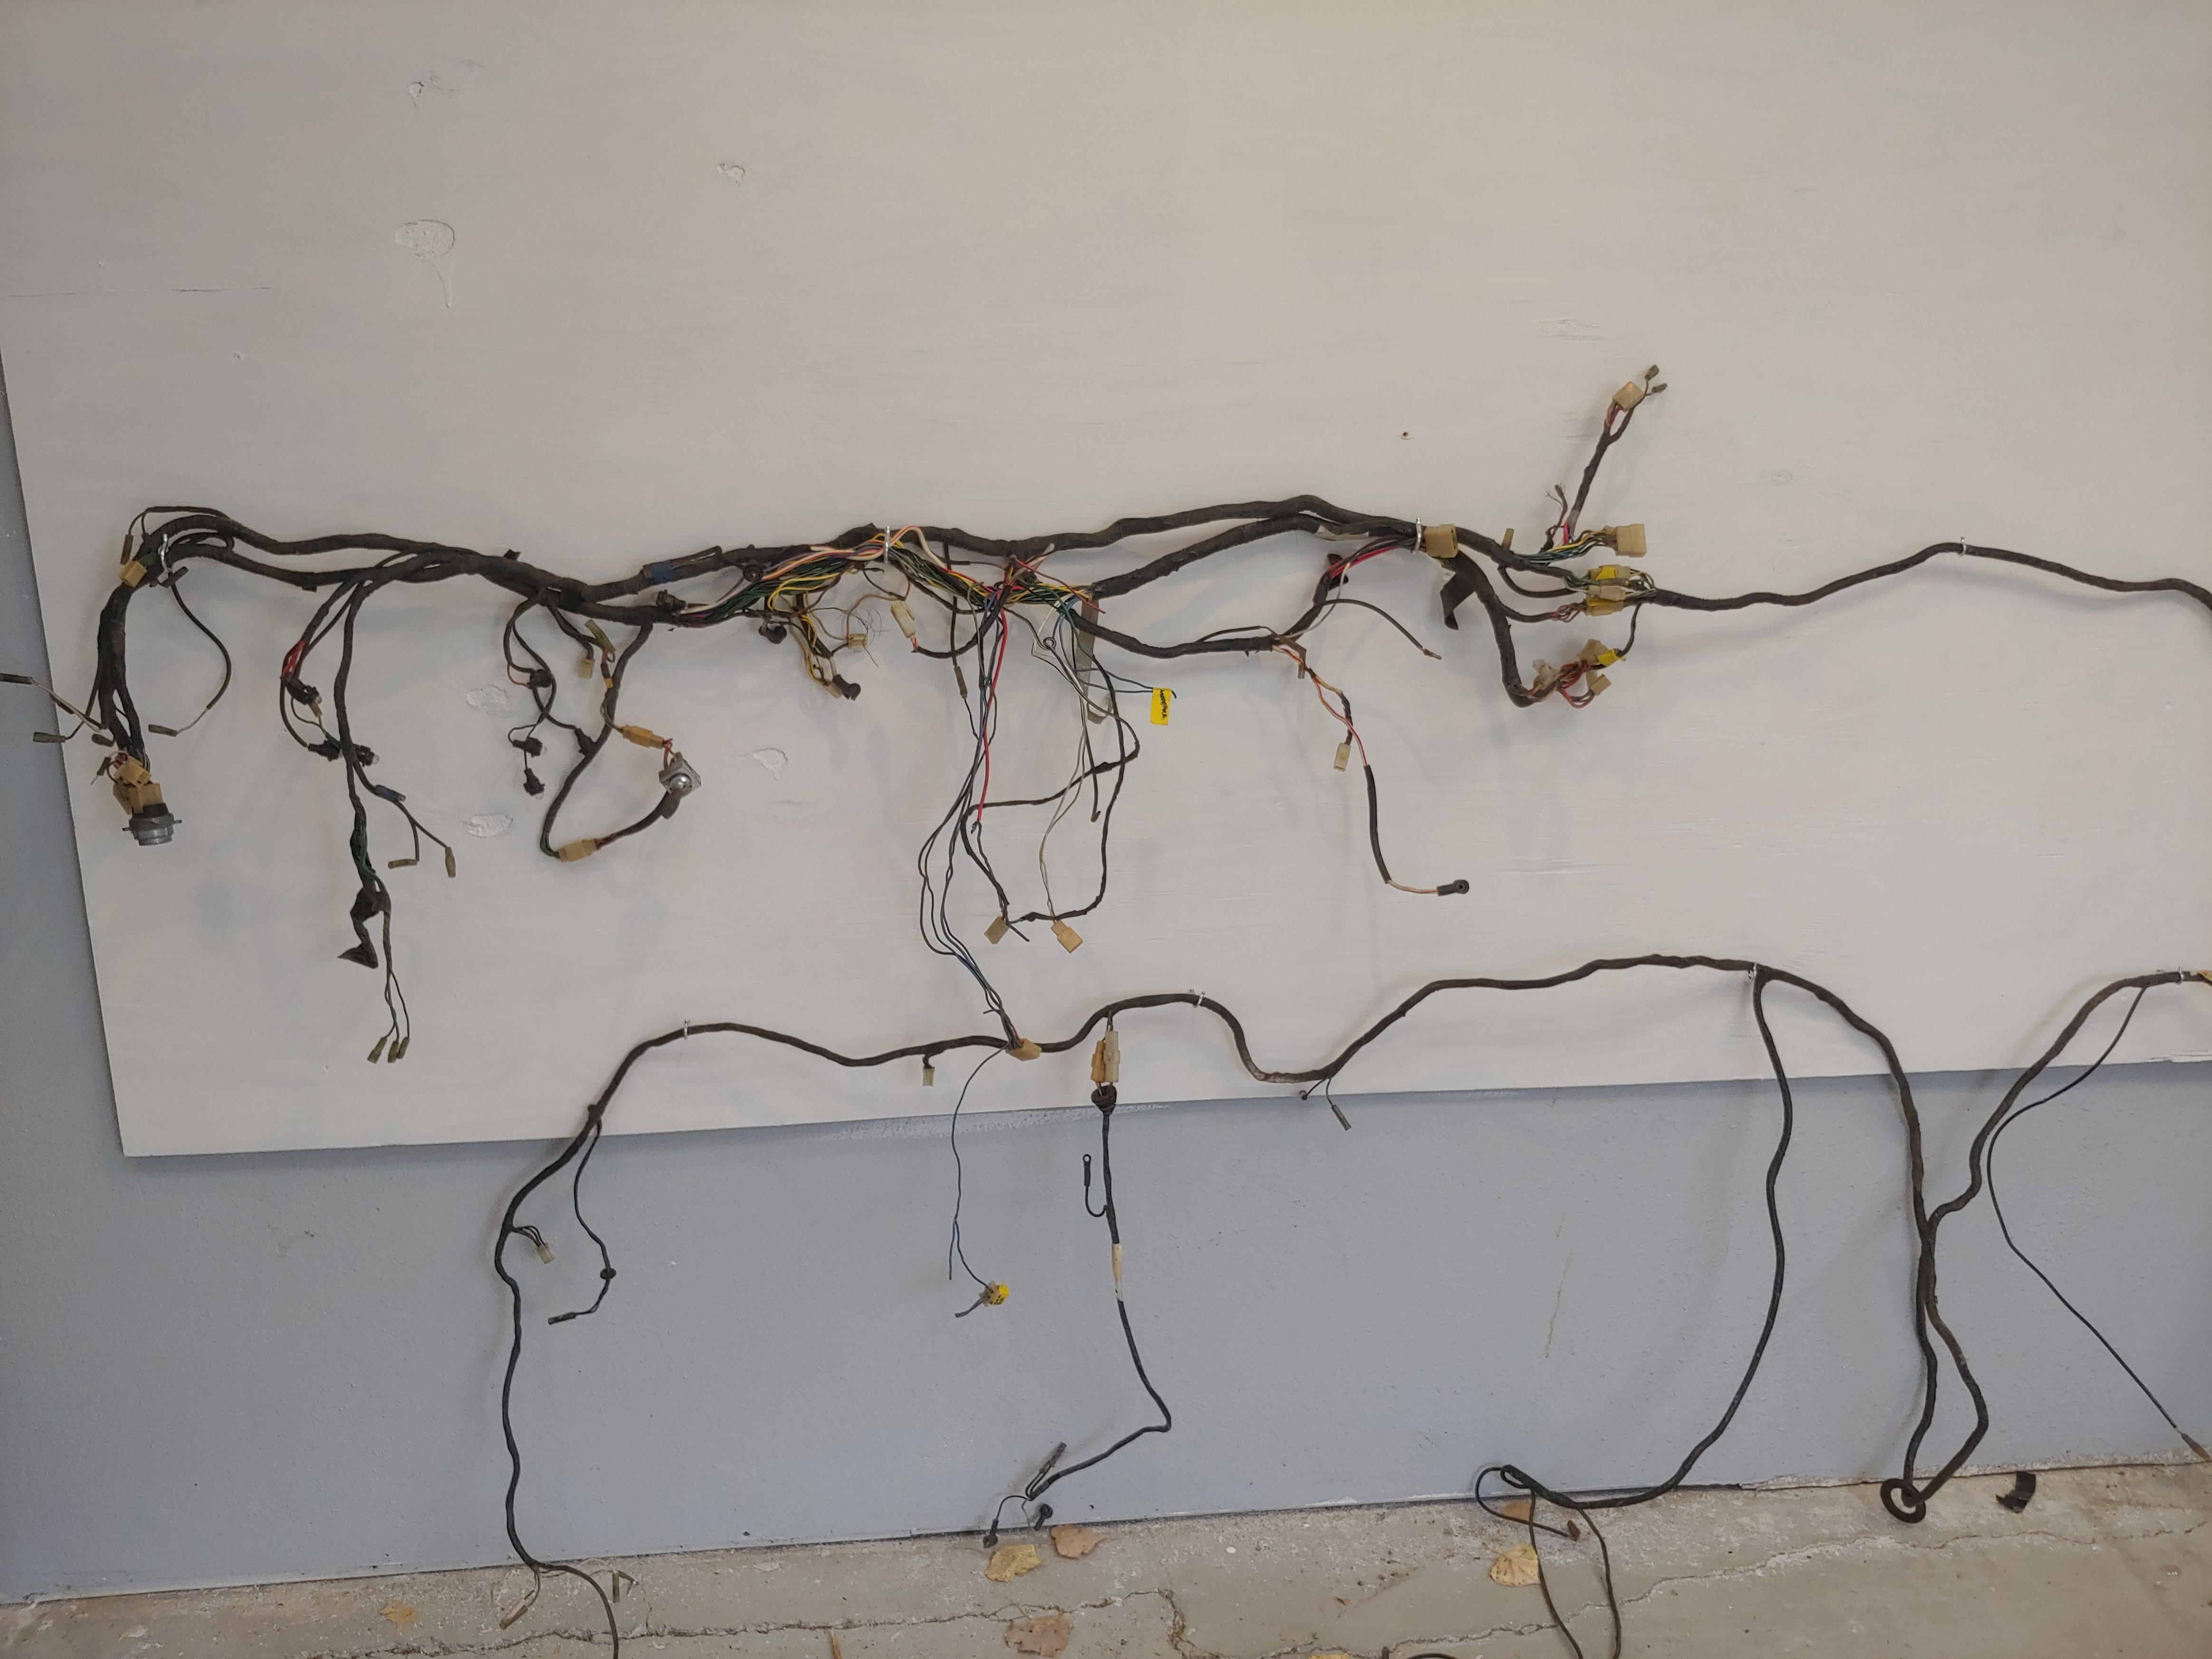
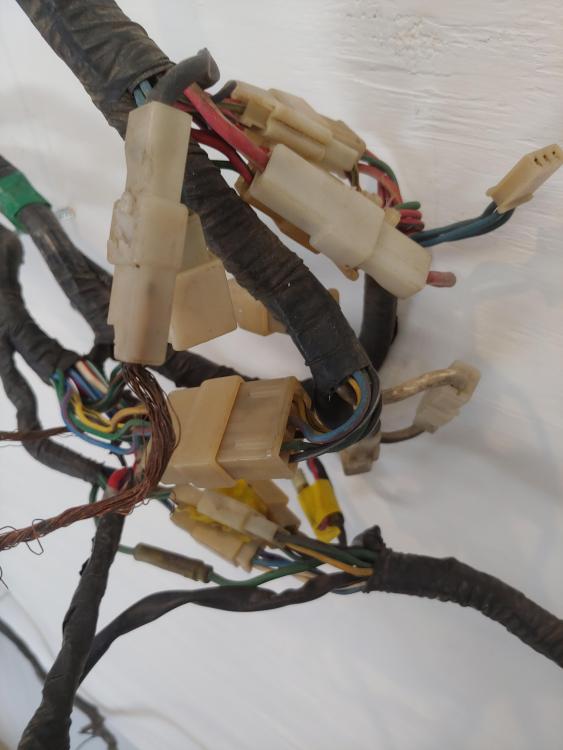
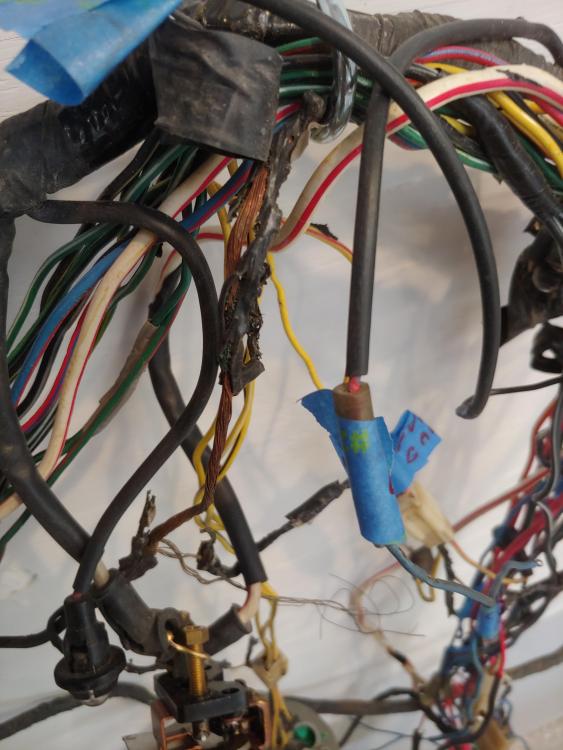
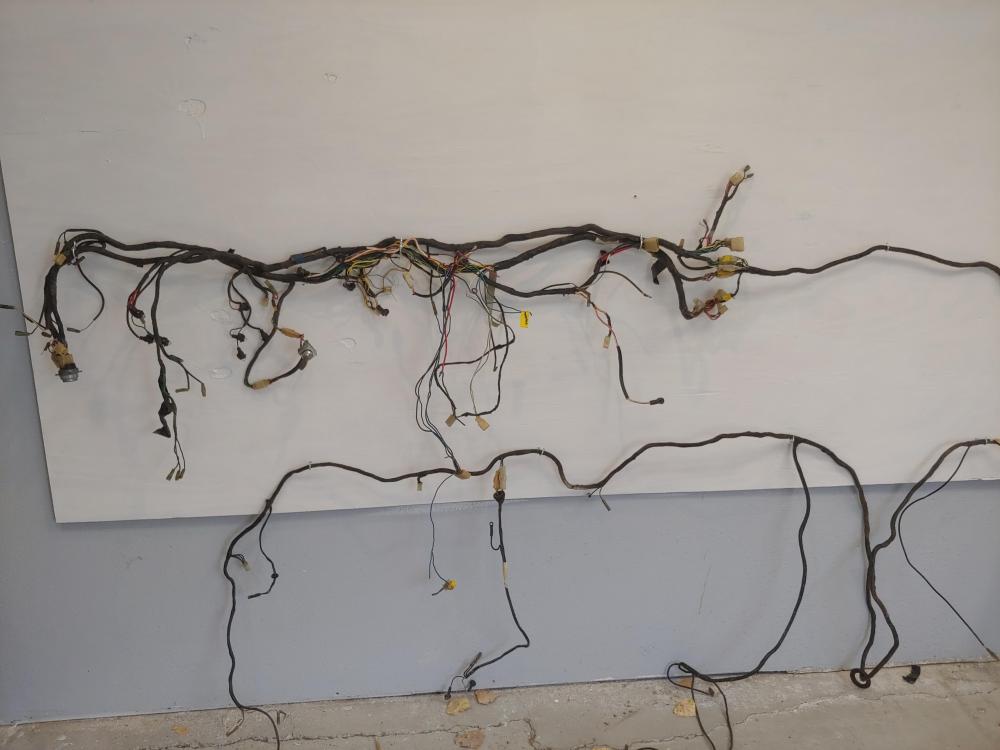
1 pointPOs had done some wiring for radios and amps. Melt down for main ground engine and dash harness. They preferred wire nuts to terminals. Fusible links to starter and alternator where removed and wires put back with wire nuts. I cannot believe datsun used all those plugs for the three harnesses to come together. That me will cause a problem,to much resistance. Made a harness board to make it easy to work on. 1. is going though all the wires with my fluke meter to check for damage and the locations of switches etc.Tagging the connectors with blue tape 2. making a power relay station for engine compartment. 3. removing all those connections 4. I may go to a bulkhead fitting for engine to body harness 5. Fuse box was total junk so installing a blue sea unit maybe in right kick panel I can post more as I build this harness if you would like

 1 point
 -
1 pointSpeaking of that, I plan to powder coat my cross member. Is gloss or satin the closest shade to original? My control arms are aftermarket and look gloss. I may go with that.1 point
-
Great purchase! It appears to be an "oiling cam" so you'll need those block offs. here's some specs from our friend @240260280 https://www.atlanticz.ca/zclub/techtips/cam/index.htm1 point
-
Let me see what that one sales for and then I may go get the one in North Alabama I posted a few days ago. A little work and I could get that junkyard car looking good if the motor and drivetrain are as stated.1 point
-
Yesterday the post officer brought a nice little package to my door: It contains a brand new (NOS) L6 Camshaft for the E88 Head. It is used widely in many L-series cars from what i understoud, but i still have to research all the details. It was for sale not far away and the price was ok, so i thought myself i better secure it... I love the beautiful wrapping with the Nissan wrapping paper, etc... It came with a (separetely sold) Set of Cam oiler blockoff plates and bolts for older externally oiled cams. I still have to check if i need those... It also came with a "Cam bracket machining procedure when replacing with new cam shaft" Manual: Here you see the typical "A" marking: I have a lot of parts on the way, but due to Covid, everytihng is pretty delayed...1 point
-
1 pointHaha! Now that's a possibility I had not considered! Quite possible! I think I've distracted this thread enough...1 point
-
1 point@siteunseen There’s some dudes on YouTube that paint cars with those HF guns.1 point
-
1 pointI'll sell you this core in the pic's (it will need a reaction disc, I shook it but did not hear anything. I may have used it in my Booster I bought from MSA. (also had no disc) been a while now. Then send it to these guys. ( I saw this on FB just now, but it is on OfferUp) They have good reviews. https://offerup.com/item/detail/1070491908/?_branch_match_id=857945268714343482 Or I am sure there are other reputable Datsun booster rebuilders. I would stay away from the chain car parts stores though. IMHO1 point
-
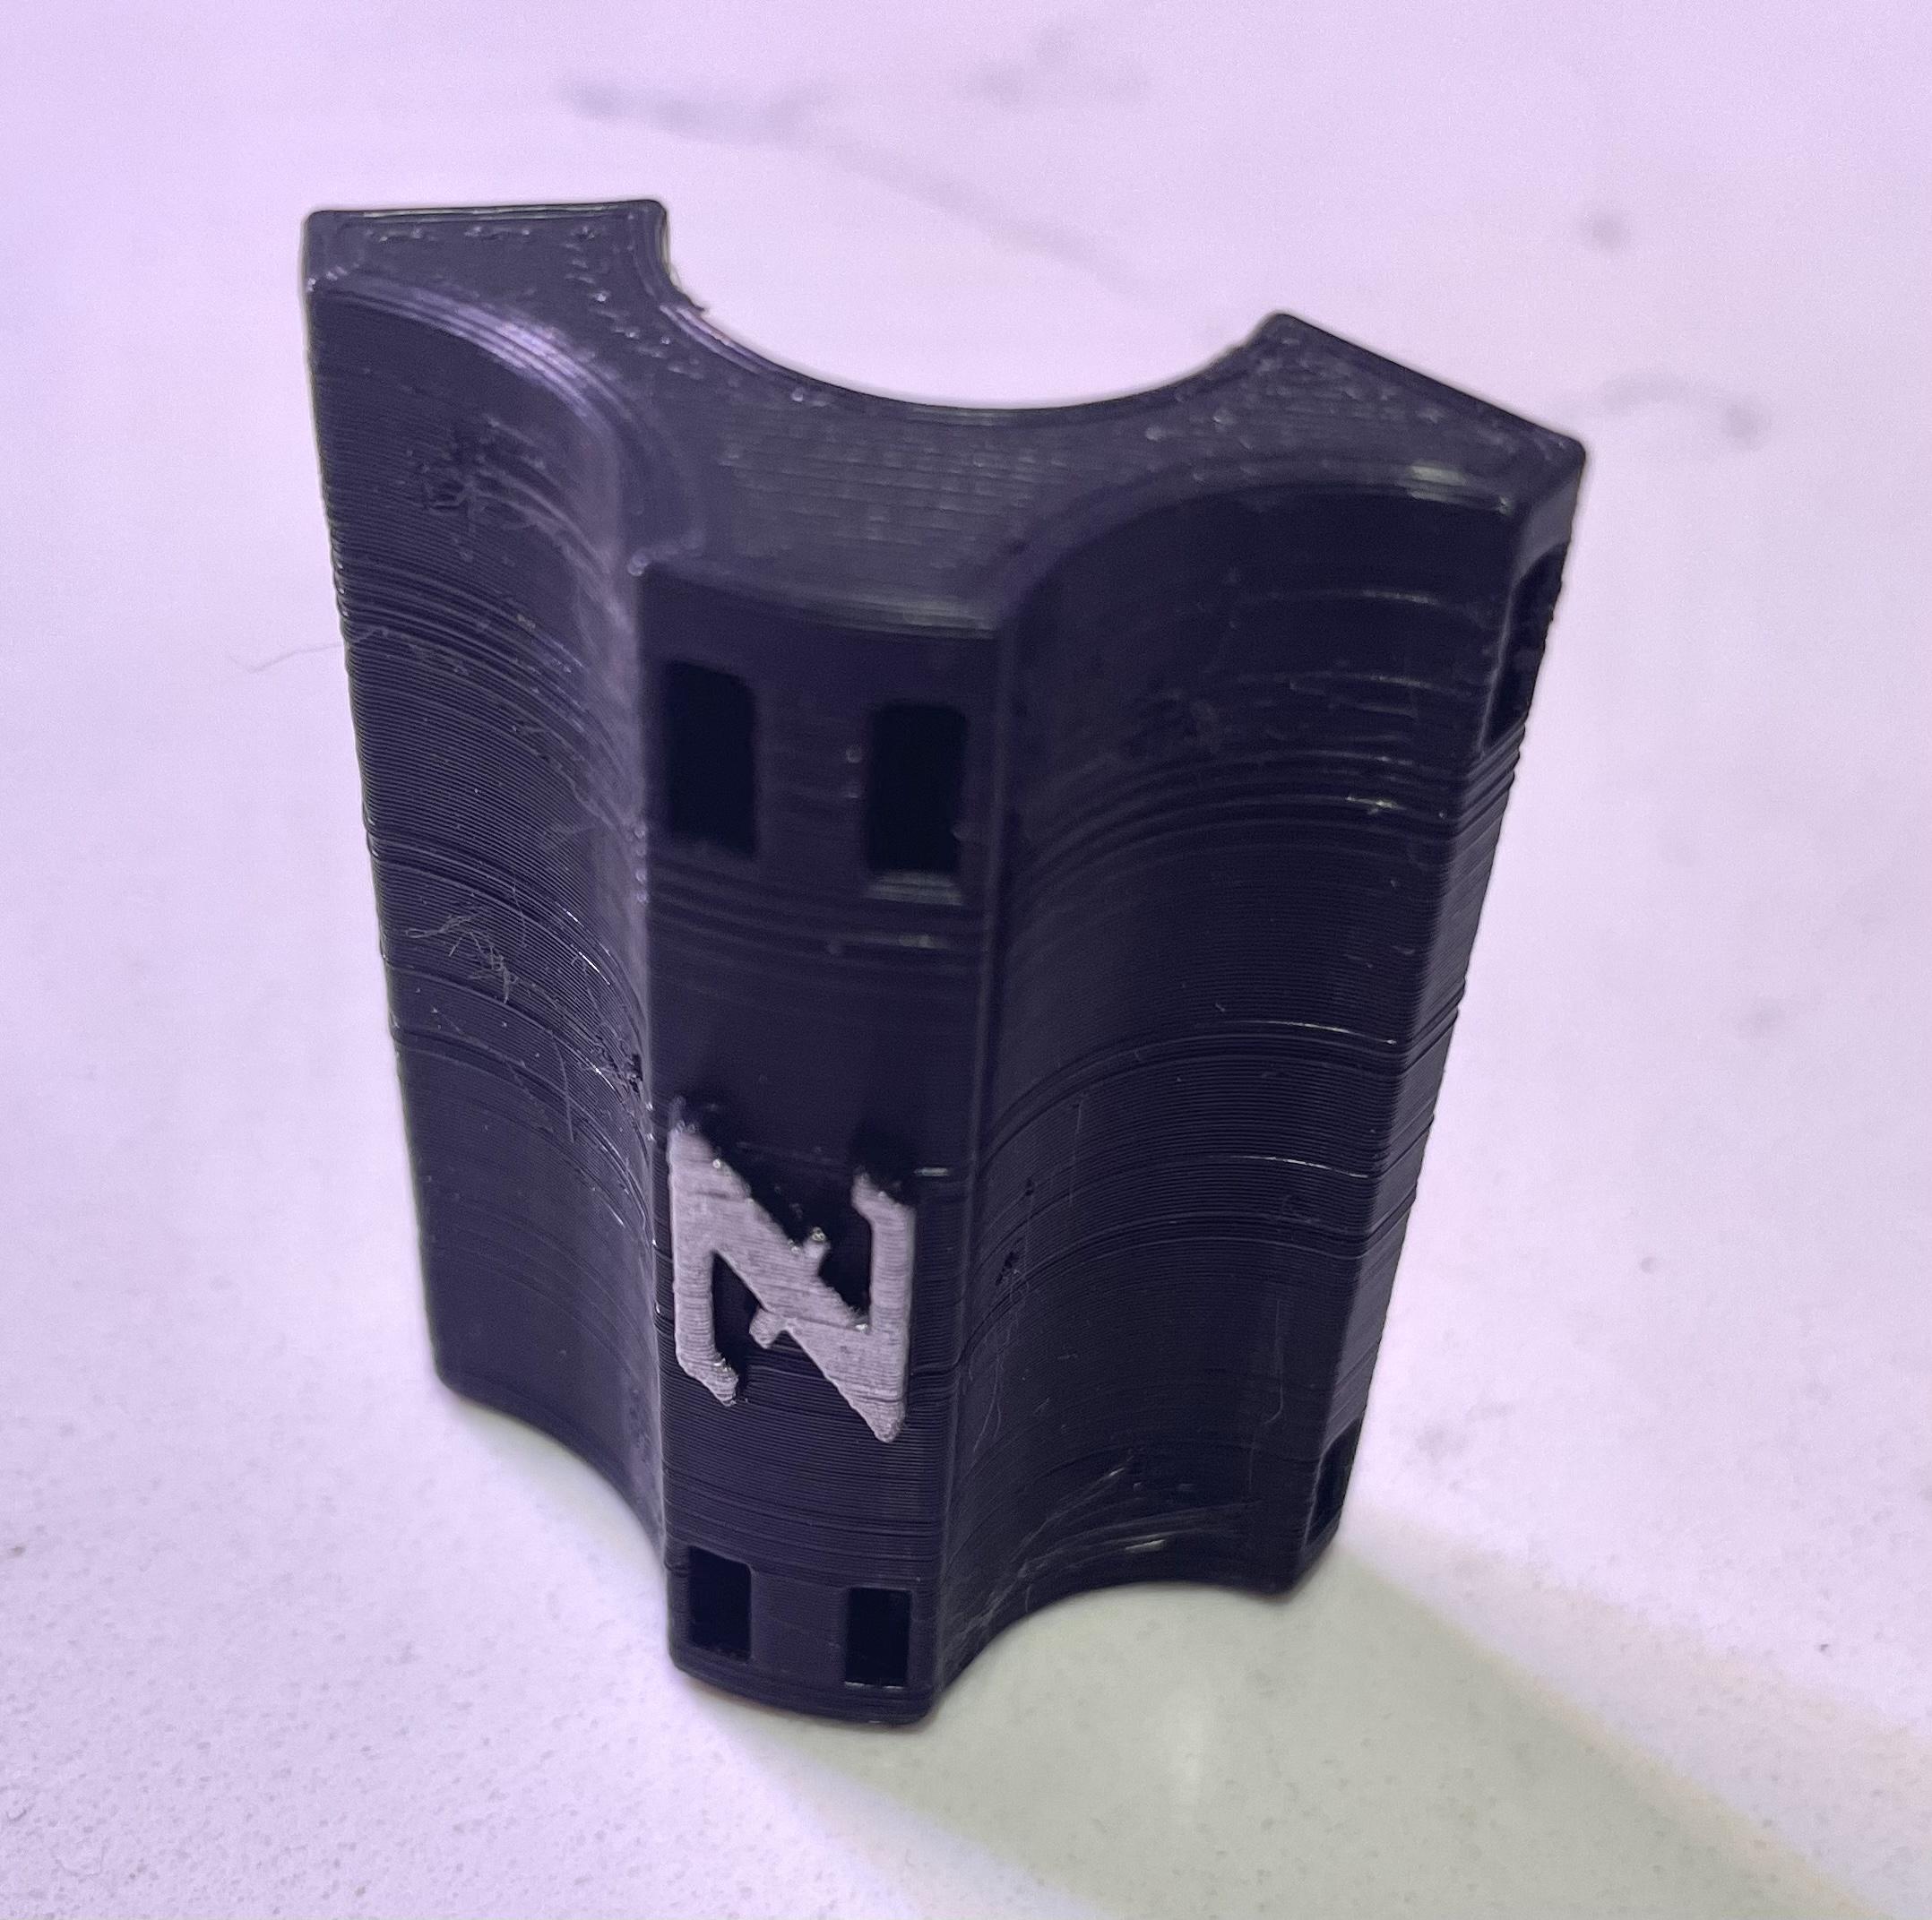
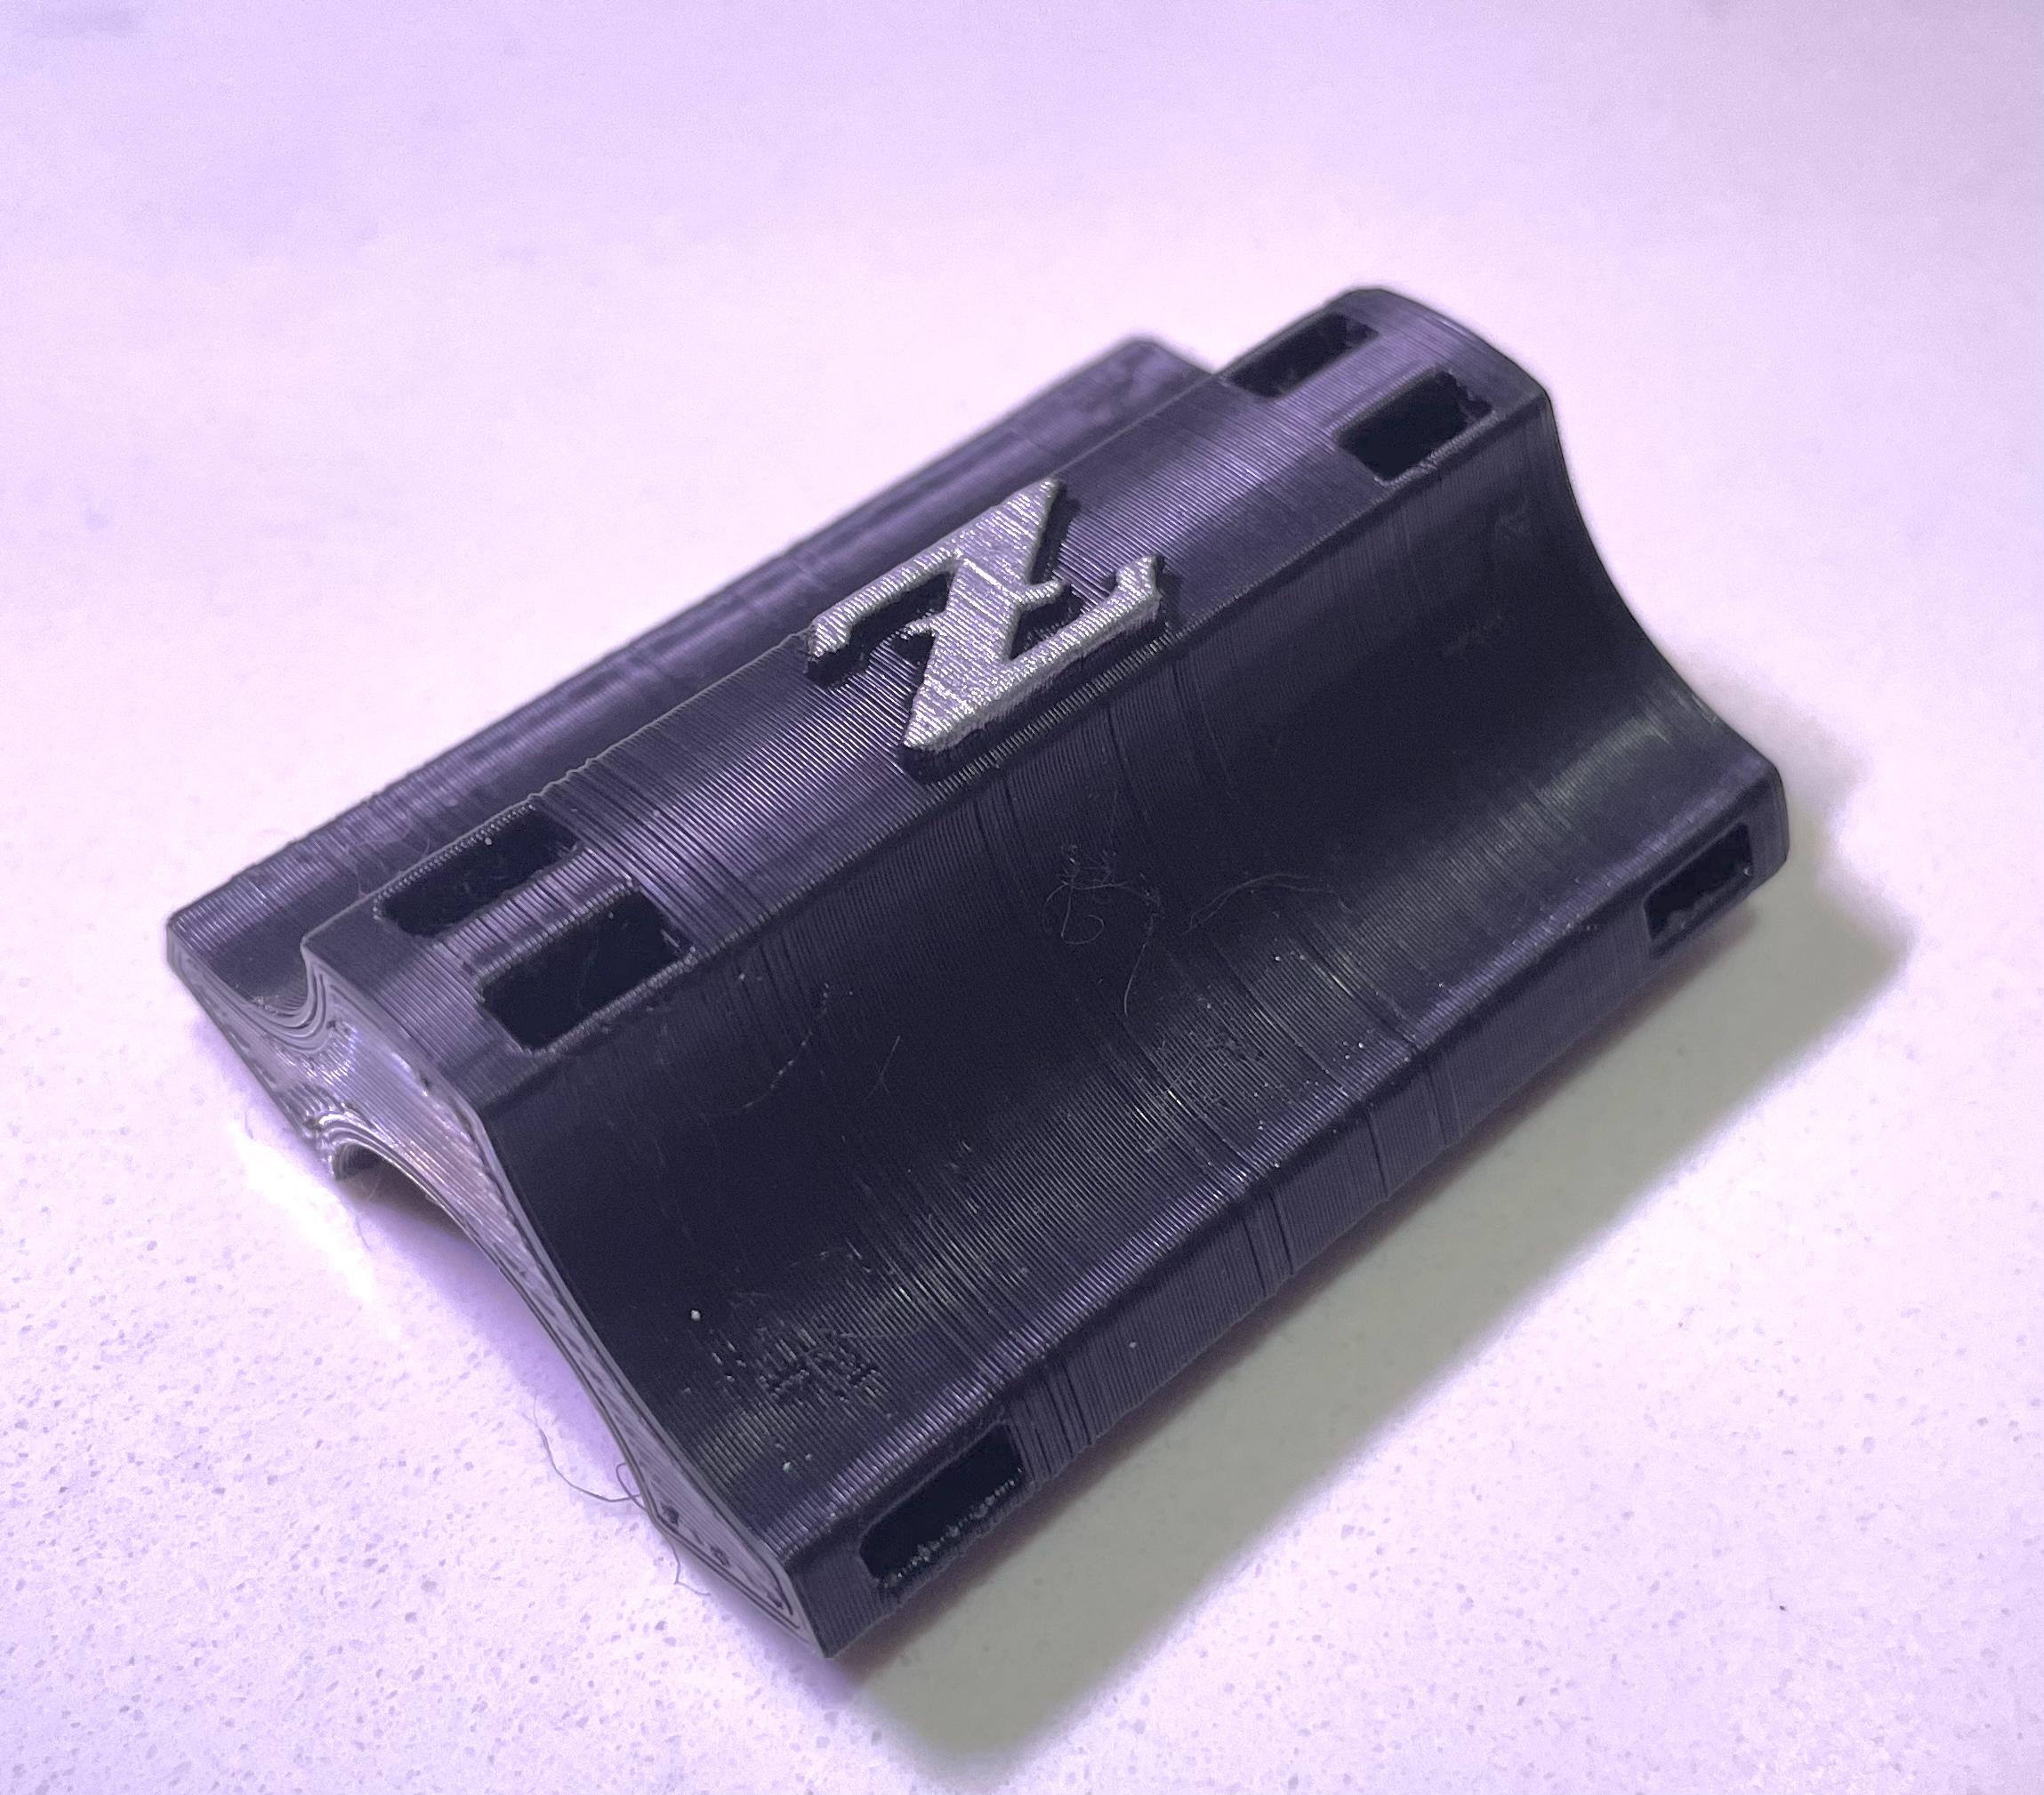
1 pointClose ups of the prototype routing aid. I’m by no means an expert when it comes to printing, but I feel these will be very presentable once installed.

 1 point
 -
Just about cleaned up Sent from my iPhone using Tapatalk1 point
-
Dash to firewall are all M6 1.0 but are machine screws not self tapping, the ones under neath the ends are the same. Even the two in the middle at the trans tunnel (four for 280’s) are all M6 machine. They do have a starter tapered thread at the tip I suppose. The self tappers that hole the vent levers are #8 roughly, quite coarse. Sorry don’t have the exact spec. the four heater panel are M4 x 0.7 about 30 mm long, 25 at least. Run a tap into the threads on the dash to clean them up. They like to get cross threaded and nasty.1 point
-
1 pointIn the middle of sub 10 F temperatures, been working on the routings for the AC hoses. Being one of the very few things on the car that's not original, I wanted to do the AC installation with as few permanent cut ups to the car as possible. I plan on routing the hoses down the passenger frame rail so that they'll be tucked away and not as much of an eye sore as the dealer setup was previously. To do this, I created these mounting saddles that I can zip tie over the electrical harness, and will also saddle each of the lines. 3D printed two to rough-in the concept. I think it'll work out nicely with a few more.
 1 point
 -
1 pointNissan split the wiring harness up into 3 units for ease of installation on the assembly line, if the connectors are clean and not corroded the resistance will be minimal.1 point