Leaderboard
-
motorman7
 Subscriber
 5Points2,228Posts
 -
Pinbill
Free Member4Points107Posts -

ConVerTT
Free Member2Points422Posts -
grannyknot
Free Member2Points5,158Posts


Popular Content
Showing content with the highest reputation on 07/06/2019 in all areas
-
5 pointsShe's alive! Not sure if this video will download but will give it a try. Looks like I have an exhaust leak at the mainfold/downpipe interface. Otherwise, not bad out of the gate with minimal adjustments so far. Surprisingly , the only leak( so far) was the return fuel line near the gas tank. 20190705_135059.mp45 points
-
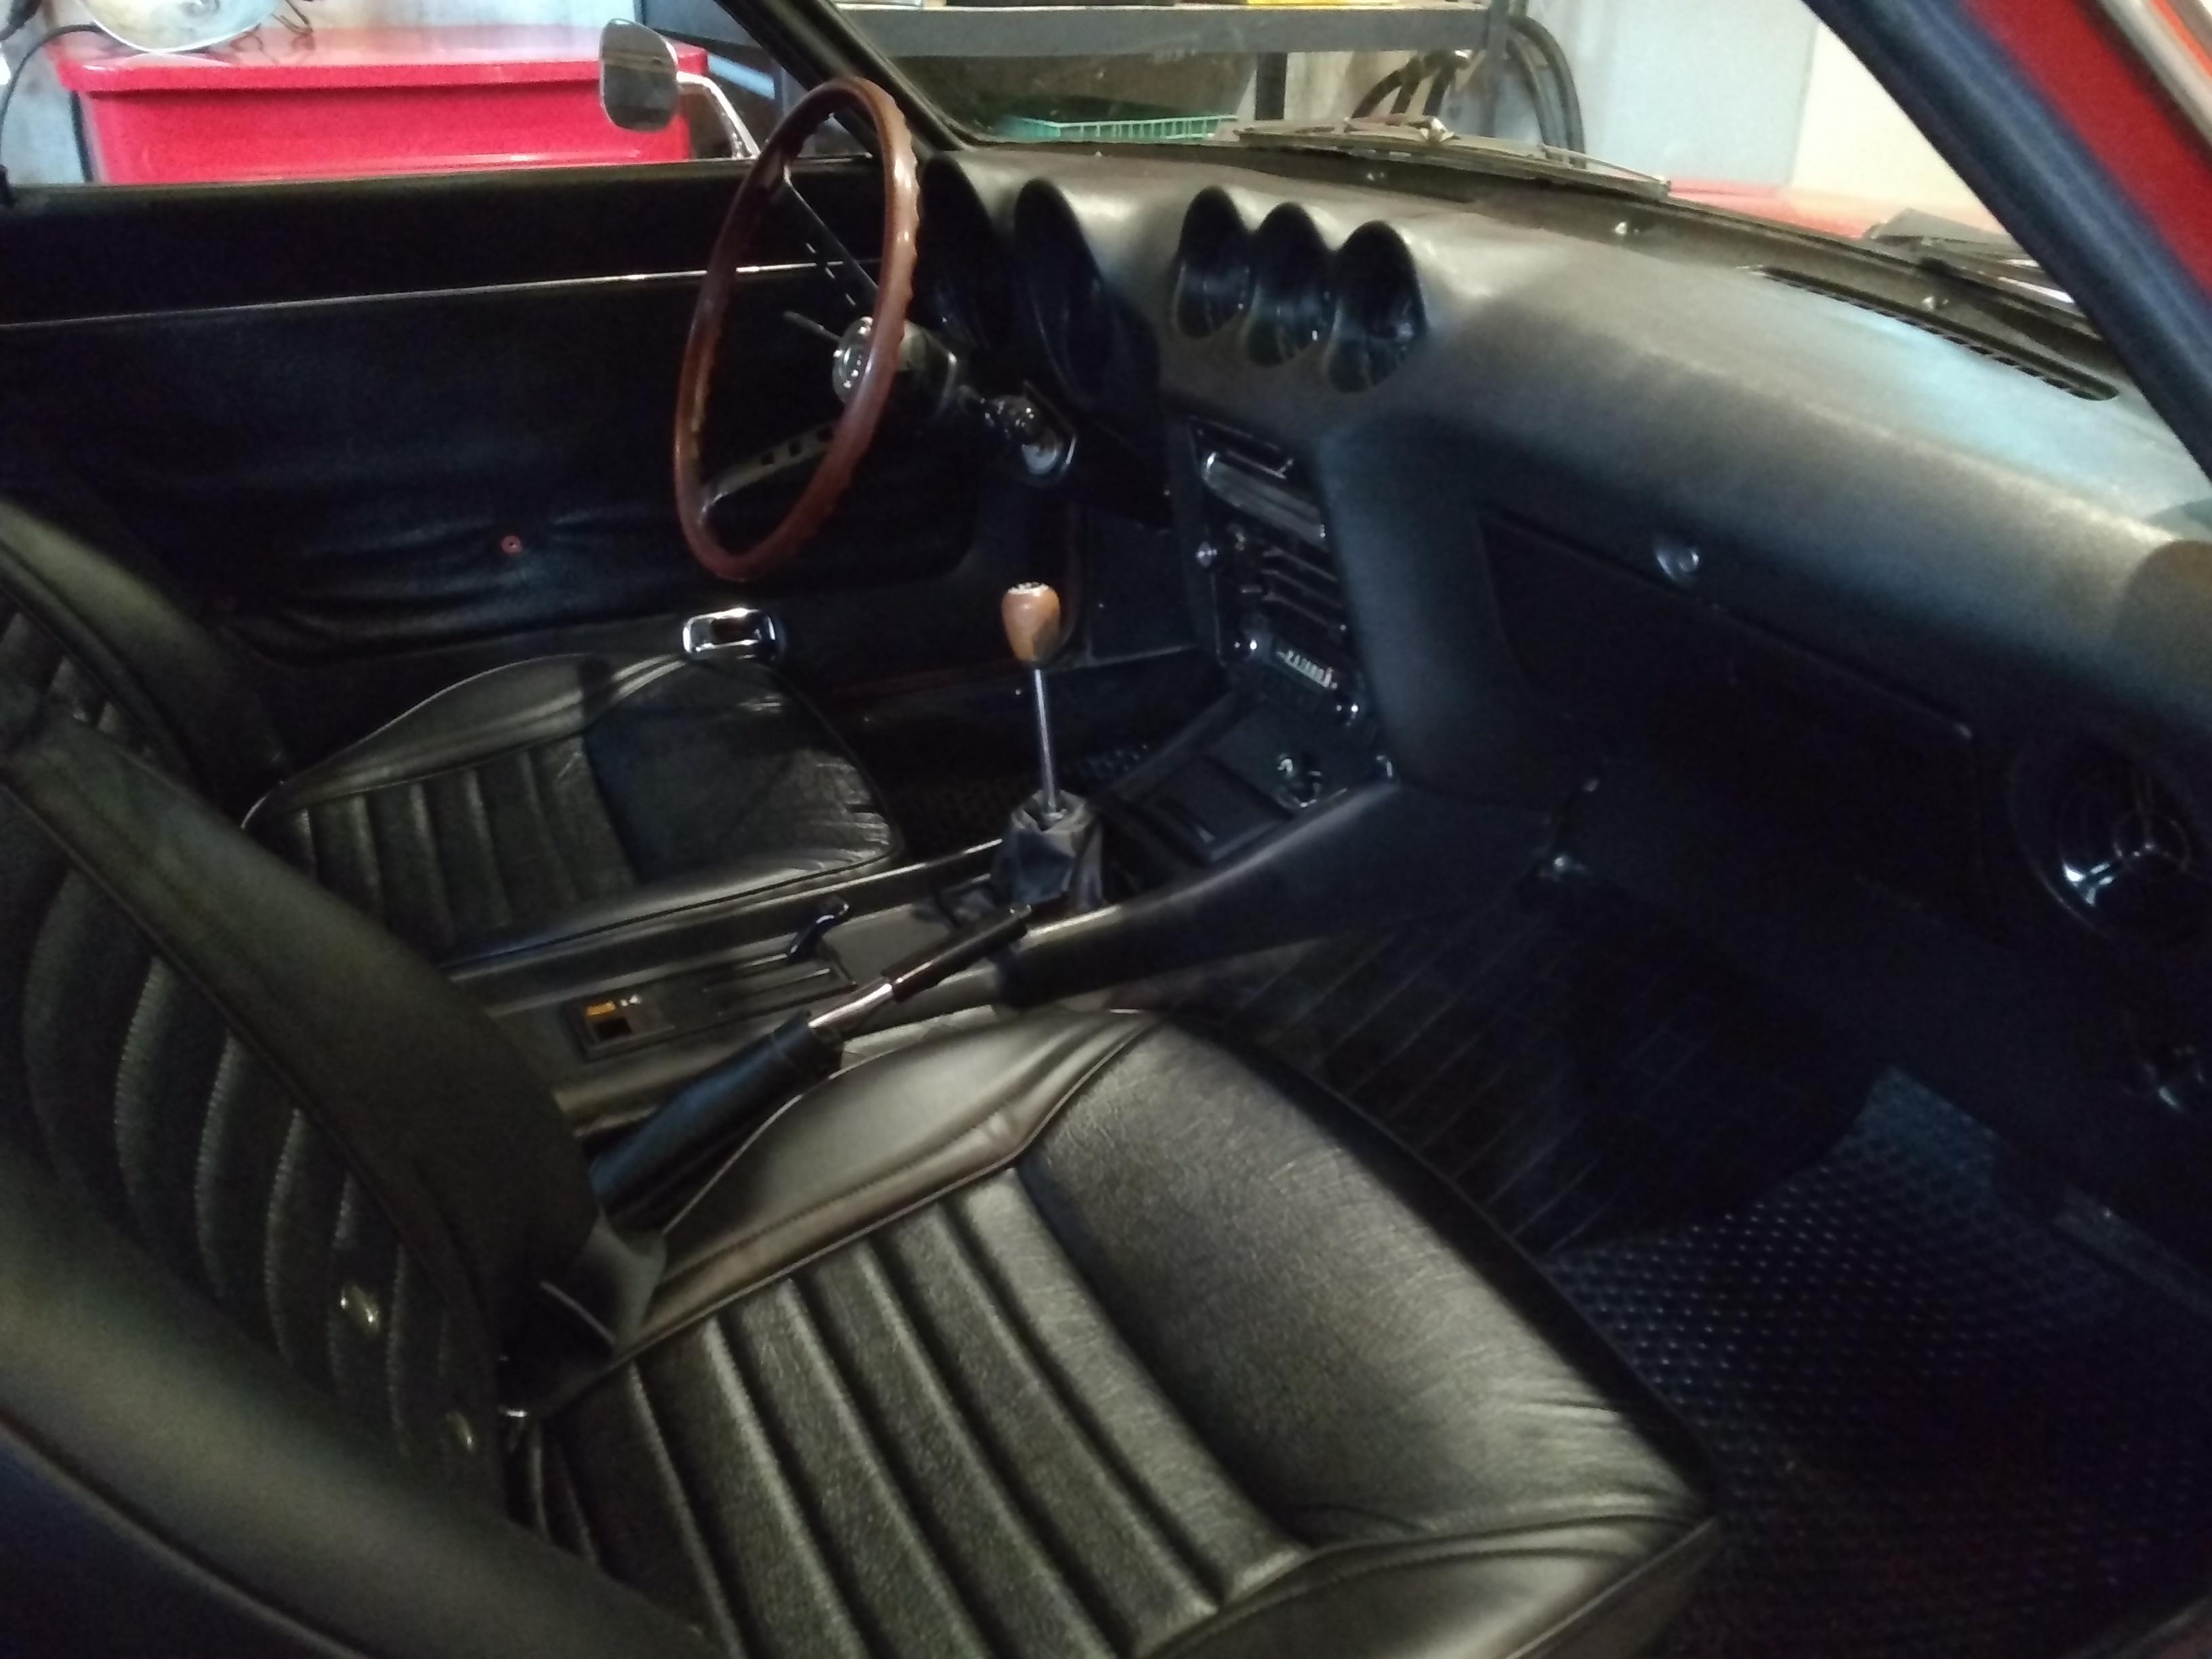
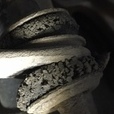
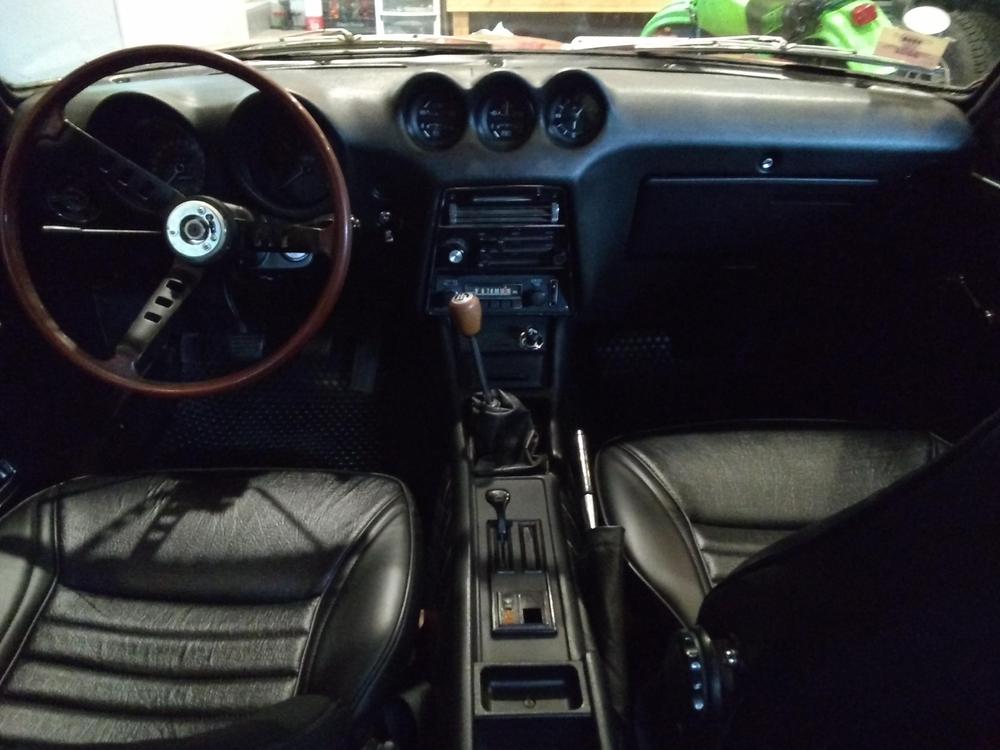
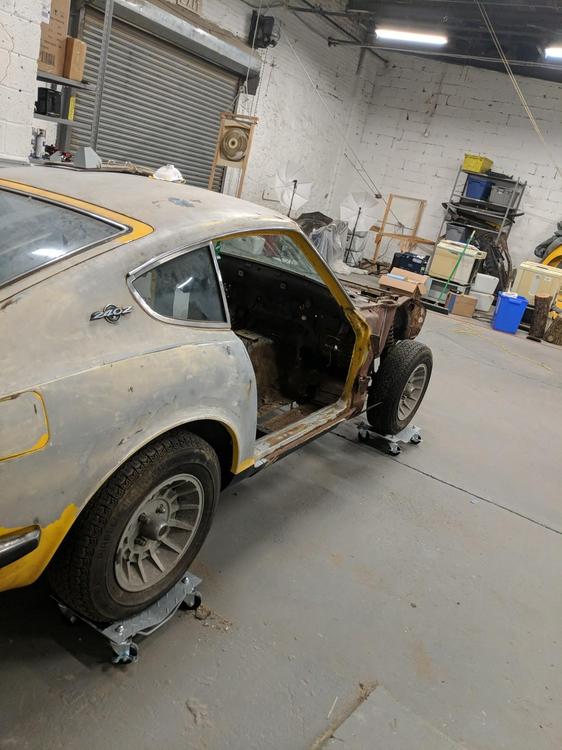
2 pointsUpdate! And a few questions. Put in some work on the interior. Cleaned it and got the drivers side window working. Put in new clips on the door card while I was in there. Picked up the seats from the upholsterer and installed them. The seat covers and foam from are from MSA. I was impressed with the quality. I ordered a window crank and door pulls from JDM parts and they were garbage. They are getting returned. I hope to find a better quality replacement for these parts. Had the car out today. It was a nice day for a drive. I took the car up I70 and it was hot outside. I have been able to shift up and downshift into third without grinding. I have to let the RPMs die down before I up shift and I have to double clutch at low rpms. I will still change out the fluid. I am getting excited to rebuild the suspension and steering. It rides like a 50 year old car. I wanted to test the power going up the hill and check the temp. It did well. The gauge got almost to the P. It is usually between the M and P during regular driving. I don't always trust old gauges and senders but I think I am ok. The only way to know for sure is with an thermometer. I attached a pic of the transmission shift seal. It is leaking pretty good. The fluid level is correct. Also, it looks like the trans is leaking from the seams where the trans splits. Is that a common leak spot. Do I need to drop the trans to fix those two leaks? Are the differentials in these cars noisy? Mine has a bit of a whine above 60mph. I changed the gear oil to redline and the old stuff looked good when I drained it. Thanks again for all the responses. Bill

 2 points
 -
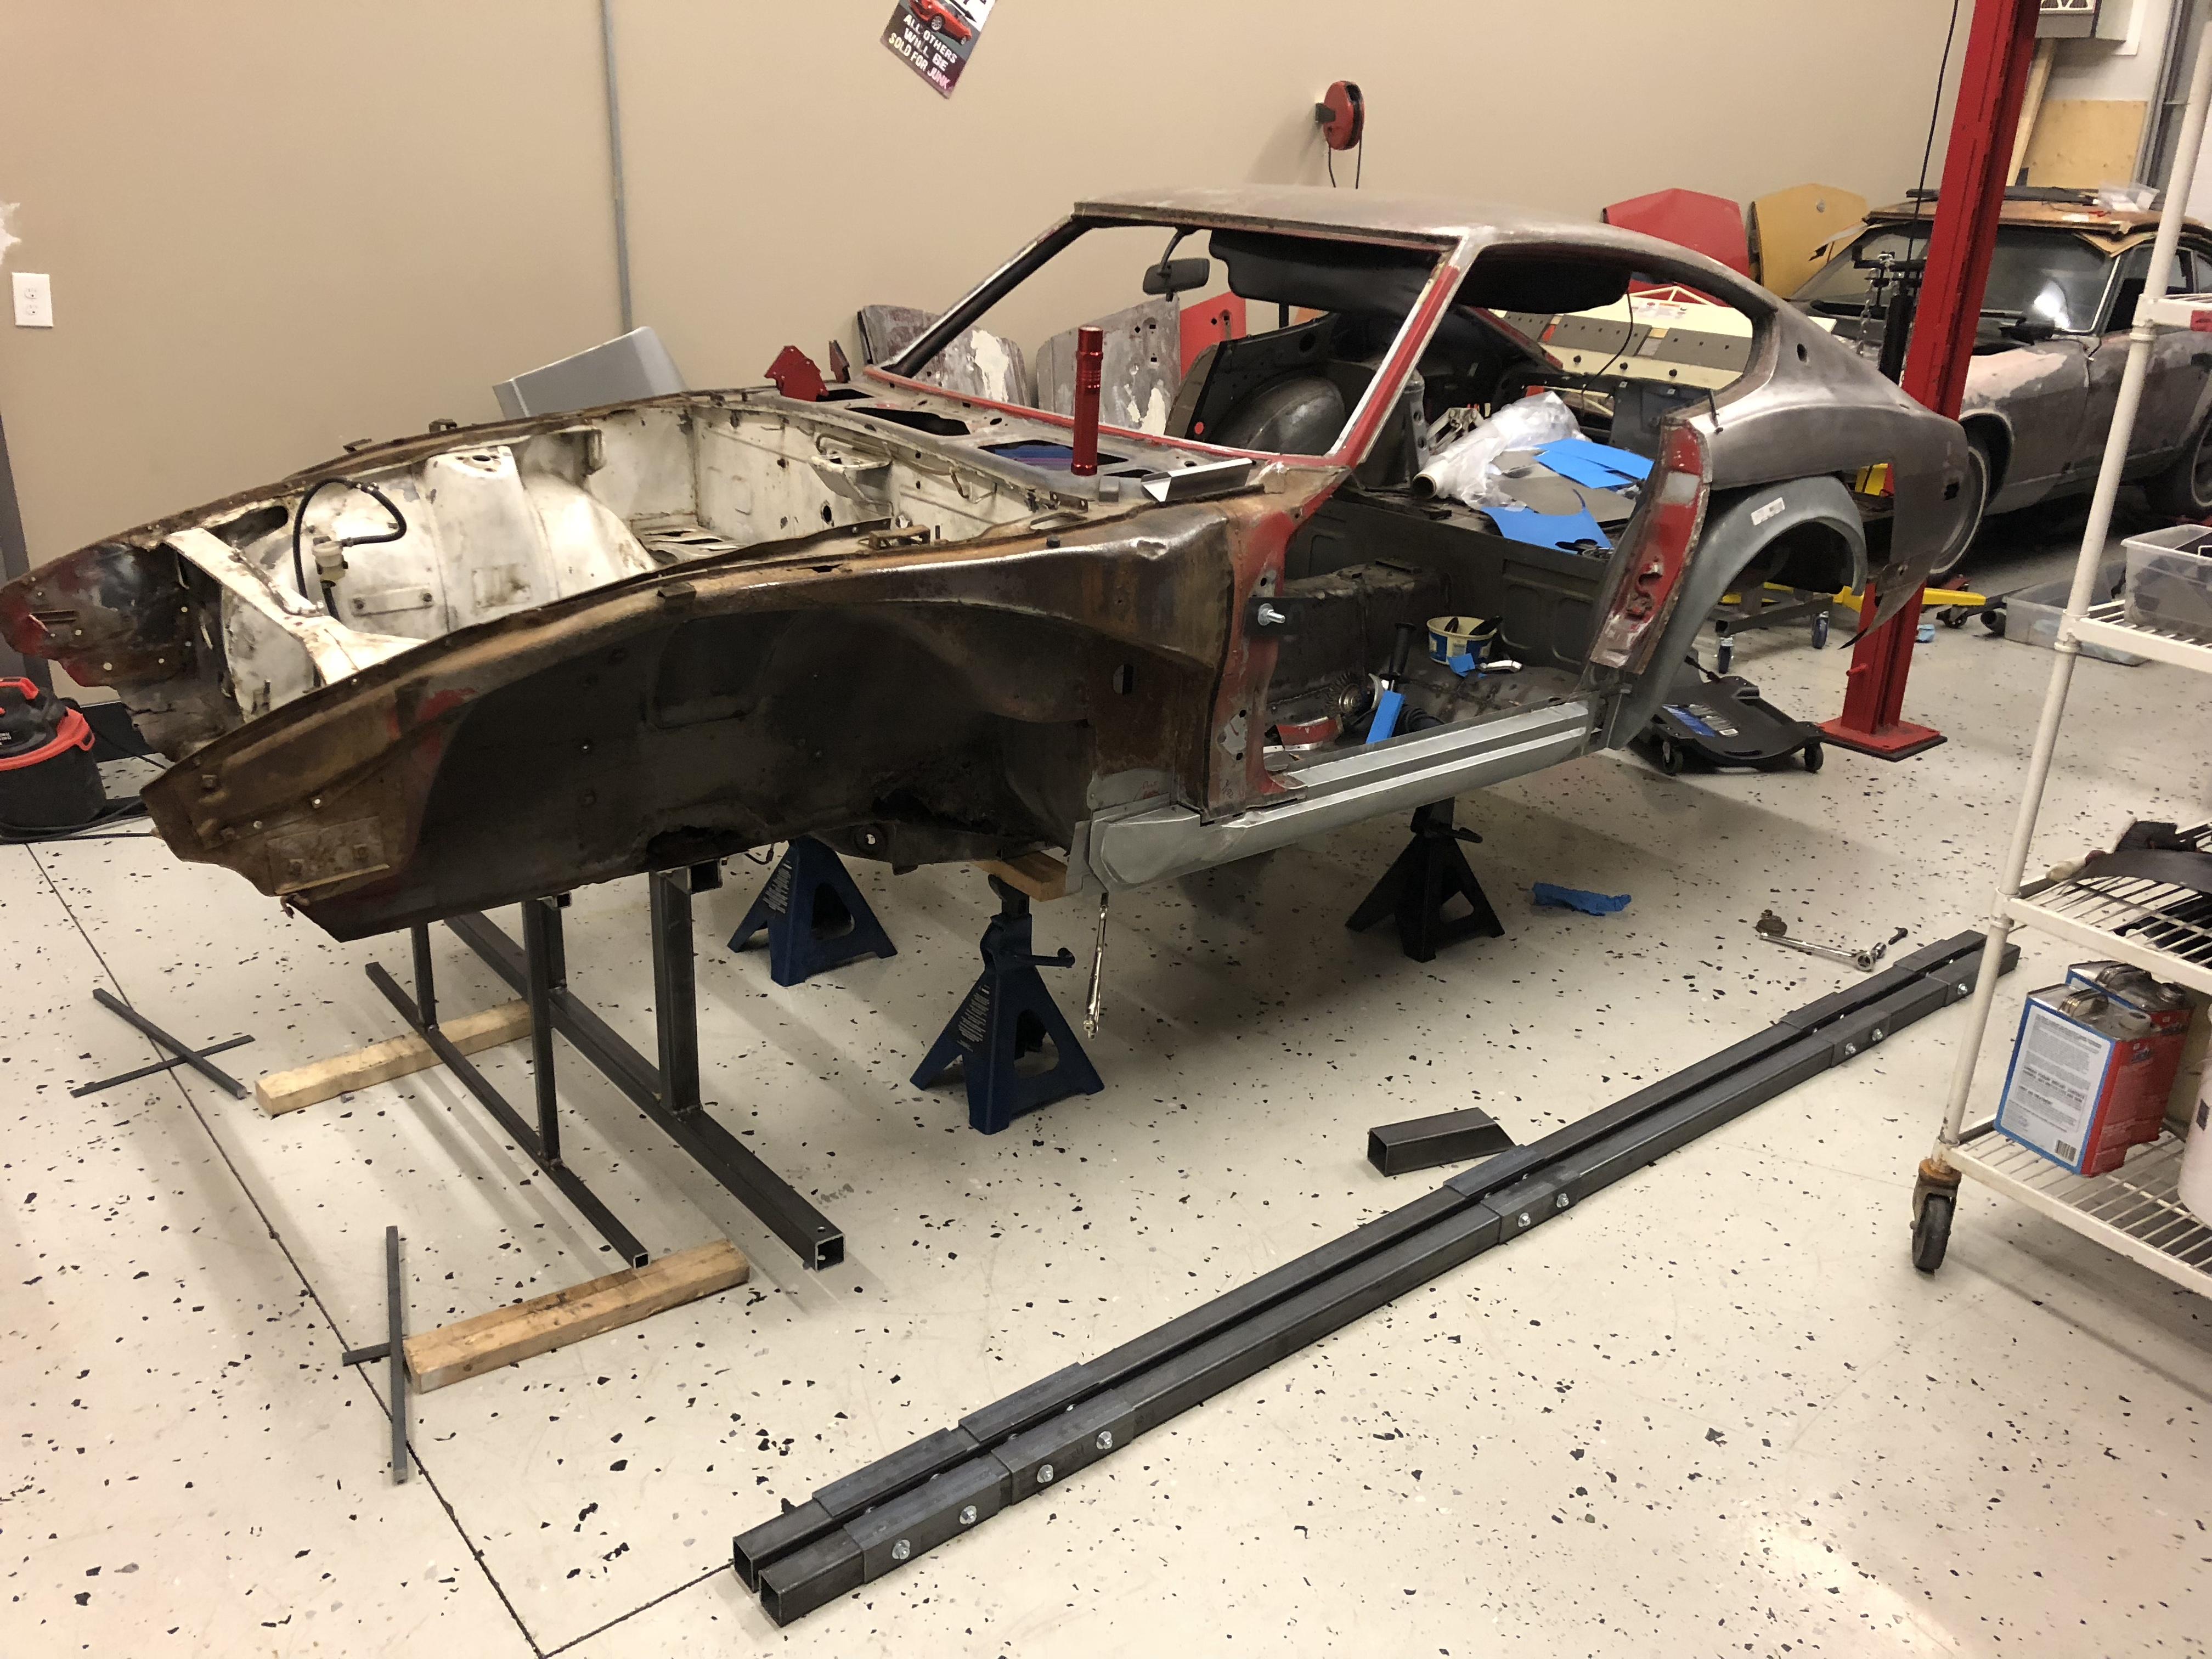
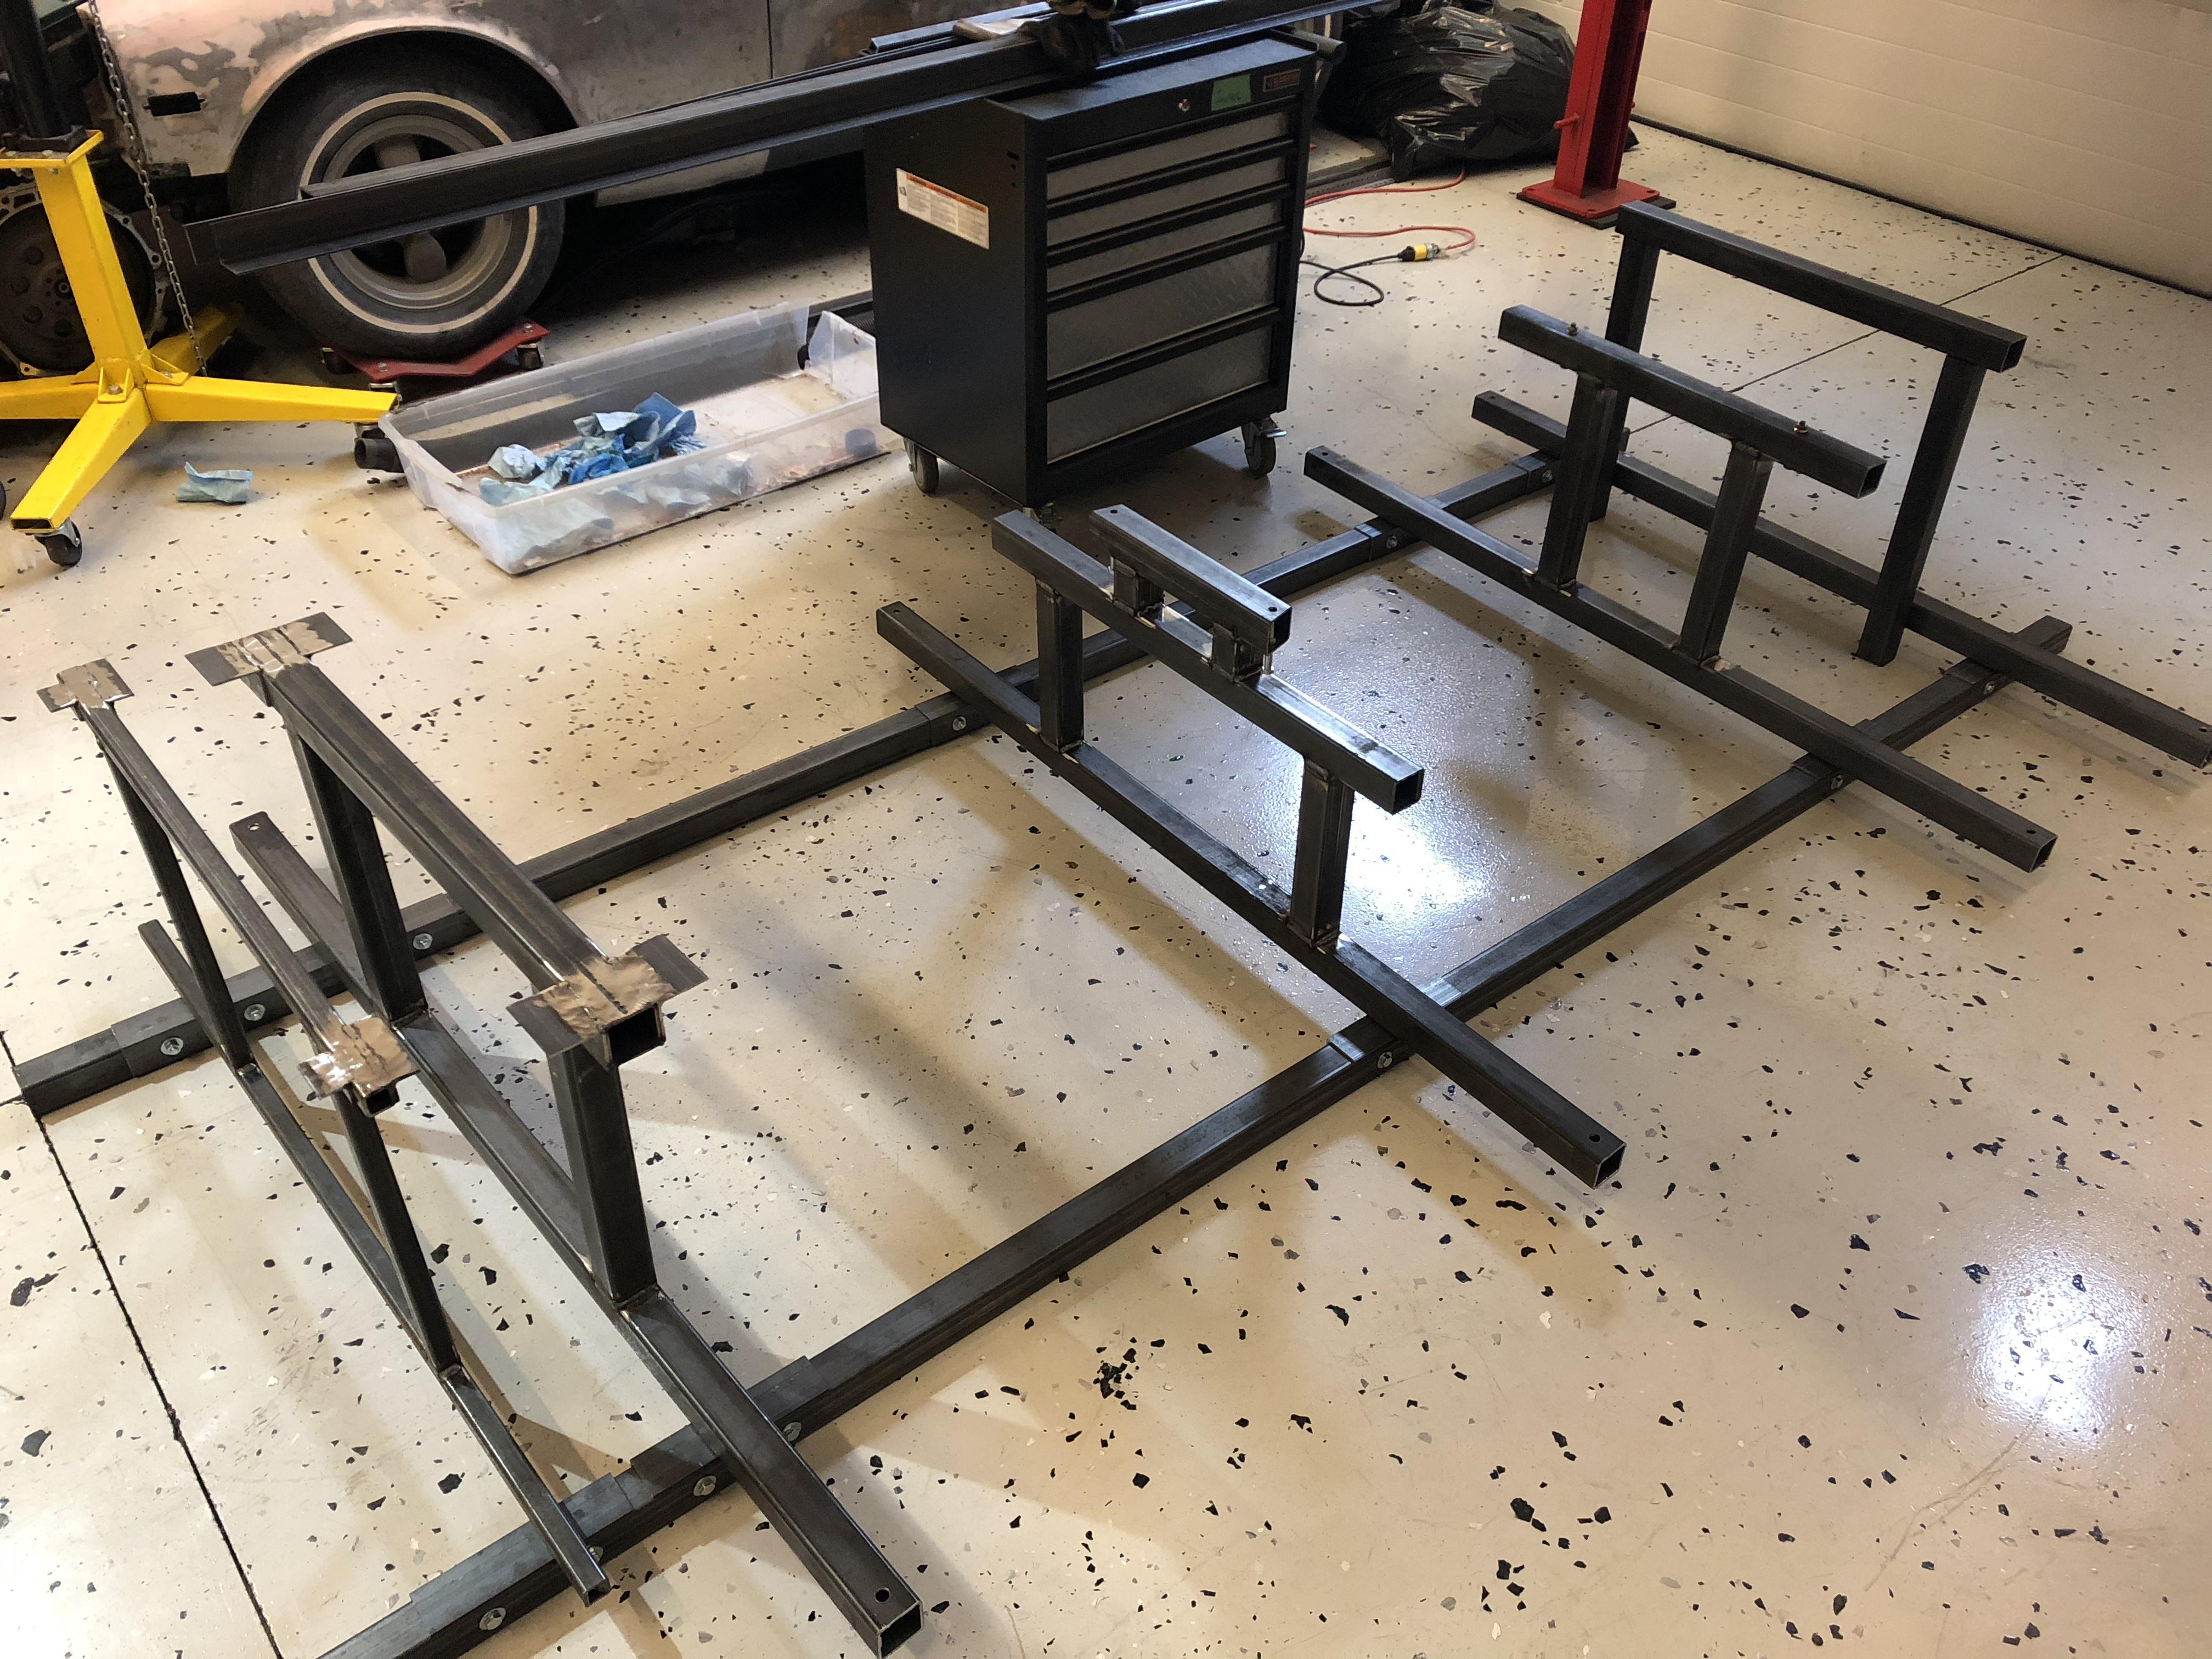
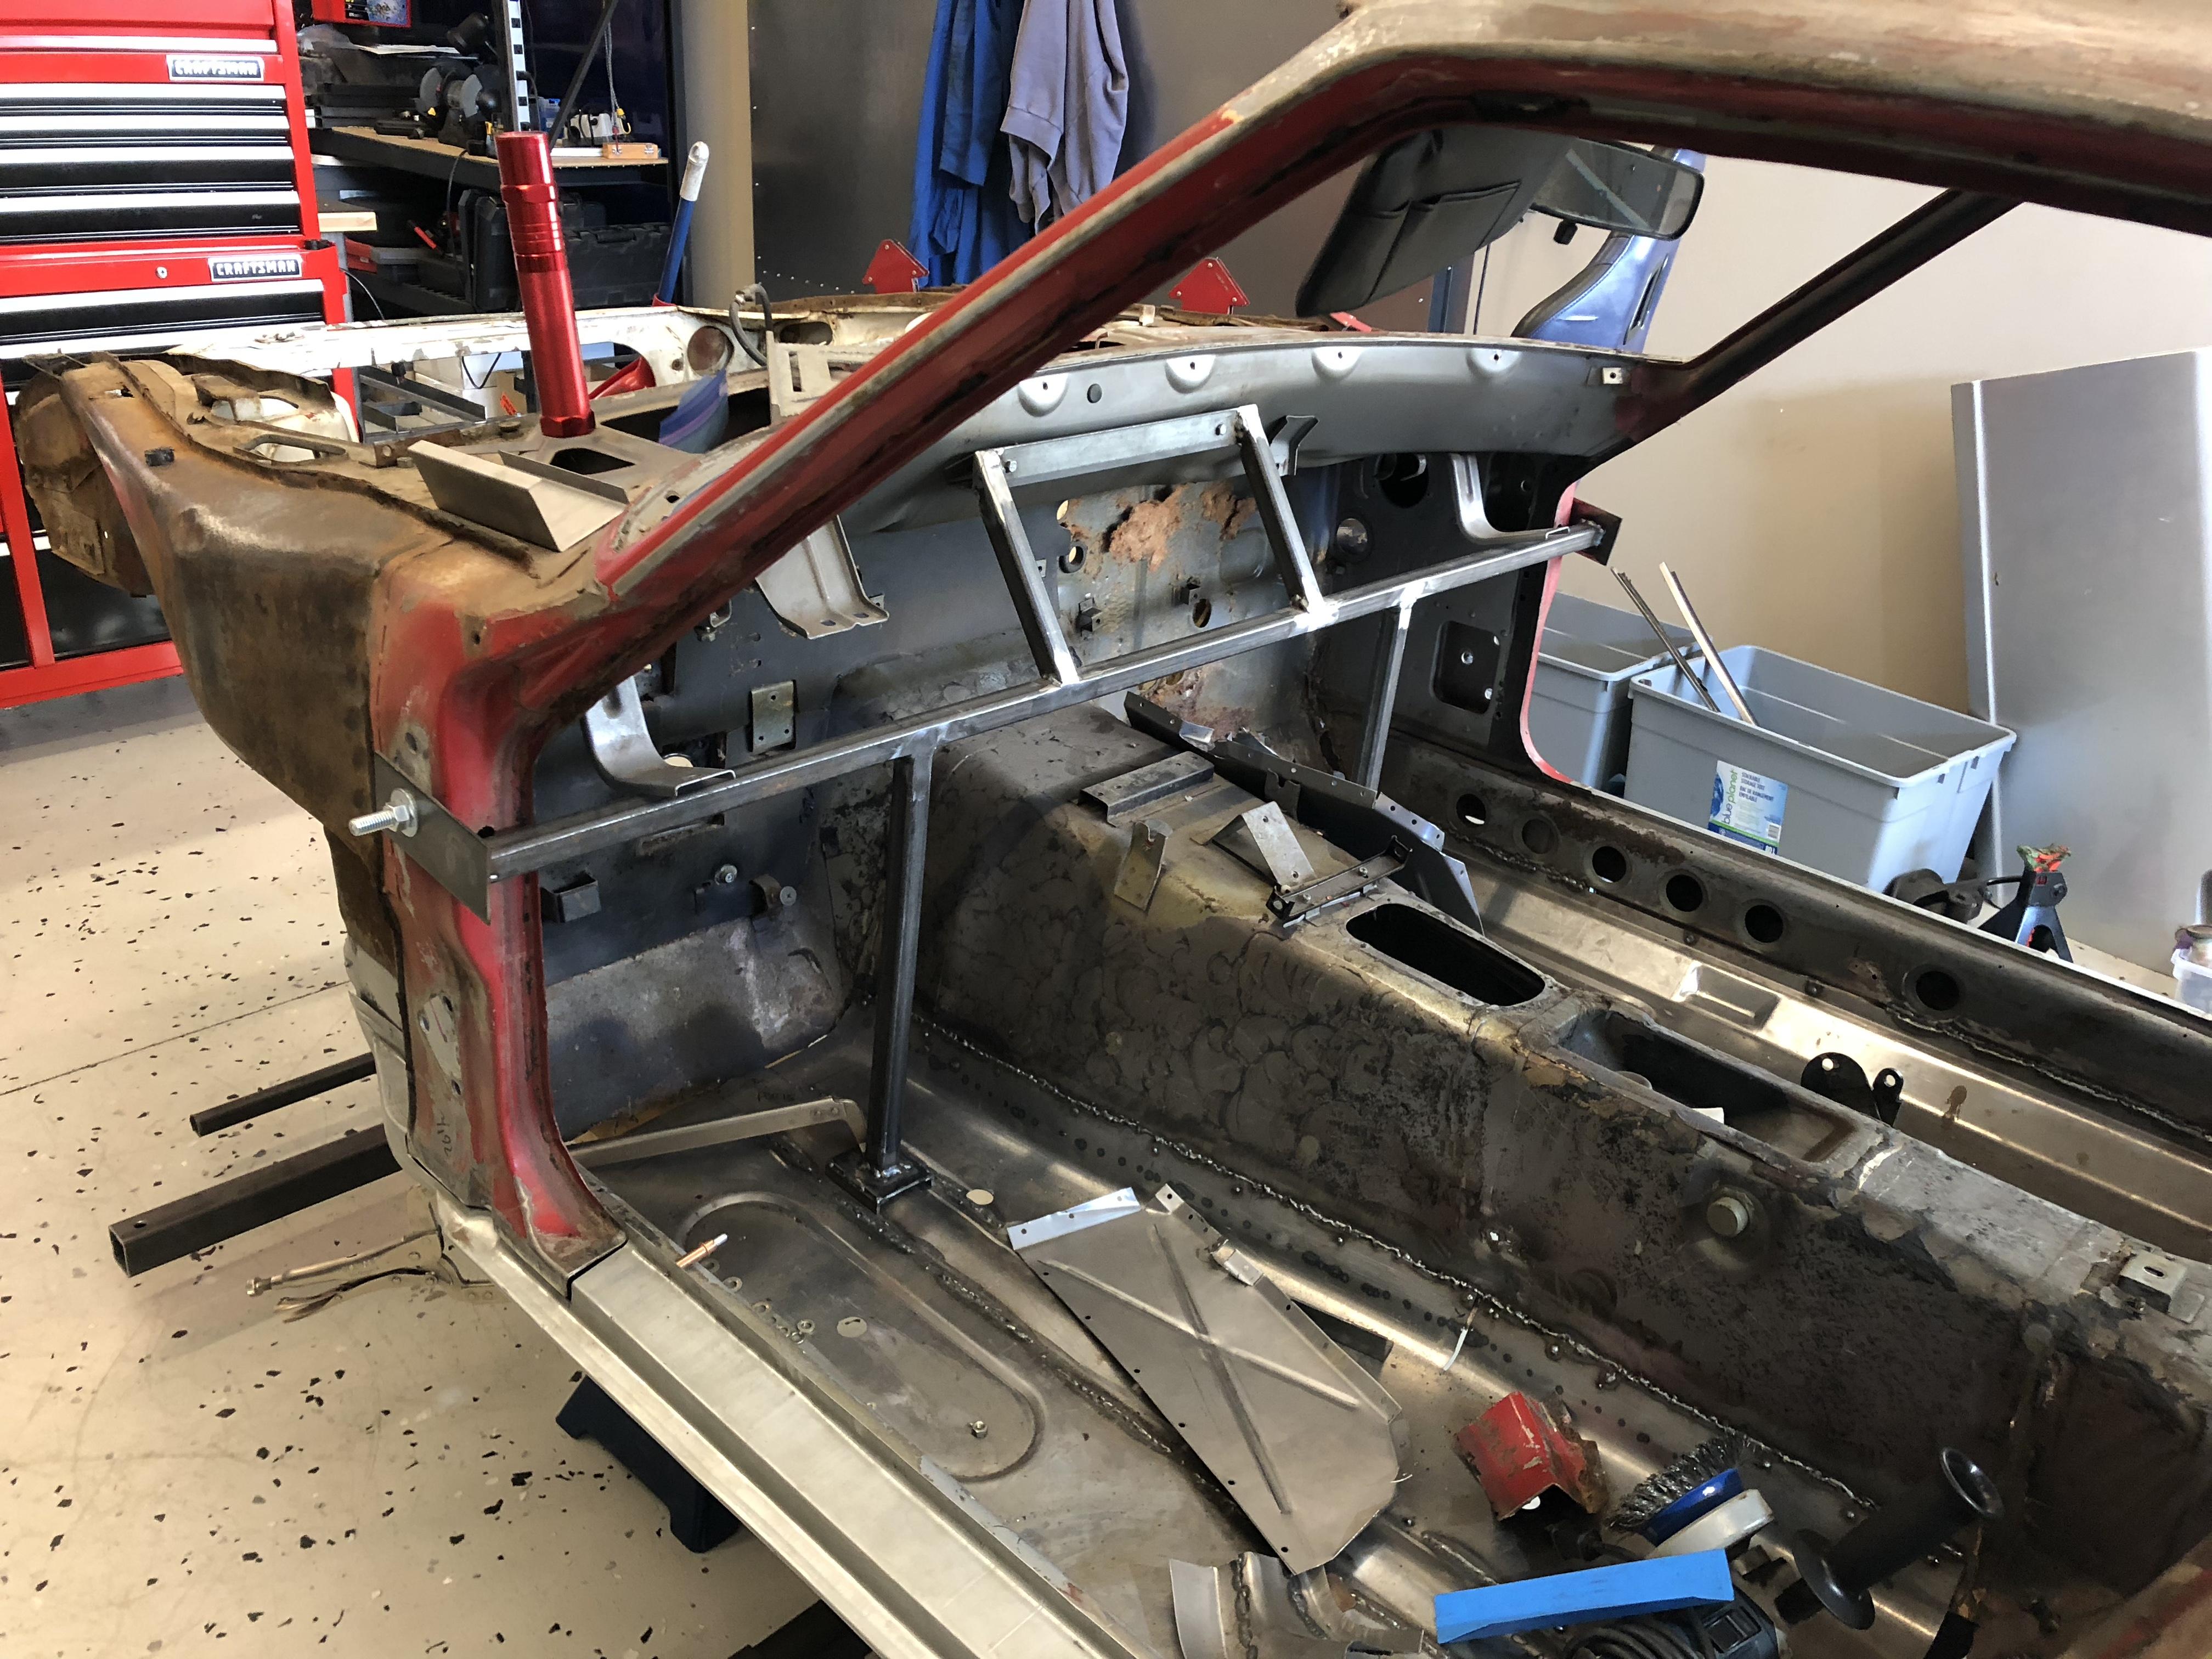
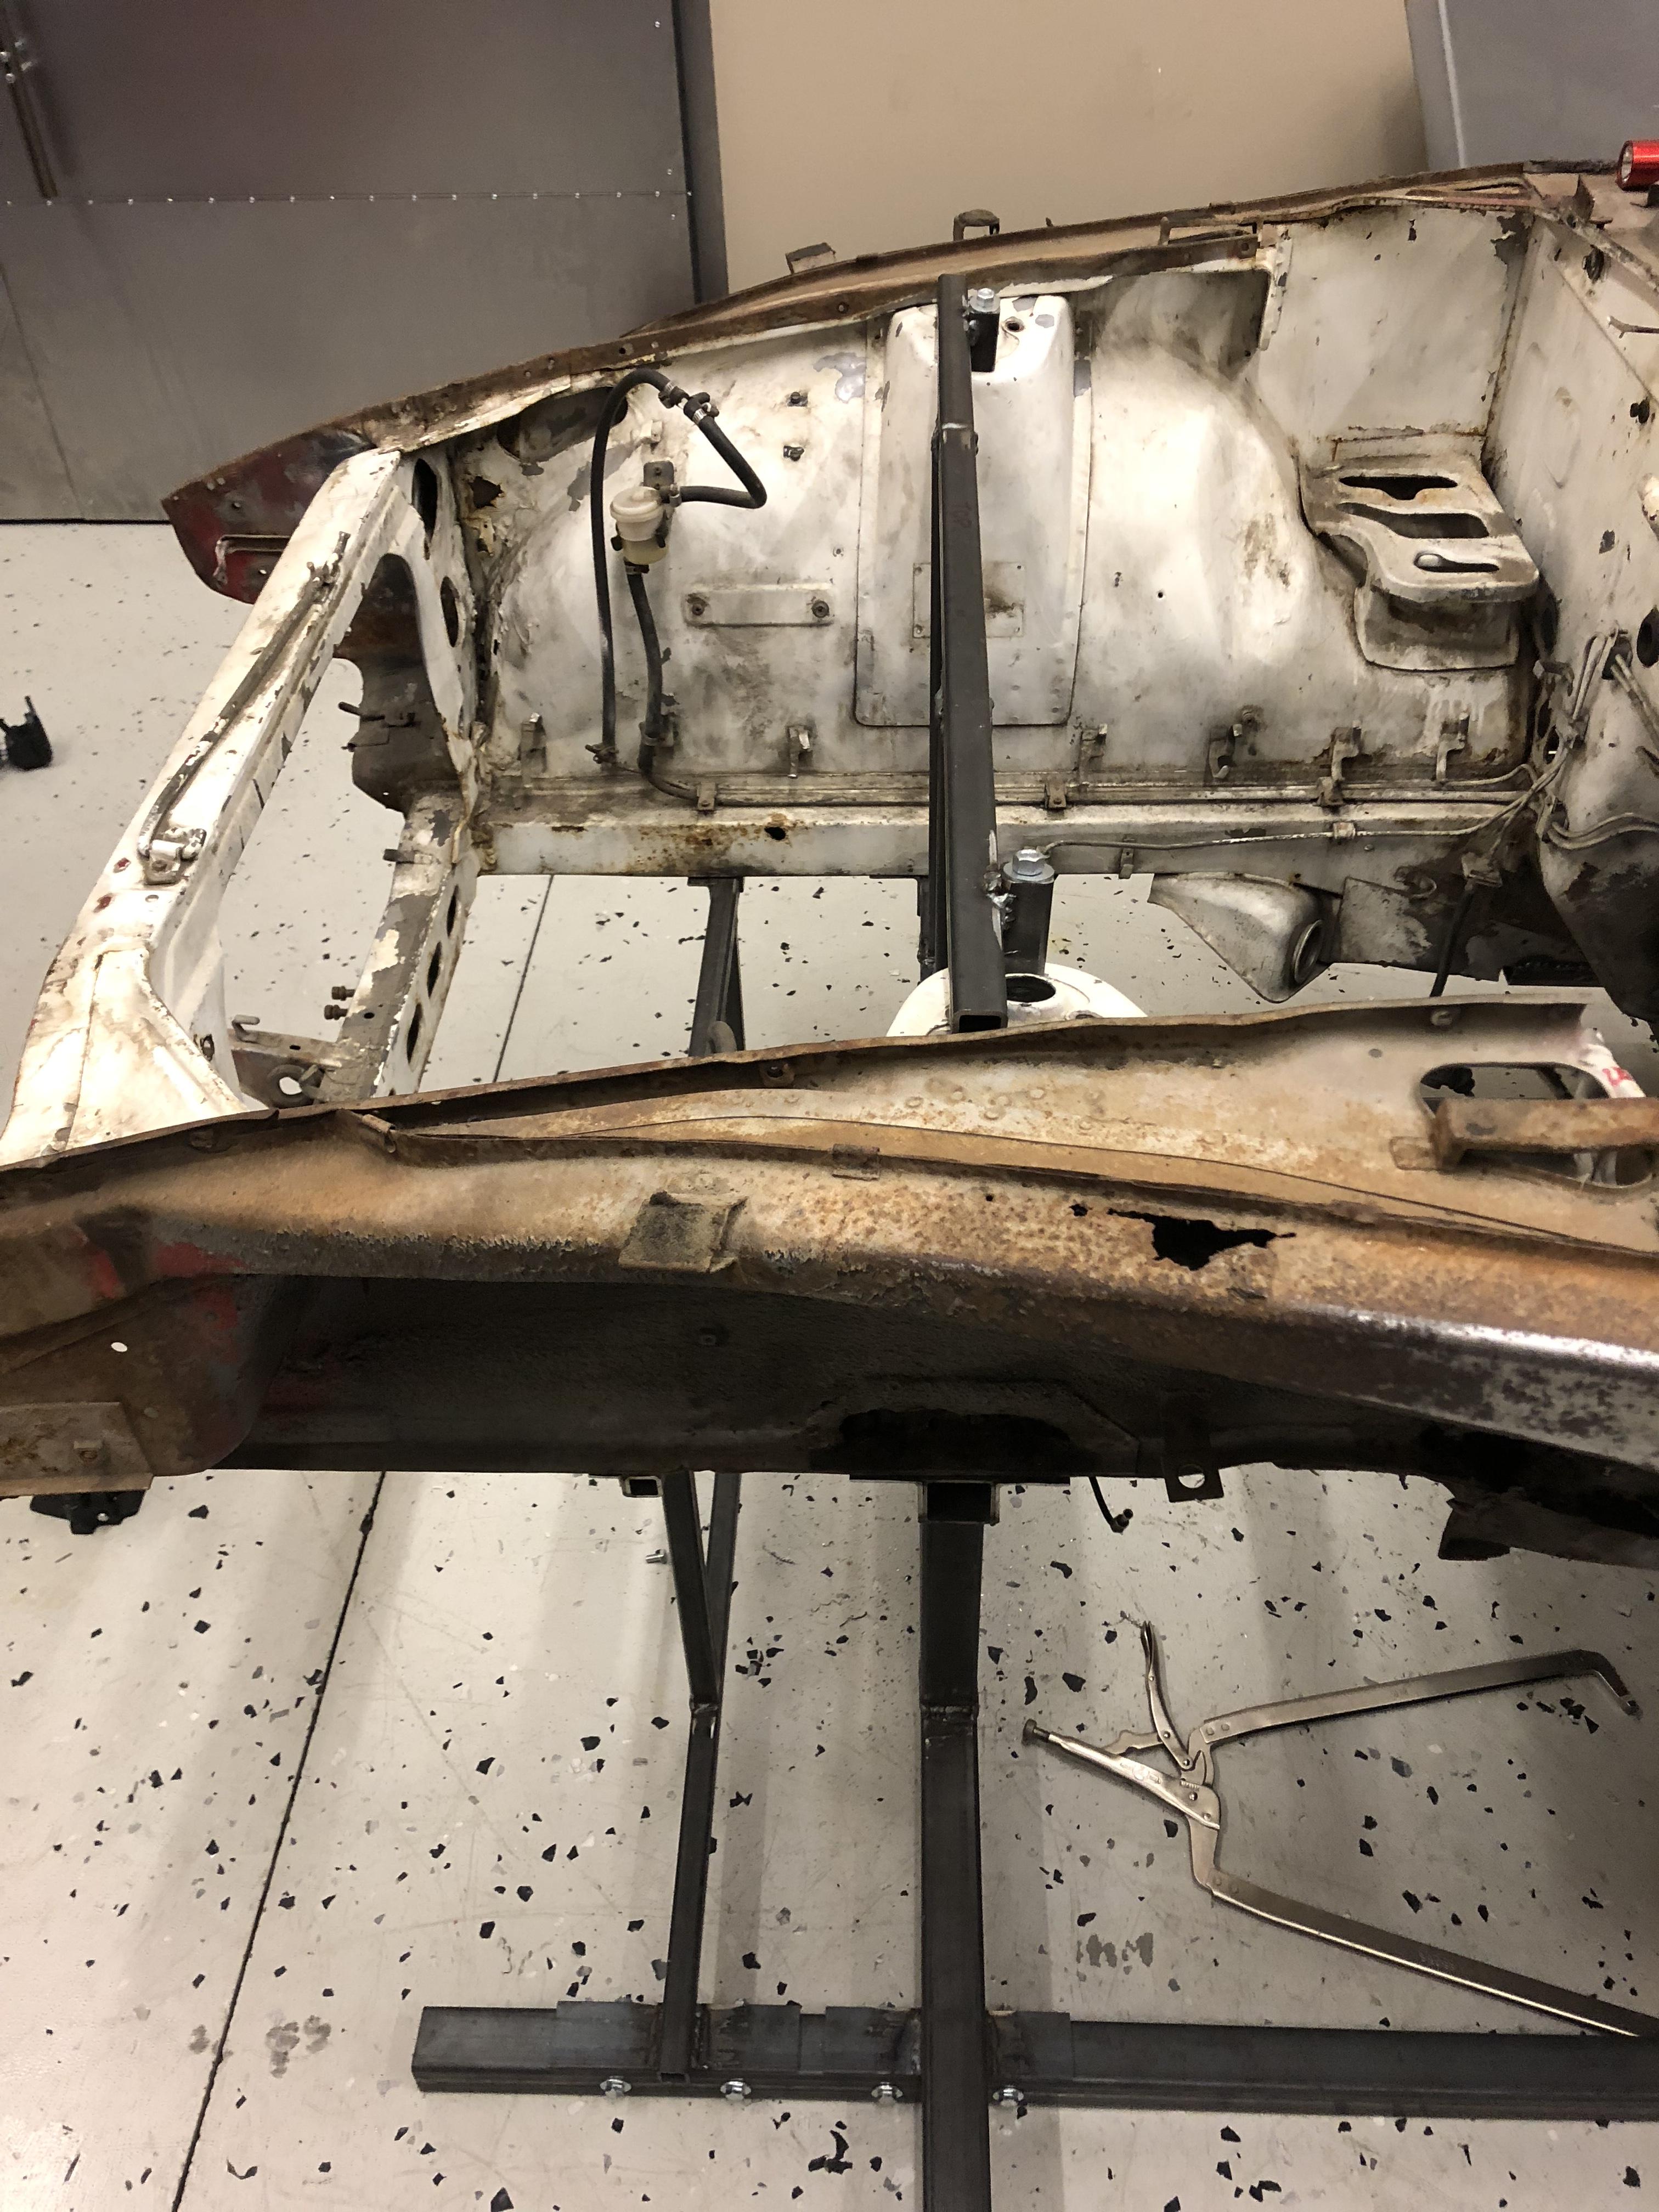
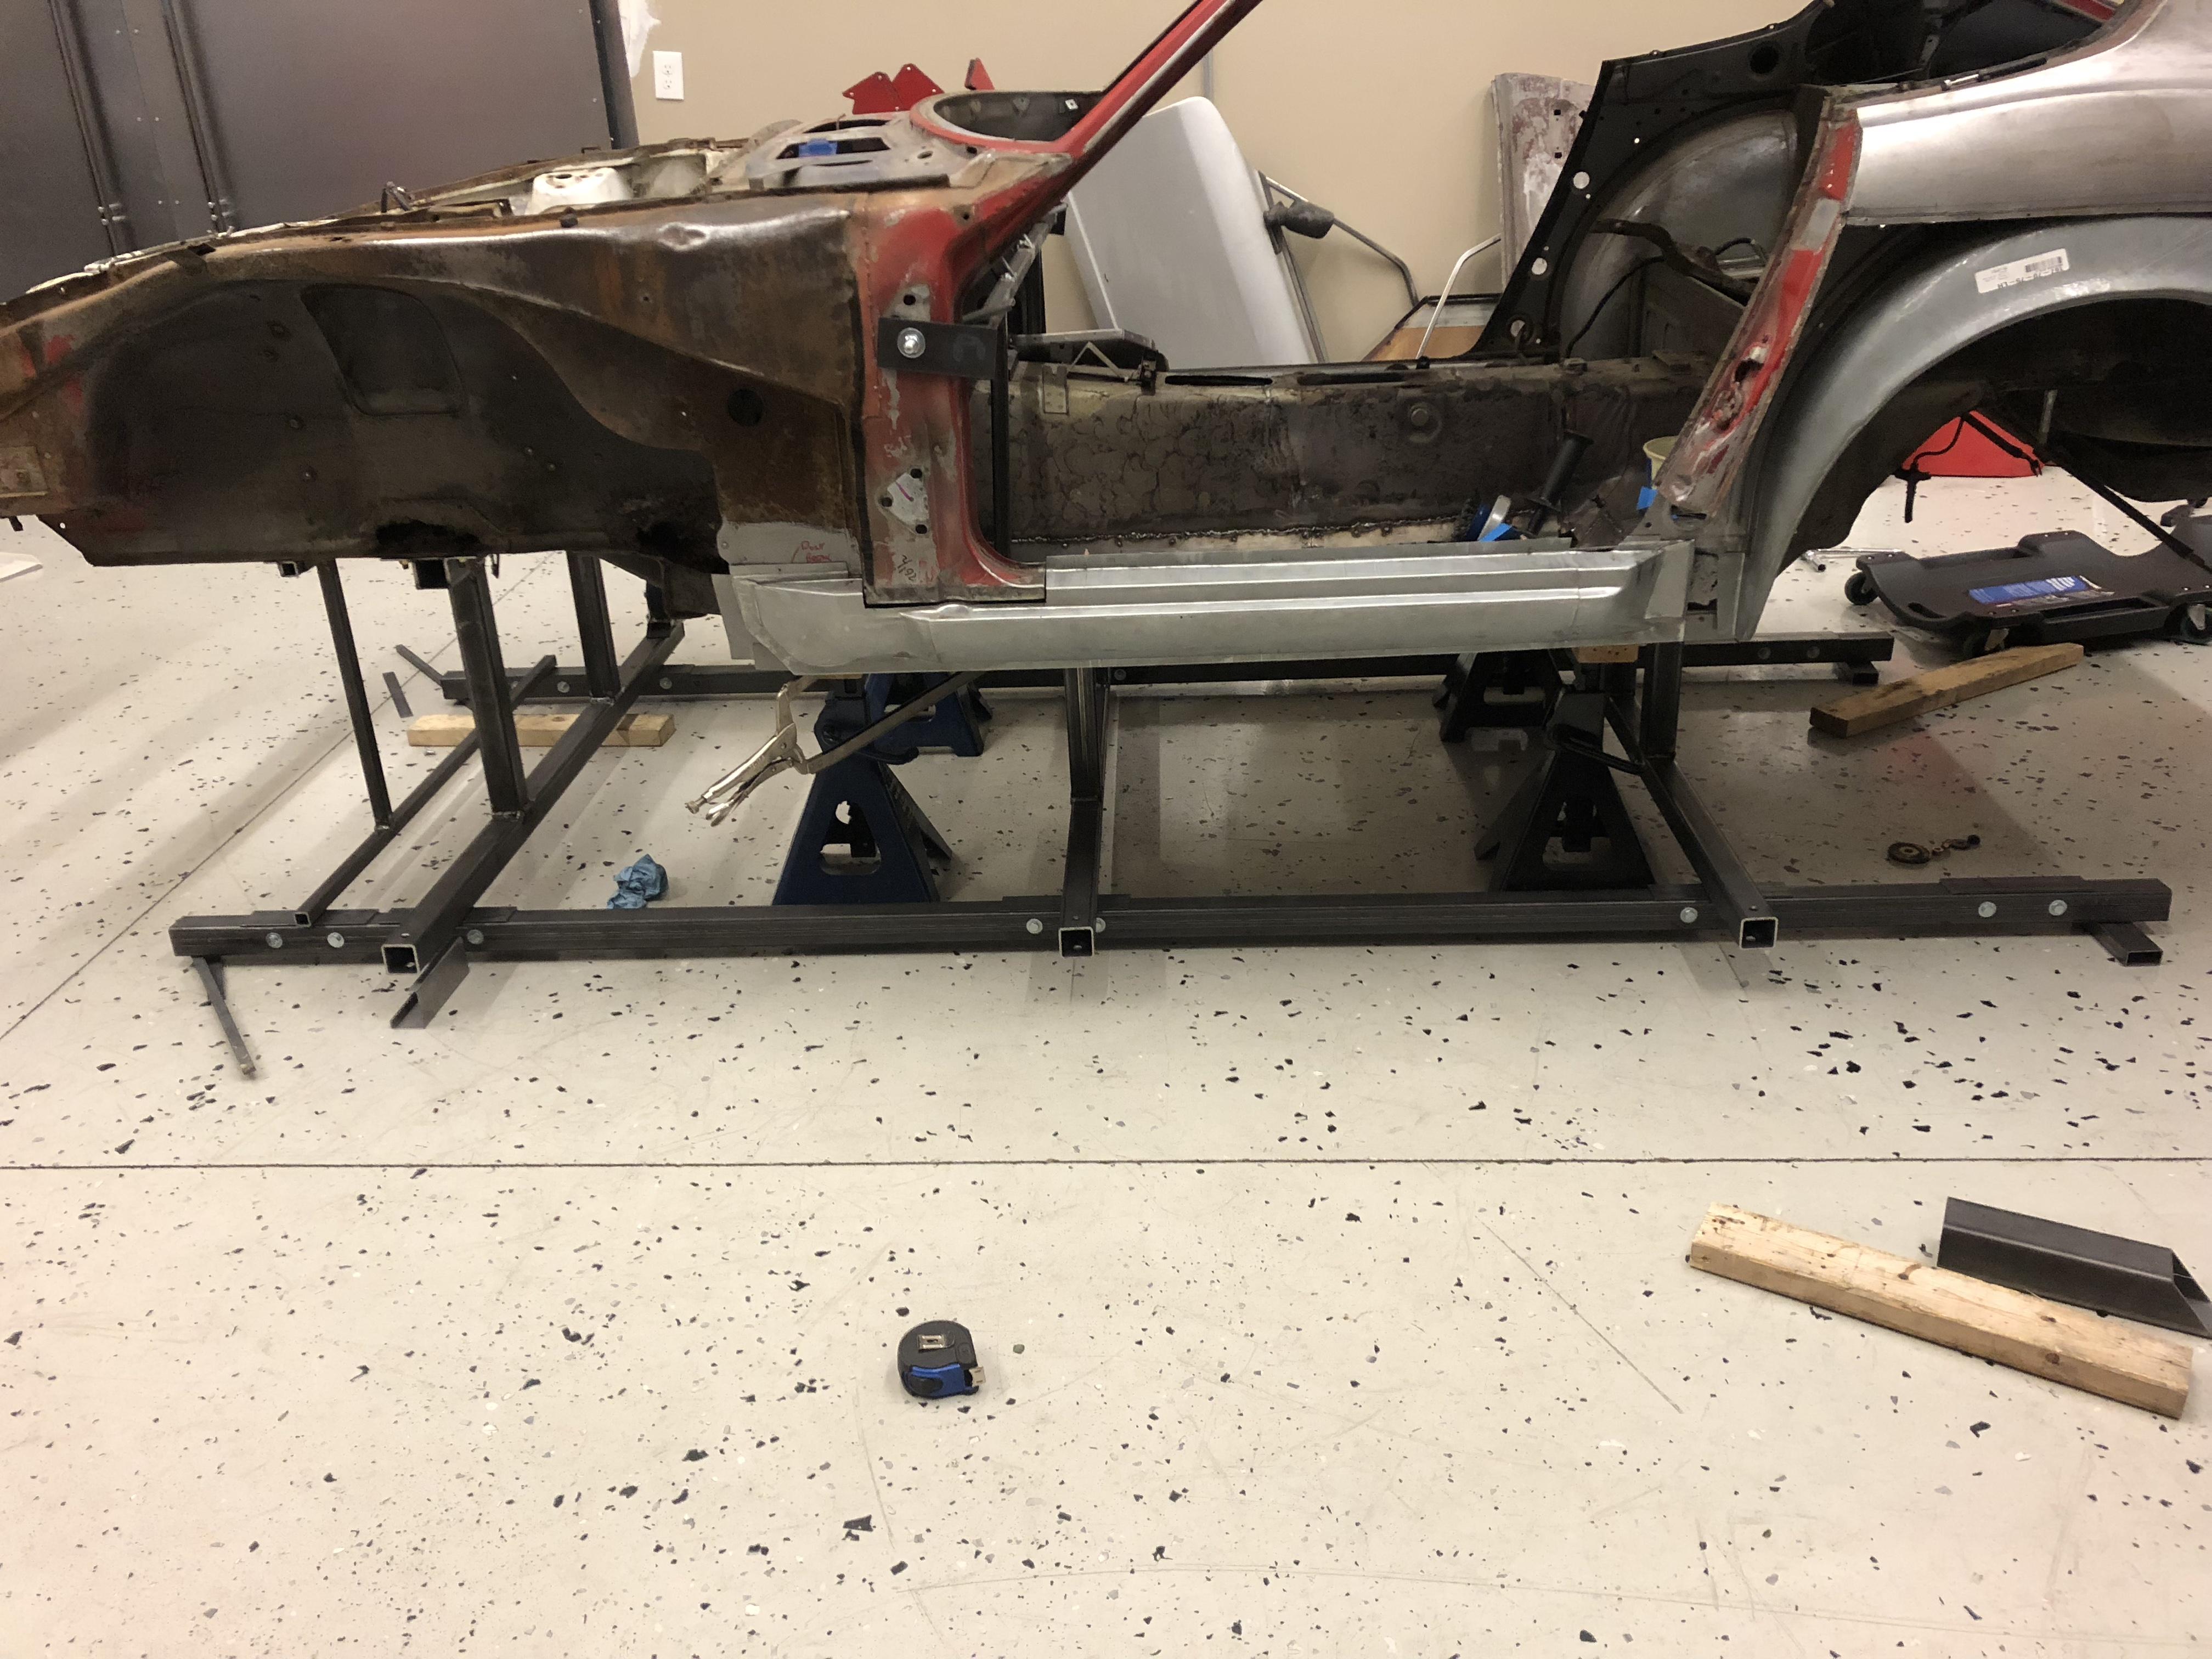
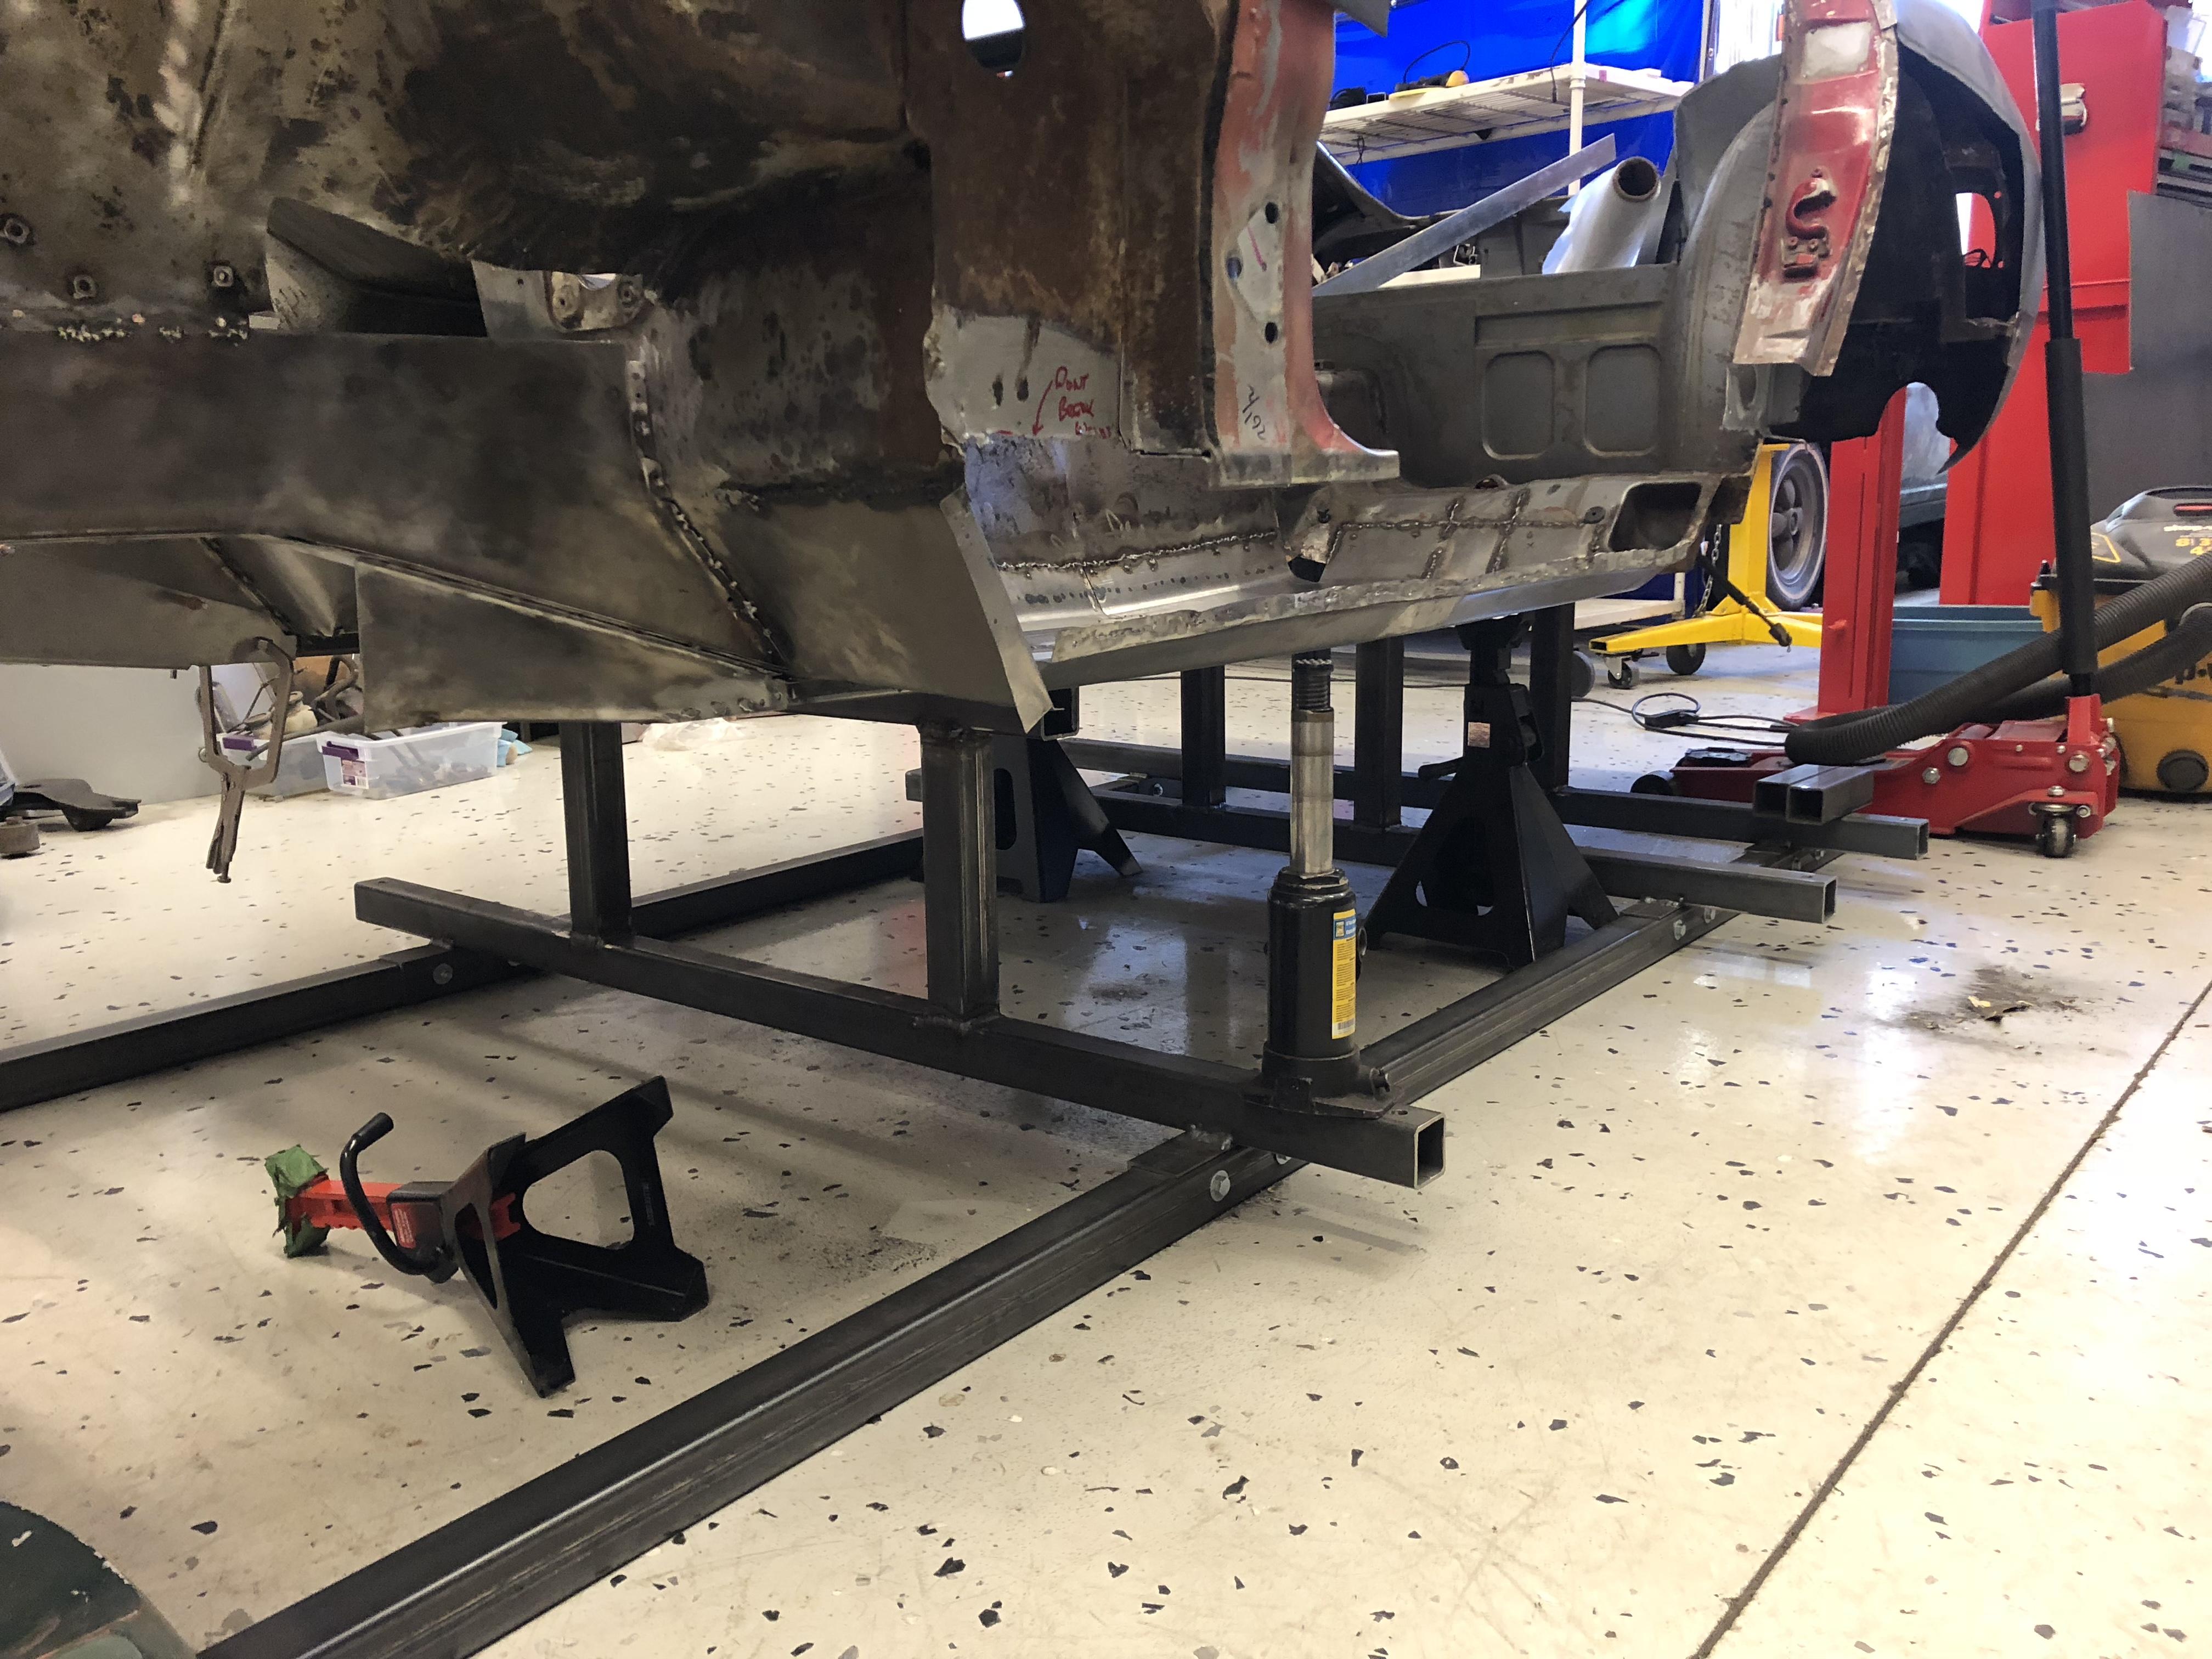
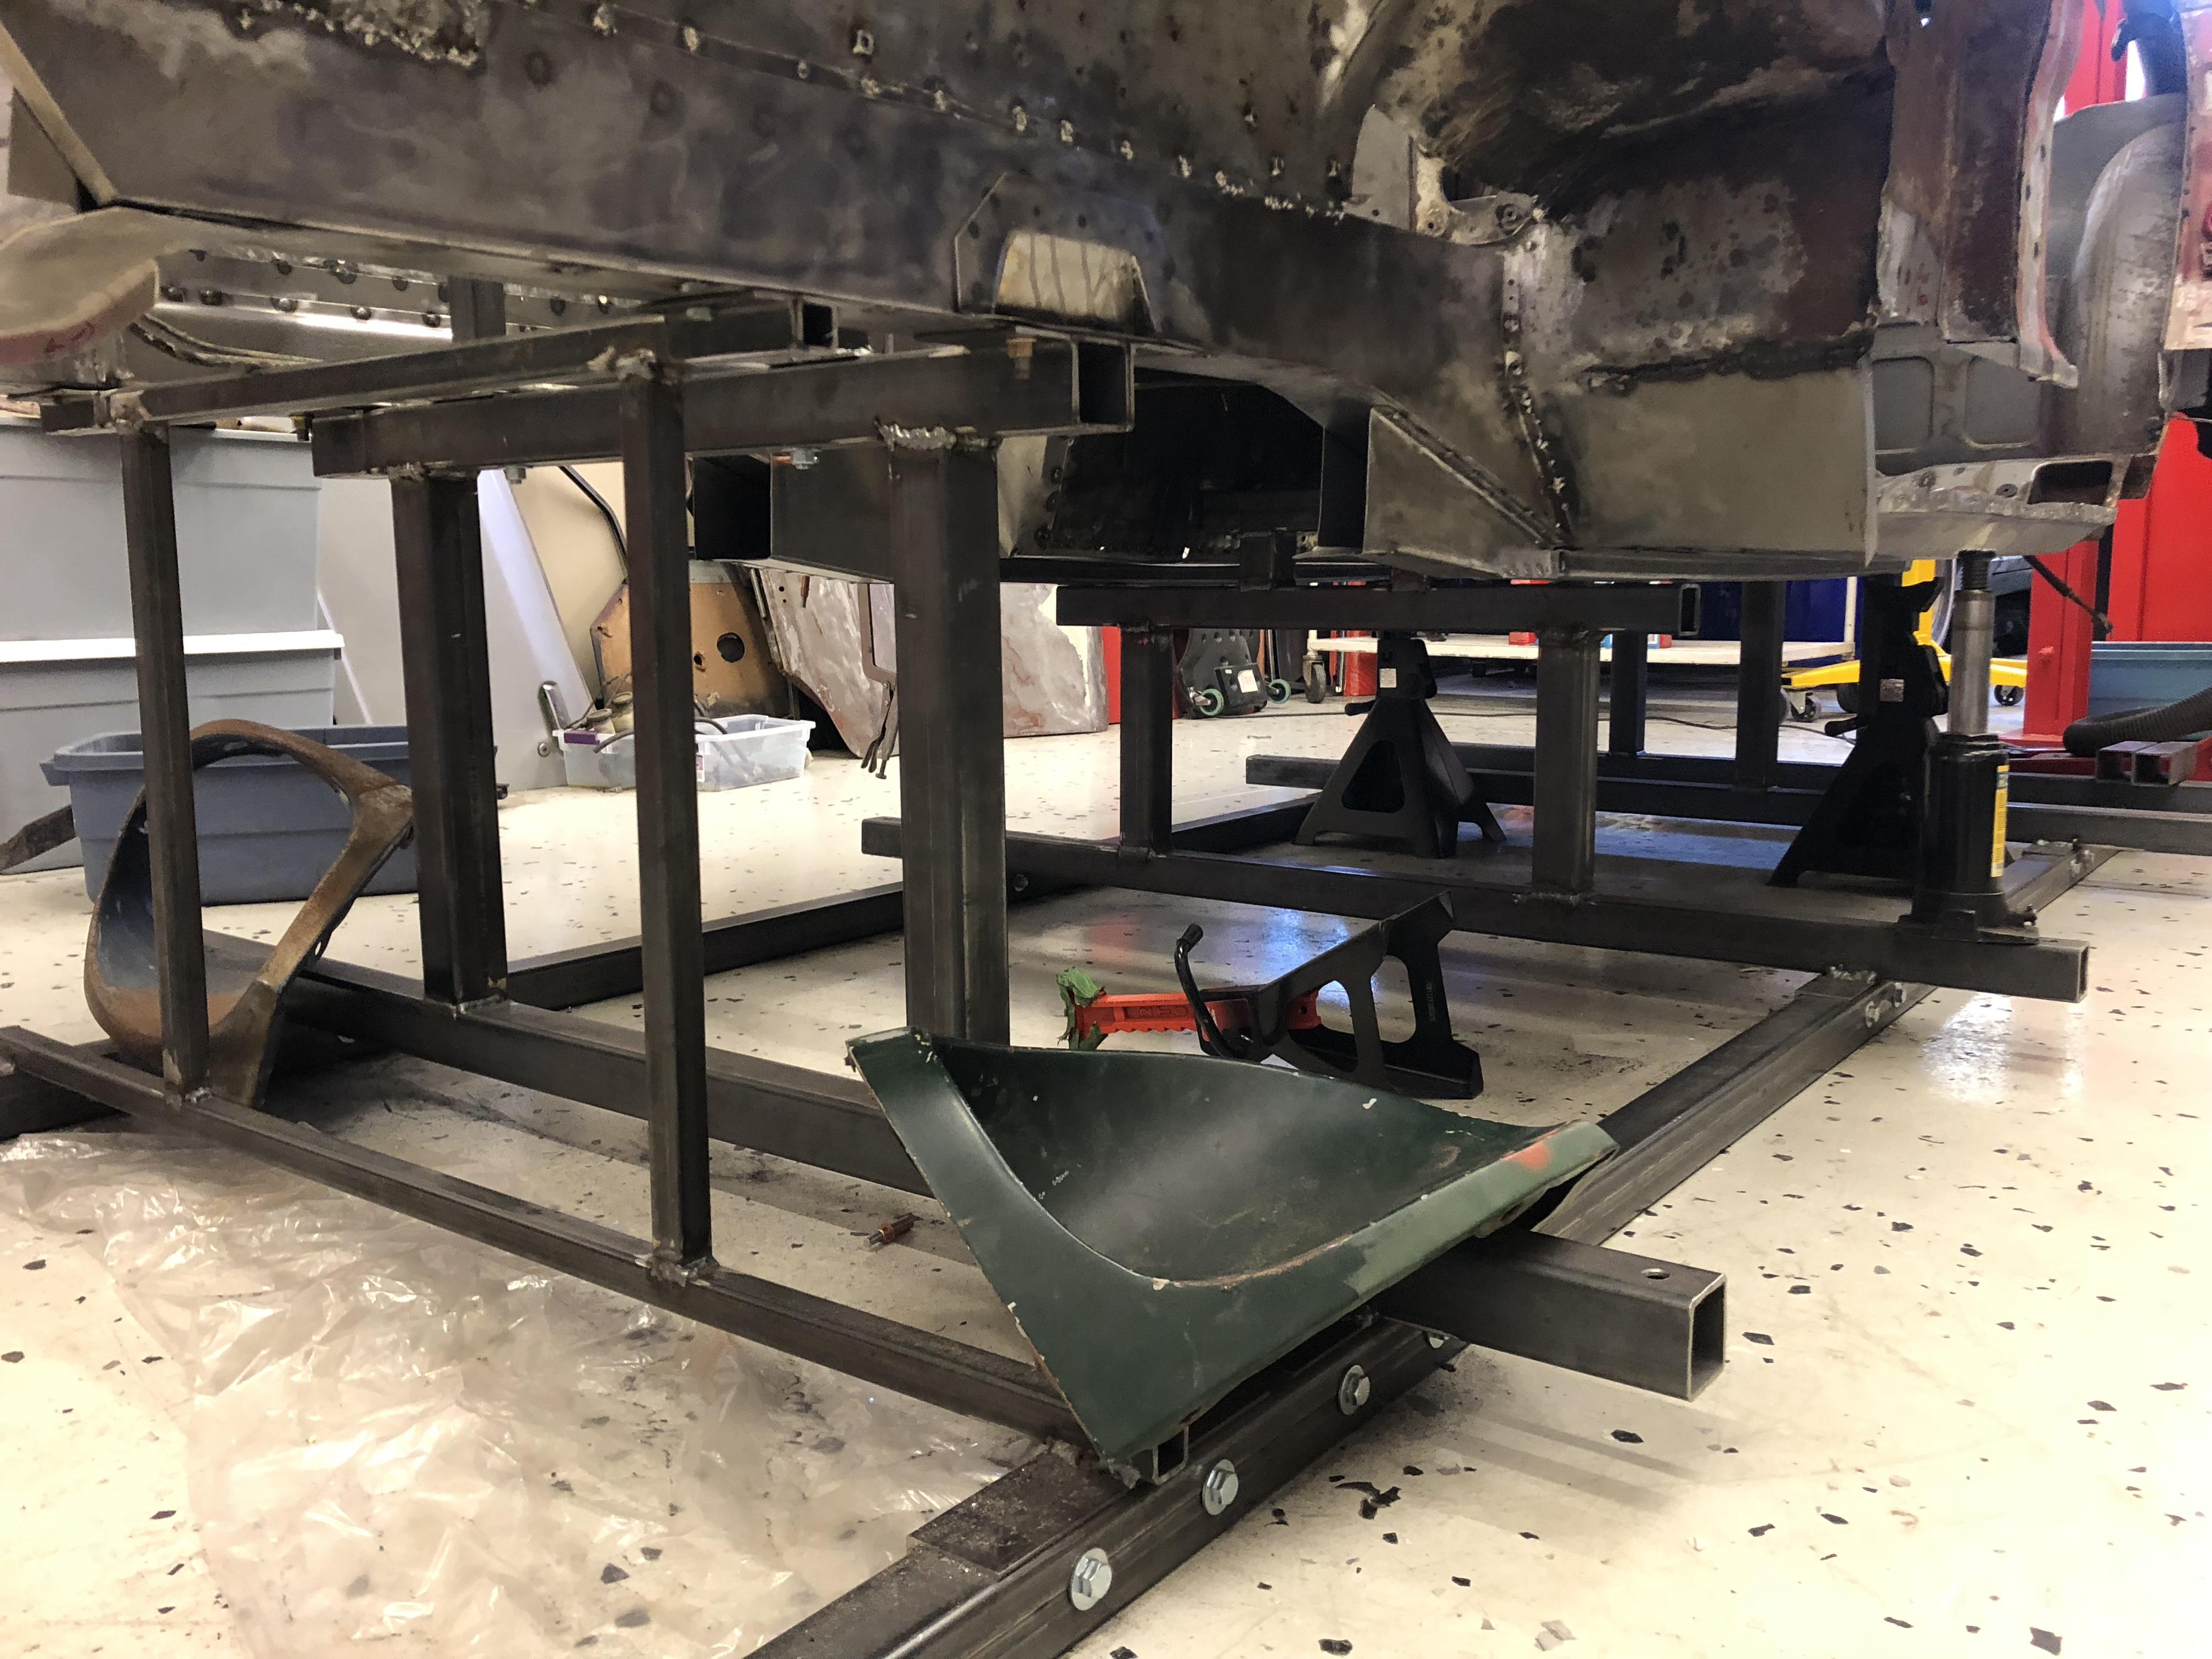
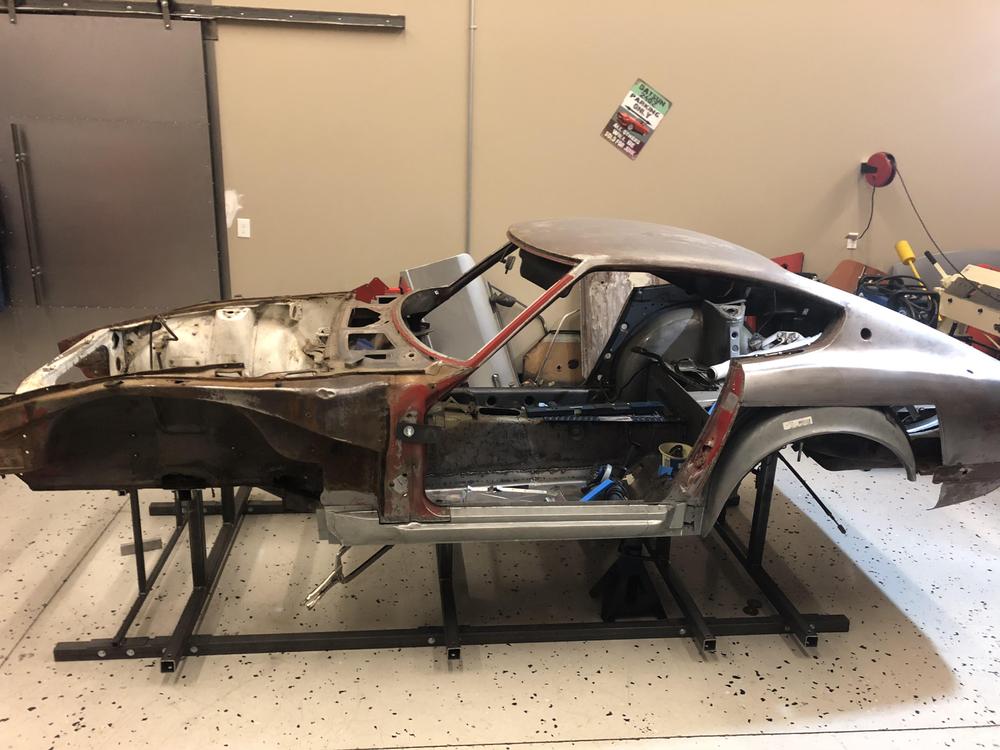
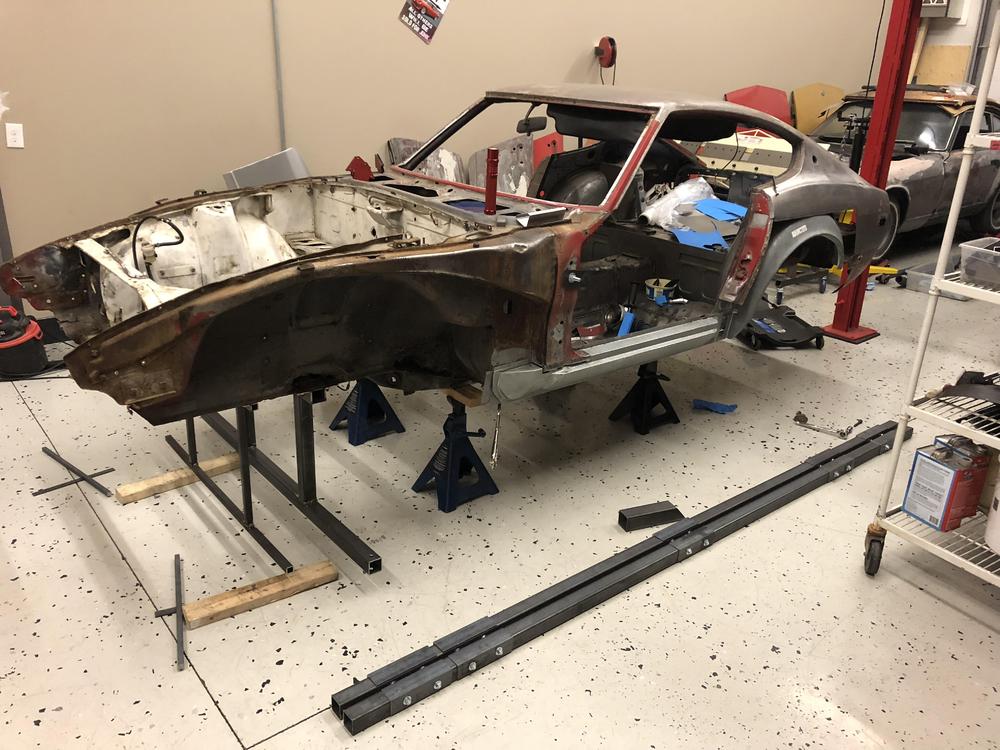
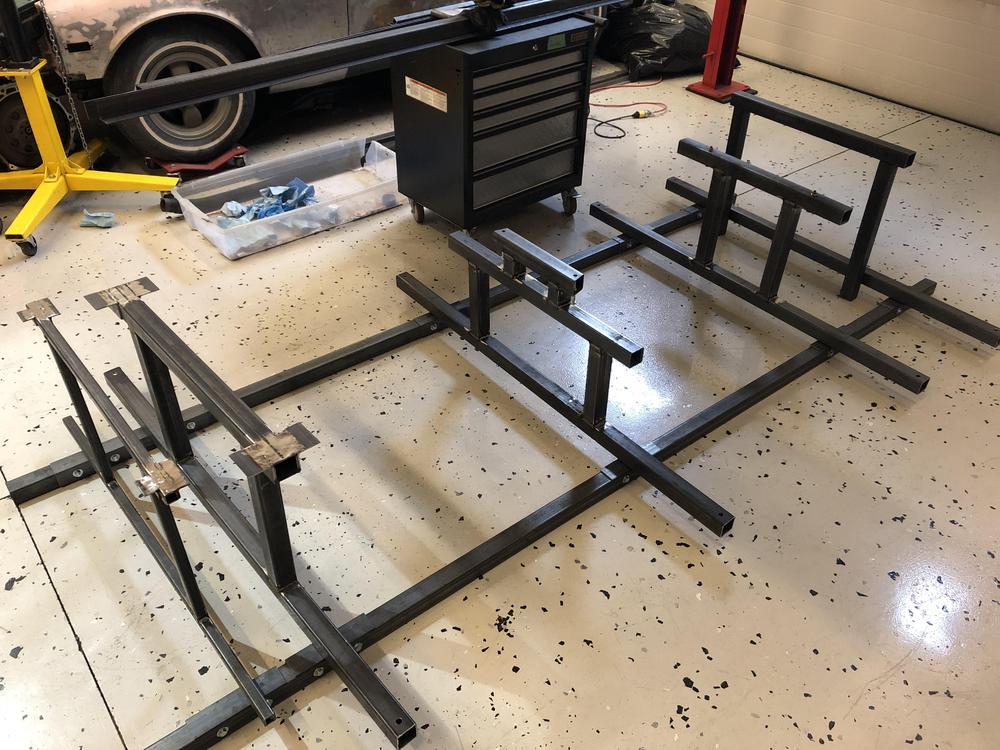
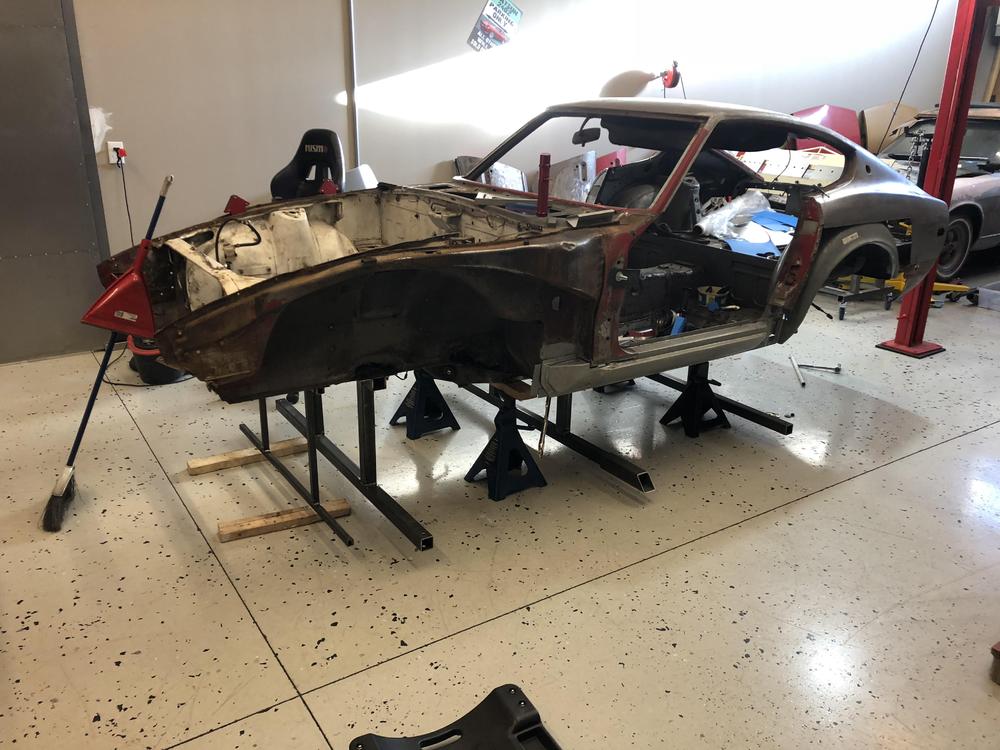
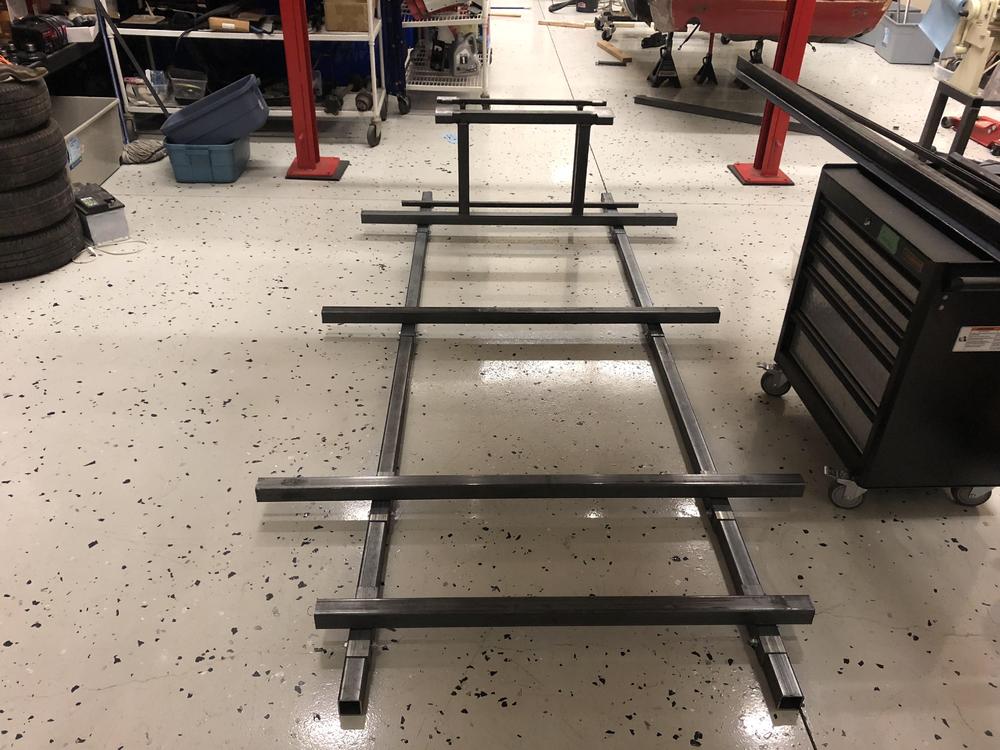
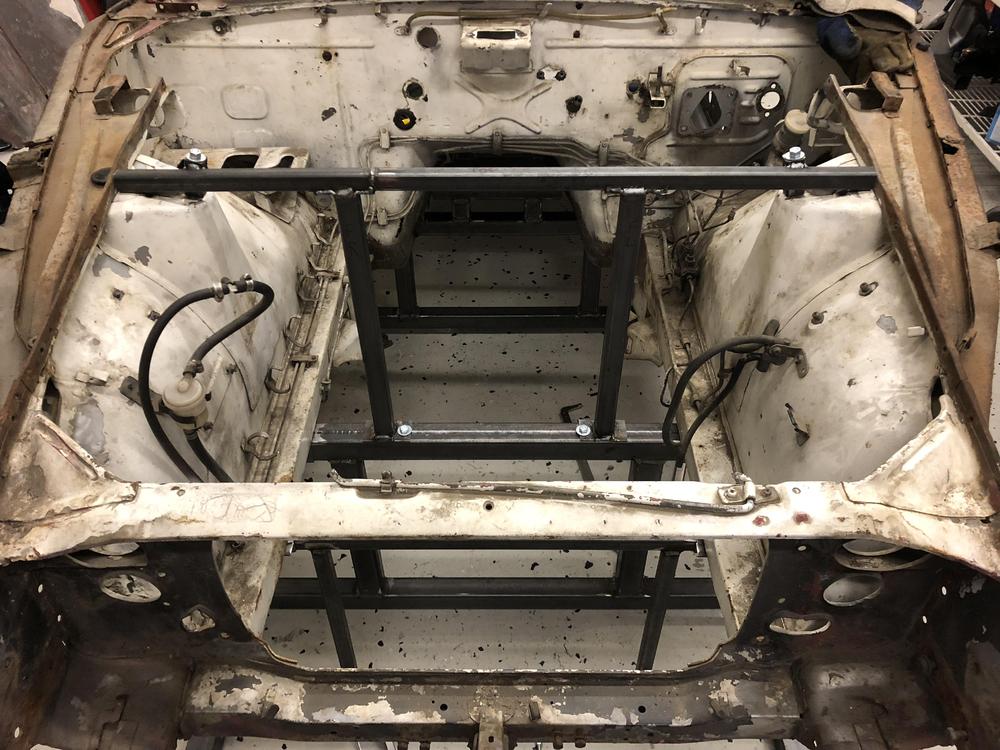
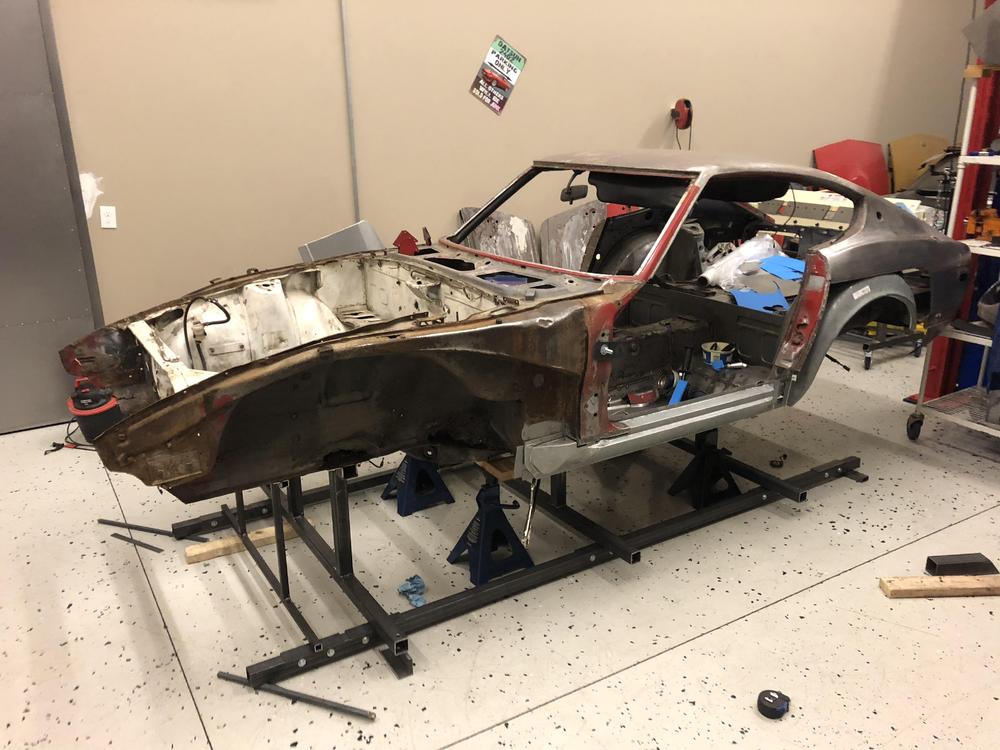
1 pointHi Guys. My name is Kent and I am a long time lurker here. I have several 240z project cars - none completed - but lots of ambition ....but that’s a story for a whole different thread probably. I started this car a few years back and, skipping to the point, I recently realized that I needed to take a step backwards in order to go forwards. I had replaced the floors and fabricated some new floor rails, but I realized that it would be nearly impossible to replace the front rails and firewall rust without stabilizing the entire chassis. Plus the rad support was repaired poorly by a previous owner at some point. Rotisserie was out of the question - way too much rust... Here she is on the completed jig .... a The jig was made from 2 x 2 x 1/8 tubing. It supports the chassis at stock suspension and drivetrain points - front swaybar, front crossmember, trans tunnel, and both side of the rear differential mounting point. I also added a support for the front strut tower, and across the door openings as I will be cutting out a lot of the firewall and the front rails. All the dimensions are available in the FSM. It is bolted (not welded) to the chassis. The whole structure is very rigid and I think that the firewall and frame rail replacement is going to zip right along. Here’s how she came together, in pictures .... hopefully this inspires someone else to get back on the horse. Cheers! e ;


 1 point
 -
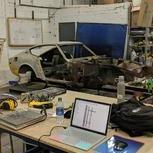
Hey everyone, I'm new to the forum so I'd like to say hello! I'm an engineer and I'm trying to restore a 1970 Series I 240z in Philly. I bought the car sometime late February and since then I've been getting all of the tools I need to rebuild the car from the frame up. So far there are a few major areas of concern on the body and frame that I need to either replace or patch up including, but not limited to... Both rear quarter panels, trunk floor, both floor pans, firewall, frame rails (front), various lips, possibly an A-pillar and etc. I'm using CAD and the technical drawings from the factory service manual to try and make my own jig, but I'd like to know if any of you know where I can find plans that have been used to successfully make a chassis jig from scratch. The drawings from the manual are sort of difficult to read and I'm trying to do this without making too many mistakes. ? Lastly, I plan on making technical drawings, and even some CAD models that I'll upload here when I'm finished and I know everything is functional.

 1 point
 -
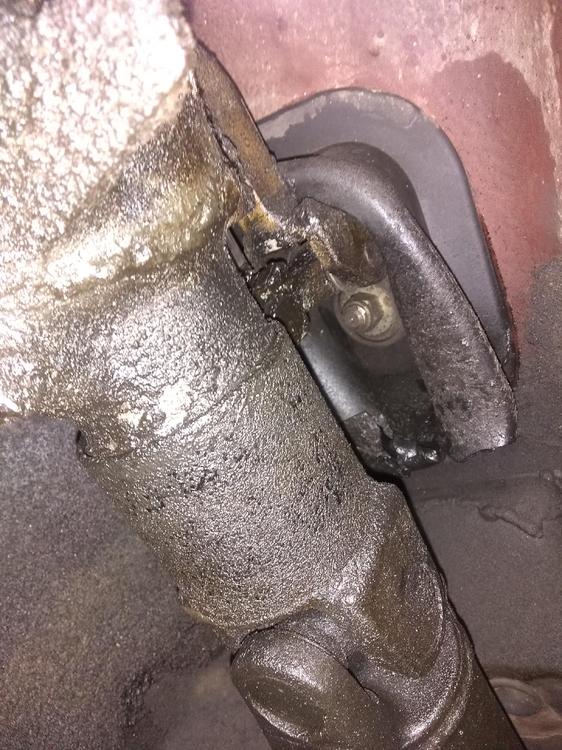
1 pointThat is really strange, quite often when you empty the diff there will be be far less than a litre because over the years it splashes out of the plastic breather cap on the top of the cover but not being able to get that full litre in is pretty weird I think. The only way you are going to solve it is to unbolt the cover and have a look, The paper gaskets are cheap and still available but something like Permatex gasket maker work just as well. Hard to believe casting irregularities could take up half a litre of space. That's because you have that gorgeous finned cover with all the extra oil capacity.1 point
-
1 pointHey LTS, Thanks man. I like to drive around and listen to the AM stations. I live very close to Auto Trim Specialists. They gave me a good quote for a vinyl top on an a Chevy Impala once. A few years ago they wanted $150 to staple on a pre made motorcycle seat cover and I haven't been there since. I have been using Rema Upholstery Services. They are at I270 and I76 in Thornton or Commerce City. They did a good job. Not perfect, but they replaced the straps on the bottom, there are no wrinkles, and the vinyl is very secure. They greased the tracks too. It wasn't necessary, but I separated the seats and removed the brackets because I wanted to clean them. I dropped them off on Monday and they were ready on Thursday. They charged $350. The owner is a good guy you just have to call first to make sure he is going to be there. The dash has a crack right in between the temp and fuel gauges. There is also a silver dollar size spot that has flaked off. You can barely see it in the picture, but you can't see it when you are sitting in the car. It is in a good spot. Look me up if you drop your seats off in Denver. Bill1 point
-
1 pointIt was a bone dry CLSD from an 83 so that might be why. I’ll have to go check what I wrote down.1 point
-
1 point
-
Welcome to the forum and a big thanks for any tech drawings you share with the rest of the members. That kind of resource is priceless.1 point
-
Another welcome to the group - and big thanks for taking on the saving of another early car! @Captain Obvious in your area is one very smart guy and should be a great help for any local issues. Consider adding your VIN and build date info to your signature, its always a help to those responding to posts.1 point
-
Two peas in Philly! Welcome to the forum. You have already found your #1 friend.1 point
-
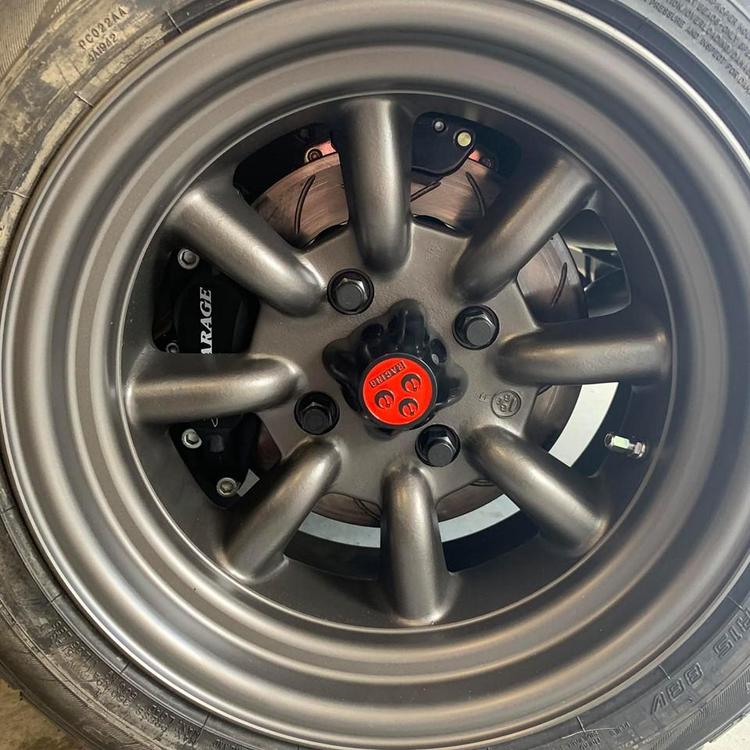
1 pointLooking snazzy. I went with stainless black lug nuts. I also have the raw stainless, it's a hard choice.
 1 point
 -
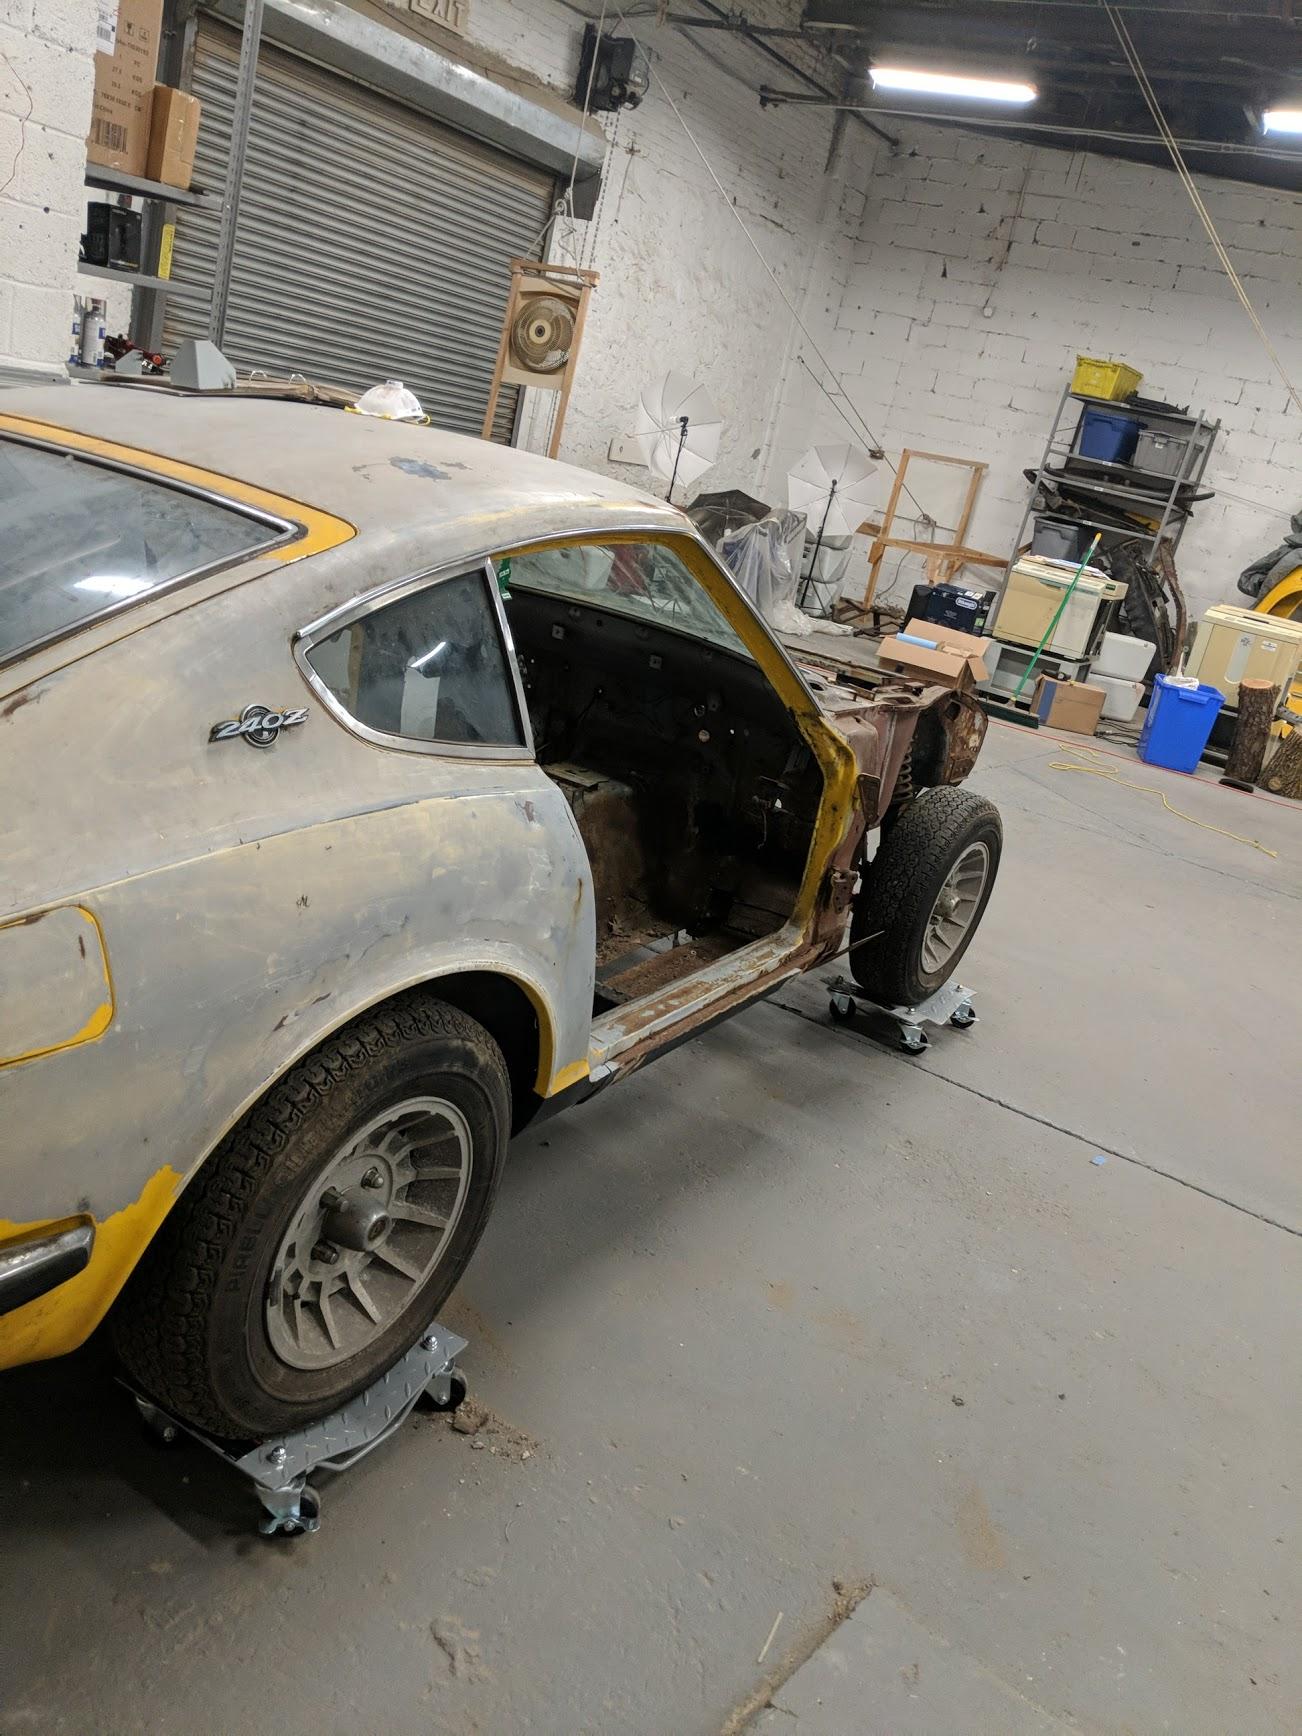
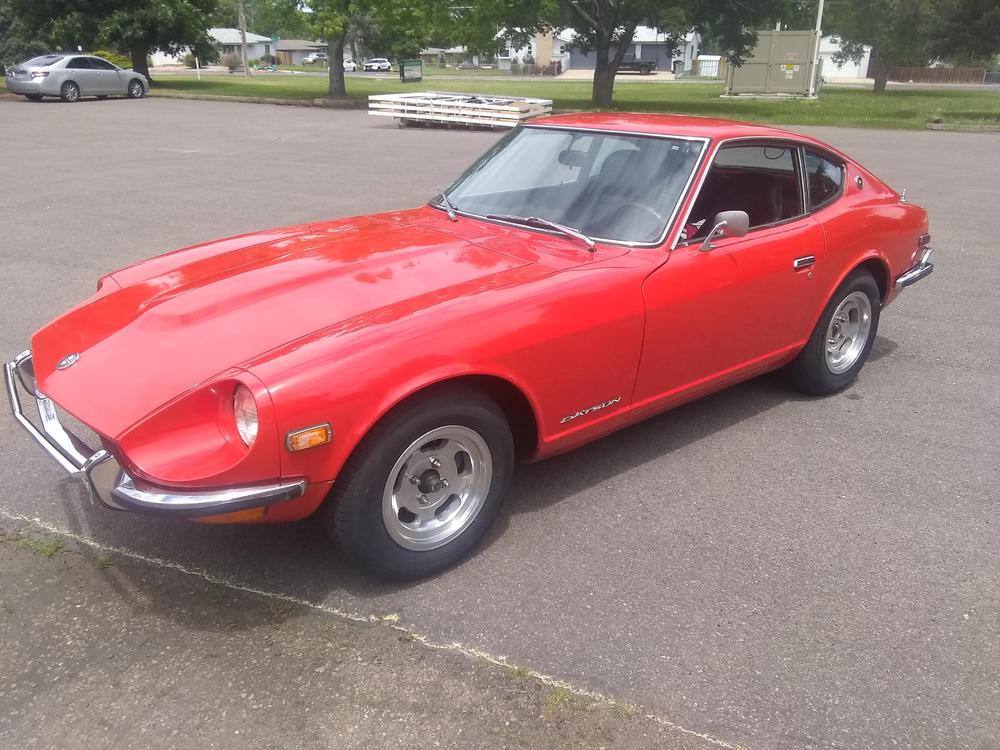
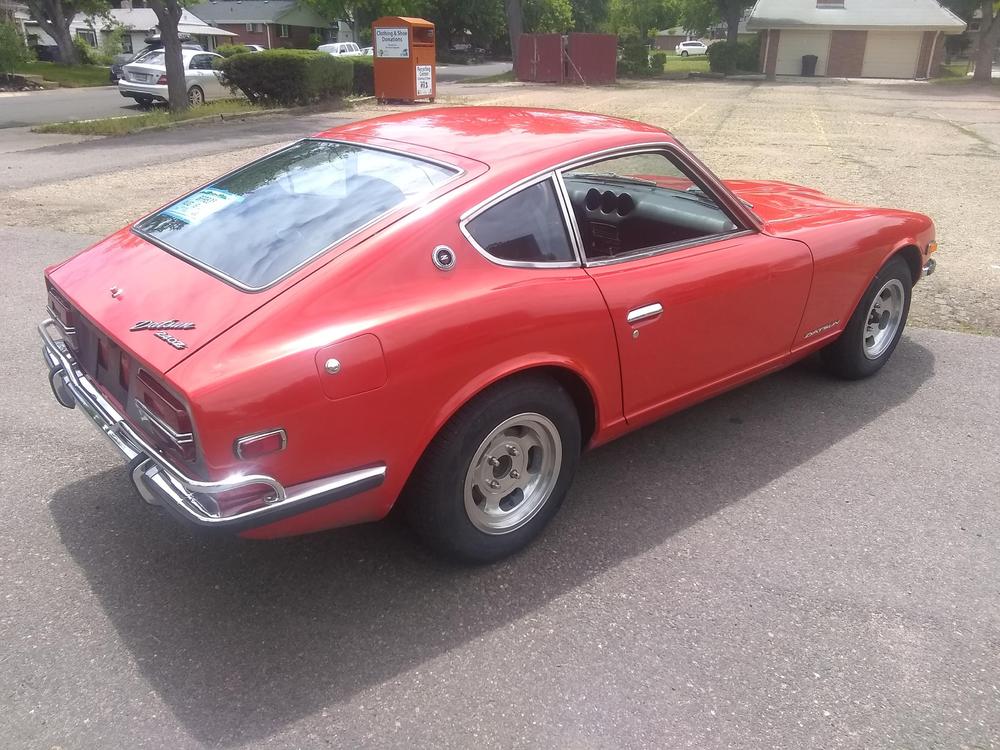
1 pointThanks man. This forum looks like a better fit. This car is too nice to modify. Some of the paint is original but I don't know how much. I polished the wheels last night and spent 4 hours buffing the paint and polishing the chrome today. I hand polished it using some light compound and then put a coat of wax on it. It came out nice, but it is still a 20+ footer .
 1 point
 -
1 point
-
1 pointVery impressive, Bruce. Maybe you should moonlight and do a few dashes in your spare time? I bet you could sell that one for good money on eBay!!1 point
-
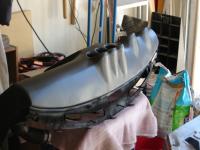
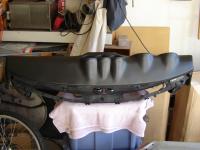
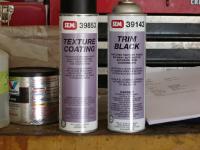
1 pointAfter the repair areas were finish sanded, I scuff sanded the rest of the dash with 220 grit paper and cleaned the surface with SEM plastic/leather prep. After that, I sprayed the complete dash with SEM's texture coating. I followed the directions on the can. I kept the spray nozzle approximately 20 inches from the surface and when the coating was finger dry, I knocked down the texture with scotch-brite. I let the dash dry for 24 hours and then lightly scuffed the complete surface. I cleaned again with the plastic/leather prep and then applied two wet coats of SEM's Trim Black for my finish coat. Here's some pictures of the finished product, it isn't perfect but it exceeded my expectations. I don't think I would have attempted this repair if the dash was in the car. Total cost was approximately $60 and maybe five hours of labor total. Bruce

 1 point
 -
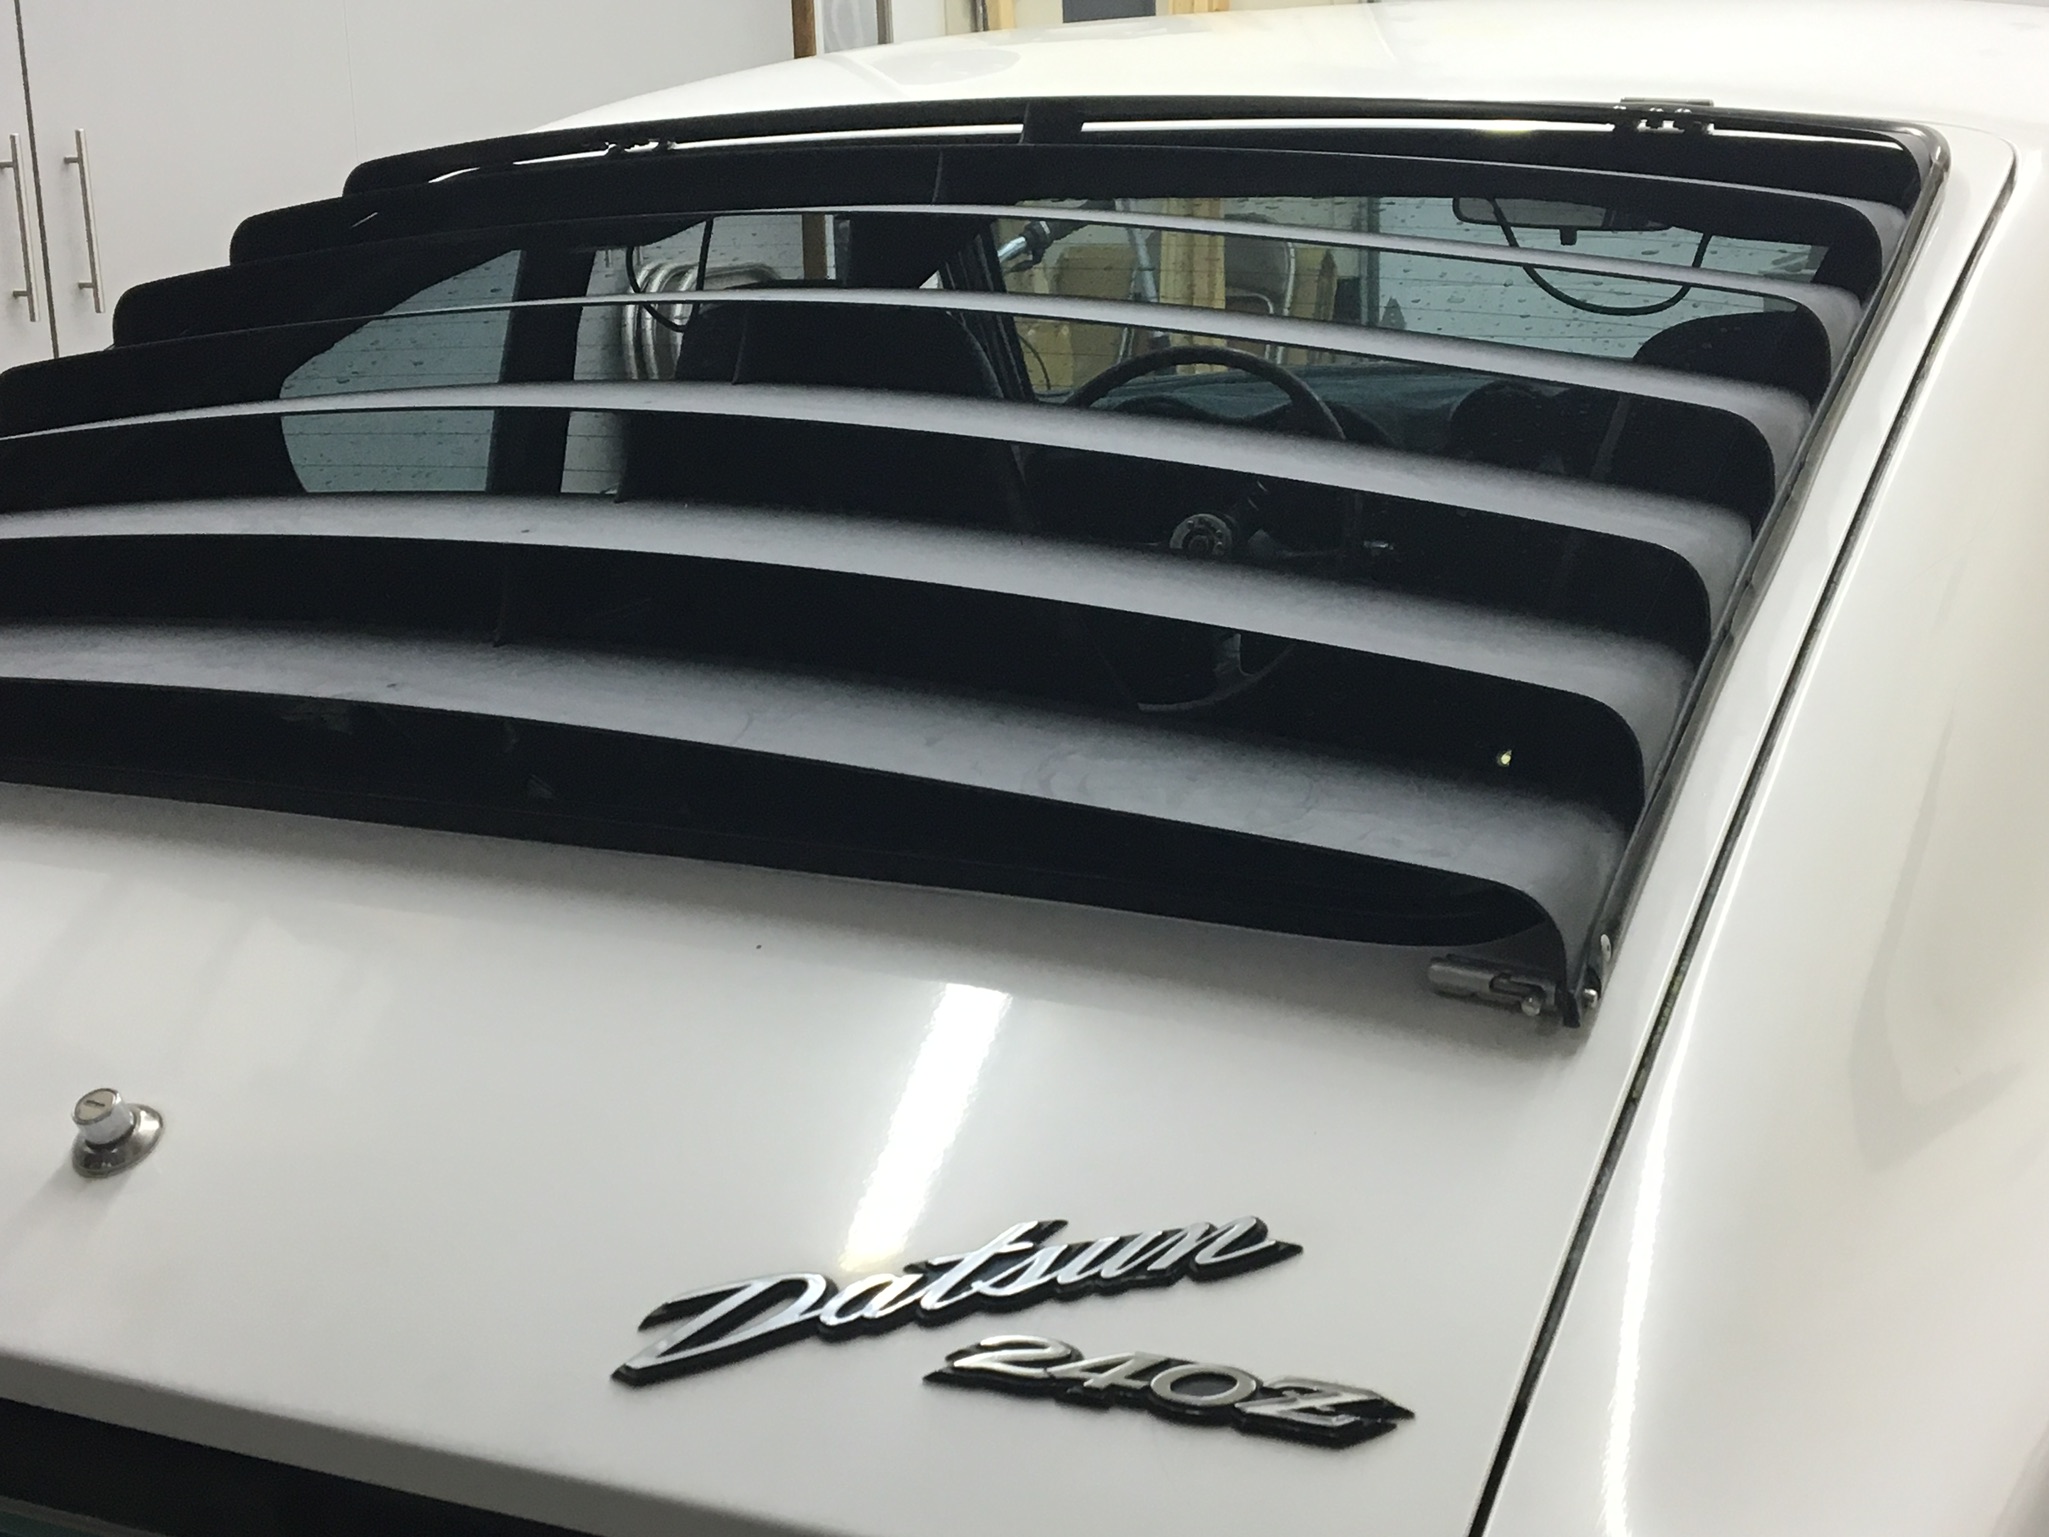
0 pointsYes they fit a 240... Long term plan is to go with Candy Red with black and chrome accents. Would I be pimped out if I chromed the louvres? Opinions?
 0 points