Leaderboard
-
.JPG.cfcada9cf1c1b502df3f5f2f2ca3ff36.JPG)
SteveJ
Free Member2Points9,646Posts -

240260280
Free Member2Points4,442Posts -
Redwing
Free Member2Points747Posts -
Matthew Abate
Free Member1Points1,204Posts


Popular Content
Showing content with the highest reputation on 01/13/2017 in all areas
-
That's exactly what I'm trying to describe. If the new valve I have doesn't shut the hot coolant out I'm going to use something like what you have. Thank you!1 point
-
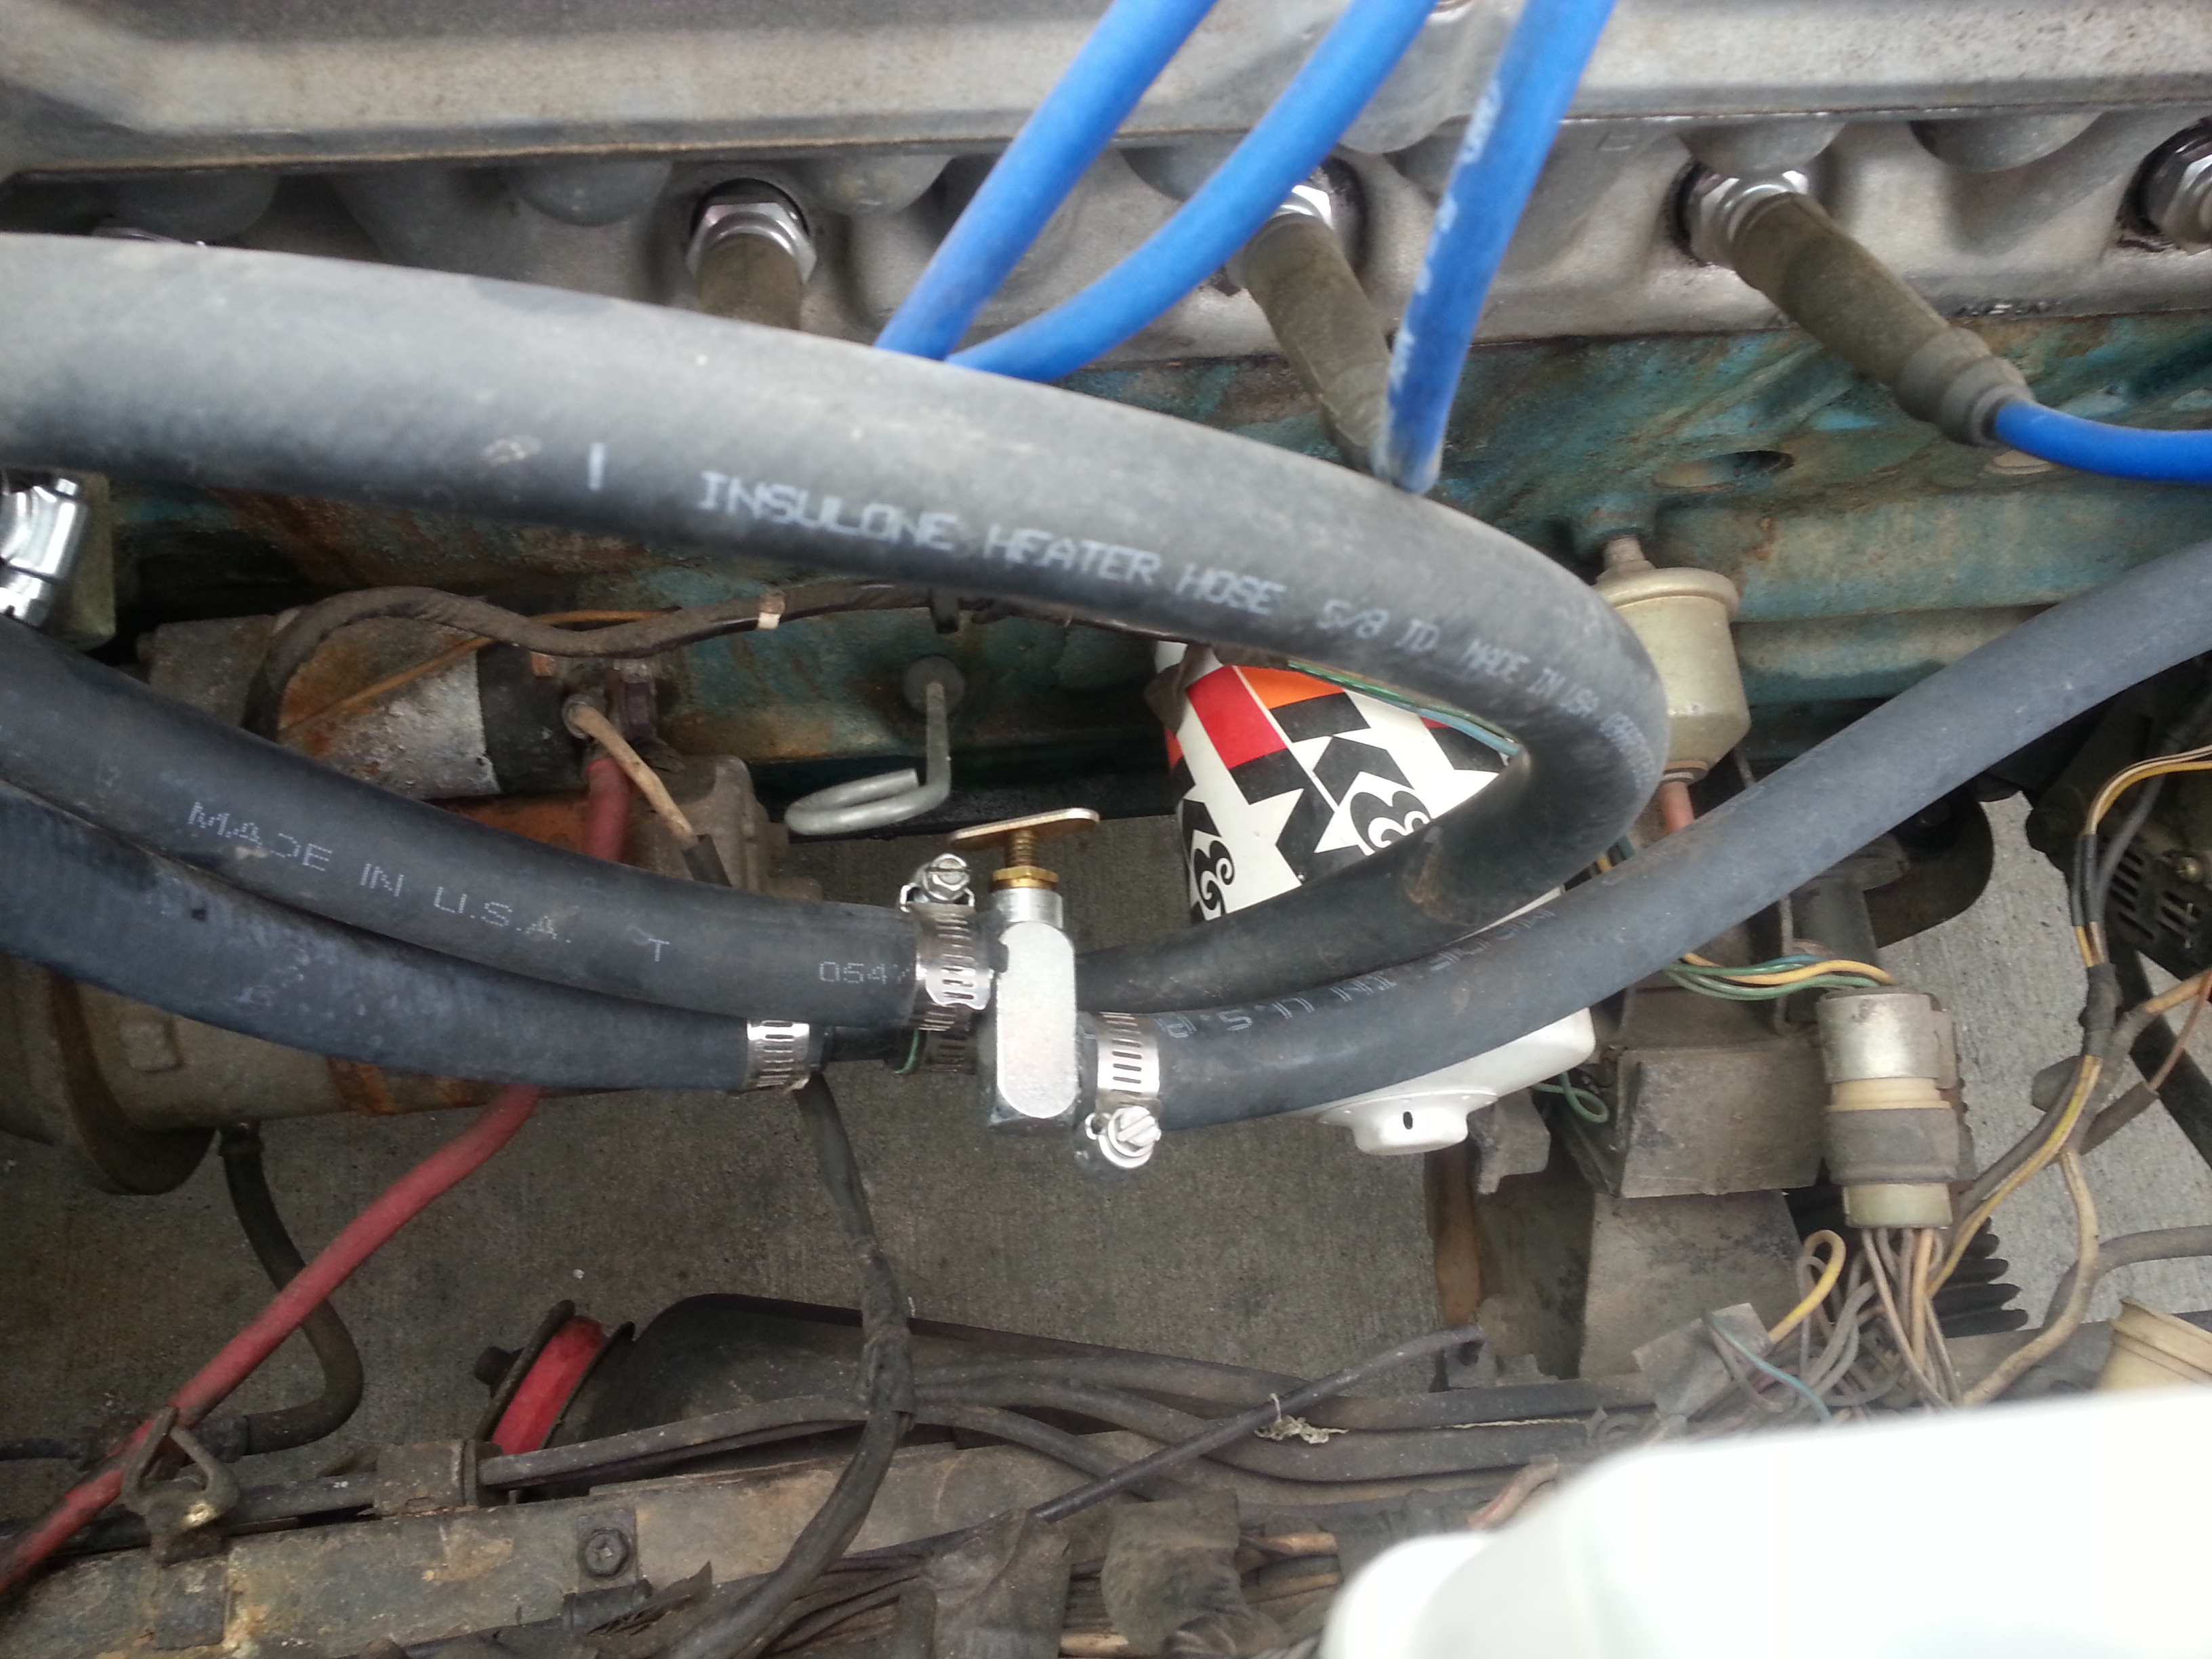
Here it is. If you enlarge the photo you can see the detail. I left it large so you could see the hoses connected to it. Let me know if you need a different angle or something else. Hope this helps. Jai
 1 point
 -
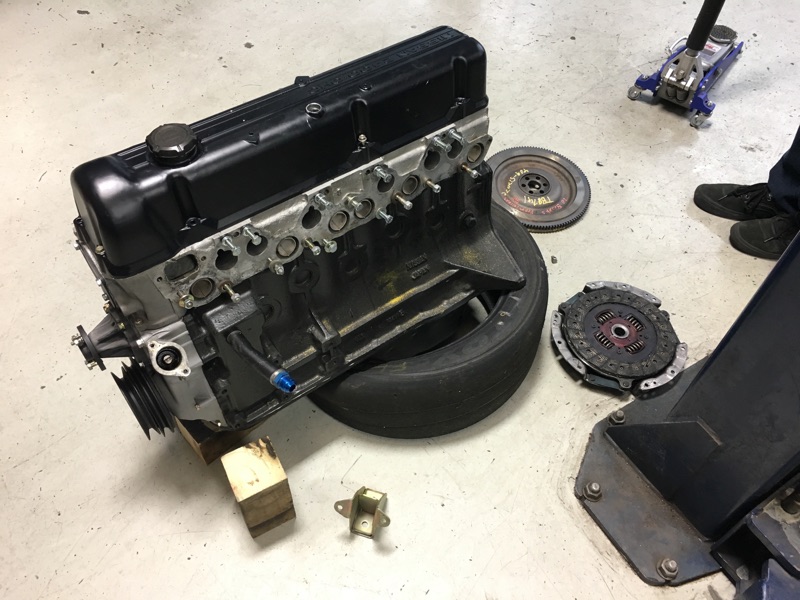
I don't know the block and head combo for sure, but I believe it is a 280 block with a Maxima head. They said it produced about 180 or so with triples (probably Mikunis). It's not an outlandish build, but it will produce more than the poor, tired lump that's under the hood of my car now.1 point
-
Hello, The car was taken apart about 30+ years ago and I am looking for a Z specialist to rebuild it. Any suggestions would be appreciated. Thanks in advance. D of V1 point
-
Today hyperventilated about Excellent but slow, no, extremely busy engine builder.... Sent from my iPhone using Classic Zcar Club mobile
 1 point
 -
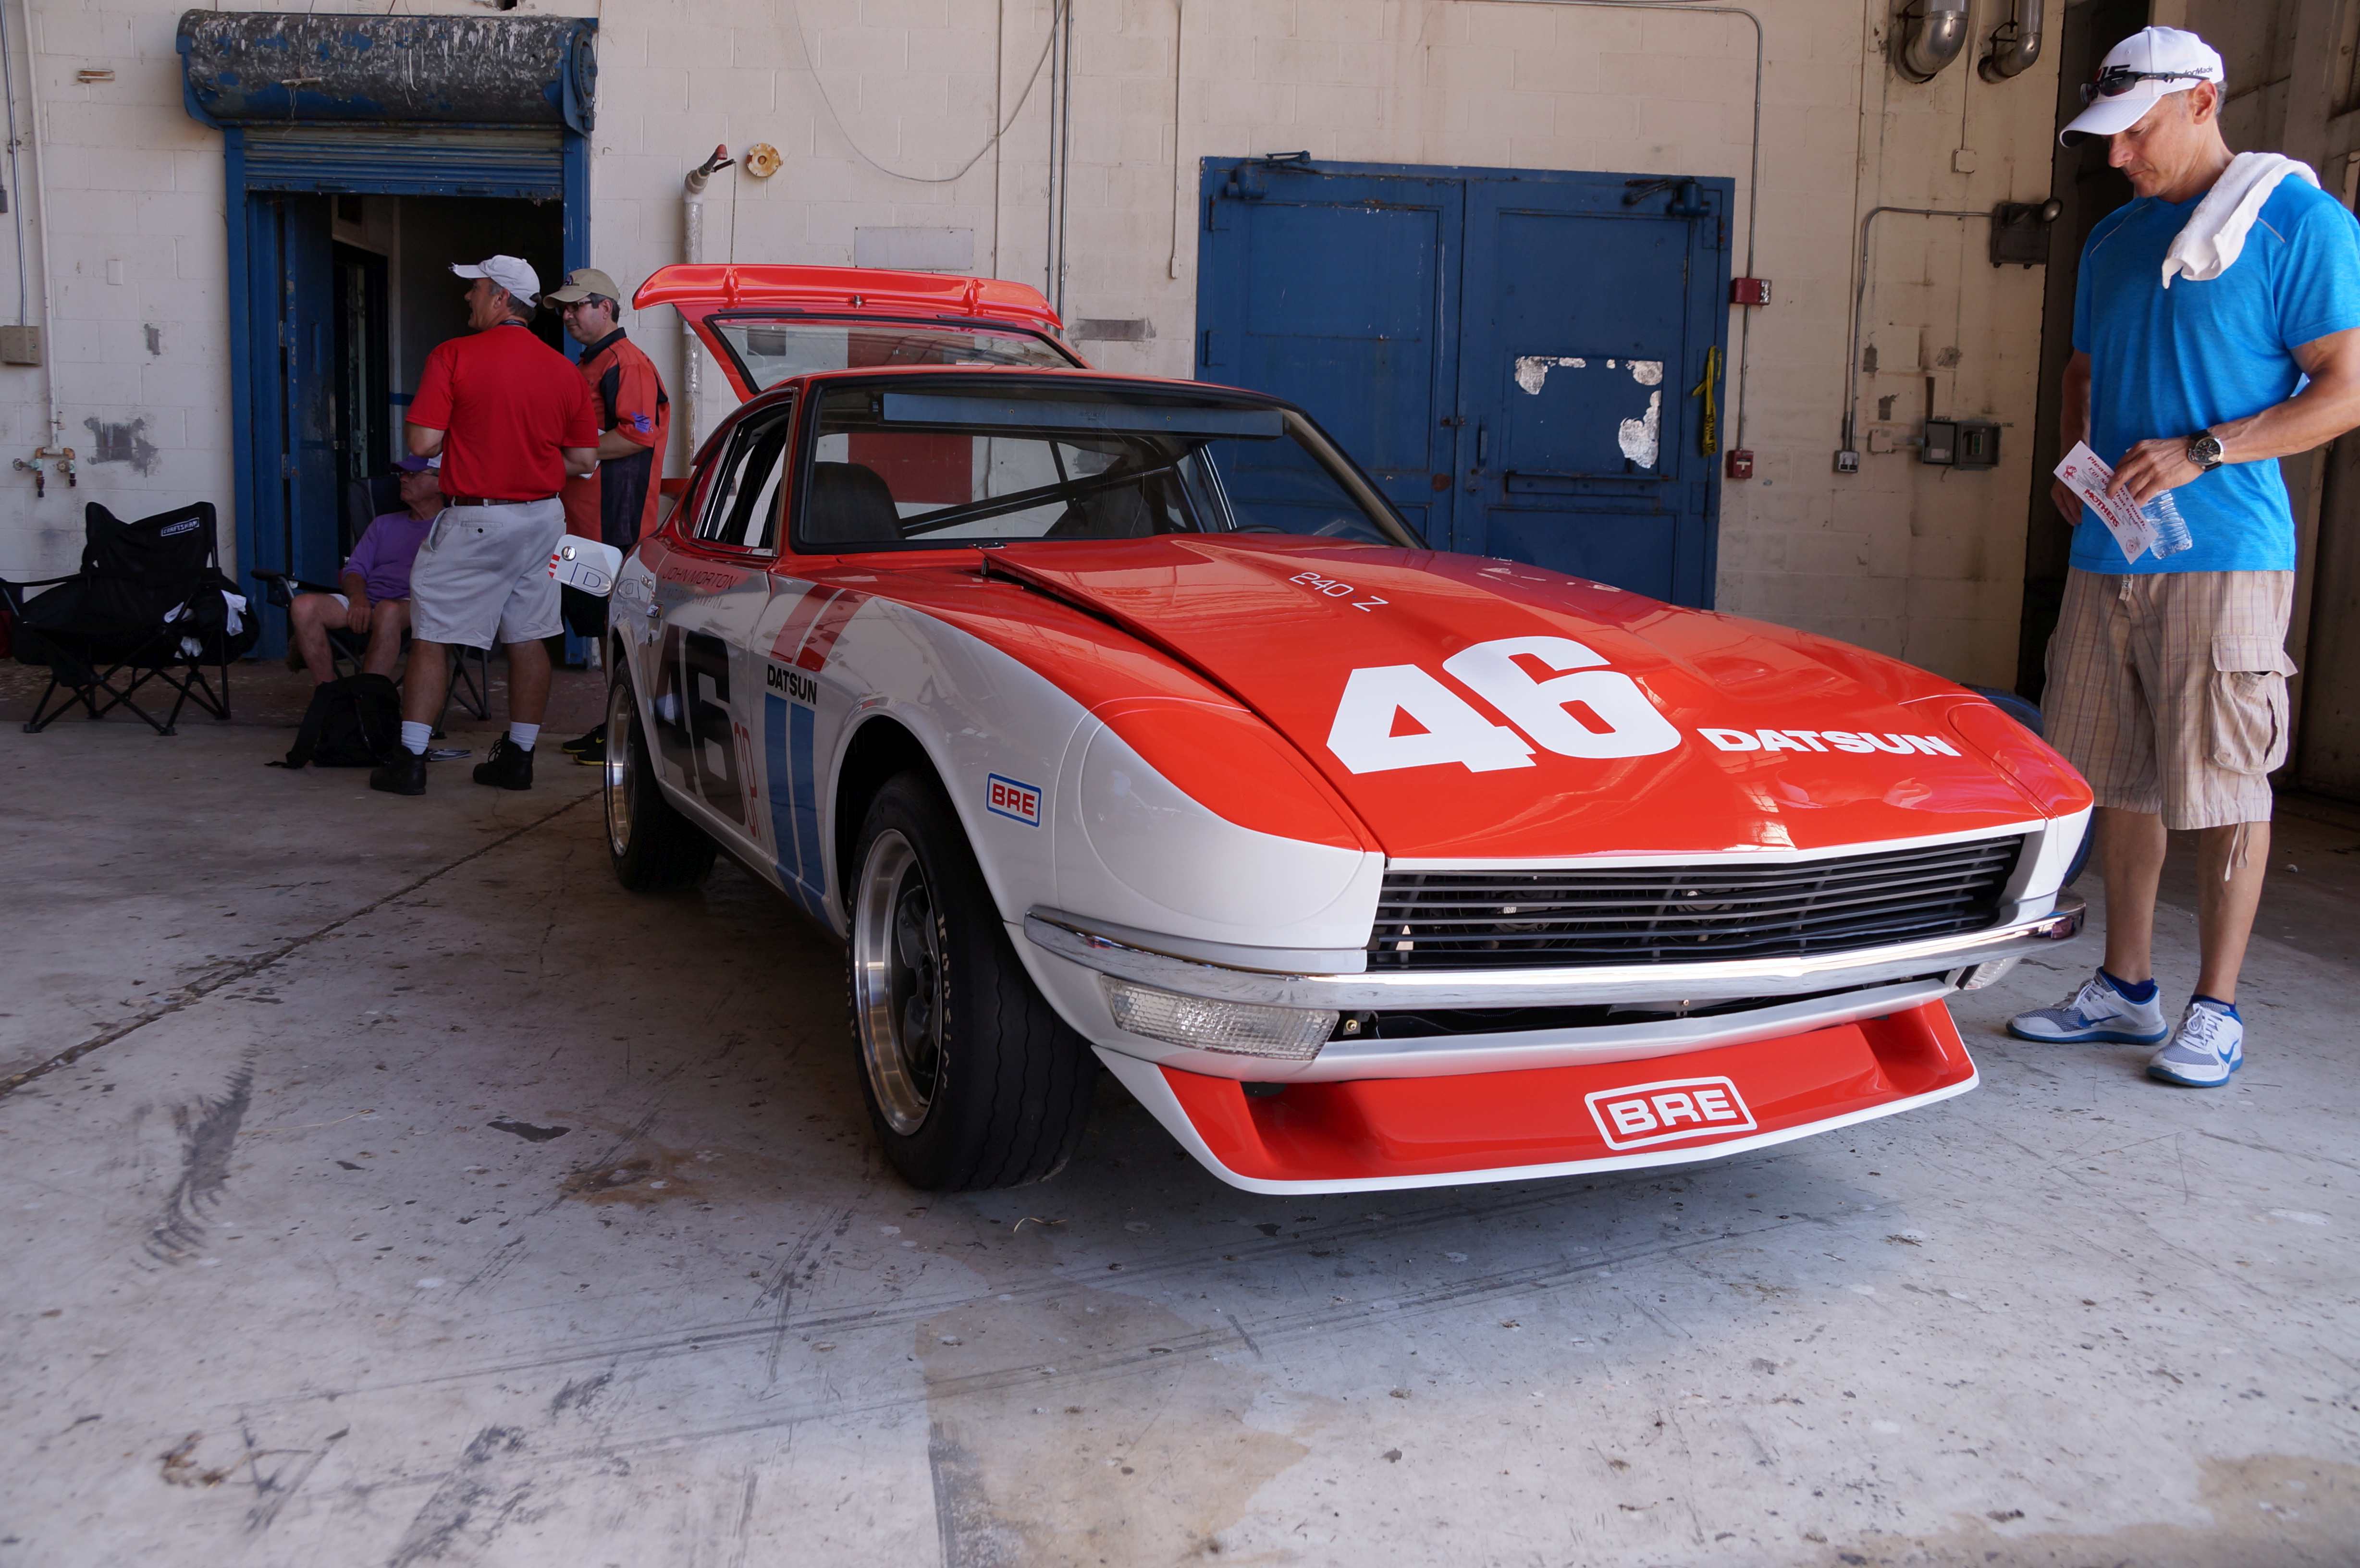
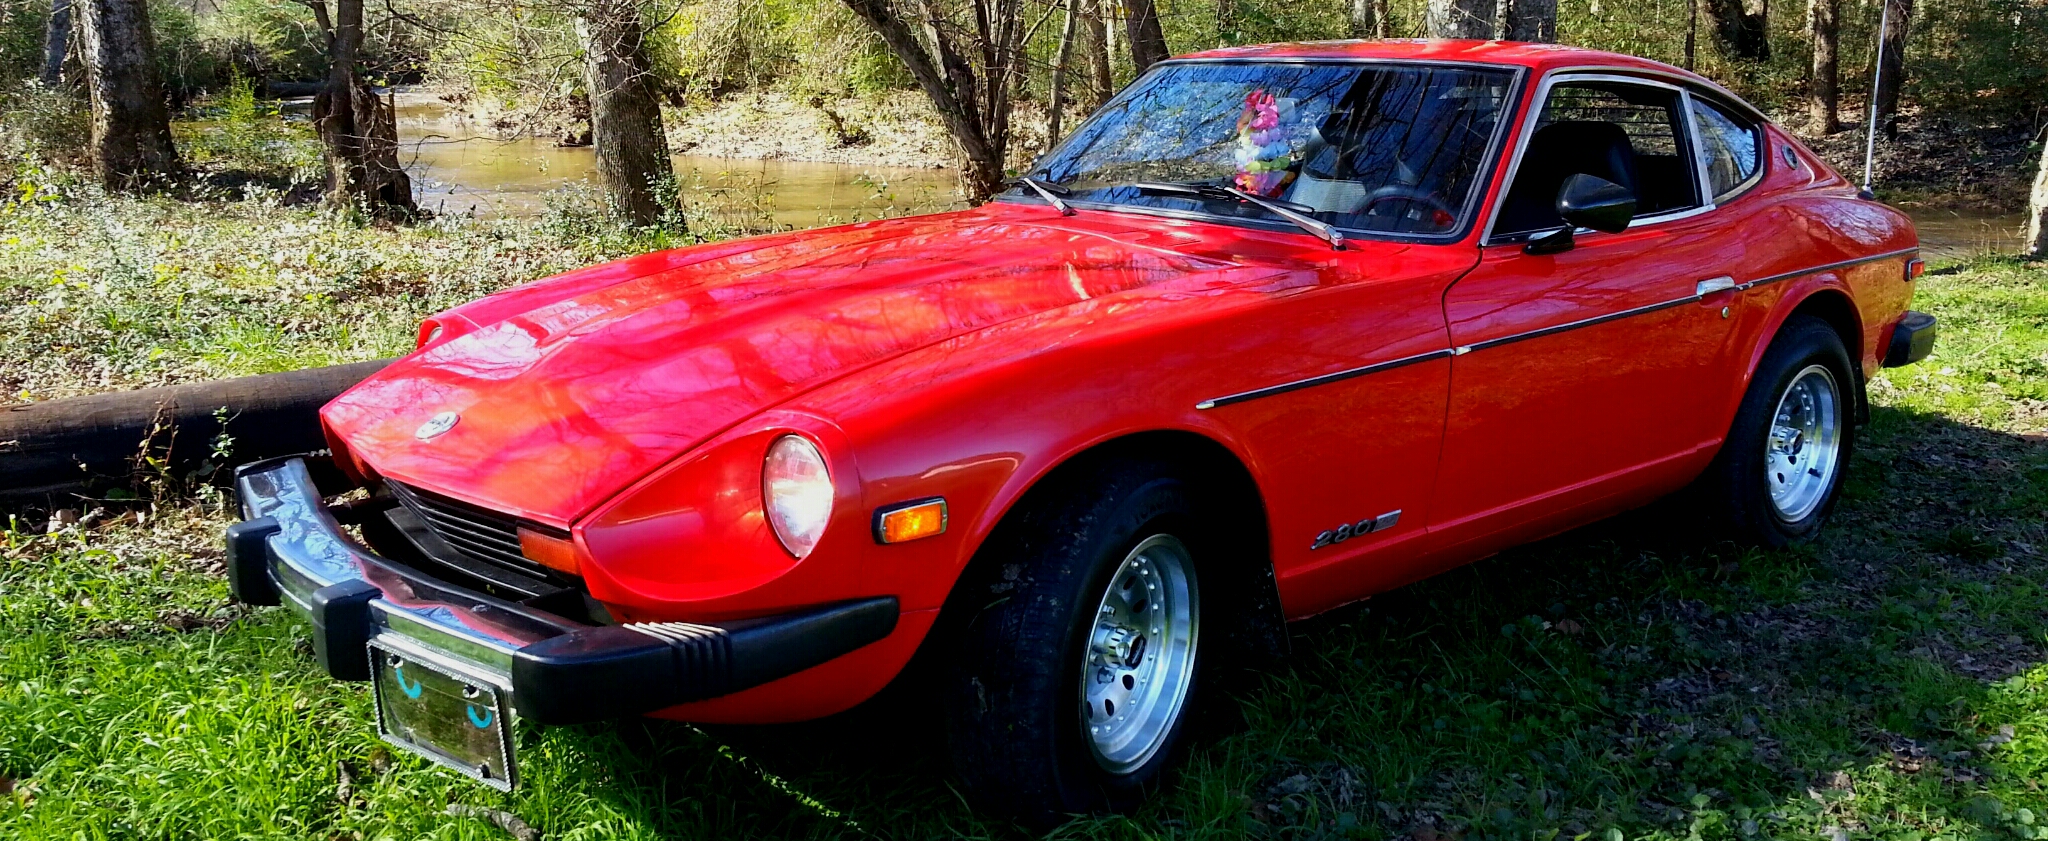
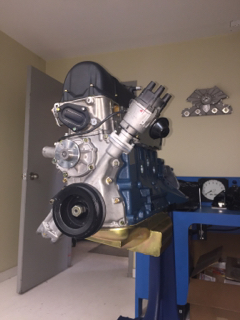
I drove my Z down to Sugar Hill Speed Shop (https://www.facebook.com/Sugar-Hill-Speed-Shop-1001732356563108/photos) today to pick up an engine, flywheel and clutch that a friend gave me. We loaded it up on another friend's truck and stored it in his garage. The engine is a fresh rebuild with less than 150 miles on it. I attached a photo of the car it came out of. The friend who is storing the engine for me is going to help me with the engine swap in about a month from now. I have been unbelievably blessed with making some incredible friendships over the last few years.
 1 point
 -
thats fantastic!! I just received my float-sync tool going to try it this weekend and see how it goes. I'm also going to remove my choke cables when I do the carb adjustments, I want to make sure the chokes don't interfere with the balancing. Thanks!1 point
-
1 point
-
1 pointMany may find this excerpt interesting. It demonstrates how Nissan had to adapt Datsun products to North America well before the Z sports car was designed specifically for the North American market. (To replace their only sports car (roadster) in its biggest market) : Source: http://datsunforum.com/datsun-discovered-america-part-3/ Masataka Usami, a Nissan executive who lived in Greenwood Lake, New Jersey, and whose own car would not start in cold weather, reported back to Tokyo that Nissan could not have a car that started only two out of ten times. Tokyo was not very helpful. The alleged starting problems were impossible, the home office insisted, since it had checked Hokkaido – Japan’s northernmost island, where Datsuns started without difficulty – was just as cold as New Jersey. Usami replied that in Hokkaido those few Japanese who were privileged to own cars lovingly put blankets over the hoods every night. Tokyo asked why Americans didn’t do the same thing. Usami explained that to the Japanese a car was a privilege, but to Americans it was an appliance, and they expected it to work without pampering. I had the same experience first hand when I worked nearly 5 years for a Chinese company who designed and produced international products that were not selling here in North America. No one in head office listened to anyone in North America whether they were local or transferred from HQ. It ultimately caused so many missteps that the company had to pull out of this market. Nissan obviously did not do this and adapted their products to the North American market; otherwise they would have failed like the company I worked for. In the early to mid-sixties, it is because of Mr. K's perseverance, automotive knowledge, powers of observation, intuitiveness, logic, understanding of people, understanding of customer needs, and international corporate skills that he was able to align Nissan HQ with the North American market. The products followed suit and sold well. For being accused of turning up "late to the discussion": It is in the spirit of accuracy and adding new and useful content that I am contributing to old posts. This is very important for the organization of content on forums for the benefit of others who come across these threads in the future. The thread should be complete with the information contained within it, not scattered throughout the forum. People are not visiting this forum to look at time stamps. I have done this (updated old internet posts) on the technical side of Z's for nearly 14 years. My interests have changed slightly as I am now delving into the history and design of the Z; however, I am doing the same as I always did with respect to posting information helpful to others. With so much great historical and design data on this forum over the years from you, Carl, Kats, Chris, Mike and many others, it is difficult to find new and interesting content to add (as most has been put forth);however, even though I am "late to the game", I am fortunate to contribute some new data in this area that I hope others can enjoy. I think you may have enjoyed this example: http://www.classiczcars.com/topic/33633-24th-october-1969-the-s30-series-z-public-debut/?page=2#comment-5091521 point
-
1 pointAs per FSM, #1 hole is factory position for new chain and components and unshaven head. If you actually got the cam sprocket on the Cam.. the chain's not too tight. New chain with new guides and tensioner can be an SOB to install. Double check the notch and groove for Cam timing as mentioned. As long as they're in spec, you should be Golden. Head or block shave may require using #2 hole to align notches. I usually prefer to have the Timing Cover removed and the oil pan loose when I setup a new chain, tensioner and guides. Two head bolts loosely installed in the back of the head. I position everything but leave the top bolt loose on the curved guide. Then I swing the curved guide in to position and adjust it to provide the specified amount of clearance on chain tensioner. Then install the TC over the dowels. Secure TC with fasteners. Check that bottom of TC is flush with block. Assemble and torque head bolts, then bolt up the oil pan last. Honsowetz recommends that method... seems to work well. Edit: I just checked my 1976 280Z FSM and tensioner protrusion, with all new parts, is supposed to be set at 0.0mm by adjusting the curved guide. However, I do like to have a bit of clearance there just to make sure things aren't too tight. It also makes putting the Timing Cover on easier as you can move the head up a bit and fit the TC over the dowels at front of block. .050" to .100" should be sufficient clearance with all new parts1 point
-
This is what Sam put in RedBird. I'll get a photo and share with you. Jai1 point
-
Are you talking about a shop, a restorer, or just someone with a lot of experience? I haven't found one myself. I've found that this and other forums, plus Google, are enough to allow me to do it myself.1 point
-
1 pointI have a pretty good idea! I would prefer you focus on the second video though! I was either going a little hard or trying to avoid John's accident. No damage to my car but unfortunately John in rhe white Zed hit the wall fairly hard. Please check out the video below showing 2 laps that were a little tidier.1 point
-
240260280, I am not measuring the fuel level from the lid, per your inference. I am measuring the float level, per instructions, 14 mm down from the lid and gasket. This is supposed to equate to an appropriate fuel level. The key, I believe, is Blue is stating the fuel should be 6 mm below the aux venturi opening in the side wall of the emulsion tube, or 6.5 mm to the center of the fuel level. I am measuring the fuel level from the top incorrectly. so I will focus on the distance below the aux venturi opening.1 point