Leaderboard
-
dmorales-bello
Free Member3Points627Posts -

siteunseen
Free Member3Points15,115Posts -
Mark Maras
Free Member2Points3,719Posts -
Captain Obvious
Free Member2Points10,081Posts


Popular Content
Showing content with the highest reputation on 08/12/2016 in all areas
-
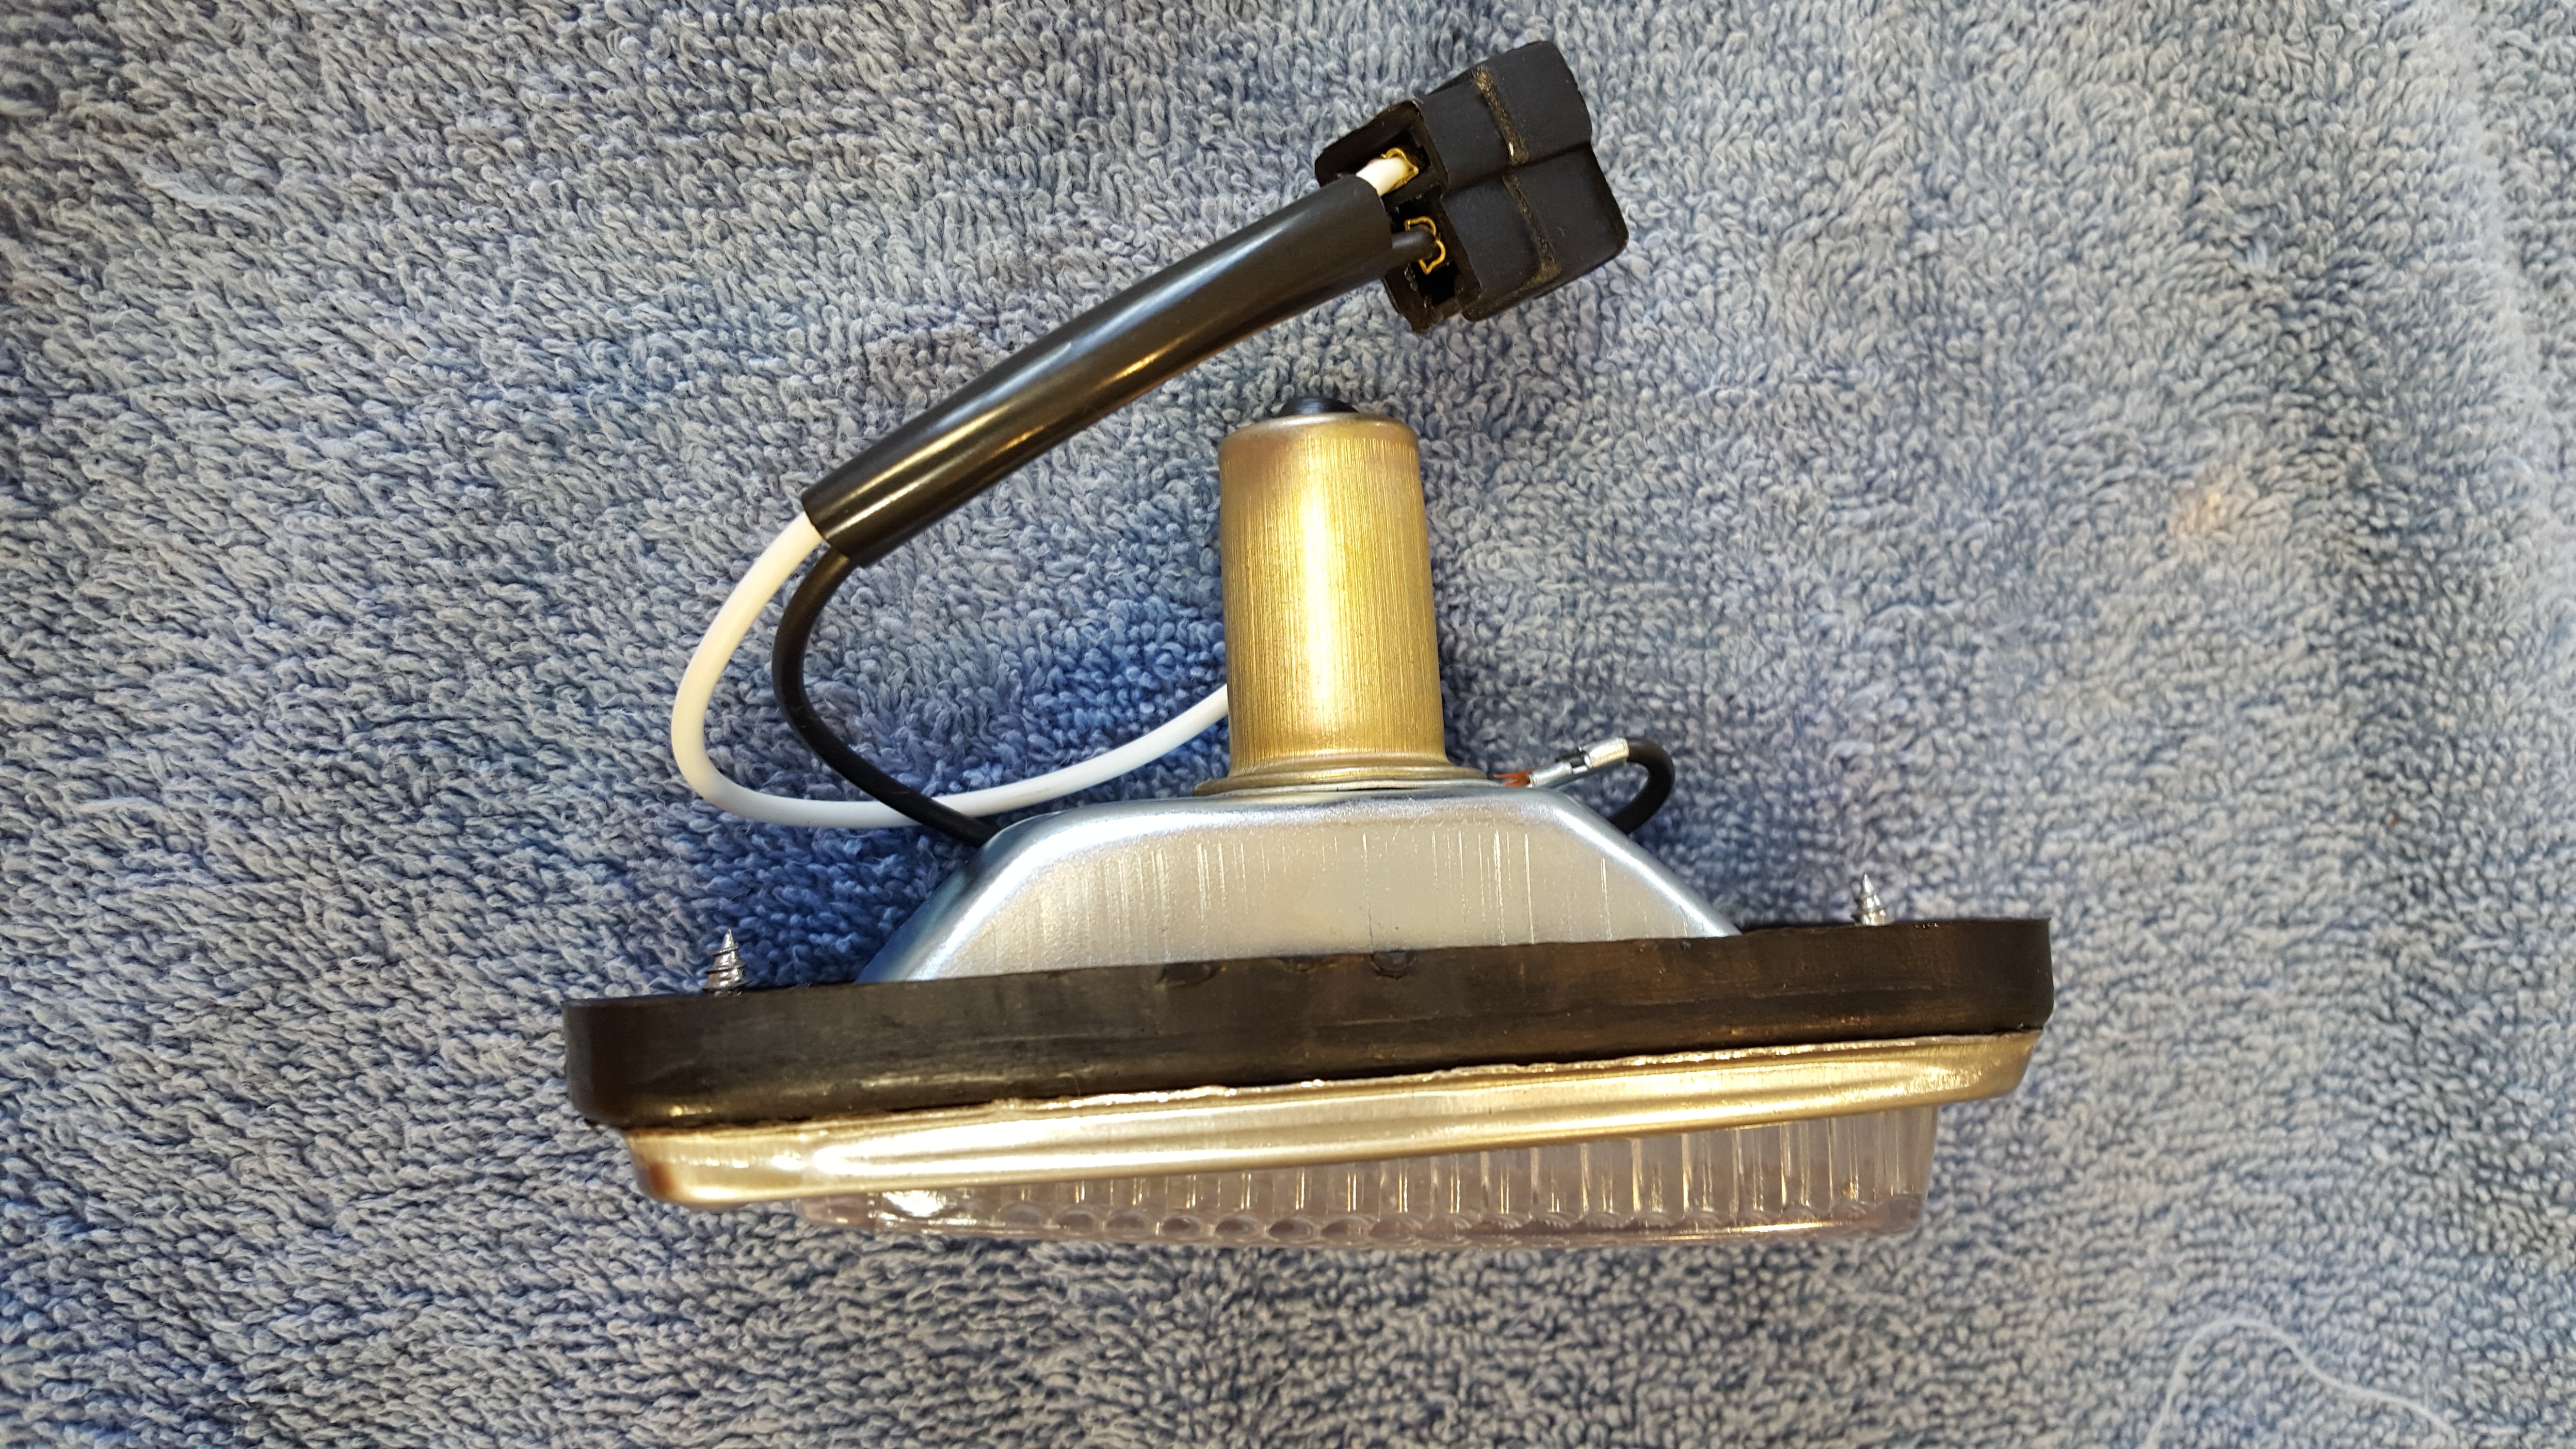
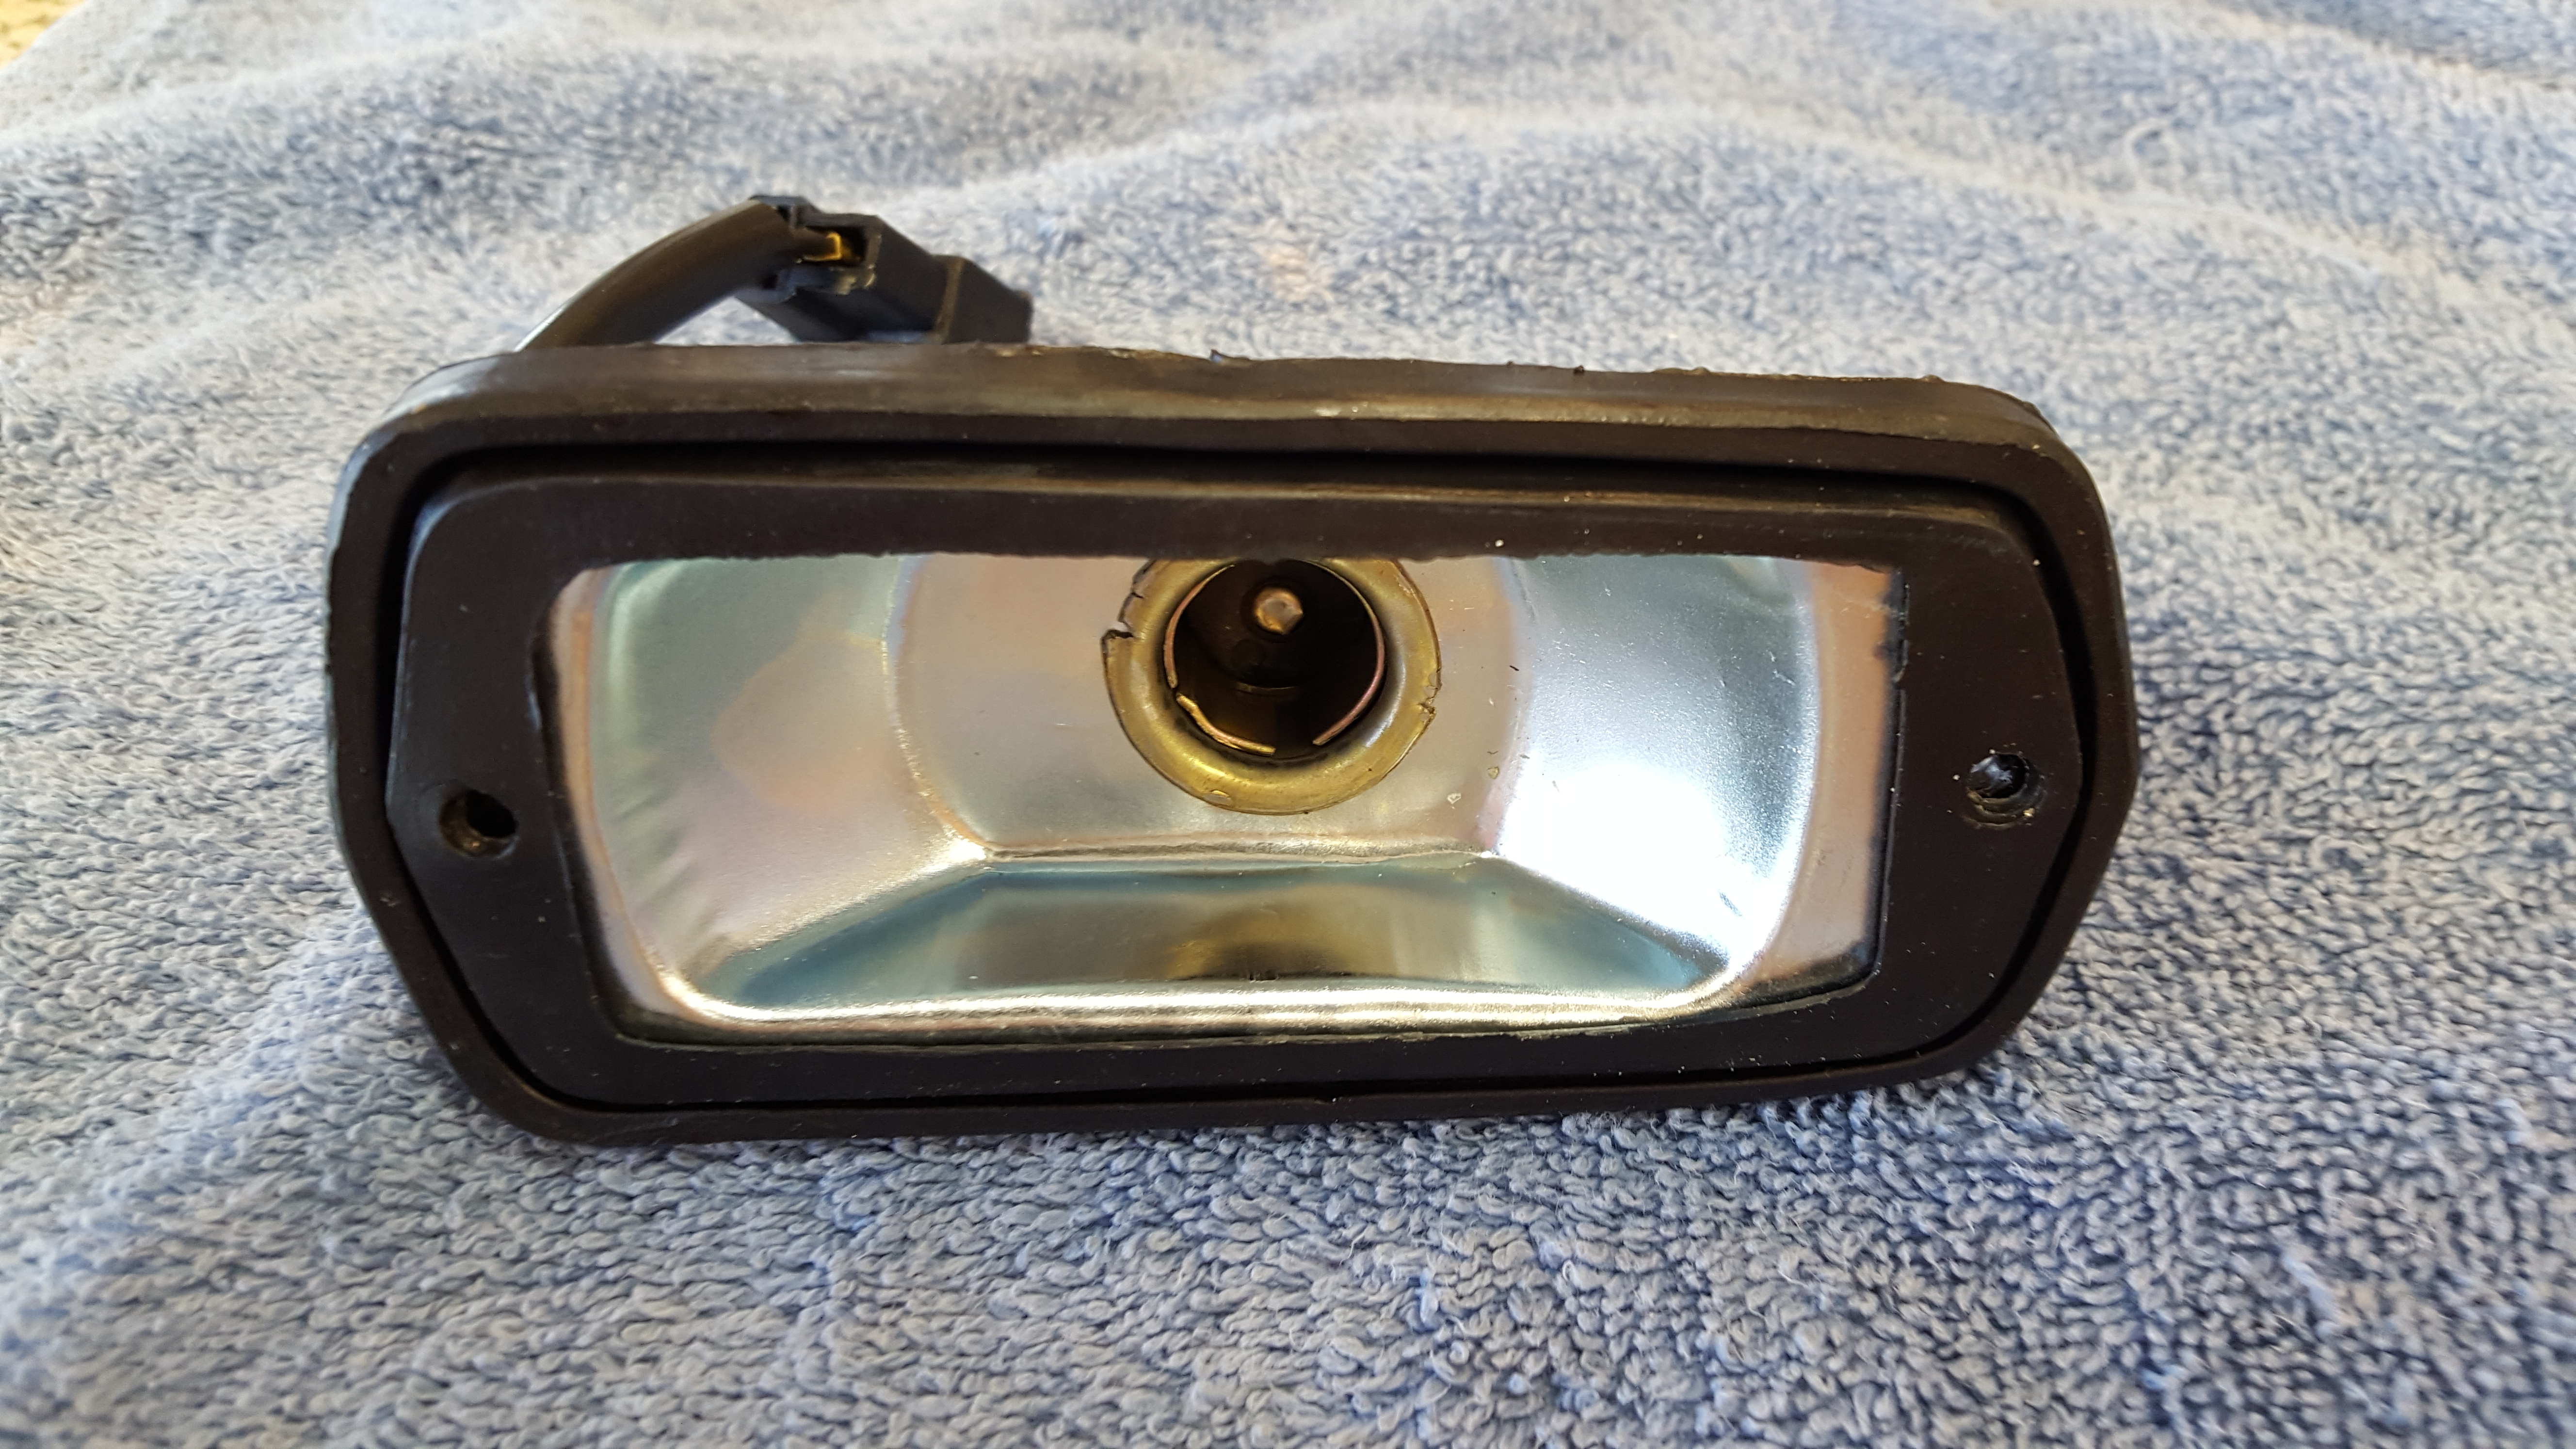
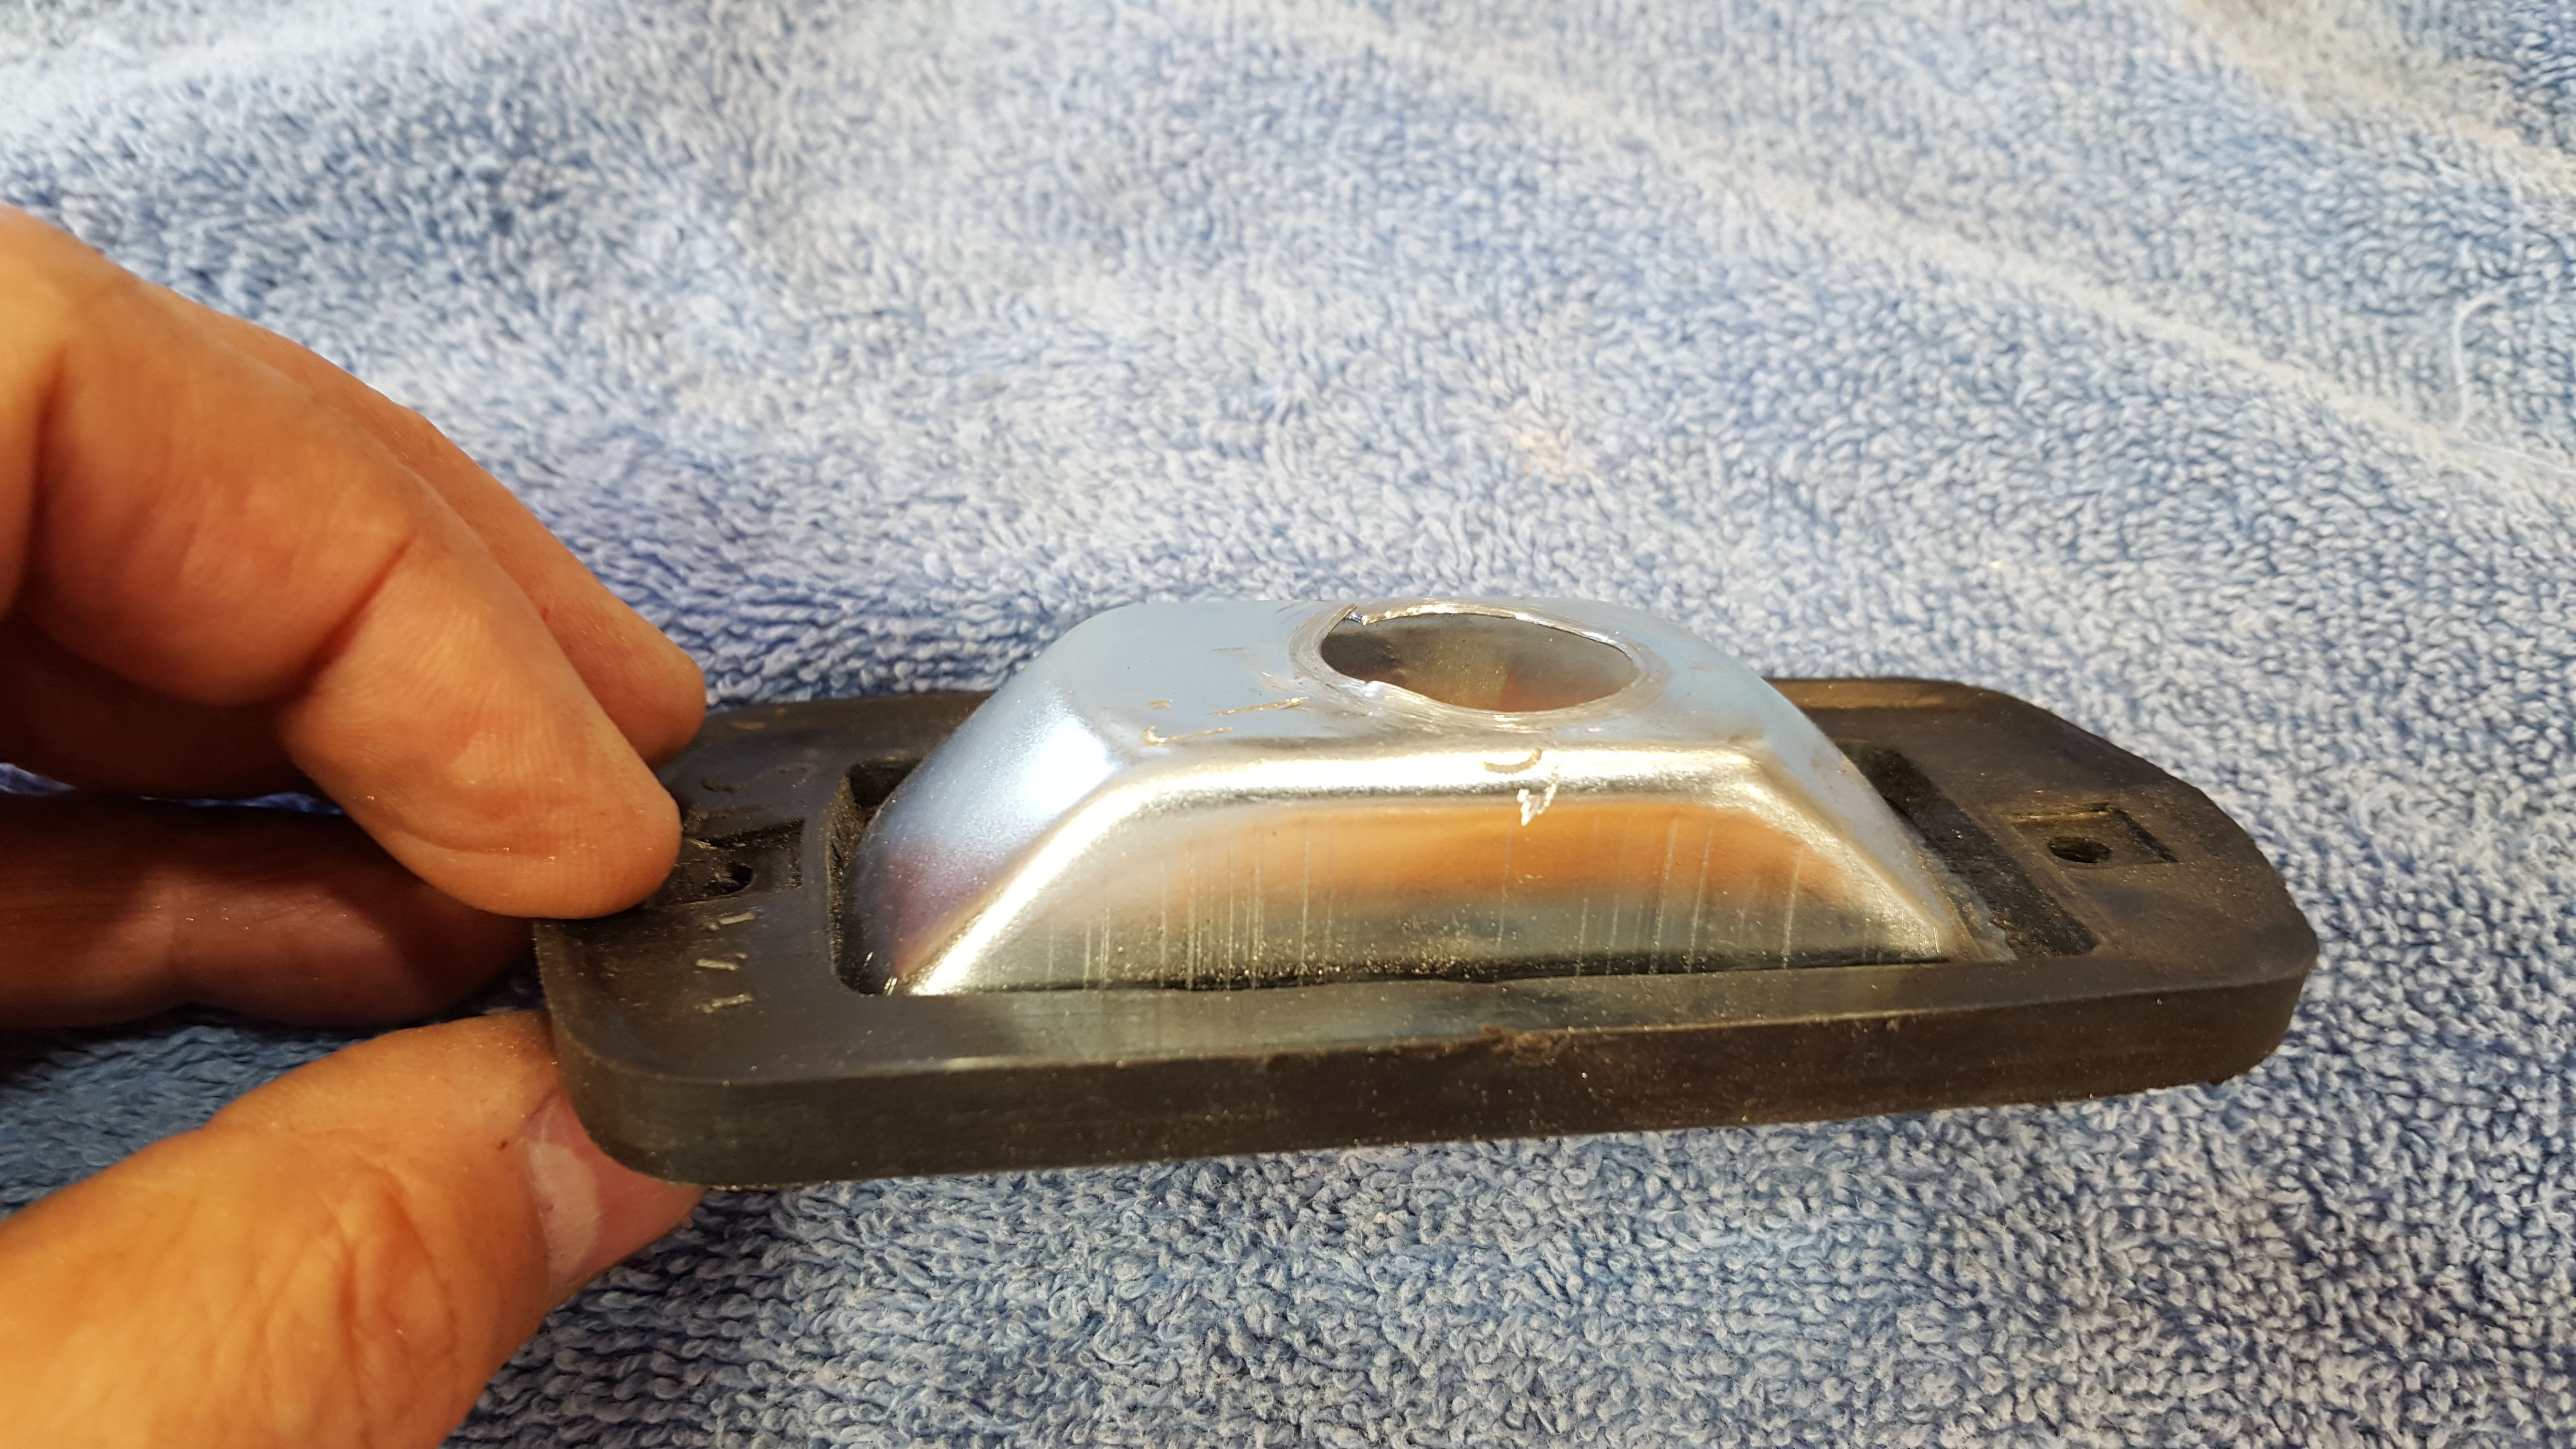
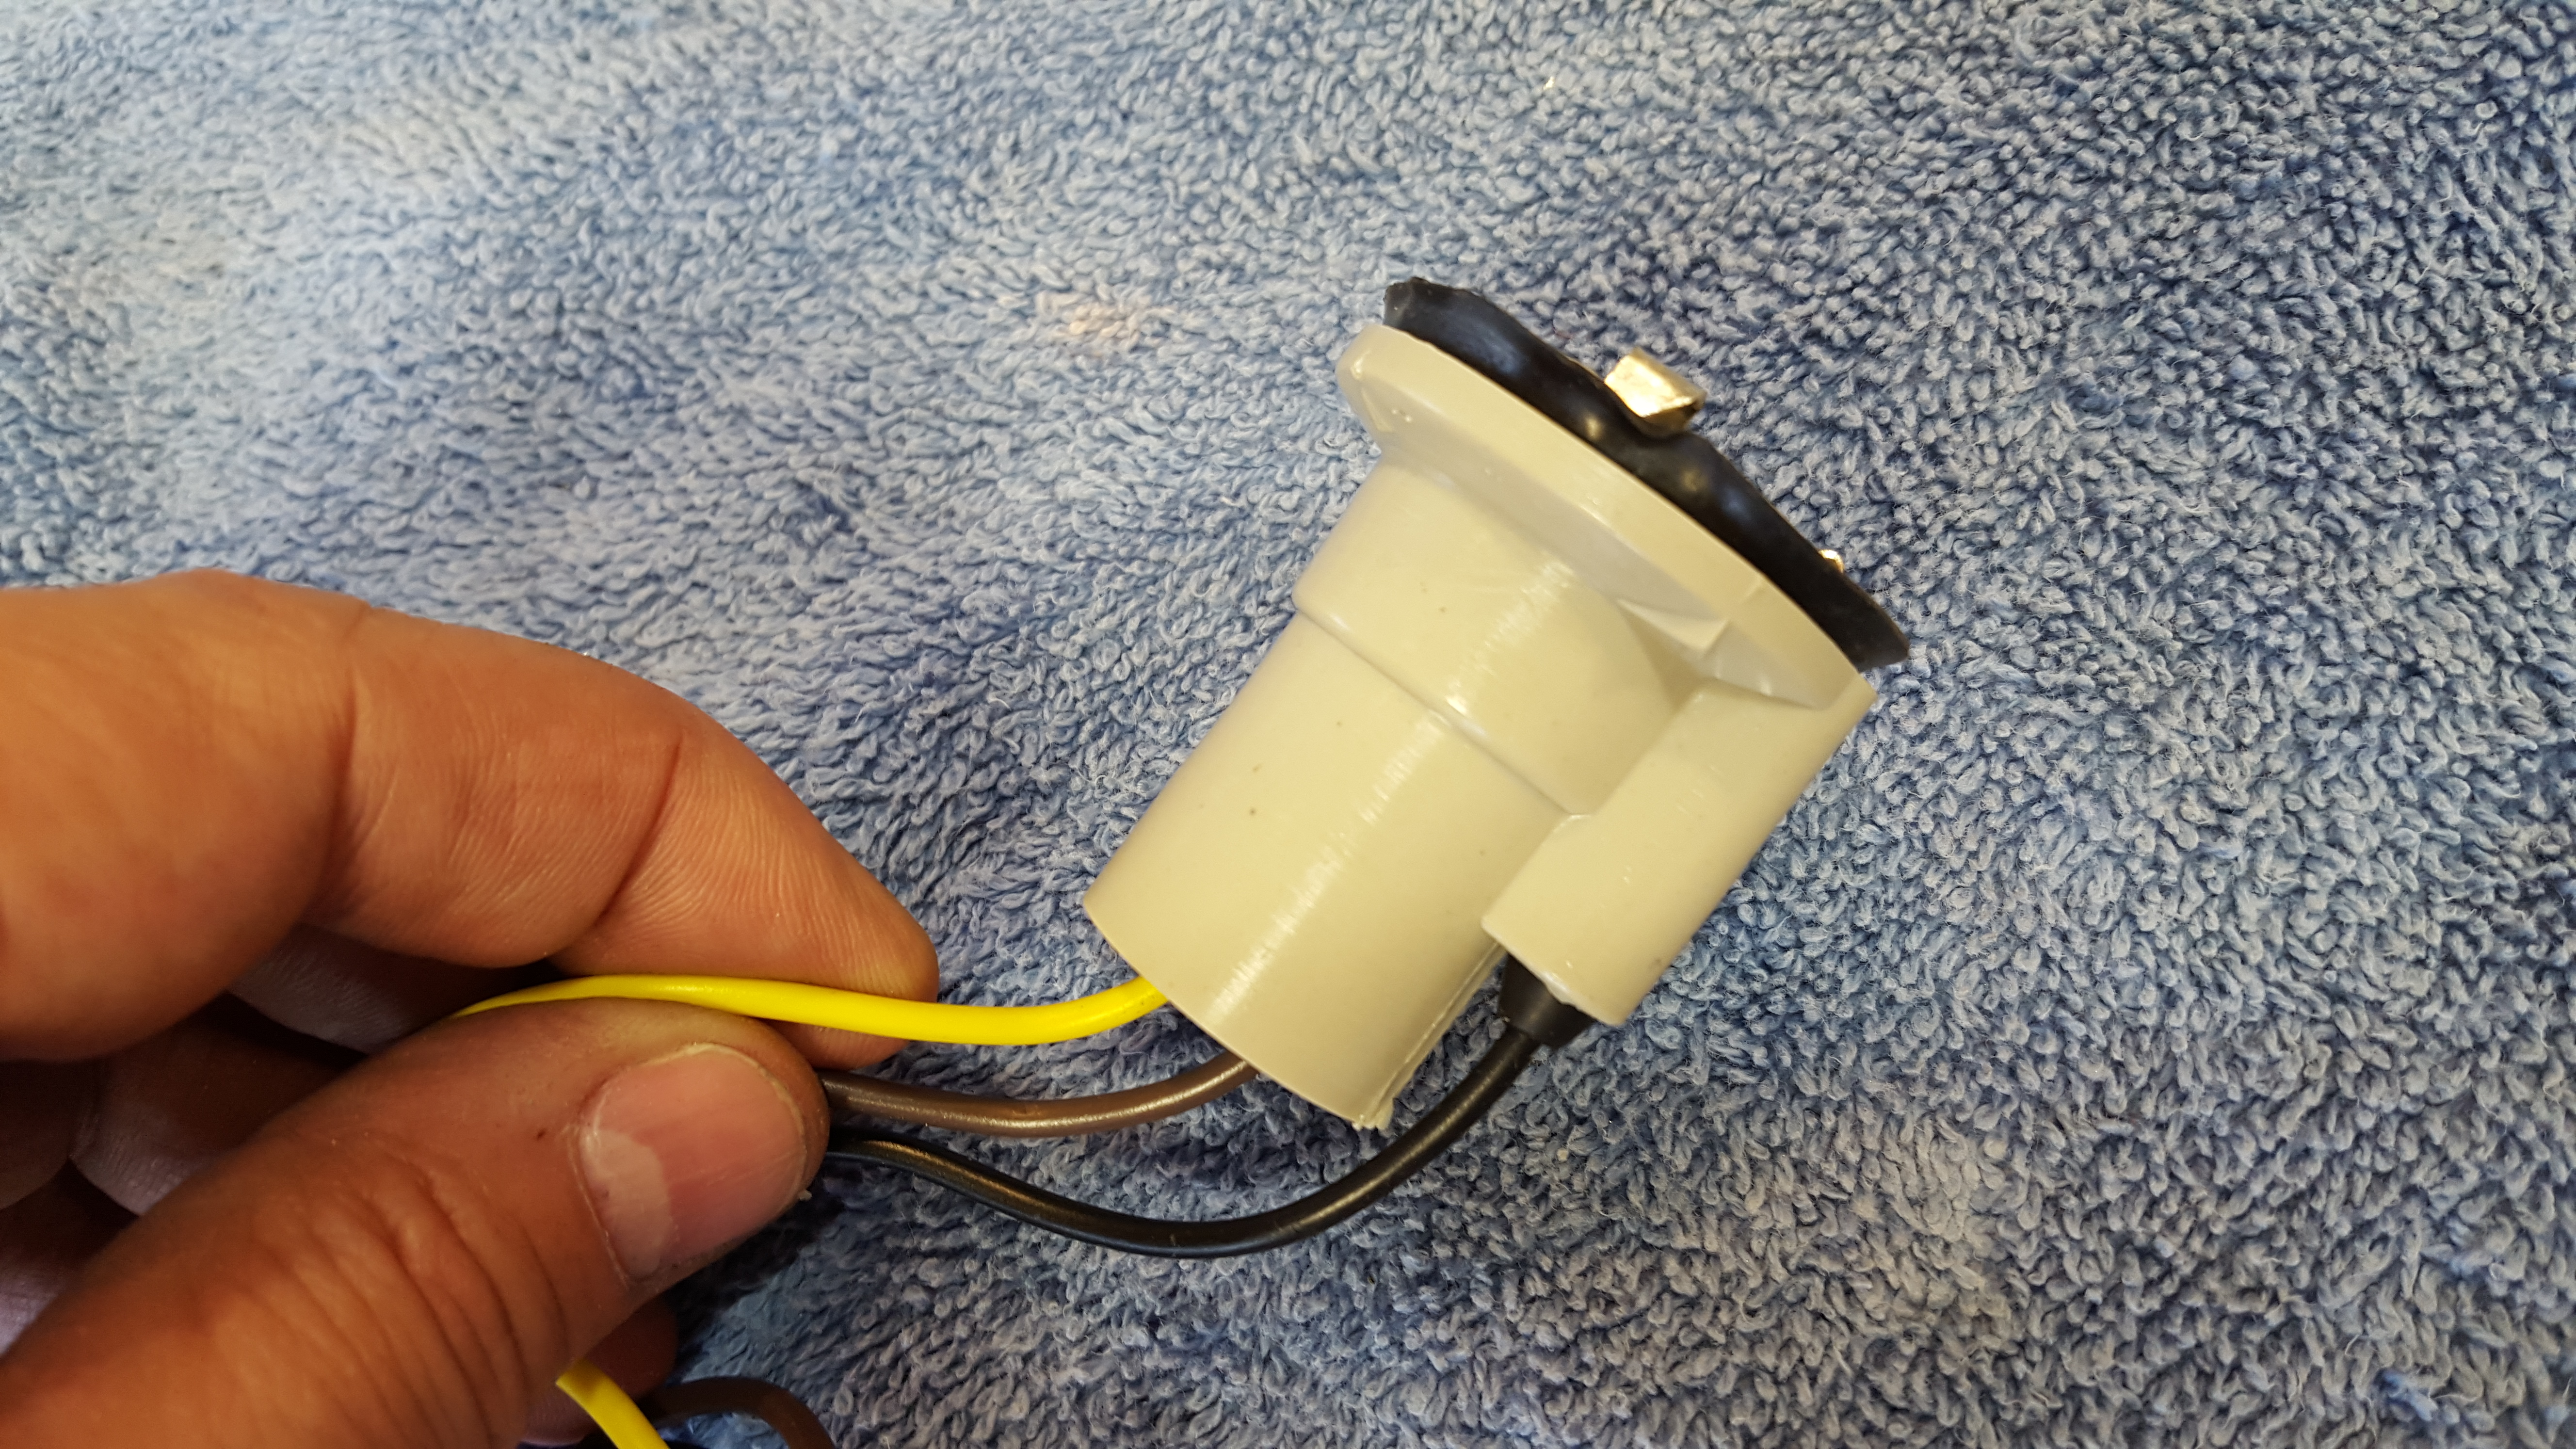
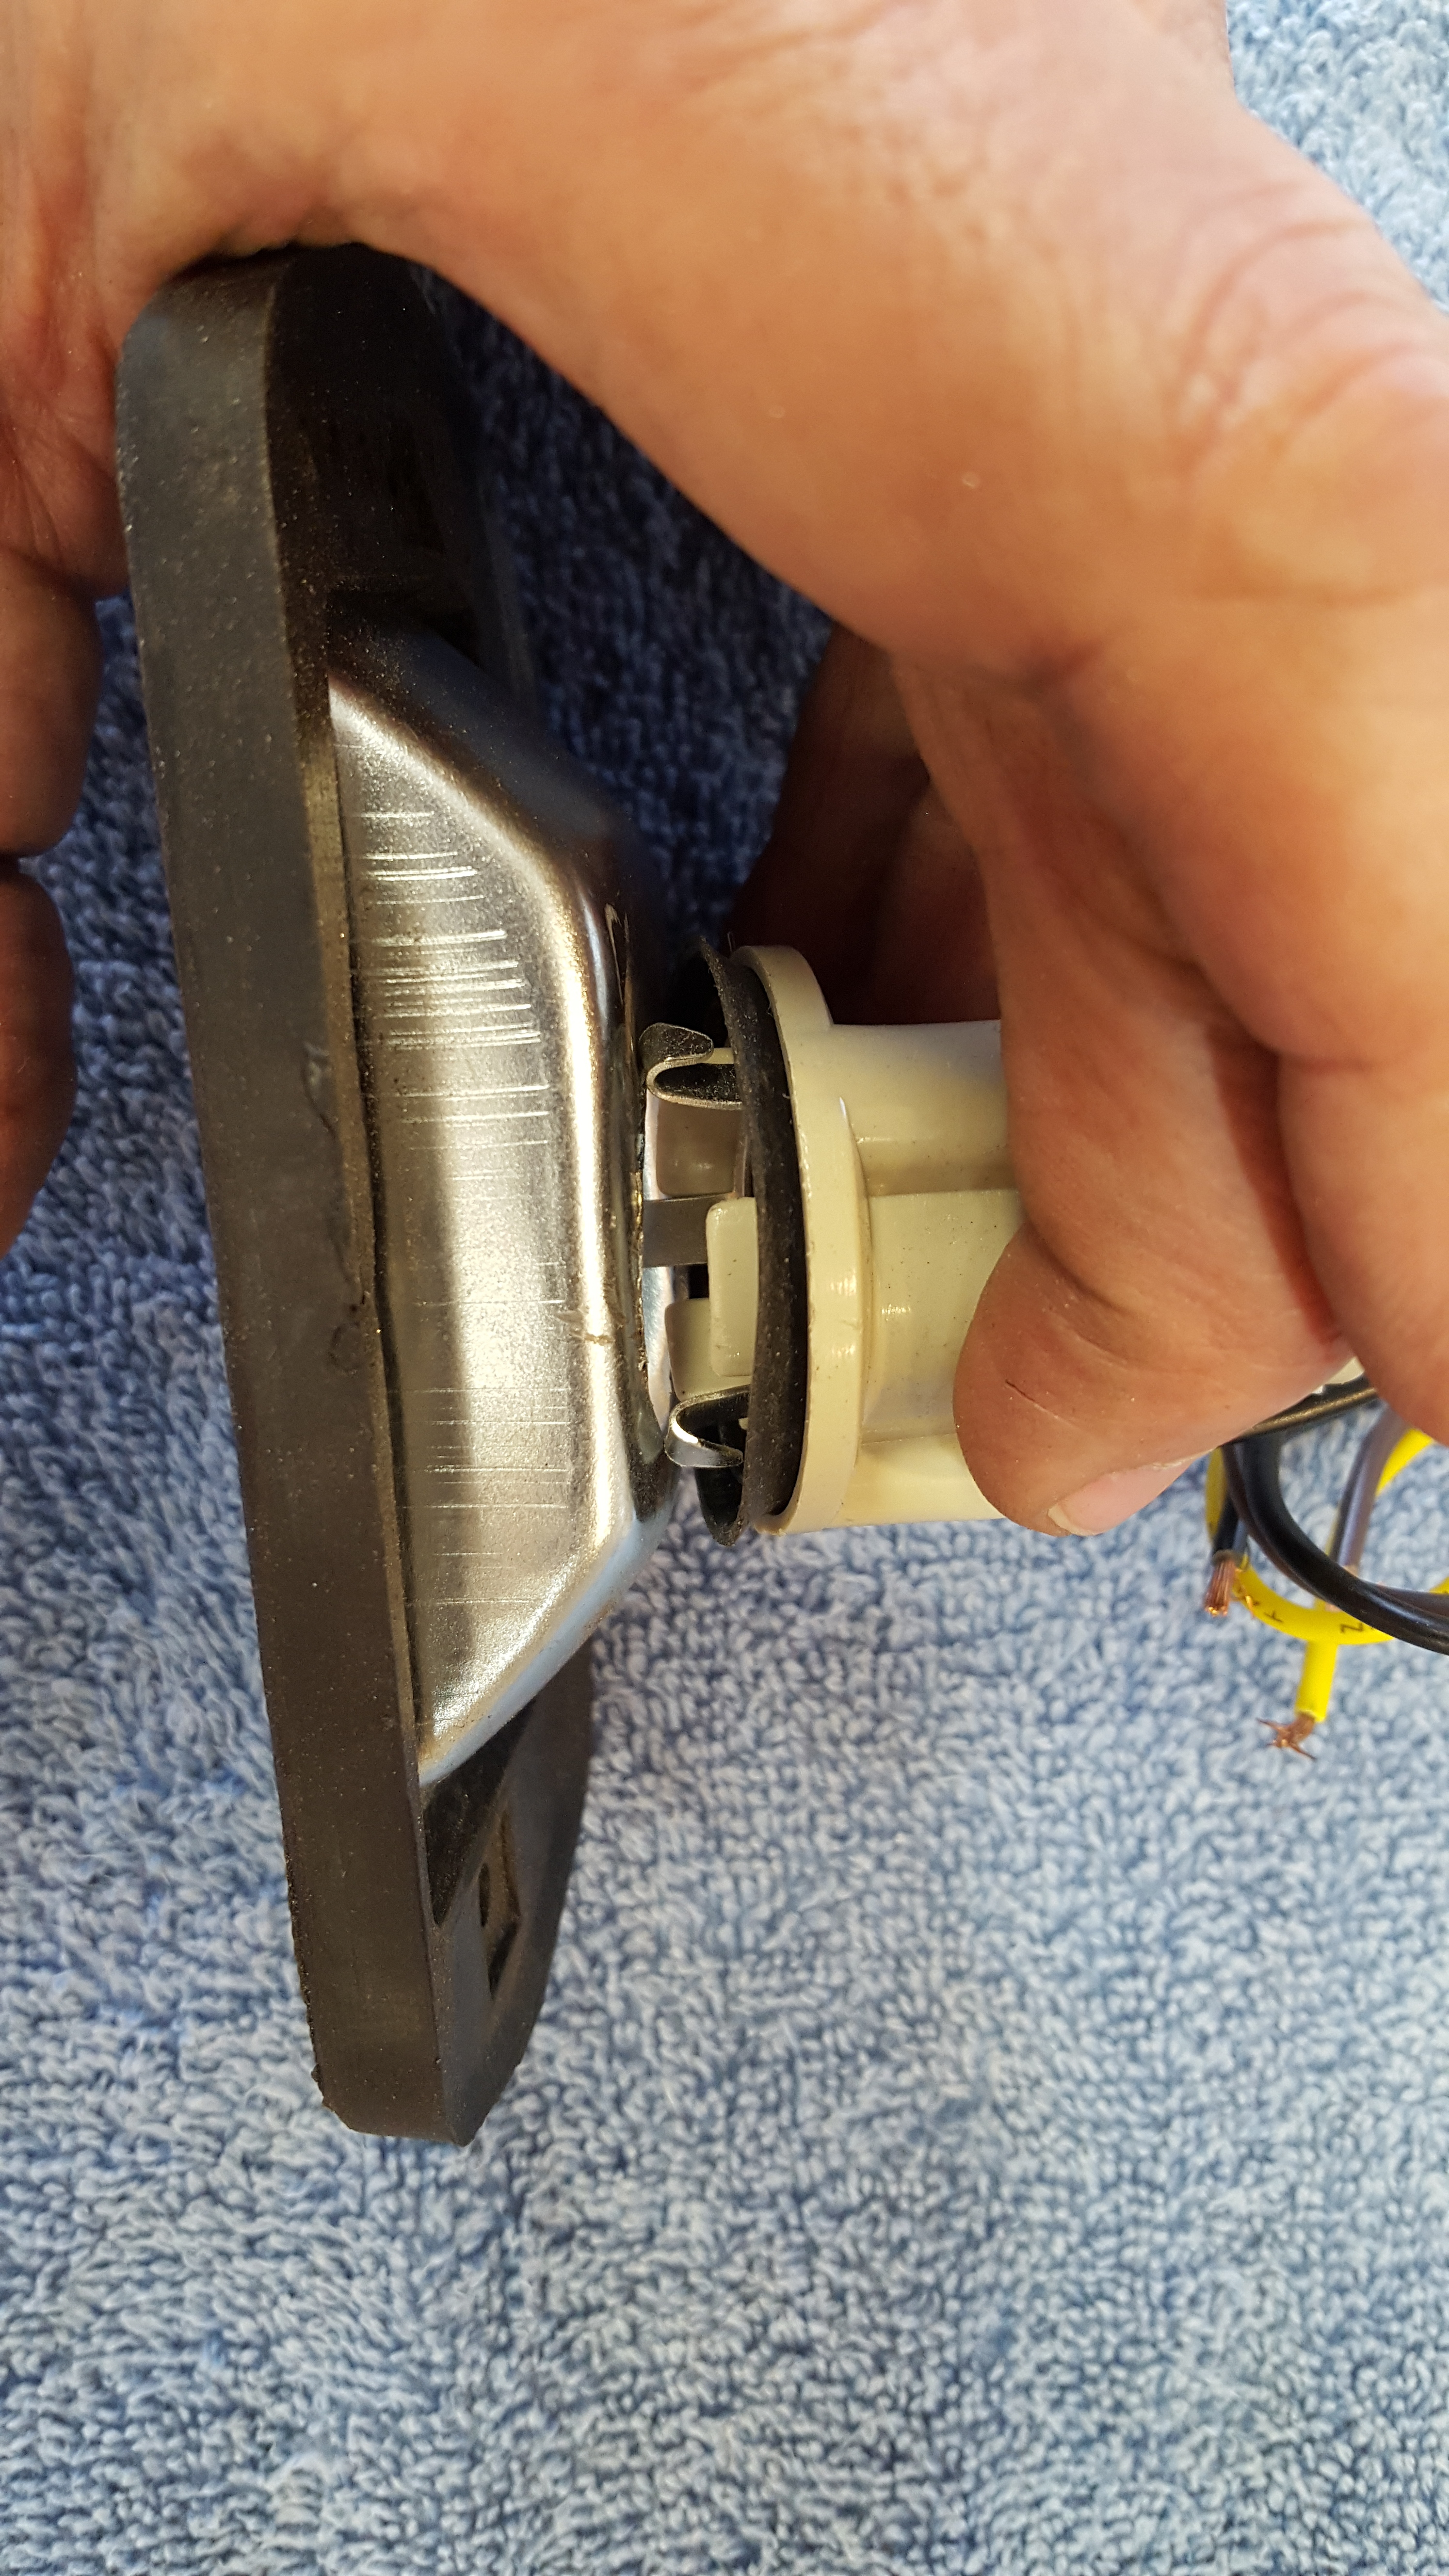
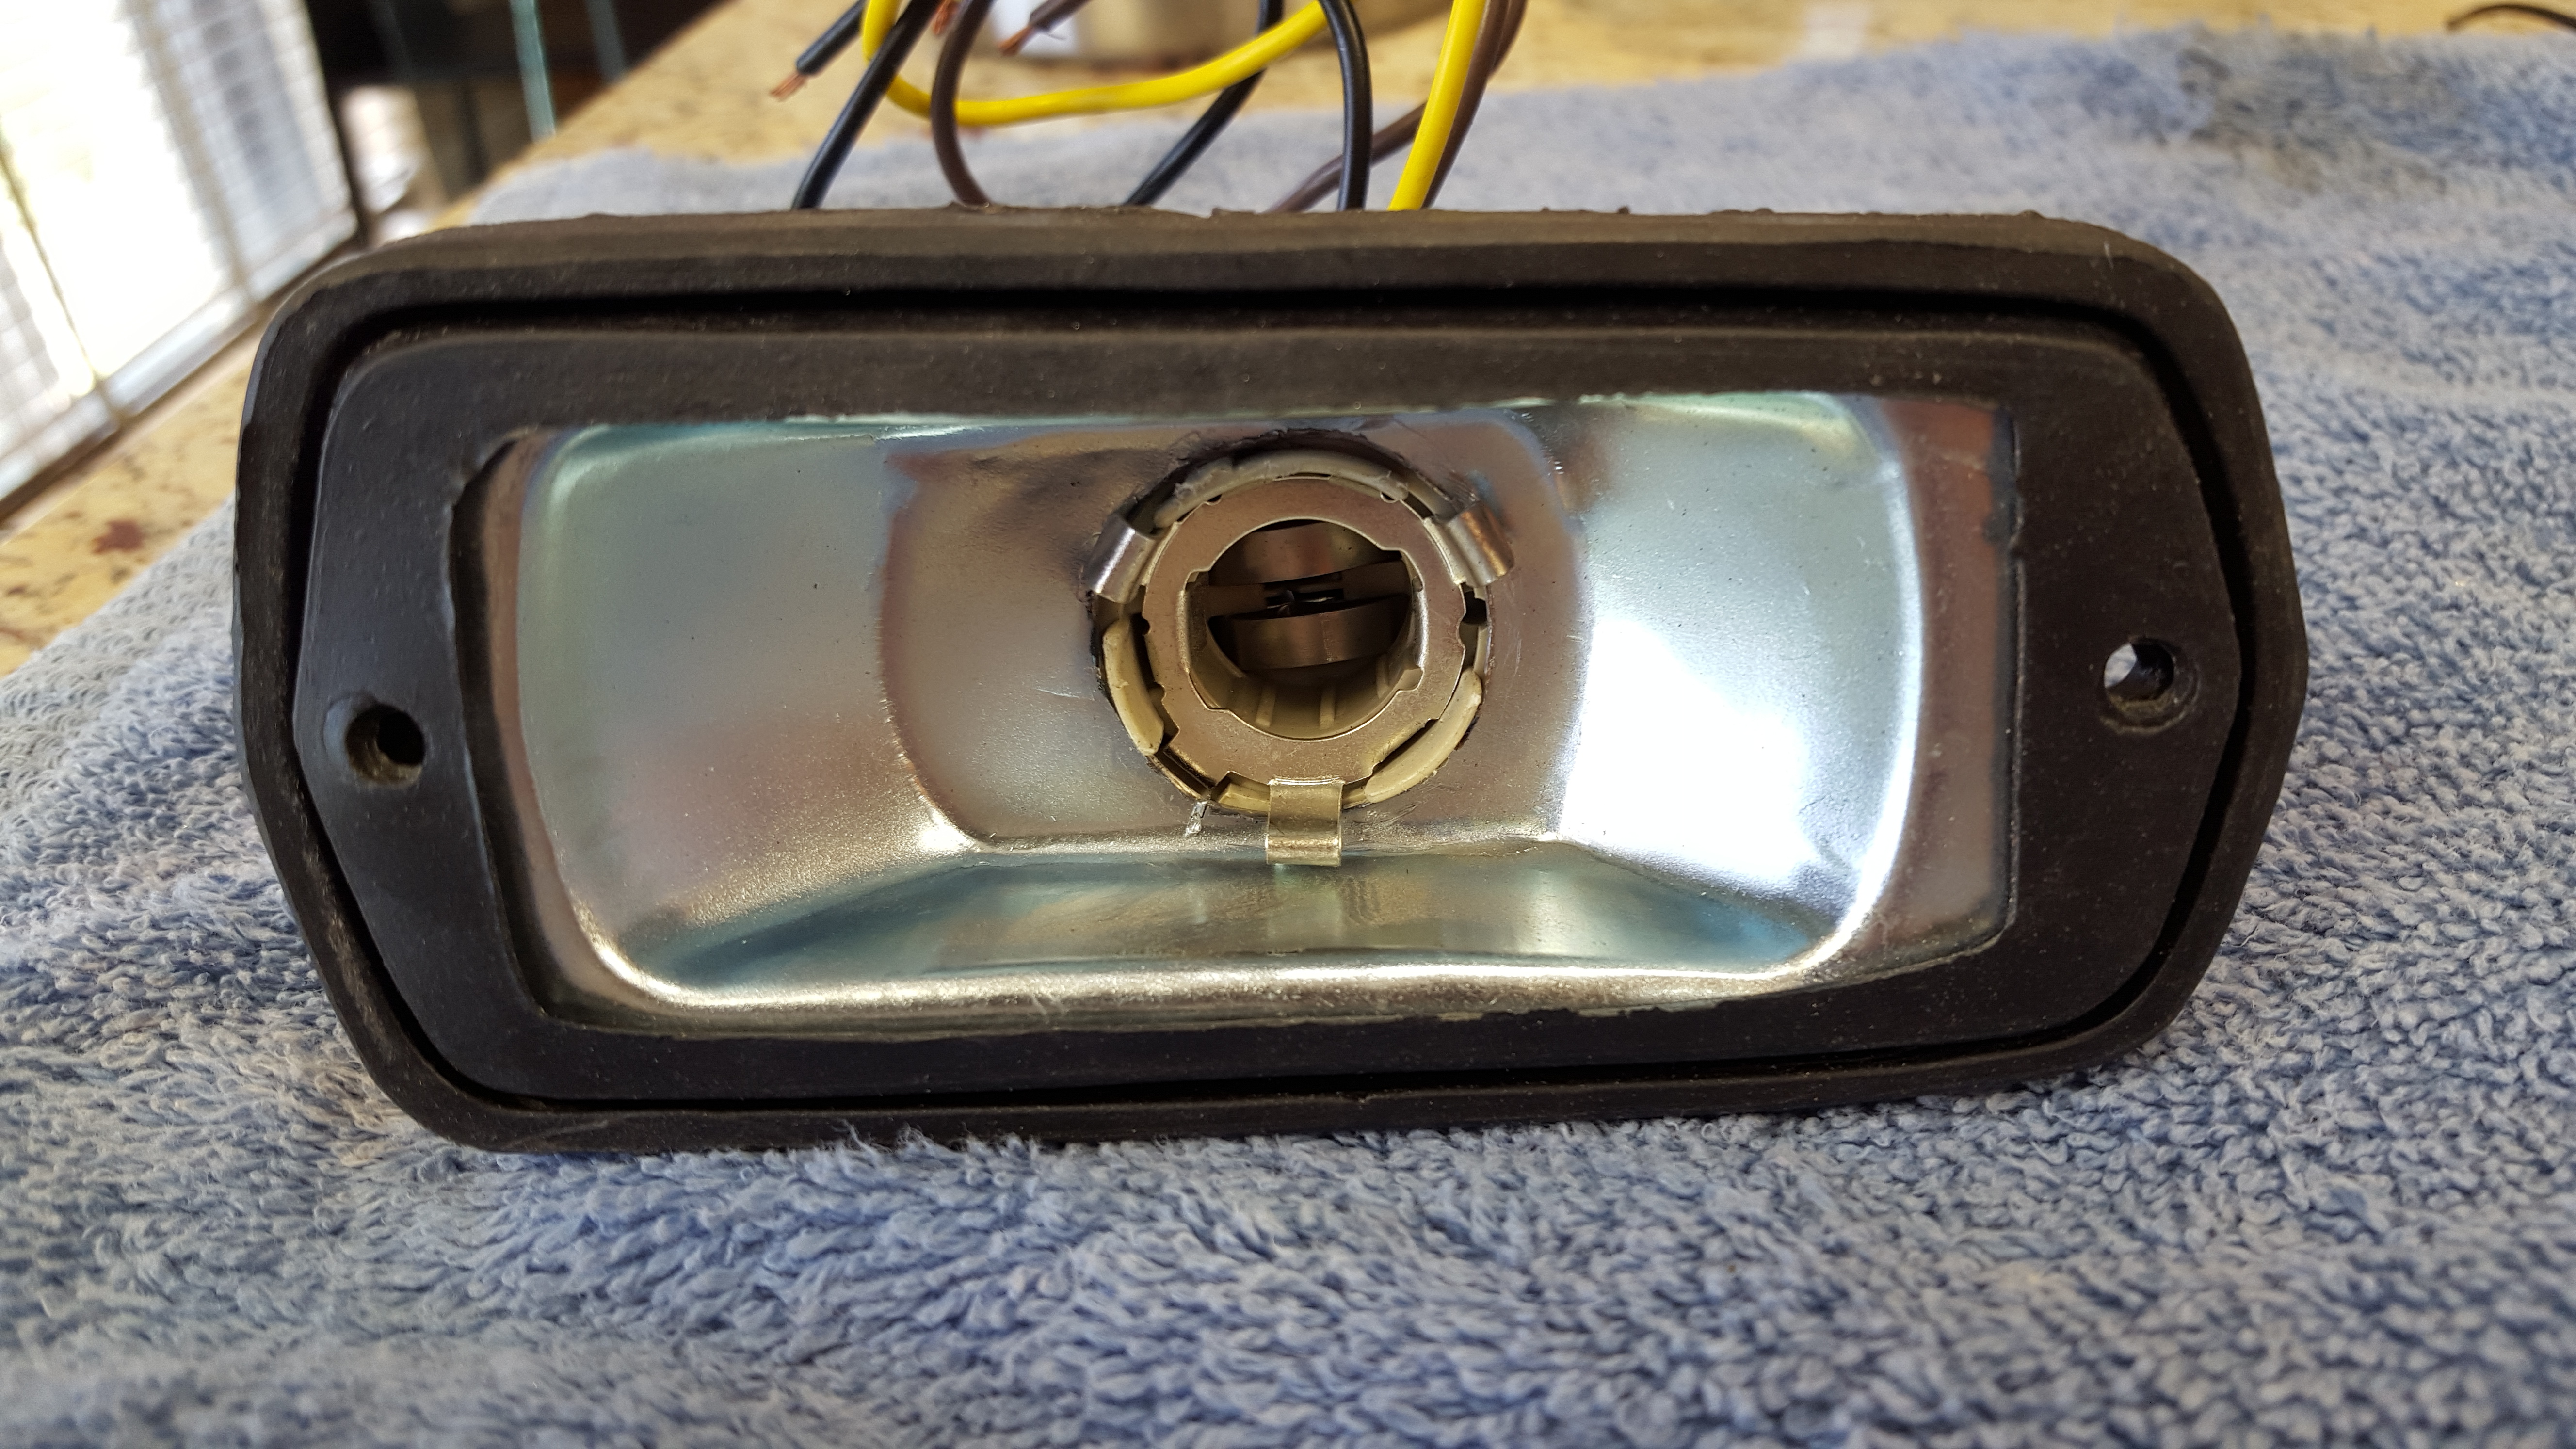
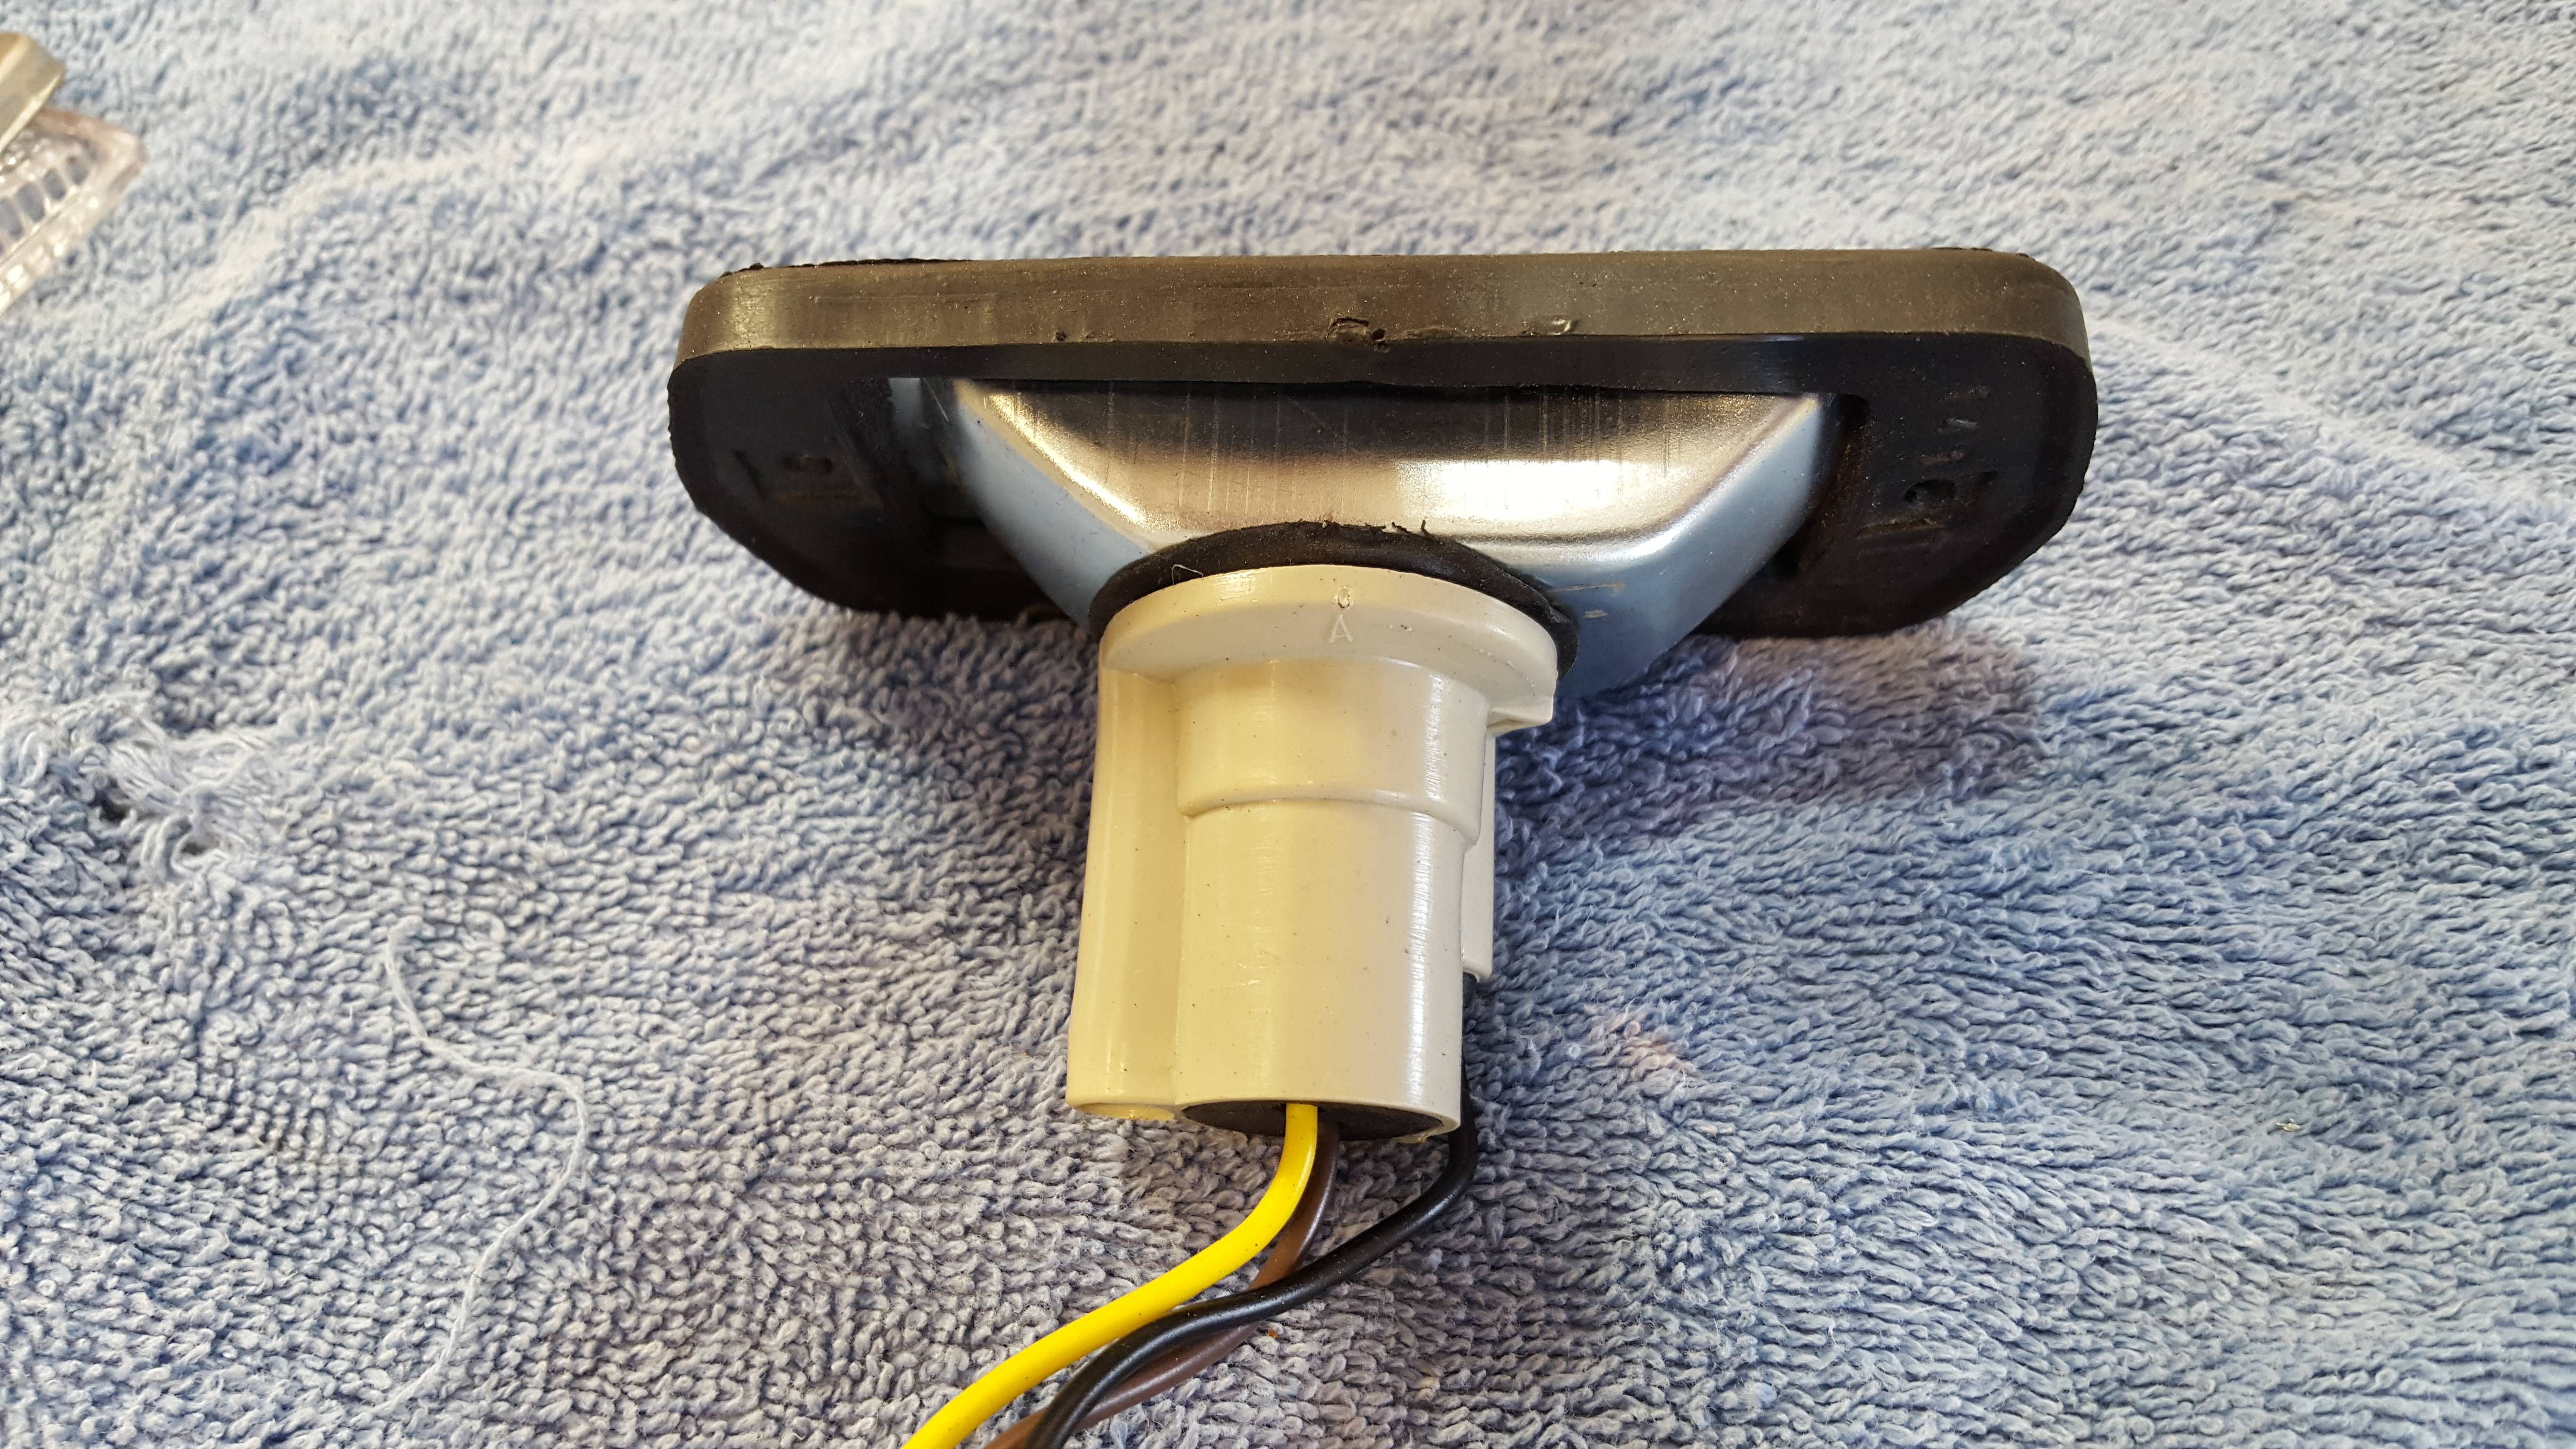
For some time I felt I wanted to update the safety aspect of the 280Z by making the front fender side marker lights function additionally as turn signals along with the front turn signals on the grille. Since I didn't want to experiment with my stock lights I purchased a set of marker lights from Thailand on Ebay. The quality of the metal case was surprisingly good, much like (or perhaps better than) the Datsun part. I pulled it apart and removed the 1156 socket, widened the resulting opening to accept a GM 1157 socket which snapped into place and sealed the joint with black silicone. I did have to lift the front end of the car in order to remove the fender liner and do the electrical work which included a new 3 wire connector and an extra wire from the front turn signals to each side marker ( green/red on the left side and green/white on the right). Now the Z turn signals incorporate the front side markers and bring that aspect to today's safety standards. Datsun_280Z_Fender_Turn_Signals.mp4.crdownload


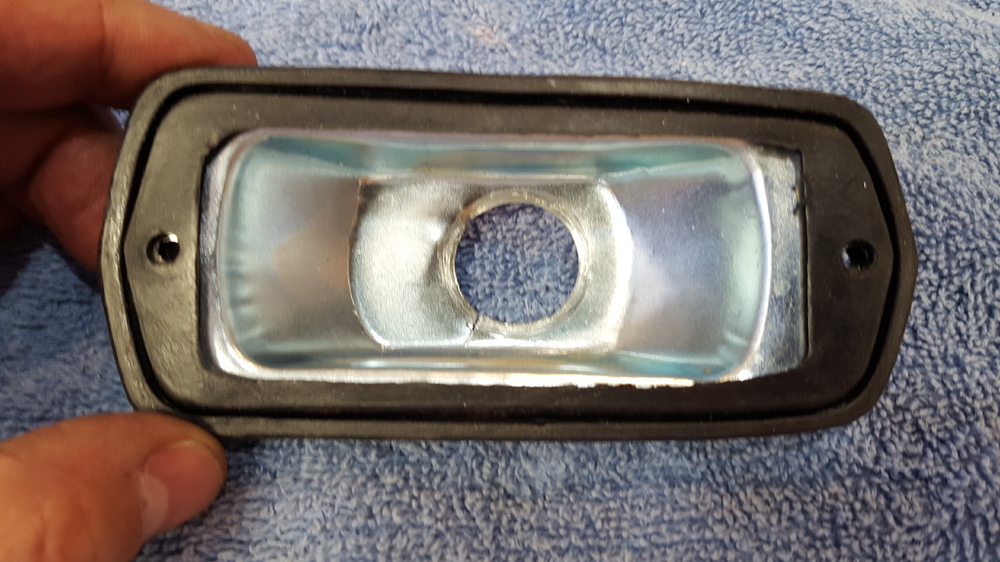


 3 points
 -
2 pointsI recently did some work on my front diff mount and strap and here are my findings from the project. It was my first time messing around with these parts. Here is a pic of the old mount and original hardware. I'm replacing the mount because the rubber is soft and squishy. The original hardware holding the mount to the diff is hard to remove because the mount itself is partially in the way. It's much easier with the whole diff out of the car, but if you're trying to replace the mount without dropping the diff it's a pain in in the butt. I think you're supposed to remove the hardware using an open end wrench on the bottom and a box end up in the trans tunnel hump on the nut up top: I decided that since my original mount was already 75% split and squishy, that I would just split it the rest of the way and pull the bottom part of the mount off which allowed me to use a standard socket on the bolt head. In other words, I finished the destruction of my old mount to get to make getting to the hardware easier. Here's my old split squishy mount: When it came time to put my new mount in, I changed the mounting hardware scheme to socket head cap screws instead of the original hex head bolts. I don't know if this is old hat or not, but my custom hardware looks like this. Socket head cap screws on the left in this pic: So what's the big deal about using SHCS there instead of hex head bolts? The SHCS allowed me to use a hex driver on my ratchet like this: And tighten the bolts from the bottom like this. The hex driver clears the bottom plate on the mount so you don't have to deal with the original hardware anymore. If I ever have to mess with this thing in the future, it will be much easier to R&R. Box end wrench braced against the diff body to hold the nut on top and hex drive to tighten from the bottom, I found this much easier to work with than the original hardware scheme: I used 1/2-13 x 4 inch long socket headed cap screws. You could also use M12 SHCS if you can't deal with the English hardware on the Metric car, but since the English stuff is so much more prevalent and cheaper for me, I used Engilsh. I used the black oxide hardware below to test fit, but for my final install, I bought some new zinc plated hardware for corrosion protection. This pic was before I had the zinc plated parts bolts on hand:2 points
-
2 pointsBoys you missed out on the good times. In Germany all types of hashish was $10 for 7 grams whe I was there from 72 to 742 points
-
2 points1974 and $35 an oz? Ya'll must have got the good stuff! I vaguely remember (and I do mean very vaguely) $15 maybe $20. But then again I've always been cheap and I still have all my digits.2 points
-
I think this is it. There is a link in one of the posts to one by Enrique.1 point
-
1 point
-
1 pointMark that is so cool you just don't know. 1985 one month after turning 16 I got one of the first crotch rockets there was, Honda Interceptor 750. It would do 130mph easy. But the brakes sucked. I almost lost my right foot crashing that thing then jumping up to kill the motor. It was running wide open four feet from me and gas was pouring out everywhere. When I stood up my tibia shot out the side of my leg at least six inches, I was standing on it and my left foot. Looked down and instantly fainted/passed out went into shock. Stayed in the hospital for one month. Weed was $100 an oz and my friends used my hospital stay as a hotel room. Stuffed towels under the door and smoked it up! I had a demoral pump that was set at 7 minute intervals. Needless to say I puked every seven minutes it seemed like. Me and my parents are thankful for everyday! I'd like to sit down, drink some cold beers and talk about "the good old days (sarcastically he typed). Here's to better days we both have earned the hard way. One of my songs is "Bird nest on the ground" by Doyle Bramyall.1 point
-
Chester and Herod Auto Carpet Manufacturing1 point
-
1 point
-
1 pointI've tried to figure that improvement? for years. I think you're right. The problem (if there was one) was probably directional. I've always run early 4 screw carbs with equal length tabs and never noticed a problem.1 point
-
1 pointThere was a tiny bit of nail left. The Dr. said if it didn't come of I would have a horn growing from my fingertip much like Zed Head's Grandpa. Dr. wanted to take it down to below the first joint. Talked her into leaving as much as possible. The joint doesn't bend very well yet. Probably never will. Dropped a 327 block on that one in the sixties. Not my first rodeo. Missing most of my right big toe too. That happened back in the seventies shortly after I got my first Z. I remember complaining to the Dr. that my foot kept slipping off the brake while novice racing. He built a stainless steel plate formed to my foot that would slip into my shoe to help out the braking problem. Worked pretty good except the pedal feel in my foot went to zero. According to Cliff's chart I was an A before. Kathy might disagree. She'd drop the C from Charming. She might might be more accurate. She usually is. Some would say there is a pattern here. I'll quote Red Green to respond. "If it ain't broke, you're not try'in.1 point
-
1 pointTilt of the engine requires rear carb 2 mm higher fuel level for same fuel level in both nozzles. There's a thread with diagrams and the trig equations that illustrate it. Touch up the sticking float with sandpaper - that cured a sticking one for me.1 point
-
1 pointAccording to my notes, these were the changes to the carbs that occurred as of Jan. 71 production and the emergence of the so-called Series 2 cars... Different, front vs. rear… Front = long-ear, long-needle; Rear = short-ear, short-needle. Drain fittings added. 3 screws for float bowl covers. (S1 carbs used 4-screw float bowl lids, with long-ear / long-needle for both front and rear. Bowls did not have drain fittings.) For the 72 that I no longer have, the carb re-build kits that I bought had entirely different part no's.1 point
-
1 point@siteunseen.... So, I understand the theory behind the longer float ears and the longer needle jet but after much work trying to make it work, I gave up. I have a decent amount of spare parts so I ended up using a short ear float lid on my front 3 screw carbs, matched of course with the shorter needle jet. Then, I followed the process I described earlier to make the fuel level in the nozzles match at 10 turns down with the domes removed. What is my theory? I just think that the longer ears change was flawed. By lowering the front float 4mm in the float bowl and since it appears to me that the float bowl is tapered a bit, I believe that the rubber float gets restricted in terms of its movement / travel in the bowl (it hits the sides of the bowl) at the point where it should theoretically be in adjustment. The end result for me is that I can never get the float adjusted right. So, to answer what I think was your question, I treat my 3 screw carbs like 4 screw carbs and adjust the front and rear the same....at the float and where the fuel hits the nozzle. Maybe a 2 sensor wideband so I could measure while accelerating would change my mind....1 point
-
1 pointTo set the level to be the same on both carbs when I can't measure fuel depth, I hold the lid assembly upside down and blow into the fuel port. While doing this I rotate the float and note where it shuts off the air flow, I then bend the tab and repeat until the air stops when the float beam is parallel with the lid (see picture below to see the parallelism). It is important that the beam and float on Hitachi carbs are not twisted (the beam and float top should also be parallel). Doing this method is easy because the assembly is literally in front of your nose. It seems to do the job reasonably well.
 1 point
 -
My new puppy eats something I would eat (have eaten the chicken, had to try it out! ). Toothpaste with antifreeze ingredient diethylene glycol, DEG. WASHINGTON — The government warned consumers on Friday to avoid using toothpaste made in China because it may contain a poisonous chemical used in antifreeze. Out of caution, the Food and Drug Administration said, people should throw away toothpaste with labeling that says it was made in China. The FDA is concerned that these products may contain diethylene glycol The alert says the agency found DEG in three products manufactured by Goldcredit International Trading in China. The products are Cooldent Fluoride, Cooldent Spearmint and Cooldent ICE. Analysis of the products revealed they contained between 3 percent and 4 percent DEG. https://goldcredit.en.alibaba.com/1 point