Leaderboard


.JPG.cfcada9cf1c1b502df3f5f2f2ca3ff36.JPG)


Popular Content
Showing content with the highest reputation on 06/13/2016 in all areas
-
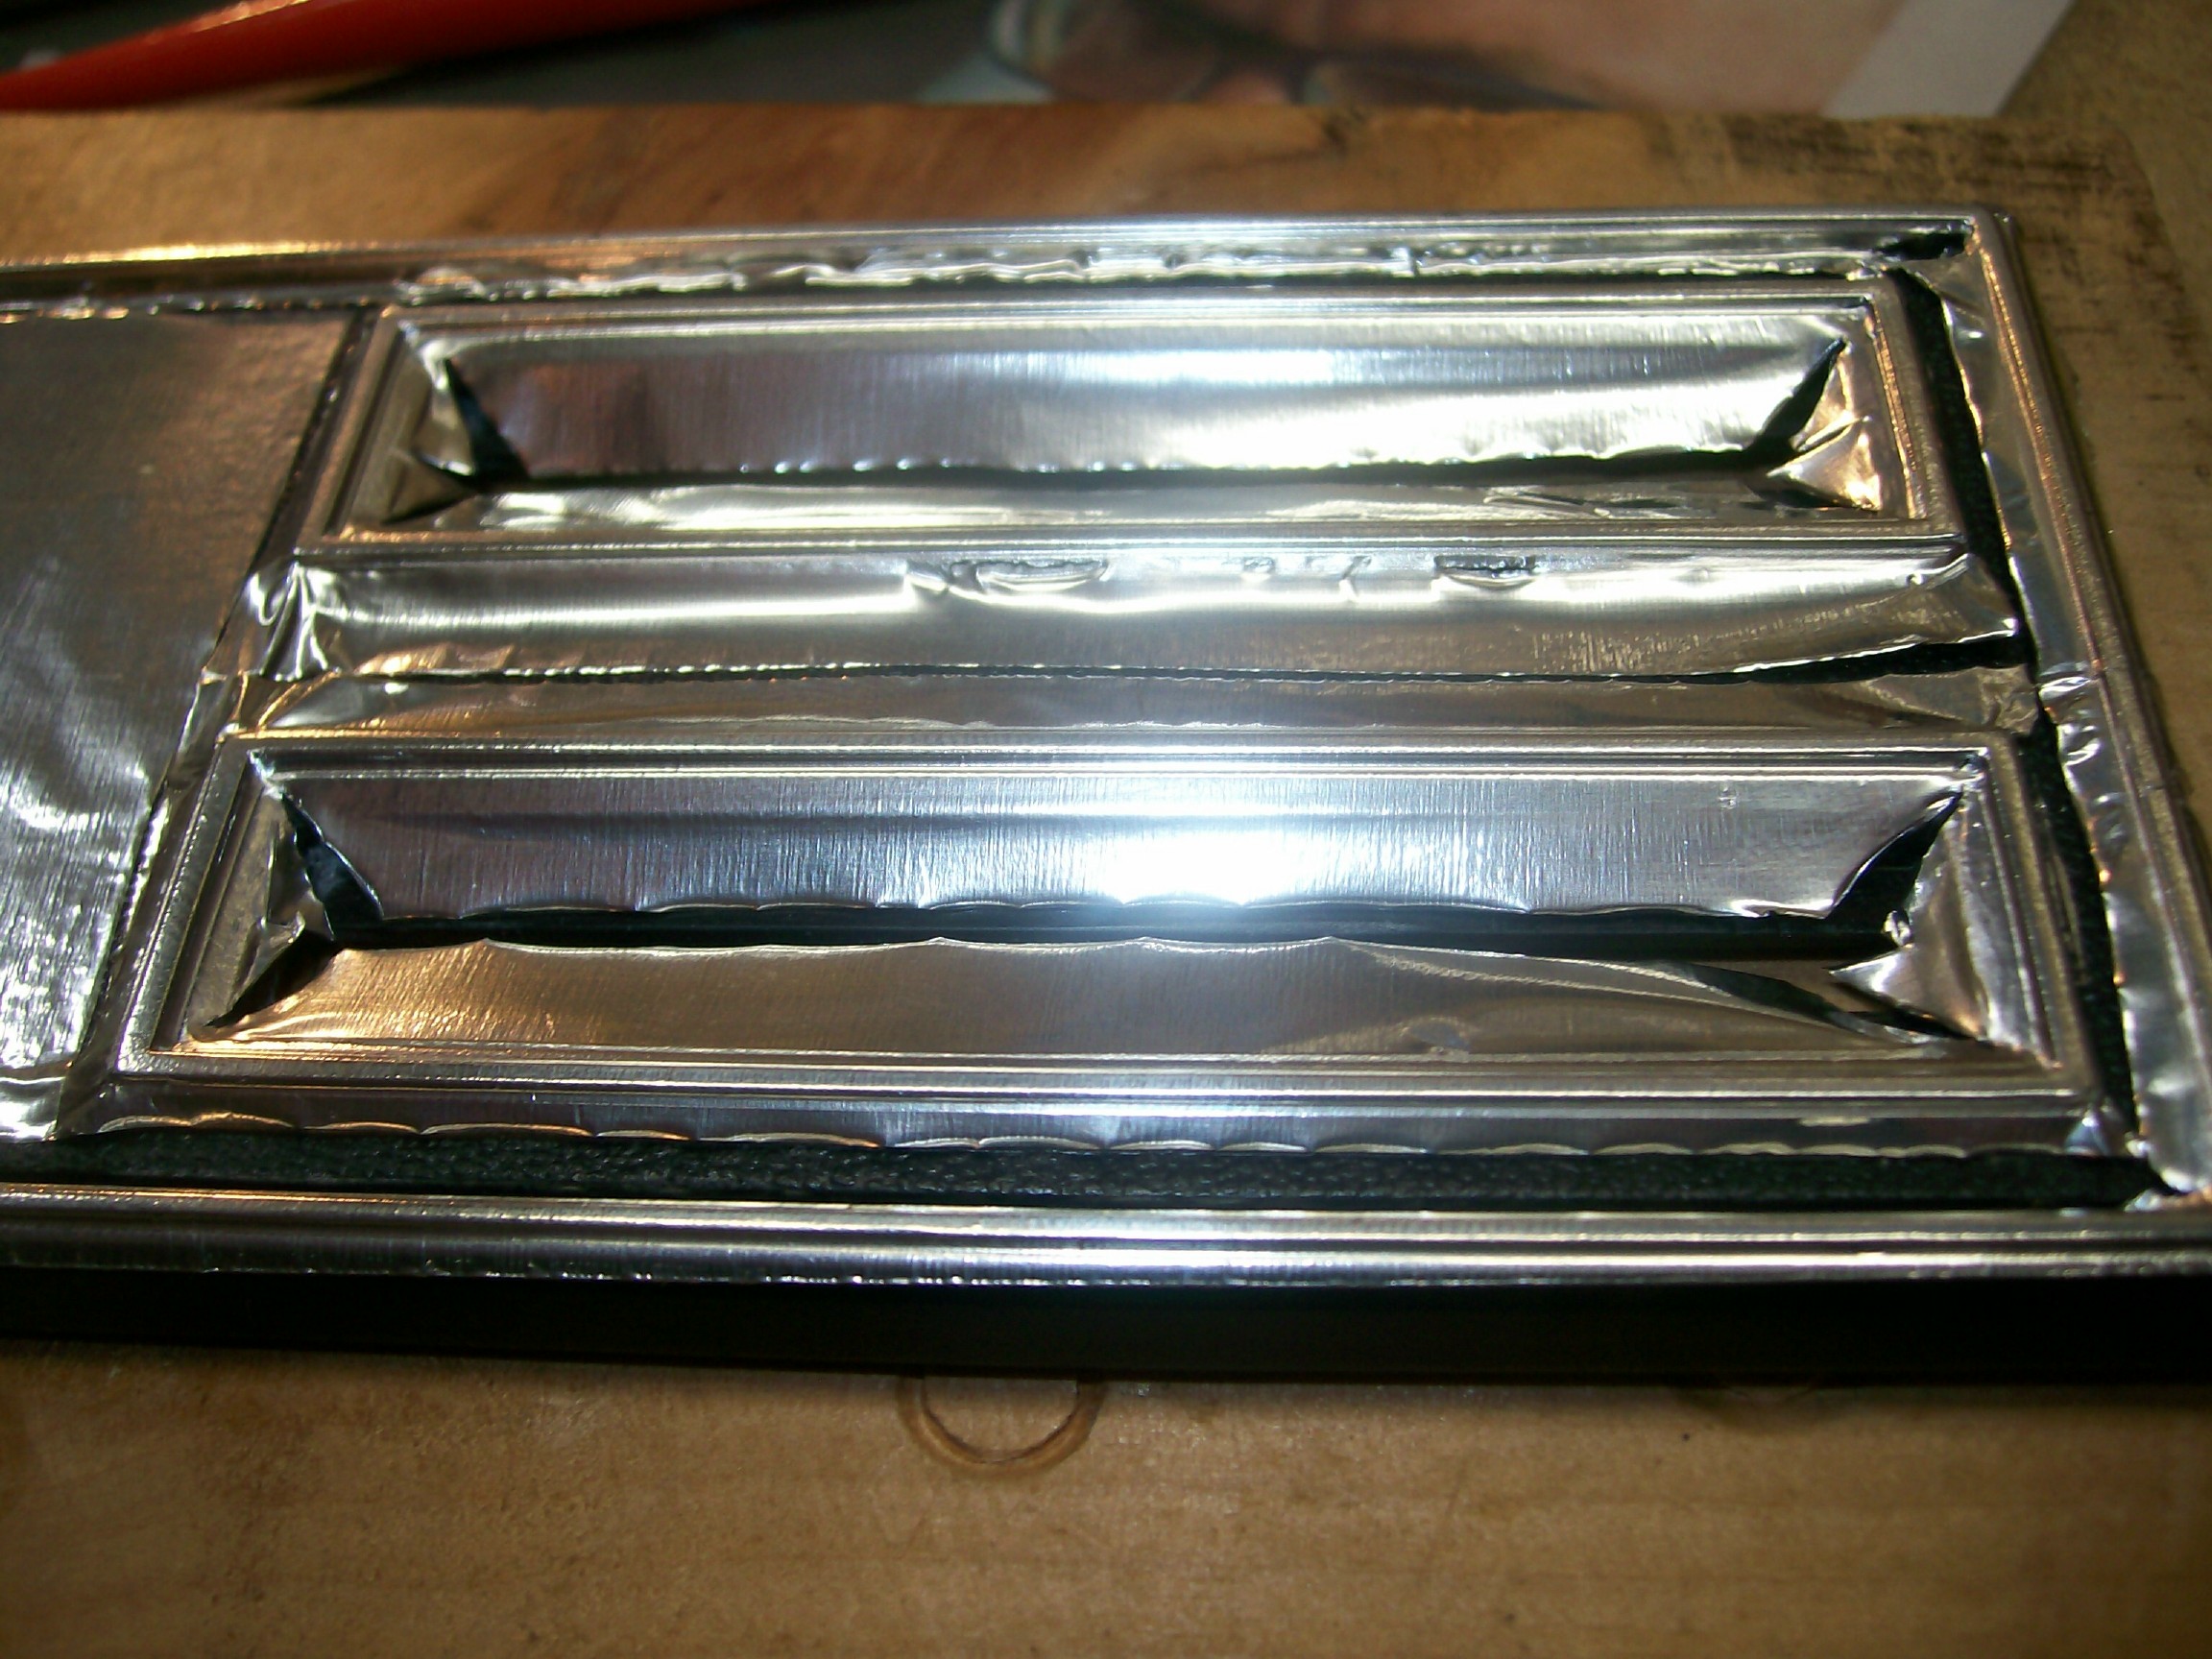
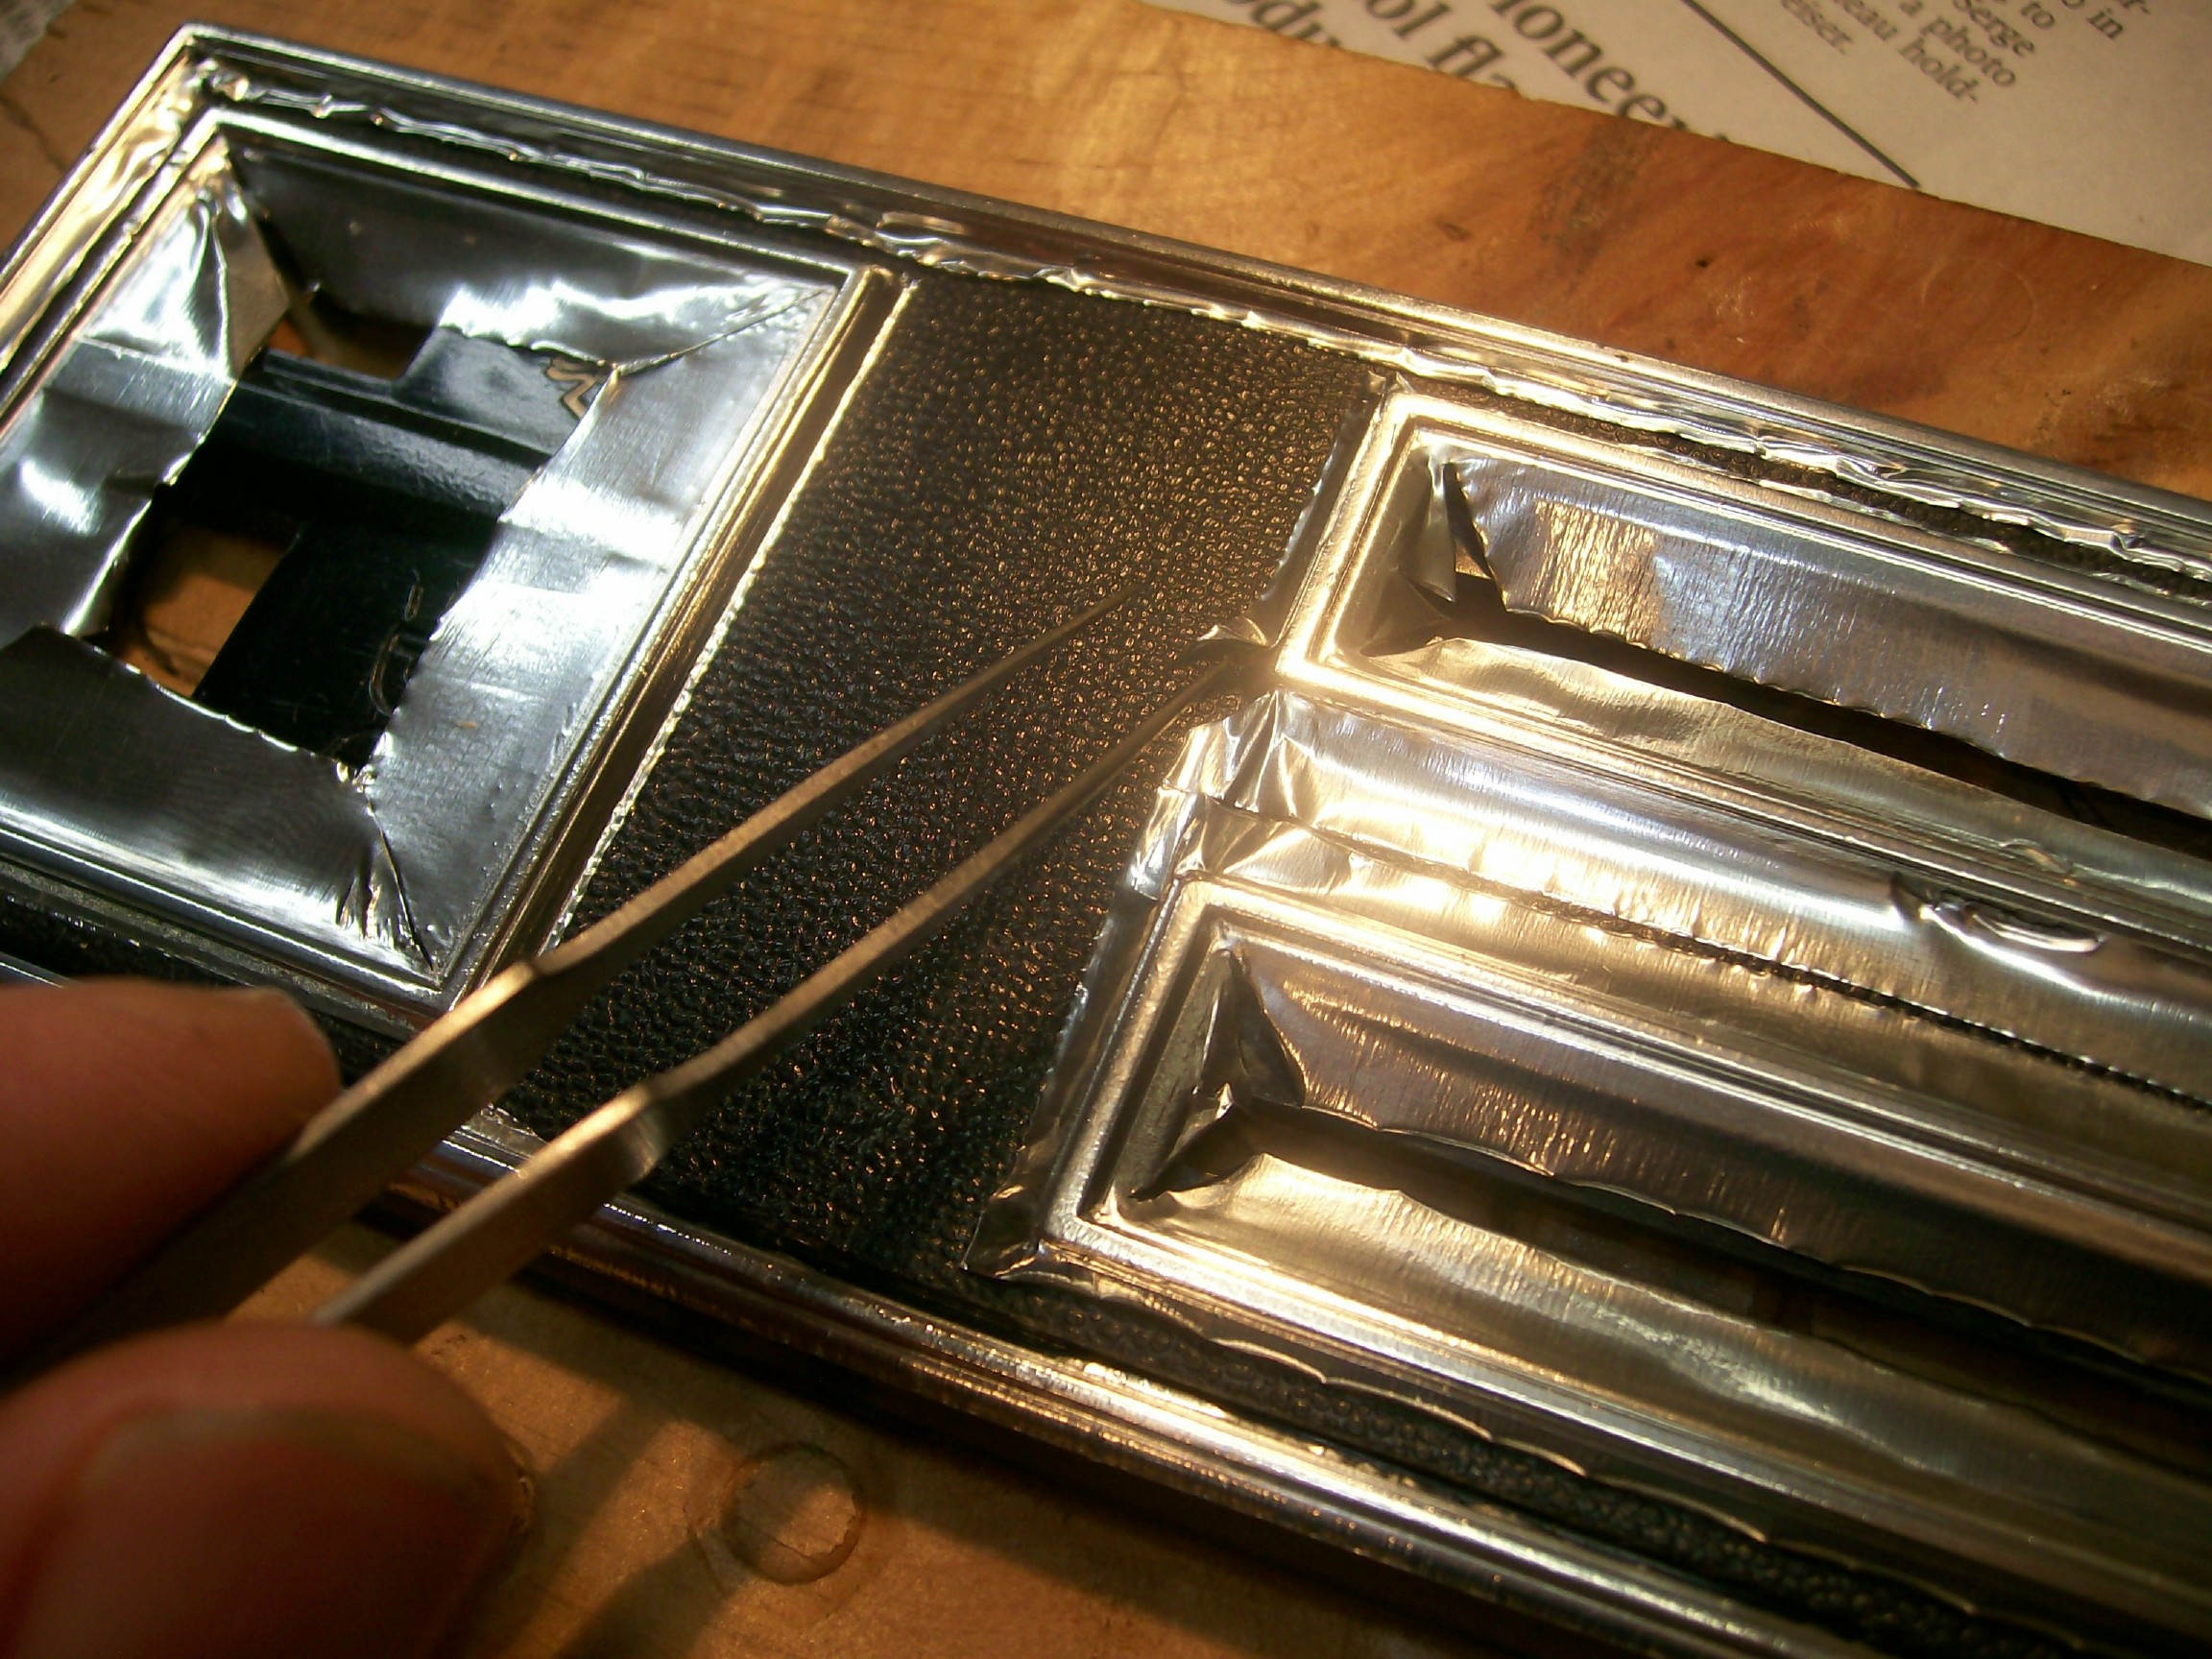
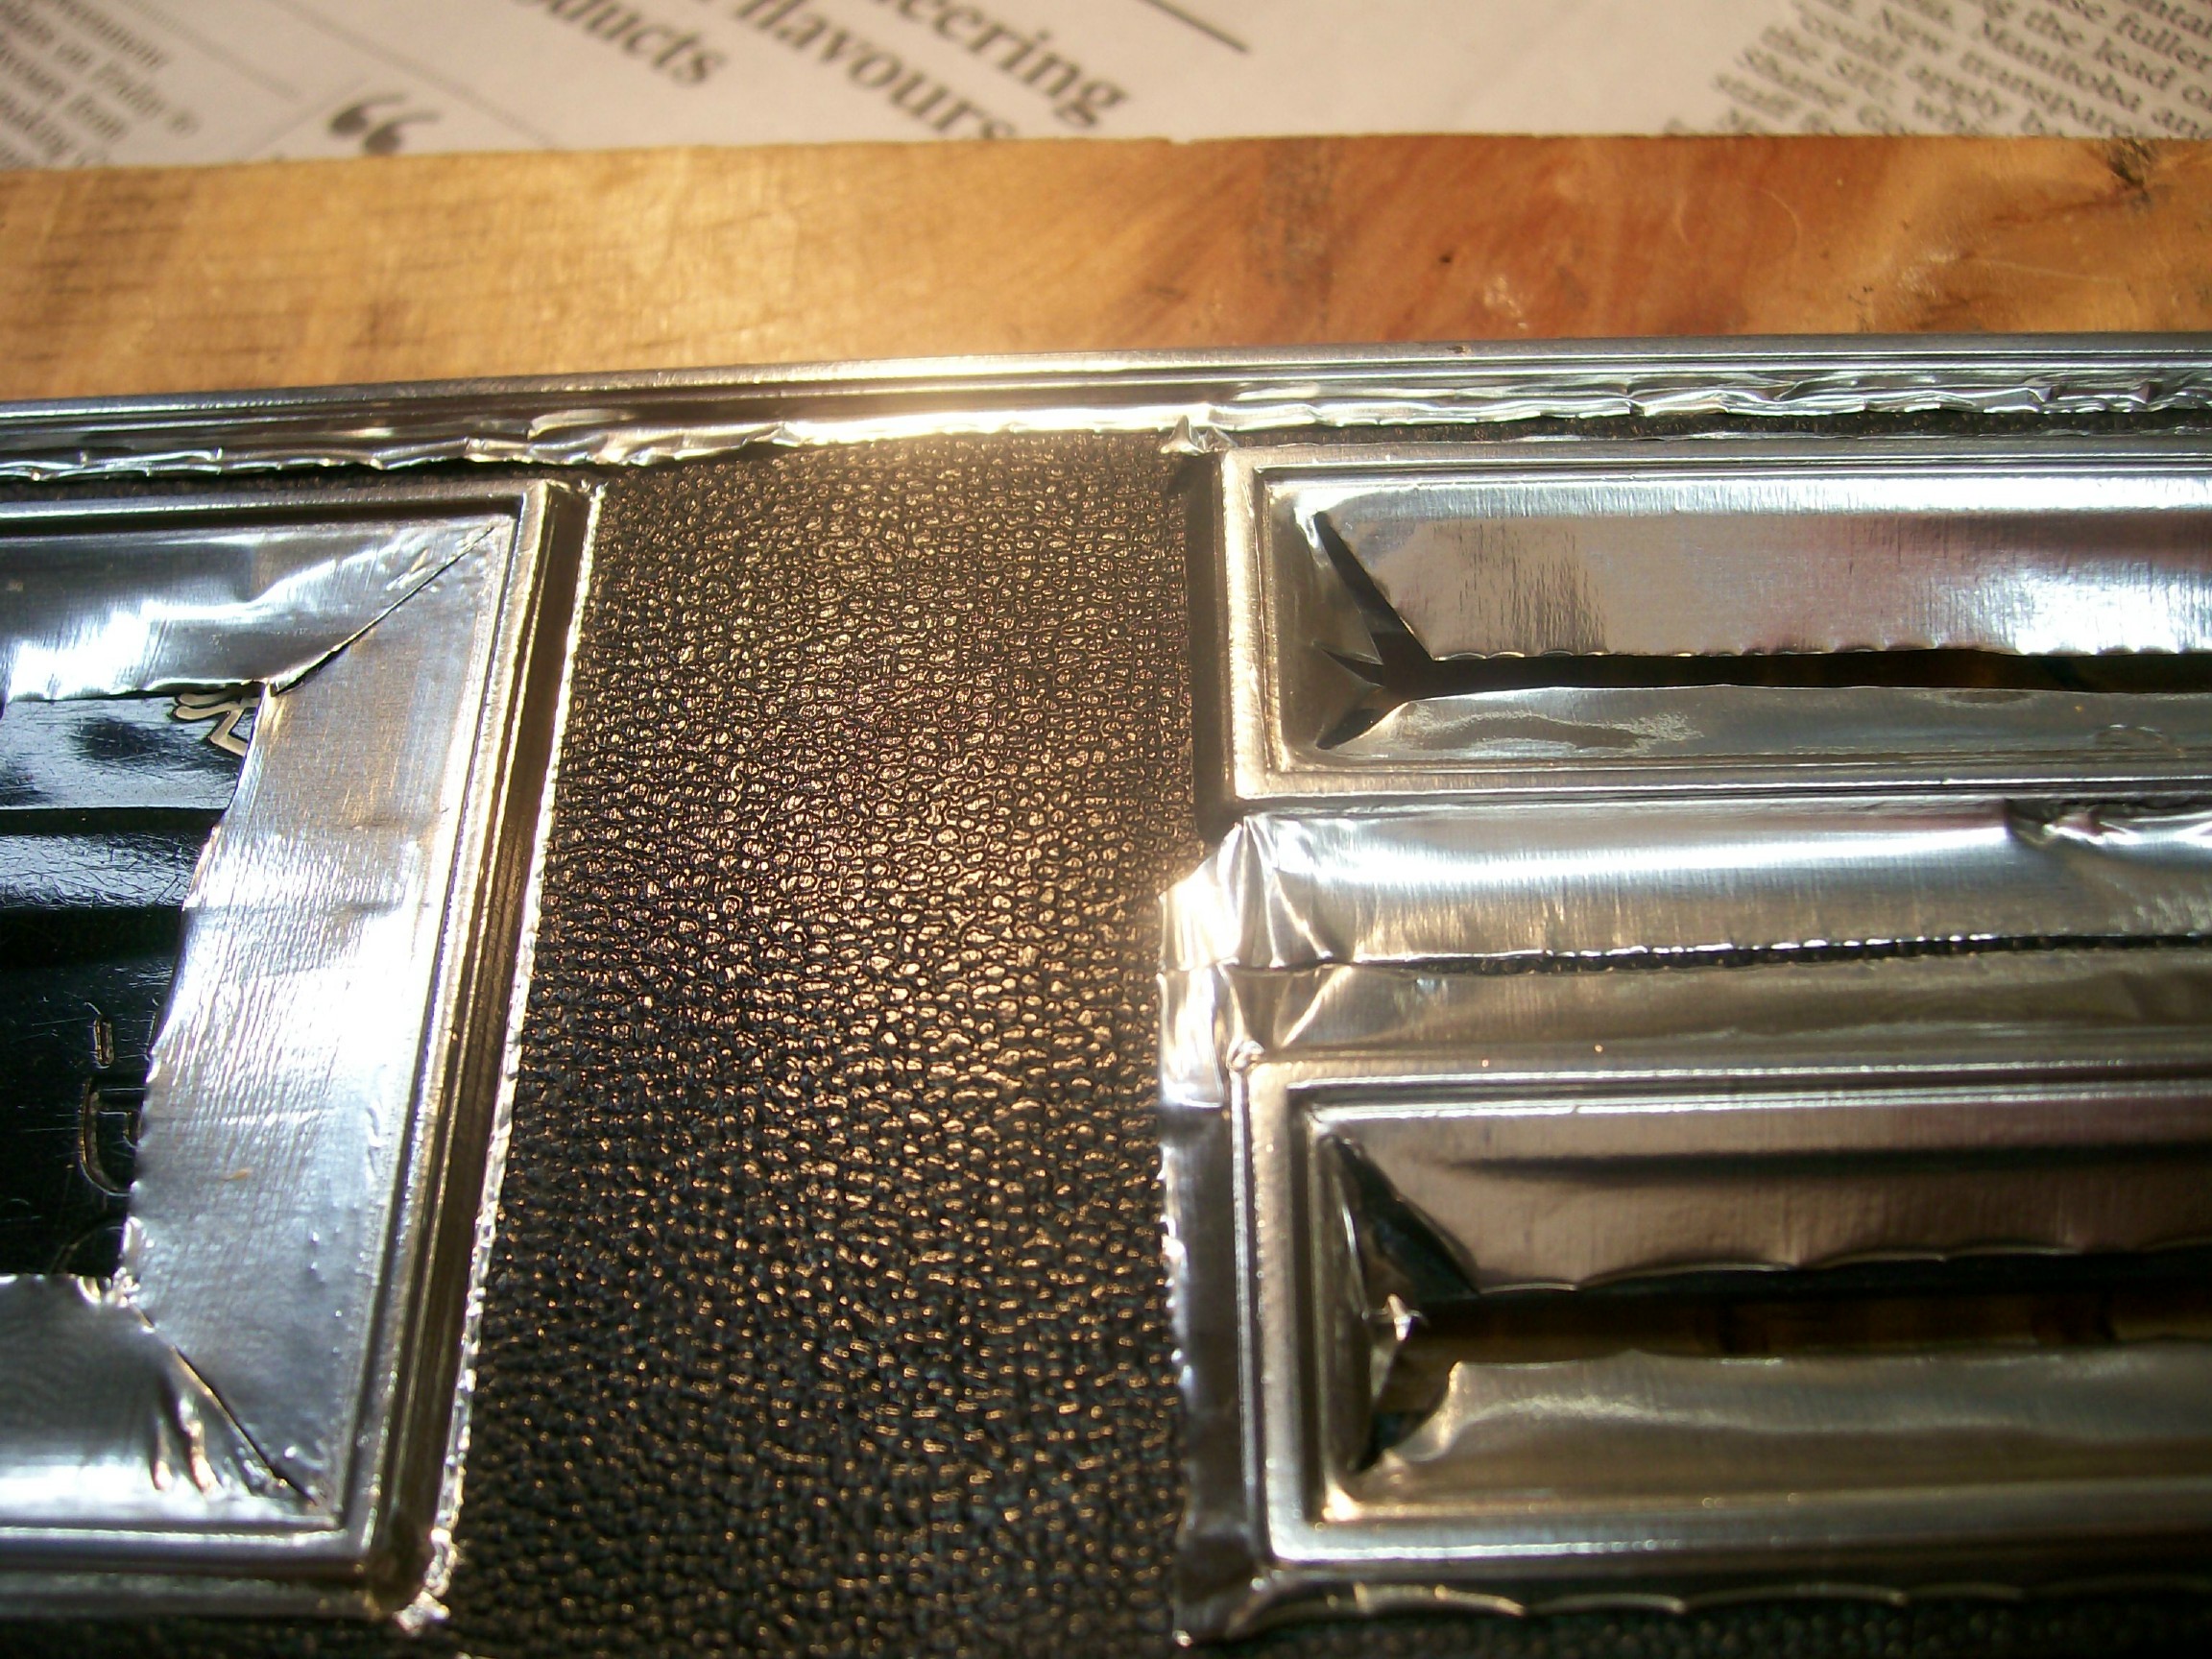
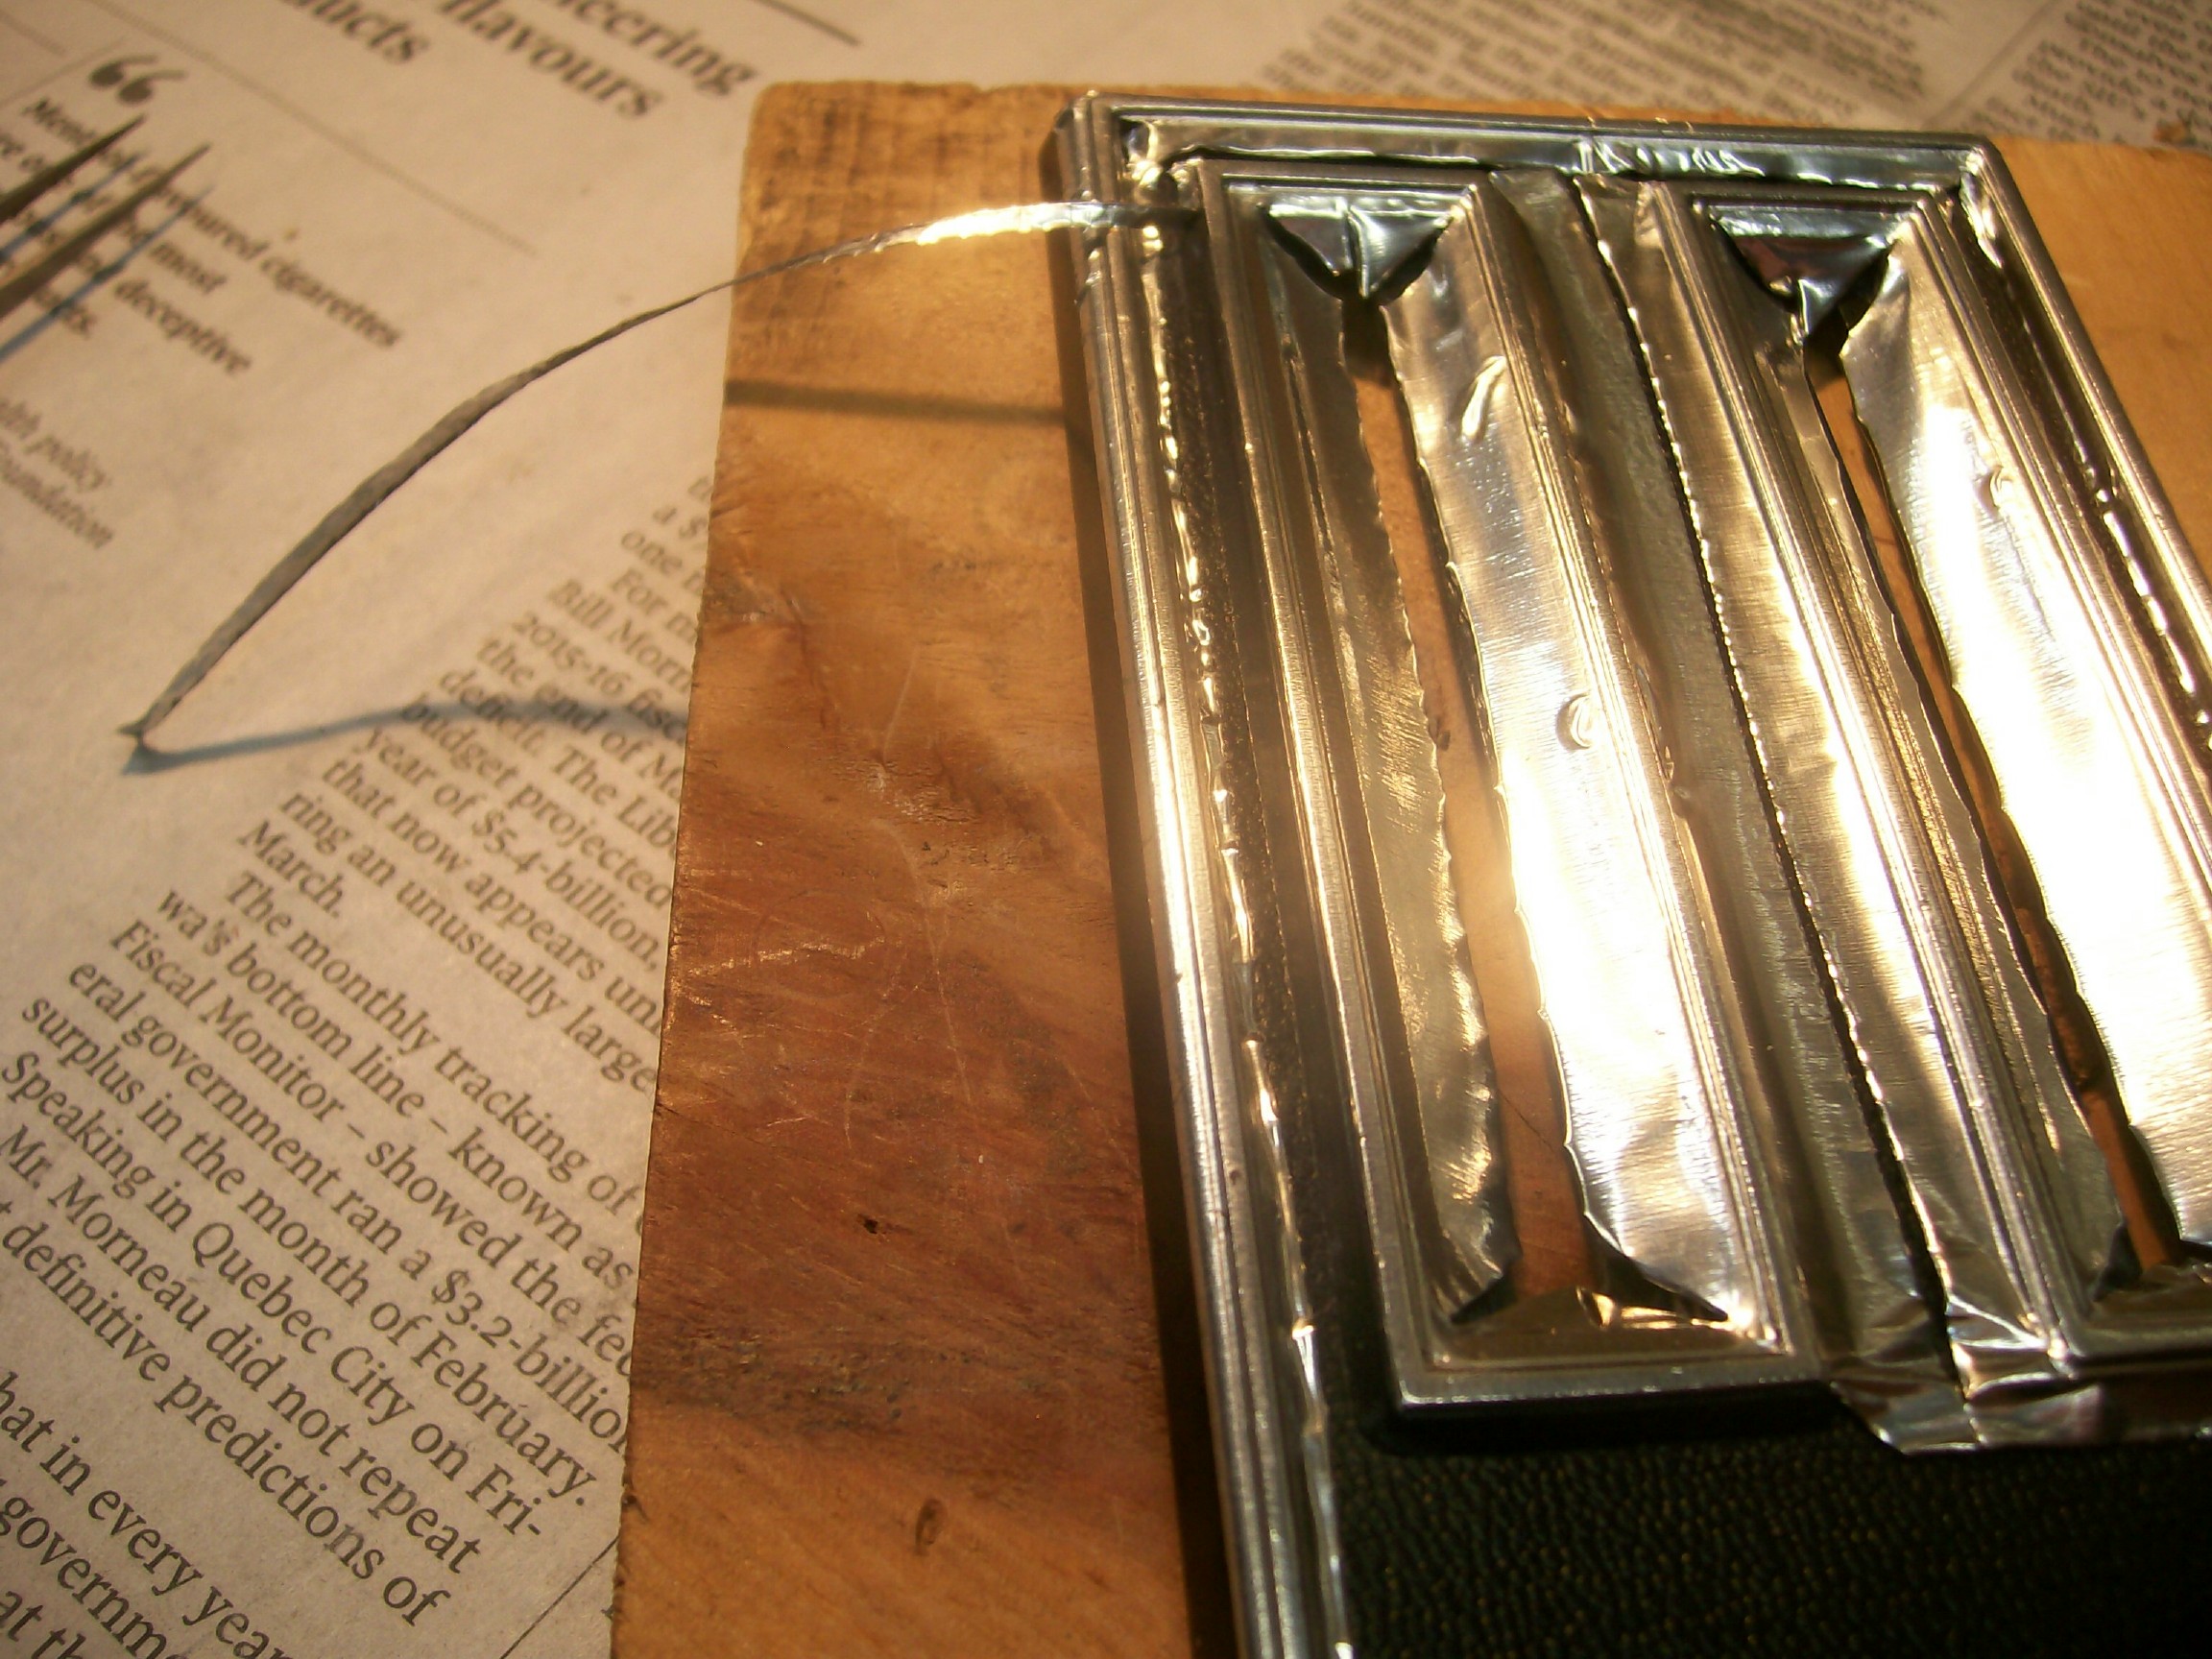
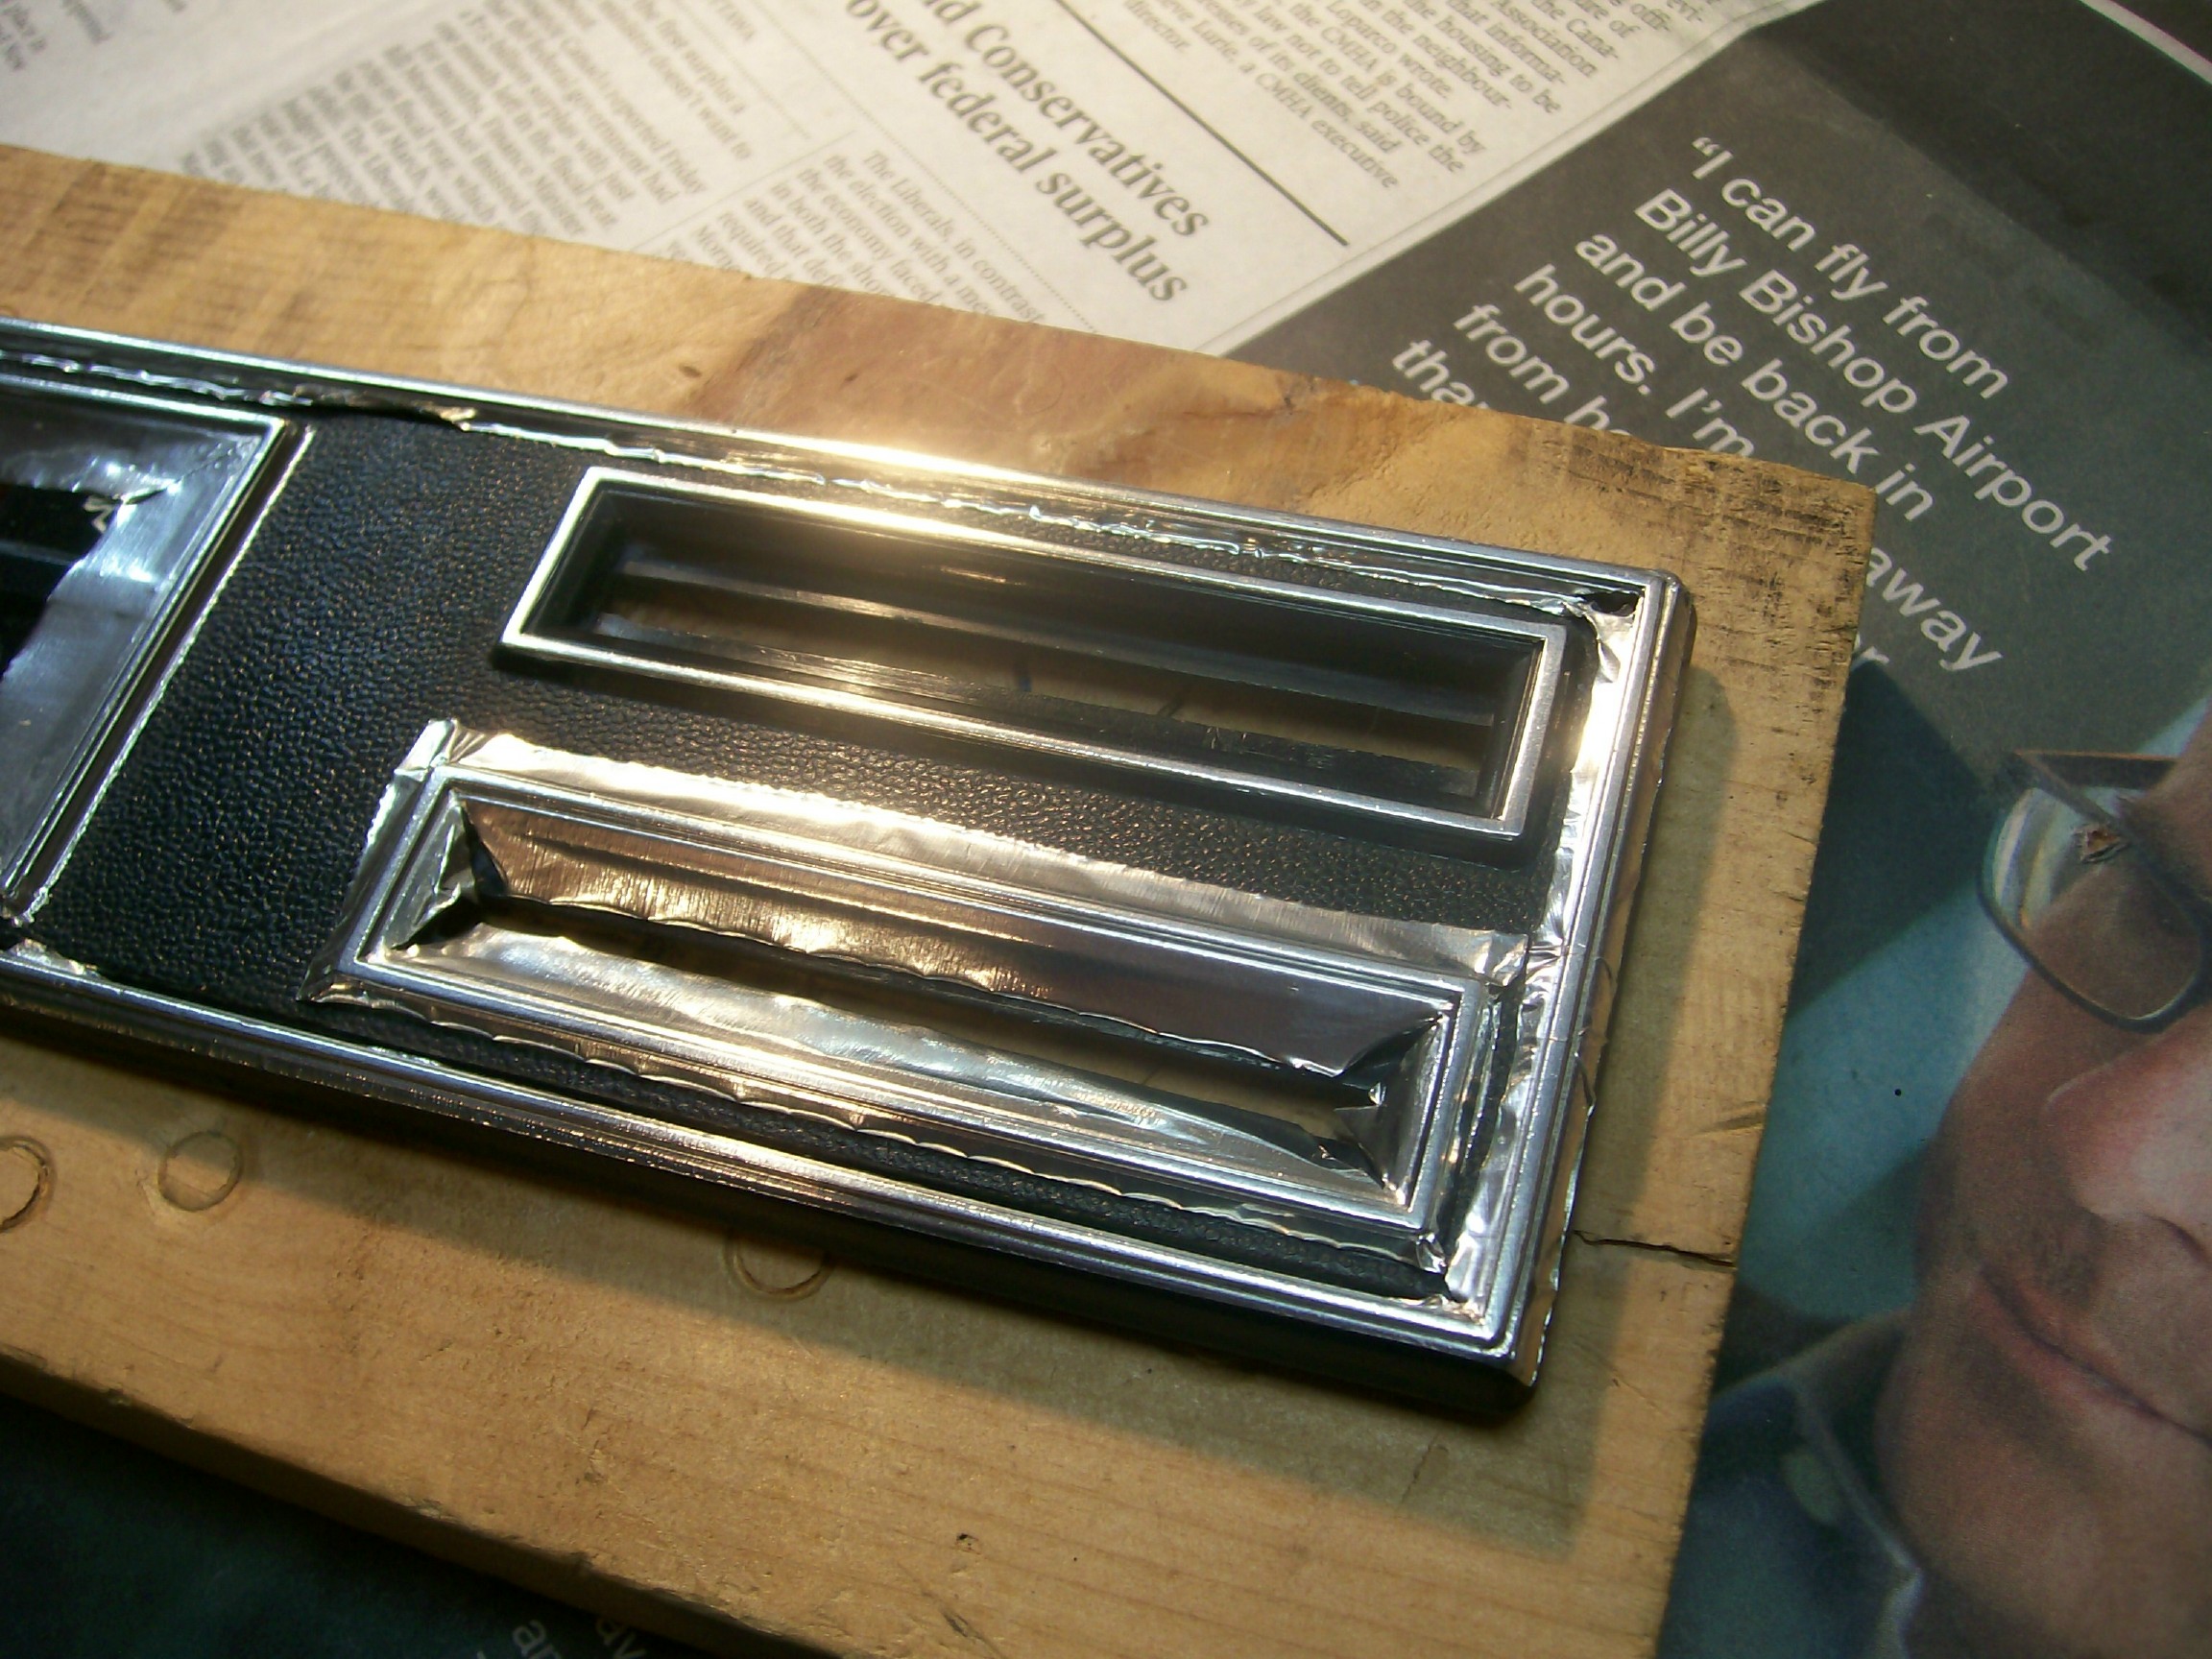
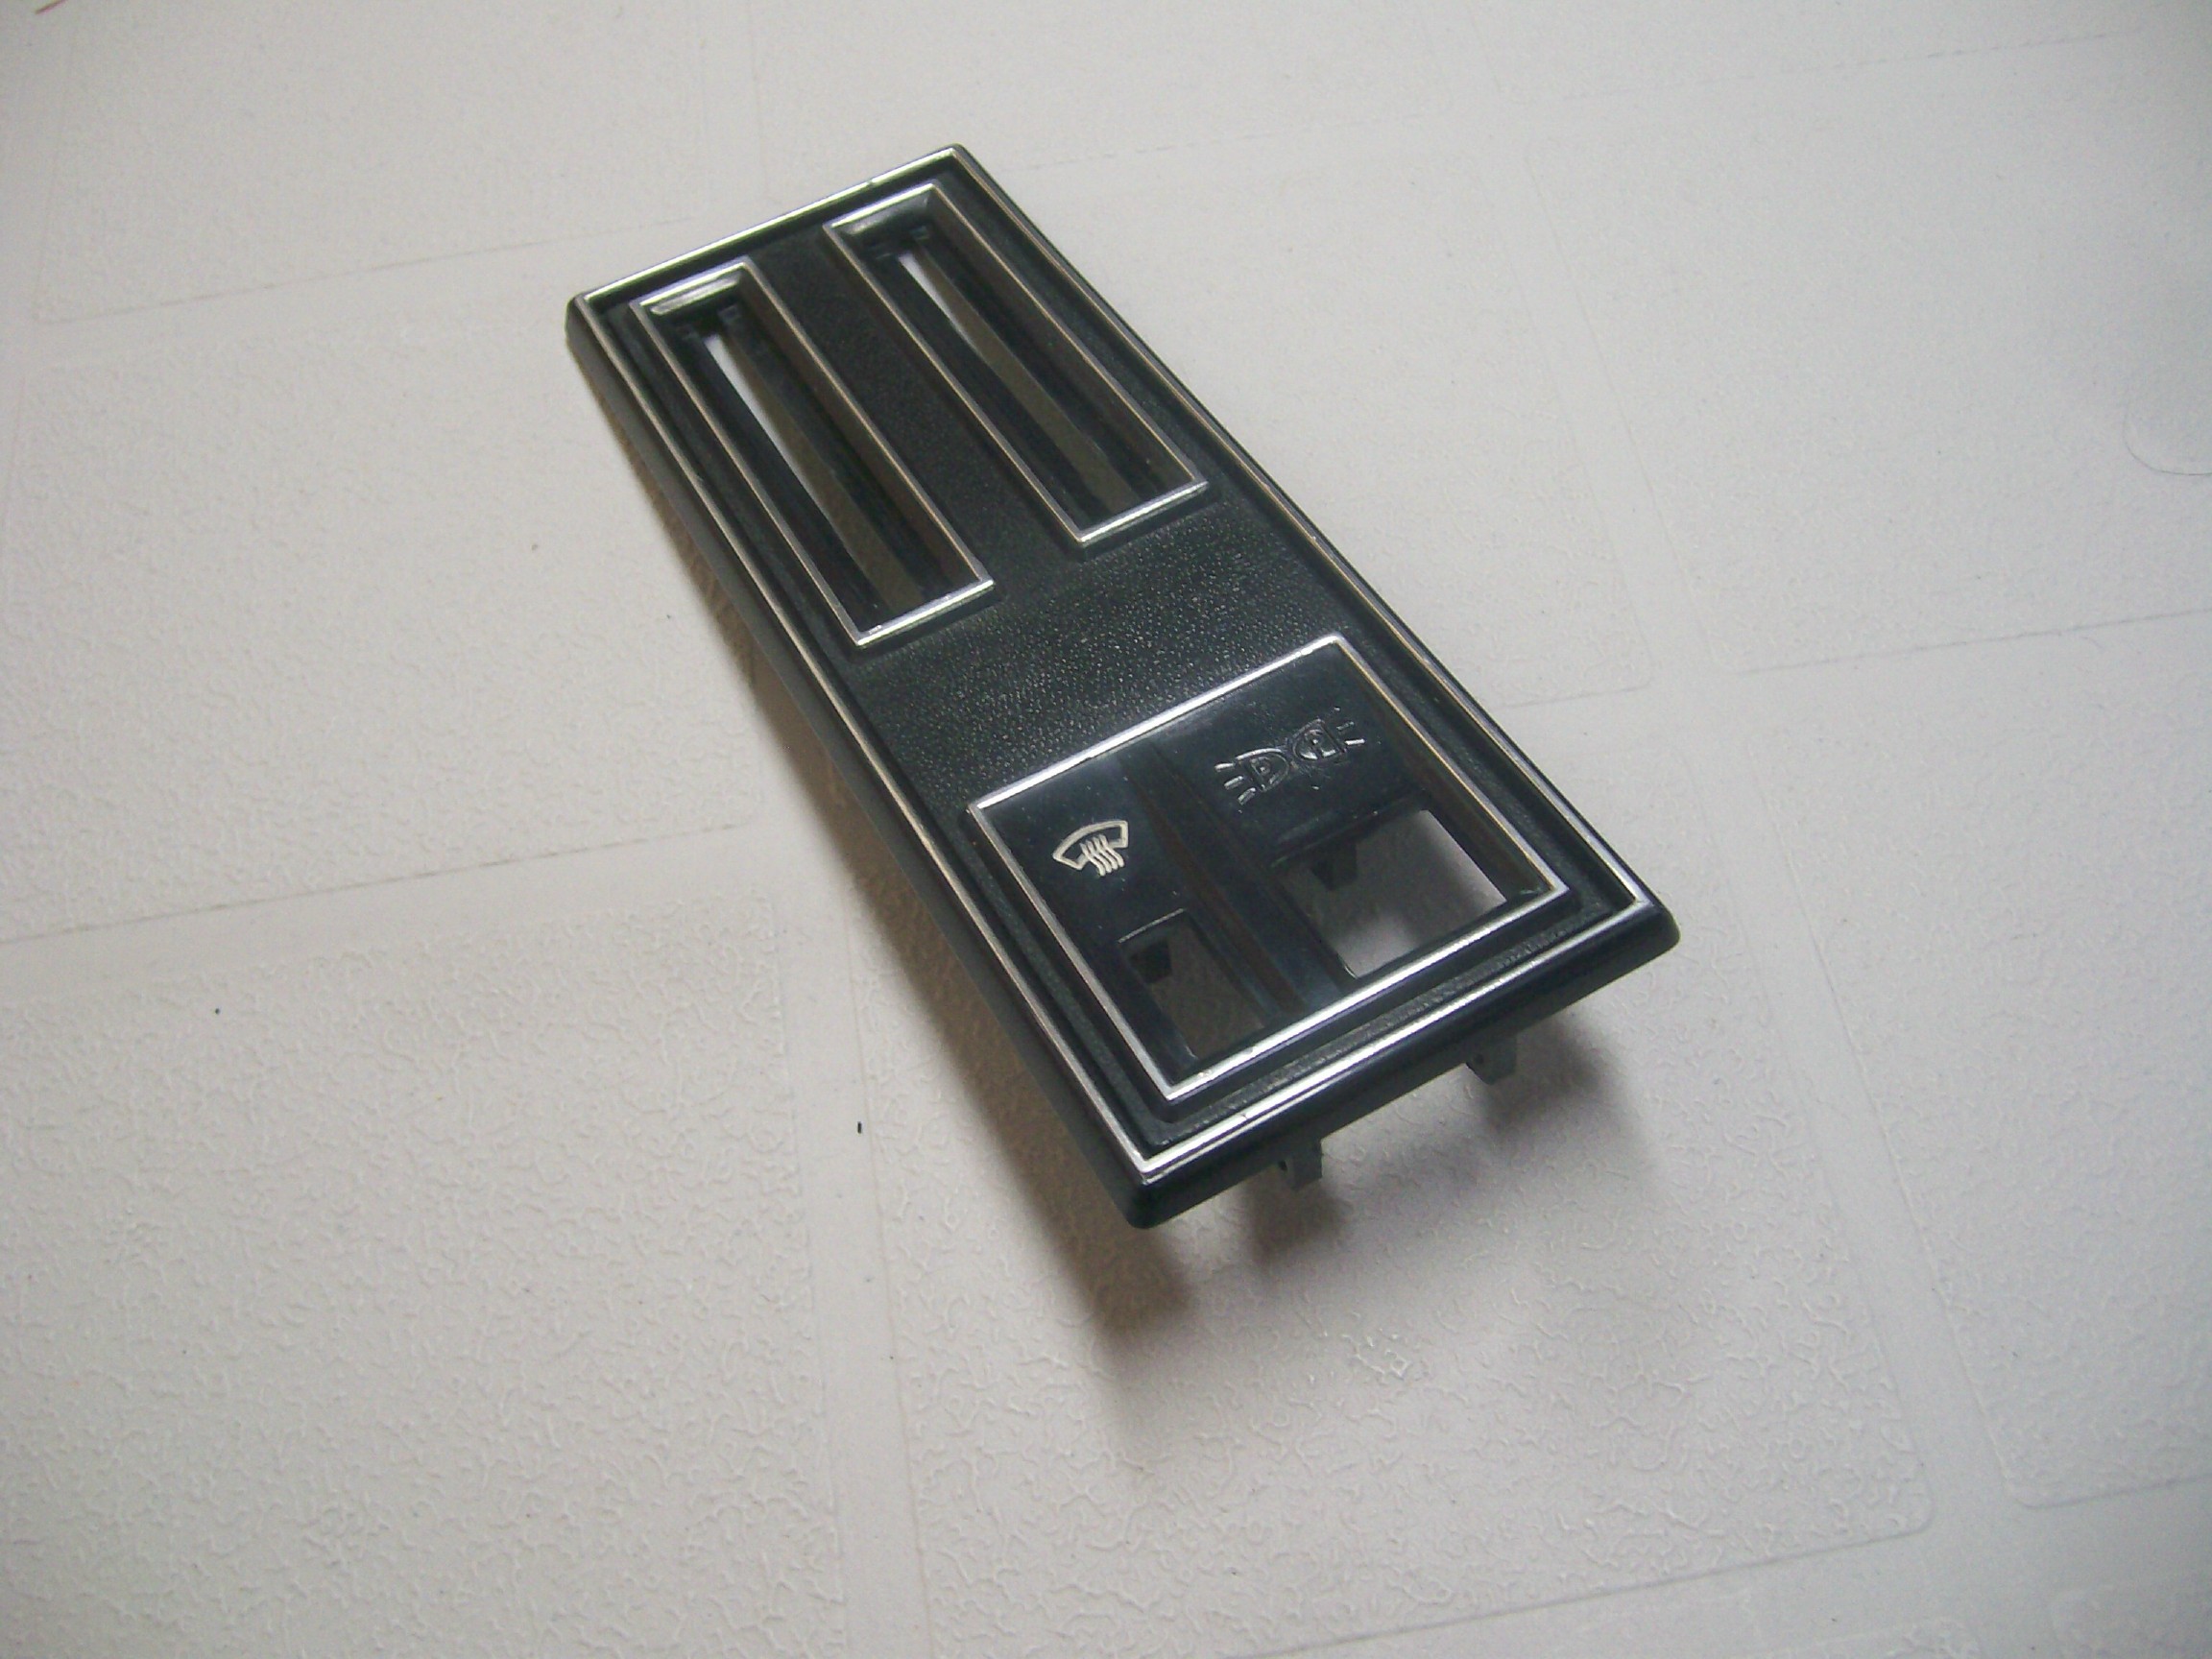
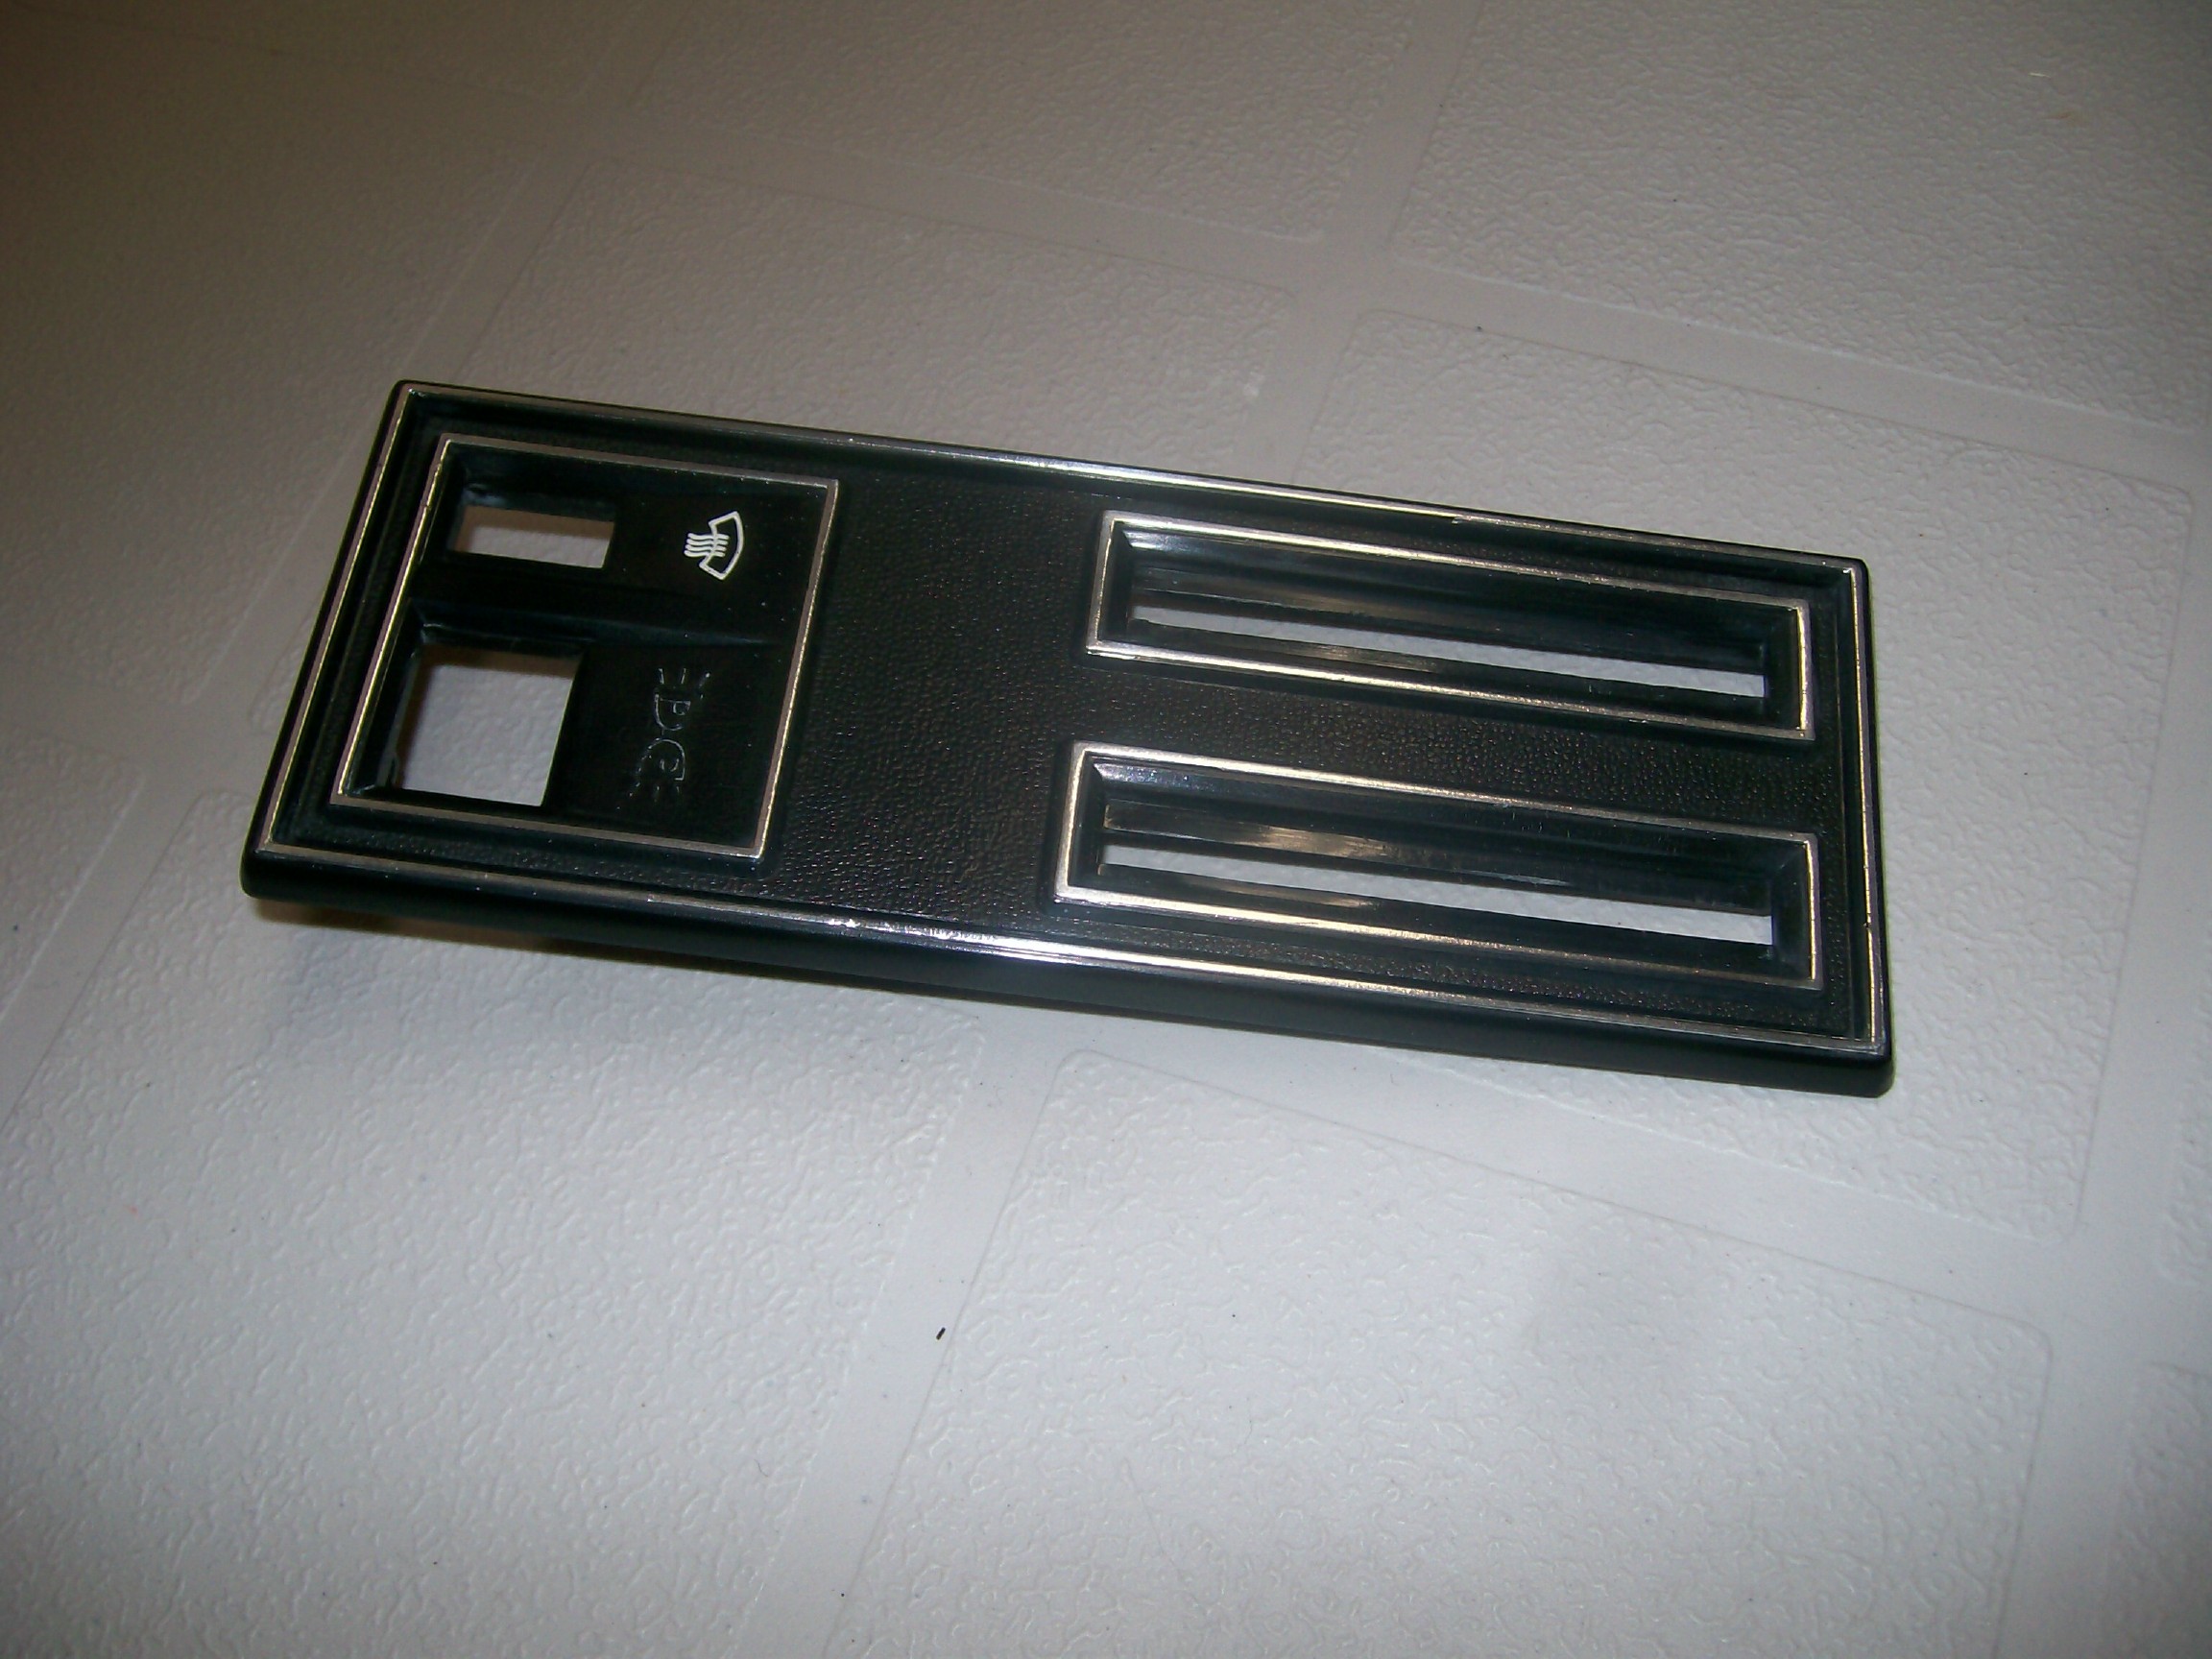
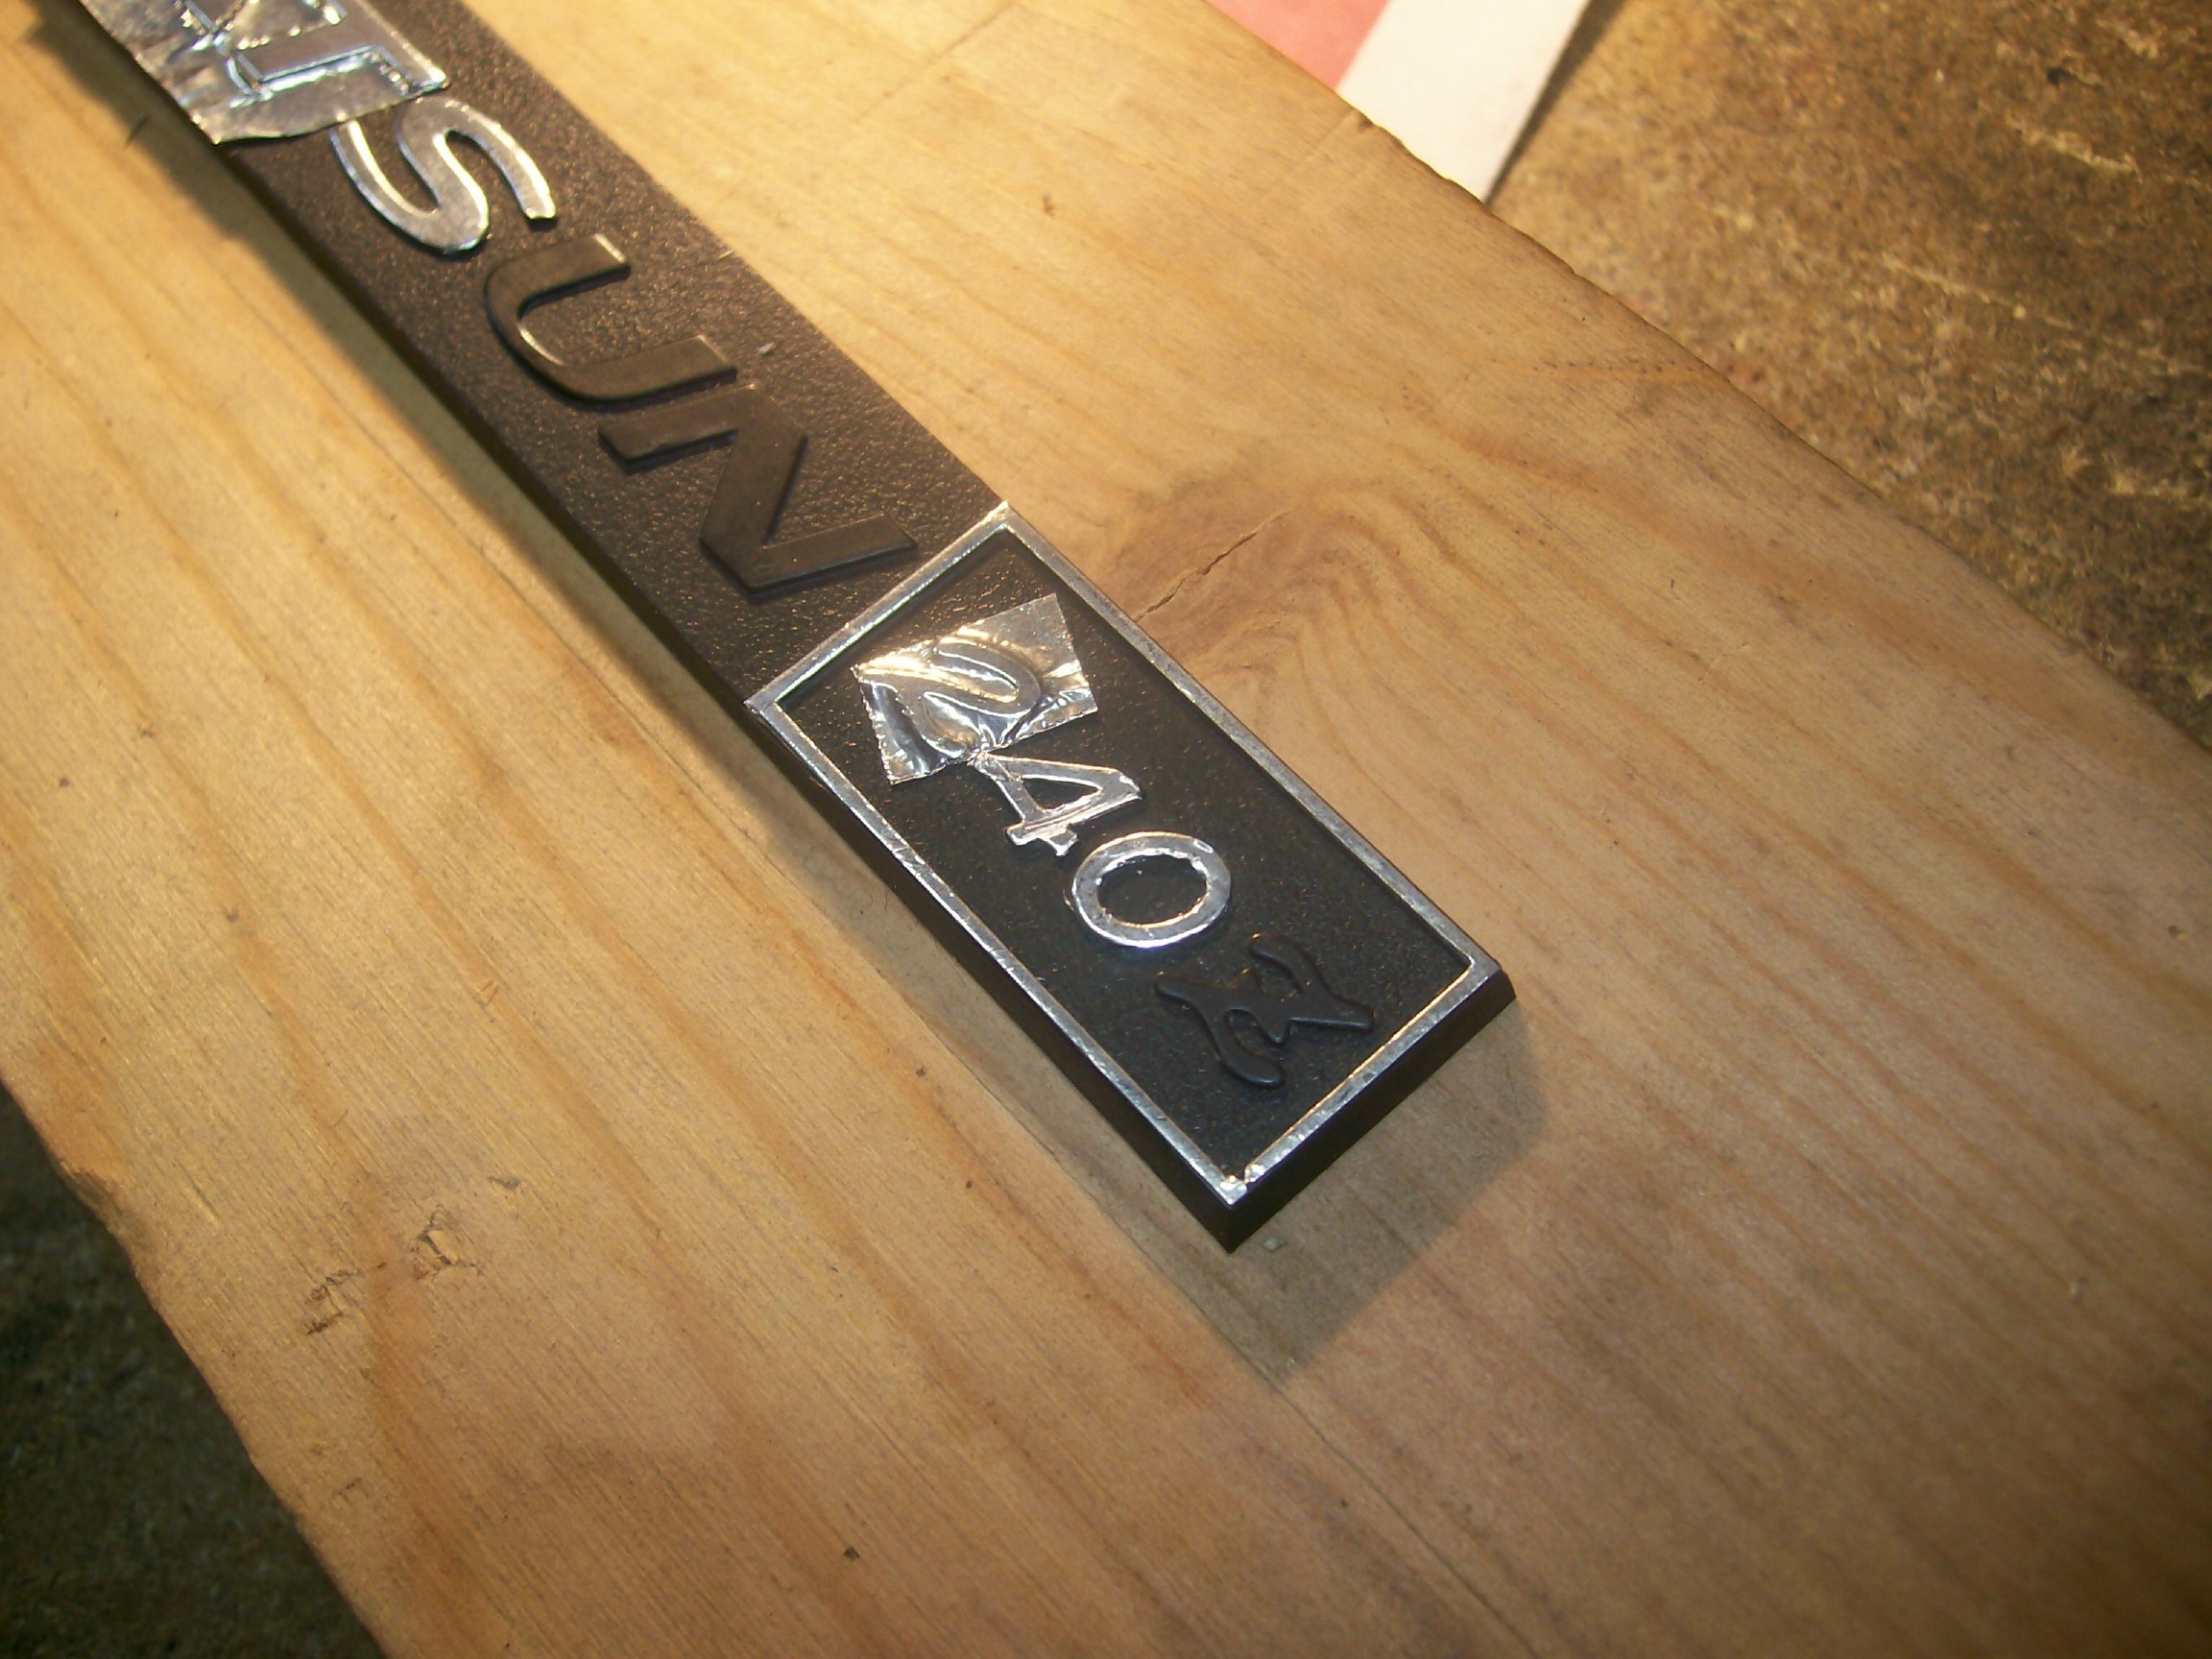
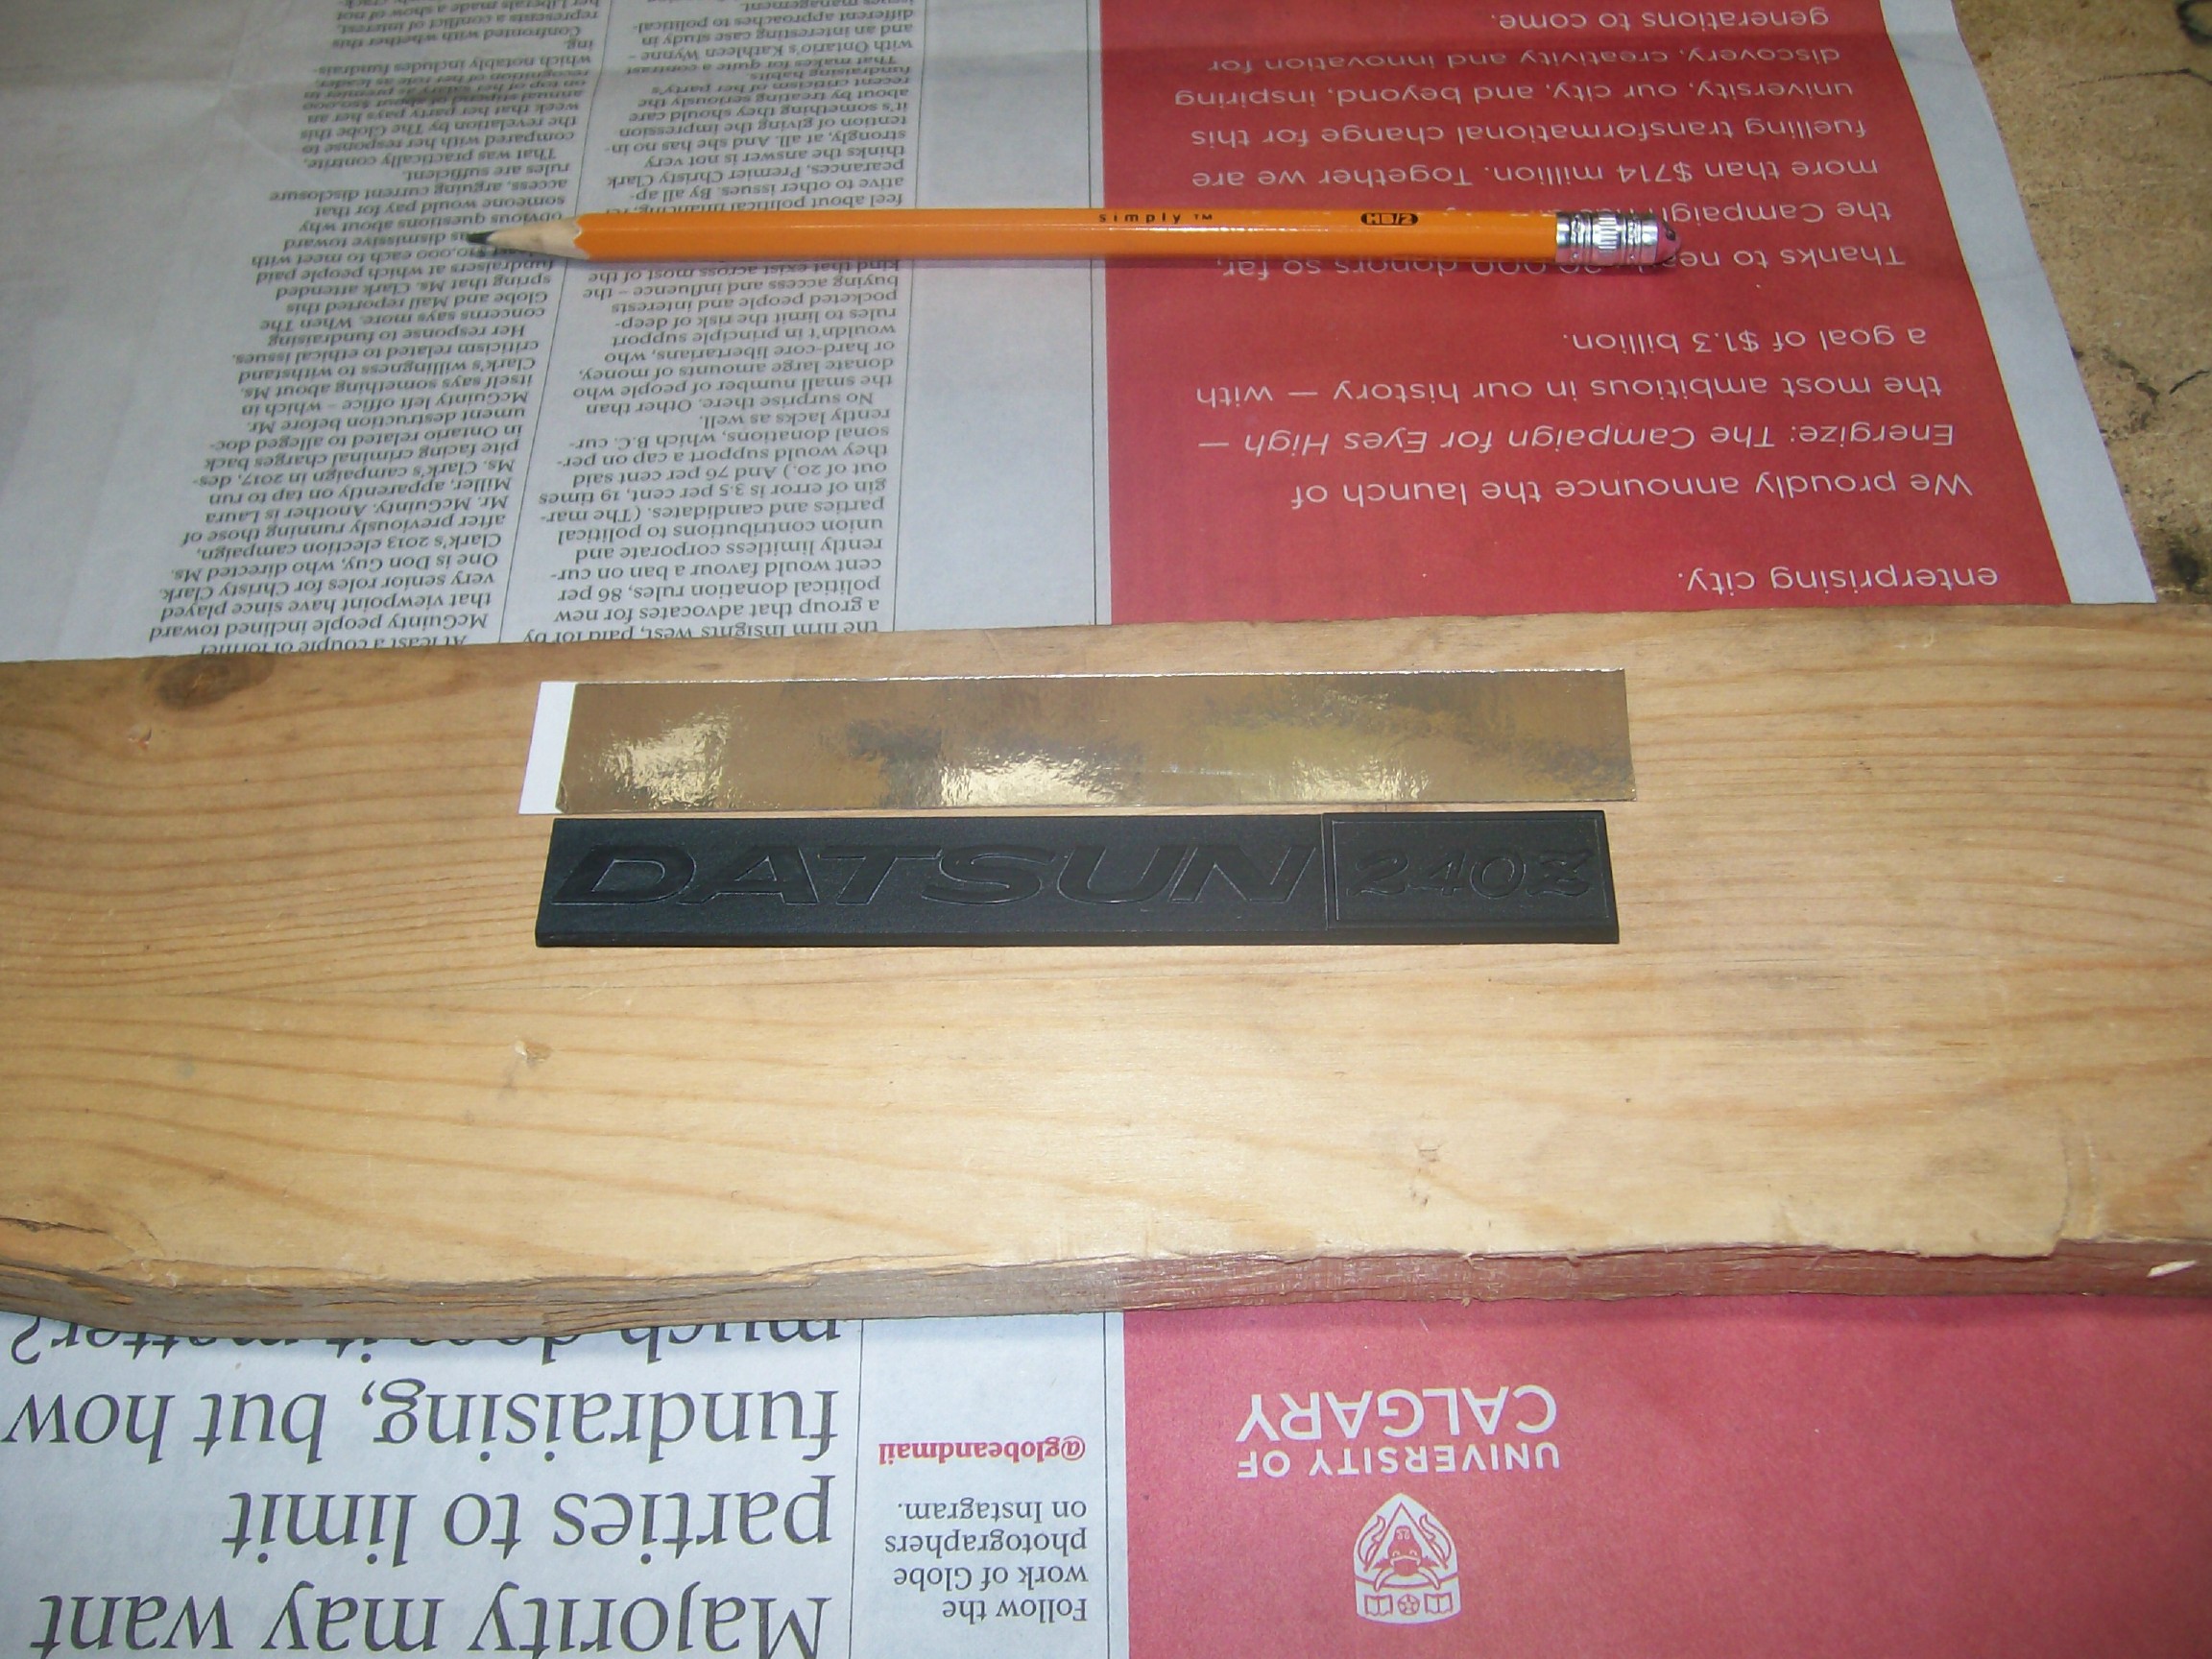
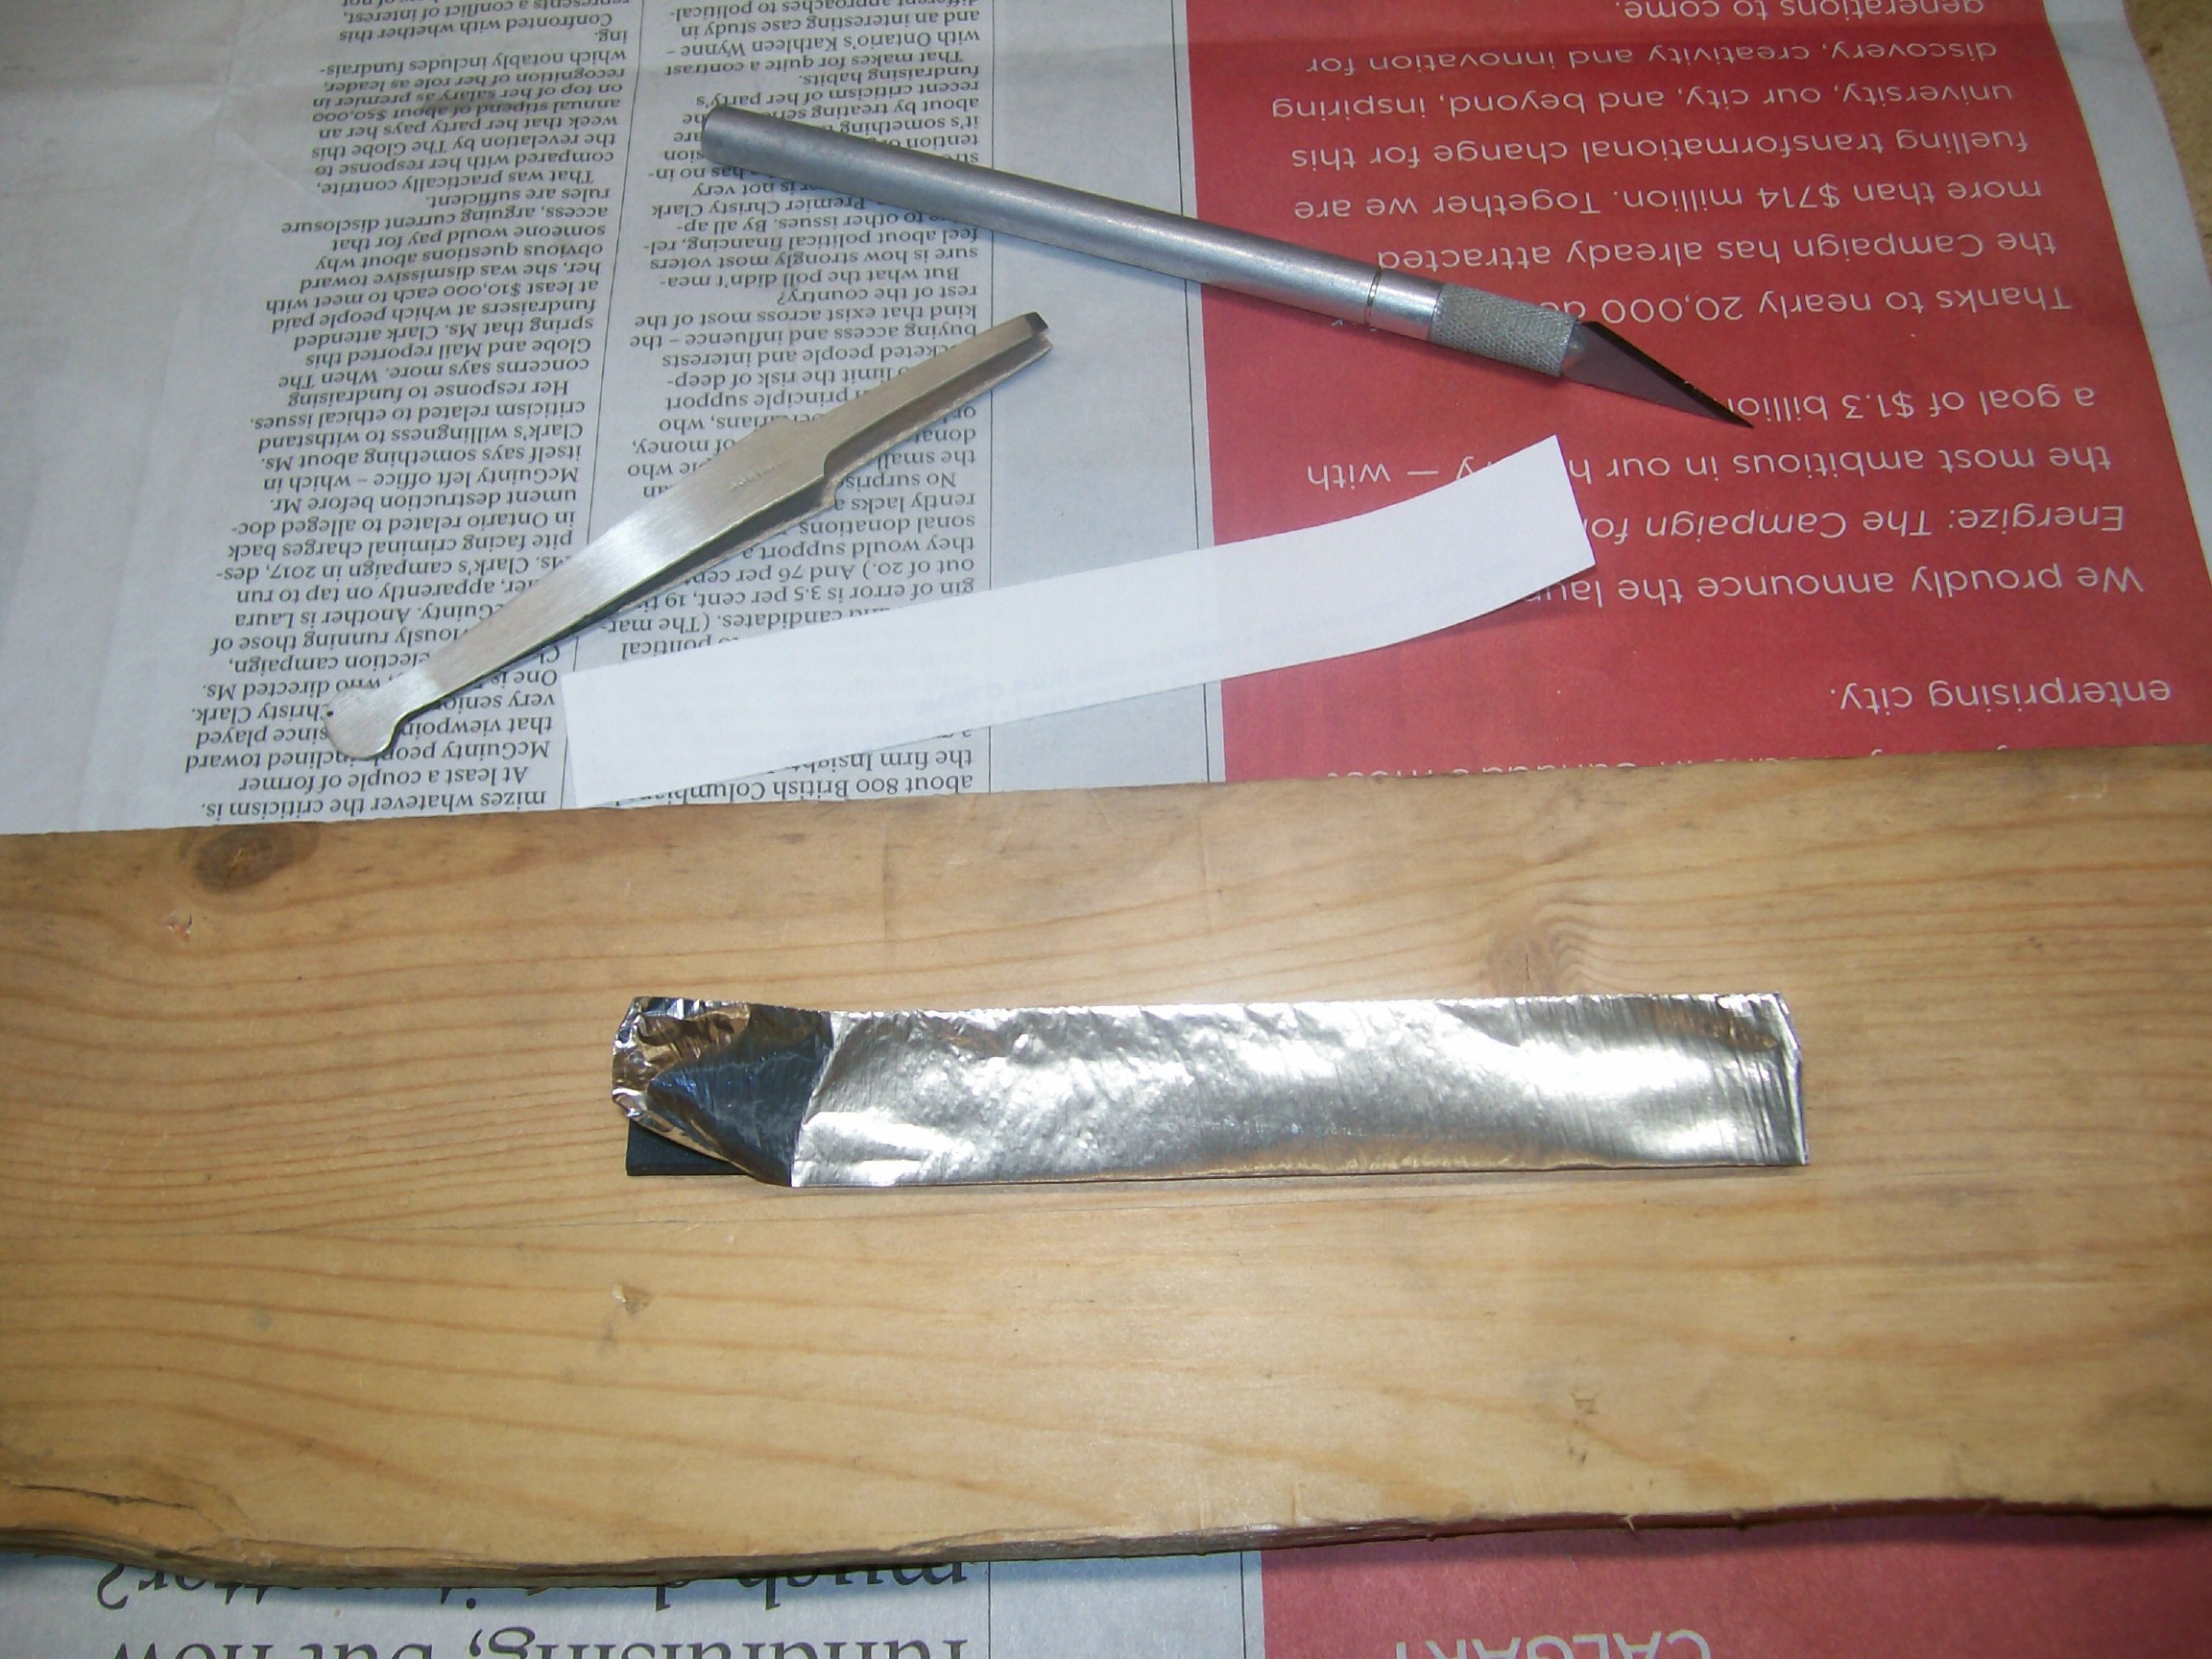
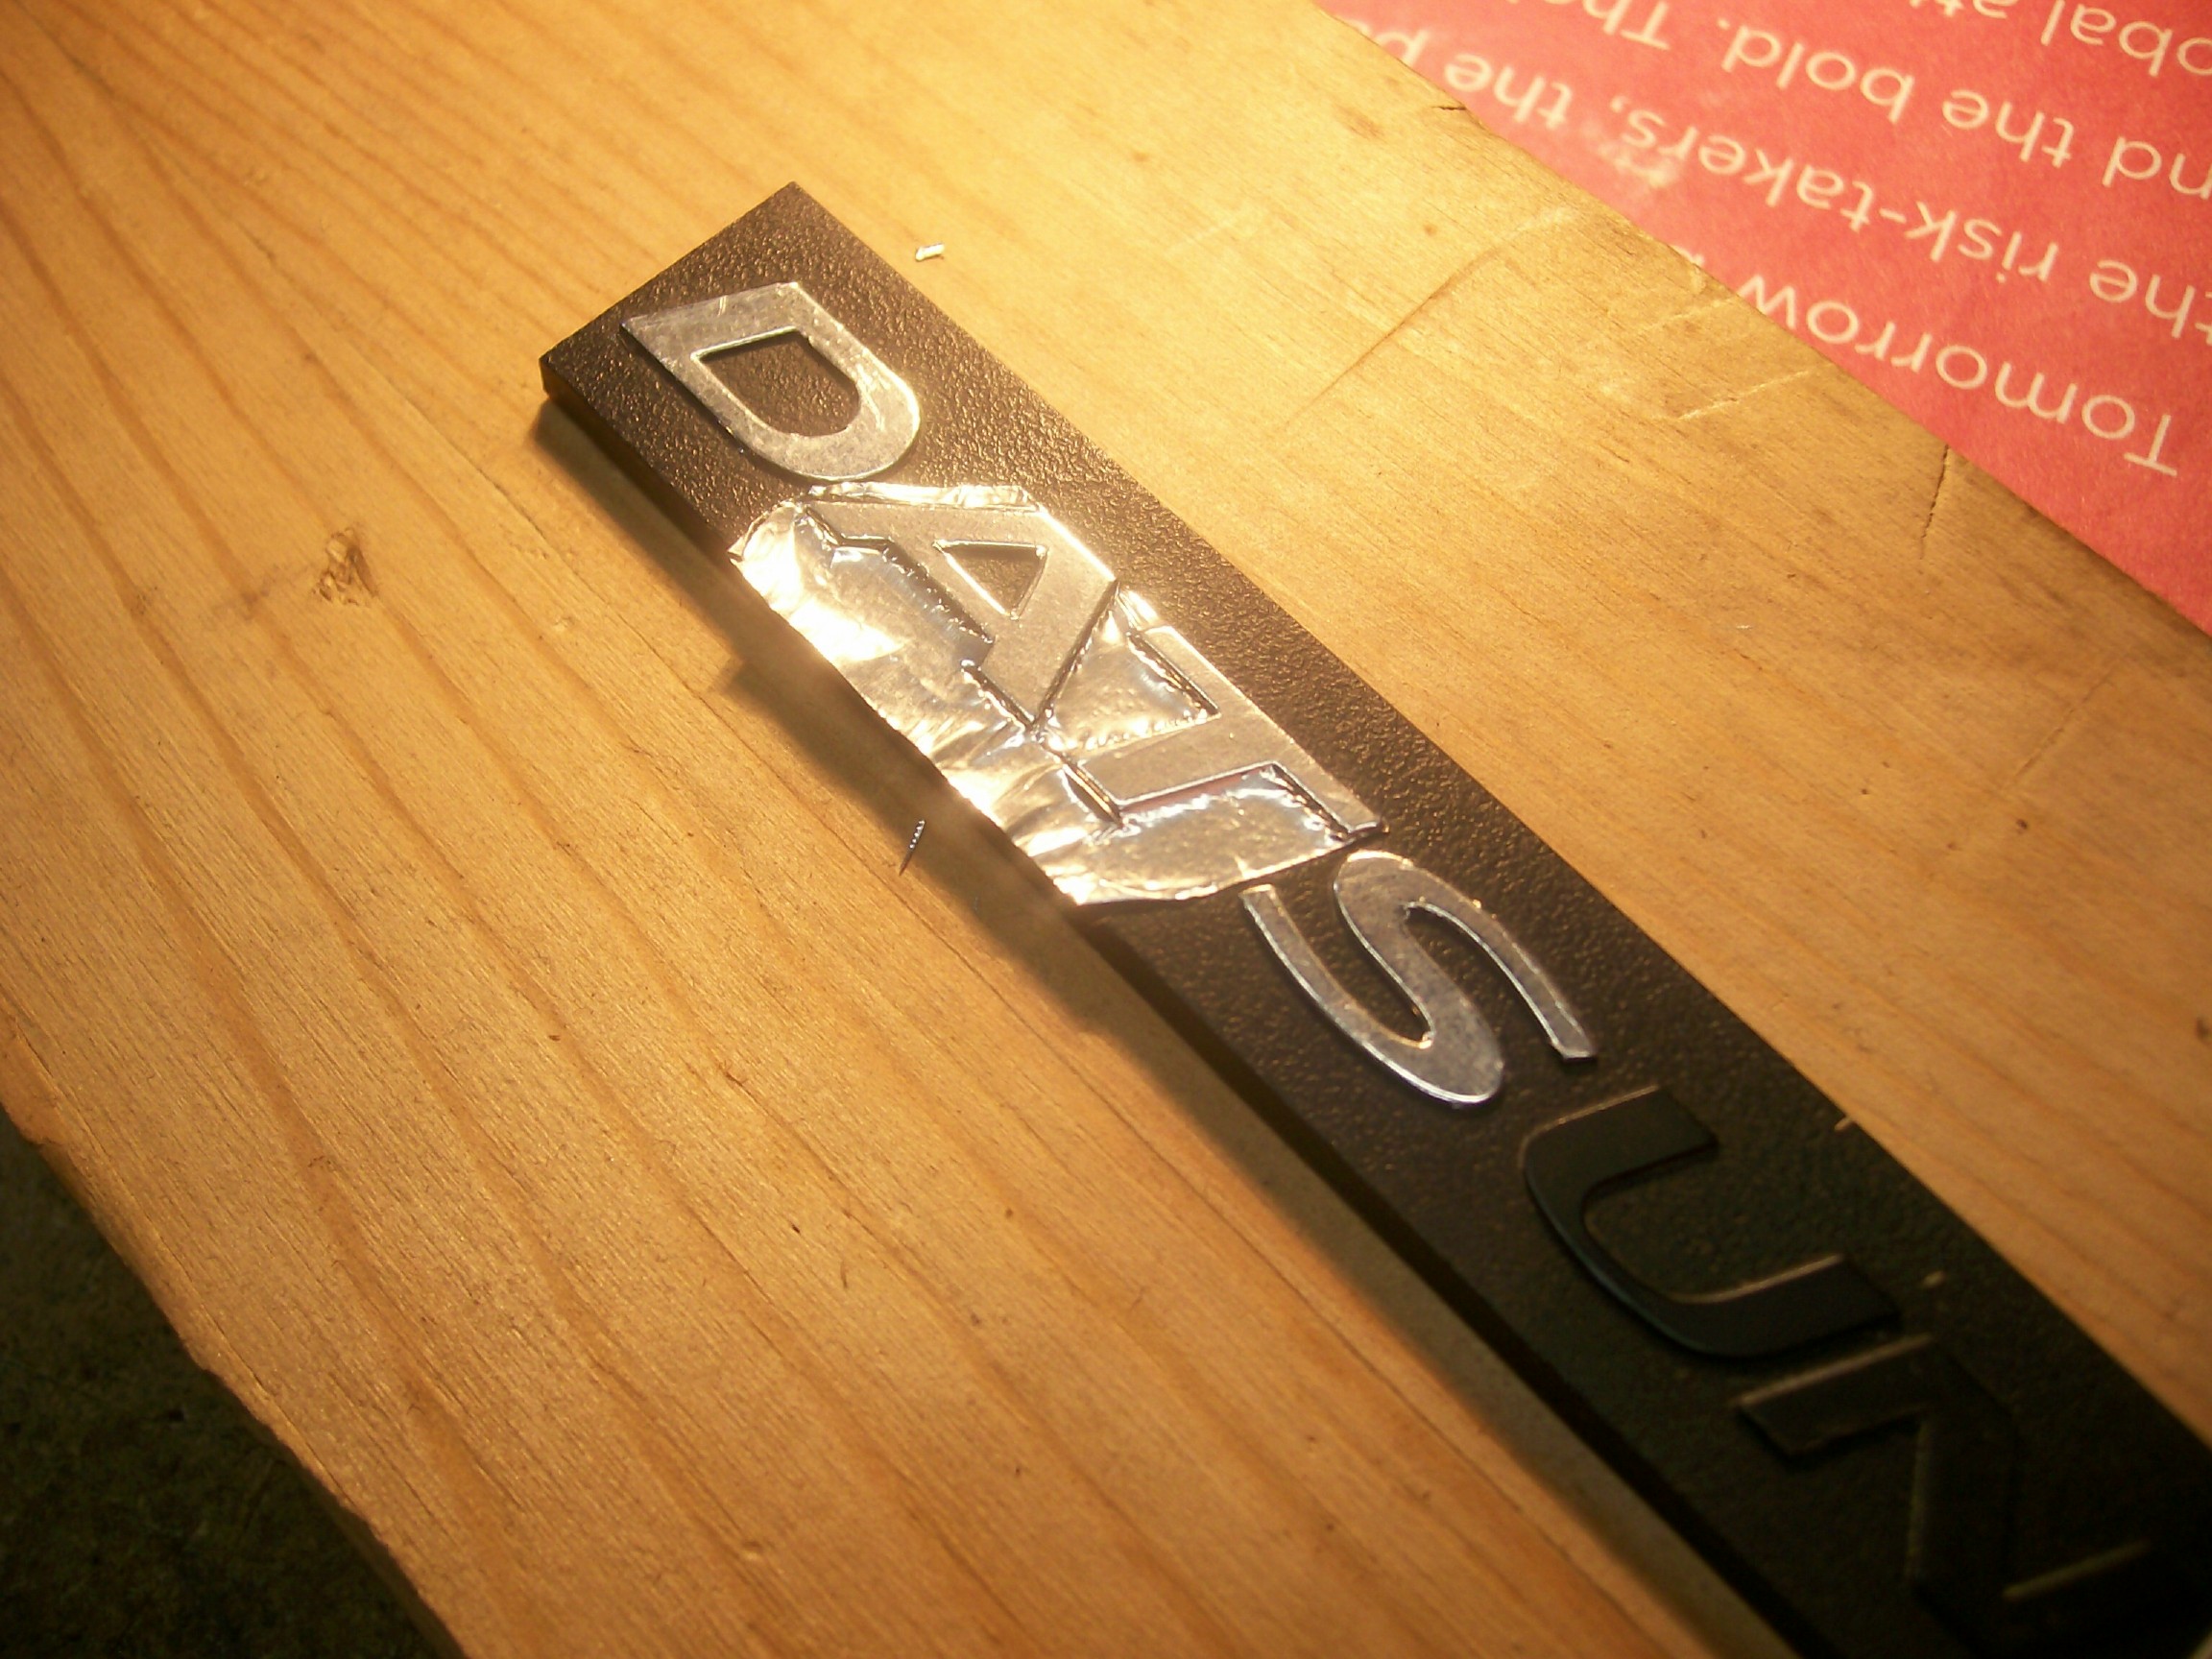
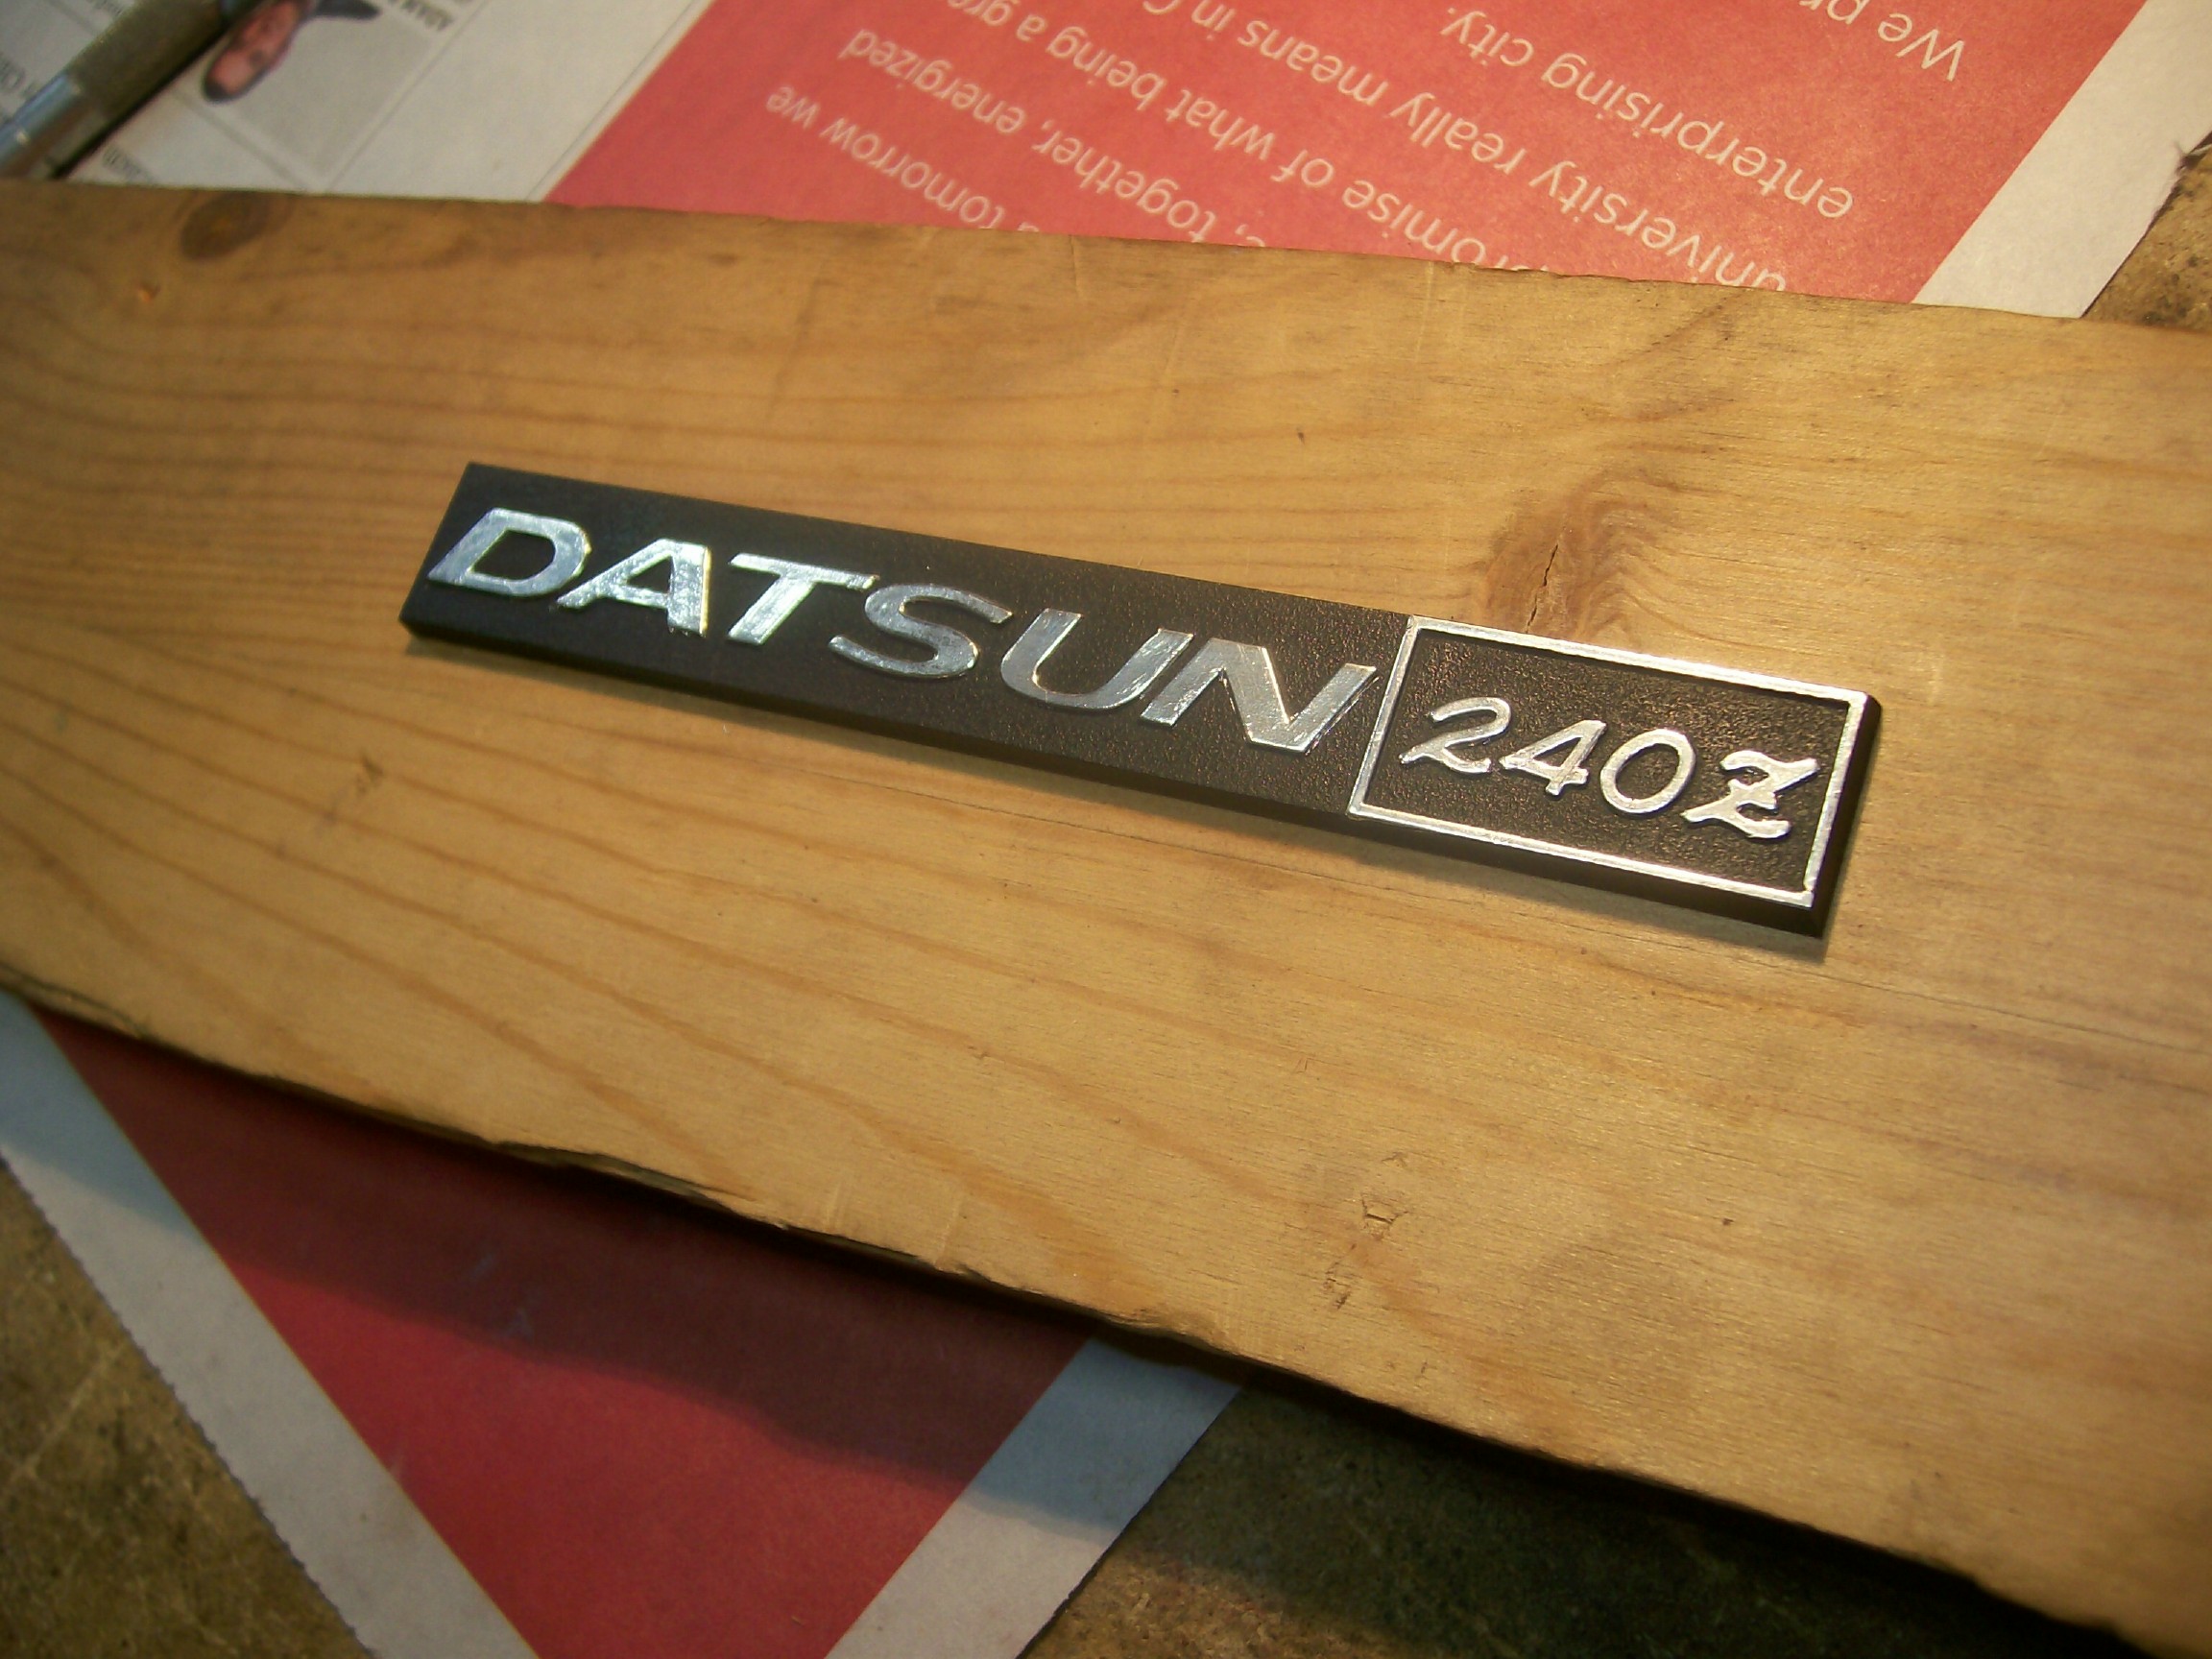
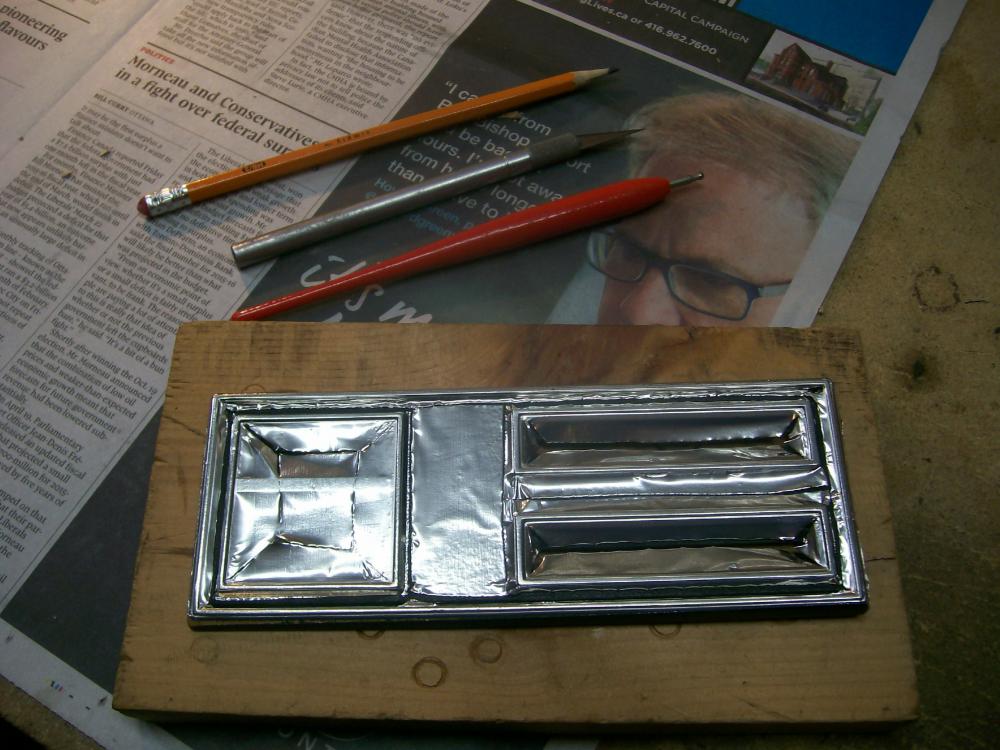
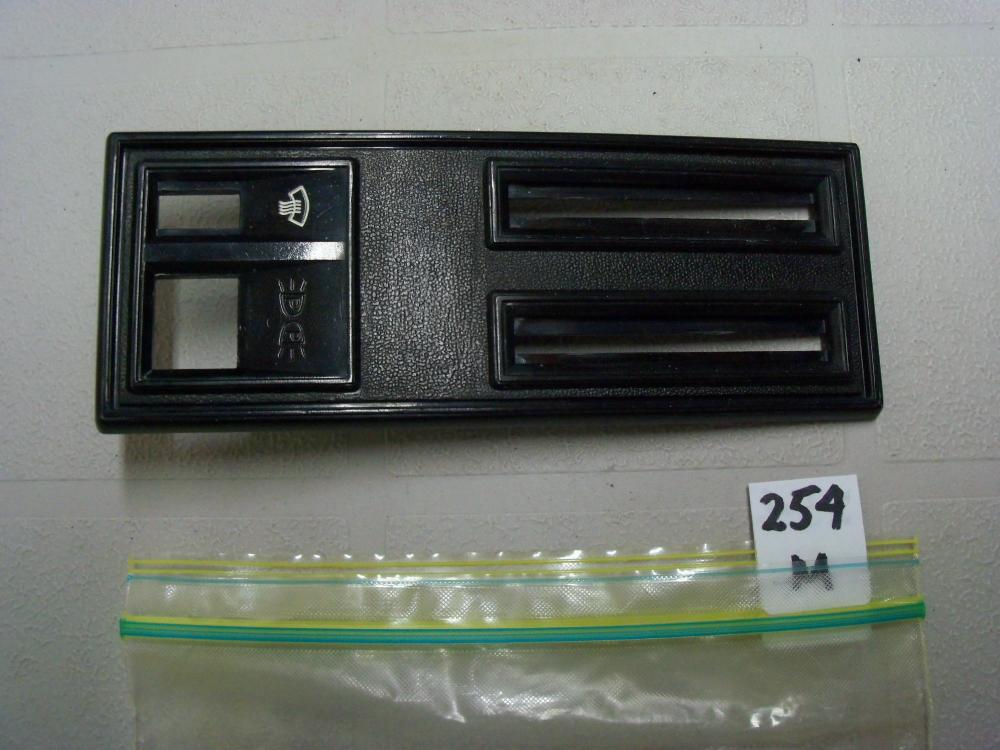
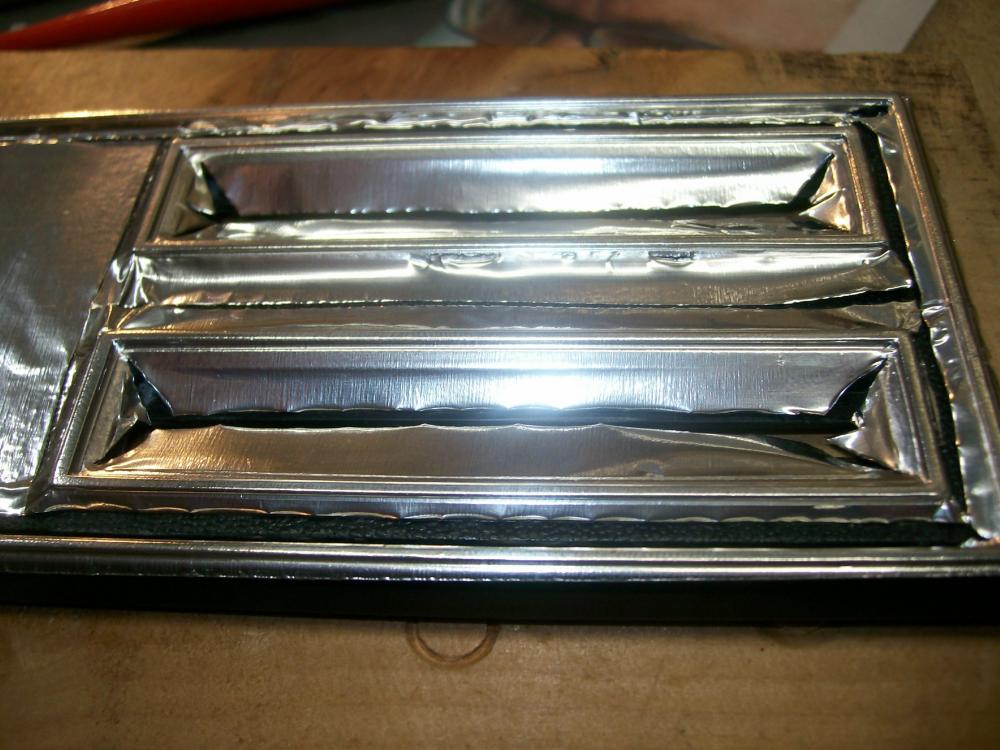
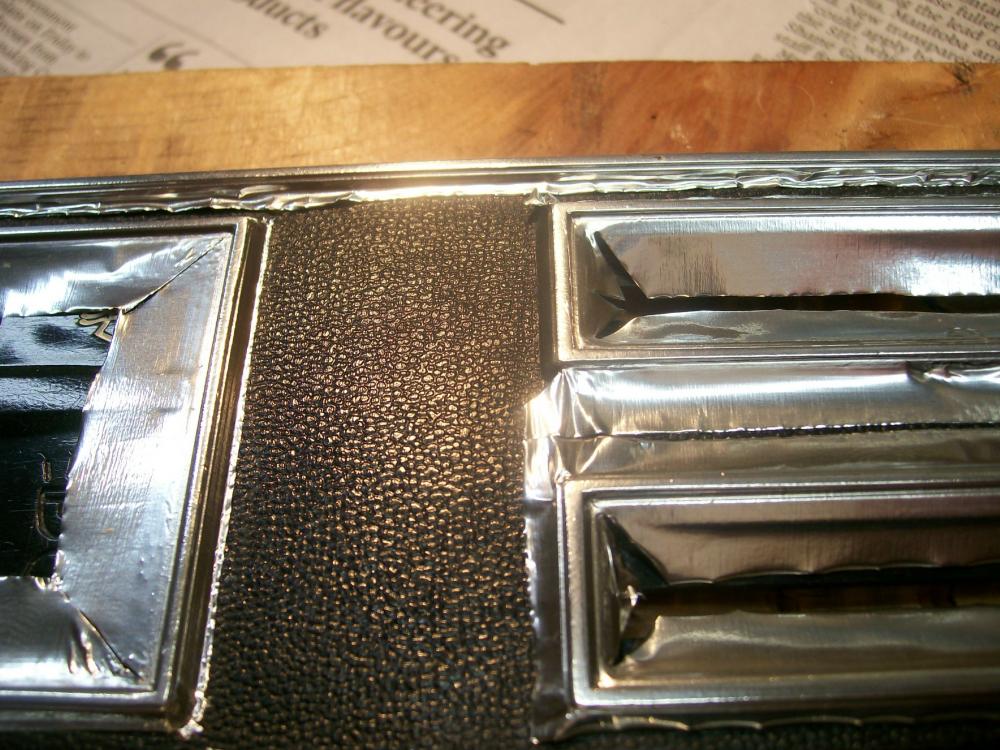
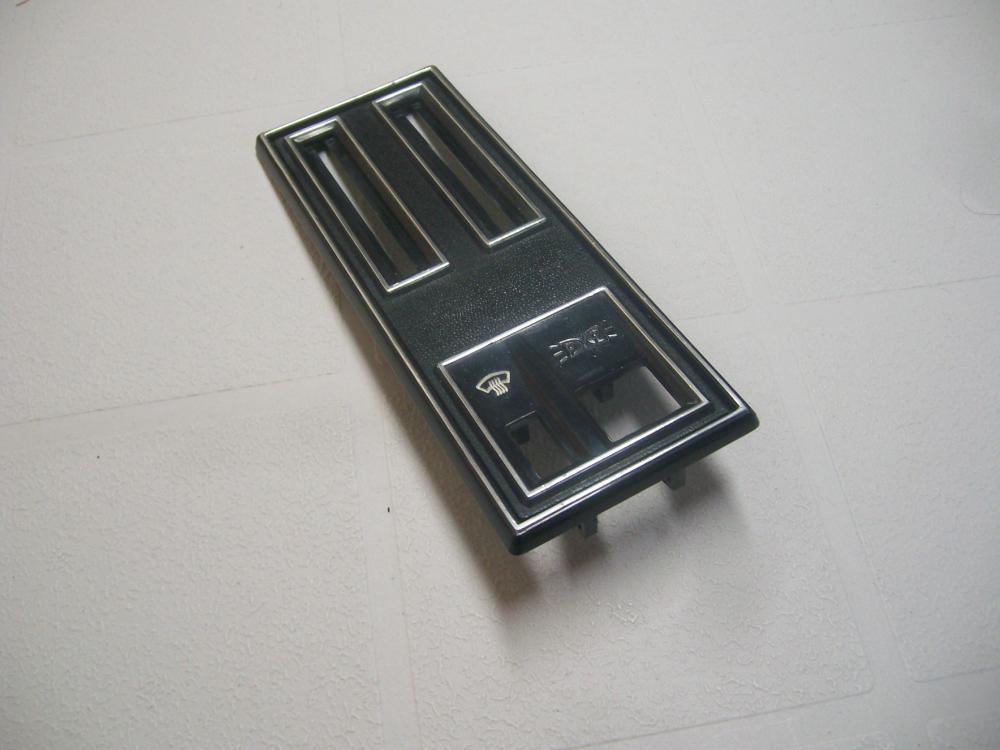
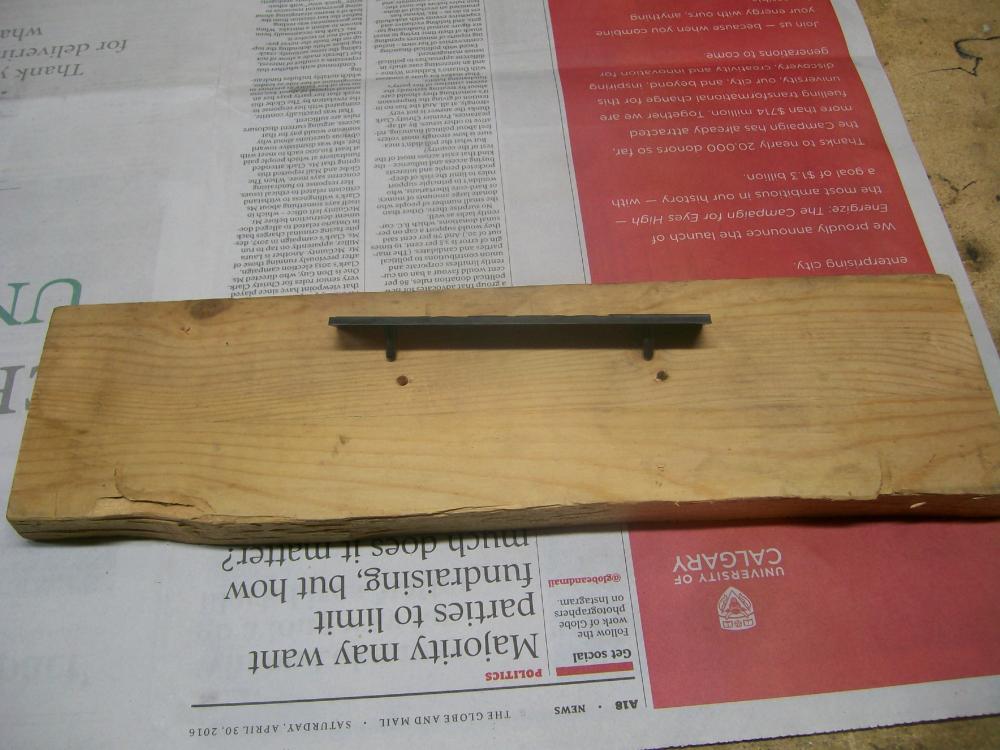
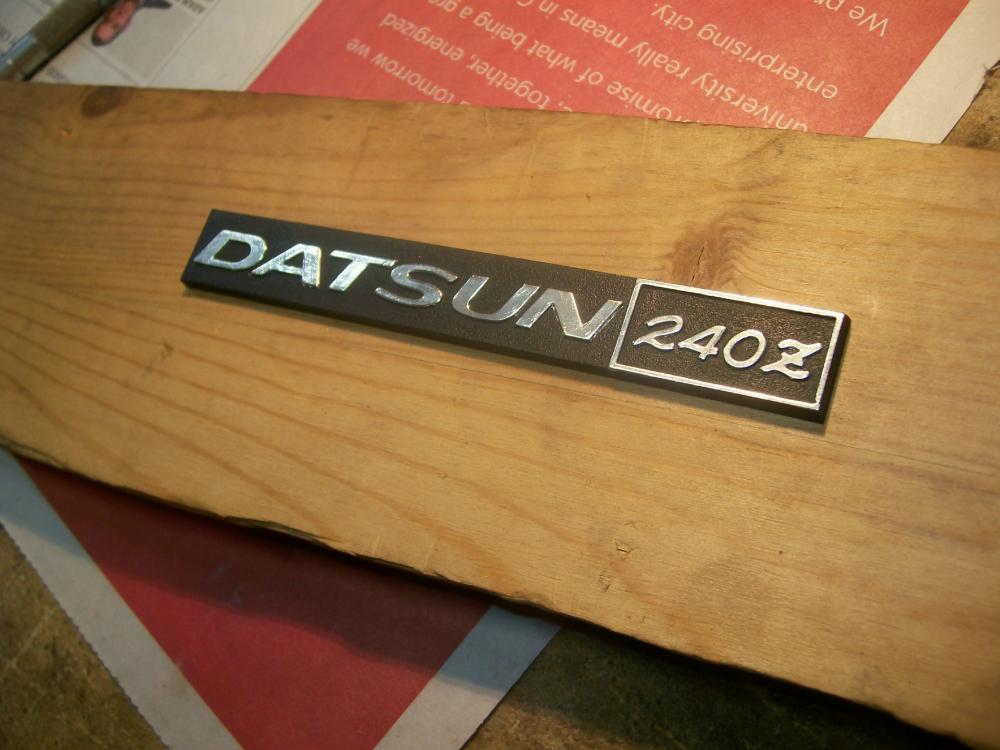
The topic of refurbishing the chrome lettering on the Z's dash features came up again today. I'd read several past posts by members, including those the recommended the use of the silver Sharpie pen. I tried this on the 'Datsun 240Z' logo plate for my glovebox door. While the results looked ok, it proved not to be very durable. As a matter of fact, the ink came off on the kleenex tissue that I'd wrapped the piece with for protection during storage. Maybe some clear acrylic would have helped. Just the same, I now had to start over. This time, I decided to try something different. I'd read about the chrome foil that scale modelers use for simulating chrome trim on plastic kits. Pictures of their results looked really promising, so I decided to give it a try. A page-sized sheet of adhesive-backed foil cost about $10 at the local hobby shop, so I figured I didn't have much to lose. The results were better than I'd ever cared to hope for. Here are some pix of the work I've completed so far -- two pieces: the glovebox logo and the centre console insert plate. The foil itself has about the same feel as the foil wrap used in a package of cigarettes. It's very thin and you need to be very careful peeling it off the backing sheet. Also, the adhesive on the back is very, well, adhesive, so you need to plan ahead as to what your next move will be after you've peeled your piece off the backing sheet. One wrong move and it'll be stuck to something you hadn't planned on sticking it to. It does not un-peel easily, so you'll probably have to toss that piece and cut out a new one. You'll need a sharp hobby knife to make this work. As the instructions that come with the foil mention, 'sharp' means 'really sharp'. Use only a brand-new blade. In fact, the foil manufacturer recommends that you hone the brand-new blade to make it even sharper. I didn't do this and I didn't find it necessary. However, you're going to be cutting through actual metal and that means that you may need to replace your blade with a new one from time to time during the job. The tip-off will be when the blade starts to tear the foil. Unfortunately, that will be too late (i.e. your job will be ruined), so the moral is, don't cheap out on blades. This job takes a very steady hand and a lot of patience. It's also really important that you set up your work piece so that it well anchored, movable, and placed so that your arm and hand will be well supported and at the right height for both comfort and position relative to the work piece. Let's start with the console insert plate. This has mounting bosses and brackets that extend off the bottom, so I found a piece of scrap wood and drilled holes in the appropriate places so that the plate would sit flat on the board. I also made sure that the plate wouldn't jiggle or move around on the board (really important). The console insert plate has a number of full-perimeter chrome accent stripes. As you can see, the chrome was completely MIA on my plate... Although it would have been less risky to do each 'box' as four separate chrome strips, I didn't want to have cut-lines at the corners. Too easy to catch on and lift and edge when driving, and also not a clean appearance. So, after taking a deep breath, I cut a big sheet of foil and dropped it in place... The picture shows the foil in place and I've already 'burnished' it along the raised accent ribs. I found this best accomplished with a piece of high-acrylic cloth from an old shirt. Whatever you use, make sure it's smooth, soft and thin. Be really careful when you do your burnishing. It's all to easy to catch a bit of raised foil by accident and create a rip (and that means you start all over again). Do not burnish in the areas that won't be chromed (it's going to be enough of a chore lifting the excess foil away, without having it stuck to the work piece). You want to burnish only on the 'flats' of the raised ribs but not along the sides of the raised ribs. In the picture above, I've also started to do some initial trimming. Again, you need to be careful at every step along the way. Little rips turn into tears, and a tear can suddenly grows by a half-inch and ruin your work. (BTW, one of the photos shows an actual 'burnishing tool' that I had left over in my tool kit from the days of 'letraset' - it proved to be poorly suited for use with the thin modeler's foil I put it away immediately). The knife work requires practice to develop the right 'touch'. You need to find the right weight, the right 'steering' angle, and the right tracking edge (it's not a freehand cut). You'll learn how to find a ledge that you can run the point along. Once you get the knack of it, you can run a 4" straight cut in one move. In point of fact, you really need to strive for making these cuts in one move, because it's difficult to resume a cut without creating a little ragged edge. Also, the foil doesn't lend itself to 'clean-up' work afterwards. You really need to try to get it right the first time. The photo above gives a little closer look at the burnishing and the start-off cuts. Below, you can see me about to use my tweezers to pull the excess foil away after the first of my detail cuts... Here's the 'After' shot, with the excess foil completely removed... Below, you'll see the same process carried out for the first of the longer cuts... And, finally, the first rectangle completed (at this point I am feeling both happy and relieved)... It perhaps goes without saying that the raised strips around the outer perimeter of the plate were the most challenging to get right. Nevertheless, I was 'in the zone' by this time and managed to get everything done without any major incidents (just a couple of small ones ). Here's a photo of the end result: and... (The second photo won't load full-size for some reason) I was pretty happy with the results, given that this was the first time I'd ever tried using this foil. I was particularly relieved to find that I could cut dead-straight edges just by finding the right little ledge to let the knife tip run in (it's easier to feel these ledges than it is to see them, but they're there). Once you find the ledge, the challenge is to keep the knife tip moving steadily forward in the right direction. It's pretty easy to have the knife tip wander out of the ledge if you have the blade's 'steering angle' a few degrees off. When that happens, you've got trouble. Now for the glove box emblem. Different challenges here, given the many curves and inside corners. Same technique though. First, the backing board... Then mount the work-piece and cut a piece of foil... Lay the foil in place and burnish with your cloth... Look for the 'ledge' around each character and start to make your cuts. Curved edges are the most challenging, obviously. You may have to re-do many of the characters before you get everything to the point where your happy with your results. If you need to do a fix-up (like I'm doing with the '2' in the shot below), make sure you cut you new piece of foil to exactly the right overall size, so that it doesn't accidentally touch the foil on one of the adjoining characters... which will mean you'll now need to re-do both characters). Of all the characters in this logo, the 'Z' was the hardest to do. Save it for the last. Here's the final result (not the greatest of pix as I found it hard to get the lighting angle right)... All told, I think it took me about 3 or 4 hours to complete these two pieces. I found it useful to walk away from time to time, as it's pretty demanding of concentration and coordination. Nevertheless, it's real (metal) shiny chrome and it won't fade. I'm pretty confident about the adhesive, but I guess there's going to be a test of that sometime in the future when the car gets parked in hot sun for a few hours. The durability looks like it will be just fine, provided I never accidentally catch an edge while cleaning.


 4 points
 -
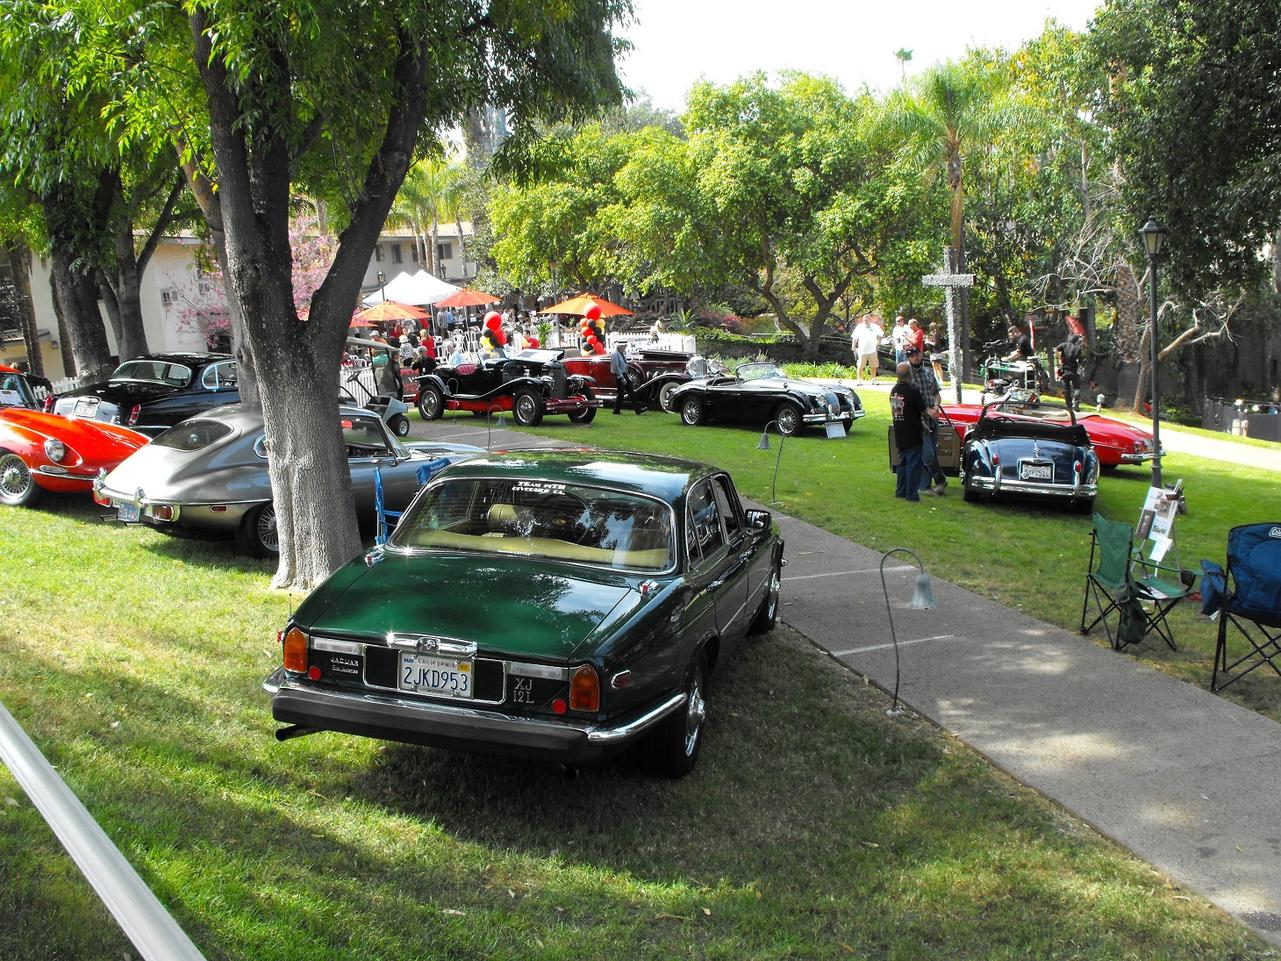
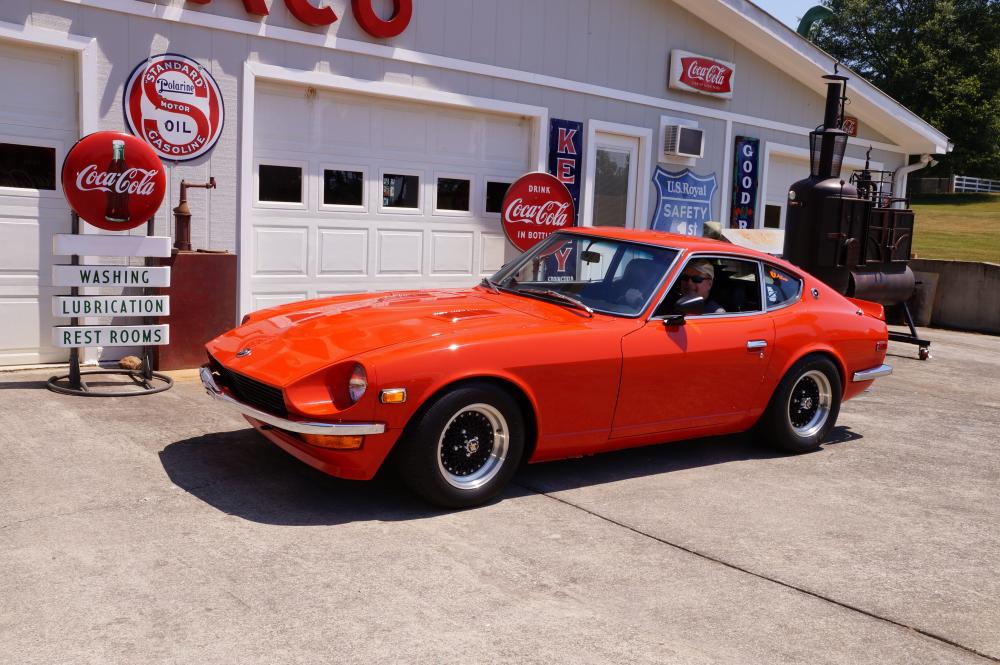
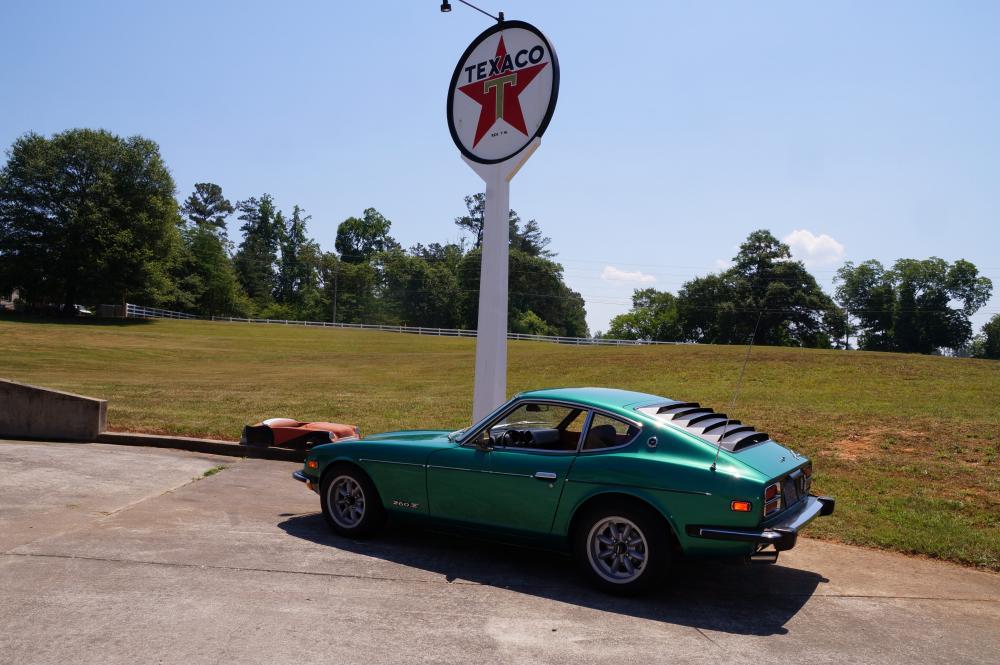
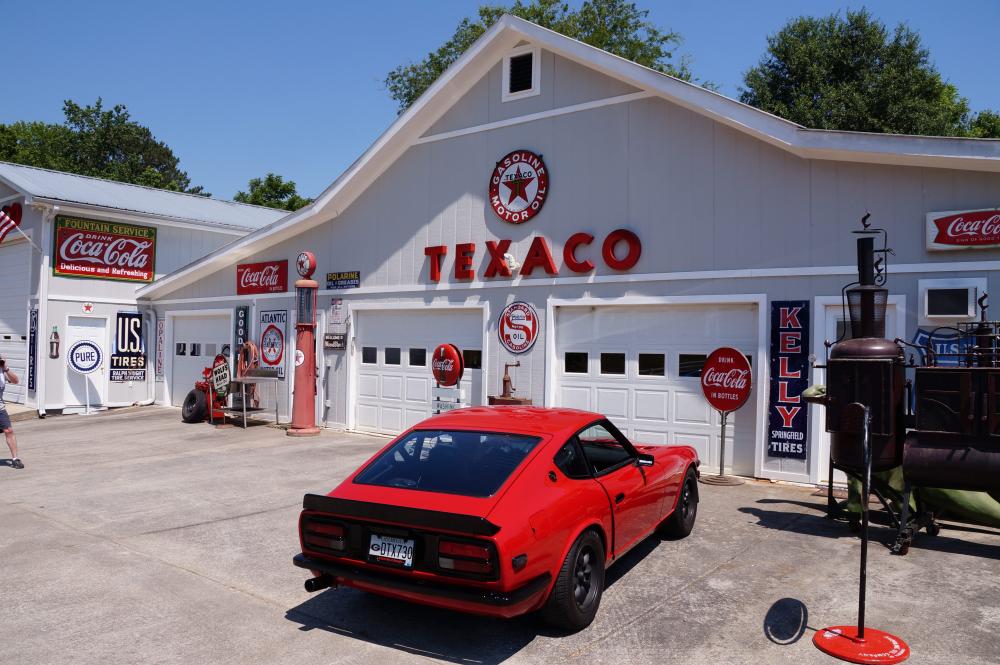
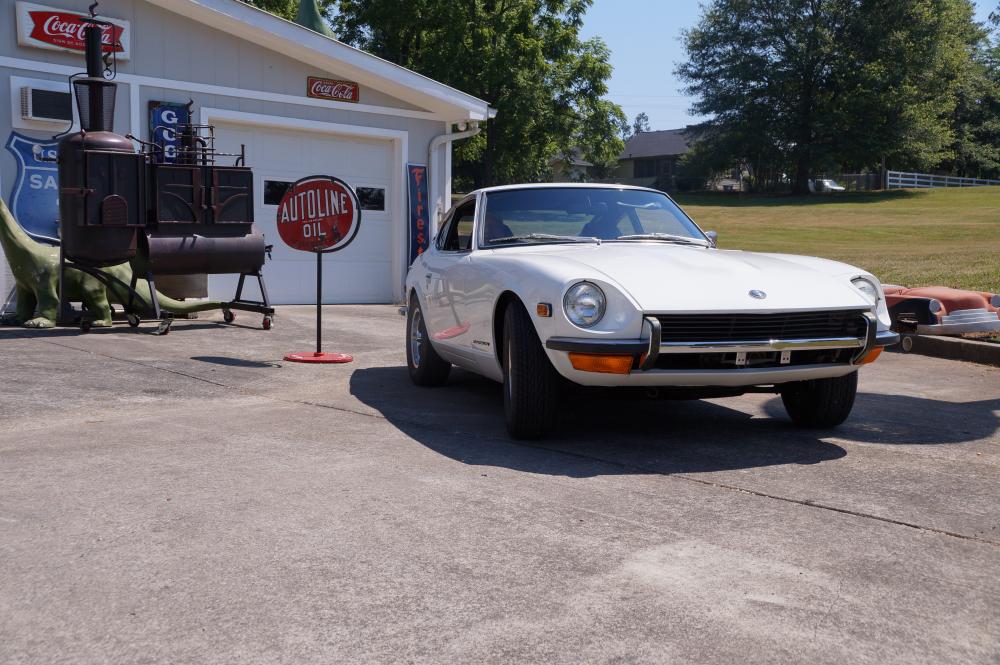
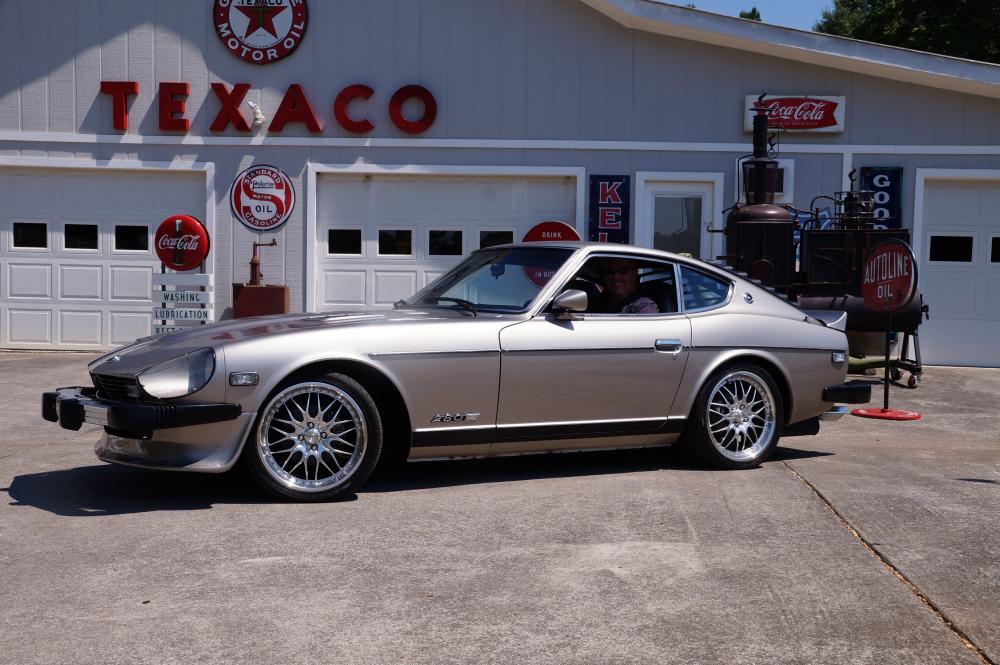
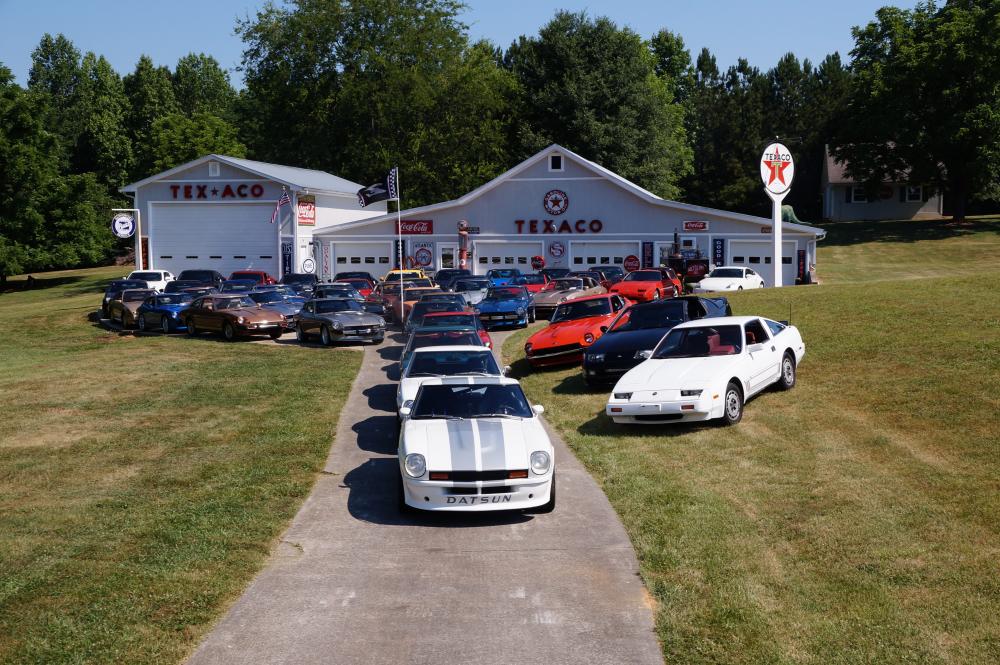
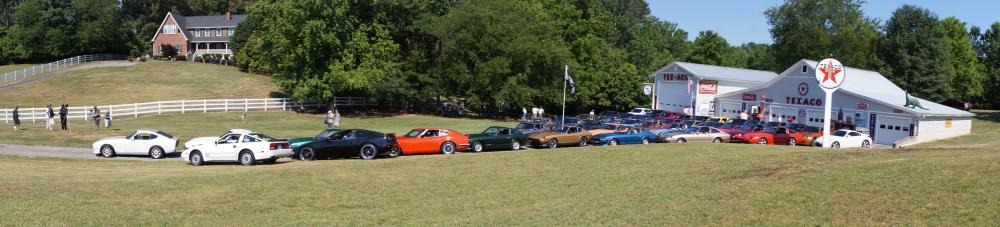
2 pointsOne of the Georgia Z Club members drives past a property that has a garage decorated like an old Texaco station. He finally saw the owner at the property, so he stopped to see if the owner might let the club do a photo shoot there. The owner agreed. It turns out he once owned a 240Z, and he owns a bunch of classic cars. The owner was a wonderful host, and we got a lot of great photos. There were a lot of great cars on hand, including Joe Travis' (@GeoJoe) nice 73. If you want to get to the full photo set, follow this link: https://georgiazclub.wordpress.com/2016/06/12/making-new-memories-284-photos/
 2 points
 -
1 pointNever dealt with varnish before, so just speculating here, but I would try acetone, lacquer thinner or Goof Off (which is mainly acetone and xylene). There's not much that either of those three won't eat through.1 point
-
Yes, advance is coming from the front carb. The carbs are synced very evenly.1 point
-
Beautiful job, John! I actually painted mine with a fine modeler's brush and aluminum paint. Took about an hour just for the dash plate and many tiny touch ups to achieve a good result. I gave it 2 coats of a satin (semi-gloss) clear made by a very reputable Japanese hobby paint manufacturer aptly named "Mr. Hobby". Not only is the work protected but also gives it a subtle sheen similar to the original which wasn't really totally flat. I think that satin coat would protect and look great on your excellent work. I'll certainly try the foil for my next jobs.
 1 point
 -
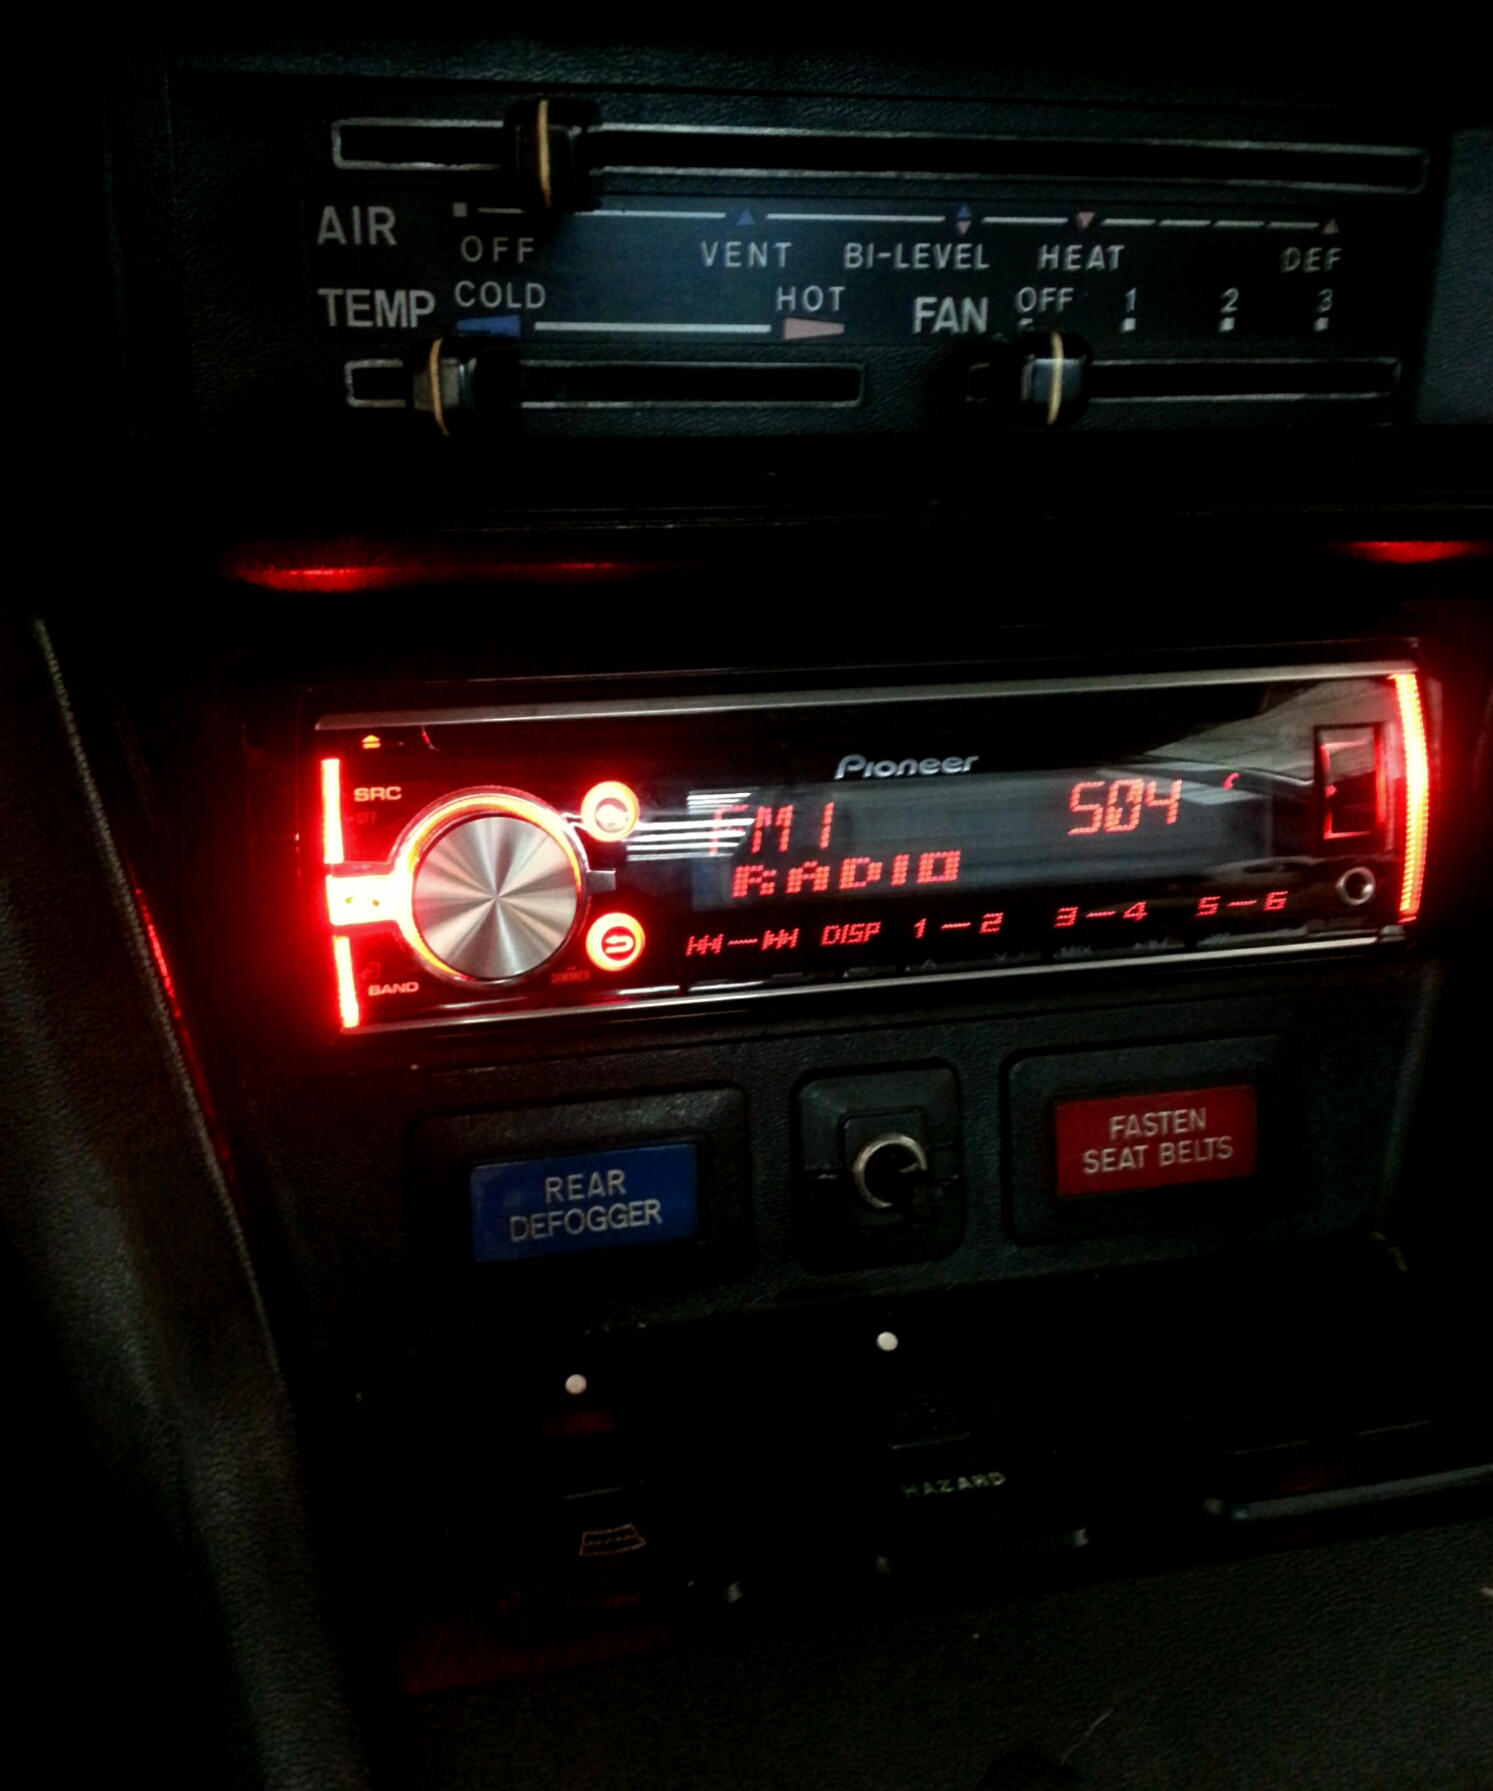
Have not turned on the Z radio for at least 25 years. Ruins the sound of my Mikunis and my exhaust note!1 point
-
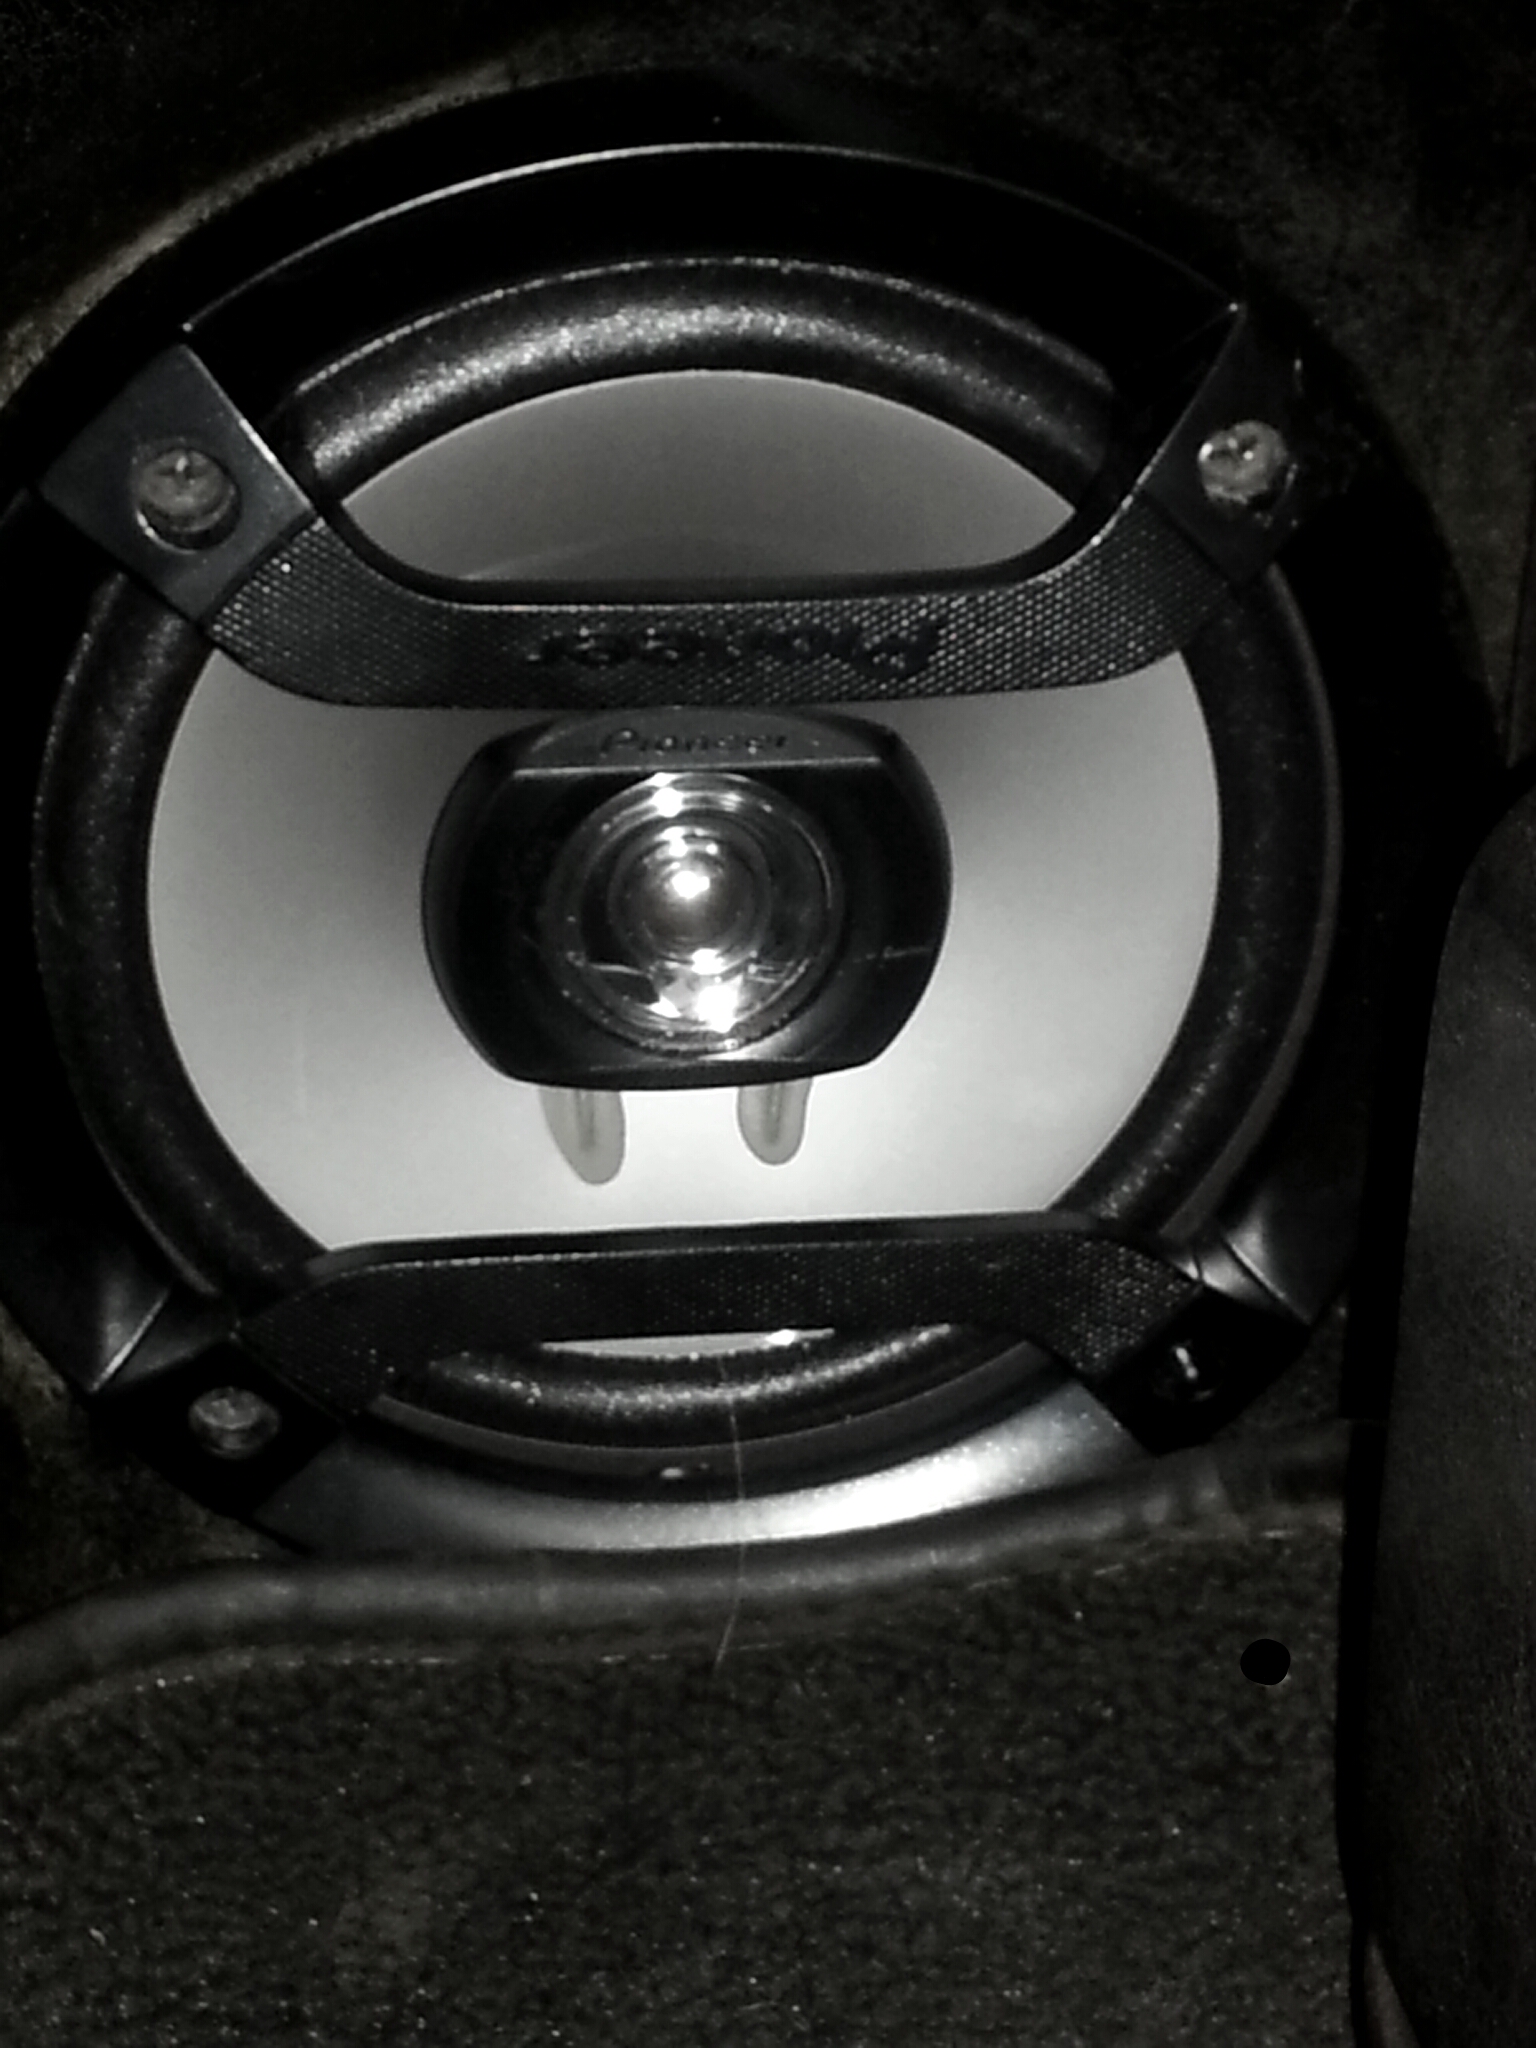
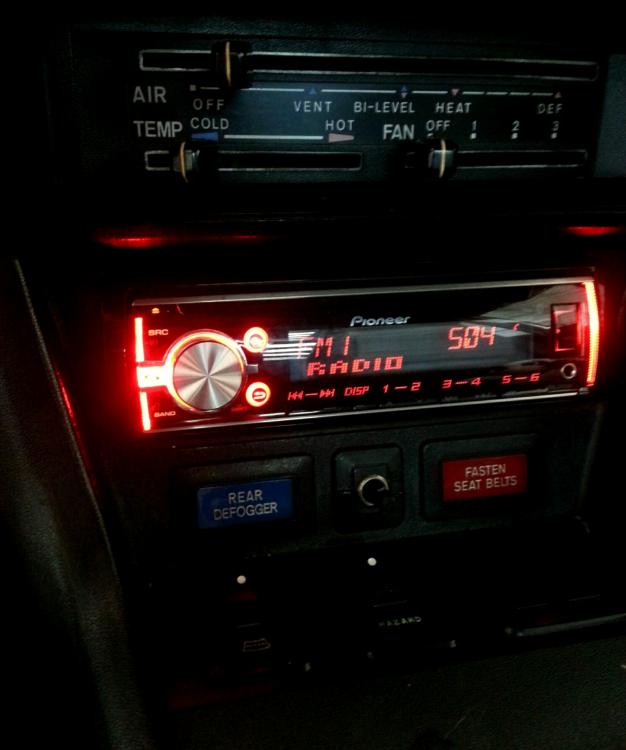
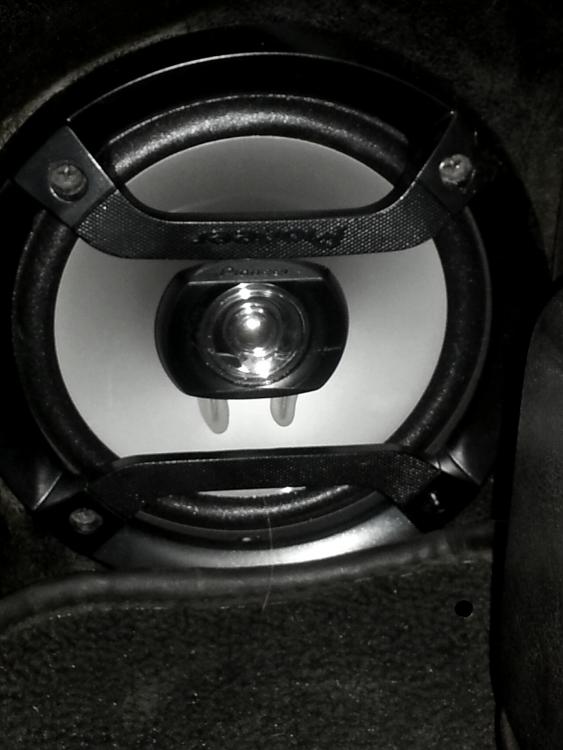
I was able recently to gift my RedBird with a new radio/cd player and speakers. They are Pioneer, and sound GREAT!!! One of my "want to do asap" has been done for the both of us. I'm sure she is happier, that old radio really was on it's last leg. And with only one working speaker, the sound was frightful. I am absolutely thrilled, now I can listen to the Old Classical Rock and Roll and blast my ears out if I choose! HA! I won't, but it is nice to have an option for it.
 1 point
 -
1 pointThe comments has a tribute to John C "A majority of the chassis and assembly work was performed by John Coffey of Benton Performance, and the car and it's participation in the 2016 Peking-to-Paris is dedicated to his memory and hard work"1 point
-
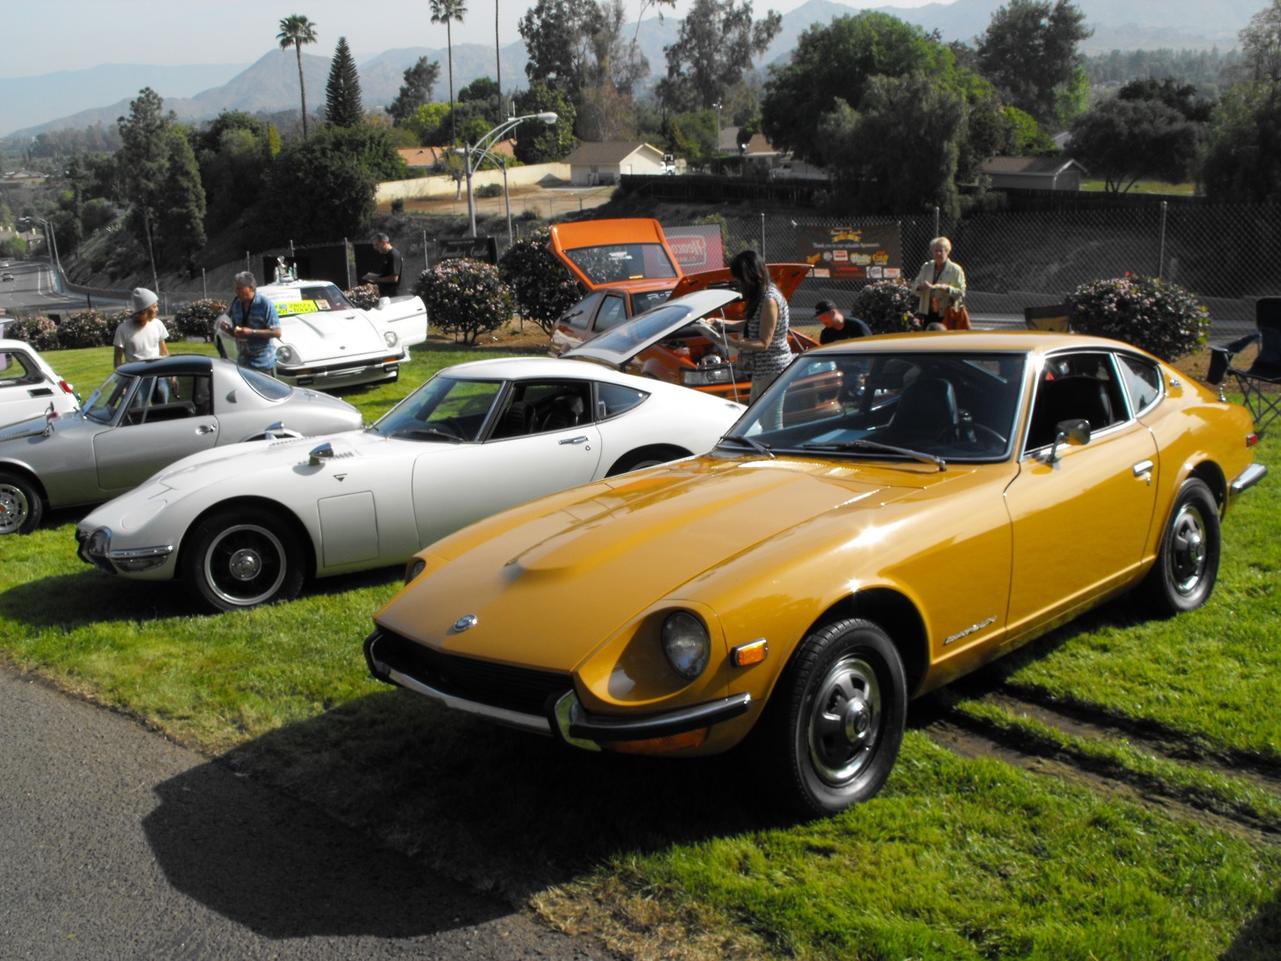
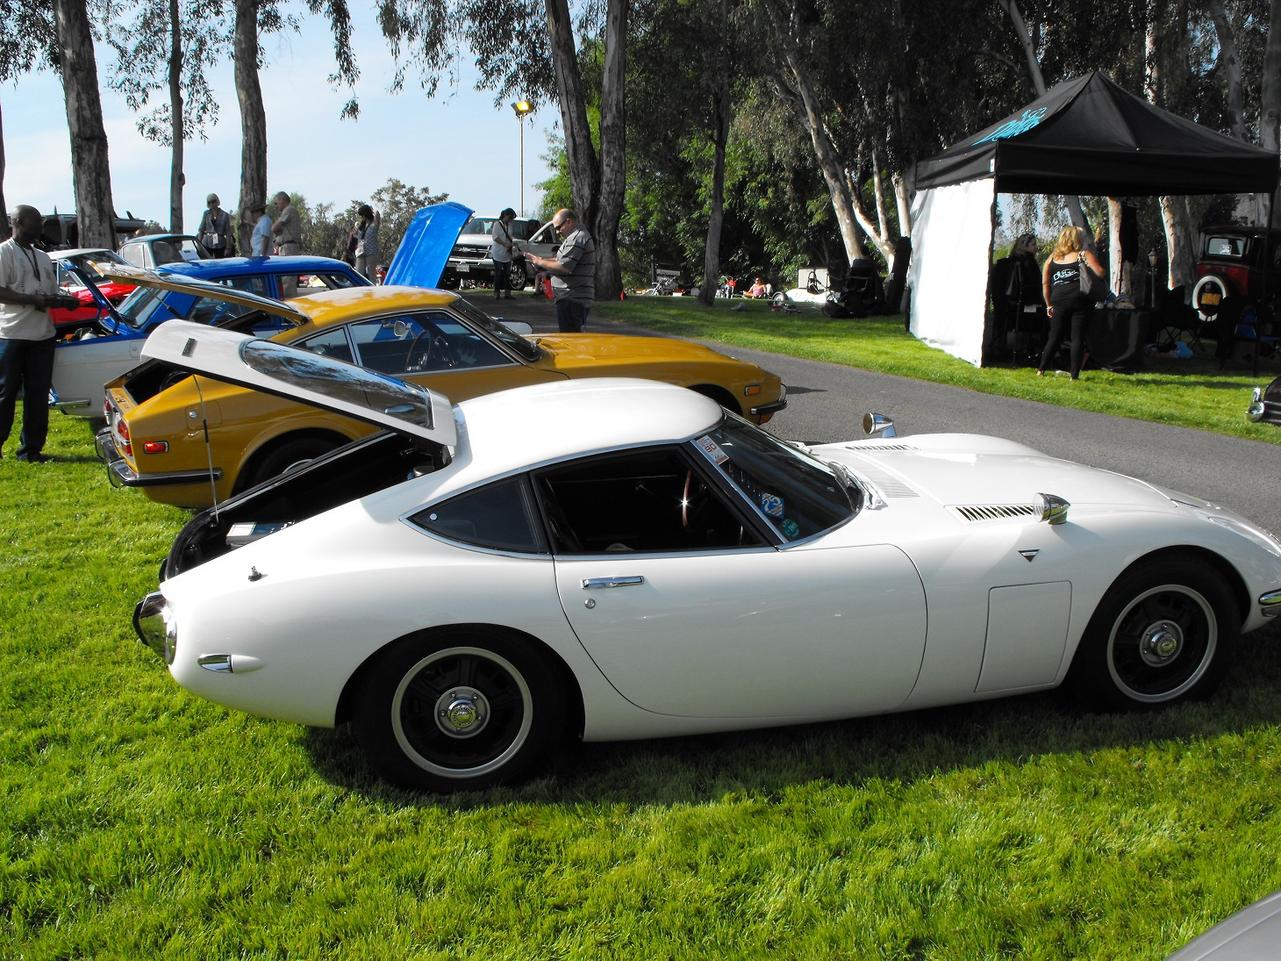
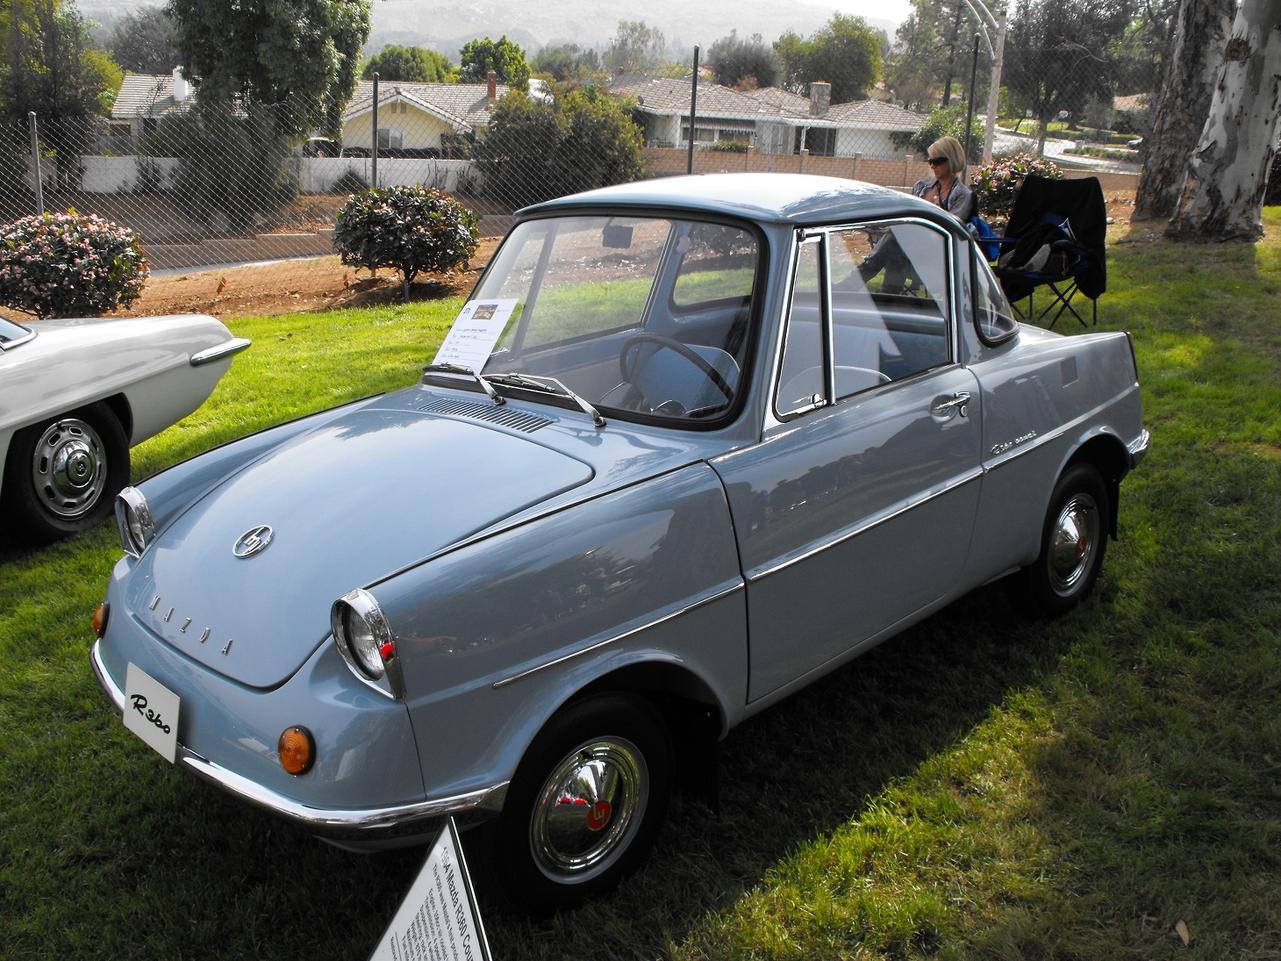
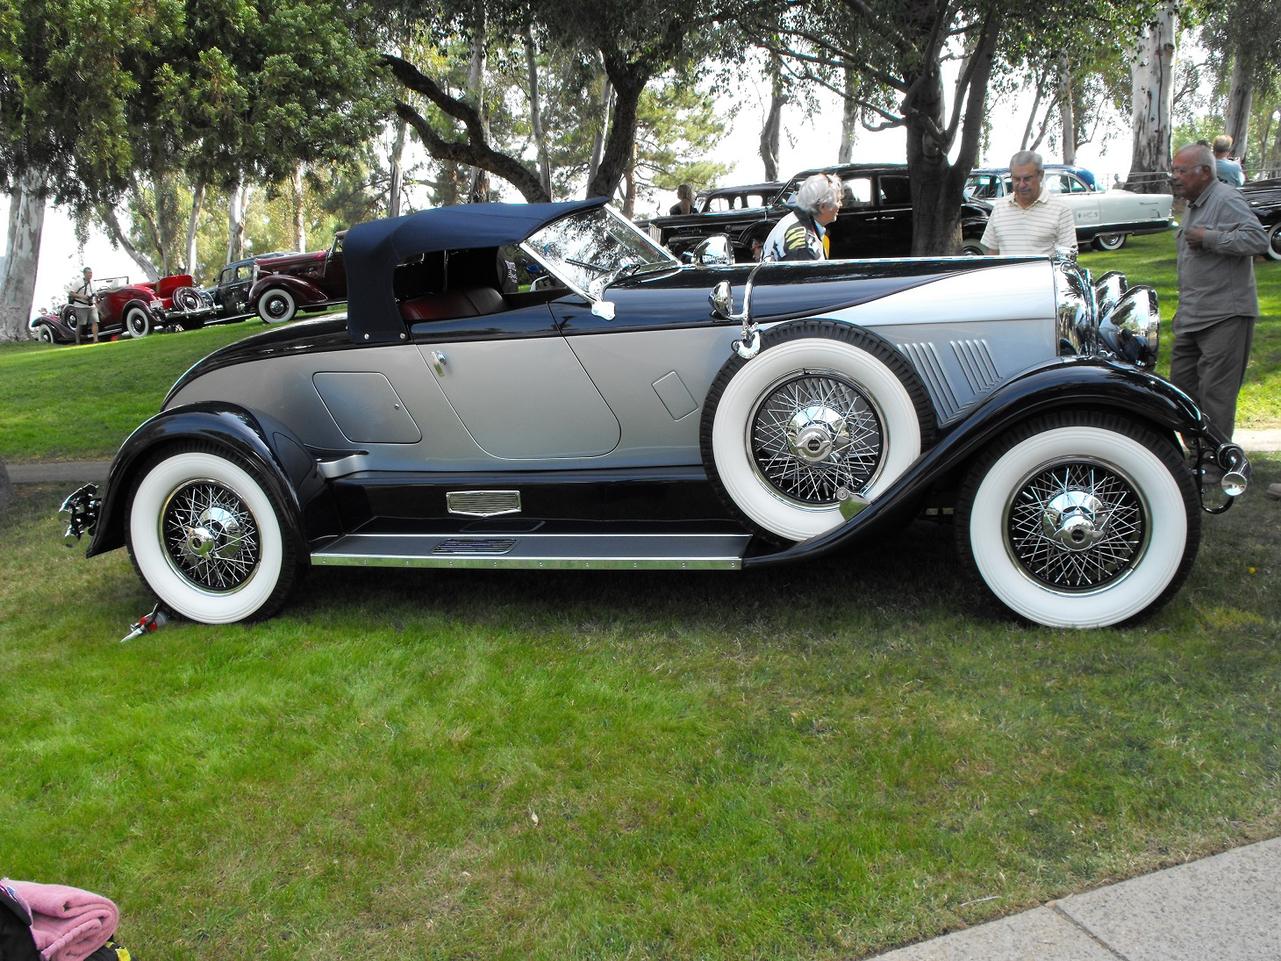
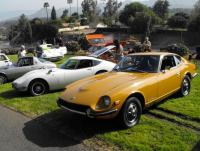
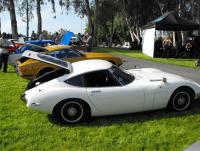
1 pointSo I took a break from my 1600 Roadster restoration and went to the Benedict Castle Concours last weekend. The show was about 60 miles up the freeway, so it worked out well to take the Z out for a drive and show. My plan is to just do two shows a year. It’s always nice to take the old Z out for a drive, and socialize at the car show. This was the inaugural event. Special tribute was paid to Chuck Barris, creator of the Munster mobile, Bat mobile and other ‘Hollywood’ cars. The show benefited the teen challenge charities and was chaired by Barry Maguire of Maguire’s car wax. They had a Japanese class with a number of award winning vehicles in the line-up. Koji and Terry Yamaguchi of JCCS fame headed up the Japanese class and invited a number of their past winners to enter the show. On hand were a couple Mazda’s, 5 Datsuns, 2 Toyotas, a Honda and a Mitsubishi. And yes one of the Toyotas was a 2000GT, I got to line up next to him. Anyway, here are some pics from the show. For those interested in awards, the 2000GT took third, the Toyota 800 took second and the Z took first. Not bad. Link for show pics


 1 point
 -
1 pointOiluj, congratulations on your recognition. As you say, many Z enthusiasts would prefer to see modified cars, and get more excited about those types of cars, whereas people who prefer XKEs would rarely (if ever) consider an engine swap. Customs will almost always be relegated into side-show status in a typical Concours, regardless of country of origin. Sometimes, a custom even makes enthusiasts angry - in the Ferrari world, replicas and cars with any type of custom modification are typically publicly ridiculed and derided. Owners of Ferraris that use the wrong sort of hose clamps will be constantly reminded by overeager enthusiasts of this inaccuracy and deficiency throughout the day. Good thing is that many Japanese-only concours have embraced a "dual-track" system, where a "stock" and "modified" class exists for each peer grouping. I'm a big proponent of this myself, as it allows for more participation.1 point