Leaderboard
-
Captain Obvious
Free Member2Points10,081Posts -

Zed Head
Free Member2Points19,228Posts -

siteunseen
Free Member2Points15,115Posts -
Patcon
 Subscriber
 2Points11,136Posts


Popular Content
Showing content with the highest reputation on 04/10/2016 in all areas
-
2 pointsPut the car in high gear and roll it back and forward. I've adjusted mine that way until I got a remote starter. With the plugs out it's pretty easy. Use the tire to roll it, there's not alot of places to grab on to up front. That rear lobe looks suspect to me. Now if you could post a pic of the rocker under it, the passenger's side where the contact pad is.2 points
-
2 pointsHaha!! Not my fault! You guys saw ME, right? I think the distraction was at the pool, not at the bar!2 points
-
You cut that air box out of a solid piece of aluminum?!!! Must have been a few chips on the floor huh?1 point
-
you might try putting the m.c. in place and pushing the pedal until you feel it touch the piston, then adjust as necessary. also check the pin that holds the pedal to the rod. mine was worn almost halfway through, and the hole in the pedal was oval-ed also. that could account for the difference without any adjustment of the rod end.1 point
-
1 pointClean enough for now. This is all I can do with the time, tools, and chemicals I have. Still got some globs of dirty oil from 35 years ago and random spray paint, but at least I can move it without gloves now. Plus no random insect eggs from Idaho in my house. Oh! And the case had "#1" cast on the side. I haven't verified the gear ratio yet, but this is a good sign that I have in fact purchased what I wanted. Back to the sheet metal.1 point
-
1 pointSend them to Mike McGinnis at Banzai Motorworks and he'll stamp em for you.....just like the original.1 point
-
Well, maybe I spoke too soon. I managed to break the adjustment rod loose and was testing how far out it went. Looks like it can go a lot further than I thought. Seems like I will be able to get the length i need after all. Whew1 point
-
1 pointA follow-up thought - #6 is typically the detonation cylinder. Where head gaskets blow and rings break. Mis-set timing, low octane fuel, overheating; could be the cause of the problem. Doesn't help fix it but might help focus. Unless oil splashed up on to the valve seats, which seems unlikely at low cranking RPM, the oil in the cylinder raising pressure still points to rings. If it were my problem, I'd use a borescope to check for cylinder damage first. If there is none, and it runs well, and you get lash set right, take it out for an "Italian tune-up". Nothing to lose. Sometimes people baby their new motors when they should be using them to break them in right.1 point
-
1 pointmarvel mystery oil. not sure why you'd have a stuck ring on a motor this clean/new. usually rings stick from carbon or glazing/varnish. the best possible scenario would be the ring gaps lined up, which still requires pulling the piston (see my previous post). some tools you will need and want to have for this work and in general for L6 maintenance: crowsfoot spanner for valve lash adjust (cheap) feeler gauge for lash adjust (cheap) plastic slip-in tool to keep cam chain tensioner from popping when you remove the head (cheap) ring compressor (cheap) torque wrench (spend $$ here and get a really good one, it's an invaluable tool for all mechanics - get the kind that "click" vs. the ones that "flex") jack stands (always on a good concrete surface!!) so you can get underneath and pull the oil pan. don't risk your life w/cinder blocks or wood... "how to rebuild your nissan & datson OHC engine" by tom monroe - get it, read it and be liberated to do anything you need on this simple motor parts you'll need to do the work: head gasket (get a good one - lots of info here on this site) pan gasket ring set (maybe...) this can be a fun adventure in learning quite a bit about your engine and nothing involved is beyond the home mechanic if you get the tools and read the book.1 point
-
1 pointYou should always give a number where measurements are involved. "Out" isn't enough. The locknut can be very difficult to loosen and you can break other things,including your knuckles when it does come loose. I use a small sledge hammer to tap on a wrench to break them loose. The mass does the job without much overshoot. The cam lobe does look like it has wear on the base circle which would imply the lash is too tight, or non-existent. That can burn a valve. If you're set on doing it yourself we can come up with a bunch of tricks. But if you have a friend with experience, you'll probably learn more and be ahead in the end if you let him do it. You might just get the valves adjusted then go drive it hard to reset things and break any stuck rings loose. Inertia, heat and high energy fuel burns at 5500 RPM should loosen anything stuck, on a running engine. I think those magic oils might have an effect on an old rusty engine that hasn't run for a while but you're way past that. Could be the engine's hard to turn because it's not fully broken in yet.1 point
-
1 pointI'm on my heating pad right now too Like my buddy says "Getting old ain't for sissies..." Hit me up when you get close to being ready and we'll work it out...1 point
-
1 pointWow, I hope so. I hadn't thought of that possibility. Also I've never dealt with that problem so I don't know how much effect that has. Kinda makes sense tho because of the fresh build. Five good cyls. One bad. You may get by with just spinning the rings to their proper position and reassembling it. Labor and gaskets. Engine in the car. This may have a happy ending yet.1 point
-
1 point@siteunseen Cliff, After you finish visiting Steve, keep on coming up I-85 and visit us. I have a guest house you can stay in during the visit. Missed seeing you in Memphis. You were too busy bar crawling with Bruce...1 point
-
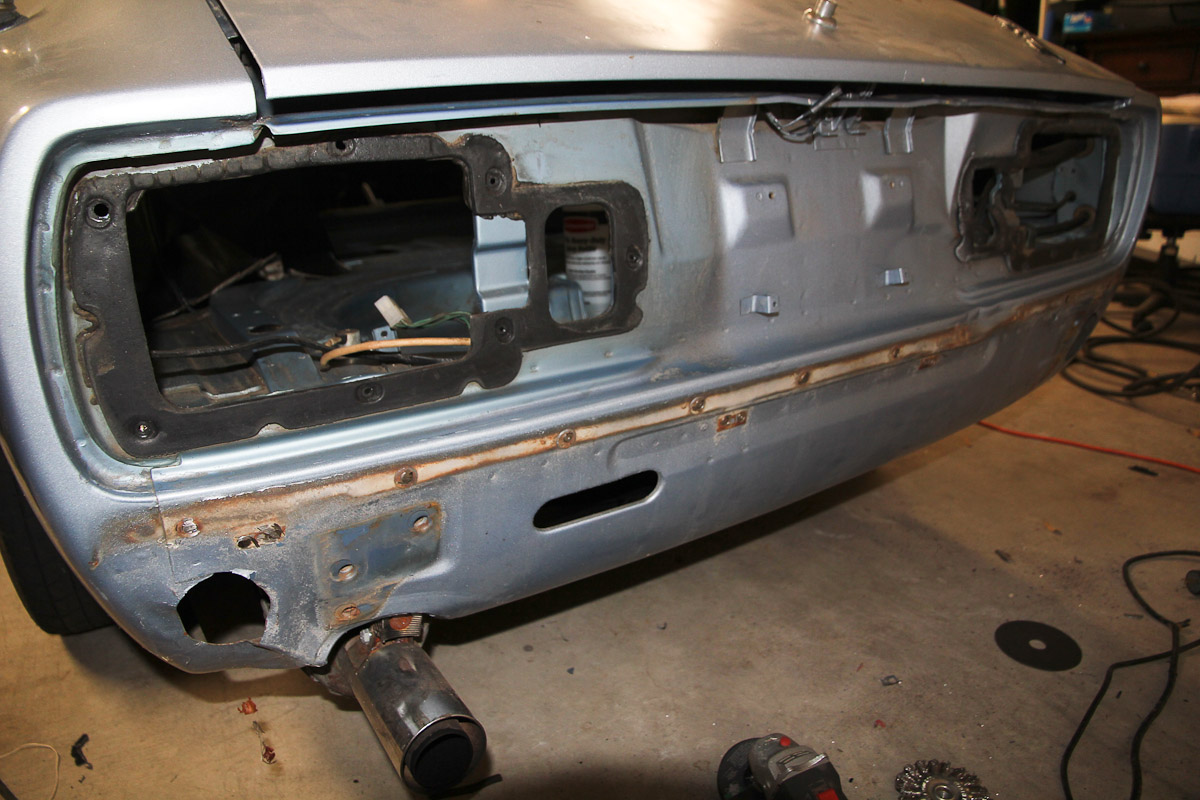
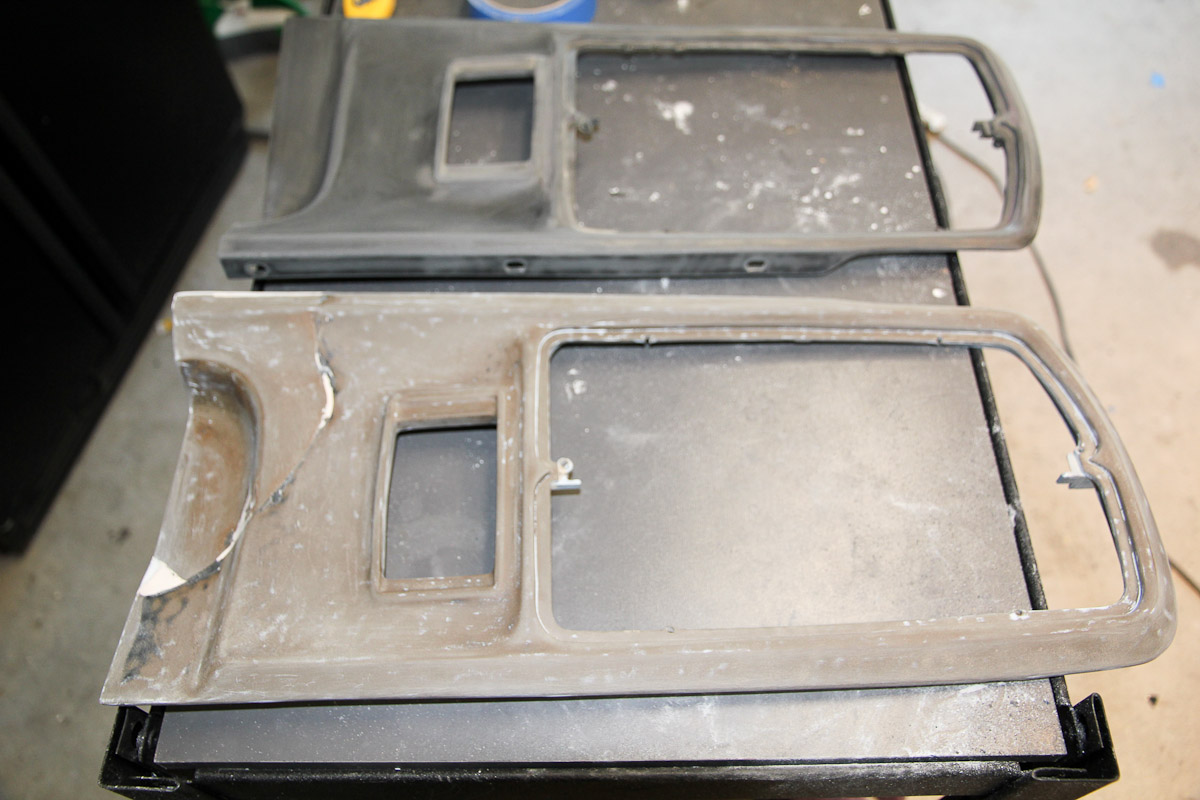
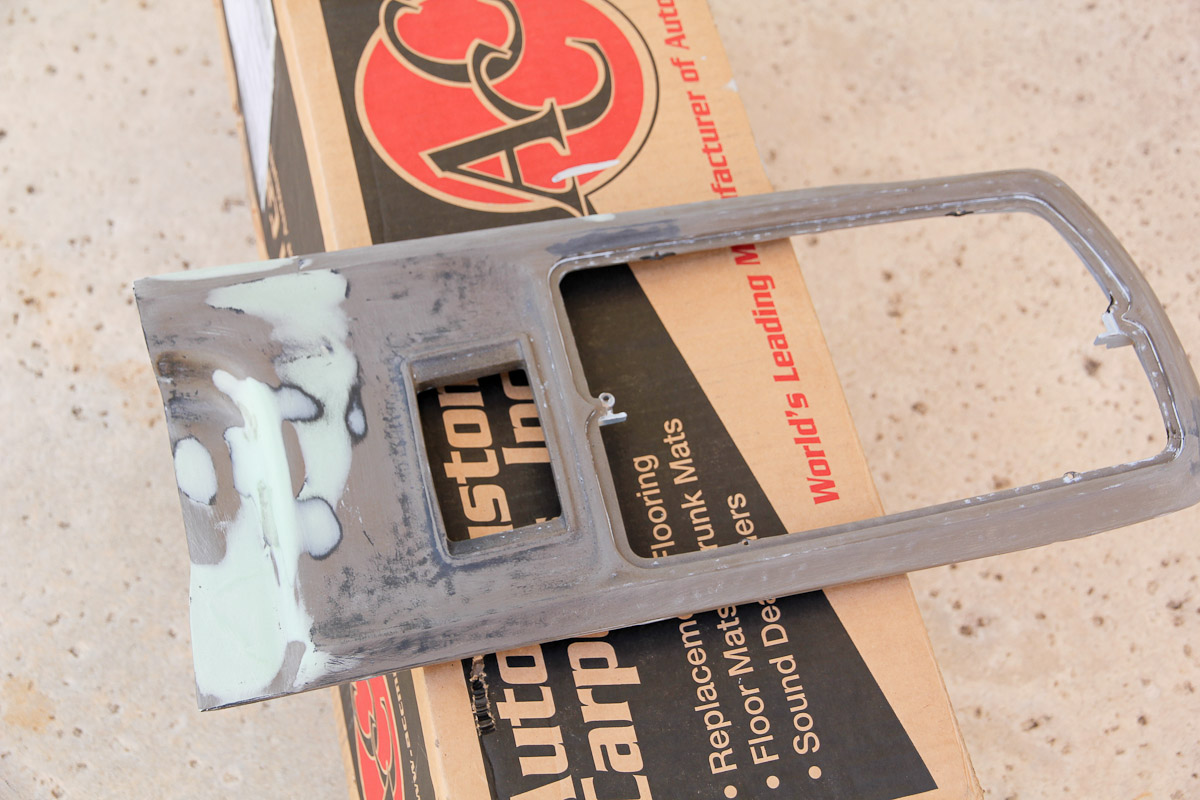
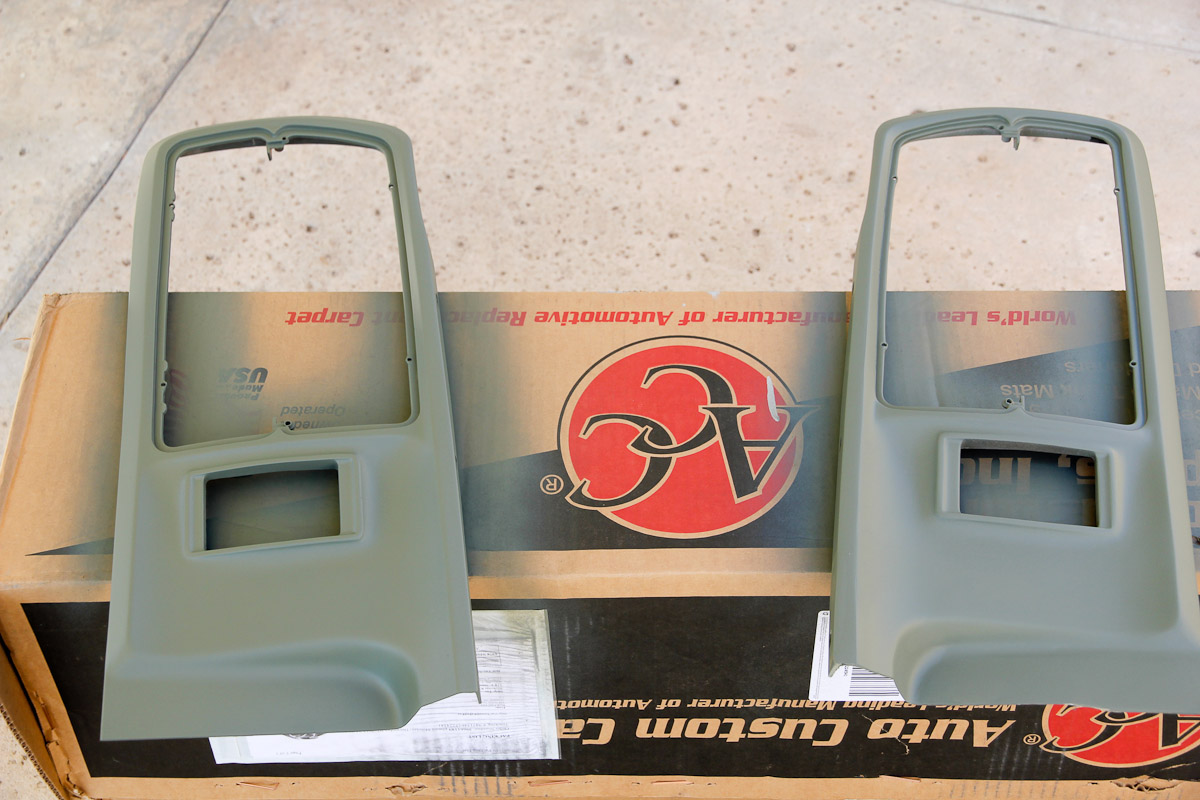
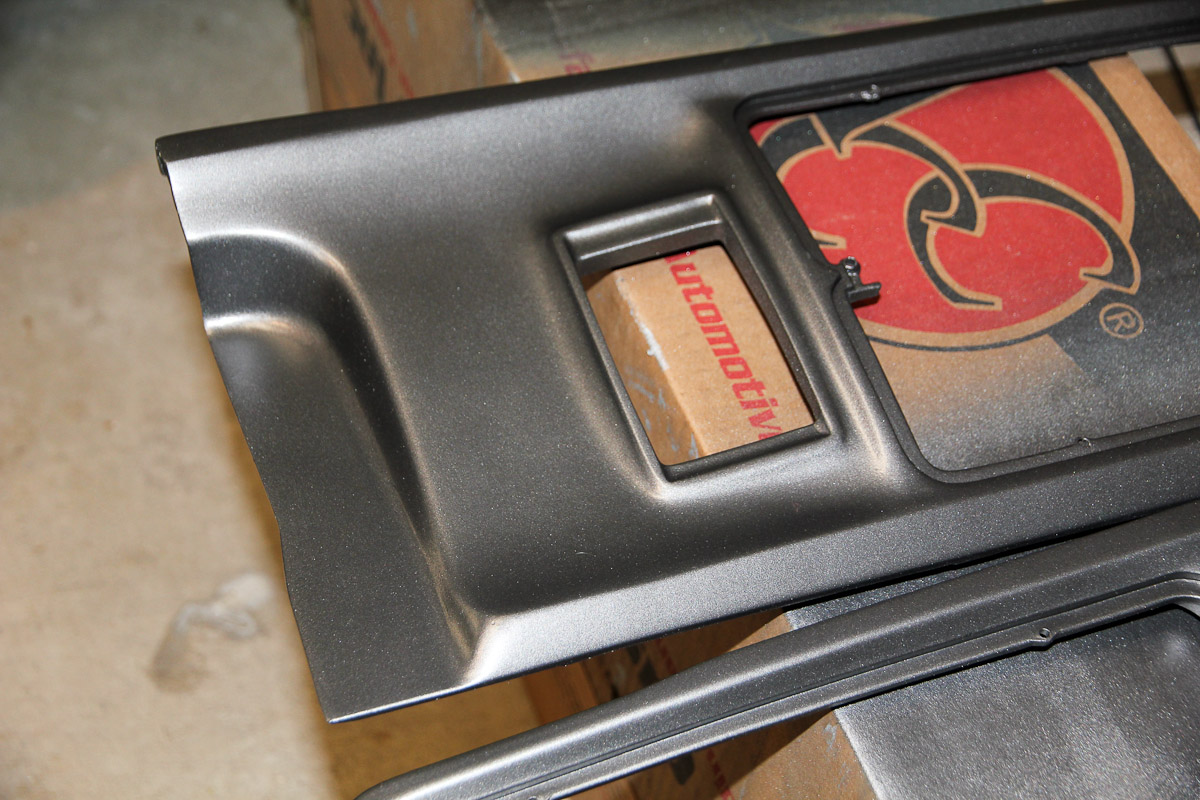
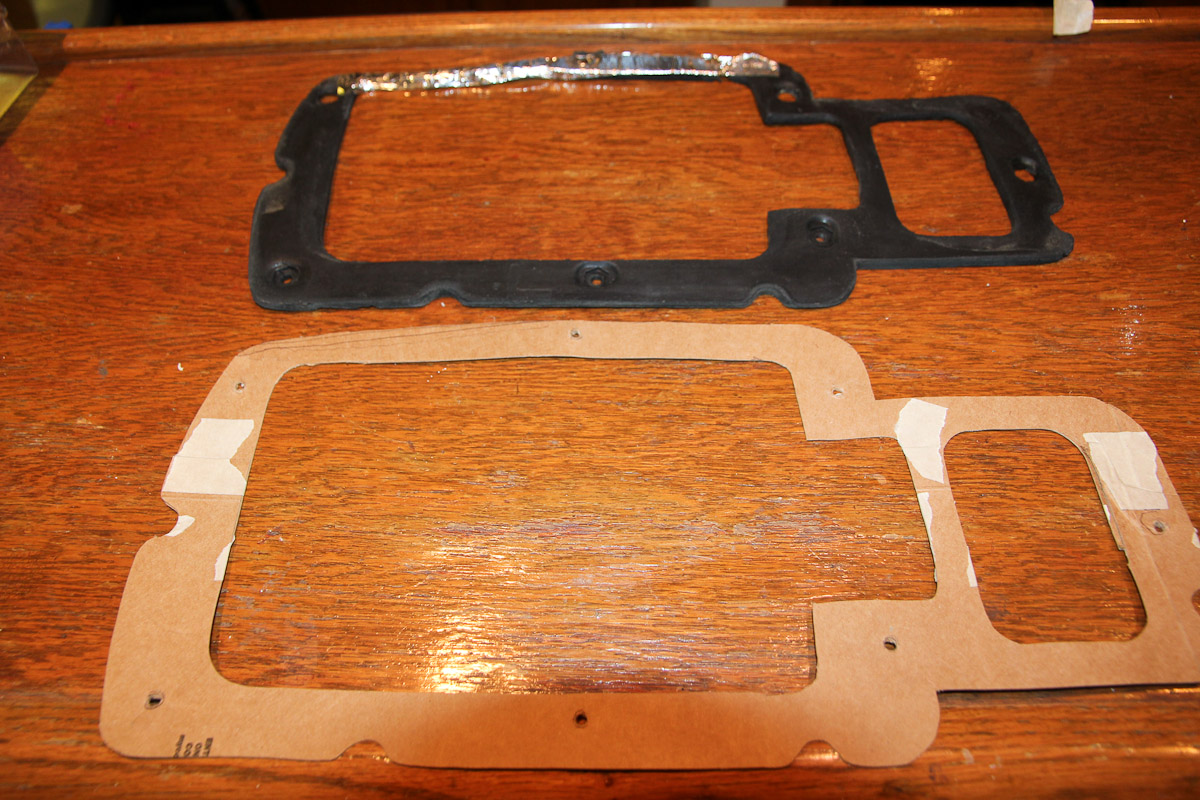
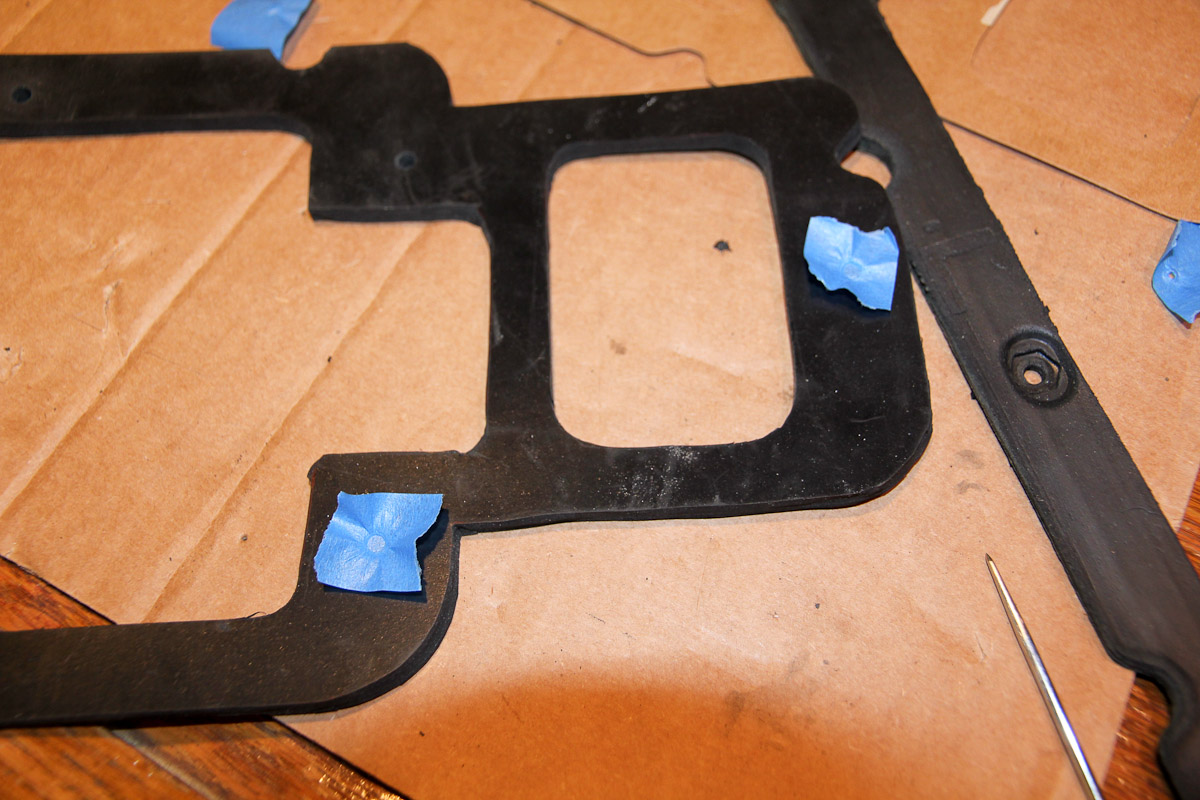
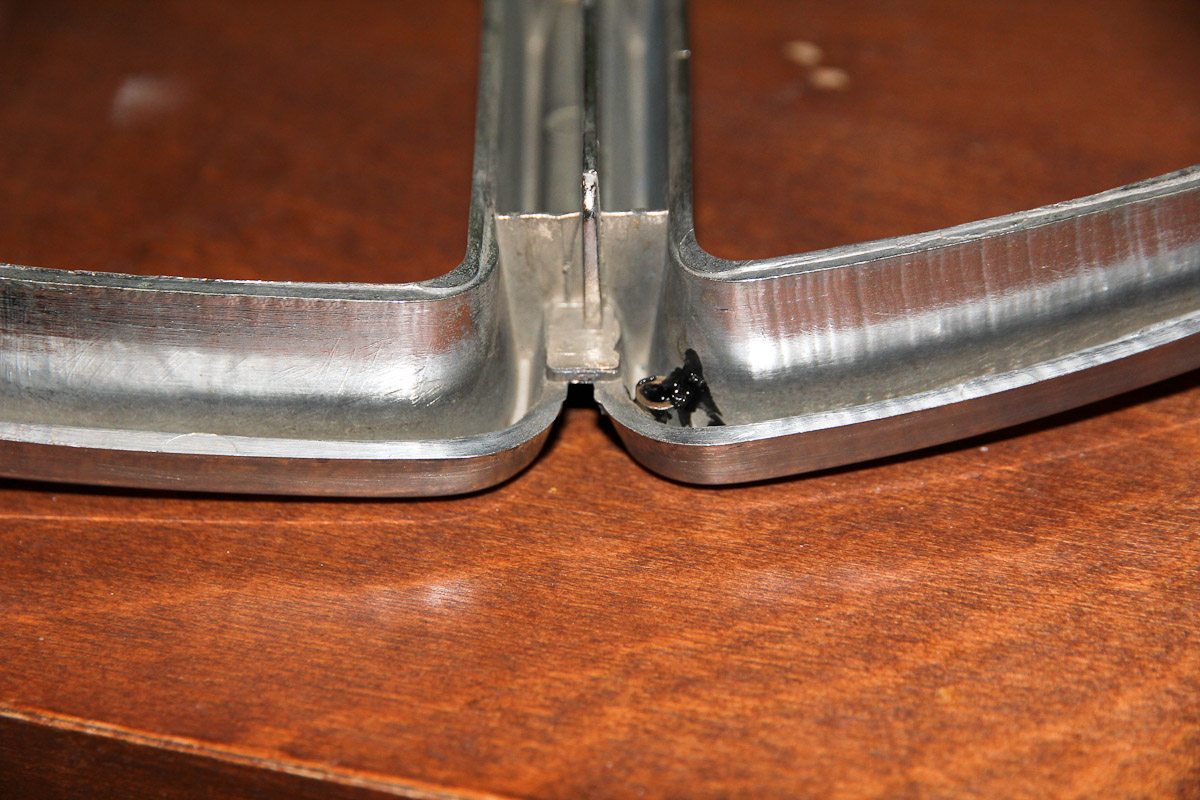
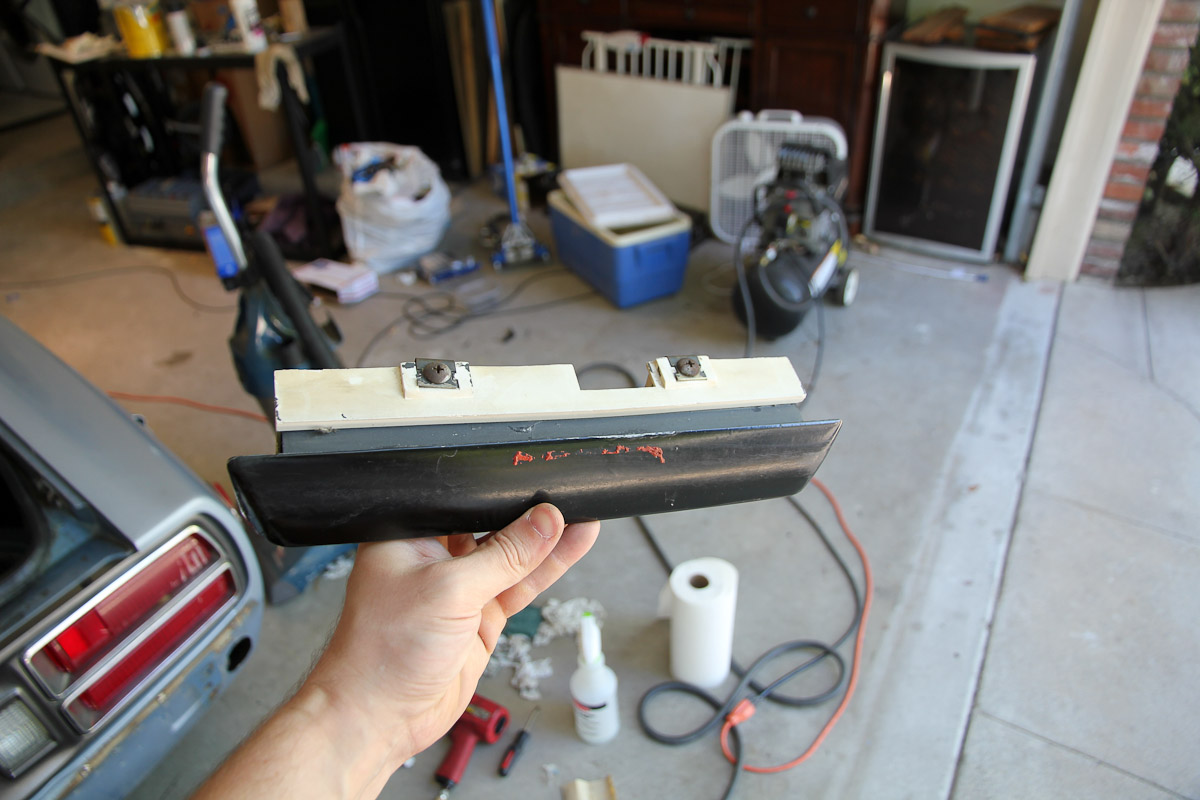
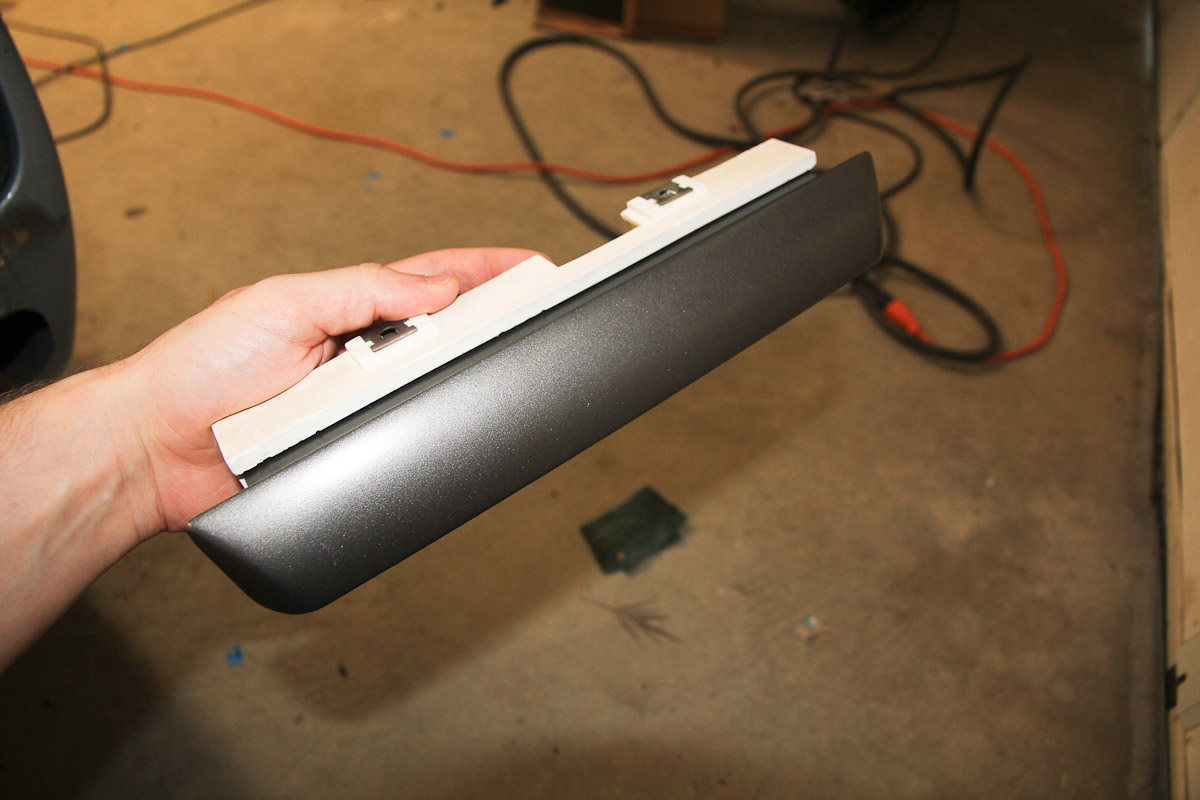
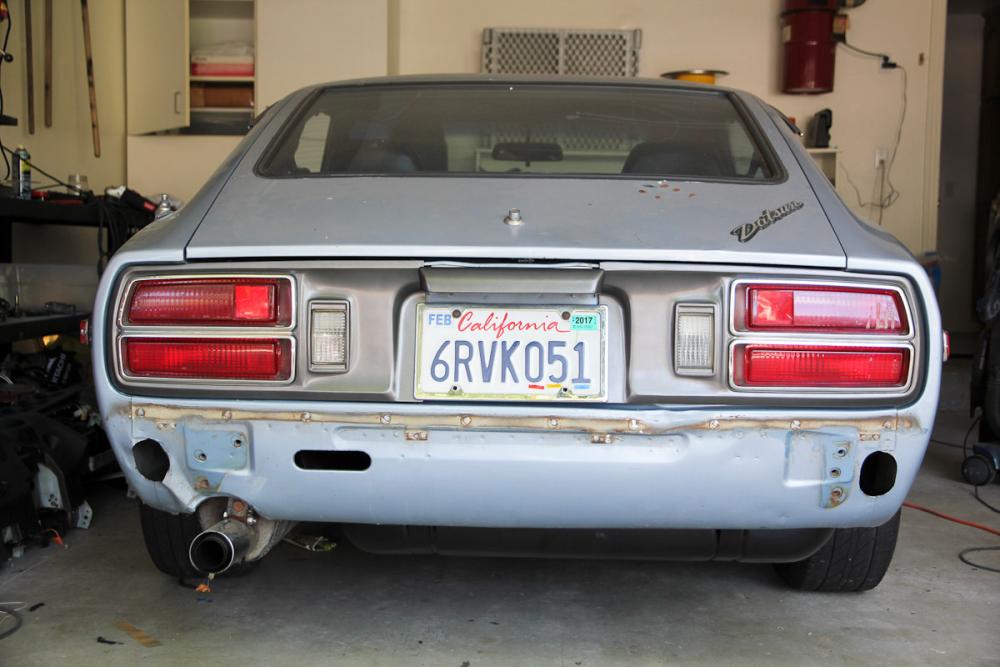
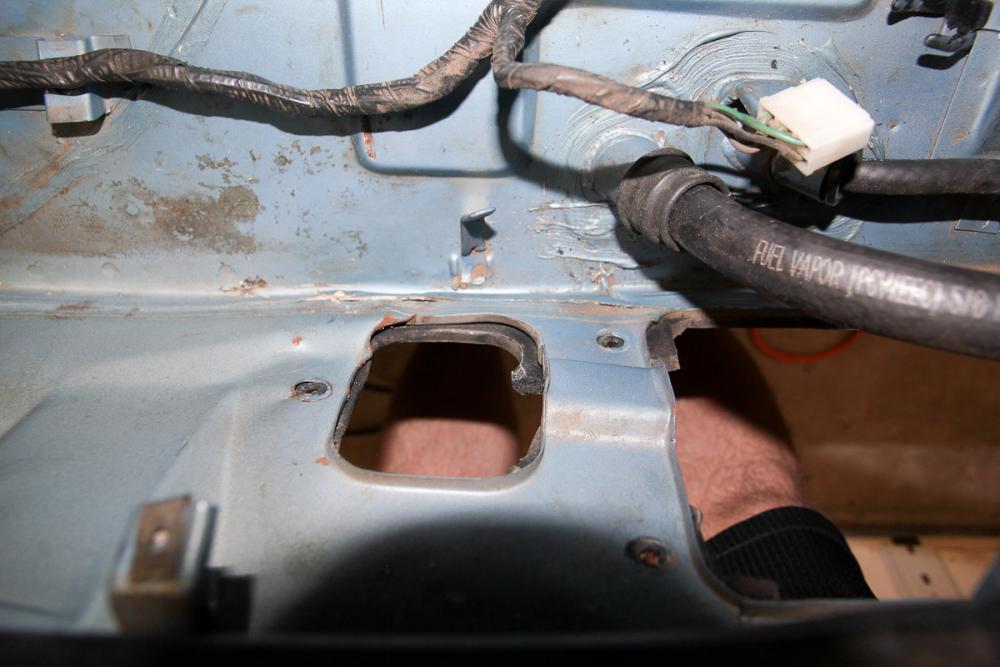
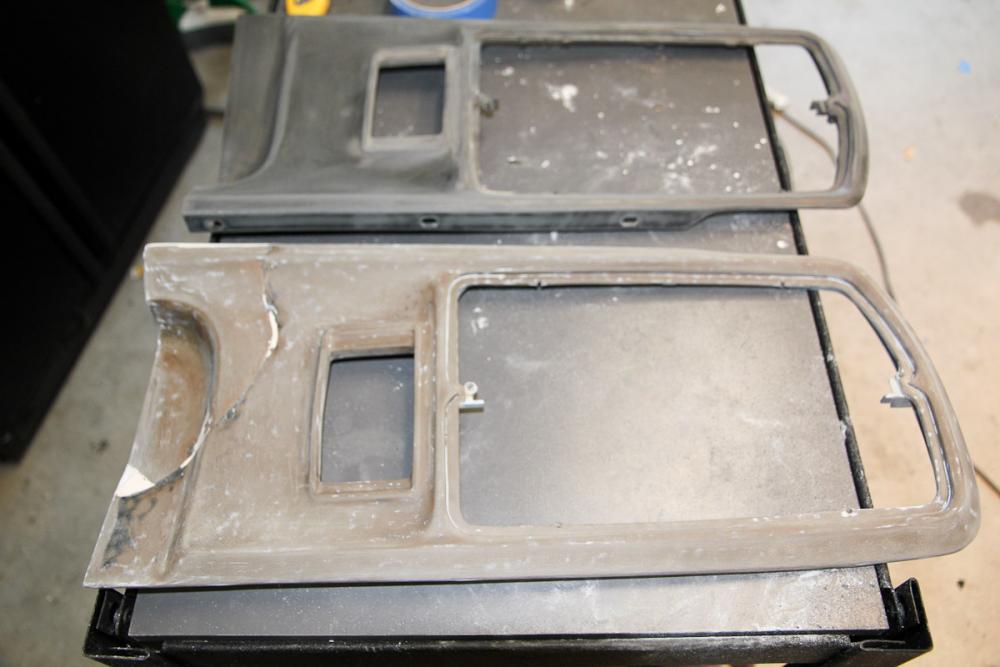
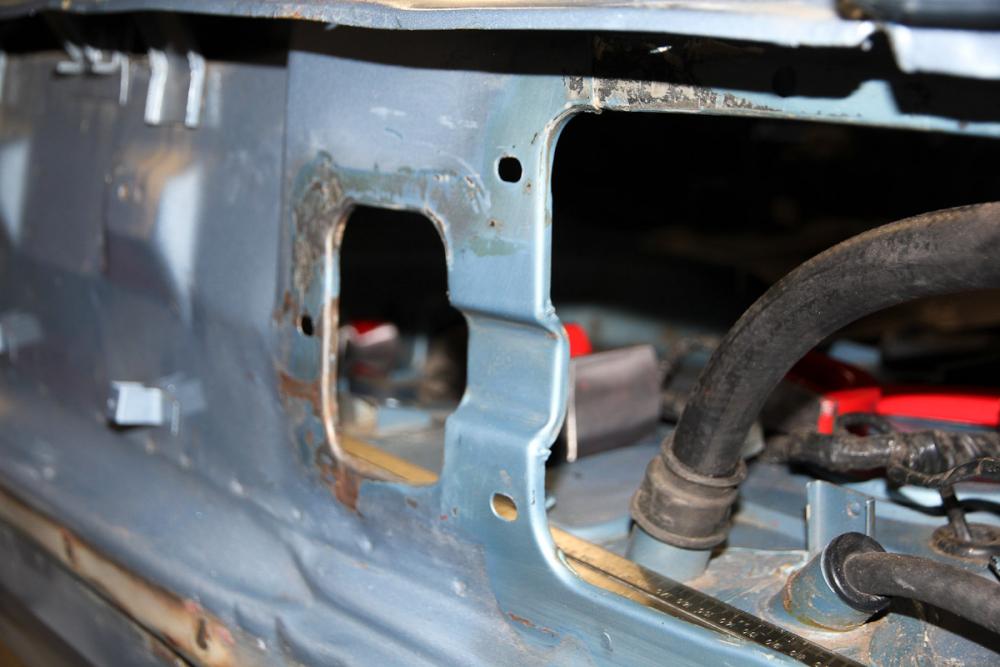
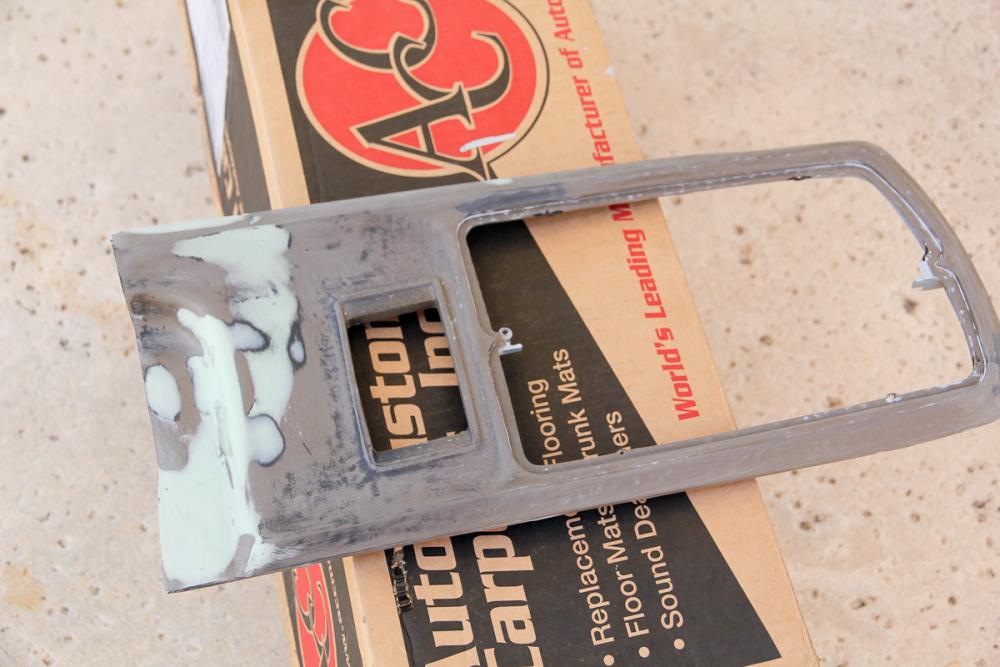
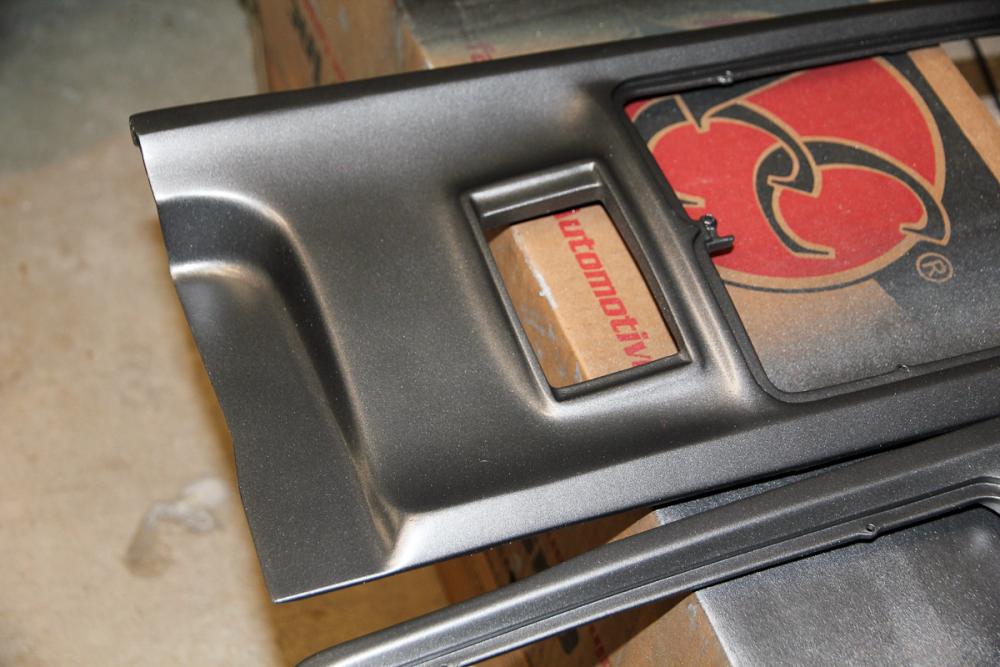
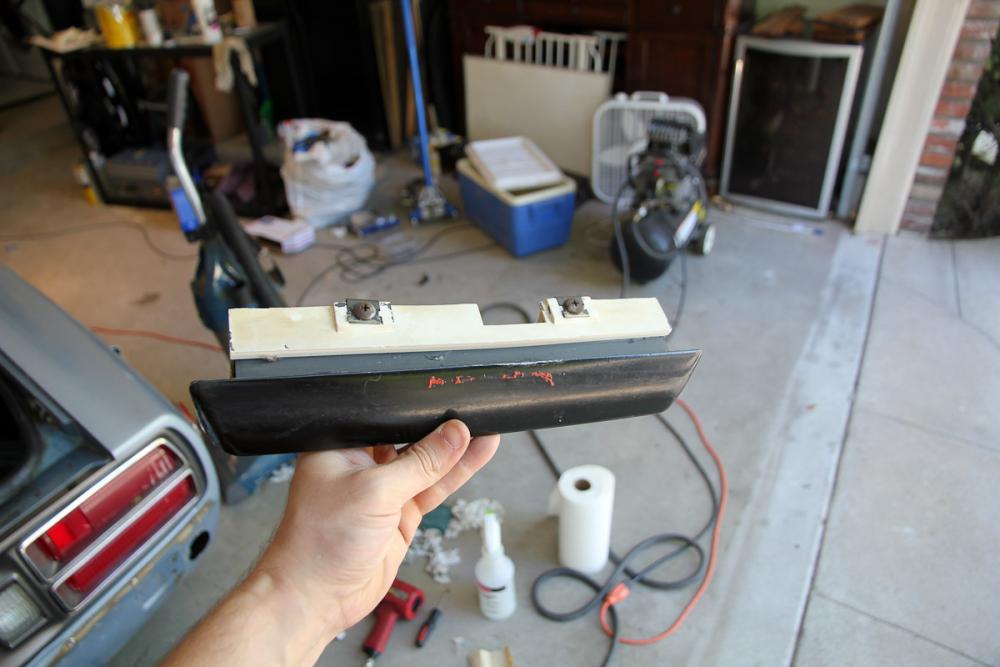
Pretty slow going over the last few weeks. My youngest is now 14 months and past the age where it's easy to schedule around her, and she's mobile, so if I can't work within line of sight, I don't get anything done! Anyway, the decision to take on those tail light panels ended up being a bigger deal than I thought. The left side was easy, the right...not so much. Apparently after the car had its rear end accident, someone had to re-assemble the tail light surround. They also did a decent job painting it. Decent enough that the paint which flaked off easily from the left side had to be blasted off from the right. I also had to dig out some old body filler to fix some of the contours, but all told, it came out pretty well. Following along from another thread I found here, I primed, painted with Duplicolor wheel paint and sprayed some matte clear. It's not quite as dark as I would have liked, but I can live with the results for now. No one bothered to fix the sheet metal after that accident, so I bought a hammer and dolly set from Harbor Freight and gave it a go. Picked up a spot weld cutter while I was at it and removed that ugly sight shield, too. Thankfully, it was rust-free under there. What else...the tail light gaskets were totally shot. I bought a sheet of neoprene rubber from eBay thinking it would be a lot squishier than it was. It wasn't. I spent a little too long trying to make that stuff work before punting and using the closed-cell foam I had left over from the floors instead. A few of the bezel screw holes broke after almost 40 years of exposure, so I had to rebuild those with ABS cement. Everything else got a much-needed cleaning. Then I remembered I put the license plate light holder in the corner and forgot about it, so it got the same treatment as the panels. Everything went back together, and I was ready for a Sunday drive, until I found that I have no brake lights, so that's next up.


 1 point