Search the Community
Showing results for 'u-joints'.
Found 1,097 results
-
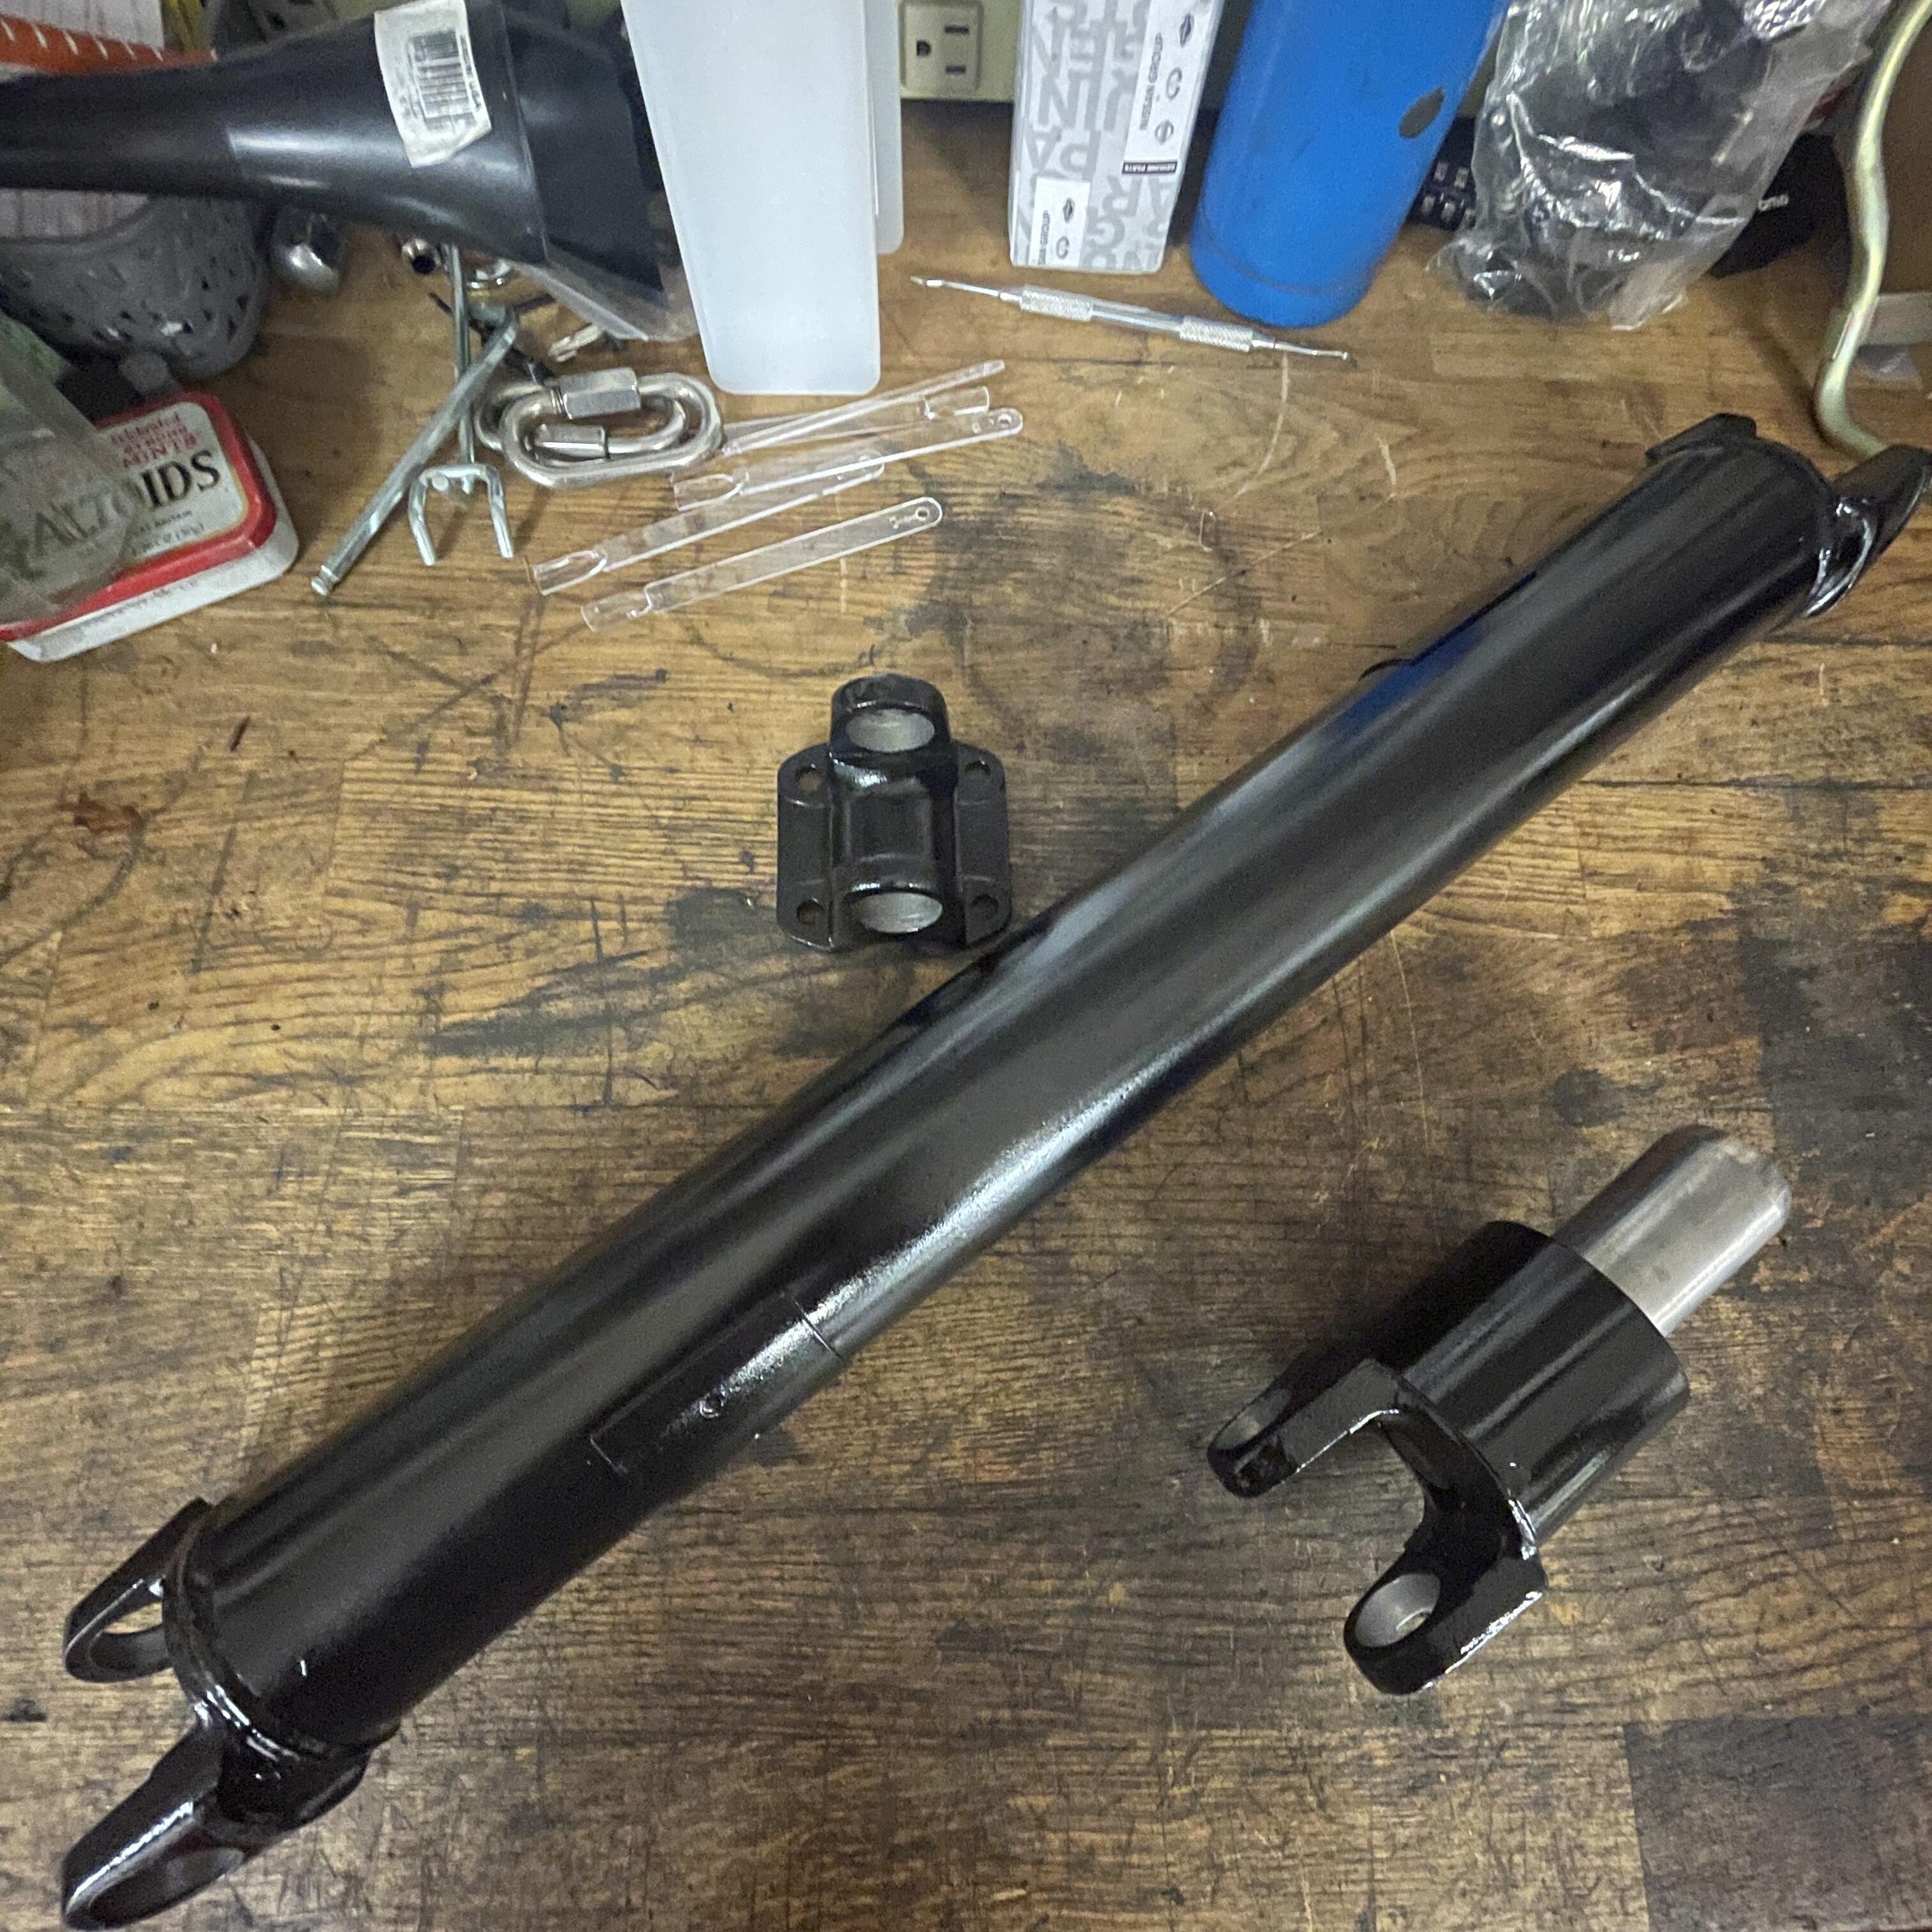
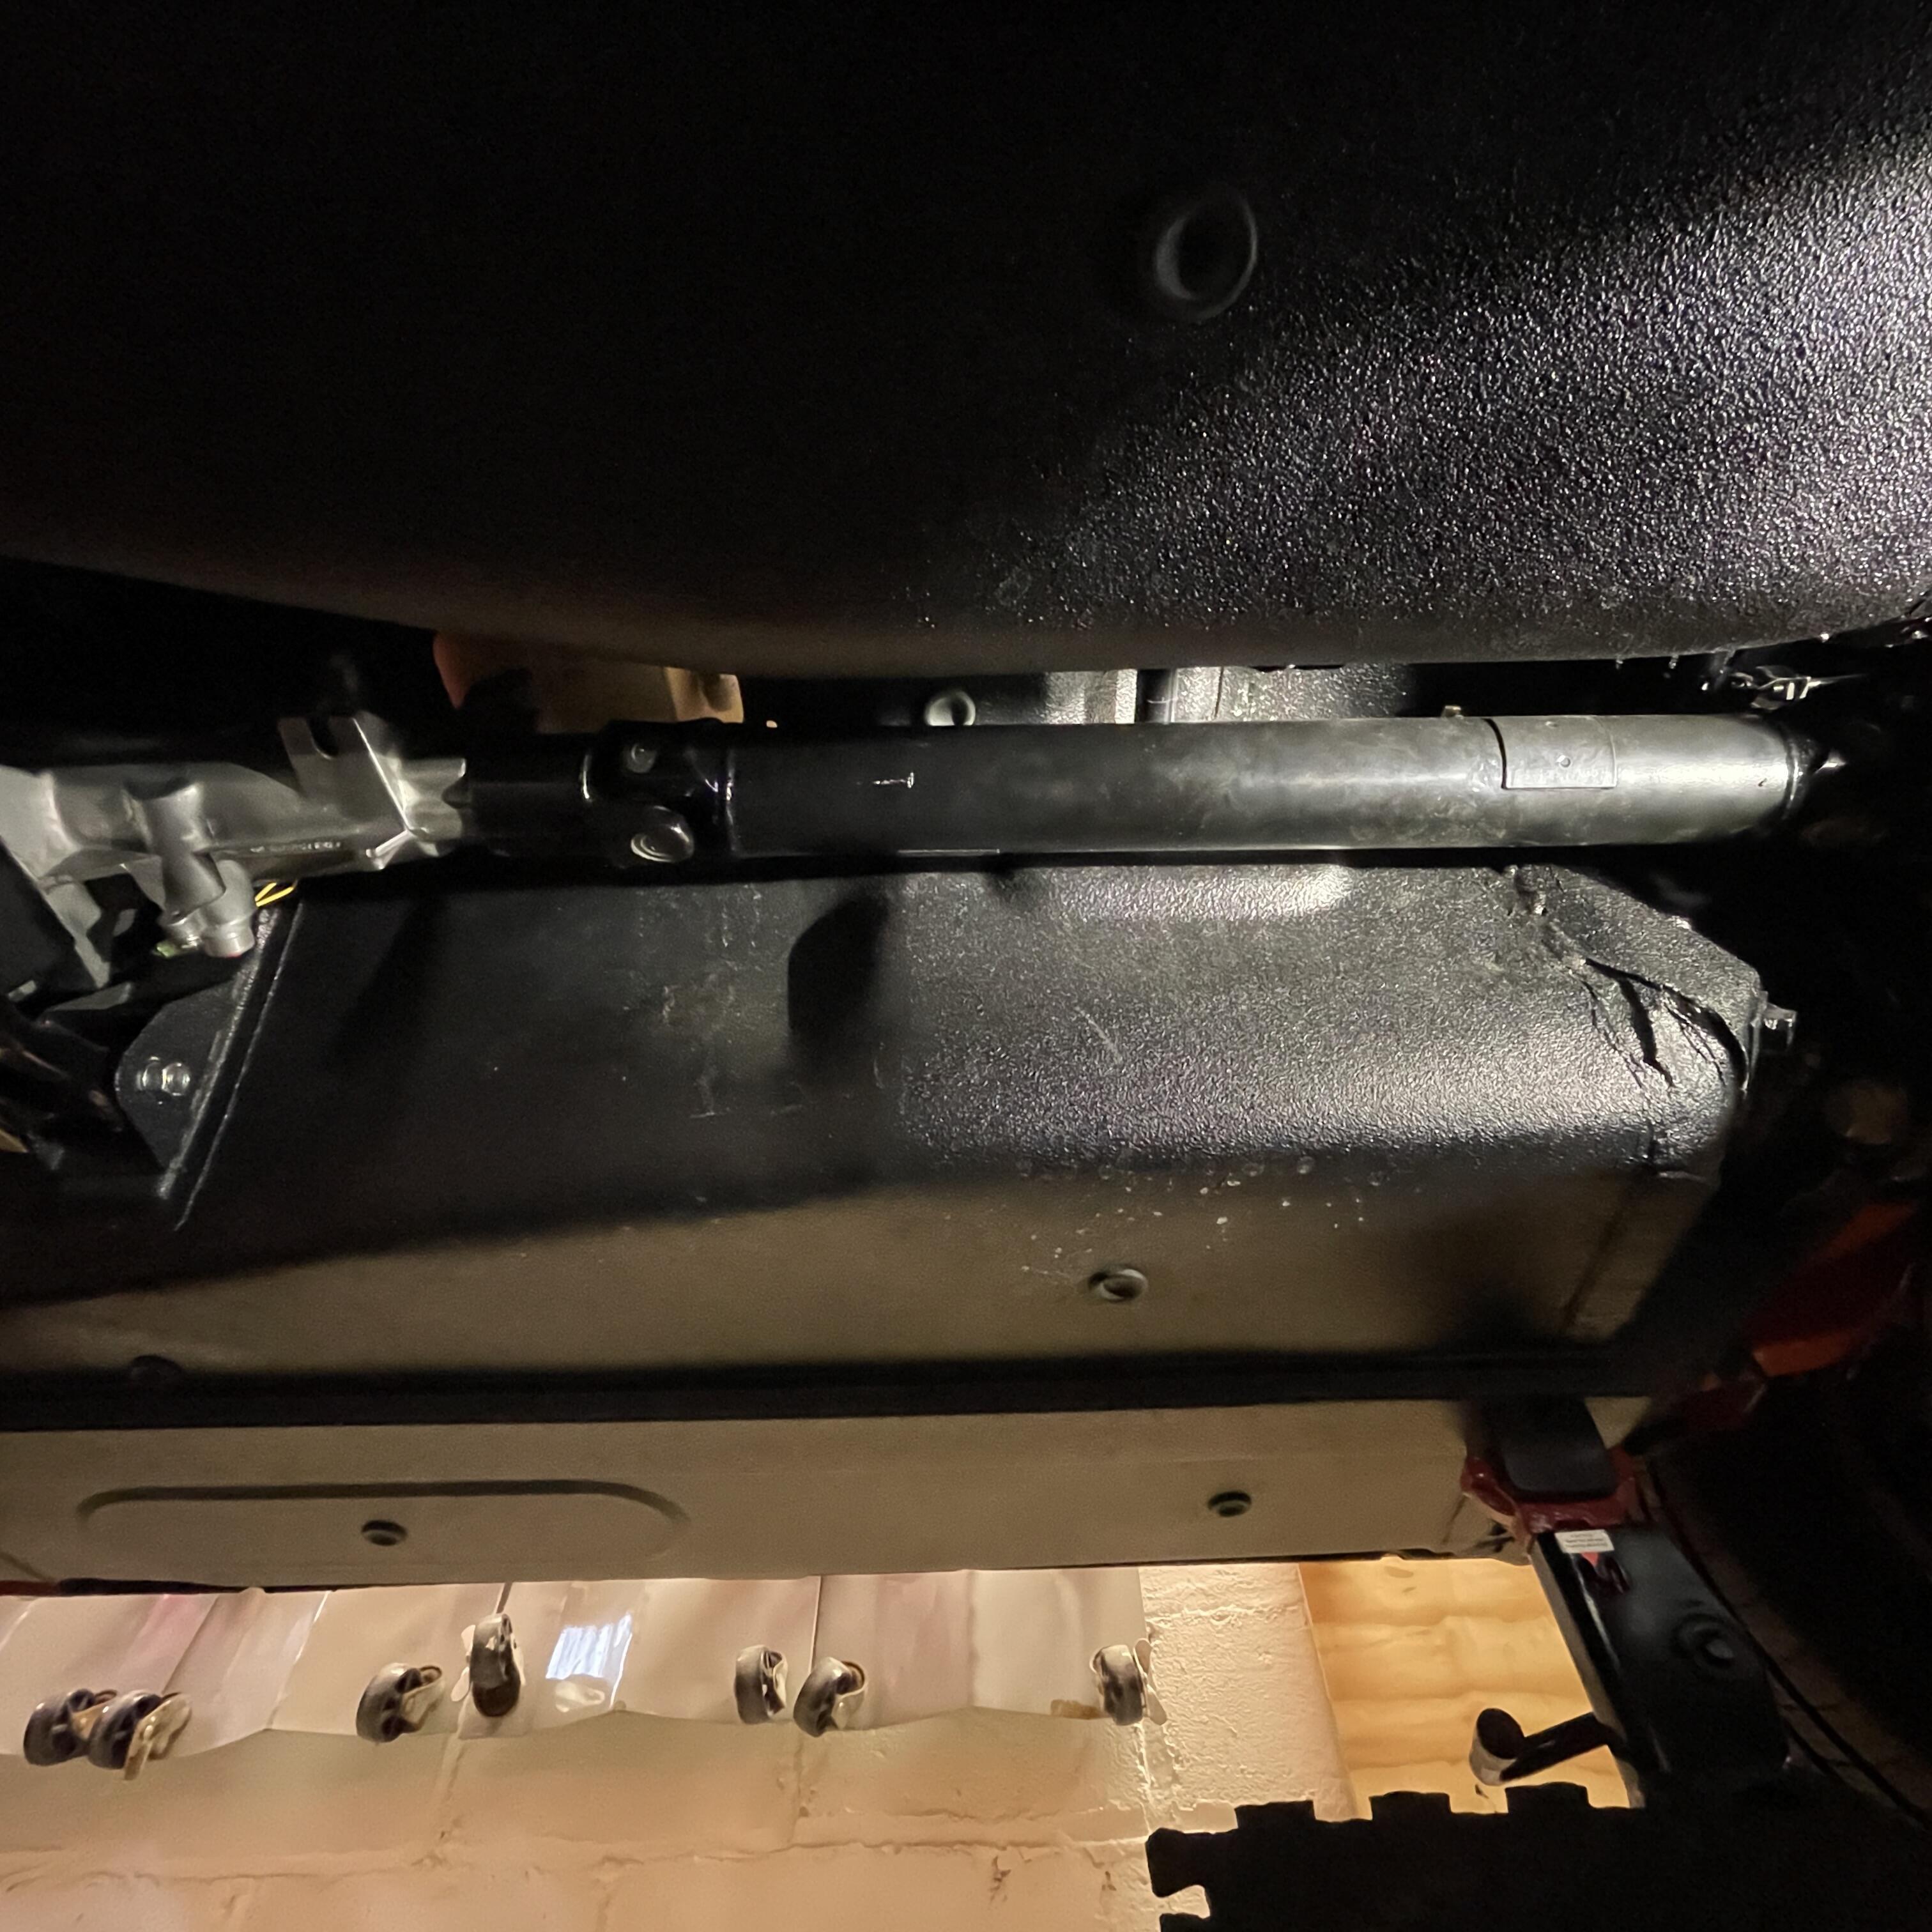
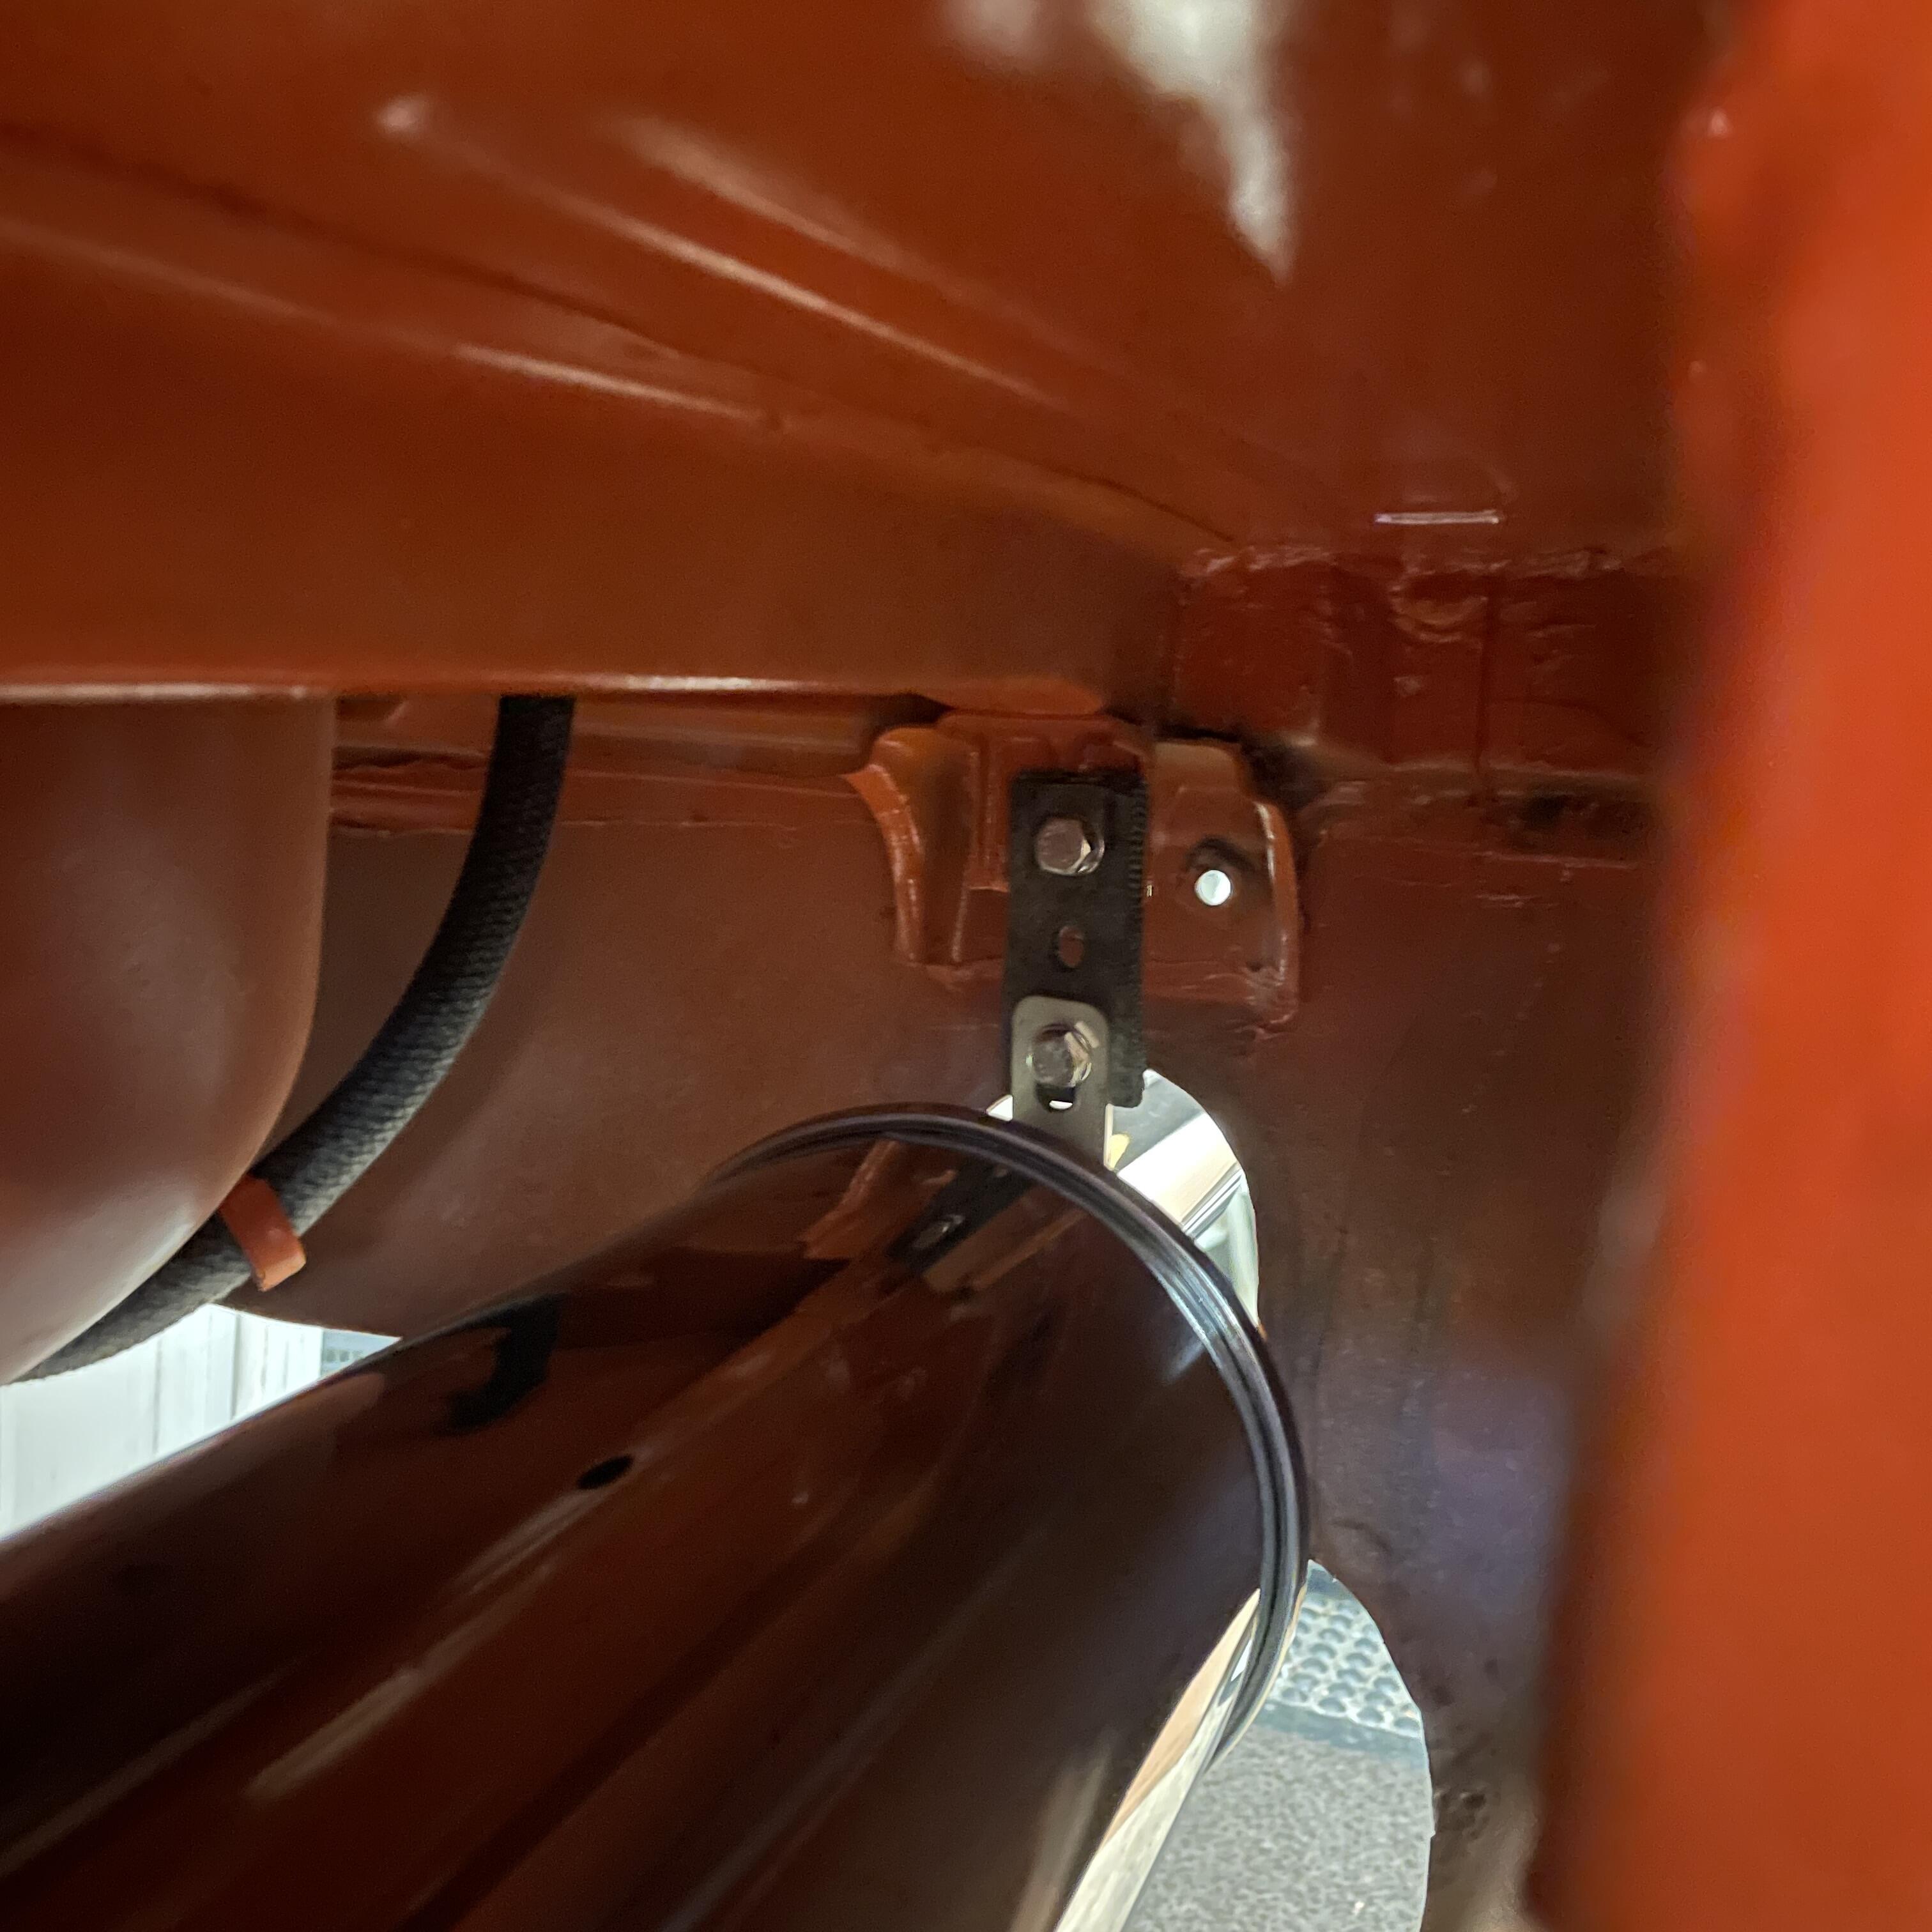
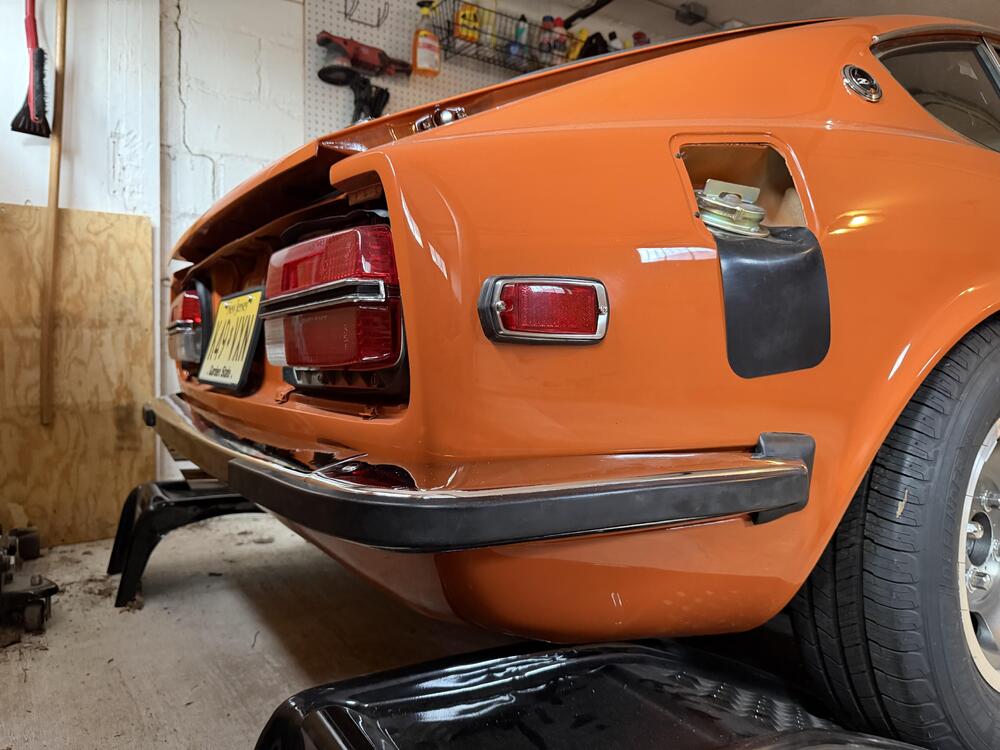
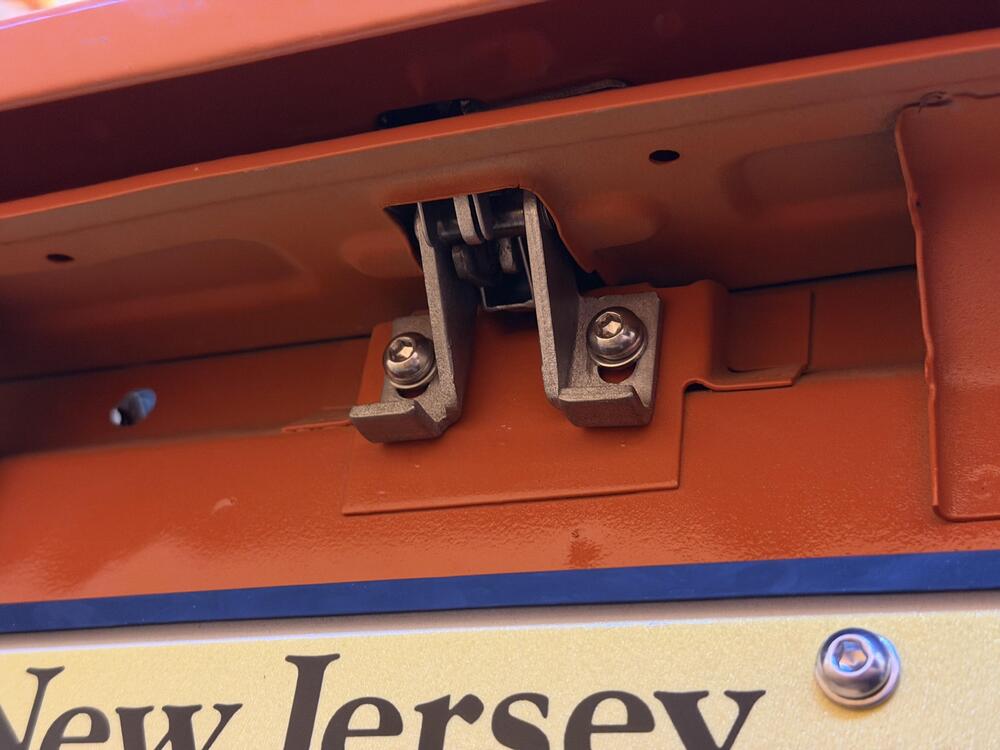
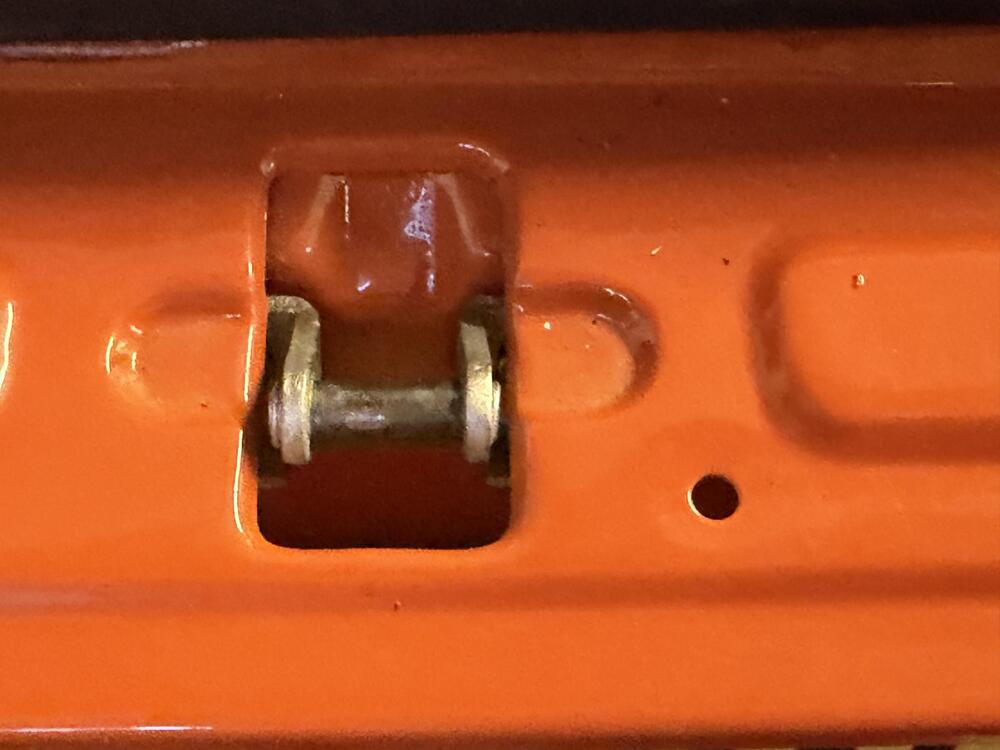
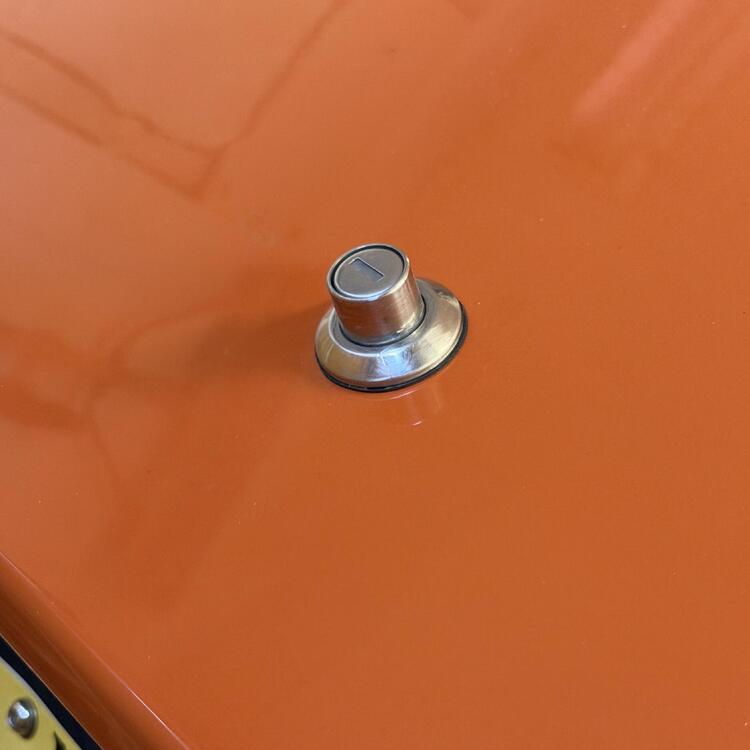
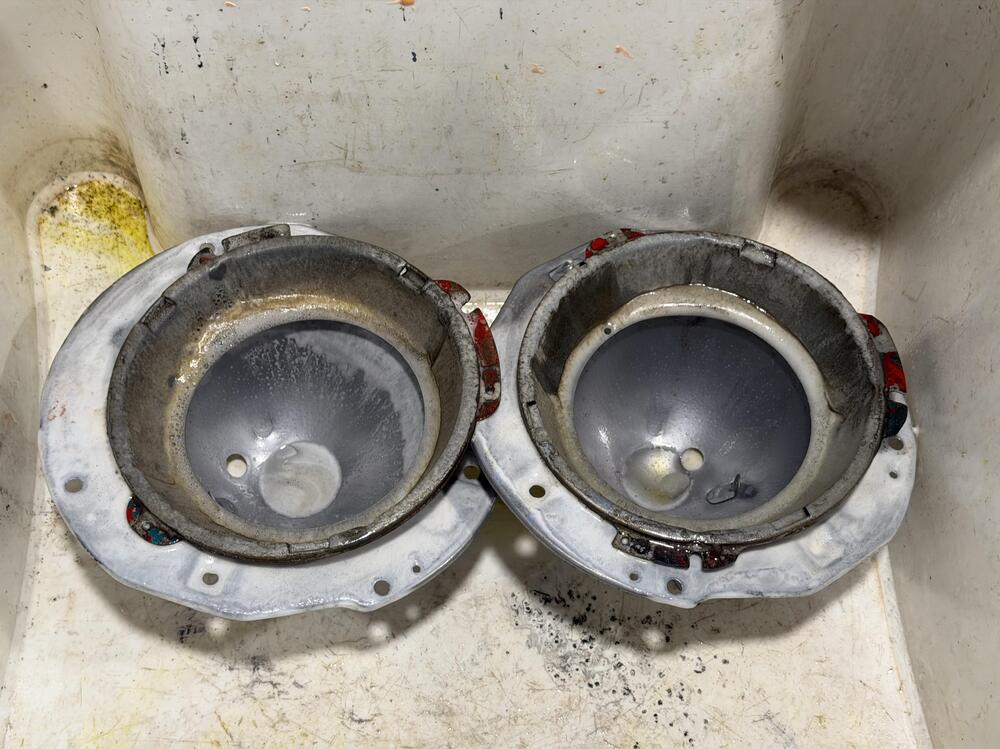
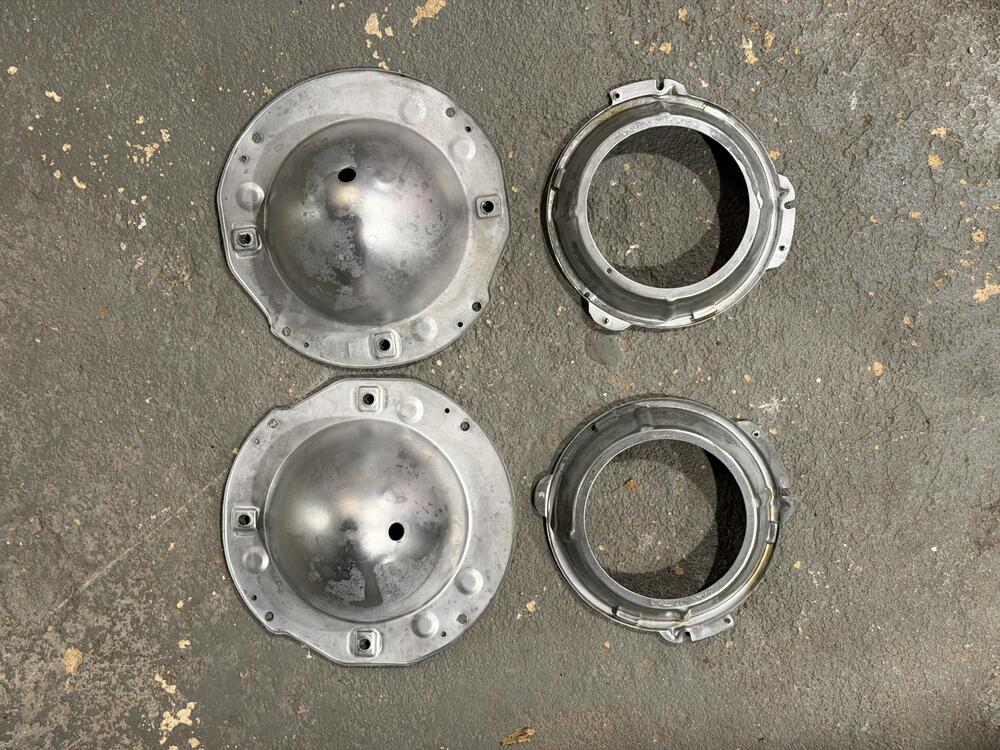
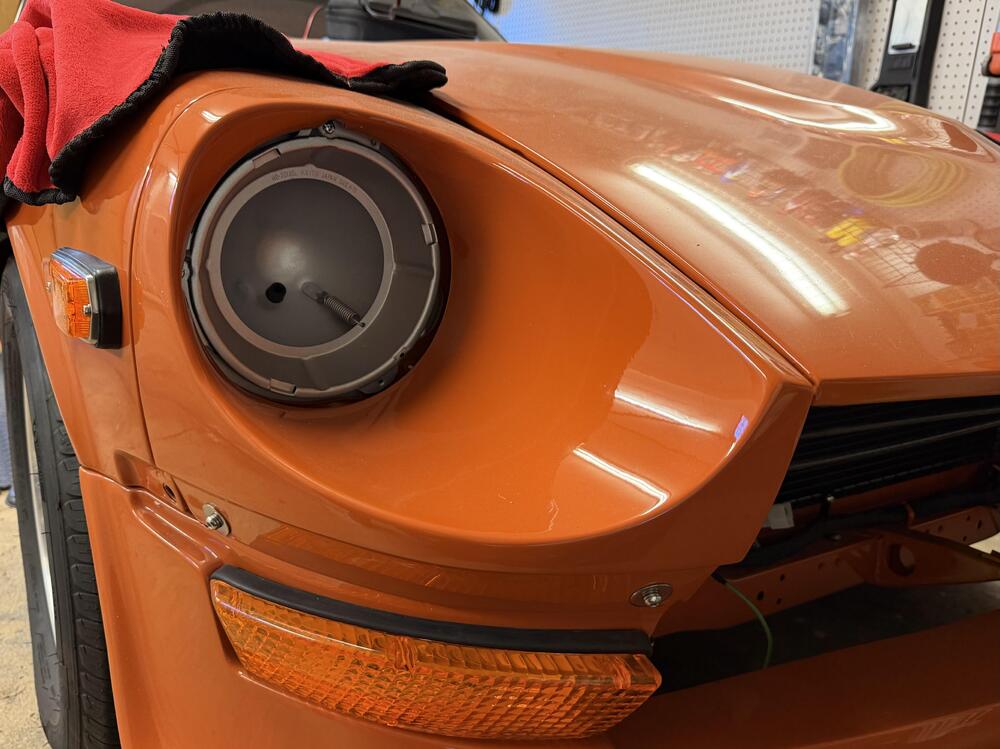
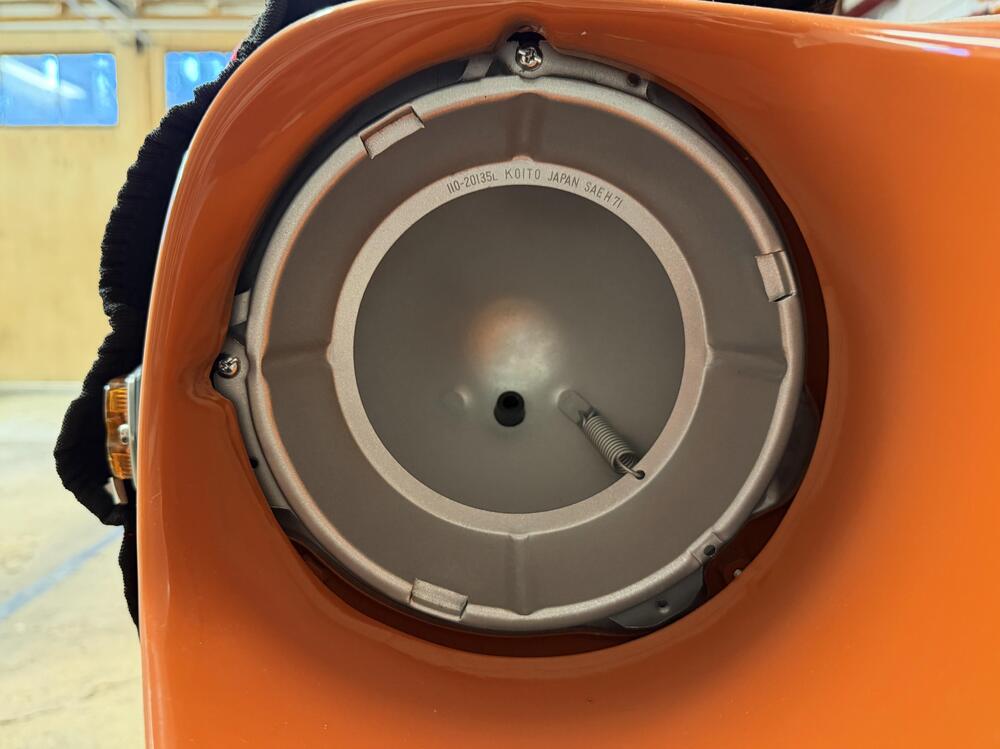
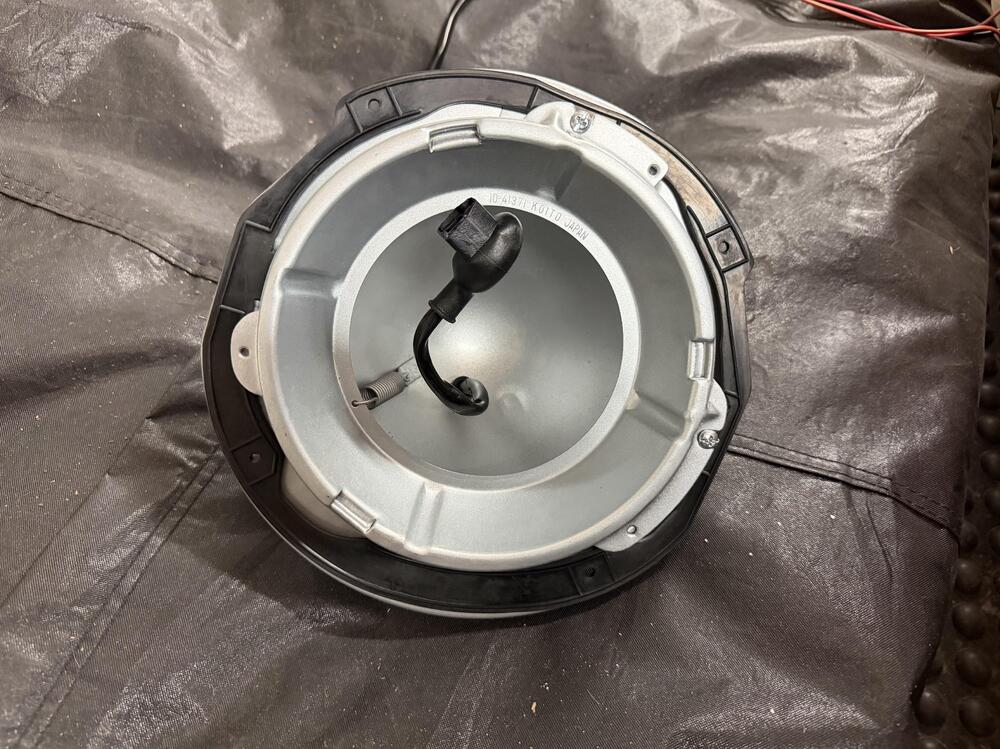
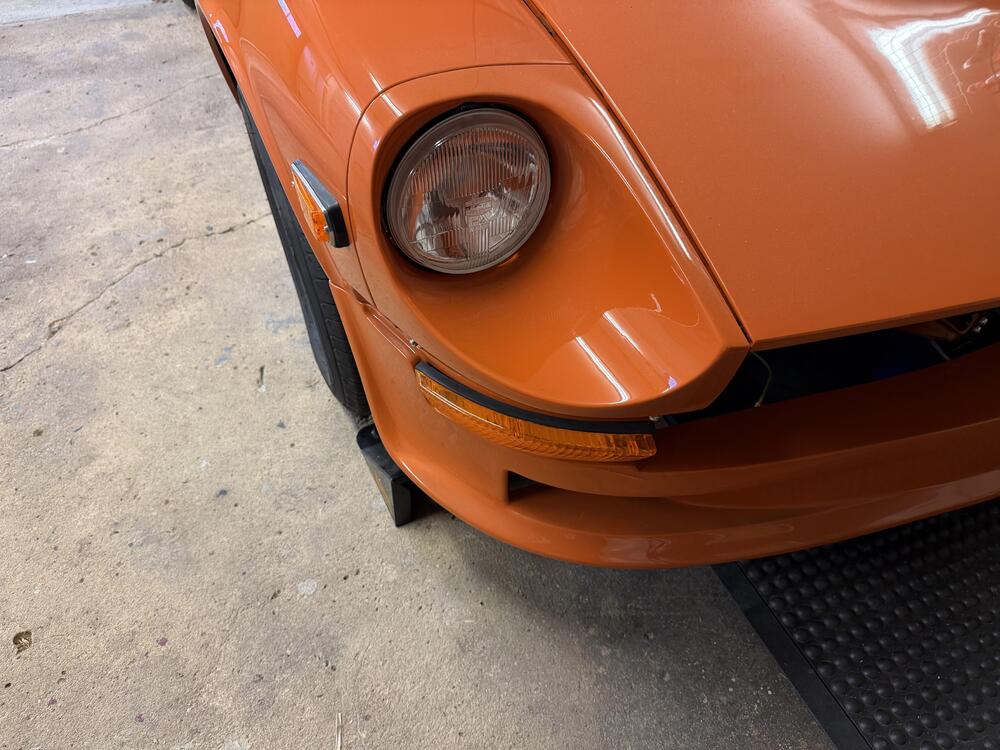
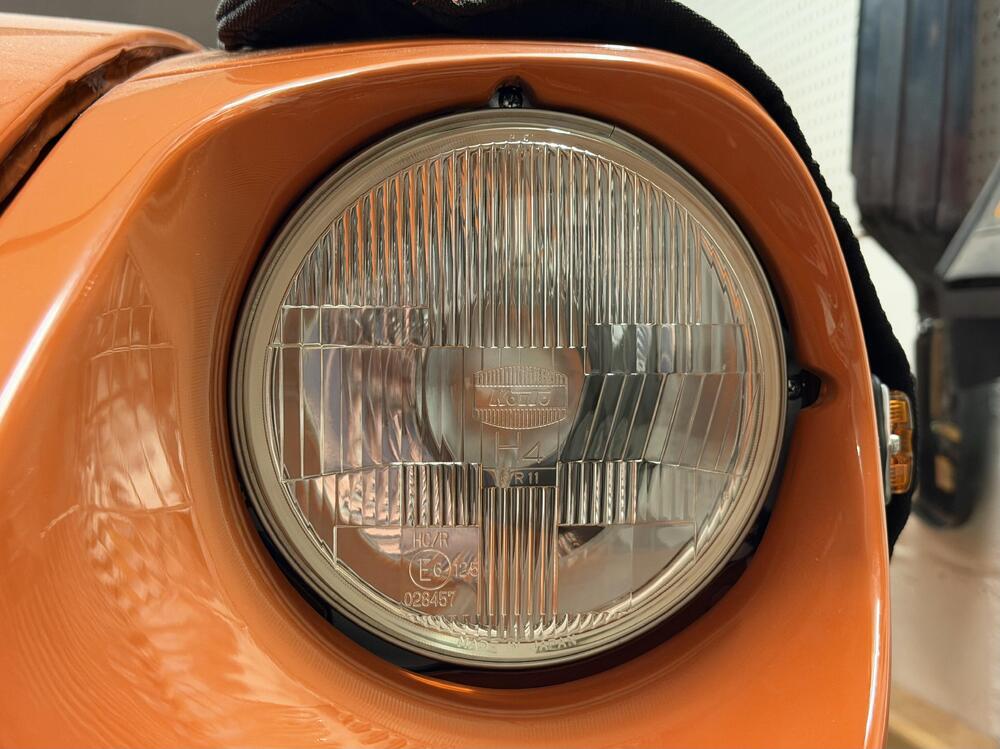
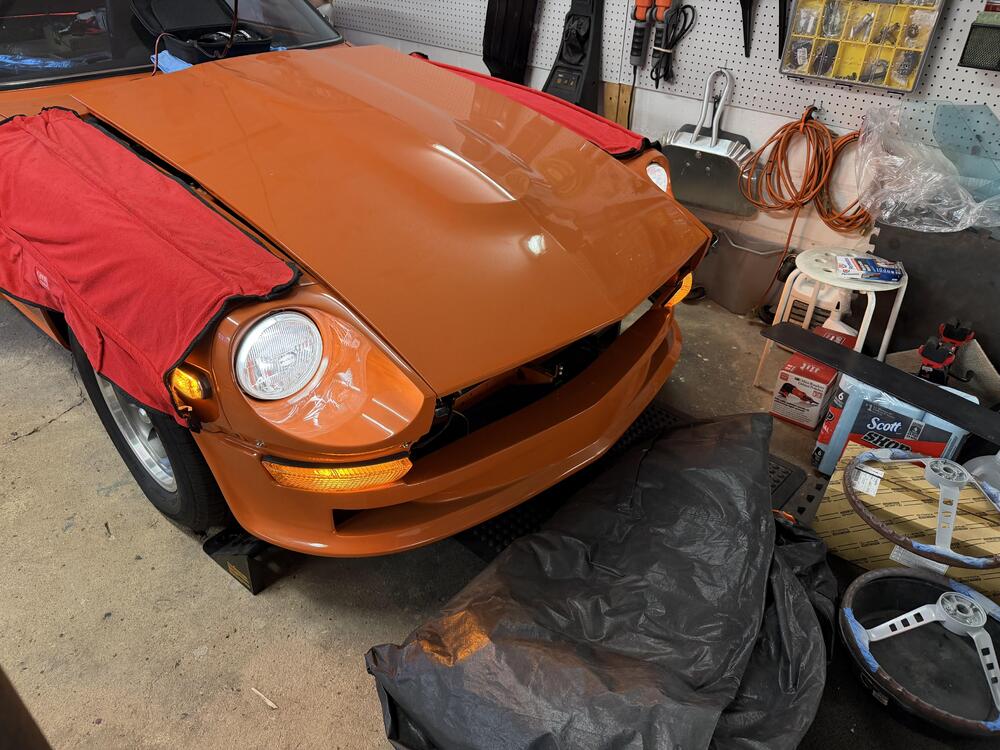
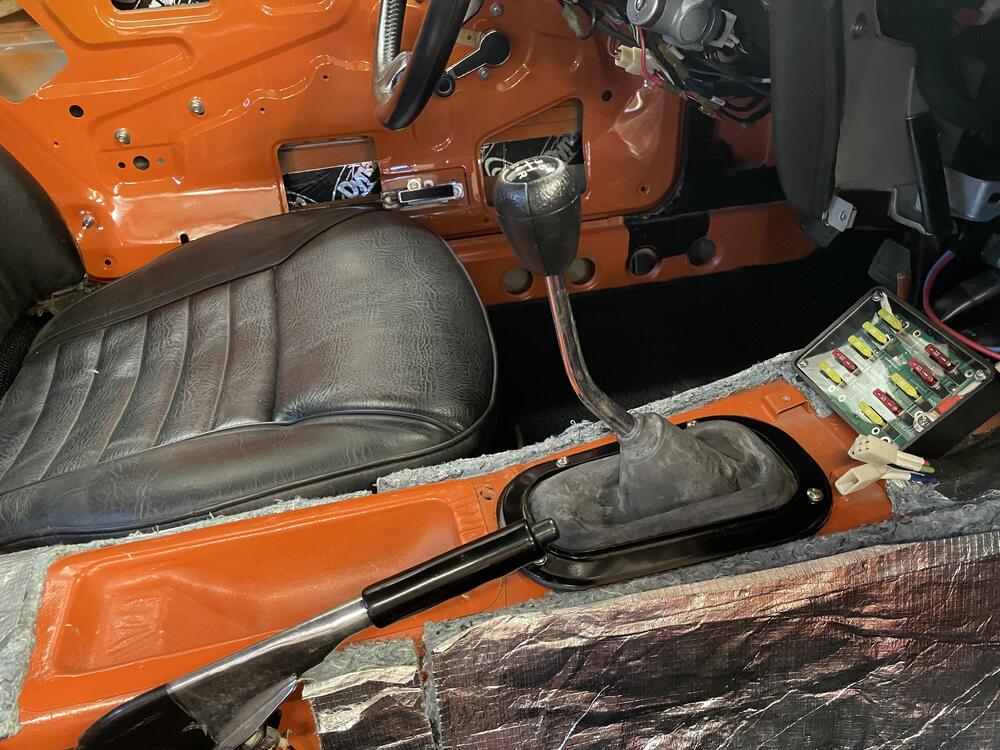
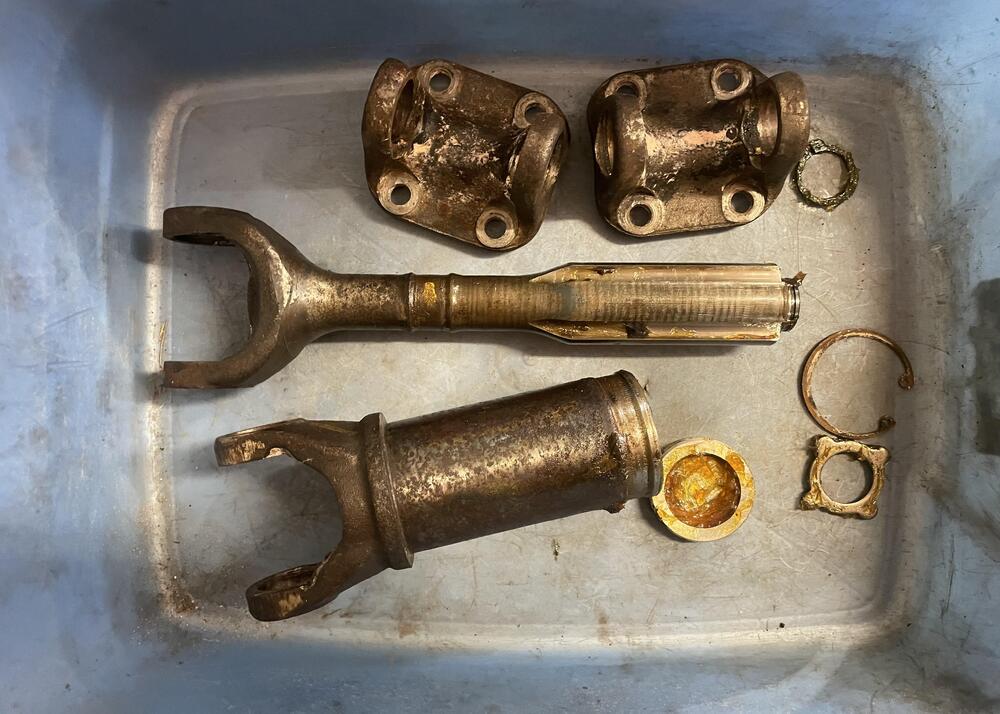
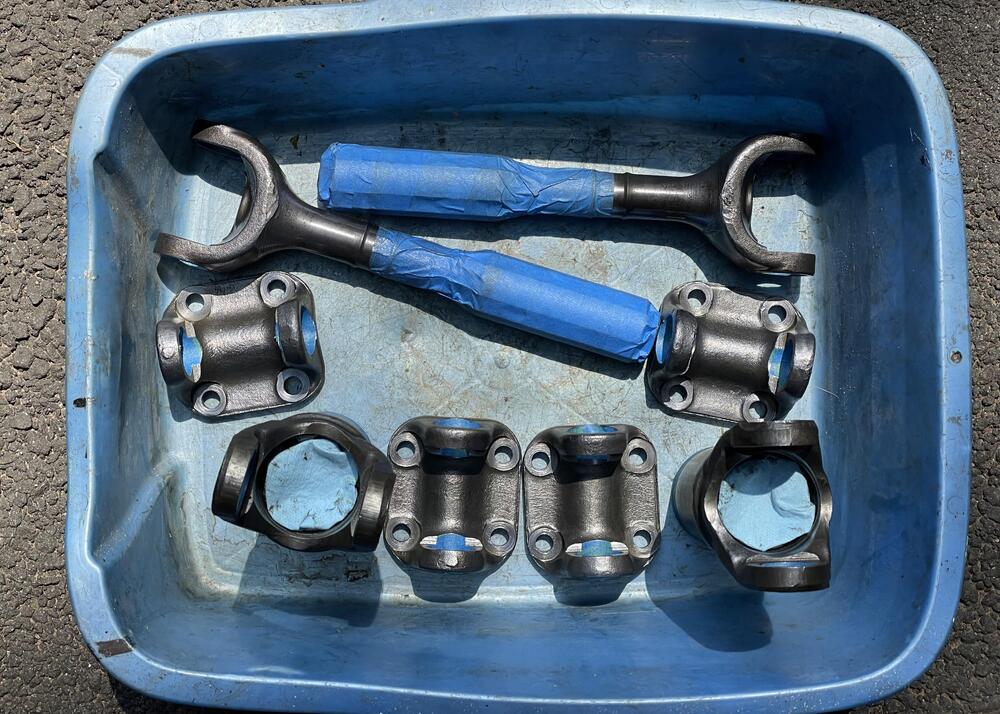
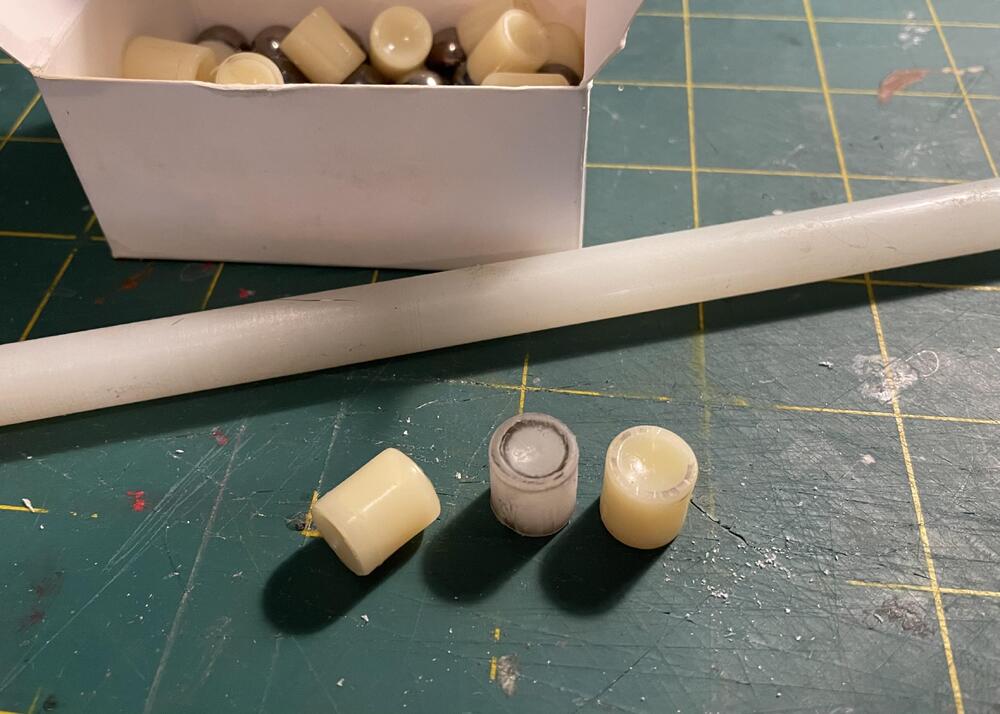
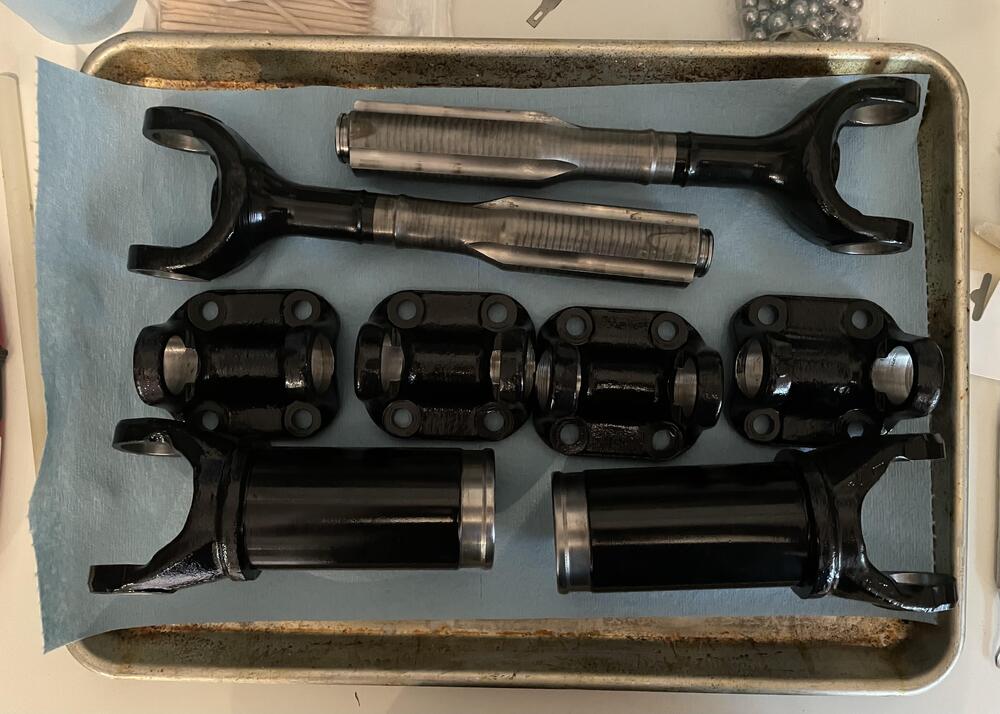
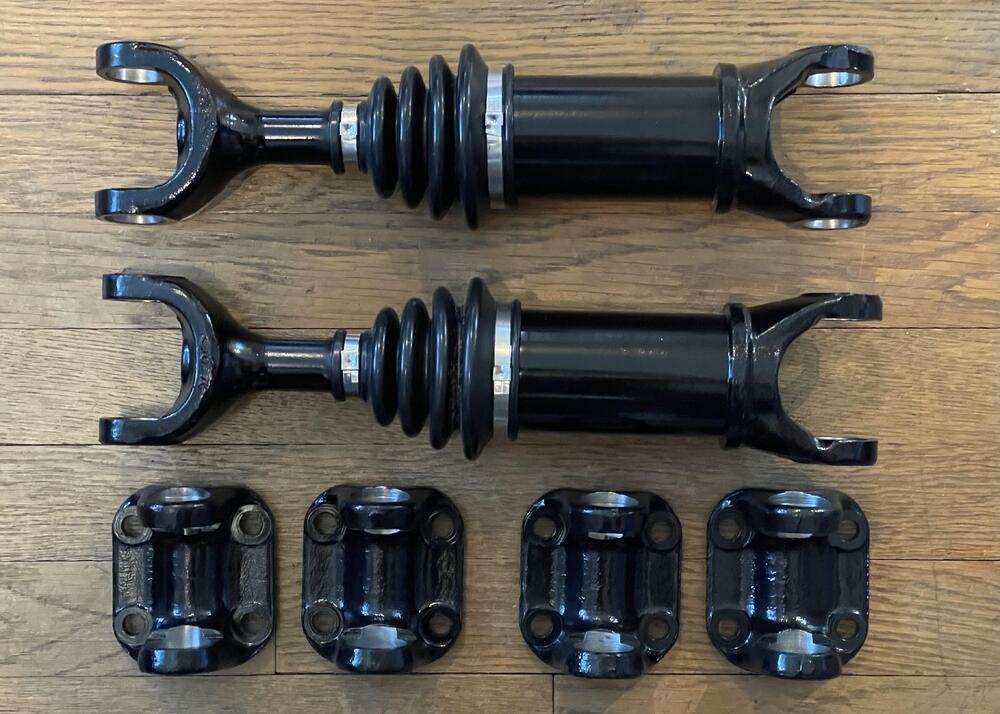
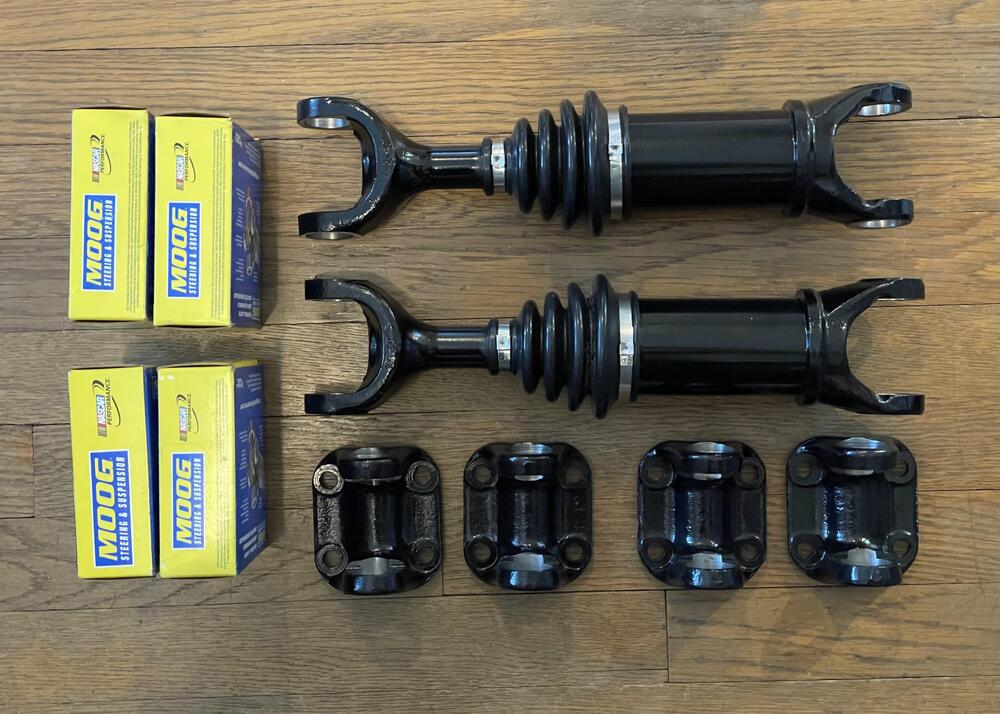
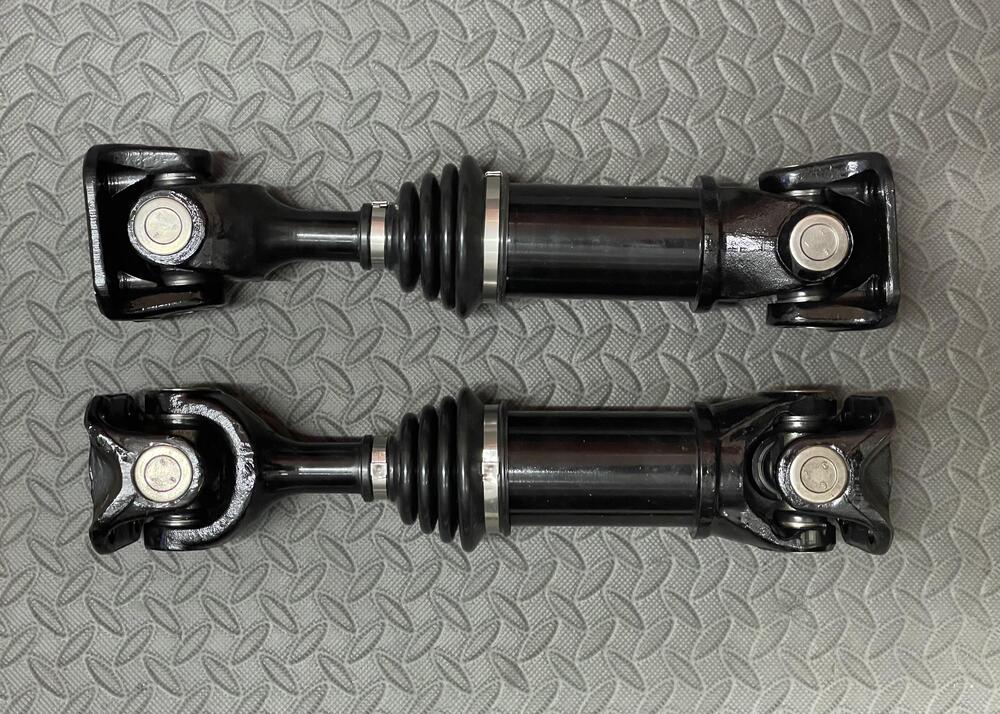
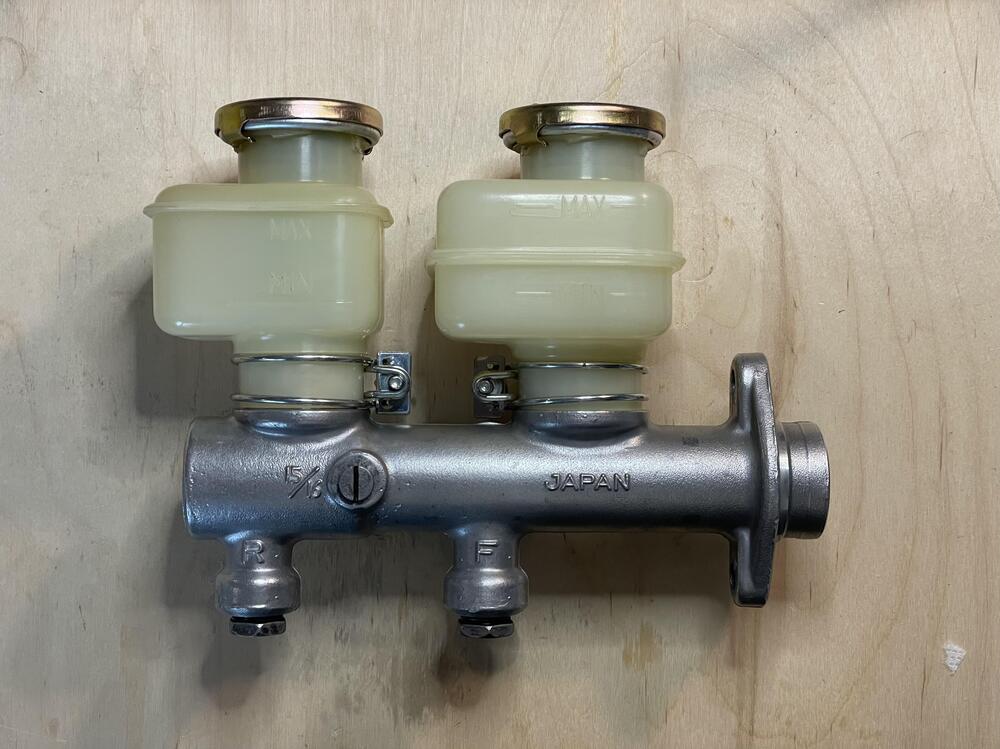
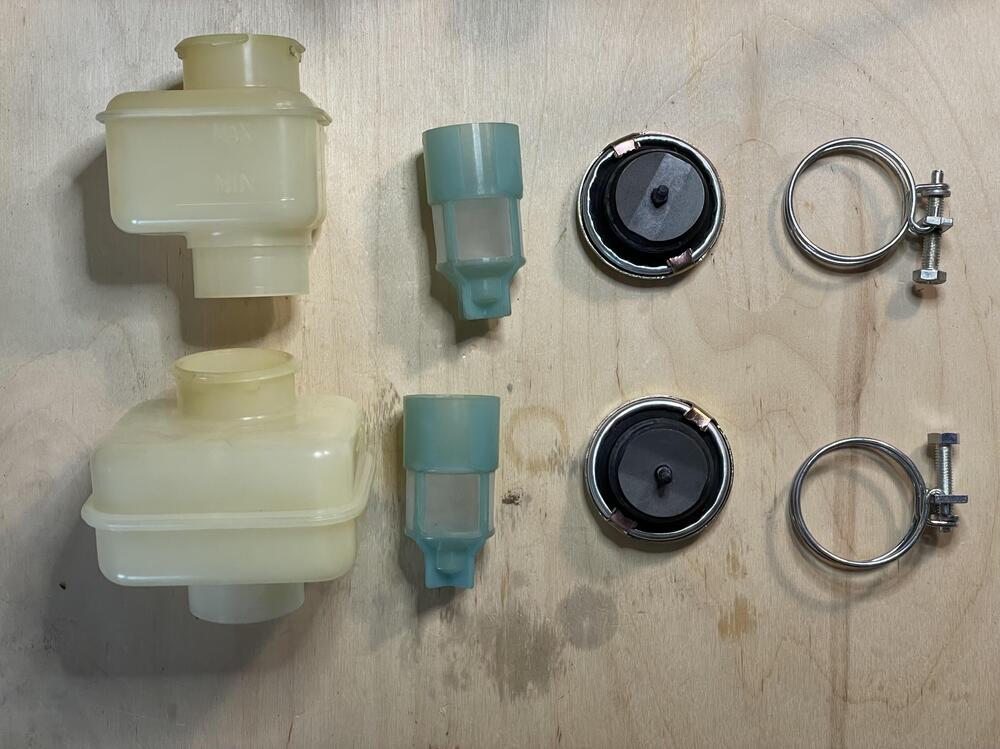
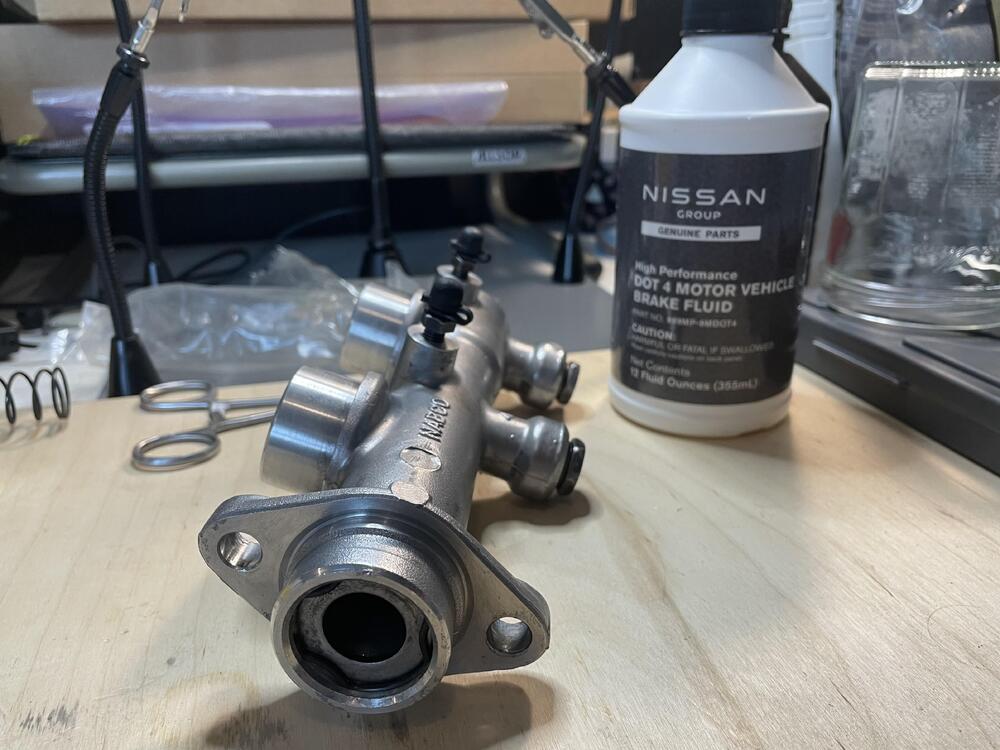
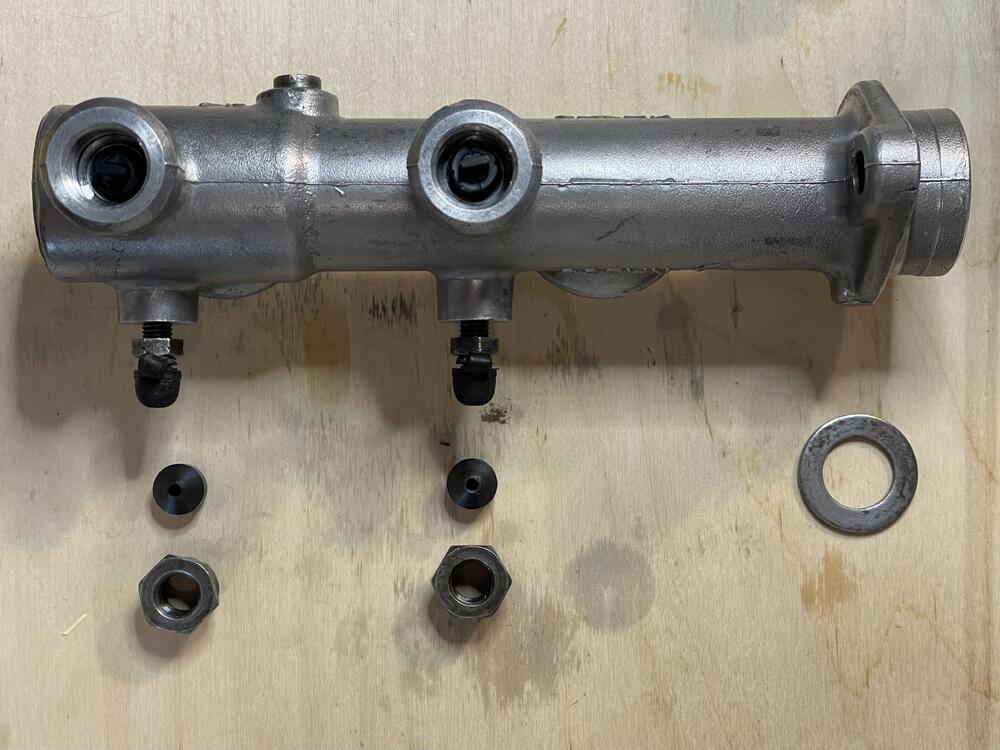
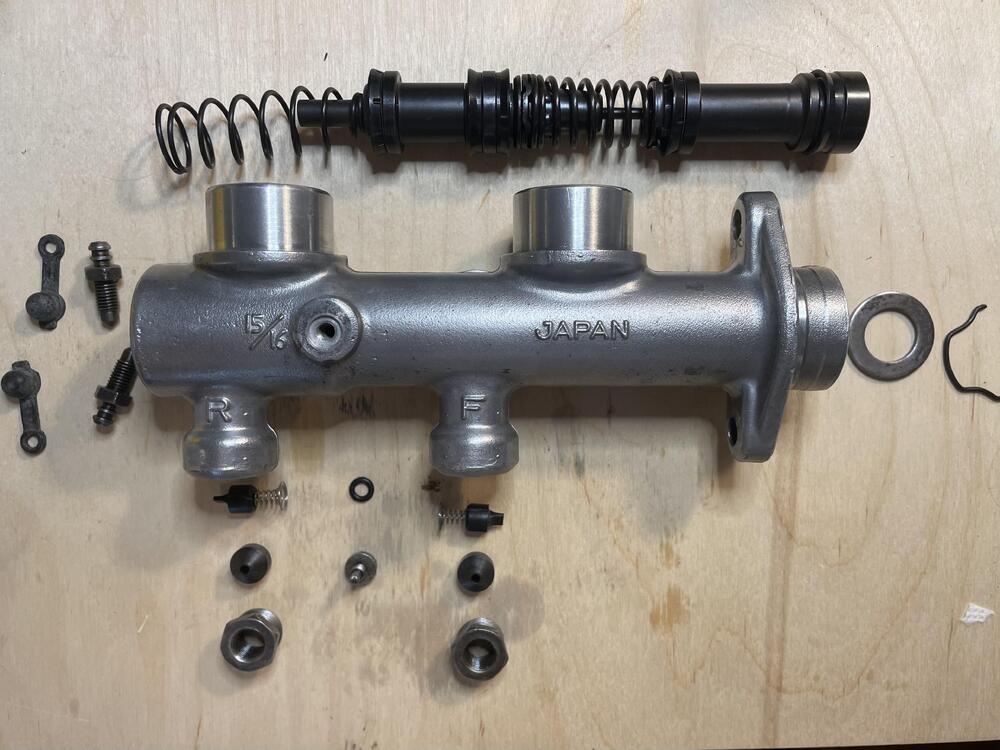
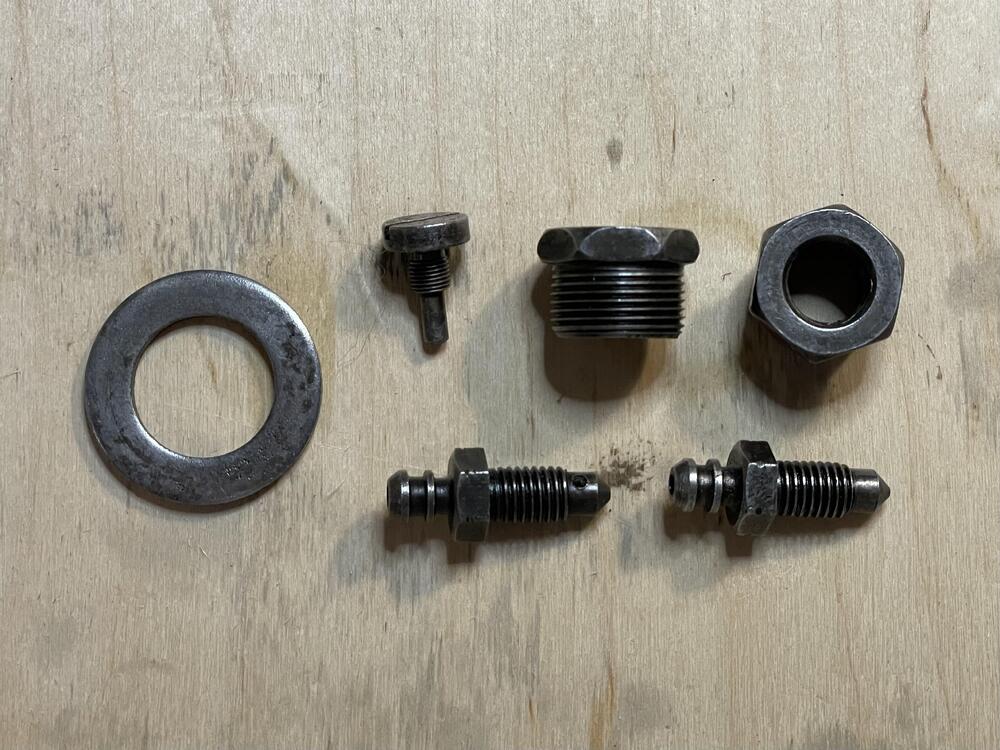
I’ve been negligent in keeping this up to date, but I have been posting regularly on Instagram, so I’ll spend the next few days copying those updates over to here to catch you all up on my progress. ••• June 26, 2025 280ZX Brake MC is ready to go! I tore this apart several years ago thinking it would be a short project, but the rebuild kit I had turned out to be for the one made by Tokico (large perforated disc residual valves) and this one is made by Nabco (small rubber duckbill residual valves). I messed around with rejuvenating the reservoirs. I read using a mix of oxy clean and hydrogen peroxide gel under UV light for 24 hours would take the yellow out. It lightened them, but they’re still clearly yellow. Super clean, though. I also did some chemistry on the hardware. The bleeders and reducers for this thing are not common sizes (the reducers are m16x1.0 to m10x1.0) and after two weeks of searching for replacements I gave up and decided to try chemically treating them. I didn’t want to do the hardcore hot bluing or zinc methods because, so I used the rust bluing method. Basically, you soak them in white vinegar to strip off the rust and zinc. Then you paint them with a paracetic acid / salt solution (8 parts hydrogen peroxide:1 part white vinegar + as much salt as it will dissolve). Dry it with a heat gun and throw it into a double boiler. You’ll see the rust turn black as it changes into iron oxide. Buff it with steel wool and repeat until satisfied, then soak for 24 hours in motor oil. They came out okay. I was hoping they would look more like the pistons, but this is after four rounds, so it’s good enough. Fingers crossed that they don’t immediately corrode. You could also do the phosphoric acid version (cold bluing), but this makes a harder coating. Then I just had to hone the cylinder, flush it with 91% alcohol, wipe it out, and reassemble. I kept the Tokico 240Z reservoir caps since I didn’t wire the car for the ZX caps with the fluid level sensors , plus I don’t have the metal or plastic Nabco caps. Maybe later if I can find a set for less than €53.40. It looks pretty good after test fitting it. I’m waiting for a dust cover and O-ring in the mail, then I can install it and bleed the brakes. ••• August 7, 2025 This is not hard… … if all the parts are there. I took these axles apart and found one of them had been rebuilt previously, and whoever did that lost one of the bearings and spacers. So what should have been three days of work, including paint drying time, turned into three weeks of figuring out how to replace them. I ended up buying a bag of 11mm chrome steel bearings that were close enough to the same (0.09mm difference) and some 10mm wear-resistant nylon rod to fabricate a replacement spacer. Even though I have tons of new bearings now, I only replaced the missing one just in case that difference matters. All in all the spacer came out well; not perfect, but close enough. The rebuild process is pretty straight forward. Search the Classic Z Cars forums for instructions if you need them. Getting the boot on the inner shaft is the hardest part. I recommend finding some plastic tube that fits over the shaft, pushing it into the boot, and sliding it on that way. Make sure you use the prescribed amount of grease, which is 10g (about 3/4 Tbsp) at the top of each bearing channel. Once I had everything nice and clean (citristrip, a wire wheel on the bench grinder, rust inhibitor) I sprayed them and got them back together. Another jam I got into was two of my u-joints had the wrong part in the right boxes, so I had to order new ones and wait for shipping on those. But an evening on my home made press and they were done. Next step is installation. ••• August 20, 2025 Well that changes things. I realized about six months ago that this car started life as an automatic. With this last step that crime has been rectified. Brass bushings. Artificial leather 5-speed knob. New seals and trim. ••• September 1, 2025 Initial systems tests (clutch, brakes, transmission) and… IMG_8948.mov It moves! I had some friends over to help me test the systems that makes this an actual car rather than a very expensive 1:1 scale model. Everything seems to be working correctly. We didn’t get too far, though, because my fuel return and carburetor cooling system is leaking directly onto the header. So, test cut short, but massive fire averted. My wife was thoughtful and made a quick video of the car’s first roll under its own power, complete with my dog barking at everyone. ••• November 7, 2025 Well, I had planned to be wrapping up something else, but I’m having some issues with the paint, so here’s something else I did on the side instead: hatch latch & lock plus the rear bumper with OEM rubber trim. I forgot to take any before photos of the latch parts, but suffice to say they were rough. Lots of rust and primer. Very little zinc. So I stripped and buffed them and hit them with some stainless-blast from Seymour paint. Looks decent. Better than the CAD yellow experiment I did on the window regulators. The button is the one that came with the car after some vigorous attention from some steel wool. It was rekeyed to match all of the other locks and installed with a gasket from JDM Car Parts (not OEM but fine) and a brand spanking new clip from Zedd Saver because I lost the old one. The bumper is the chrome version from @resurrectedclassics. I’d say it’s 4/5 stars. Great fit but the gauge of the steel is a little thin so the mounting tabs flex more than I would like when installing, and the chrome finish is not as smooth/nice as I expected. There are occasionally streaks (kind of like brush strokes) where the chrome built up or the steel wasn’t smooth before it was applied. If I had it to do over I would go with the stainless version. ••• November 16, 2025 Steps 1 through 5 of getting my Koito H4 headlight kit installed. These frames were covered in paint (three different primers, metallic blue, orange, and red) and one of them is from a different year. I’m 99% sure the right front fender was hit as some point and they just replaced the entire corner. Acid bath for the rust. Steel wool. Eastwood Clear Zinc as a base coat, then dusted with Silver Cad to knock back the blue and give it a more metallic look. Then satin clear coat to keep it from rusting. Almost indistinguishable from the zinc coating on the springs. All new hardware from Z Car Depot except the covers for the adjustment screws, which I cleaned up and reused. Tip: to get the various plastic parts on, drop them in a bowl of almost boiling water for one minute, then press in. ••• November 27, 2025 Parts 6 through… whatever, 27?, of putting the headlights in. I was able to wire up my Koito H4 kit this week. It took a while to get to because I had to find the right size flag terminals for the bulb connectors. I could have gone with straight connectors, but the kit comes with a wiring harness that has nice 90° connectors with really snug boots. Unfortunately I couldn’t just use the harness as is because I wired the car to have the headlight relay in the cabin. So I scavenged what I could. The right side went together in a snap. I had some vinyl tubing left over from making the harness that just barely fits through the grommet on the back of the headlight can. It took a while to squeeze the wires though, but once done I had a fully waterproof setup (at least from the back/outside. The cans can still get water in them from the gap around the light, but hopefully that will be minimal and drain out. I’ll try to remember to blow it out with canned air when it does happen. One small problem I’m having is the light switch doesn’t want to work 100% of the time. There’s a contact that isn’t working consistently so I’m going to have to pull it out and re-rebuild it. I haven’t tried them at night, but I assume these are comparable to my Crosstrek H4s, which are adequate. All these people with LED headlights in cars not meant to have them are pissing me off on a daily basis, so I’m not going to be one of them. If I have to go with LeDs it will be complete lights, not just replacing the H4 bulbs.


-
I have loved and enjoyed my Z since 2008. It has been a loyal friend to me over many many many miles. The other day I was driving her round and the brake pedal was starting to feel a bit hard. I mean hard in a way where no matter how hard you mash the pedal, the braking force does not increase. I find this entirely unacceptable. I am currently 100% stock. I have refurbished front calipers and OEM stock (but not original) rear wheel cylinders/drums. I think the time has come for me to take a serous look at my brakes. The time for another Zedyone Build thread is YEARS overdue and this is something I have always wanted to do. My options include: 1) Complete overhaul: Front redo/rear disk/larger master 2) Just do rear disk conversion (probably end up doing CV conversion as well from u-joints) I worry about needing a larger master to handle rear disk brakes. I have looked at Wilwood conversions and some from silvermine, etc. All appear to be the same thing packaged a bit differently. But I do think the time for 4 wheel disk brakes has come. is there any advice from my Z buddies on this conversion. I want to entirely rejuvenate my braking power.
-
Don't assume that new aftermarket u-joints will be better/tighter than used Nissan joints. Nissan's specification is very precise. Each joint came with clips of varying thickness so that play could be adjusted and set correctly. New aftermarket joints come with one clip thickness for all. I replaced a set on my car and they didn't seem any better. I actually removed them all and returned them. They were Precision from O'Reilly's. The Nissan joints are greaseable and are often just fine after a shot of new grease.
-
I'm not saying you're wrong about the vibration source, but many years ago, a friend had a '56 Ford pickup that someone had slopped a 302 ci engine into. The engine was visibly out of alignment both vertically and horizontally, and it ate u-joints every six months, but it never vibrated at speed.
-
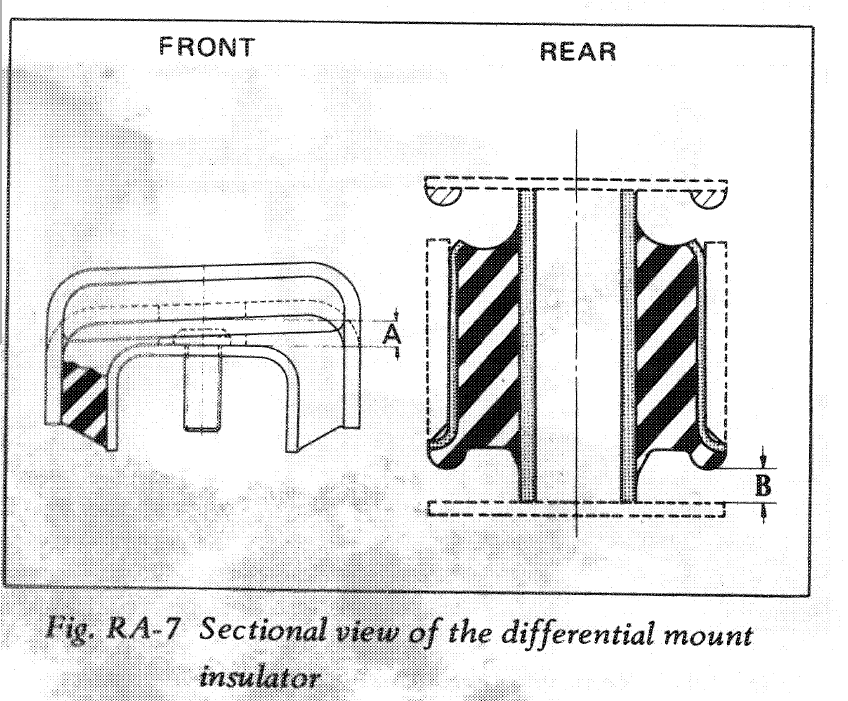
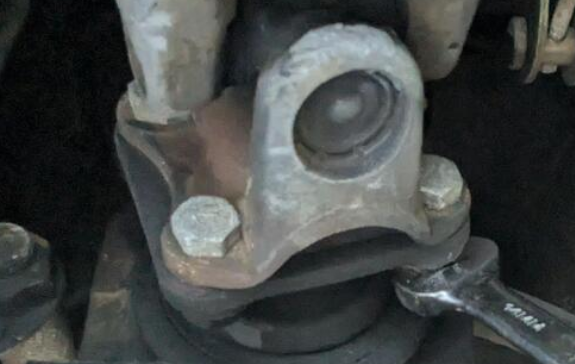
I played around with lowering the rear of the transmission today after work. I backed off the bolts securing the transmission mount (Techno Toys Tuning) to the body to see what kind of change in angle would result. Picture of the mount I have (for use with the 240SX transmission) in the early Z: Backing the bolts off to drop the rear of the transmission more than 5/16 of an inch only changed the angle from 89 to 88.5. I expected more change in angle. Anyway, now I am thinking through various things. I find myself asking why the front differential insulator mount has such a "large" angle to it. First of all, I confirmed that my insulator mount is part number 55415-E4102 (the early one). When looking at the factory workshop manual, the image clearly shows an inclination. As my car is sitting on the lift, I measured the inclination of the pinion flange, and it was 87.1 degrees. Why is it so far away from 90? I mean, the driveshaft is supposed to operate with less than 3 degrees of angularity on the u-joints. If I was able to match the 87.1 at the transmission, that would be 2.9 degrees on each u-joint. And, we all know that when power is applied to the input flange, the nose of the differential lifts upwards (and thus the need for the "arrestor" belt which limits to differentials upward movement at the front). It seems to me, that instead of dropping the rear of the transmission down, it would be far better for me to change the angle of the front pinion flange, by either lowering the front of the differential, or raising the rear of the differential. Since I have used lowering springs to lower the car a bit, it seems to me that it would be more desirable to raise the rear of the differential. However, that would require modification of my stock parts here, perhaps removing the upper washers that have rubber bonded to them and replacing them with flat washers? I went through a fair amount trouble to source these washers as I am fairly certain they are what came originally on my 6/71 car. Further, I believe that the front differential mount, front differential insulator, rear differential mount, and rear differential mount washers are all as original for my car. So, I am baffled why the pinion flange angle is what it is. Am I missing something? How do I confirm that my front differential mount is the correct part number for my car - 55411-E4100 (used up through 6/71)? What is the difference between that one and the later 55411-N3001 used from 7/71 to 7/73

-
Your vibration description is identical to one I had in my early 71, except mine came on at 80 mph +. I described it as having a 500 lb. bumble bee in the car. The vibration was too fast to be half-shaft u-joints. I tried new u-joints, but they didn't improve the vibration. After carefully cleaning the shaft and upon closer inspection, I found a bit of scuffed paint and the slightest hint of a dent. The dent was only visible in bright sunlight and at the right angle. Off to the local drive-shaft company it went. They retubed it and installed new Spicer u-joints. The only brand of u-joint they would guarantee to not screw up the balance at the time, I reinstalled tyhe shaft and never had any more trouble with it for the next twenty years..
-
Today, I was putting on some miles to be sure the engine is broken in fully on the Z I recently "finished" restoring. I have a vibration that seems to become noticeable around 70 mph. I have only owned two 240Zs, but I have experienced some driveline vibration with each of them. I was hoping not to have the issue with this one, but it is present. And it is bugging me. First, a simple question: Is it perhaps, normal... for a 240Z to have a driveline vibration? I mean, maybe with me driving modern cars, I just have lost touch with how these old cars really were? How do I describe it? Well, for one, the rear view mirror vibrates and blurs the image I see in the mirror a bit. That doesn't seem right. But, it isn't just the mirror. If I touch the center console, or the padded area of the transmission tunnel, I can feel the "hum" that is happening. And, I can feel it coming through the seat as well. The driveshaft has new OEM u-joints and was shortened and balanced by Carolina Driveline in SC. The rear axles have new, OEM u-joints and when they were installed, measurements verified they had the right amount of axial play. The rear differential has all new bearings and was assembled properly. The differential location is stock - it has not been shifted back as was done by the factory for the 1972 and later cars. I remember that the new engine mounts were thicker than the old ones by a bit. That may have raised the engine a touch. I also recall there being some slop in the transmission mount, which allows for a bit of side to side movement of the transmission. I think I will look at the propeller shaft angularity... to see if that looks off. I am interested to hear how much vibration... or how vibration free... is your Z?
-
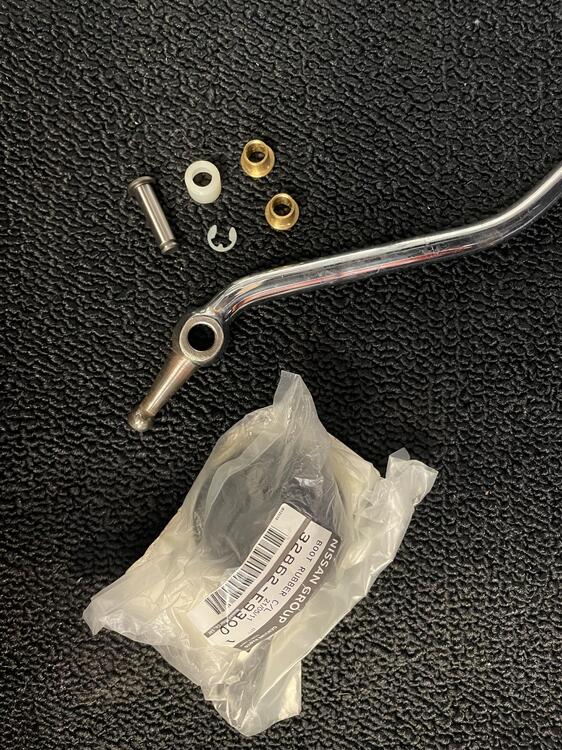
Added a resource to this complication thread. Another source for the stake u-joints
-
Yes, I think I will send my propeller shaft there (https://carolinadriveline.com/) as I had planned, but now it needs to be shortened in addition to getting it balanced. I just very carefully measured my center to center distance again. I got 21 and 1/8". Looking very closely, I think it is maybe .010 more than that. That is 536.829" mm. The factory shop manual says the length from center to center of the u-joints is 540 mm. There is no way this propeller shaft is that long between the centerline of u joints. Perhaps because there is a slip yoke, factory tolerance of propeller shaft length was not strictly held. After measuring carefully, I will be removing 2 inches from the propeller shaft. I suppose if I had the pieces in the car to move the differential back to align the drive shafts, this propeller shaft might fit as is. I seem to recall coming across that before in my internet travels. I could search to confirm, but it is a waste of my time as I won't be swapping in those pieces from a later car. If the drive shaft angularity causes issues on this car, I'll swap in some CV axles.
-
Still sorting out my 280z after manual trans swap and r200 diff install. Transmission was rebuilt and diff was resealed after inspection (everything looked good). Upon first test drive when coming to a stop I can hear a rhythmic thunk/thump coming from the right rear of the car. The only thing that wasn’t touched in the swap was the donor half shafts so I rebuilt them with Japanese u-joints. Reinstalled them and still have the same thunk. The driveline is original but u joints seem fine (nice and tight). This *sounds* like a half shaft or driveline u joint problem but I can’t find any slop in any of them. Next step might be swapping the half shafts side to side to see if it moves but before doing that I thought I’d post here and get some opinions. All bushings in the rear end have been replaced with rubber except for mustache and diff mount which are poly (couldn’t locate rubber replacements). Brake drums and shoes are new. What else should I be looking at? Thanks in advance for the help!
-
cgsheen1, excellent question. I pulled the suspension off of a 2/71 car, cleaned it up, powdercoated, and swapped it on the 11/70 car. New bushings, and in most cases, bolts went in. Not that this matters for the rear, but a new steering rack and ball joints up front, and rebuilt half shafts with U-joints in the rear. For the rear, the original brake cylinders and e-brake cable stayed. I did replace the rear drums with the available cast iron drums and put new pads on. The first set of shoes actually adhered to the rear drums after a bit, and the rear edge broke off as I extracted the drum. I have new shoes on now, but still the same grinding. I have it on a four post lift now and do not see any grinding marks on the half shafts.
-
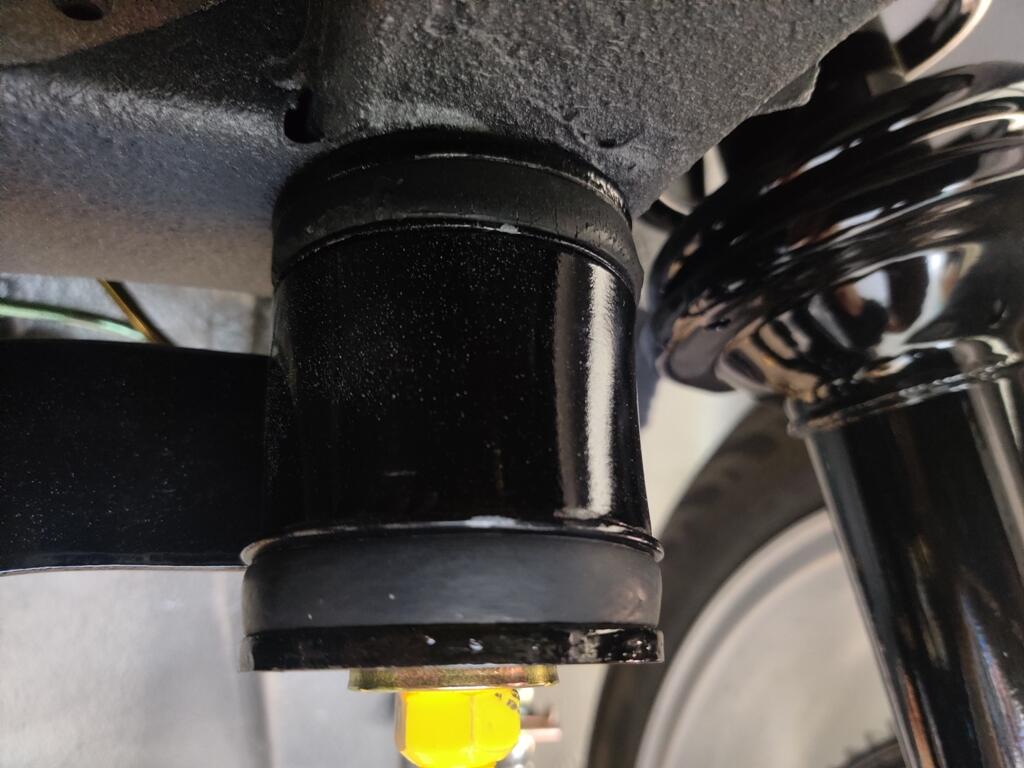
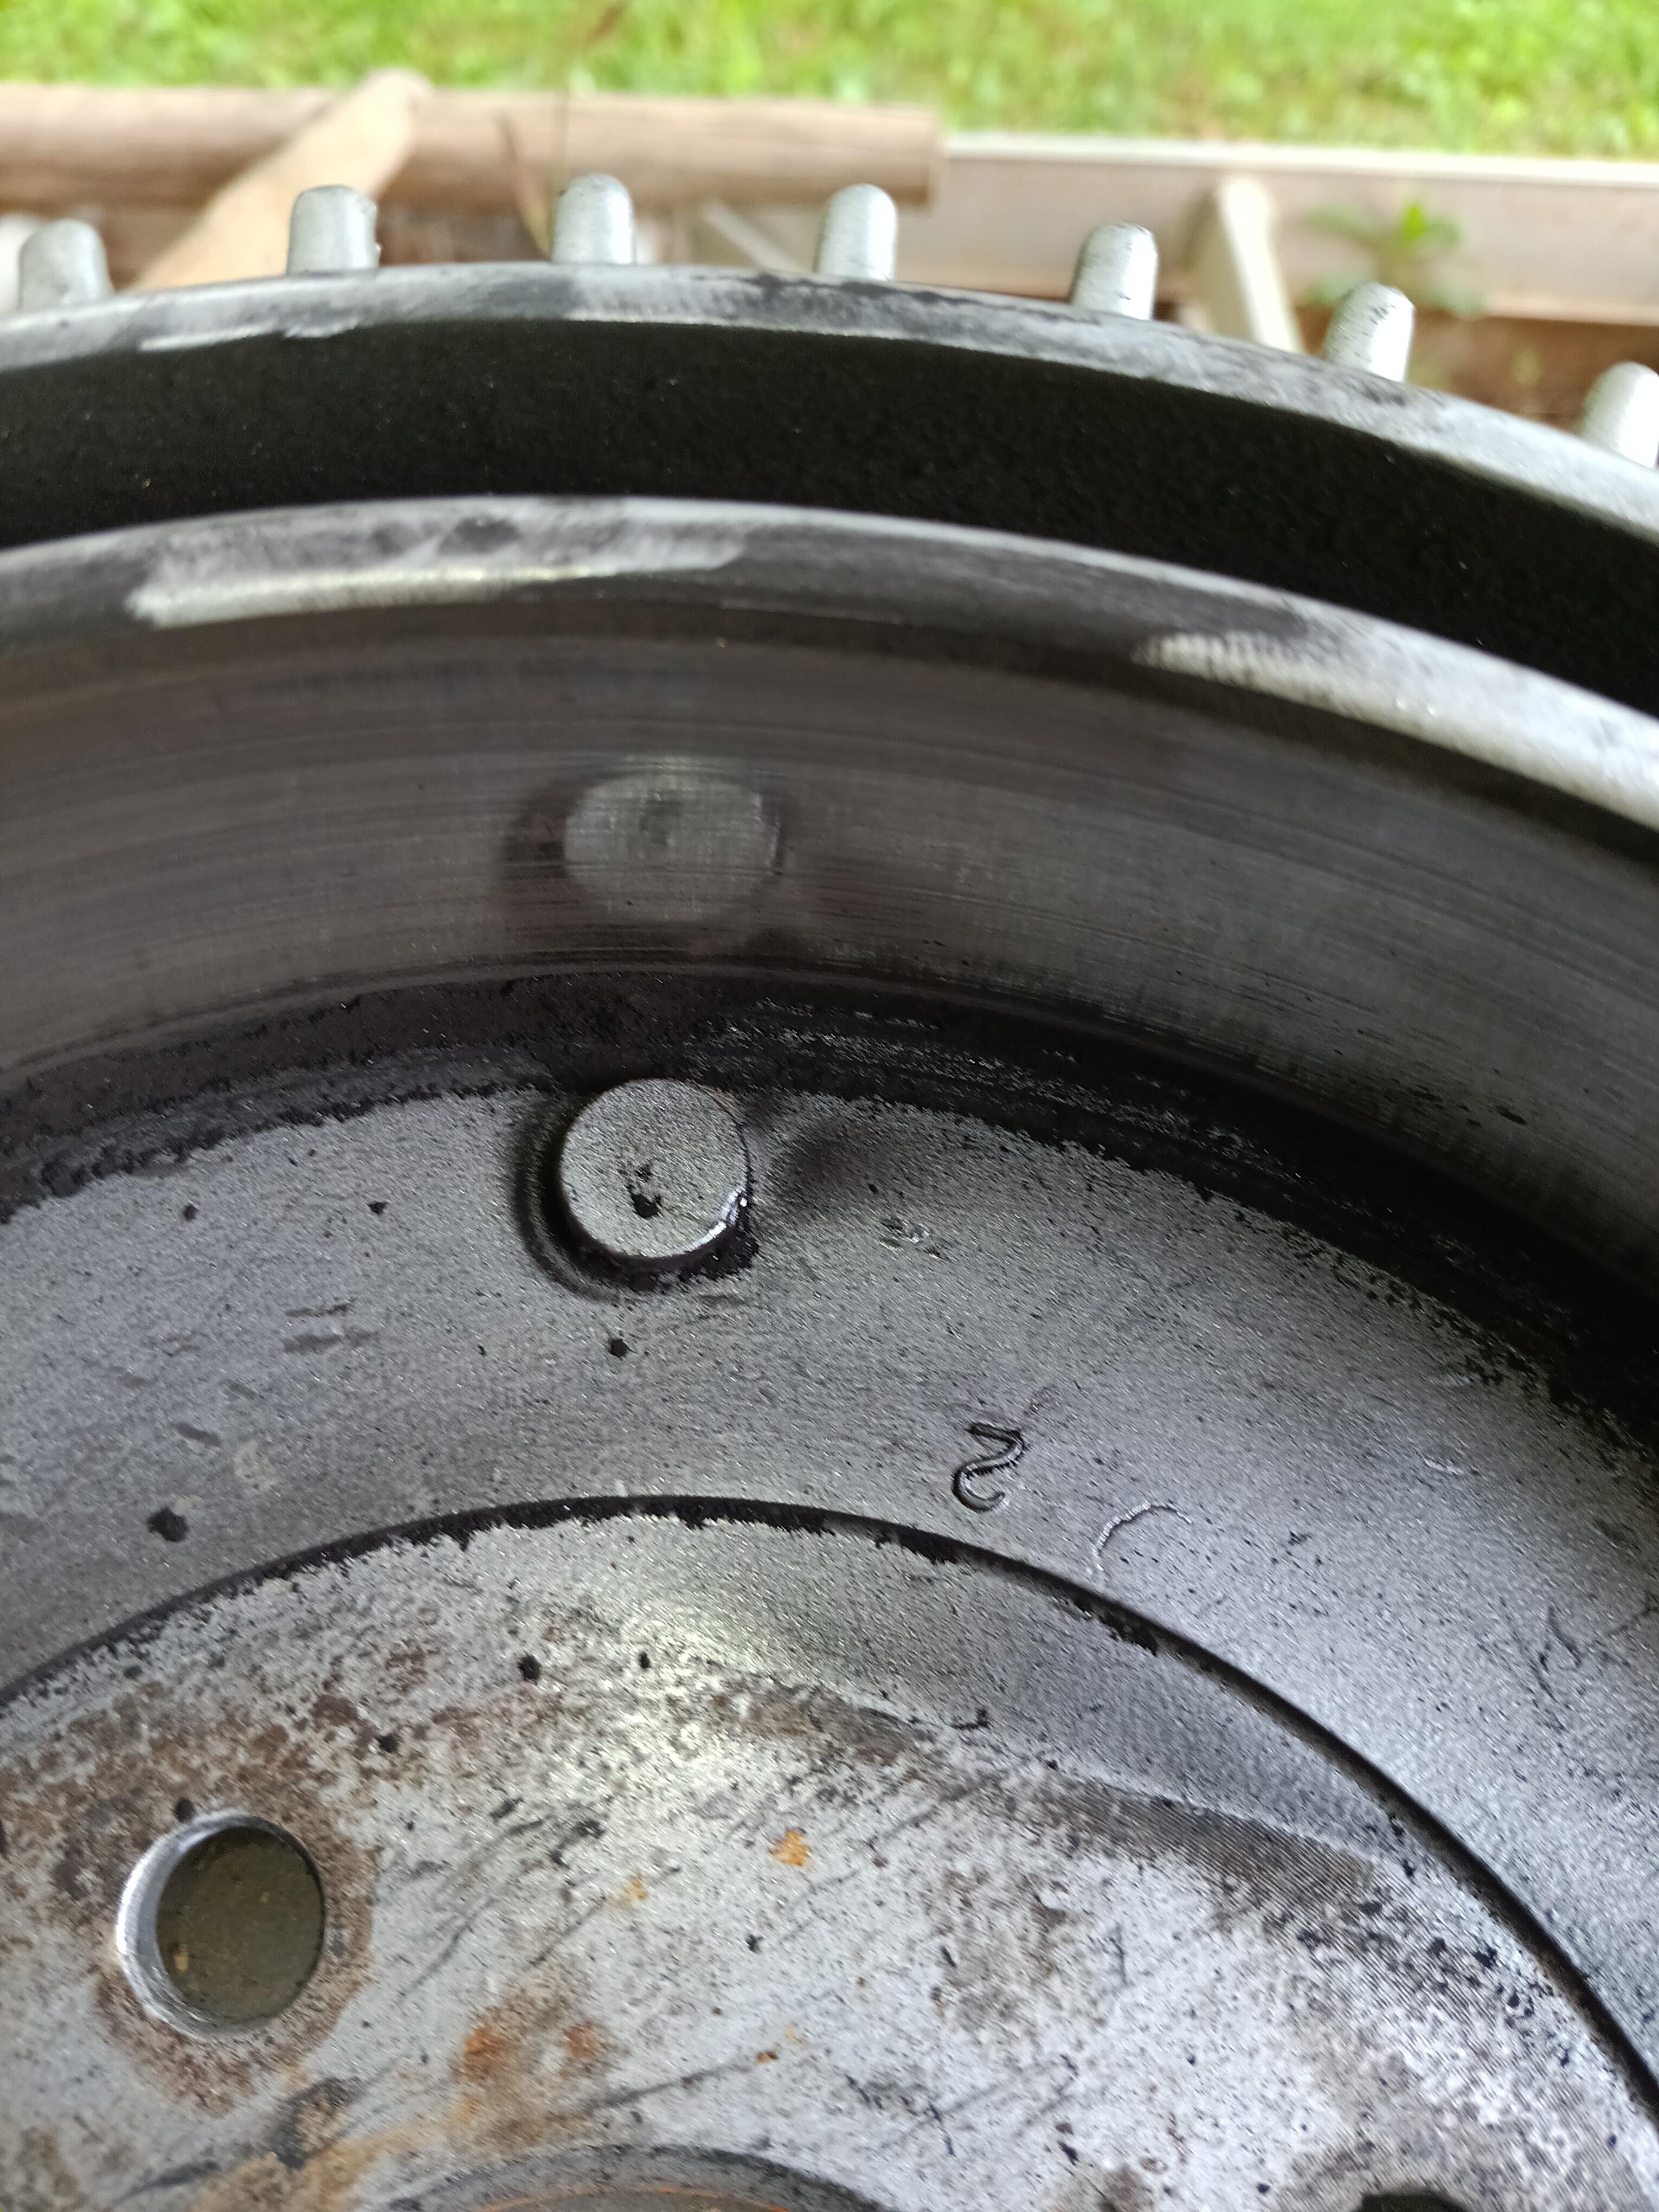
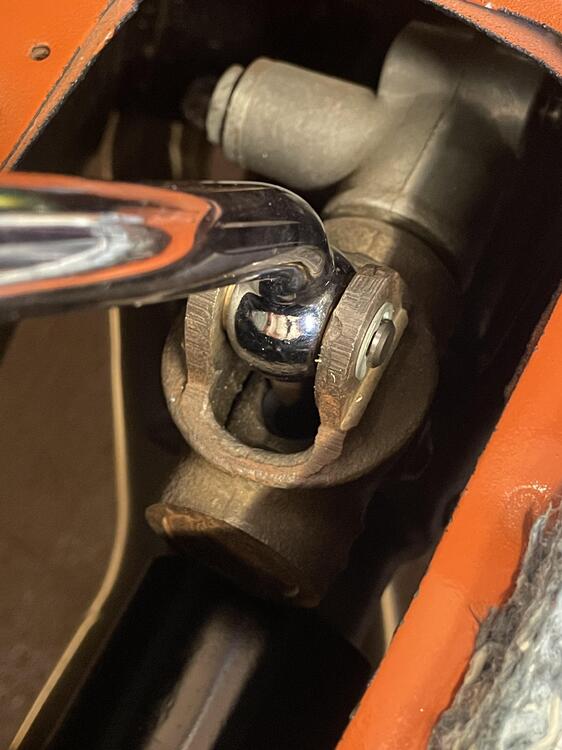
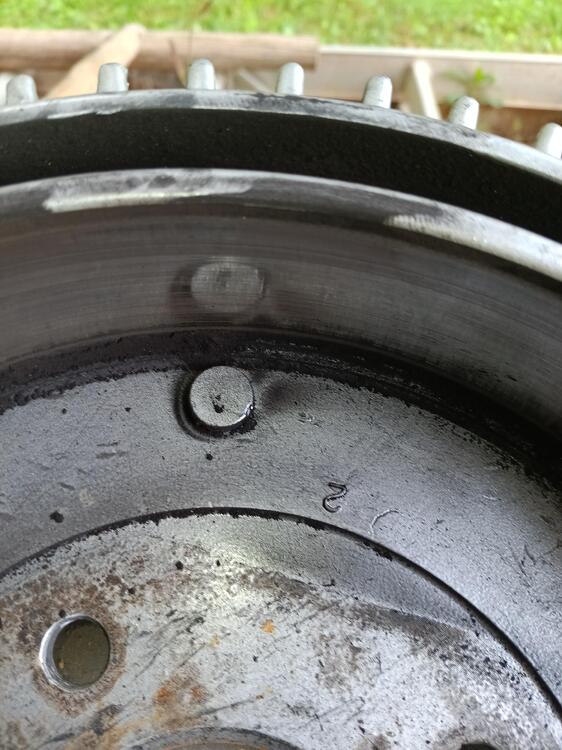
Your propeller shaft (Nissan word) has the wrong bolts. They should be "D" head bolts that seat against the inner yoke surface. You can see the flat in the picture. The bolts are still available, it looks like. https://www.carpartsmanual.com/datsun/Z-1969-1978/power-train/propeller-shaft The rod is called a compression rod. It stops the control arm from moving back on braking. Some people call it the TC rod since it is also in tension under reverse braking. Nissan started staking the propeller shaft u-joints in 1974 I think. When the "big body" came around. You can see the stake impressions in your picture. Just some minor details...
-
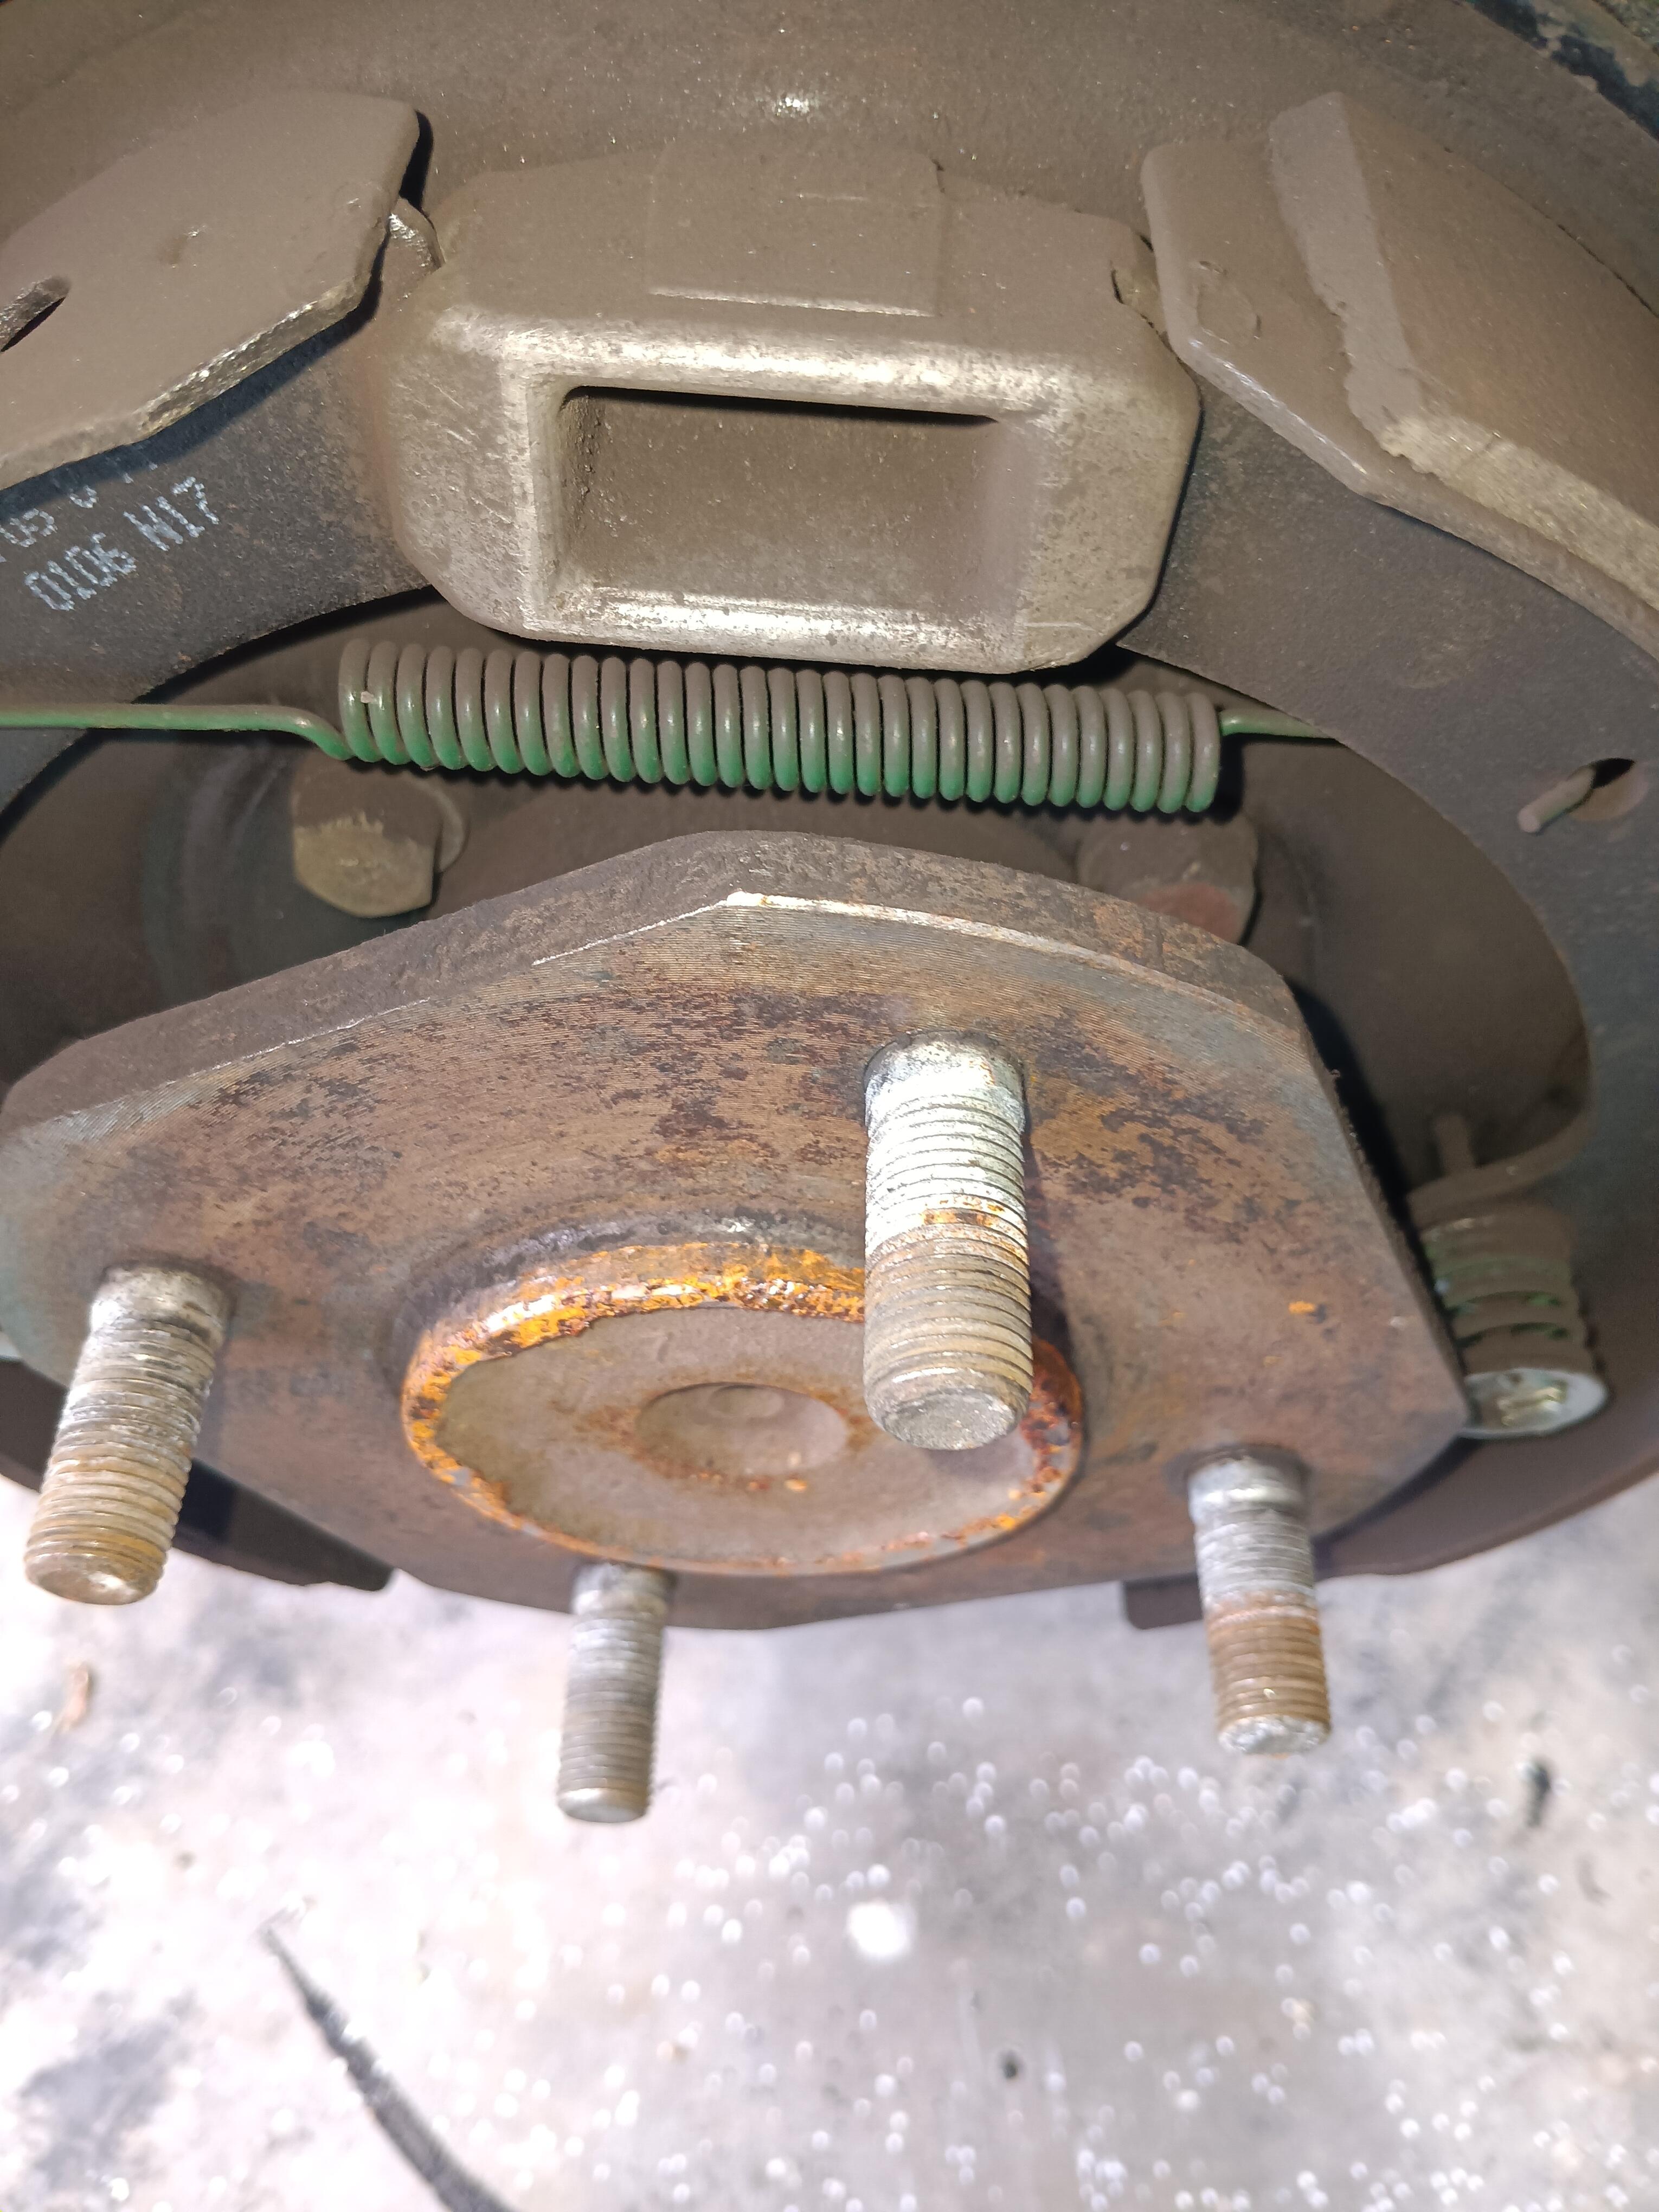
I have a clicking sound coming from the right rear wheel / axle / brake when I am backing up...especially when I pull out of the garage in the morning. My initial thoughts focused on the universal joints, then the rear wheel bearing, but looking at the inside of the drum, there is a slight indentation in the round plug seen in the pics. The plug is about 2mm proud of the inner face of the drum and there are shiny tracks on the edges of the hub. I have to assume I have found the source as there is no bearing noise when I rotate the hub...and no play either...same for the U-joints which are new. I am also getting a slight rumble out of the area in question. Any thoughts...?

-
Your diff mount looks in pretty bad shape. But it usually causes a clunk when shifting, not a constant noise while coasting. The play in the driveshaft (propeller shaft) is normal for the diff, if the tranmsission is in neutral. Can't tell if the diff gears are stopping the movement or the transmission. Don't forget the other two drive shafts. Four more u-joints.
-
I have a 12/70 car that is having a serious rear brake issue. Here is the background. I have an early 2/71 parts car (still lots of Series 1 pieces) that I removed the suspension from, had sandblasted and then powder coated. As I removed suspension pieces from the12/70, I replaced with the refreshed pieces and torques to spec. At the same time, I rebuilt the halfshafts, replaced and greased the u-joints, replaced and greased all bushings, replaced shocks and springs (Koni yellows and Eibach springs), replaced all bearings, and packed the hubs with fresh grease. The last piece of the puzzle are the rear brakes. I replaced the pads, added rubber new brake lines, bled the system. and put the original aluminum drums back on. I did not replace the cylinders as the old ones looks OK and are prohibitive to replace unless I swap lines and go over to the 73 ones. I also did not replace either the master cylinder or rebuild the booster. I ran the car for a block and heard the most god-awful grinding noise. I bought it back home and parked it. The drums had a hard time coming off (each time actually). The E-brake also will not hold. Today I replaced the drums with new steel ones, and worked the e-brake to self adjust, I seemed to work for a bit (always more than 4 clicks) but then did not. I ran the car and the noise was just as awful. Even the neighbors noticed it! I ran it less than a block and brought it home. It sounded like metal on metal grinding. I only get the noise the when the wheel has weight on it and is going forward. In reverse, or when the wheel is spun while jacked up, there are no issues. Any advice for what to do next?
-
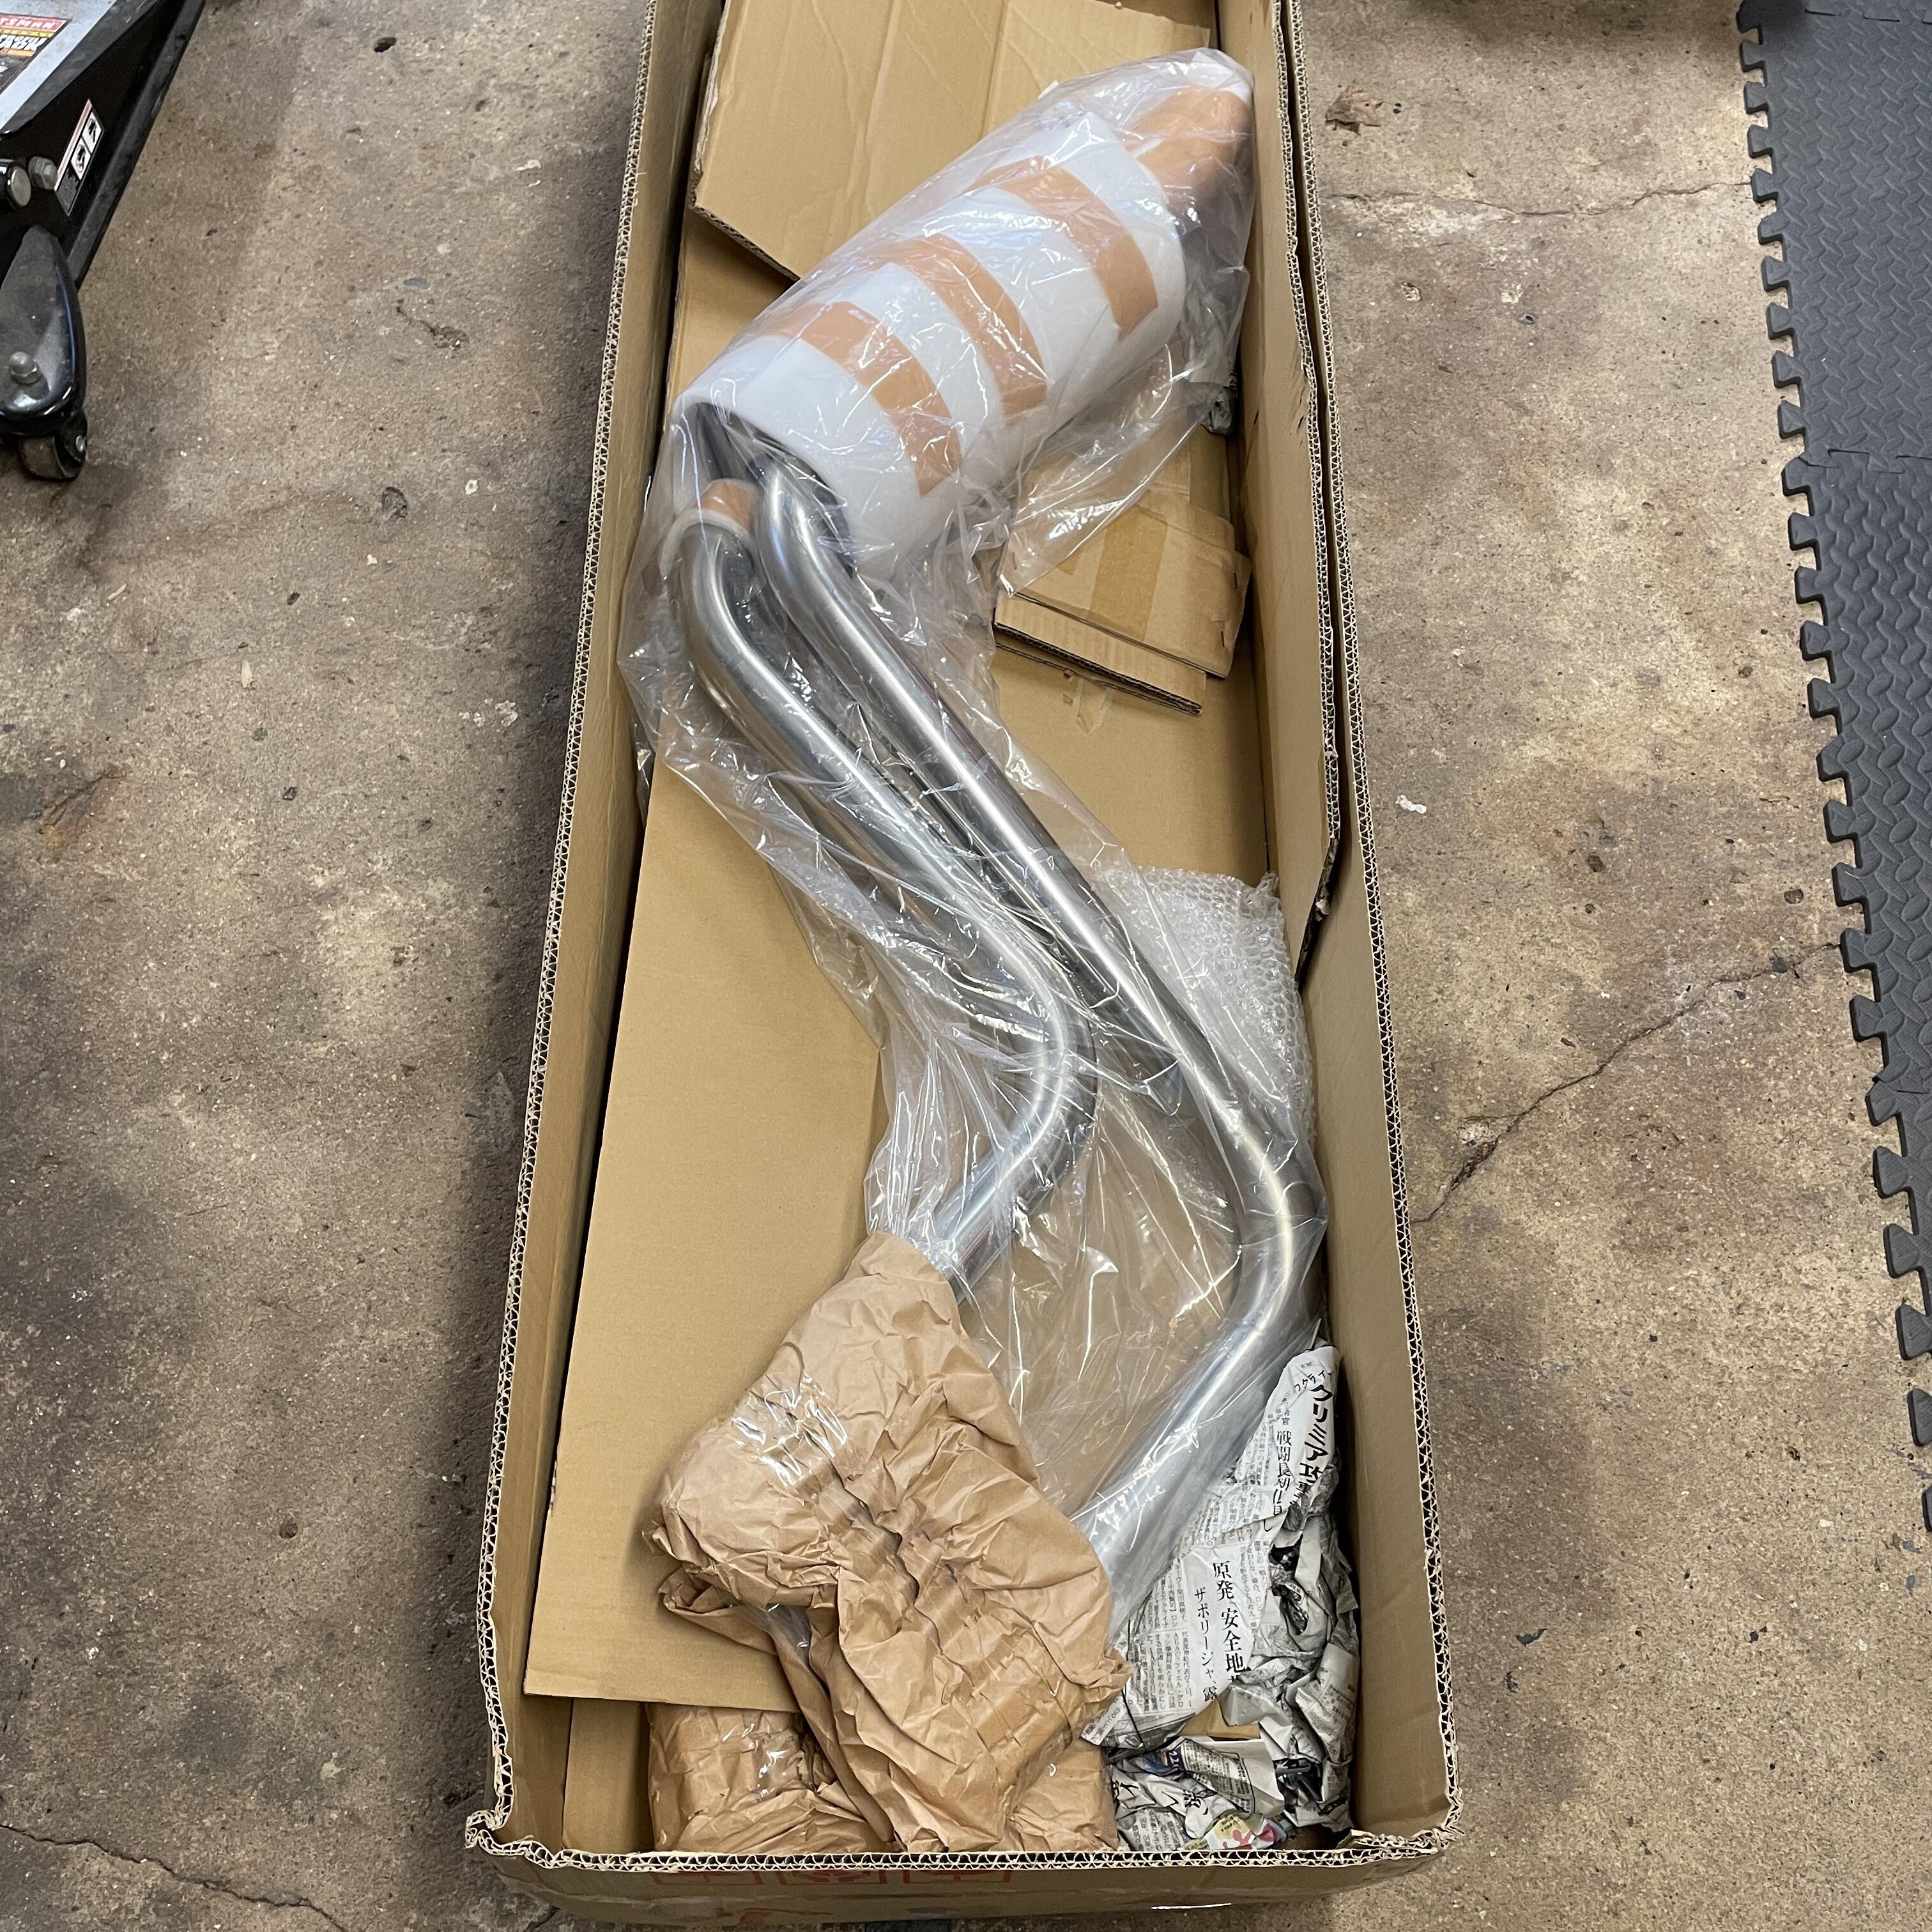
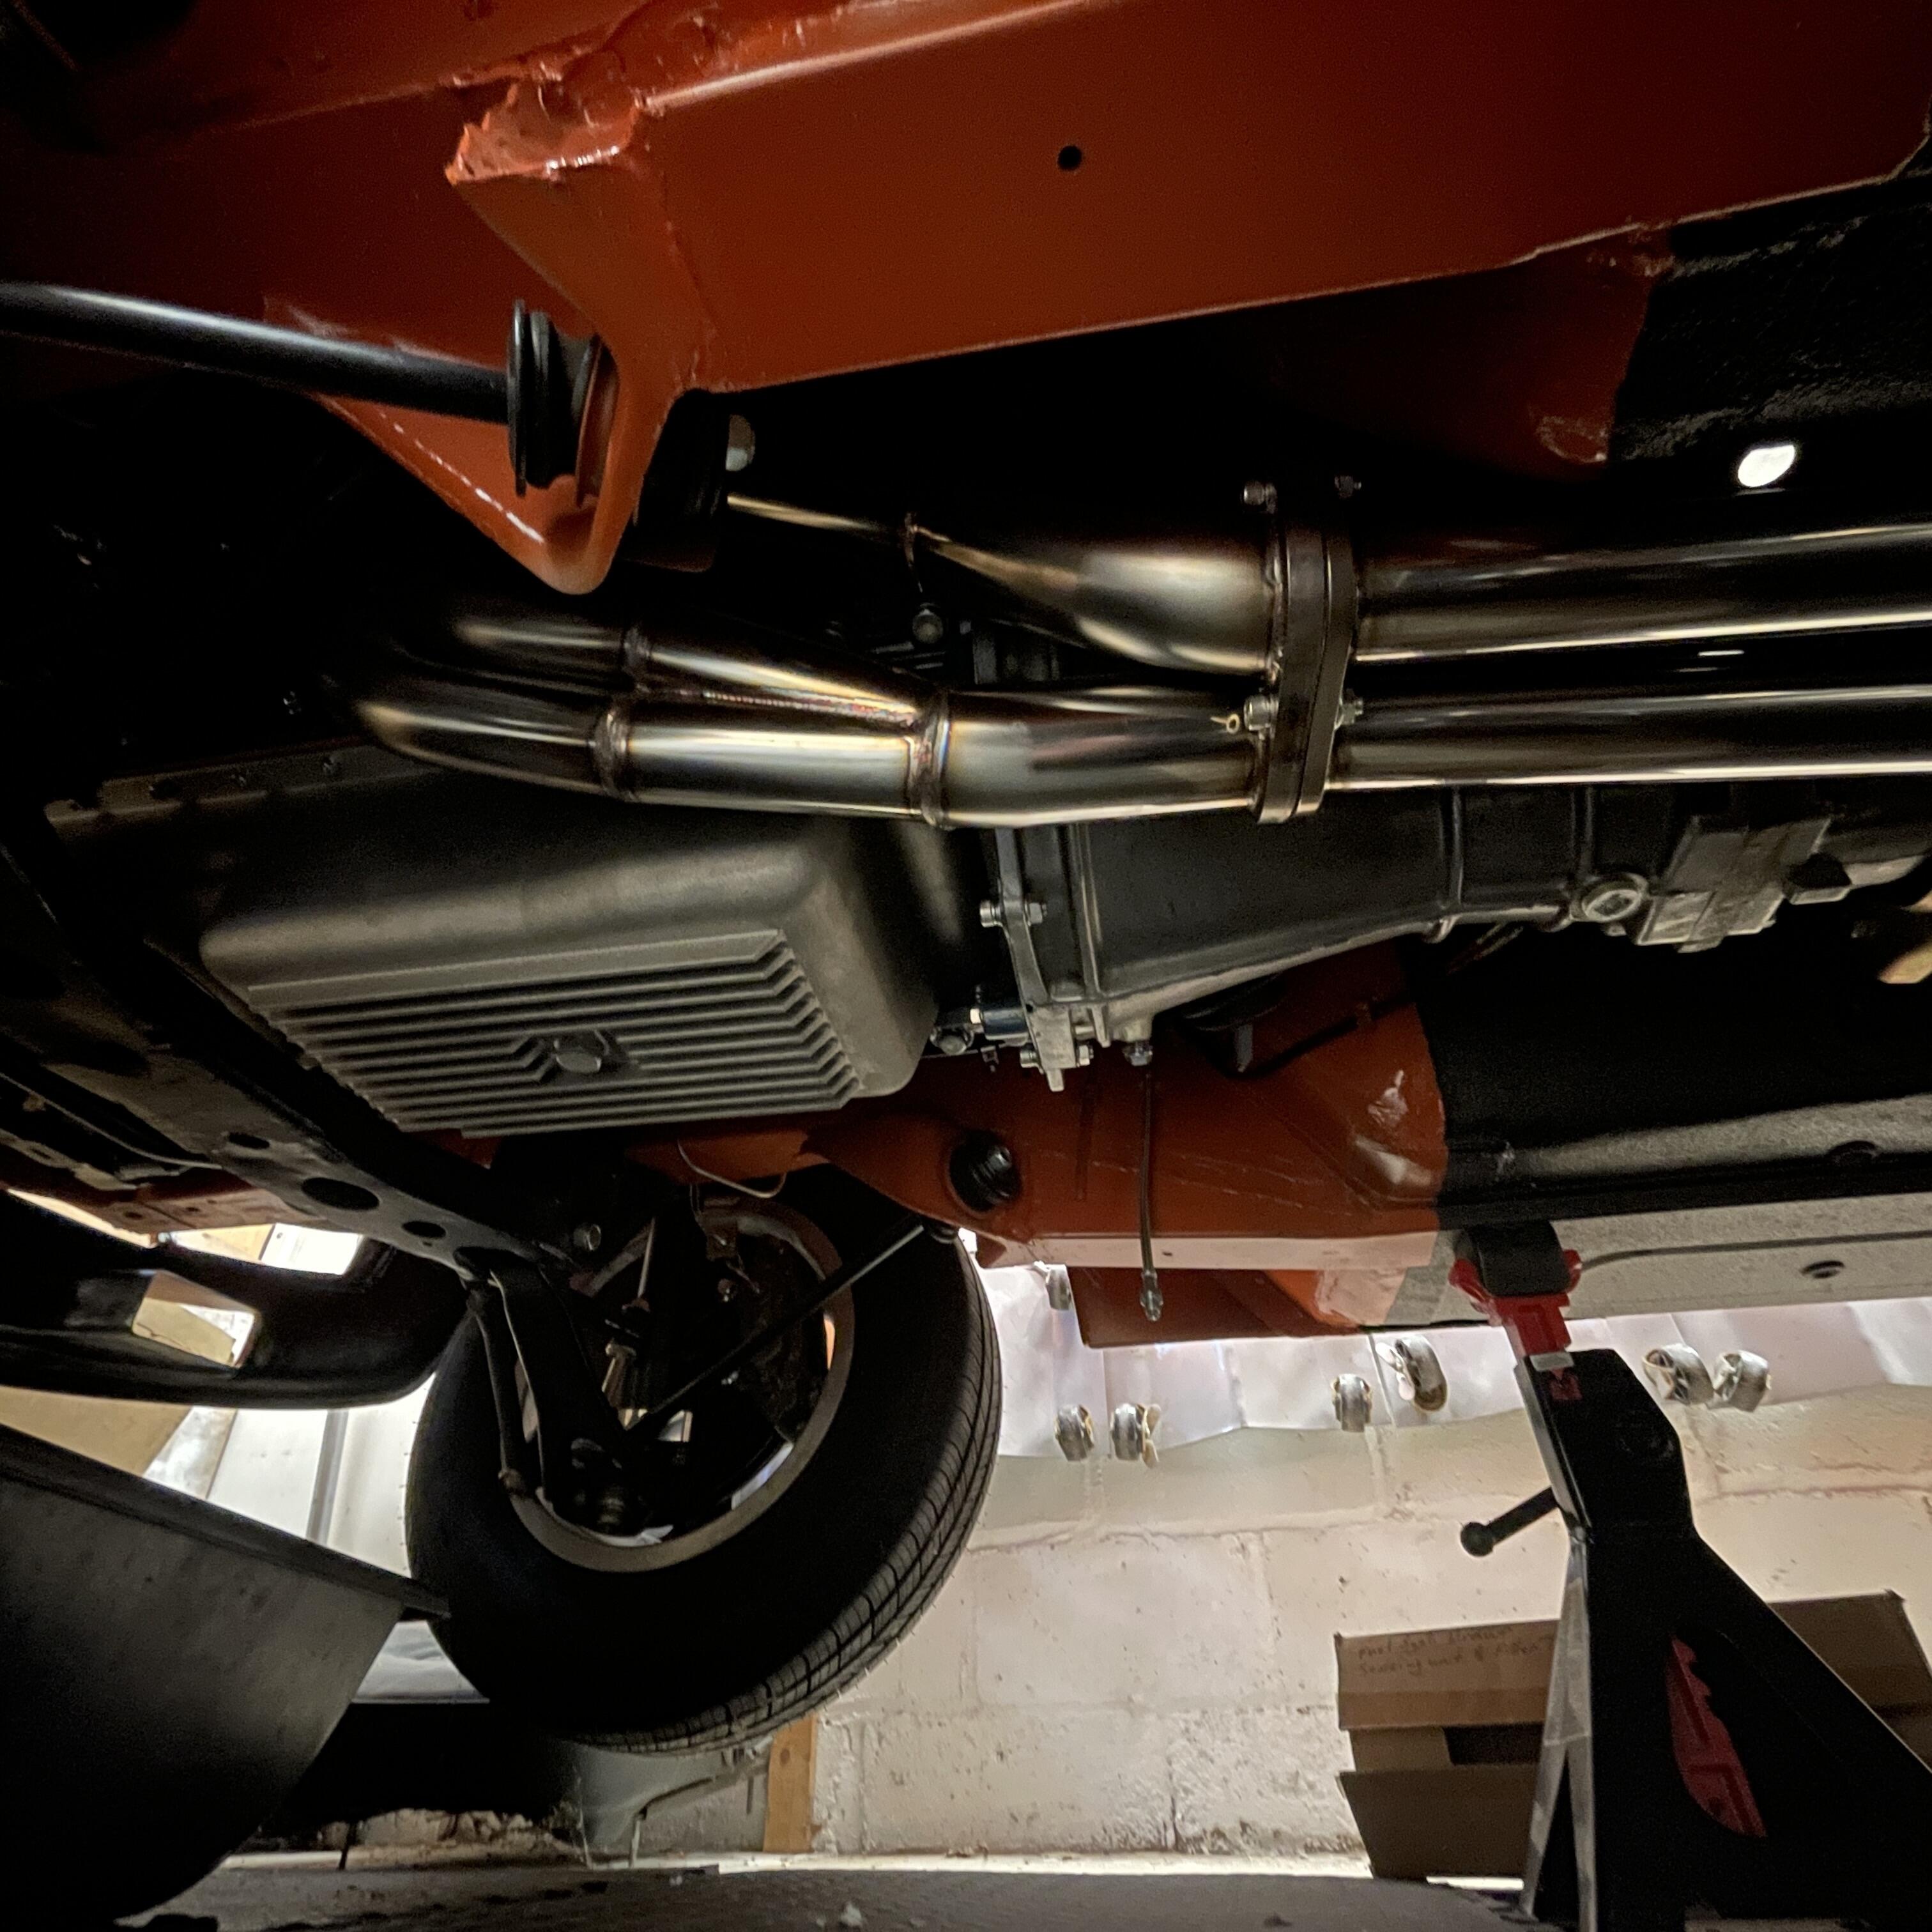
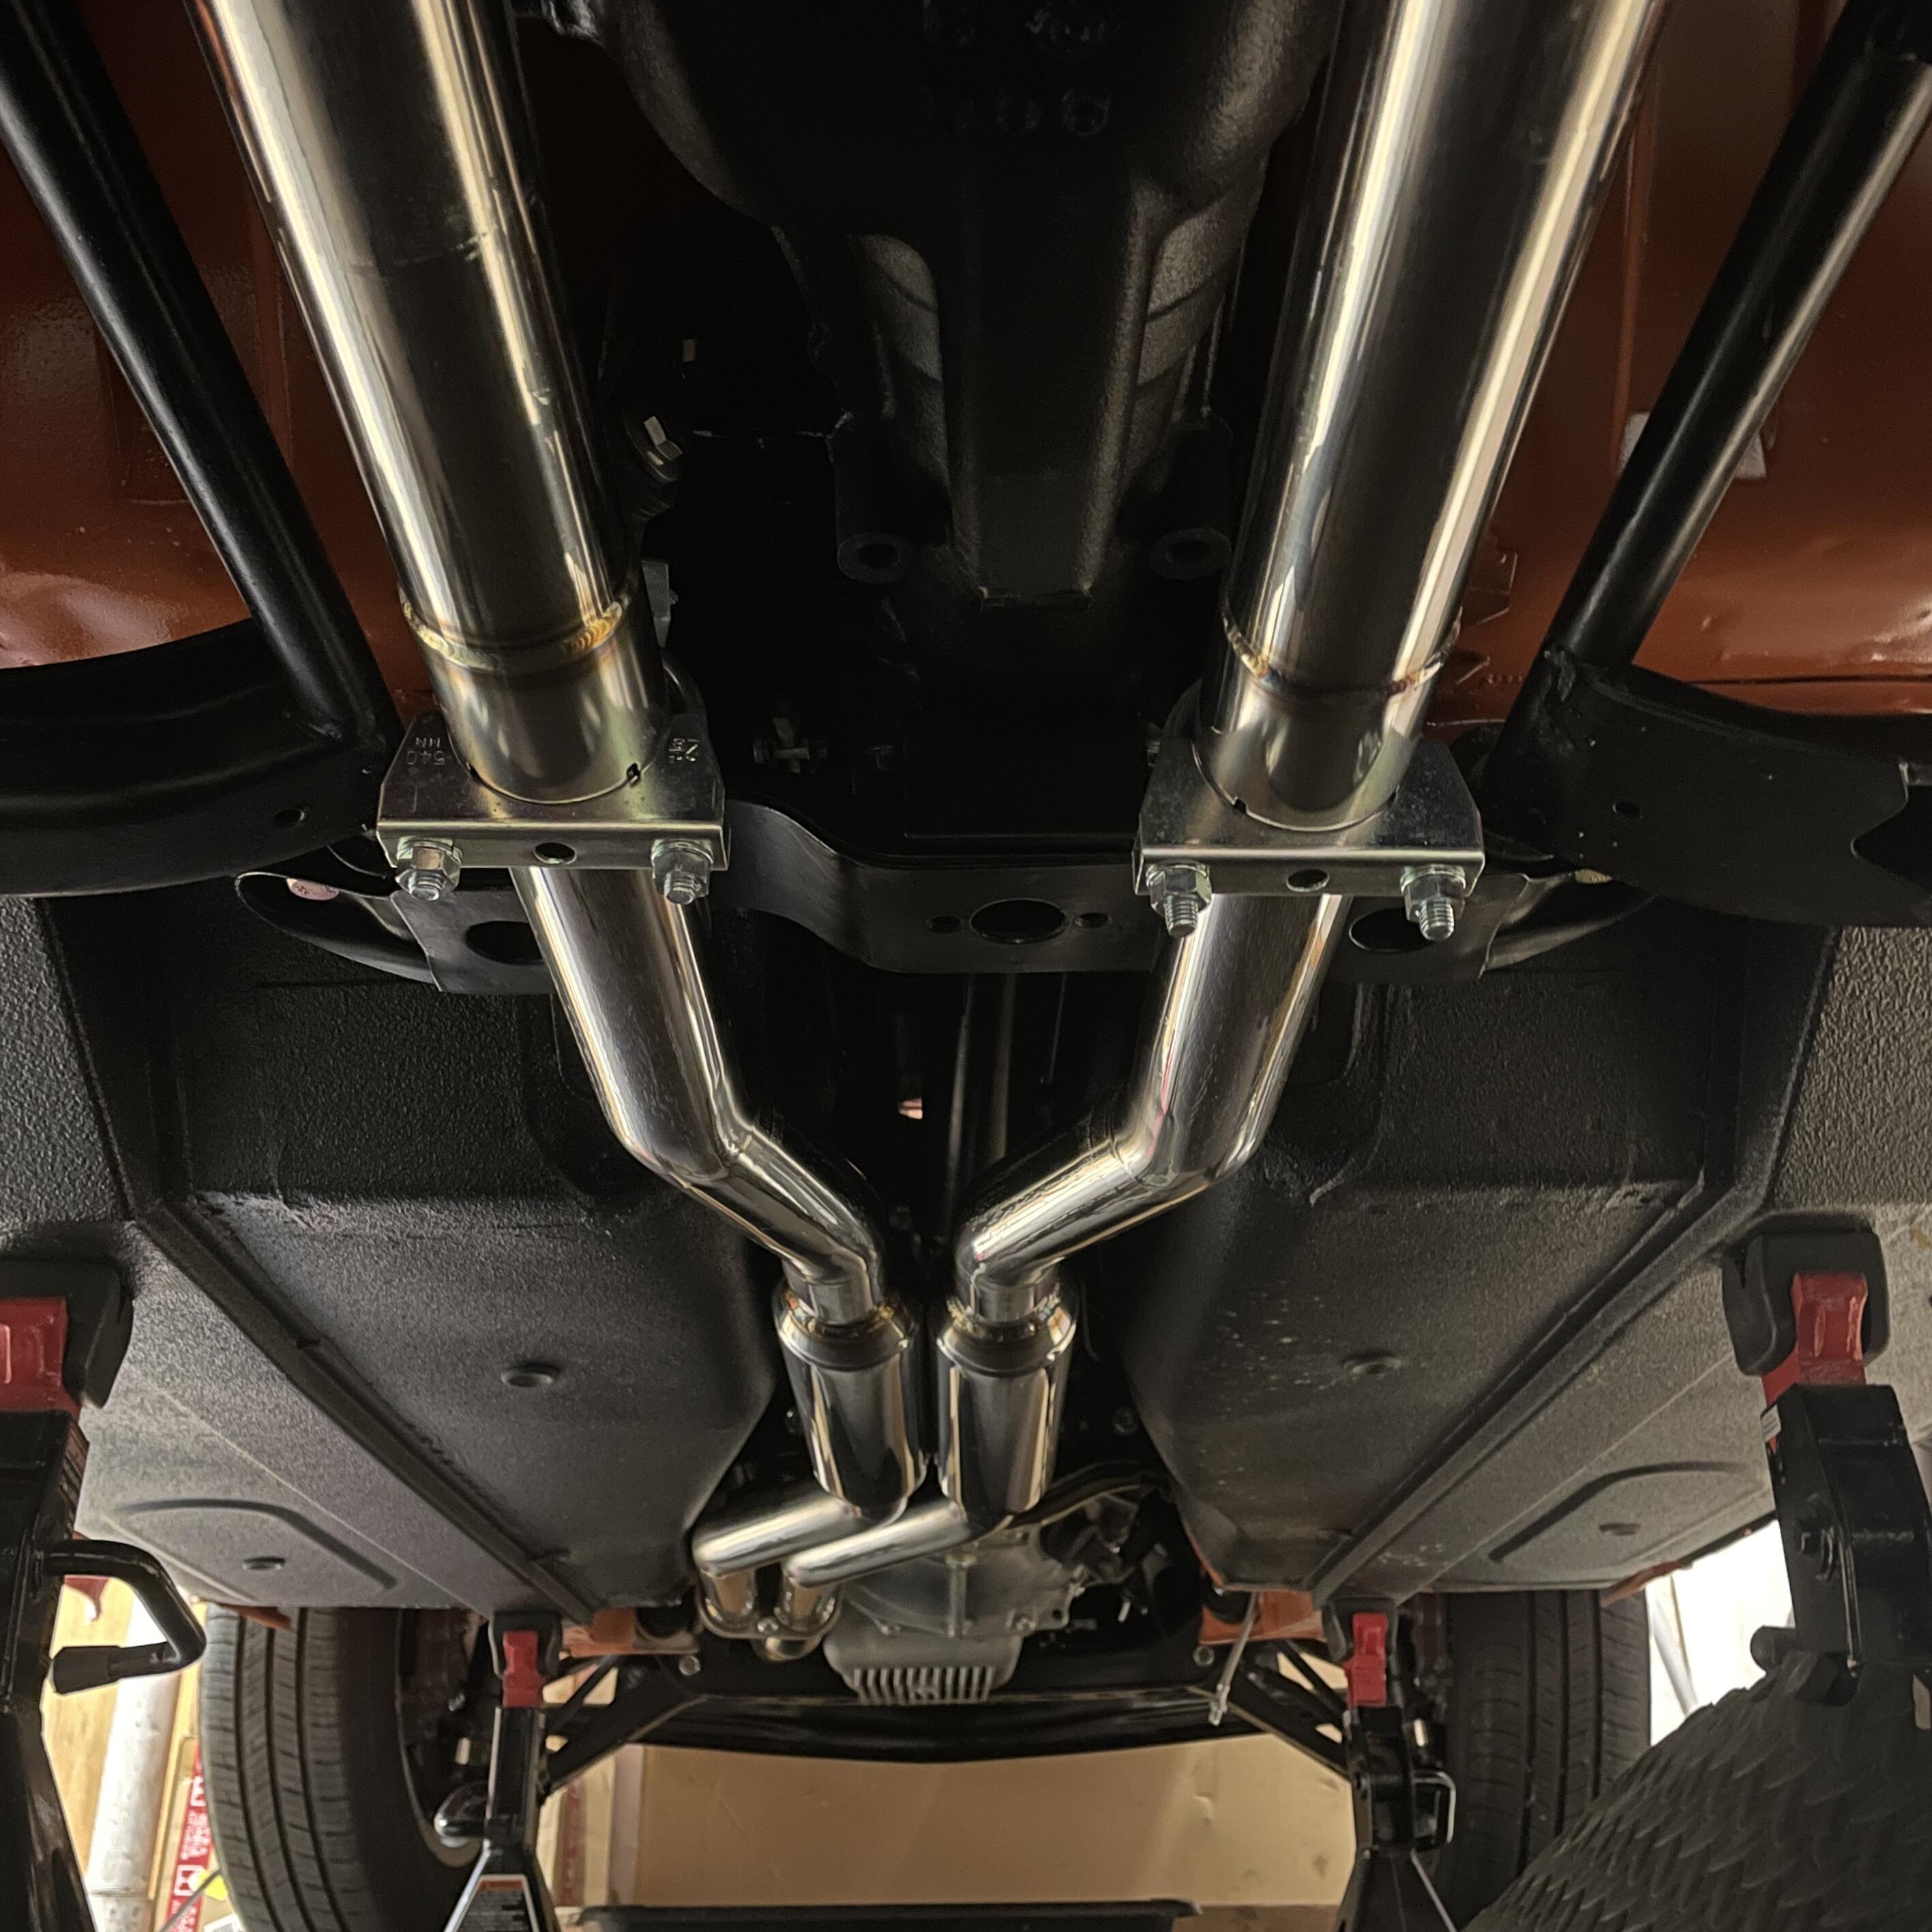
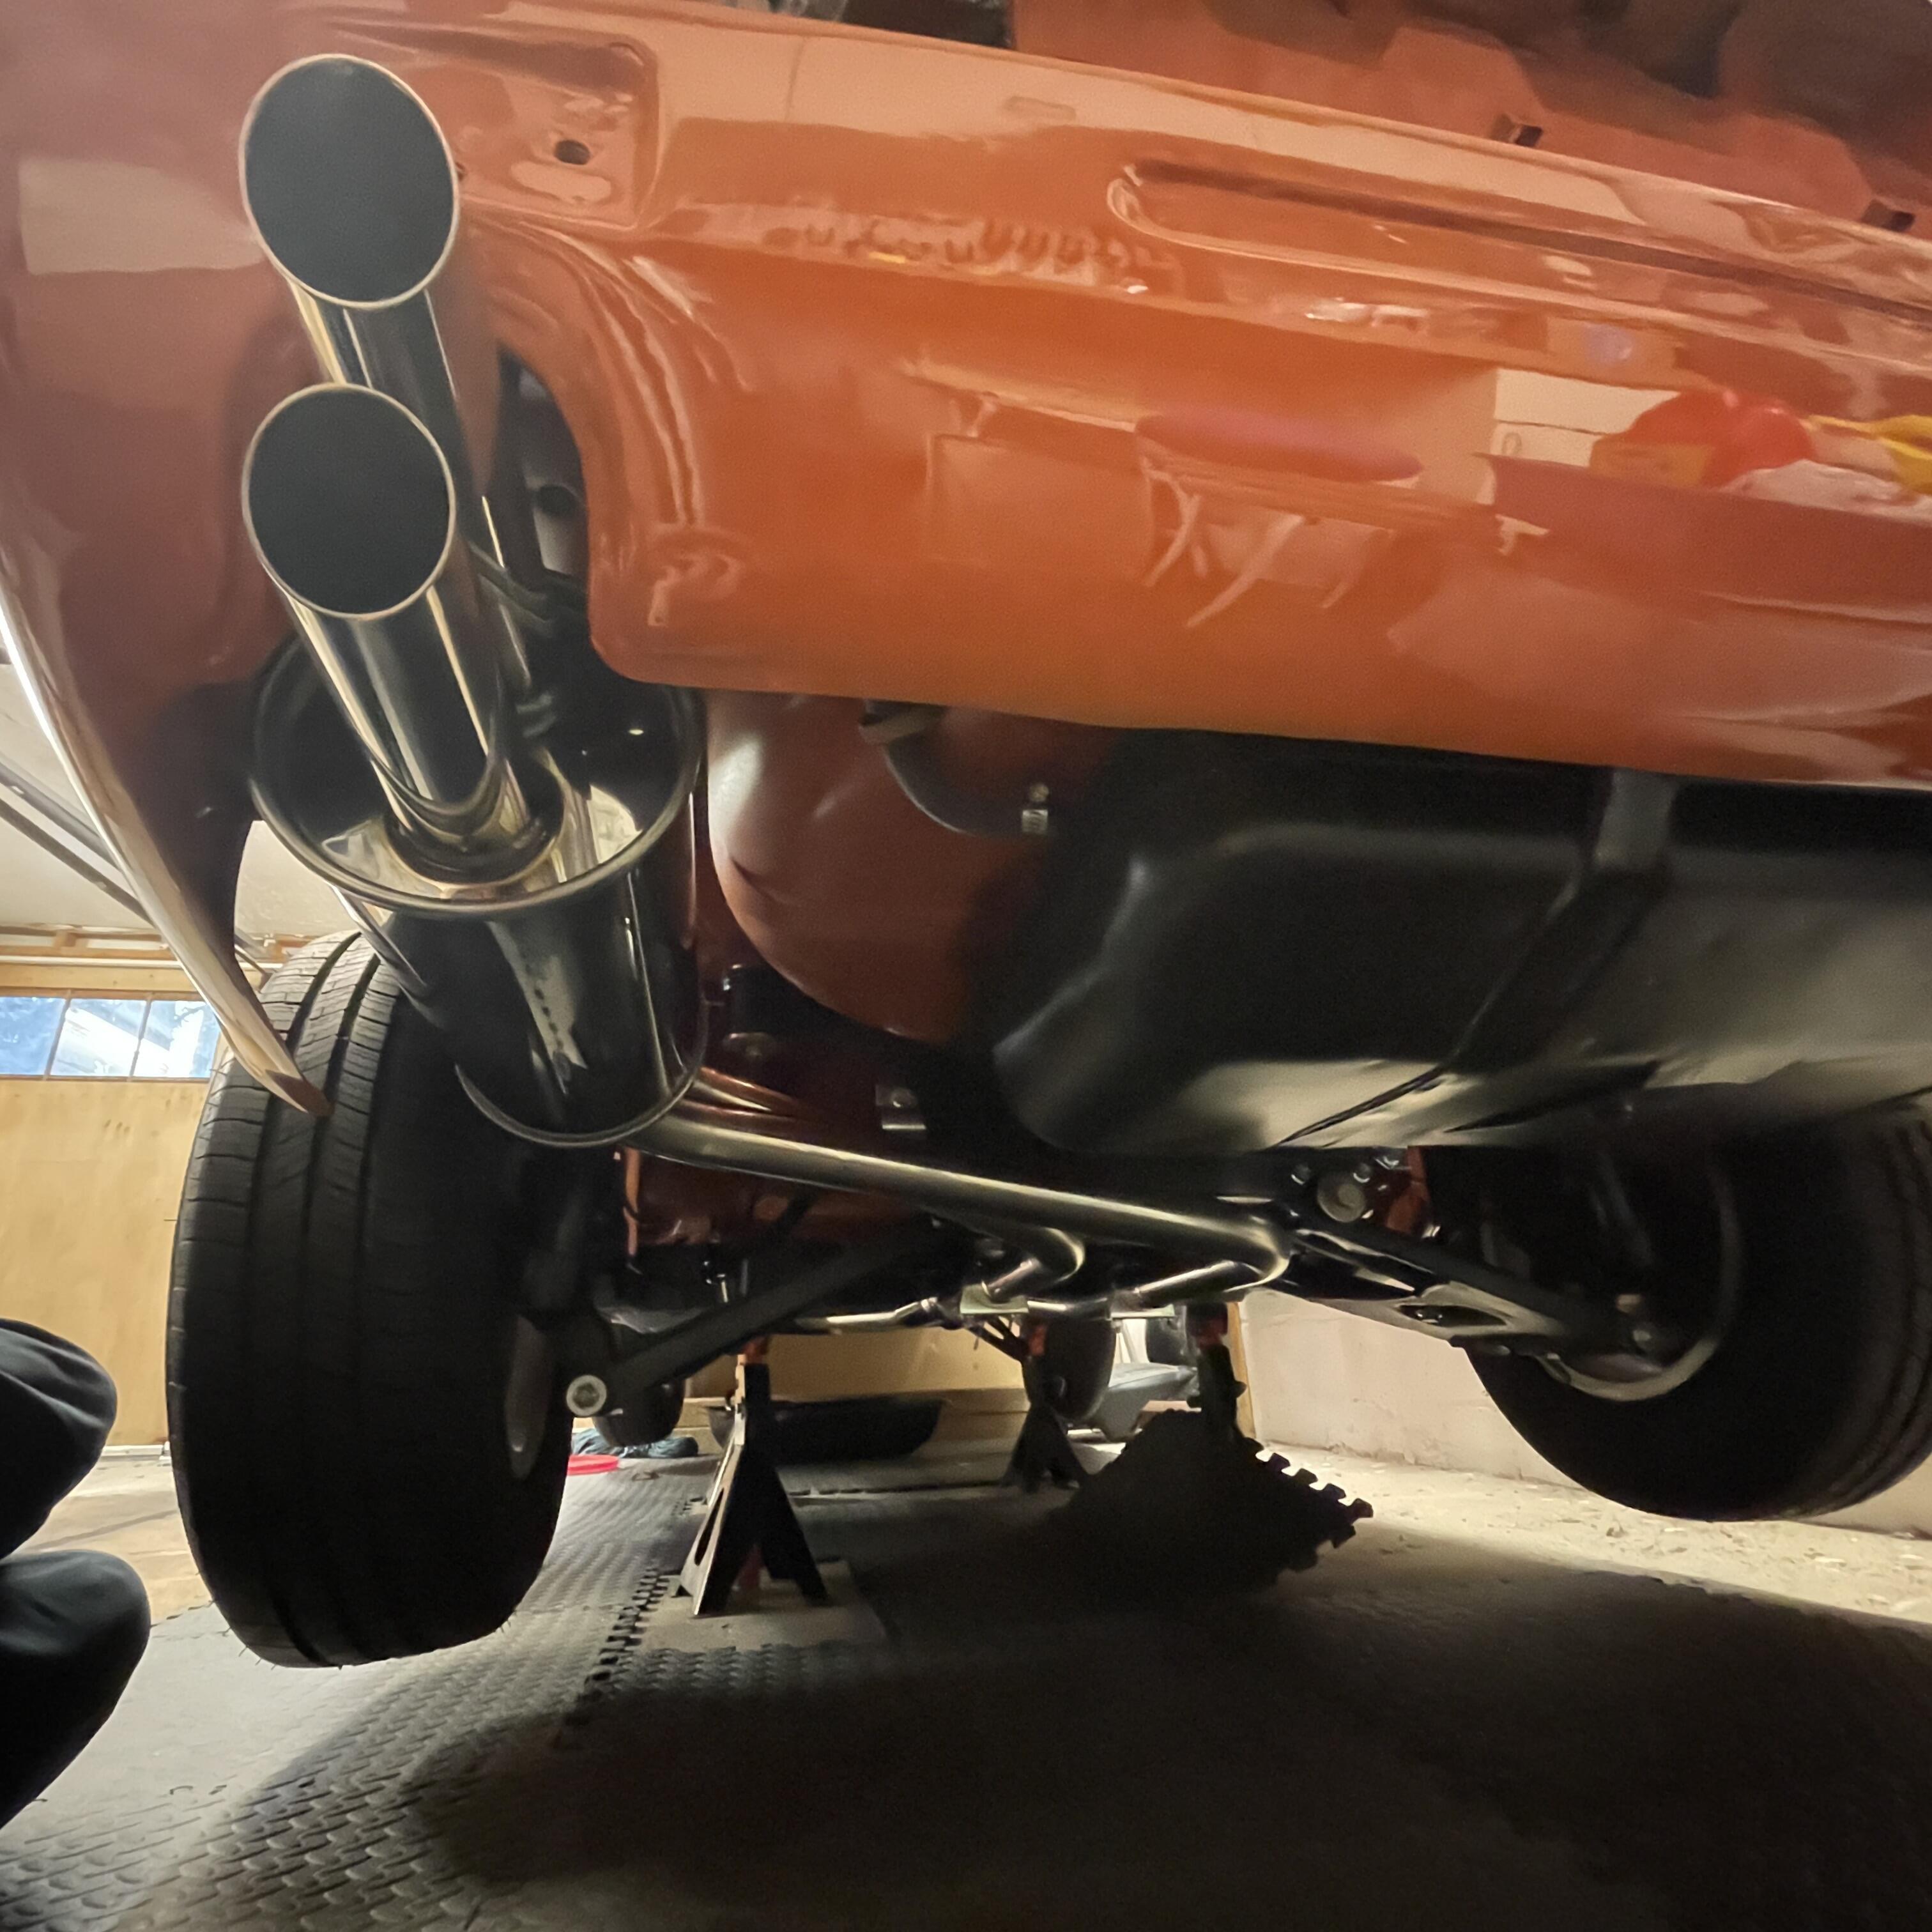
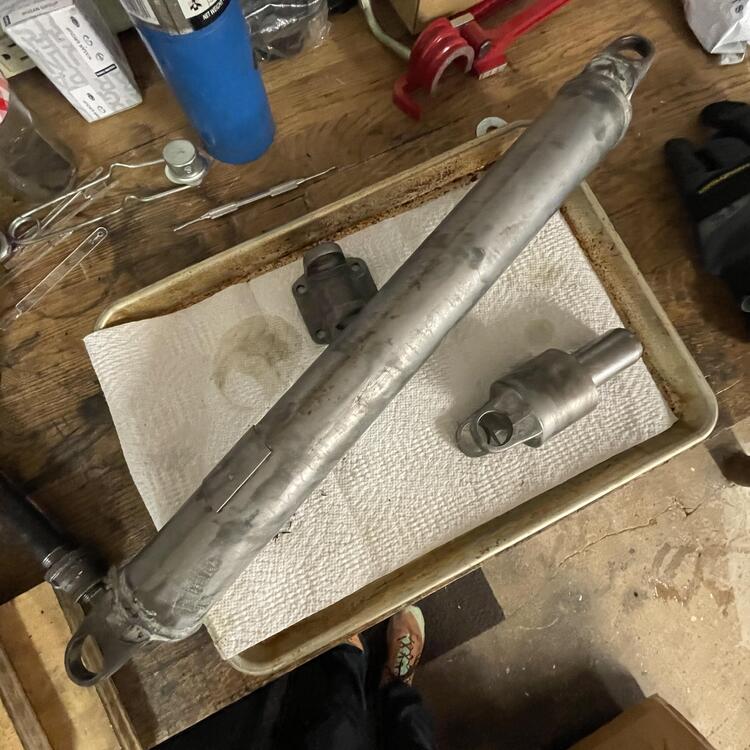
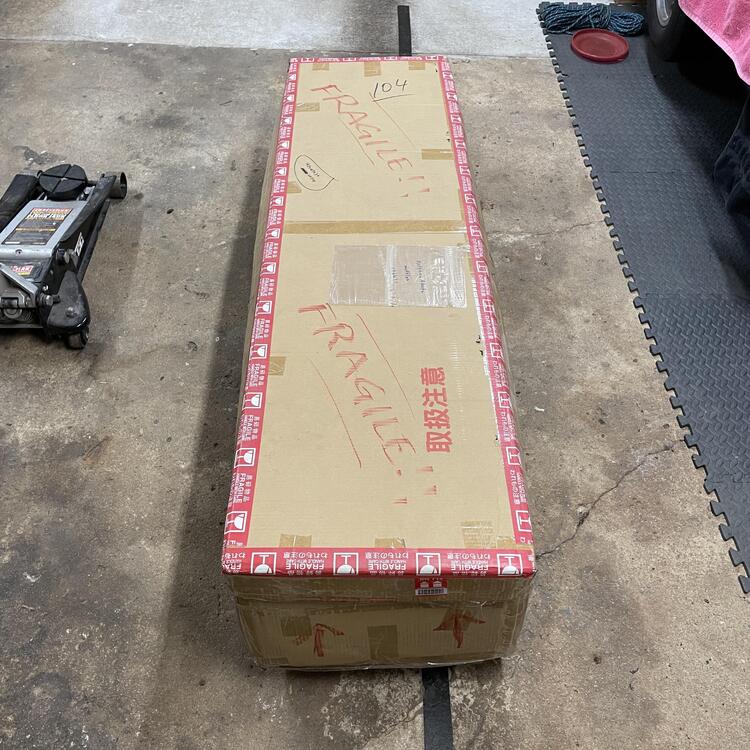
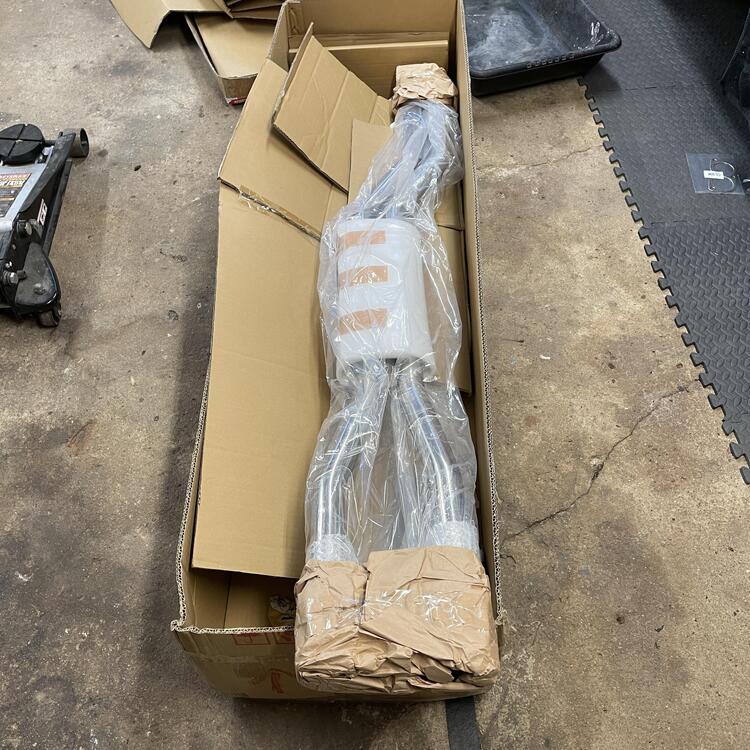
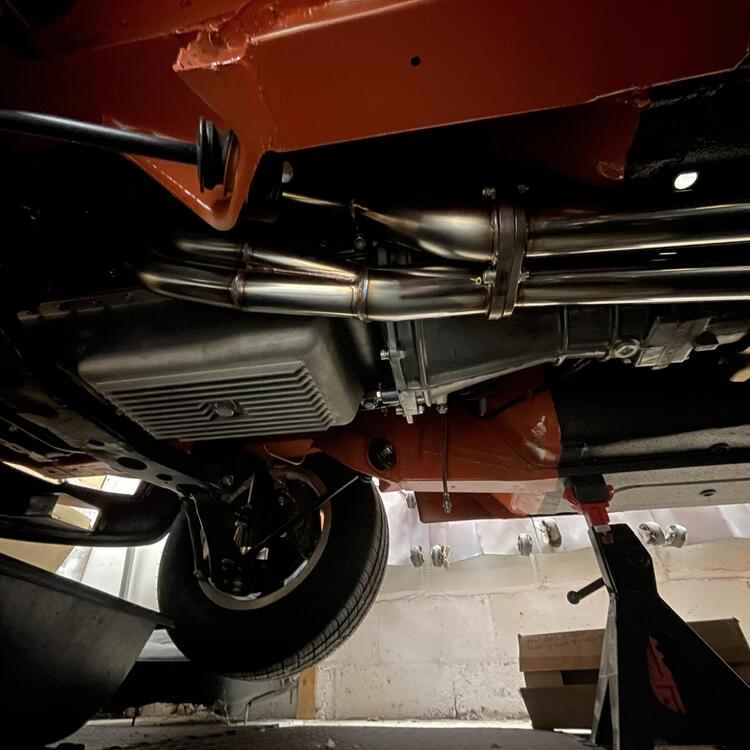
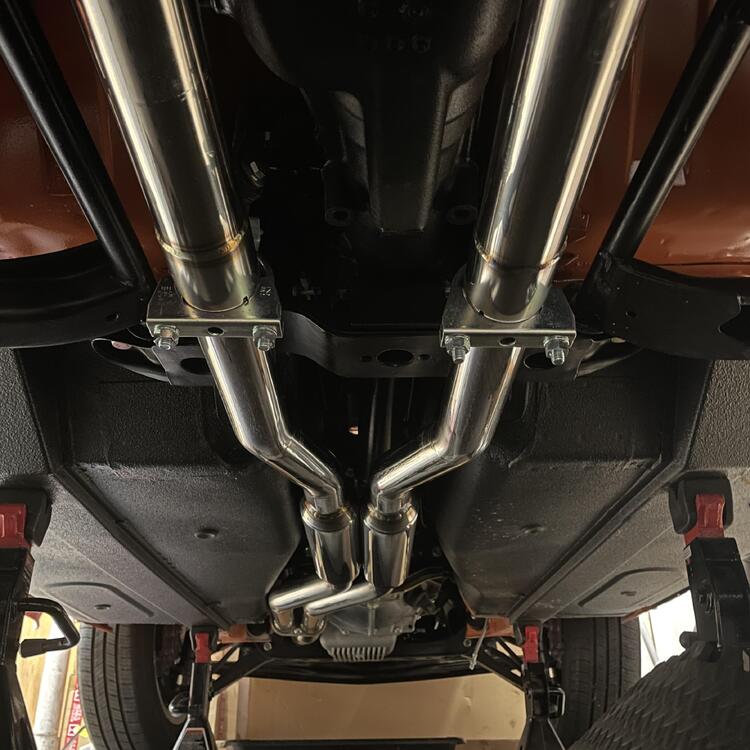
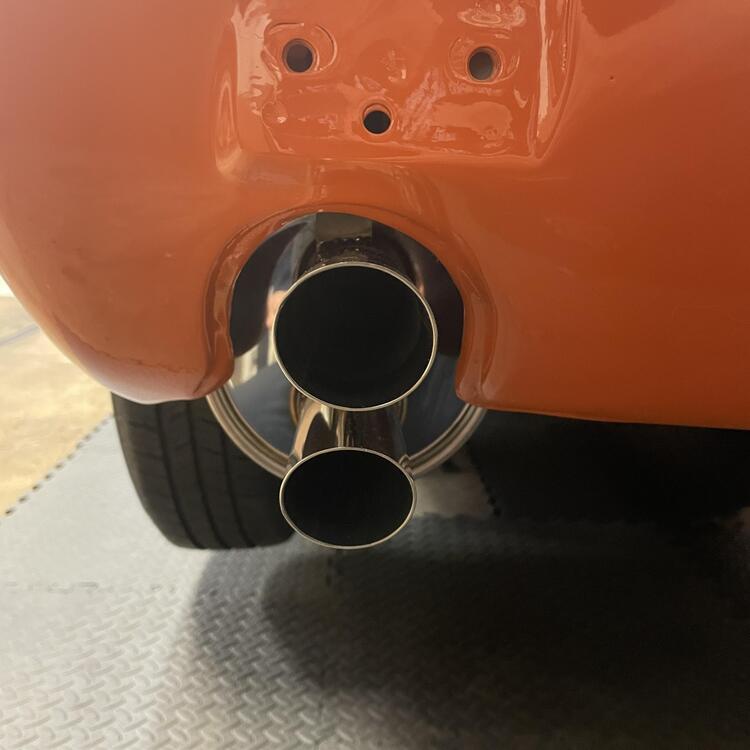
Couple of updates.. Other than the half shaft, the drive train is complete. Restoring the driveshaft was simple. I had read somewhere that the u-joints are NLA, but I found them in two seconds at Z Car Depot, so I don’t know what that’s about. *** I swapped the flange from my Datsun diff and put it on the Subaru way back, so it went right in. Hanging the rest of the Spirit Garage exhaust system really felt like reaching a summit. Maybe it’s because now everything I need to do start the car is in the engine bay, which feels more doable conceptually. The system went in really easily except for a few minor things: The hanger tab in front of the muffler is about an inch too far forward, so I had to put a bolster on the bolt to take up the slack. I don’t love how it looks so I plan to get two that are half as long. That should clean it up a little. The pipes hang a little low at the differential crossmember. I had expected them to tuck tight up into the relief on either side of the, but if I lift it any higher it hits the differential. That’s a little bit of a bummer, but it’s similar to what I’ve seen on some others. Also, the exhaust tips are a little close to the rear valance. I could get different hangers, but I think it will be okay. Still plenty of time to think about that. For hangers I opted for some universal pieces from Walker Emissions (36273 and 36274) that I just cut to an appropriate length. So now I just need some stainless clamps and some acorn nuts to protect them from random debris. Now back to the engine bay.


-
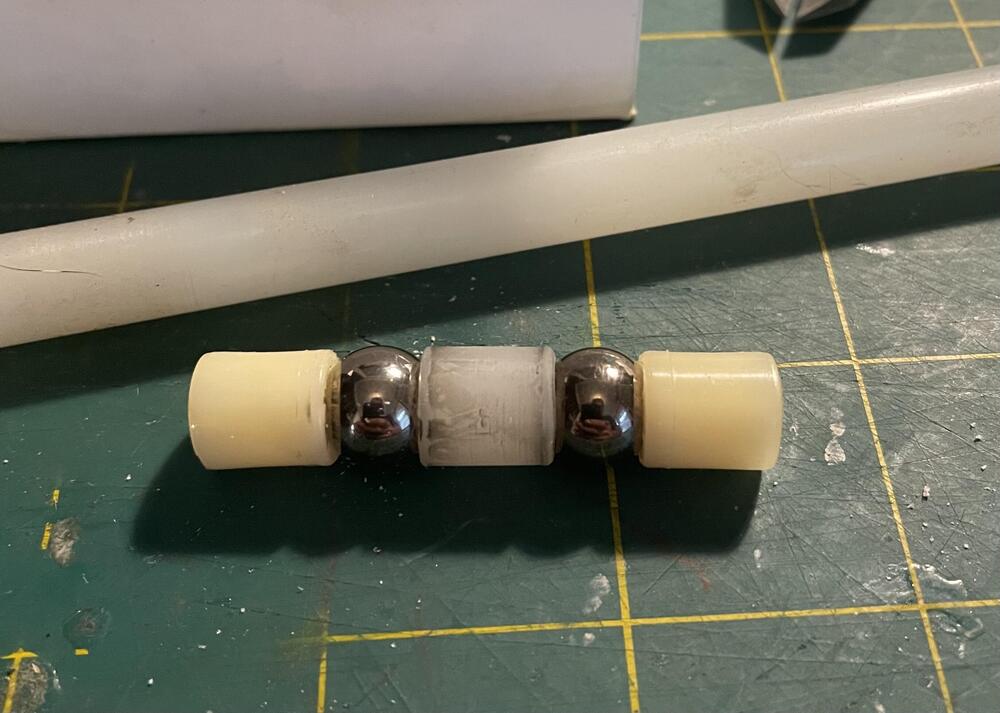
Run them through their range of motion and see how they feel. I had one from a parts car that had been rear-ended and it must have damaged the half shaft. It would bind in its travel. I took it apart but did not see any visible damage. On the u-joints, the factory joints have caps in the Zerk fitting holes. Remove cap, install Zerk, squirt grease. Check the seals.
-
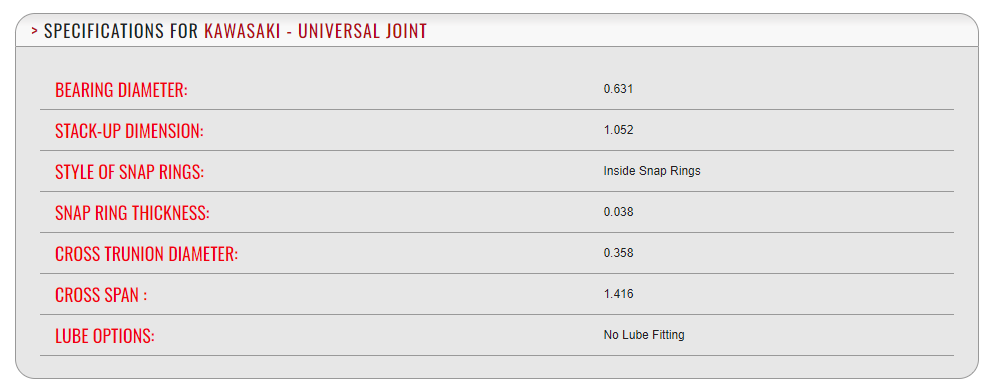
First the early 16mm x 40mm style with C clips Previously I could find them using the ATV700 part number. These come from this specific Kawasaki ATV Kawasaki Bayou 300 front driveshaft u-joint set 1989 - 2004 Kawasaki OEM part number : 49050-1055 Once I knew this I was able to google that part number and found plenty of suppliers BTW, this is all confirmed through a local Kawasaki ATV store here in Calgary. He can get them for $37.99 CAD each. Ebay has them too. As does Amazon.ca, $46 each, 4 day delivery They mention the model # of the ATV, KLF300C They also mention it fits "Mule 2510 4x4 1993 - 1999" Ebay mentions there manufacturer is East Lake Axle and their part number is U201.02 And the really cool thing? All these U-joints have zerks..... And some specs from http://motormasterpowersports.com/index.php/product/detail/sku/ATV700 On the generic ATV700 part

-
I have been searching for u-joints for the steering shafts again, and my usual suppliers seem to having stock issues. I searched around in the threads for old links and sources and found a bit of a mess so after finding out tons of additional information about part numbers and such, I thought I would leave a single thread with as much information as I can I'll divide this into the two sizes of u-joints. The 16x40mm early un-staked type with the snap rings, the later 15x39mm ones that you have to deal with the stake and un-stake. Won't get into how-to in this thread, just sizes part numbers and companies etc
-
Not sure if you mentioned the Silvermine package in one of your threads (it's hard to to follow along when you start a new thread for each sub-project), but if it's one with adjustable control arms you could also widen the track to get clearance for the axles. That's what some people do. And, since I'm here, might as well say that the u-joint halfshafts are actually pretty strong, Lots of guys run them with high HP Chevy small blocks. The CV axle swap was a neat idea when people were using Nissan CV axles but I'm not so sure that aftermarket Trakmotive axles are better than Nissan u-joint halfshafts. Not trying to be a buzzkill, just pointing out the aftermarket problem. That is also something to keep in mind if you run the u-joint shafts for a while. New aftermarket u-joints are probably not better than used Nissan u-joints. Anyway, looks like fun.
-
Yes, on originally installed u-joints. The assembly is too small to have clearance for the zerk fittings, so after assembly and lubrication, the zerk is removed and a plug inserted. During routine service, remove the plug, install a zerk, grease the joint, remove the zerk and replace the plug.
-
It's a good time to grease the u-joints on your half shafts. There are small slotted plugs in the Zerk fitting holes.
-
You might look at the rear brakes, the diff, and the half shaft u-joints.
-
It might also be that they were putting in the extra effort to perfect the installation. "Blueprinting" the u-joint and shaft with extra care.
-
Yep - it sounds like you and I are both of the opinion that using snap ring thickness to adjust center line of the shaft with the axle outputs is not likely. Picking the right snap ring was probably done like you said. I was just pointing out that trunnions probably vary a bit as well.