CanTechZ
Free Member
-
Joined
-
Last visited
Everything posted by CanTechZ
-
 No problem, I will post here when it is available for download. Sadly it will be "Body & Chassis" only as I don't have a copy of the "Engine" volume. I picked the FSM locally from a craigslist ad a couple of years ago. It was advertised as a two volume 1972 set but when I checked with the seller he realized that it was actually two copies of the Body & Chassis Manual, one 1972 and one 1970 but no engine manual, so I'm still on the look out for a 1970 engine FSM volume. The good thing was I got both copies for $30 and he threw in a copy of "How to modify Datsun engines & chassis 510 610 240Z" by Bill Fisher and Bob Waar printed in 1973. Lots of great historical reading.
 -
I really don't see any issue with the integrity or honesty of @tse4me with regard to this potential sale, unless he actually backed out of an "accepted offer". His original wording regarding the price was "Looking to get 8-9K for it". To me this is not a fixed price and could be interpreted as "8-9K OBO" until a firm offer is accepted. But that's just me.
-
-
-
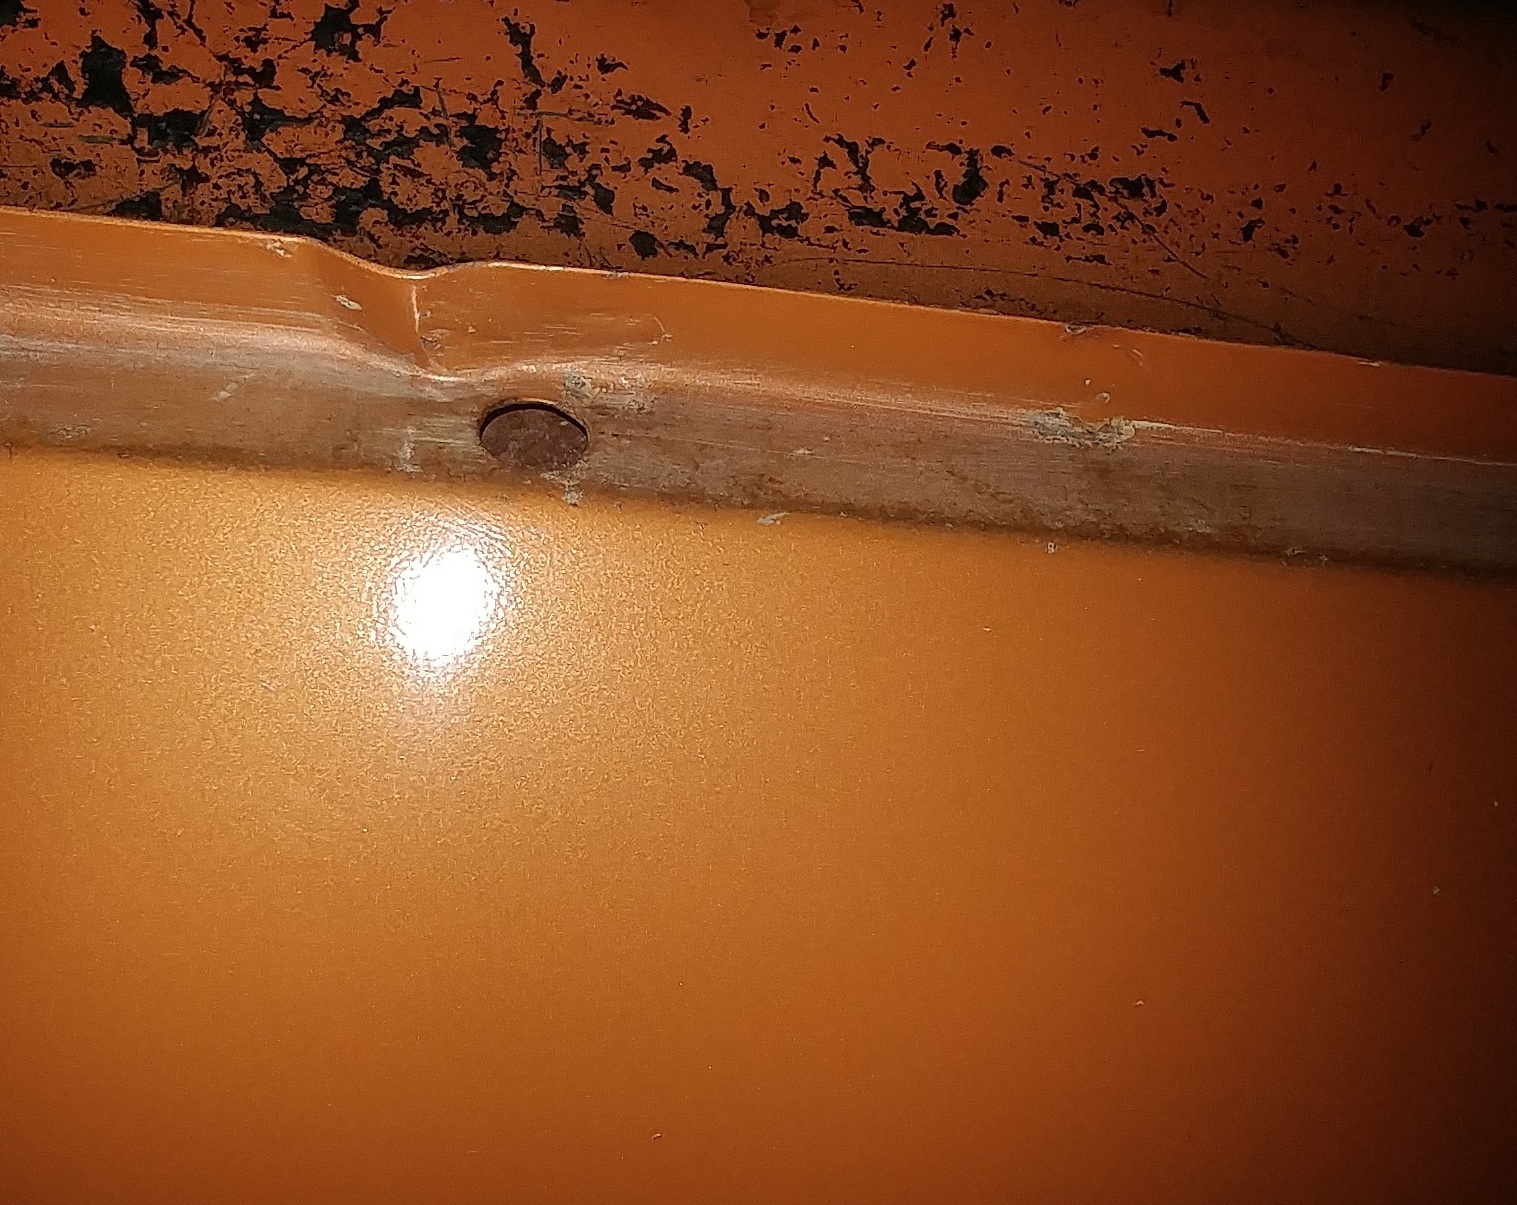
Here is a picture of the drain hole in my LH rocker, it is about 9/16" dia and is near the rear end. This is an OEM replacement rocker that was installed in about 1981 when I had the body restored.

-
-
@delsol the upper perforated areas that you have indicated are part of the cabin ventilation system, not speaker locations. Here is an old thread discussing this, see thread item 10 for an image showing the ventilation routing through these areas.
-
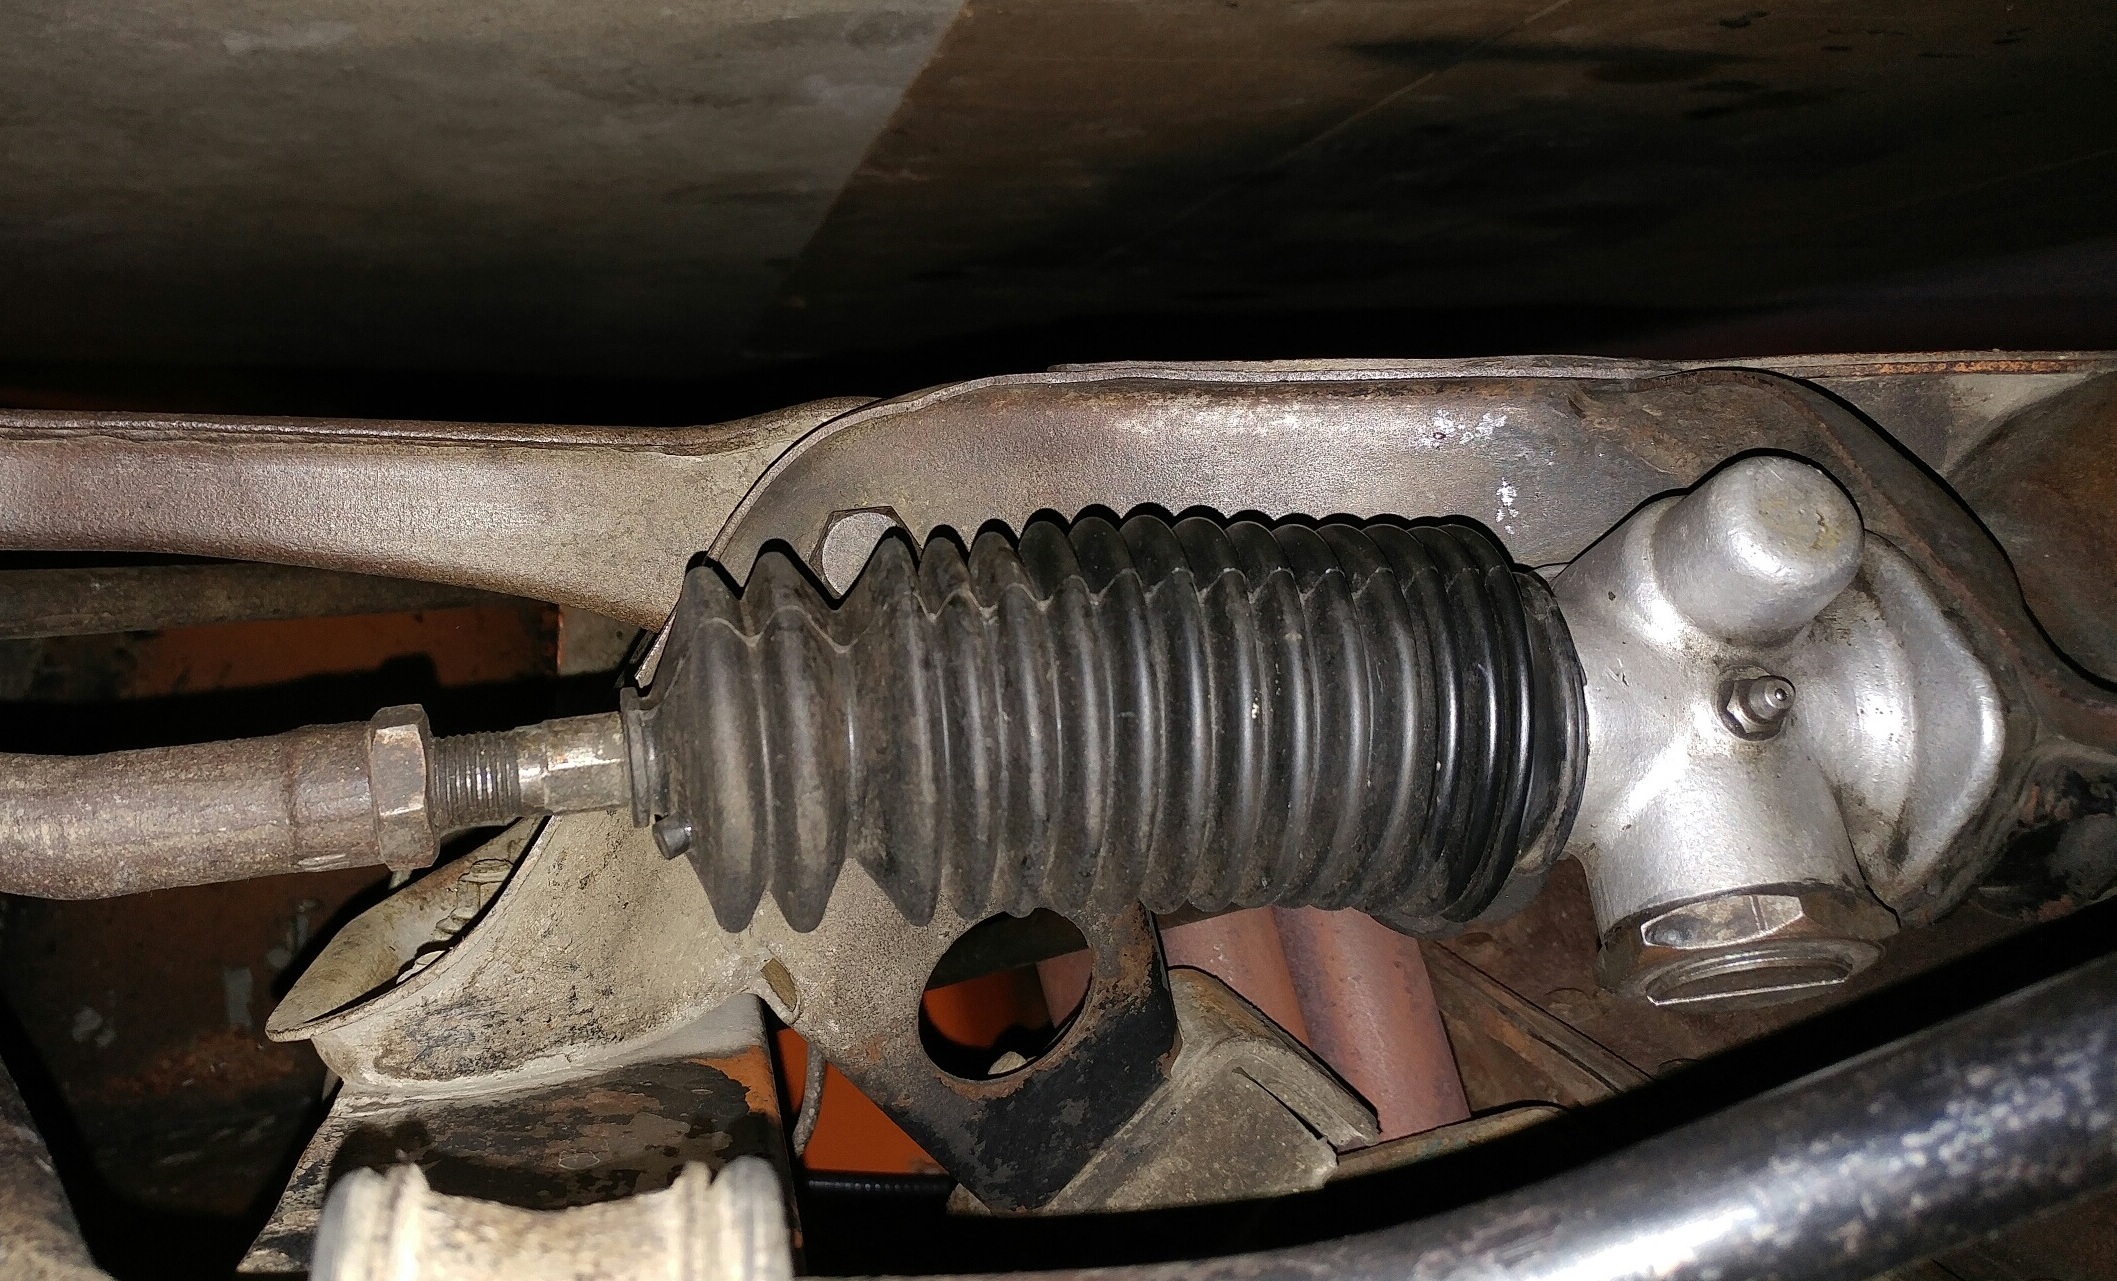
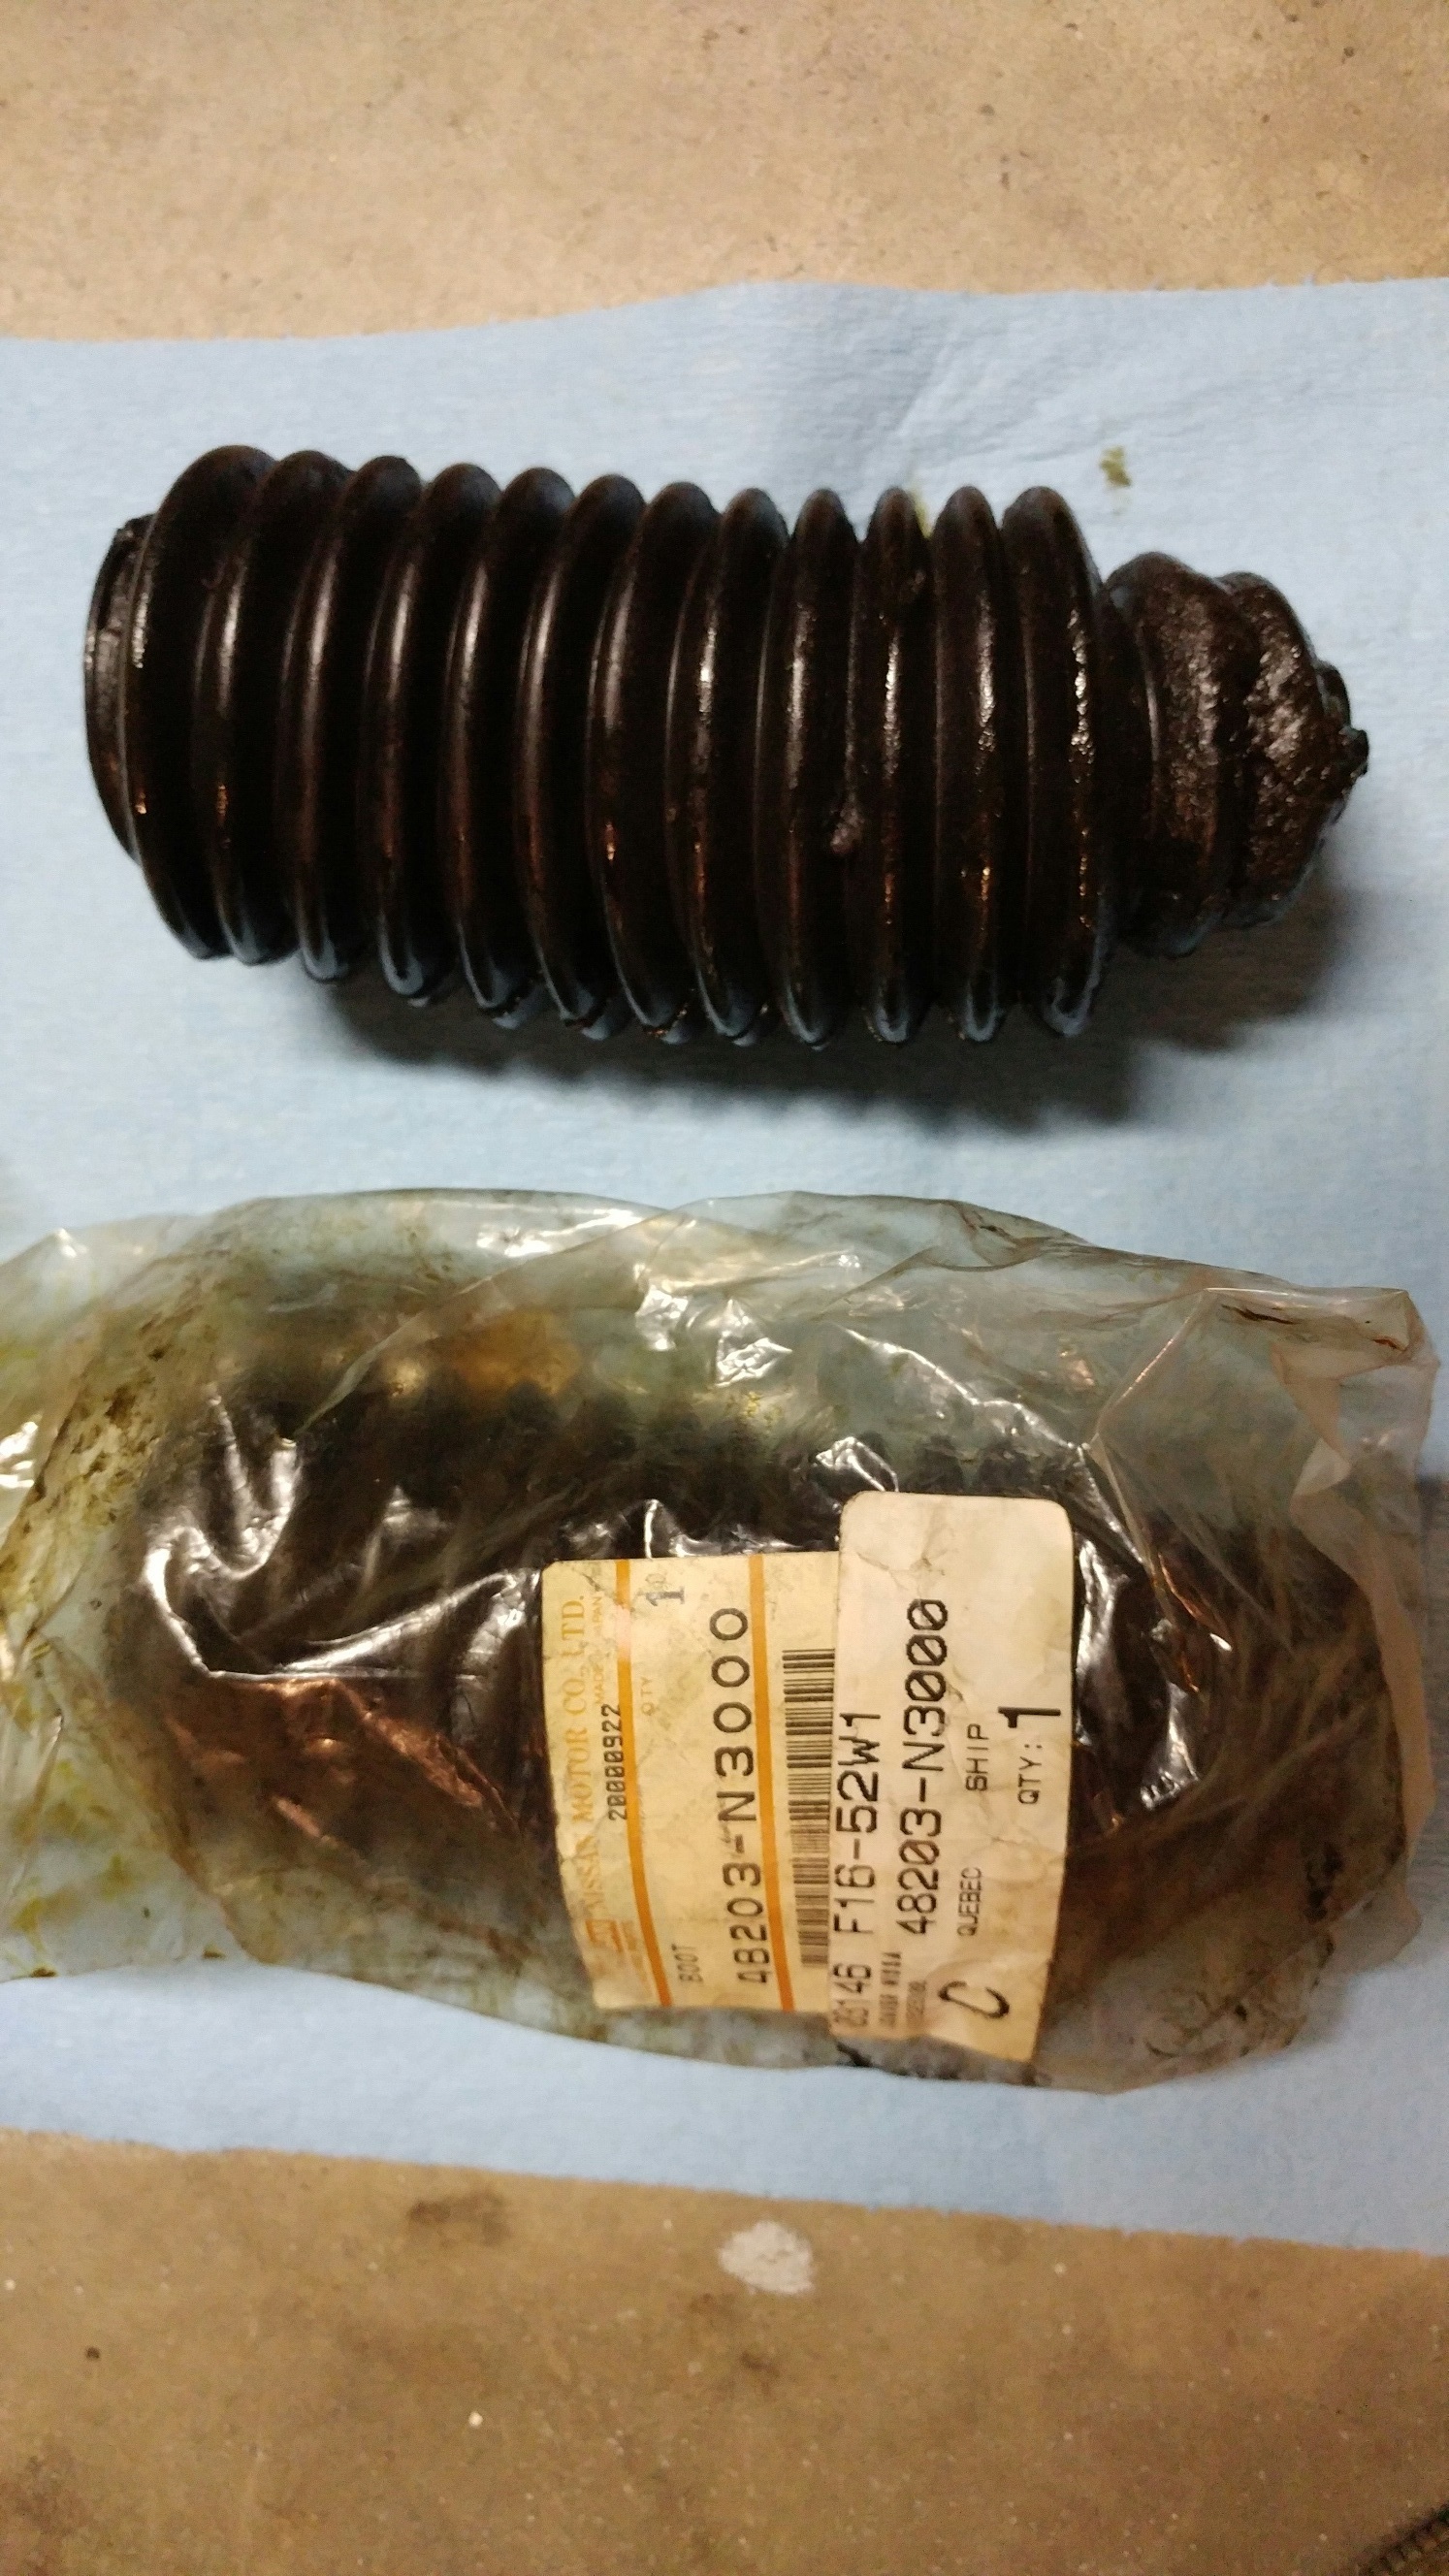
I must be more of a hoarder than CO, when I replaced my rack boots in 2005 I kept the old ones. I can't be certain that they were original but I purchased the car in 1978 and this was the first change. The old boots don't have the "wide separation" but the new OEM parts I purchased do have it, the new part number is 48203-N3000, strangely my parts book says that pn was only used from 05/73 to 07/73. Here is a picture of the new boot (48203-N3000) installed And here is a picture of the old boot (was stored in packaging from the replacement boot)


-
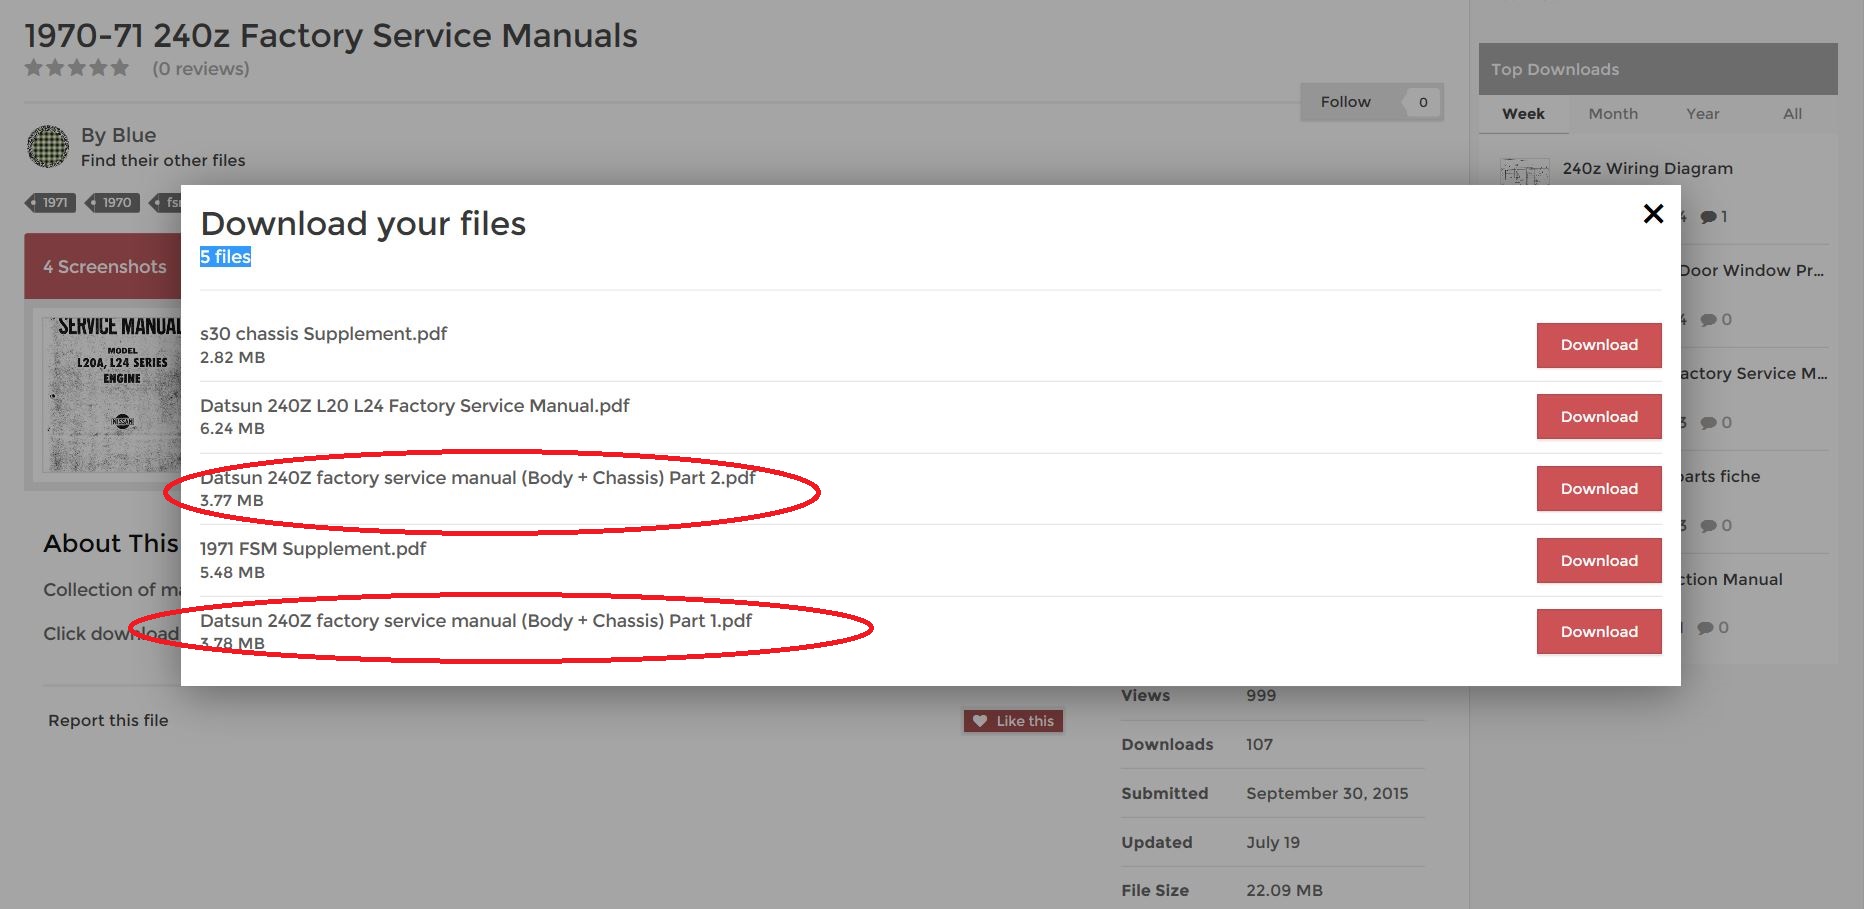
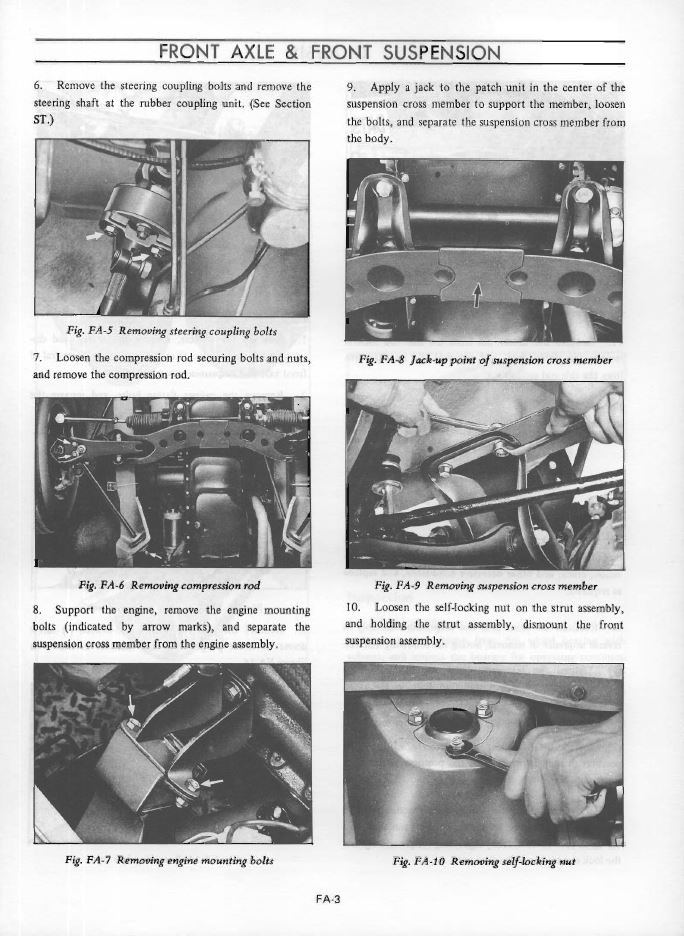
The '72 and '73 240z FSM's on XenonZcar.com are much higher resolution scans, they can be found here: http://www.xenonzcar.com/s30/fsm.html Here is a screen capture of the same page that @Blue shows above, but from the Xenon scan of the '72 manual. Of course the downside is that the file size is much larger, but well worth it. Too bad they don't have the 1970 FSM. This is a not so much of a problem with 260z and 280z FSM's as they mainly used line drawings and not photographs.

-
Old thread but lots of great info. Here's a couple more: Yazaki/spark plug wires and electrical connectors Bando/fan belts Here's an interesting video on the 110 year history of Bando: http://www.bando.co.jp/eng/corporate/video/history_eng.mp4
-
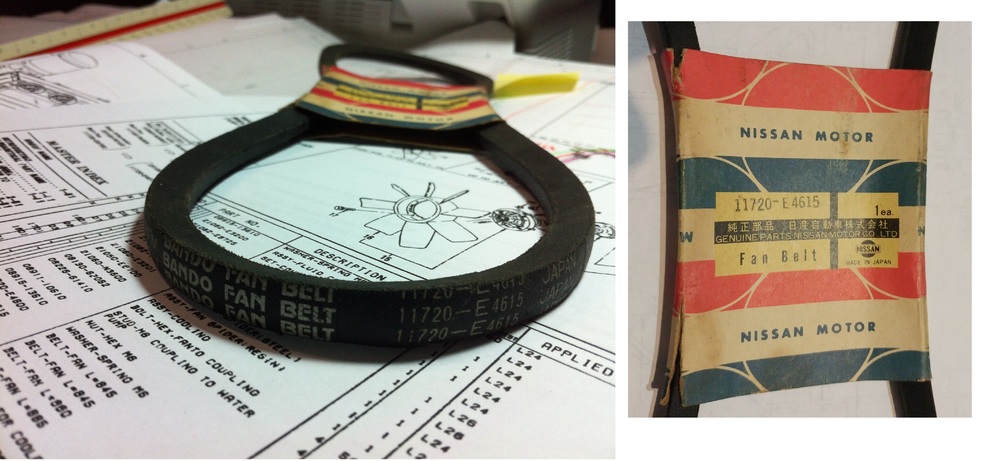
I think you do have the numbers reversed, the Nissan parts book lists 845 (pn 11720-E4615) for the fan belt (water/alternator) and 858 for the air pump (pn 11720-25604). I have a spare OEM fan belt (11720-E4615) that I purchased from Chilliwack Datsun in the early 80's and from what I can tell it is the 845mm effective length stated in the Nissan parts book . The belt has the Nissan part number on it, but not a length number, the outside length measure 860mm. One thing to note when checking belt length is that the length number usually written on replacement belts refers to the approximate effective length, for the cross section size of our belts if you subtract 15mm from the outside length you will get the approximate effective length. Here is a pic of my spare original, manufactured by Bando for Nissan The other thing to note is that some replacement belts have a "cogged" inside surface and the original belts were smooth, the newer cogged inner profile will flex better around smaller pulleys for less chance of slippage. The cogged belts are better but the smooth ones look more correct. I am currently using a gates XL V-belt part number 7335 that is cogged, the effective length is 851mm and outside length is 866mm, I have attached a pdf from the gates website with specs. The gates site also lists a replacement belt for the air pump belt and it is also slightly longer, here are a couple of links: http://www.gates.com/all-search-tools/search-by-application http://ww2.gates.com/if/automotive/partslookup/Application/printthis.cfm?year=72&make=290&model=1558&engine=15432 Also note that with an 865 effective length on the alt/water pump belt you might run out of adjustment on the tensioner bracket, with the gates 850 belt on mine there is not that much usable length left on the slot in the tensioner. HTH Mike http www.gatespowerpro.pdf
-
From what I understand the 240's had very little or no factory applied undercoating. My '70 had very heavy tar like undercoating that was probably dealer applied. I have owned the car since 1978 and just recently removed that undercoating and found that my car was painted body color (918 orange) under the floors, in the transmission tunnel and in the wheel wells front and rear. HTH Mike
-
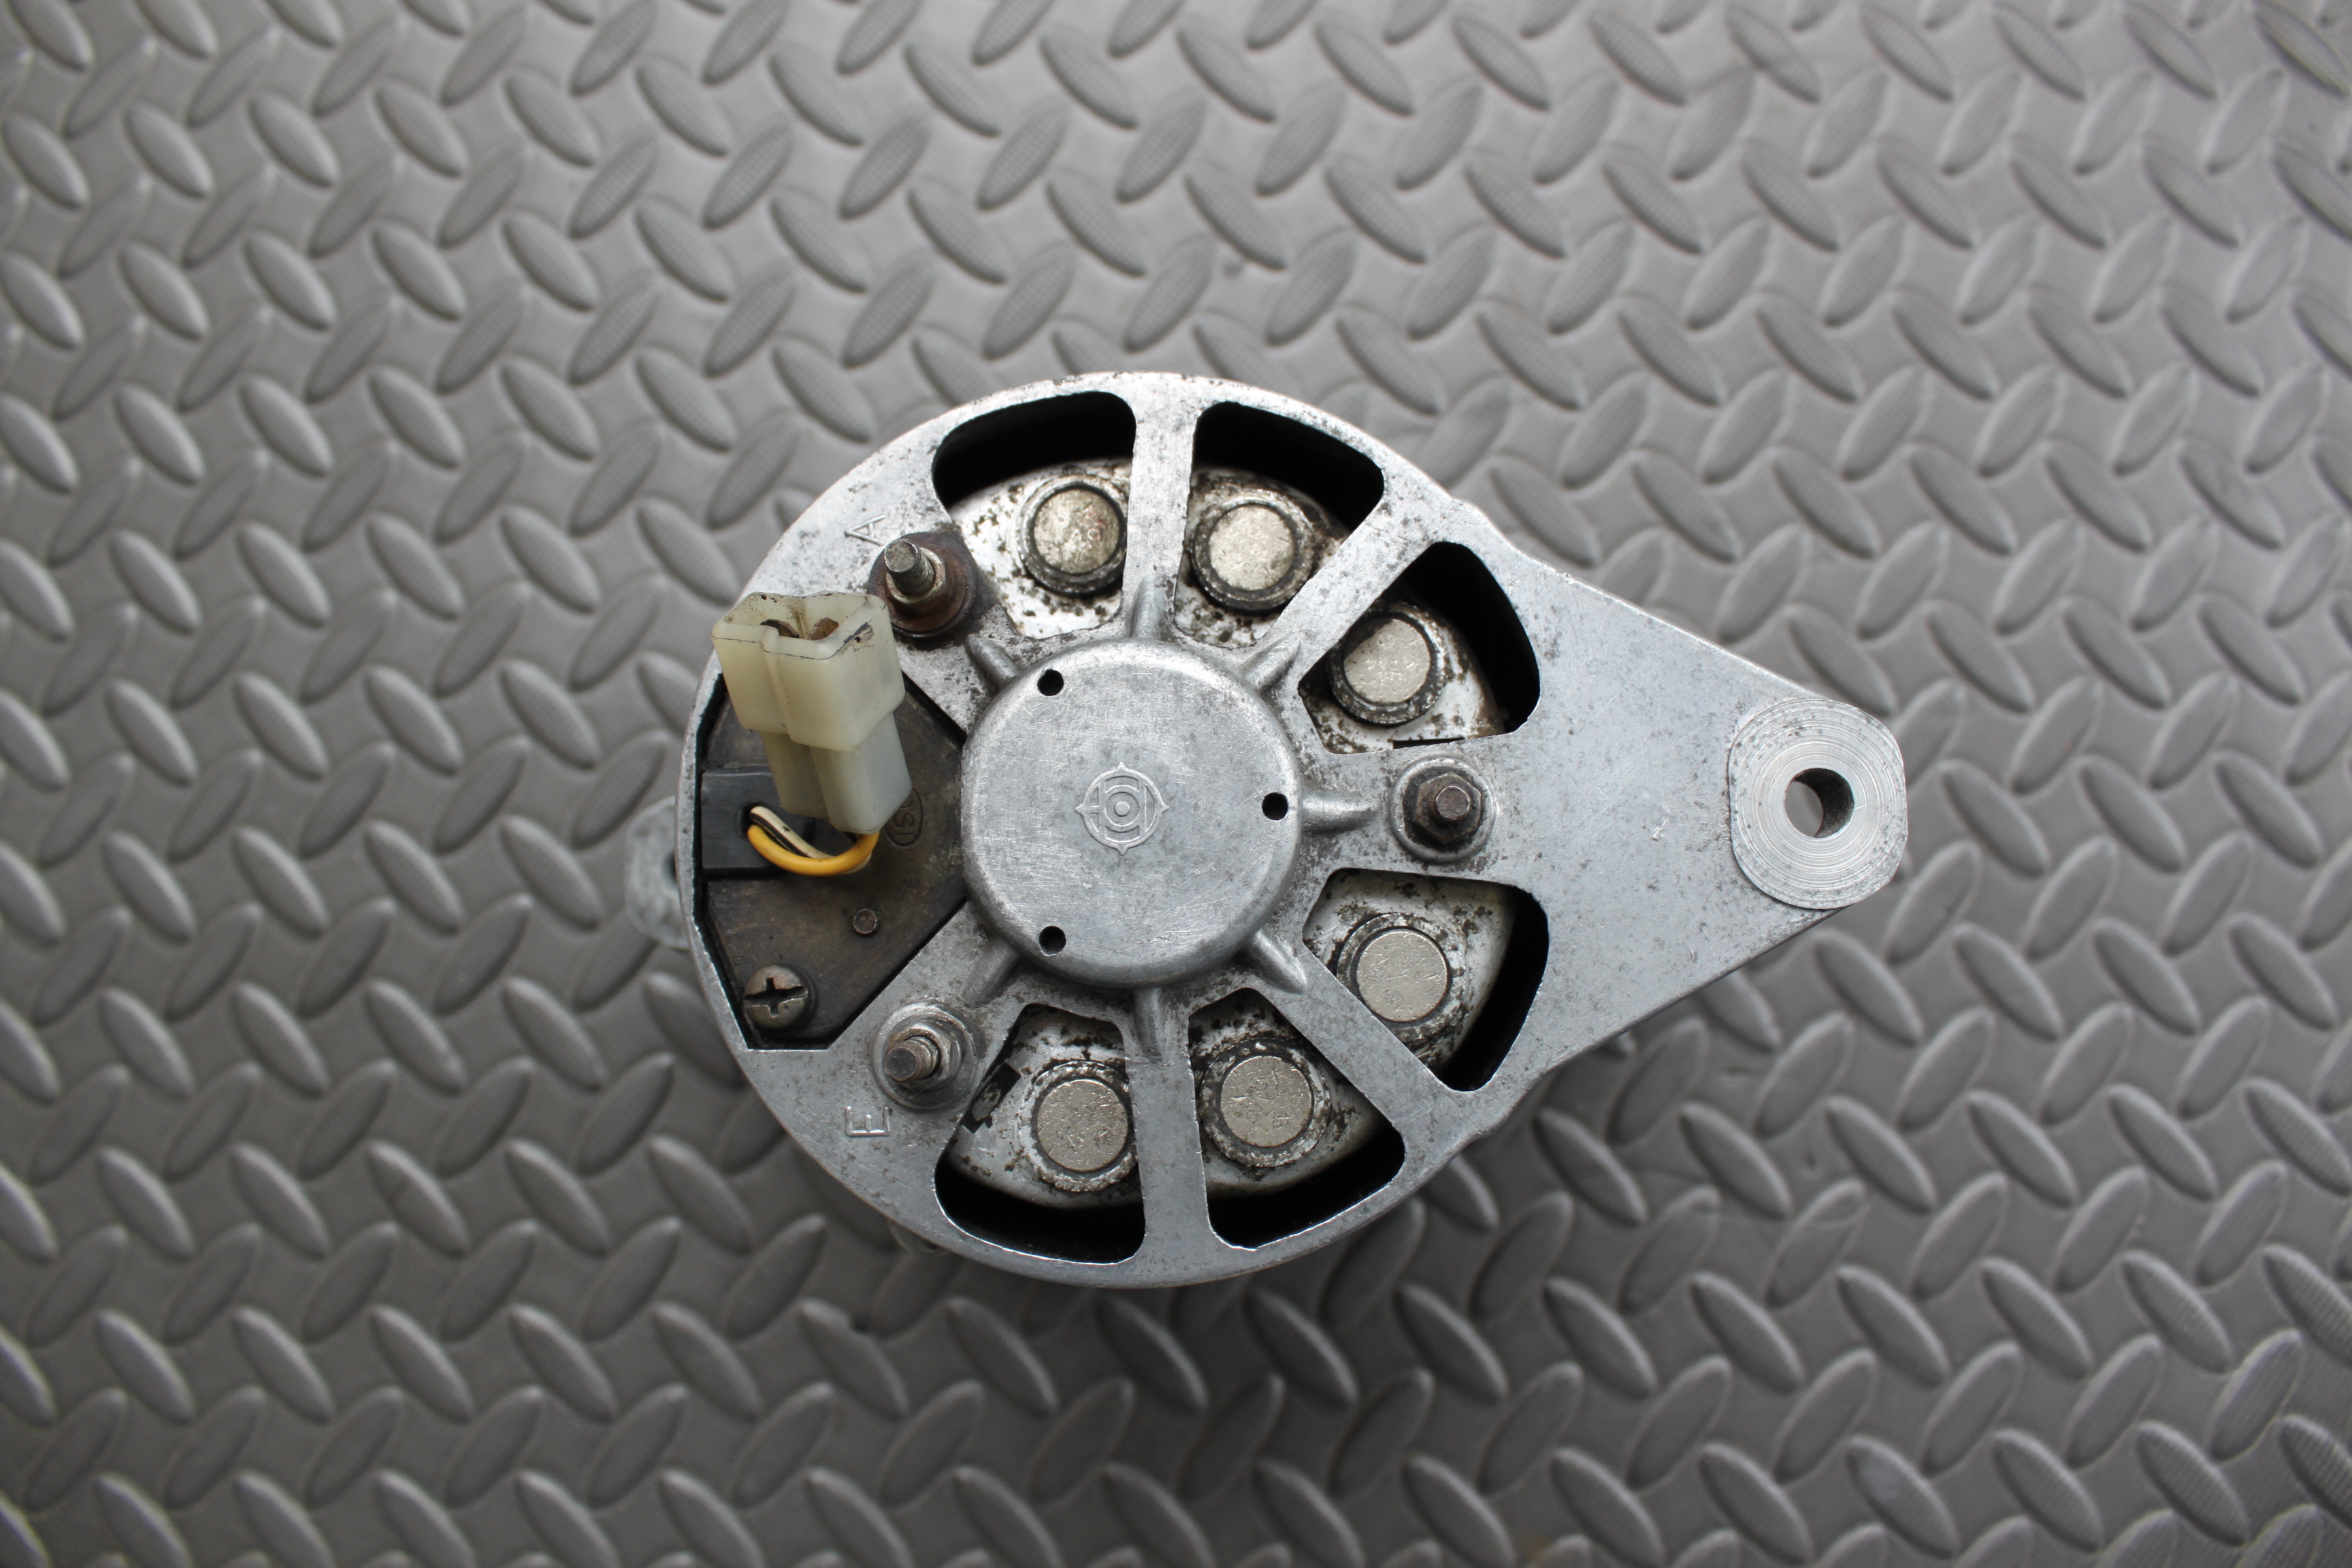
Not a stupid question, "Grapefruit" refers to the look of the openings on the back of early alternators.

-
M5 x 14mm long Phillips pan head c/w lock and flat washers on my 1970. Should be the same I think. HTH Mike
-
Based on the holes for the bumper guards, it looks like a '73 bumper. On the 70 thru 72 models the bumper guards are flush on the outside with the grill. The rubber strips on your bumper are correct for a '72 and that is where the bumper guards should be. Also I think the '73 bumper guards are larger.
-
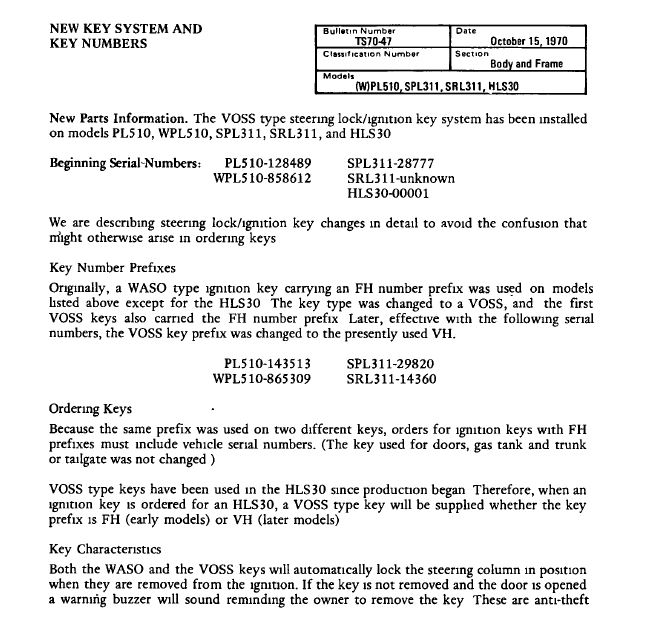
Here is the TSB Geezer was referring to,

-
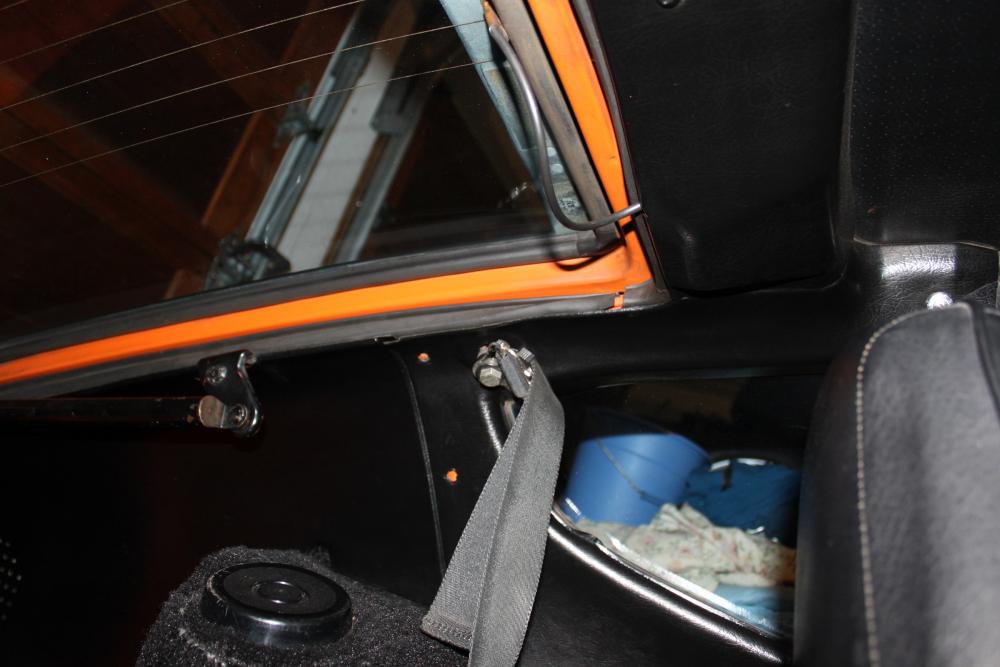
Also the plastic panel around the quarter window should be removed as well as what @Dave WM said. As it overlaps the panel you are installing. Assuming this is on a 240Z, at least you only have this issue with the strut on the LH side.
-
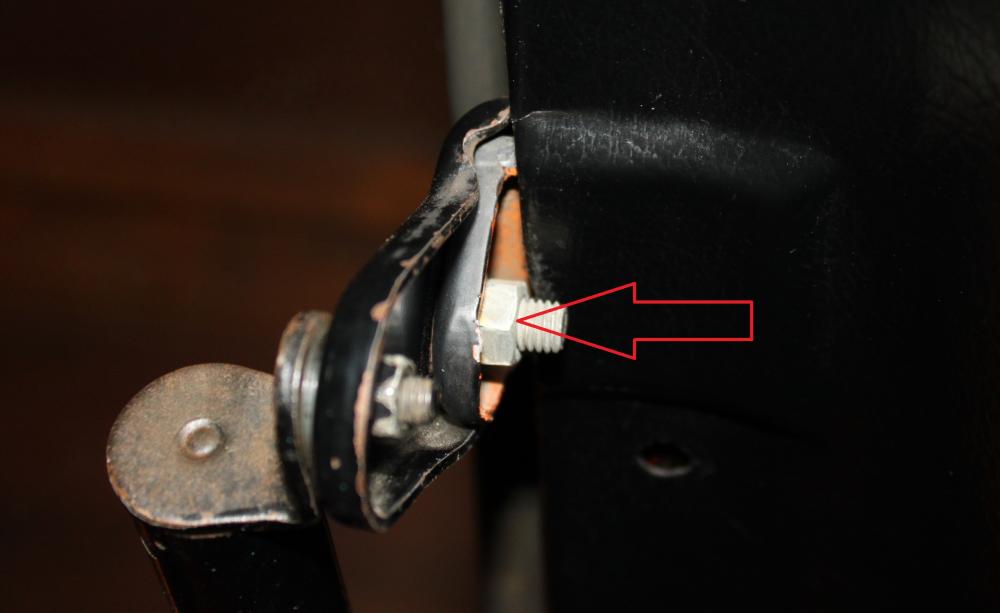
When you say the strut bracket is welded in are you talking about the larger bracket that the strut pivots in at the top end. That bracket is bolted to the smaller bracket that is welded to the body. Here is a picture showing the nut you need to disassemble so you can remove the larger strut bracket to get more clearance for installing the new plastic panels. Unless of course yours is actually welded.
-
Not likely since it was posted in 2004
-
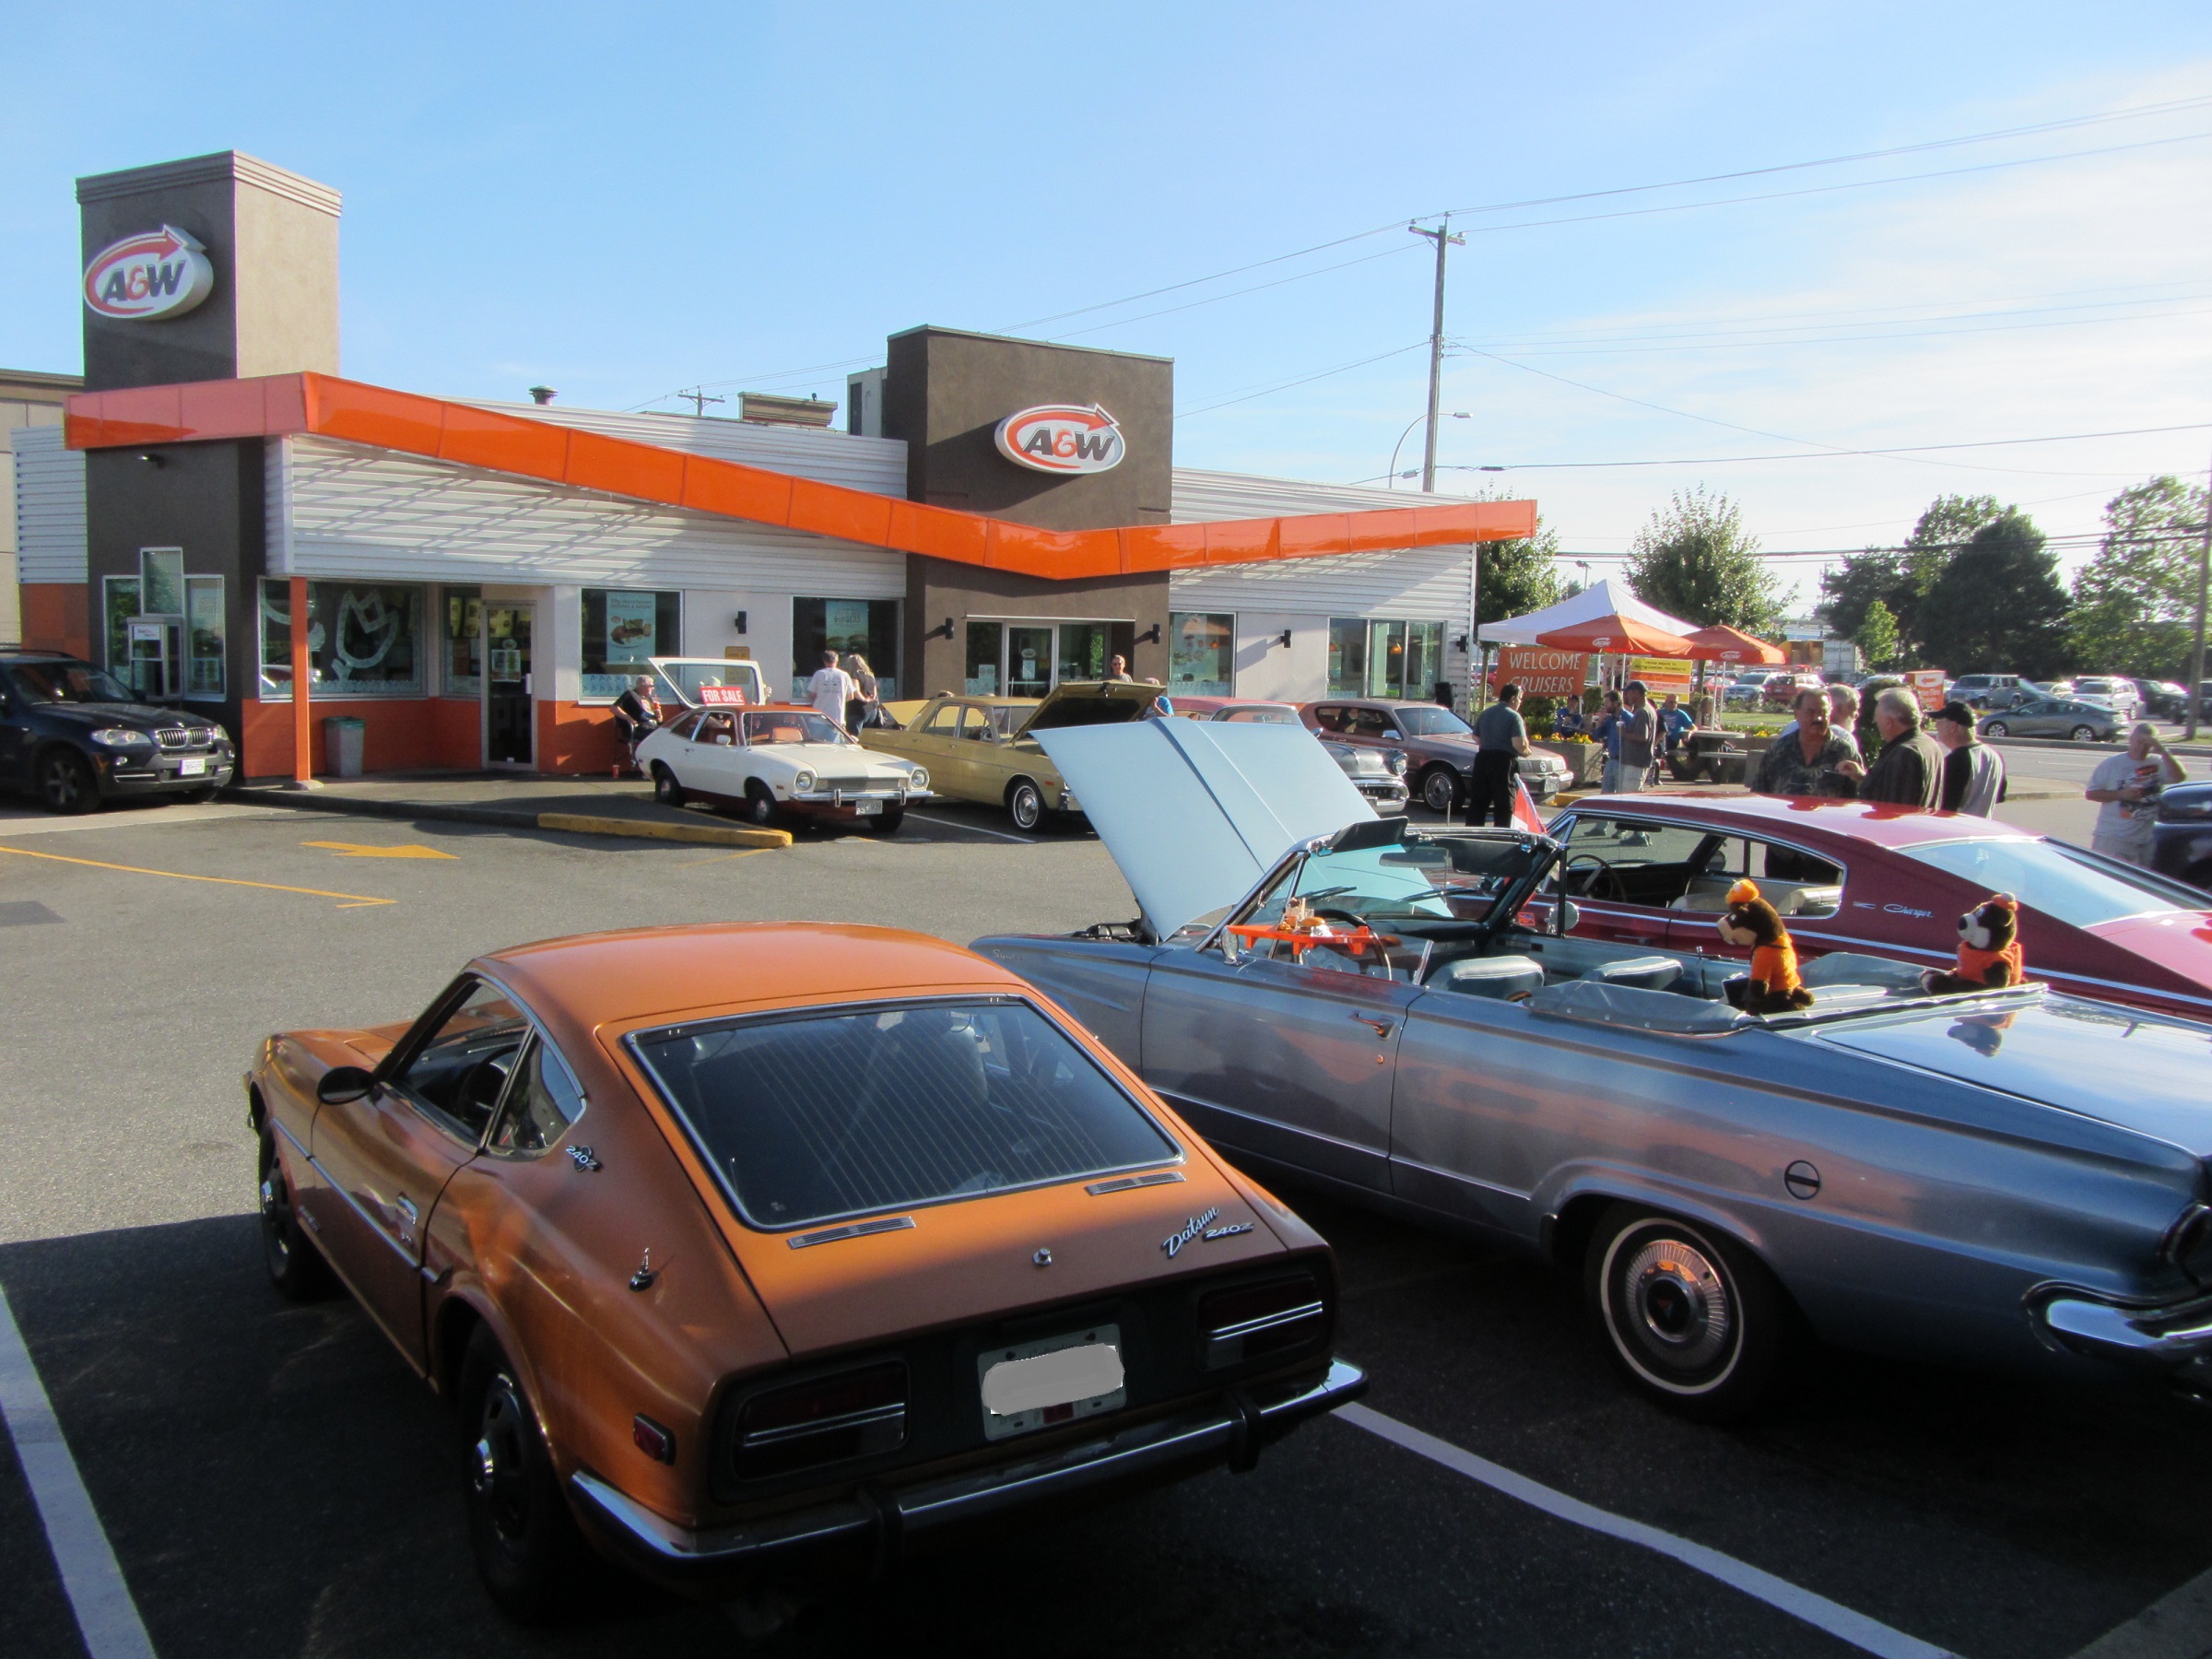
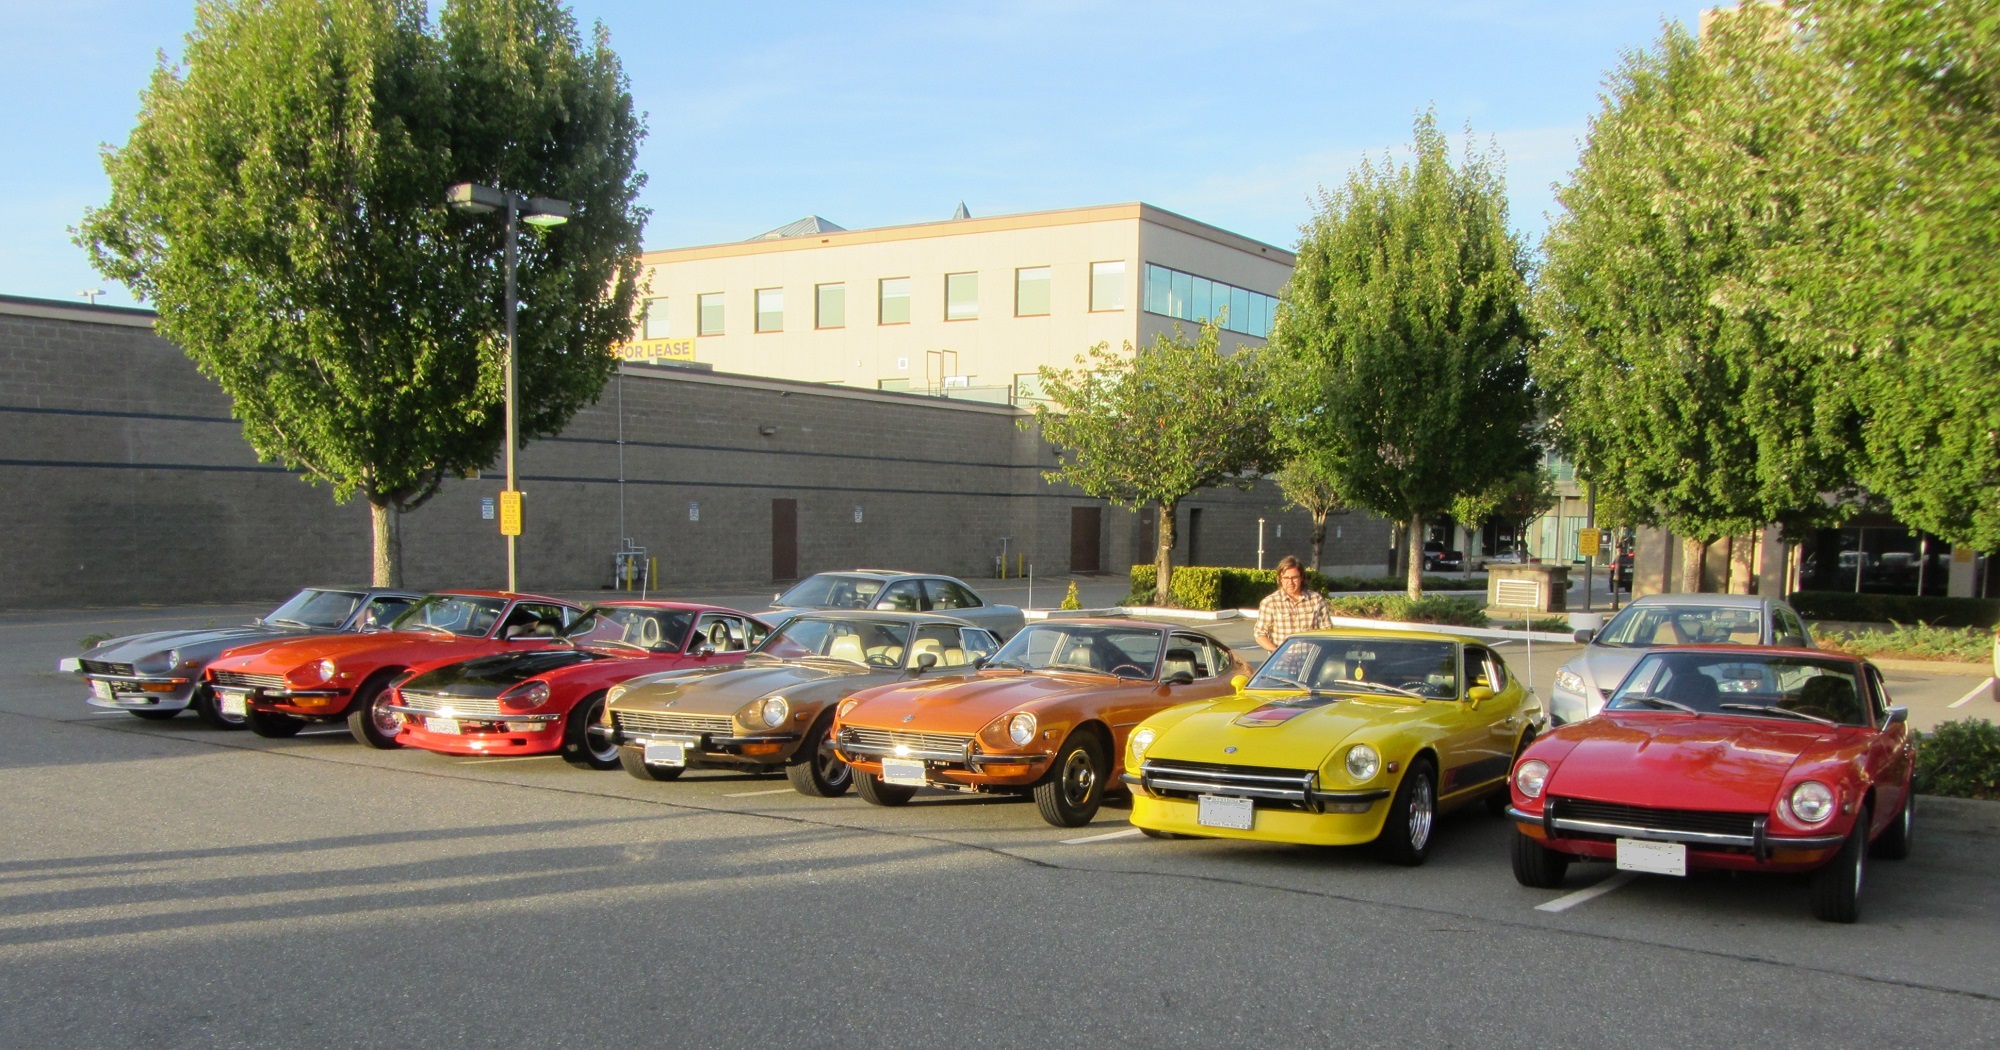
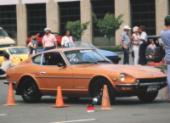
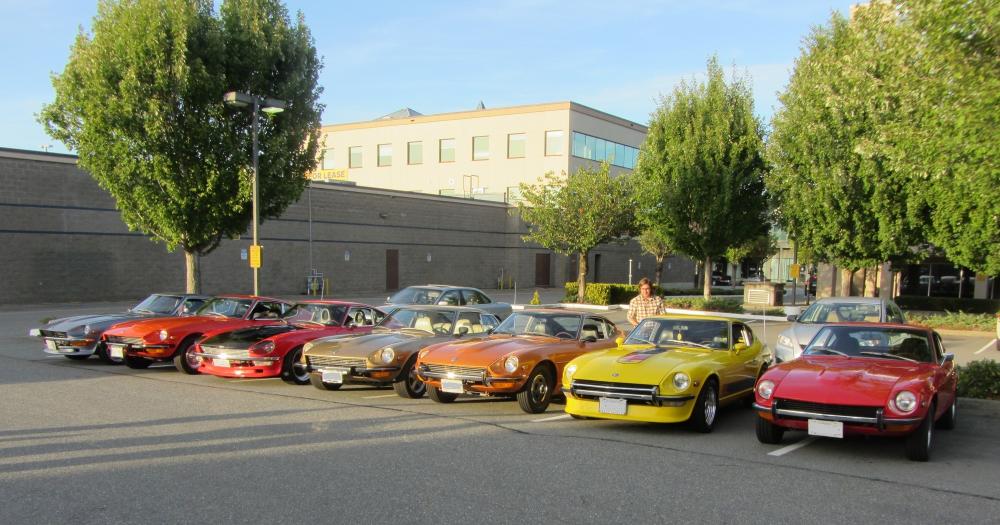
Thanks Jim, we had no choice but to park very tight for that group shot at the end of the show as parking was limited, but it was worth it. I was told that A & W recently went through a major renovation, I'm glad they didn't just tear it down. It's great when the older retro look businesses are preserved.
-
Took my car to the weekly Thursday night car show at a local A & W restaurant, and met up with a group from the BC Z Car Registry. there were seven of us attending. Here's a few pics,

-
Here is a 240Z tank on Ebay. Except for one fitting it doesn't look to bad from the outside. Not sure if shipping from Arizona would be an issue though. http://www.ebay.com/itm/Datsun-240Z-Fuel-Gas-Tank-70-73-/201610702001?hash=item2ef0ef2cb1:g:X80AAOSwjXRXbdOL Good luck with your search.
-
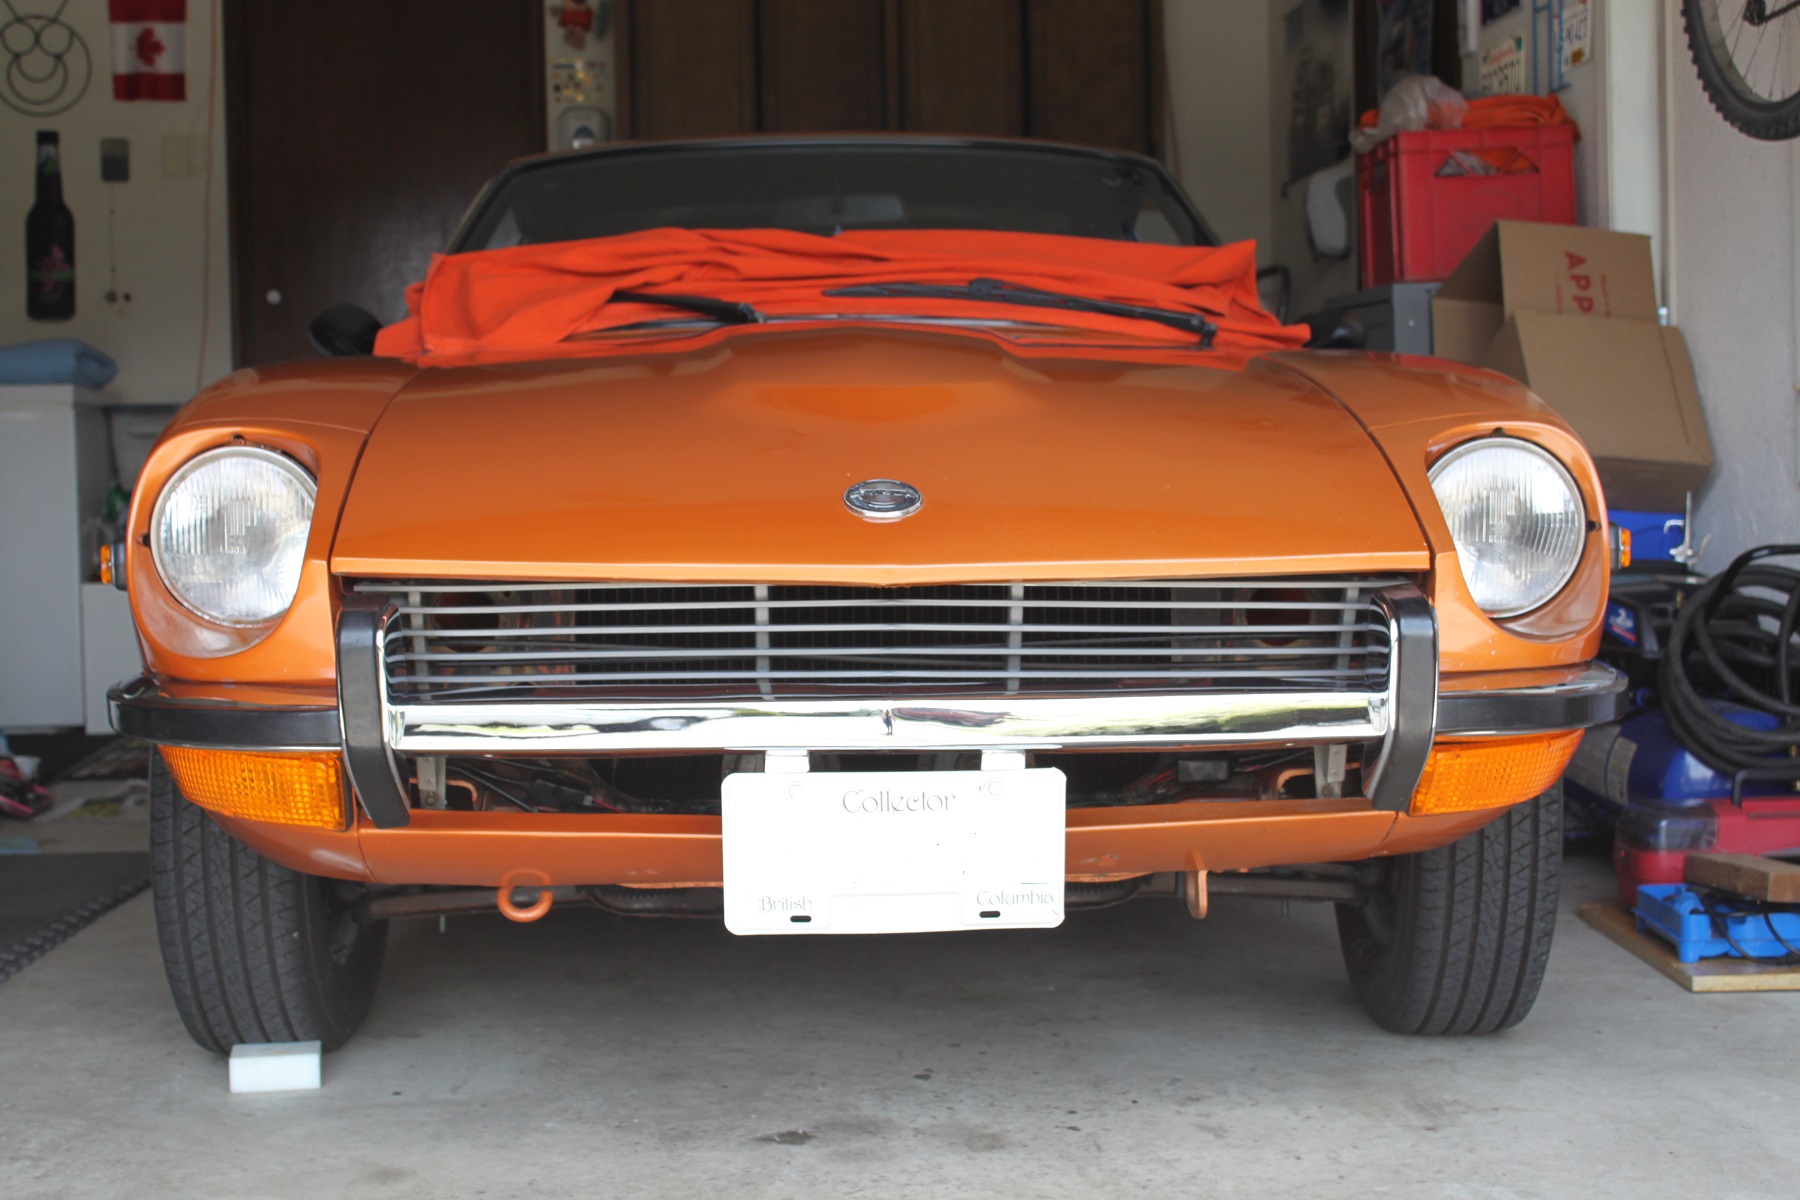
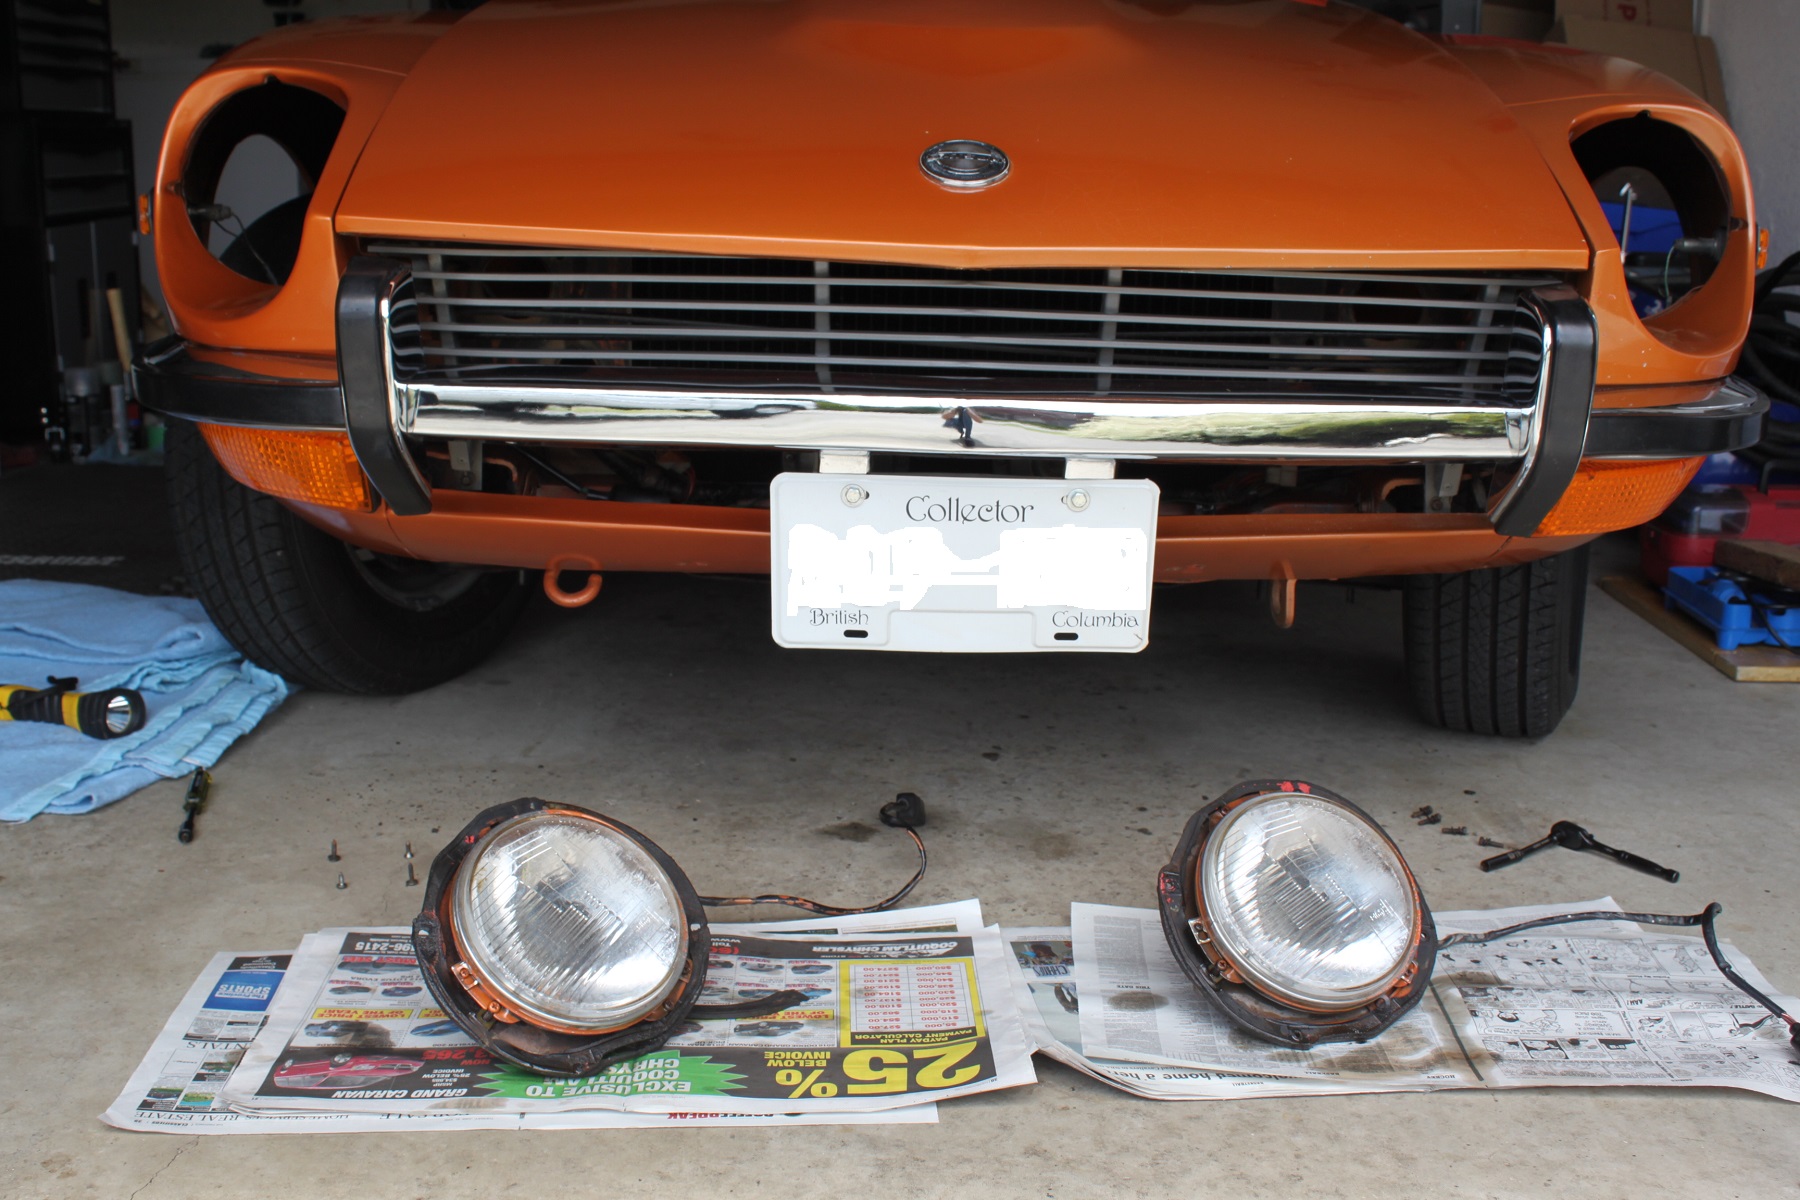
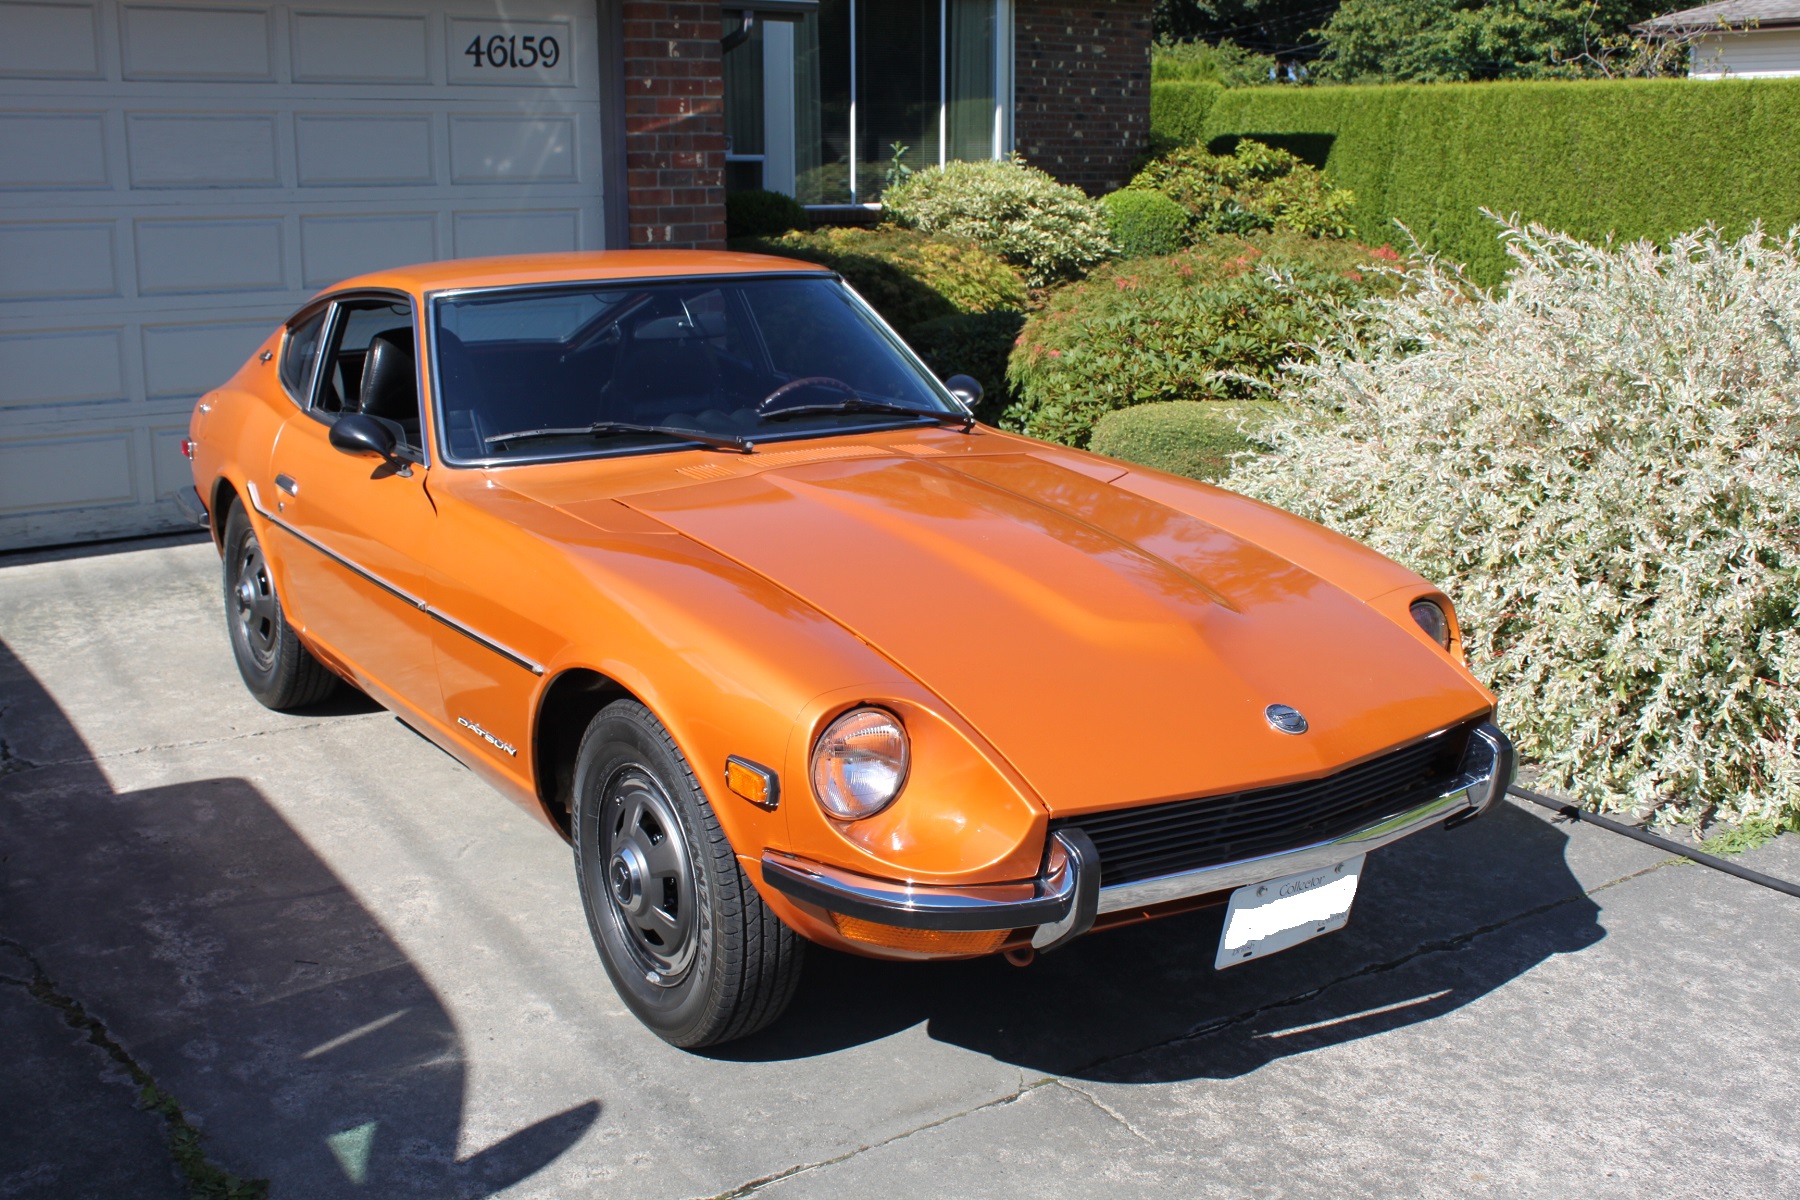
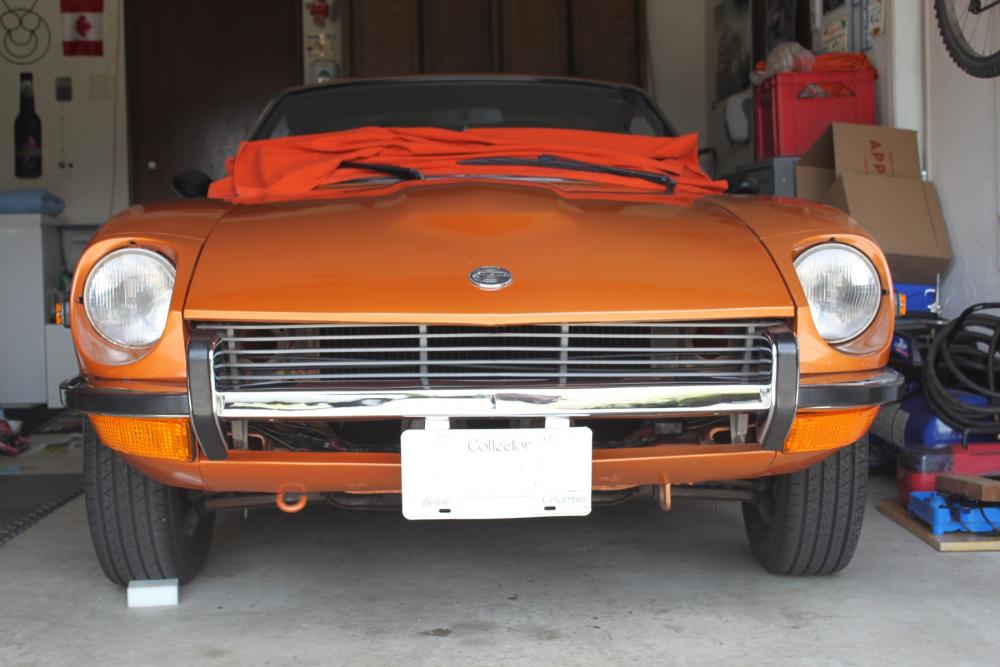
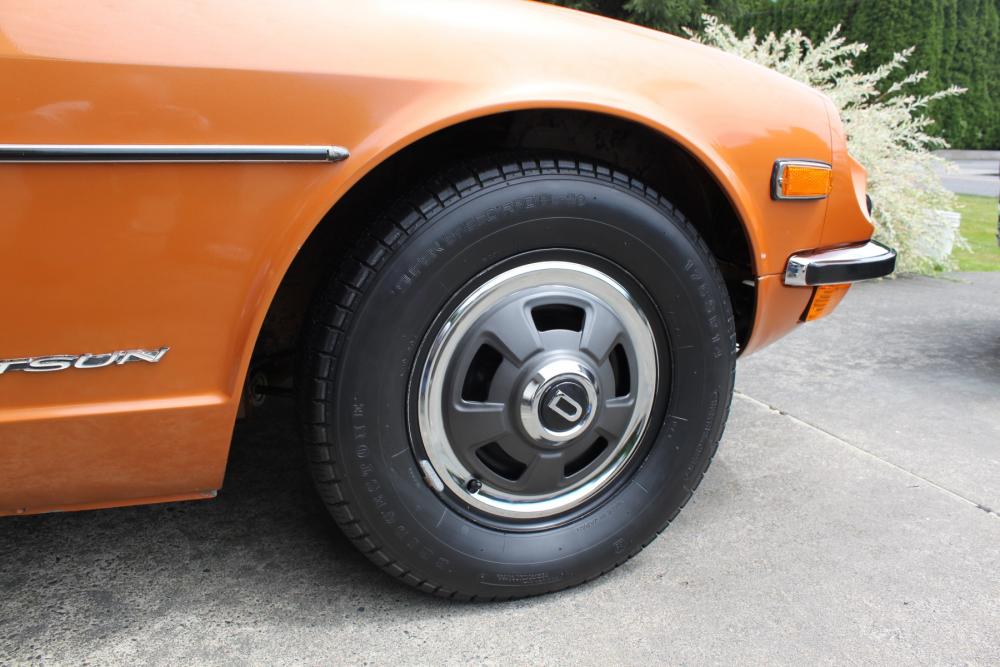
One more thing off my to do list, I replaced the sad looking headlights that were in my car when I got it in 1978. It was long over due. While I was at it I cleaned the corrosion and oxidation from the HL wiring harnesses with WEICON Electro Contact Cleaner, thanks @Chickenman for the name of the local distributor. Here's what the old Bosch H4's looked like, in and out And with the new halogen sealed beams in, Since I had the wheels off I couldn't resist taking a few pics with my original Bridgestone175SR14 Super Speed Radial spare on. Now if I only had three more I would be set.


-
Good question, I'm not really sure but what about looking at the engine mounts and fasteners, checking for signs of removal or replacement.
-