dutchzcarguy
Community Member
-
Joined
-
Last visited
Everything posted by dutchzcarguy
-
Hihi.. It has ALL to do with what you are used to.. I worked with studer revox studio equipment, audio machinery worth sometimes over a million Swiss Franks.. For example, and i said it before .. I was in the factory in Switserland, they make capstan axles* on 1/1000 of a mm! After they made them on some special lath they are stored for a year! Then they get measured on a special bench and if they are out of tolerance they get scrapped! That's SWISS engineering! I've seen there recorders for studios they where expensive, well over 1 million swiss Franks.. Also mixers that were over 4 meters wide.. (13 feet). Capstan axles = are those axles in a taperecorder or other tape machine like a cassetterecorder that give the speed to the tape.. (Also the pinchroller pushes the tape against this axle.)
-
Let me just say: ....... I'm going a bit crazy...... I will NEVER understand what the americans have with those inches, 1/4 1/8 3/32 pfff... (sigh) Why not mm it's metric it's simple!! What do you mean with: it's only 1.260 thick ... to me that's A LOT more than 0.140 ???? and.. " means inches.. Right?? Oh man... am i glad i only had to learn about meters and mm cm Km Mm (I just invented the Mega Meter! 😉 ) Forgive me for getting so annoying!! (I think it's sad that the change to metric was so difficult to do, i believe the canadians did this better? They have Km not miles for example?) (Btw.. you guys also use a point were we use a comma.. and visa versa... does also complicate things so 1,230 are twelfhundred and thirty items.. (to you ) but overhere that's one and twentythree hundreds of a item.. 1.230 are twelfhundredand thirty items of something.) I always think of the guy in europe that ordered a boat in the USA.. he thought that he would get a big boat (in meters) but got one in feet! 🙈
-
Correct me if i'm wrong please but... a shim of 0,003 inch is 0,0762 mm! I NEVER seen a shim that thin! Are you sure?? I know that the right spot on the gears for all that raw power💪 is important but 0,003 inch?? or 0,07mm ??? If it is.. i would make some more space for a fatter ring/shim.
-
Your talking about the future??? You meant 2014?
-
WOW! If you would drive that car in that state overhere.. you.. (your car) end(s) up in the press and would be seen never again! Every car gets a checkup every year* overhere.. when you have a rustbucket, you can forget to drive it.. not a meter! (about 3 feet? 🤣) But since a few years our country has a new rule about cars older then 50 years.. they don't need any check! So.. i think that's also crazy! * Also cars of 30 years and older (till 50) only need to get a APK (check) every 2 years. APK= algemene periodieke keuring = general periodic inspection.
-
My spellingschecker always gives a lot of wrong spelling when i'm on this site! .. I wonder why? 🤣
-
Nice job! As this is part 3... there are gonna be some 10-15 parts i guess? Very nice recordings of the work. The "leading" you (he) uses is this soldering tin like 40/60? made of lead and tin? i always wanted to know what is what? 40% lead and 60% tin? or the other way around so, 60% lead and 40% tin? Who can tell me this? Or is it pure lead, i don't think so because that's to soft.. I have seen restorers use the leading technic and it's a very good way to finish sheetmetall like that hoodedge. Well Done!!
-
I always appreciated the 2+2 as a tall guy well over 6 feet i appreciate the rooooom... in the car! Are you sure? It should be in the chassis-service manual in the electronics section.. otherwise it should be somewhere on the internet i think. I can't help you as i don't have a clarion of that type. (The one with the fuse is the 12v+ i guess.. and with a ohm-meter you can find out the rest? 🙂)
-
I would use that.. just use some soapy water to install it.. One day you want to sell the car, it would be bad if it wasn't original..
-
Yeah.. and always Hitachi's.. I never saw a Clarion in that configuration with AM and FM and the antenna switch like that. Oh well, MH77280z, congrat's with your buy!
-
I'm confused now.. I was always told that in a 240z there was a Hitachi.. The people that told me that were always from the USA.. Then i always said: We overhere in the Netherlands (EU) have had always the Clarion brand, So there were also Clarions in old datsuns in the USA? That's a first! 👍
-
You could also use some Freeze.. it's a spraycan and use that on the inner parts like the axle itself and the nut. It cools under -40 celcius so spray it on the axle.. NOT on your fingers! You could also get the unit off the car and freeze it first in a freezer before you heat the housing of the bearing(s).
-
On picture 146 we see the data plate under the hood.. is it normal for a 280z to not have the engine number on it? but just L28 ?? HUH?? .... what about matching numbers, it's not on the data plate!
-
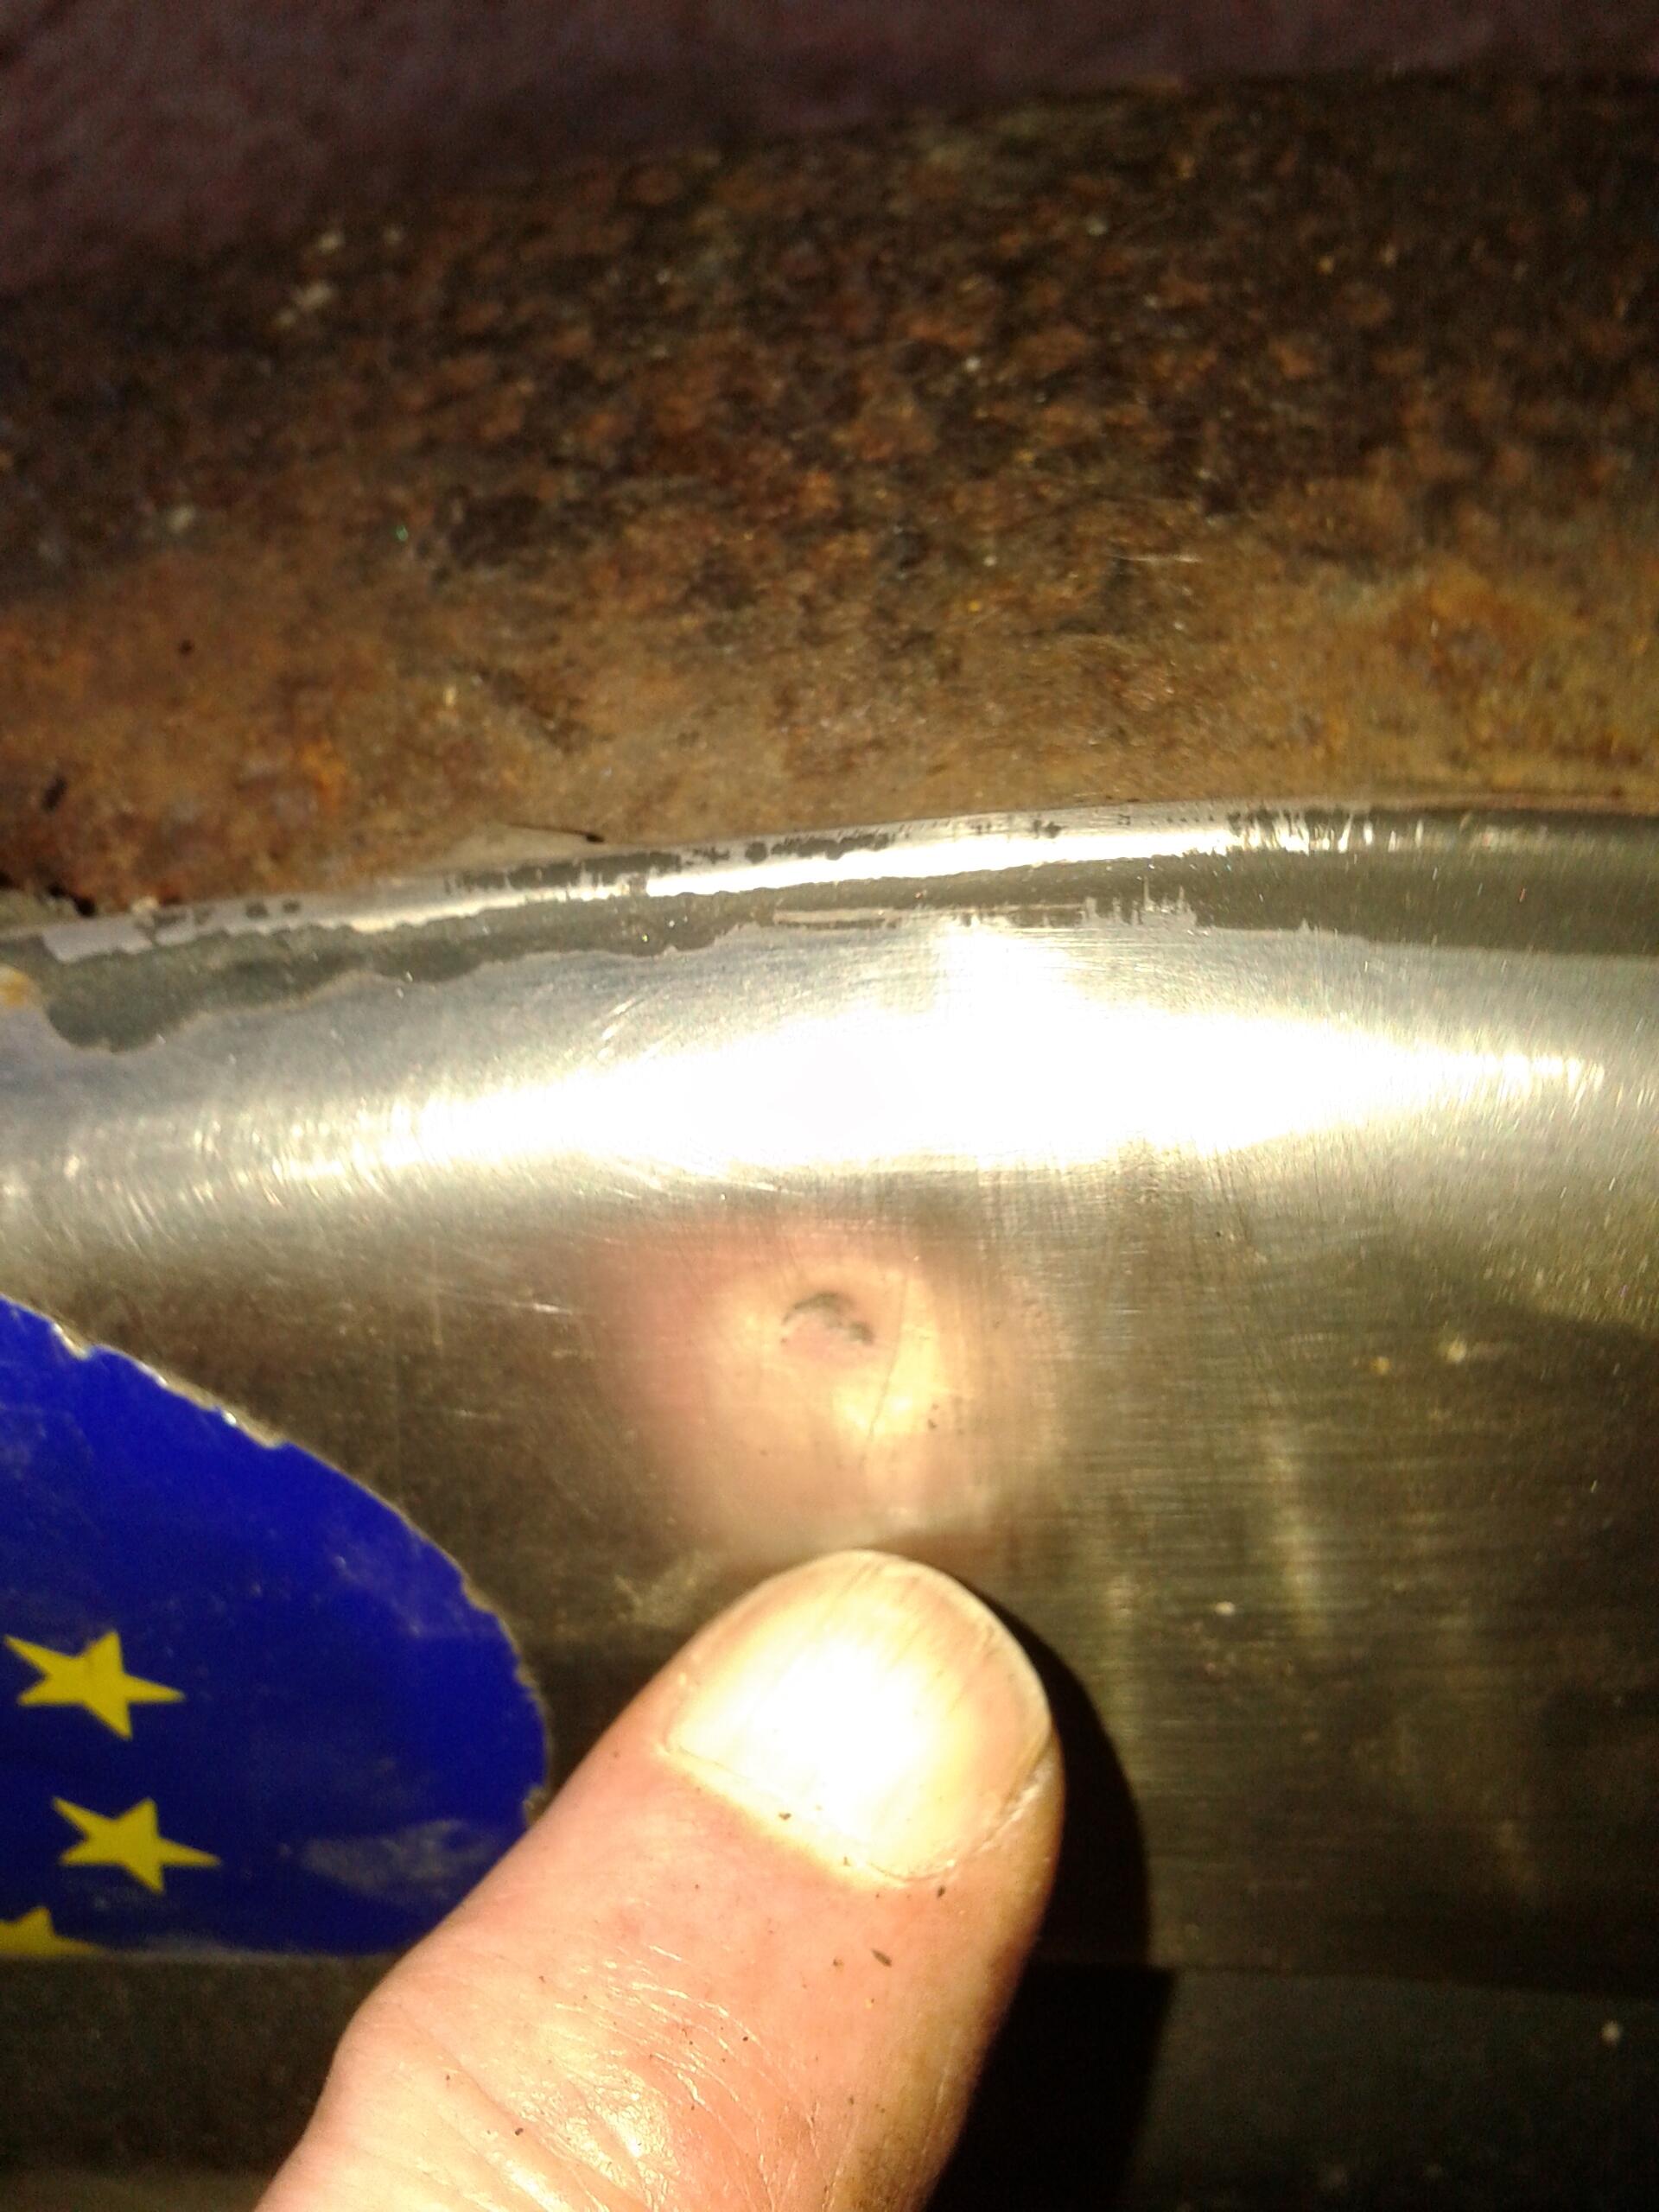
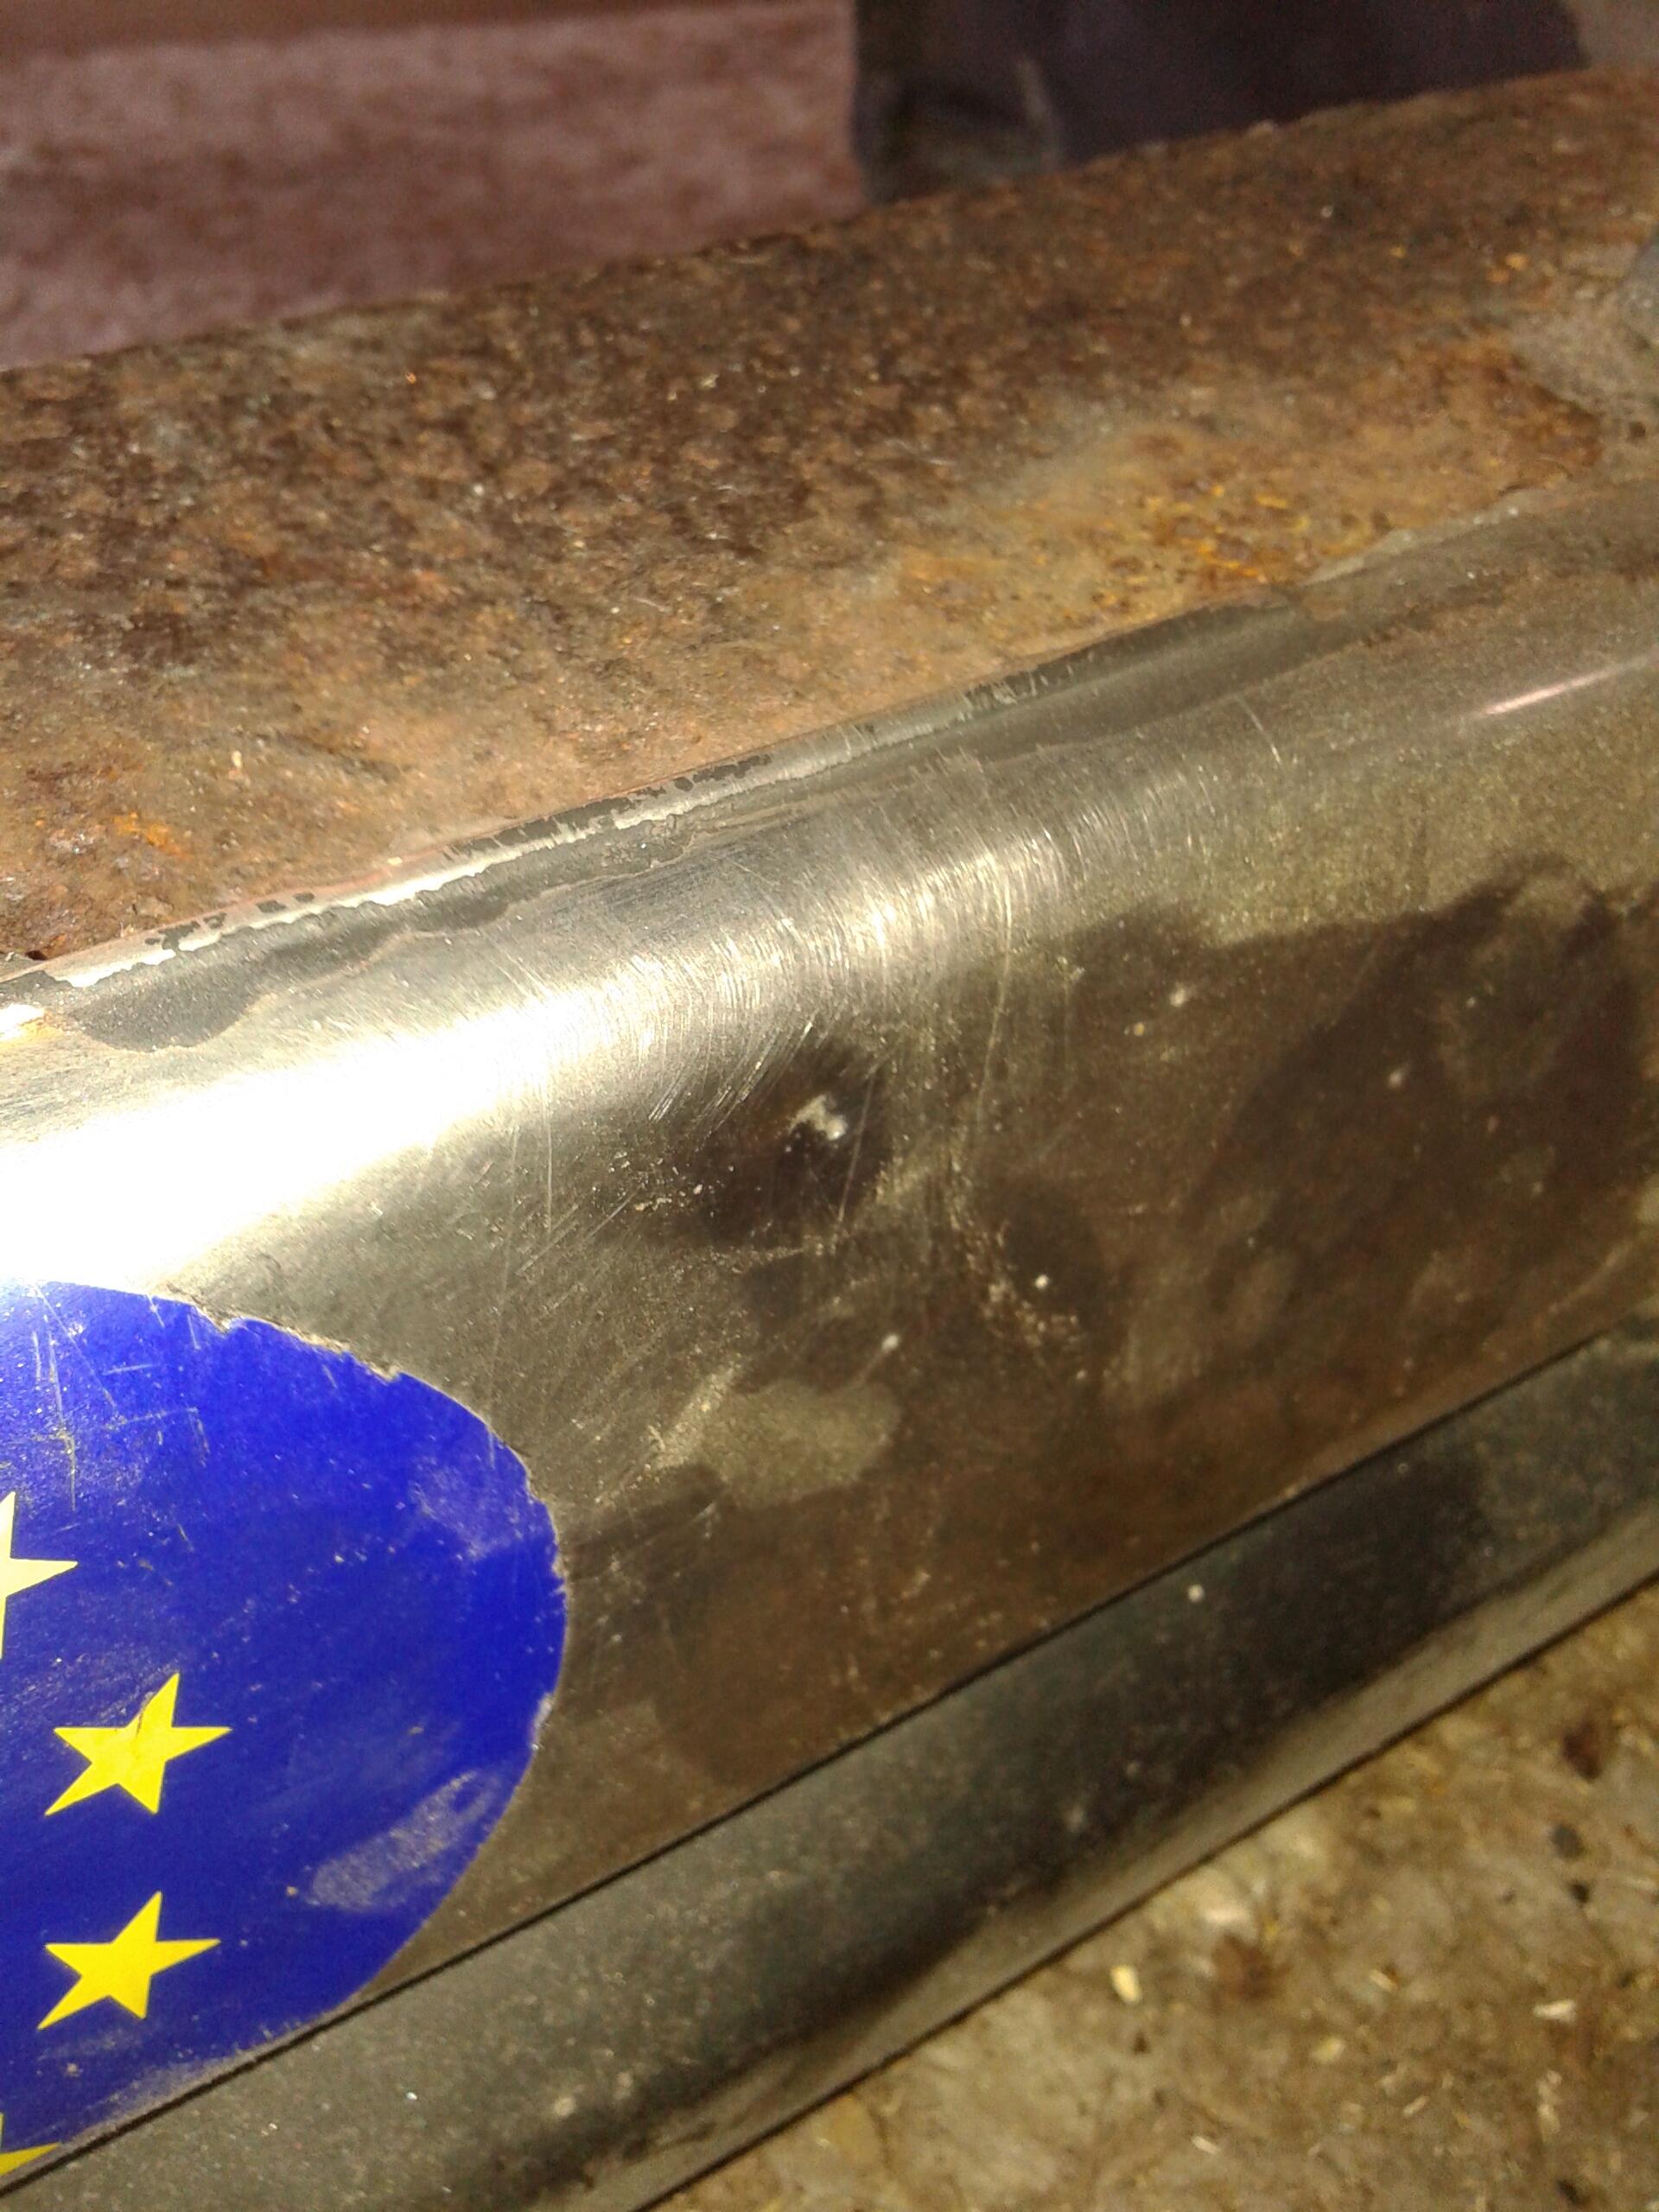
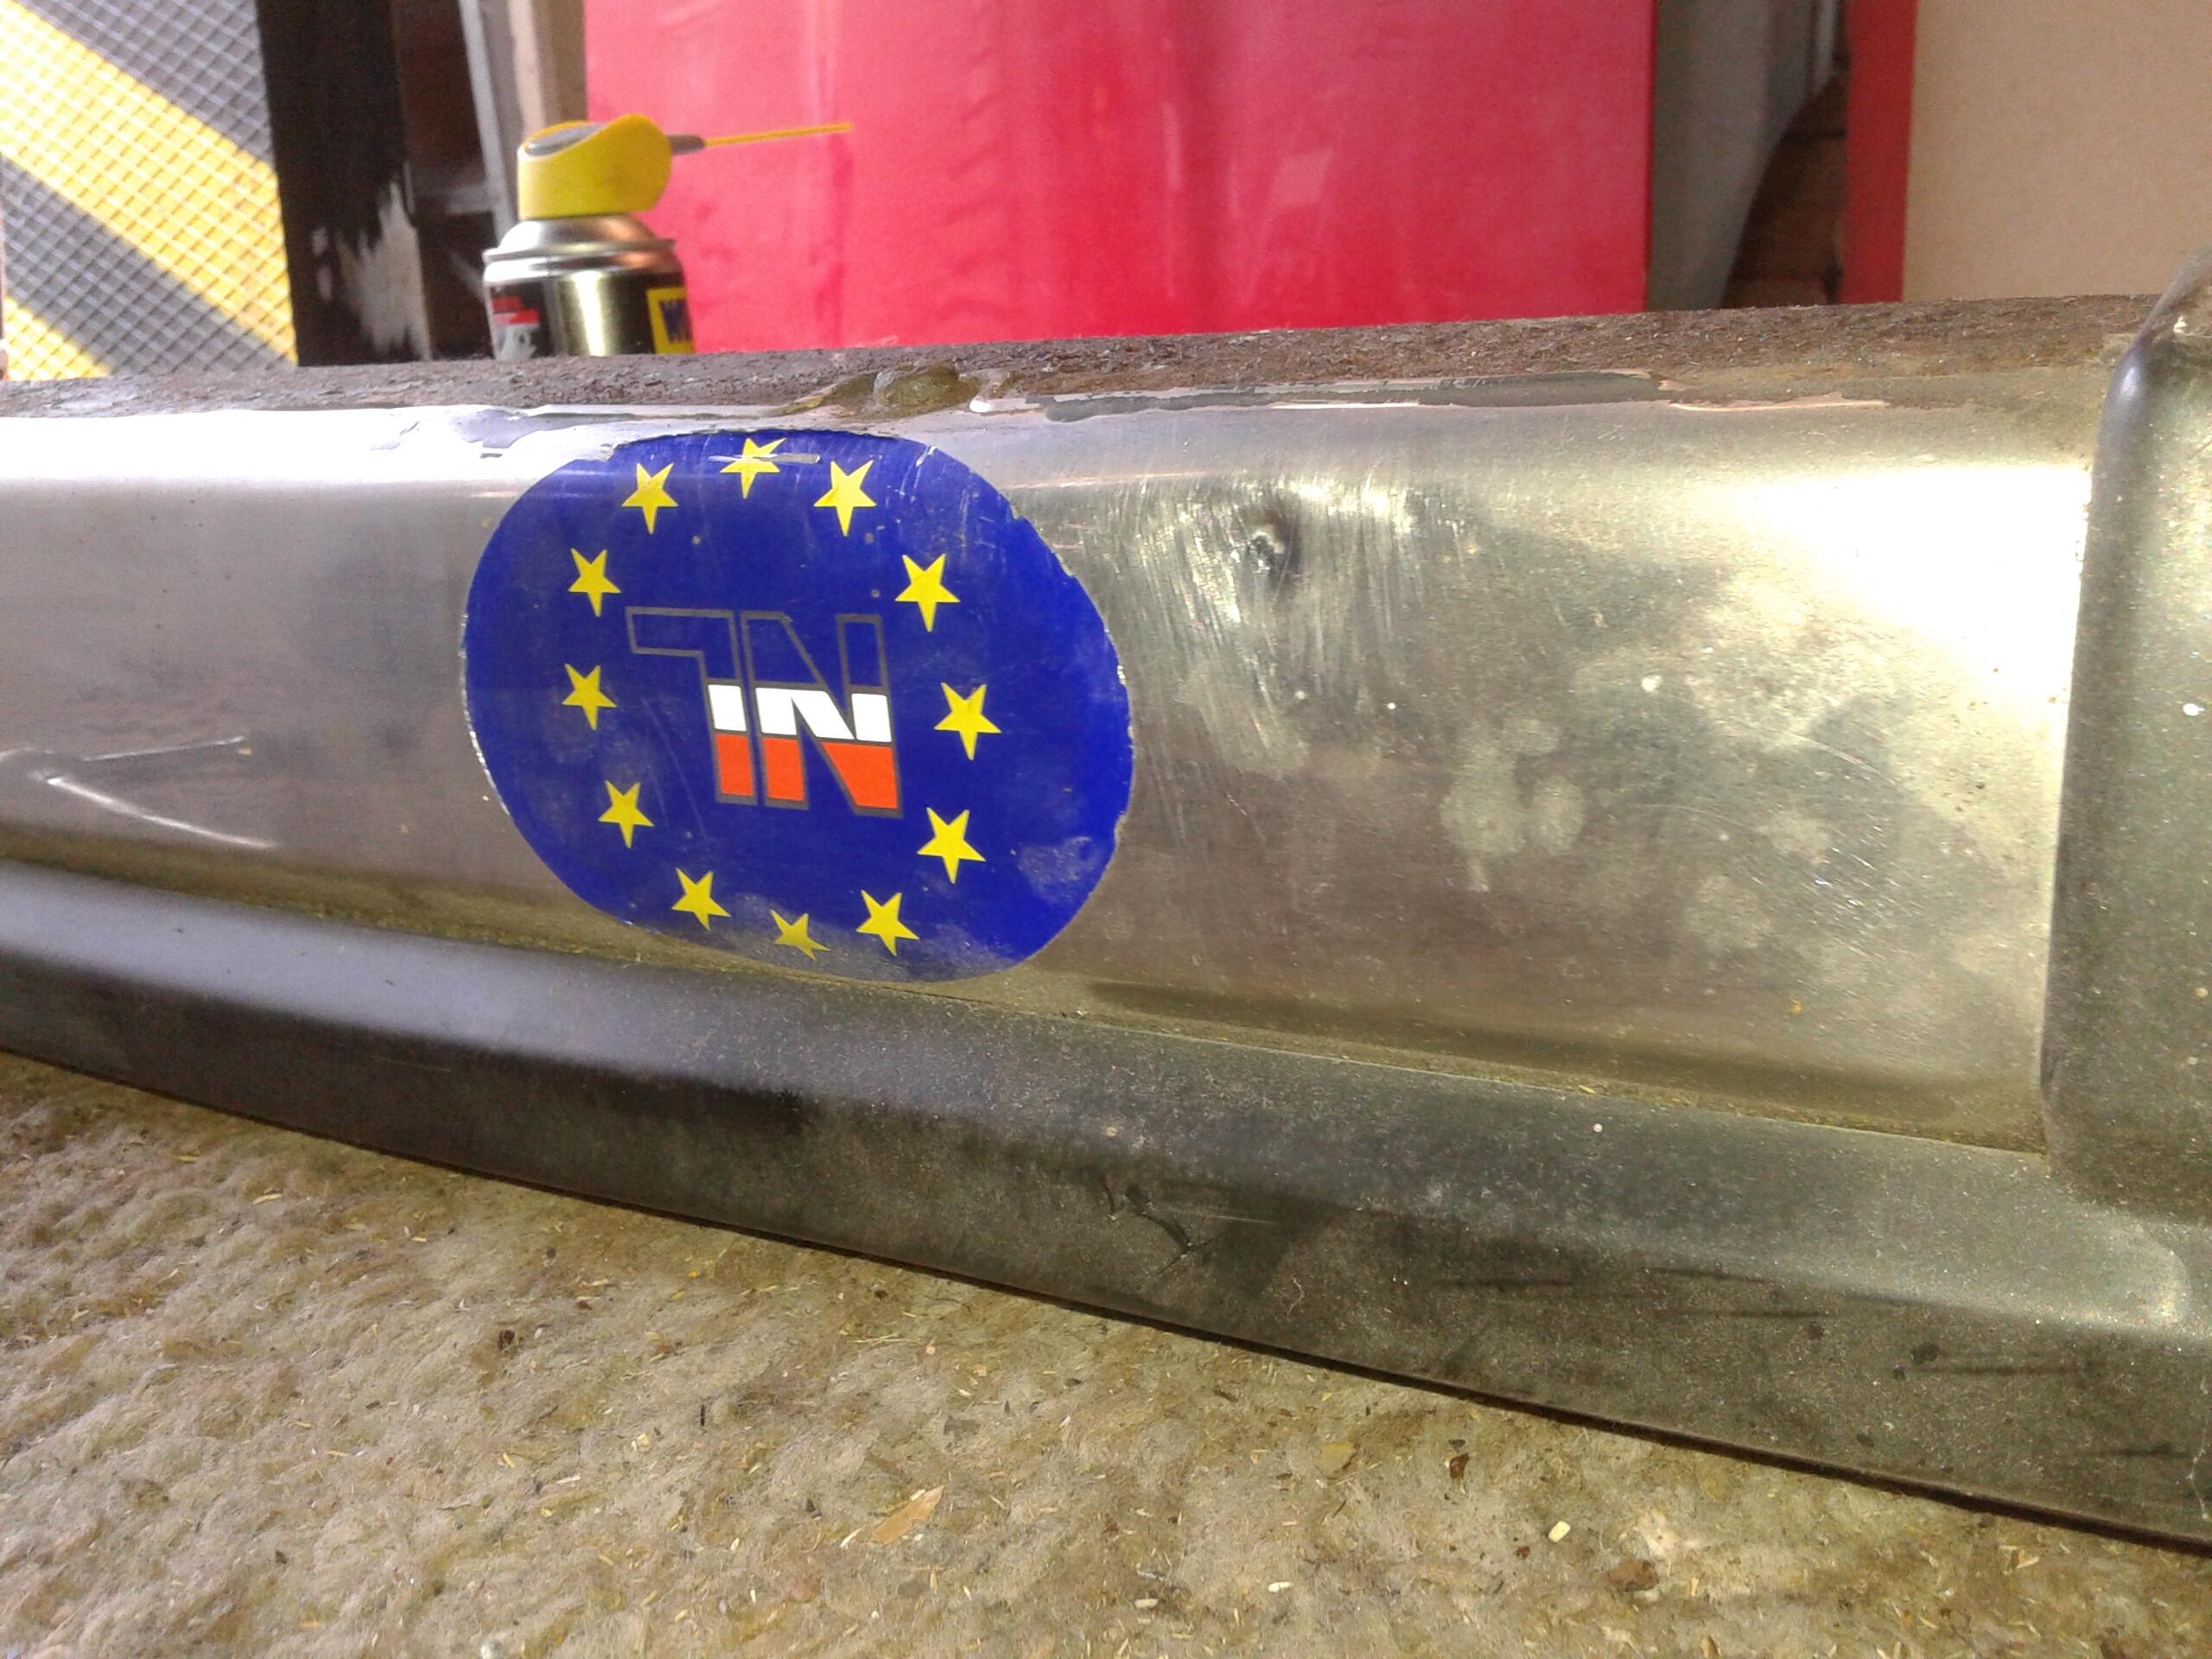
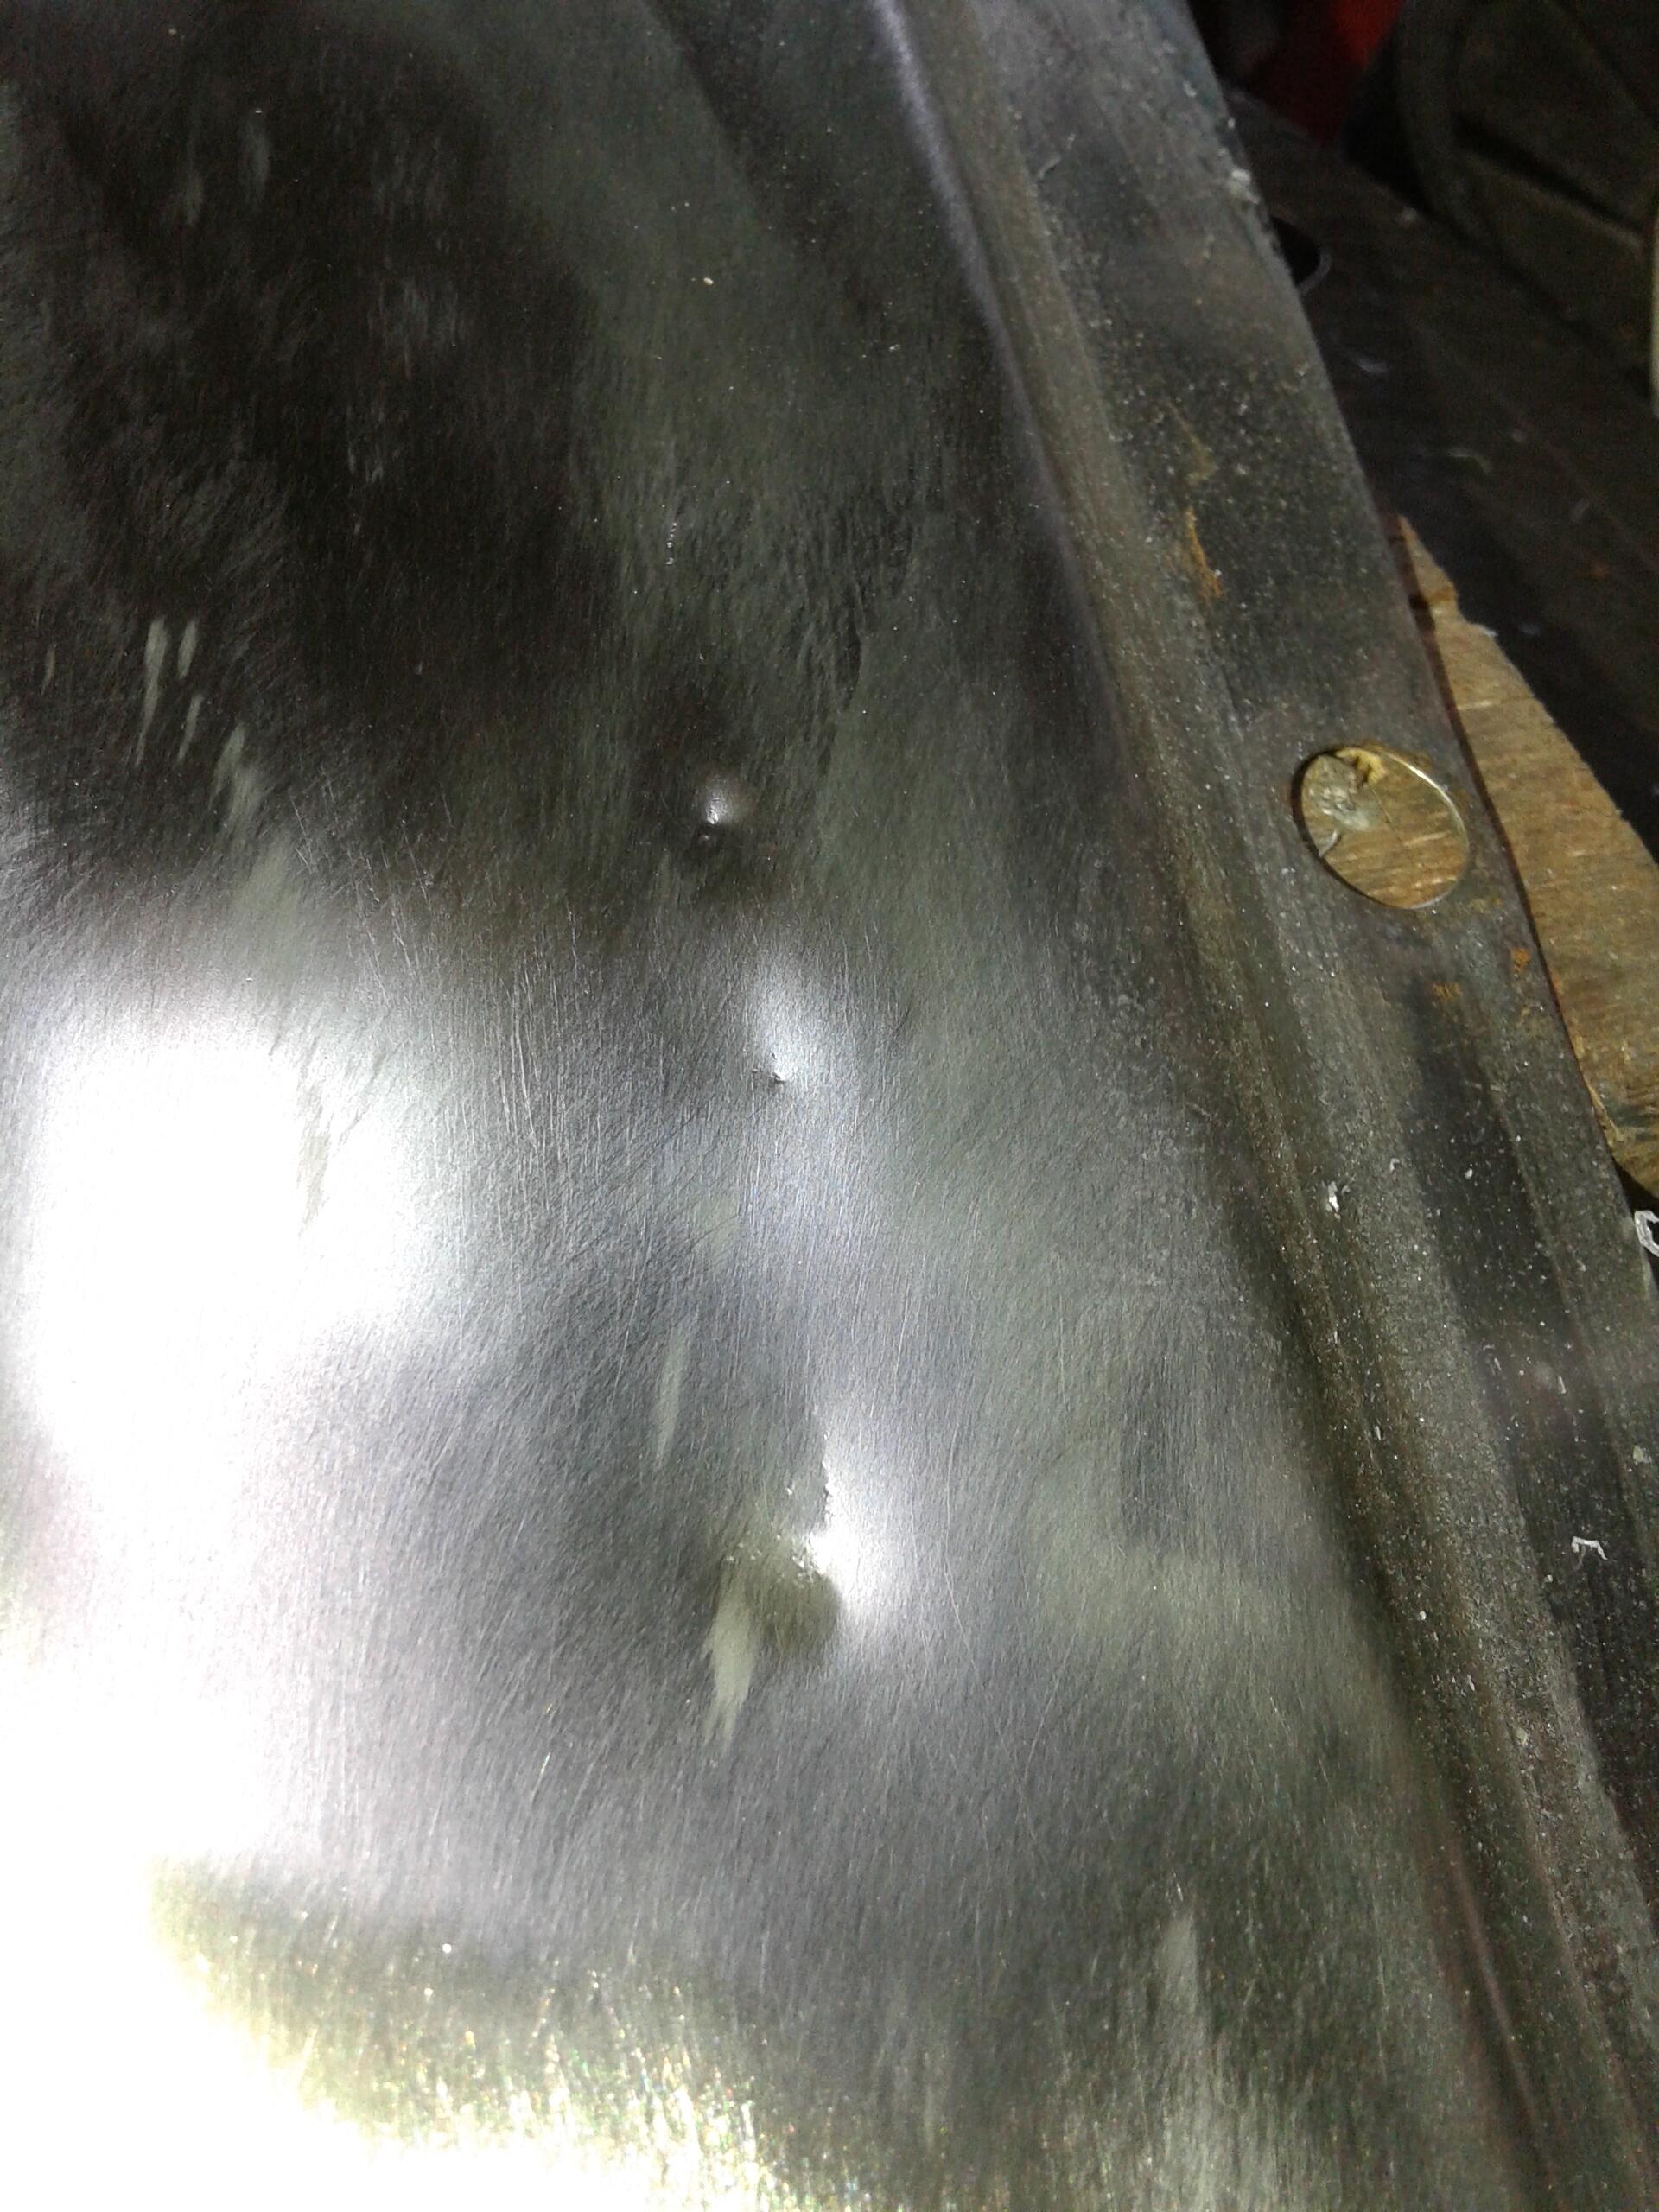
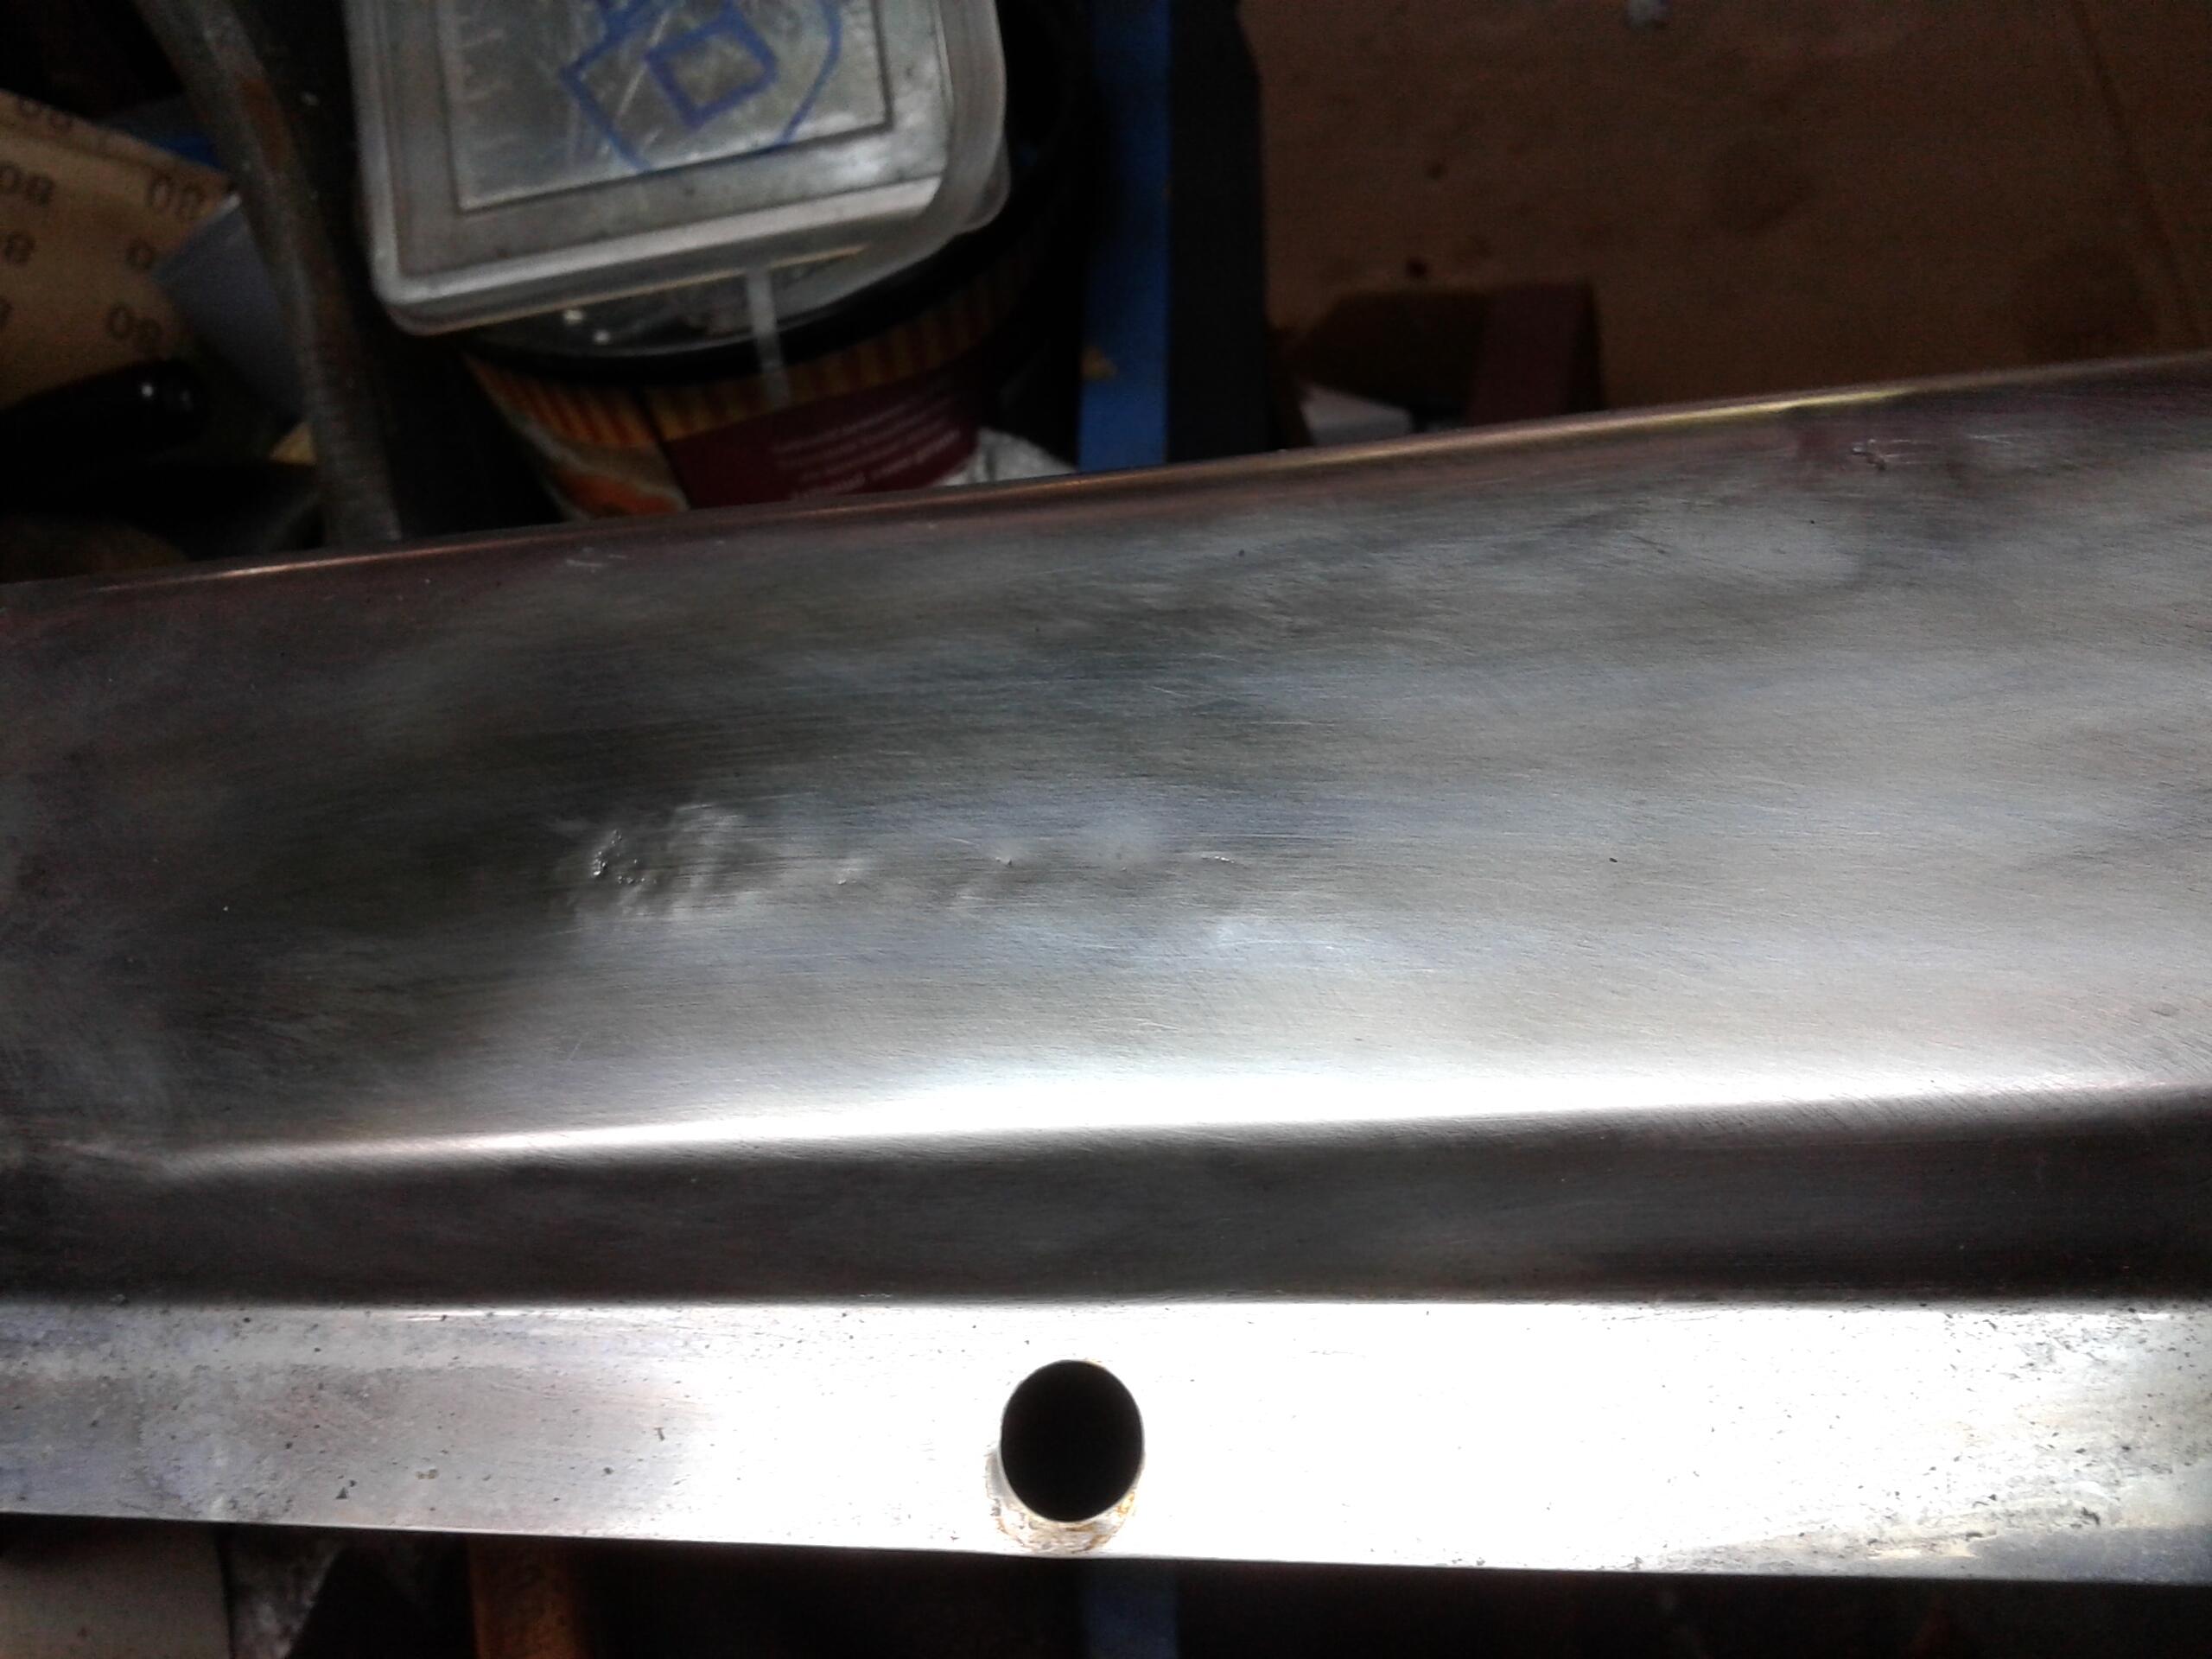
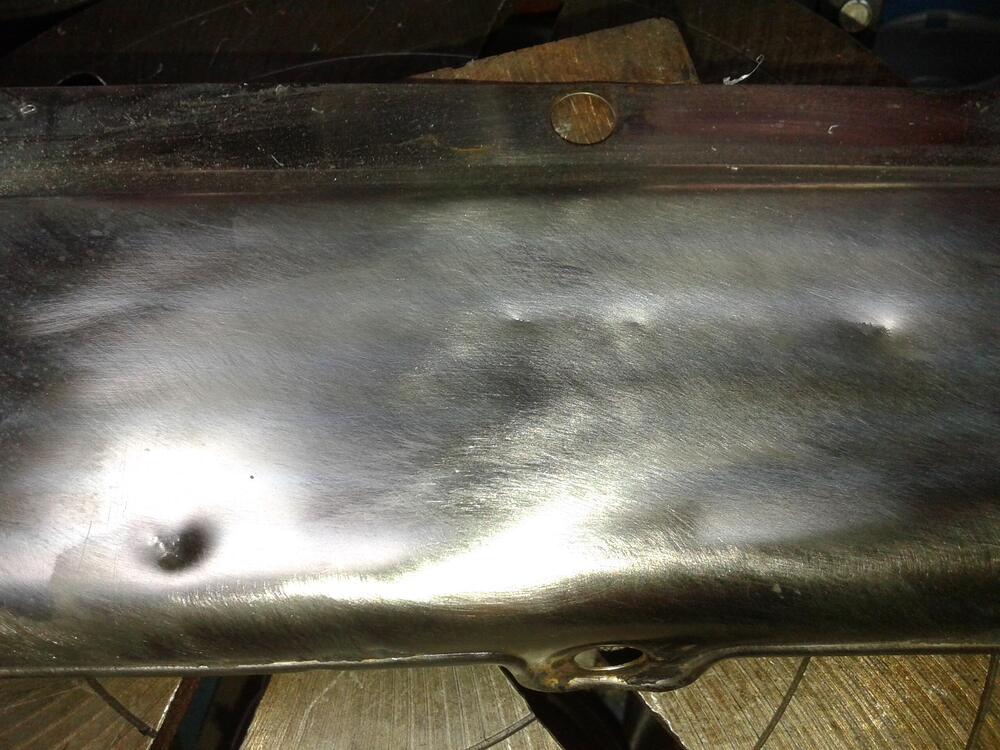
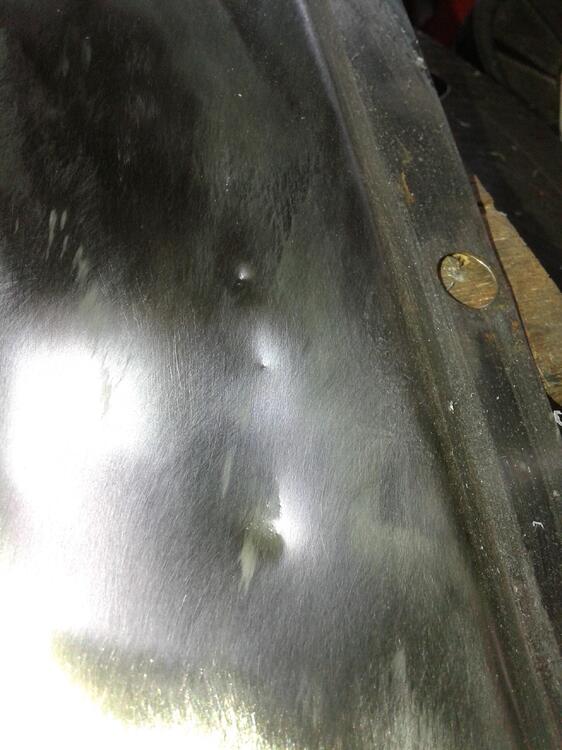
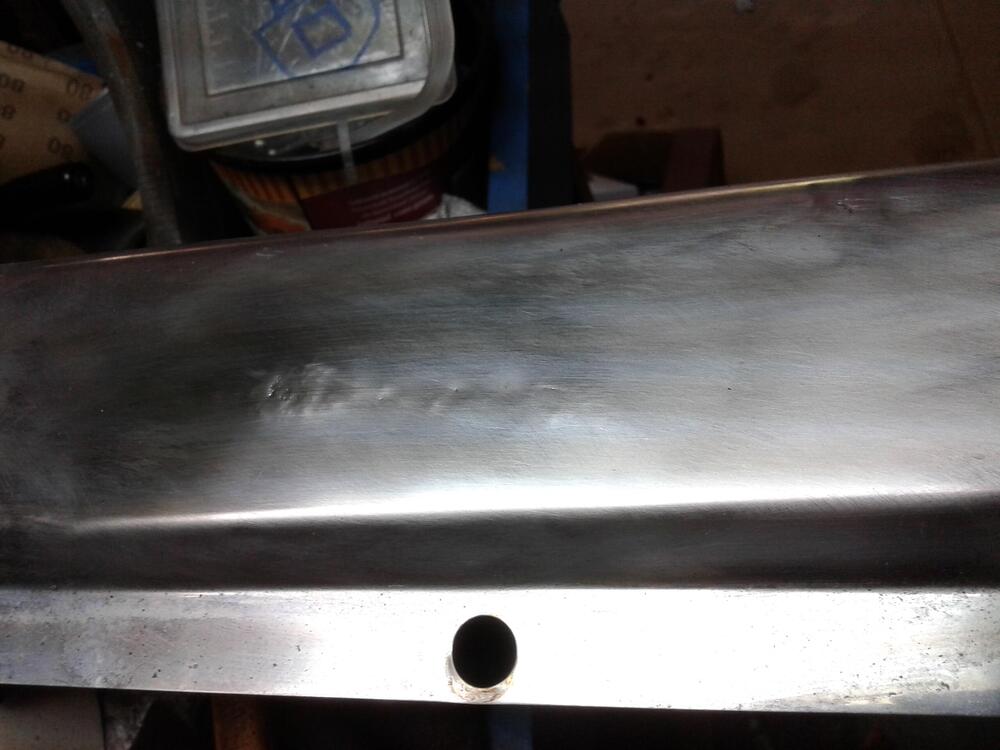
Aha.. i didn't notice that.. (I look at the repair not on the hands who are doing the work haha) I once had some very difficult dents in the rear bumper from my 280zx and worked on it for about 3 days every afternoon some hours.. I think the result is about perfect? This metal part is stainless and very hard and only 0.68 mm thick. It had some nasty dents.. the PO had bought some stickers for them haha... When i look at how bad it was.. i'm surprised myself haha.. It turned out very well.


-
Hihi.. Your gonna be surprised.. The answer is sadly.. no.. I believe that it would have had the Hitachi radio.. but that Hitachi radio looks a lot like yours so you are close ( enough.. if i would have to choose!) But then you could think, hey.. what radio had the 280z in Europe and the answer is: we didn't ... didn't have the 280z! It was a car special for the USA! We had the 260z till the 280zx came in 1979. So that's why it is possible that you see 260z from 1974-1978 overhere! And yes they had Clarion radios .. (And i think but don't know for sure that by that time they also had FM besides AM.) So they would have looked a lot like yours!
-
WOW!! I missed these videos.. The guy is a pro! I like the way he takes the time to get all the little dents out! I've done that also, but i need just a little more time as it is not my daily job haha! Also, he's a bit special.. when you look at the 26 minute 20 sec... THE GUY HAS 3 HANDS!! 🤨
-
Hitachi was the brand of the original radio in the USA, In europe we had Clarion. They only had AM in Europe. That was original for the 240z. My 280zx first edition has a mono Clarion and a stereo Hitachi cassette! It has 1 single speaker on top of the dash for the mono radio and two speakers in the back sides! So you could play them at the same time as they were completely separate units! Funny but original!
-
About living with this.. your door is not watertight this way.. so don't leave it like this..
-
First question i would have is.. does it fit like this when the rubber is out? I think it does.. If that's the case i would leave it out, loosen all the screws from the stainless part and close the door carefull then see if you can align it with the glass down.. be careful not to break the glass. Then open the door careful and fasten the lower screws and test if the door still fits. you can fasten the screws lightly and still change the fitment in the dooropening.. fidle with it take your time. I wouldn't bend the stainless, when i take a look at your foto it's repairable by only make a adjustment in the setting of the screws.. they are made for these adjustment, they can make the top shift for half an inch or even a bit more i think? above all, take your time and if you are scared to do something like this take out the glass.. but that's a lot of work.
-
I would have gone for 80Nm.. (think.. For example the wheelnuts are about the same and they are on 100-110 Nm.. ) So 59 Ft-Lbs..
-
I thought that those calipers were dark grey? (Maybe unpainted..?) I hear nobody talk about temp resistant paint? I would use some paint on it that can handle well over 150 Celcius.. (How much fahenrats that is i don't know 😉 )
-
The problem i have with those pins of emblems in the fender or elswhere,, they collect moist and the paint just needs to be a little broken and rust will come.. For thiefs of the emblems.. they get them off one way or another (And brake the paint in the holes) so i find the very sticky stuff the best solution.
-
Wow!! Then you should use some other brand, i had really difficulty to get them of my fenders years ago and used some of black tape that looked more like sealant.. Till this day it sits there on my fenders being difficult to remove.. i never tried because i got other worries haha.. Maybe one needs to clean the emblems of any grease first? I never had that problem.. are you sure there wasn't a "collector" looking for very rare emblems? 🙈
-
For as far i can remember you have to take out all the rubber and chrome parts out of the door opening as you need to start the restore of the windscreen at the bottom and work your way up and to the back.. You can't leave the chromerail above the door in place.. you have to work from the front to the back.. i believe i have something like that explaint in my 280zx slick roof restoration.. (As i don't have the t-bar car, The chrome went from under the windscreen till the c-style of my car! It's all fitted in one direction.)
-
I could believe it when you say they fit without those barrel clips! When i restore a car i weld those (alsways trouble) holes shut! Then i use some strong double sided tape in black. I know that on those Z emblems on the L and R side at the rear are 3 barrel clips (240z at least), they are often rusted.. When you go to use some double sided tape, put the tape first on the emblem and cut it to fit with a hobbyknife, then mark the spot where you want it with some tape (Just under the spot where you want it) and then place the emblem. You'll never loose it and can easy remove it with a thin wire and NO RUST EVER! 🙂