


siteunseen
Free Member
-
Joined
-
Last visited
-
 My 80s. If only I could go back! Maybe 90s? It's foggy!
-
Naw, just realized I was venting out of bounds. 🙂 I've got a lot to spew but this isn't the place for all that spewing, I'm sorry if I offended you.
-
-
I use a power pack. https://www.walmart.com/ip/20000-mAh-Portable-Charger-Power-Bank-Dual-USB-Battery-Pack-for-iPhone-iPad-Galaxy-Android-Pixel-and-Tablet-Black/3303493713
-
I'm gonna guess 1.25 Don't recall any 1.0 while I've ben fooling with Zs.
-
That's what we did with boats, river racing. Put spray paint marks on the inside of the highway guardrails along the river. 13 hundred and 20 feet, run what you brung was like a Bible verse I'll never forget.
-
-
Awe man this is a trap!
-
Agree with Yarb on rebuilt alternators. I make the store test them before I buy one. Been burnt before with a bad one, literally. Popped all my fuses as soon as I cranked the car. If you have a volt meter or can borrow one, check the fully charged battery without the trickle charger. Mine usually reads about 12.5 volts. Then crank the car and see what the alternator is adding, should go up to 13.5-ish. Check the alternator belt to make sure it's good and tight. I always use a broom stick or similar as a pry bar to get mine tight.
A quick google search... it's not good. EDIT: not trying to be a prick but the New Zealand girlfriend is online or in person? The email in question is sully38b@gmail.com. Sooooo if you get a message with that email or similar messages beware. I'd ask the moderators to ban PiersMorg18 (have already reached out to Valk and provided picture evidence). Sad what people have to resort to! Not today scammer, not today!
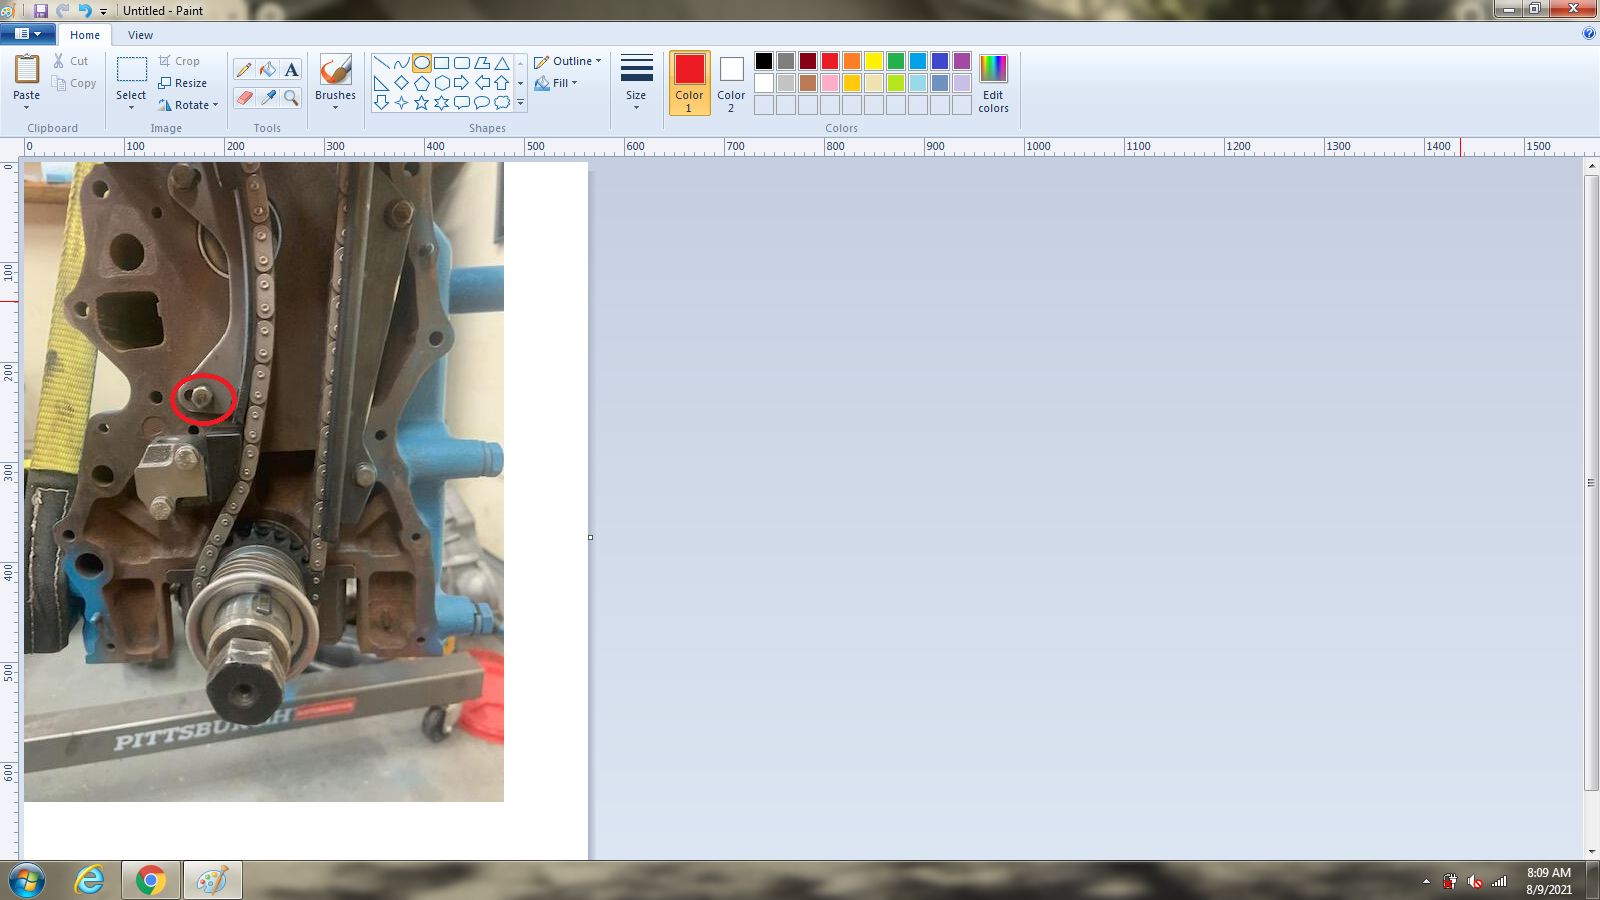
Looks cross threaded to me, and seems it should be threaded farther in if it weren't.
Clean the turkey off and cut the seats up. I used one on my boat seats years ago.
I made mine as tight as I could on the slack side, the one that curves. I pushed the tensioner in all the way and put a zip-tye on it then pushed the curved guide as tight as I could and tightened it down. For some reason I'm thinking there's a white plastic washer that goes on the tensioner between the housing and the pad but it's not visible in my picture. Maybe you can confirm that and don't forget the oil slinger that goes on the crank nose.


Important Information
By using this site, you agree to our Privacy Policy and Guidelines. We have placed cookies on your device to help make this website better. You can adjust your cookie settings, otherwise we'll assume you're okay to continue.