Patcon
Supporting Member
-
Joined
-
Last visited
Everything posted by Patcon
-
Thanks Steve
-
Here is an area calculator from Caswells site http://www.caswellplating.com/surface.html They list the tube and ask whether you are plating the inside or not. I assume if you're not plating the inside that is a line of sight thing? Not actually plugging the ends...
-
Not really any platers in my area and they don't like to mess with little stuff. Also I have had issues getting everything back from the plater, small parts are easily lots in the larger tanks. Easier to just plate in little batches as I get to it and cheaper for me in the long run because I have other cars to work on, obviously...
-
Yeah I have a few too many projects lying around but I am working on that. The thunderbirds were gonna be a restoration project and the Lexus and BMW were being parted out when work got really slow. Too many projects, too little time I have a 5" piece of 1/2" copper tube. Caswell recommends this as a test piece. As for calculating area I was unsure whether you calculate just the exterior or the interior of the pipe too. After plating for 40 minutes and still really not being fully plated, I am assuming that you should double the area So: 7.865 Squ In @ .15 = 1.179 amps if it's necessary to double it then 2.358 amps I could only get to about 0.7 so pretty far short of just the straight amperage needed. I am not sure the area of the zinc plays any part in the area and current calculations... Also in this part of the world stills are legal for personal use, but it really feels more like Dr. Frankenstein's home lab kit
-
Thanks
-
$30 is home run if they're from a Z...
-
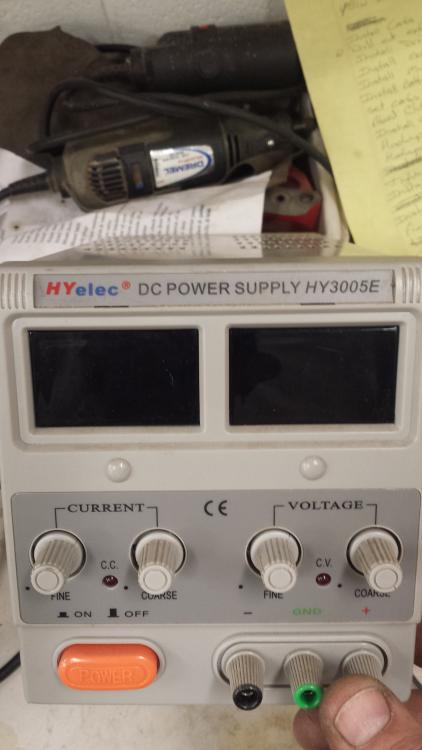
I did try that, multiple ways. With the voltage all the way up, which should make the current adjustable and constant I could only get 0.7 amps. Motorman7 What power supply are you using?
-
Are you sure the SU's you purchased are for a Datsun? Also what size are the bores? There are multiple Datsuns that ran SU's in different sizes and other cars that ran the SU design also...
-
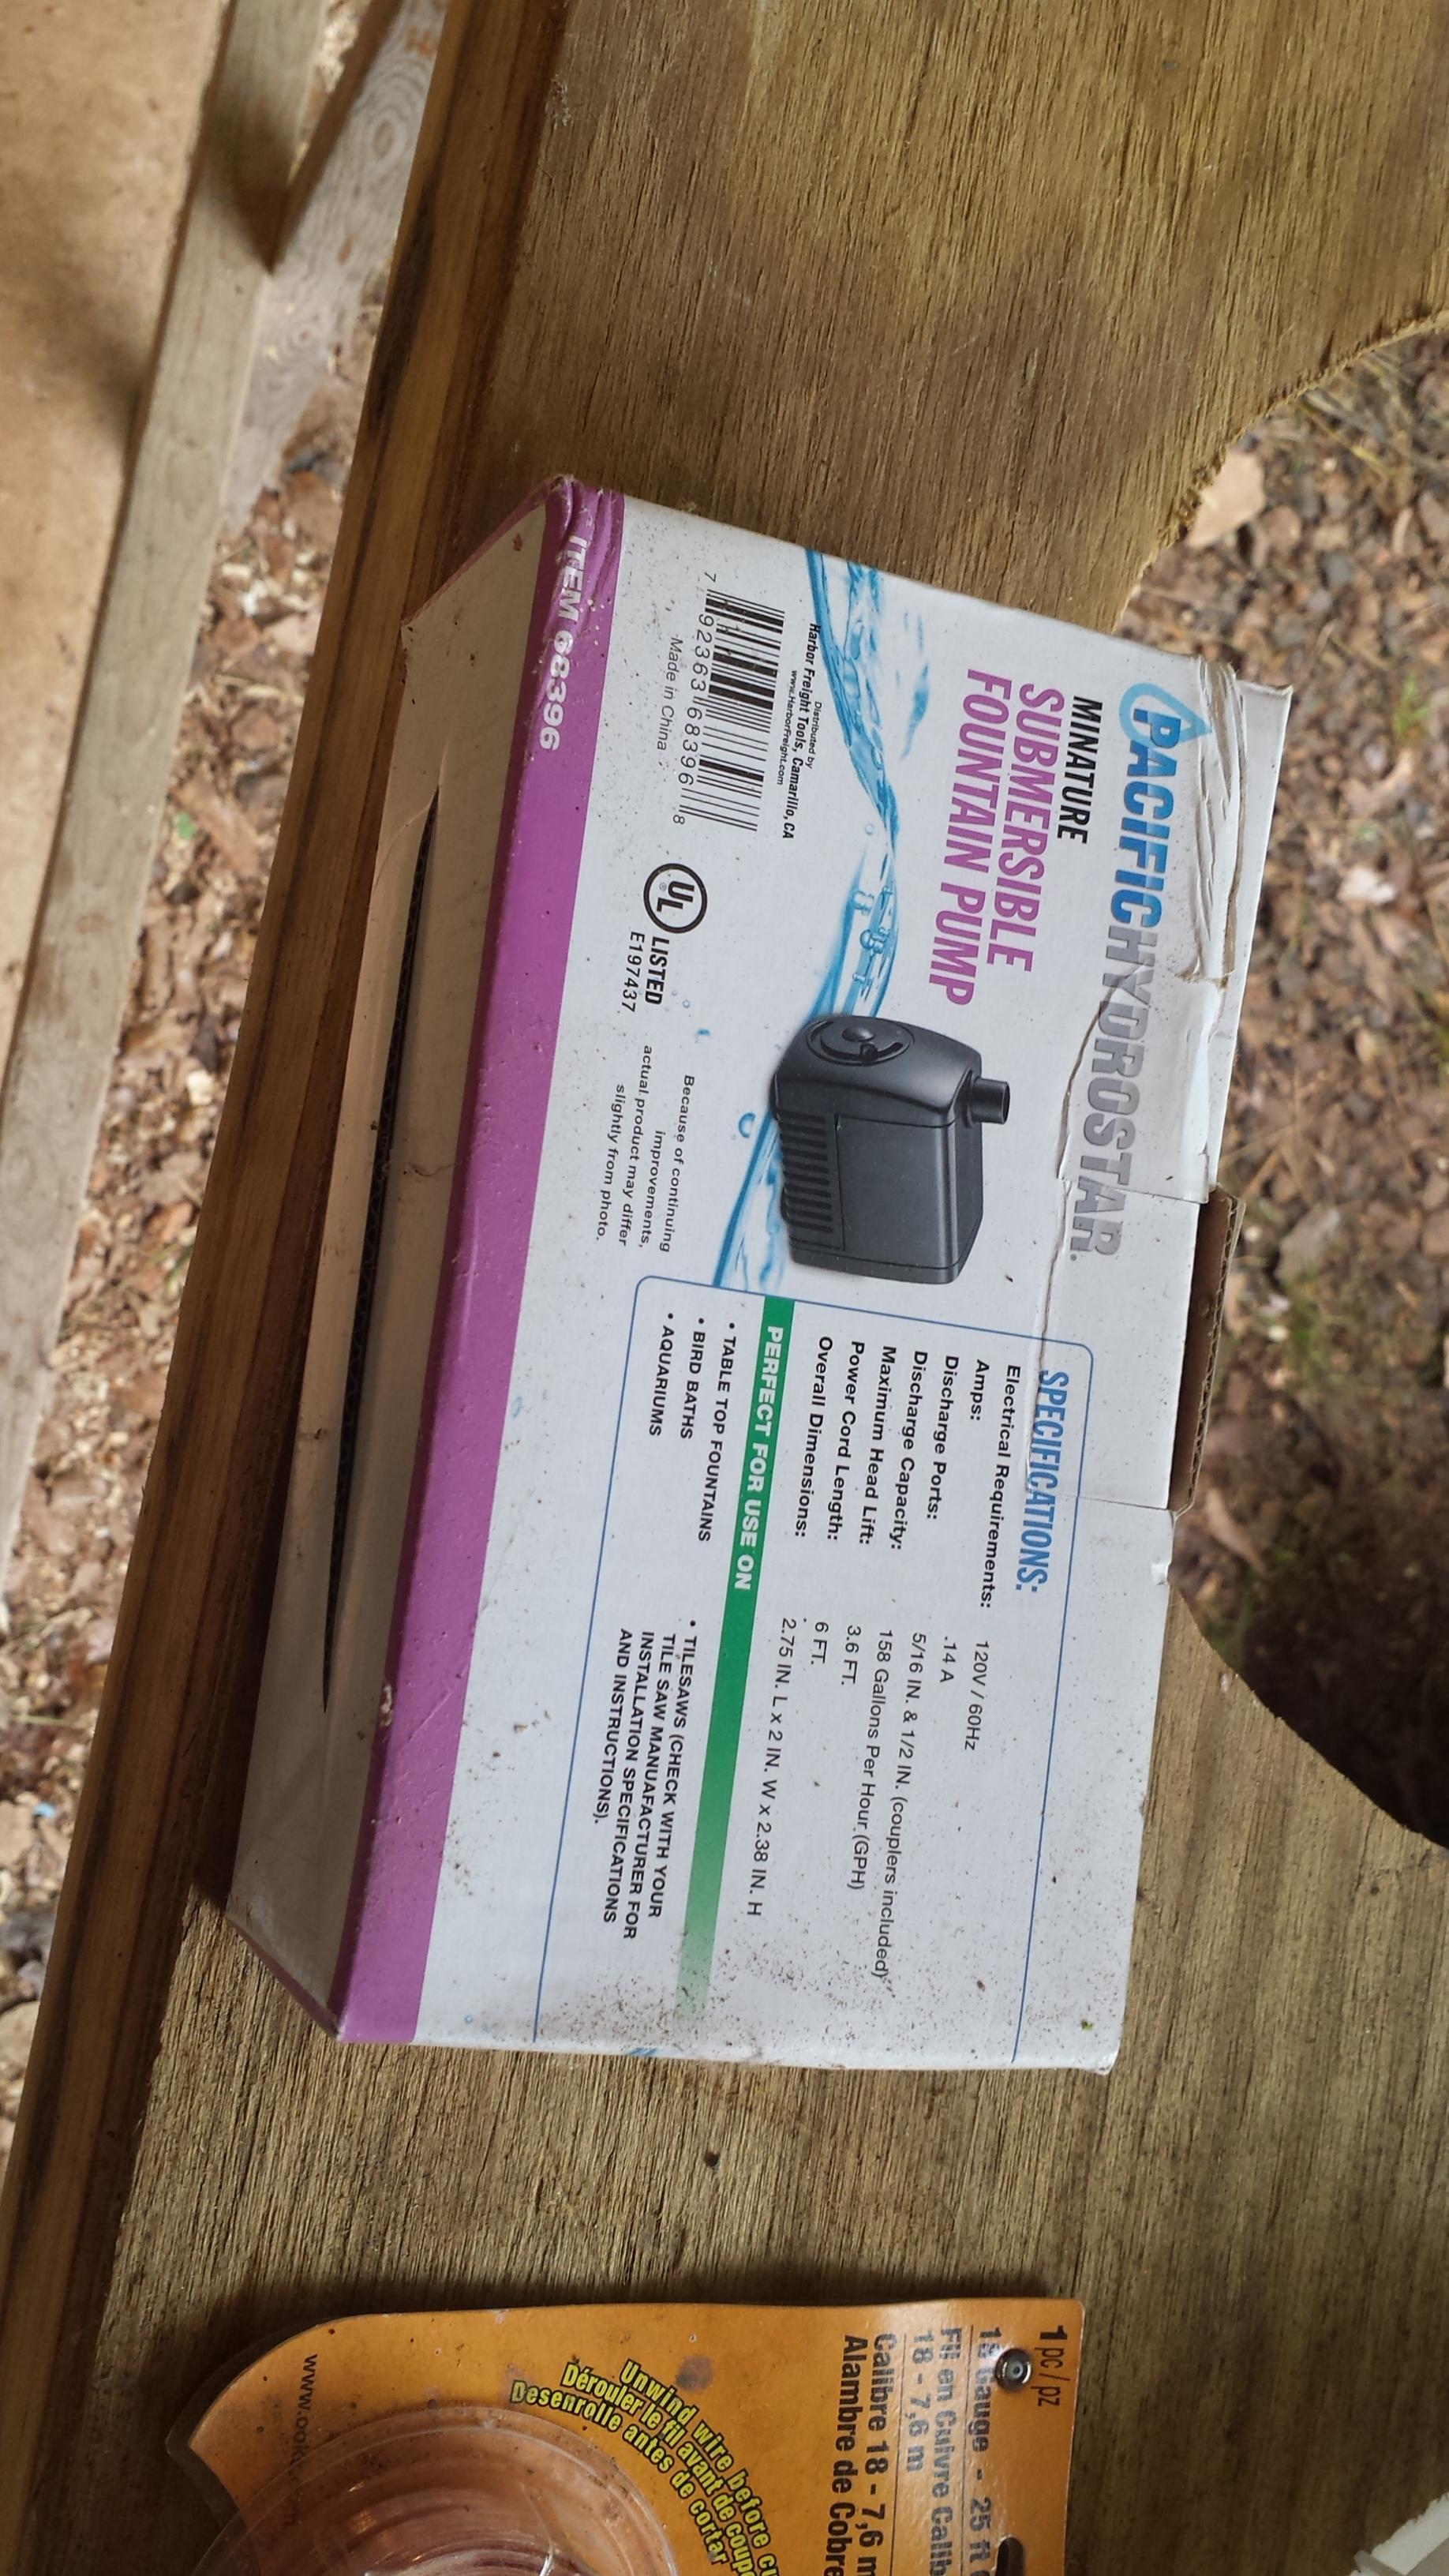
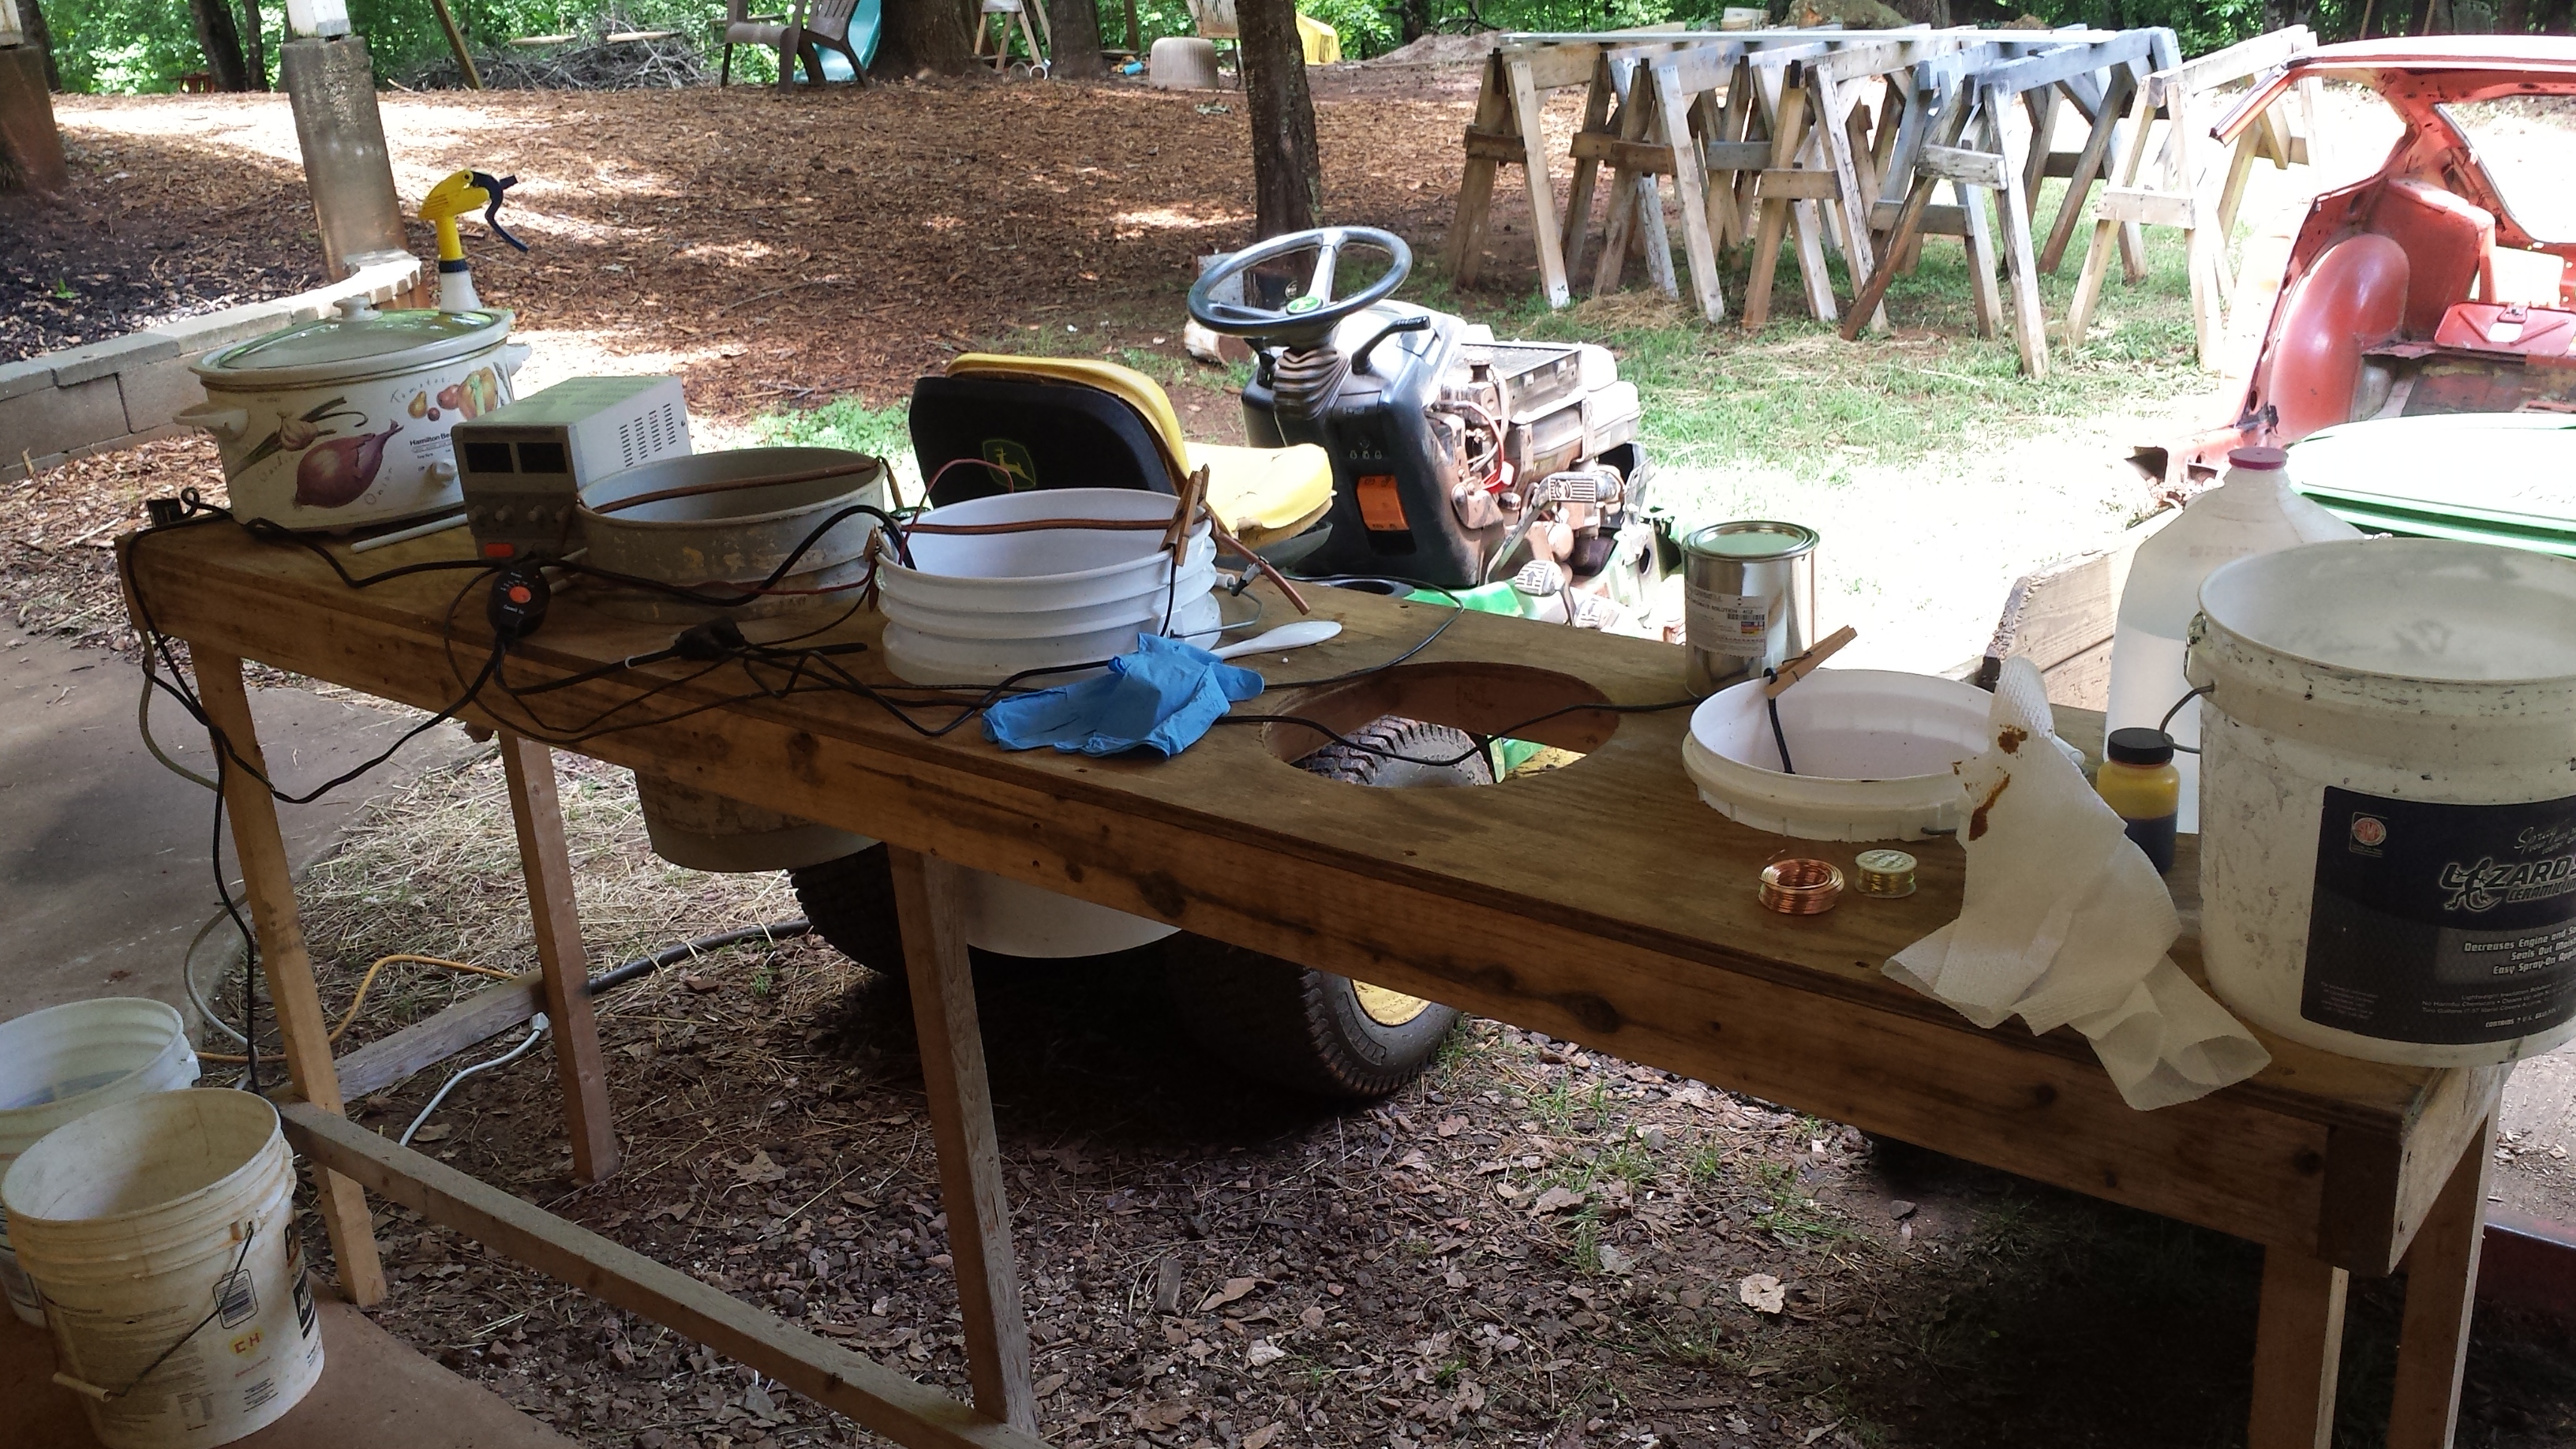
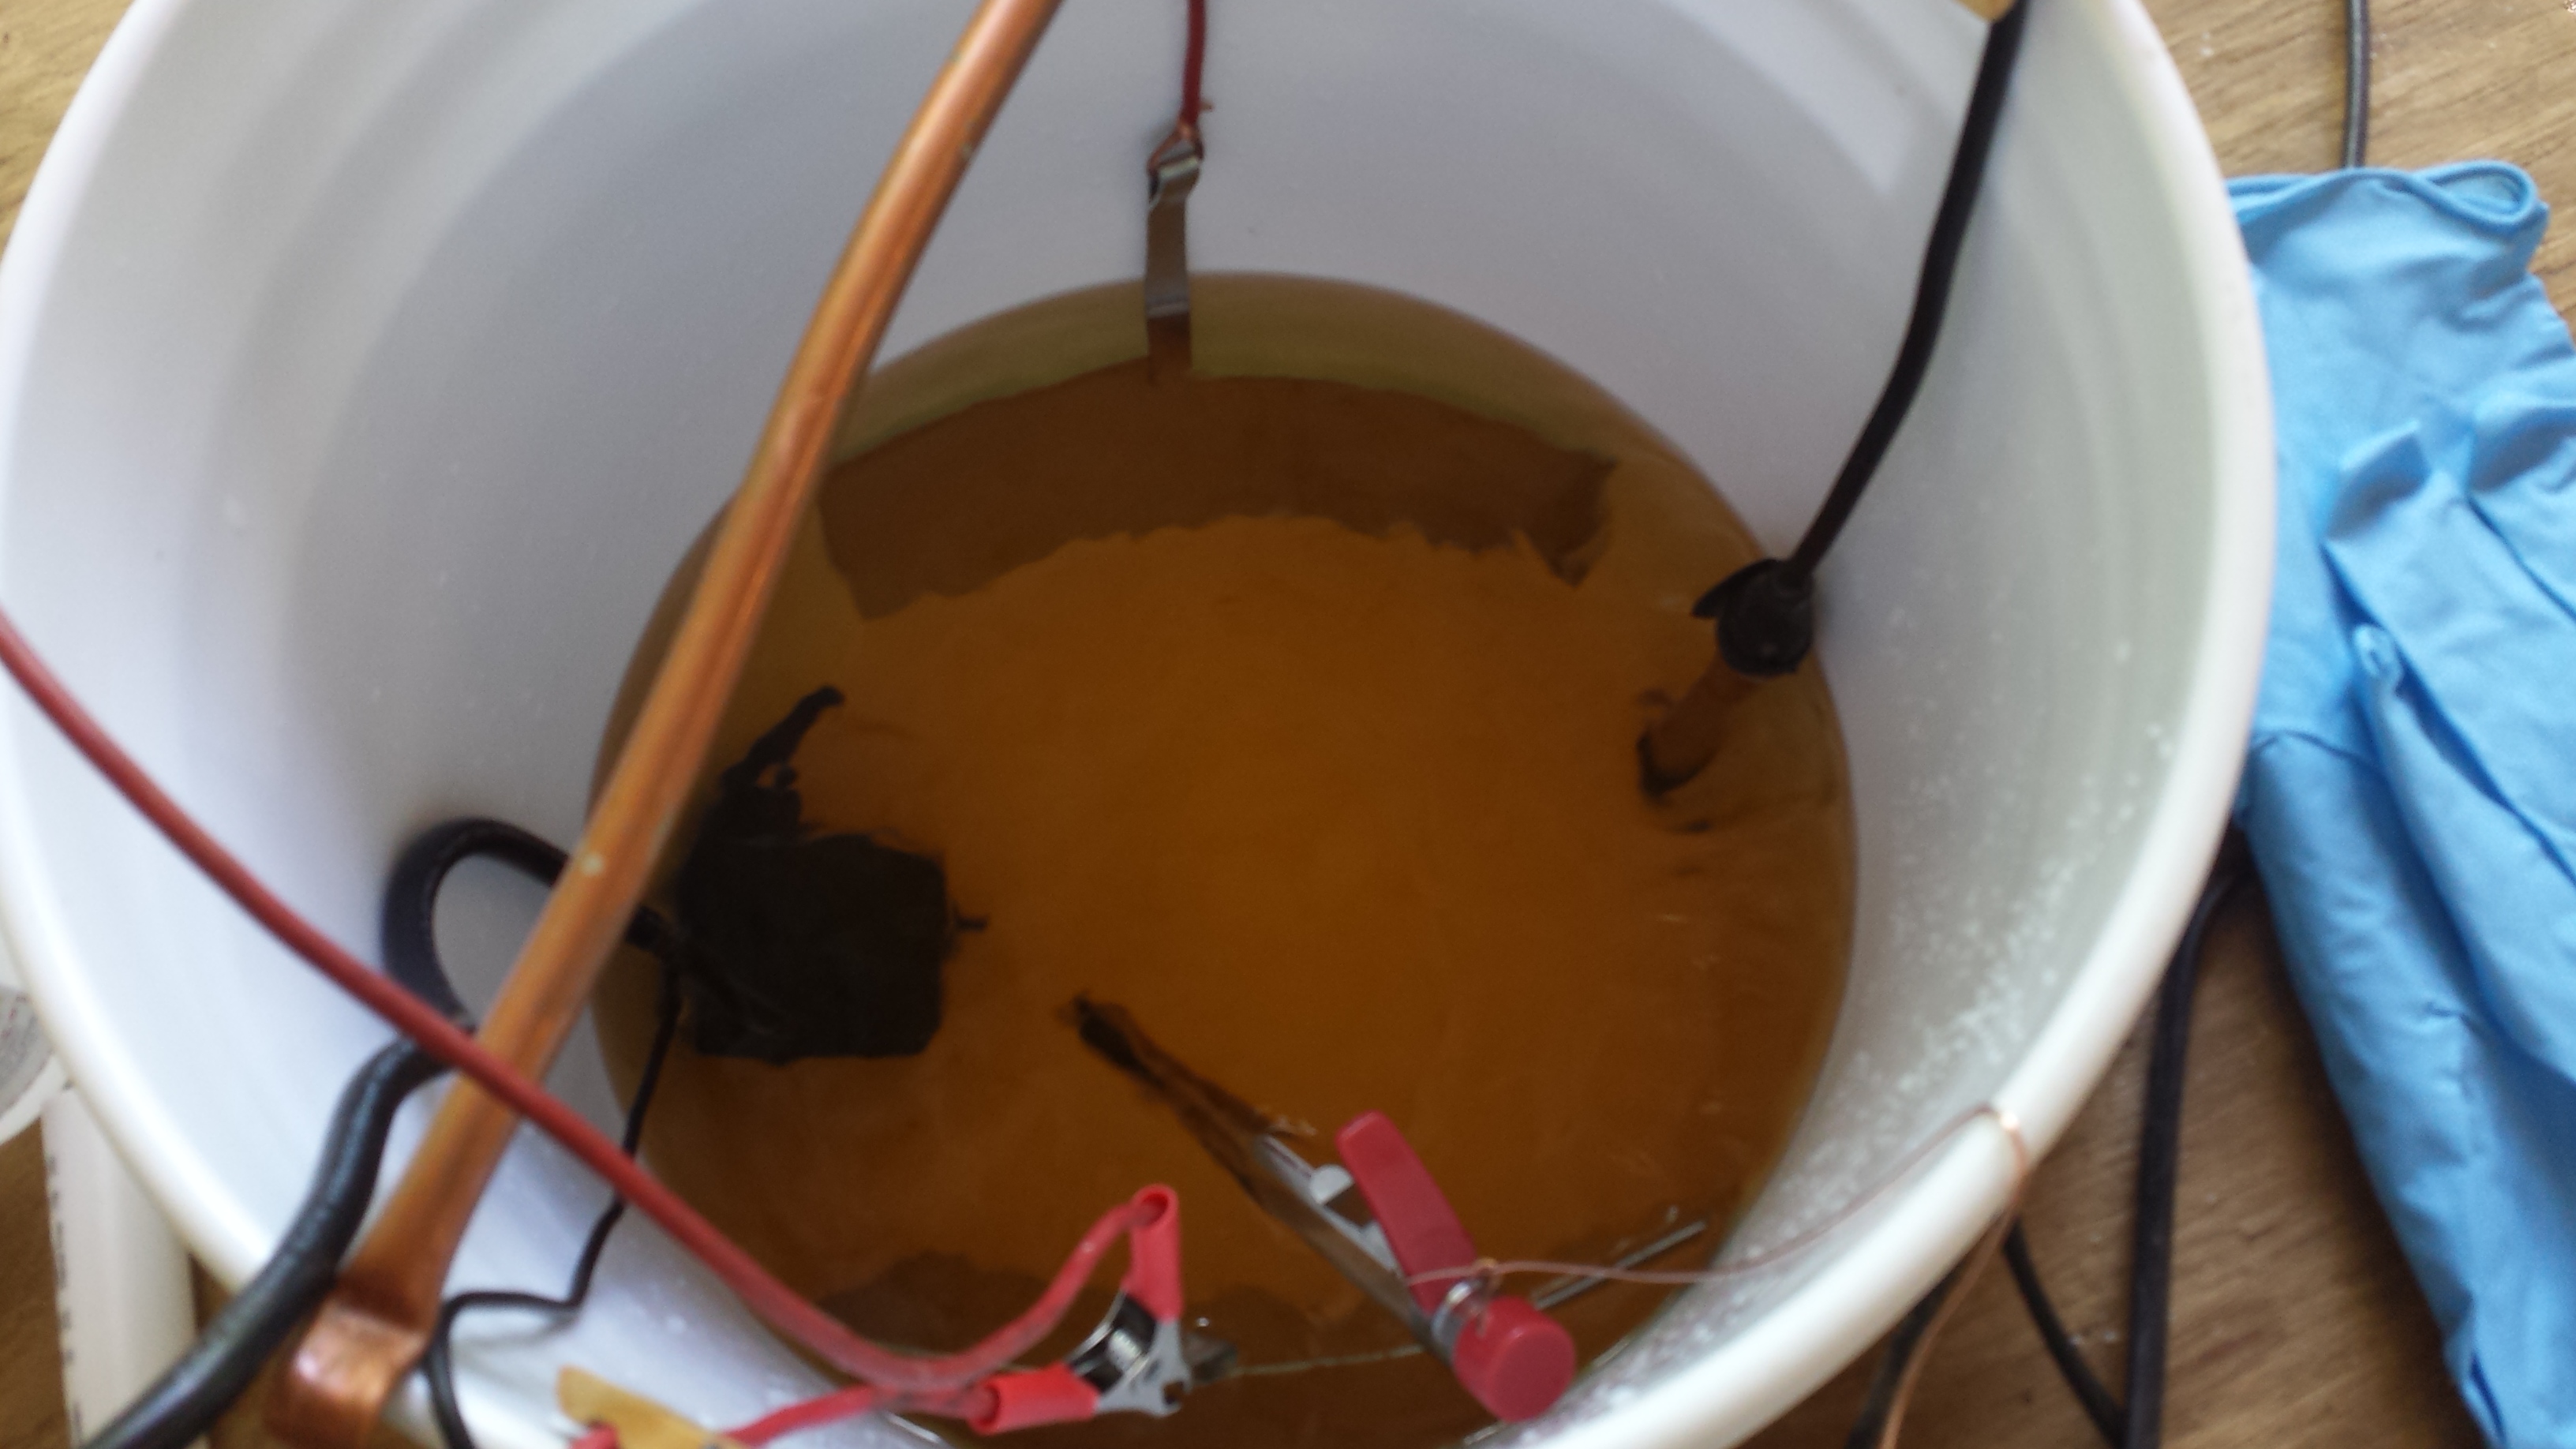
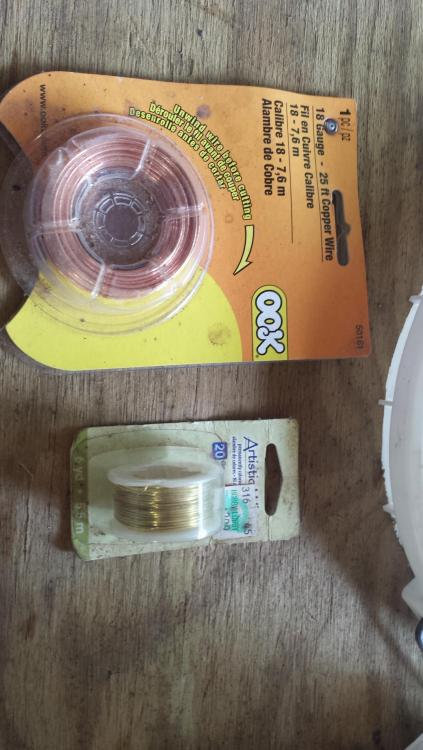
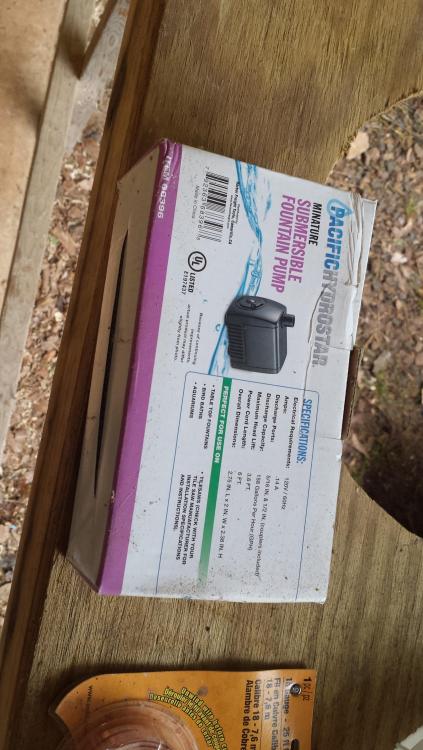
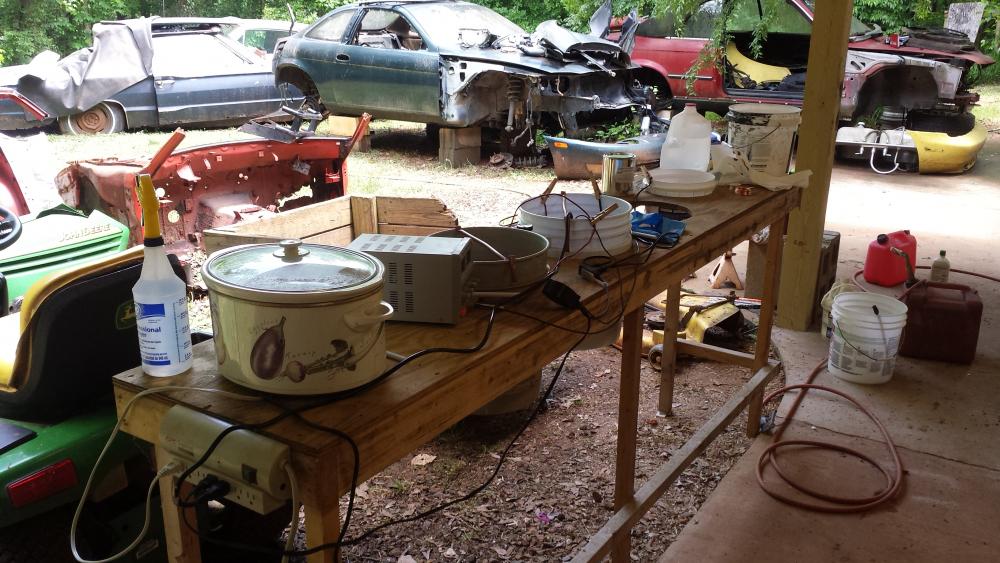
Ok, it's been a year and it's time to hit this again. I worked on my plating setup today and tried to do some plating...I was unsuccessful I am using this power supply that I purchased from another forum member with some Caswell heaters. I haven't run a full test but the power supply seems to working properly but I can't get my current up high enough... Sorry about the rotation, they show horizontal on my laptop until I add them here. The wire I'm using and the aquarium pump from Harbor Freight. The wire came from Michaels I believe. I thought the brass wire might have been painted but I have the same issue with the copper wire. Here is the current layout. Crock pot with SP degreaser in it on high. An acid tank in the next bucket after the power supply. The plating tank is this white bucket. Then I have an extra spot if I need it, then the yellow chromate tank in the 1 gallon bucket.. In the plating bucket I have the aquarium pump, the temperature sensor, the heaters and opposing zinc plates. I have done some reading and evidently the plating tank has very low resistance across it so the power supply doesn't want to raise the current. I added a 12v automotive bulb but still couldn't run the current up any higher than 0.7 Amps. Not nearly enough for my 5" copper pipe test piece. If I turn the voltage up any more I smoke the lamp. I also tried adding a regular 120v 60w bulb in series but again could raise the current up... Have any of you other guys had this issue with your power supply? I ordered a 1 Ohm 100 watt resister off Amazon. I hope that will get me going... @grannyknot @motorman7


-
I don't comment in this thread much but I want you to know I enjoy reading it and the pictures are fabulous. I will use them as information for my own build...
-
http://www.classiczcars.com/topic/55266-carlisle-import-performance-nationals-needs-show-cars-and-race-cars/ This is his thread
-
That all sounds good
-
PM cbukzesk He has a lot of parts spread out at Carlisle right now...
-
I like that drivers quarter, lots of badges and interesting stuff
-
nix240z has done this on his own Z, and he knows what it takes. You could try to patch the hole but it is hard to do with out warping the roof. The best method is re-skinning the whole roof about 150 spot welds...
-
That's the kind of advance I need...
-
Thanks Chuck I have to plan pretty far out to make these kinds of trips and work often gets in the way. I hope to start making more of these in the next few years...
-
Wish I were closer...
-
115mph in boat is hauling it...
-
Or you could contact one of the members parting cars. There are three currently I believe. I usually feel old used is better than new cheaply made...
-
I would love for you to provide some more details on what it a takes to go this route. If I were doing a car as a driver only I would be interested simply to upgrade the wiring, but since these cars many times switched the ground or had some other oddities I would like to know how hard it is to integrate a new harness to the chassis
-
I would agree with Guy. Especially if Rebello did the work...magnet anyone...
-
-
Ahh puppies, that'll make you see red...
-