



Zed Head
Community Member
-
Joined
-
Last visited
Everything posted by Zed Head
-
The resistance versus T is the same. Fitment would be the issue, I'd guess. Might be that Nissan just modified the connection part because it had a tendency to fall apart like mine did. From the 1980 EFI book.

-
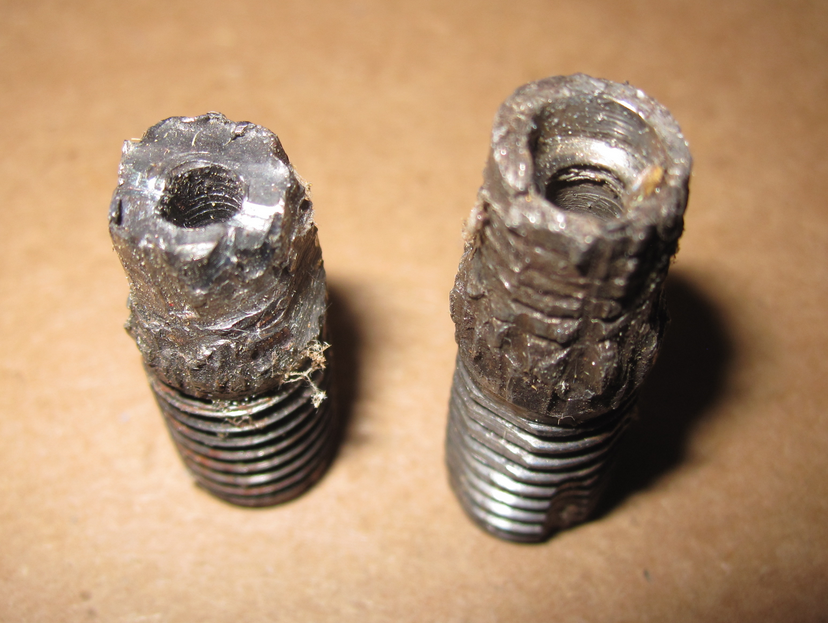
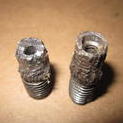
Other manufacturers have moved to dry cylinder head temperature sensors. I have a Ford that has one and they actually use the reading for the "coolant temperature" gauge in the dash. And, it turns out, they just set the needle in the middle if the temperature fits within a wide range. Anyway, on the Z's Nissan went to the head sensor with the P79 and P90 heads in the ZX's. They look almost identical. The part numbers differ by one digit. Actually, now I see the difference. But I think that they have the same thread and can be interchanged. I accidentally pulled the guts out of one of mine trying to remove the connector. It's just a dry hole with a thermistor and silicone gel inside.


-
@Joseph@TheZStore @Greg@TheZStore @James@TheZStore @zcardepot.com
-
Hope you guys don't mind, I'm going to "at" the MSA guys and ZCD. ZCD never responds but I think that he does read the posts. The guys at MSA usually respond, and seem to address issues. The penny-saving on shipping seems like a new one though. @Joseph@TheZStore @Greg@TheZStore @James@TheZStore
-
Nissan used BSPT on their tapered plumbing fittings. You could probably take the old piece that fits in the hole and "machine" it to look better. Chop the connector off. I think that they all have a sealed well inside for the actual sensing element. Or maybe find a plug on McMaster Carr. Check/uncheck the boxes on the side to change the display. https://www.mcmaster.com/standard-pipe-fittings/thread-type~bspt/brass-and-bronze-pipe-and-pipe-fittings/type~plug/ The straight thread is probably BSPP. https://www.ralstoninst.com/news/story/the-difference-between-npt-bspp-and-bspt-seals
-
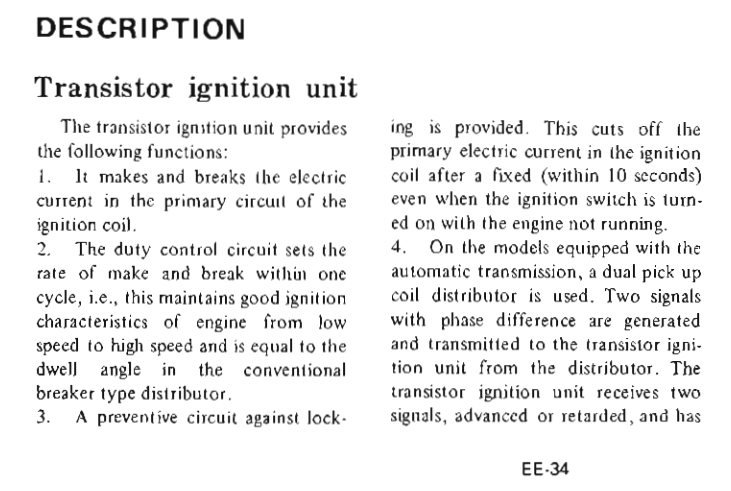
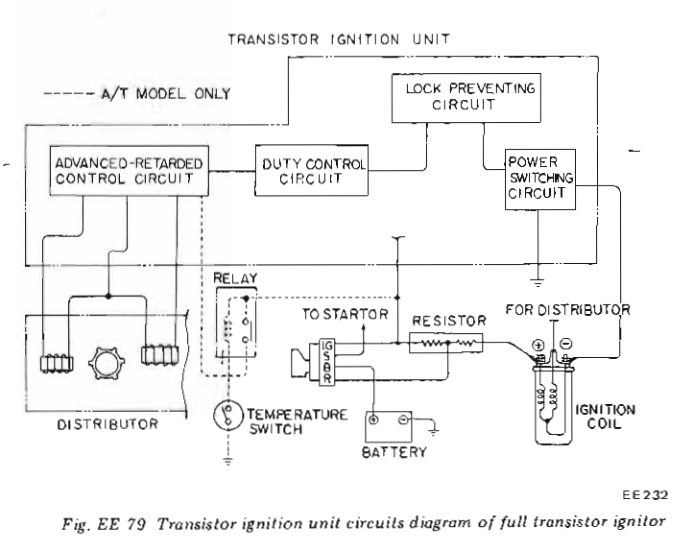
It says "lock preventing". I know it's just a translation error. Interesting though. There are better terms - current lockout? Current cut?
-
If you have the factory ignition module you should see battery voltage minus resistance drop, then it should go to battery voltage after 10 seconds (no current). For what it's worth. Not really sure why they call it "locking".
-
https://www.classiczcars.com/search/?&q=damper&author=Diseazd&search_and_or=and&sortby=relevancy
-
Shouldn't this be first? You can't have a voltage drop unless current is flowing. If you're seeing a drop at the ballast resistor that narrows things down to the ignition system. Except for the wires that are there as part of a terminal block. Nissan put extra terminals on the ballast that have nothing to do with ignition. Really though, if the problem is the battery dying with the key off, you shouldn't be looking for a voltage drop. You should just be looking for voltage. There shouldn't be any voltage at the ballast resistor with the key off. If anyone wants to summarize what the "current" problem is, feel free. I assumed it's still the battery dying.You might check the tightness of the damper on the crankshaft snout. People often use the wrong combination of washer and bolt and end up torquing the bolt in to the nose of the crankshaft without actually clamping the damper down. Bolt too long, in effect. The key will keep the damper from spinning but it can still wobble around and cause damage. I think that @Diseazd might have a picture, if my memory is right. And, if you have AC, the AC belt idler pulley bearing is known for going bad and making noise.The 7.2 volts could mean a grounded circuit, either after the ballast or the coil, maybe at the ignition module or along the way to the module. If you had points I'd say check that your points weren't closed. Edit - p.s. the coil, or the ballast, or wires in the vicinity should be warm if current is flowing, giving that big of a voltage drop. Just spitballing. Hard to get a good grasp on the overall picture.It is. It's a on a branched circuit, and 1978 has a nice protected plug. Just unplug it and let it hang. OR, disconnect the FAST module and reconnect the original one. Not really clear why the FAST module was purchased and installed. Might be a clue there. The 1978 ignition module is pretty good.You need to give more detail on how you tried and what, exactly, happened. Might be you turned the key, heard a click, and quit.Pretty sure that one of these magnets (red) needs to be in the middle of the sensor (purple). There are other tricks a person can do with wires and voltage and turning the shaft but I think it would be a bit much for this thread. Turn the distributor body until one of those magnets is centered and you will be about as close as you can get for an initial start.
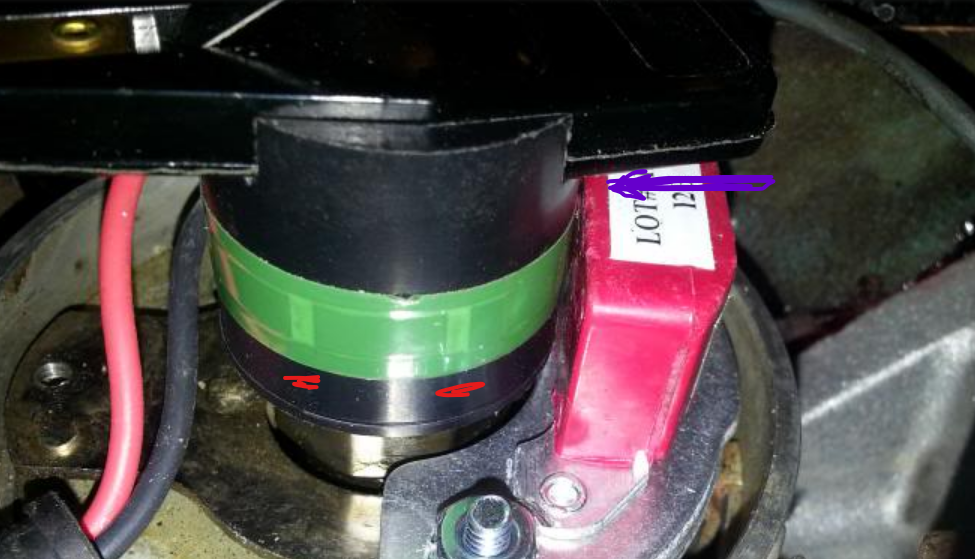 Check the trigger on the Pertronix first. I don't know how to do it, but it's important. I did some Google but the instructions are all for people who had a running engine before they swapped points. Can't find any "starting from scratch" instructions. It's probably as simple as lining up some marks on the sensor and magnet but I've never had one so don't know. If you do that you and confirm that the rotor is pointed at #1 plug wire then you'll have everything pointing where it should be pointing and it should start. Assuming...Nissan used both sides on the early cars. I think it had to do with air conditioning. That's about where you want to be. Now you just need to make sure that the Pertronix trigger is just about to trigger. If you had points or a 280Z system it would be pretty simple but Pertronix is a bit different, with the magnet.I found this picture on the Google. (It's from zcar.com but it doesn't exist in the original post, so I won't link it). The picture on the left is of the bottom pulley on the front of your engine. You should be able to see if from the passenger side of the car. Shine a bright light down there and look. Those are your ignition timing marks. The picture on the right is of the distributor base. Nissan put degree marks right on the base of the distributor. Yours will probably be off because you have Pertronix now but they should be close. See if yours is between the A and the center mark. p.s. you don't have to remove anything or turn any bolts except for the screw that locks the distributor body down.
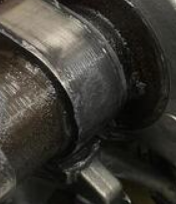
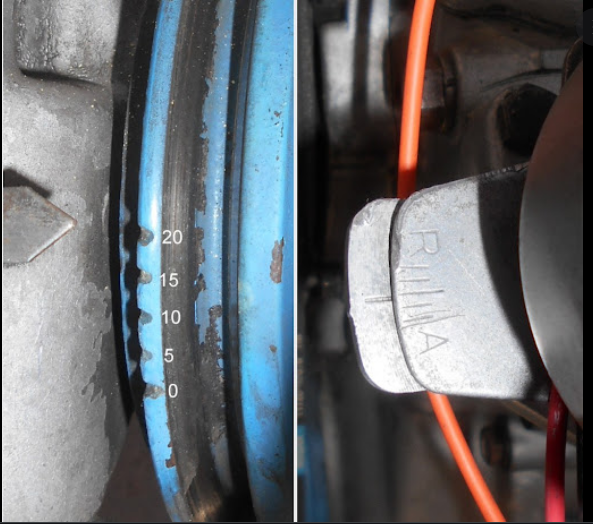 The "bunny ears" picture confirms that you are on the compression stroke. The rotor seems to be pointing close to the correct direction. But the distributor body is rotated too far counterclockwise, (compared to site's picture at the top of the page) which would cause the ignition timing to be retarded. Can you get a picture of the timing mark on the damper pulley? It should be at zero or about 10. Then you need to rotate the distributor to get the Pertronix trigger at the right point. The Pertronix guys know how to do that. But, just because you're on the compression stroke doesn't mean you have compression. I can't remember all of the details of what's been done to your engine but the cam lobes look a bit used. Anyway, as far as parts they look pretty close except for your ignition timing. Get your igntion timing adjusted and use some starting fluid and you should get it to start for a few seconds.
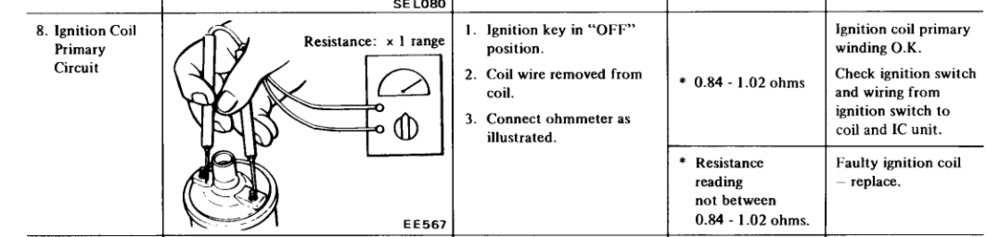
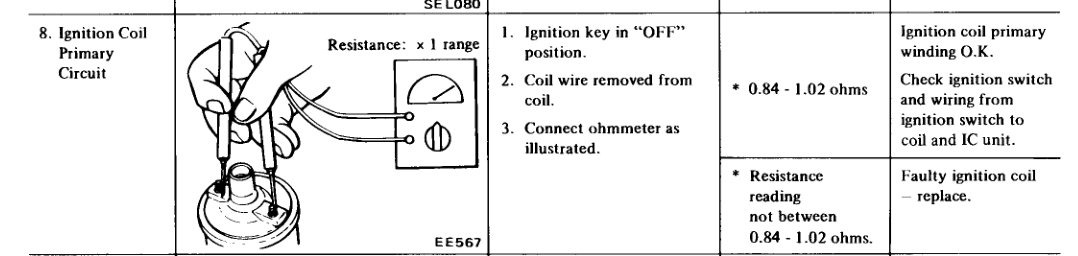
 The primary circuit is what you want to match to your ignition module. That's + terminal to the - terminal. And if you got 1.2 ohms (not k-ohms) from the center post to the + on your #2 coil, it's no good.
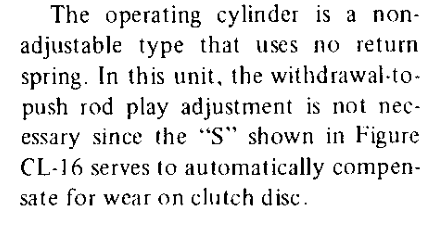
 I see your problem now. Wasn't sure what the concern was. But you're kind of at the point of just adjusting based on the principles of operation. You don't have the full set of original parts. I think that what you have is a self-adjusting cylinder with a rod that is meant to fit the clutch for the old adjustable style. So you don't need the spring. The only reason to use the adjustable rod is because the clutch fork won't take the new style of rod, because of the hole. I think that you'll need to study the original procedure and realize that the external spring pulls the piston all the way to the back of the bore on the old style and then they have you loosen up the rod length just a hair so that it gives maximum stroke, but doesn't wear out the TOB. So what you could do is adjust the rod length so that the piston is pushed back all the way then shorten it enough to give you that "S" distance shown on the drawings for the newer style. Or, just match the match the length of the newer non-adjustable rod. If you haven't installed the transmission yet, you could change the fork to the later style and use the non-adjustable rod. It's a judgement call. There is no Nissan procedure for it, I think.They don't make it very clear but the "self-adjusting" slave cylinder has a longer bore (I believe, that's why they call it out and describe the self-adjusting operation) and an internal spring. The "S" that they show is the possible stroke area, not the working stroke. There is actually a lot of information in the drawing if you stare at it long enough. You don't need the external spring and you don't need to adjust it. As long as you have the correct match of throwout bearing sleeve/collar and pressure plate (92 mm). Here is another version from 1976 of the text that EuroDat copied from 1974. Basically what Nissan is saying is "we fixed the slave cylinder so that the risk of poor adjustment is gone". No return spring necessary, no adjustment necessary (because "S" is long enough to take up the disc wear). The match between TOB sleeve and pressure plate is very important though.
 Ignition module. By the fuse box.It would be in the FSM's for the later year Z's. Maybe 73 and after. Actually, I just looked and 73 and after is the non-adjustable type.Just a look back at the start of the problem. All of the new electrical connections should be examined for correctness. Any one of the three could be the source of the problem. But, if you take your first post literally, then the problem happened with the key at Start. That narrows things down to the circuits involved in starting. It might be though, that the smoking happened when you turned the key on. Whatever it is though, the circuits initiated by the key seem to be involved. Unless the smoking started as soon as you connected the battery terminals. I'm just offering a different way to address the problem. Your first post actually leaves a lot out that could be important. If I had the problem I would disconnect the battery, and check the positive cable resistance to ground with the key in whatever spot it was in when the smoking started. Remove loads until resistance rises to the appropriate level.



Important Information
By using this site, you agree to our Privacy Policy and Guidelines. We have placed cookies on your device to help make this website better. You can adjust your cookie settings, otherwise we'll assume you're okay to continue.