Leaderboard
-

SpeedRoo
Free Member2Points357Posts -
jfa.series1
 Subscriber
 2Points2,731Posts
 -

cgsheen1
Free Member2Points684Posts -
26th-Z
Free Member1Points5,263Posts


Popular Content
Showing content with the highest reputation on 10/24/2025 in all areas
-
2 pointsBetter question is what is that carb for... Sorry, no love for those with me.2 points
-
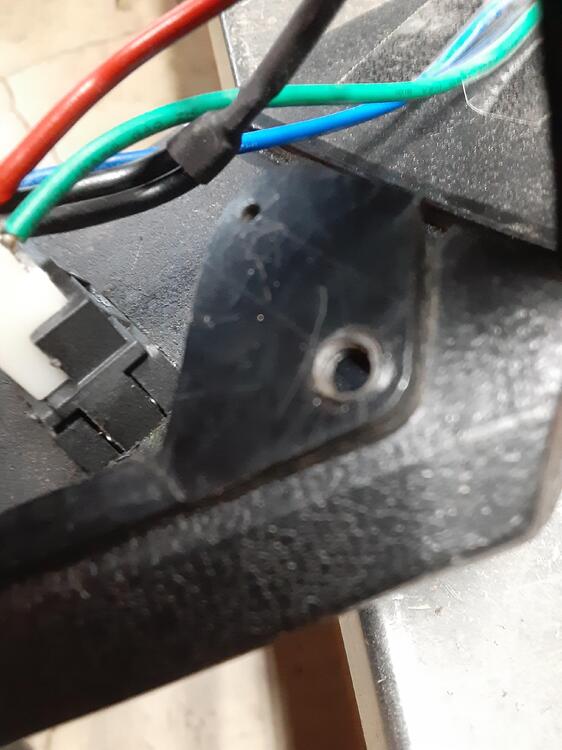
2 pointsFresh air intakes for the vents controlled by pull/push knobs under the dash near the driver and passenger kick panels.2 points
-
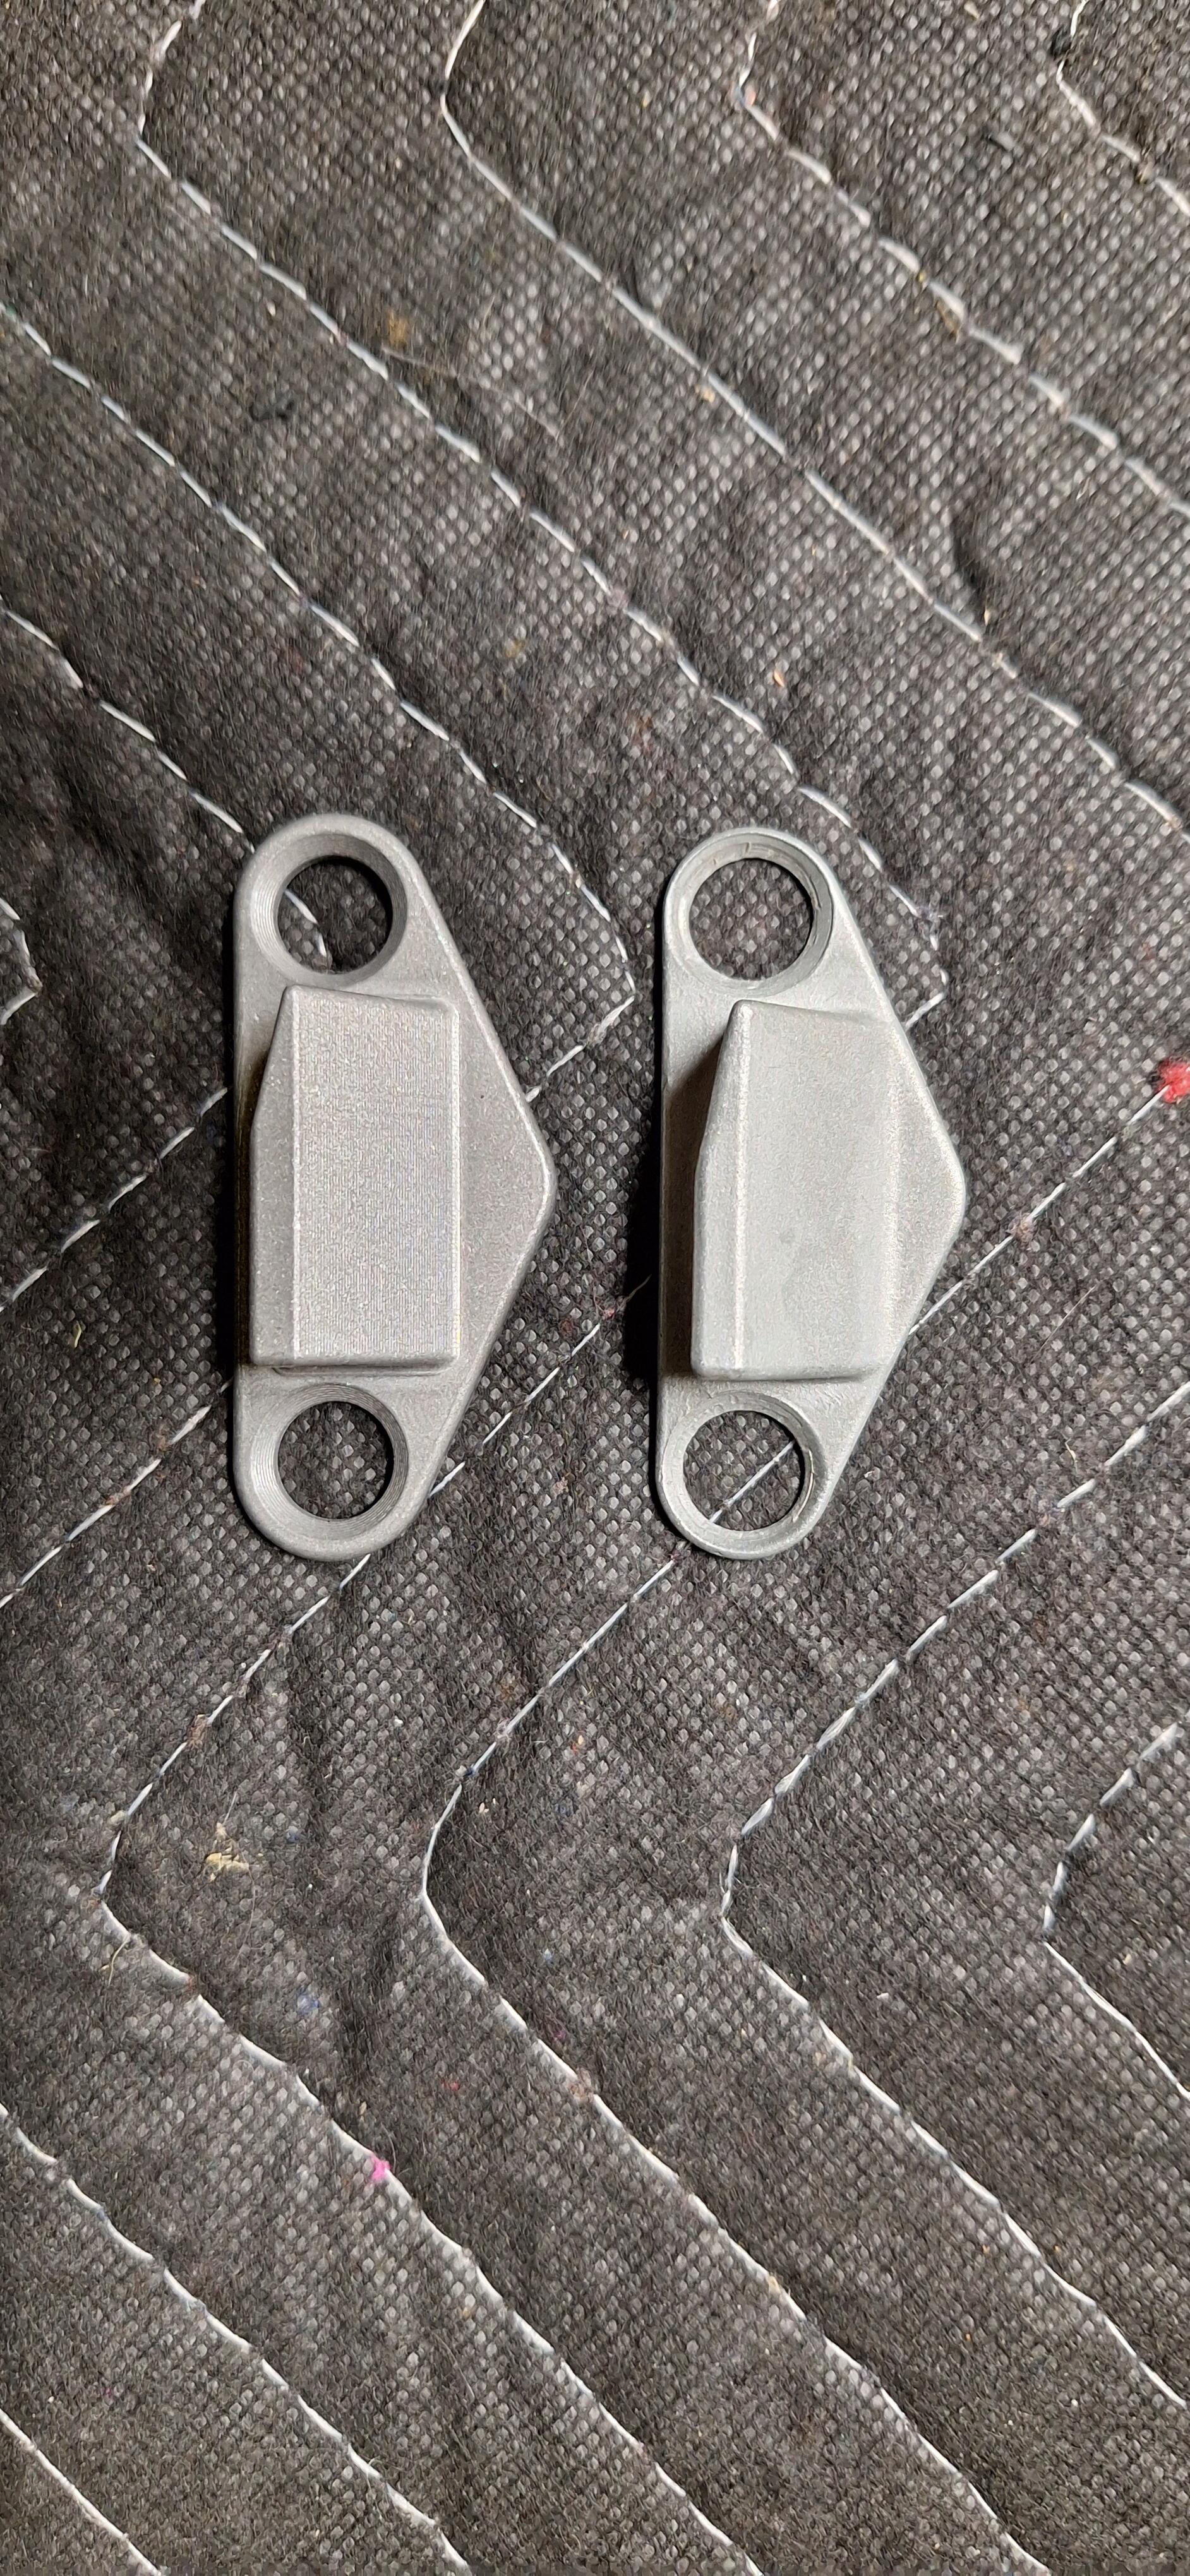
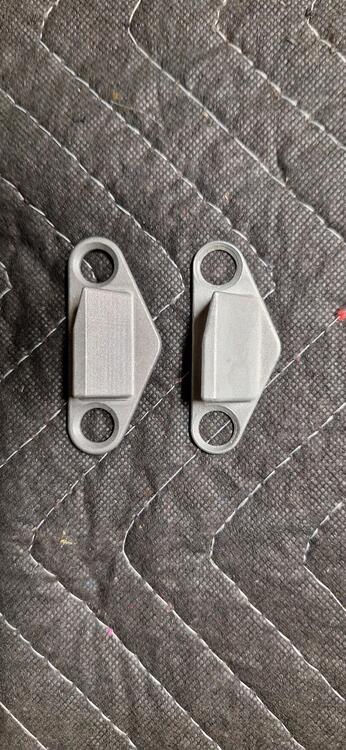
1 pointThe early 240Z had handed dove tails for the doors, a left and right sided fitting were required. Part numbers R 80530-E4101 and L 80531-E4101. https://www.carpartsmanual.com/datsun/Z-1969-1978/body-240z/body-side-trim-side-window/62 On later cars there were replaced with a symmetrical part that fit on either side. 80530-N3400 Biggest problems with the early ones were the tabs where the screws went through breaking off. Replacement factory parts haven't been available for years. Fortunately I have a set of unbroken originals which we modelled up and reproduced in aluminum. We added an extra 1mm around the screw holes to prevent the cracking and breaking. Just picked up the first samples to fit check and they work just like the originals. The original one is on the right, you can see the slight increase in thickness around the screw holes on the left one. Also modelled up and replicated the original plastic grease reservoir for the steering rack. I'll post details in a separate thread.
 1 point
 -
1 pointI'm happy with how the dove tails turned out so I'll go ahead and have a batch made up if anyone needs them for a restoration. Just sourcing the right JIS screws.1 point
-
1 pointI'm really impressed with the carburetor set-up. That's a very valuable car, and with some provenance, perhaps? That should be worth at least one year of med school!1 point
-
1 pointIf you're going to have a muffler shop do it why not them look at it and use their database to find one. If you're going to do it yourself, then trying the no muffler twin stack should be easy. If the dimensions are correct. Looks like what you have is clamped on, not welded. So trying some things should be easy.1 point
-
1 pointHey, @Mike the car’s paid for and trying to build another today will definitely be difficult than the era you built that beauty. Just sayin!1 point
-
1 pointI think that twin stack muffler will be way to loud without a serious resonator behind it. I do like loud cars and the Z’s sound awesome with some more noise but I think that muffler would be to much. But seeing as you already have it I would say it doesn’t hurt to just throw it on and see how she sounds. As for repairing the old muffler I wouldn’t really recommend it. You could try but the steel usually isn’t the best quality which makes welding hard and it won’t look that good. So if you can spare it I would suggest looking at a new one, maybe a JDM dual stake muffler? I know Zstory from France has some nice option for stock US and JDM look. I haven’t used anything from Zstory but I do find them very interesting. First up is getting my 280z on the road and then I can slowly move towards engine work for which I’m highly considering them.
 1 point
 -
1 pointWell, no one came to my aid on this matter so I've solved it as best I could using a metric bolt to replace the missing plastic pin. I measured the left side plastic pin diameter as approximately 4.7 mm. This is close to the 4.7 mm diameter that I measured on a 5M bolt's threads. The hole on the tab on that side of the cover comes in at 5.3 mm so there is about 0.6 mm of "slop" when the pin is in the hole. The hole on the right side tab measured 5.8 mm, almost exactly the diameter I measured for the threads on an M6 bolt. I was a bit squeamish about using an M6 bolt as there would little, if any, of the kind of slop as exists on the other side. So, an M5 bolt it was. But I do have the option of swapping in an M6 if I feel the need. I started by creating a small divot in the middle of the broken pin's location. Then, starting with a 1/16" drill bit (Hey, I ain't got metric drill bits), I gradually increased the hole size step-by-step using the next larger drill bit until i finished with 5/32" bit. I then slowly tapped the hole with a 5 mm-0.8 tap. Note that my tap and die set says to use an 11/64" drill for this but I wanted to have plenty of plastic "meat" for the tap to bite into. With that done, I took a 5M-0.8 x 30 bolt and cut off the hex head to give me a crude stud. I threaded this into my hole so that just a little tip of the stud showed on the side where the tab would eventually be. I then put the cover on the remaining plastic pin and, using needle-nose pliers, rotated the M5 stud so it engaged with the tab hole and then a bit more for good measure. I was going to epoxy the M5 stud into place but decided to not do so now at least because things are working well and it will be easy to retract the stud if I need to remove the cover at some point. I LOVE field engineering.
 1 point
 -
I was busy with sorting out some things in life, recently, so no big progress on the Car project side, aside from changing all family cars to winter tires. To keep my spirits up, the postal guy brought new stuff almost daily. The first was a nice delivery of an EU-spec front spoiler and a set of EU-spec front lower corner valances. Thanks a lot @HS30-H for your support, once again! One of them was even a NOS item with the Nissan stickers on it: Then, I also got a small delivery from 240Zrubberparts.com. I was looking for that KM-1520ZC replacement faceplates and I have to say it looks quite good. I was even gifted a set of label stickers for the radio, which I really appreciate. This will come in very handy when come to the planned restoration of the Radio. I hope to be back on the car project again soon. I've discussed a few next steps with a specialist and I hope the project gets a big boost next year, but I also hope to be able to finish a few things in the coming weeks.1 point
-
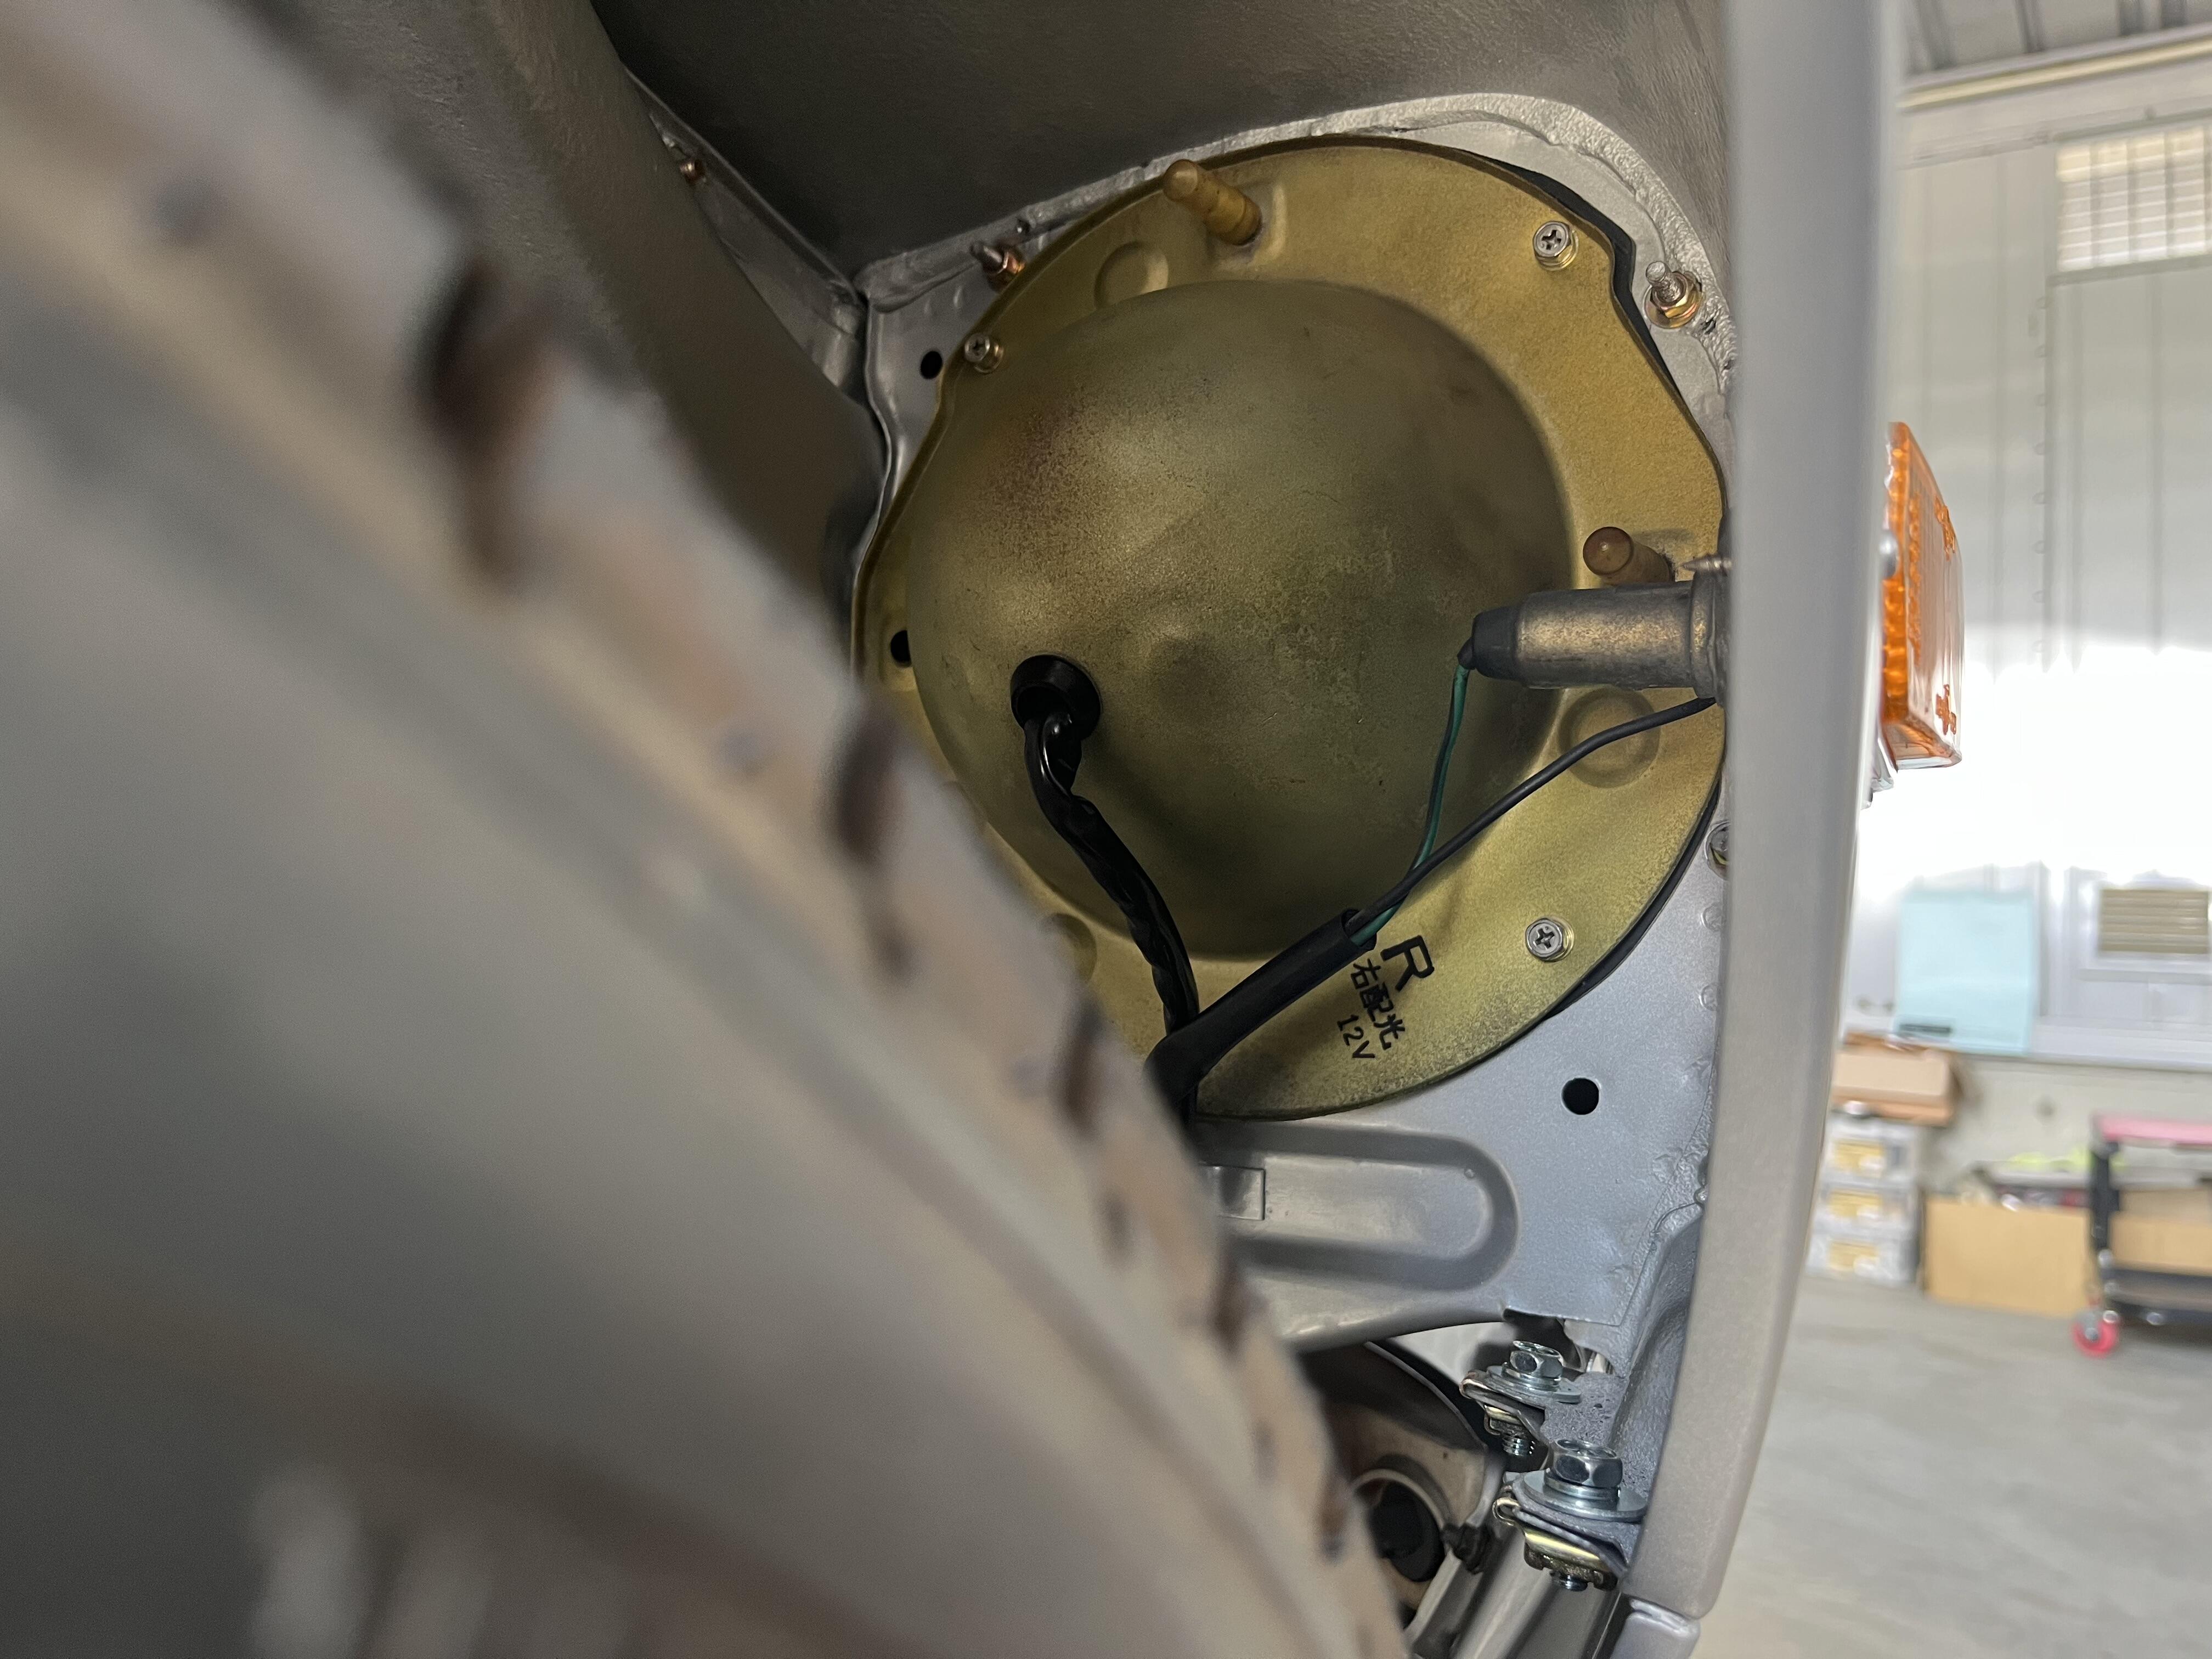
1 pointHi, I did some work refreshing for metal headlight bowl case of my Z432. In Japan, headlights case has a note “右配光” (Aiming to the right) and “L o R.” Is that its lens cut different? I have a new set of the light bowl but I don’t want to use it because new replacements from Nissan has different shape of the plastic screw cover.Original is also a see through plastic but new one is white. So I cleaned it and painted it with hand written “右配光 R(L)” “12V” Please note earlier type doesn’t have tiny holes for retaining the rubber seal to the metal bowl. Kats
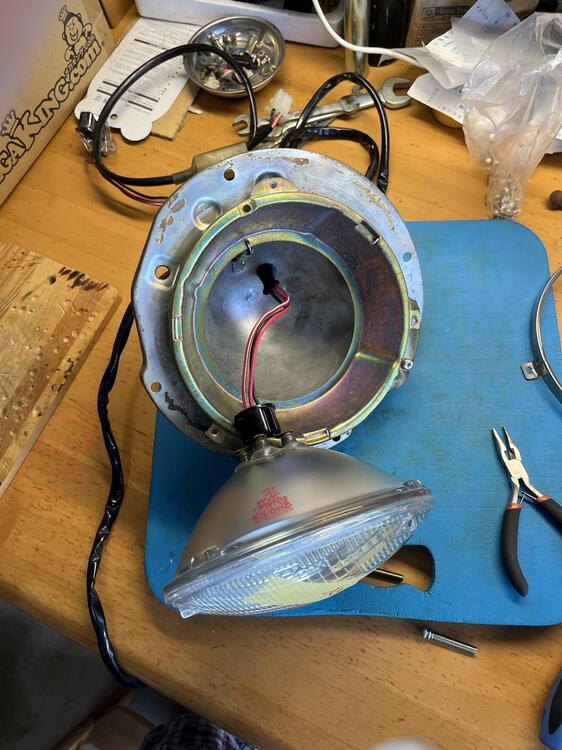

 1 point
 -
1 pointThe original Libre wheels were made by American Racing (I believe). I also believe they did not come with a black center and many were painted later. Here is a pic of our car with those American Racing Libre wheels. Both the VTO and BRE Libre are made by VTO. It is possible to get caps and decals with the American Racing logo for the Libre style. I also included a pic of the Morton car which (i believe) used what BRE now sells as the "LeMans" . Both are similar in size and will fit and look great.

 1 point