Leaderboard
-
grannyknot
Free Member10Points5,158Posts -
zKars
 Subscriber
 4Points3,770Posts
 -
chaseincats
Free Member2Points1,035Posts -

Dave WM
Free Member1Points3,591Posts


Popular Content
Showing content with the highest reputation on 01/26/2024 in all areas
-
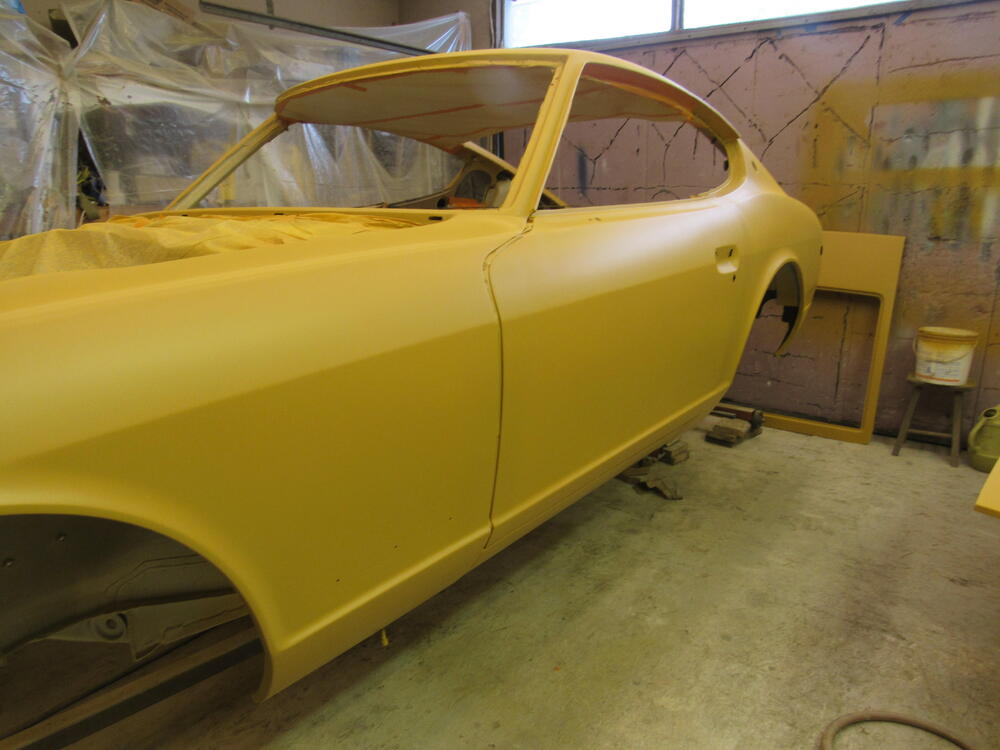
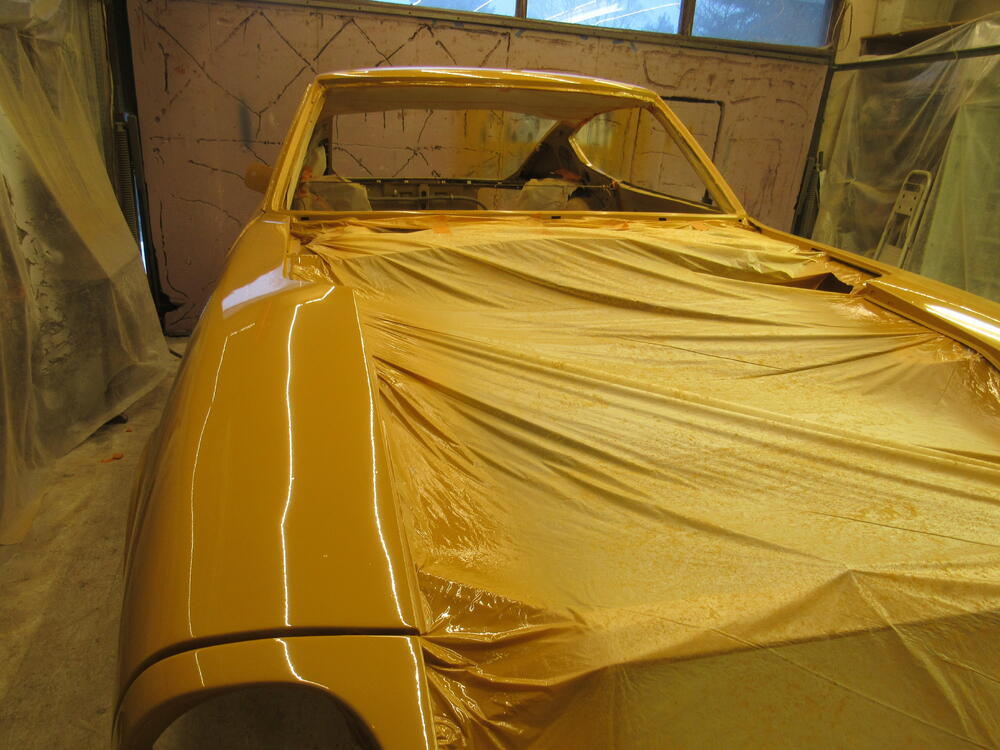
6 pointsTo my eye it is identical to the inside of the cubby lid. I got the colour coat and 3 coats of clear on everything today and started a 4th coat but the gun kept plugging up, I tore it down, cleaned everything and tried it again, same thing. I farted around for an hour and half trying to get it working, cleaned everything 6-7 times and finally called quits, threw out over a litre of mixed clear. Then I noticed the tiny little breather hole on the top of the gravity feed cup, plugged up with clear coat 3 coats should be more than thick enough to sand flat and polish.
 6 points
 -
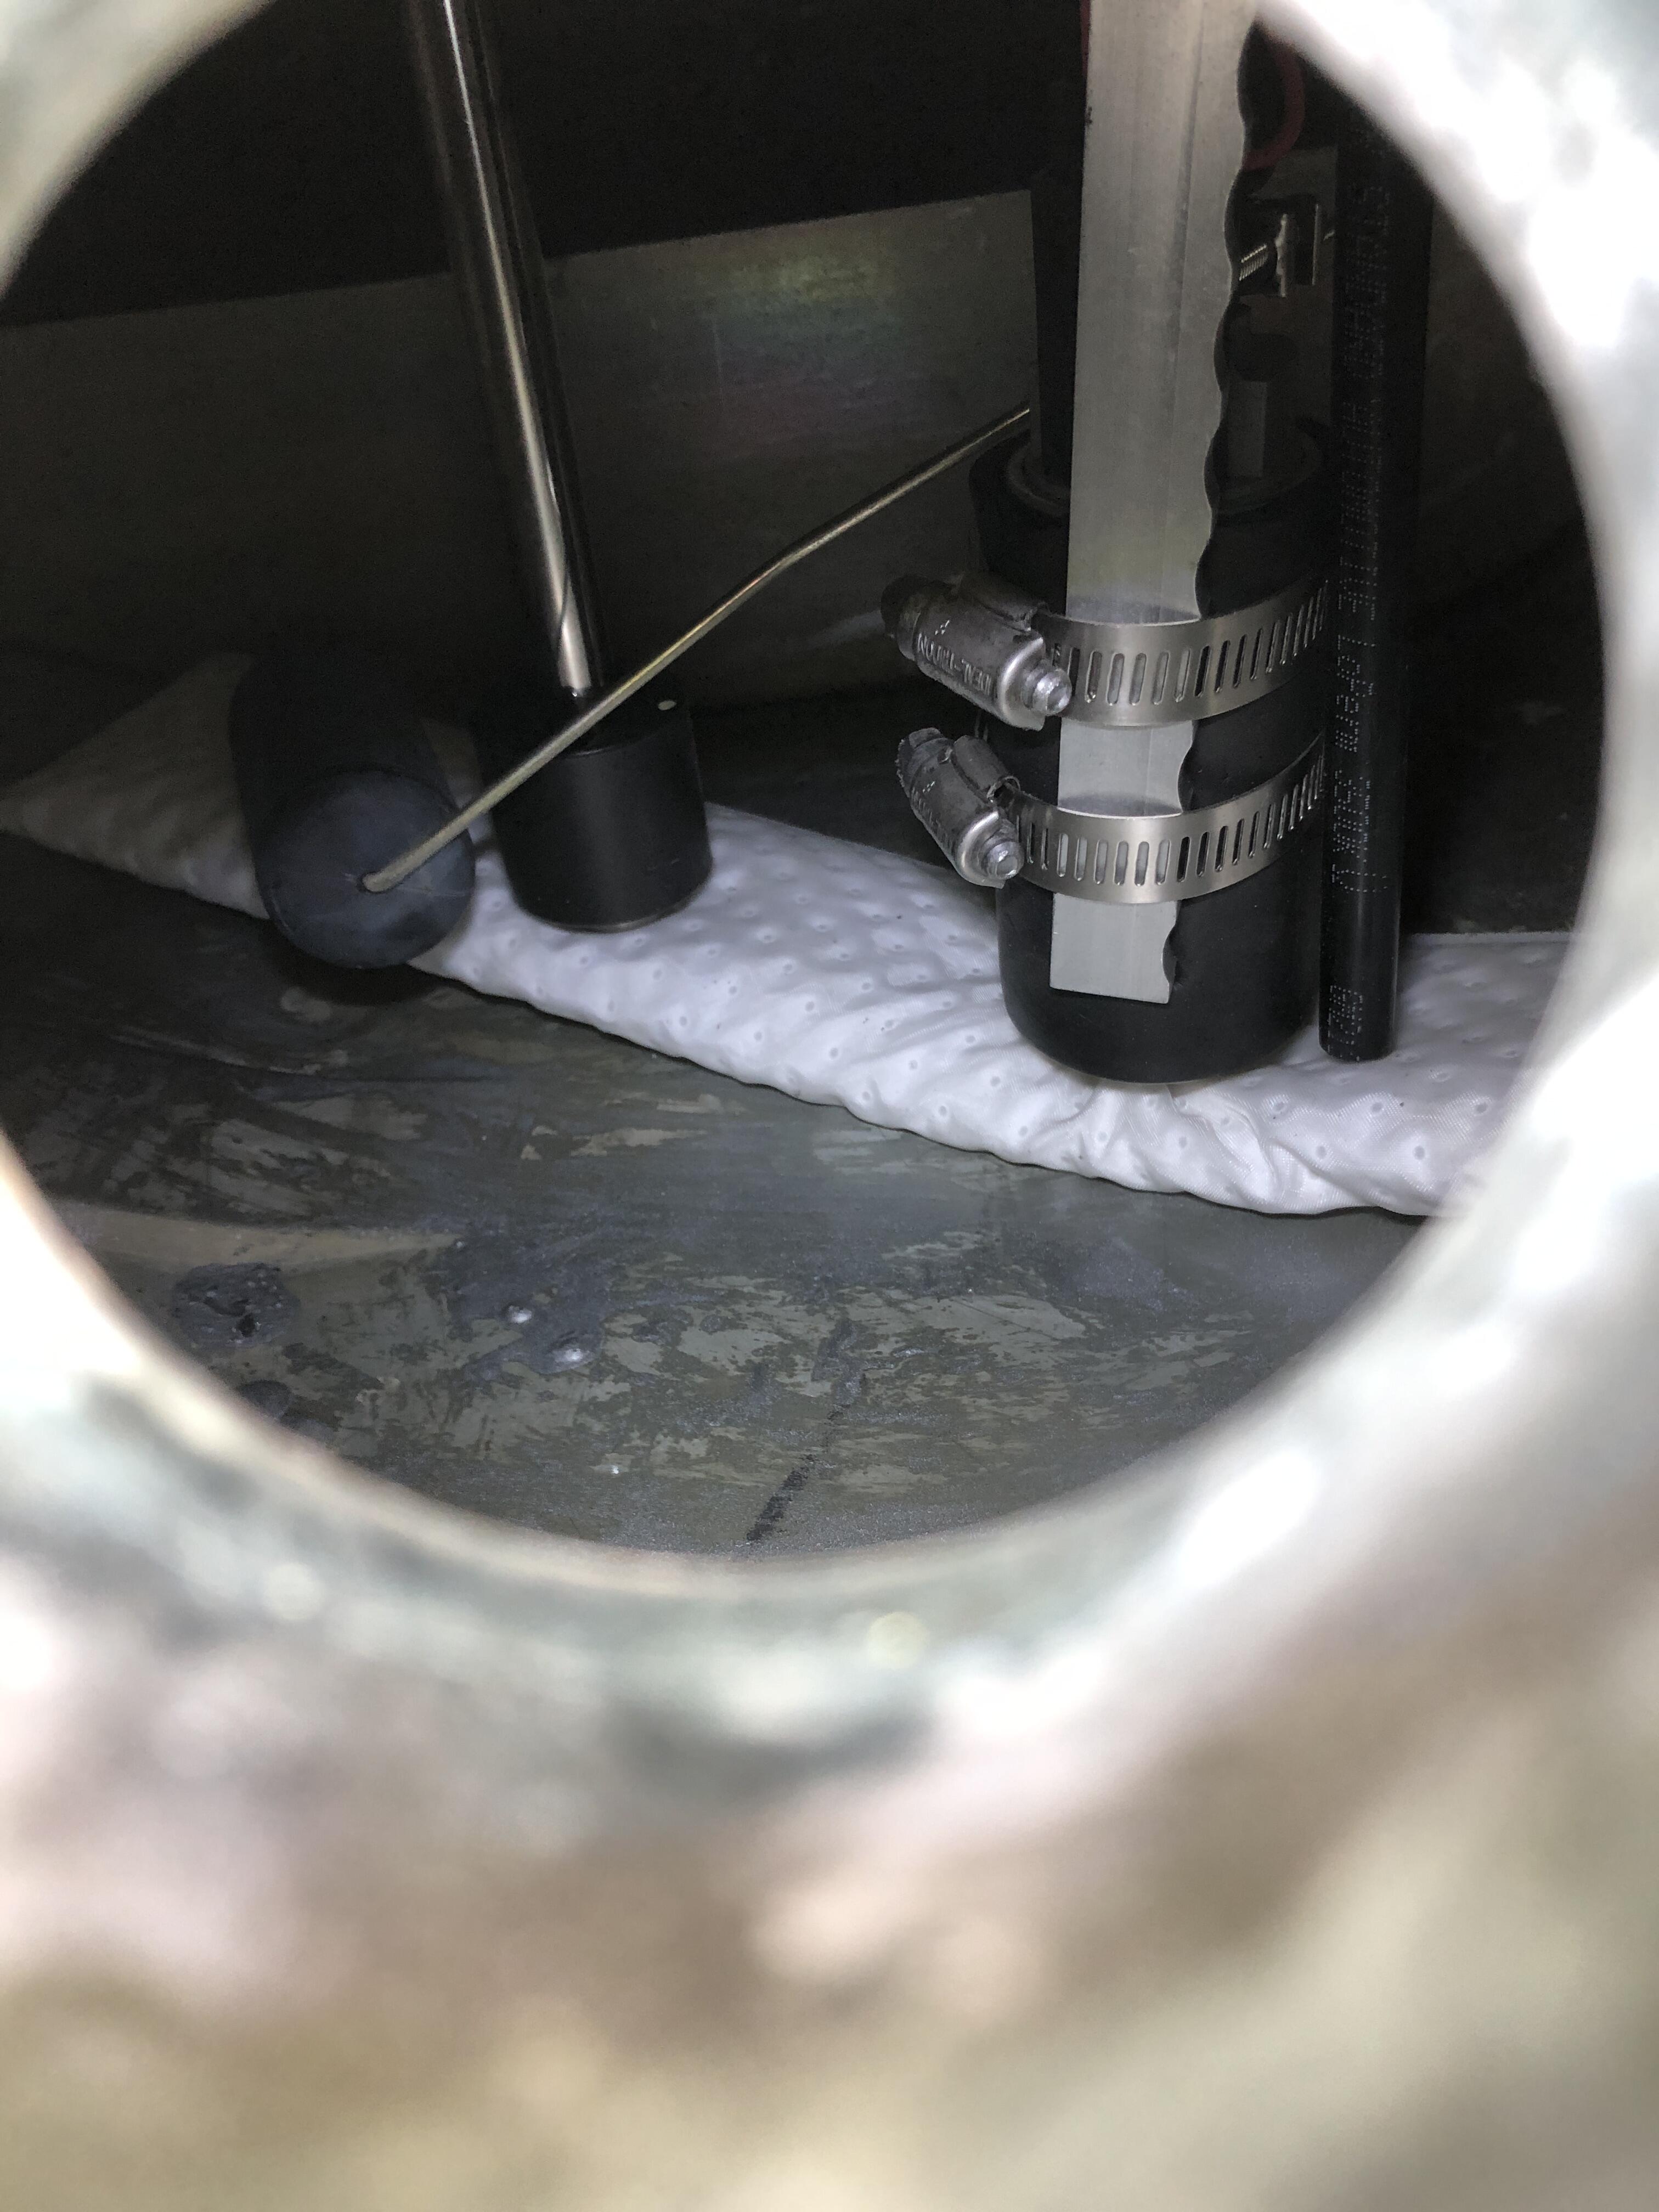
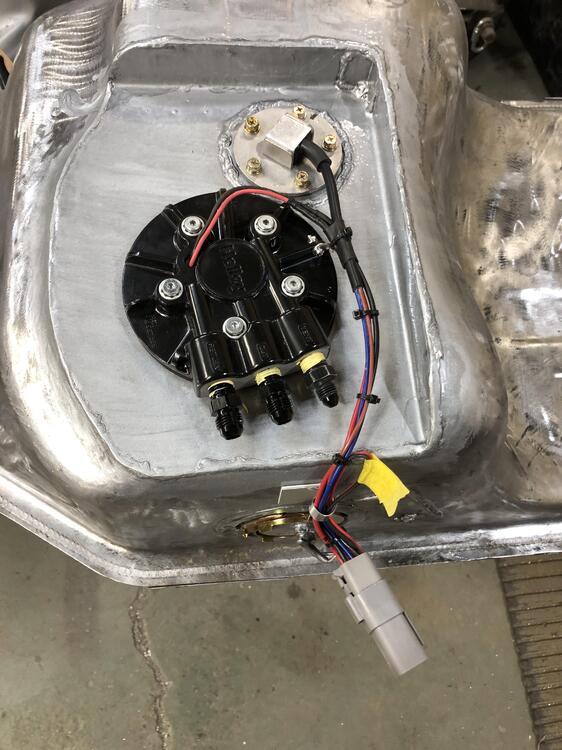
Okey Dokey, got the tank mods done and the pump and level senders installed. After careful welding and grinding, I covered the weld inside and out with POR gas tank sealer paint. Bit fun getting your hand in the pump hole with a wire brush and/or scotchbrite to clean the backside of the weld and surrounding tank area real pretty but I managed it. Even managed to get the stock sender arm bent to clear all the new tank occupants. Just took a small kink near the end to get it around the stalk of the new fancy sender. Figure this way you can use a stock gauge if you want to at some point, or if I’m not happy with the Amazon sender for whatever reason. AND it fills the sender hole in the tank. The resistance range is 15 to 61 ohm given the restricted movement range, vs 10-90 stock. Float hits the lower ceiling now, and sits on the fancy hydromat on the bottom. Oh well. Notice also the nice waterproof Deutsch DT connector. I’m very happy with this setup. Just have make short hoses to bring the connection point down in front of the tank. Can’t put them together with the hoses going upfront and the filter with the tank in place. There is one more detail yet to be added, but will have to wait until I have a chassis to mount to the tank. This dropped area means I am missing one of the four points of contact with the hatch floor above. If the tank won’t snug up and sit nice with the straps, I’ll have to add a little leg from somewhere in the SW corner (in this picture) of the lowered area, up to the ceiling above to form that fourth leg.
 4 points
 -
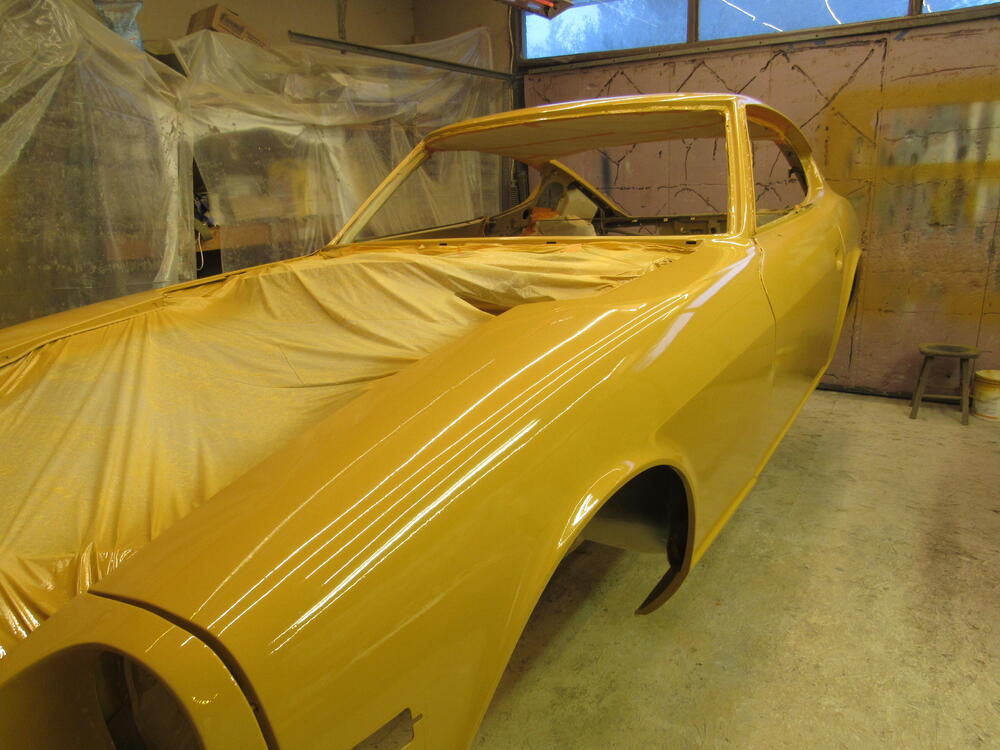
3 pointsI should have taken some pics, I tape off the door and fender panel right at the edge, after spraying paint/clear I then remove the tape. There is always a little lip of clear coat at the edge of the tape, I wet sand that 1/16" lip with 600, then tape the painted door jamb leaving that 1/16th" exposed, paint the rest of the panels and remove all the tape. Again, there is another lip of clear coat, this time I leave it until it is hard then with a nib file take most of it off and the rest of the blending happens with the various grits, 1200, 1500, 2000, during wet sanding and polishing. It's a pain to be sure, but I find the final finish is better than spraying everything at the same time. The only time I did spray it all in one go I found a I ended up with drips and spots where I brushed up against the just sprayed surface. It also allows you the get complete coverage around the hinges from both sides, the factory sprayed it all in one go and the coverage on the front of the hinges was spotty due to the front fender being in the way.3 points
-
2 points
-
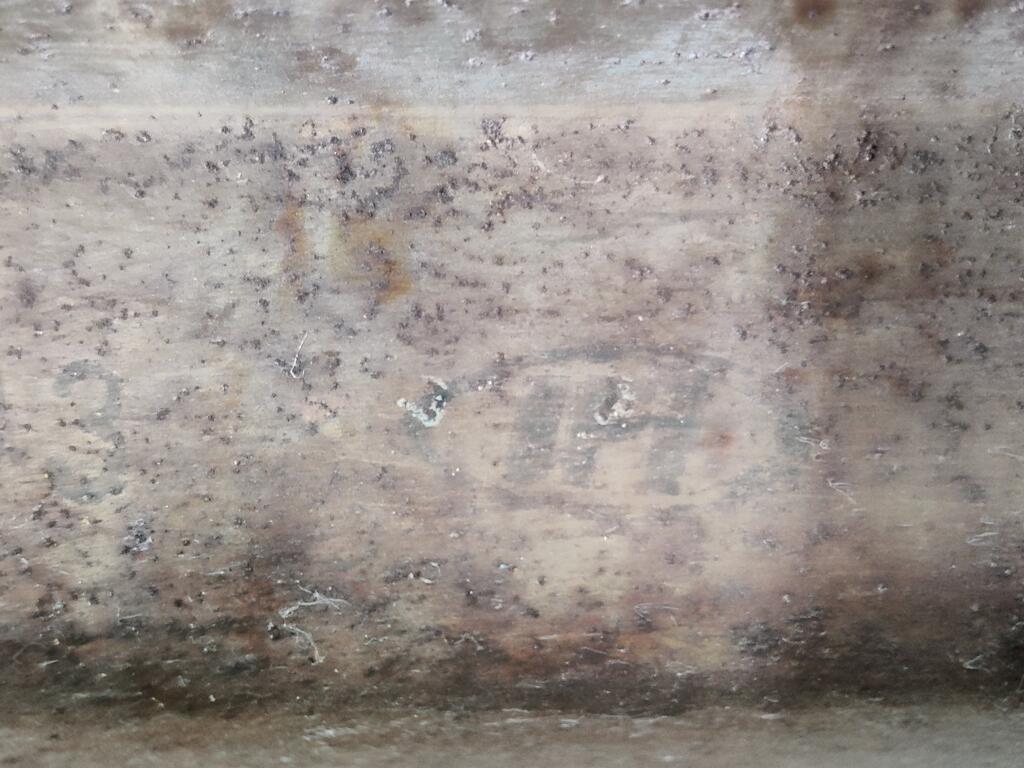
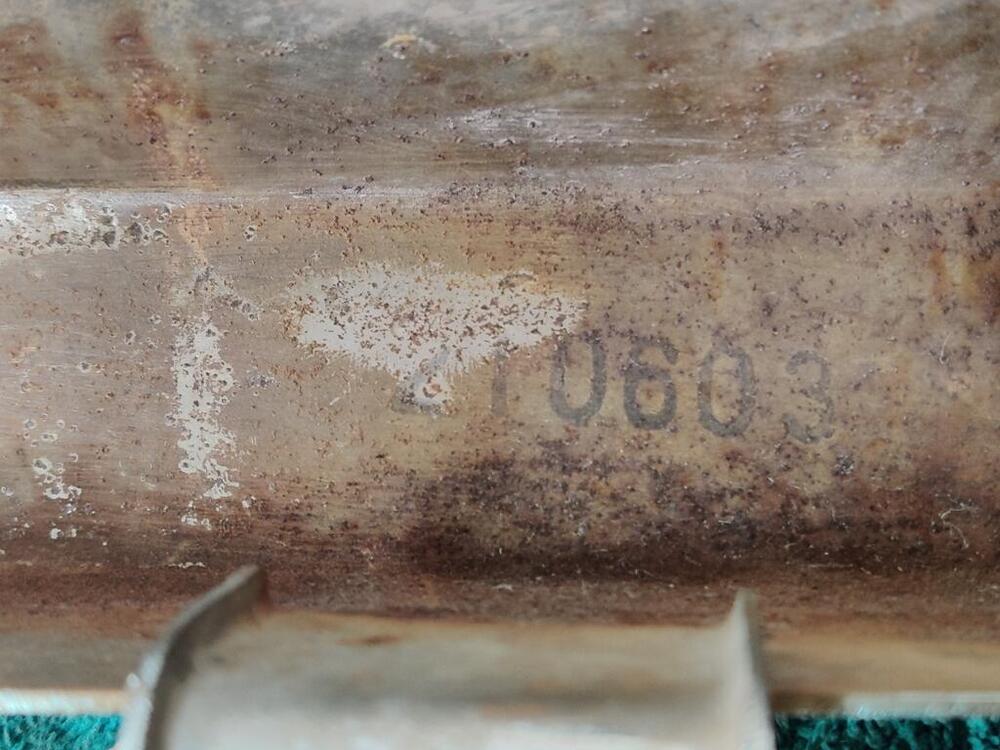
Ink stamped numbers are 210603 followed by IPI or 1PI

 1 point
 -
Like I mentioned they do offer sales prices every now and then. It is currently closer to your Courtesy pricing. You really have to be diligent in your purchases.
 1 point
 -
1 pointI've always thought the felt washers were soaked in some heavy oil or grease to keep ball joint lubricated and maybe keep out some of the grit.1 point
-
1 pointI was able to reuse my c rings and purchased these from Amazon https://www.amazon.com/dp/B00NWJO520?ref=ppx_pop_mob_ap_share I think I may have trimmed them a bit by copying an old one that was on there. They worked great but I'll be honest functionally I don't think even the original washers were doing anything at all. Maybe it was there to possibly absorb some sound but it certainly wasn't there like a typical washer to prevent friction or seal anything.1 point
-
1 pointAmazing description @inline6. Makes absolute sense to me, I bet you nailed it right on the money then. Everything carrier/ring gear side looked super solid to me, I couldn't even find a micro scratch scratch on any of the bearing surfaces. Yes, definitely an oil starvation issue. Hopefully the few miles I had to drive with no backlash and loud wine didn't ruin my gears! @AK260 I agree! I kinda am sad I am not doing this job by myself, but I could use the time saved. I will be checking the gear contact pattern myself though before sealing the cover, so as not to get jipped by another shop:).1 point
-
It is a PITA to remove the speedo with a dash cap. You may have to trim the cap with a dremel to get it out the front. I wired up Speedhut gauges in a 280 after the owner mounted them. The issue is that you still need to get the old gauge out. Then you have to decide how far you want to take replacing gauges since some of the ancillary features like the high beam indicator and brake idiot light are in different gauges IIRC. Still I wouldn't discourage the use of Speedhut gauges if you know what you're getting into.1 point
-
1 pointDone, I am attaching the last video, see parts 1-8 if you are interested in some of the details1 point
-
1 pointBruce - I think you've done an amazing job of resurrecting your dashboard - The end result appears well worth the effort you put in. Congratulations. GWGarrard1 point