Leaderboard
-
grannyknot
Free Member4Points5,158Posts -
conedodger
Free Member4Points12,513Posts -
HusseinHolland
Free Member2Points1,031Posts -
.JPG.cfcada9cf1c1b502df3f5f2f2ca3ff36.JPG)
SteveJ
Free Member2Points9,646Posts


Popular Content
Showing content with the highest reputation on 11/21/2023 in all areas
-
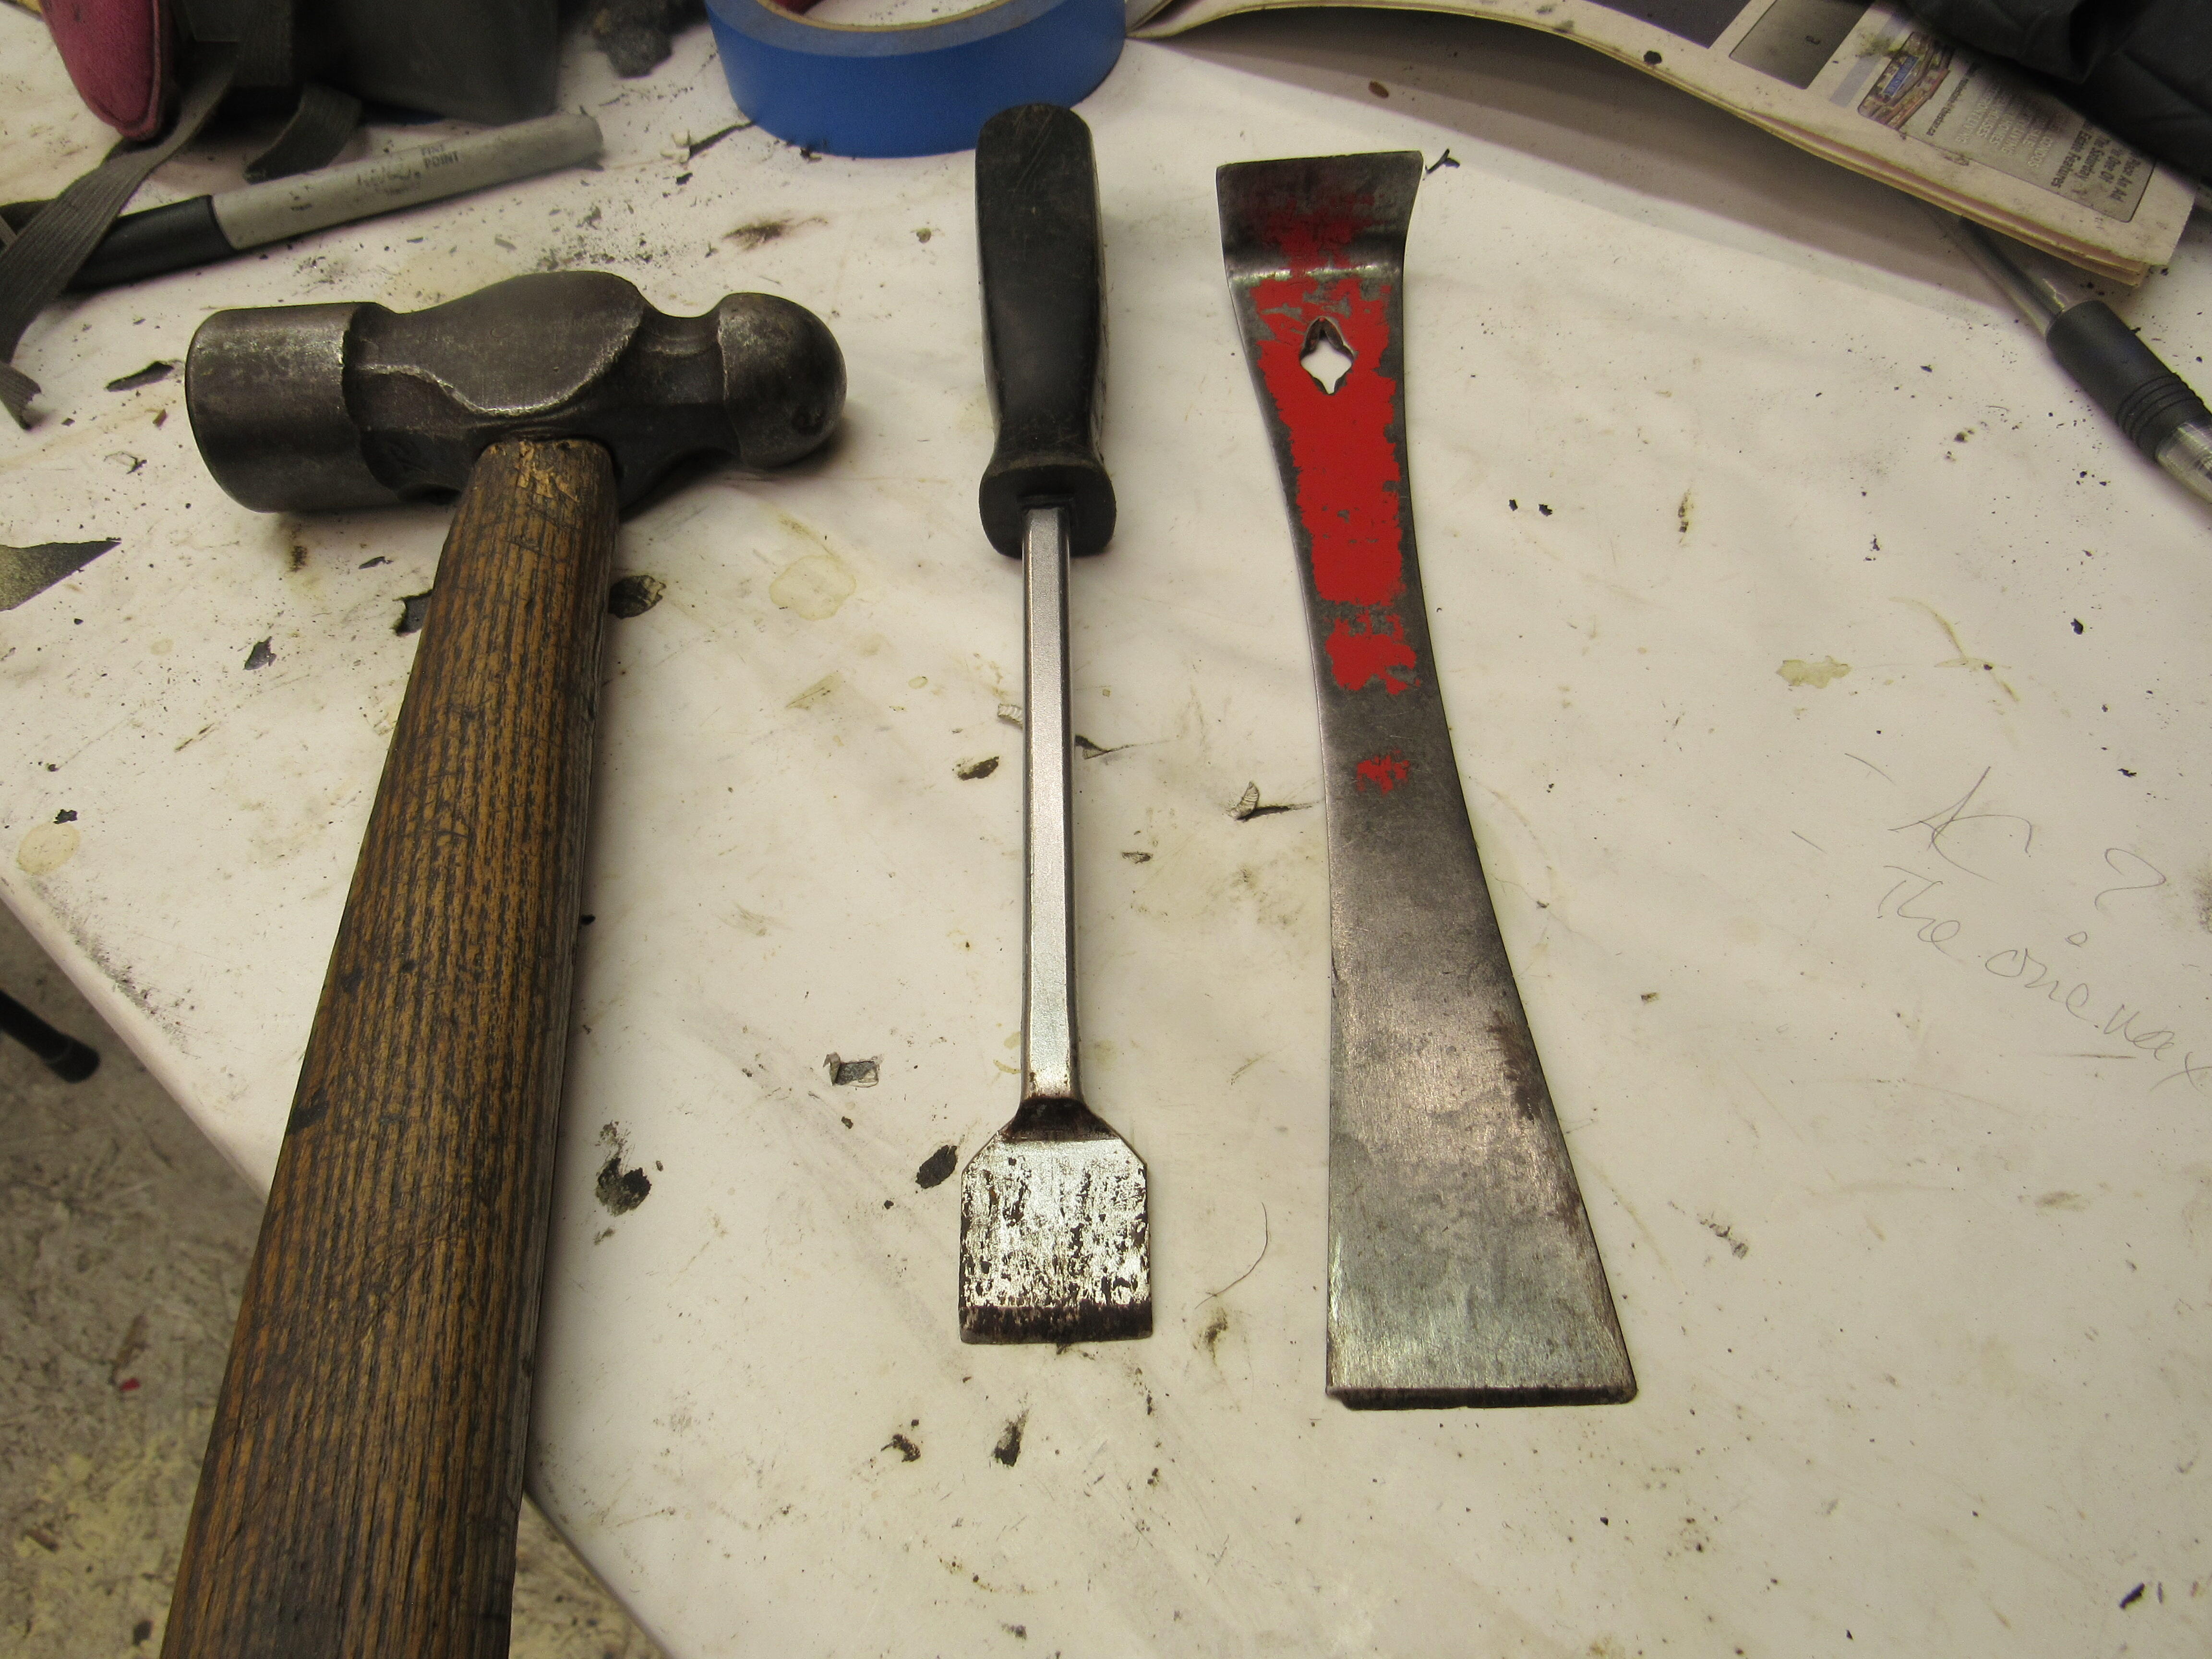
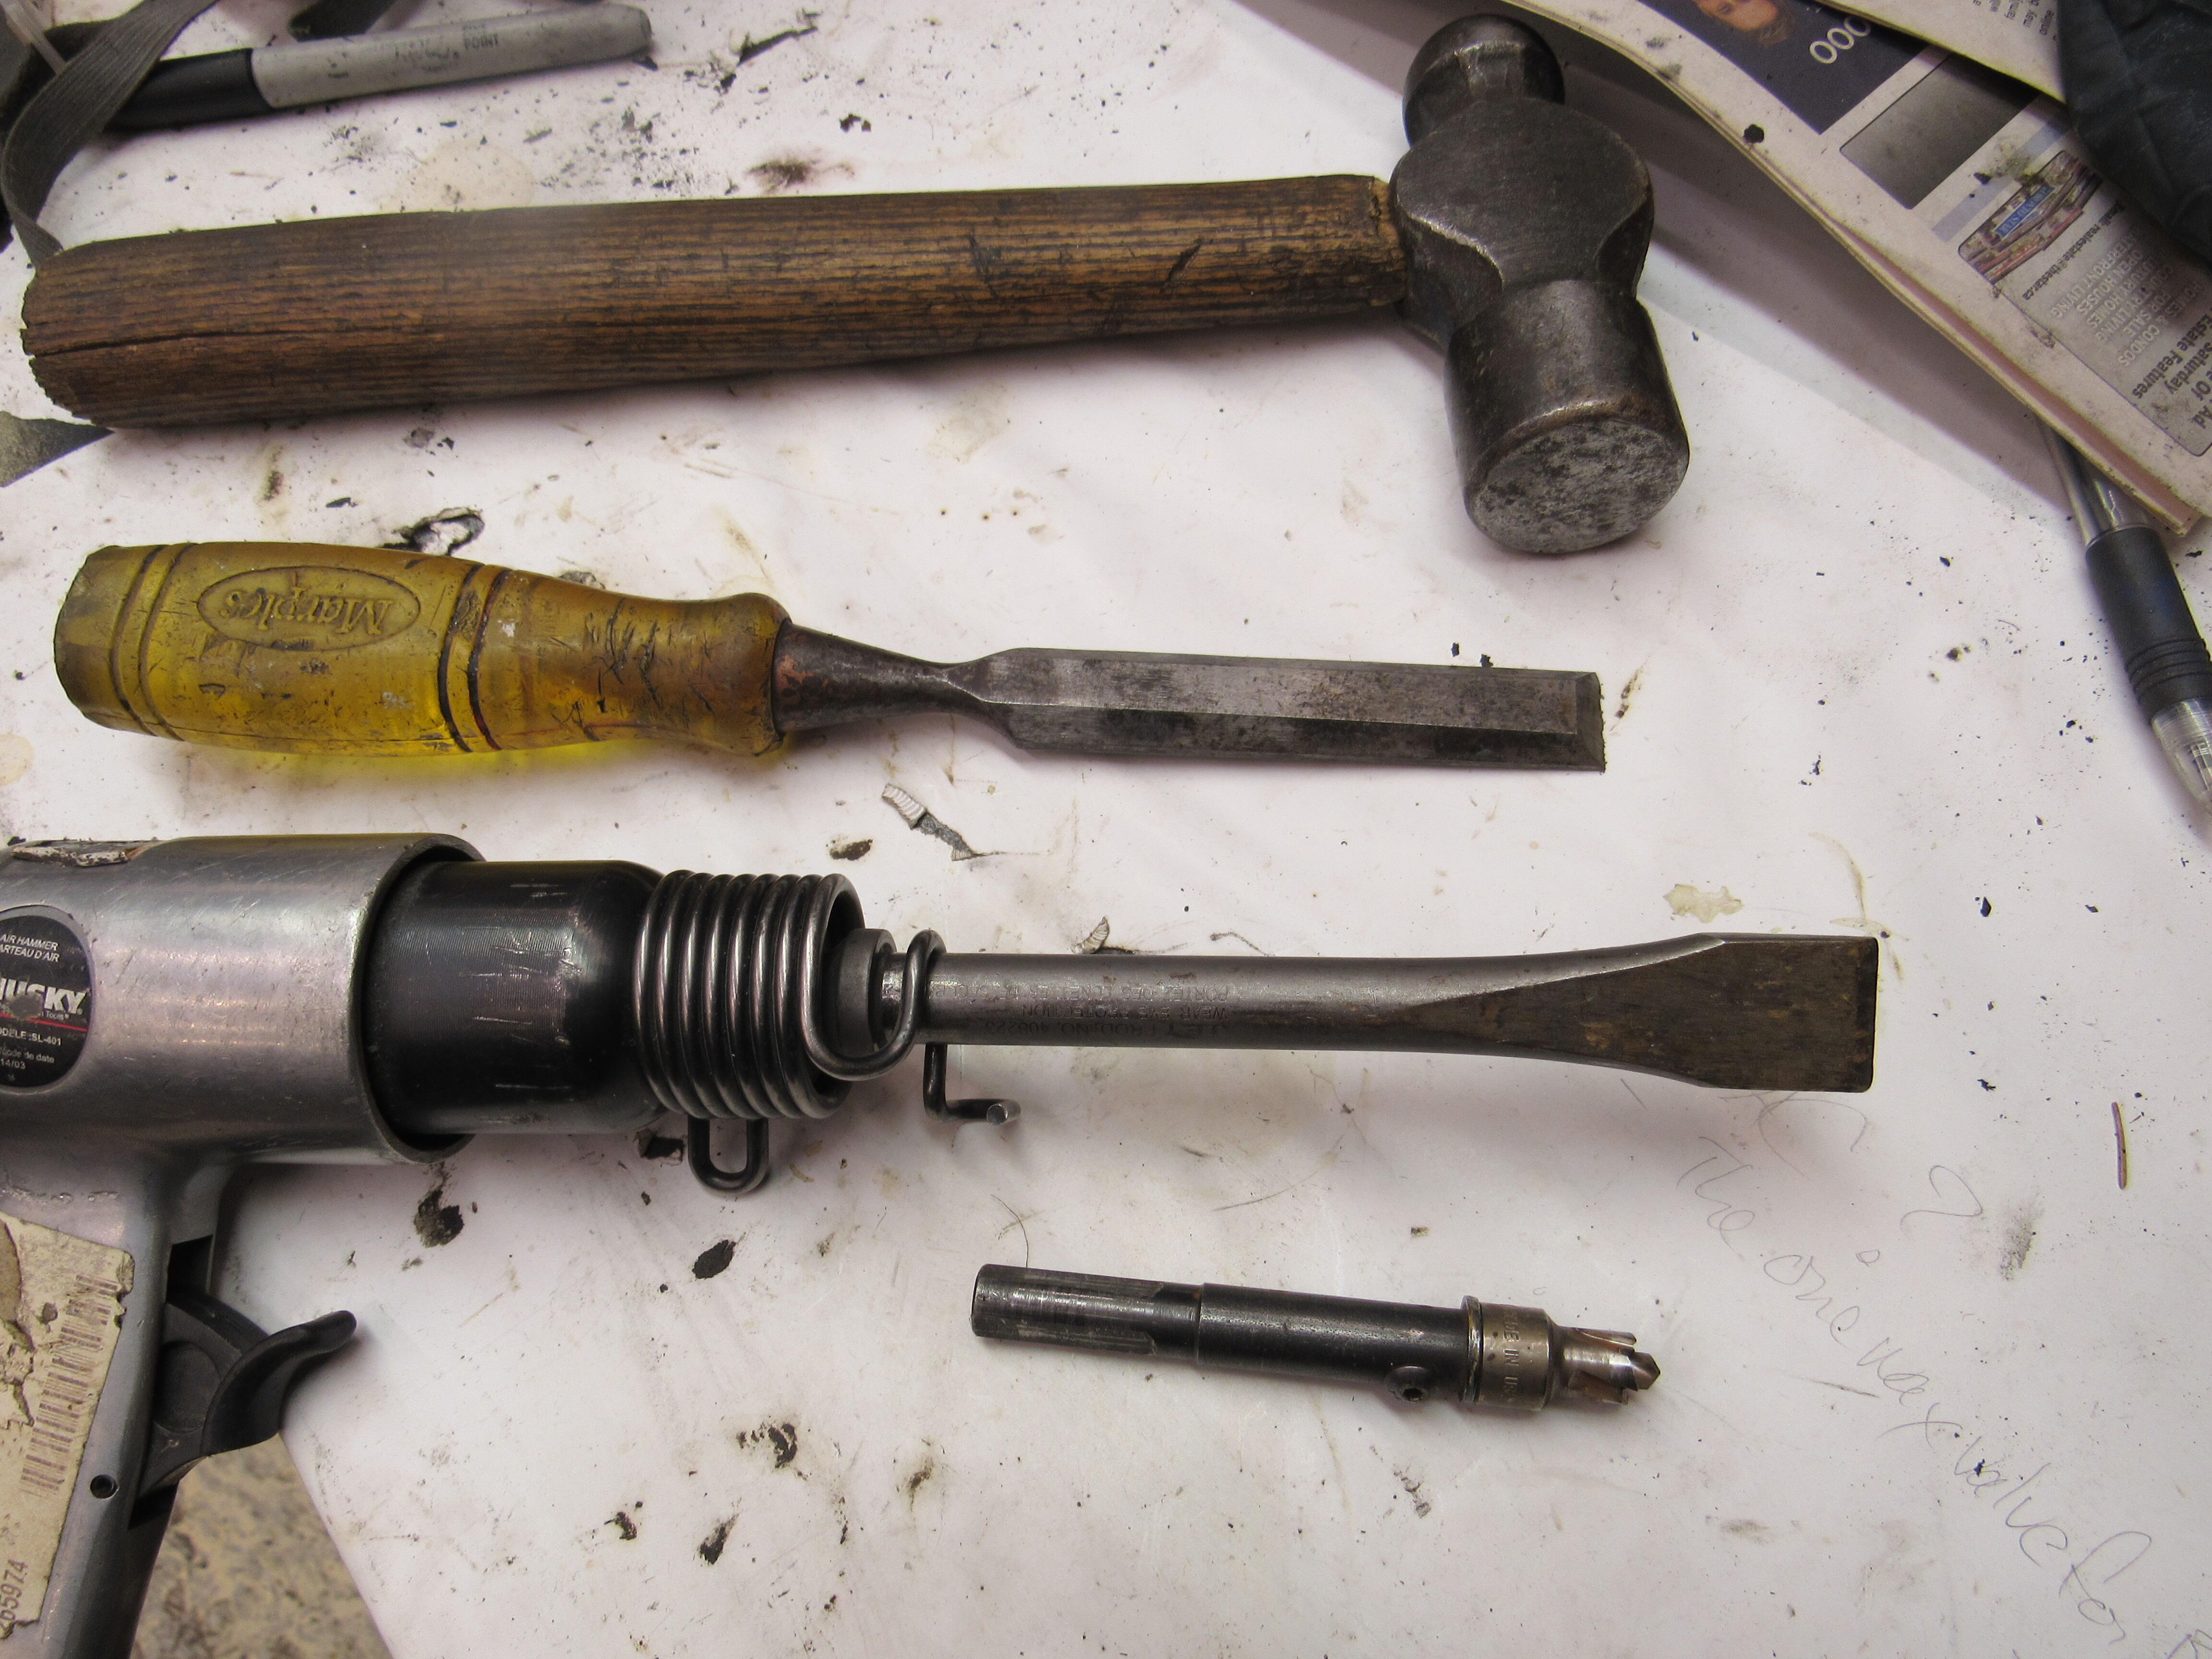
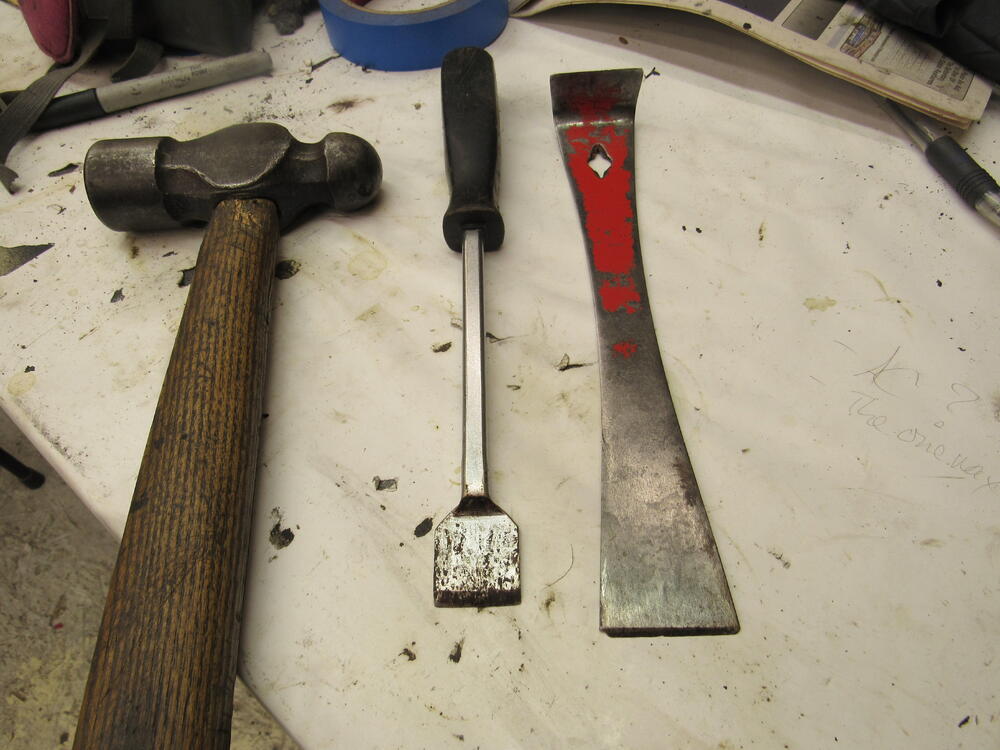
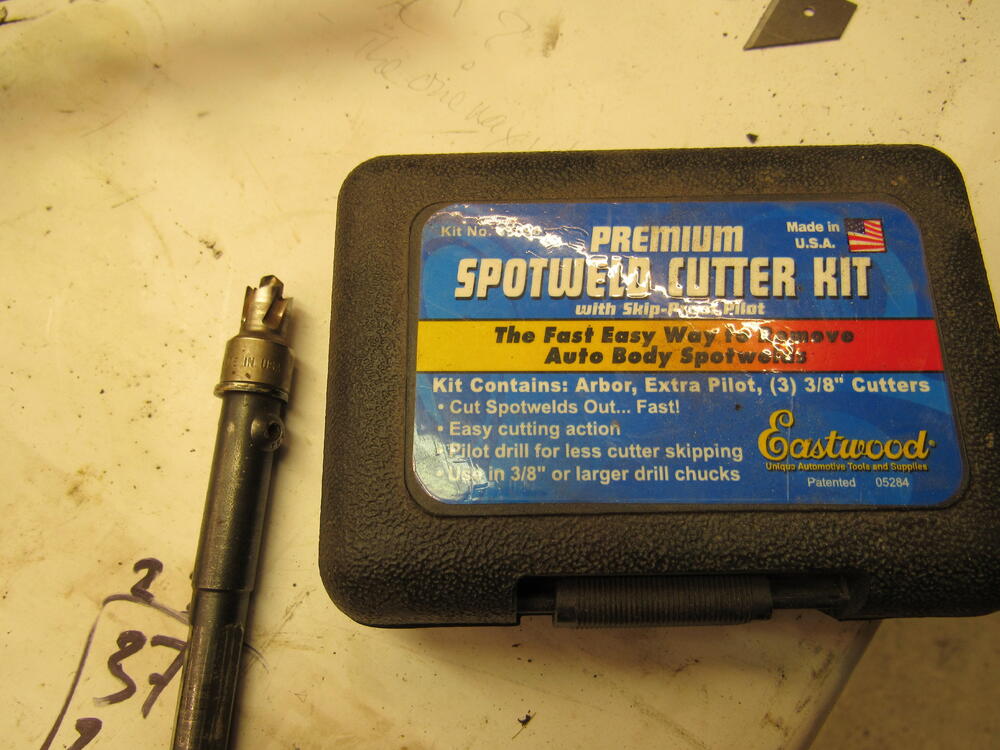
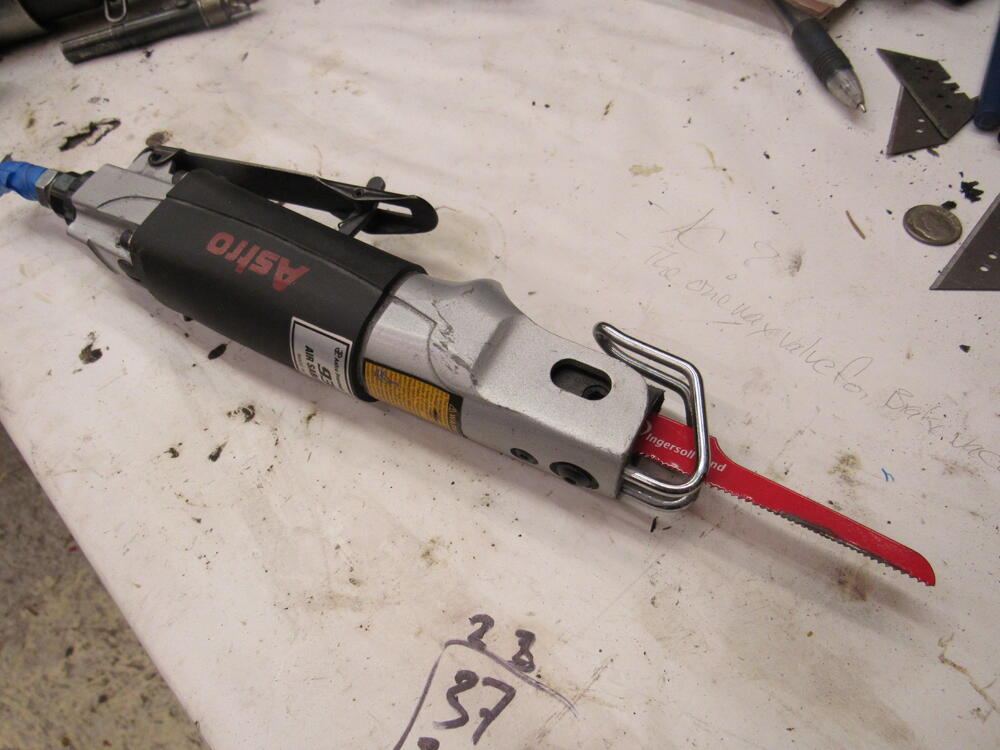
3 pointsI did use dry ice once and it worked okay, the closest place to me that sells dry ice is about an hour away so I end up doing it by hand. If it is like -10C in the shop early in the morning I take a hammer to the tar mat and breaks up almost as well as the dry ice. My 2 best chipping tools are a gasket scrapper and a carpenters pry bar, also, a hammer. I've gone through a few different spot weld tools and the best one so far is this kit from Eastwoods, it works best when you pre drill the centre of the spot weld with a 1/16" or 1/8" drill. You push hard with a hand held drill and as soon as you see a little puff brown rust you know you are through the first layer of metal, that's where you stop or you will cut a hole in the backing plate. Splitting, the seam I mostly do with and old wood chisel, it's easier to control, if I'm not making any headway I pull out the air chisel, it's a great tool but you can cut through the good metal you want to keep really fast. If neither the hand chisel or air chisel are working then the air saw is the best way to go. As good as these tools are, drilling out spot welds is a hard, dirty tedious job, almost as bad as chipping out tar mat😄 Yes, that's a corn cob, cattle corn, feed corn.

 3 points
 -
ProTunerZ is sending me another rail. They said they will send one with a more obvious chamfer, as they do seem to be variations. Apparently none of them have a significant chamfer on the ORB-6 port, and they said I am the first one to indicate it is a problem. The "chamfer" such as it is on mine is not uniform, and where the thread is visible close to the surface is where the o-ring pushed out. Perhaps most ppl block it off instead of using it as an active port? I dunno. Anyway, I'll swap it out when the new one arrives. The Allen heads are where the rail is bolted to the provided standoff brackets. The website illustrates the old brackets, which apparently bolted to the head/manifold studs (Yuk) - the new version bolts to the stock rail mount points.2 points
-
2 pointsNice job on the hatch trim! I went thru all of this years ago with all of the windshield and hatch trim, drip rails, door glass frames, and the quarter glass frames. In the absence of air tools I used an old high speed drill motor, 4" buffing wheel and jeweler's rouge. I ended up holding each piece flat on the bench with one hand and polishing with the other. Not always the easiest to handle but at least I didn't have parts flying around the garage. I also polished the aluminum door sill plates. I used small screws in the existing holes to fasten them to the front edge of the bench to hold securely in place.2 points
-
1 pointI saw no road rage during the two drives I took. People smiled, waved, and took pictures when the Jag stopped at intersections.1 point
-
1 pointI think I figured out the AAR issue on my car. Yesterday I was bench testing one of my AARs and noticed that blowing air one way allows for more air to pass through vs the other inlet when the curtain is closed. I checked onine pictures of the AAR orientation in the engine bay of other 280z owners and realized that my AAR was/is installed backwards (the electric connector is facing the firewall). I am going to change it tonight after work and see if this improves the idle speed 🙂 If this is the case, I have had the AAR installed wrong way for at least 5 years now. And you know how it feels ...1 point
-
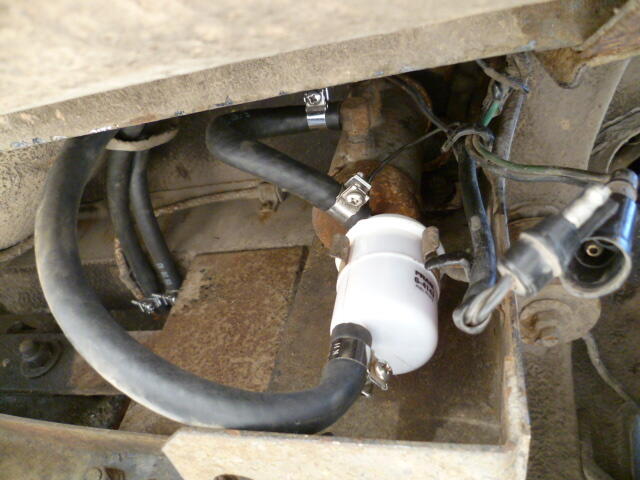
1 pointHere's a crappy pic from a 74 260Z. Note that it's not the correct filter. Nipples aren't in the correct location, but it was what I could find at the time: Pic is a little too close-up to get a good handle of what's going on, but that's all I could find in my files. And also, I'm not even sure if the 260 is the same as your 73 240Z. But hope this might help some?
 1 point
 -
1 pointWell on an SU setup there is the diaphram that I think helps with antistall. They are missing on many cars. I would look for something to install there. I think it can pull in that configuration1 point
-
1 pointHmm, there may be a way to make this work, too. I like that it's threaded. That could give you the adjustability you need for a creative application. It's also relatively cheap. https://www.jbugs.com/product/049129412C.html?utm_content=shopping&gclid=Cj0KCQiApOyqBhDlARIsAGfnyMrYlnwBku6XT-gmx765EpQ_c_n1XtiWz4JO2P3e6vYVxrxMArI5hqIaAo1QEALw_wcB1 point
-
1 pointSo to see what I could find, I ran across the Edelbrock 8059. (Not me pointing) $245? Maybe it could be done cheaper. Hey, my friend Google suggested a Quadrajet solenoid. Okay, but what cars what the Quadrajet? Chevy V8s after 1966. Let me check with Rockauto about a 73 Camaro with a 350. Hmm, This could work, though it would need a bracket fabricated: https://www.rockauto.com/en/moreinfo.php?pk=39841&cc=1034941&pt=10687&jsn=916. It's only $59. Now, where do you mount it? There is a pad on the throttle linkage by the EGR that could be pressed by the solenoid. The bracket could be mounted on the EGR (or on the blocking plate if the EGR has been deleted. How's that?

 1 point
 -
1 pointAn AAR that works correctly is pretty satisfying. It just works. Your varying idle speed might be due to one of your other problems, not the AAR. If you apply 12 volts to the AAR pins and it doesn't close completely, it's broke.1 point
-
1 pointHey, I like the Rolok idea, the last time I tried buffing SS window trim on a bench buffer I almost cut my face off.1 point
-
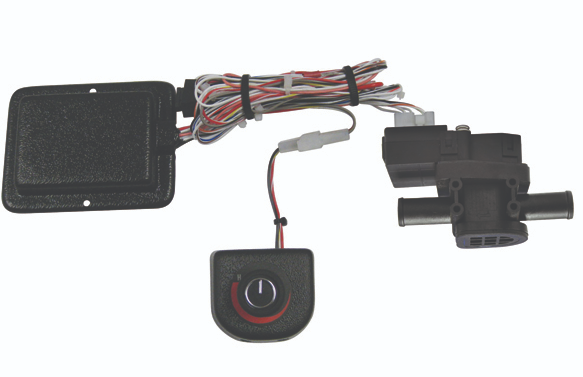
1 pointOr go all the way with a Vintage Air servo controlled heater control valve and adjust idle with a dial on the dash! https://www.vintageair.com/custom/product-pop.php?pn=50507-VUA
 1 point
 -
1 pointOk, so here is an interesting little spreadsheet. Somehow I managed to harvest all the S30 part numbers from a certain on-line resource... Now you can do a little sorting and searching a bit more easily. CPM_Fiche_S30.xls1 point