Leaderboard
-
Yarb
 Subscriber
 9Points1,935Posts
 -
Captain Obvious
Free Member7Points10,081Posts -
Patcon
Subscriber4Points11,142Posts -
HusseinHolland
Free Member4Points1,031Posts


Popular Content
Showing content with the highest reputation on 10/24/2023 in all areas
-
5 pointsYes I did. I changed on the previous page of this thread, but it's too late for me to go back and edit that old post. Don't know why I didn't fix it back then, but I don't have rights anymore to change it now. And as for the flat top comment, it's simply to point out that I've been known to buck the mainstream consensus on some controversial topics and hence may have questionable judgement. I've heard some even say that I "might not be all there."5 points
-
I’ve had a couple of the Remy starters that had issues right out of the box. Went to the gear reduction and like it a lot.4 points
-
This date is awesome!! My birthday day so I always celebrate by spending time with my Z and of course buy her a gift!!😀3 points
-
Don't change two things at a time!!! Make the change Gundee suggested and drive the car! Only one change at a time. Always!2 points
-
Found a new construction 280ZX gear reduction starter on RockAuto, WAN Global - I've used that brand before with my Honda K24 swap, so I have some faith in it lasting. I'll just swap it out when it gets here next week.2 points
-
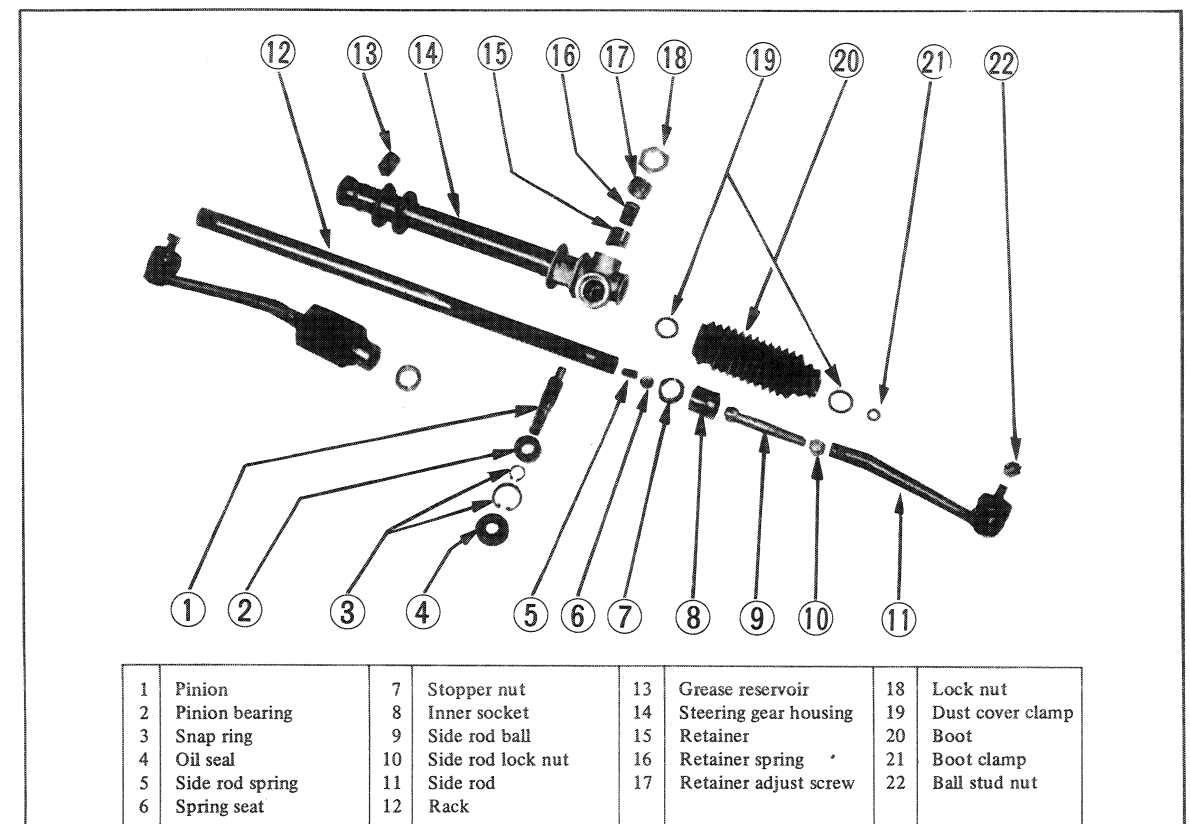
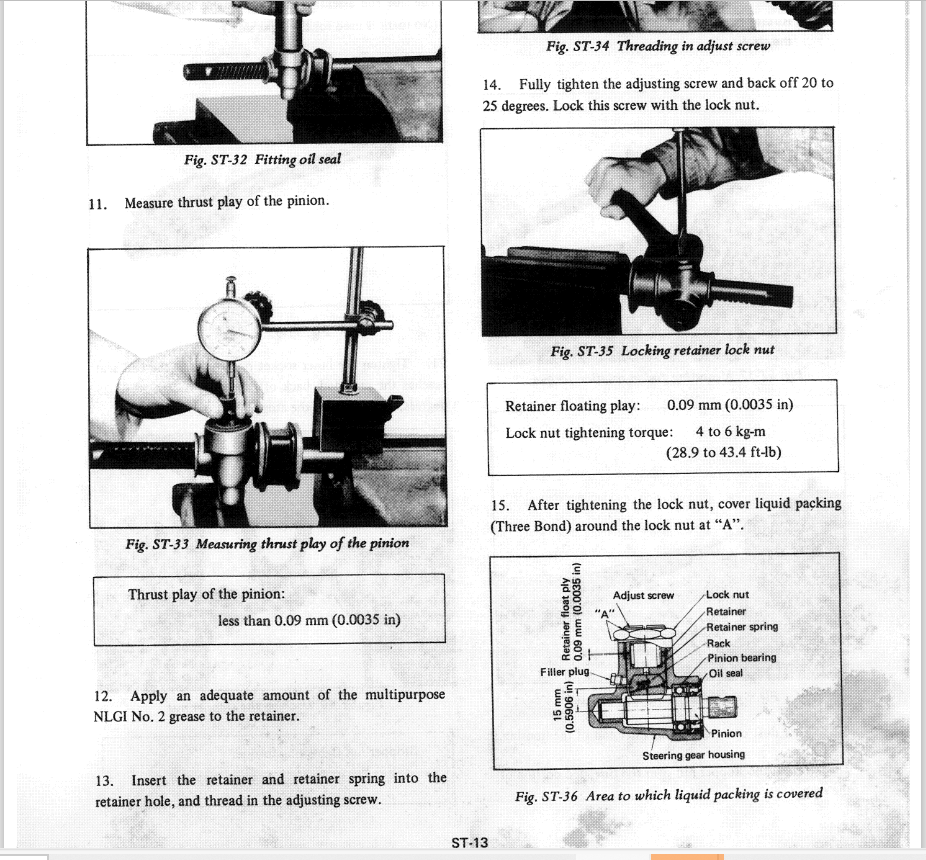
Many years ago, I grabbed 240z steering rack from a salvage car in a yard. My thinking at the time was that I could send it in as a core on rebuild exchange some day. Tonight, I removed the retainer nut and screw, and found two washers - one thin and one thick sitting on top of the spring. There was no shim under the spring - the spring was sitting on the bronze retainer. Since the rack has been in my possession since the 90's and is covered in tons of gunk, I assume it has never been apart. Of the three youtube videos I can see, one puts the washer(s) under the spring against the bronze bushing, one puts the washer(s) on top of the spring, and one has no washers. There are no shims in the picture in the factory shop manual which identifies all of the parts to the rack (15, 16, 17): I suppose it is possible that the shims were used to adjust the amount of spring tension pushing the retainer against the rack... with the retainer screw in the precise installed position per the factory manual instructions. Steps 12-15 pertain to the retainer and retainer screw installation: Perhaps originally, they were added by factory worker in a fashion such that, the retainer screw was set per factory instructions, and then some type of resistance check was made. Then this was followed by adding shims (remove the retainer screw, add a shim, replace retainer screw, then check resistance again... Anyway, that is my guess. Another interesting thing I am just now seeing: the retainer spring I took out of my "undisturbed" rack does not match the specs for the 71 manual, which are here: Free length is about .890" and it is only composed of just under 4 coils. Odd!


 2 points
 -
NO! Do not do that. Do not revert. Do not try anything else. The 3 ohm coil is different wiring. DON'T.1 point
-
I swapped the earlier starter back in, and this one cranks very nicely, regardless of starting after a short sitting period. I'll send the defective one back to RockAuto1 point
-
1 pointI suspect that vintage cooler is built as well as anything you could buy today. It's probably repairable and I'm sure it can be cleaned out1 point
-
I think that I tapped the power wire to the headlight switch and ran a lead cut the wire to the buzzer power supply side, and replaced it with the new lead. When the door is closed there's no ground so no buzz, when it's open the buzzer gets current if the lights are left on. I drive all of my vehicles with the lights on in the daytime so it was useful.1 point
-
1 point
-
@SteveJ thanks for confirming will get to checking. @Yarb I think your memory isn't all that bad lol. When I did some research on this site I did see some pictures of three wire door switches probably for the diagram and cars that Steve was mentioning just not mine.1 point
-
1 pointWith that reading you have you probably have a lot of dirty connections. You will probably find plenty of green corrosion. Corrosion is impedance and that will throw your readings way off causing the system to go crazy🤦♂️🤦♂️1 point
-
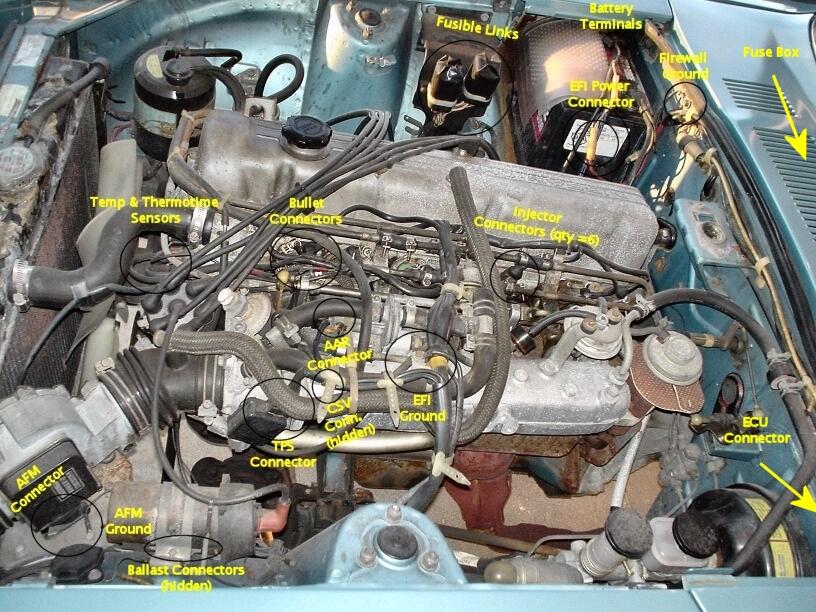
1 pointHere's some quick cleaning spots that will help a lot. Metal files work good, fingernail files too. I have an old points file that works great. 320 sandpaper works. Blow it all out with an air compressor. https://www.atlanticz.ca/zclub/techtips/electricalconnections/index.html
 1 point
 -
1 point
-
1 point
-
That switch should be closed any time there is a key in the lock regardless of what position the lock is in. Should not matter whether the lock is in the OFF, ACC, On, etc. And a little late with the pics, but...


 1 point
 -
The valve seat came loose? Did it beat the piston to death or did you shut it down when you heard the racket? There are cylinder head repair shops all around my part of Alabama so I'd think you could find something close by. If it were mine I would go by the oldest machine shop you can find and explain your problem. You might save $$$ taking the head off and have them replace the seats, probably old bronze now, and grind your valve edges. Install new valve seals too. Put the head back on yourself. That way your Z stays in your garage.1 point
-
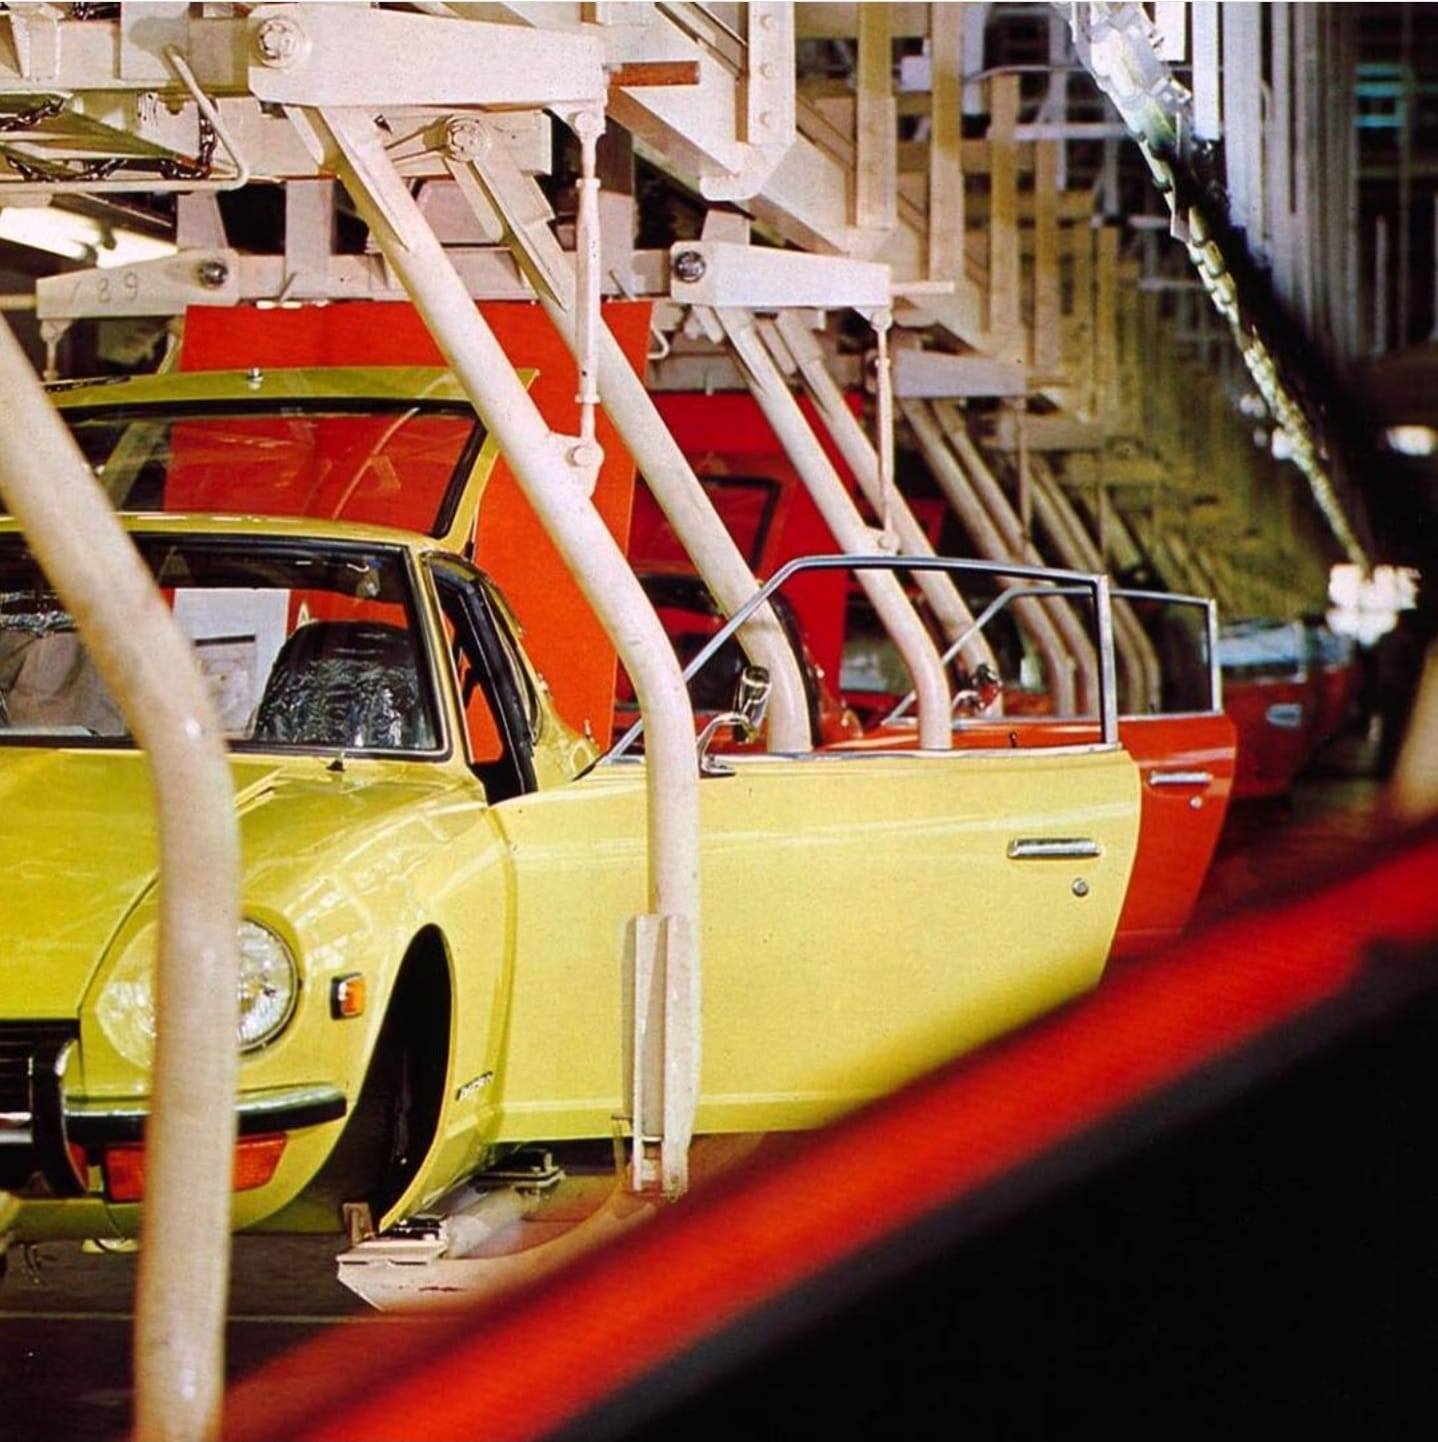
1 pointGreat news they kept those records @kats Would be great to see the manufacturing process notes detailing how the 240Z was built and how long it took for each step. Hopefully they can give you access to the records and document the build for a 240Z. Always interesting to see the original overspray on parts of the car and work out how they put it together in sequence. I wonder if they kept any original photos with the build records.
 1 point
 -
I had a Deco Remy from RO defective right out of the box. Why not try the gear reduction later model style.1 point
-
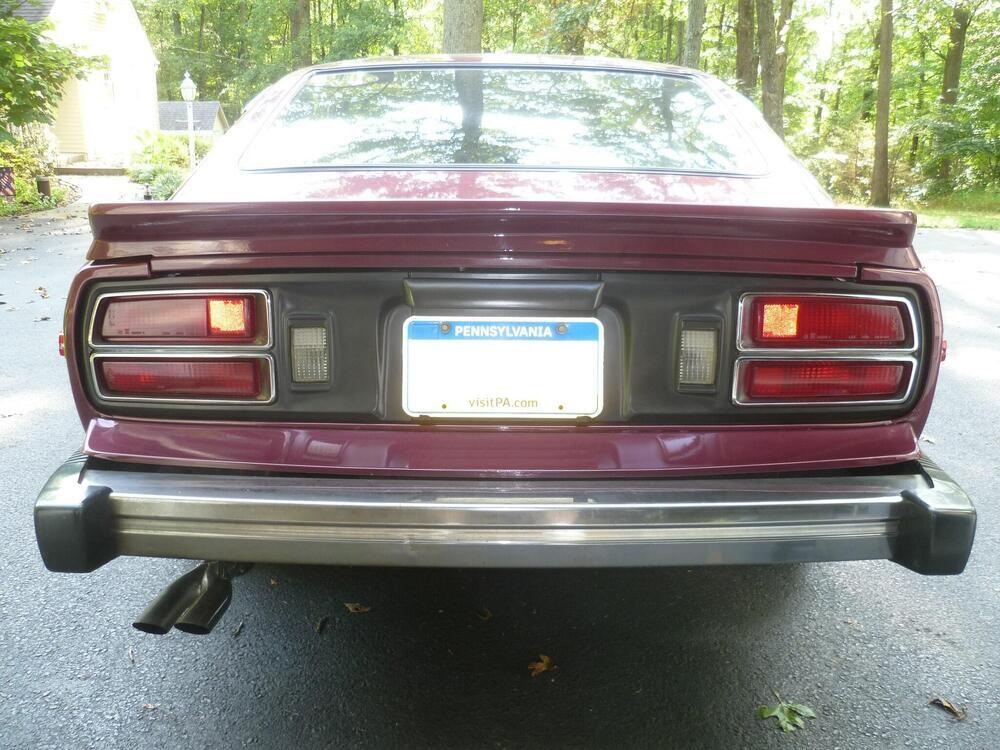
1 pointBottom line? Duplicolor 261413 Metallic Carbon Mist. Top coat with Krylon Colormax 53530 Flat Clear. More detail? My first attempt was BFM0360 Ford Dark Shadow Gray. The basic color was good, but it really lit up when light hit it. In other words, it looked pretty good in certain lights, but in other more direct light, it didn't look so great. Looked way too light. My second attempt was Duplicolor 244228 Metallic Charcoal, and pretty much the same problem as the Ford Dark Shadow Gray. It looked good in the shade, but when light hit it from the right (or wrong?) angle, it was way off from stock. My third and final attempt was Duplicolor 261413 Metallic Carbon Mist. I found this paint looks good in both sun and shade and does not "light up" like most of the other metallic options (like the Dark Shadow Gray). I would recommend this color over all of the other previously discussed varieties. Of course, it really doesn't mean much unless I could compare it to a stock colored panel, but I don't have one here. Anyway, it looks like this. This is in the shade with no flash: In the shade with flash. Note how the reflectors in the taillights and the license plate lit up with the flash, but the panel did not: And in the sun. Half direct sun, and half shade-ish:

 1 point