Leaderboard
-
gwri8
Free Member6Points1,385Posts -
HS30-H
Free Member6Points5,509Posts -

Dave WM
Free Member5Points3,591Posts -
HusseinHolland
Free Member5Points1,031Posts


Popular Content
Showing content with the highest reputation on 08/01/2023 in Posts
-
4 points
-
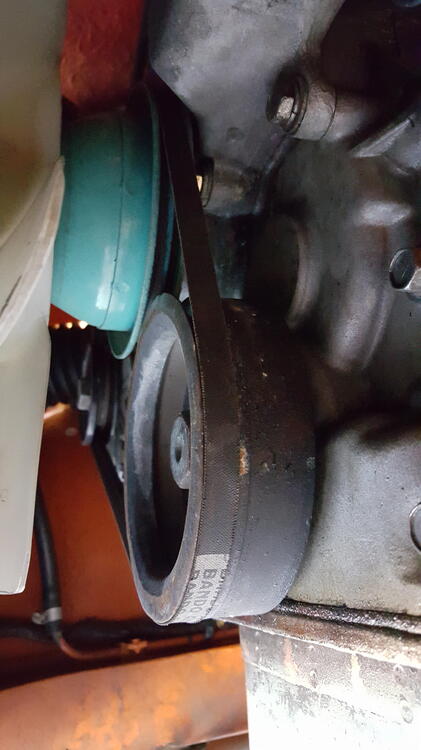
3 pointsRubber-bonded Harmonic Dampers get old, the bonding can perish and - worst case scenario - the outer ring makes a bid for freedom. No problem! Just break out the white Tipp-Ex correction fluid and paint some new timing marks on what's left. What can possibly go wrong?!
 3 points
 -
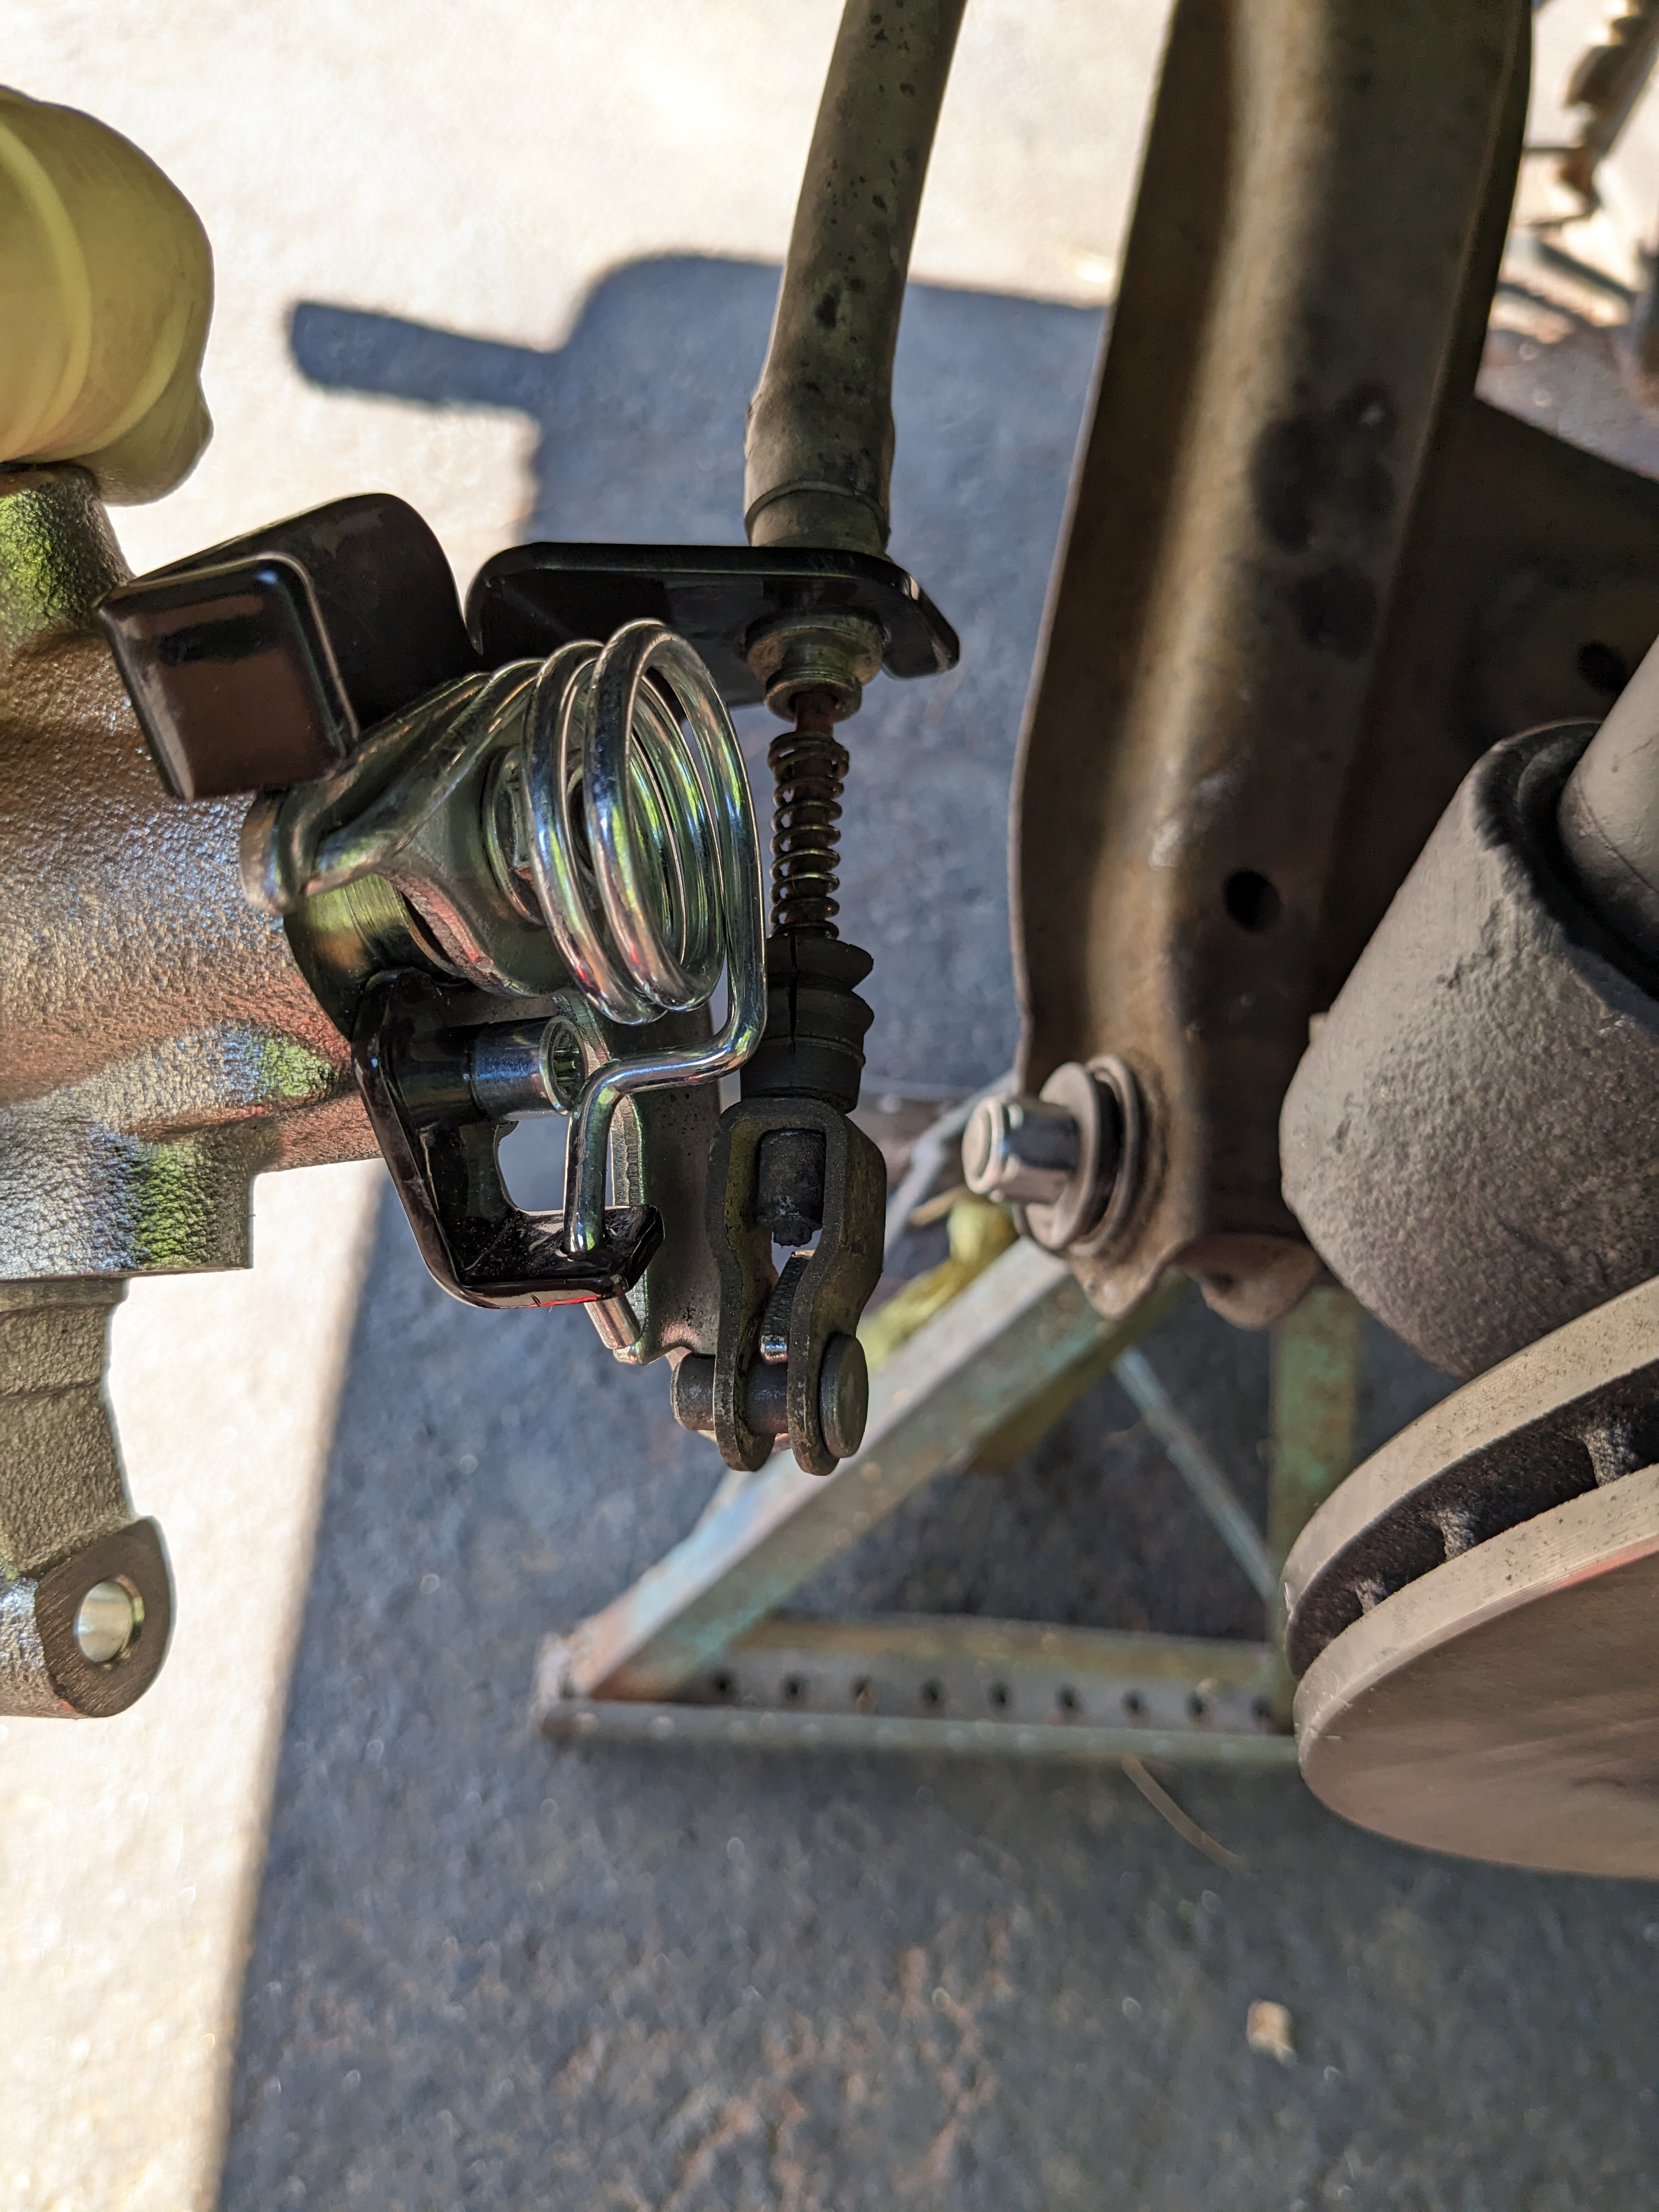
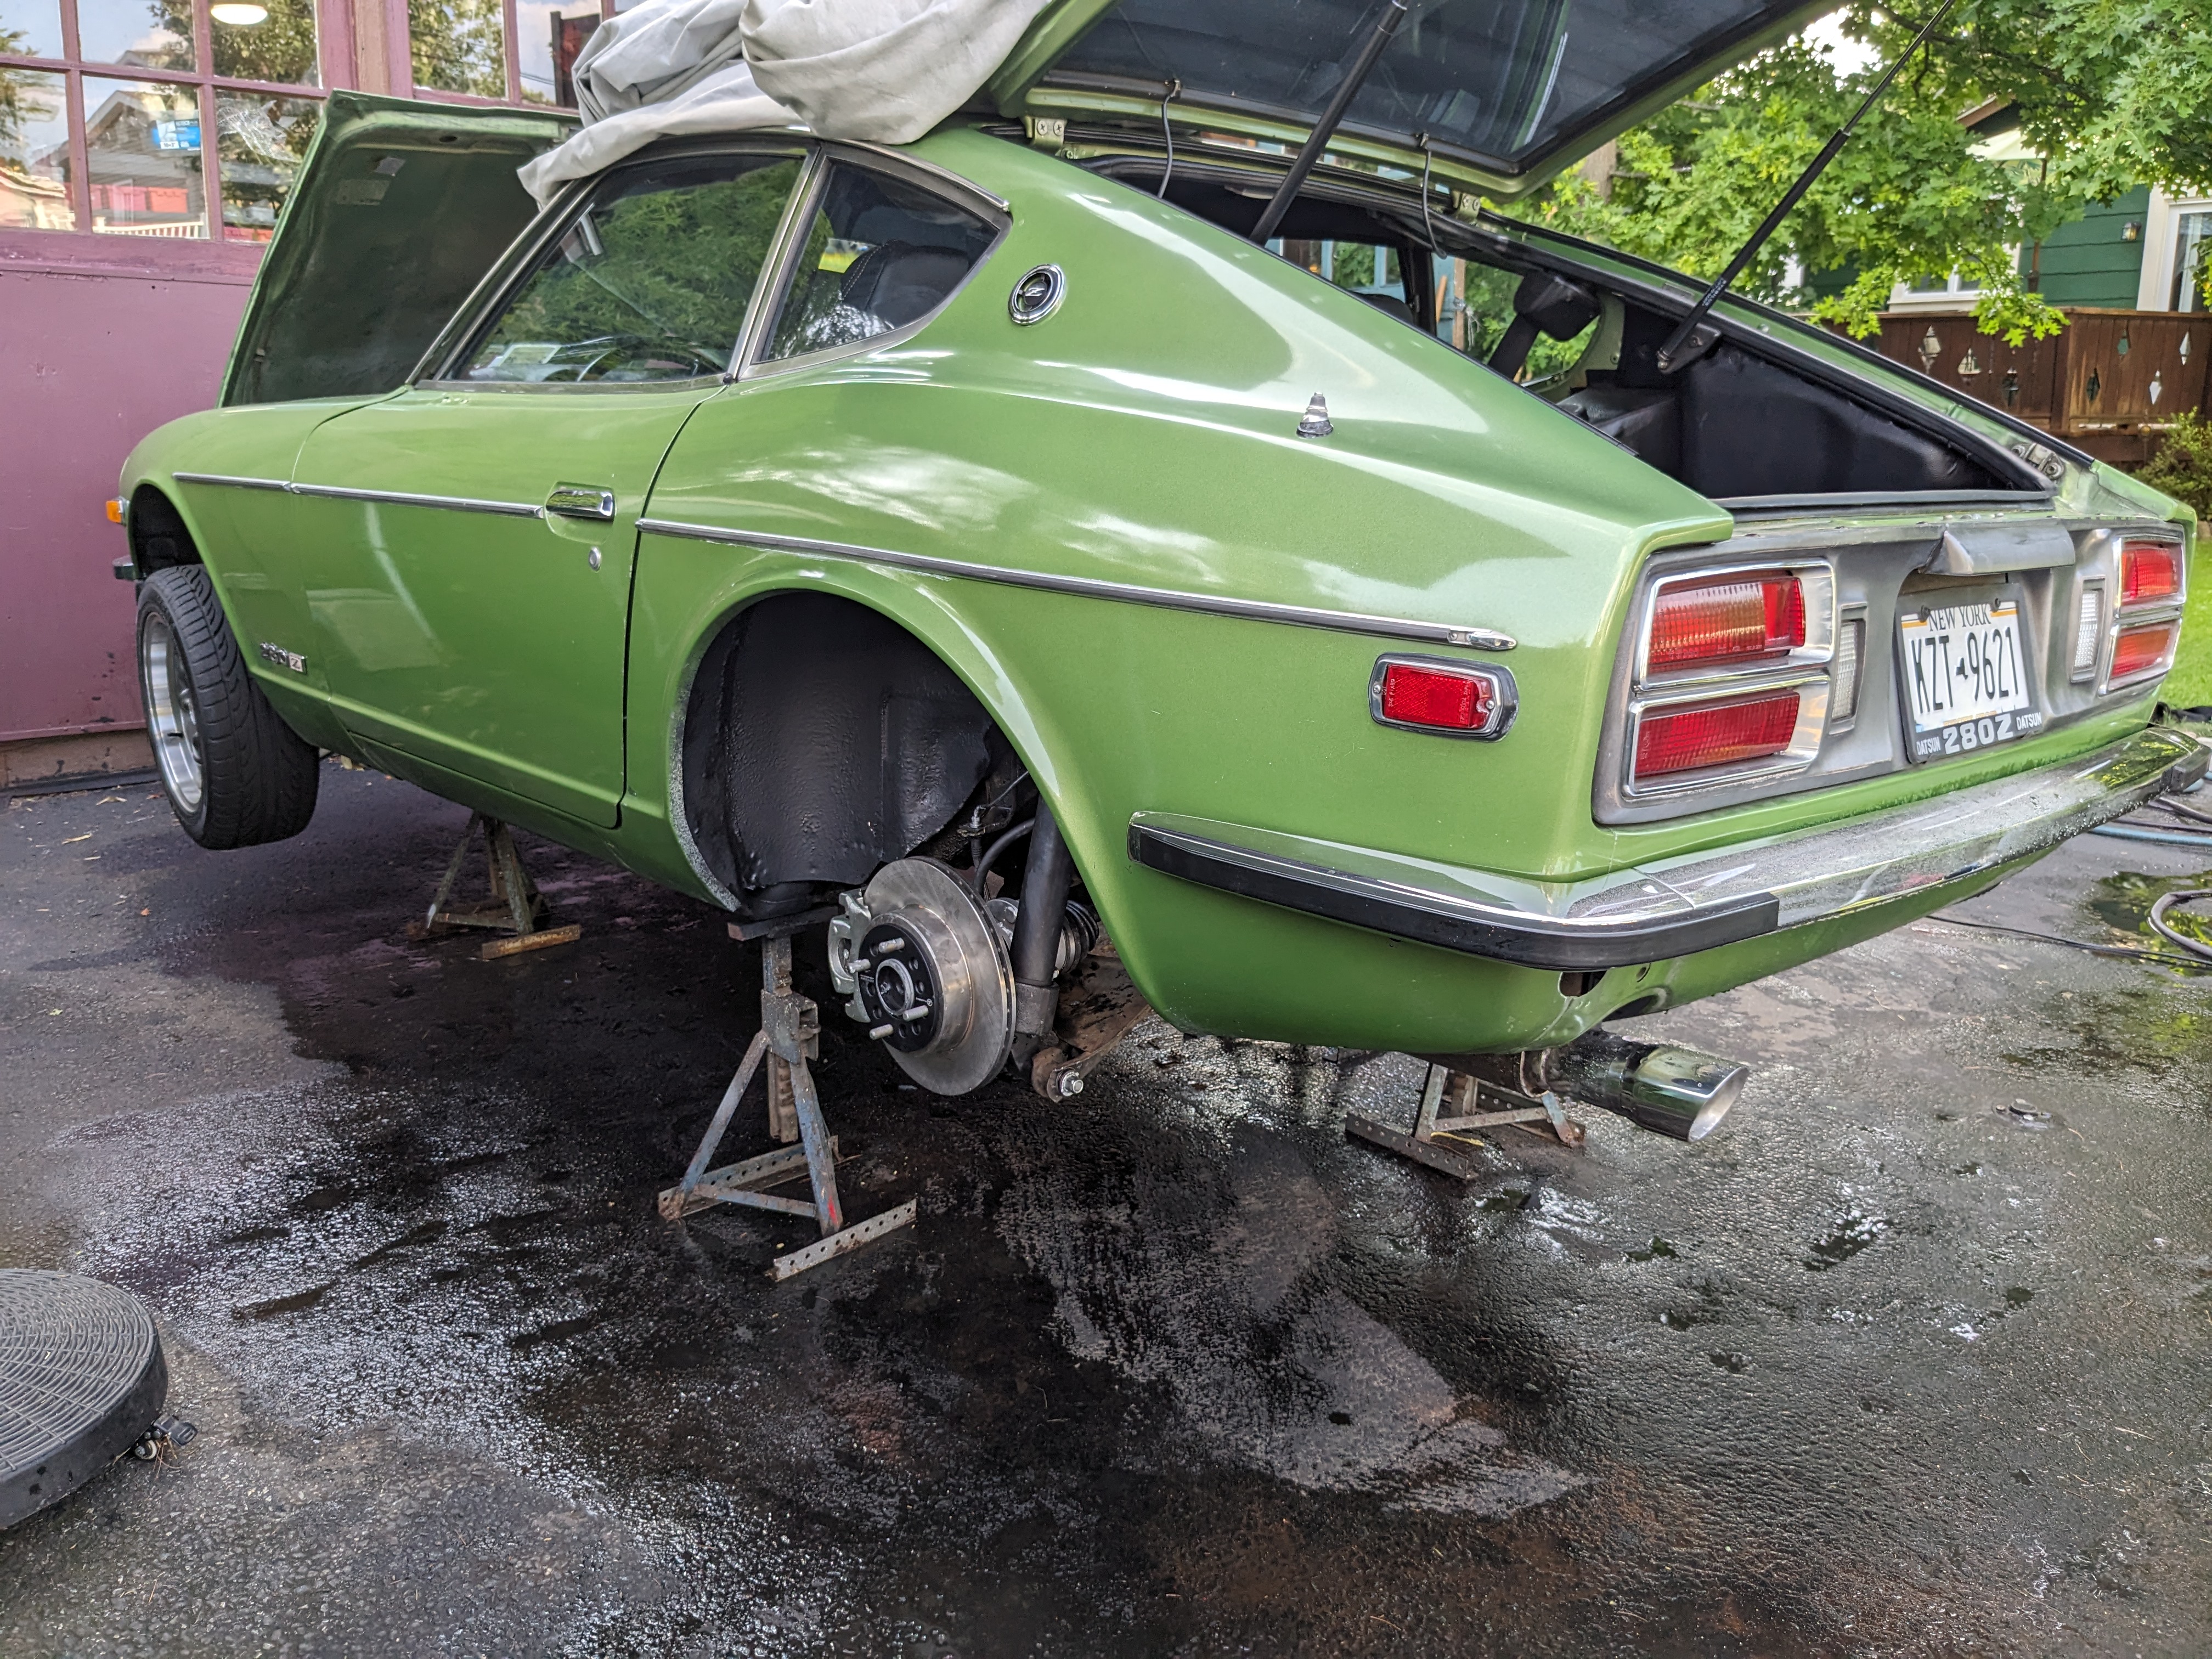
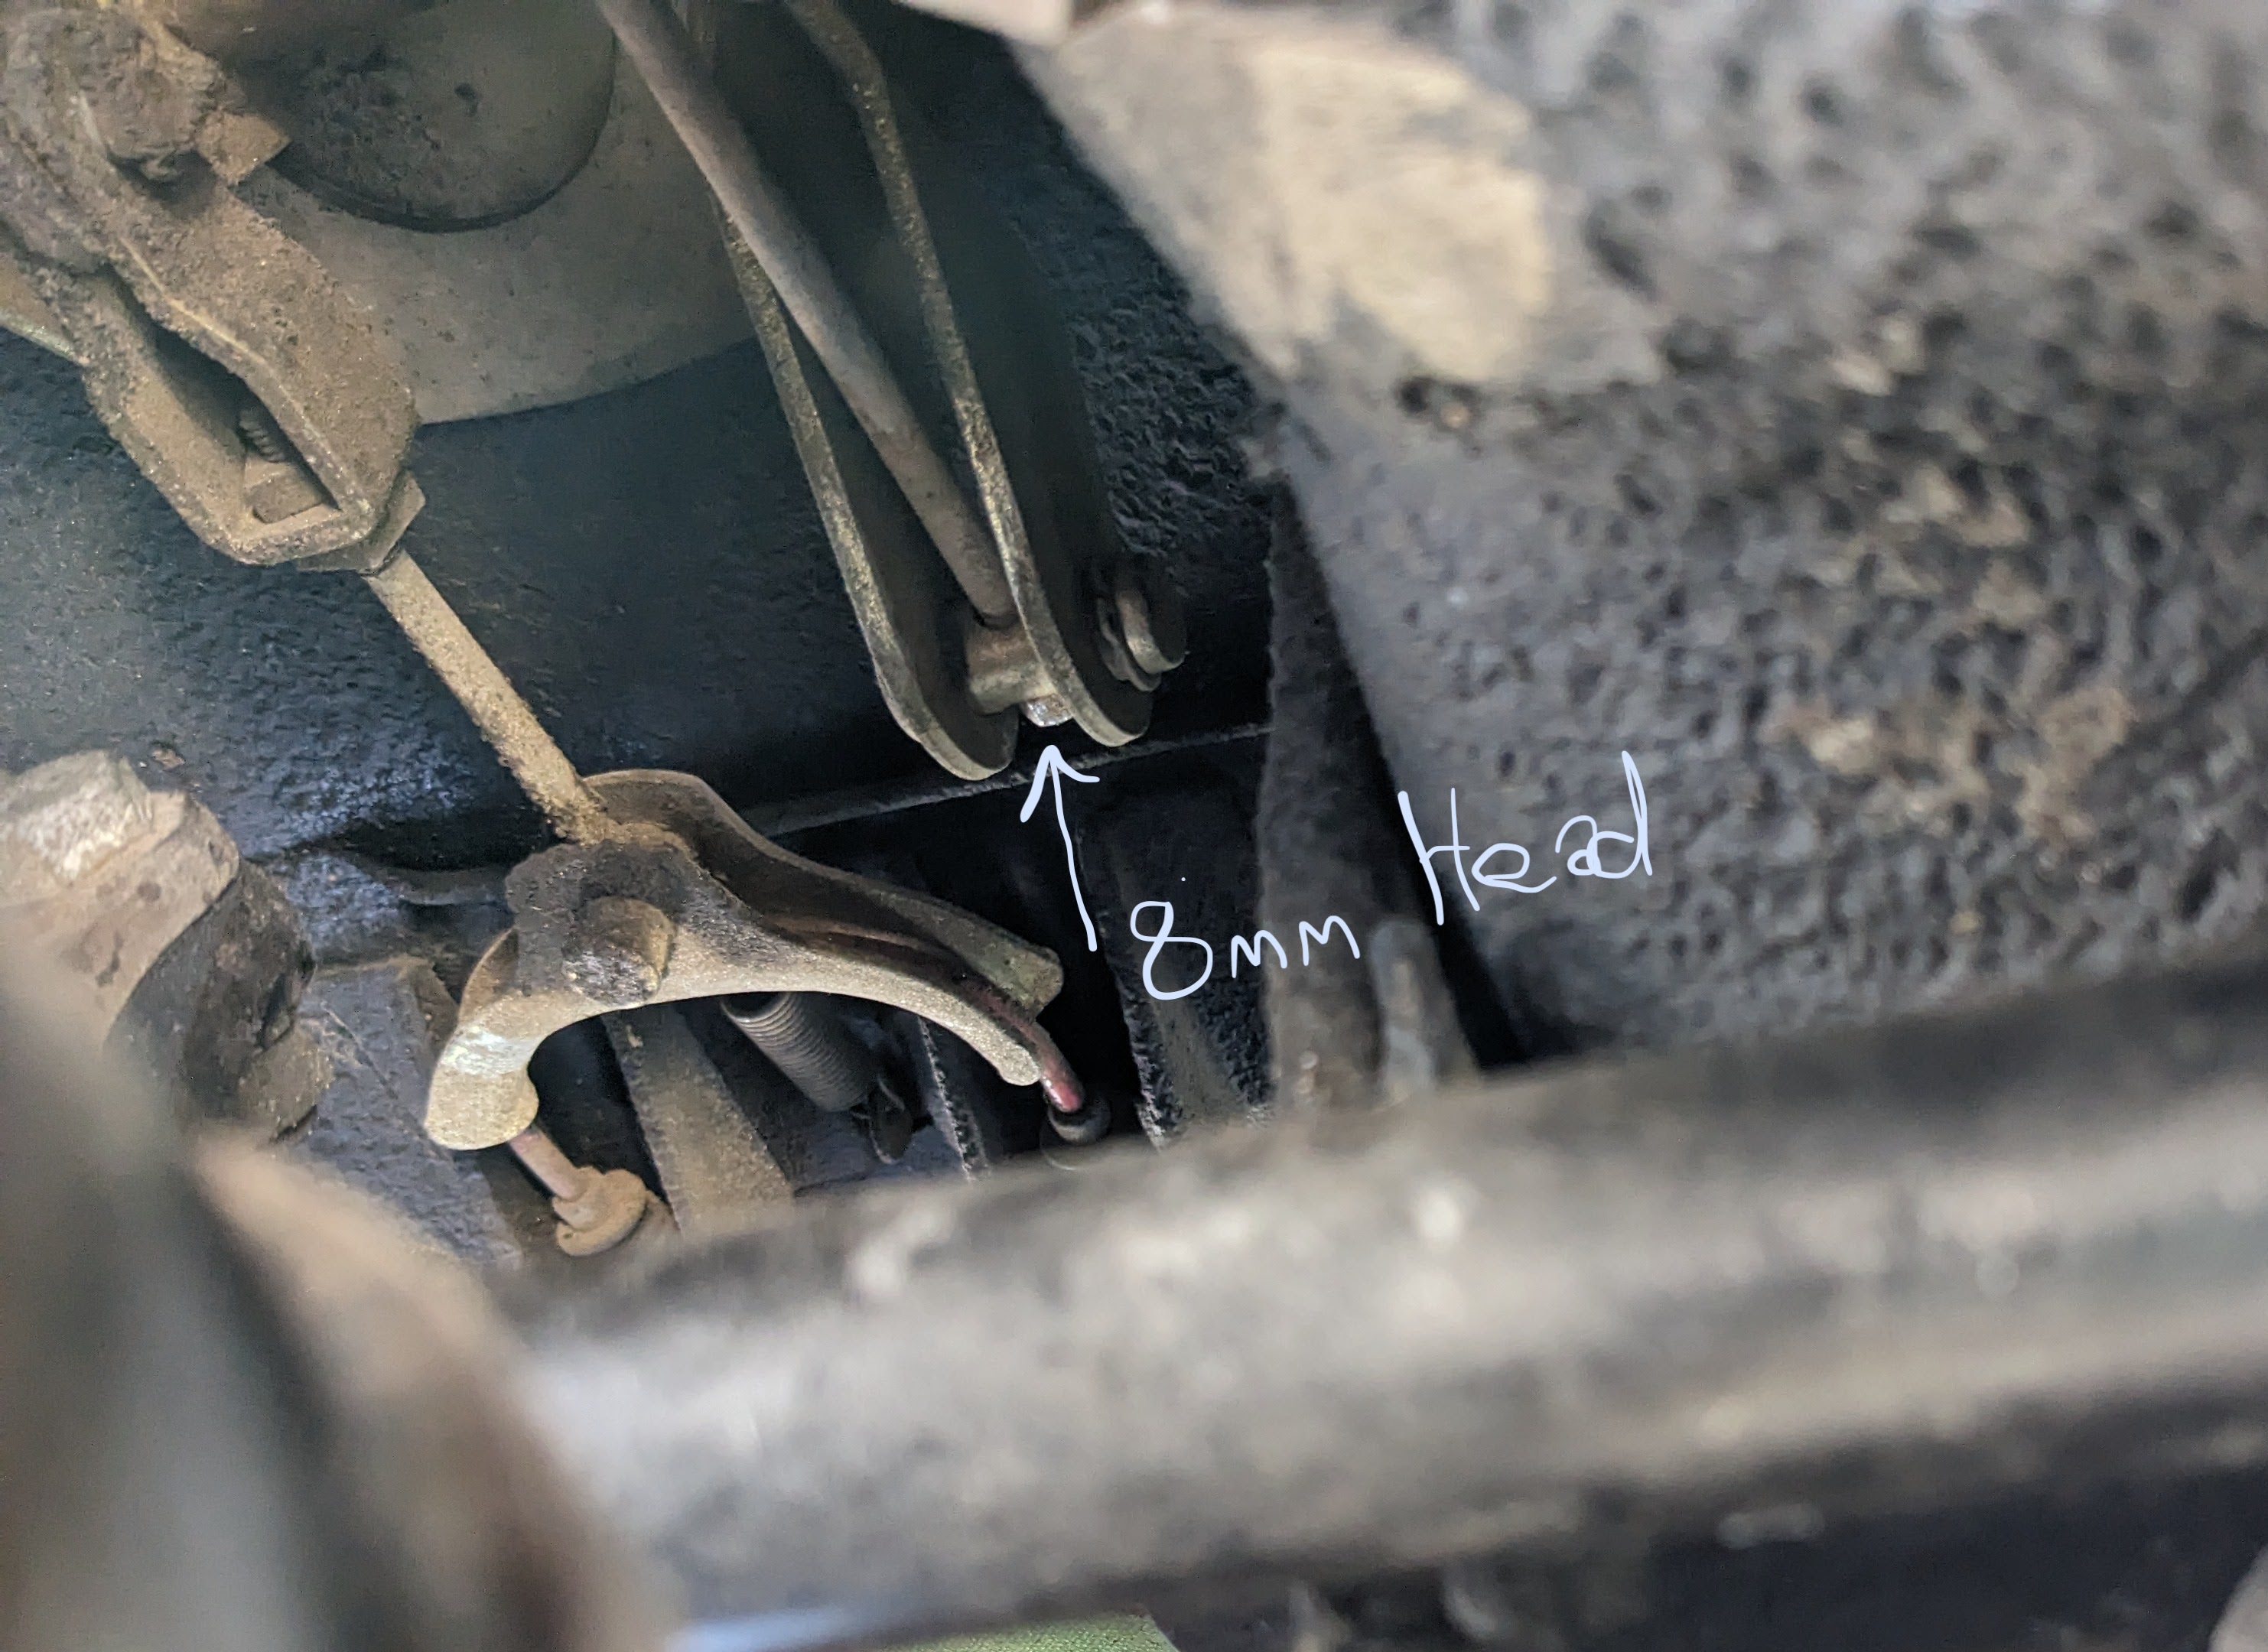
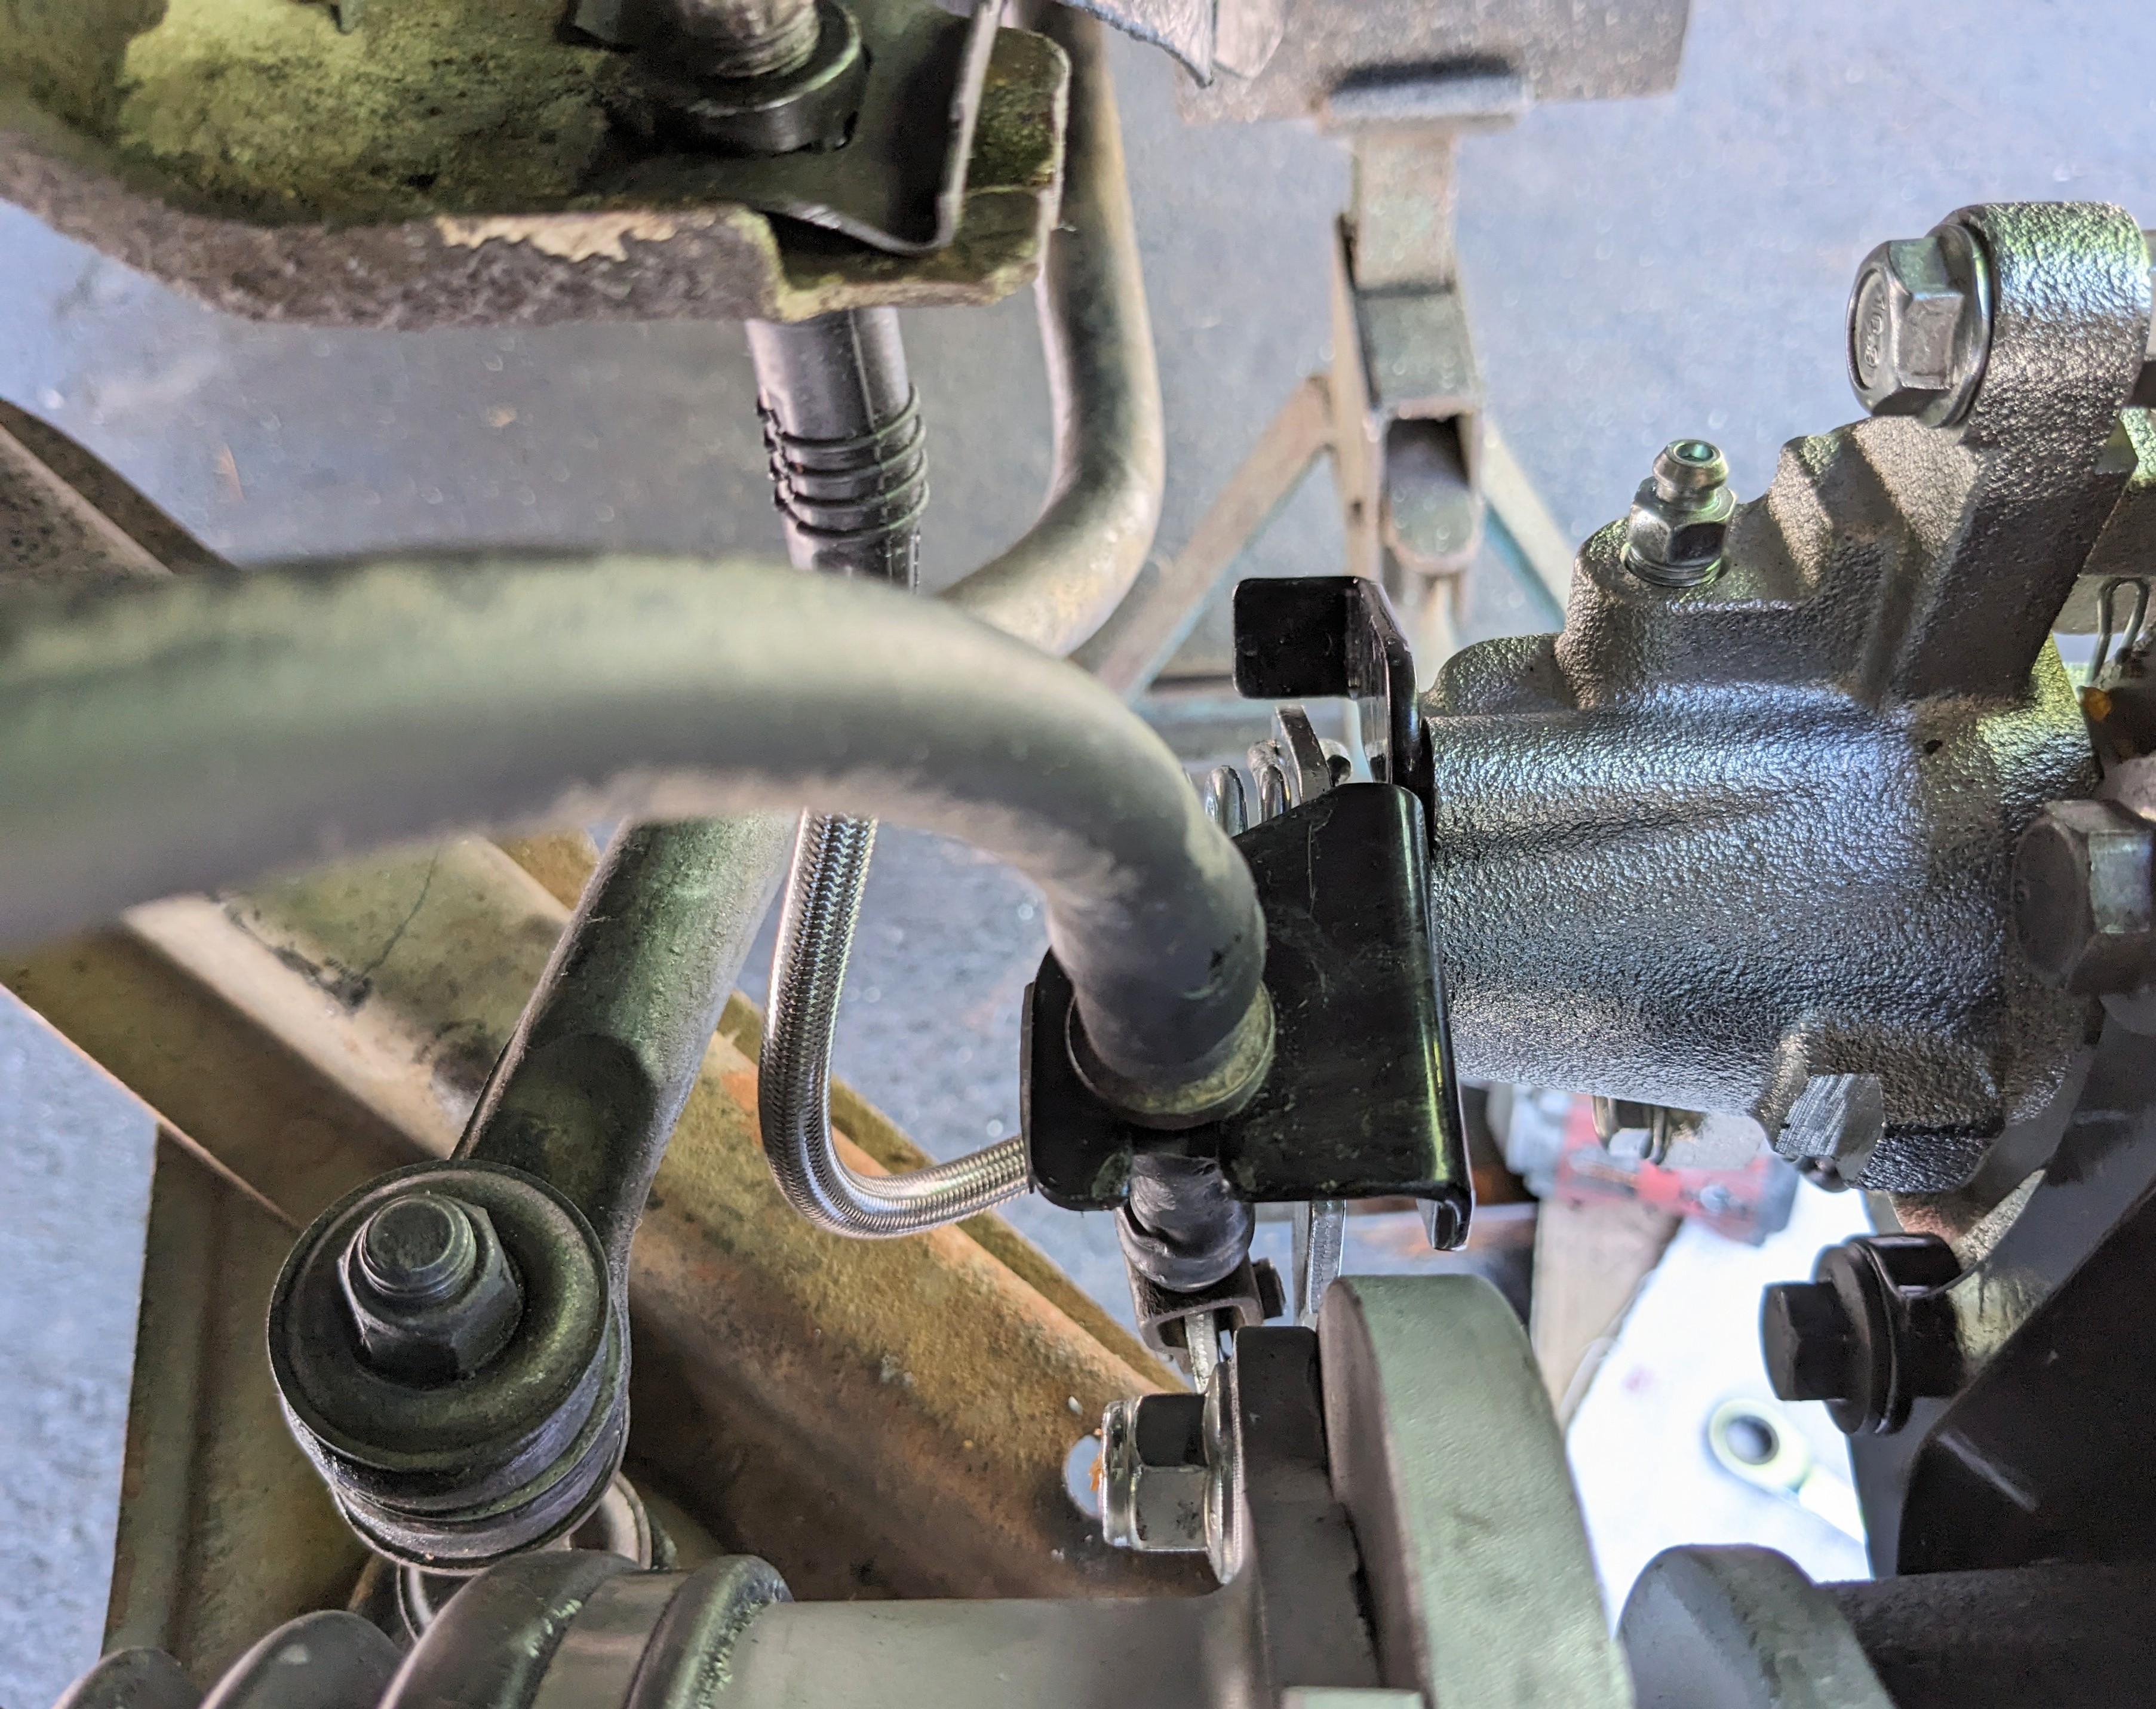
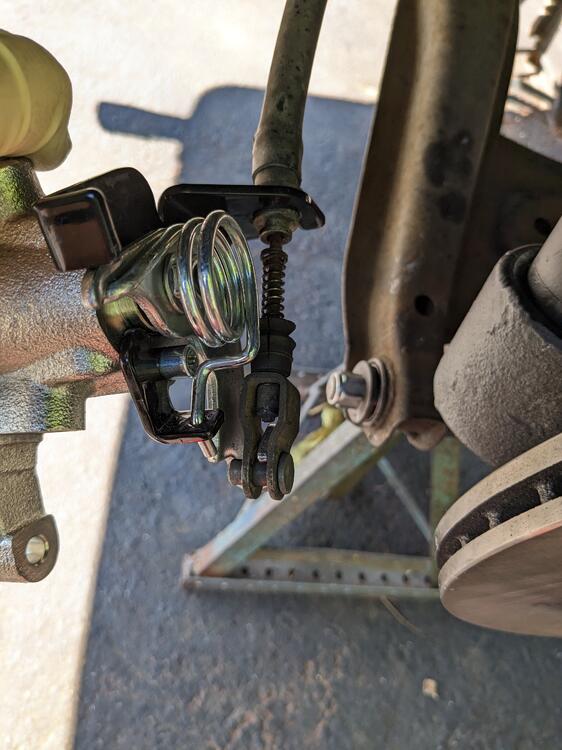
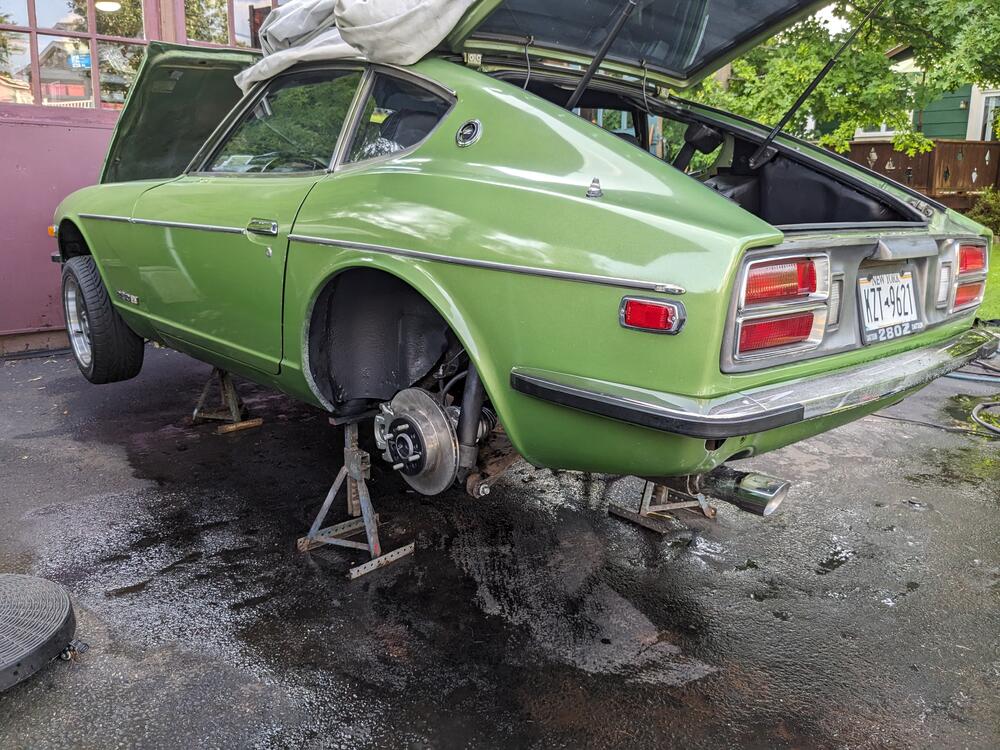
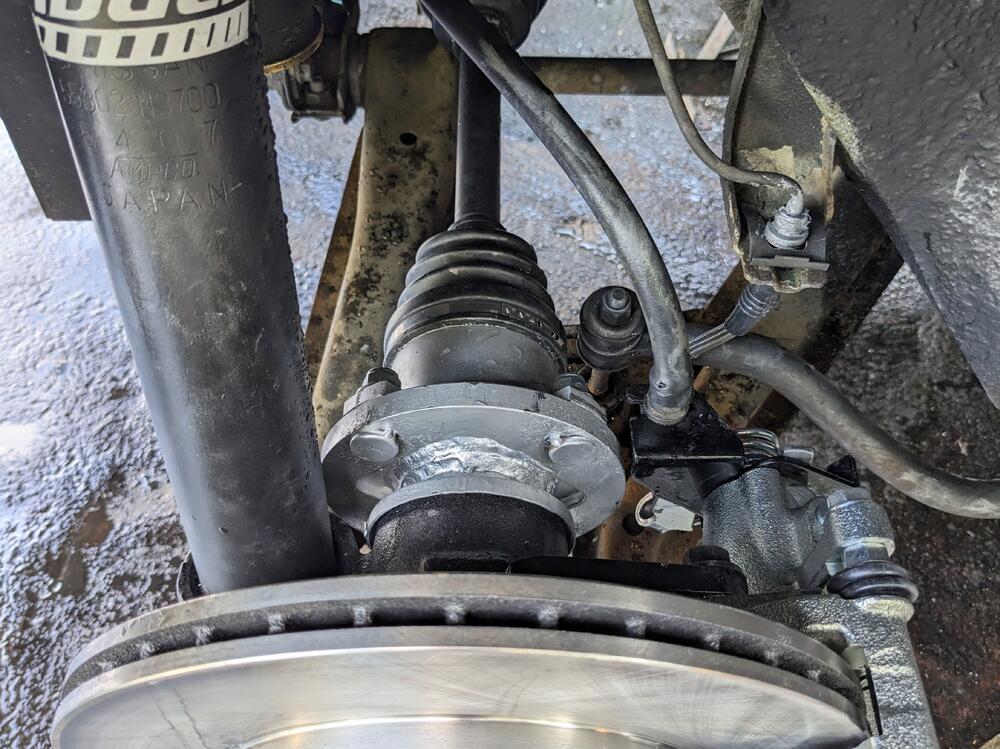
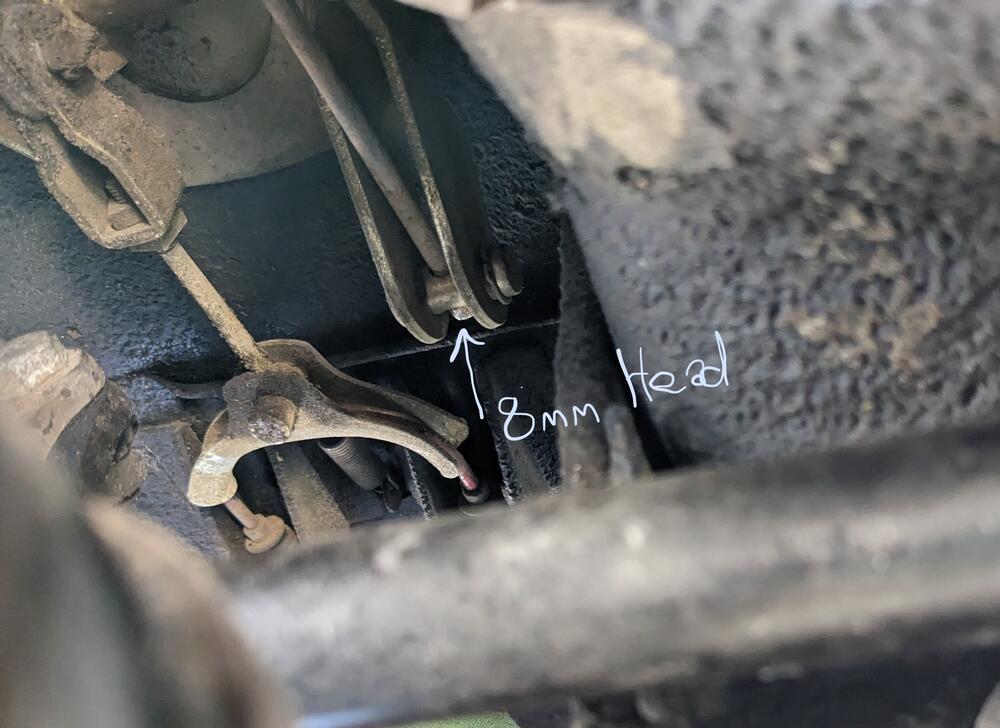
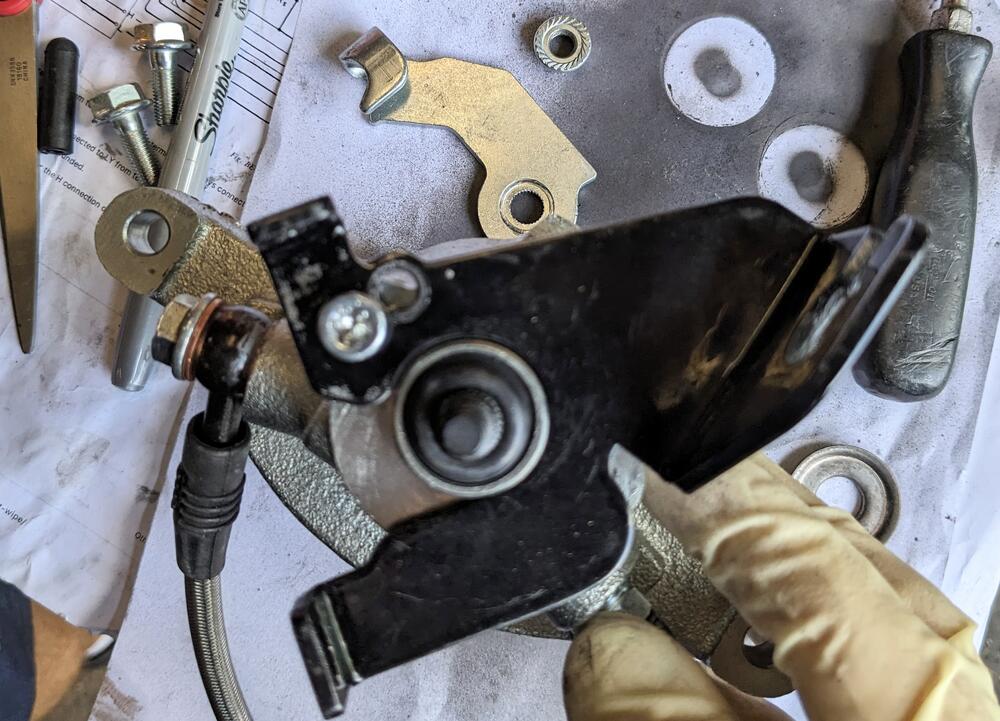
Cable attaches as I thought after looking at the pics I took Getting all the cables / hoses routed nicely. Used a vacuum- bleeder after this to get the rears bled (Dot 3). adjusted the cable to get enough slack. Looking online, there are ppl using pliers to turn the rod - I realized that the rod end is 8mm, just have to turn it had dropped the heat shield to get better access - so I removed the Cat heat sensor & shield while I was in there Volvo grommets to fill that & another hole problem with MilkFab cable bracket - it flexes significantly when cable is operated. I've emailed MilkFab about it car in the air, did some more power washing before putting wheels back on wheels on, after driving to settle the suspension - when I first took it off the stands, it looked like monster-truck arch clearance. Still would like it lower, but roads around here are not great & the town had speed bumps all over. Feels so much better on the road now, it was horrible with all the worn parts.


 3 points
 -
3 points
-
3 points
-
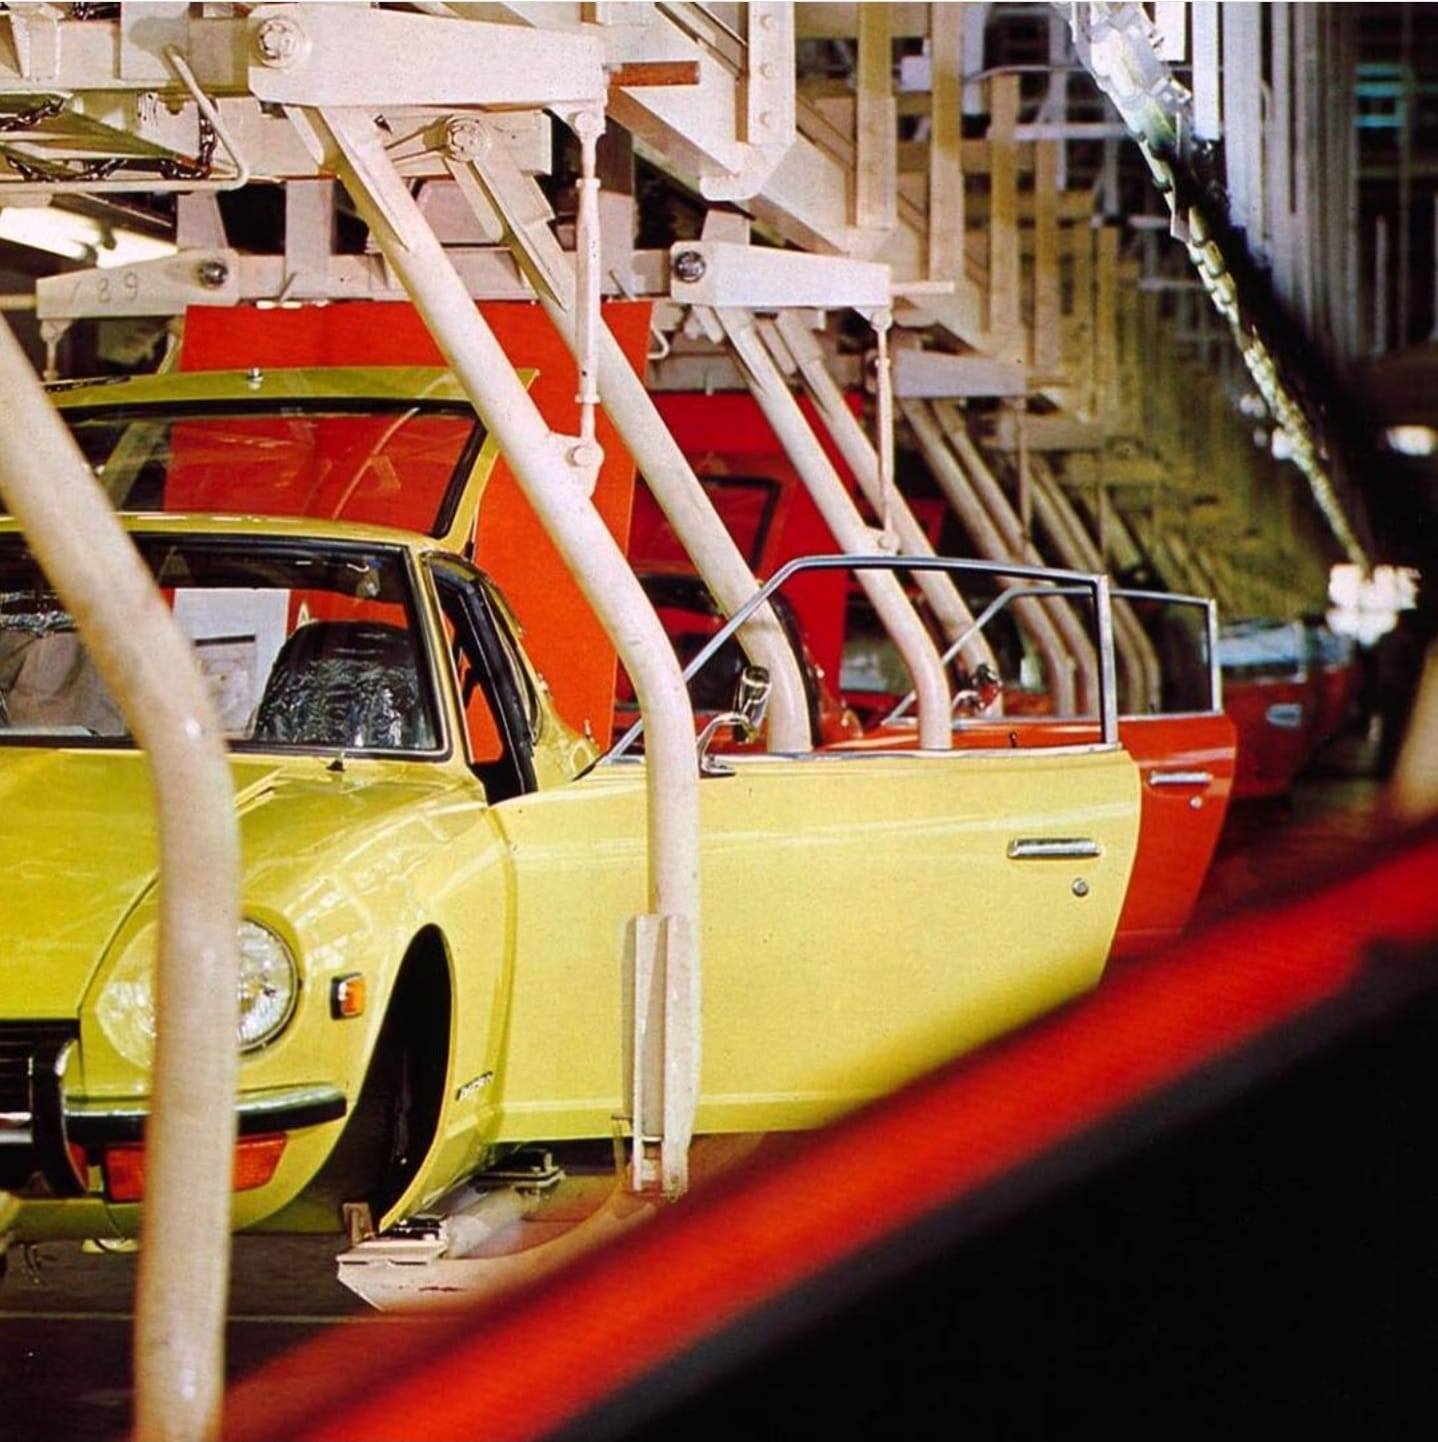
2 pointsIf anyone can track down the details it will be you Kats! I love the period photos of the 240Z construction, an insight into a different time in a different place.2 points
-
2 pointsHi SpeedRoo, thanks too! This picture is my favorite, and fascinating! Thanks Chris (26th-Z) for sharing it with us that was more than a decade ago. Let’s hope we will find more interesting stories and pictures. Kats2 points
-
2 pointsThanks for the link, I am impressed by your wonderful collection of goodies, they are rare, I have never seen them before. And about the attitude of Nissan, not to disclose details about our car. Yes actually I was talking about it with Mr.Miyazaki. Mr.Miyazaki agreed with me, I told him how much we want to know about our car’s birthday and what ship loaded our car to the port. I am still dreaming about to find the record of our car’s history in Japan. Kats2 points
-
Right, and I found the reason for the gas flooding, the idle mixture screws on the triple Webers are suppose to be somewhere between half to one and half turns open, if the carbs need more than that you have to start changing jets. On these carbs the idle mixture screws were turned out 5 1/2 turns, so the gas was just gushing in.2 points
-
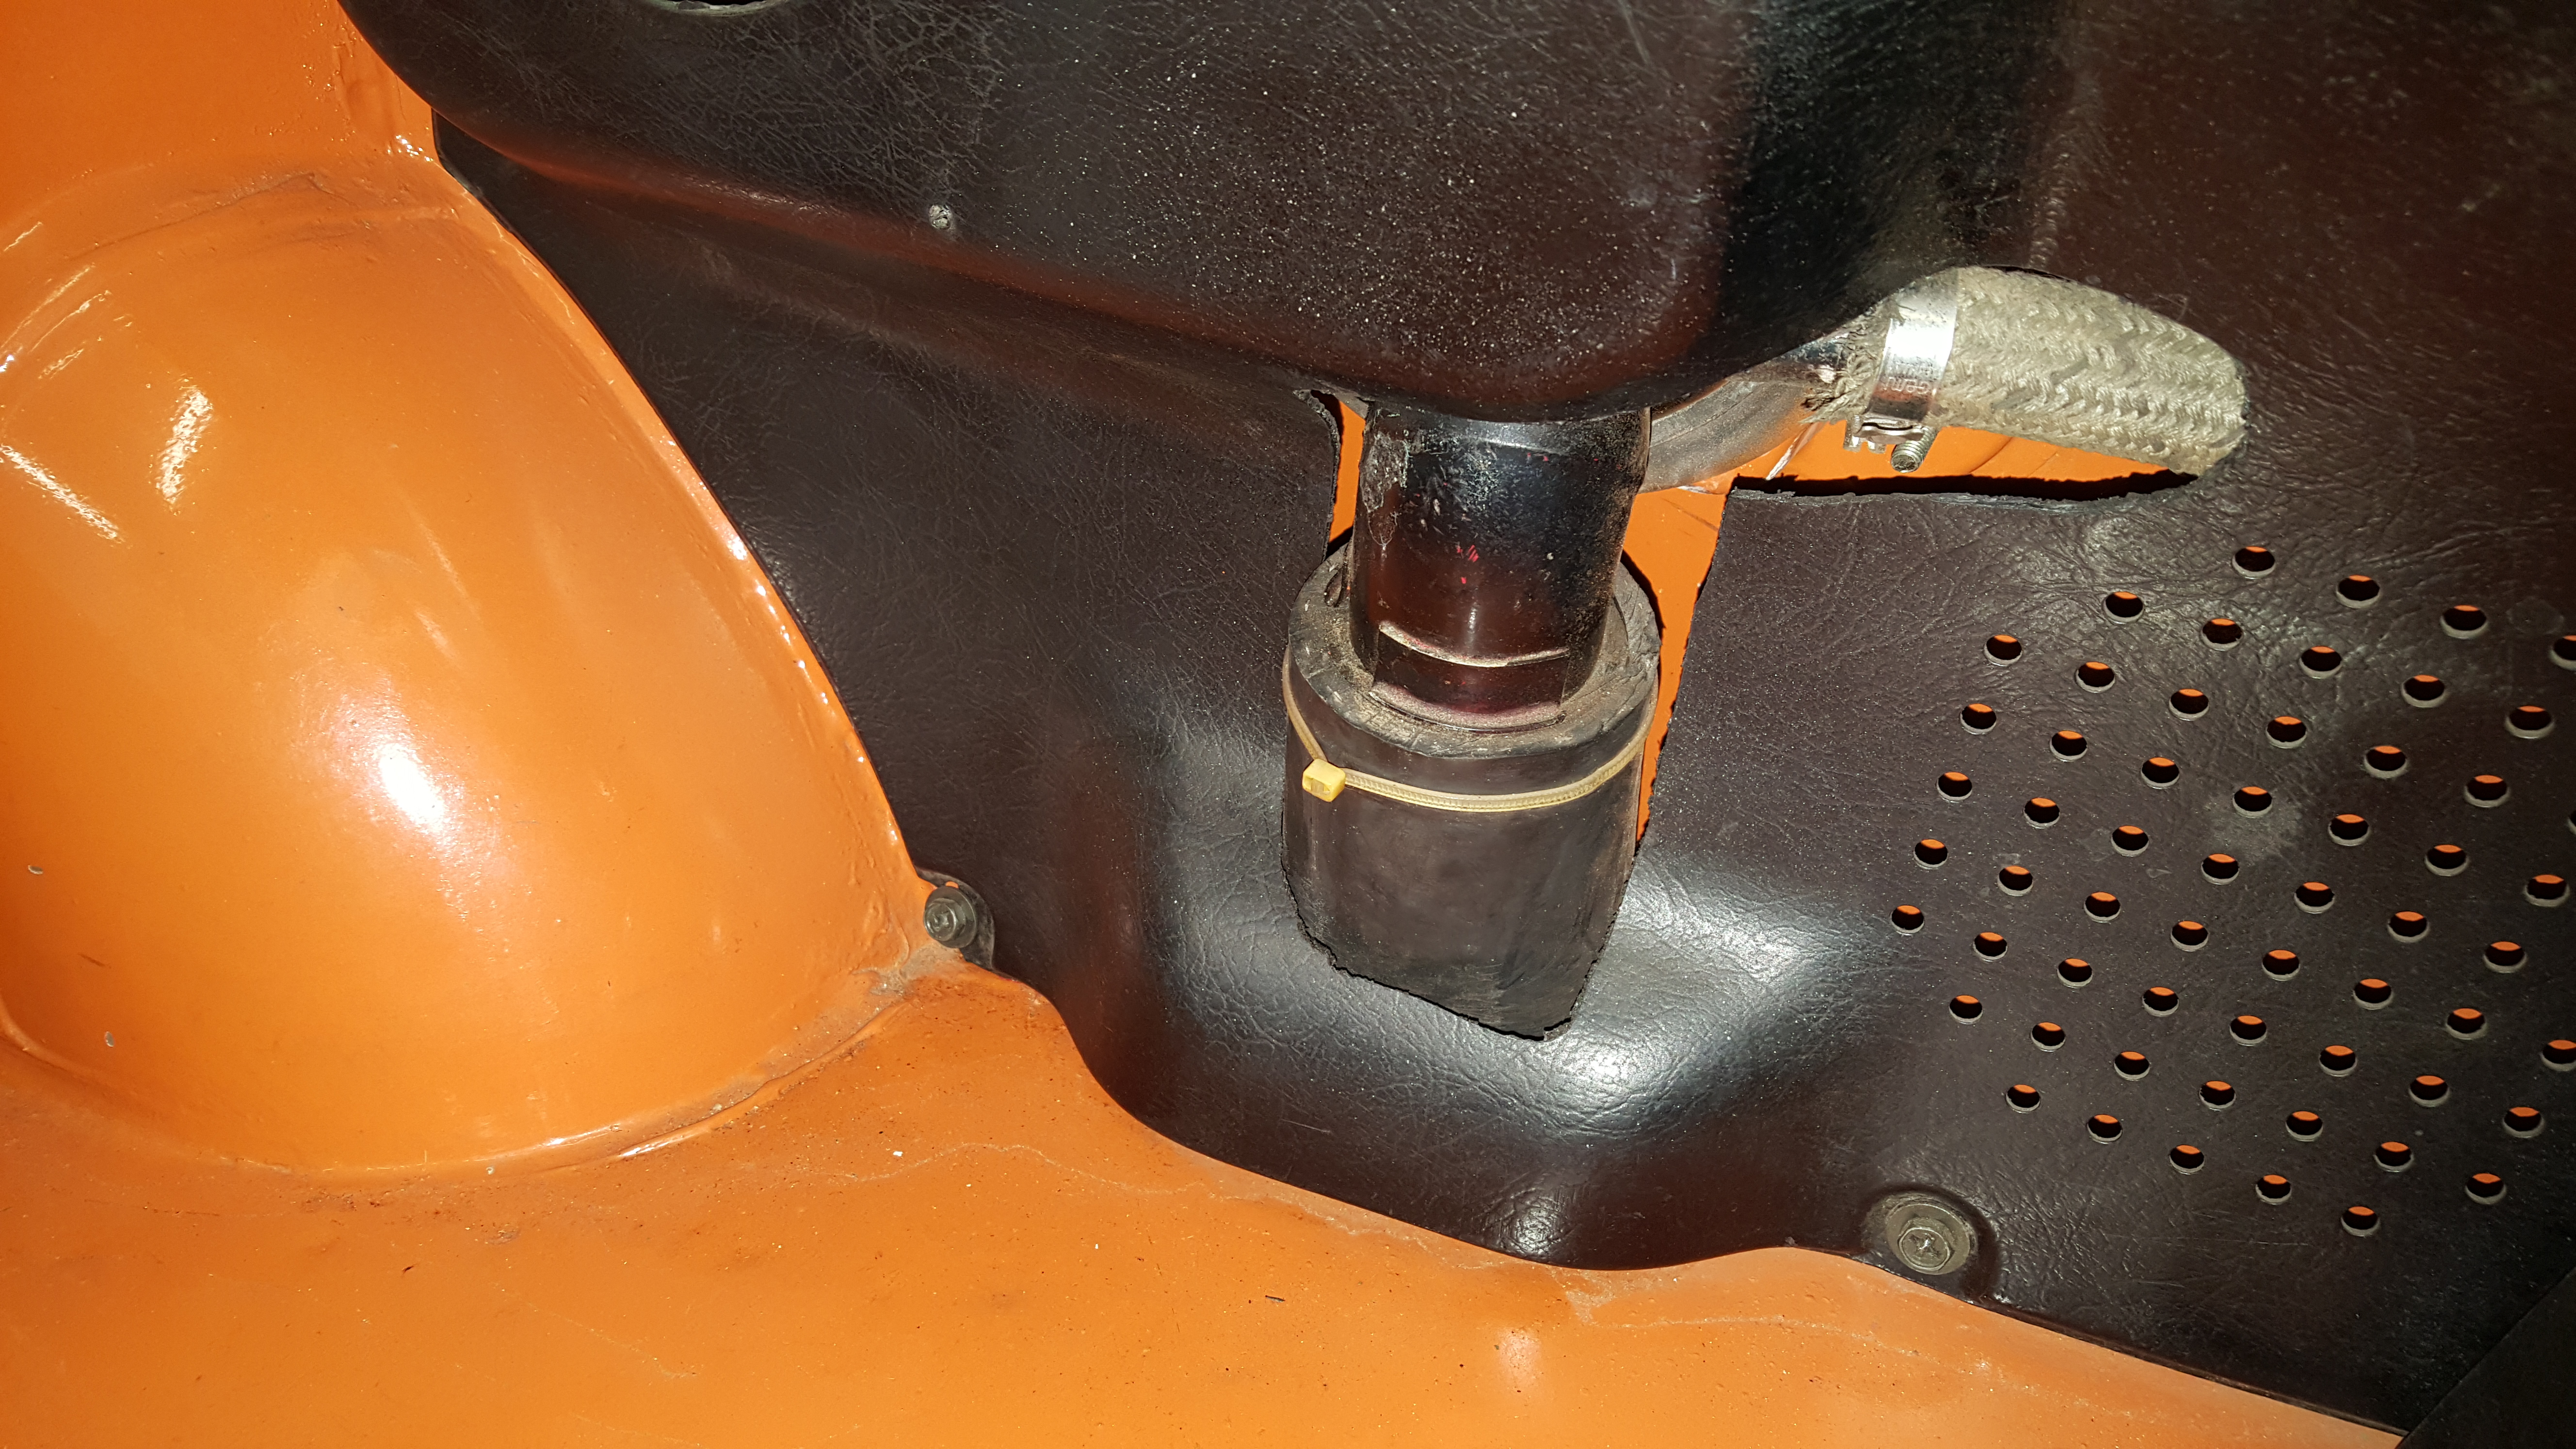
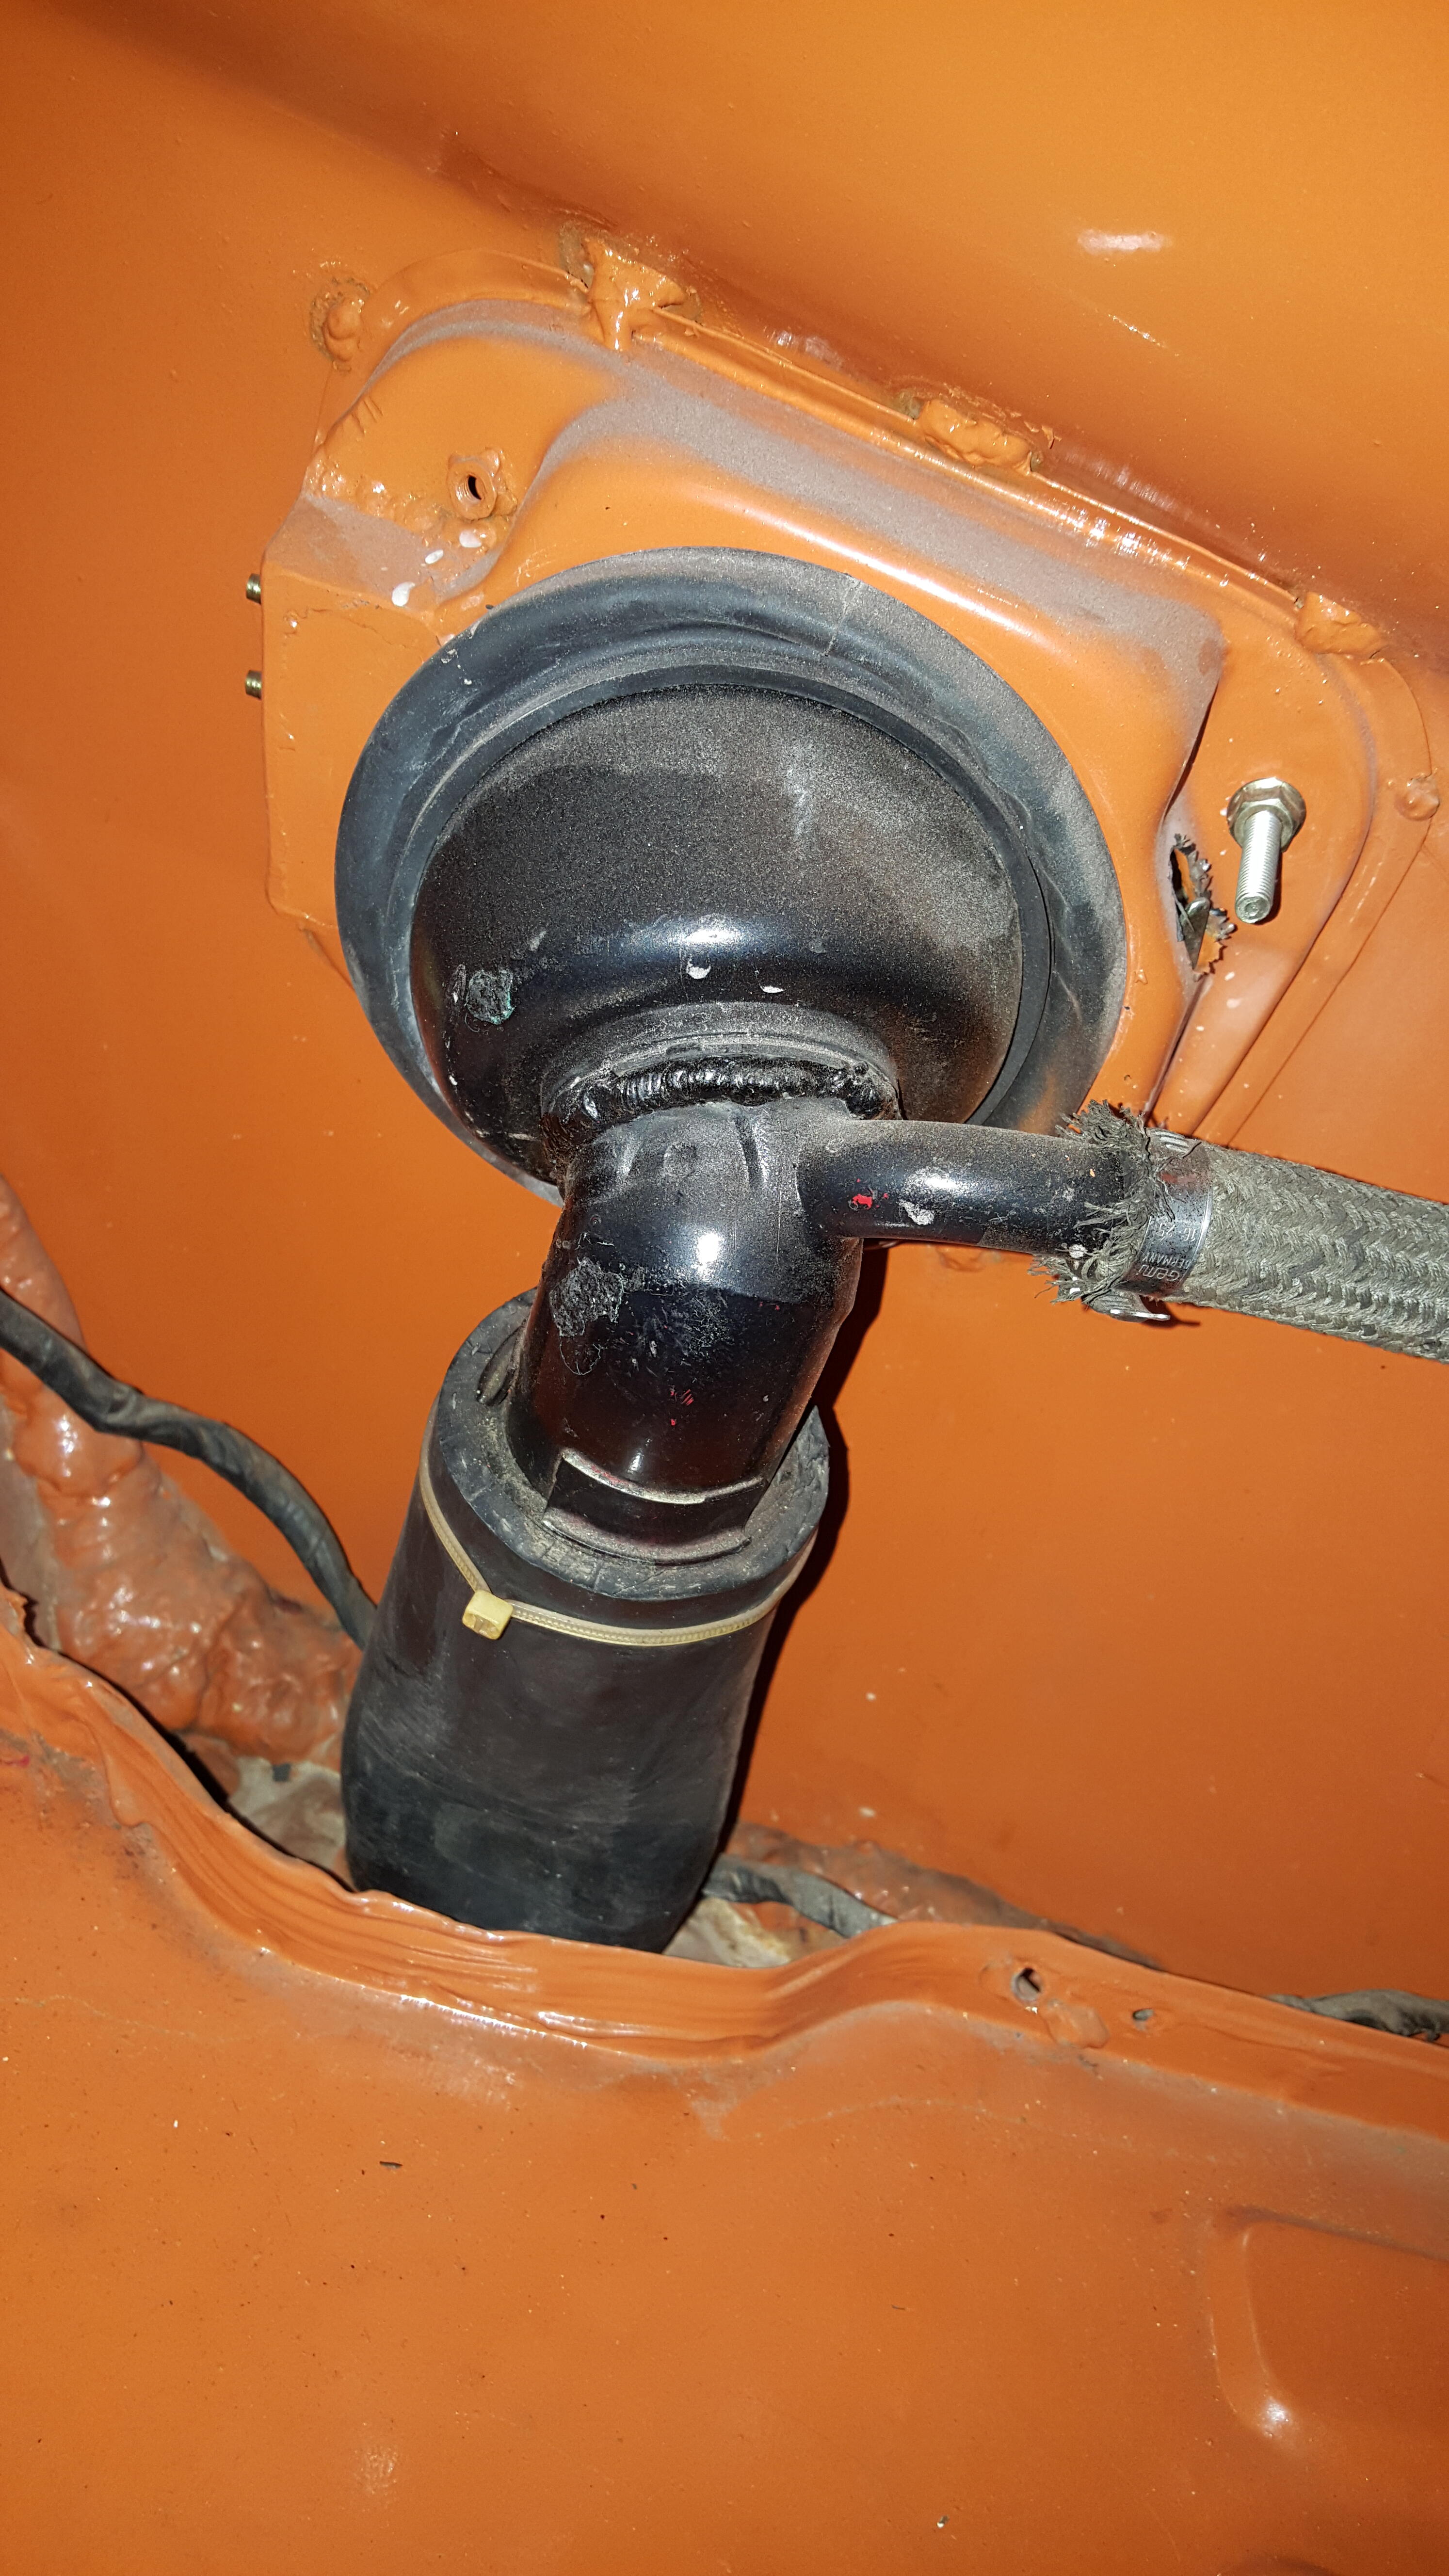
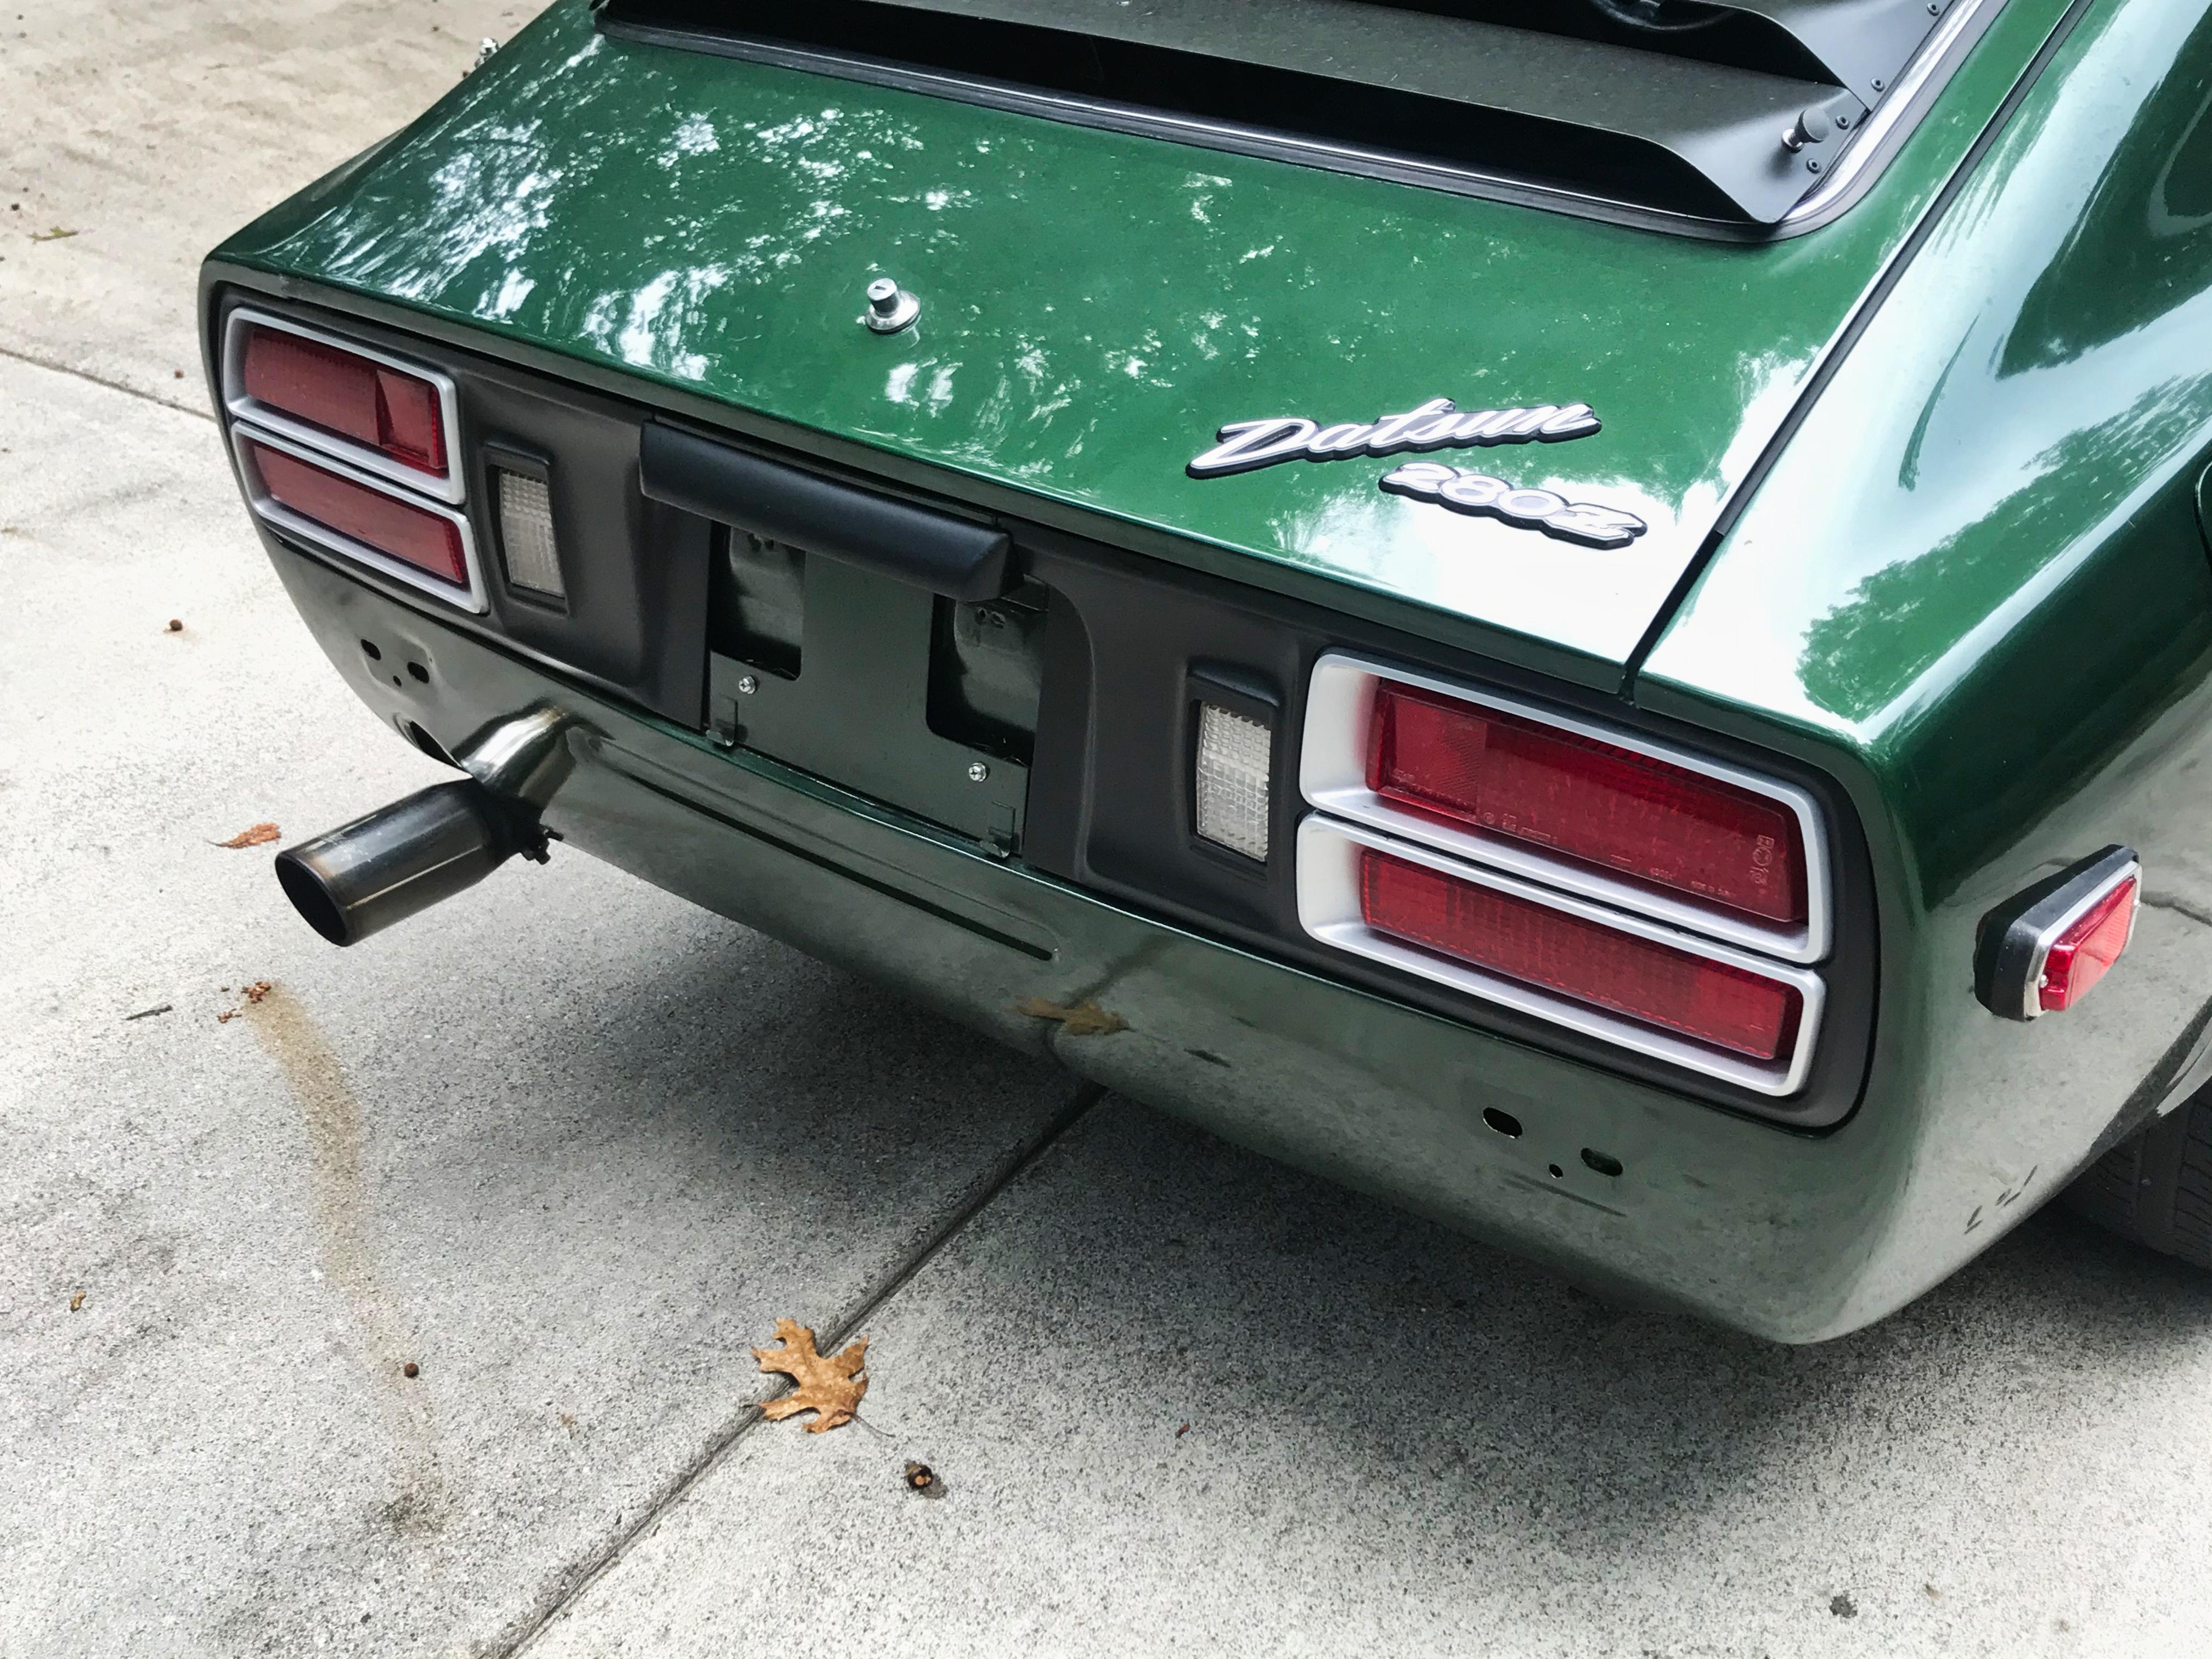
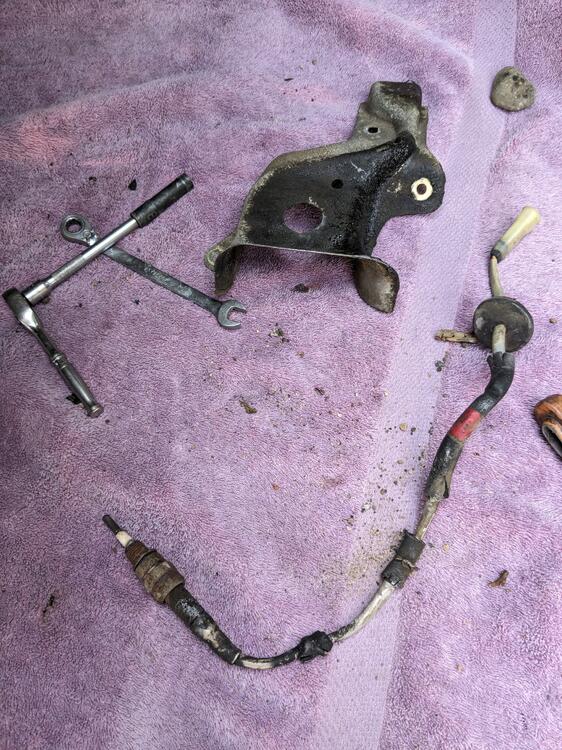
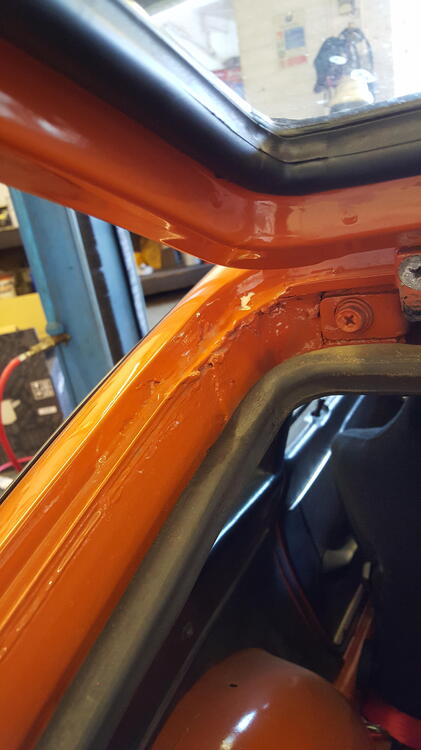
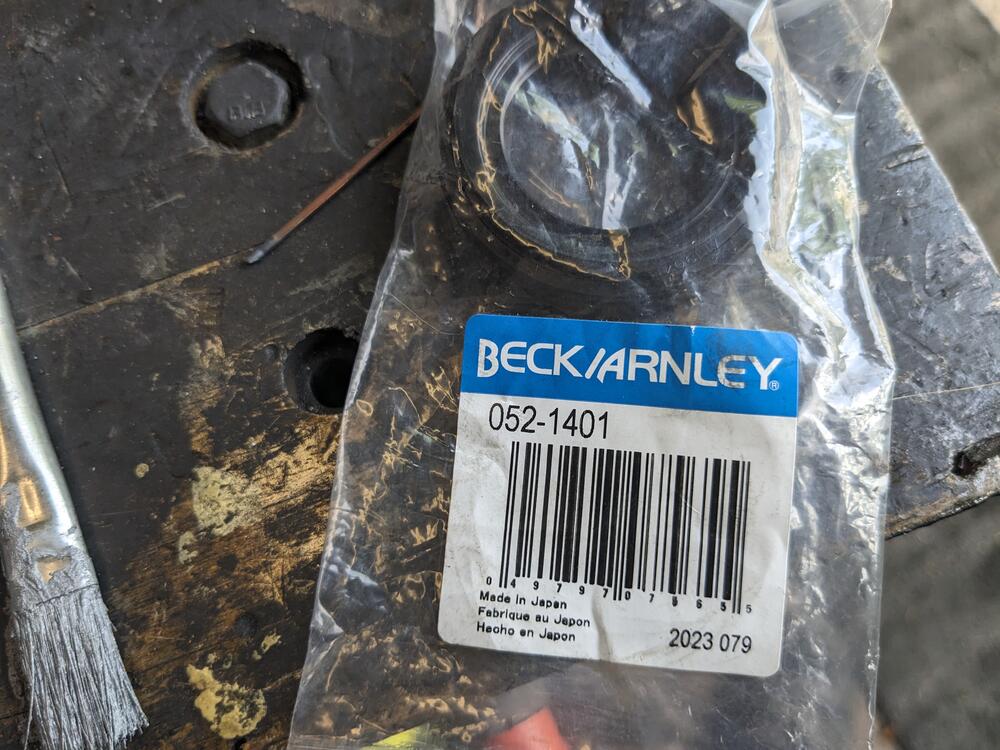
Inspired by a couple of recent posts on the Bring-A-Trailer thread, here's a thread to show some of the 'It wasn't me' type beastliness inflicted on cars by previous owners or their paid minions. I think we've all seen them. To get the ball rolling, I present to the jury this absolutely arcane replacement fuel filler arrangement on a 1970 car. I had been asked to perform an inspection and appraisal of the car for its new (and somewhat green) owner before he commissioned a restoration by a specialist here in the UK. Being an early Japanese market variant with a low production volume, a second opinion was being sought and I was happy to oblige. Lots (lots!) wrong with the car, and this particular example was not even the worst of it. A used rear quarter (in fact, totally the wrong type for the production year of the car...) had been attached but it must have somehow been supplied without its original fuel filler 'box', prompting the attachment of something from an entirely different vehicle (answers on a postcard please) and some mind-bendingly arcane domino-effect er, 'fabrication'..... I'll let the photos speak for themselves, but just add that the latching mechanism (look closely) was verging on 'field repair' genius...


 1 point
 -
That means you get one burnout instead of two when you dump the clutch.1 point
-
1 point
-
Yeah, I checked, they were good, the work the machinist did is excellent, very consistent, it's the guy who reassembled it🤡1 point
-
Dave! That was it!!! I too, maybe 5 years ago, repaired my combination switch to fix the headlight switch. I put the nylon washer in the same way as the guy in the video. I rearranged the washer and I can now wash my window, at least the passenger side until I find the clog. Thank you ALL for the help.1 point
-
I would be checking ring gaps too just for fun.1 point
-
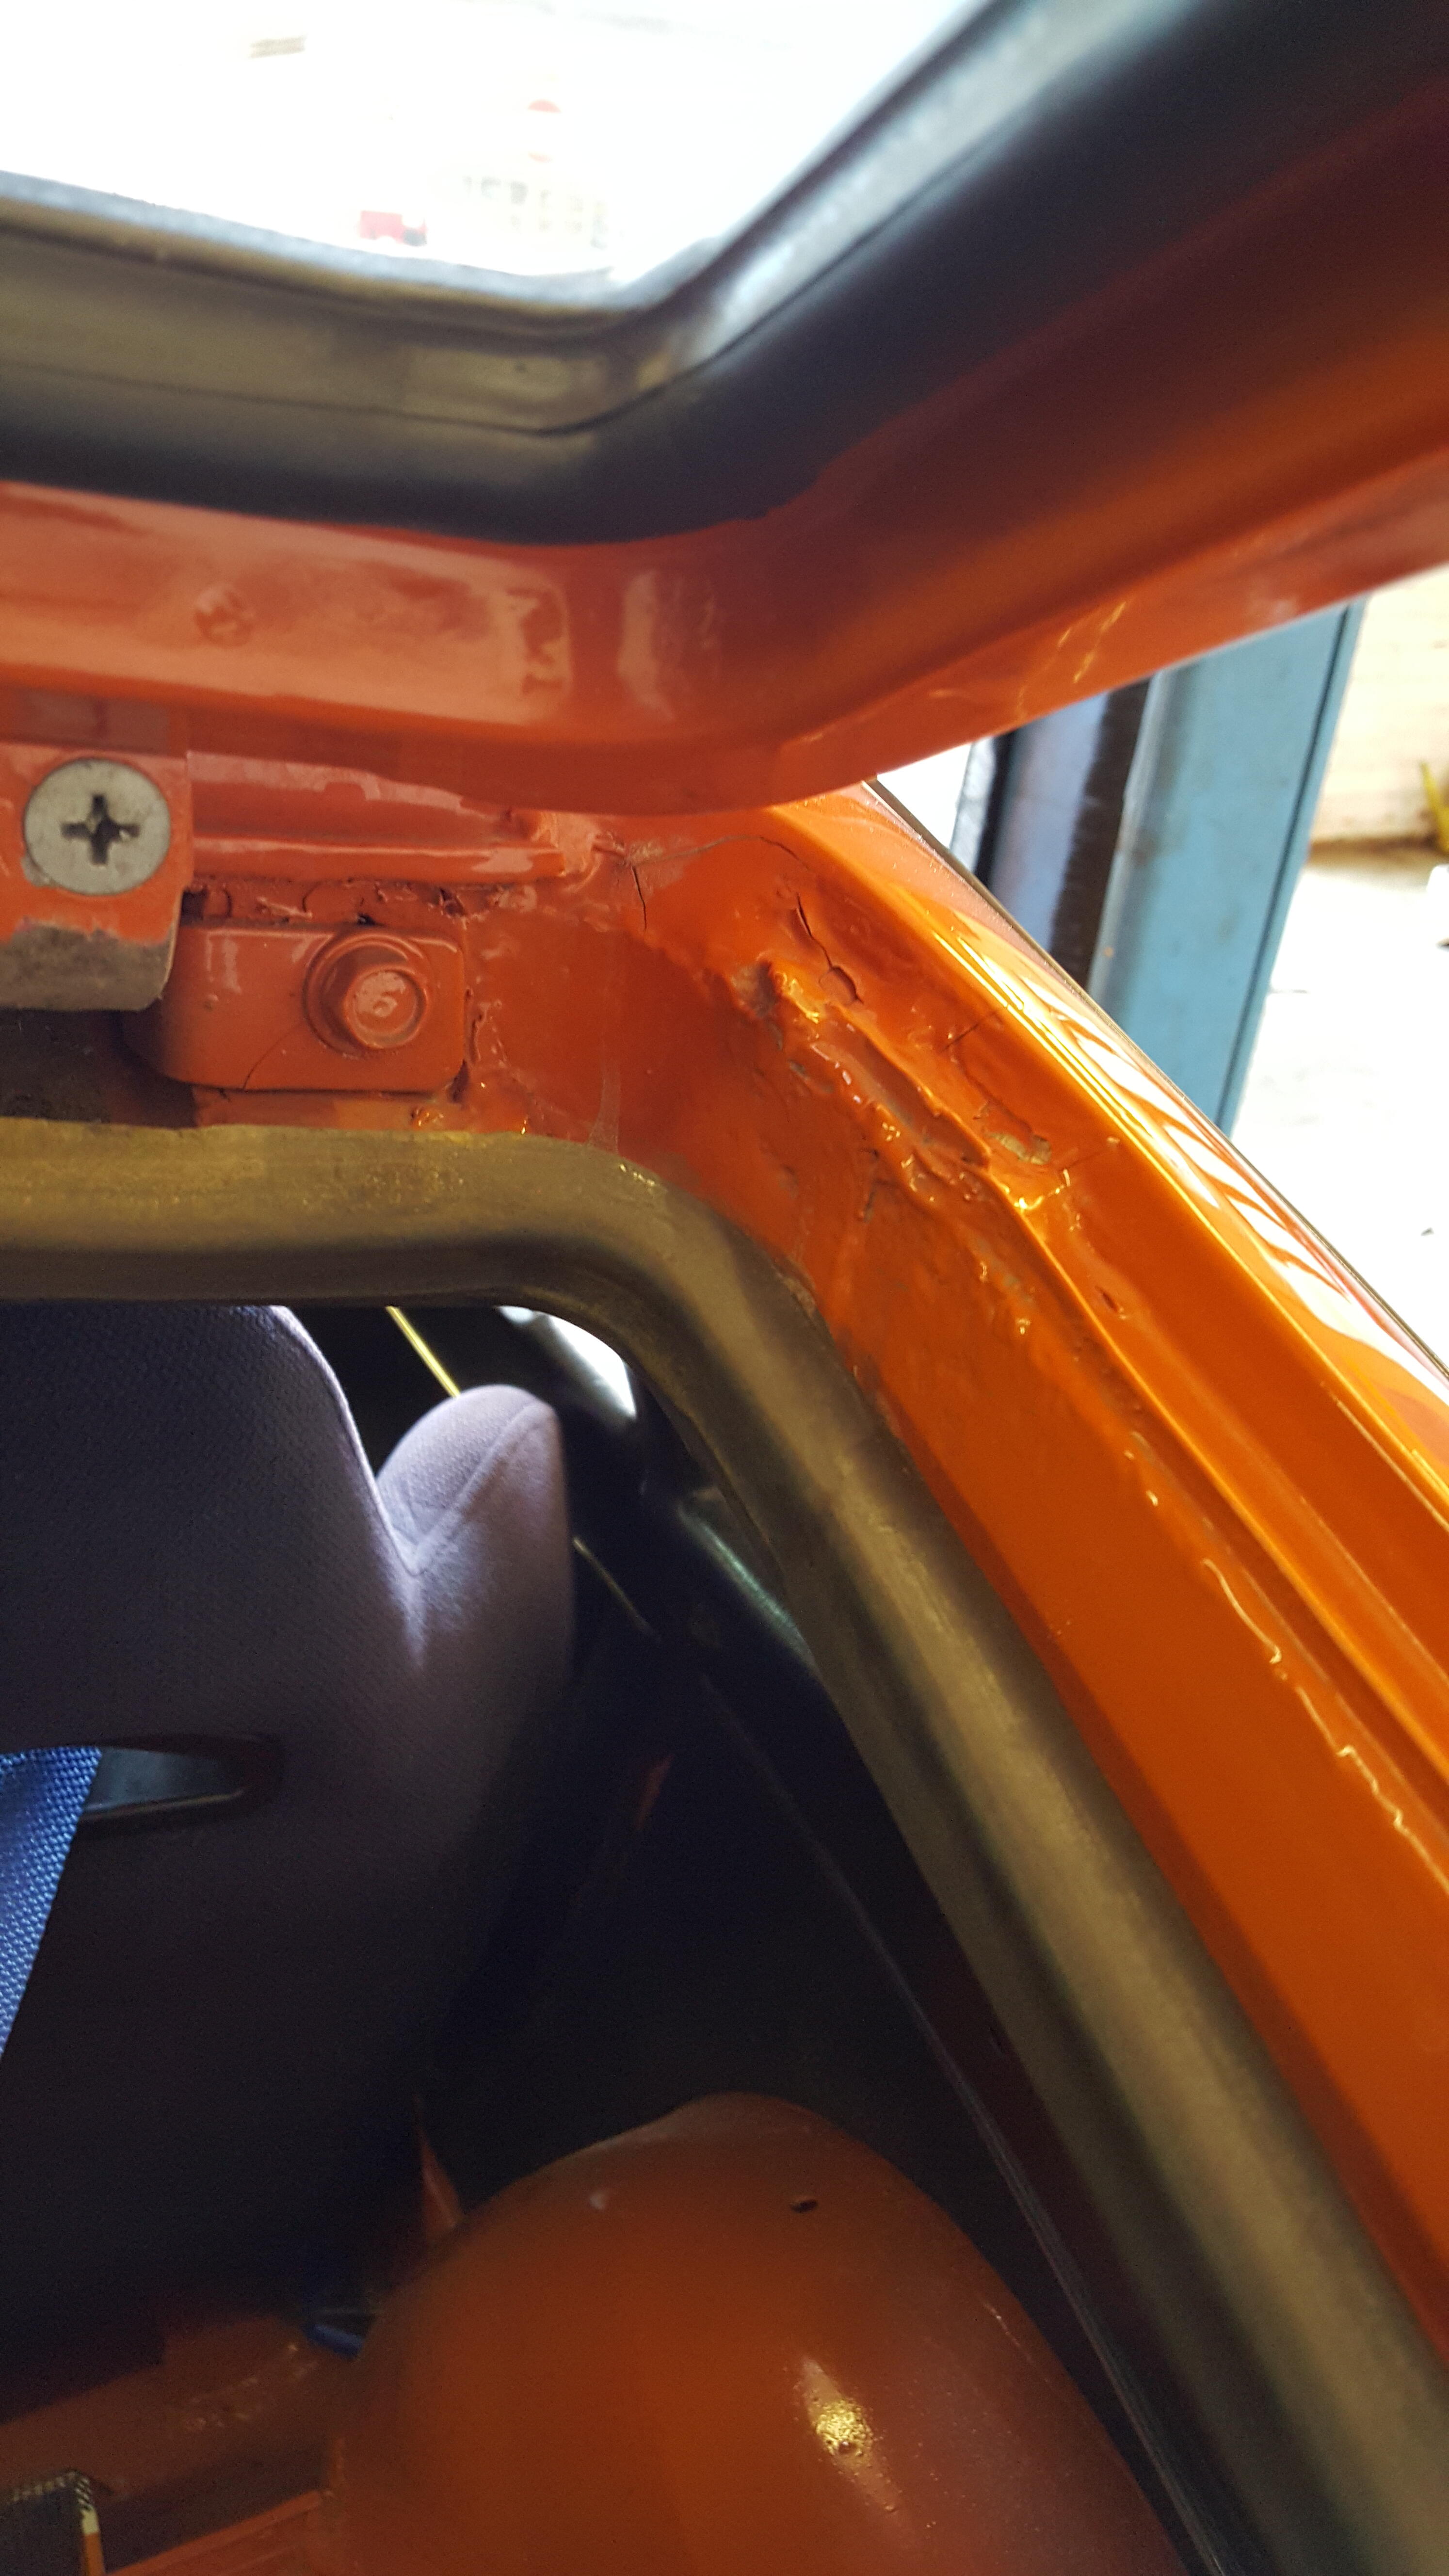
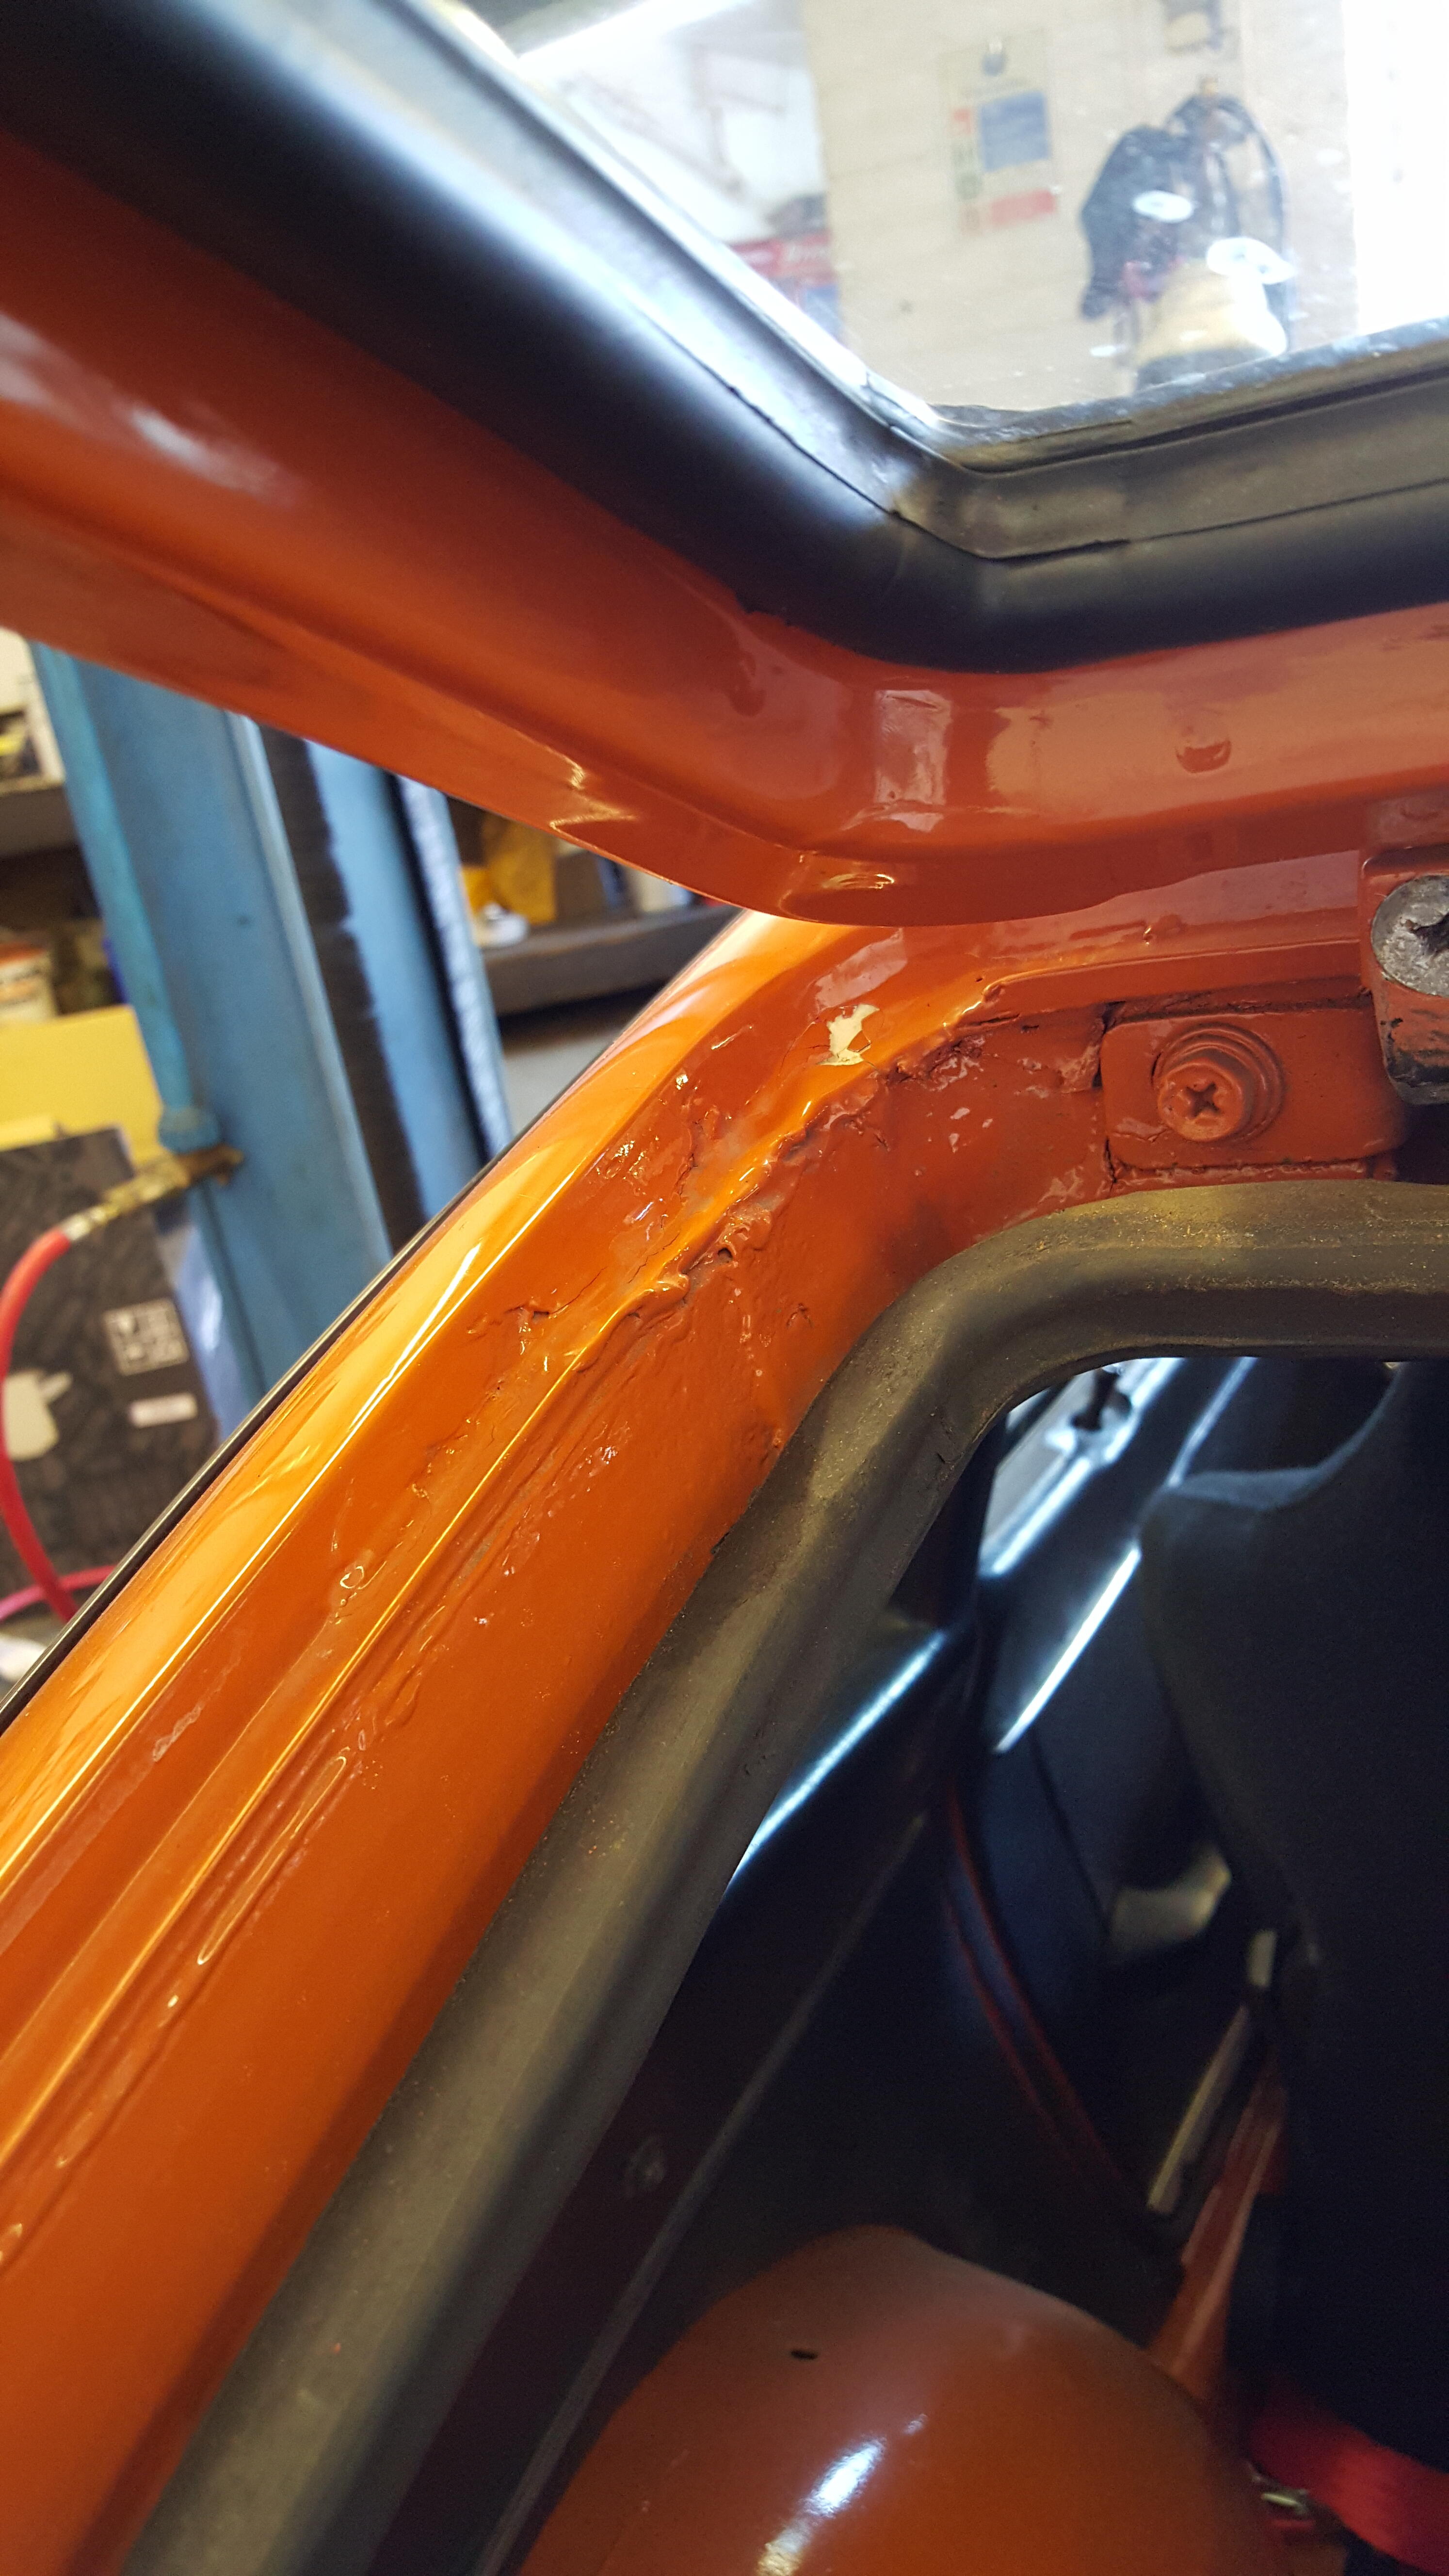
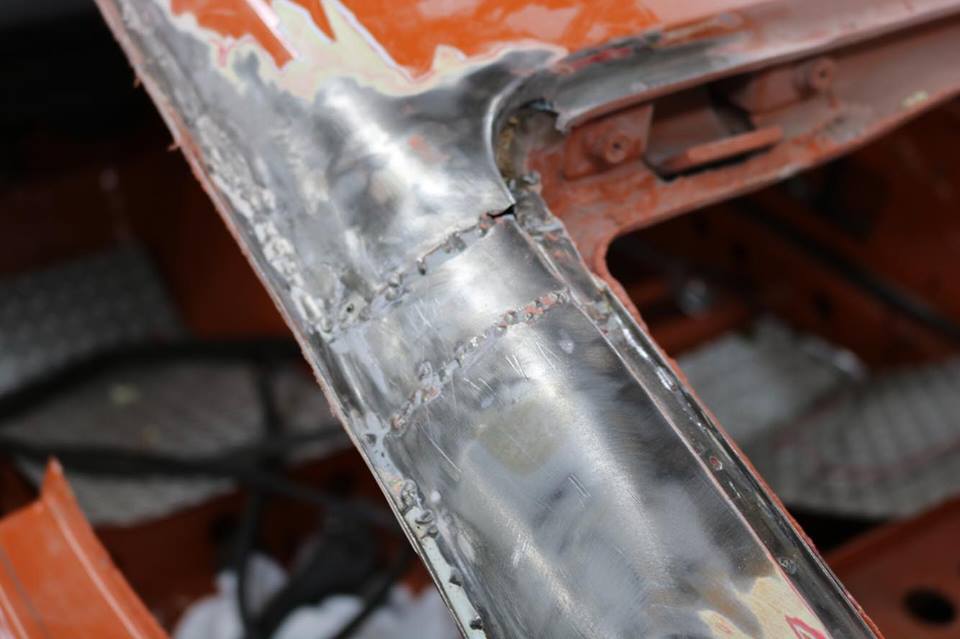
But if, by some twist of cruel fate, you end up needing to hide some of these small errors of judgement, you can rely on the wonders of modern polyester fillers to get you out of the hole (so to speak...). The same guy who did your welding is pretty good at this sort of stuff. He's pretty handy with the spray gun too. It'll be all but undetectable. Trust me.

 1 point
 -
Car needs a replacement rear quarter? Well, make sure you follow the old maxim; Measure Once And Cut Twice... Or was it the other way around...? Anyway, make sure to do the same on both sides.

 1 point
 -
If you blew the fuse holding the washer button, that means the combination of the washer motor and wiper motor exceeded the current limits of the fuse for too long. Where specifically are you measuring 4 VDC? Keep in mind that for the washer motor, the washer button only completes the path to ground. It doesn't send voltage to the washer motor. positive side of the washer motor has voltage to ground any time the wiper fuse in the fuse box is hot. Review my post on how the circuit is wired and look at that PDF. So having said that, unplug the washer motor. Put the key in ON. Measure voltage to ground at the blue/red wire at the washer motor. What is that voltage?1 point
-
1 pointThe ZX manifold is different from the Z manifold. It will fit the engine but I don't know if it will not conflict with something else on the way back. Can't recall anyone using the ZX manifold in a Z or vice-versa. Worth a test fit. kickstand 80, he has a ZX parts car, and a Z driver. Not a lot of crossover in parts. The engine will swap though. The ECU won't unless the wiring harness and AFM come along with it.1 point
-
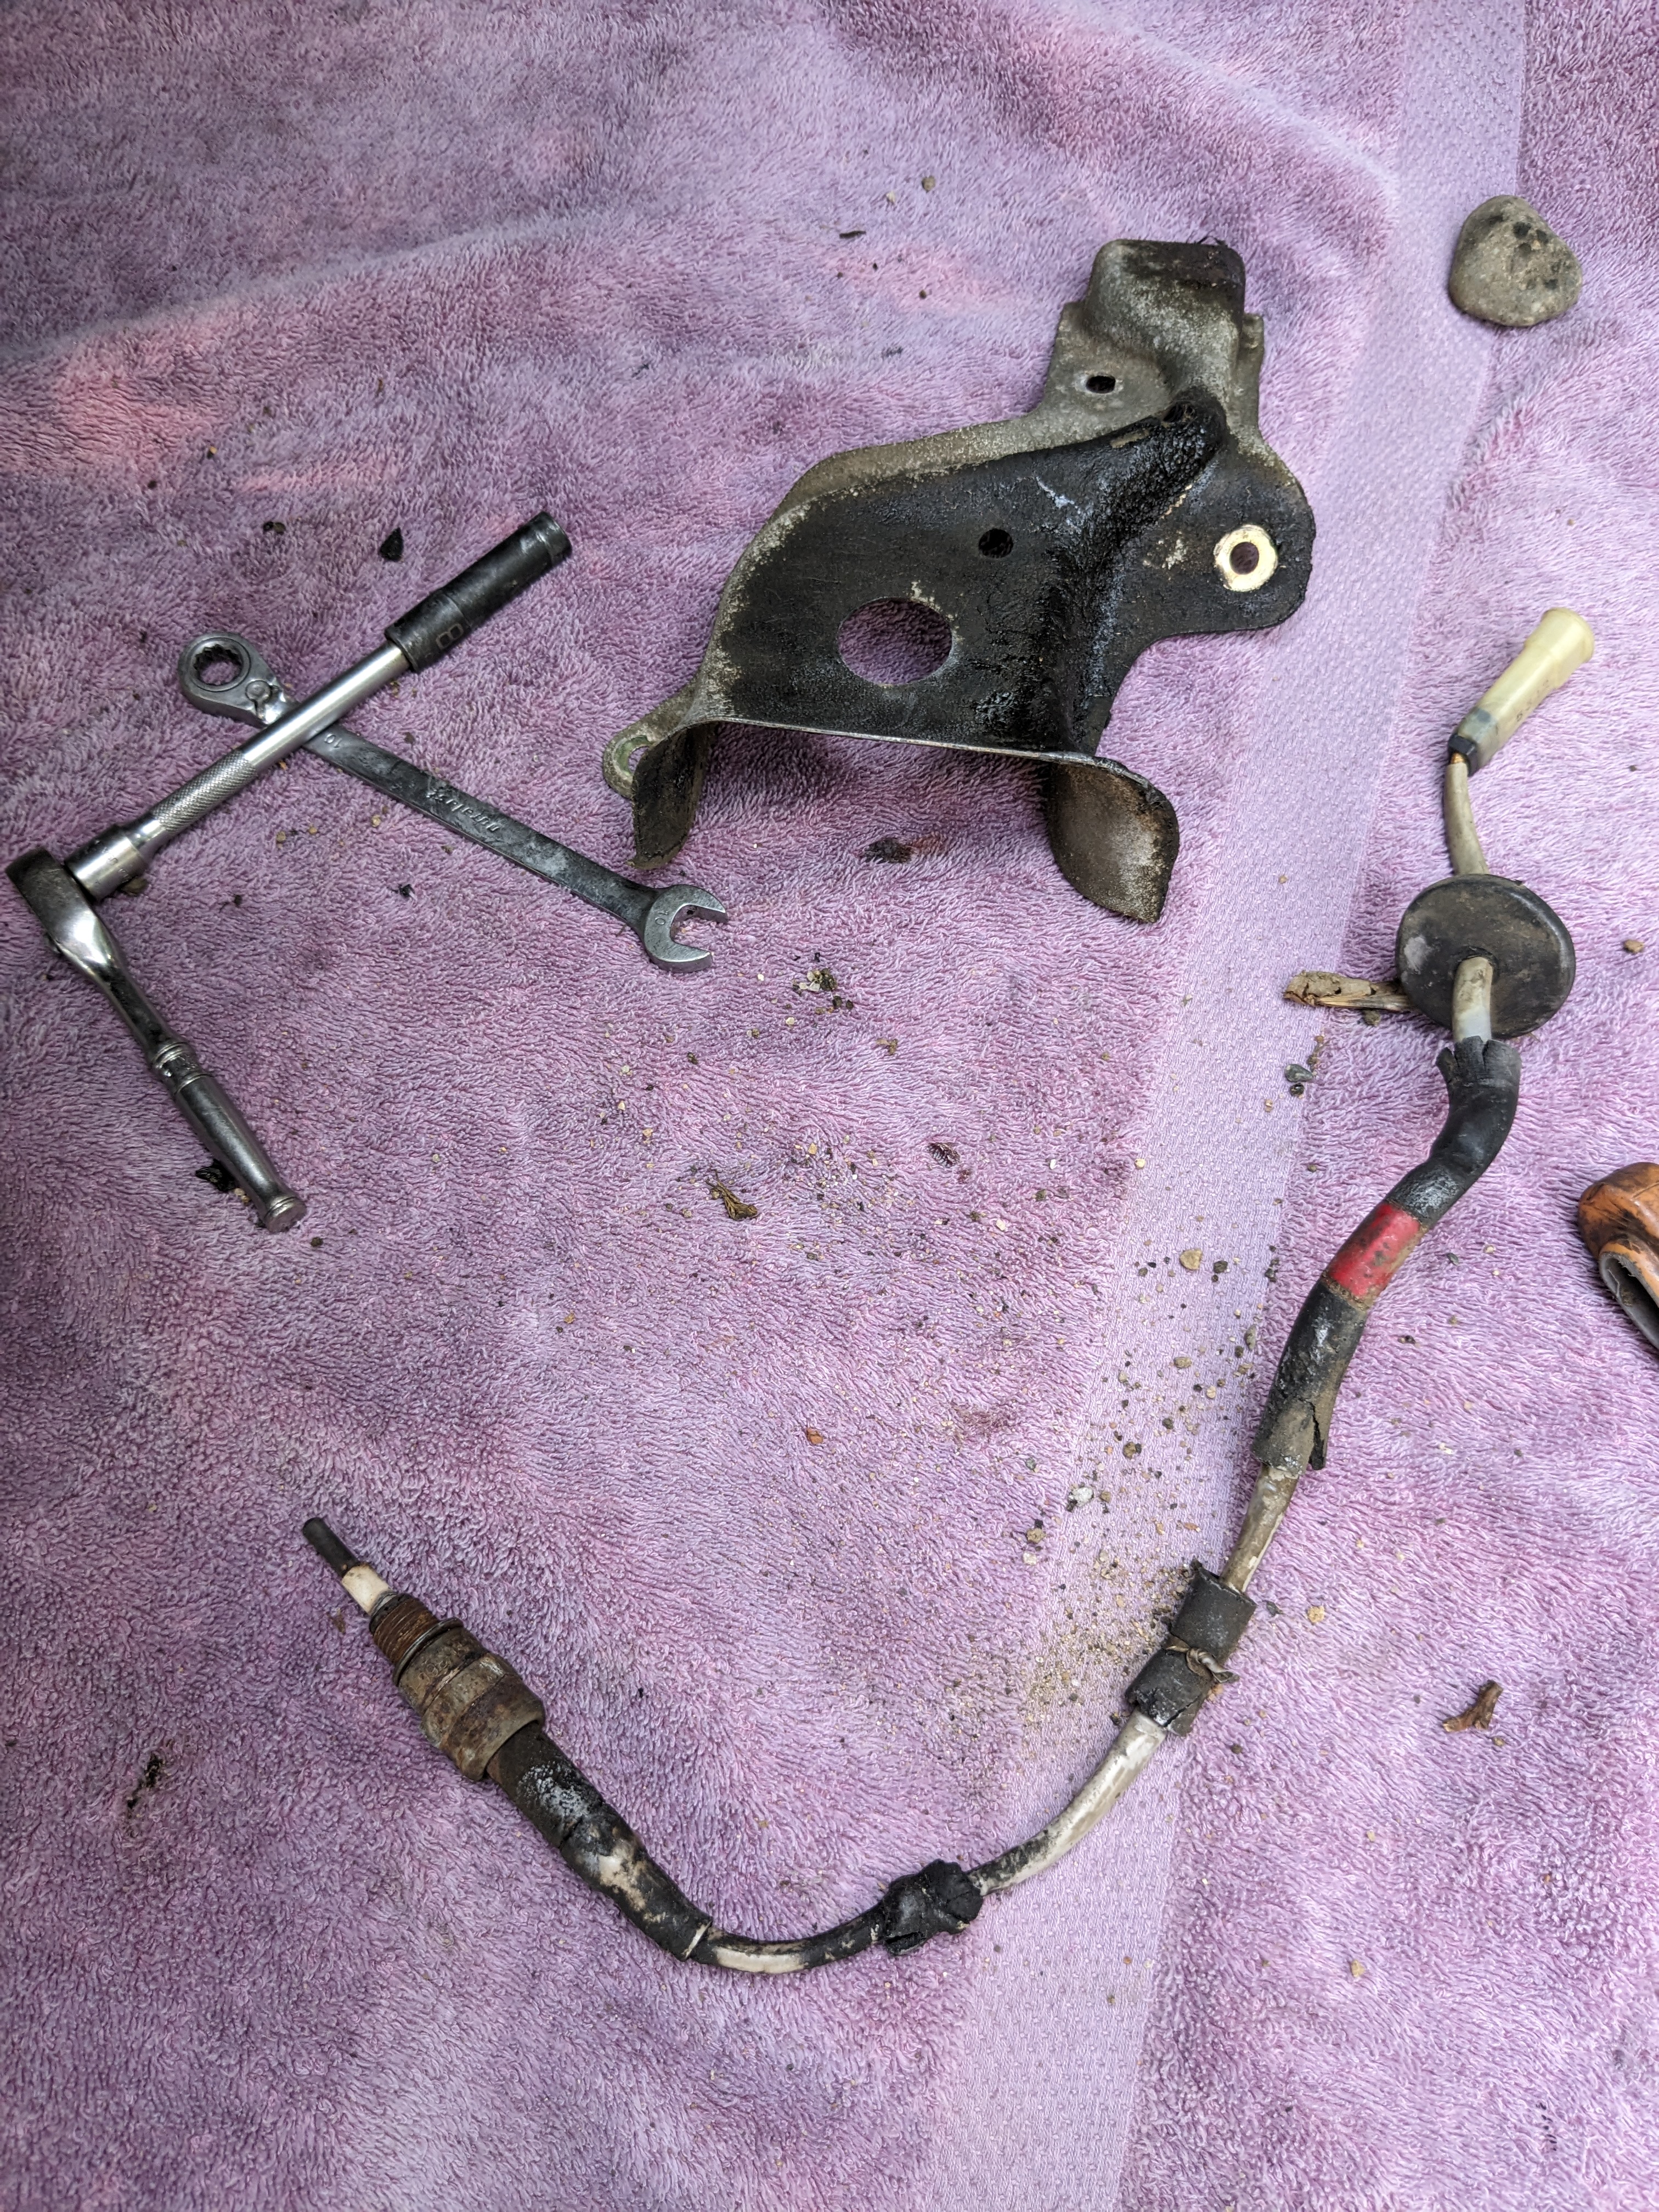
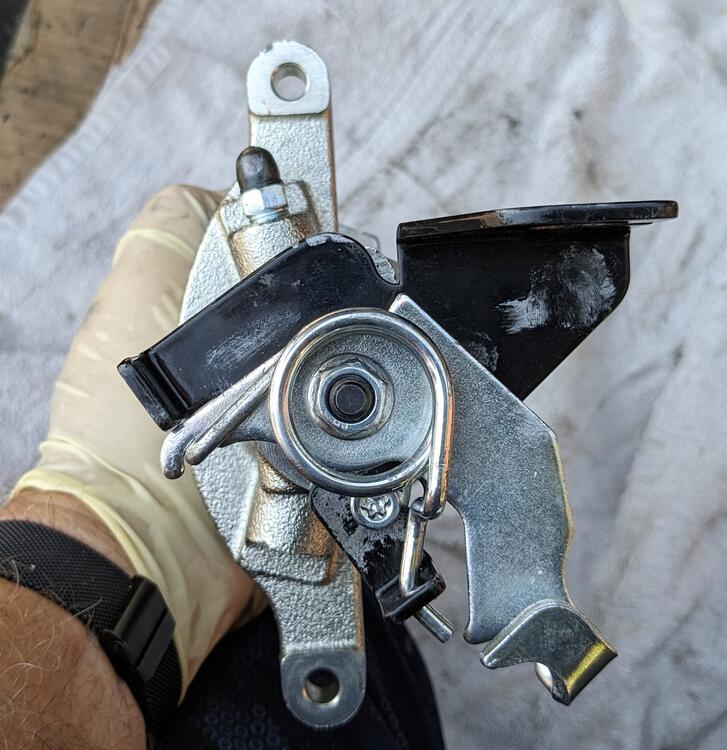
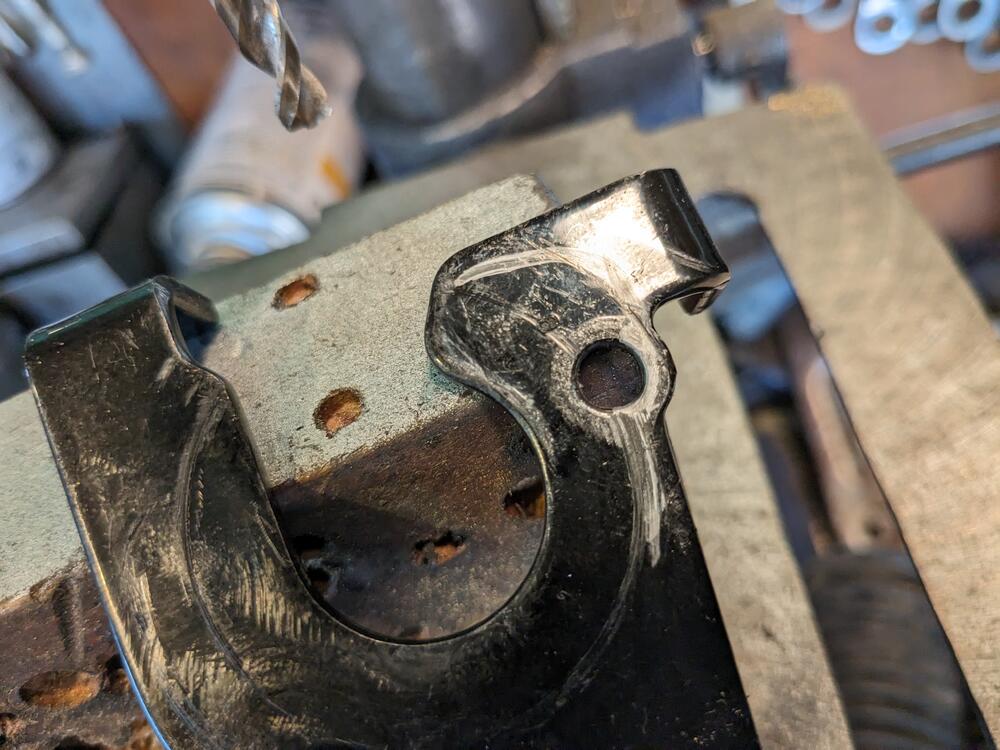
Resolved the eBrake lever issue. Figured out I could just redrill the axis point, and gain the necessary clearance off the flange Rotated the flange on the back of the caliper to mark the centerline, drilled a new 1/4" hole just outside the existing Reassembled after confirming offset clearance

 1 point
 -
1 pointUpdate-- Took a 1/16" off the stepped manifold washers allowing a little more compression of the intake to the gasket and it's sealing much better. Still a leaking a tiny bit on two ports so I'll take the washers off and take off bit more. However, I was able to put the AFR toothed wheel back to it's original position. It's running a little lean and I can only get the idle (in park or neutral) to 900 RPM. However in drive it drops to about 700 RPM. I also took it for a drive and I think that's the first time it's been on the road in 10 years! That's a big win. Still tons of work to do. EVERY bushing needs to be replaced. (Should I be looking for urethane or rubber bushings?) Rear shocks are pretty much completely gone. Making lots of progress. and am happy I found a good forum for help. I'm not going to cancel the MSA header order but that will be a fall install. I'm hoping I can get it running well enough to pass emissions testing so I can register it in the meantime. I've also got a 81 ZX 2+2 parts car in the driveway I'm using for a 5 speed and rear end swap. Is there anything else other than engine and drivetrain I should keep from the parts car?1 point
-
The carb side is the thrust side so will always get the worst of any scuffing.1 point
-
1 point
-
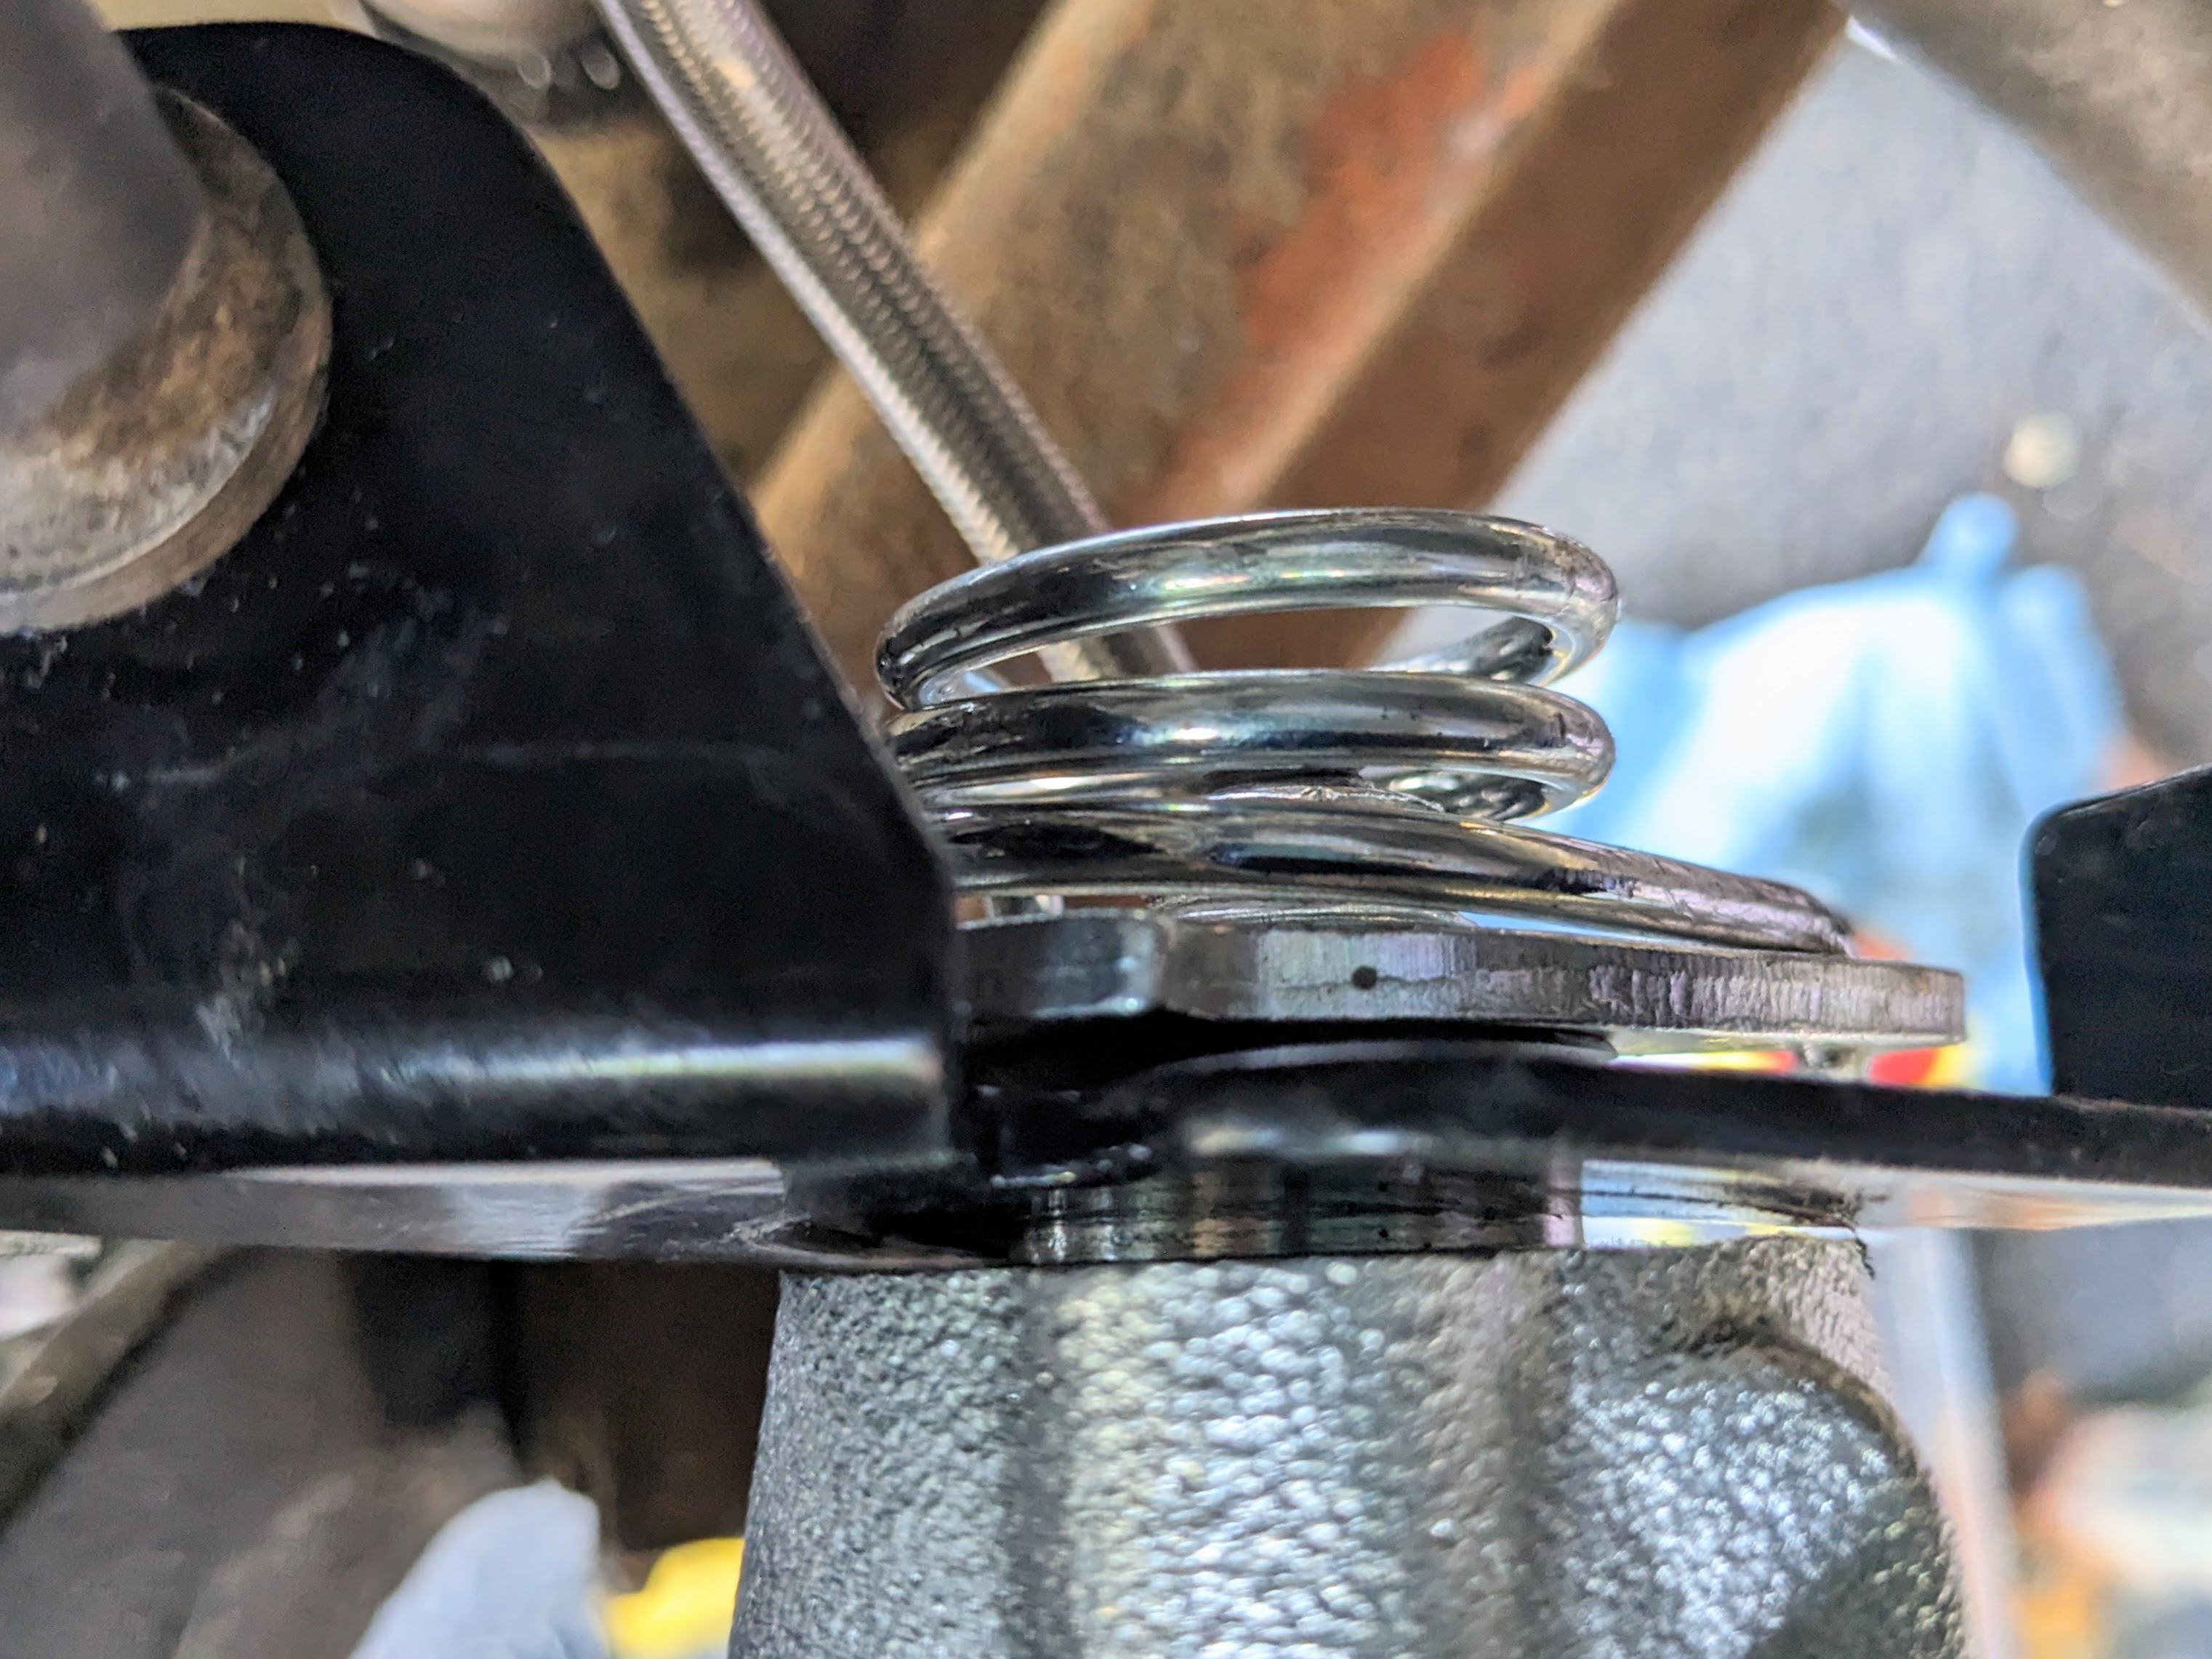
1 pointOK, here's a start: https://www.classiczcars.com/forums/topic/55336-collapsing-shocks-to-push-bumpers-closer-to-body/ There's some pics in there, but the links to my pics are dead because photobucket sucks. Here's a couple pics of my front. This is with the bumper out at stock distance: And here it is pushed all the way in:

 1 point
 -
1 pointGreat news they kept those records @kats Would be great to see the manufacturing process notes detailing how the 240Z was built and how long it took for each step. Hopefully they can give you access to the records and document the build for a 240Z. Always interesting to see the original overspray on parts of the car and work out how they put it together in sequence. I wonder if they kept any original photos with the build records.
 1 point
 -
1 point
-
1 pointHi sboy. Welcome to the club. Checking vacuum leaks, you could try what was called the yogurt cup test. The original thread "Purs like a kitten" is unfortunately long gone, but this one describes the procedure well enough. You basically block the afm and blow very low pressure air into the manifold and spraying soapy water on all the suspected areas. If it is tight and doesn't leak, you can move on. Zed head is right with the AFM. It's an hands off device, it's not tunable. In fact these old efi systems are not very turnable en this JECS variant of the Bosch L-jetronic does have some known issues with leaning out over time. Vacuum leaks and things like the AAR leaking air past the throttle body are your most likely issues. Mine 77 280Z was sucking air through the dip stick when I first got it. Changed hoses and even the injector seals before I found it with a simple yogurt cup test and soapy water.1 point
-
1 pointThat's really cool. It's maybe a bit off-topc. but i got a few original Datsun UK Colour sample booklets, from various years, and the colour combinations (interieur / exterieur) that were sold in the UK. If you're interested, you can find them all here (for later cars i even have interieur fabric samples) as photos, but also high-resolution Pdf scans. https://www.jdmjunkies.ch/wordpress/2023-01-11/240z-various-datsun-z-zx-color-charts-brochures/ And some different versions (including 240Z) can be found here: https://www.jdmjunkies.ch/wordpress/2021-05-30/240z-datsun-colour-code-brochure/1 point
-
1 pointThanks a lot for sharing this information again. 1) I'm currently working on a bigger story about the development of the "Final Euro Spec" cars where Mr. Miyazaki was involved. but it's hard to find a lot of information about it, especially from serious sources. 2) It would be lovely to find the exact records of ones car's production. Like how did the specify the trim / marked specific details for the production workers, etc. and especialyl which day (and even what time of the day!) the car was completed in each production step. It's a bit sad that Nissan doesn't share a lot of records with the public in the matters of old cars. When you think about Porsche, Mercedes, etc. they all have specialized "classic cars" departments, that help the vintage cars customers to find all this data and details about your car. I even think about it as a paid service. Want to get some details about your car? You spend for the time they research, but then get officially approved information from the factory. I'm not sure but i don't think such a service exists, and i have tried to reach out to nissan via various channels to get data about my cars confirmed. but didn't even get an answer.1 point
-
1 pointWell, we're on the right path then. This car has been in my family since new and my uncle had it for the last ten years. He got halfway through replacing a broken exhaust stud and manifold and then sort of lost interest. It came to me with everything on intake/exhaust side of the engine in boxes. He purchased a Pacesetter exhaust (my research says the forums hate them) to replace the broken manifold. I got everything together with the header and felpro gasket and the car ran horribly-- lean backfire. Smoke tested it and the intake to engine seal was leaking badly. No amount of futzing could get it to seal. I ordered a remflex gasket and tried again and it's running better but not good. Posted my question with Zed Head so kindly answered and then ran another smoke test. Still leaking but WAY less. I actually tried to order an MSA header since the header flange is the same thickness as the original manifold and should seal much better but they are 2 months backordered. I've replaced all vacuum lines, fuel lines and cleaned the tank and fuel pump out. I went through the EFI bible and bench tested every component and everything works. I also cleaned every electrical connector and tested at the ECU harness with no issues. When revved it runs GREAT so I think everything works ok. Sooooo any tips on sealing a crappy Pacesetter header or should I throw it in the dumpster and wait for the MSA header?1 point
-
1 pointLooks more like you had a vacuum leak from the beginning. You should return the AFM wheel to its original position immediately. The only reason to move it is to move it back to where it started at the factory. It's not a tunable device. One thing that gets overlooked often is that a leak in the PCV system can let air in to the air intake system. Any air that does not flow through the AFM will lean out the mixture. The hose from the valve cover and the one under the intake manifold are both possible leak points. People sometimes use a smoke test to find vacuum leaks.1 point
-
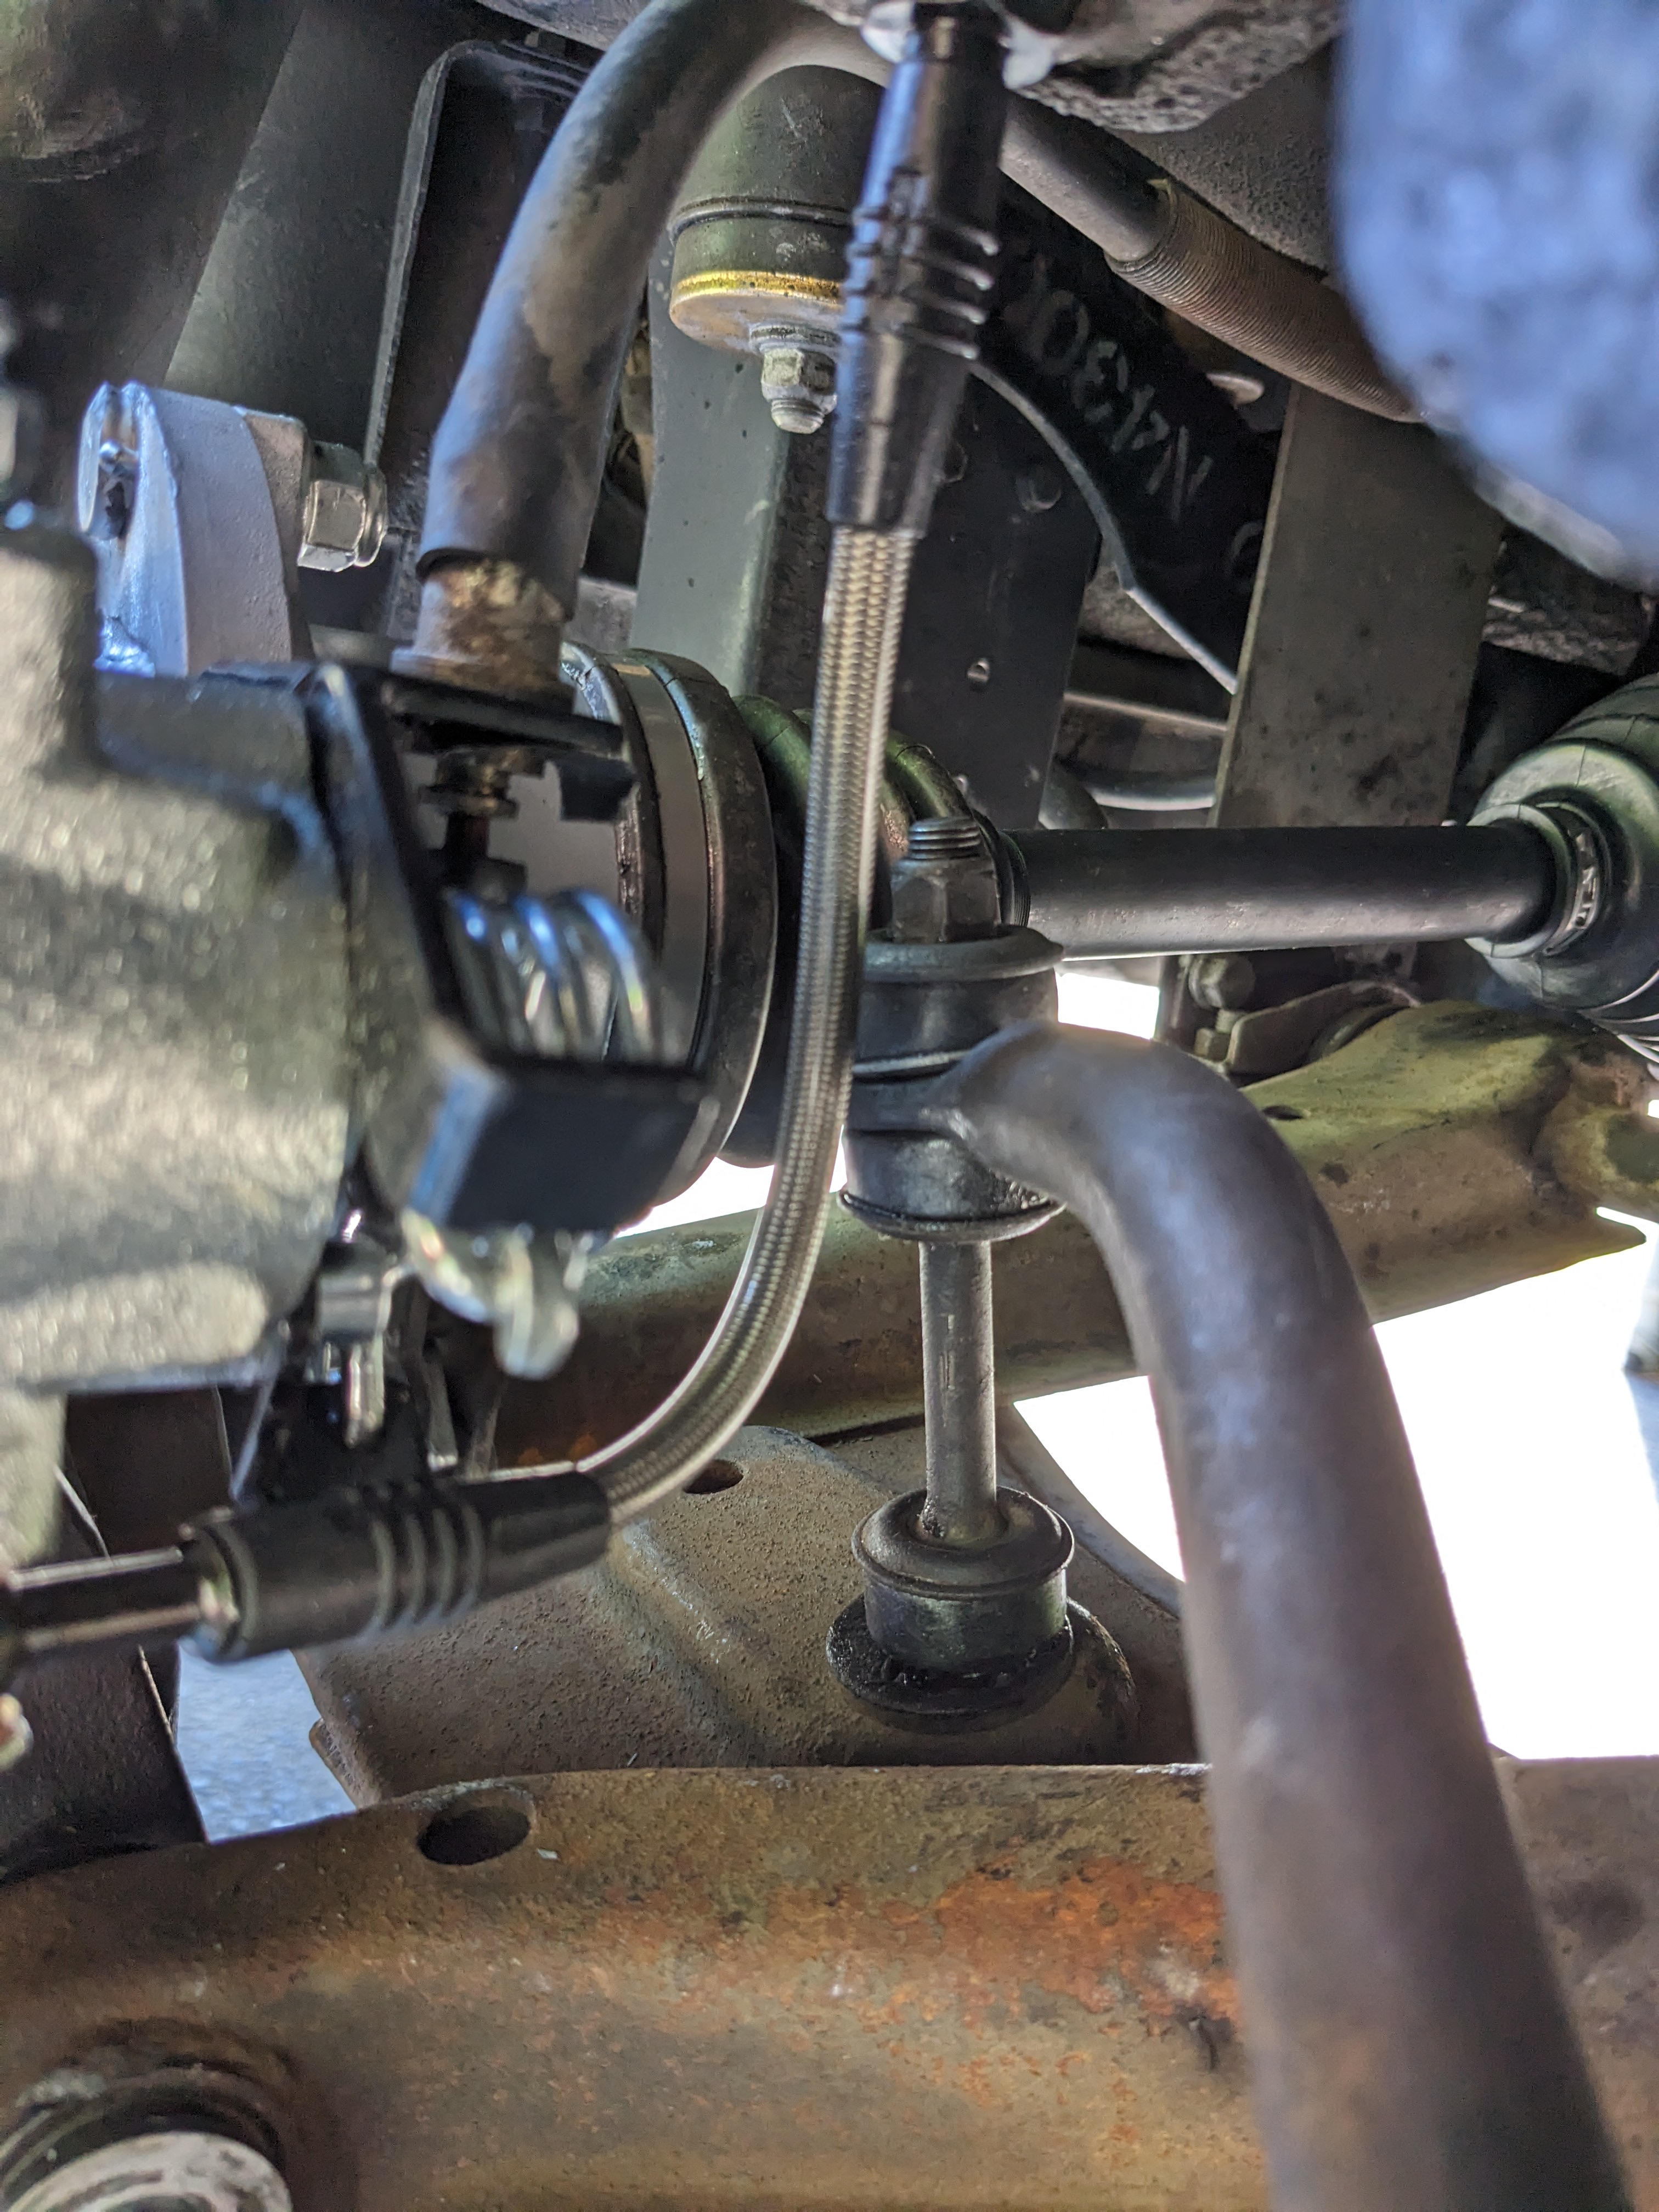
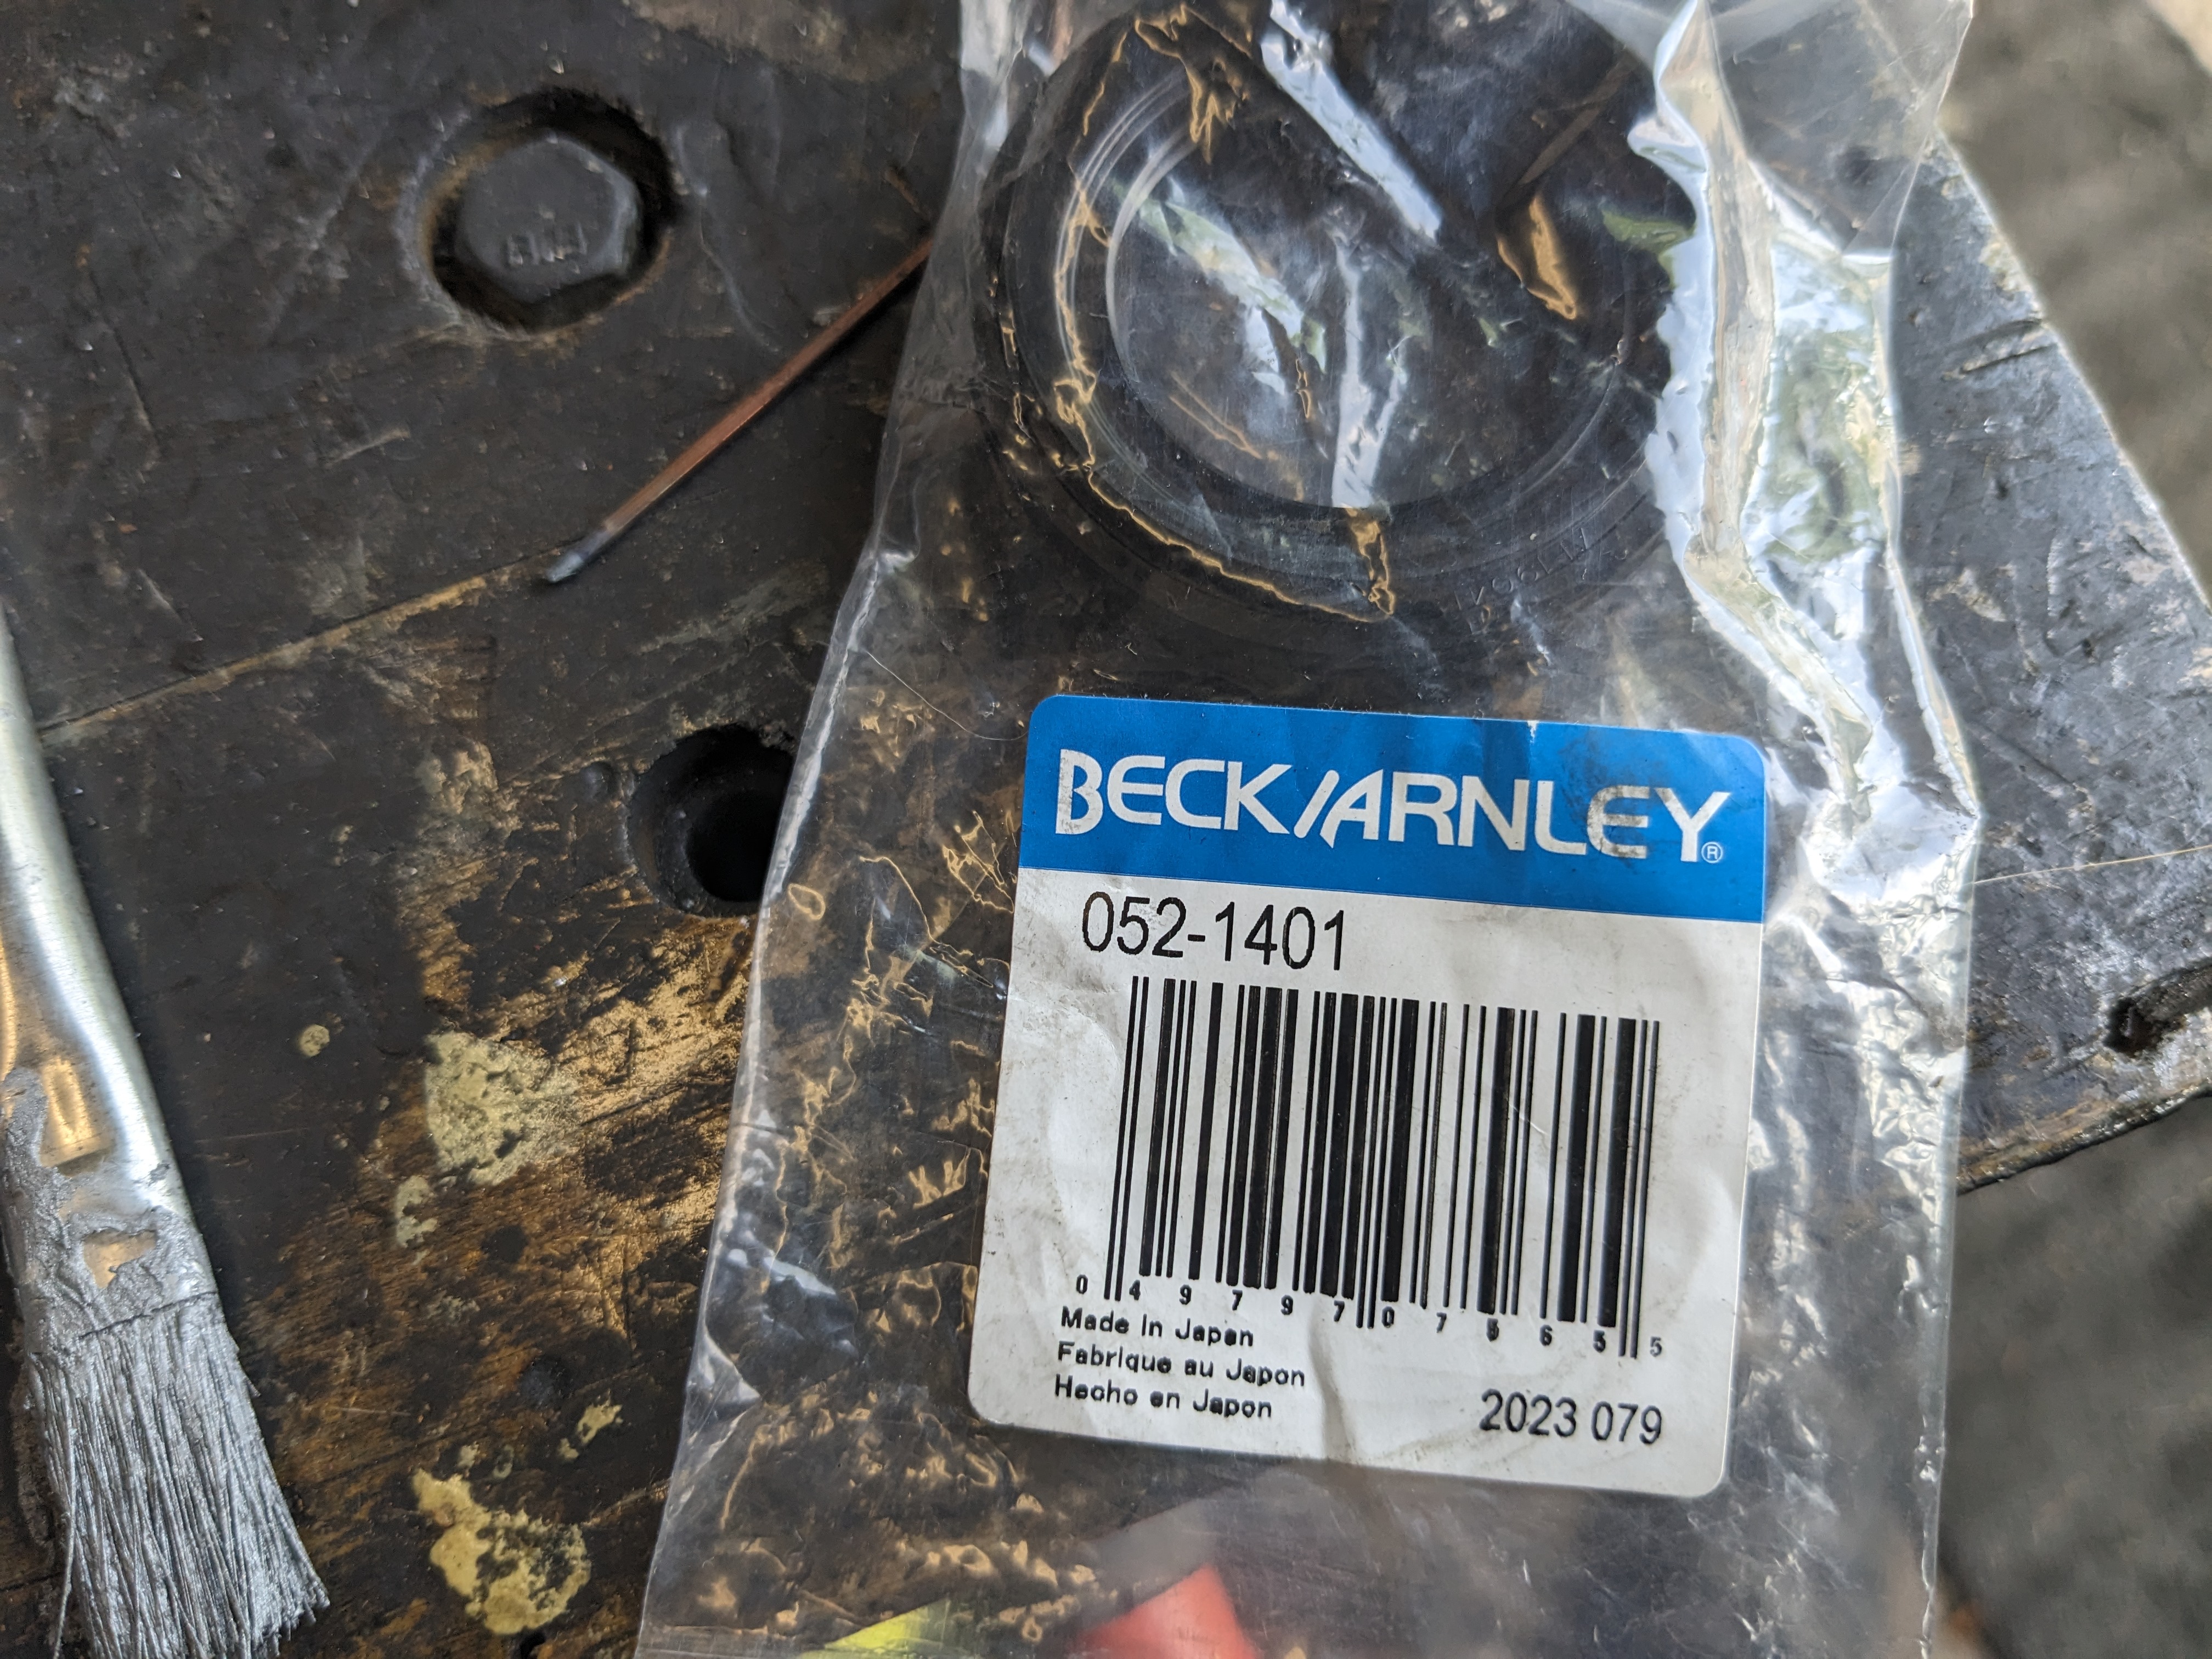
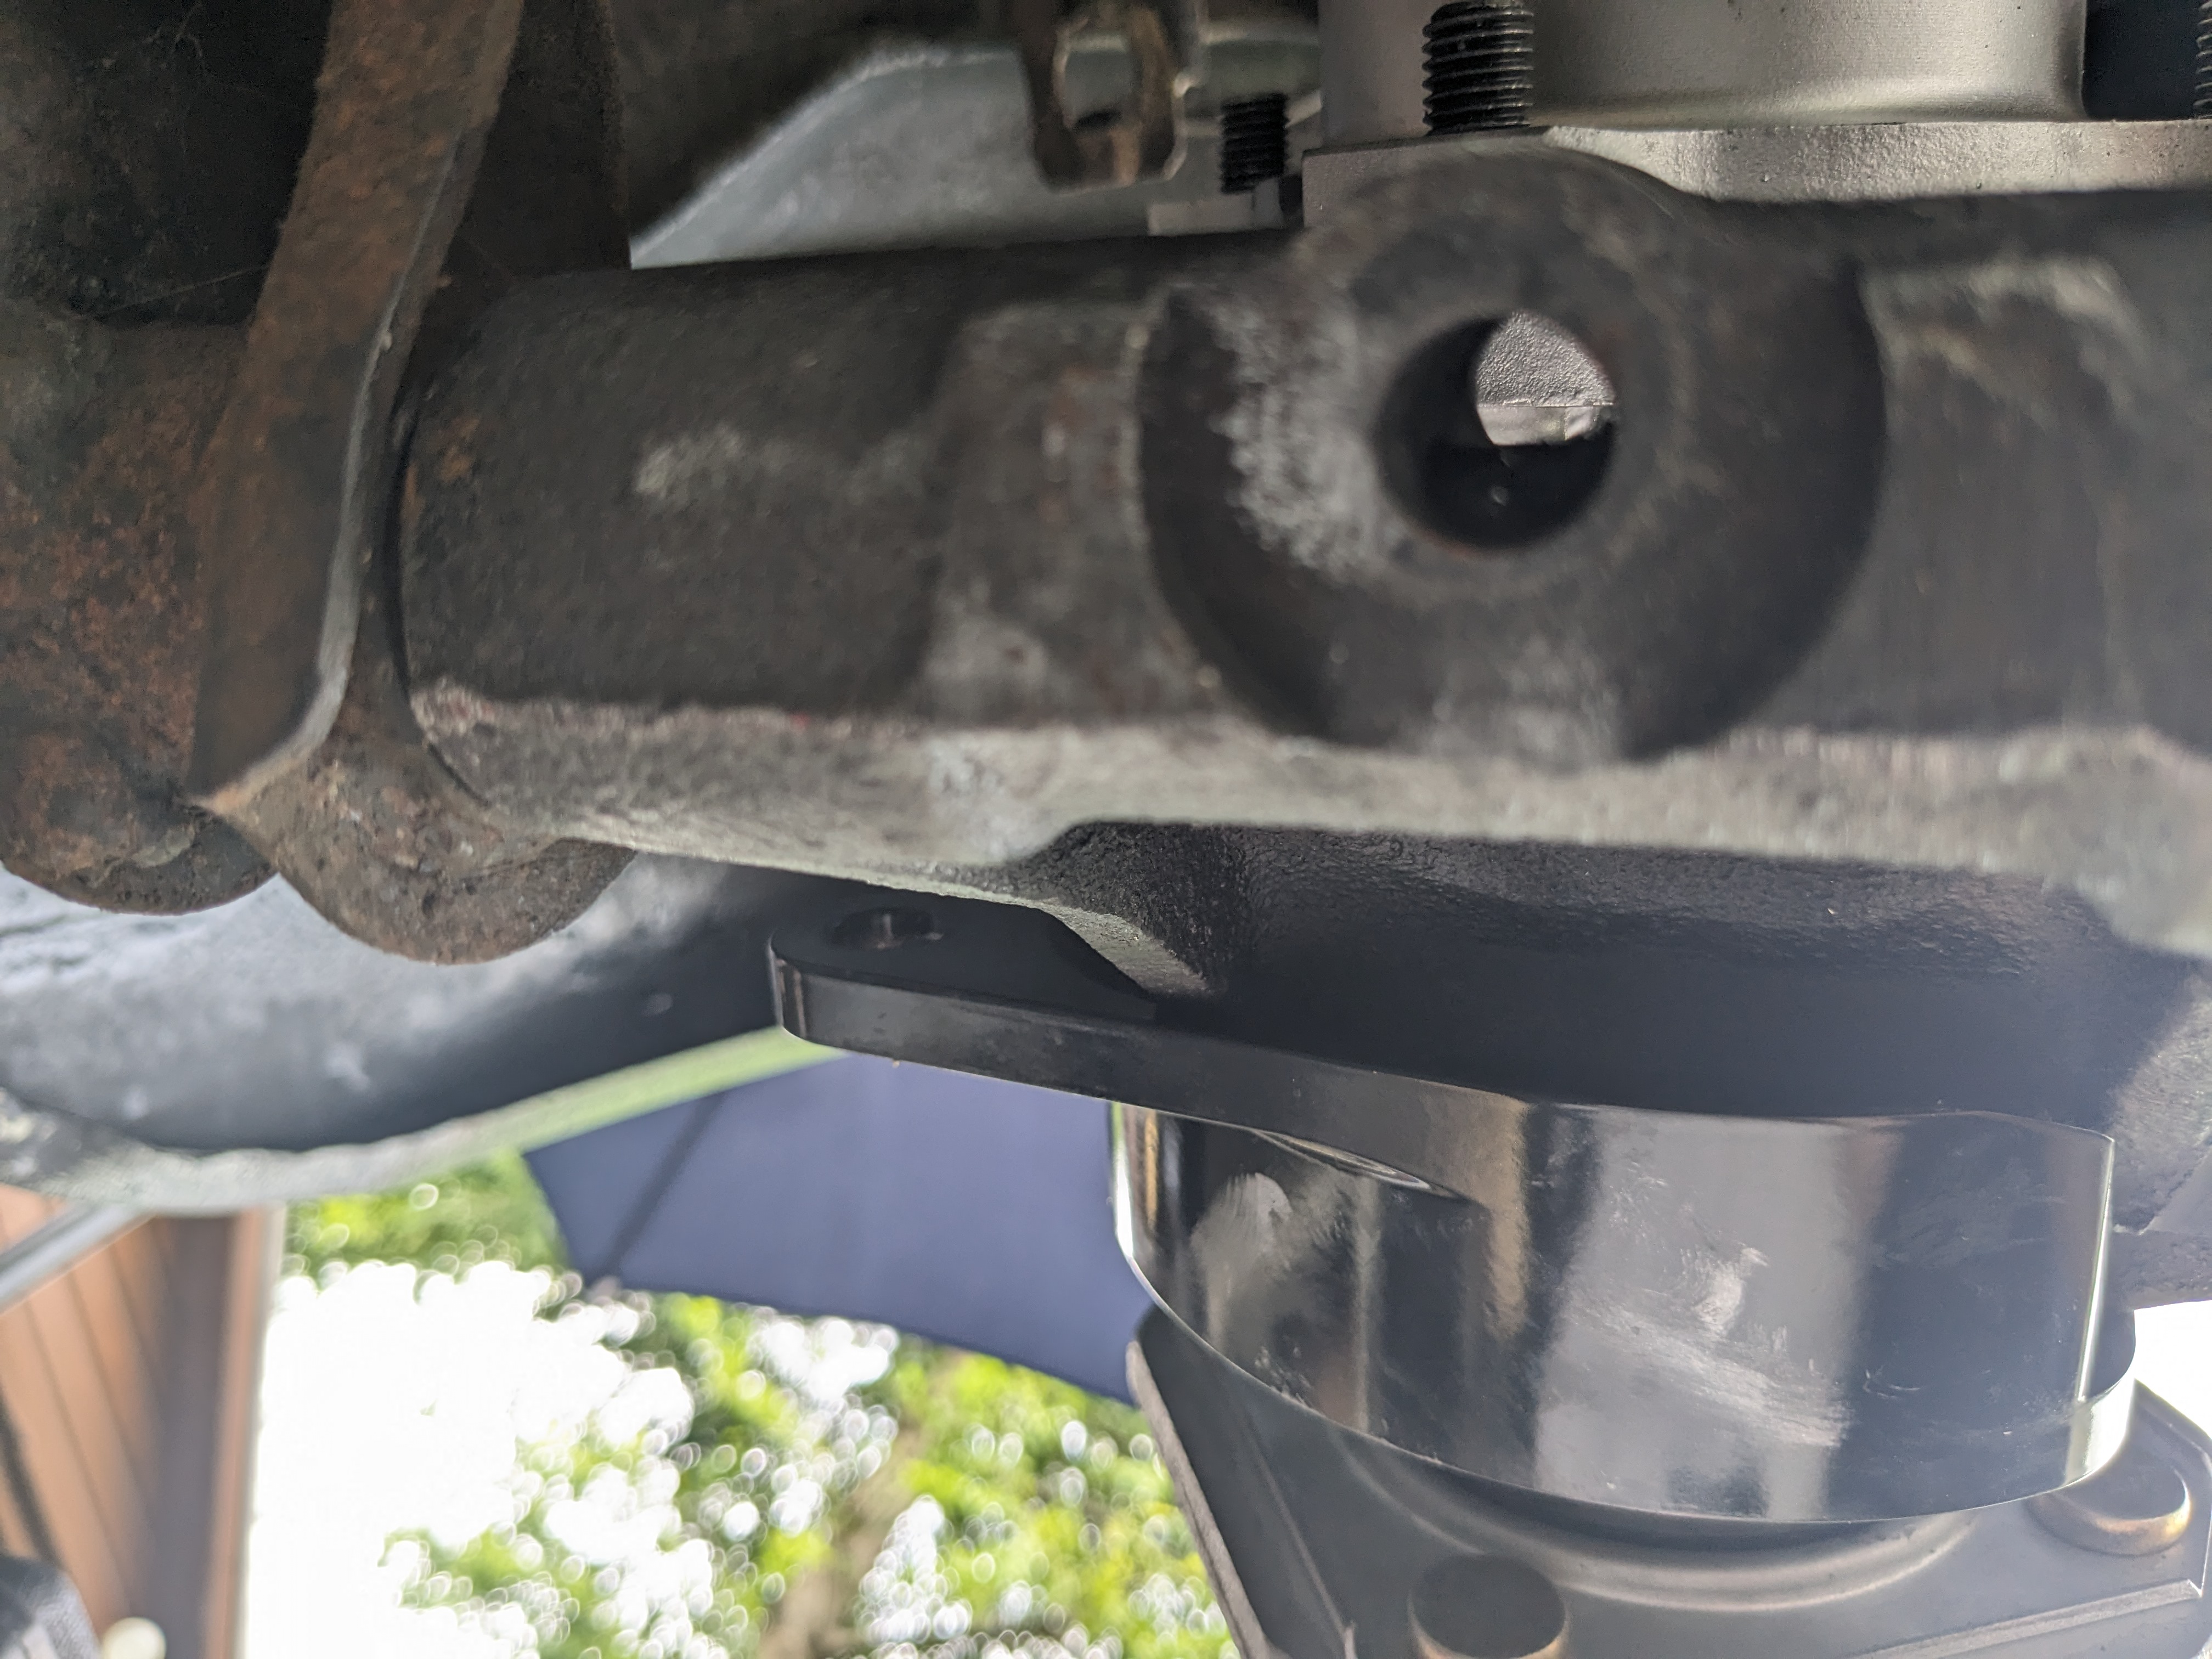
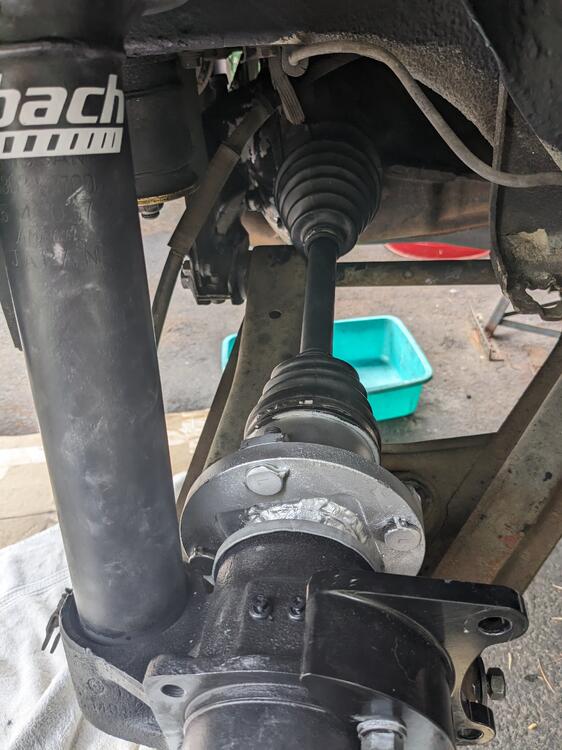
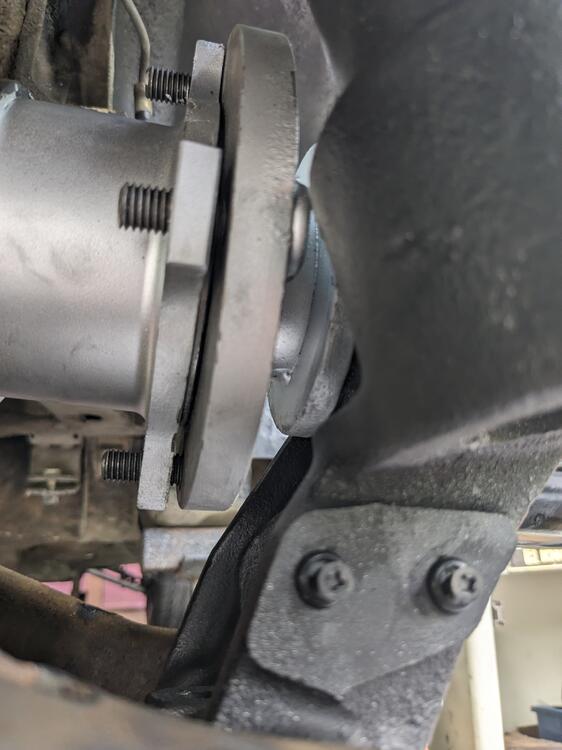
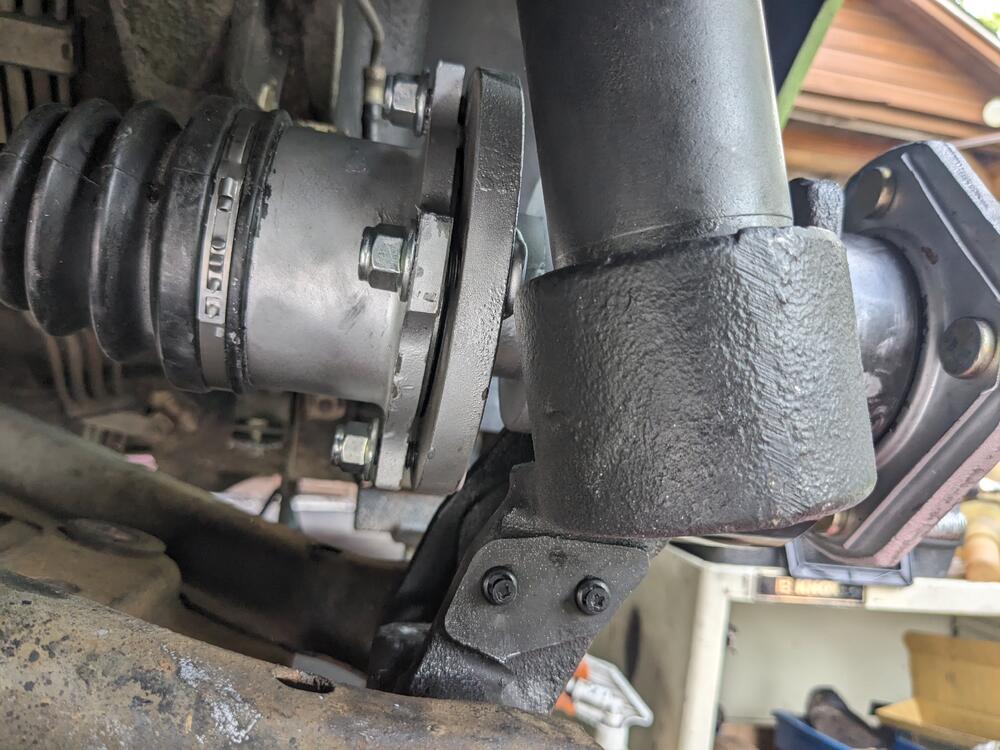
So.... I got some work done on the rear suspension & CV conversion. First, I started to assemble the rear struts only to find the spring was waaayy to short - then I figured out I put the rears on the front - I'm used to cars where the front spring is typ[ically longer than the rear, and I just assembled it that way. SO, I had to remove both front struts, remove the .002 springs & put the .001's on instead, then assemble the rears with the 002's. The fronts (Eibachs) are so short that the upper seat is loose at full drop. Didn't get many pics today, it was so f'ing hot I was dripping all over everything. Only got the right side in. Checked the right axle & stub against the 300ZX T right axle (#NI8442), overall the later axle is longer when fully extended. With it installed (with outer CV now at it's inner end of travel), I had about 1/8 - 3/16" slack between the flange & CV, so no bind will occur. I was going to change the axle seals in the diff, but the ones I got off RockAuto are the wrong dimensions - with the axle inner stub out, I got the numbers off the seal R15 35 55 11 The seal I have is clearly too small (when measured). I went back with the dimensions I now have off the seal & figured out the National 711070 matches the 35/55/11mm dimensions. I have no obvious leaks from the seals, but I really wanted to do them now. The way these axles are installed with studs on the flanges, the hub spindle bolt has to be removed to get the axle out right axle in the diff, located in the outer flange clearance at full drop clearance at normal ride height - not very scientific, and it's unclear form the pics, however there is much more play as the axle lifts getting the clevis pin back in was fun - I had to double-nut the spindle & work it back & forth on it's axis to get the pin to drop, then I also had to knock the spindle fore/aft to get it to fully seat in the housing

 1 point
 -
I've had some issues with the water temp switch in the past on my 260, and have put together the below in an effort to help other owners diagnose issues with the system. I'm no expert and it's certainly conceivable that I've made mistakes with the below, or missed something somewhere, and I'd be happy to hear about it. Keep in mind that the only year I've laid hands on is 74, so other years info is somewhat speculative in areas and has been gleaned from documentation sources. Also, if there anyone would like to add info for years 75-78, that would be excellent. Respectfully submitted.... ~~~~~~~~~~~~~~~~~~~~~~~~~~~~~~~~~~~ The Water Temperture Switch - What It Does: Starting on the 1974 260Z, Datsun included a "Water Temperature Switch" located in the thermostat housing. It is used to control ignition timing and EGR actuation. Looking in the earlier manuals, it's clear that the origins of the water temperature switch actually started in 1971 when a device known as the "Thermo-Switch" and corresponding "Thermo-Relay" was used to control ignition timing on the automatic transmission version cars (1972 manual page EC-11). Here is a description of the systems for a few years. The reference pages are based on the FSM for that year. ~~ 1972 240Z ~~~~~~~~~~~~~~~~~~~~~ 1972 - The "thermo-switch" and "thermo-relay" were used only on automatic transmission cars (EC-11 and BE-5) to control ignition timing. If included, the thermo-switch is located near the passenger's feet (Fig BE-1) and the thermo-relay is located in the engine compartment on the wheel well below the ignition coil (Fig BE-1). The remainder of the 1972 details below apply only to the automatic transmission cars as the manual transmissions versions did not have a thermo-switch or thermo-relay installed. The thermo-switch characteristics are as follows (EC-11): On (closed) below 30 F Off (open) above 52 F The thermo-relay characteristics are as follows (EC-21): One set of Normally Closed (N/C) contacts System operation is as follows: When cold, the thermo-switch is closed and the thermo-relay is energized. The normally closed contacts are open and the ignition timing is controlled by the advanced points. When warm, the thermo-switch opens and the thermo-relay de-energizes. The normally closed contacts are closed and the retarded timing points short across the advanced points which over-rides the signal from the advanced points. In this way, the ignition timing when warm is controlled by the retarded points. ~~ 1973 240Z ~~~~~~~~~~~~~~~~~~~~~ 1973 - The "thermo-switch" was used on all cars to control EGR function (BE-5 and BE-6), and in addition, automatic transmission cars also included the "thermo-relay" to control ignition timing (BE-6). The thermo-switch is located near the passenger's feet (Fig ET-44 and Fig BE-2 #16) The thermo-relay, if included, is located in the engine compartment on the wheel well below the ignition coil (Fig BE-2 #24). The thermo-switch characteristics are as follows (ET-21 and EC-12): On (closed) below 30 F Off (open) above 52 F The thermo-relay characteristics are as follows (Fig ET-37): One set of Normally Closed (N/C) contacts System operation is as follows: When cold, the thermo-switch is closed, the EGR solenoid valve is energized, and the EGR function is disabled (EC-19). Also on auto trans cars, the thermo-relay is energized. The normally closed contacts are open and the ignition timing is controlled by the advanced points. When warm, the thermo-switch opens and both the EGR solenoid valve and thermo-relay de-energize. When the EGR solenoid valve is de-energized, the EGR function is enabled, and when the thermo-relay is de-energized, the normally closed contacts are closed and the retarded timing points short across the advanced points which over-rides the signal from the advanced points. In this way, the ignition timing when warm is controlled by the retarded points (Fig EE-62). ~~ 1974 260Z ~~~~~~~~~~~~~~~~~~~~~ 1974 - The location of the temperature sensing device was moved from the passenger footwell to the thermostat housing and the name changed to the "Water Temperature Switch". The water temperature SWITCH is located next to the water temperature SENDER (not switch). The water temperature SENDER is used to control the temperature gauge on the dashboard, while the water temp SWITCH is used for EGR and ignition timing control. The water temp SENDER has one bullet style connector on it, while the temp SWITCH has two wires coming out of it which go to a two wire connector. They also changed the name of the associated relay from the Thermo-relay to the "Advance control relay" (Fig EE-60) or the "EGR Relay" (wiring diagrams). The location of the advance/EGR control relay remained located below the coil. All cars used a water temp switch and a advance/EGR control relay regardless of the transmission variety (see wiring diagrams for both versions), although only the automatic transmission cars varied the ignition timing. The changing of the ignition timing is now controlled inside the electronic ignition module and the auto and manual trans cars used different ignition modules because of this. The manual trans cars have a fixed ignition timing, while the auto trans cars have the ability to choose between an advanced or retarded pickup signal from the distributor. The manual trans cars only have one pickup. The water temp switch characteristics are as follows (EC-28): Off (open) below 88 F On (closed) above 106 F (* Note that the operation direction is different than previous years. It is now OFF-COLD, ON-HOT) The thermo-relay characteristics are as follows (Fig EC-28): Two sets of contacts. One set of Normally Closed (N/C) contacts used for EGR control One set of Normally Open (N/O) contacts used to send a signal to the ignition module System operation is as follows: When cold, the water temp switch is open and the advance/EGR control relay is de-energized. The N/C contacts allow power to flow to the EGR solenoid valve and the EGR function is disabled (Fig EC-28). The N/O contacts are open which open circuits the ignition module timing control signal line which tells the auto-trans ignition module to use the advanced pickup signal (EE-34). When warm. the water temp switch is closes and energizes the advance/EGR control relay. The N/C contacts open and de-energize the EGR solenoid valve which enables EGR function (Fig EC-28). the N/O contacts close which sends a 12V signal to the ignition module. This 12V signal tells the ignition module (if so equipped) to use the retarded pickup signal from the distributor (EE-34). Note that all the related wiring is the same for both the manual and auto trans cars (see wiring diagrams), but the difference is inside the ignition module itself. The manual trans module gets the same signal as the auto, but it simply has no effect. Some general notes for 74: If you were to use a manual trans ignition module on your auto car it would work, but your timing would be fixed to the advanced pickup. (Proof is left to the student) You cannot use an auto trans ignition module on a manual car without making some additional modifications. In theory, you could break the connection between the advance/EGR relay and the ignition module and then time the ignition off just one pickup, but you would have to figure out which pickup input is active and ground or hardwire the control signal to 12V accordingly. (Again, proof is left to the student) If you have a manual trans car and have removed the EGR valve, then the water temp switch and the advance/EGR relay are both doing absolutely nothing. There is a grounding mistake on the black wire from the temp switch (missing dot to a ground connection) on the wiring diagrams - Nothing connected to the temp switch would even work at all if the car were actually wired as it's drawn. The driver's side turn signal and marker lamp wouldn't work either. There are no other connections on the wiring diagram to anything involved with the temp switch and/or the relay that it controls. In other words, the ignition timing and EGR functions are the only two things that the water temperature switch can possibly affect. ~~~~~~~~~~~~~~~~~~~~~~~~~~~~1 point