Leaderboard
-
grannyknot
Free Member7Points5,158Posts -
HusseinHolland
Free Member4Points1,031Posts -

cgsheen1
Free Member3Points690Posts -
ckurtz2
Free Member2Points340Posts


Popular Content
Showing content with the highest reputation on 07/15/2023 in all areas
-
3 pointsAgree 100% We have pulled (and re-installed) DOZENS of windshields. They're not glued in. The glass can be removed safely EVEN IF the gasket is hard. (And believe me, in the desert South West the rubber is always baked to a crisp!). One can cut the exterior of the gasket, remove the trim, and cut around the glass without chipping the glass in any way. The glass can be lifted out once the exterior of the gasket is removed from it. Then the rest of the gasket in the flange can be removed. With a new gasket, windshield reinstallation should be easier than getting it out. Hell, with a flexible gasket, we've removed the windshield with the gasket in place - and reinstalled it. Patience is the key to joy. Once we had a Z come in with small crack on the upper left tip (only in the top layer of the glass). No replacement windshield, so we had to pull and reinstall it with the crack. EDIT: I have a Pilkington warehouse nearby and with covid they changed their inventory system. So, when I stopped in they couldn't even find Z glass in their computer system or catalog. I spread that word - but - we have a retired glass guy that has provided us with glass for years before he retired. He just looked up the old part number, called the wholesaler and found that they had 4 in stock. They don't anymore... (but I didn't actually get the part number from him - my bad)3 points
-
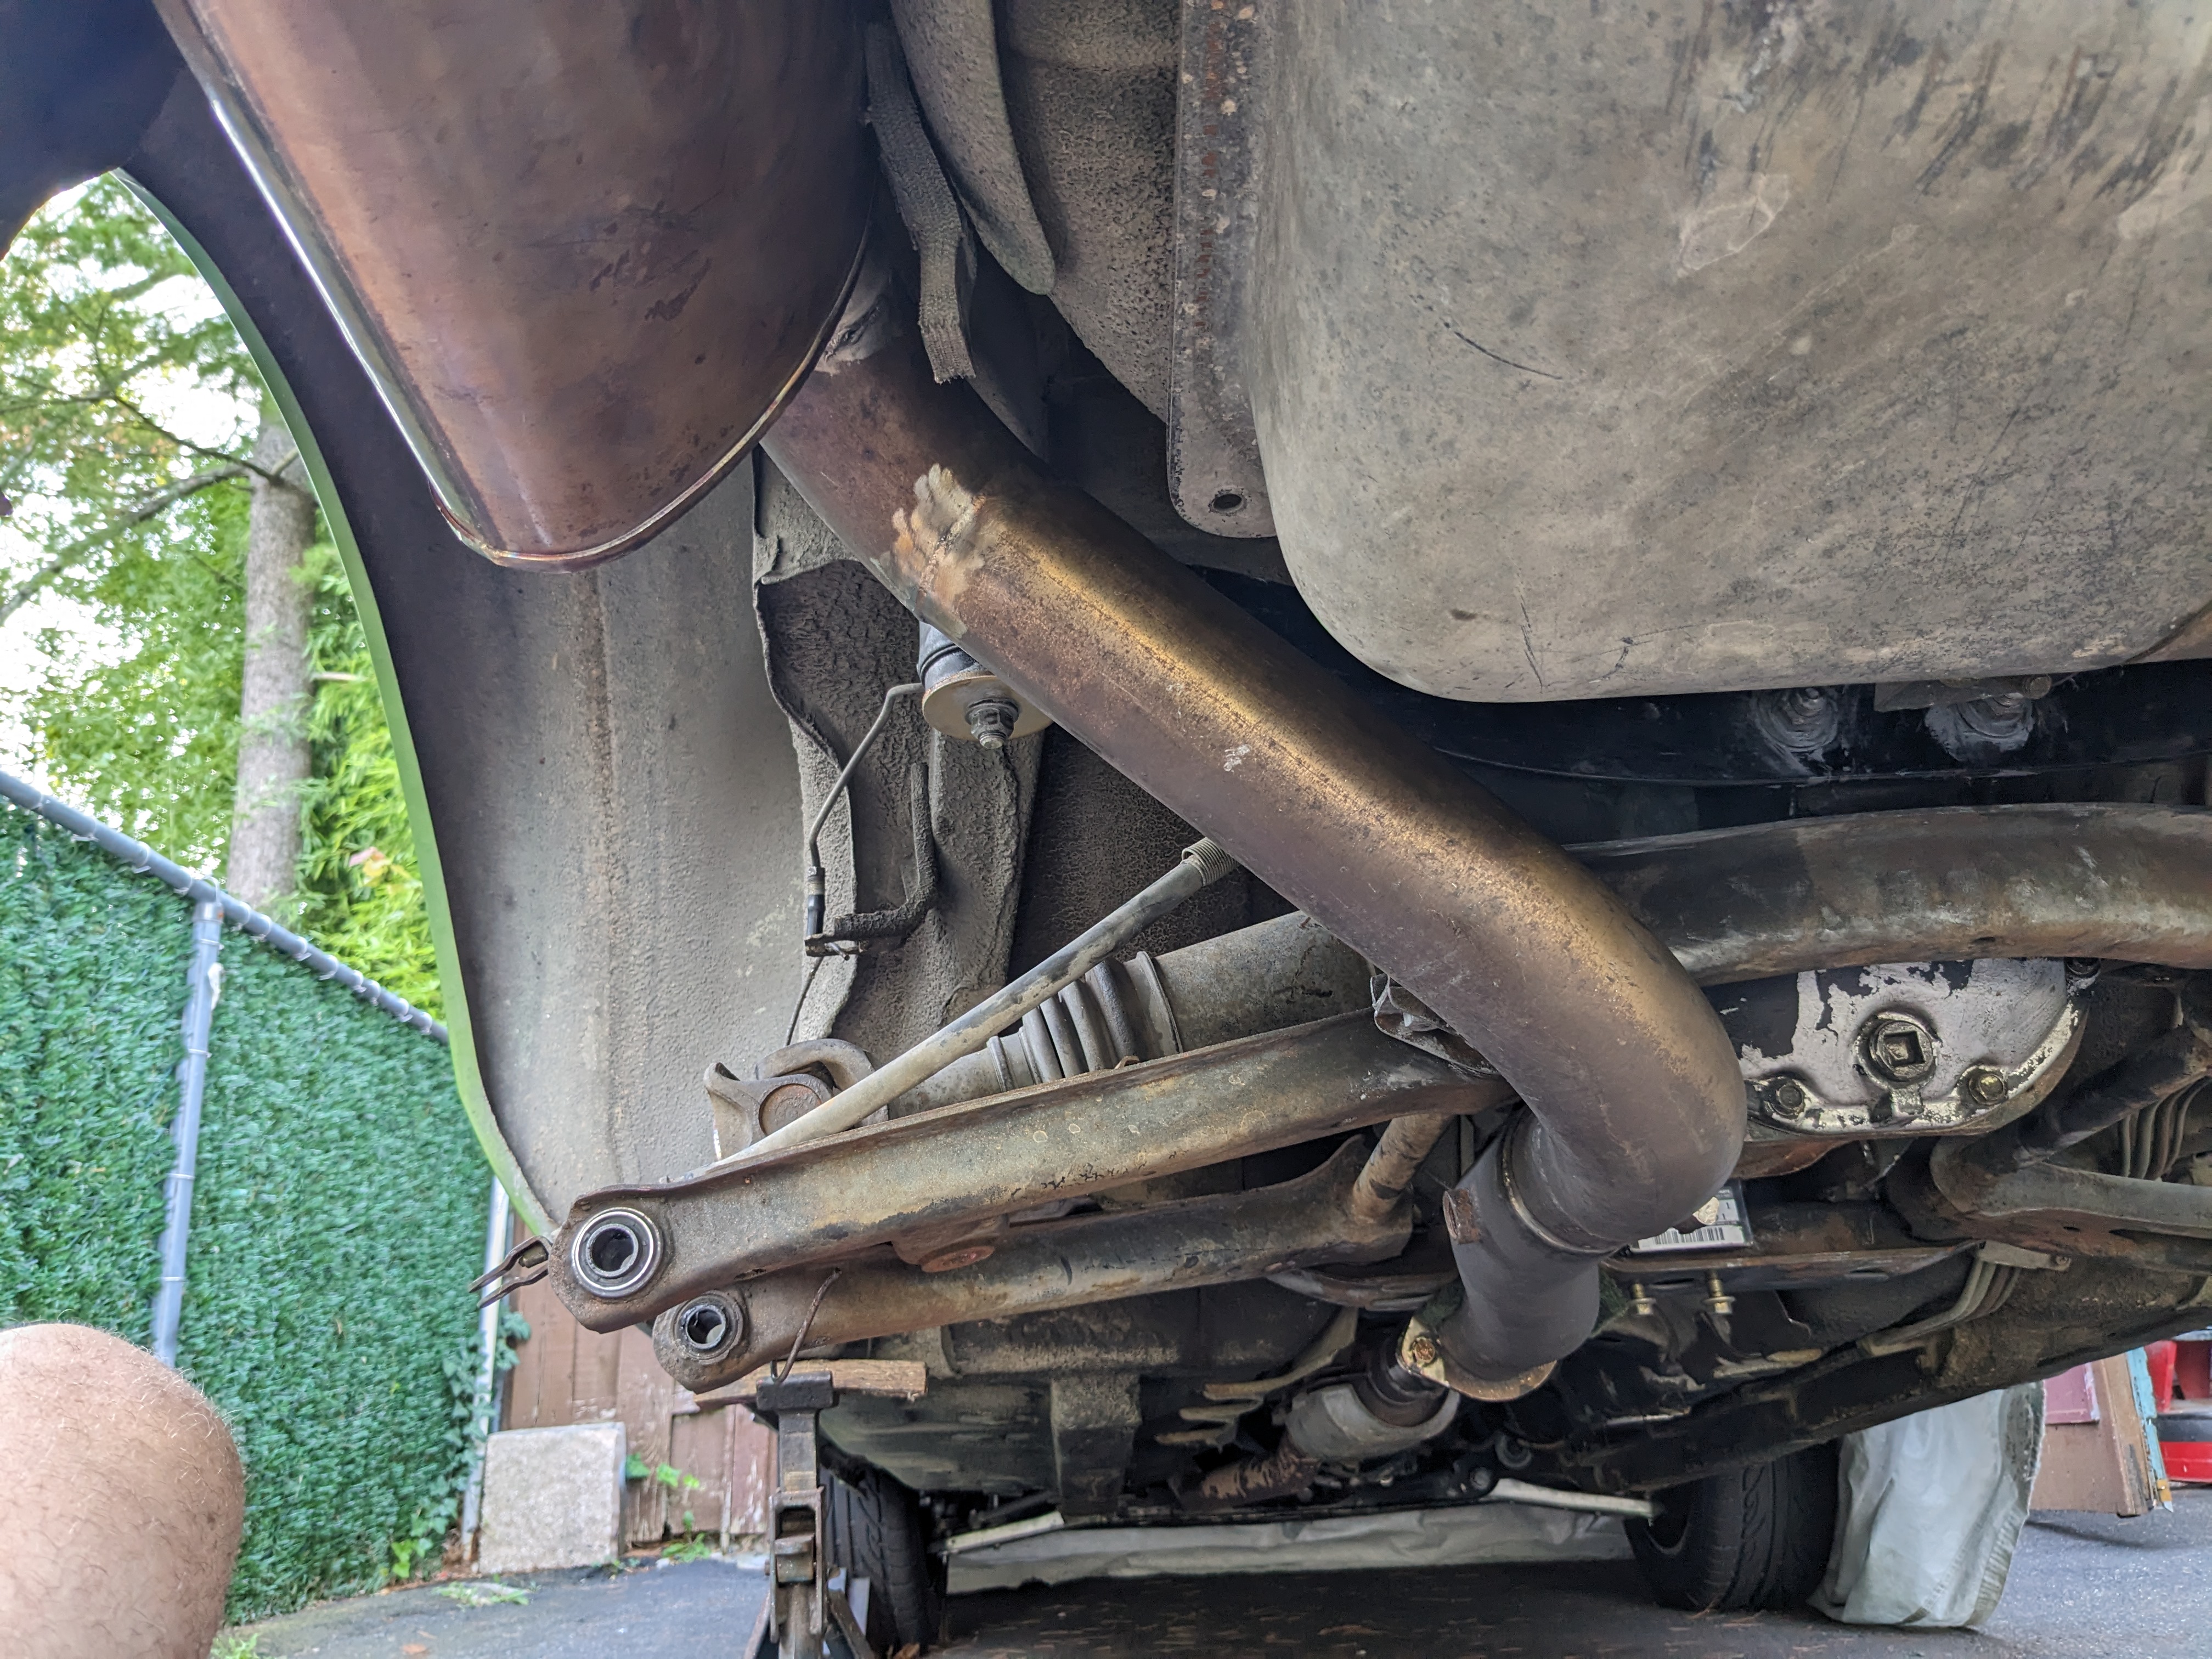
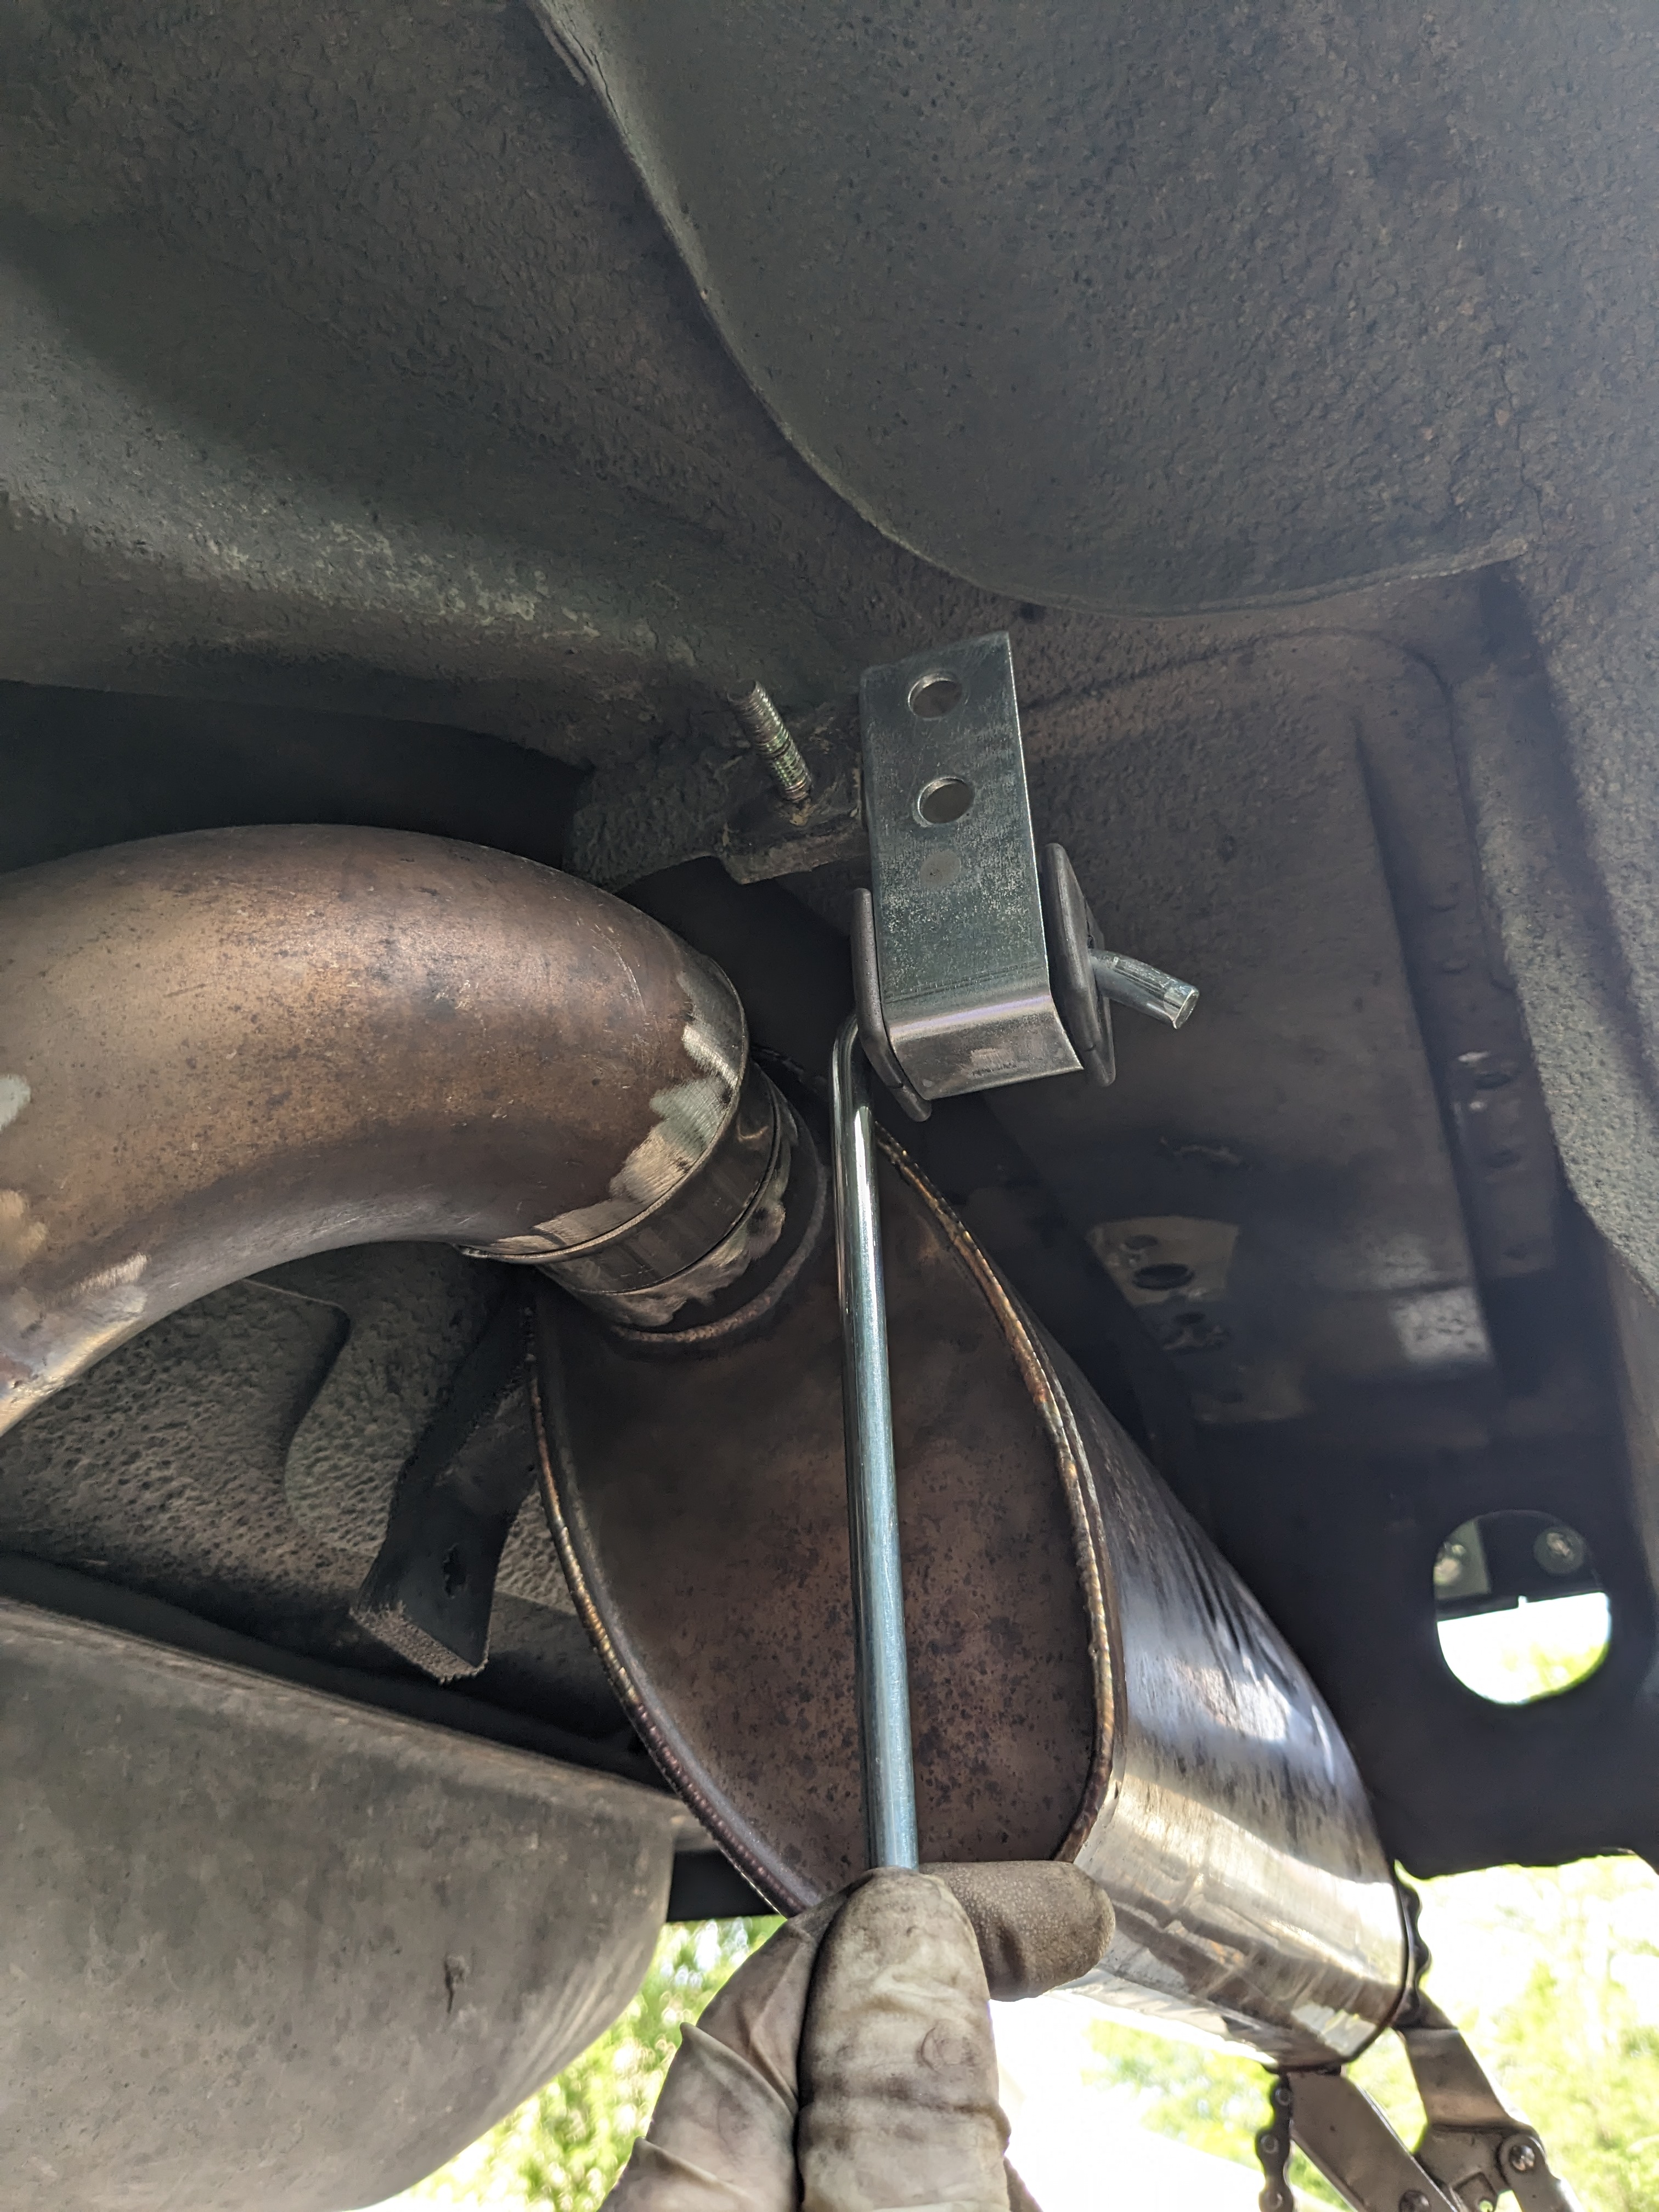
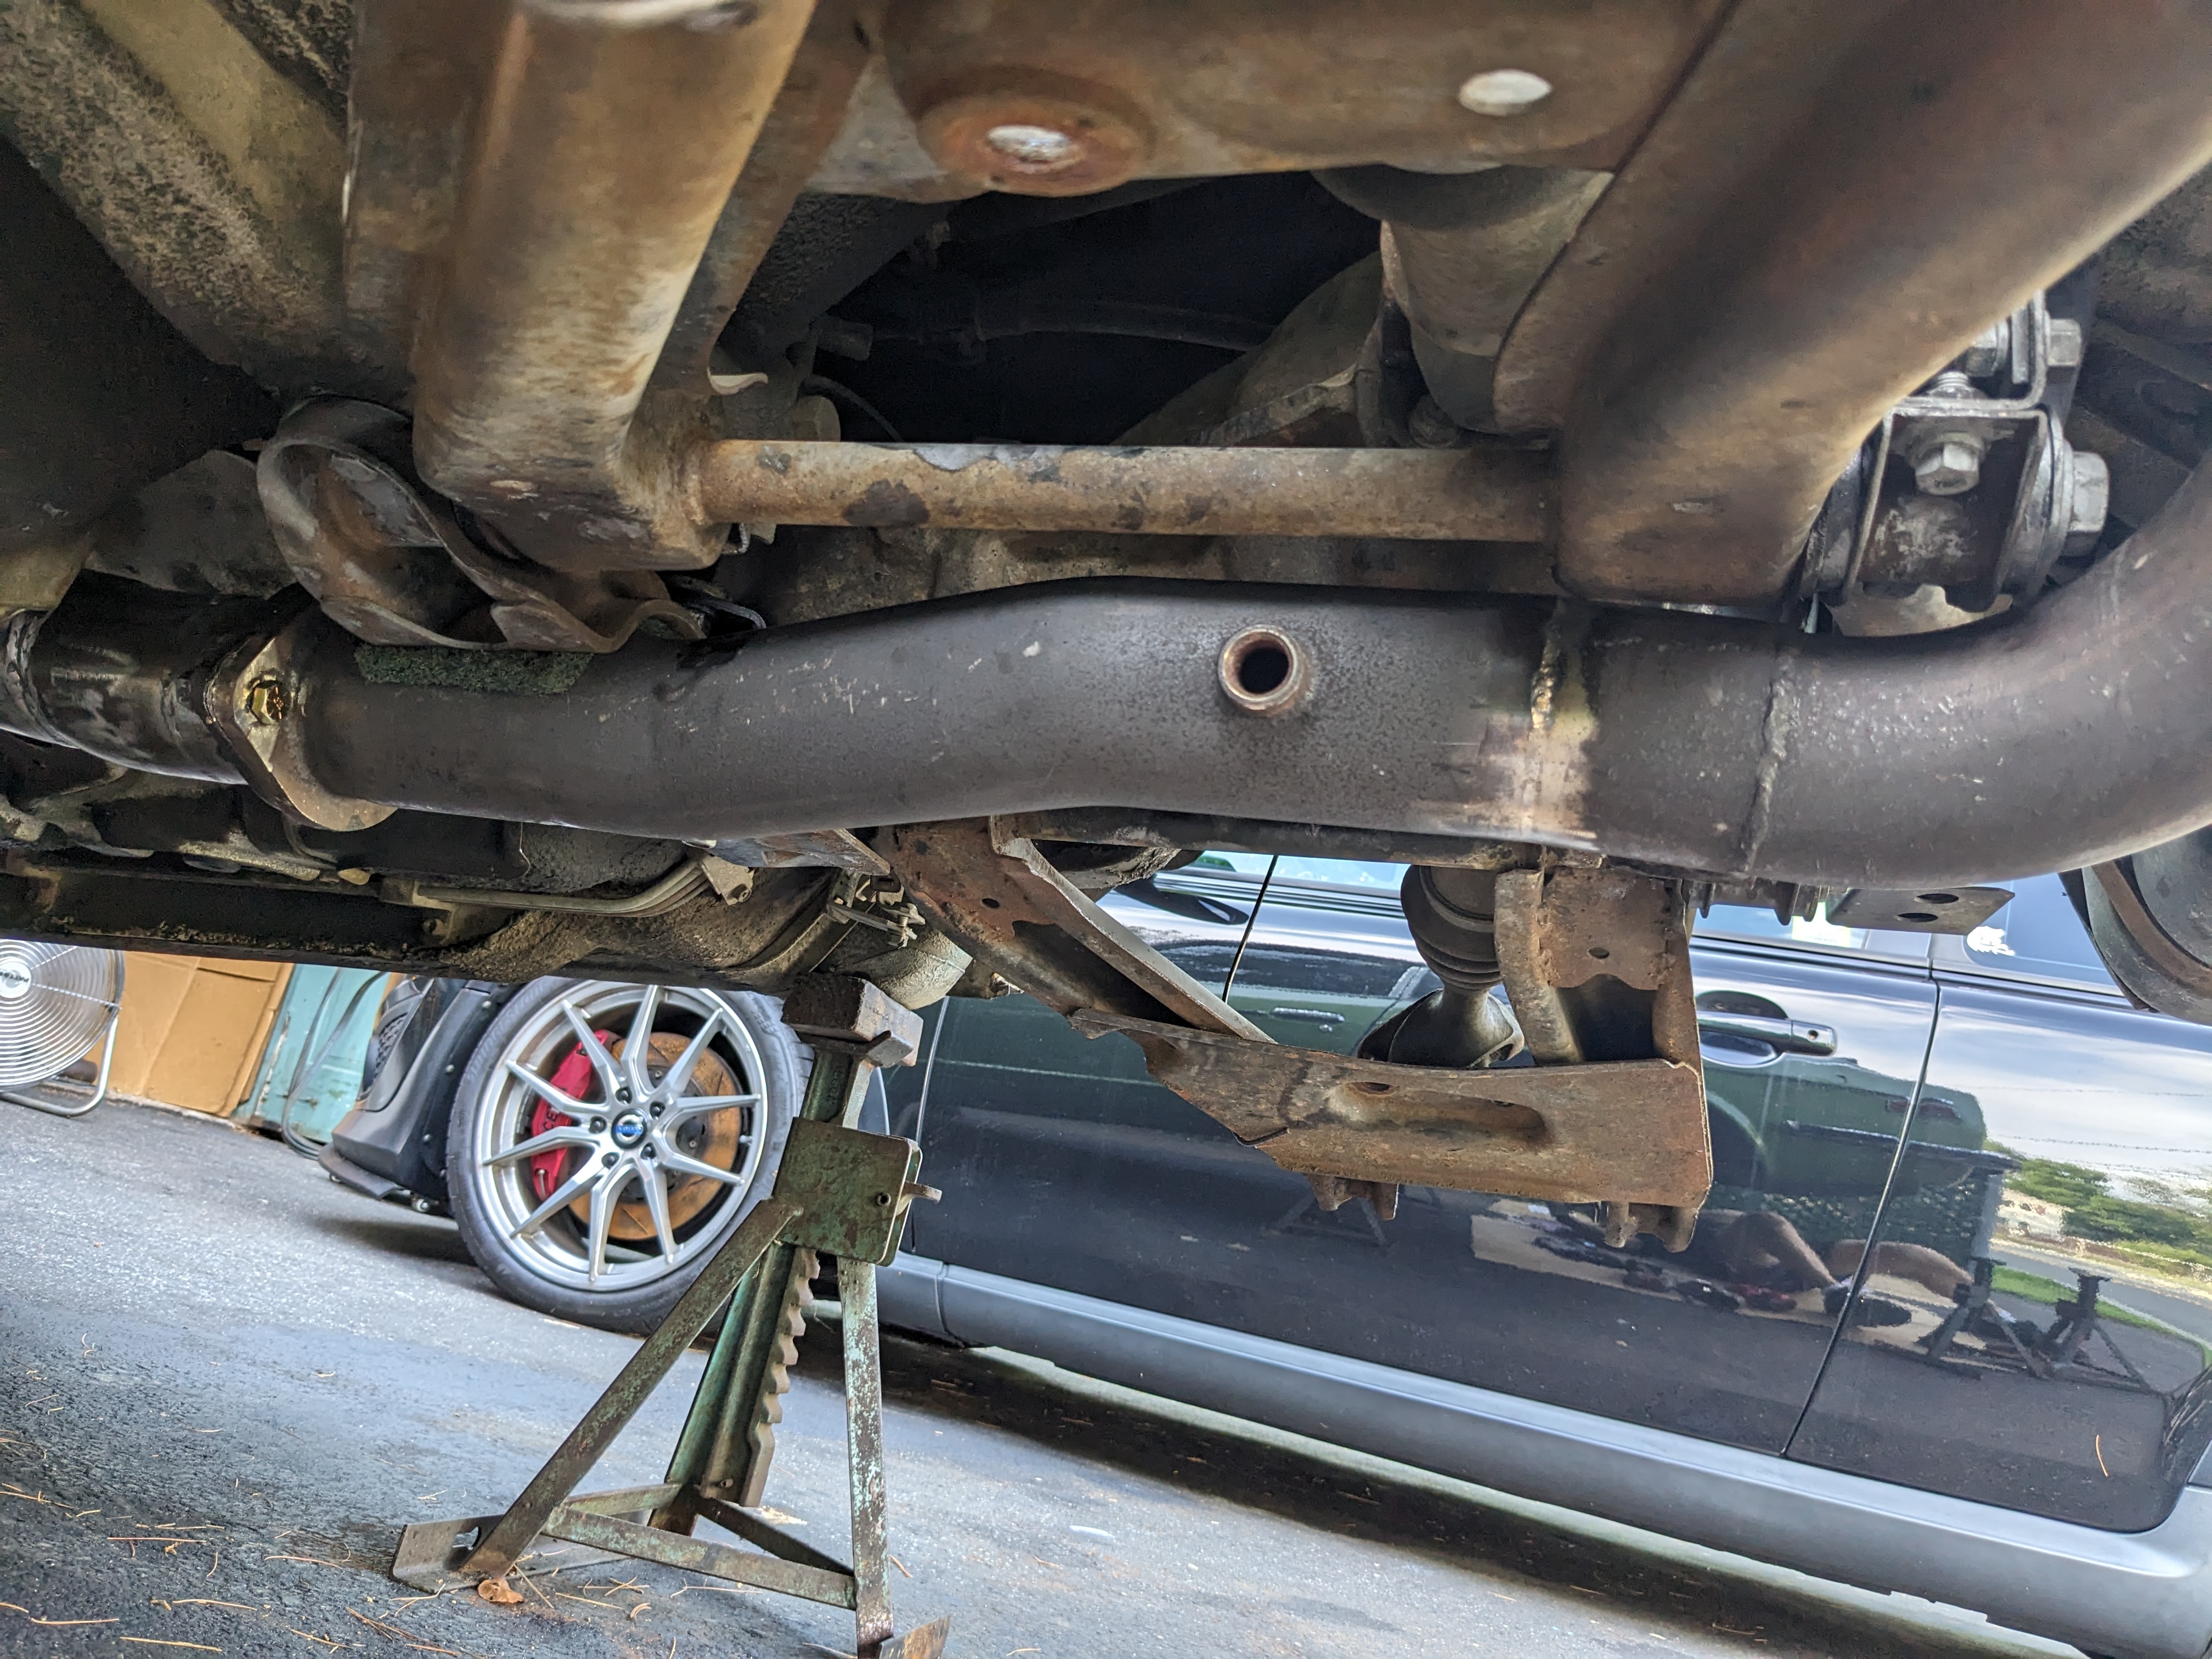
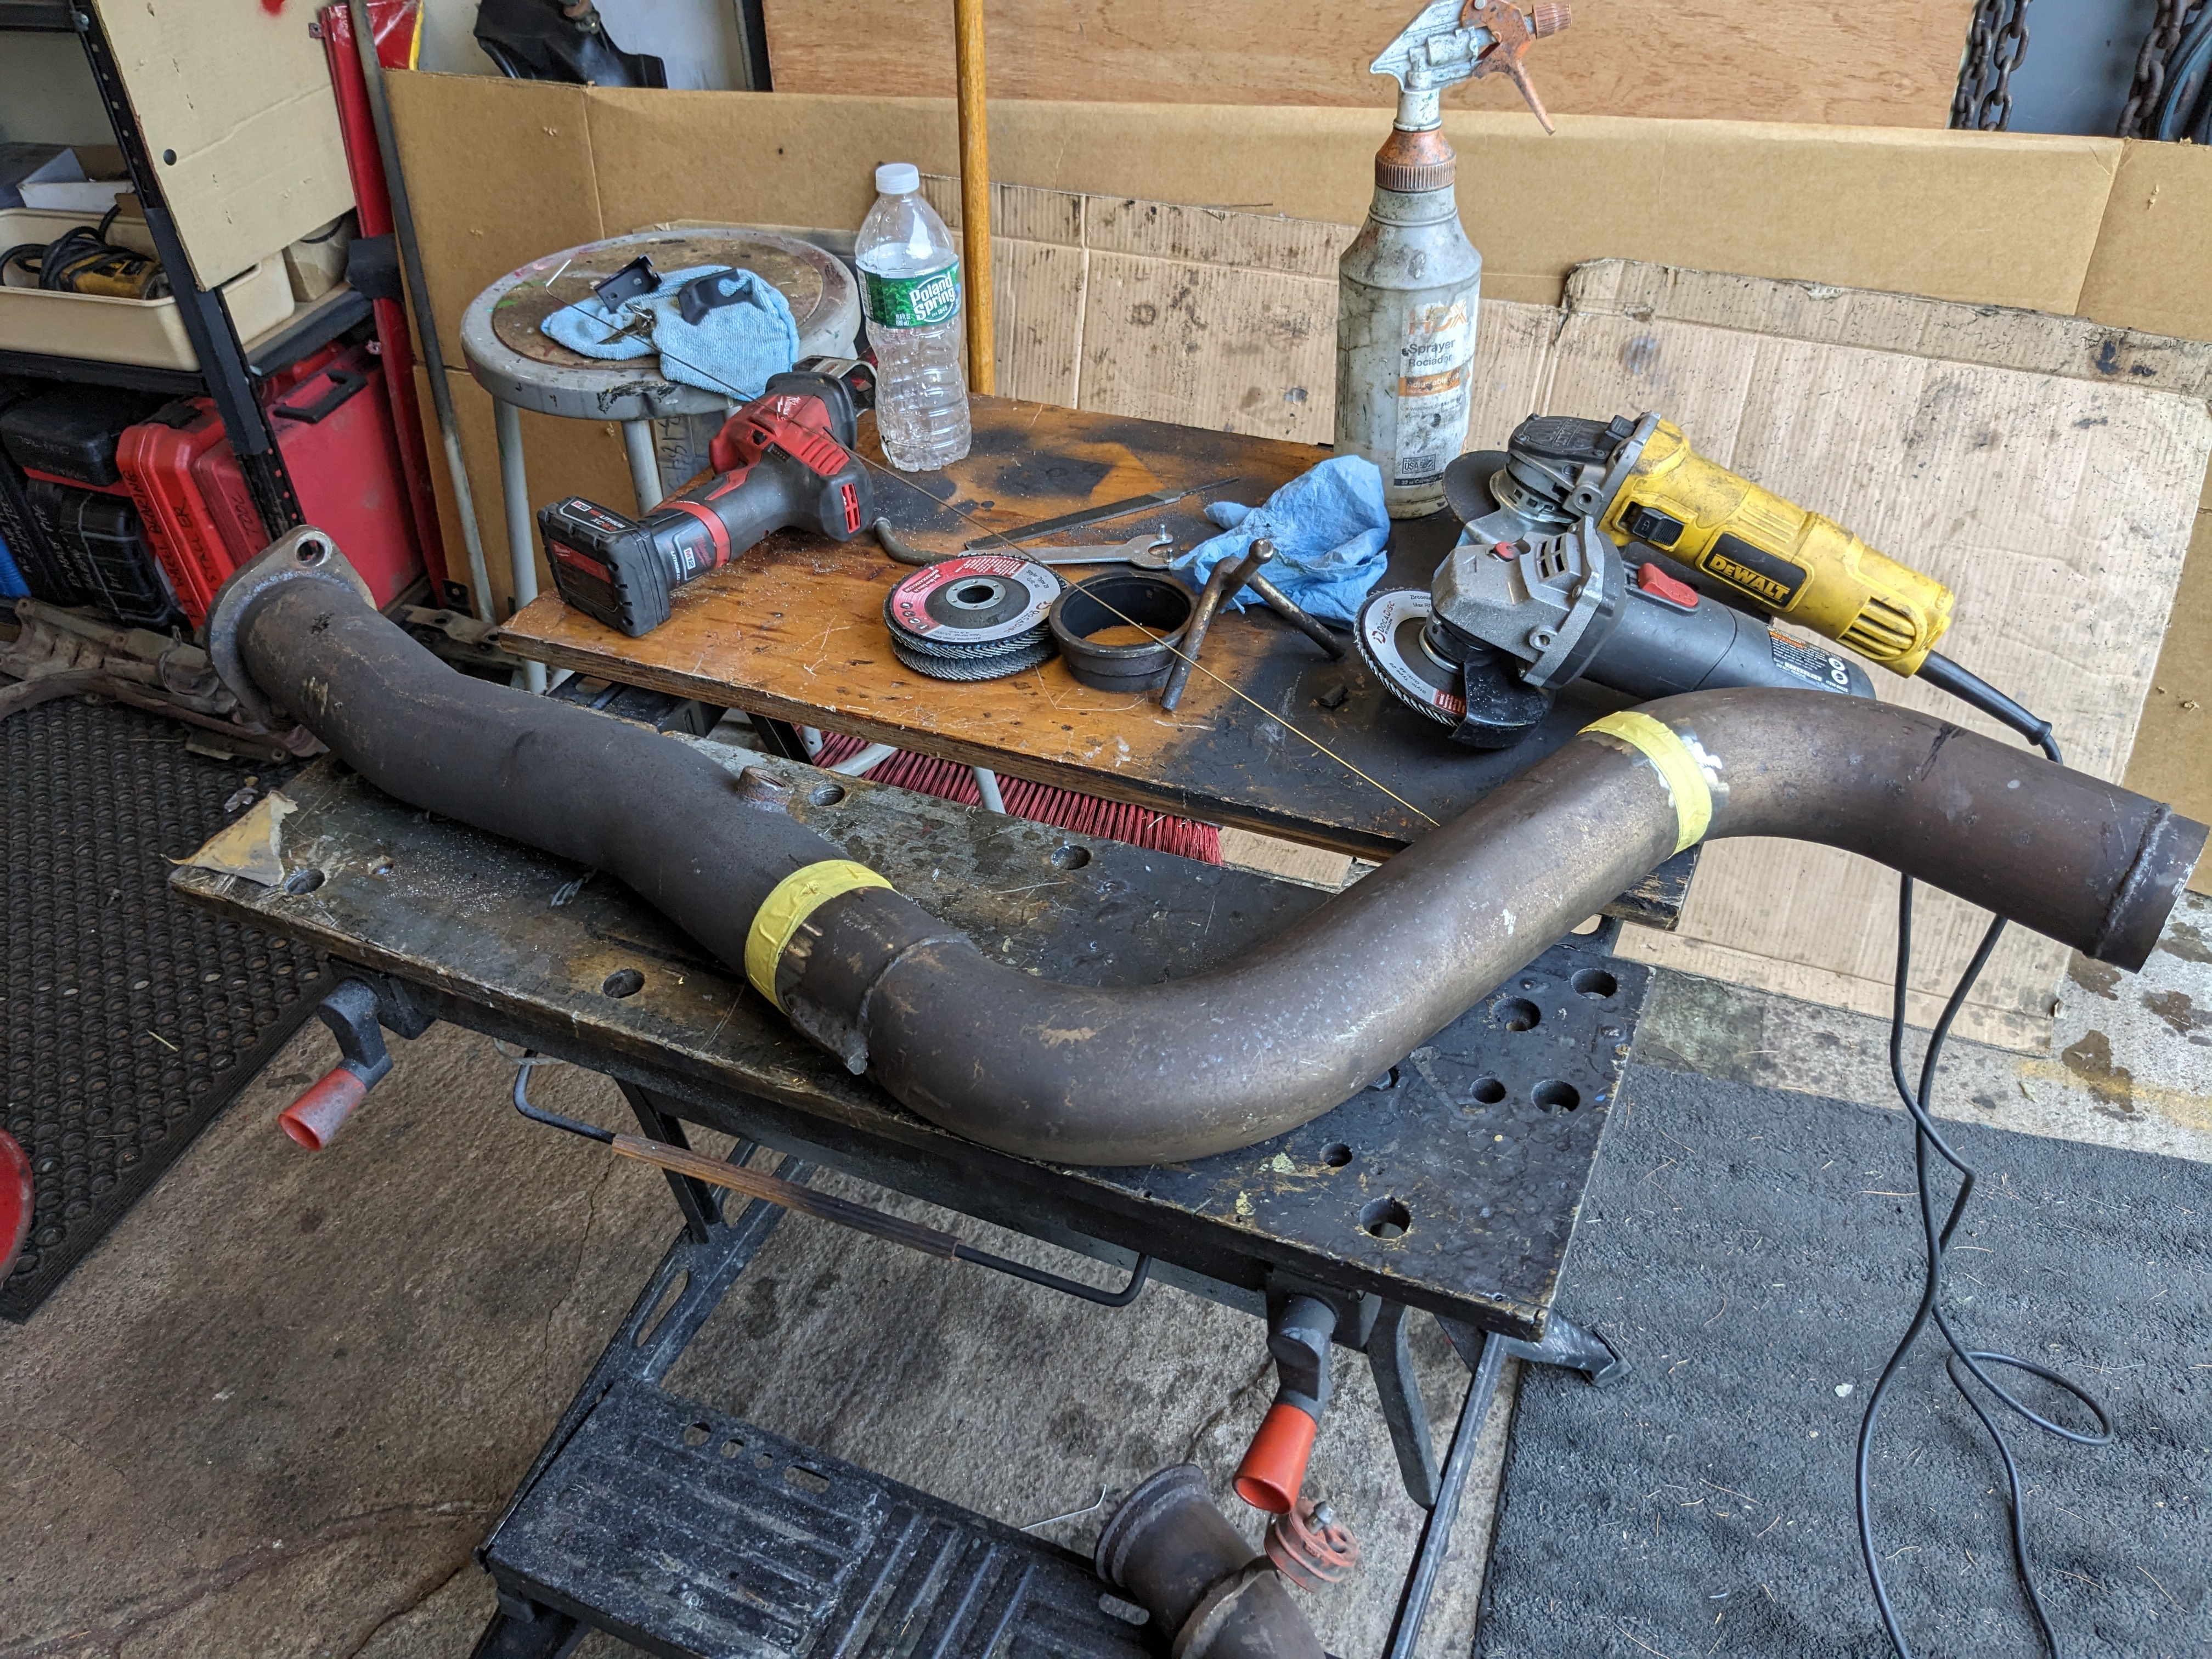
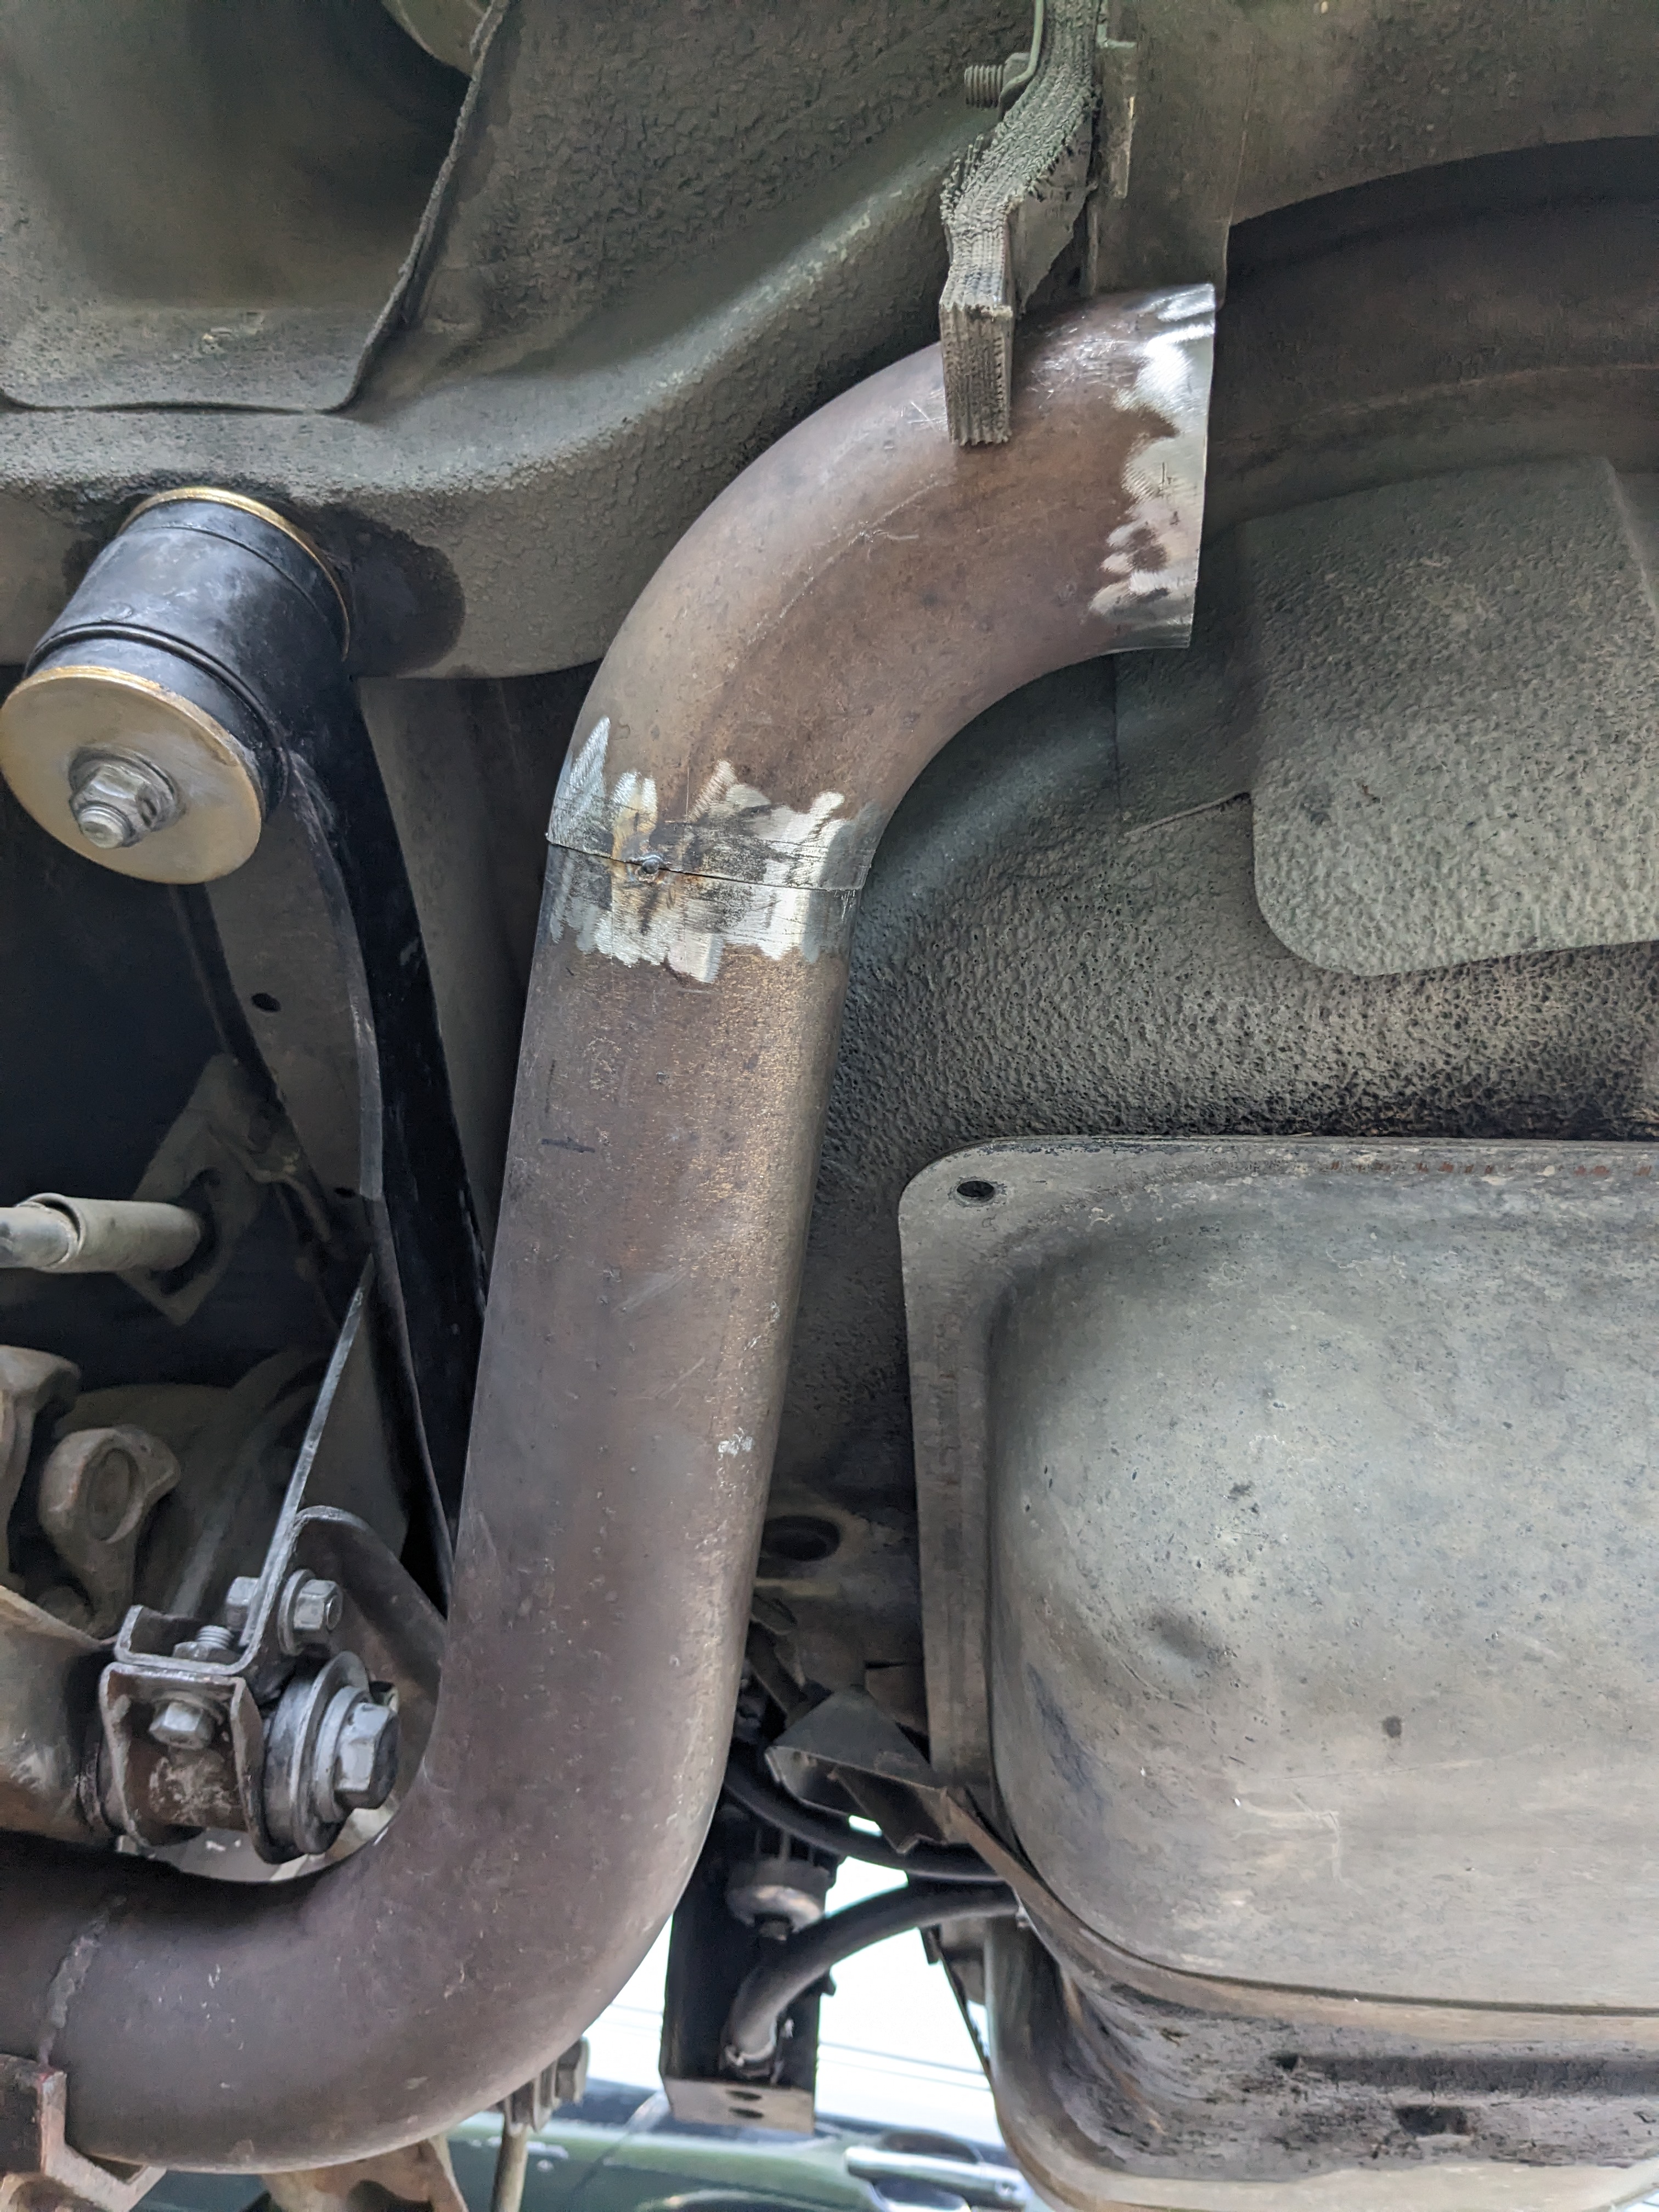
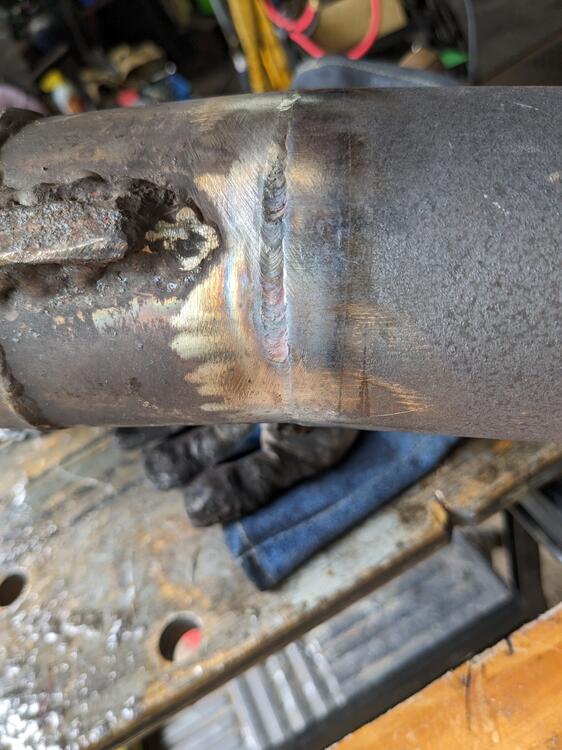
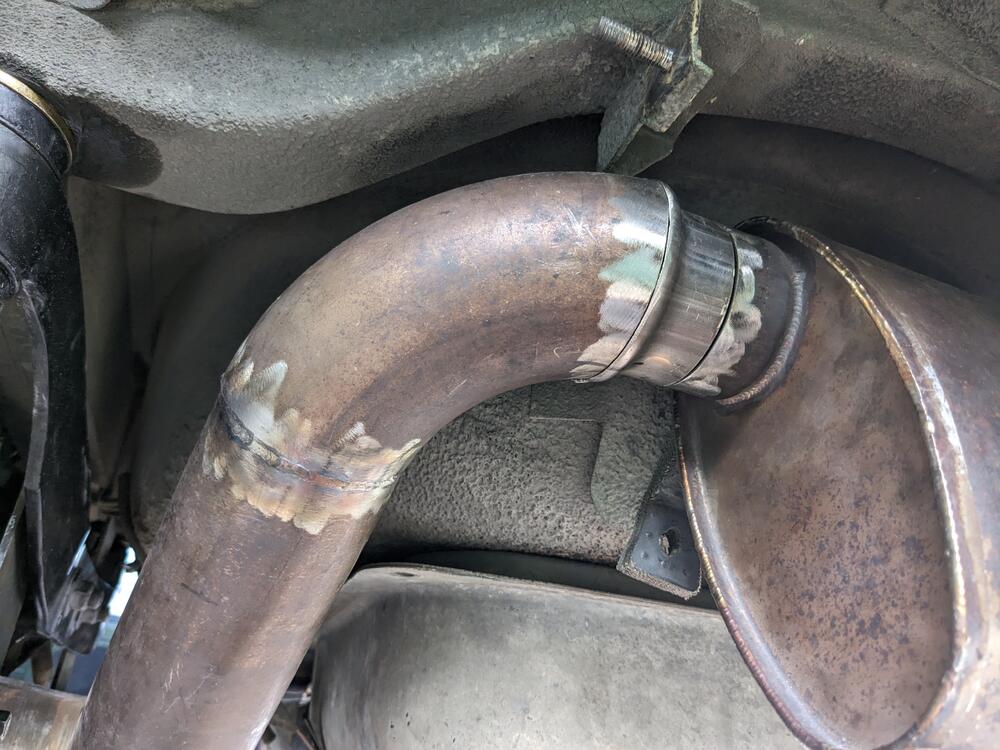
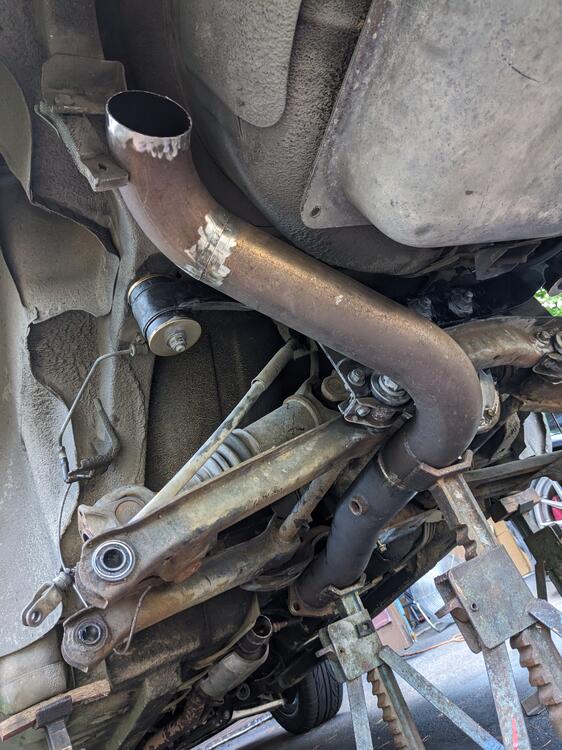
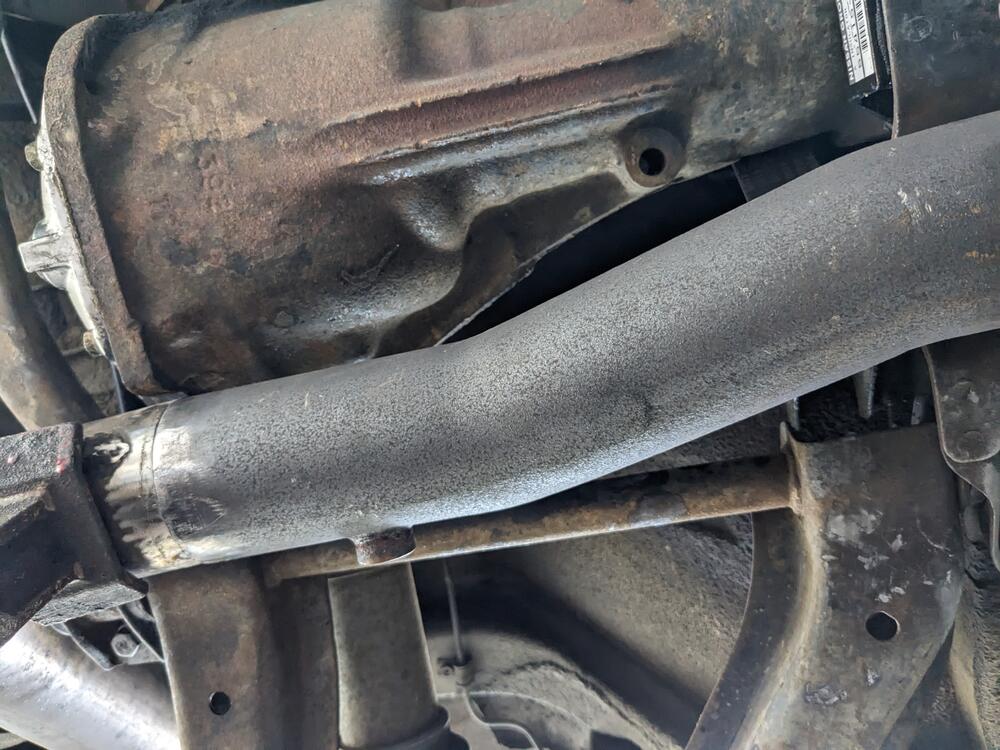
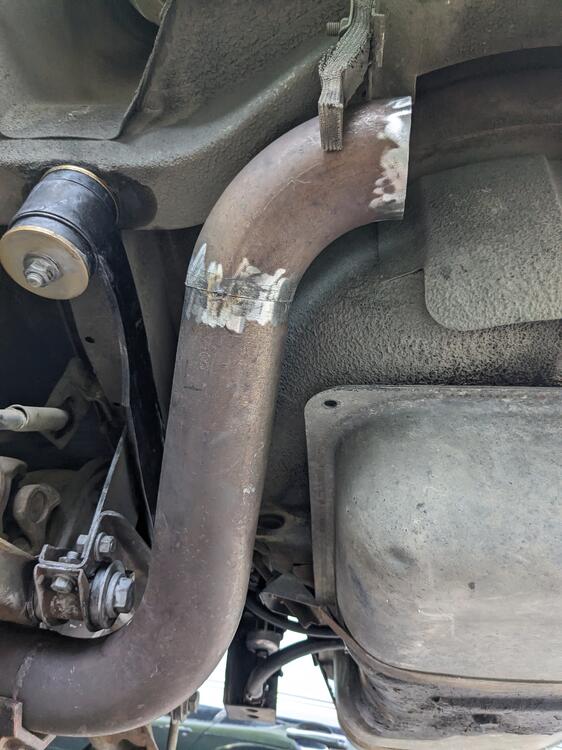
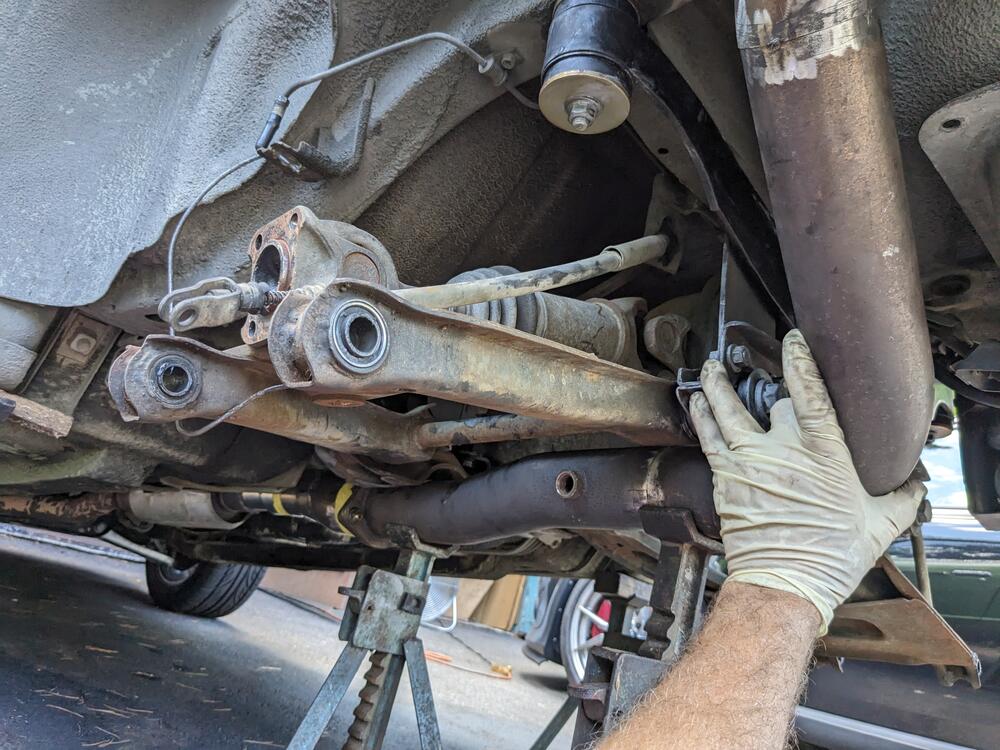
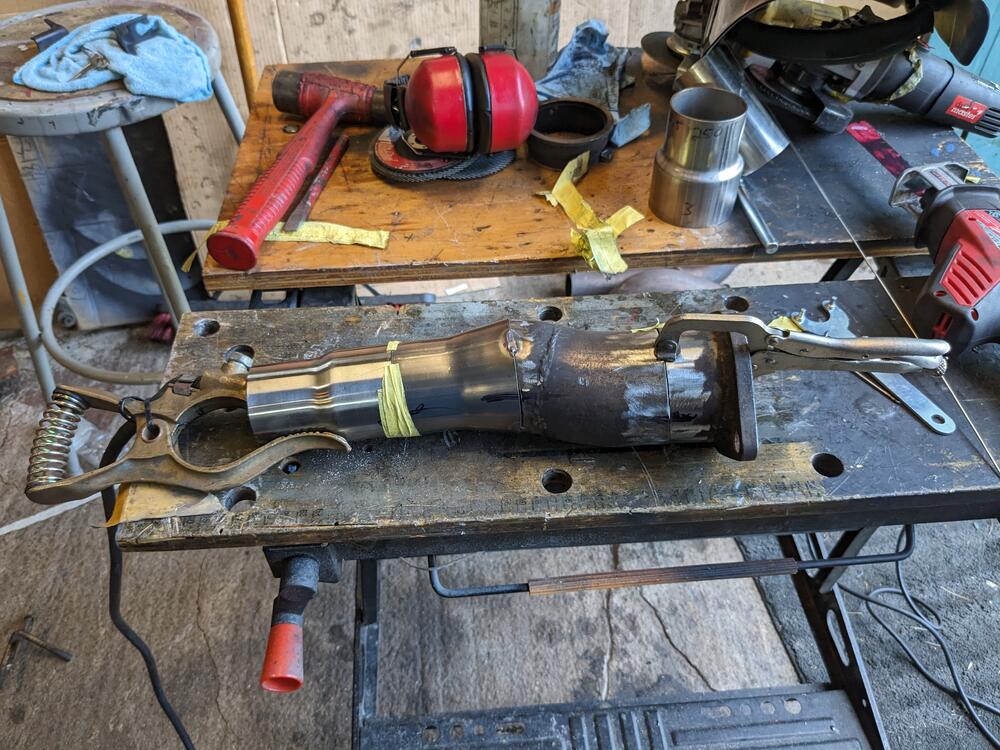
TIG for this - it's all stainless. I could use my MIG I suppose, but I don't have stainless wire for it. TIG is cleaner for pipe anyway. Where I had good butt-joins, the welds are clean (enough, I'm not a professional). Where there was discrepancy/offset, so so much. More work on the exhaust today. Got all the tacked seams welded, and figured out the muffler placement cut down the 3"-2.5" step for the available spacing have to figure out the hanger here, have to make sure it pulls it slightly away from the spare well like this maybe or here, to push it away from the spare well. There is a hole in each corner of the gas tank, I could use this one, and add a smaller outward placed one to locate the strap from potential rotation maybe one set here


 3 points
 -
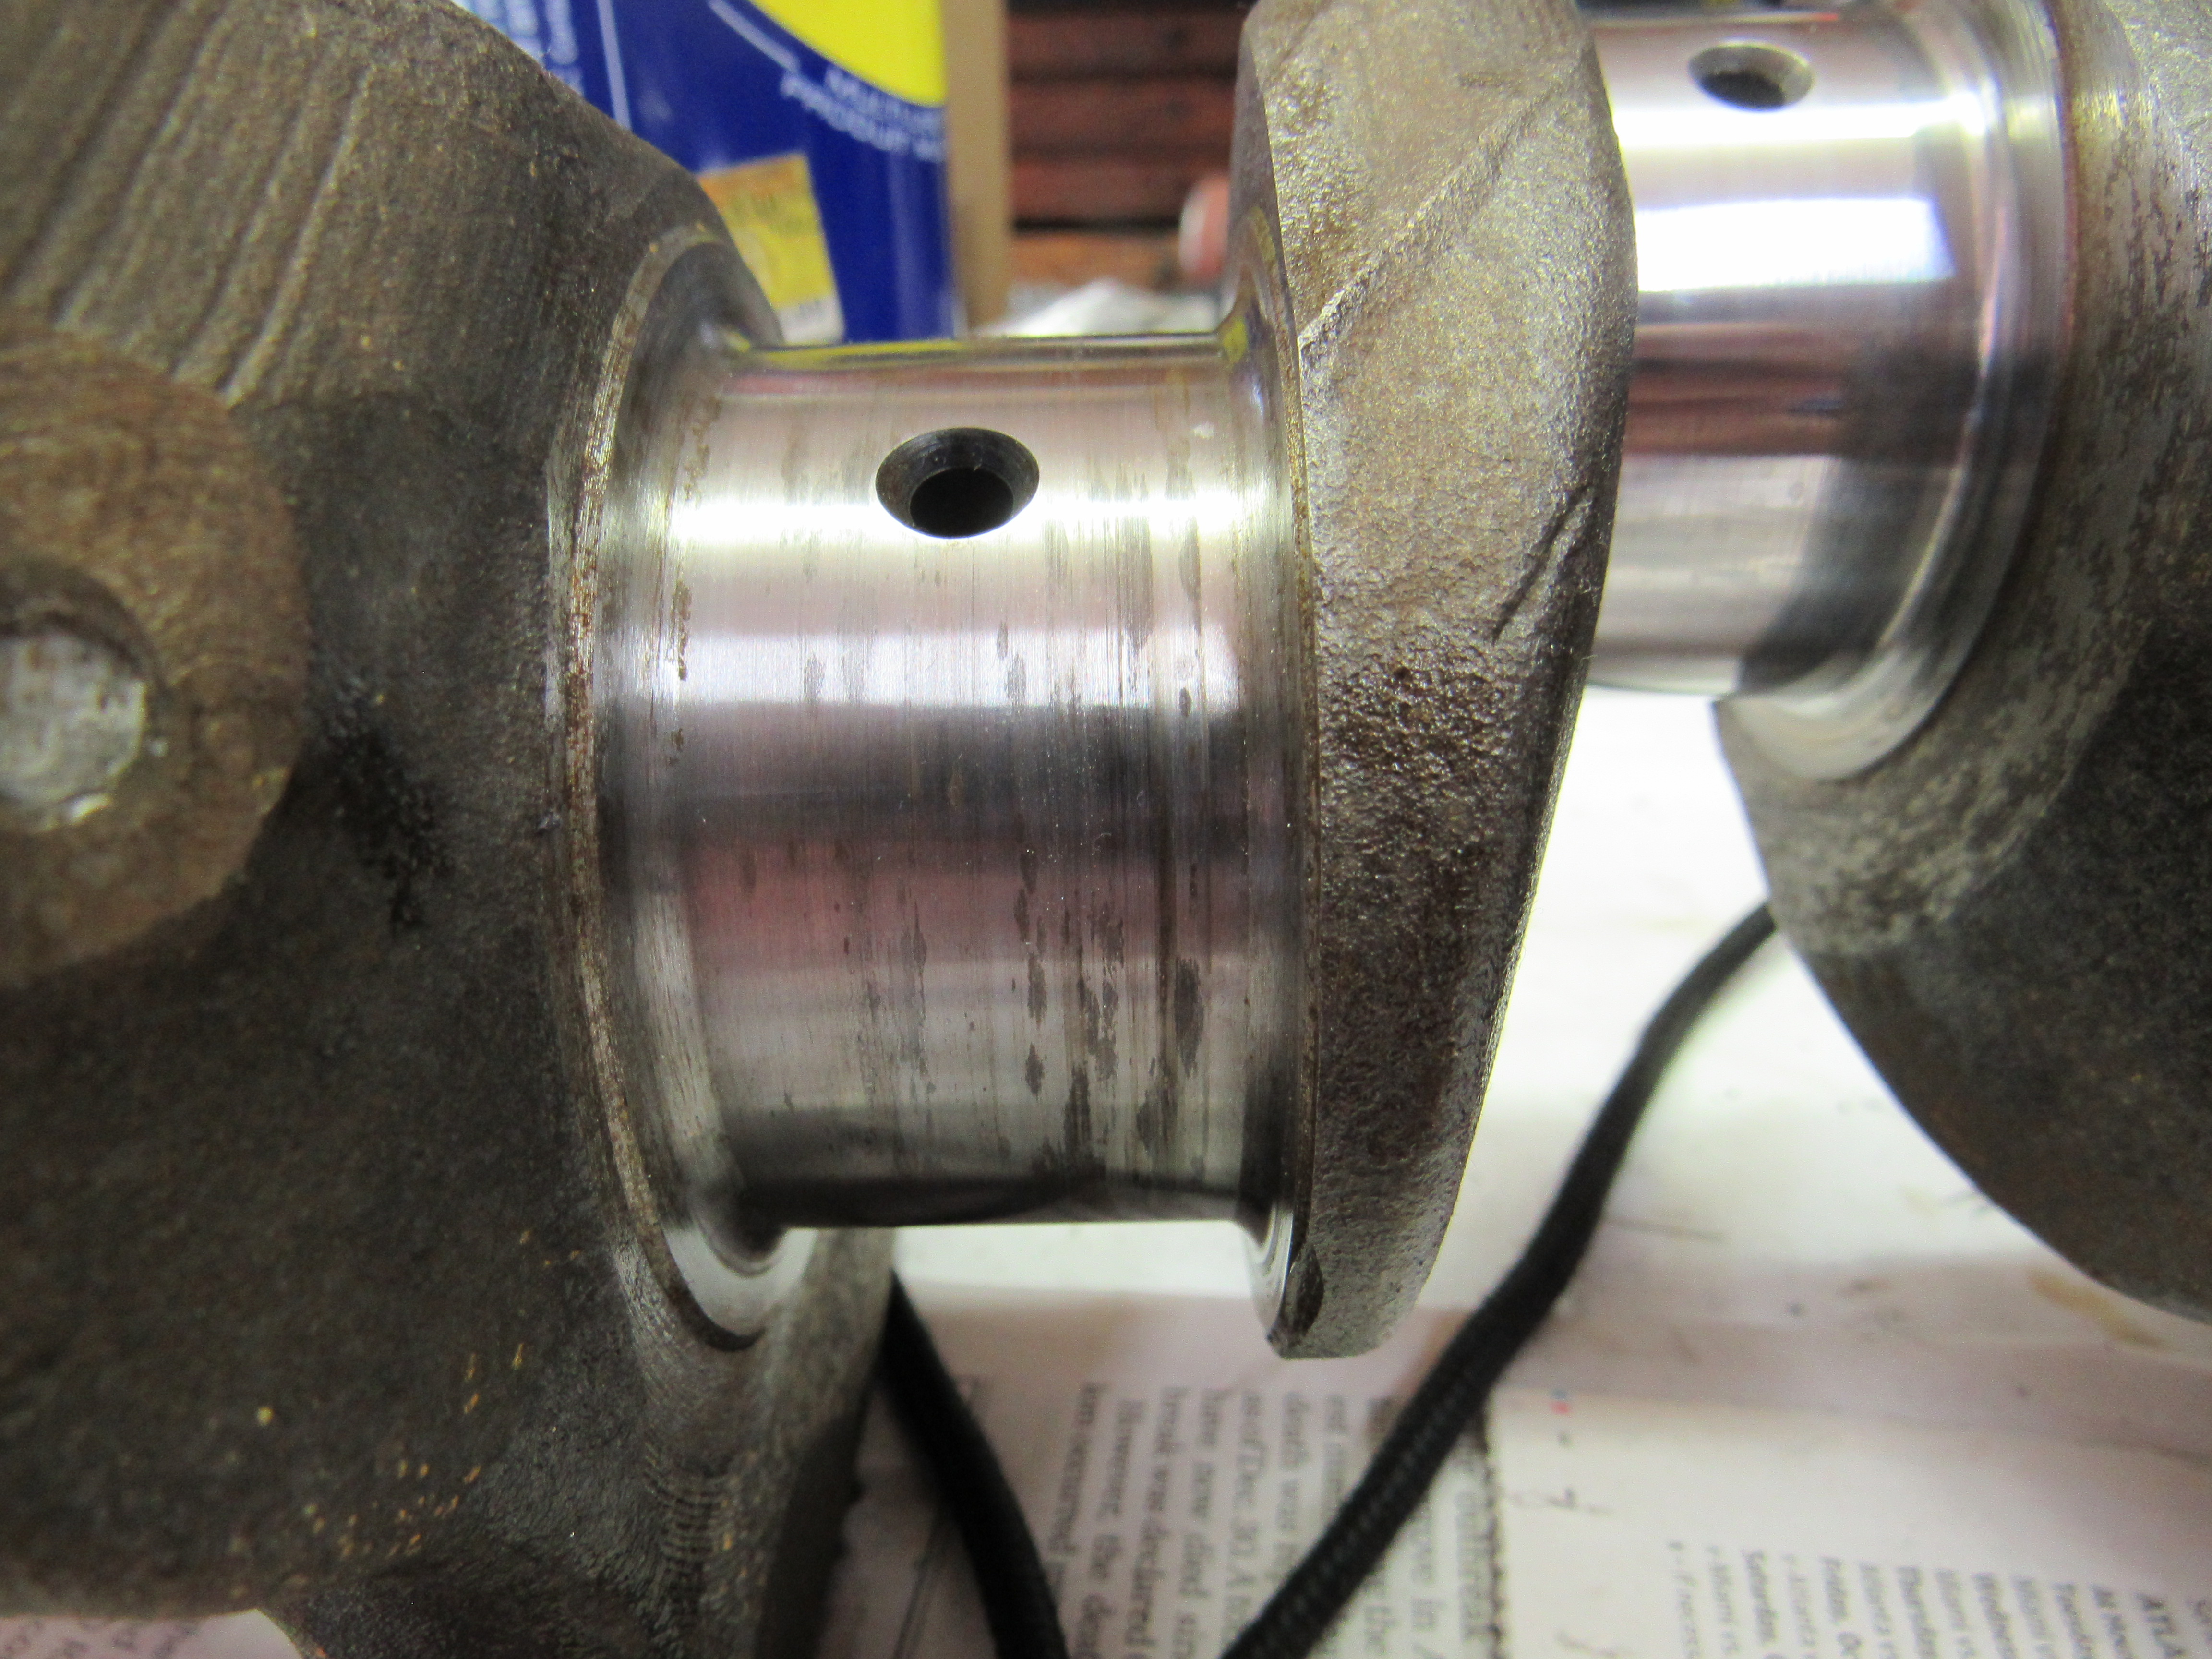
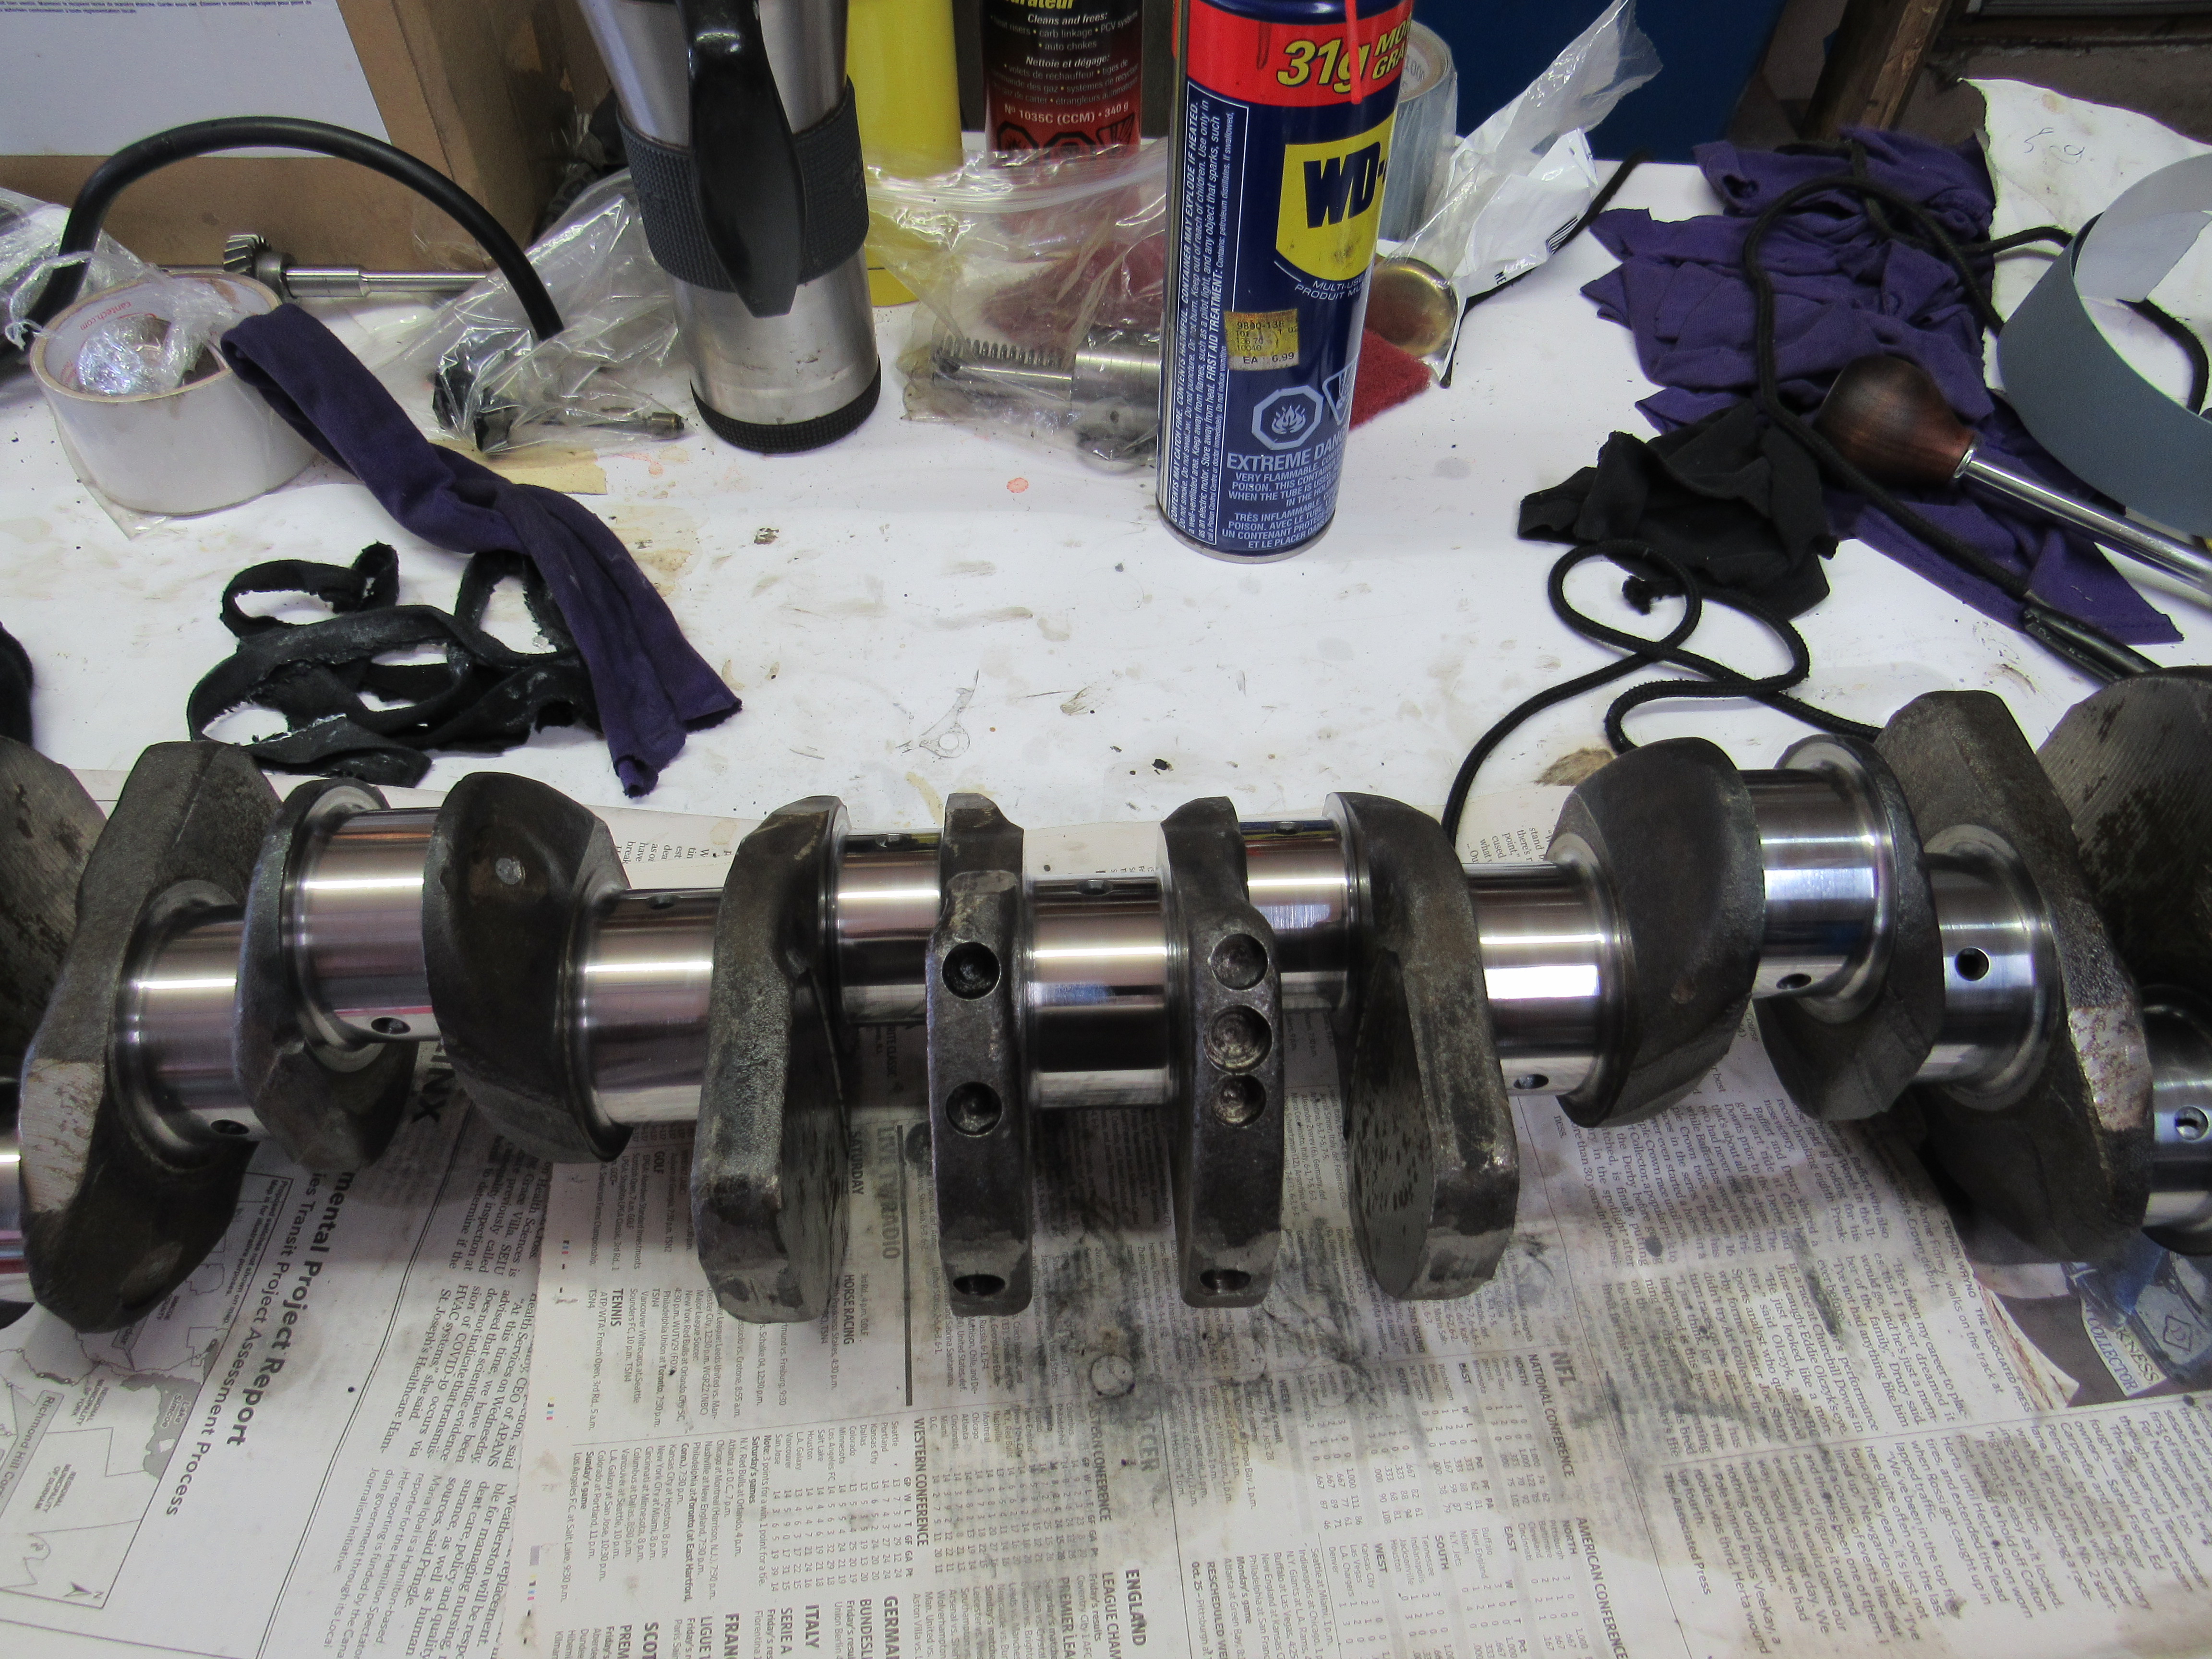
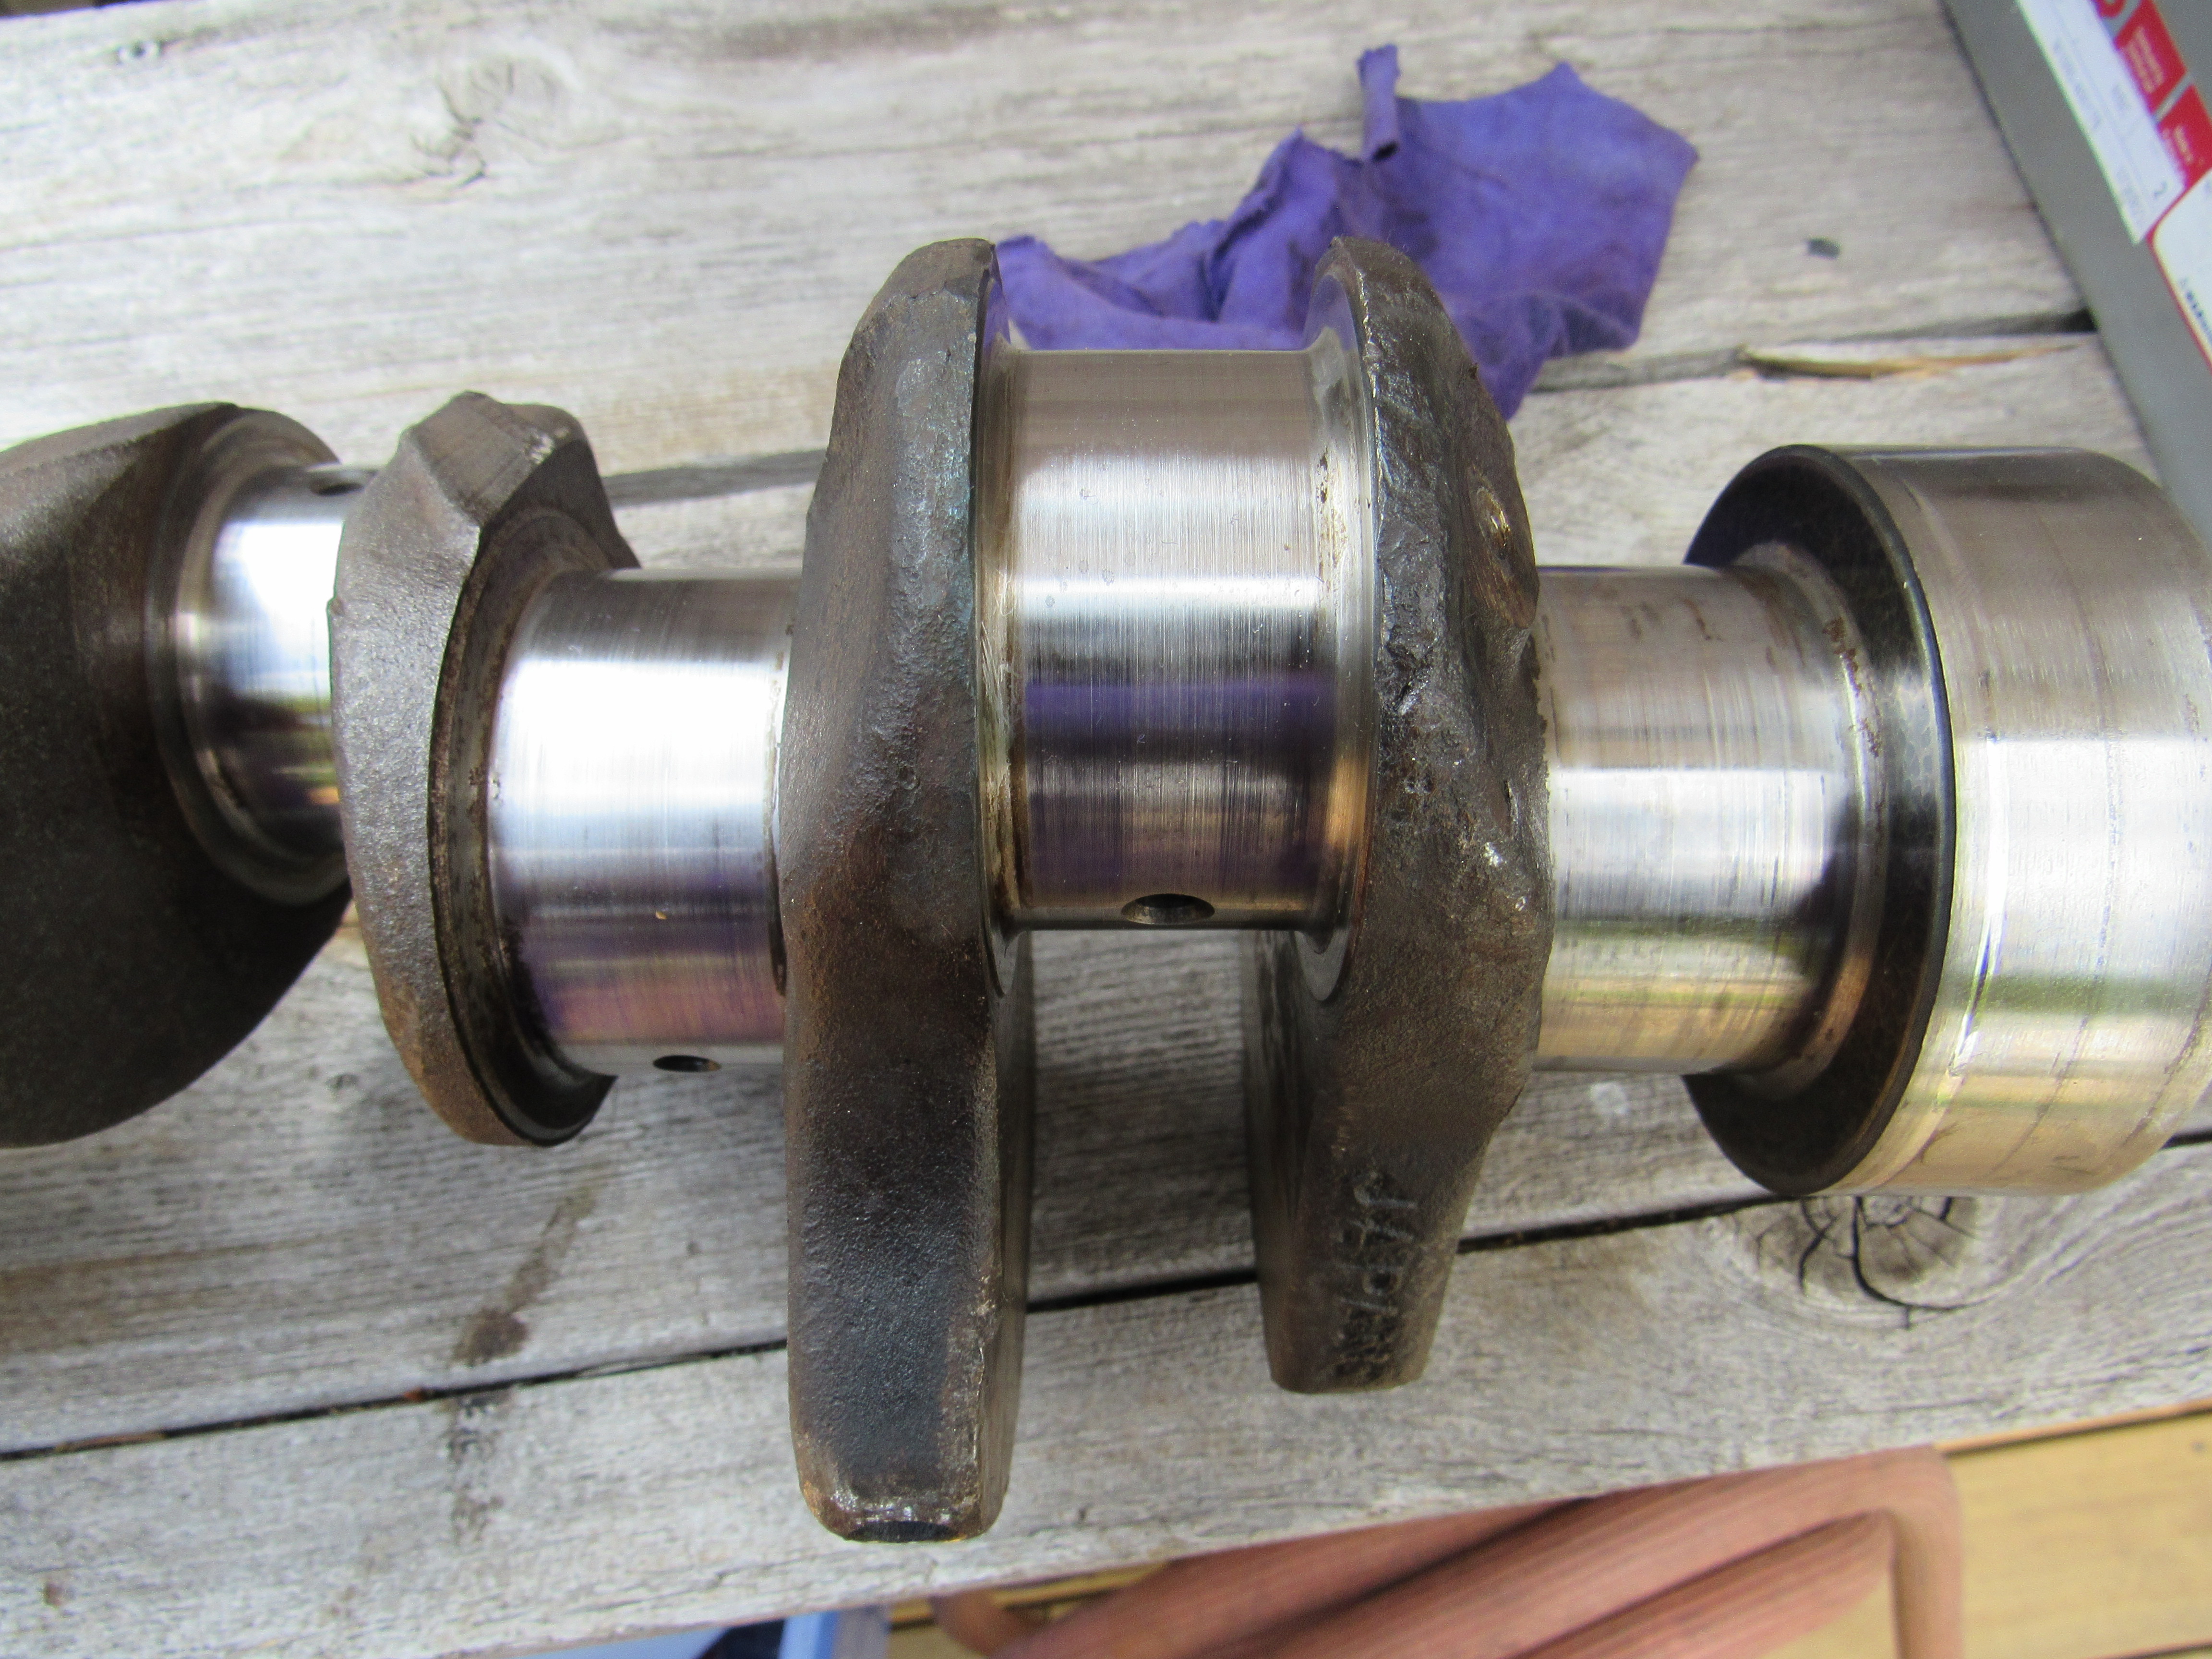
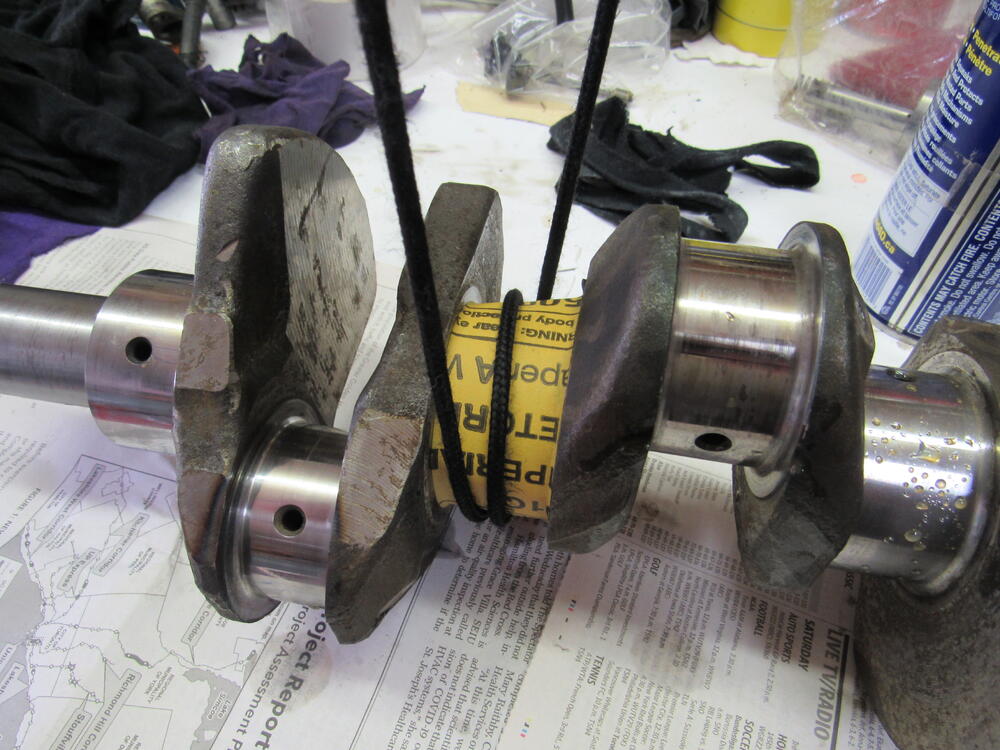
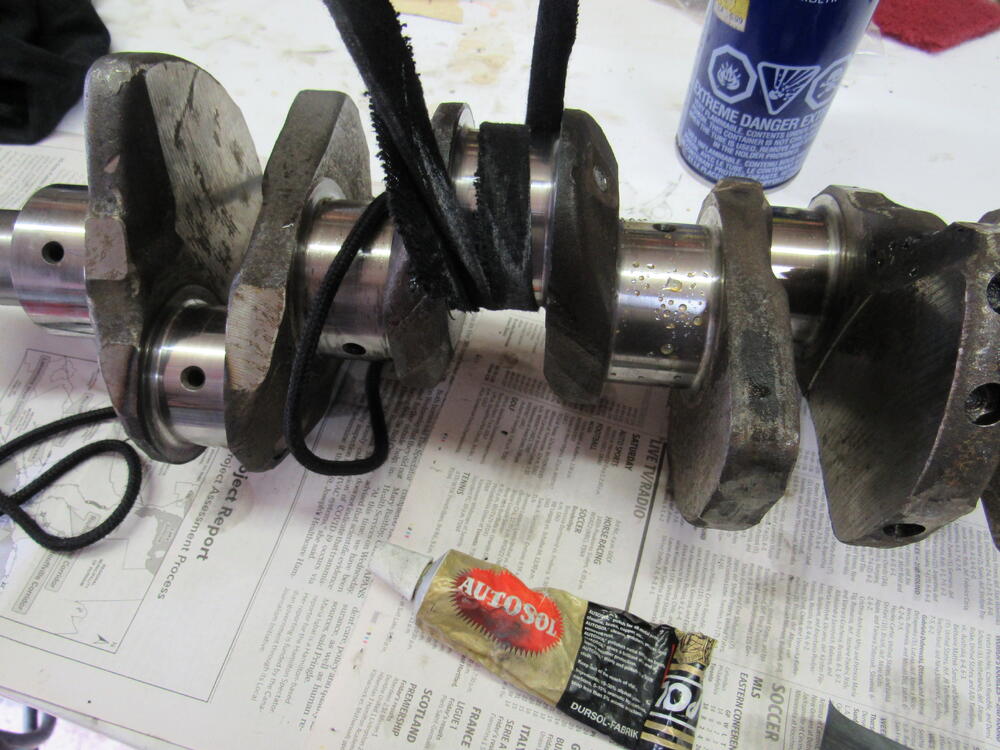
2 pointsI really don't like dropping off a crankshaft to be polished, very few machinists do it in house anymore so they job it out to a 3rd party that doesn't deal with the public. Once they have it, it can sit on their floor for months before they get to it. So I thought I would have a go at it myself, I started with 1500 wet/dry paper, lots of WD40 and an old shoelace. Spent about 2 min per journal, then cleaned it off and made a long strip of an old T shirt and some Autosol polish, about 1 min per and I'm done.


 2 points
 -
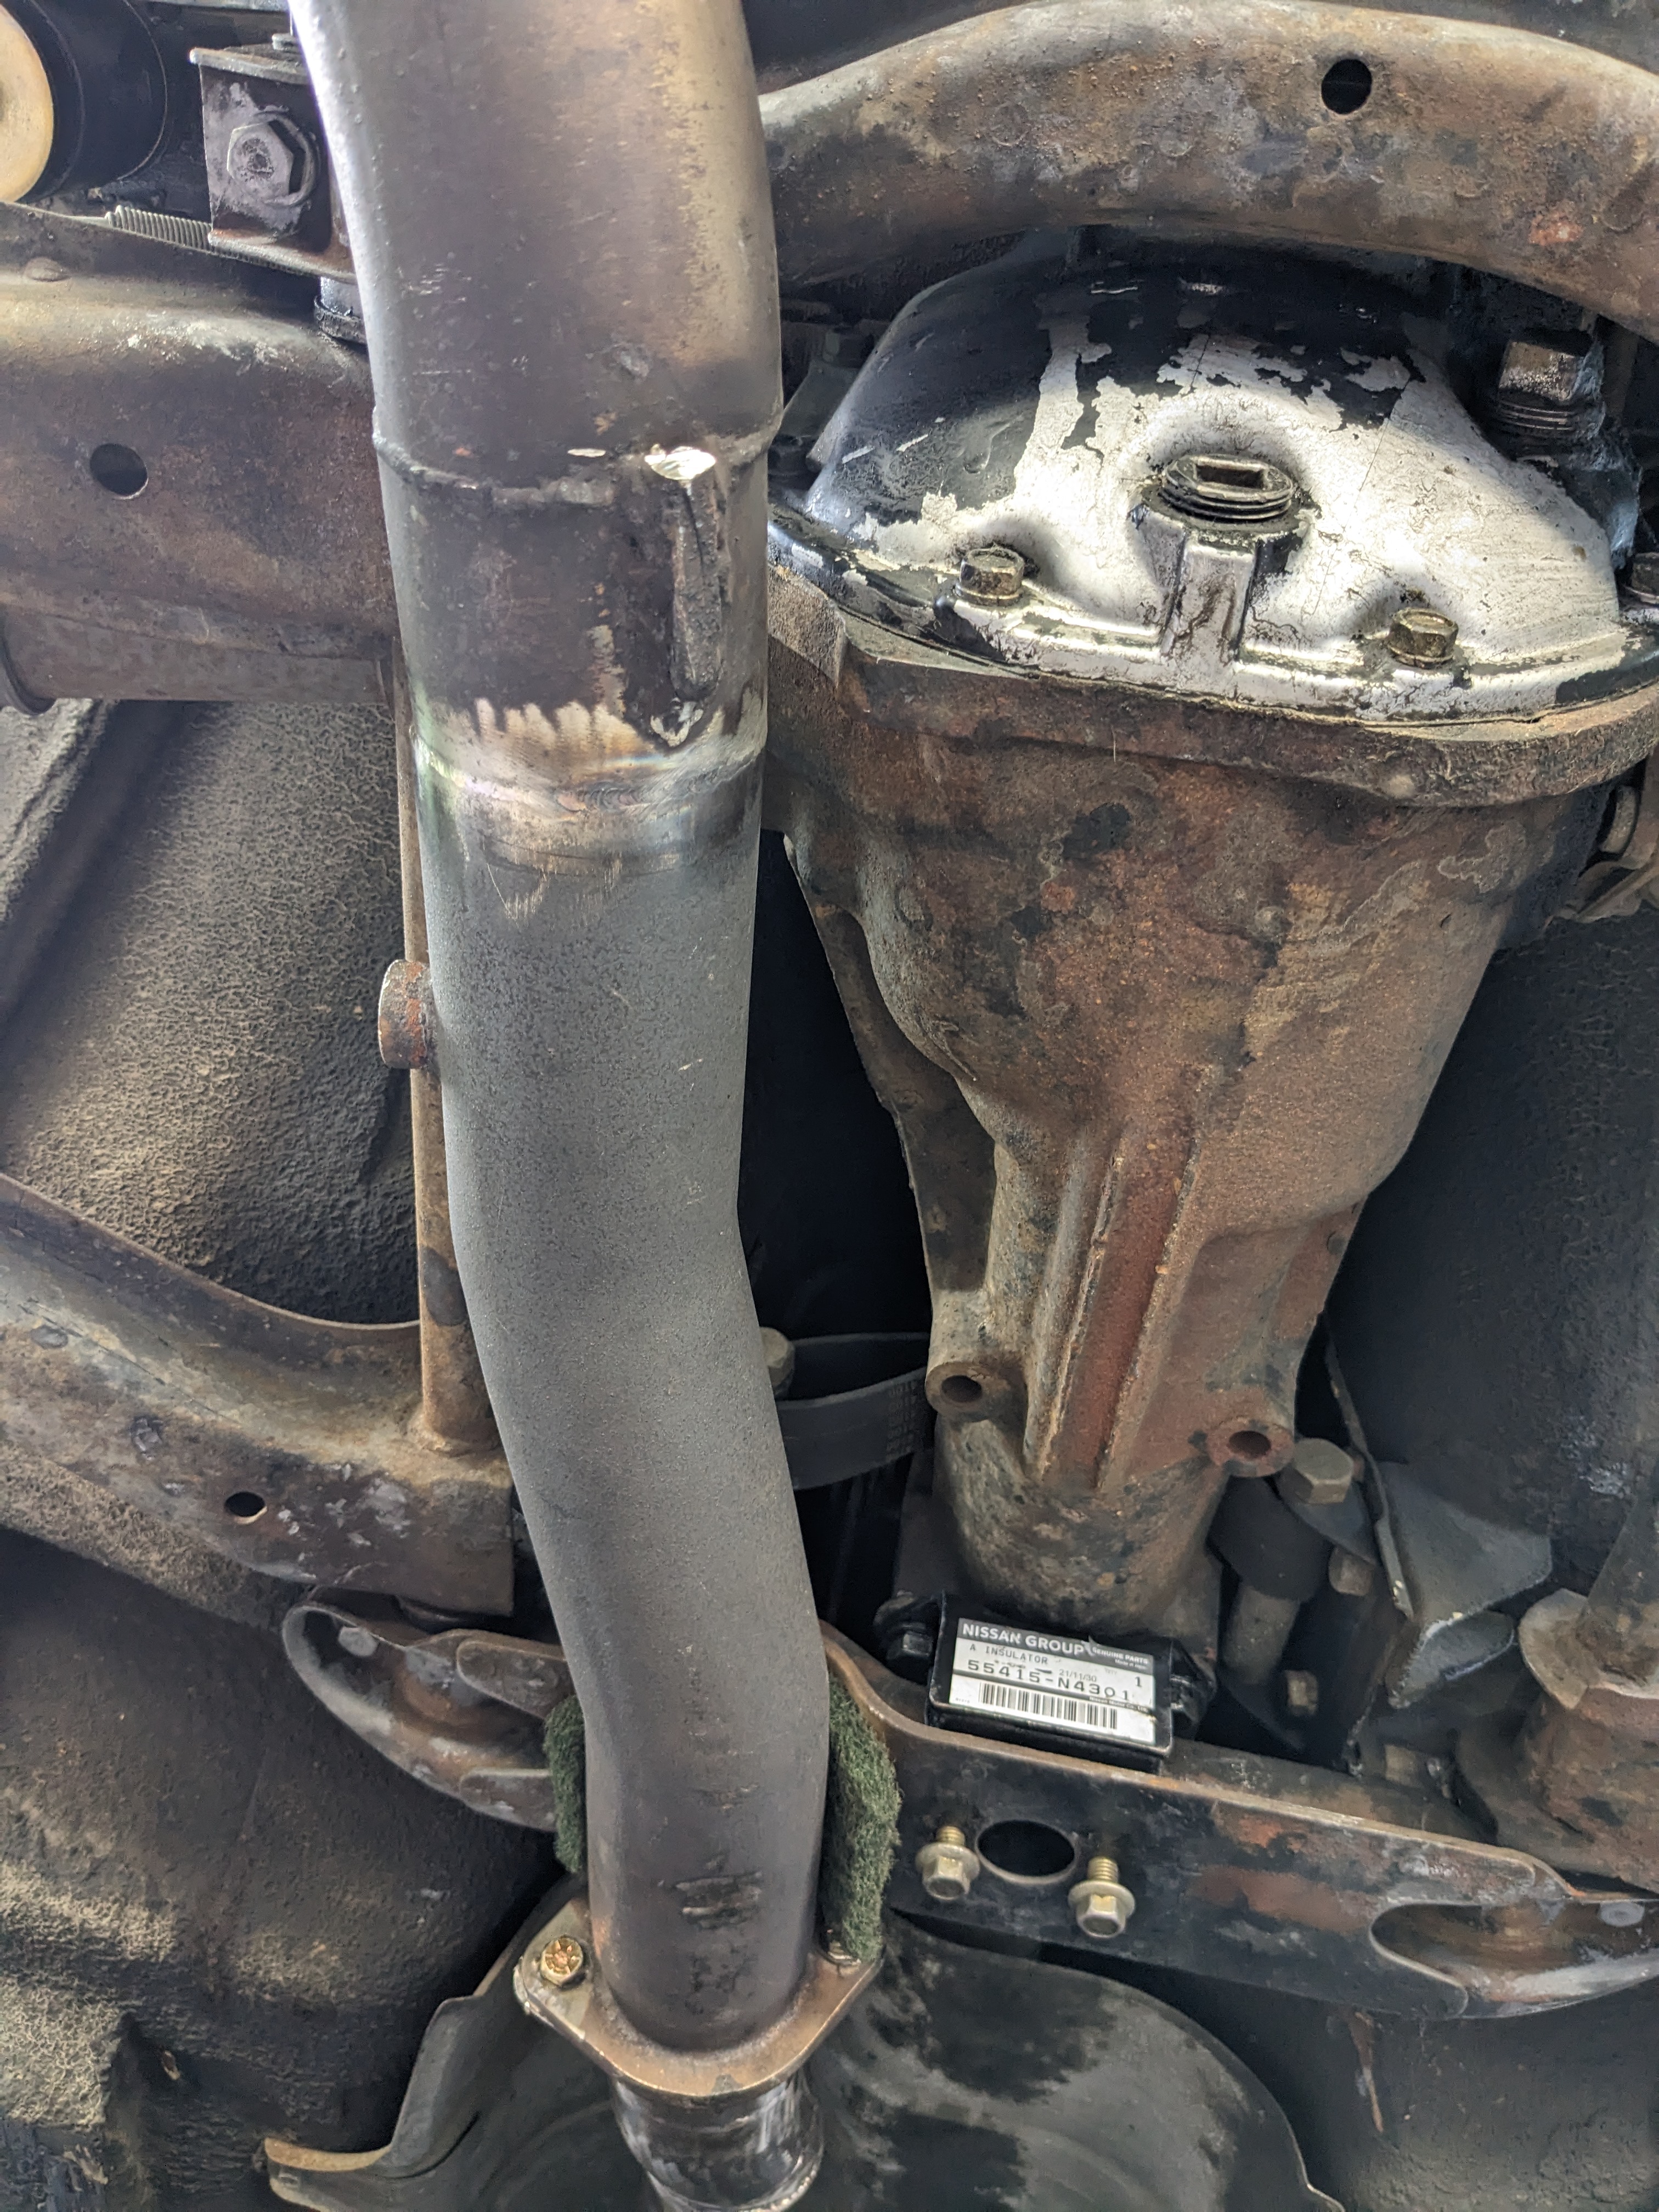
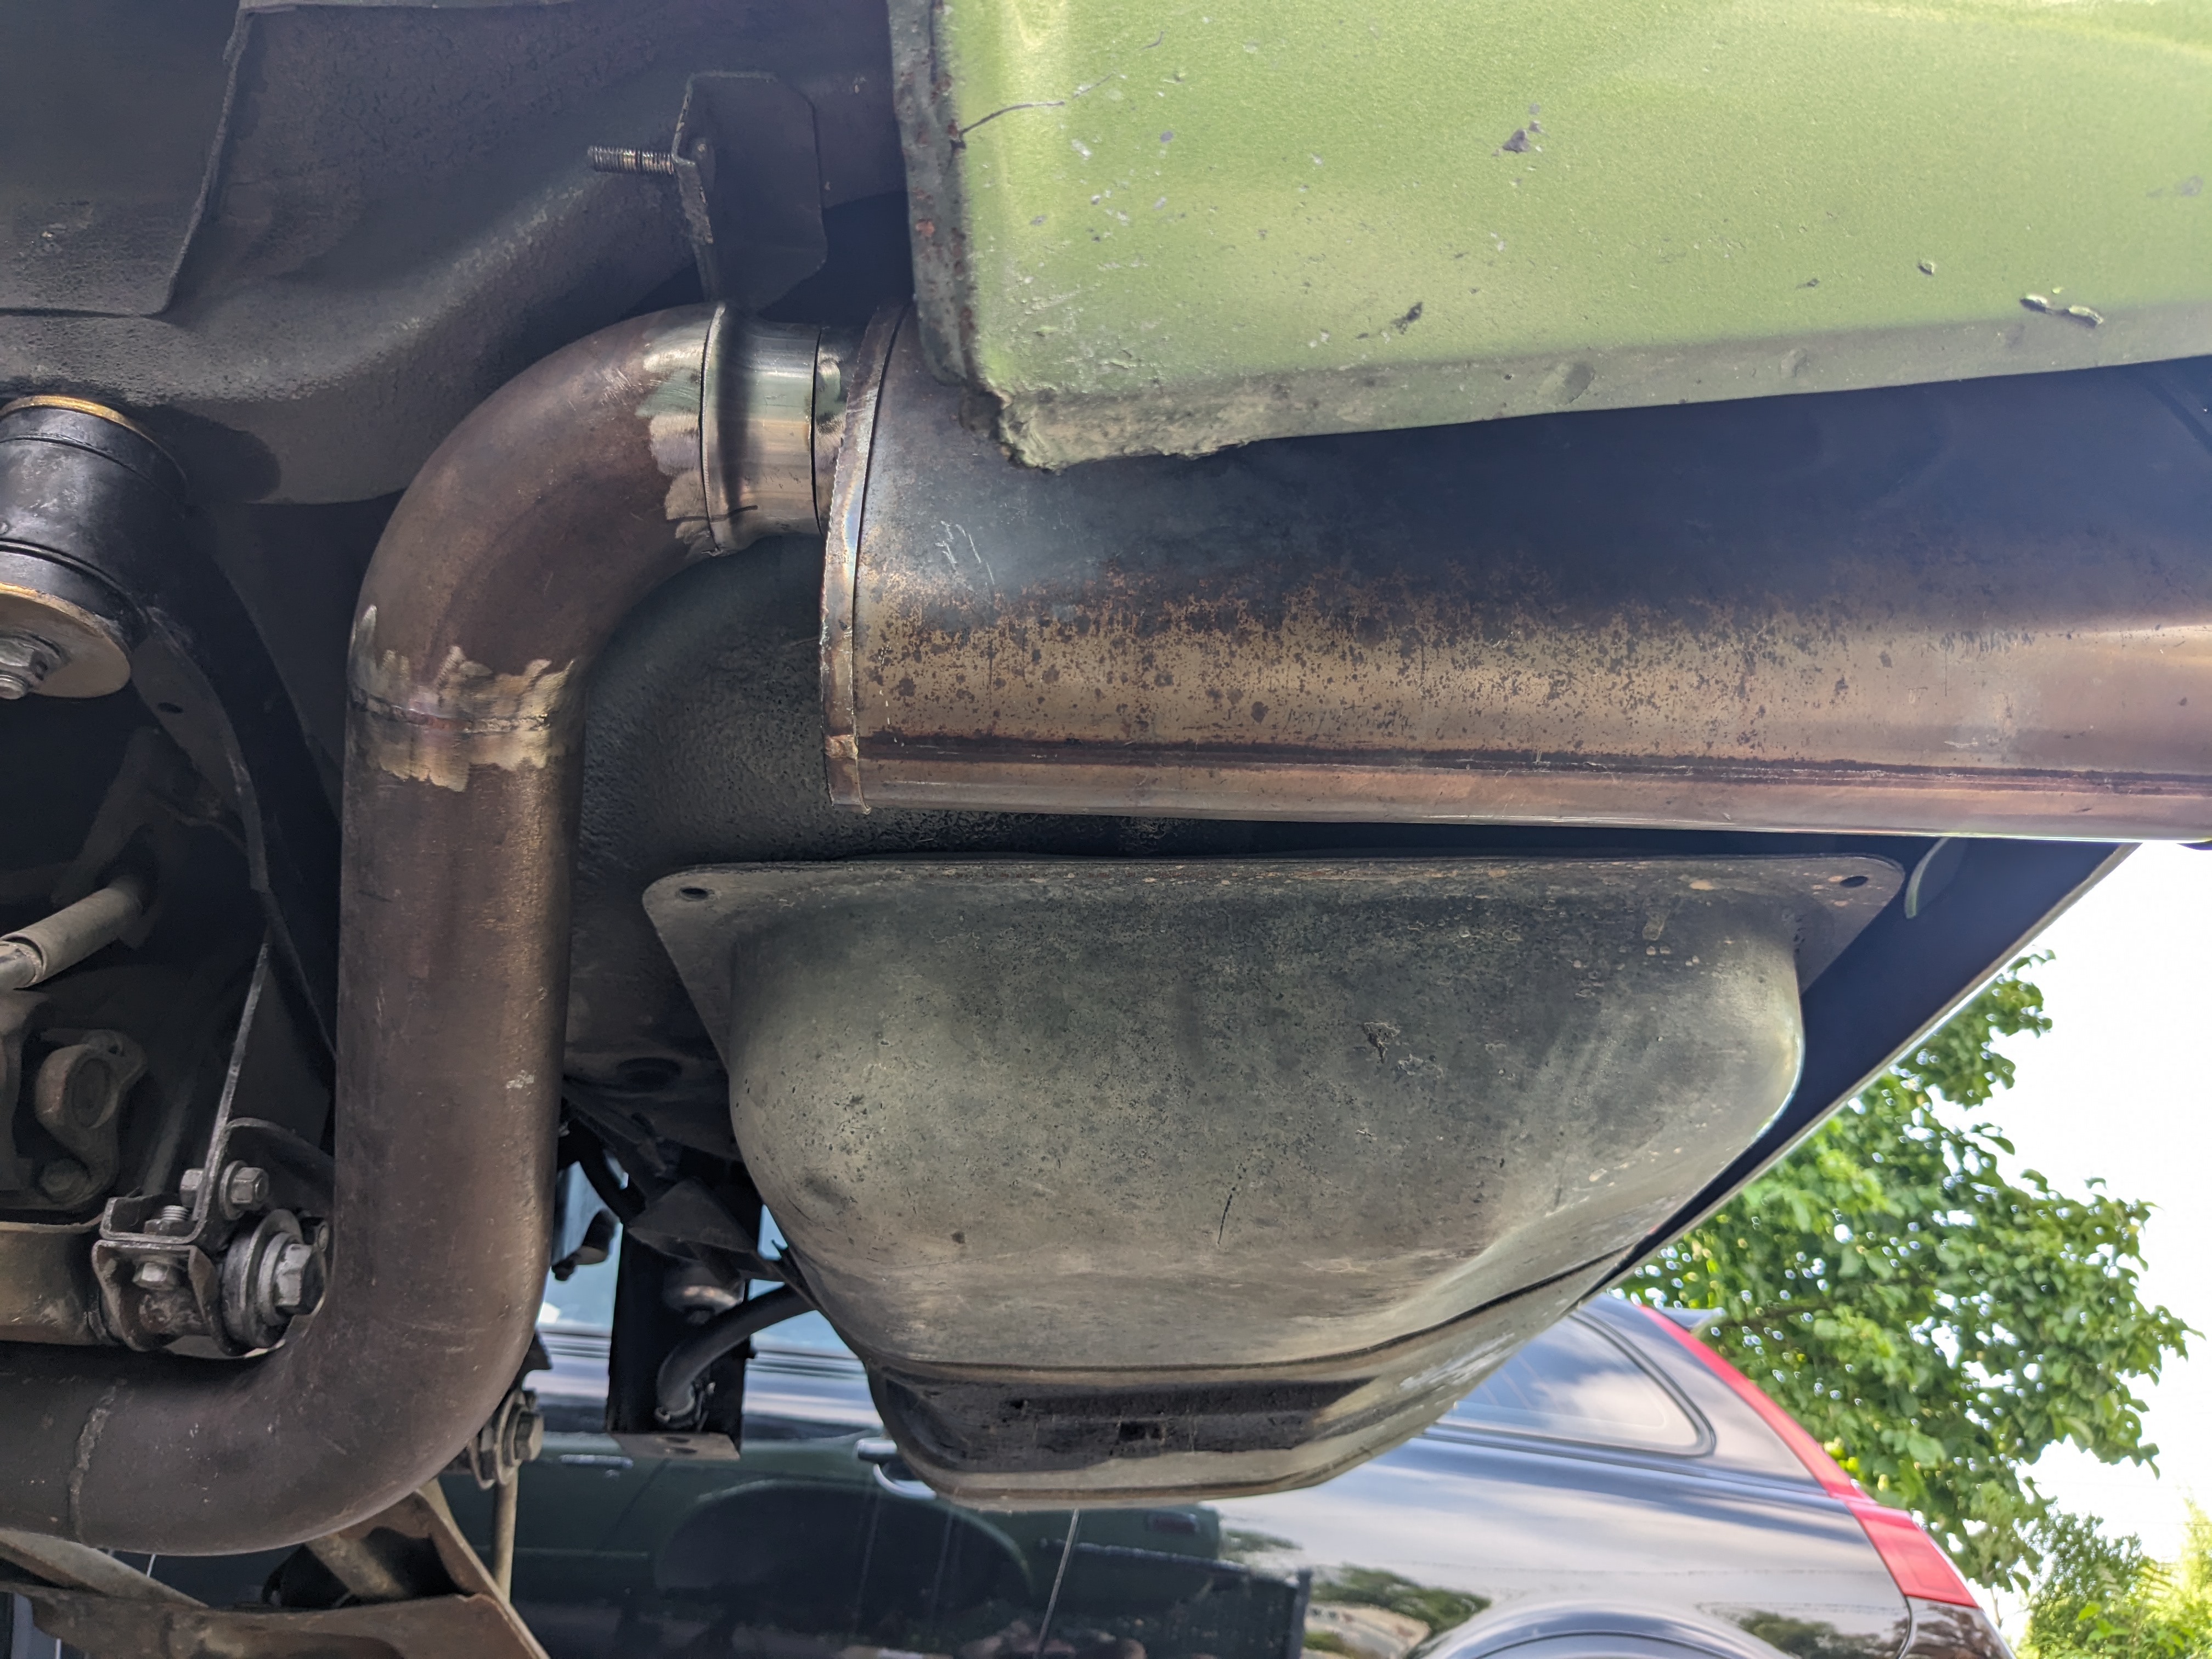
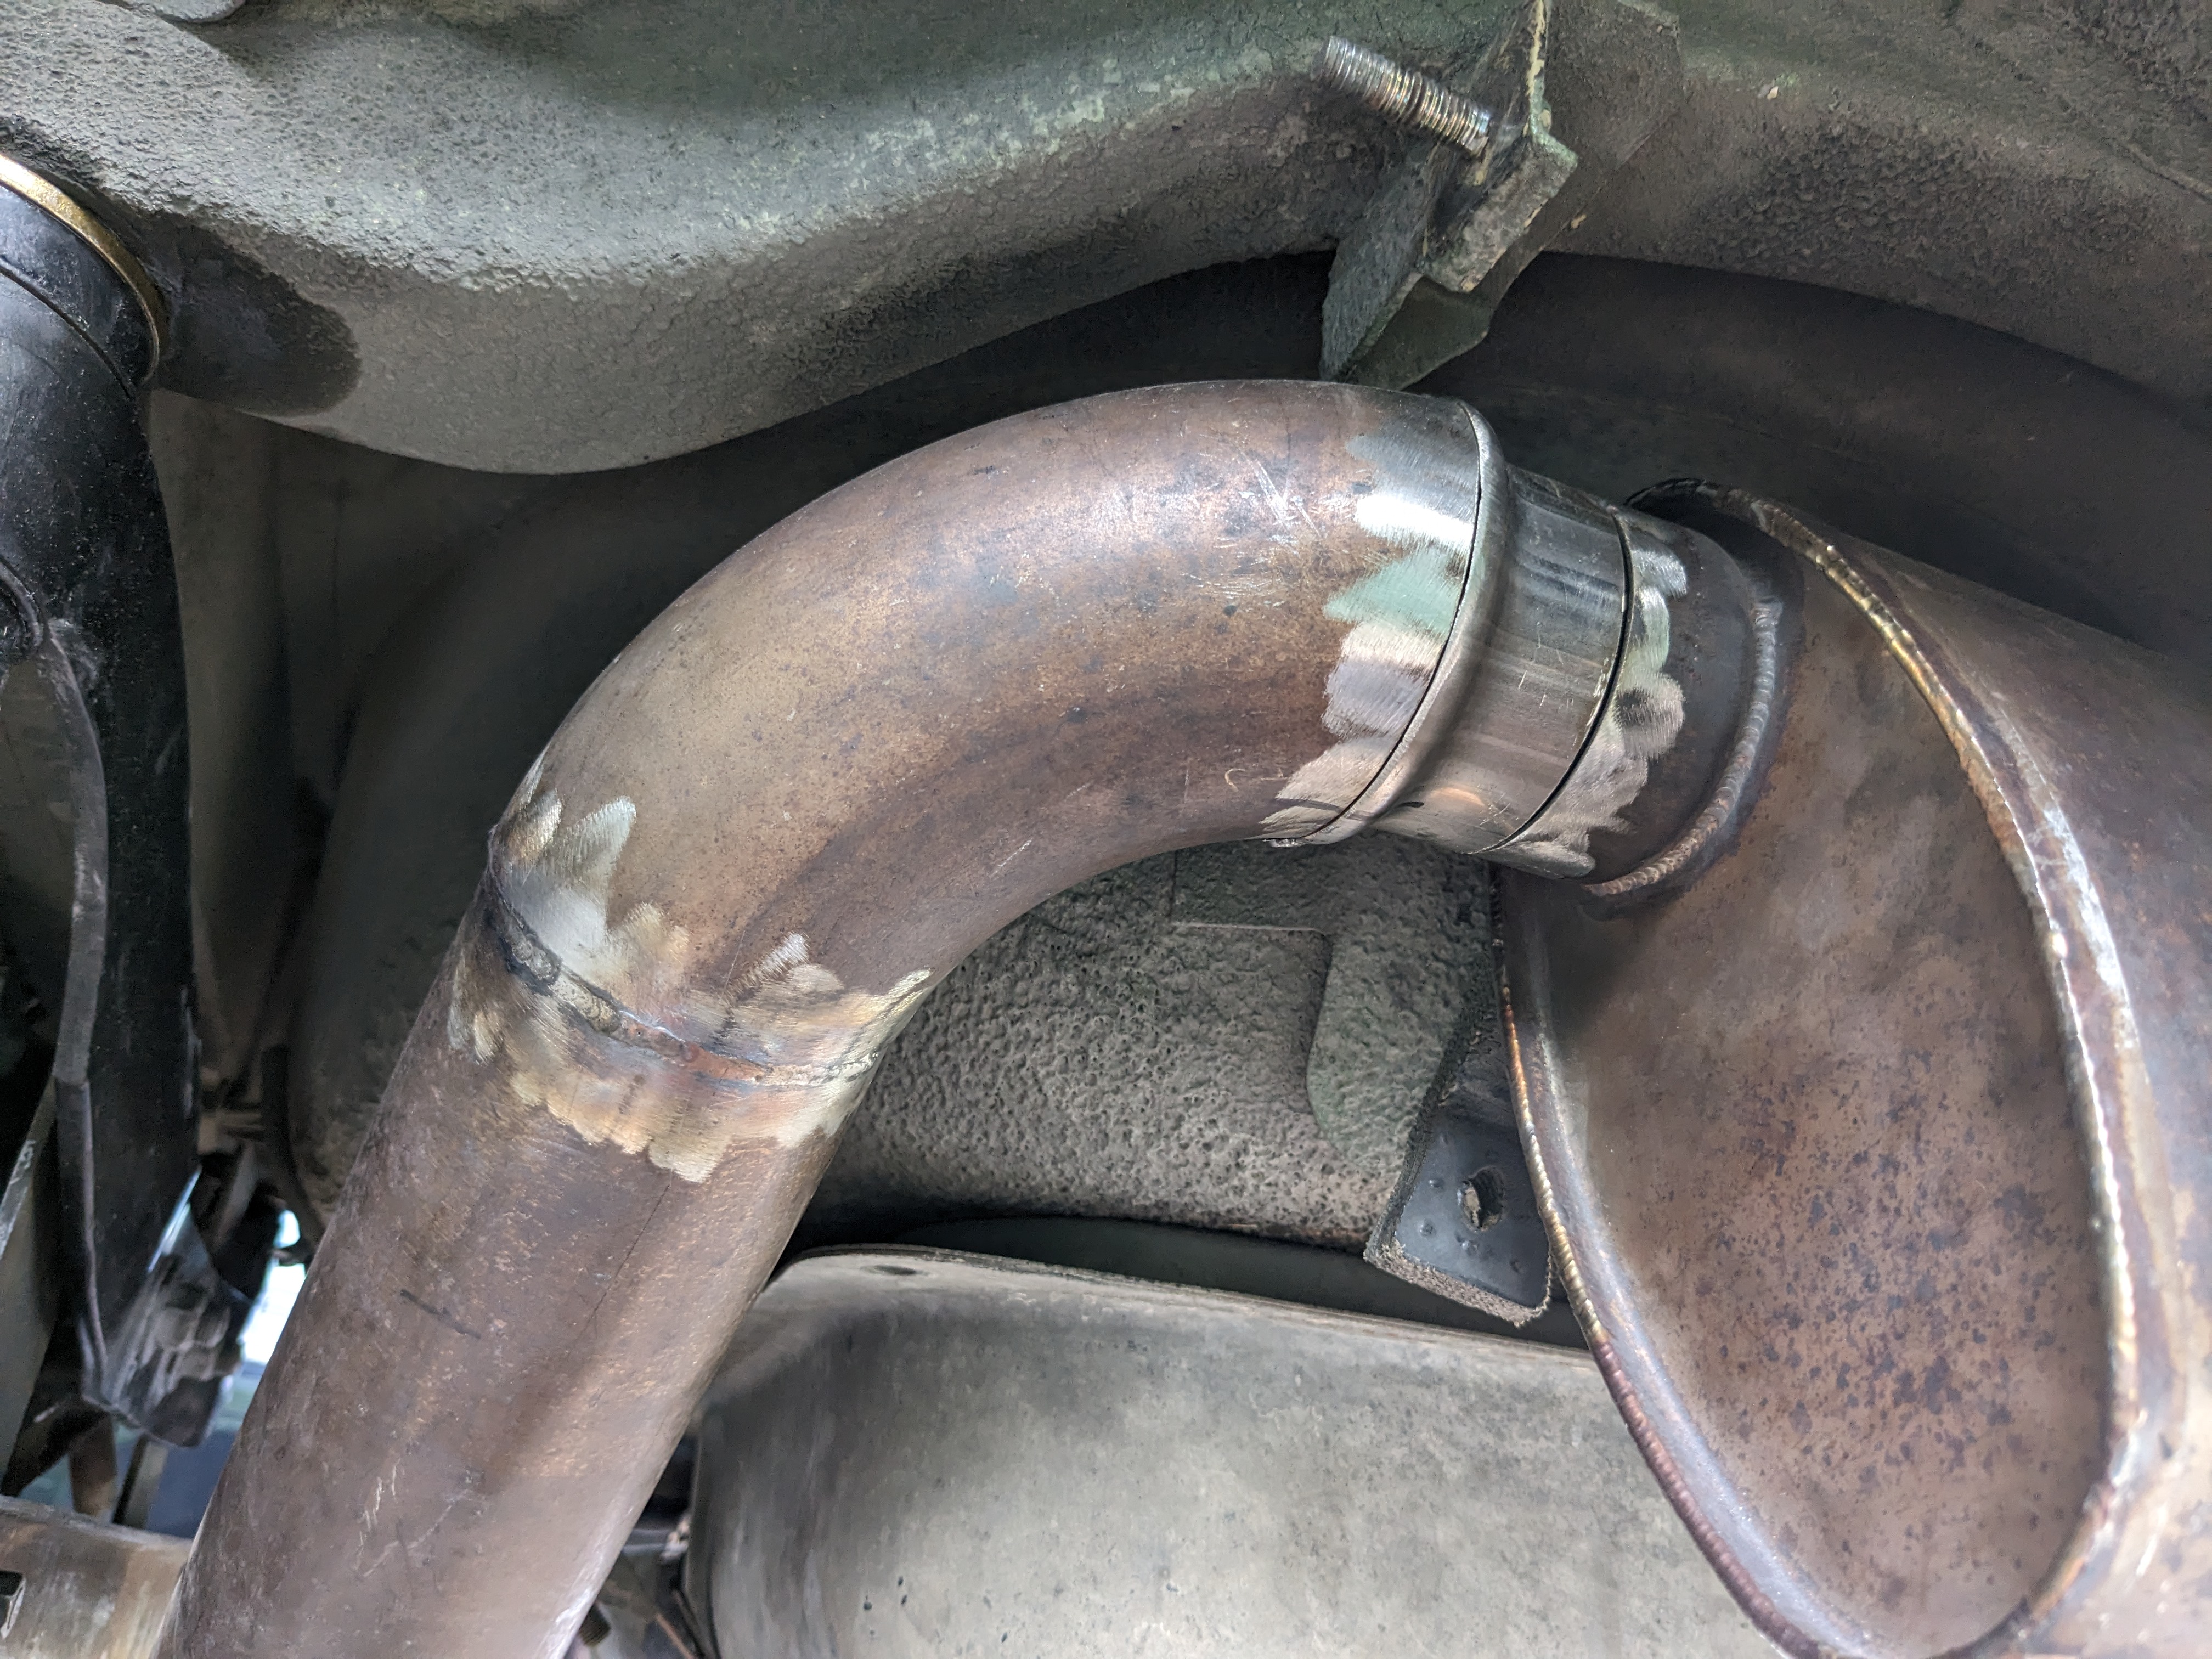
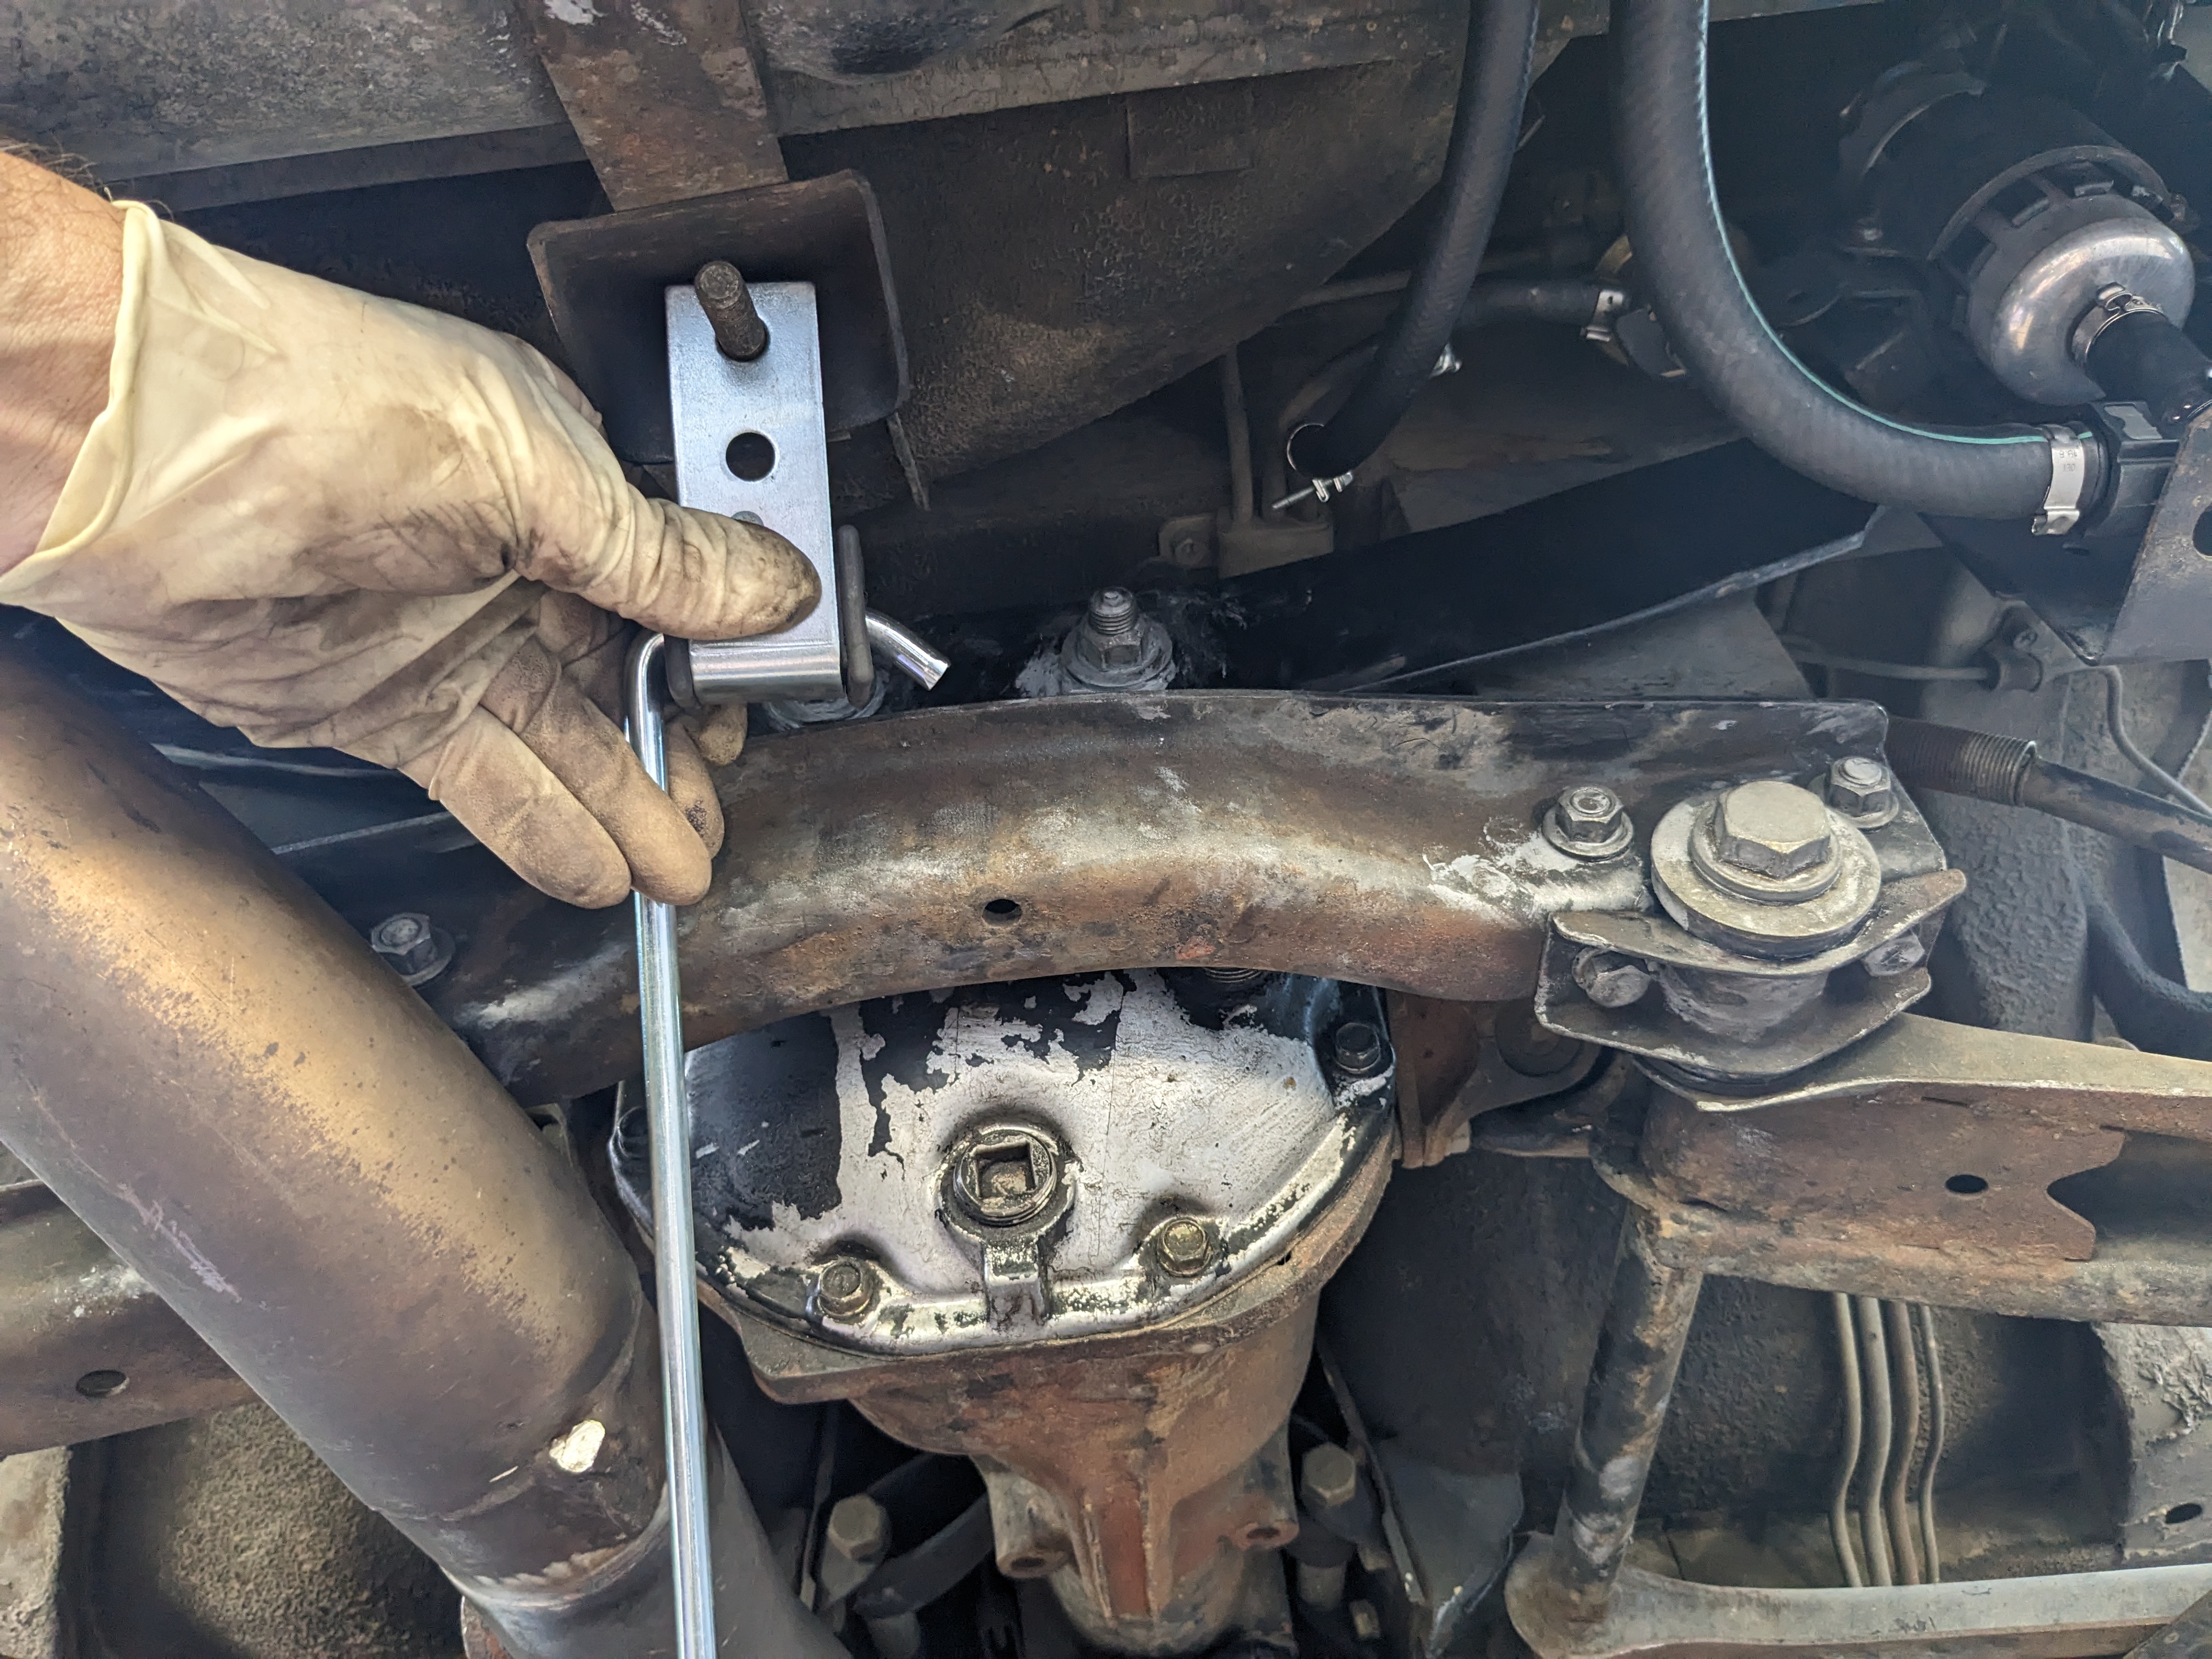
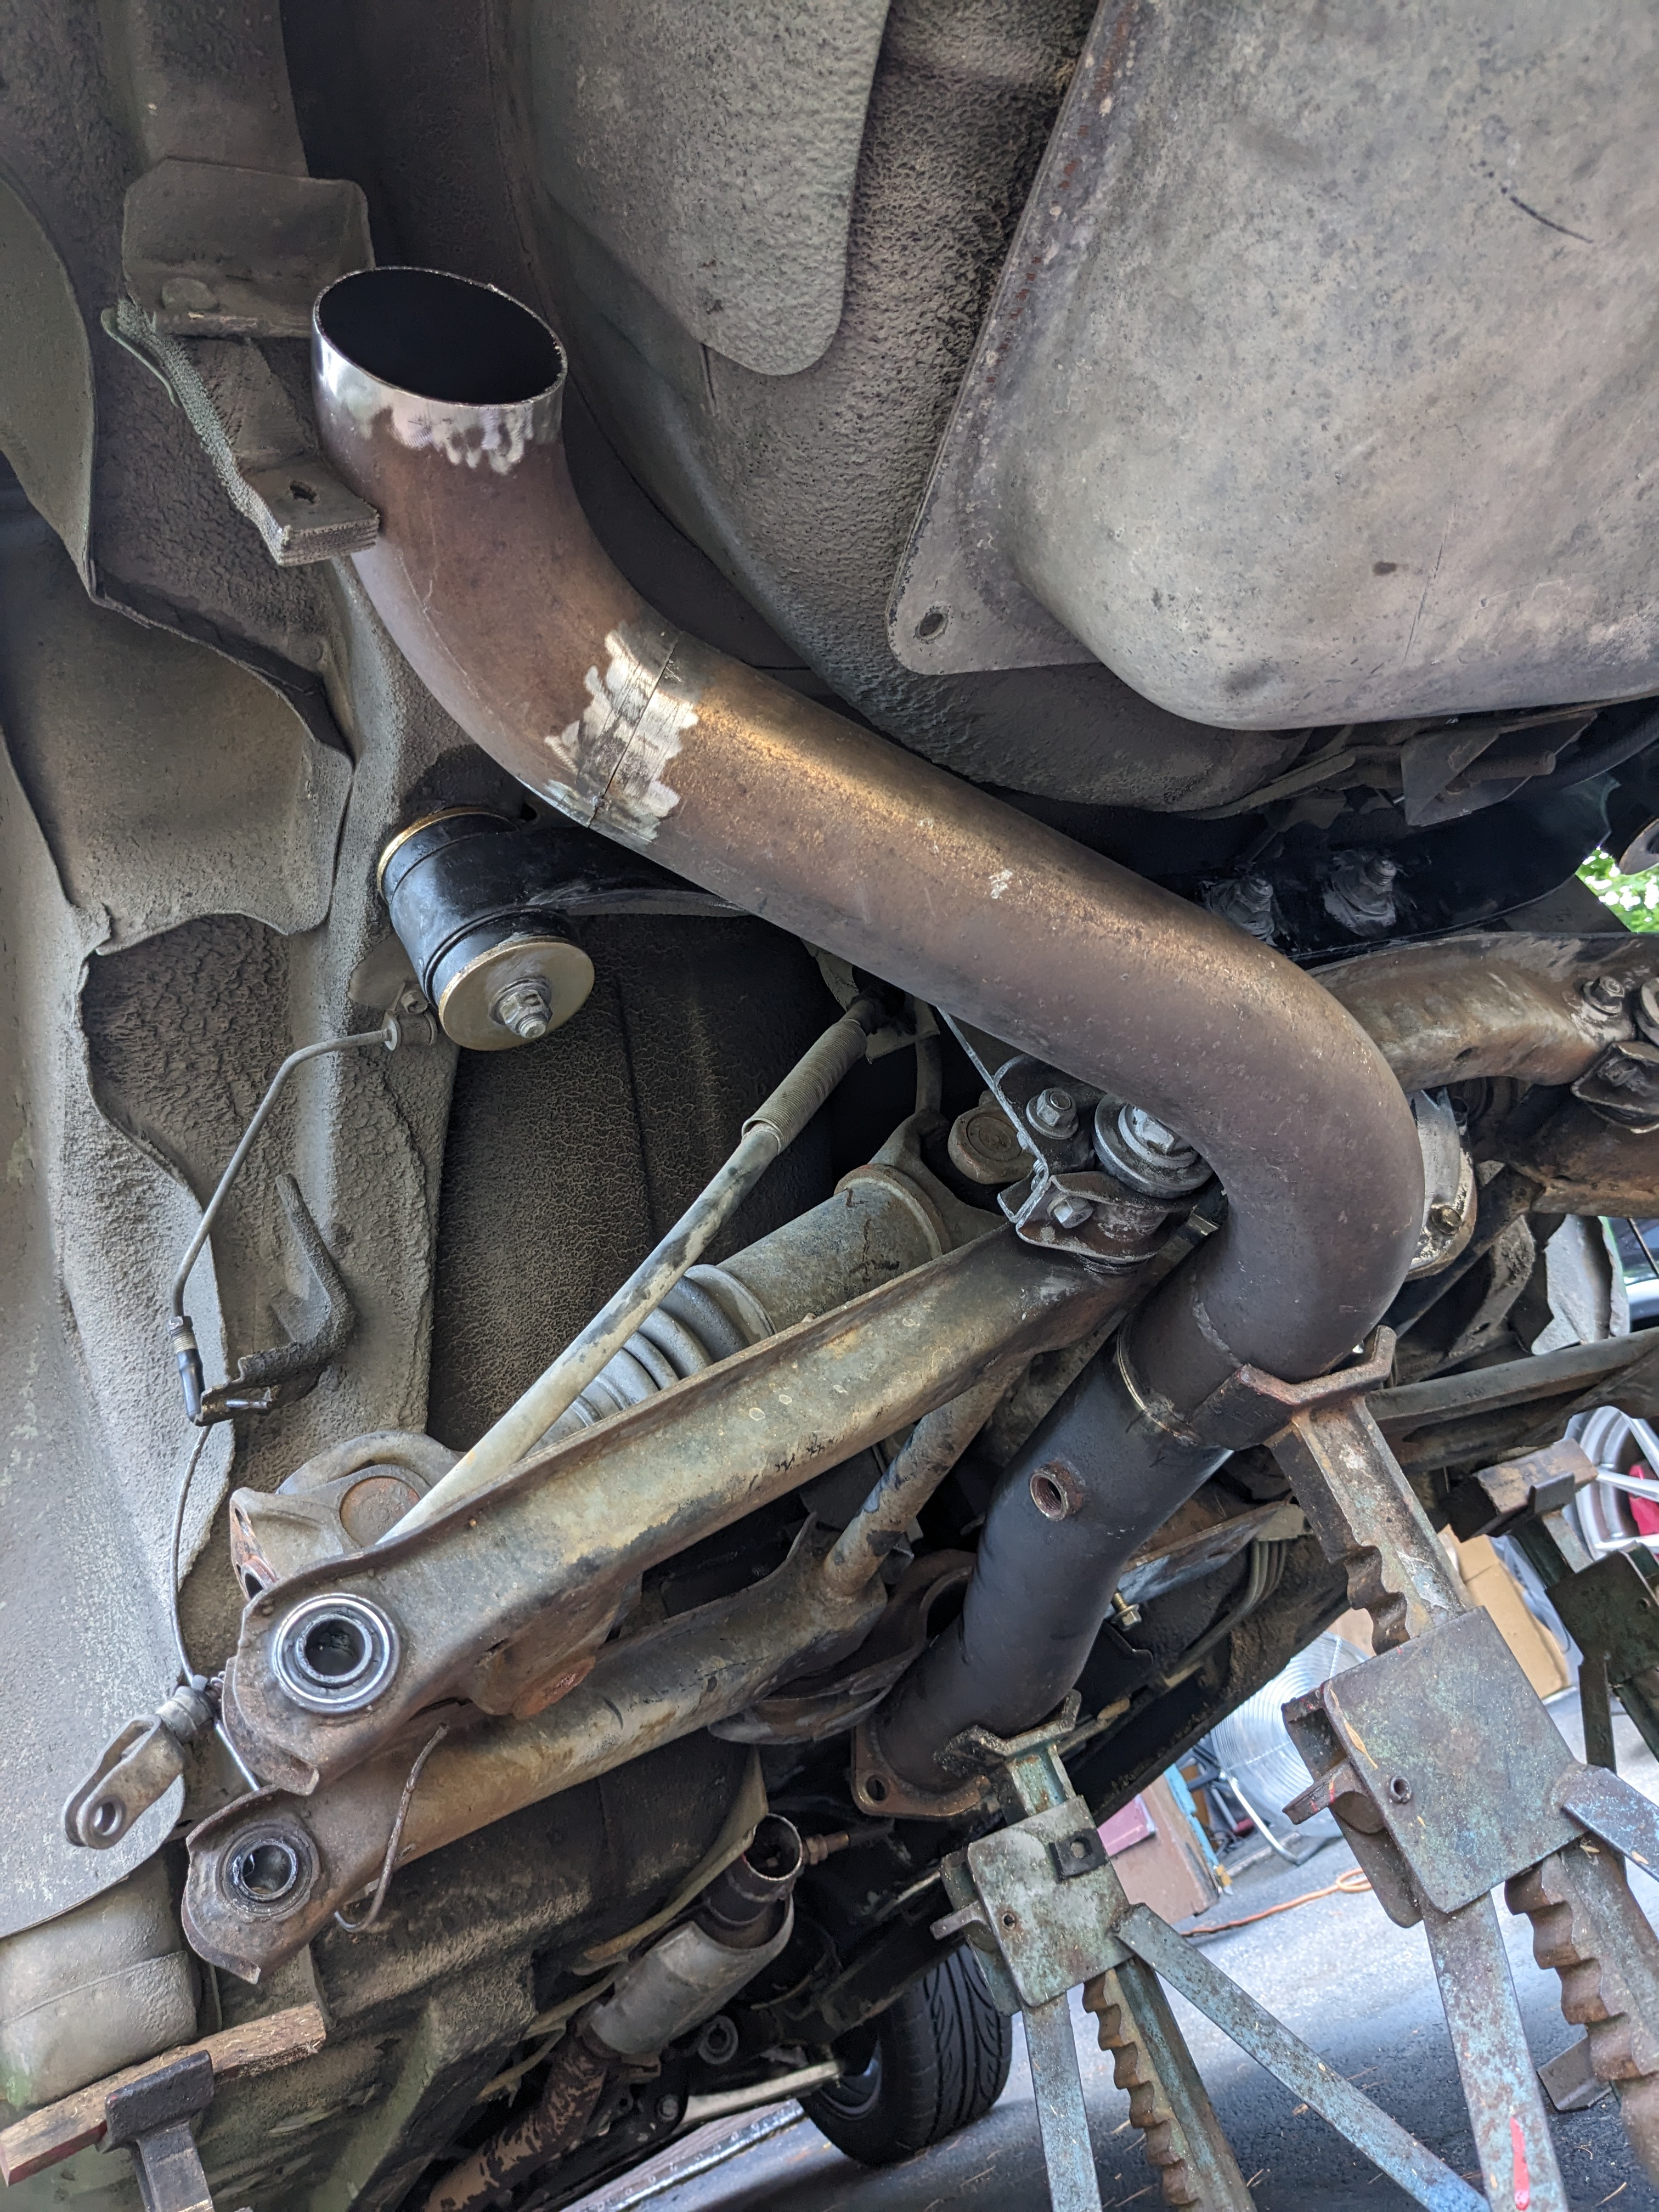
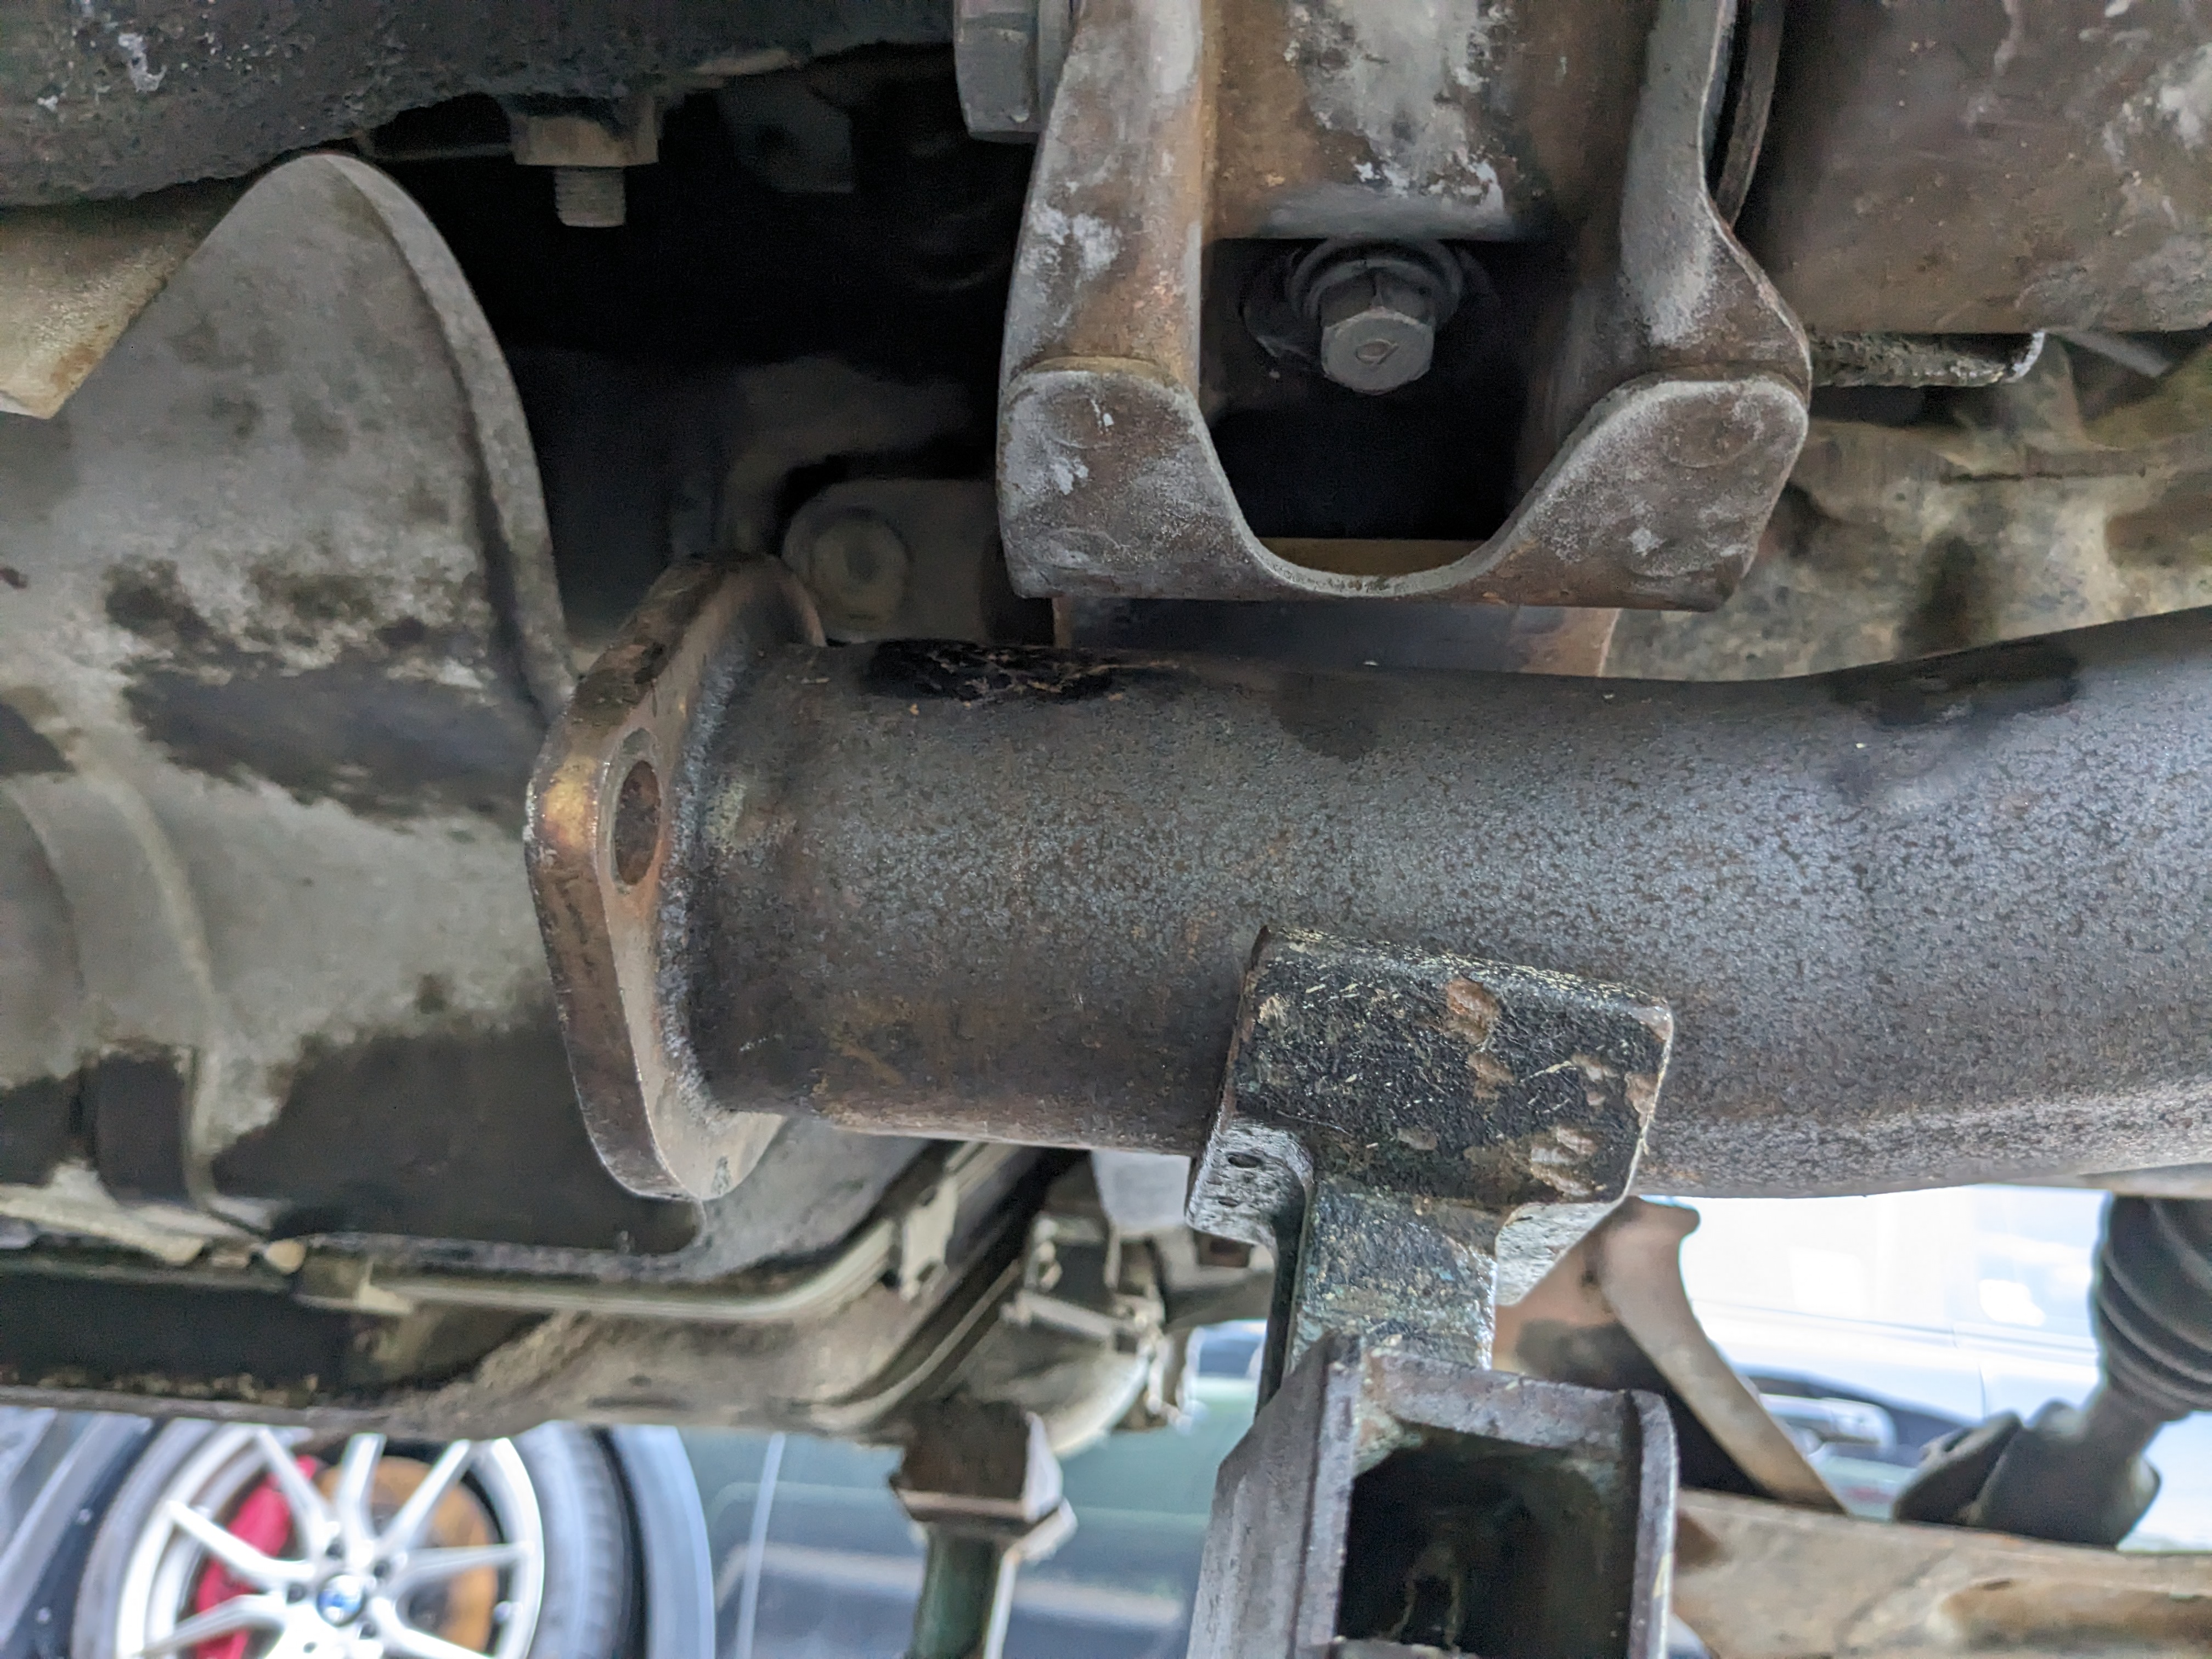
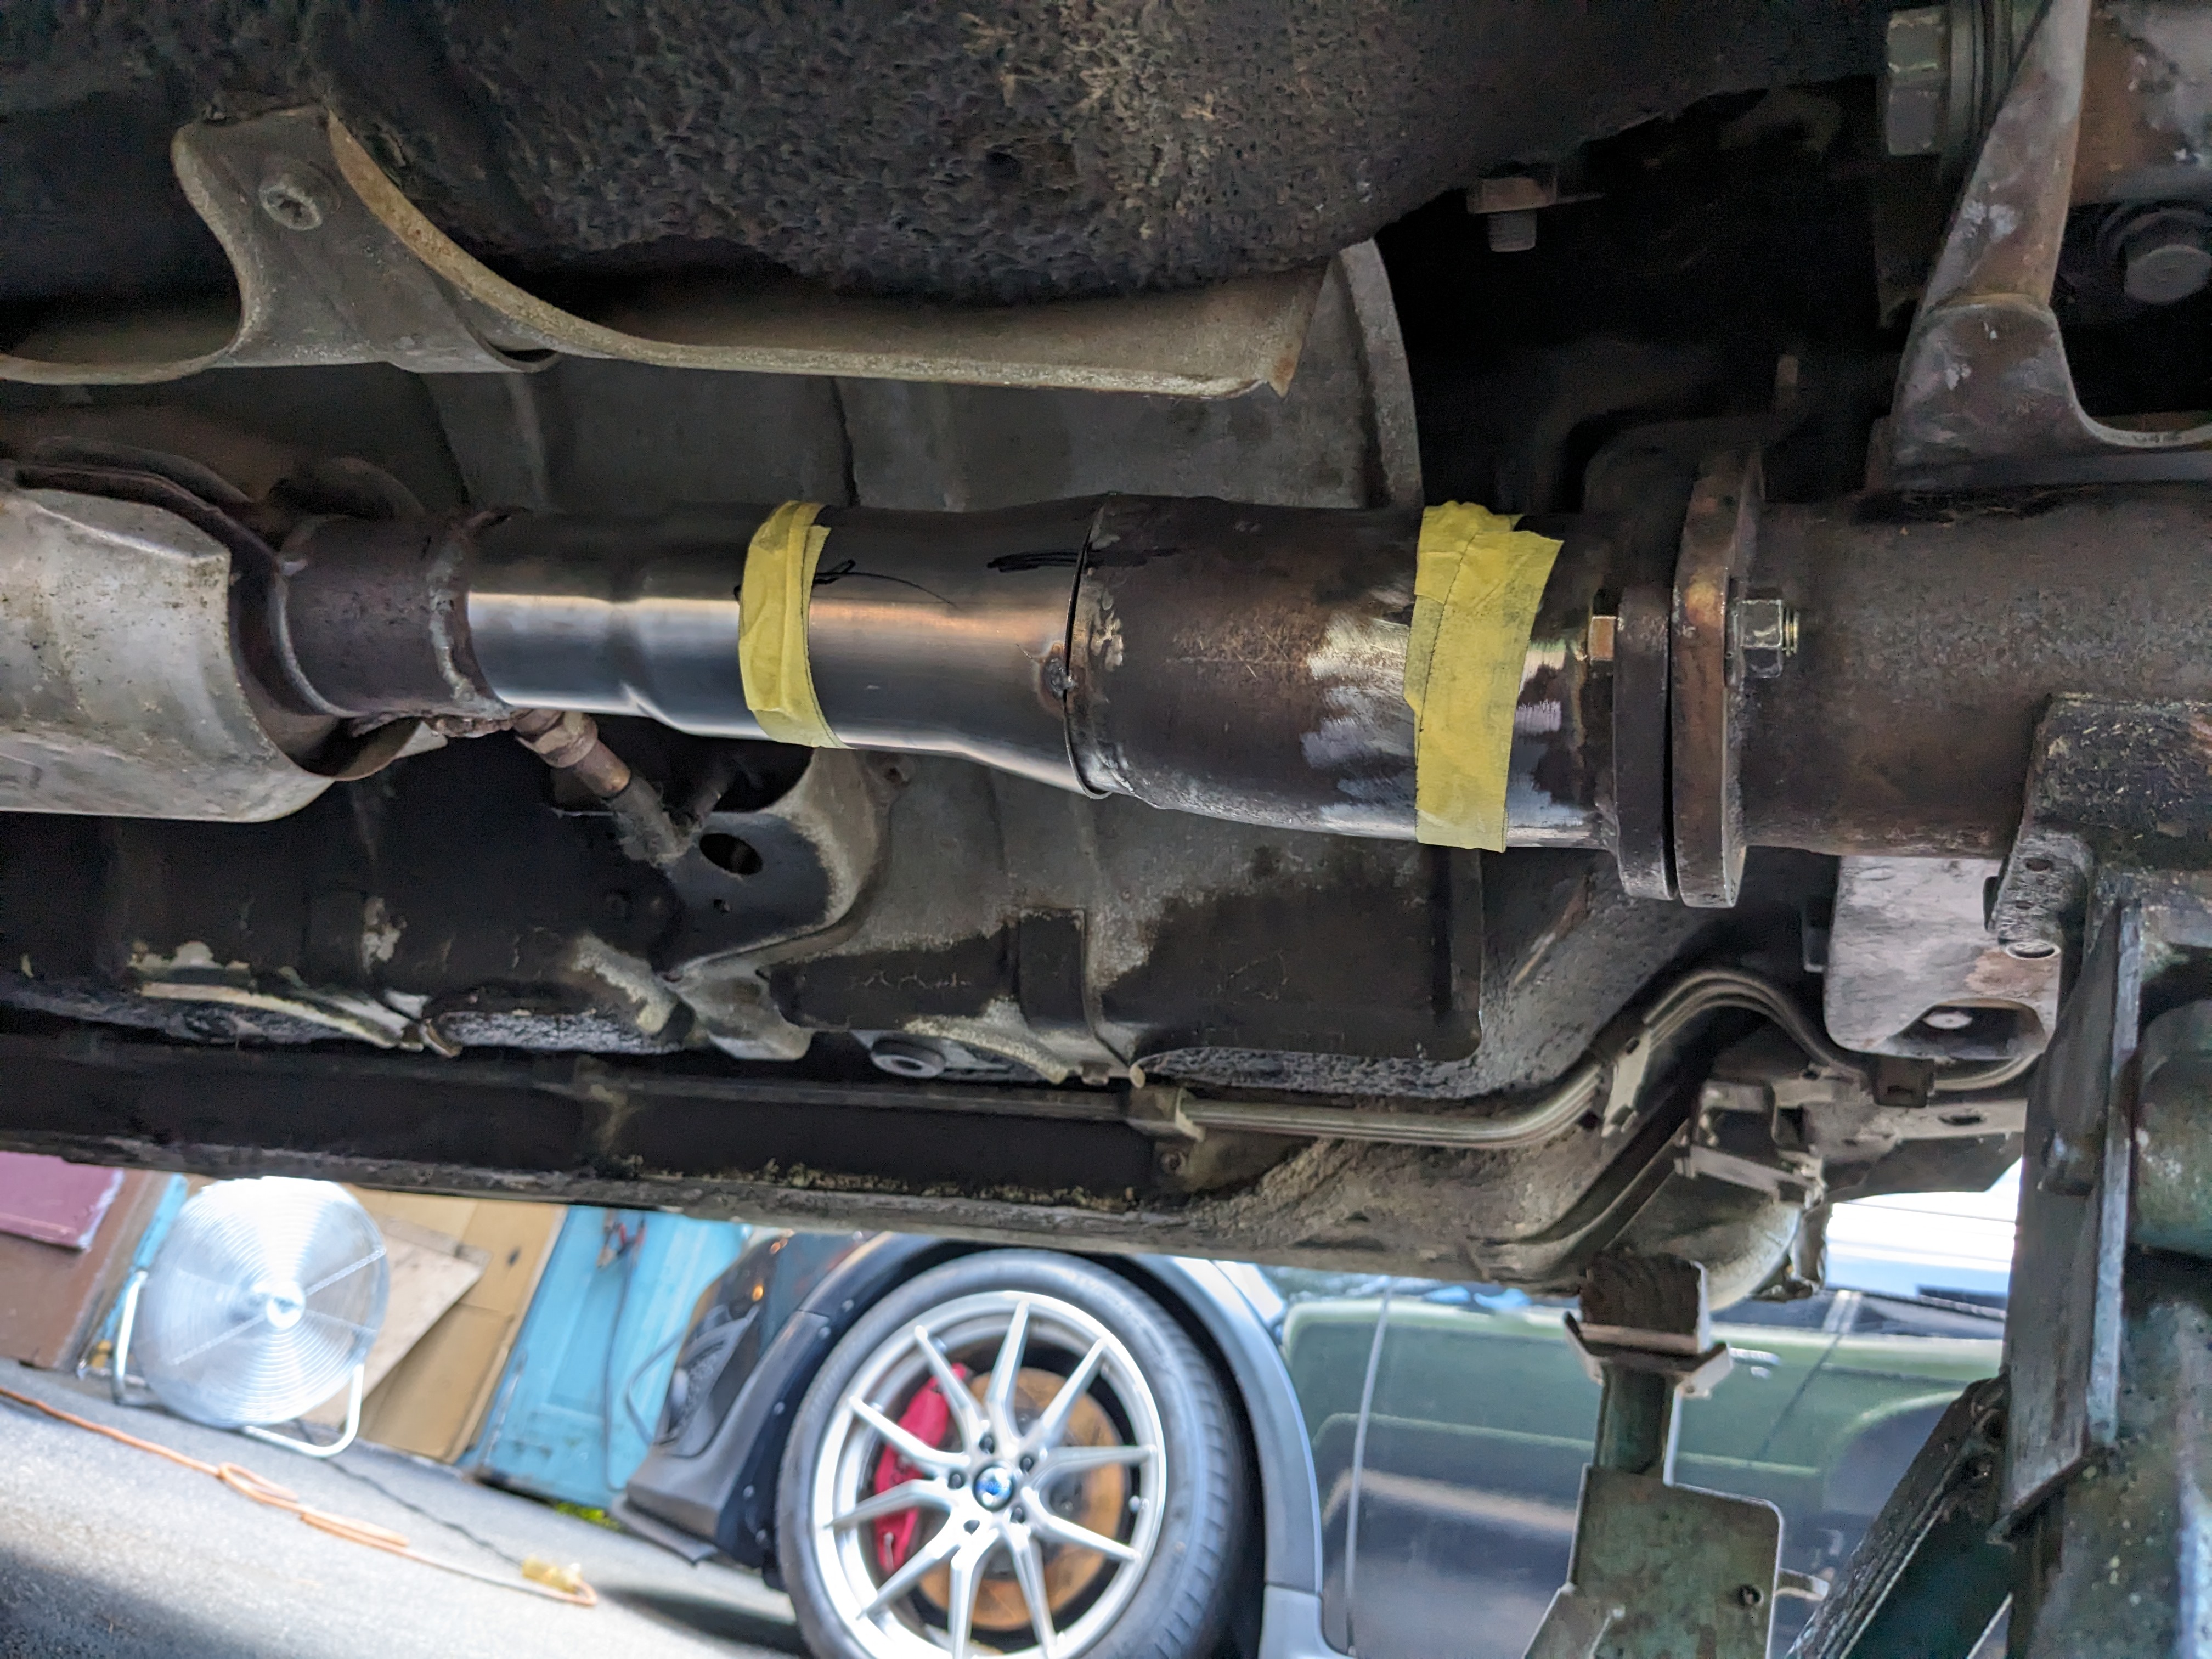
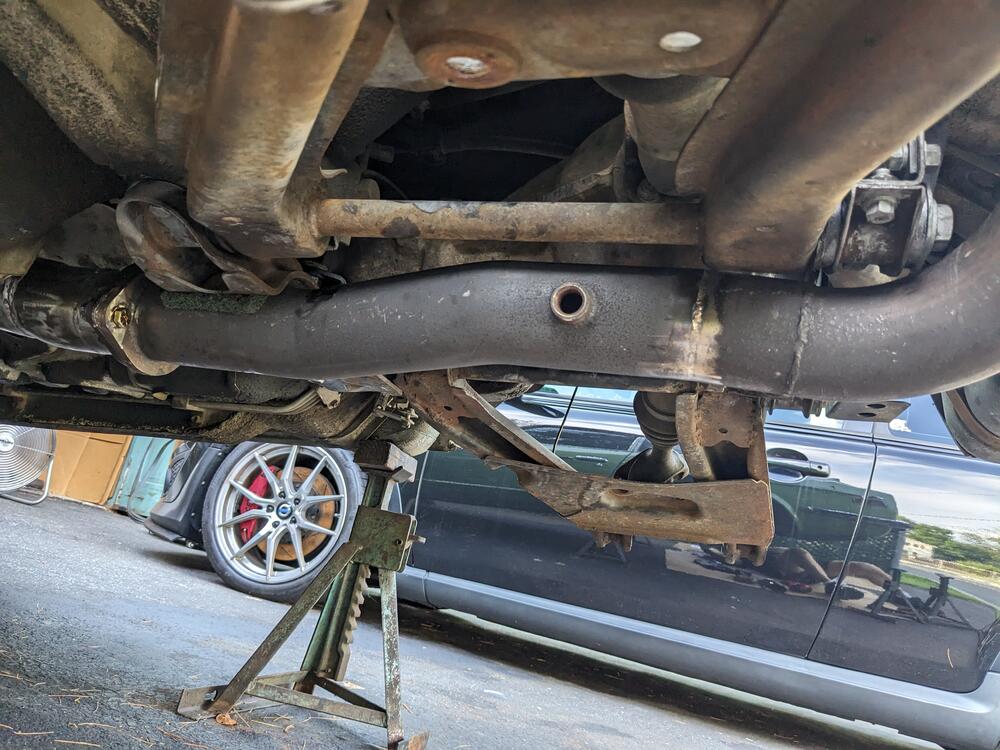
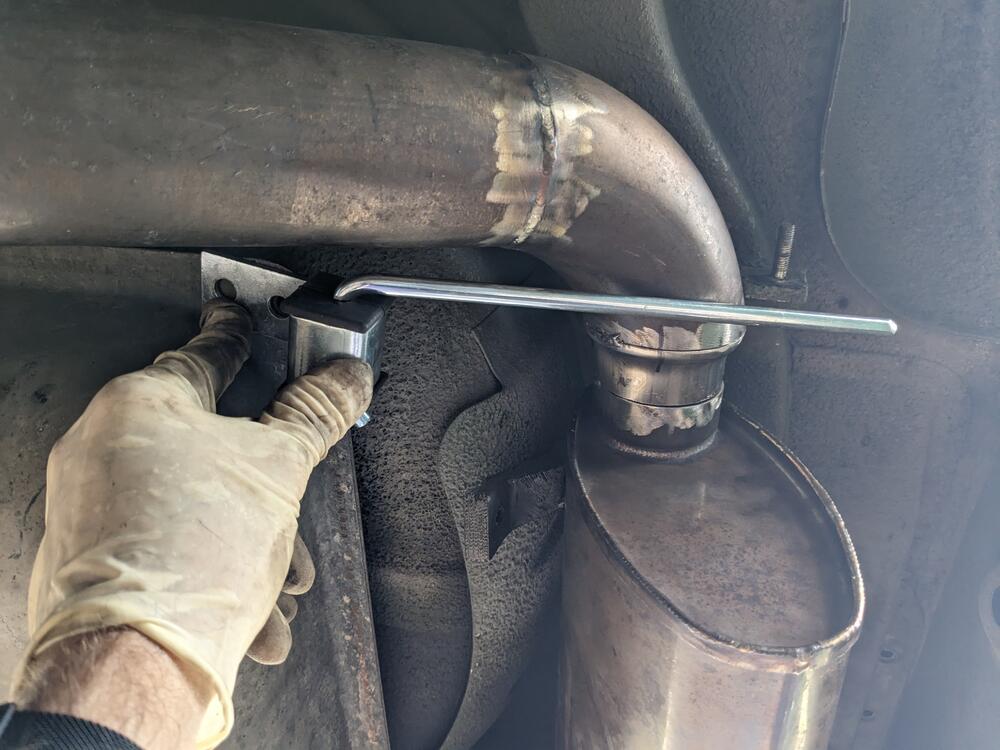
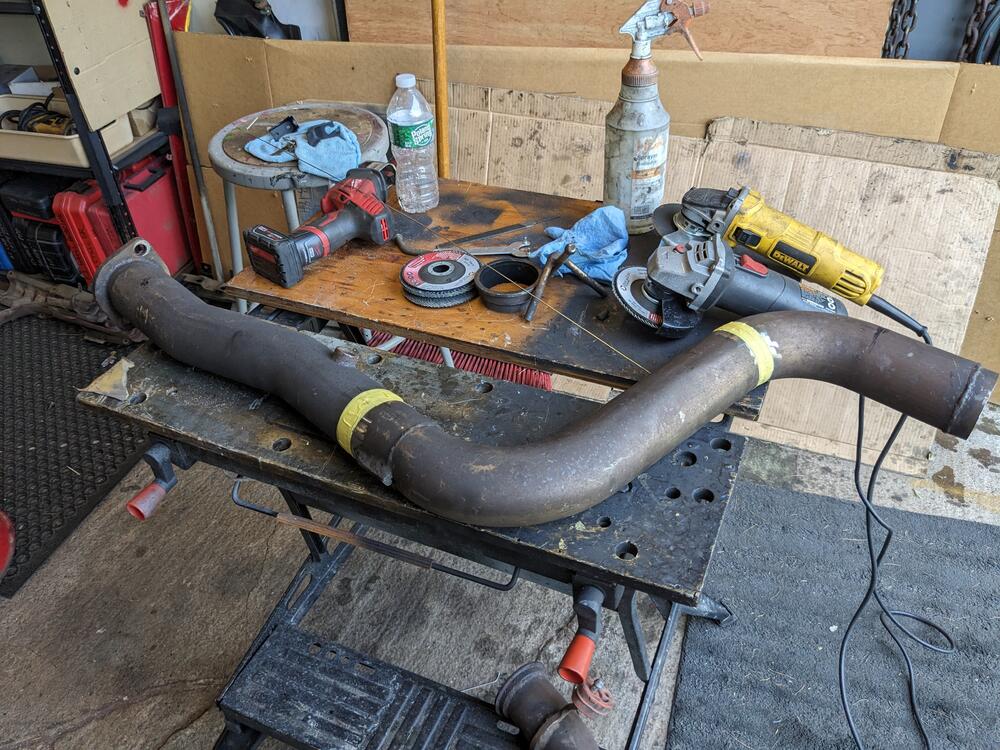
Since I had to cut off the exhaust to deal with all the rear suspension work, I decided to put together a 3" SS rear section, starting after the existing cat, then going to a 2.5" Stainless Works rear muffler (ran it on my X1/9 K24 swap for a few months). The 3" SS exhaust I put together from a exhaust I had made years ago for my Volvo C30, before I converted it to AWD & had to make it all over again. Forgot to take pic before I cut it up - this is what it was Eyeball the general placement, then cut, & tape together to check clearance off the forward crossmember and lower control pivot & diff casing tack welded, then recheck fit I'll be adding a 3" - 2.5" step from this into the muffler looks pretty good step down & dogleg to attach to existing exhaust/cat. I'll rework the entire exhaust forward of the 2 bolt 3" flange when I do the VQ35DE 2"-2.5" - 2.5"- 3" steps


 1 point
 -
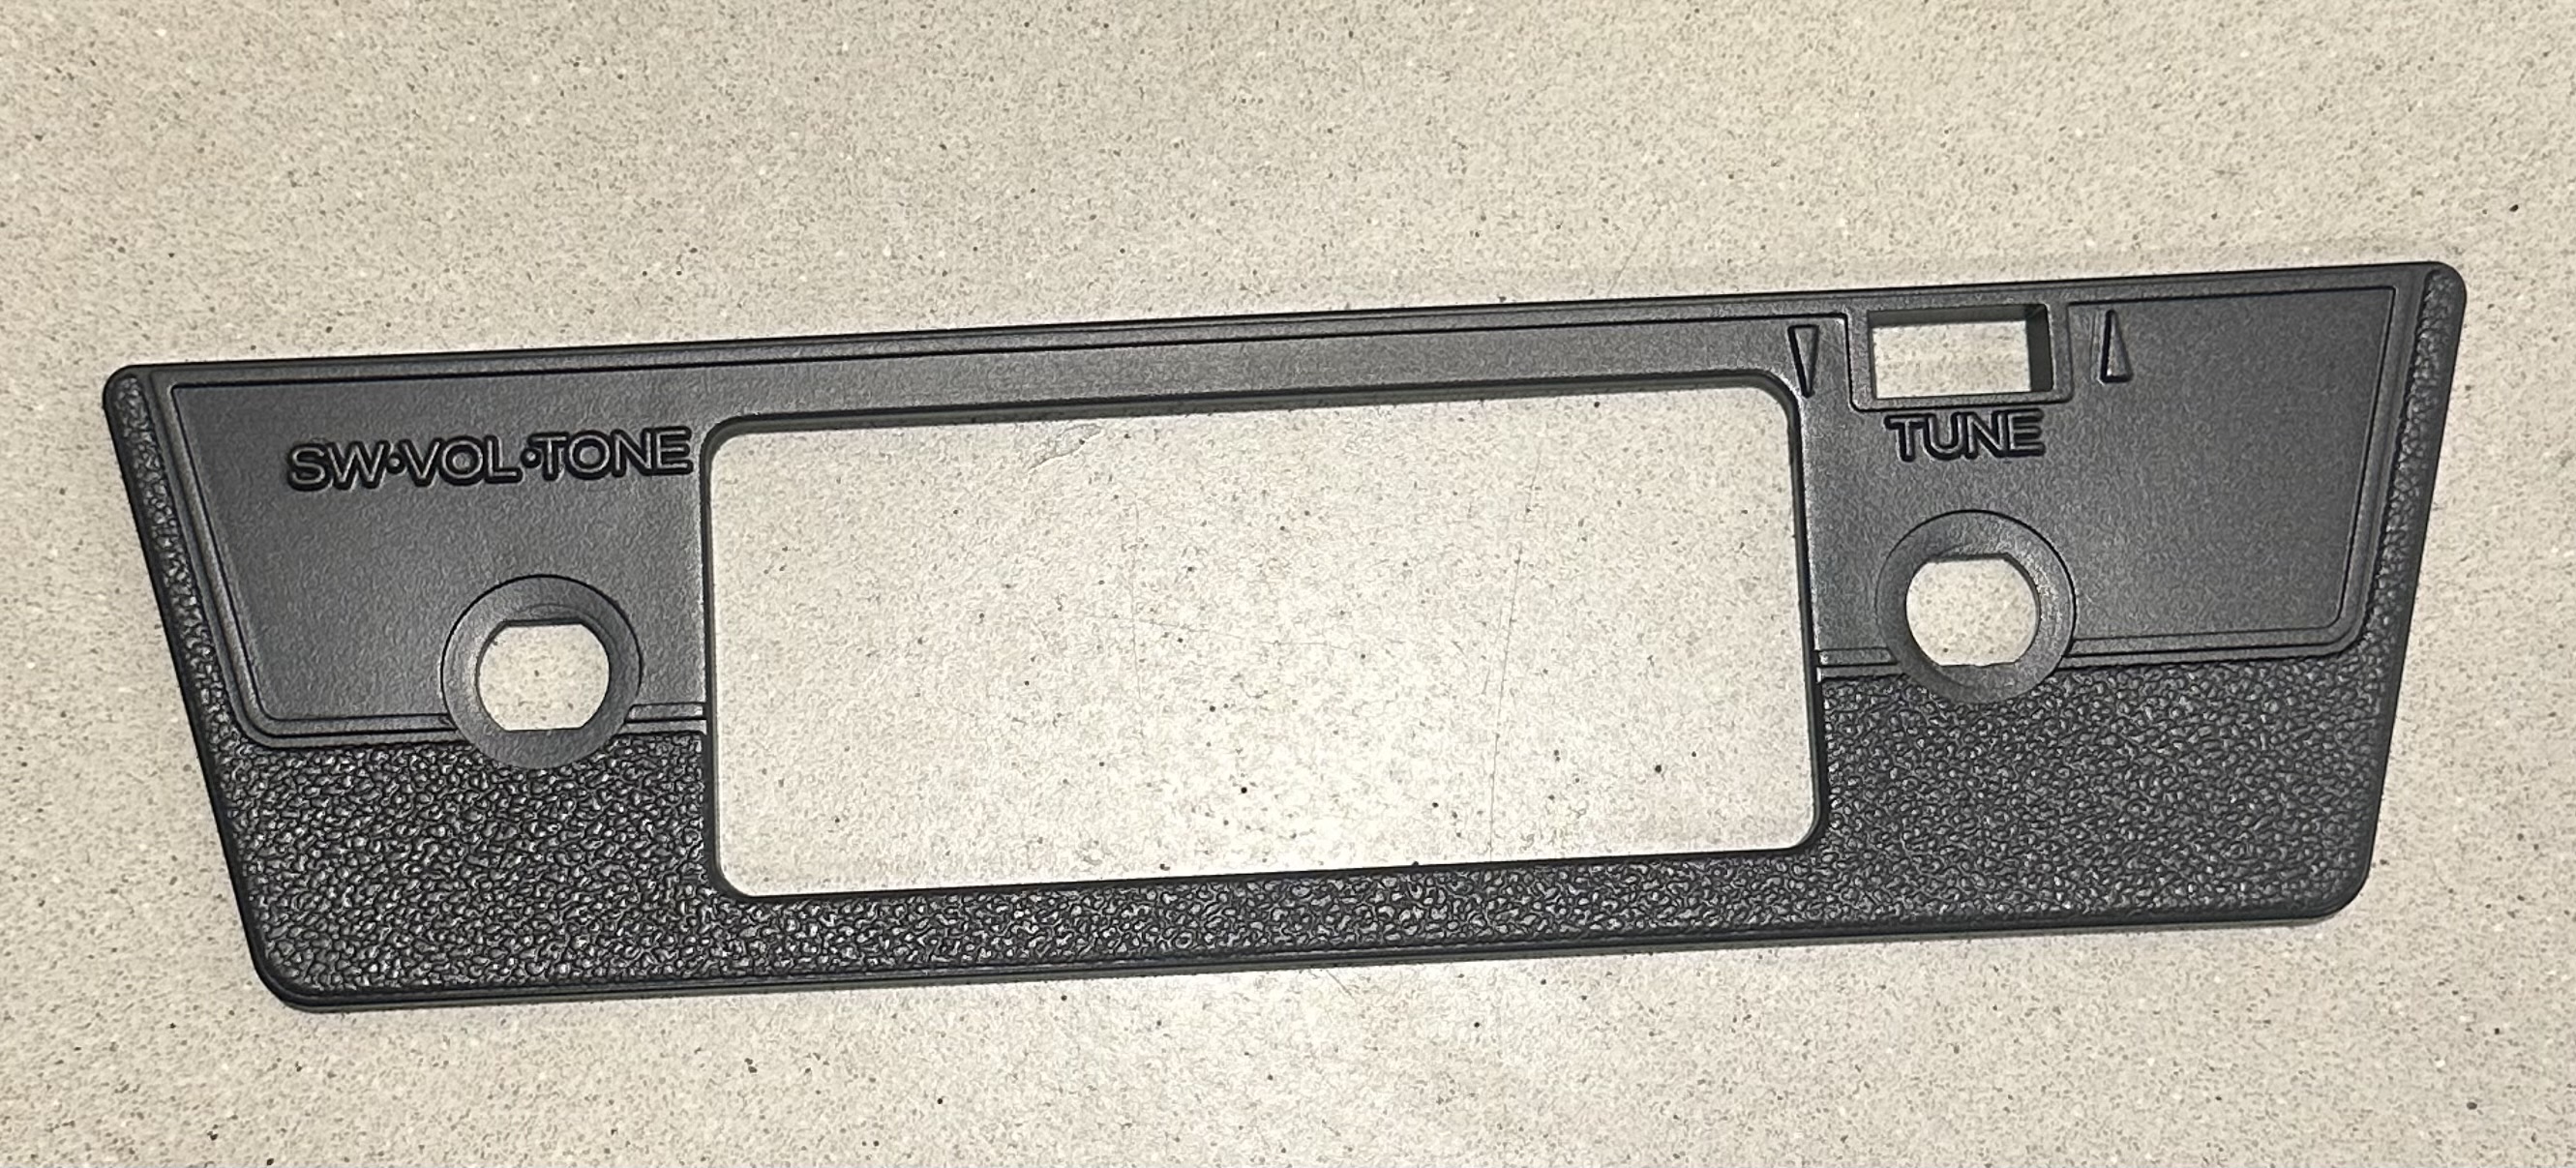
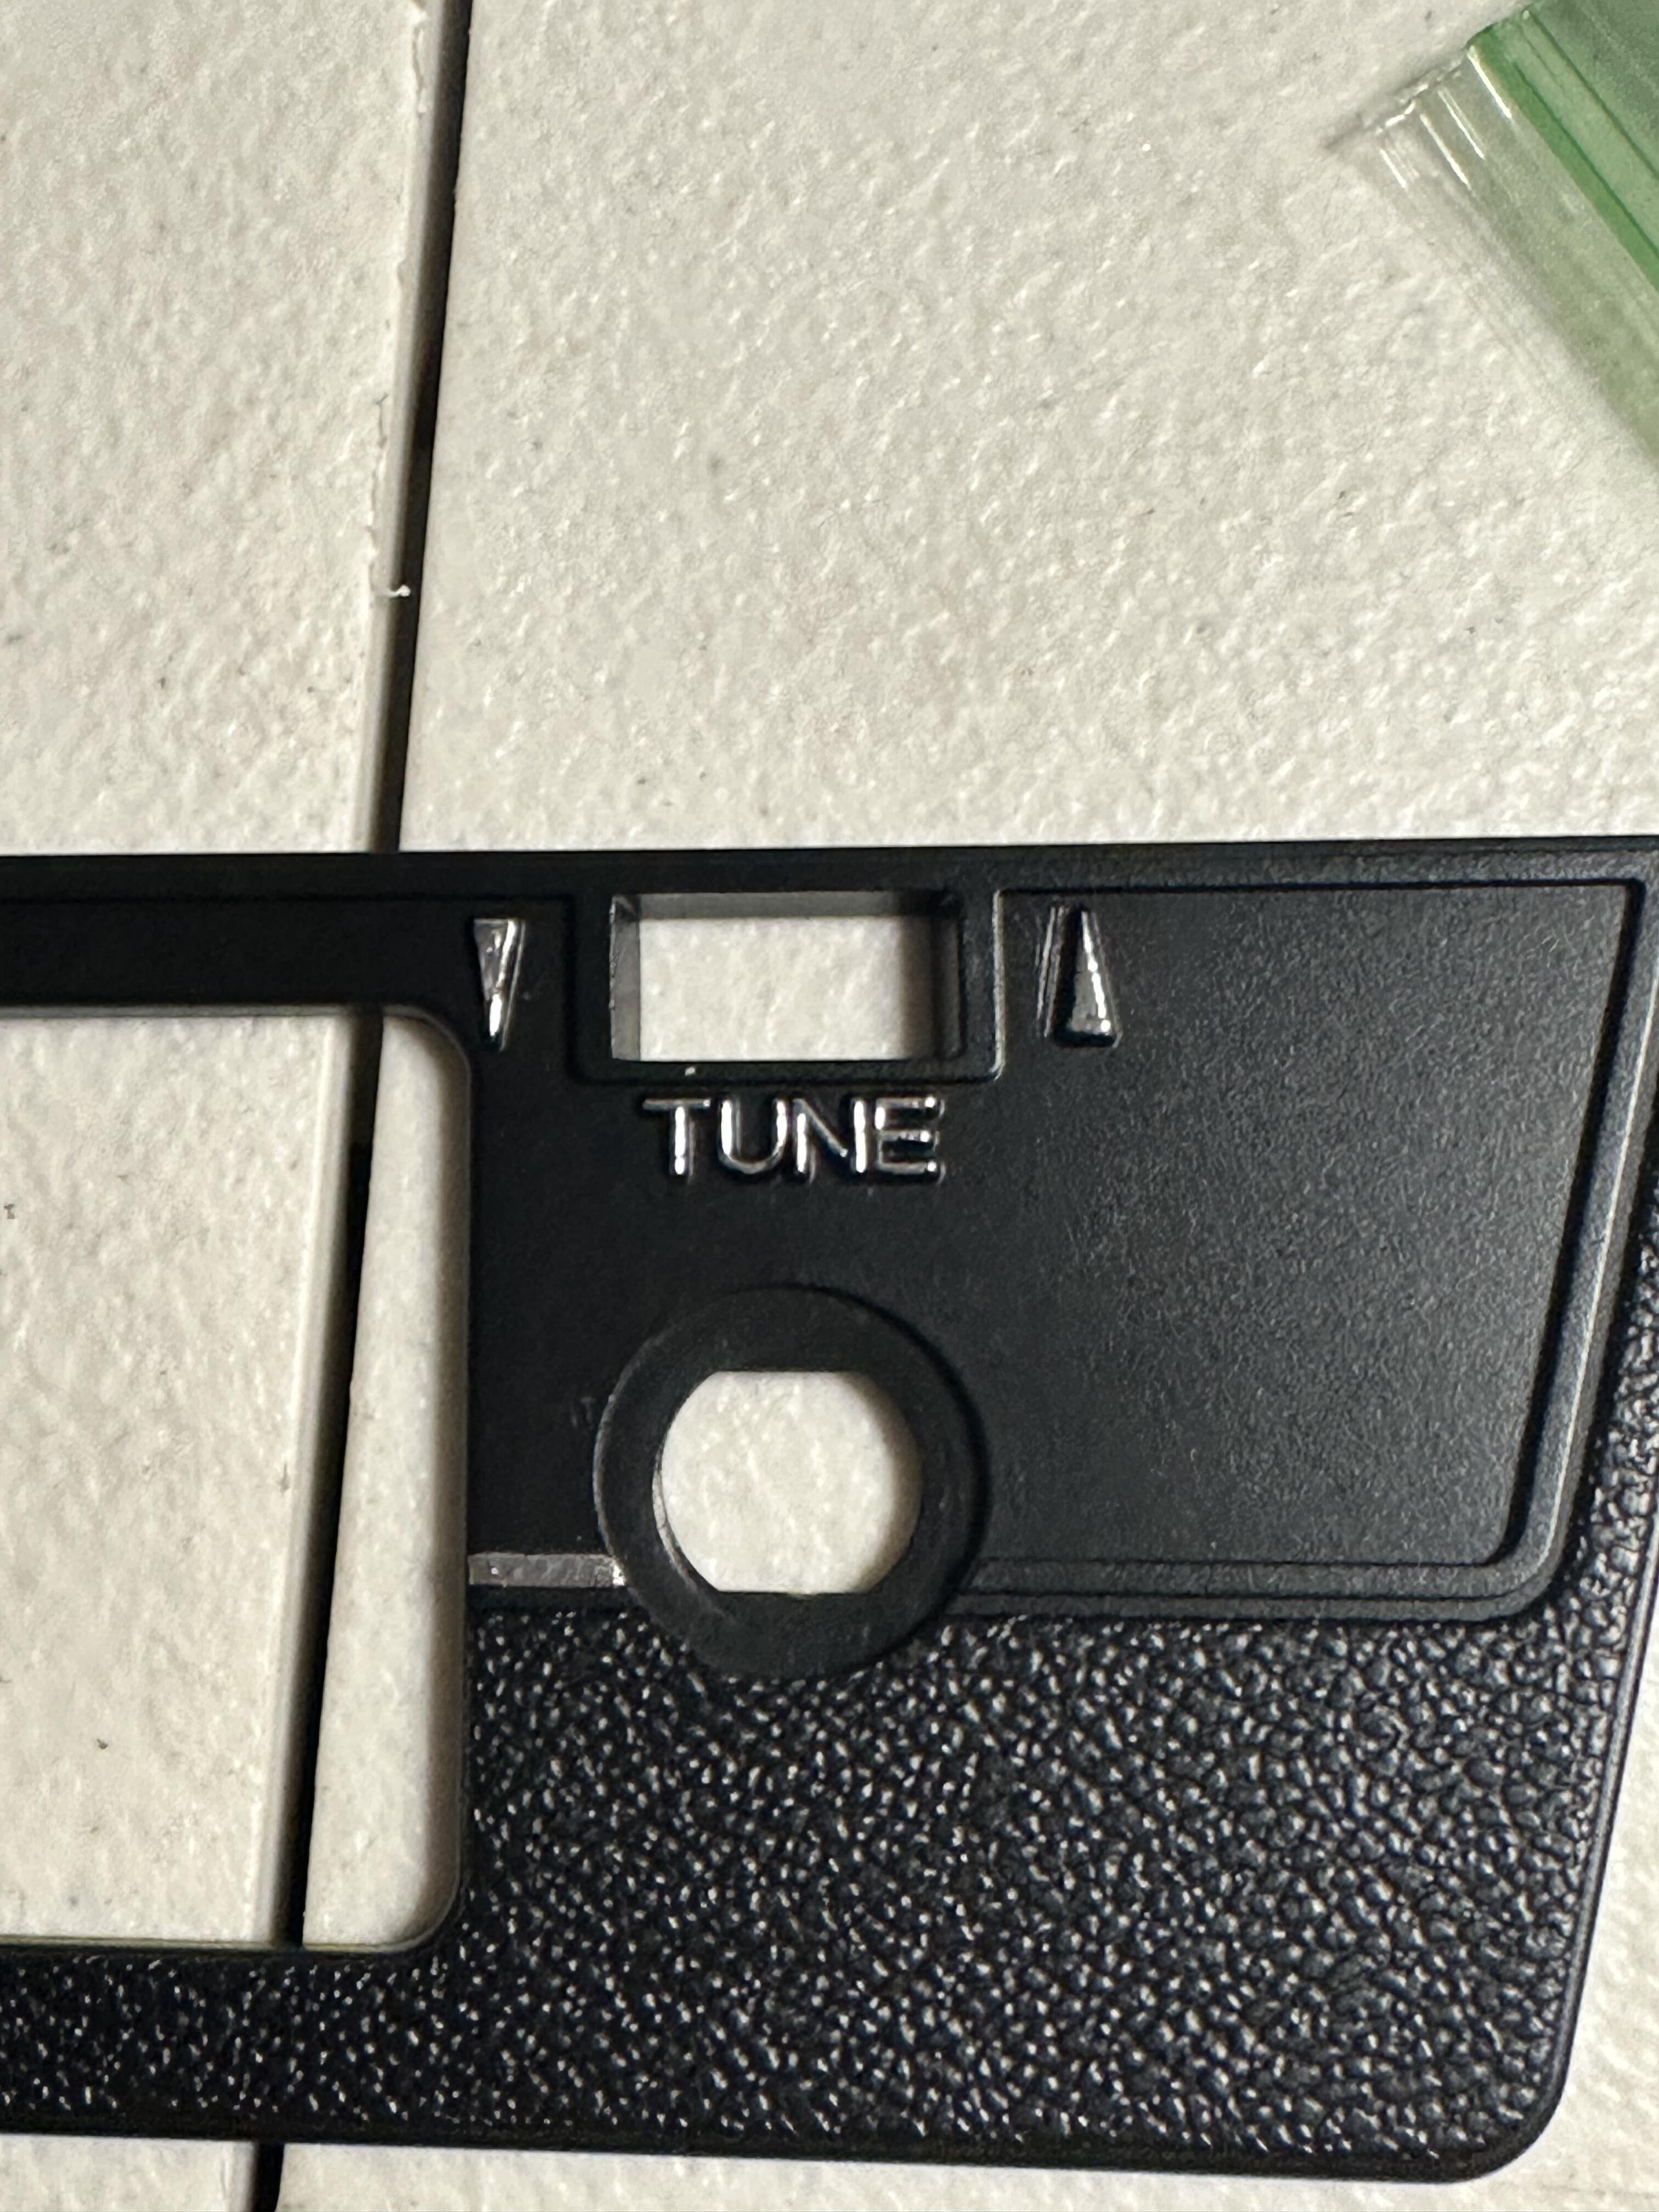
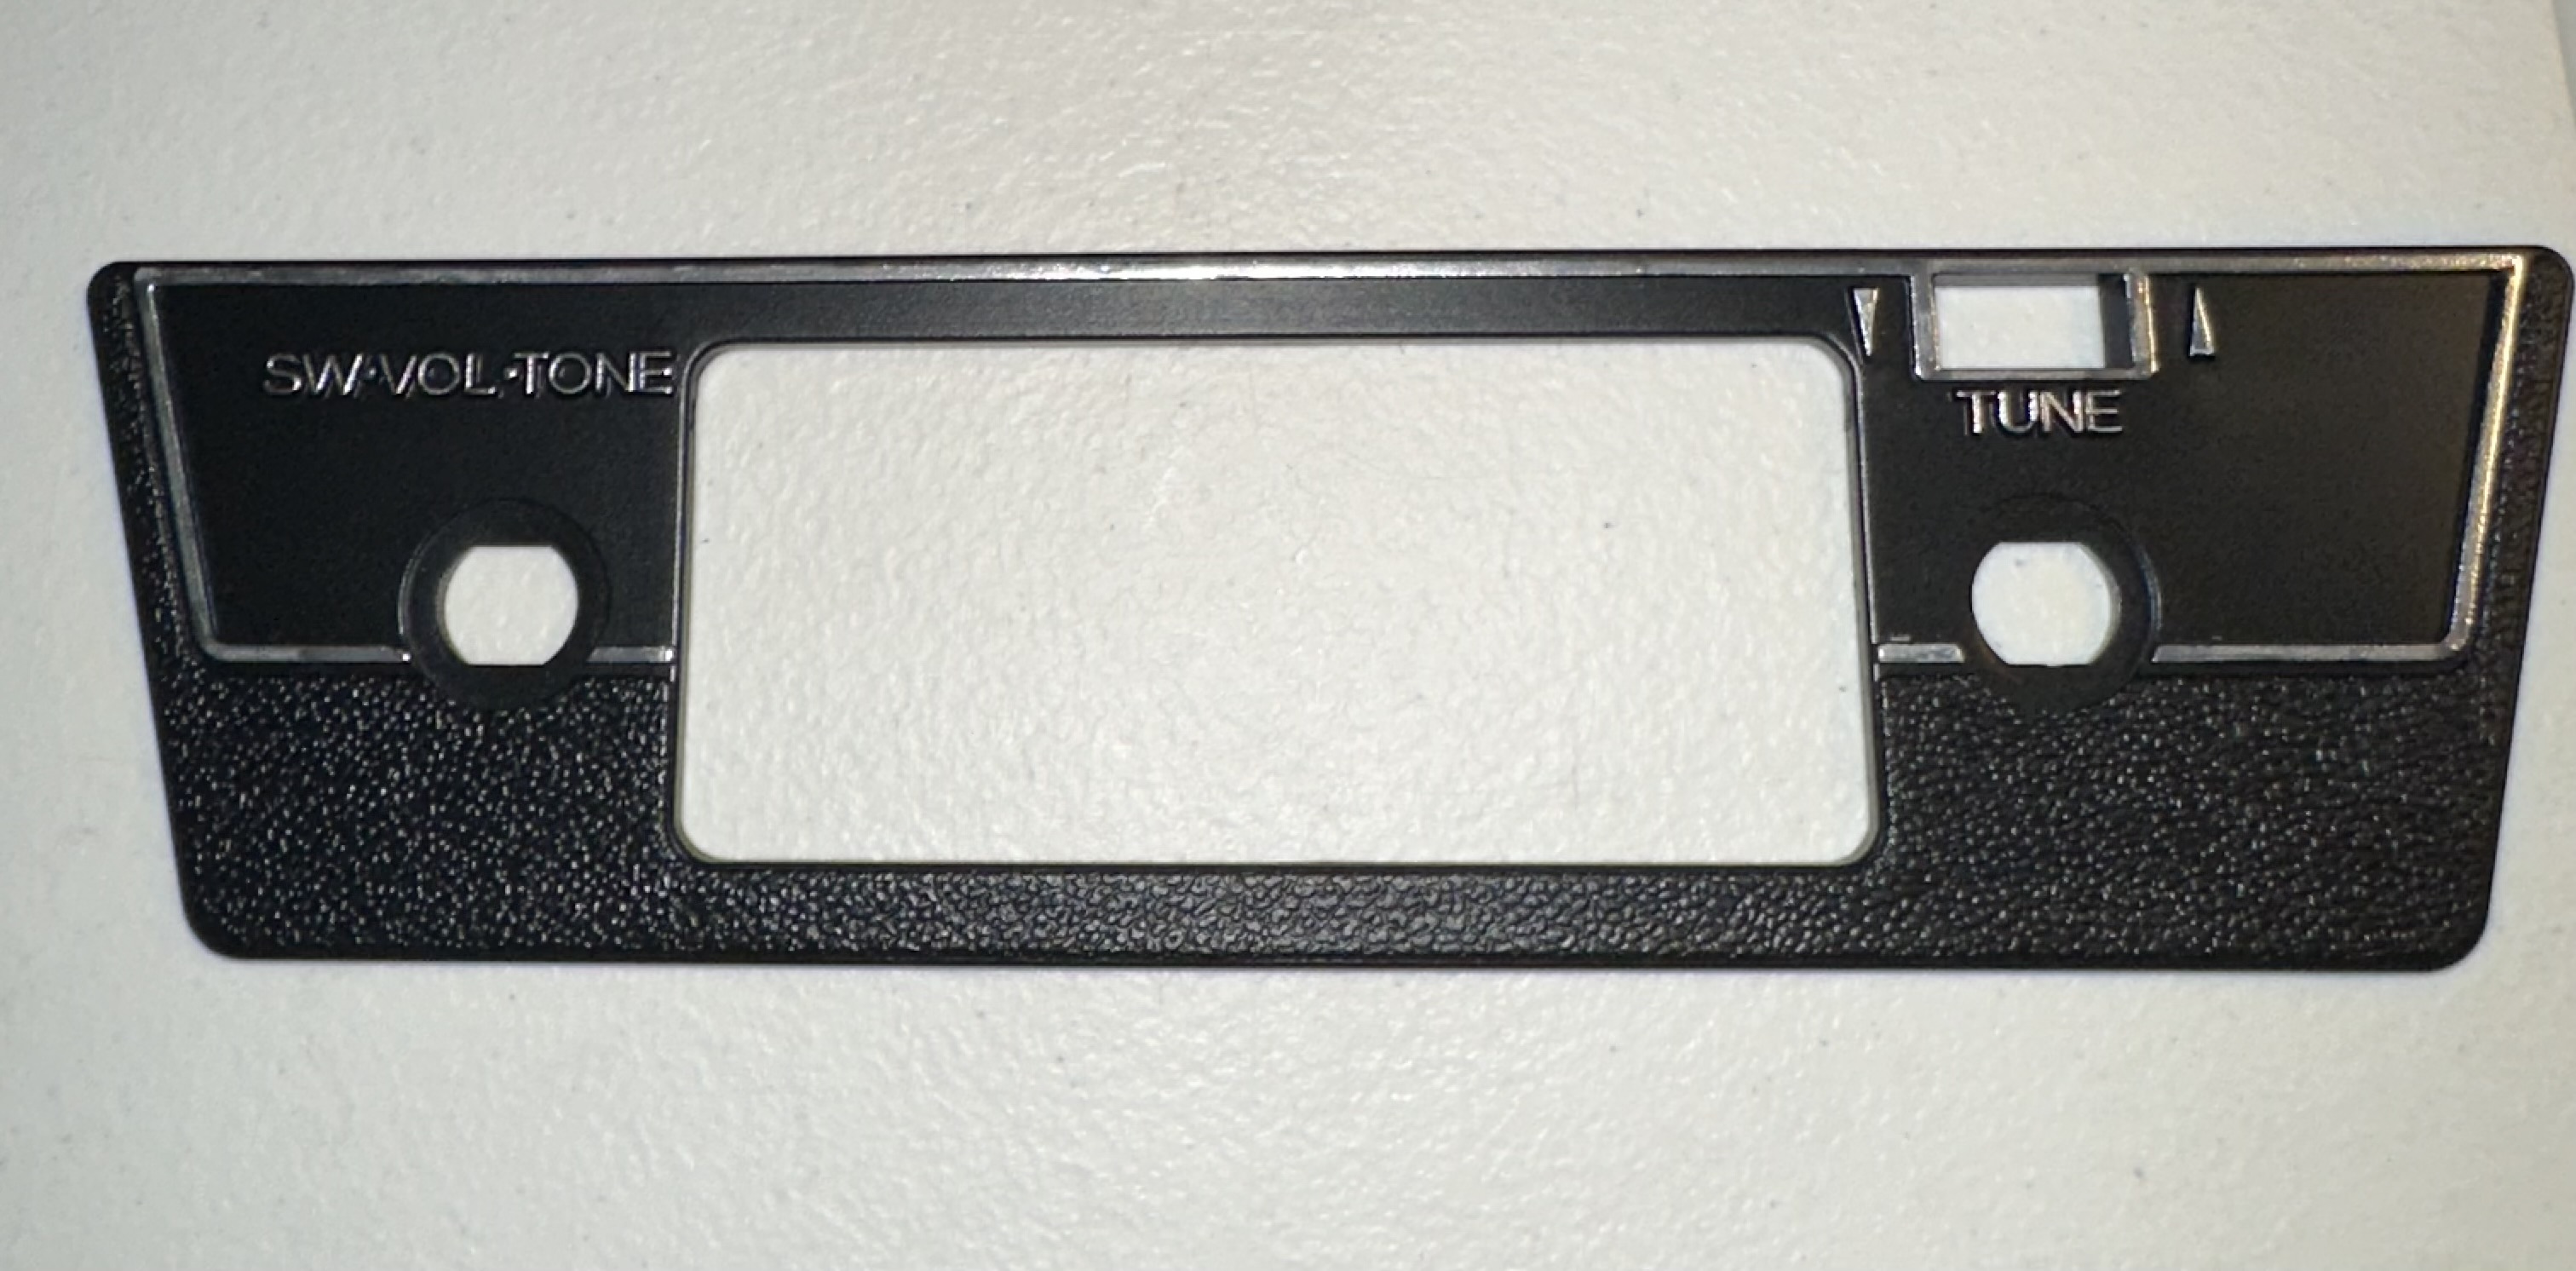
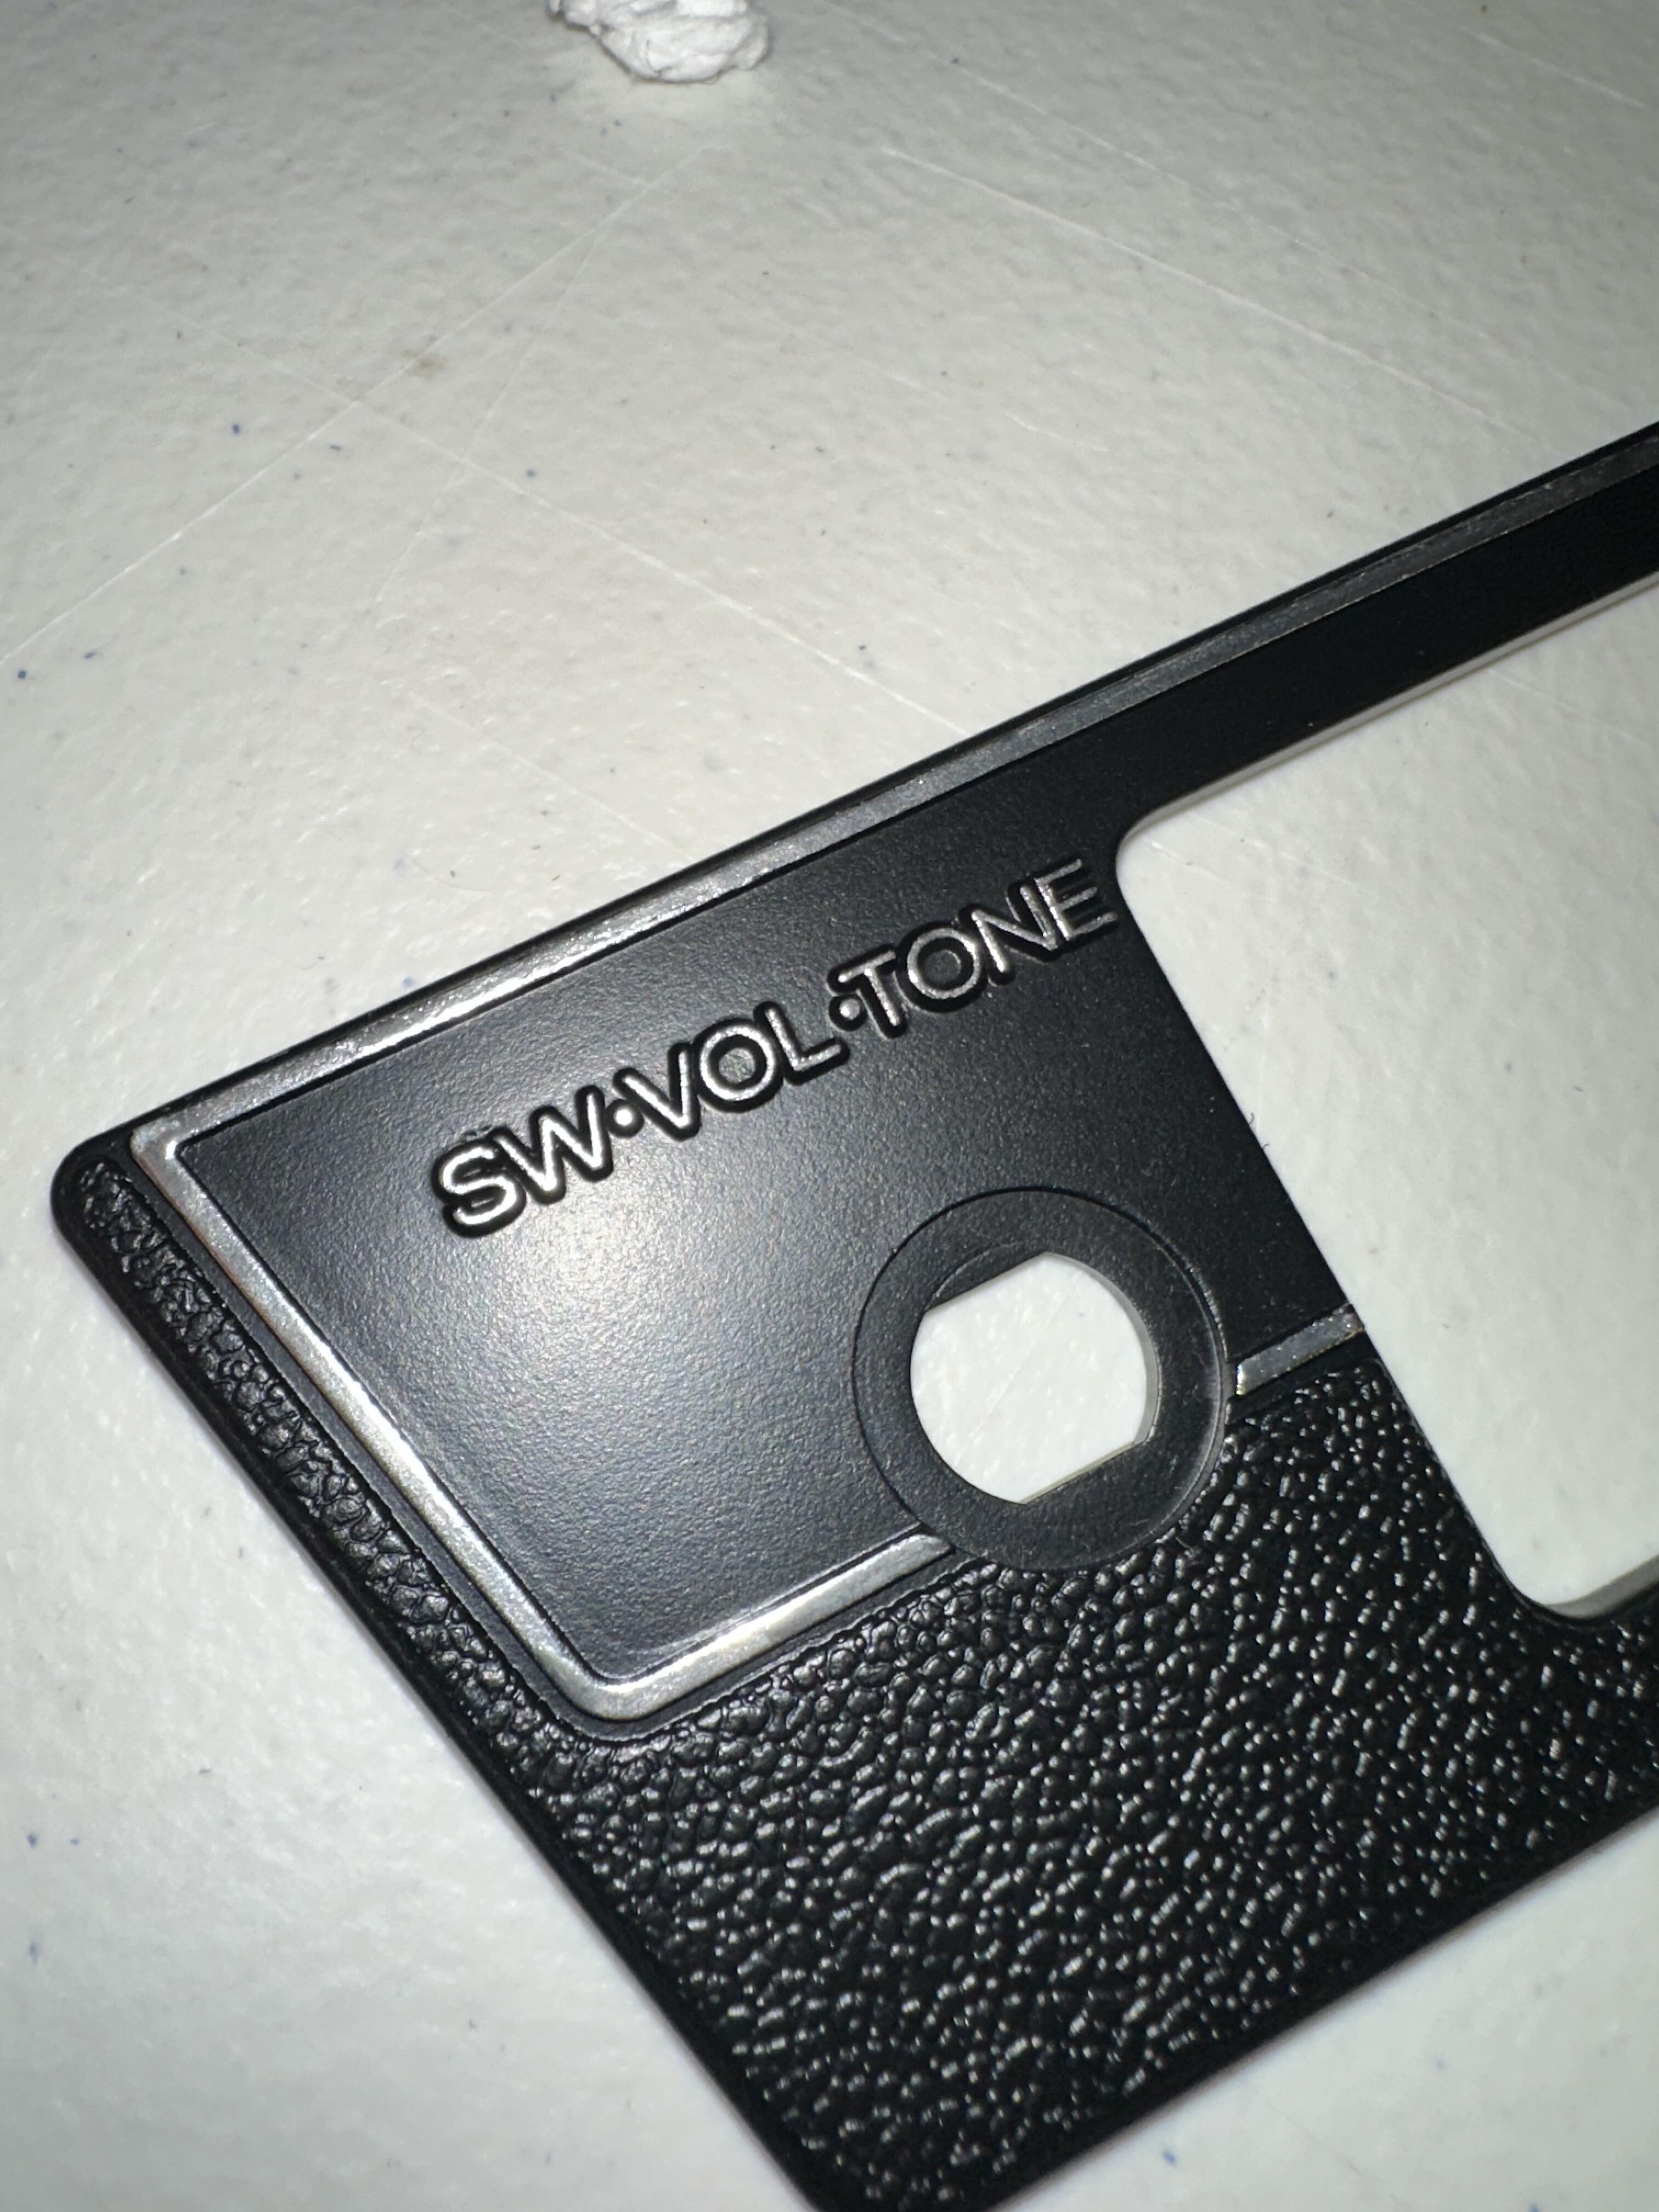
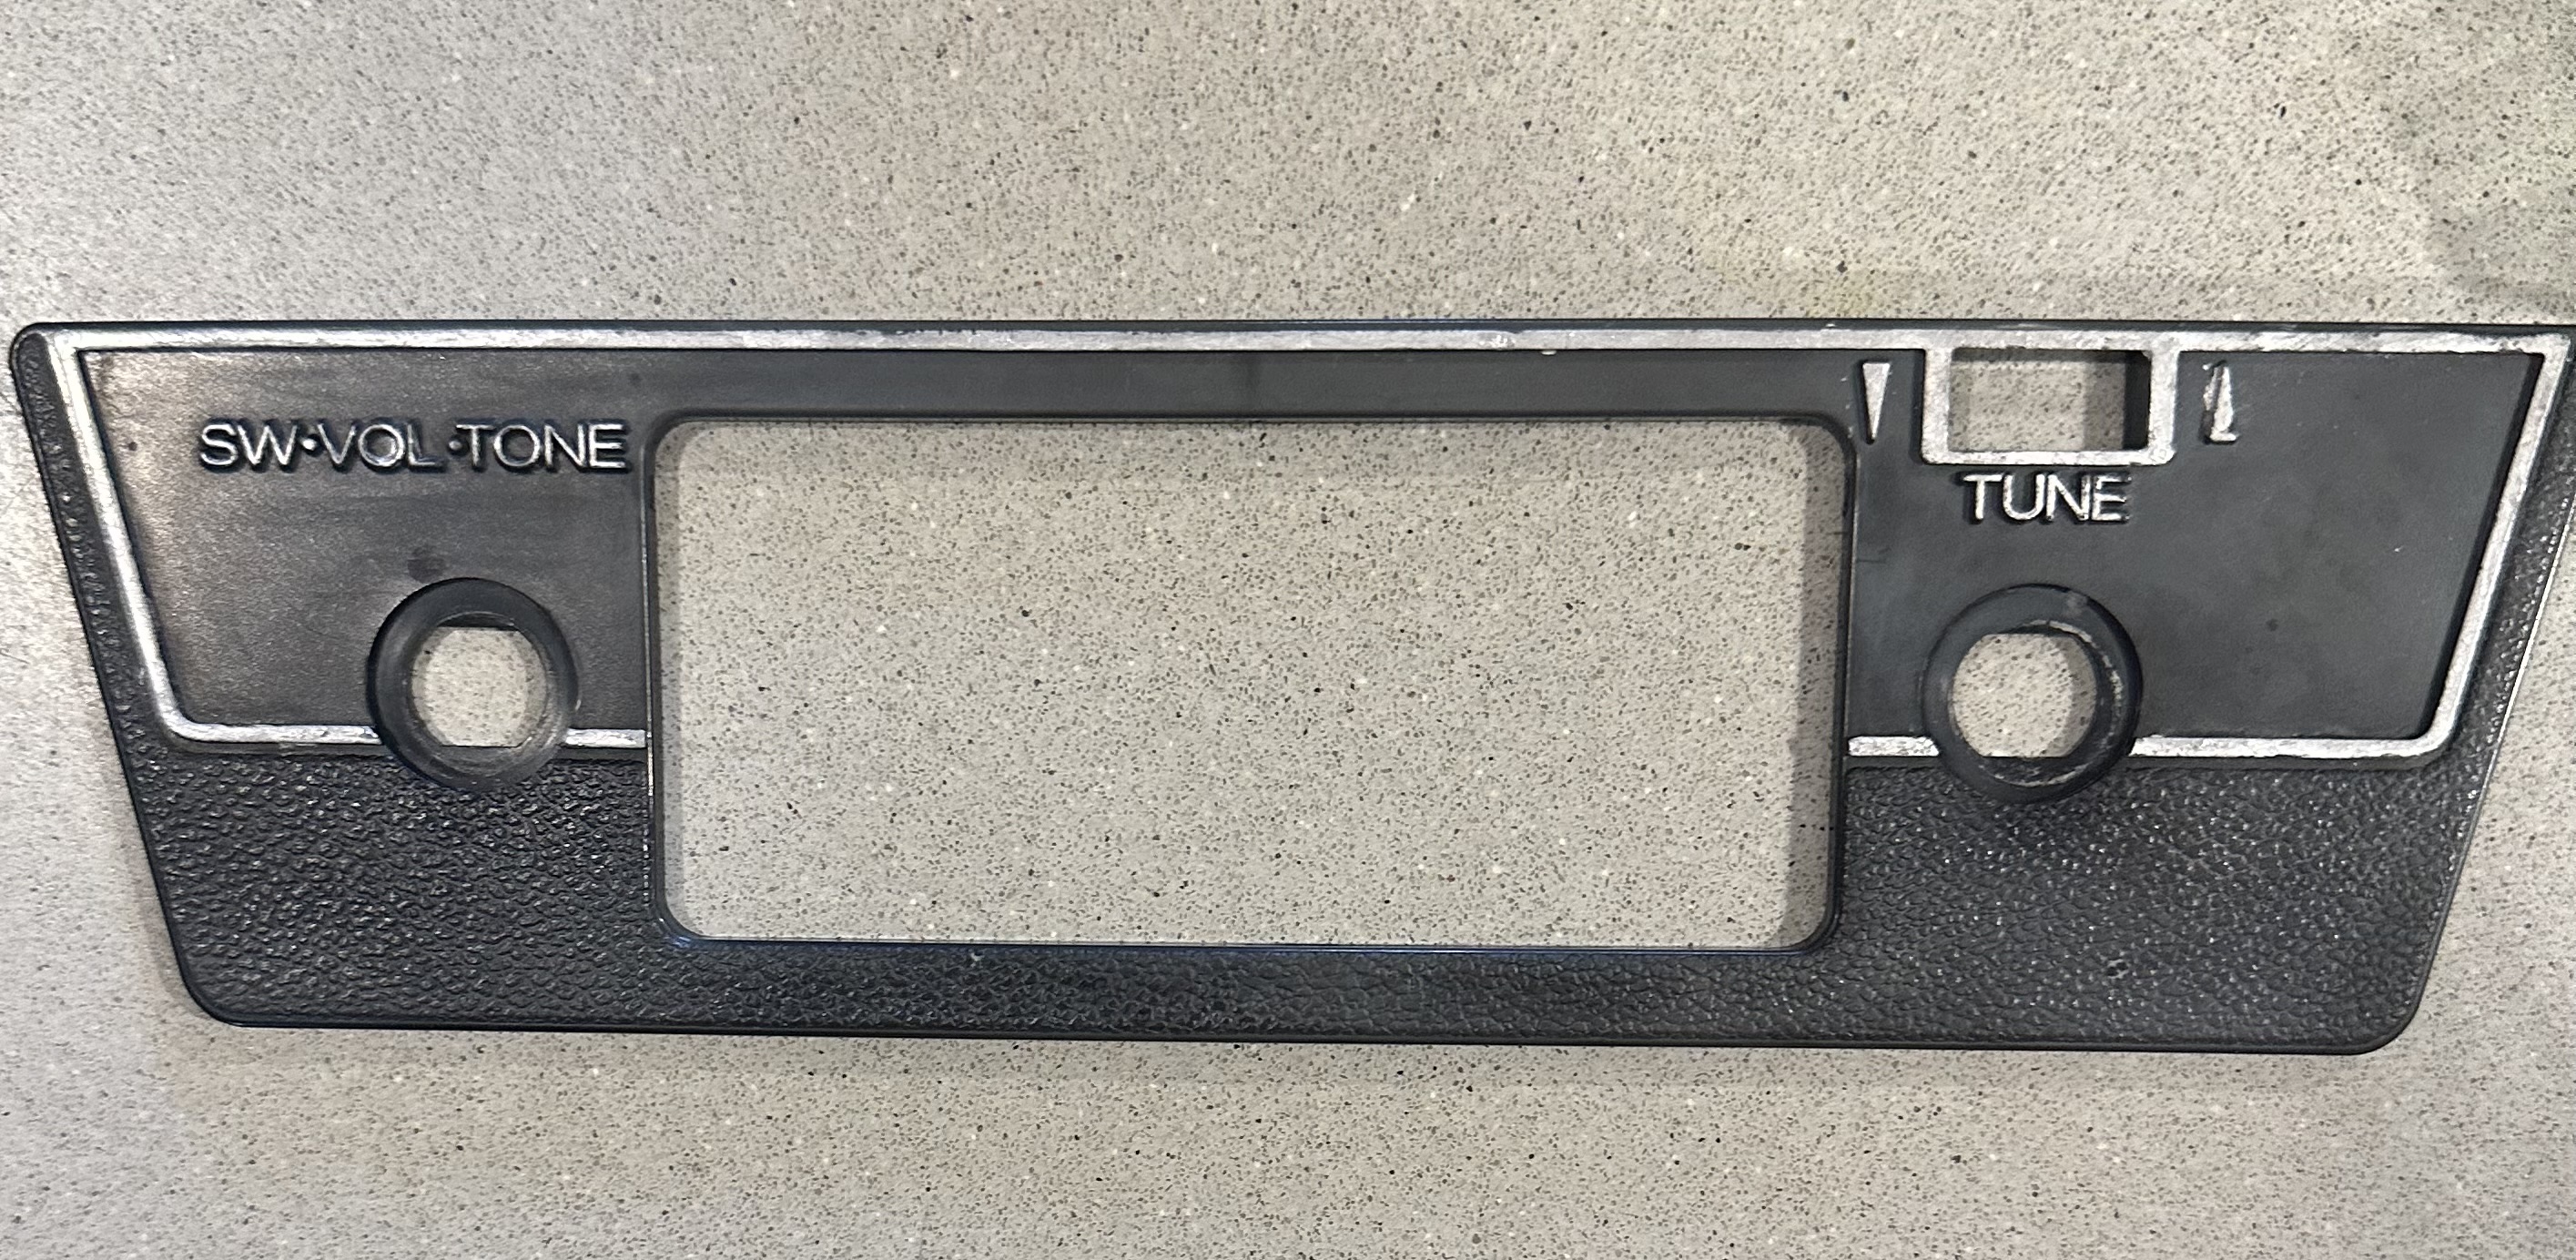
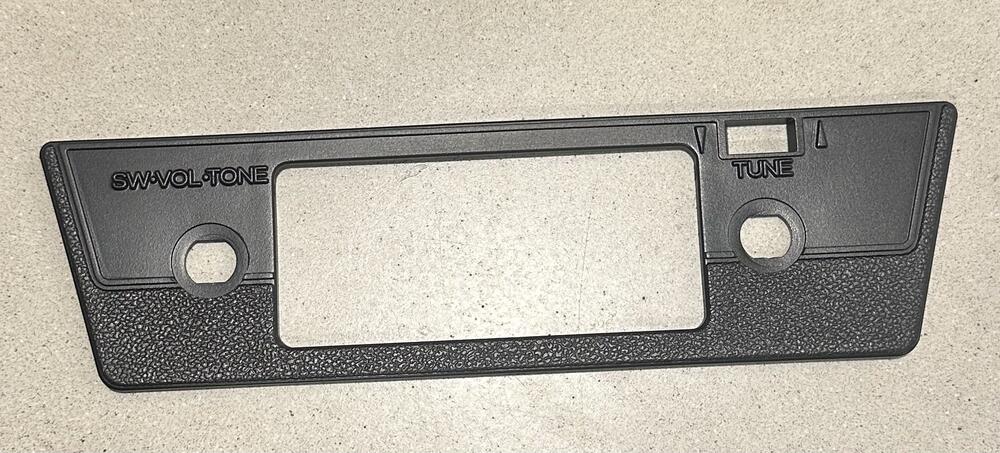
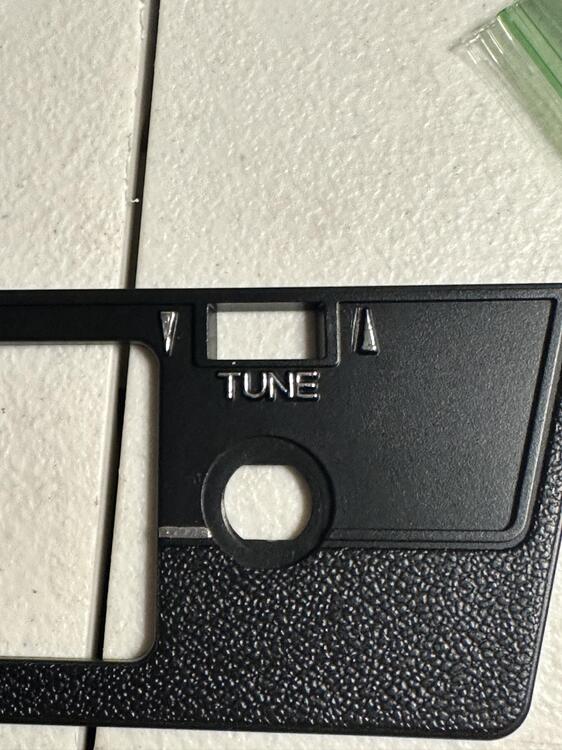
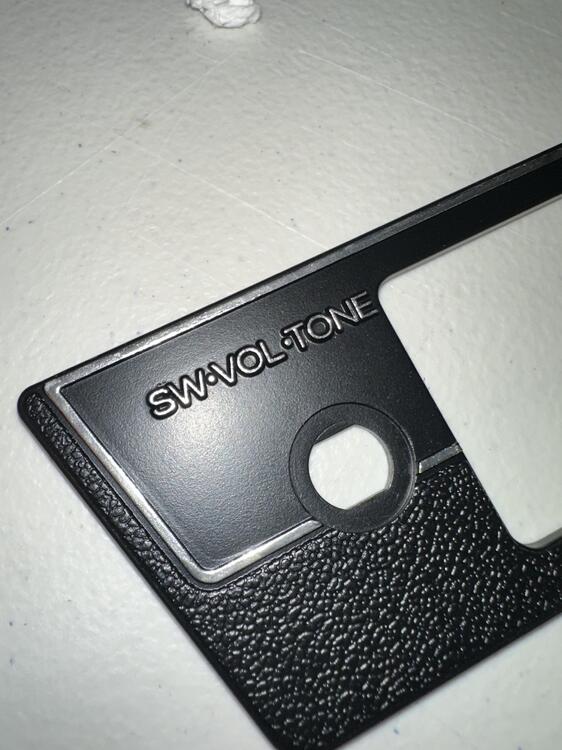
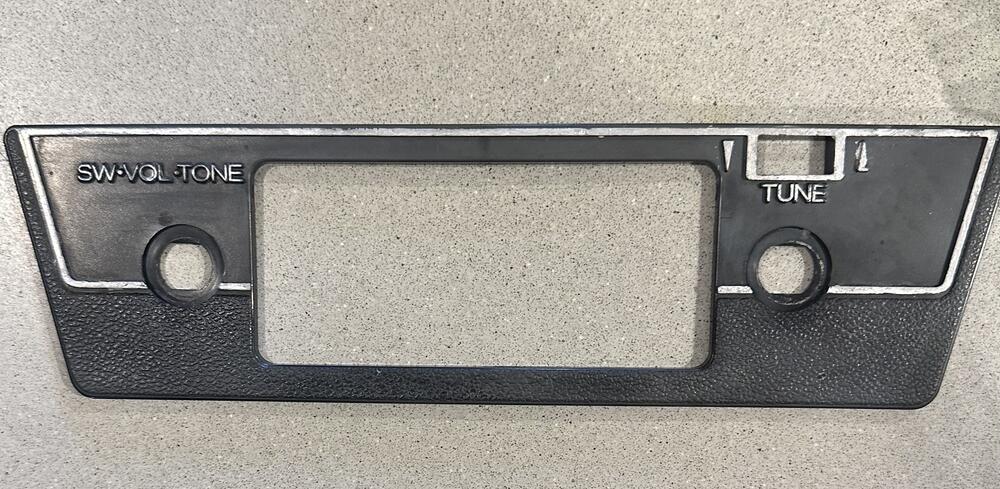
Here is my attempt at restoring the radio faceplate on my 1977 datsun 280z. I used this same process for the climate control bezel. Not perfect, but better than before. Items Needed: SEM 39863: Plastic Adhesion Promoter SEM 38353: Plastic Prep SEM 15013: Landau Black- Color Coat 3M Scuff Pad Chrome Paint Marker https://www.amazon.com/dp/B0B212M89Z?psc=1&ref=ppx_yo2ov_dt_b_product_details you can probably use any marker of this type, this one was just cheap and worked pretty well. Starting Peice. Chrome had faded, been scuffed off in areas. The sun had also caused fading in the black plastic and blotching as well. To Start I first washed the peice in the sink with dawn and scrubbed it. I then went at it with the 3M scuff pad and removed all the chrome, as well as roughed up the surface in preparation for SEM. I then washed it again. Next, I hung it outside and used the SEM plastic prep to clean it, and wiped it down again. After that just follow the directions for the SEM adhesion promoter, then I did about 3 coats of the Landau black with about 6mn in between each. Came out smooth and consistent. I then waiting a day for it to dry and came back at it with the chrome marker. Just spend your time going over the lines and it will turn out decent. The ink comes out a little fast though, so be careful to not hold it in one place too long. FInished Result I didn't clear coat the whole thing as it didn't occur to me until now. Would be nice to hopefully make the chrome paint a bit more durable for when you detail the car. Unfortunately the color coat is long past it's dry time so I am not sure if clear coat is an option now. If anyone has experience on this let me know.


 1 point
 -
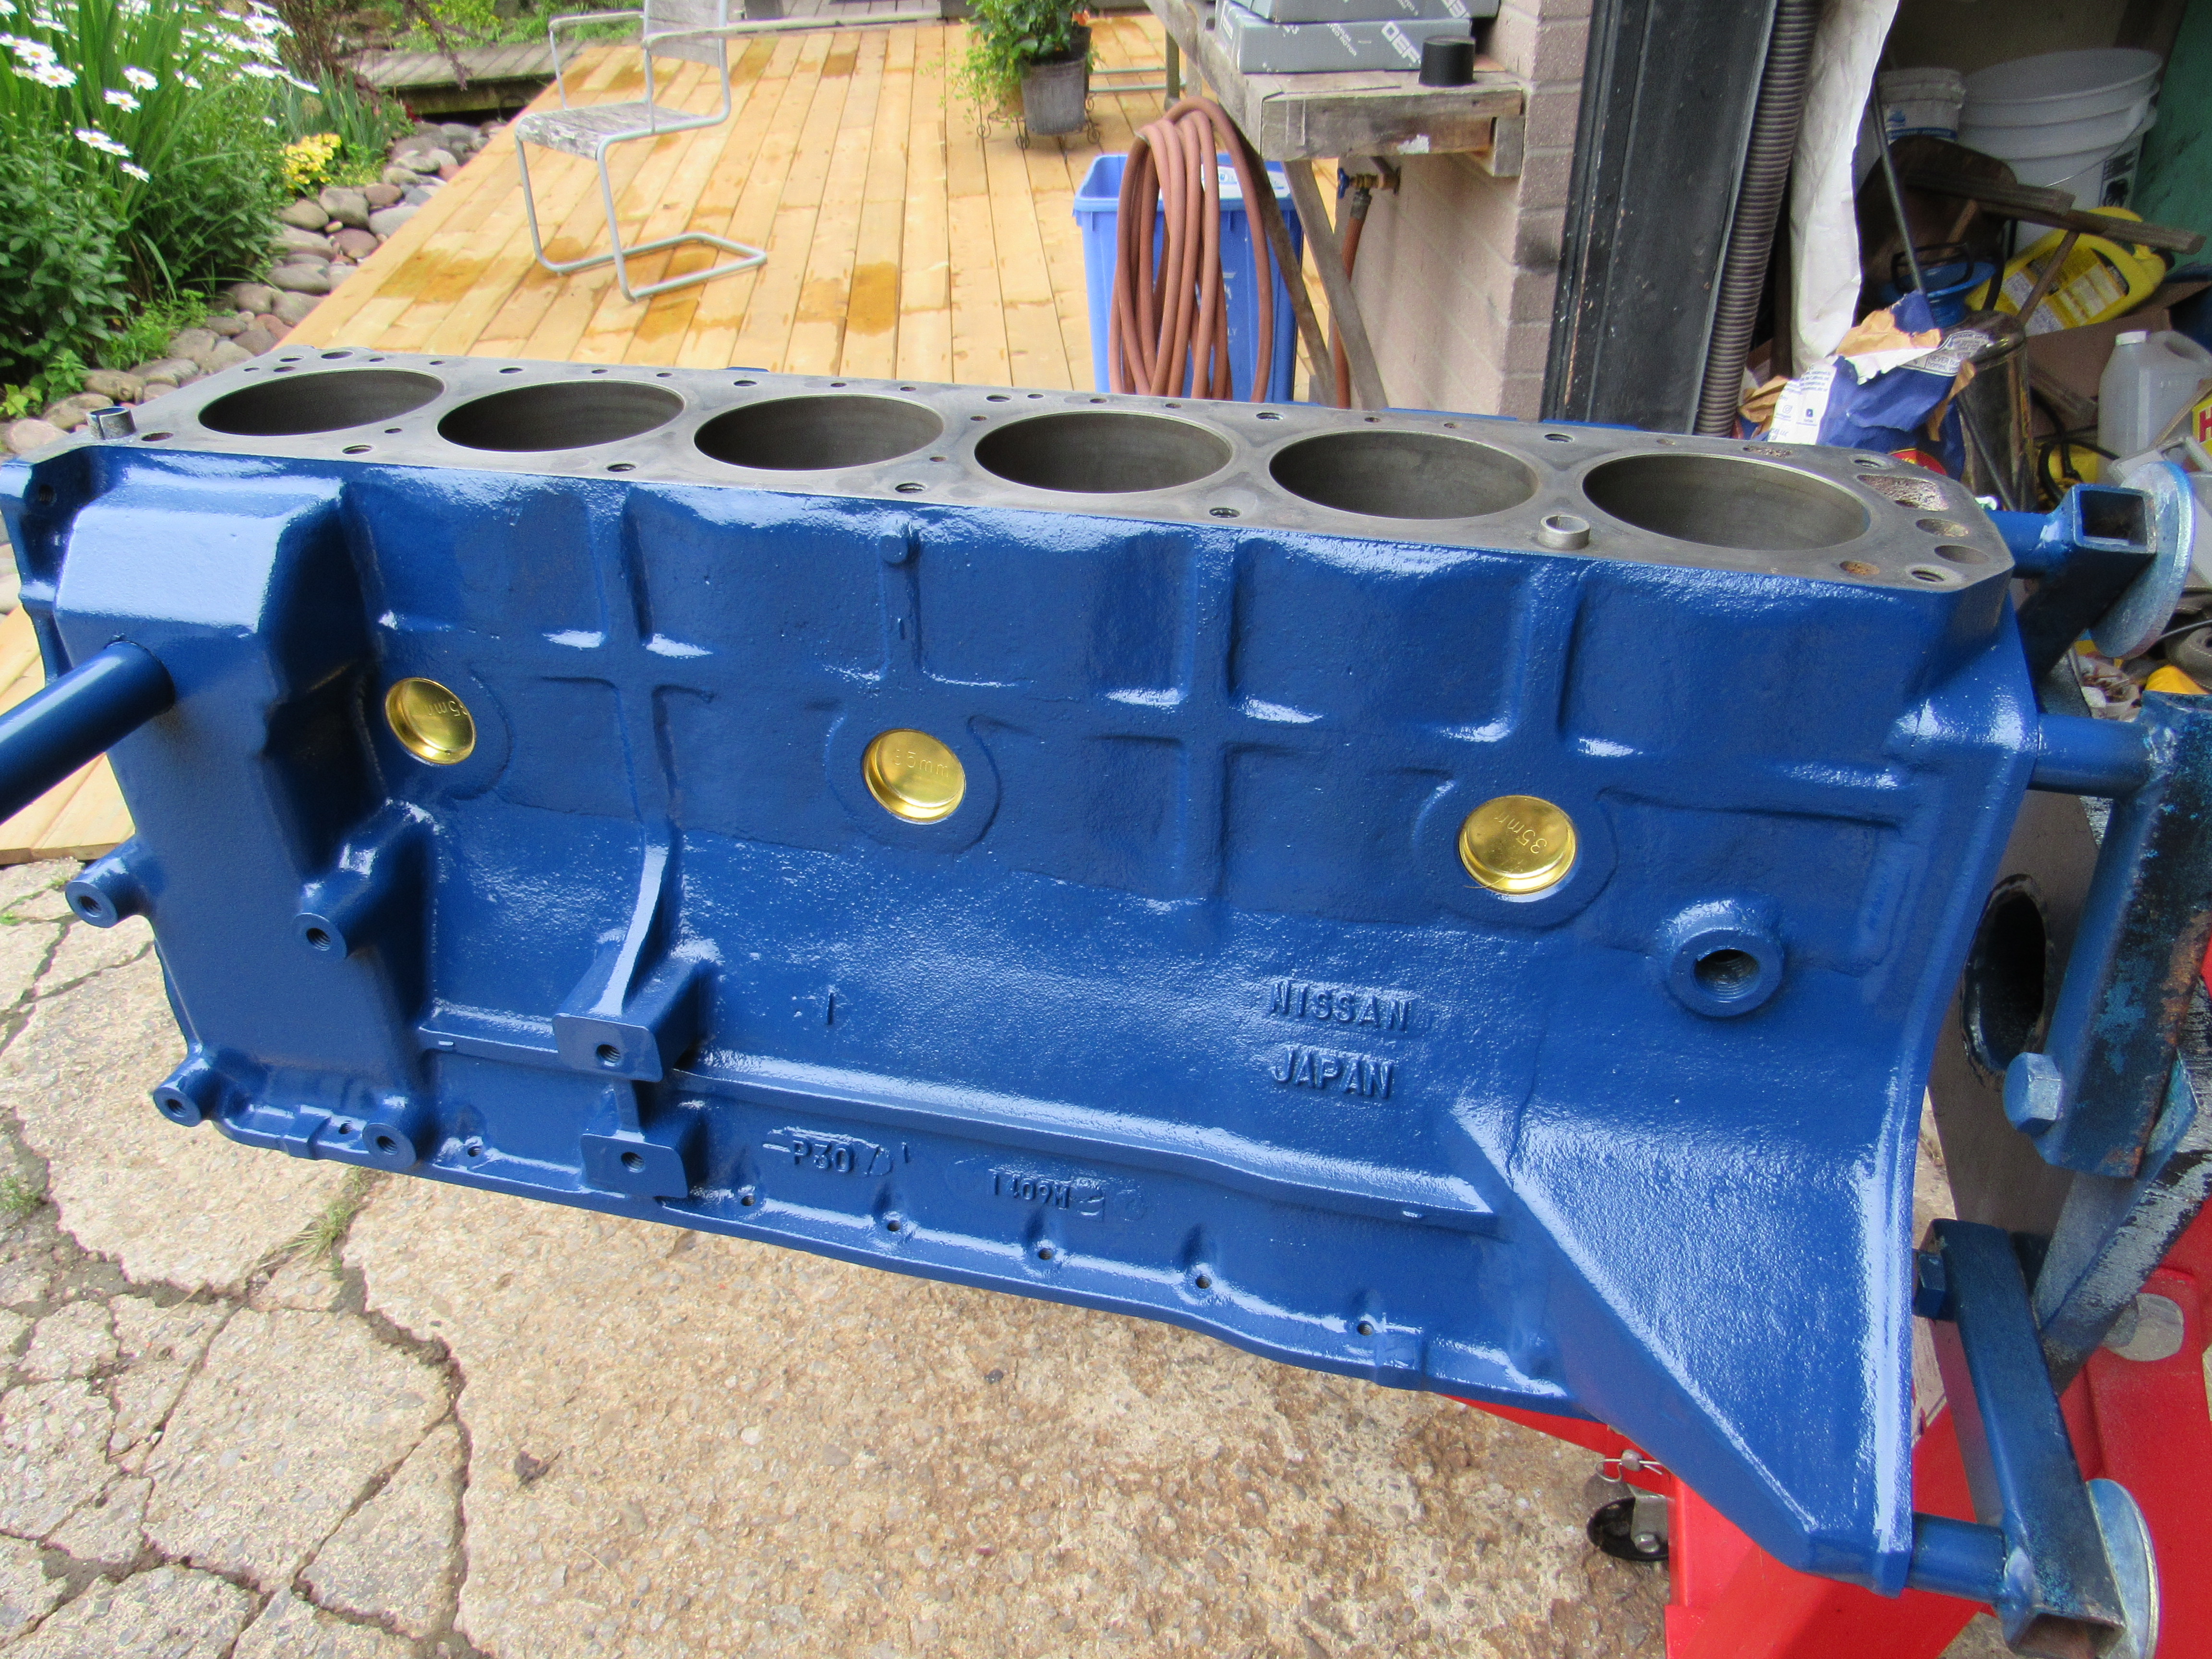
1 pointAfter having saved some of the budget on the crank, I thought I would have a go at the broken exhaust studs, ah a few more dollars saved! Also got some painting done today and added some bling to the engine block.


 1 point
 -
1 point
-
1 point
-
1 pointYou work in Arizona where it never gets cold. Did you or your son ever break a windshield? You said you replaced dozens but didn't say that you never broke one. My first experience removing a windshield was in a wrecking yard. The owner was gone and his wife told me and my friend that we should wait but I told her that we could do it. It was about 35 F. A small tendril of adhesive was still attached (GM used a rope of sticky tar-like adhesive for windshield installs. Nasty stuff) as we tried to lift it out and it cracked. We left, I didn't pay for it (cause I was a punk kid), and the owner started calling me "Easy Money" after that. In the long run I paid him back by giving him a 66 GTO (the same one that I was getting the windshield for) after I wrecked it, and his son a 55 Chevy pickup truck after the axle bearing went bad. The statement was, basically, that old windshields, especially those with chips, are more prone to cracking than new ones. Just because you guys were careful enough to get it done doesn't mean the statement is not true. Anybody who's watched a chip grow in to a crack and spread across the windshield should know. Tell some stories about how to get it done. Heating the adhesive helps, a warm day helps, make sure that every scrap of adhesive is cut free (a PO might have tried to seal a windshield leak in the past). Stuff like that. Interesting though that by the statement it broke during installation. So the BS calling ia about the wrong part as are my suggestions above.1 point
-
1 pointA lot of people on this forum have used power brake exchange in San Jose Ca. Including myself. They have two locations. If you want it powder coated they will suggest which location to send it to. Around $2501 point
-
1 pointPATCON Rebuilding the brake booster cost $470 back in 2021. Re-sleeving and rebuilding a master cylinder cost $245 and that was just a month ago. Jim1 point
-
1 pointI bought a booster for my 73 from Harmon with exchange. All good. The only thing I did was repaint it to my standard. Works perfectly. From my Triumph / MG days...Whitepost for rebuilding cylinders. No one better.1 point
-
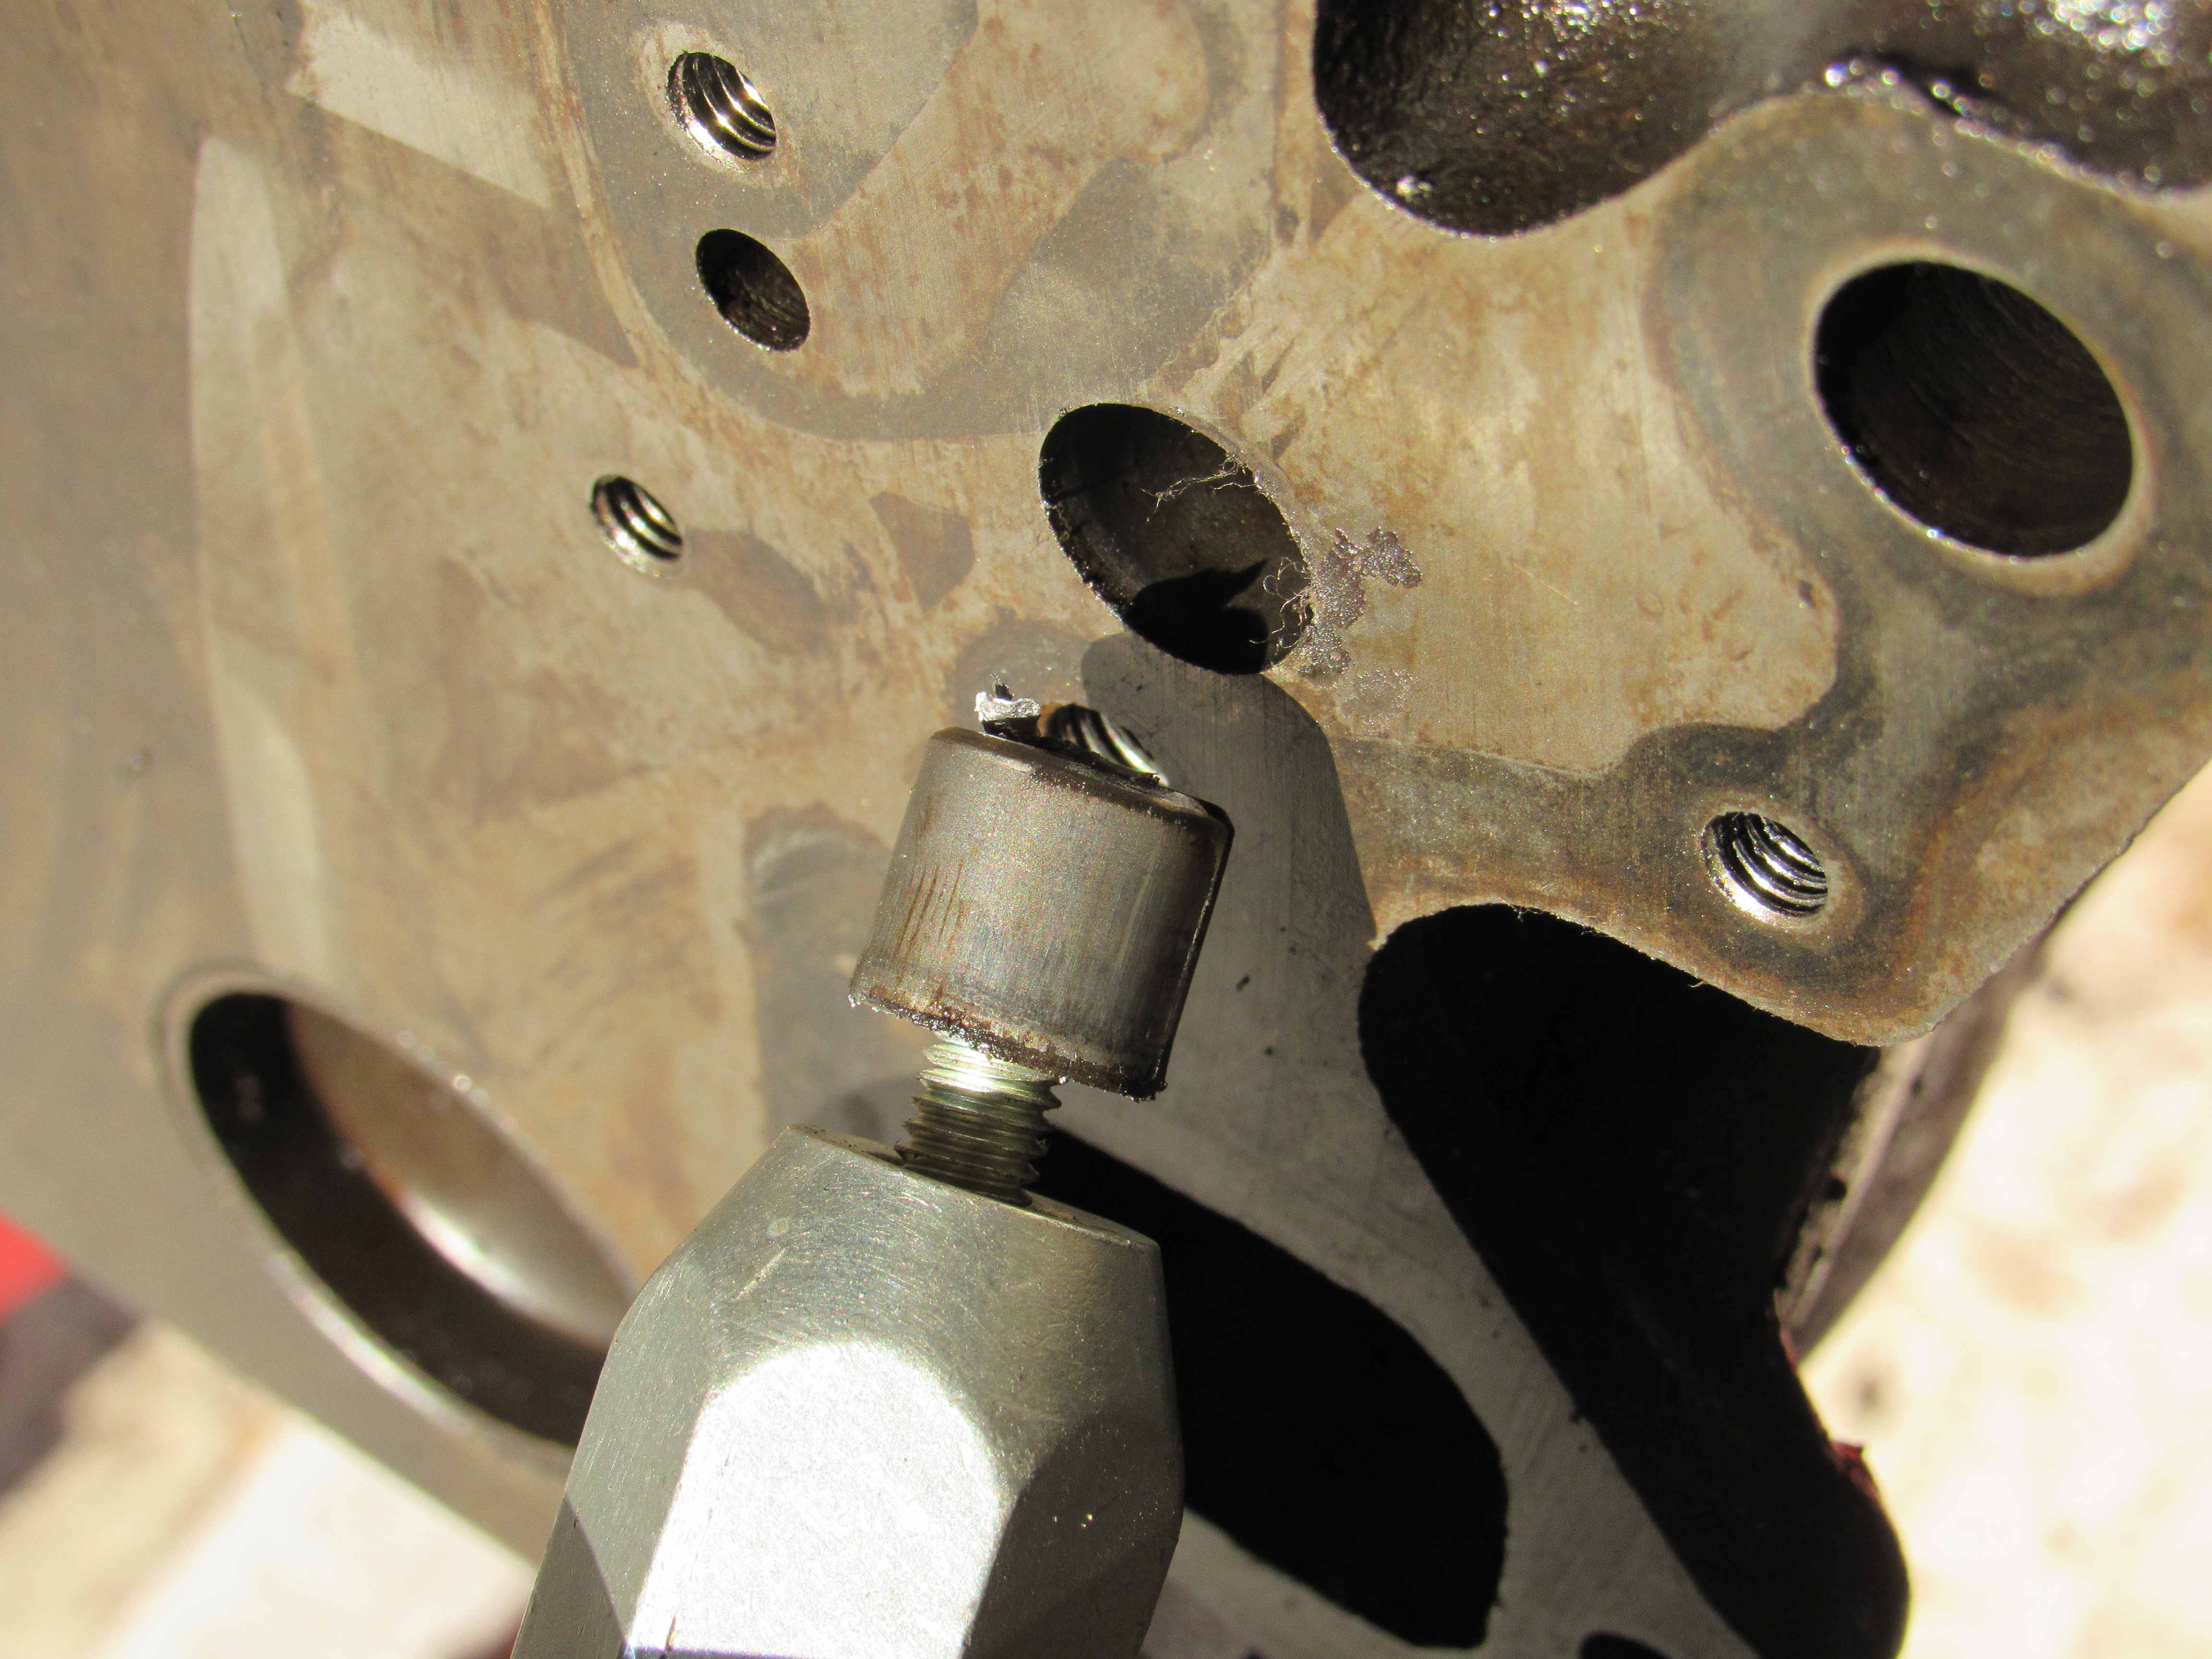
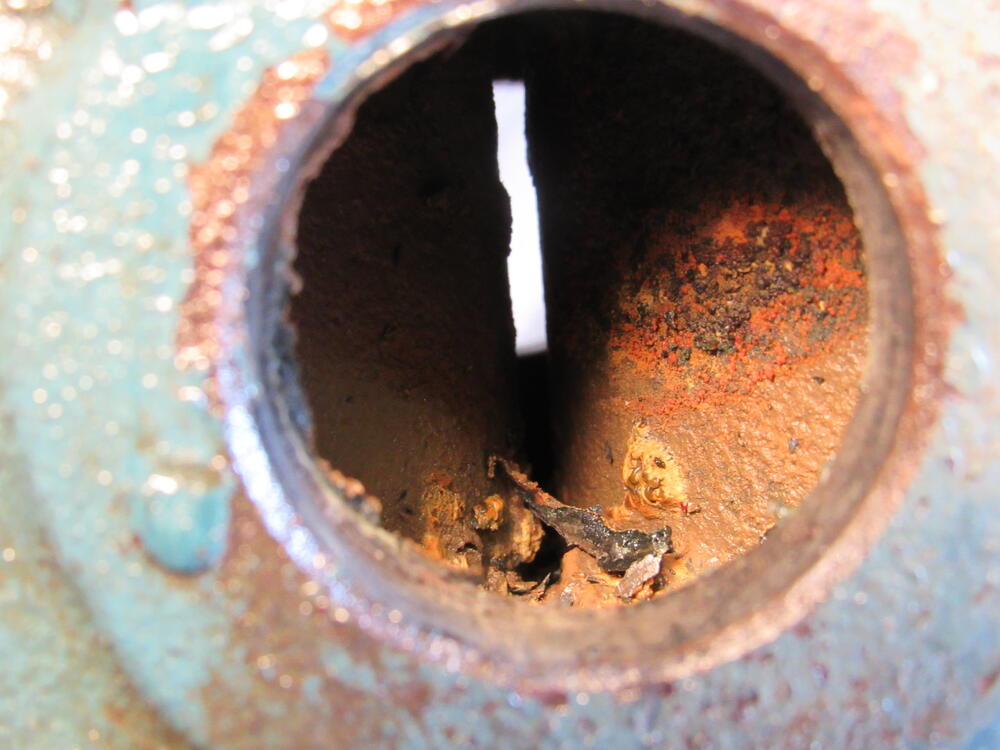
1 pointBut even with all the trash that scored up the bearings, the oil pump is in very nice shape. As far as I can tell, the engine has seen light use but a lot of neglect, I'll bet most of that wear happened on startup with old dirty oil. I rolled the block outside yesterday, removed the plug sealing the main oil passage and scrubbed every hole with bottle brushes, lots of oil sludge in those lines. 💡 Could have been an obstruction in the line leading to oil starvation!
 1 point
 -
1 pointI have used White Post several times, including a complete rebuild of the brake booster on my 72 Z. Turn around for the booster was just under a month. They also just resleeved and rebuilt the brake and clutch master cylinders on my Sunbeam Tiger. I would give them a call. Jim1 point
-
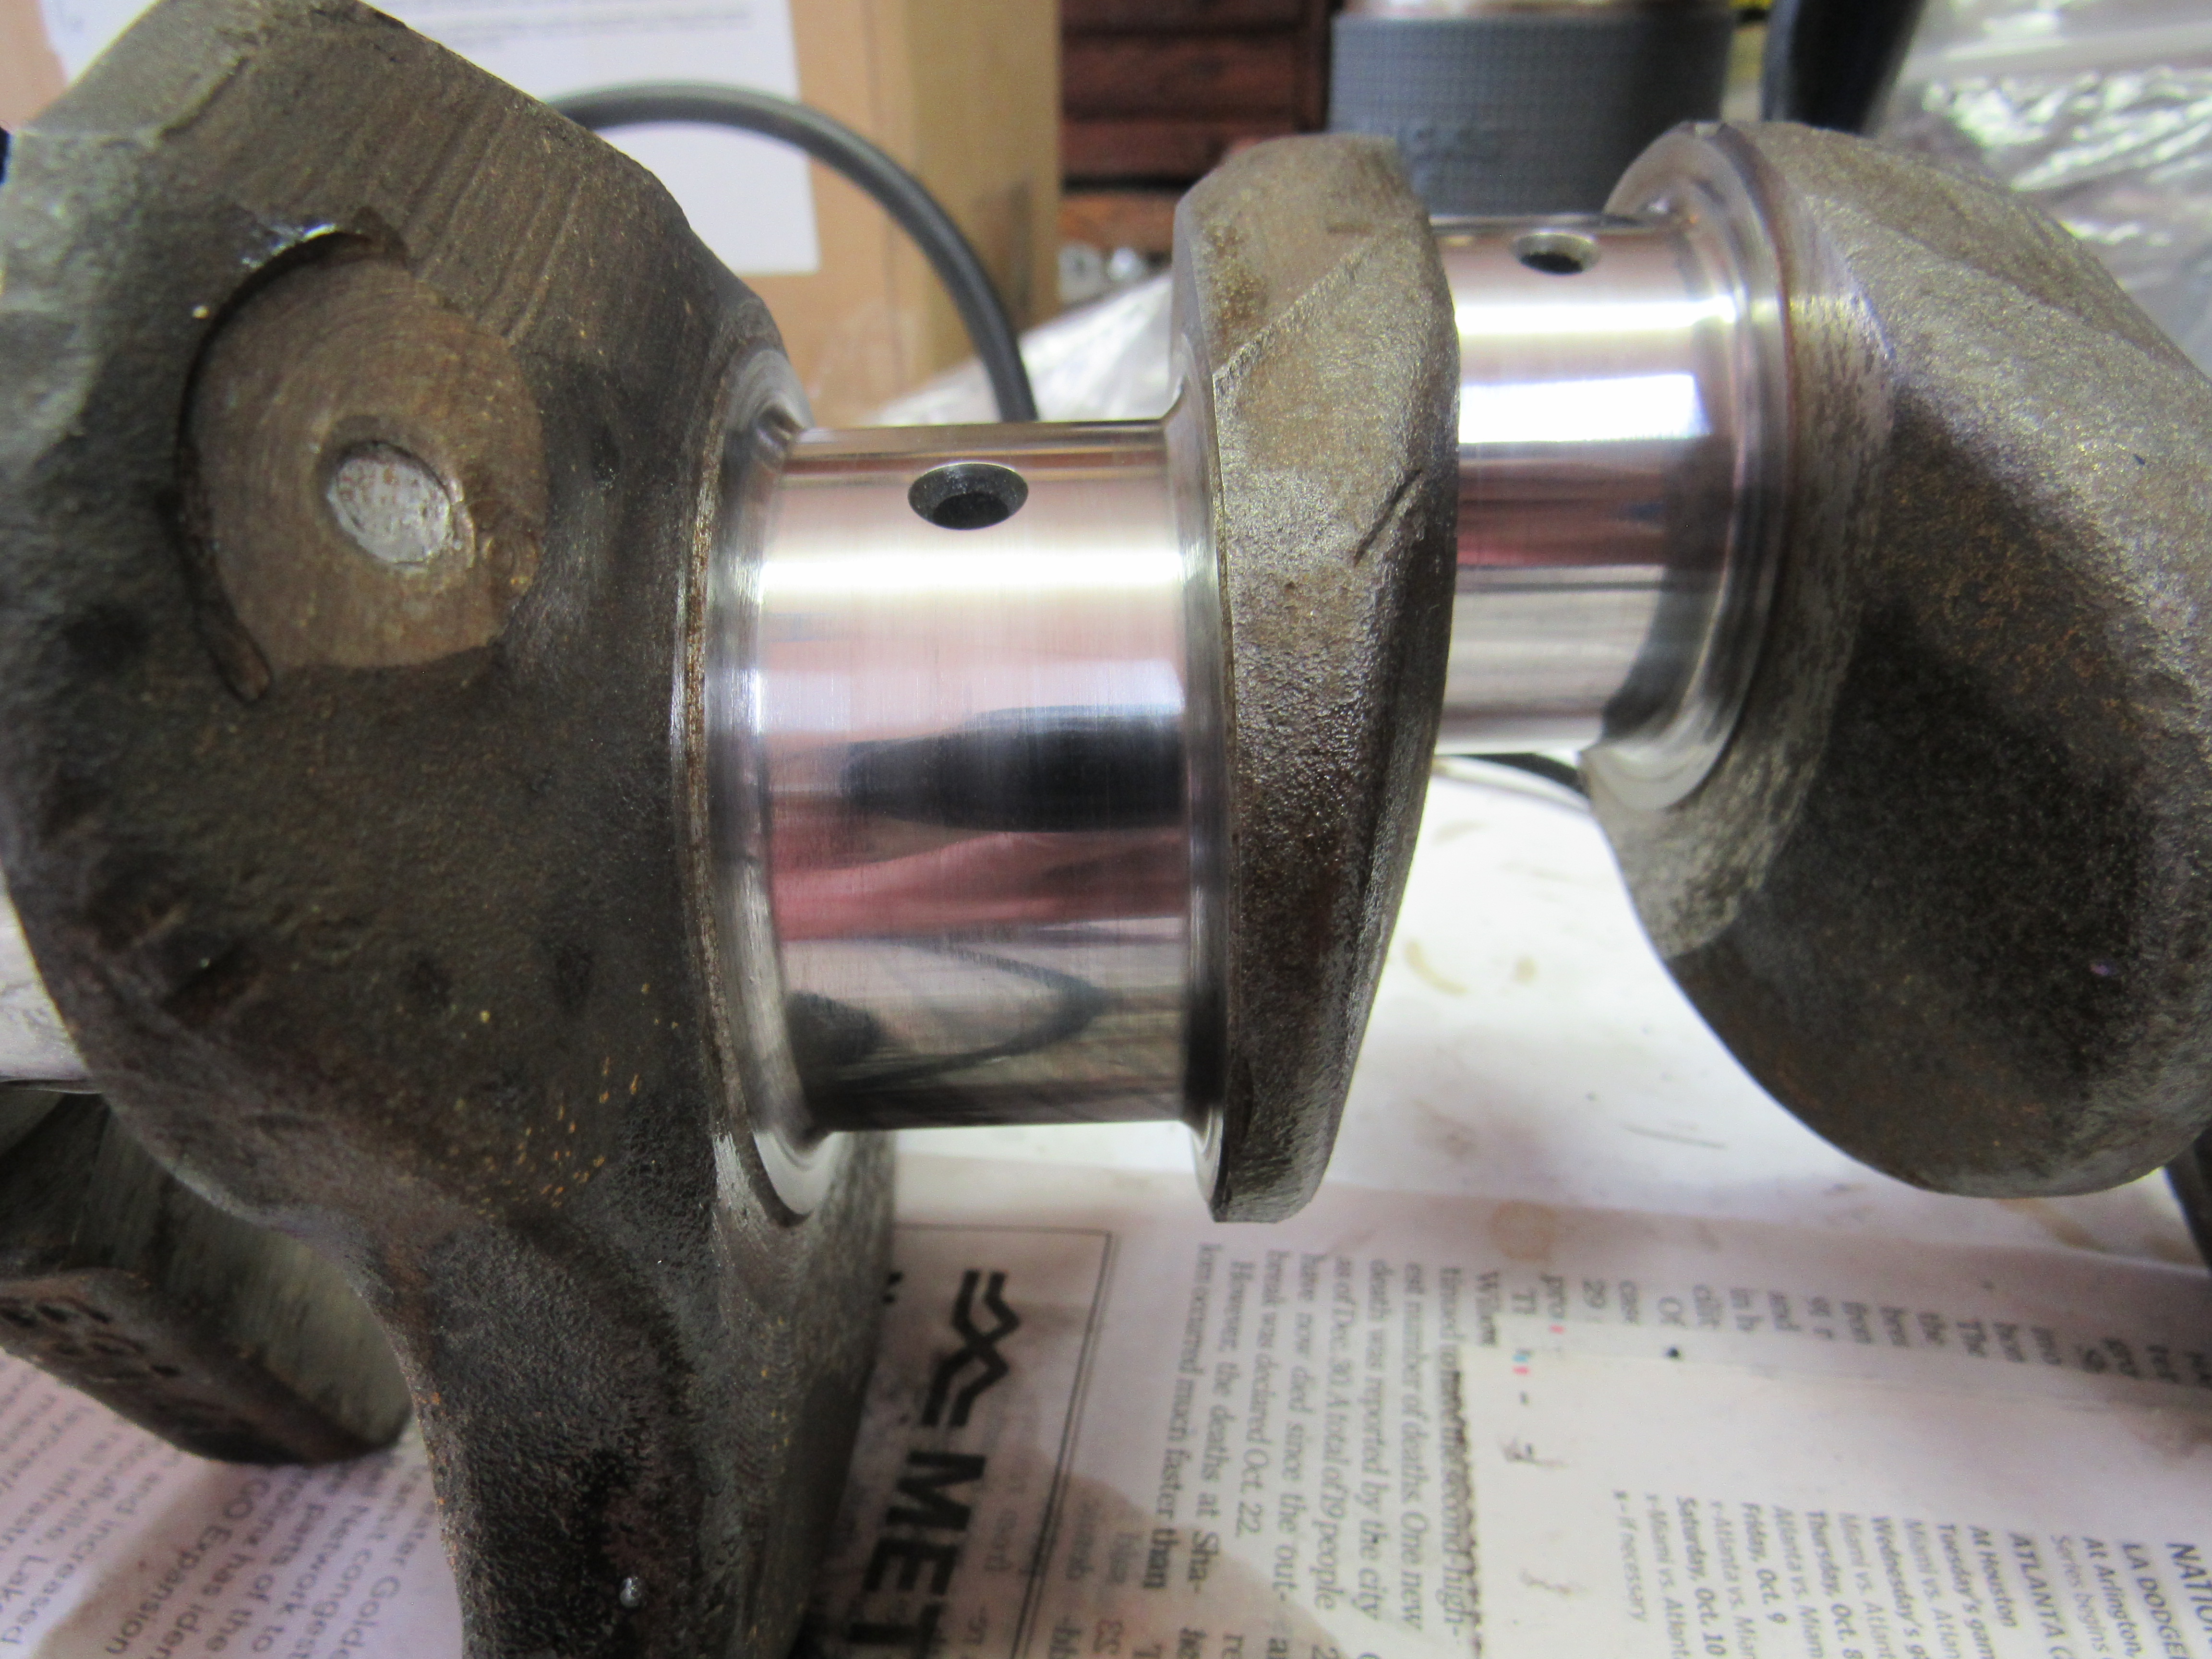
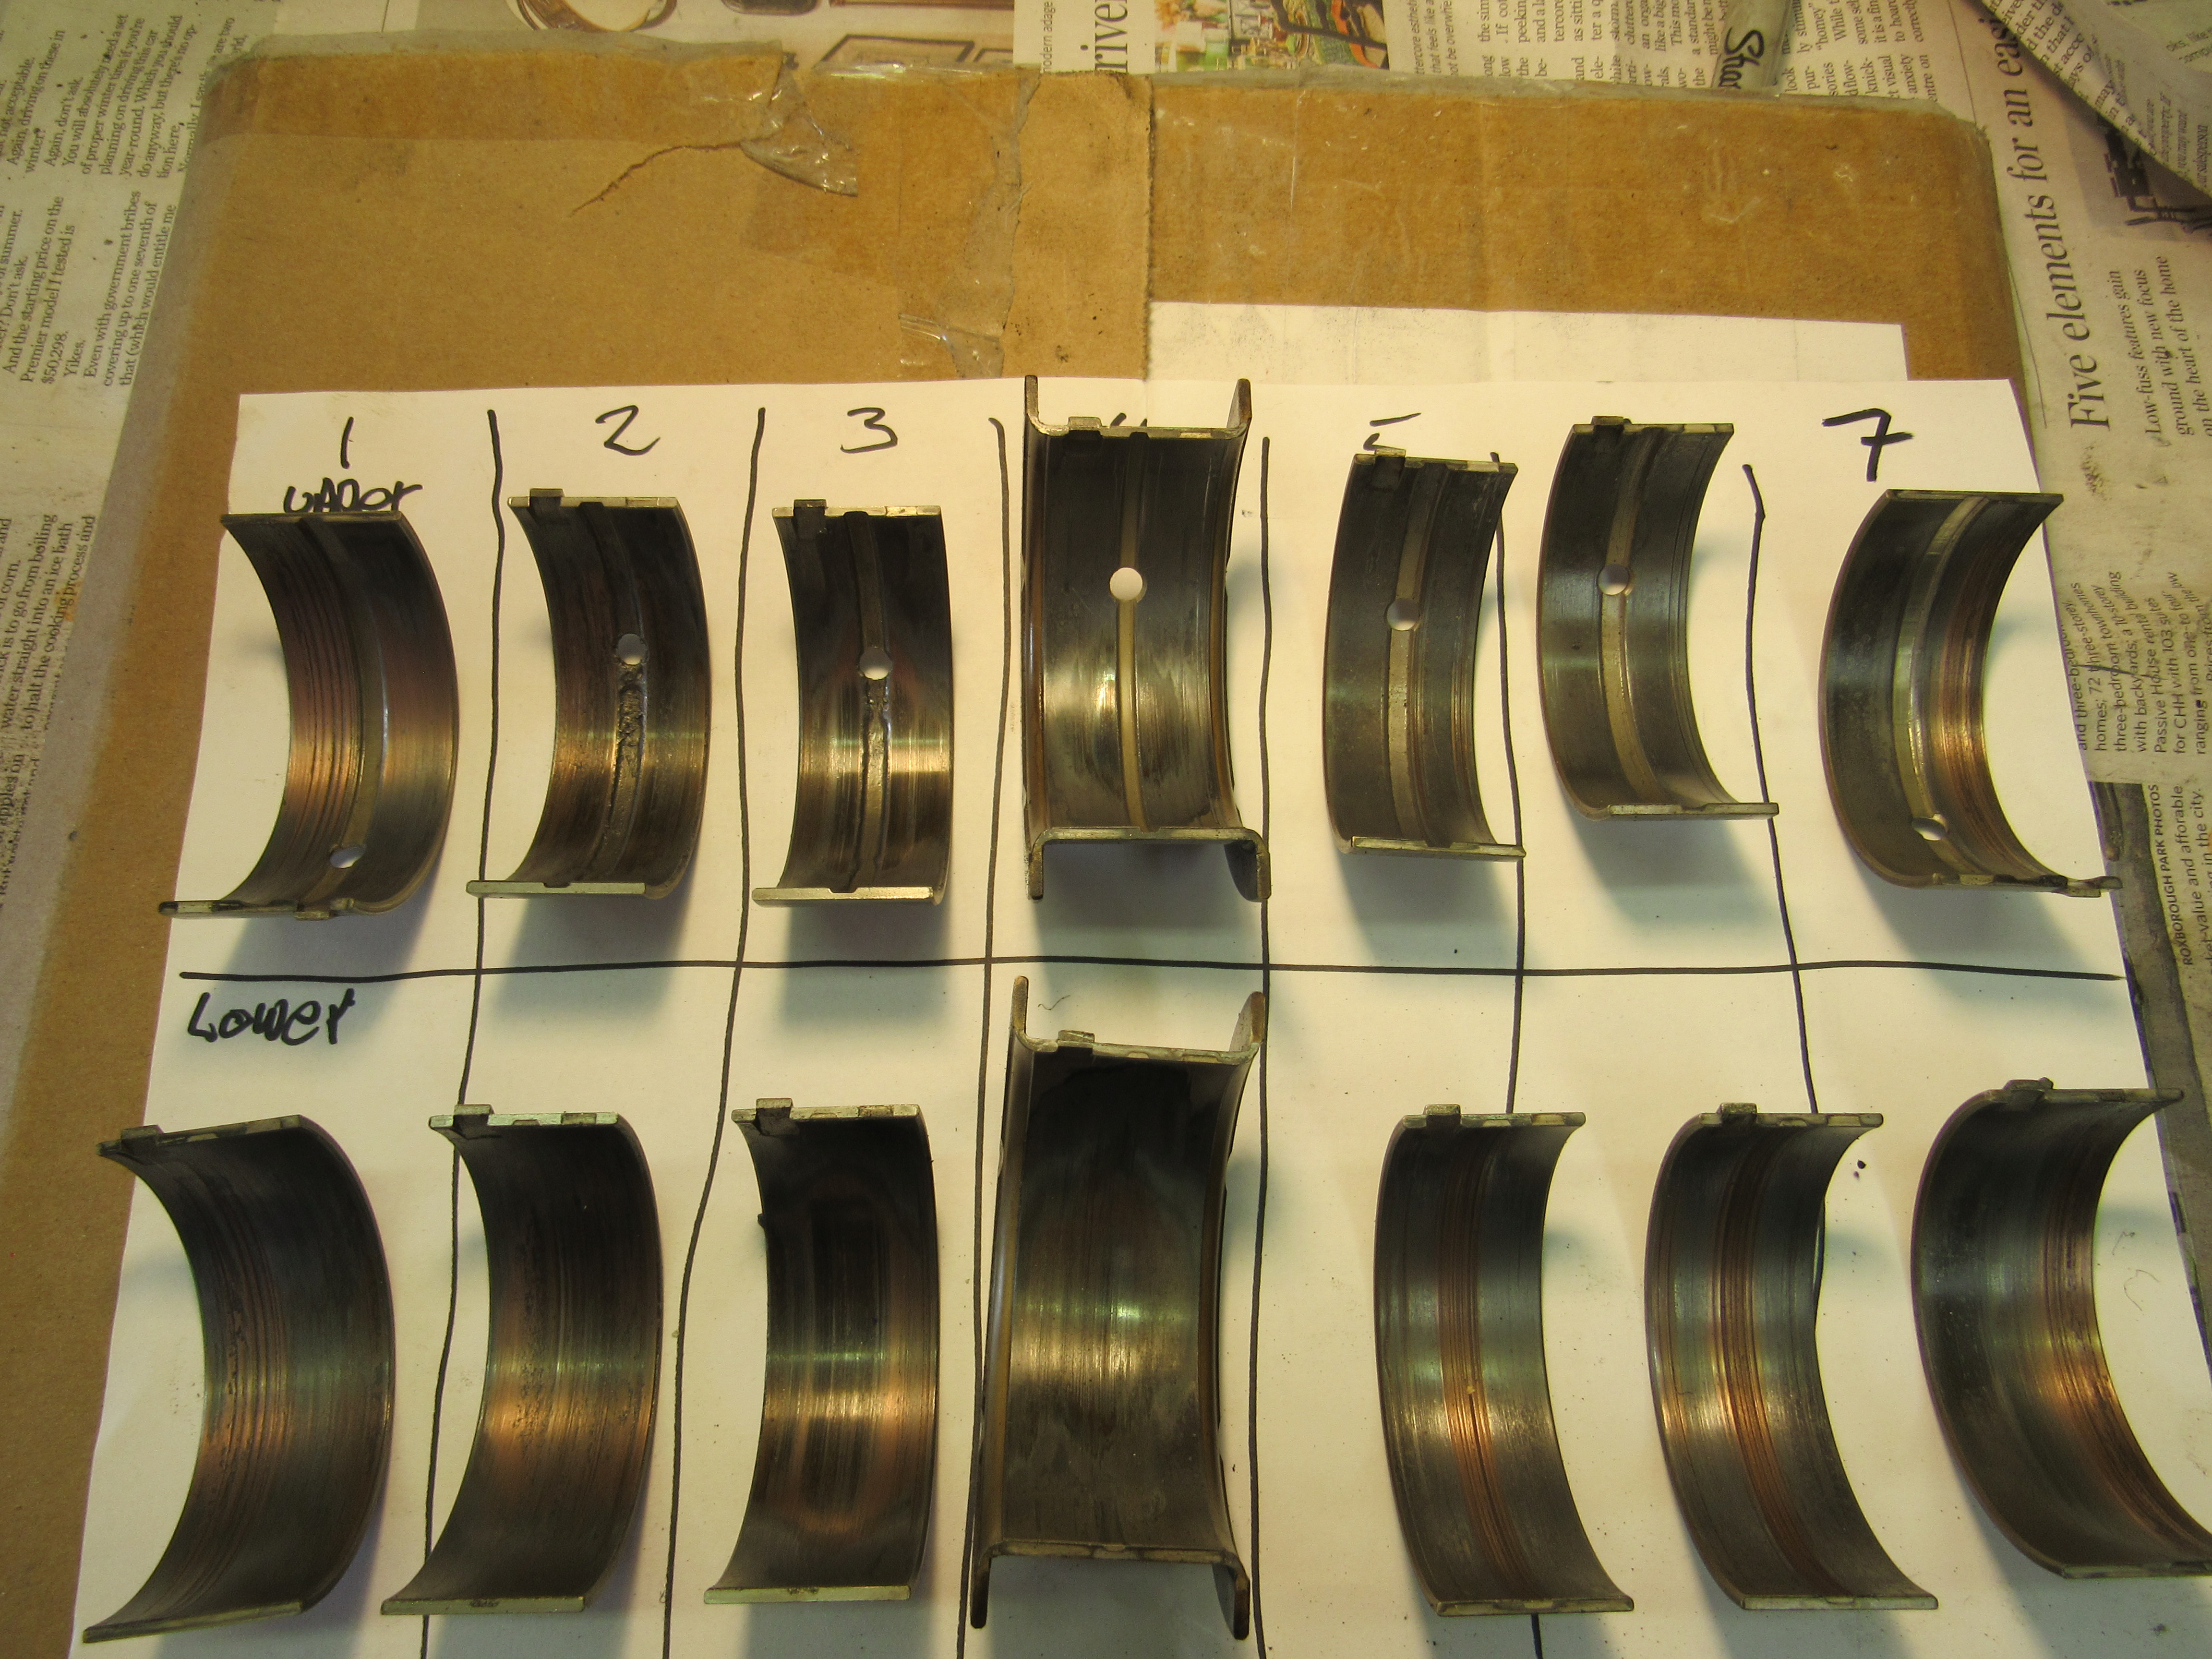
1 pointWell not a moment too soon for the bearings, at least they did their job and sacrificed themselves because the crank journals aren't that bad. I'll still send the crank out for polishing. Because the engine has been sitting for so long I gave each shell a couple of swipes with a scotch pad to bring out how much much copper is showing, these could have spun any moment. First pic is the rod bearings, second are the mains. The crank is showing some water marks and some copper transfer. Knocked out the freeze plugs and found lots of crud and silicone sealer clogging up passages.


 1 point
 -
1 pointI call bs. Glass is a very stable material, able to endure millennia provided it is not changed in any way. From Wikipedia: “Generally speaking, emulsions/colloidal systems and glasses are metastable. The metastability of silica glass, for example, is characterized by lifetimes on the order of 1098 years (as compared with the lifetime of the universe, which is thought to be around 13.787 X 10⁹ years).” Ten to the ninetyeighth power is a very long time. Glass will outlive any of the other materials a car is made from. Without any interference from, say vandalism, if a car is left to sit undisurbed, after the metals corrode to dust, the plastics and vinyls decay into crumbs, the glass will still be there, dirty and covered in whatever growth is common to the place it is. So yes, glass may become unstable over time. A very, very long time. There it is. The small chip results in a weak point in the glass structure. If it had not been damaged, the glass would have been fine, given proper care and handling. Even brand new glass will be weakened when nicked or chipped.1 point
-
@grannyknotit is tempting.... My radio works perfect. I am honestly torn as wether to keep the original or go with something like this. https://www.retrosoundusa.com.au/index.php?l=product_detail&p=2530 Judging by some of the shotty wiring you are probably right. Weird thing to change though.1 point
-
A PO must have installed the early radio and face plate, have a look on ebay what those early radio & faceplates are going for, you could install an entire sound system for what they are worth.1 point
-
1 point
-
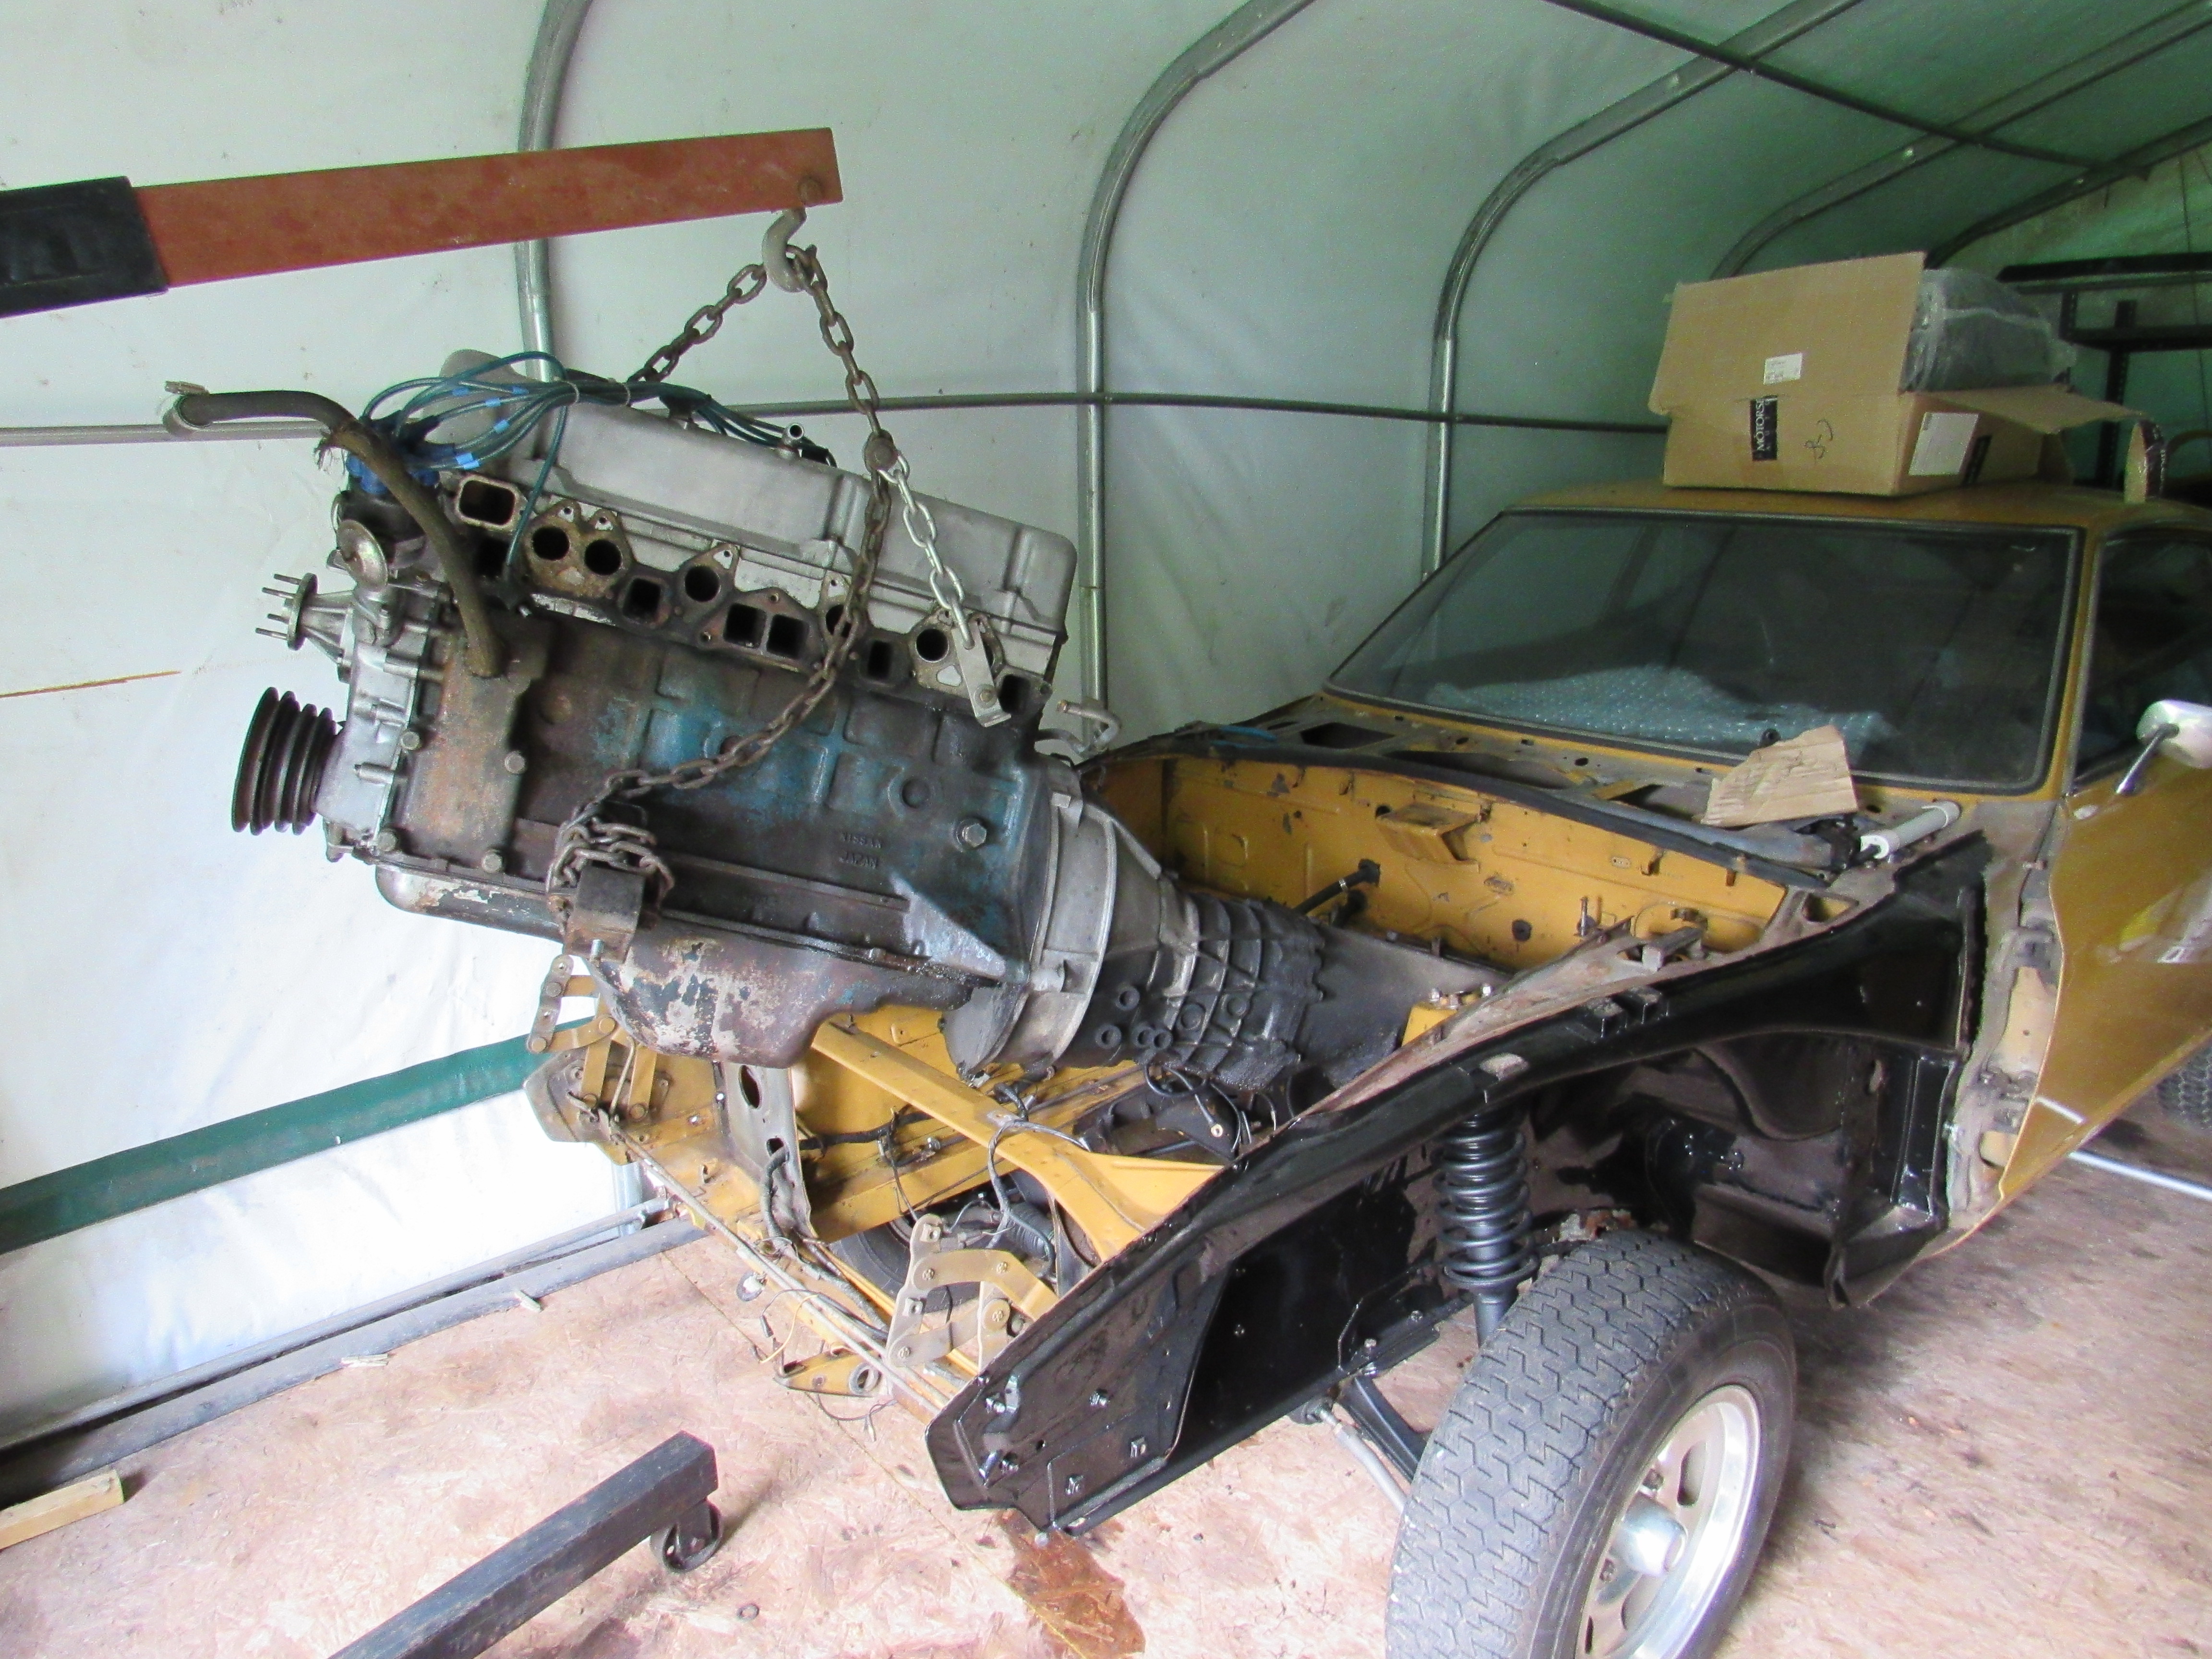
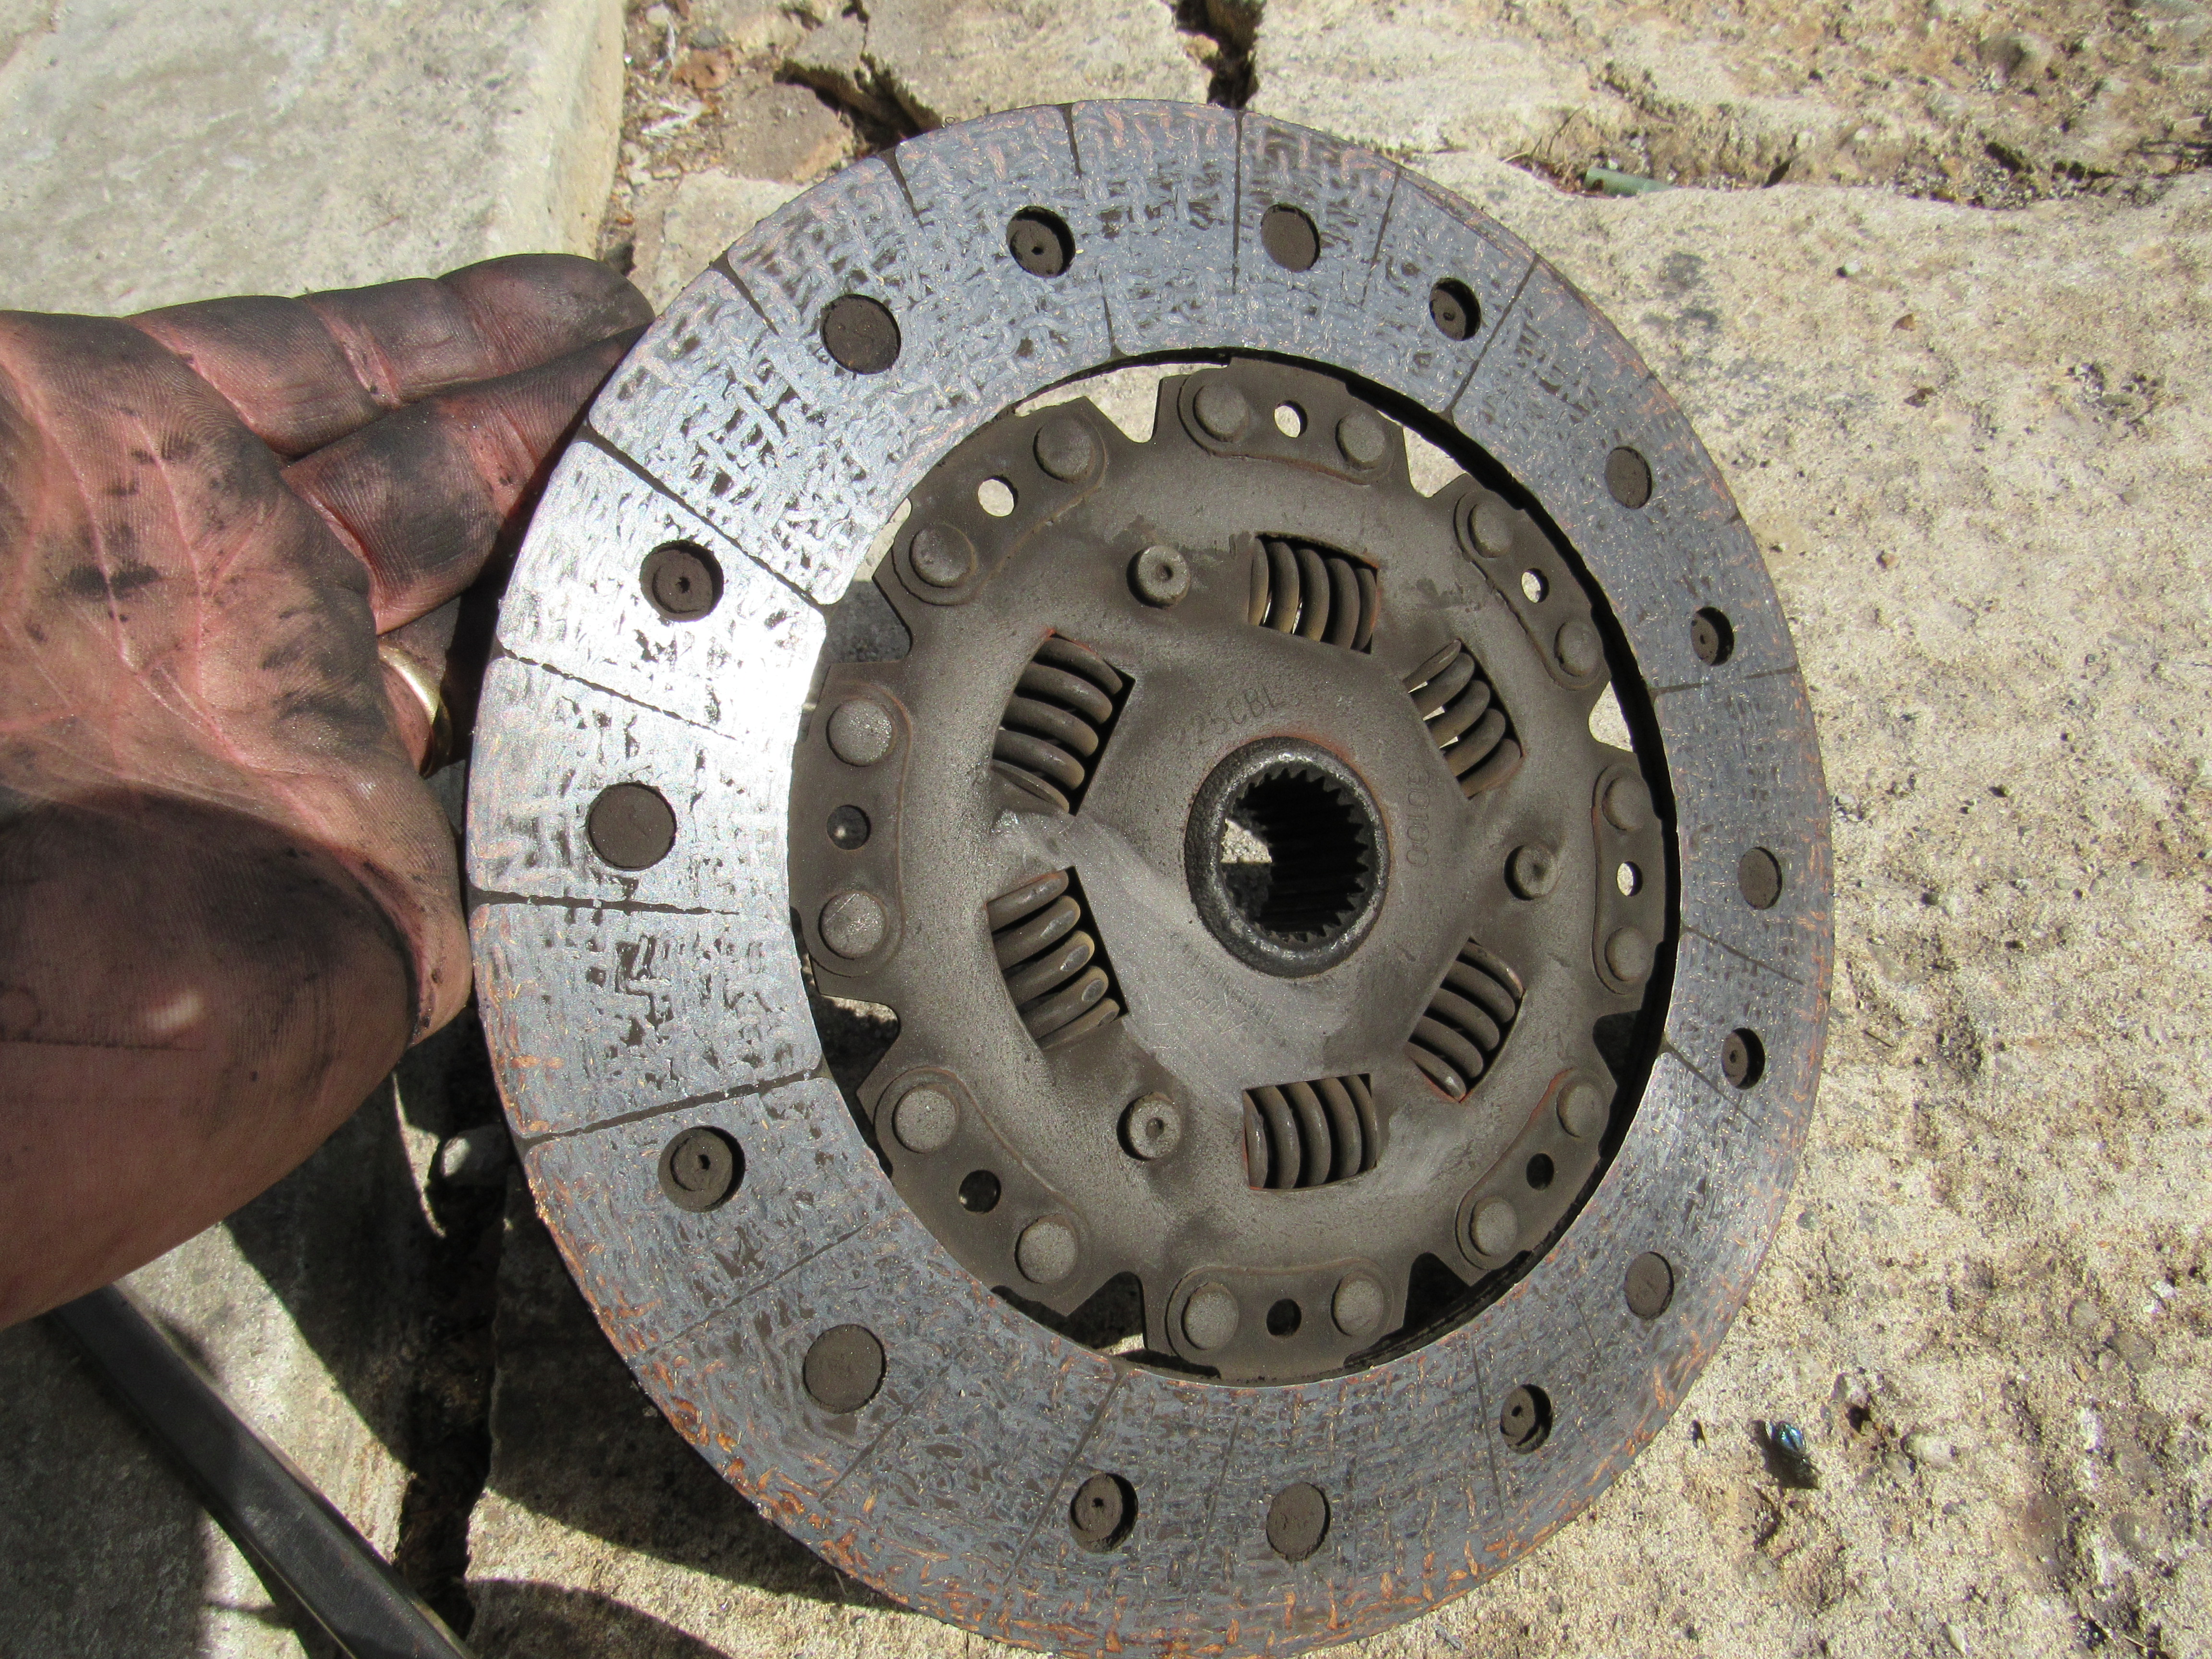
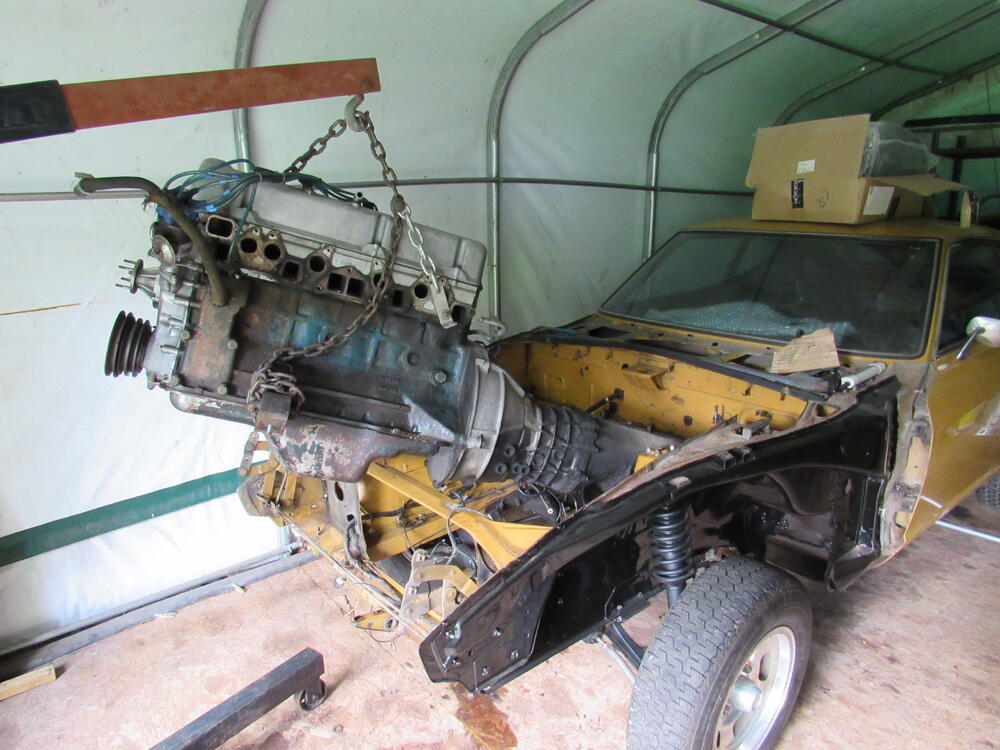
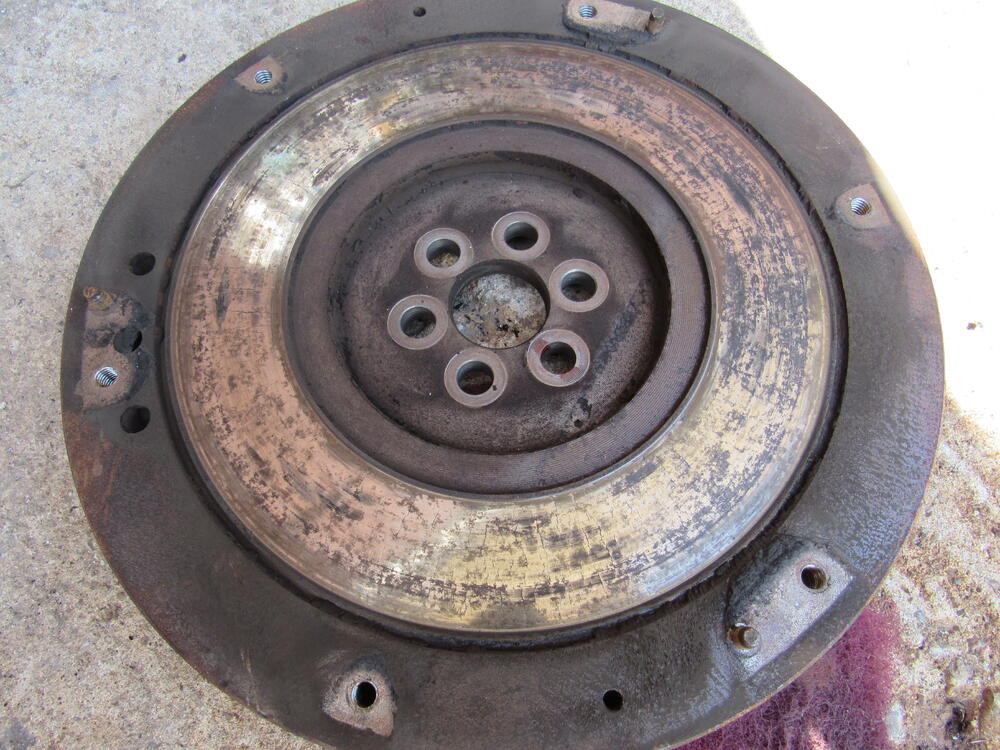
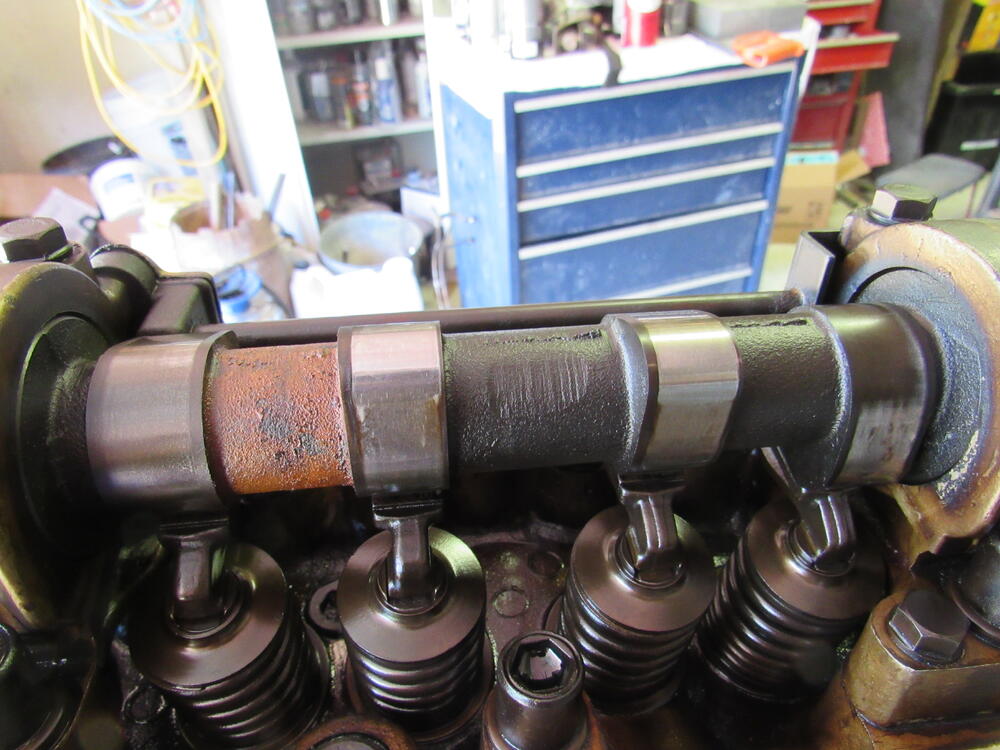
1 pointI got the engine and trans pulled this morning, up to the shop on the engine stand. Dave, looks like you got your moneys worth out of the clutch, the release bearing was kind of crunchy, not sure the flywheel can be saved either. All the lobes on the cam are in very nice condition, no real wear, underneath 50+ years of grease and dirt is some of the assembly line marker paint.


 1 point