Leaderboard
-

Paulytunes
 Subscriber
 6Points107Posts
 -

Racer X
Free Member4Points1,877Posts -
HusseinHolland
Free Member4Points1,031Posts -
grannyknot
Free Member3Points5,158Posts


Popular Content
Showing content with the highest reputation on 07/02/2023 in all areas
-
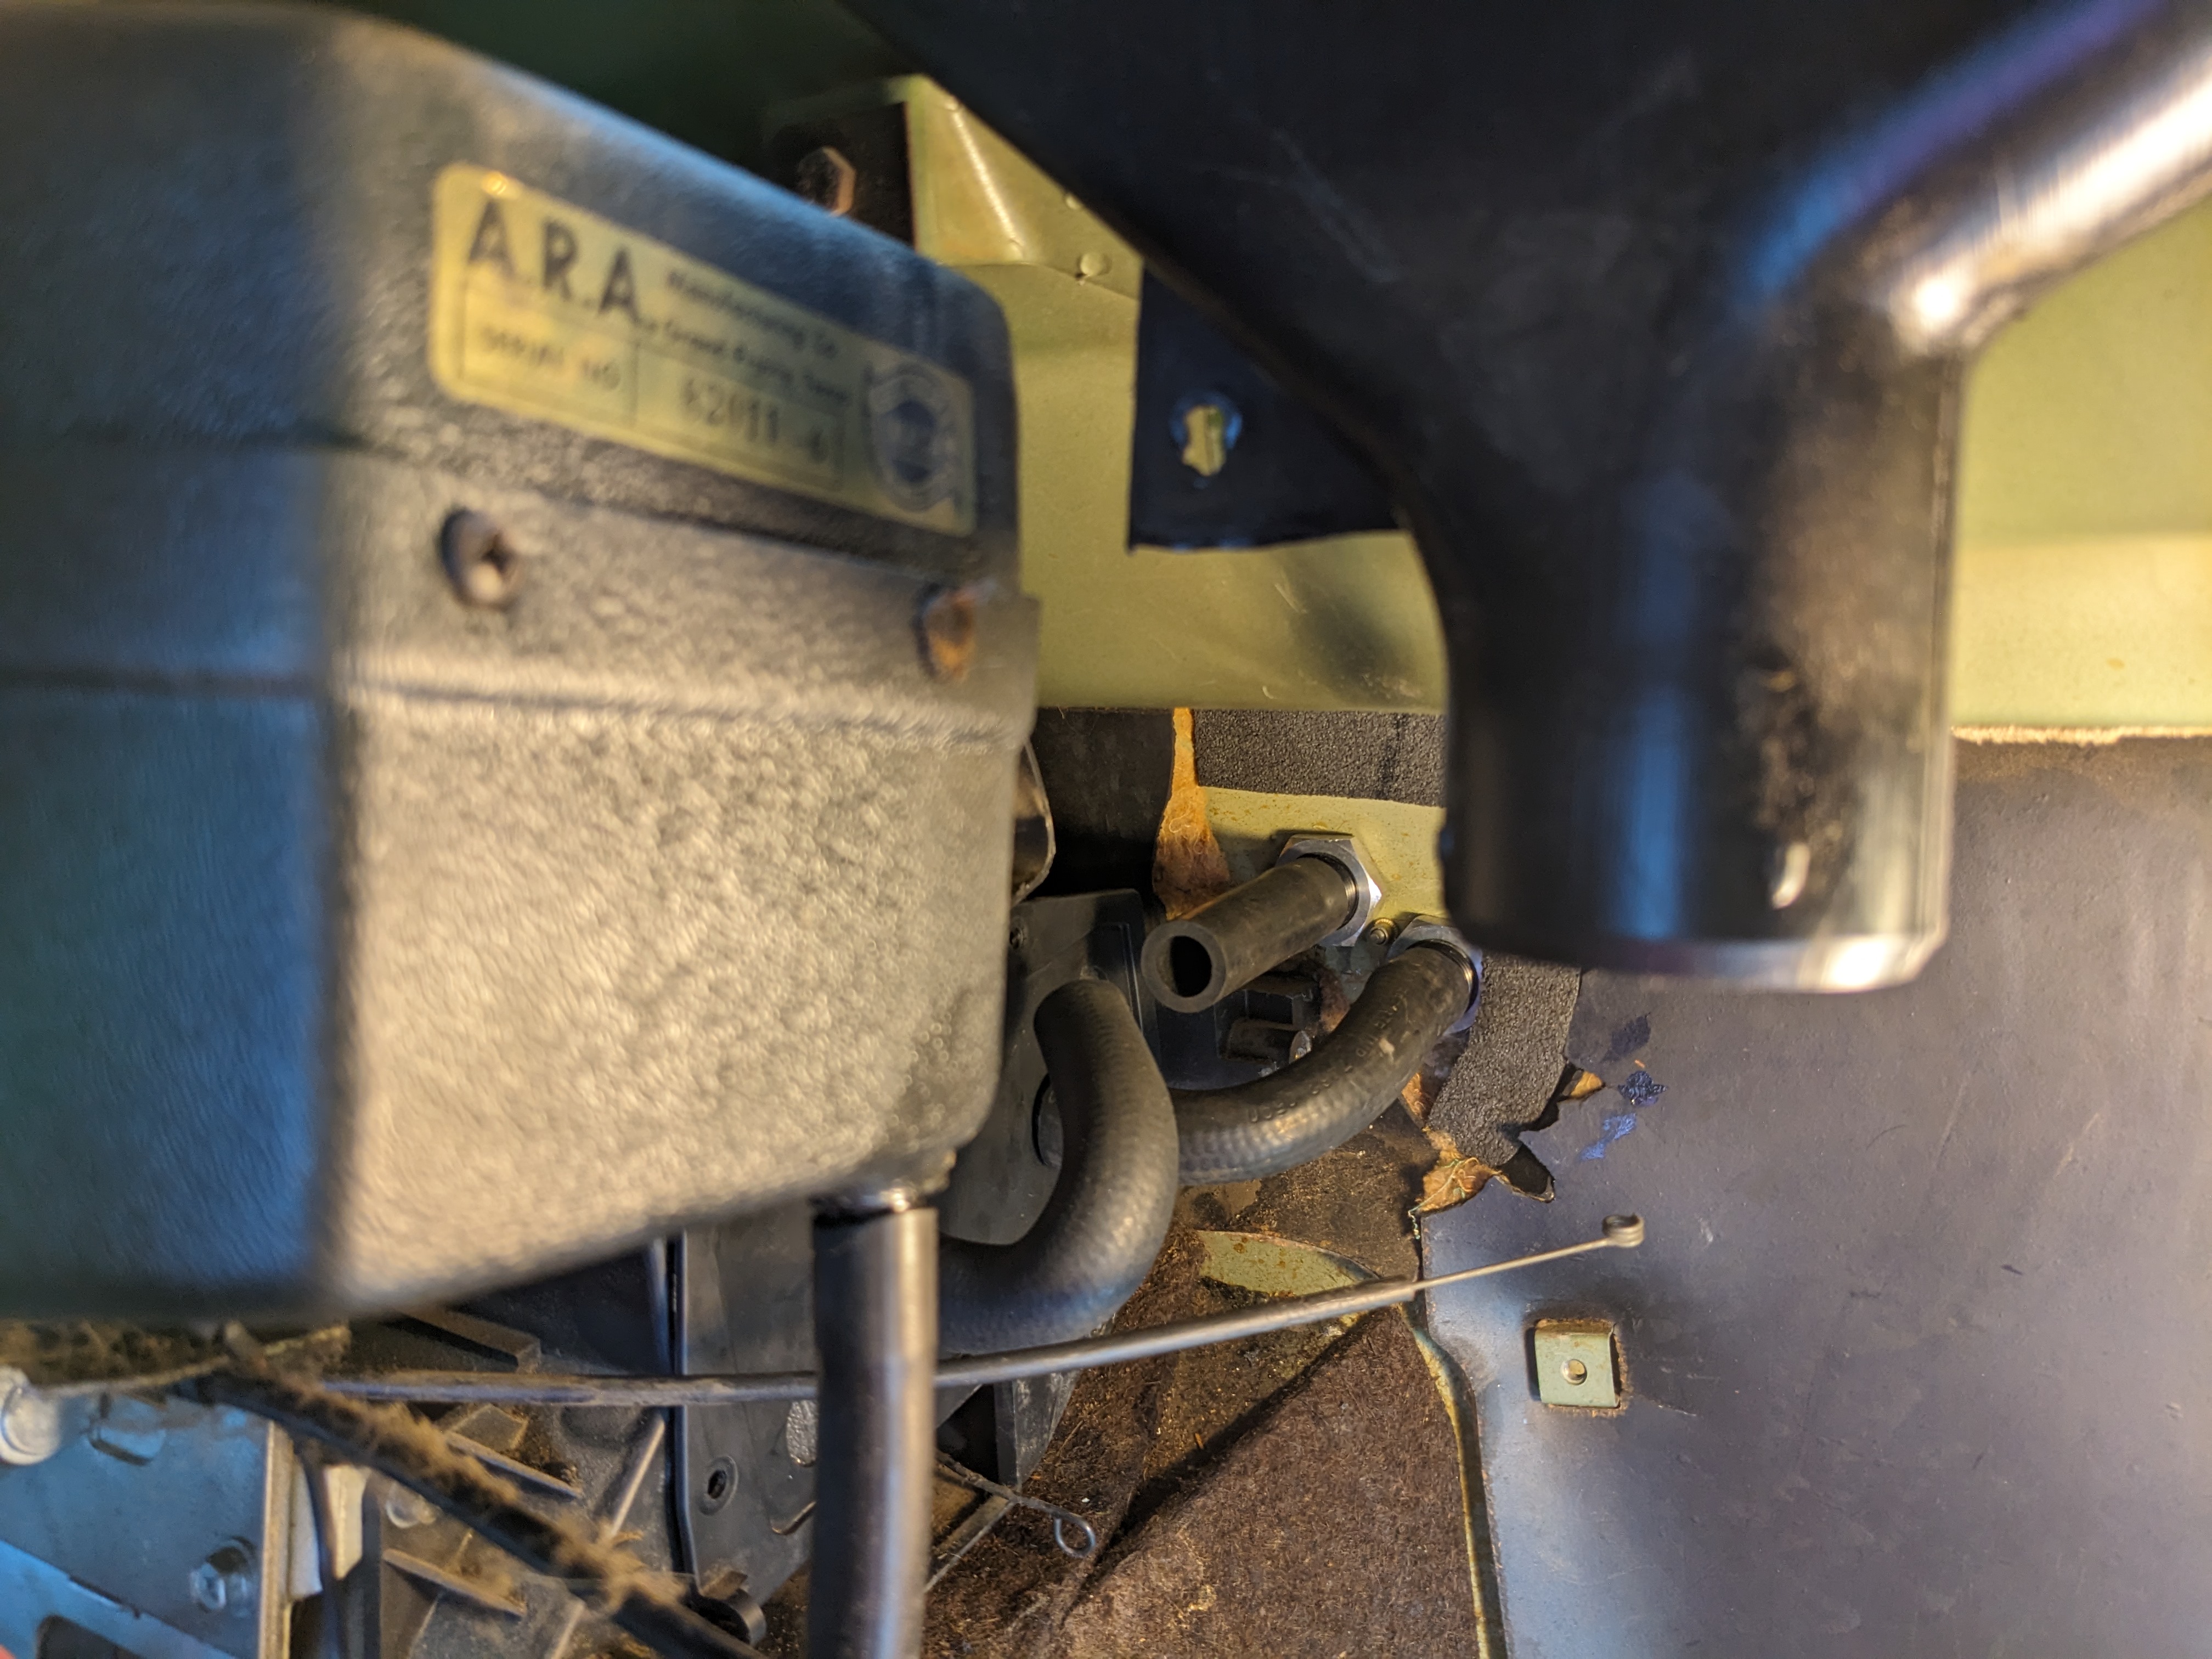
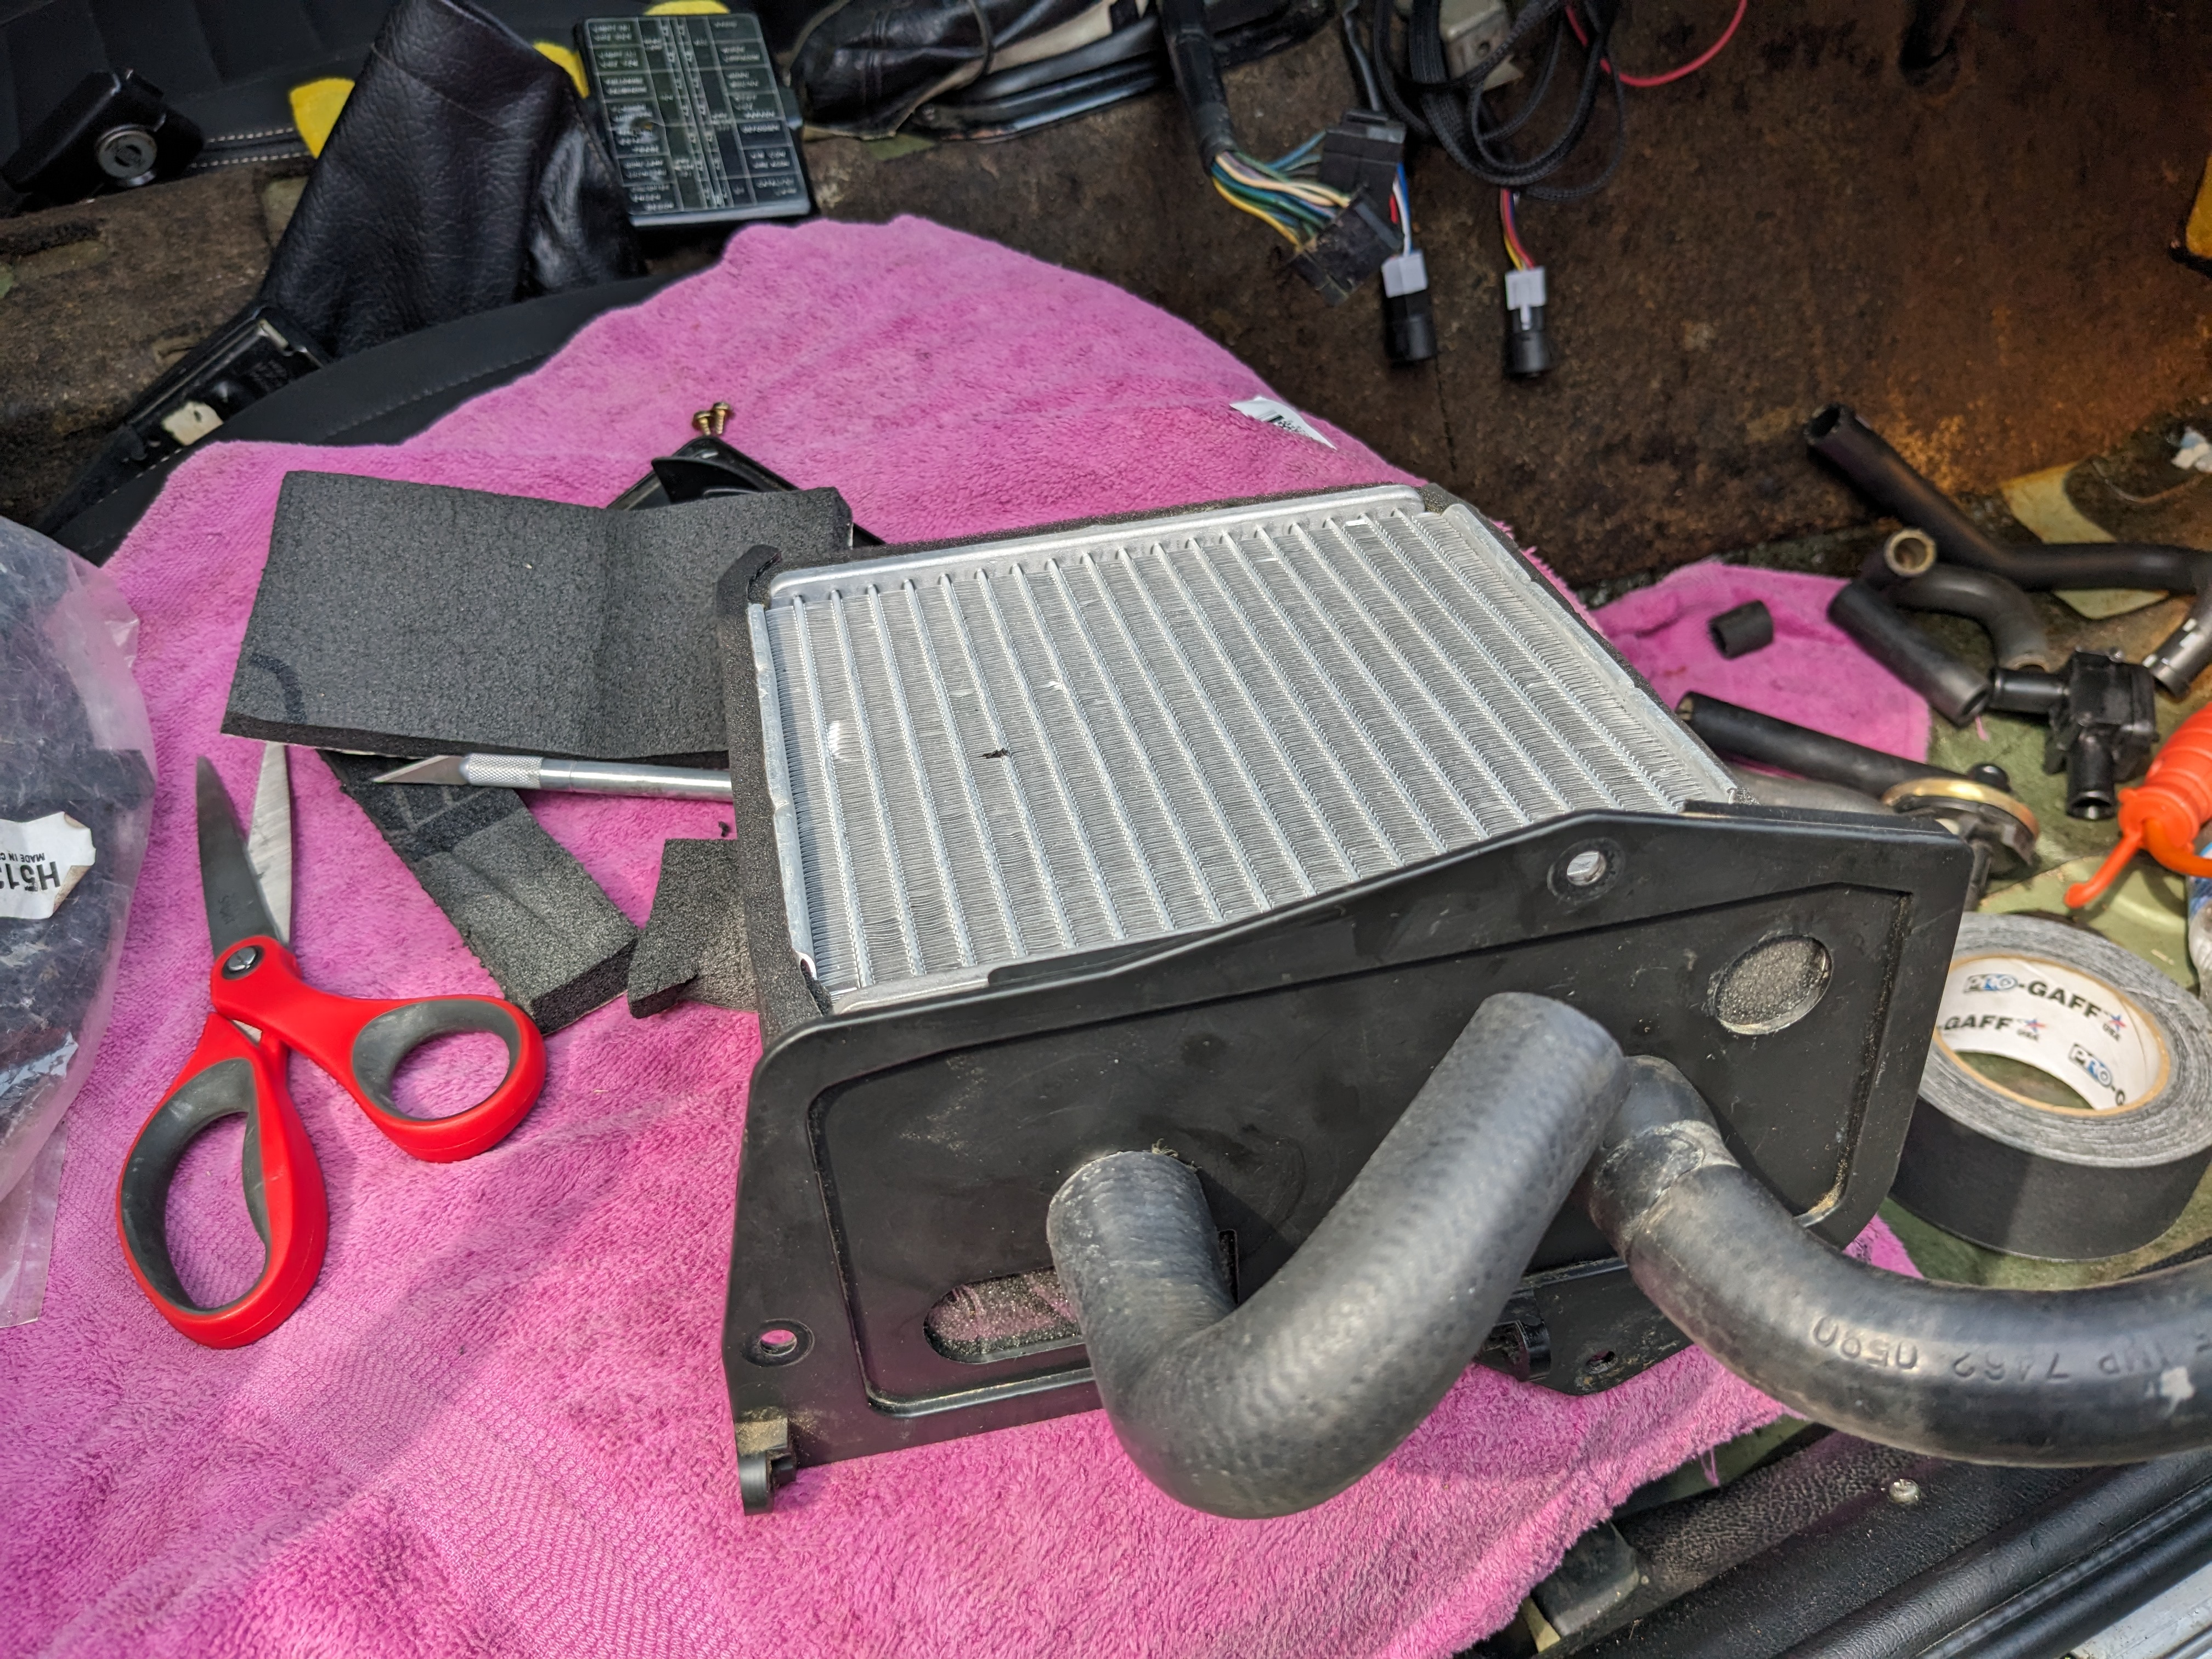
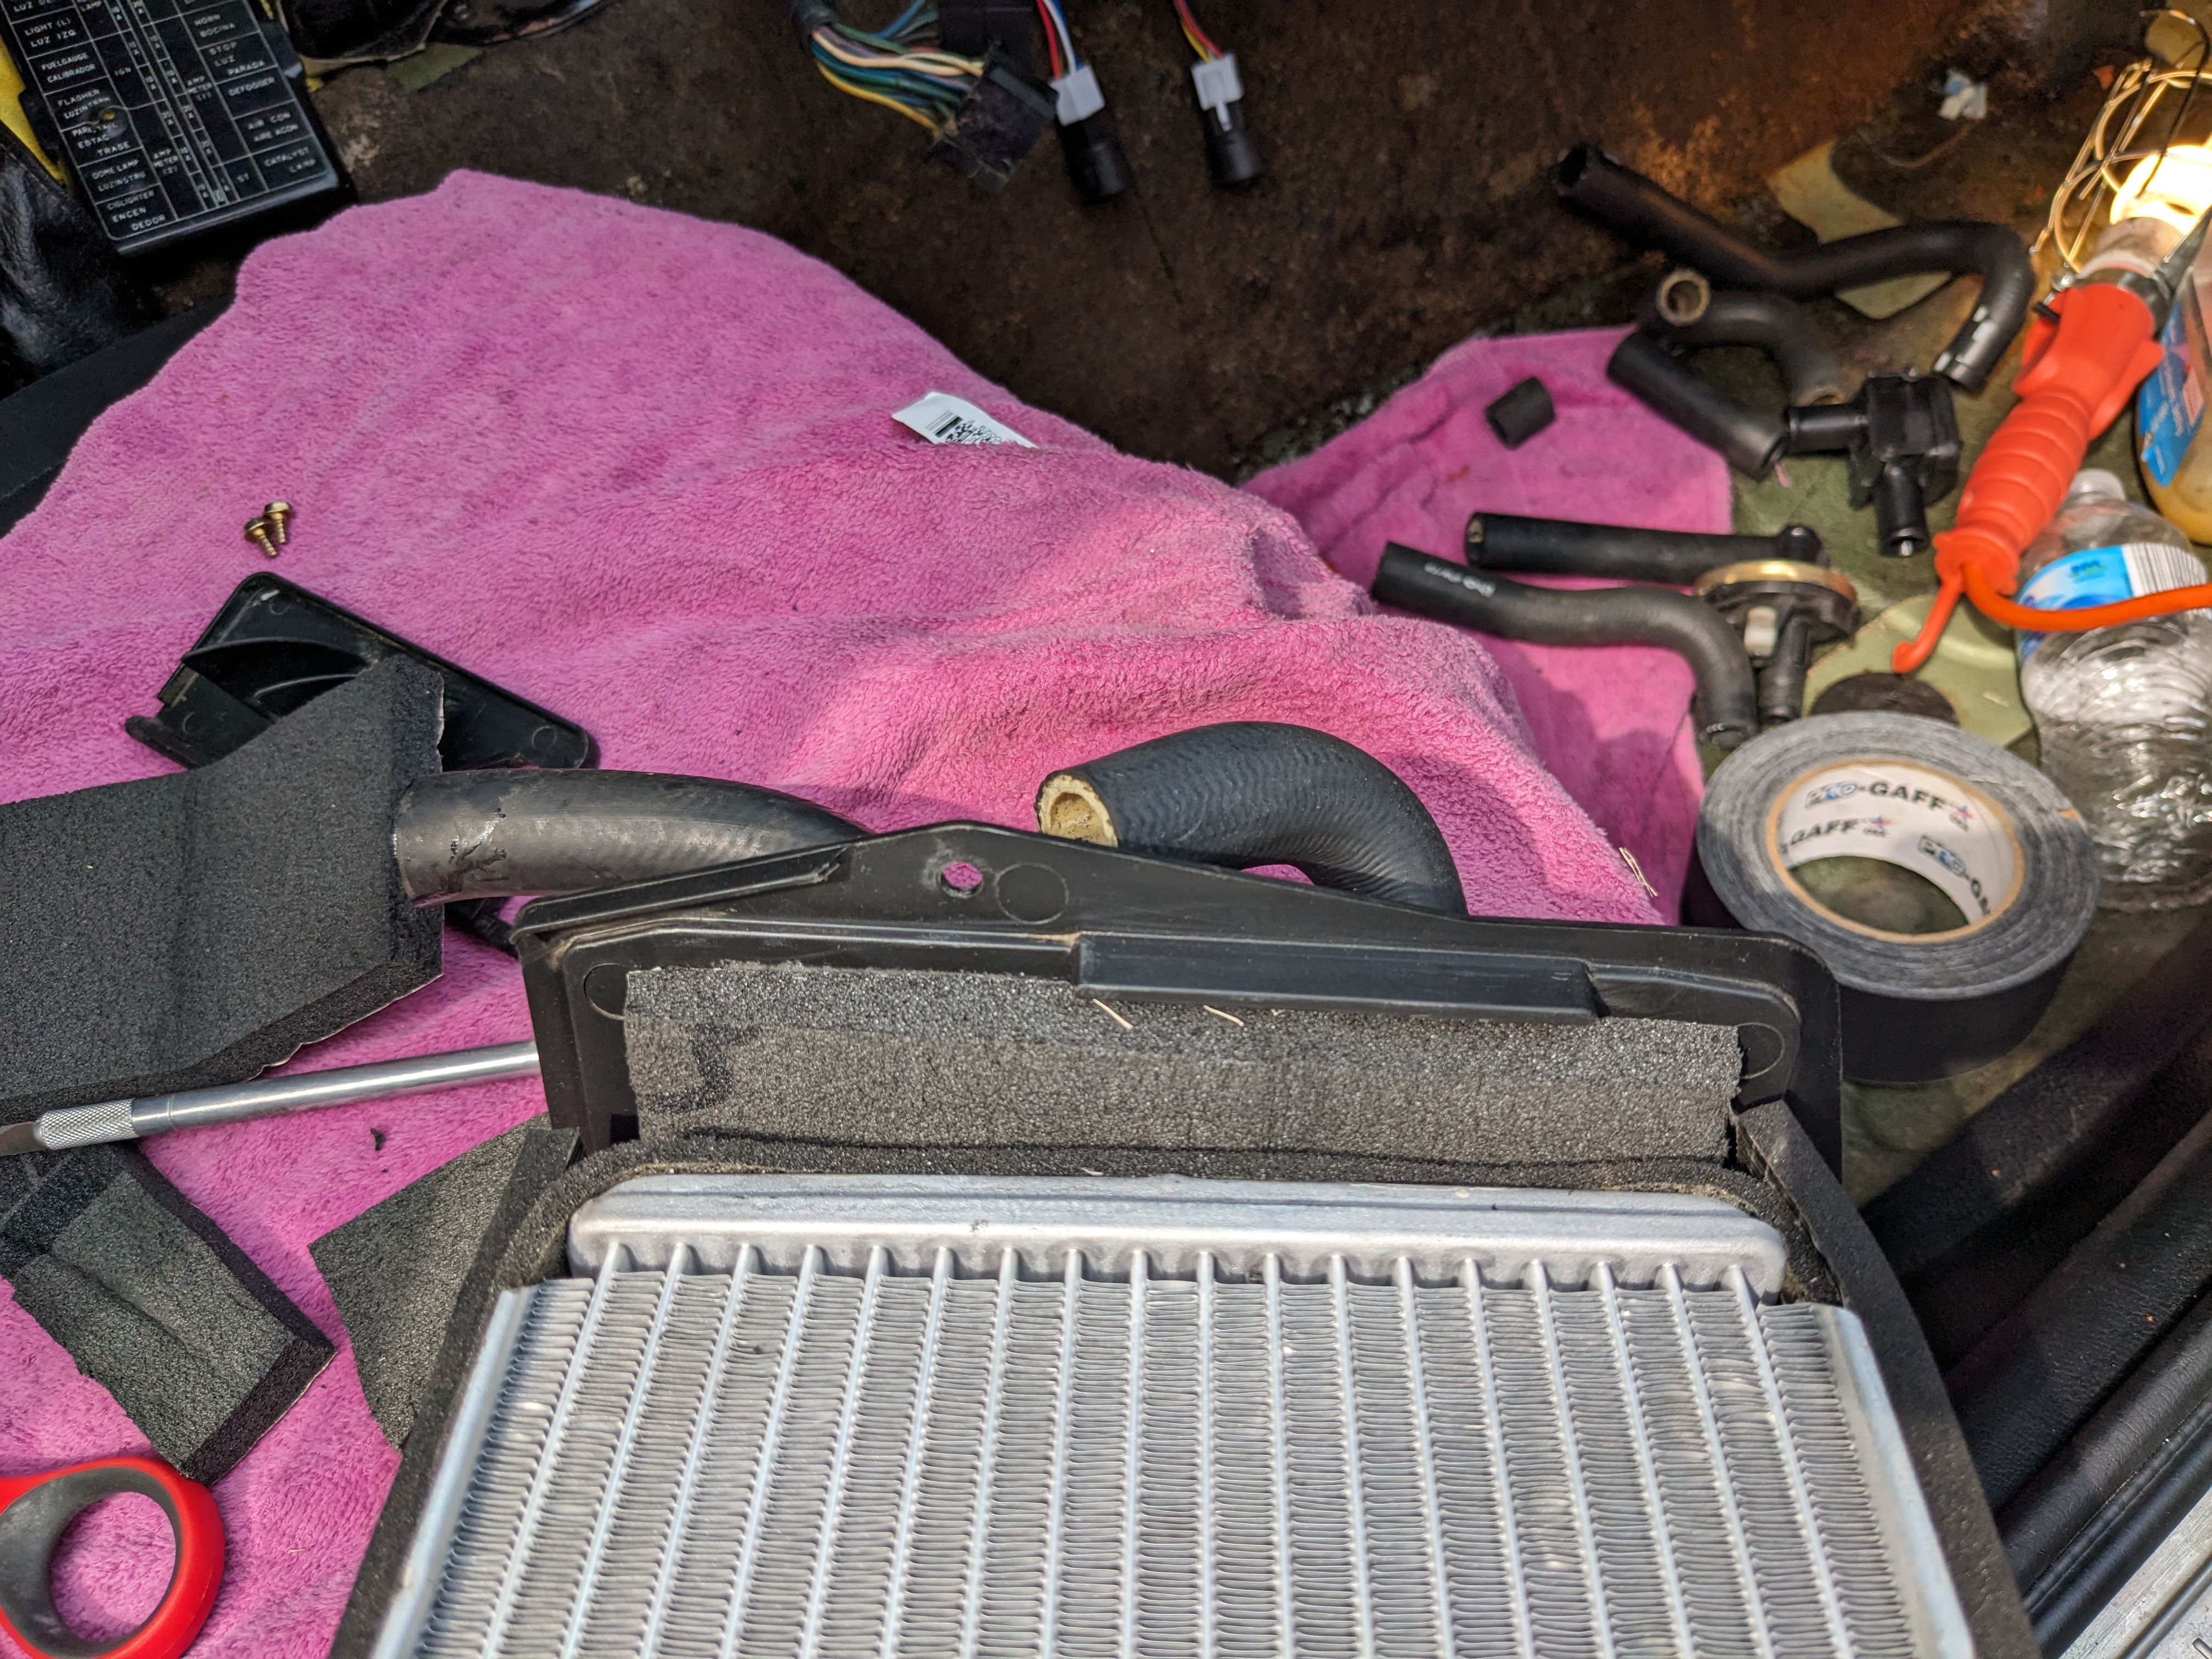
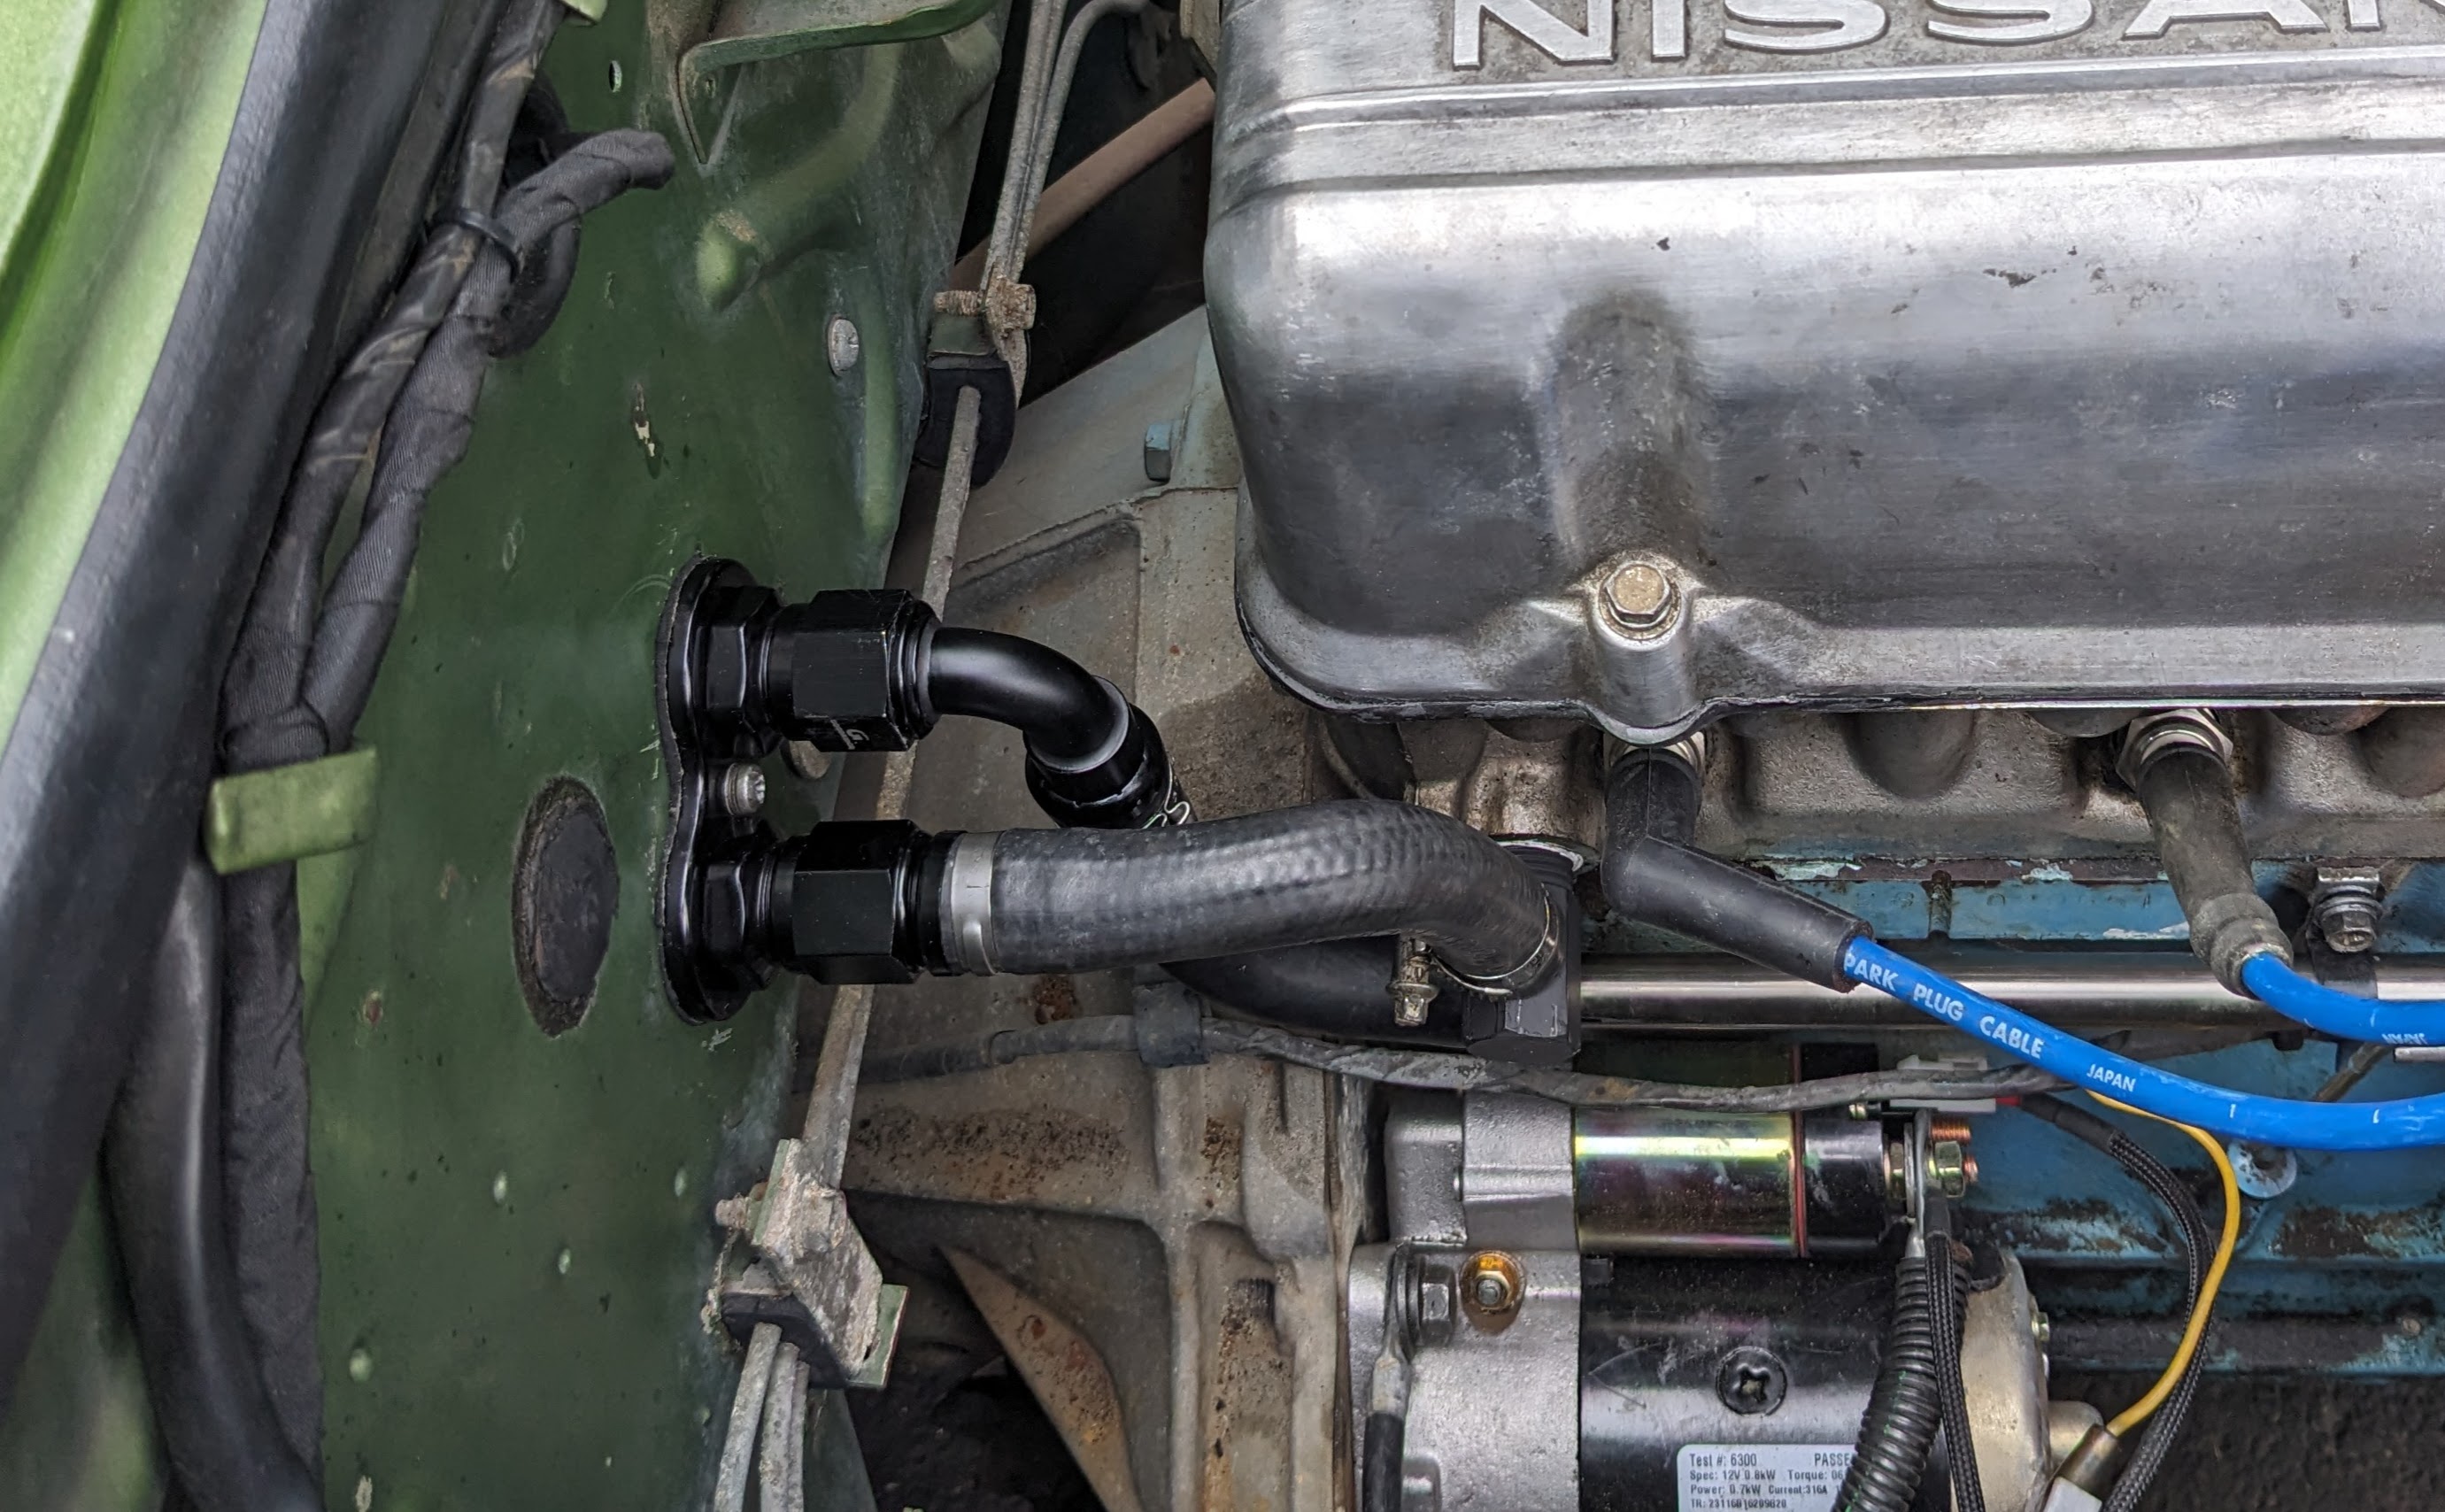
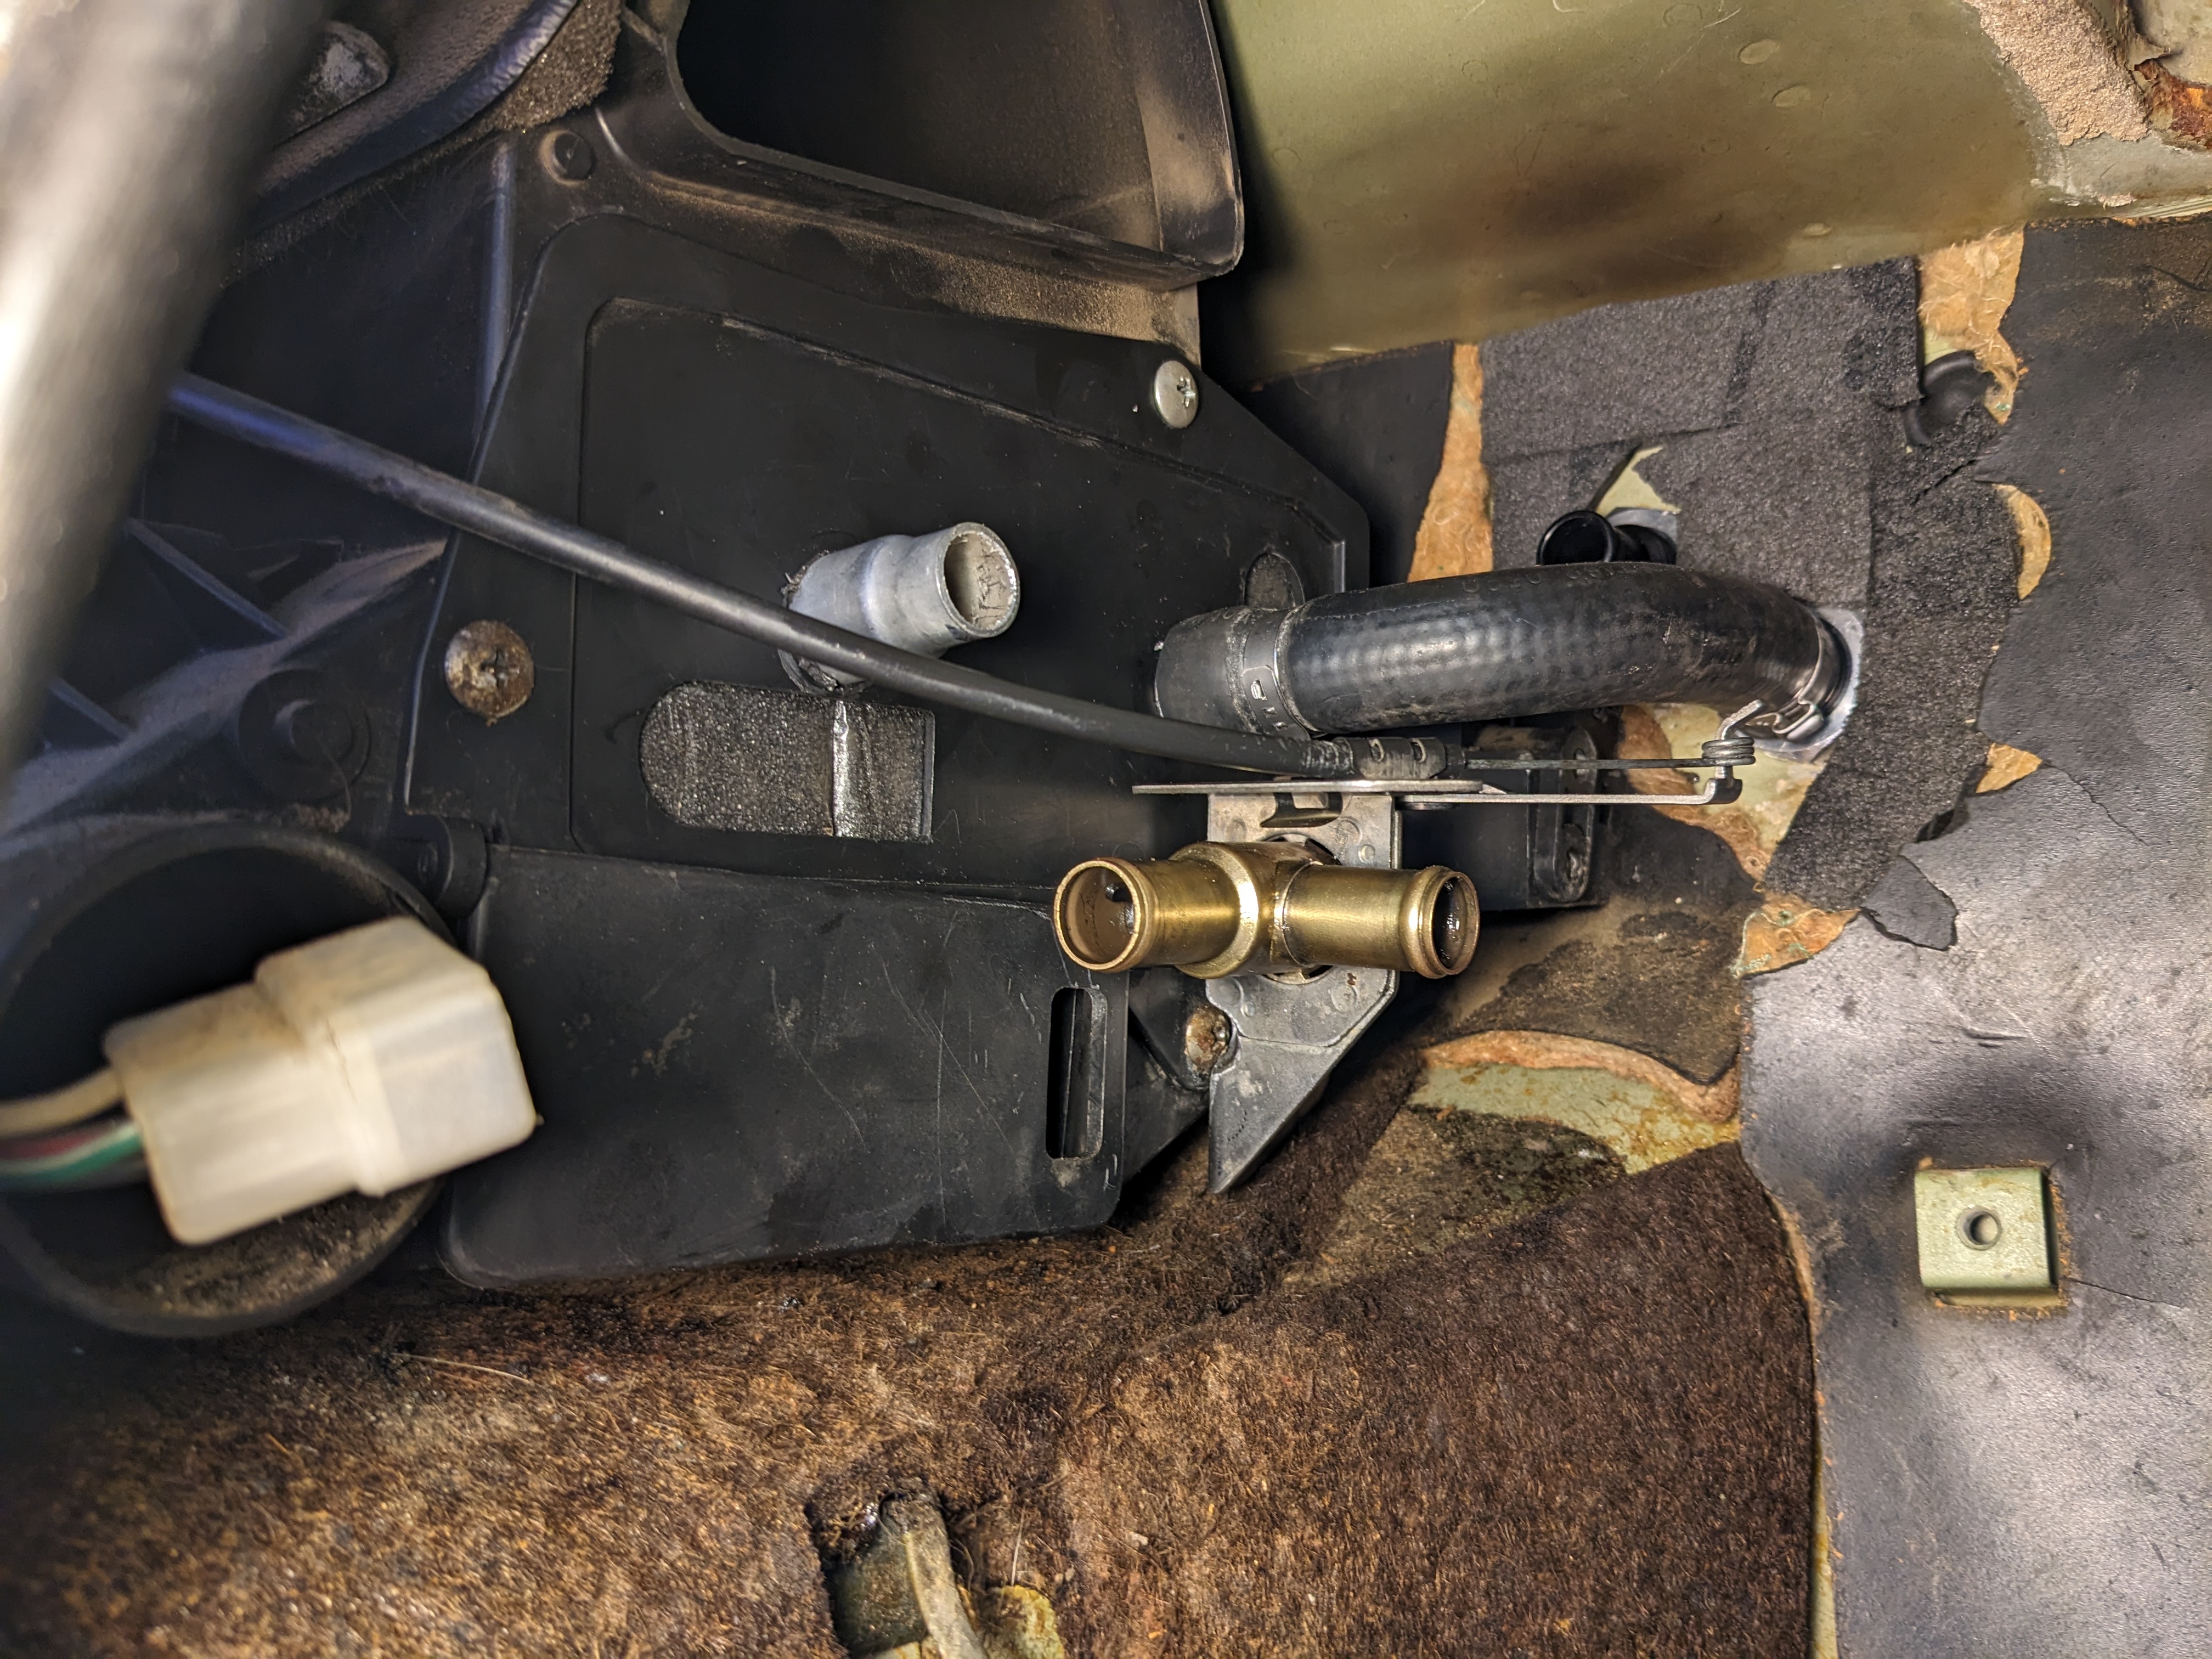
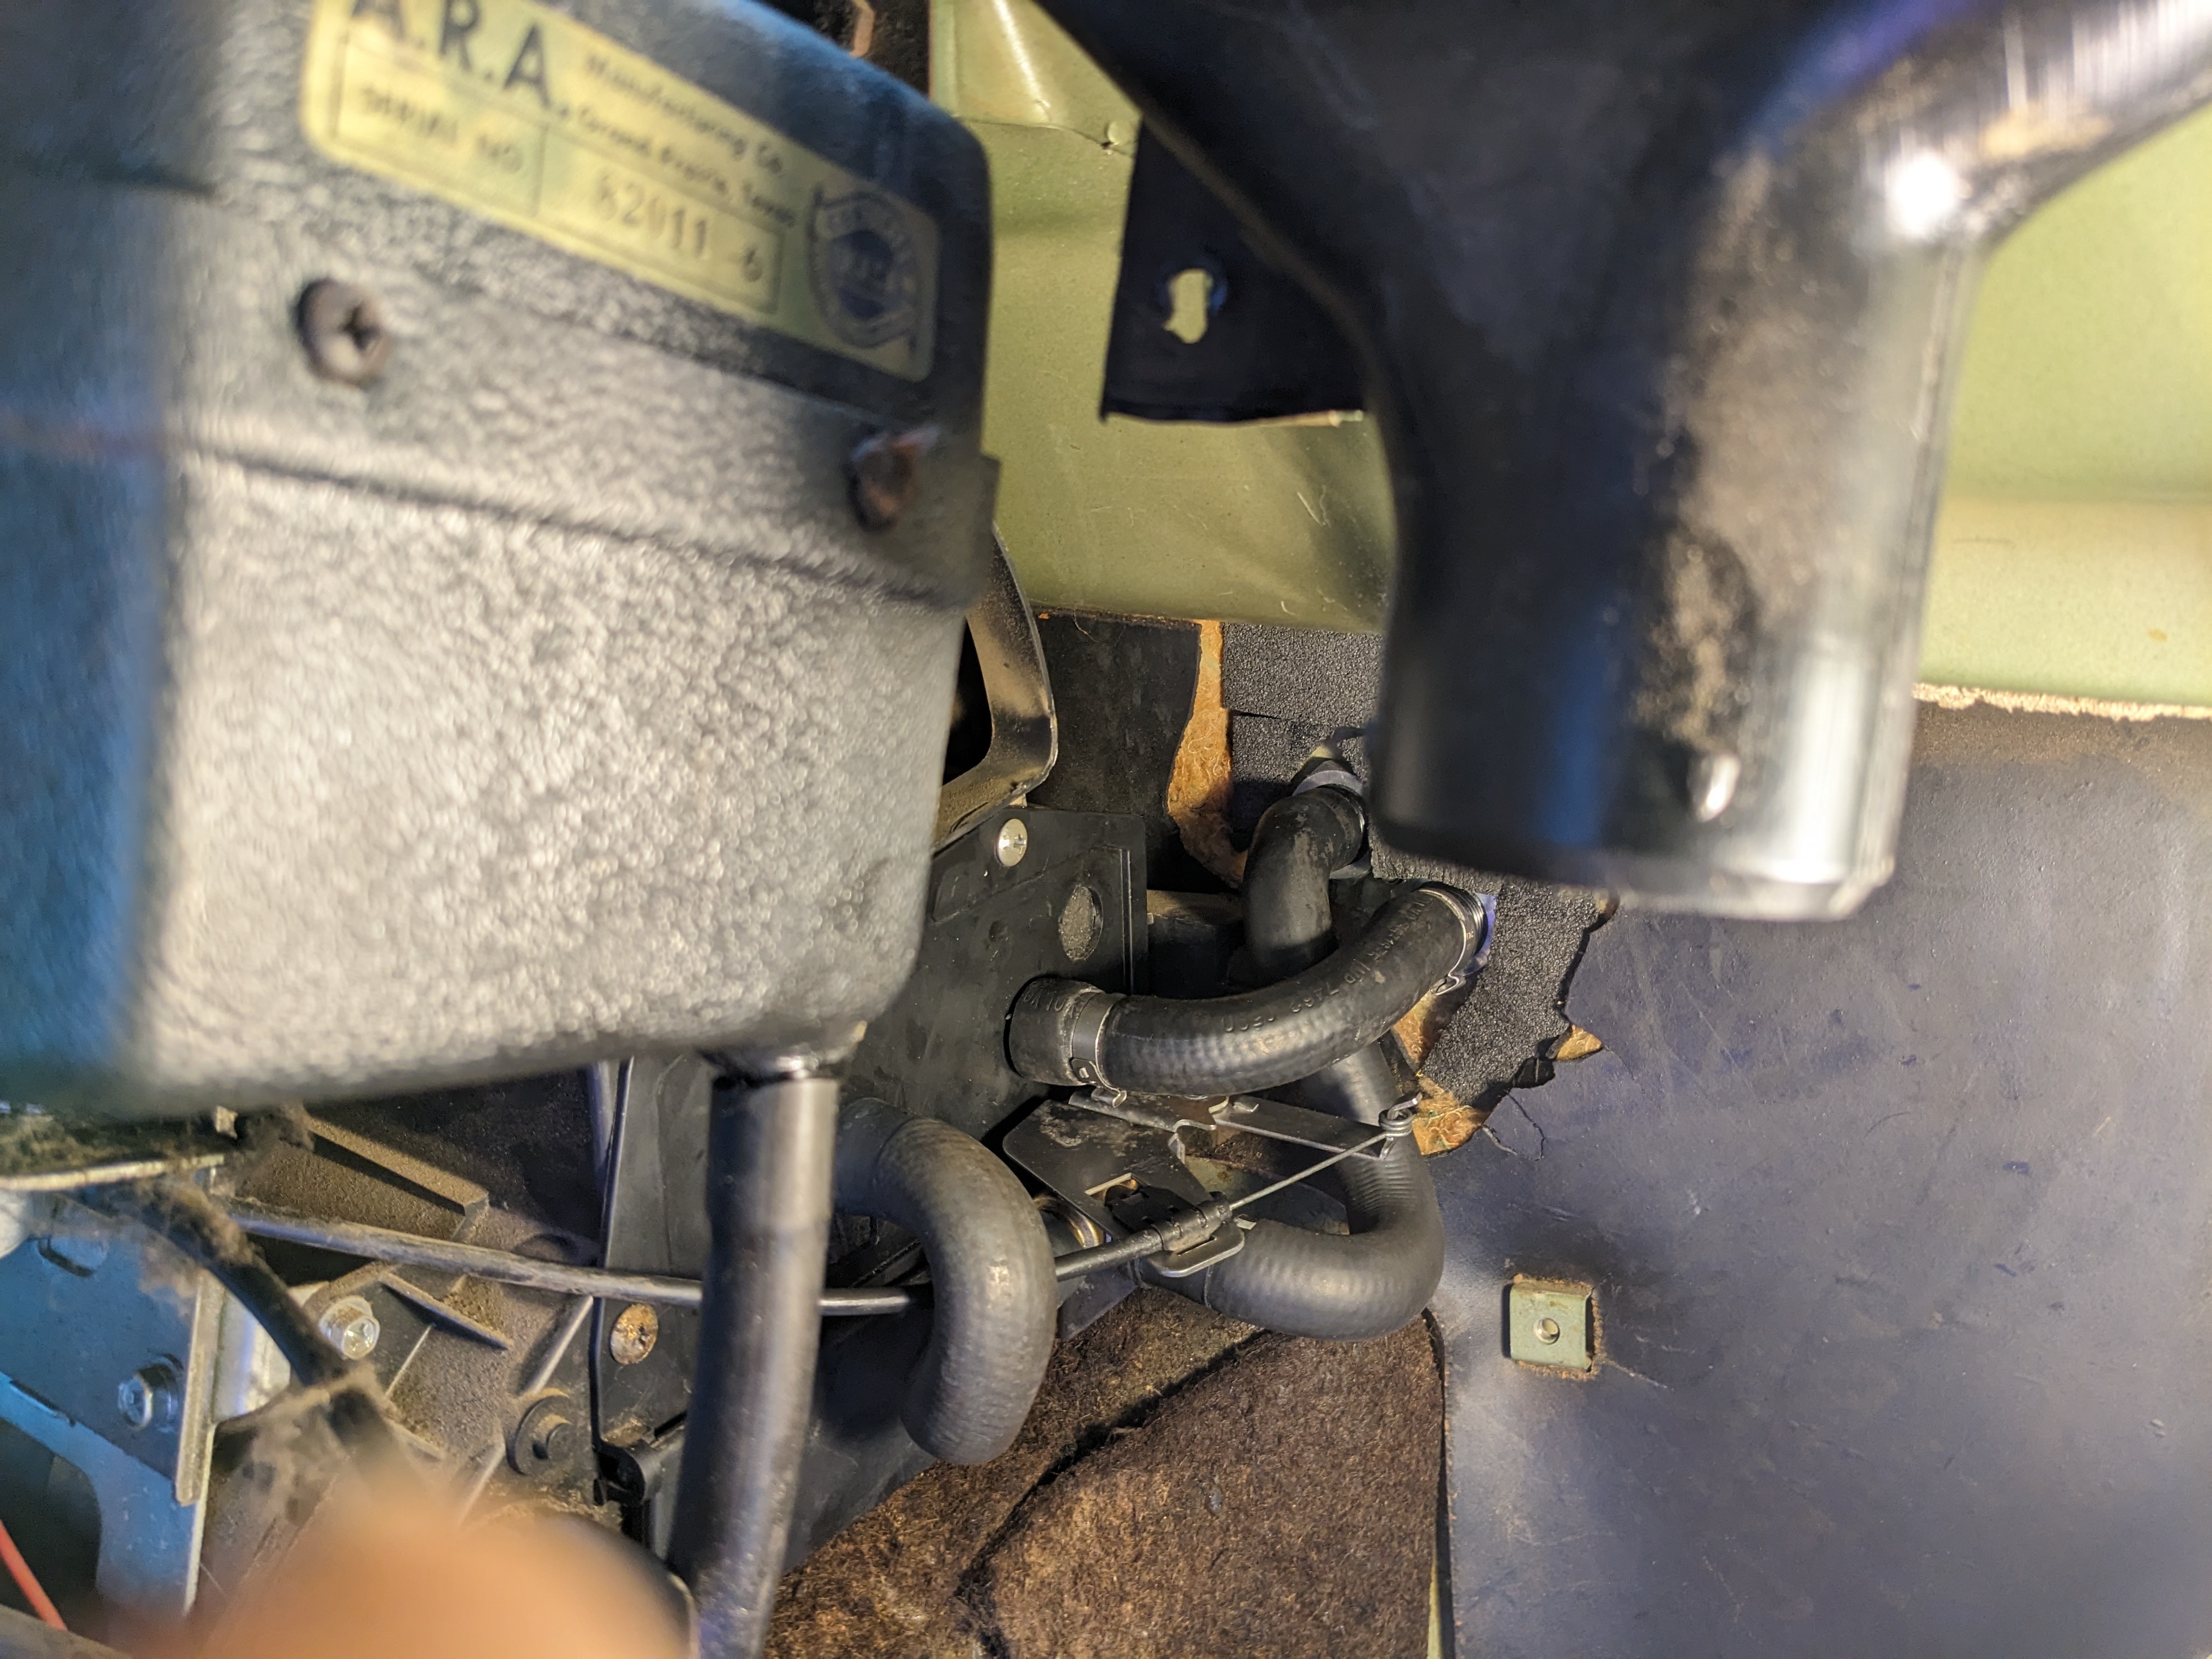
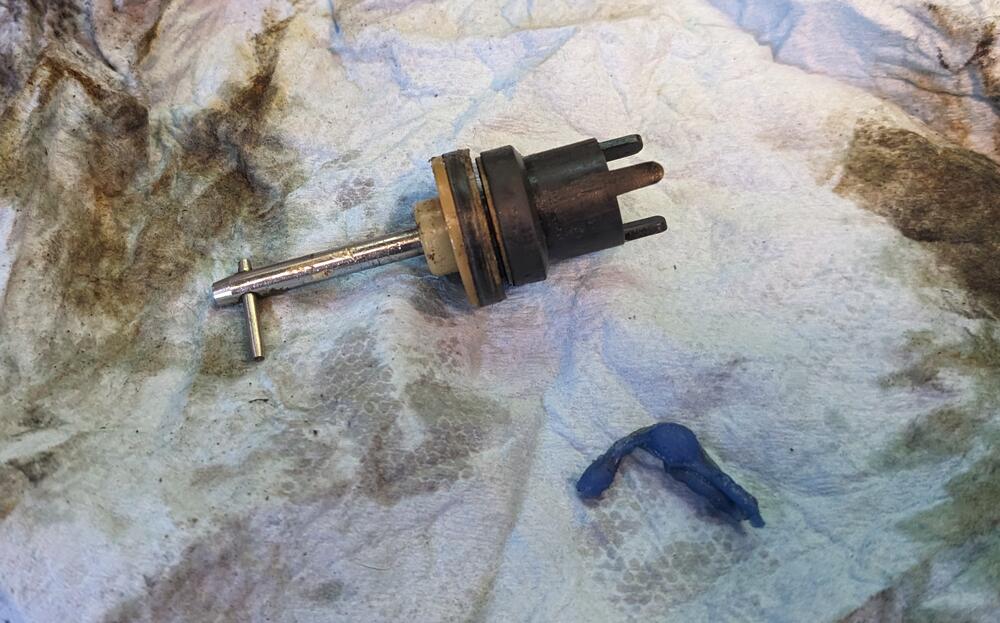
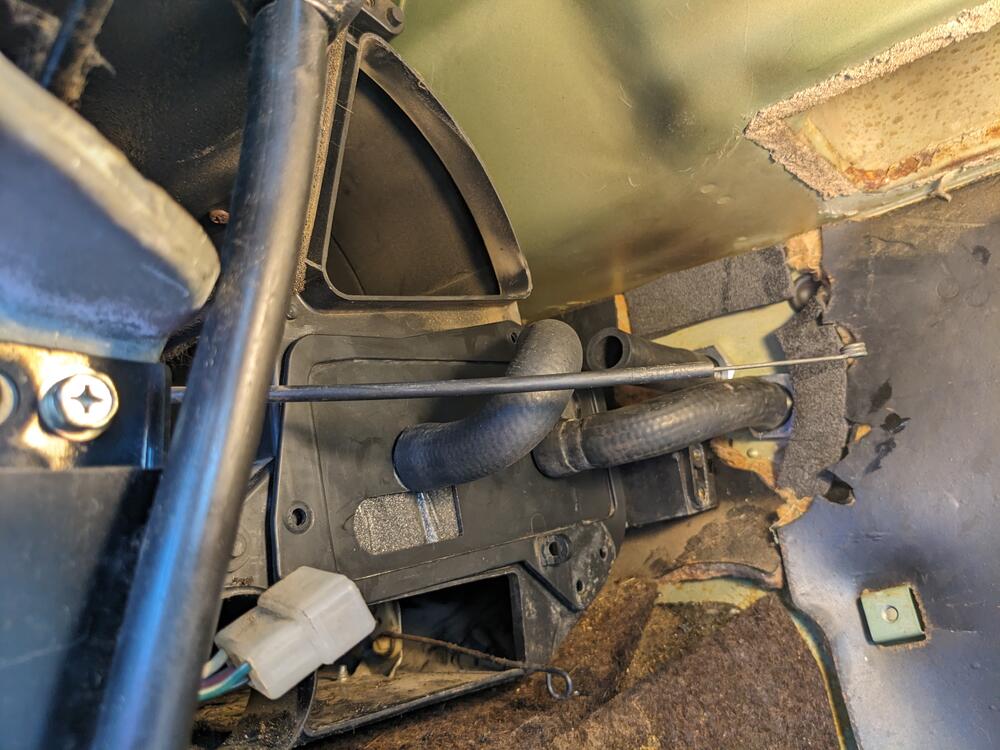
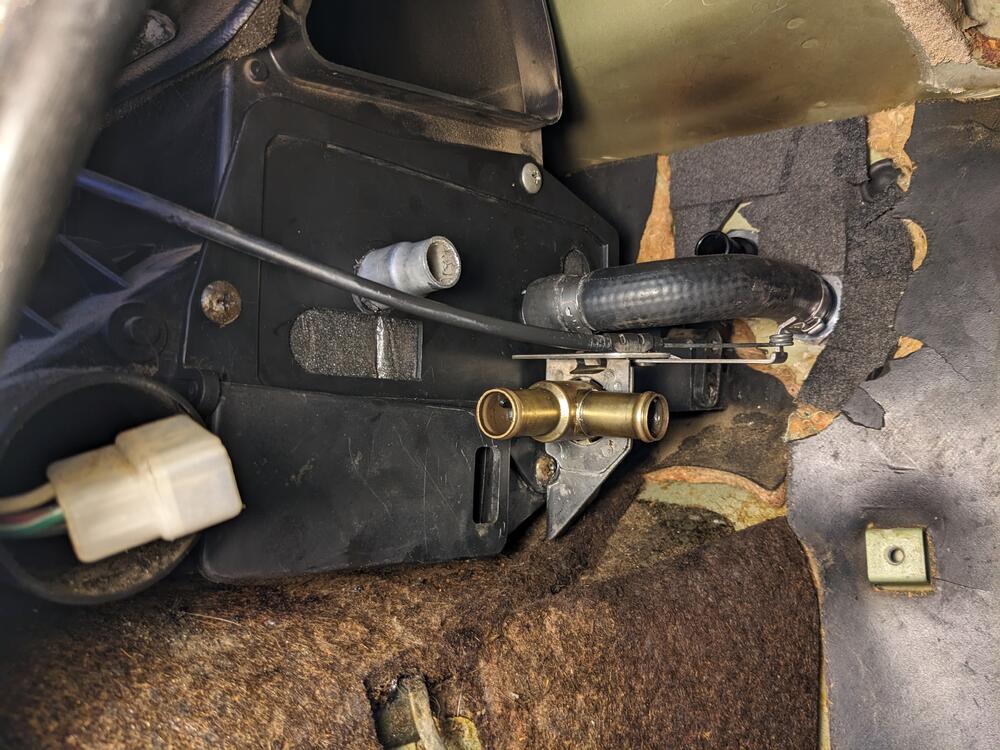
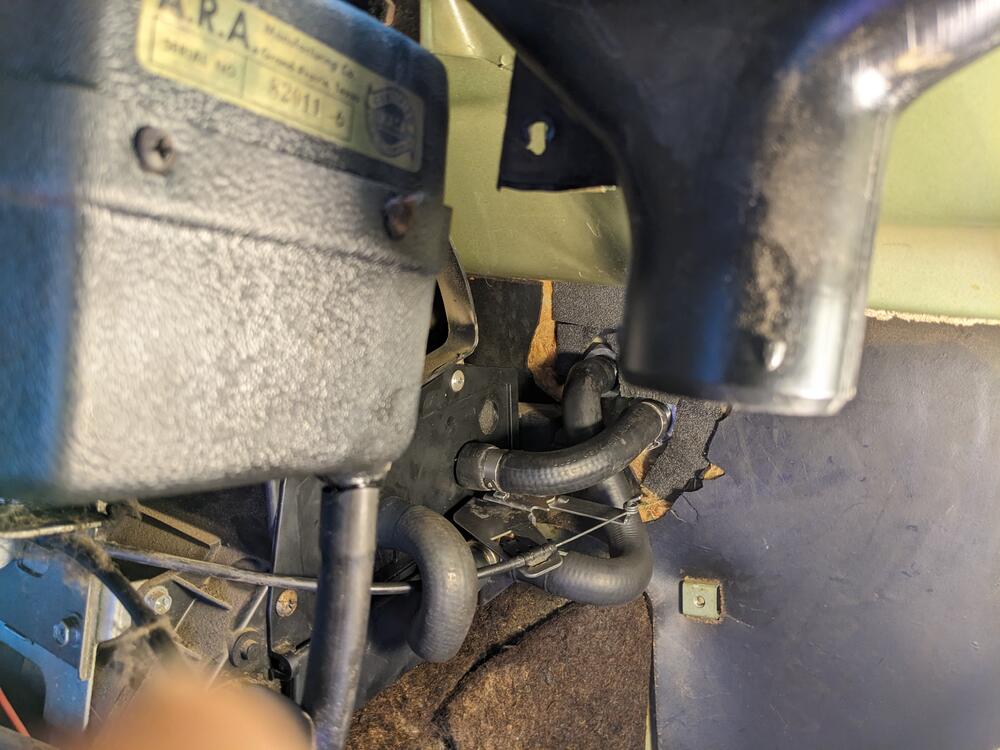
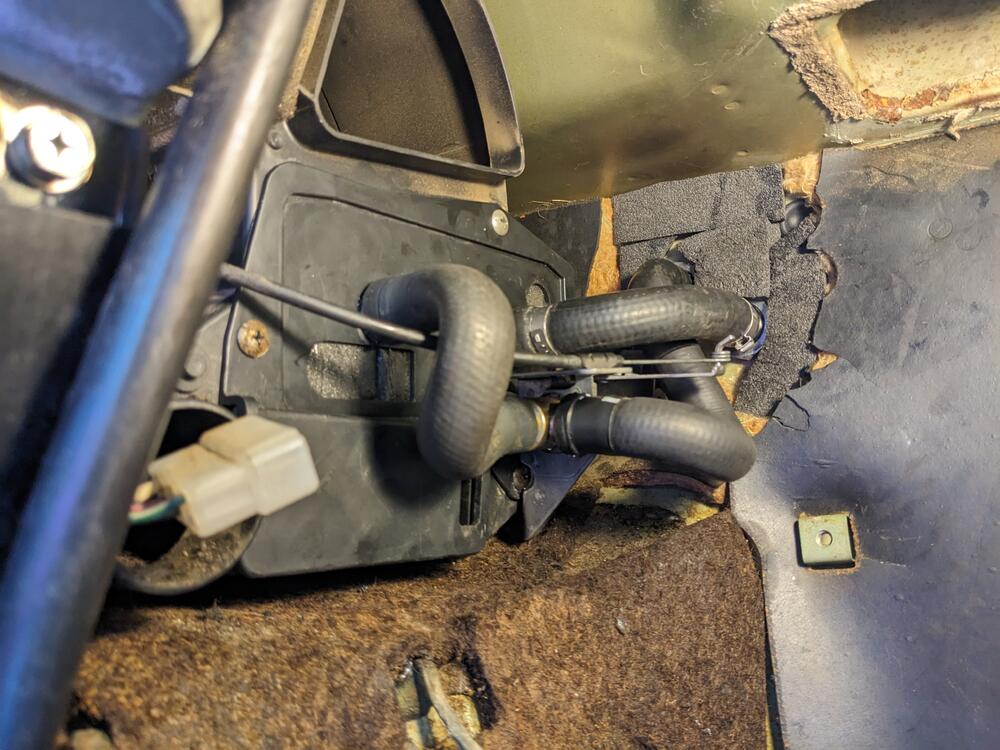
So to continue with my version using the '91-02 Ford Escort heater core (thanks Capt. Obvious!) I ordered the heater valve mentioned by another -4 Seasons 74627 - but it didn't arrive until late this evening, so I dismantled the original & had a go at fixing it following the other thread Think it's pretty clear why the heat never shut off - large chunk of silicone wedged in there I forgot to take pics of the re-assembly, I used a Viton o-ring in place of the square cut outer seal, I left the inner one alone. Left it set on an angle filled with fluid to check for leaks. This is what my phone screen looks like (actually worse now, it's all dark) - so my pics are hit & miss I flipped the I/O for the heater hoses - the bulkhead upper is now the return & the outer/lower is the feed. I did it this way so that the feed is not too short, and the return is a straighter run. and so the inside feed is a plain elbow 90º. Determining hose lengths (cut from Volvo 700 formed hoses) here. SS tubing is 20.5". dogleg for the other end, test fit alignment of pipe & hoses Hoses cut & clamped (head fitting was removed, de-rusted, sealed & reinstalled, slight offset change -more vertical Far end adjusted & clamped With that end out of the way, I returned to the heater valve & core. Eyeballed holes for core pipes, based on the core being centered. Added closed cell foam on the sides to make it snug, and to the front to keep it pushed all the way in & cover up the old pipe holes. Was playing with hose routing - this way was to allow the 74627 straight pipe valve to sit above the feed pipe along these lines I'll revert to this layout if I need to switch to the 74627 valve When it became clear that the 74627 wasn't coming , I switched gears & worked on fitting the original repaired valve - Heater valve fitted using the upper existing mount screw, new hole drilled in plate. Cut a notch in the valve mount bracket to clear the lower screw. Checked that flap can open. Feed hose clamped. Cable attached & function tested. Test fitting (formed, Volvo) hoses to & from heater valve Added oetiker clamps after this. Since I wasn't able to flare the end of the core tubing, I prefer them as the clamping is typically more uniform than a worm clamp of any type.


 4 points
 -
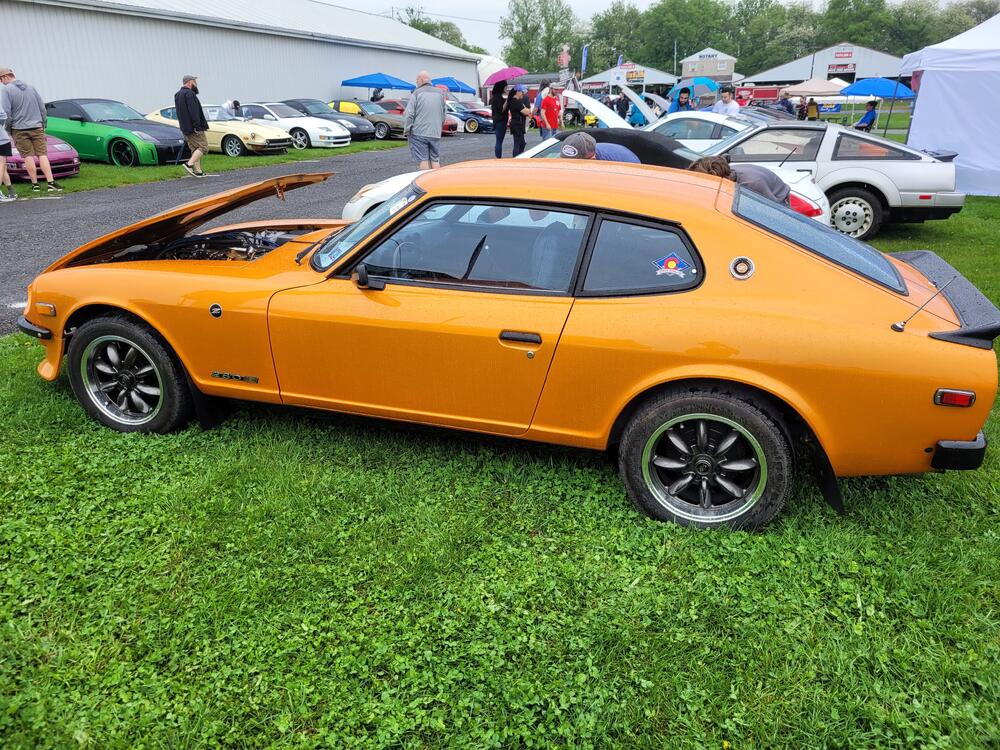
Agreed. My daily and my wife's minivan get serviced every 5k miles and will likely have a similar plan for the Z. I probably should invest in a battery tender too. I've been reading through some of the threads on here and going through my FSM to try and diagnose before posting anything. I figure I cannot be the first person to have this issue and I stubbornly want to try and see if I can figure it out myself. I've heard a lot of different ideas like bad gas, rust in the fuel tank, clogged vent lines. I think I can rule out the vent lines, as my son and I carefully pulled out the rear trim and made sure all the vent lines were all free of obstruction. One curious thing I did find was that after the first time the stuttering happened, the fuel tank cap was ridiculously tight, enough that I had to gently hit it with a rubber mallet to free it. Tonight I pulled the AFM and I think I may have found that the air temperature sensor is bad. I cannot get a reading from my ohmmeter for pin 27 (p.EF-52). As I told my wife, this is a father and son bonding and educational experience, which should justify these added costs. I do wish I could make my garage a little bigger or at least tall enough to accommodate a lift. Thanks. I know these are a PITA and will likely require some tool purchases. I'll certainly be going through the FSM to test and see if there's any way to adjust and/or rule out if they are shot before replacing. It does sit a little low in the back and I hit the damn exhaust pipe on the more poorly maintained roads around here that Baltimore County or MD chooses to neglect year after year. My inspiration was a 2+2 I saw at Carlisle Import Nationals a few months ago, I also think I really like and want the rubber rear spoiler. I think that's a show winning car. I've looked into the Retrosound radios, which are a cool idea. Is this different? I think I need to research this a bit more. The speakers are original, but I think I need to perform some rewiring to get them to work. I found what looks to be a rodent nest behind the right rear plastic trim and the right rear speaker wires were chewed up to the point of nonexistence! I think he was looking at the washer tank and was fascinated that the pump was located on the bottom of the tank. Although he did as me about the brakes shortly after I snapped the photo, so he could have very well been looking and thinking about them at that point in time. Yes, I am sure PJ will want to learn how to drive it and will likely want to drive it as soon as he is able. I think if I do let him take it out, I will either need to have some sort of intricate surveillance equipment installed or I will just be on pins and needles. Of course, he will need to learn how to drive stick first, but I am certainly not going to let him learn on the Z! Thanks! I certainly will be posting here. This seems to be one of the best Z forums online. I am not really into the short attention span reddit sites or Facebook (which to me is a tremendous waste of time spent keeping up with the Joneses). Forums, however, are a tremendous resource, especially for classic cars. I hope to contribute as well as learn a lot here.
 3 points
 -
2 pointsWhat I did for the paper gasket was take some card stock and cut it to the appropriate diameters. After punching the holes, I sprayed both sides with a few layers of plasti-dip.2 points
-
2 pointsYou said it brother! Good quality jacks can be had on craigslist or kijiji for a 1/3rd the price of new and they will last. I know a lot of guys like SS brake and fuel lines but they are so hard to work with and difficult to get a good seal without repeated tightening, where as Cunifer brake line can be bent by hand, never rusts, shines up beautifully and you get a good seal every time.2 points
-
I received spray cards on Thursday. 901 silver - a similar Honda silver, and 918 orange. I went with 901 silver. Maybe the car will get painted this upcoming week!2 points
-
🤣 That's the main reason I got the Z. Imparting my knowledge to my son should also help keep me on my toes, he asks questions non-stop and has a neverending curiosity of figuring out how things work. He's become quite the mechanic's assistant. The Z needed a few things, as no 47 year old car is going to be perfect. Speaking of which, thus far it has needed a new fuel sending unit, speedometer cable, a new wheel stud and lugs (one on each wheel), battery, and fender resecuring, all of which were performed by the mechanic that performed the inspection. My son and I found that the car didn't have a windshield washer fluid tank, and it needed an oil and filter change, as well as a new fuel filter, so we have done that. It has developed a recent more pressing issue with fuel delivery. The Z runs fine when started cold and warmed up, at least until a significant load is applied and then it begins to drive really rough, eventually stalls, and needs to sit for a long length of time before restarting and is ok to drive again. I will likely ask for help in the technical threads, as I have tried to troubleshoot but it has been driving me insane. As far as long-term plans, I may get it painted (it was once already in the 1990's, but it is showing its age and wasn't the best quality). When I do that I will likely need to get two new front fenders, as these have some rust and Bondo. I'm also not in love with the likely period correct 280Z decals and pinstriping on the lower sides. I think it's also going to need rear shocks. The P.O. also planned on replacing the rear drums with discs, and included the discs in the sale - this and the shocks may be my winter projects. Some Panasport rims and new tires would also be nice. The current 8-track stereo is non-functional, which I may just remove and install a blank panel. With the stock speaker locations and the loudness of the current exhaust (may also be a future change, my mechanic referred to it as a "cheap muffler" and the pipe is noticeably the lowest thing on the car), I think I would be better off using my phone and a nice bluetooth speaker for music. Once upon a time I was into installing stereos, amps, subs, tweeters, mids, etc., but I think there are now far better things I can do with my money. Paul
 2 points
 -
2 points
-
1 point
-
1 pointRecently bought a stainless fuel line kit from SSTube. 1/3 of the cost. Good people and they answer the phone. Hand made in house.1 point
-
So the device on the BAT car is item 16 in this diagram, which would be mounted near the injector fuel rail, under the hood, not at the rear of the car downstream of the fuel pump.1 point
-
1 pointZCD has stuff. https://zcardepot.com/collections/fuel/products/fuel-line-pump-to-engine-stainless-steel-280z-1977-781 point
-
1 pointSome suggestions for new gaskets: - thin (1/32") , closed-cell neoprene sheet (Michael's craft store) - the material used in those stretchy exercise bands (Canadian Tire - sporting goods section) - lid from a margarine tub (soft polyethylene) I really don't think there'll be an issue with vibration damping, but at least it'll be easy to go back to paper if there is. If you want to try sealant instead, how about strippable window sealant (DAP product, available at CTC). I just cut new ones from paper gasket sheet 🙂1 point
-
1 pointI believe, buying premade lines is the way to go in your case. It is probably possible to do with everything still in the tunnel. I would definitely start like that. You might find removing the exhaust or driveshaft makes it easier. Beware of breaking bolts on the exhaust. It will just make more work that is not easy to fix. Bear in mind, stainless lines can be difficult to seal because they are harder. I suspect steel lines will easily last another 50 years. Longer than most on this forum, including me, will be around...1 point
-
1 pointI feel for you guys who don't have the years of experience and training it really takes to effectively make proper repairs. I'll try to offer some insight and help that will get you moving in the right direction. First, those cheap arse jacks at Harbor Freight are junk, and I don't know who is selling, if anyone, a good quality jack. Mine are both fairly old, manufactured in the early 1980s. Even with that, I just had a local shop rebuild mine. Two of my jacks: I also have decent quality jackstands, in a couple of sizes depending on what I need to support, and like the jacks, no one seems to sell them anymore. Additionally, I have a large, well equipped shop with enough tools to make Tim the Toolman Taylor jealous, and a lift, but not all the work I do can be done on a lift. For instance, I have been doing a lot of work on a 1995 F150 I picked up from my oldest grandson a few years back. It is too big for my lift, so everything I do that requires clear access underneath it, is done on jackstands. For instance, the fuel tanks were rusted and leaking, and new ones were available, so a couple years ago I swapped them out. And while I had it in the shop, I decided to do a brake job. What a can of worms. By the time I was done, I replaced everything on the brake system but the brake pedal, including all the hard lines. I also replaced all of the fuel lines. Snaking them along the frame rails, around the crossmembers, and wiring, and transmission, and transfer case, and engine and exhaust was difficult, but not impossible. I chose stainless steel. Which brings me to comment about your leaky fuel line. The hard lines on your Z are likely original to the car. The repair by the PO, and the problems you are having now, cause me to comment that you really should replace the entire line, from the tank to the engine bay. Classic Tube offers them, either in mild steel, or stainless steel. The previous repair may have been well intended but was poorly executed. The hose and clamps you have put on is sketchy, and I would not want to read a post by you that relates a fire that has destroyed your Z. Any fuel leak is dangerous. Patcon mentioned that it is the vapor of fuel that is the dangerous thing, and he is correct. But a puddle of gasoline will quickly become vapor, especially in the 100 degree heat of Sacramento. Don't play Russian roulette with your car. I highly recommend the stainless. It doesn't cost that much more than the mild steel and will outlast the car. And you can replace the lines without a lift, just the car on stands, and without pulling the engine and transmission. It will be a bit tricky, but it can be done. I bought the entire set of hard lines for my 72 240Z from Classic Tube, in stainless, for the fuel, clutch and brakes, and will be replacing them, soon myself. I've examined the car and feel that I could also do the job with the engine and transmission in the car, on jackstands, but I am also pulling them because the engine is tired and needs an overhaul. If I wasn't already pulling the drivetrain, I would definitely do it with them in, as I am too lazy to bother doing work I don't need to do. I also need to comment on the type of end the lines have. It is not a compression fitting; it is an inverted flare, and seals where the flared end of the tubing seats on the inverted flare inside the fitting and the clamping pressure exerted by the nut is what keeps it from leaking. These fittings do not require a huge amount of torque to make the seal. There are tools available to make the ends up, but if you get the lines from Classic Tube, they are already done, you simply remove your old stuff, put the new stuff on the car, and make the connections. And get a set of flare nut wrenches. Using open end wrenches will collapse the barrel nuts on inverted flare fittings, and round the wrench flats off so the only tool that will turn them is a vice grip. While I'm on the subject of tools, buy quality tools. They will cost more, but it goes like this: Buy quality (read expensive) tools, cuss them once. Buy cheap tools, cuss them every time you use them. I have tools that belonged to my grandfather, and my father, as well as tools that I have collected over a lifetime of working on stuff. Craftsman (from when they were good tools), Snap-On, MAC, K-D, SK, all made in America. I even have the very first socket set my dad gave me for Christmas when I was 10 years old, a 3/8 drive Craftsman set, a ratchet, 3" and 6" extensions, and sockets from 3/8" to 15/16". Never broken, still not worn out, except the ratchet, which Sears gave me a rebuild kit for a couple times over the 56+ years I have had it (although I doubt whoever is selling Craftsman tools these days will honor the lifetime warranty anymore now that Sears is gone). The chrome is worn, but they still get the job done.1 point
-
On my daily drivers I change oil and filter, rotate the tires, and perform a full service, lube hinges, inspect brakes belts and hoses, etc. every 5,000 miles. For My Z cars, which never see that many miles, they get a full service every spring prior to use, including oil and filter. Cooling system every two years. The reason is first, oil is cheap insurance, and second, it breaks down more quickly from short drives and sitting. Moisture gets into the crankcase, and due to frequent short duration operating cycles, gets polluted more quickly. I also use a battery tender on them, as well as my tractors (I have two), the riding lawnmower, and one of my pickups that doesn’t see daily use. It could be the fuel pump is failing. The injected cars also have a fuel return that (I believe) has a regulator. Those have been known to go bad, and given the age of the car, if it is original, it may well be the culprit. Somewhere on this site is a place where you can download the factory service manual. If you haven’t already, grab it, and read through it. Everything you need to know is covered, including troubleshooting the fuel system. Careful, next thing you’ll have a rotisserie and welder. Floor pans, frame rails . . . . . 😂 If you didn’t live so far away I’d loan you the special tool it takes to remove the gland nuts for reworking the strut cartridges. Panasports look awesome on Z cars. That would be a nice upgrade. 👍 There is a guy near me who converts stock radios to accept USB and Bluetooth. I think he even offers a power upgrade. There may be someone similar near you too. Something to consider. Looks like he is fiddling with the brakes. Next thing he will be wanting to auto cross the car. 🏎️ Looking forward to updates as your journey unfolds.1 point
-
1 point
-
Thanks to all for the kind words! I posted a build thread here to document progress on my Z:1 point
-
Just say no. Get an old carburetor. Doesn't matter what kind, or even if it still is functional. Every weekend go out to your workshop, take it apart, and then put it back together. Repeat every weekend.1 point
-
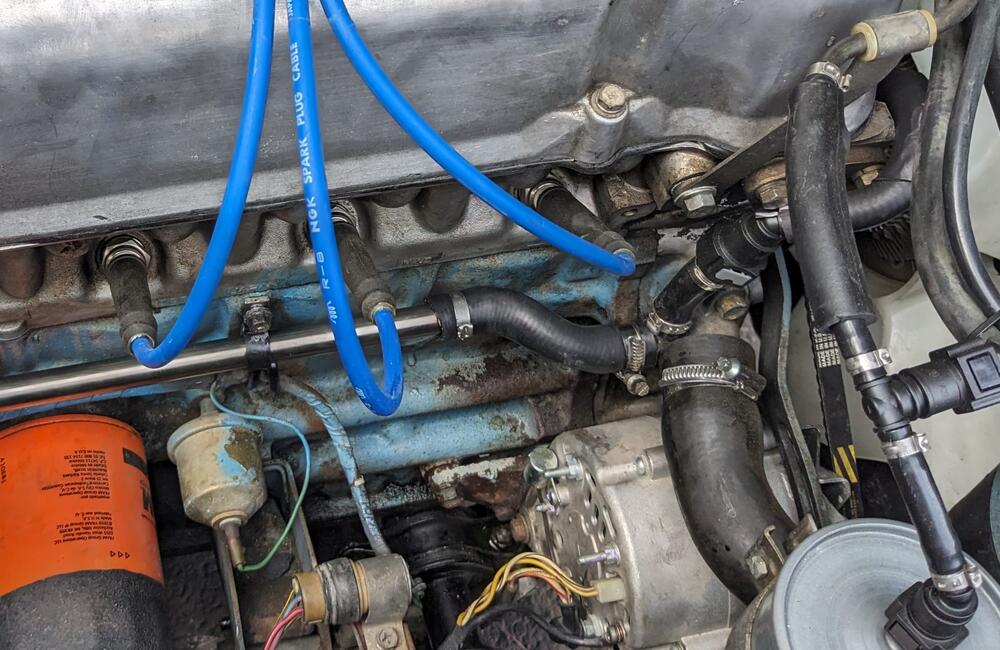
Maybe just spanning the gap between the old crusty hoses ends. Looks like a new FPR though. Strange. @zspert, that old braided fuel hose could blow, or just slow leak from longitudinal cracks, at any time. It's on the high pressure side. I remember that soon after I bought my car, after I had installed a new pump and got the car driving well, I was pulling out of my neighborhood and a UPS truck driver pulled up beside me to tell me that fuel was pouring out from under my car. A PO had used low pressure fuel line and it had split. Luckily everything was cold and I was within walking (running) distance to my house where I had some spare hose. I was able to squeeze under the car which I had parked next to the curb behind a strip mall to replace the hose and get it back to the house. I felt bad about the big gas stain on the pavement but at least there wasn't a pile of melted plastic and tire rubber.1 point
-
1 point
-
1 point3D printing gets a bad rap sometimes because the designer had no idea how to design the part to be 3D printed. Done correctly it is an amazing tool that is capable of making many intricate parts that can't be made conventionally. We use it a lot for aerospace and automotive components, material choice is critical and also print orientation to ensure the correct load profiles. We use FEA analysis and optimization software to get the strongest parts possible.1 point