Leaderboard
-

Zed Head
Free Member4Points19,236Posts -
.JPG.cfcada9cf1c1b502df3f5f2f2ca3ff36.JPG)
SteveJ
Free Member3Points9,646Posts -
HusseinHolland
Free Member3Points1,031Posts -
jfa.series1
 Subscriber
 3Points2,733Posts


Popular Content
Showing content with the highest reputation on 05/31/2023 in all areas
-
I don't think that material quality was very good back in the early days of fuel injection. Nissan had a team of engineers create a document about changing hoses. So, it was probably a thing back then. Much of the garage lore we all picked up is only based on who the oldest, most authoritative guy (best BS'er) in the garage was at the time. Just saying...I learned a lot of not-quite-right stuff.3 points
-
Thanks Zed Head - with my Mum it's only going to get more involved moving forward. I'm retiring from teaching at the end of the upcoming school year (2023-2024), so I'll be able to give her more time. She has a long to to list for stuff on her house & yard that I really don't have time to address as things stand. I had looked at that and a couple other posts before I decided on the rear brake kit. I went with the MilkFab kit, in part because they include specific directions, which can also be downloaded off their website . The other main reason is that it uses much newer & readily available Mustang (Girling?) calipers - they are very similar to versions used on various Volvos, so I'm comfortable with that.2 points
-
Max doesn't visit this site very often. Reach out to him at the Resurrected Classics website.1 point
-
Other people have noted the lack of instructions with the ZCD parts. He has a good thing going so doesn't seem to care about the small details. If you get the rear brake kit pay close attention to the parking brake cable. Apparently the cables supplied and/or the fittings are of poor quality. Can't remember if the ends pull off or some other part fails but people have had to fix the problems themselves. @Derek has posted about it on Hybridz.org. Good luck with your mother's health issues. Those are tough. It's good to have something to keep you occupied in the free time. The car looks good, I don't think I've seen a full view of it before. I found Derek's post on Hybridz.org. It's the bracket for the sheath. https://forums.hybridz.org/topic/131360-rear-disk-kit-from-zcar-depot-anyone-using-it/#comment-12199811 point
-
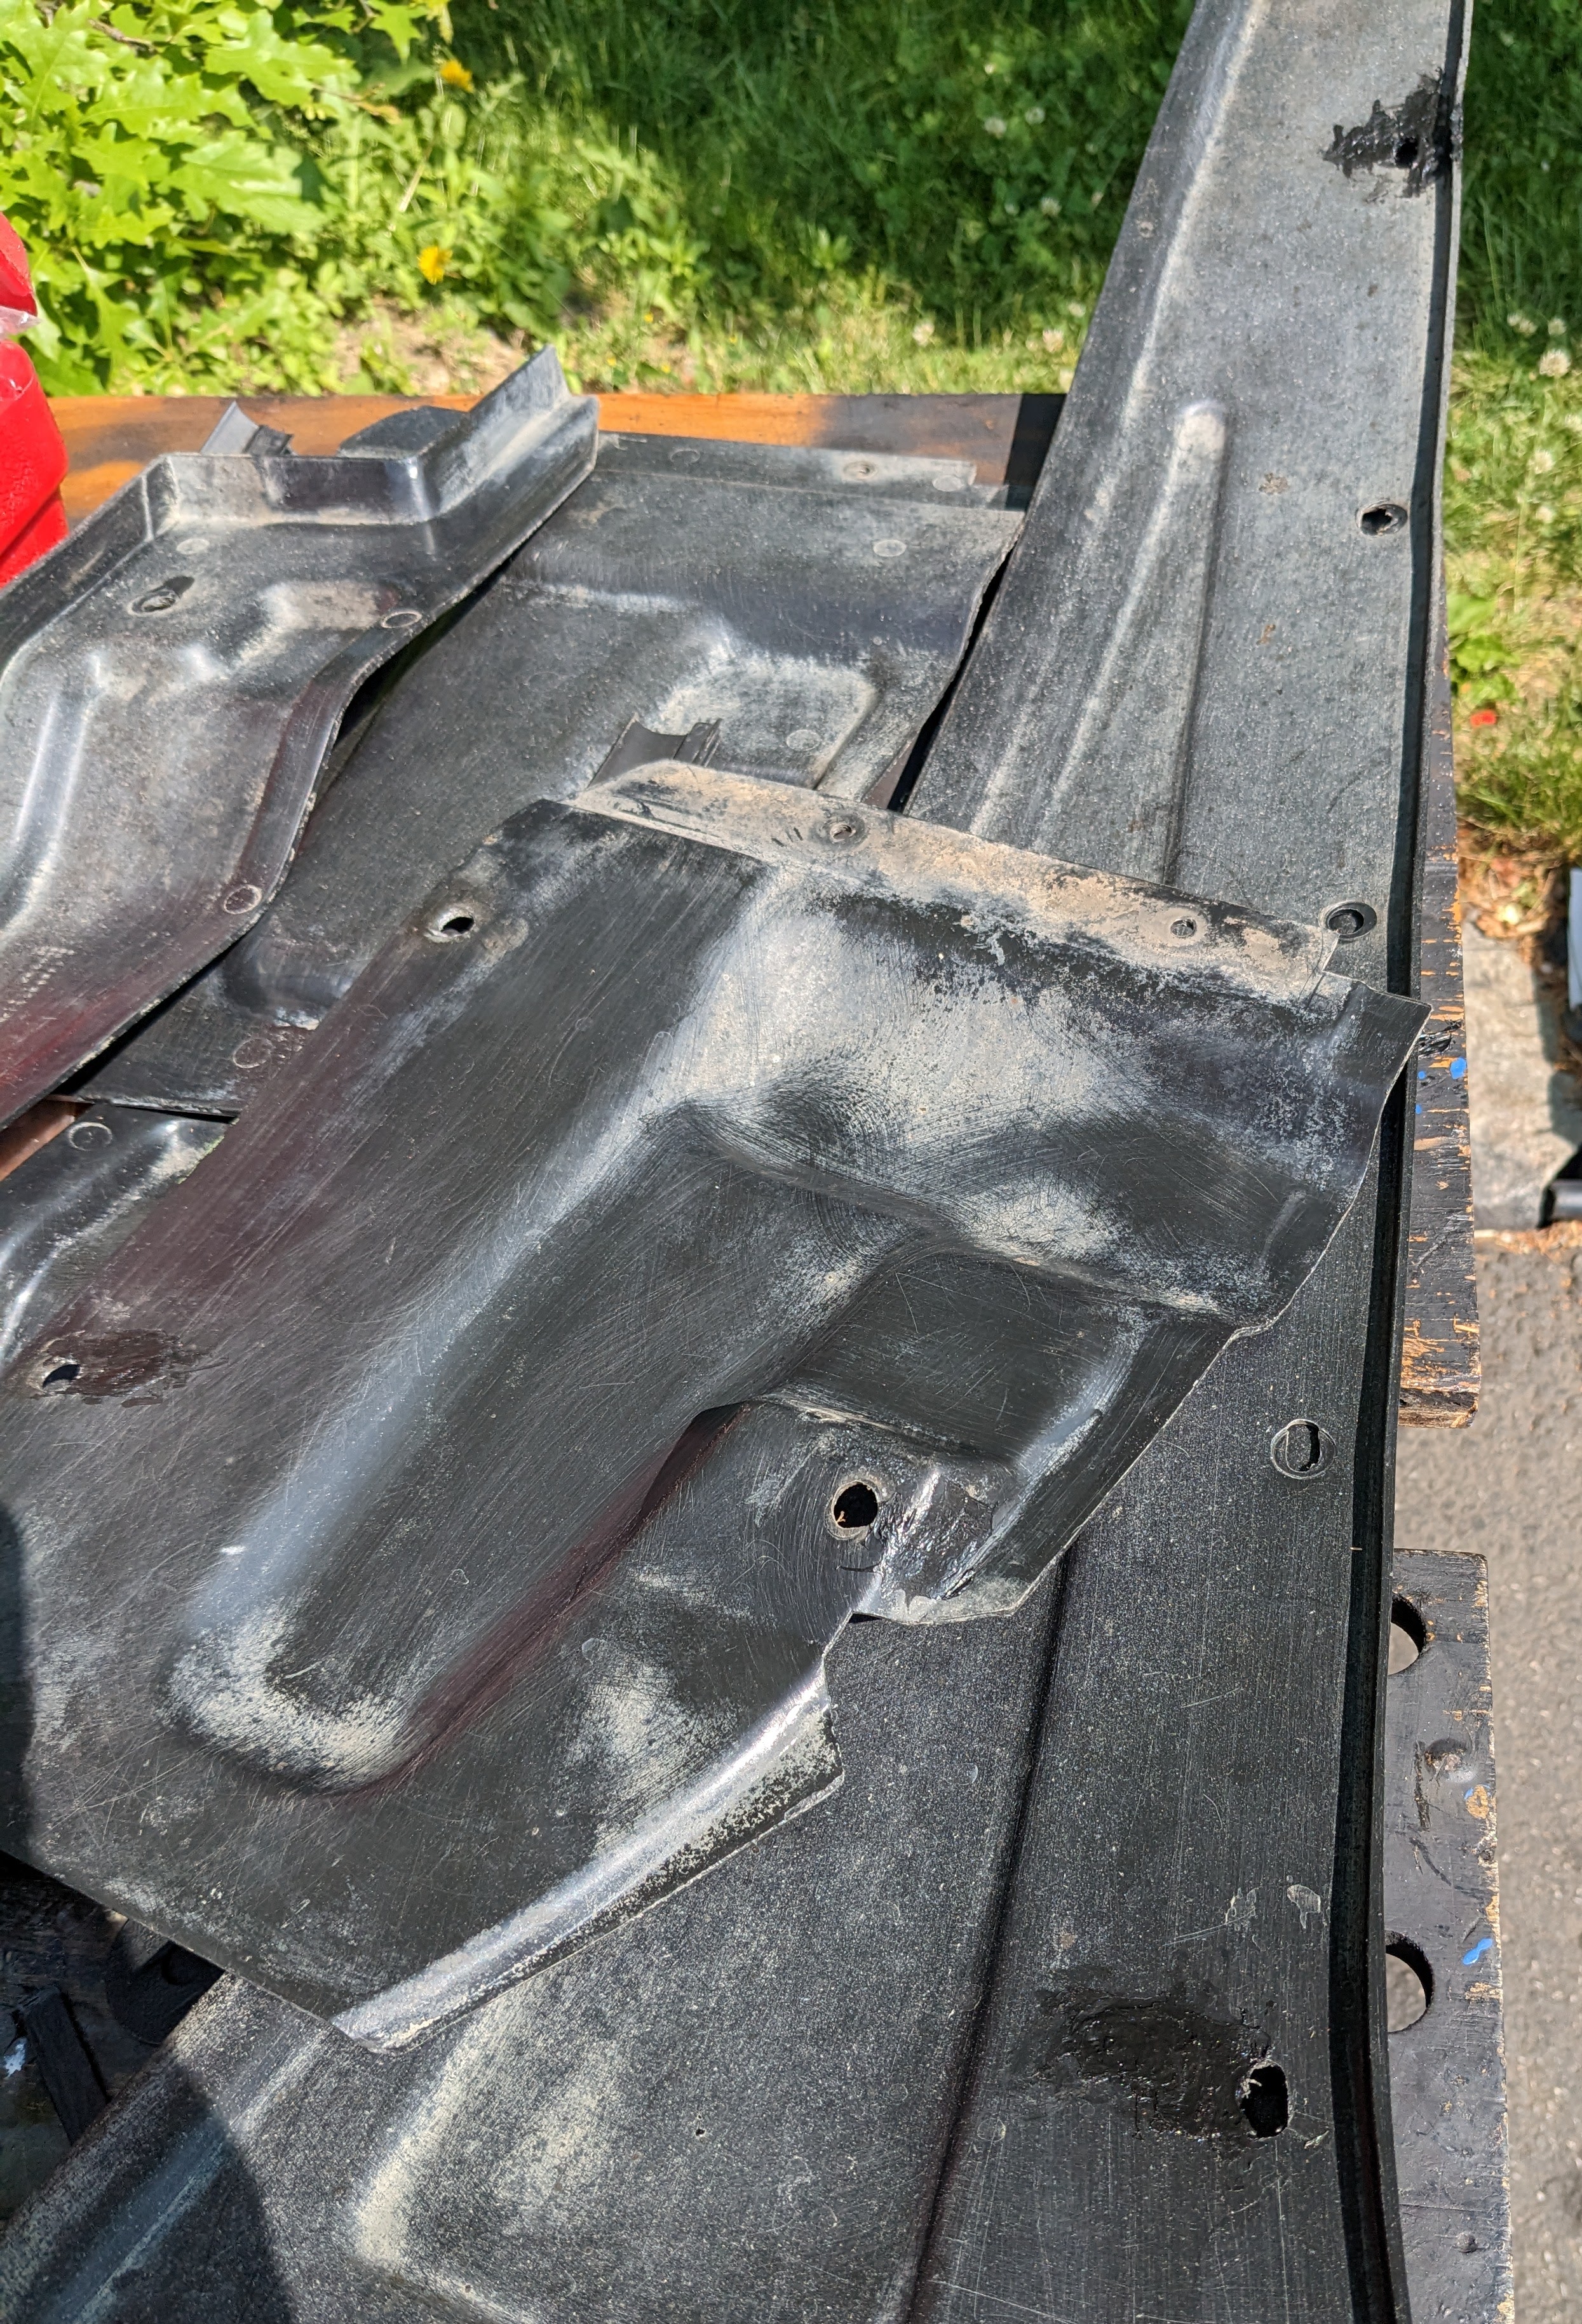
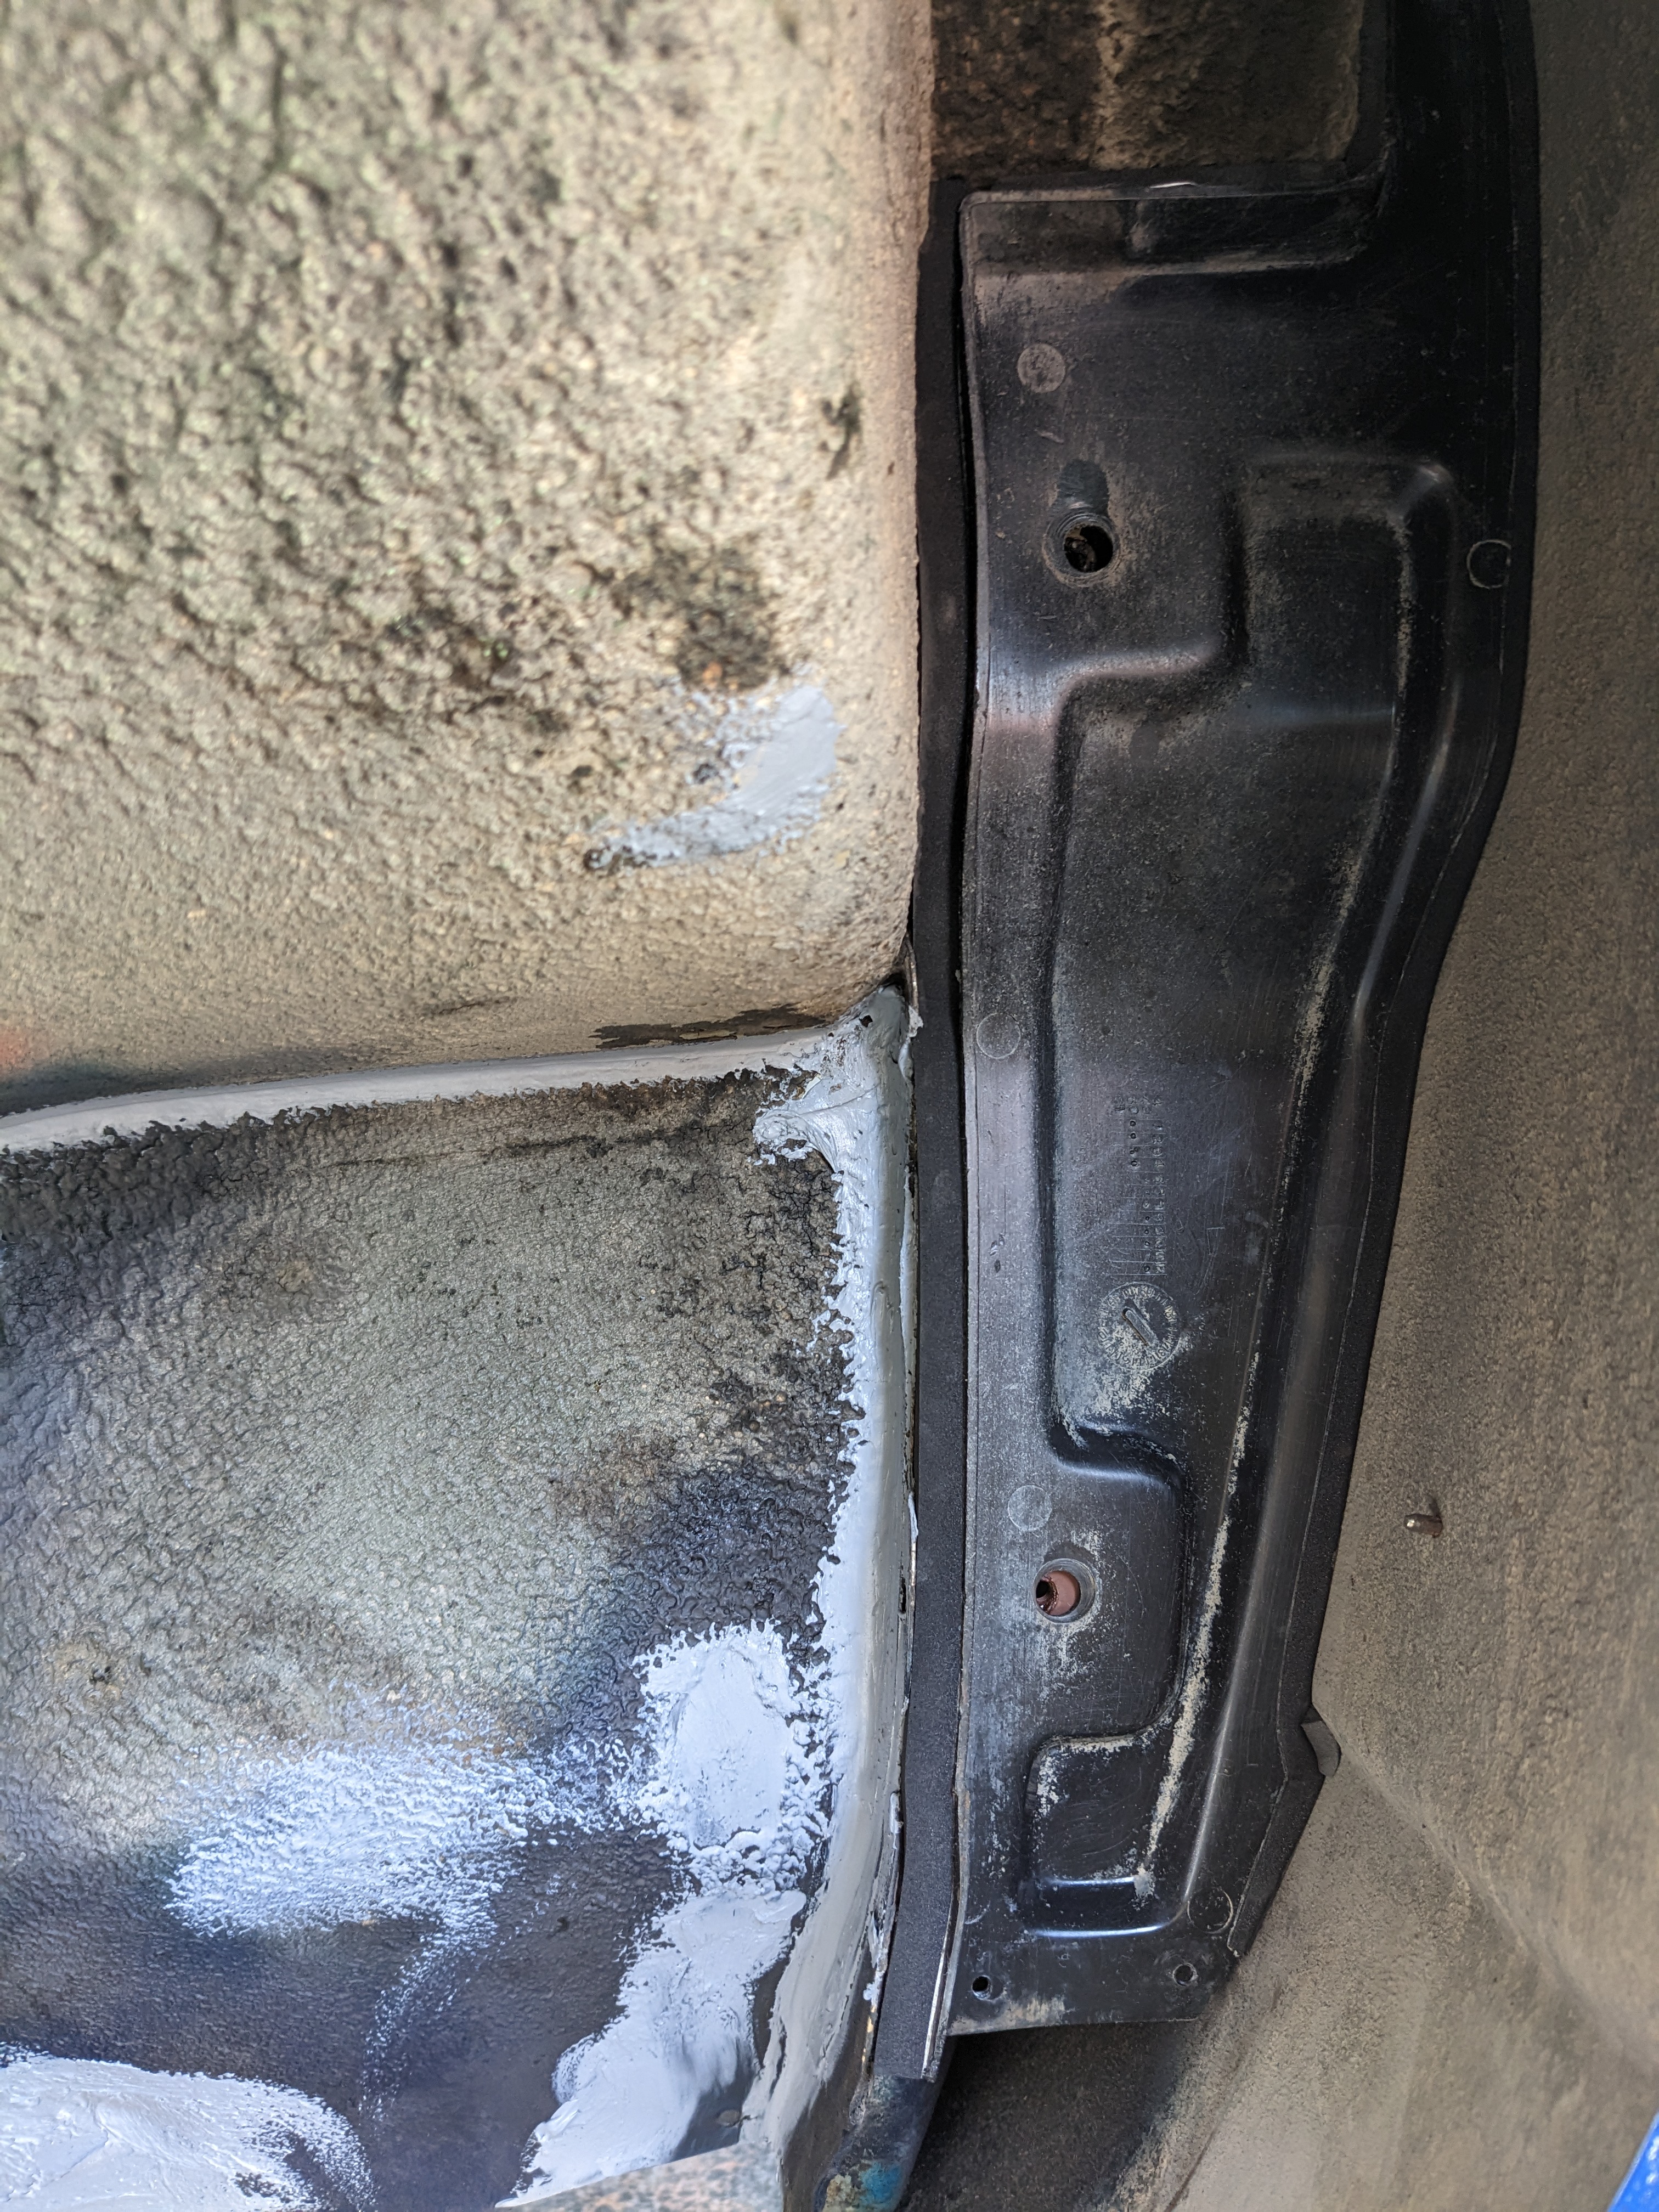
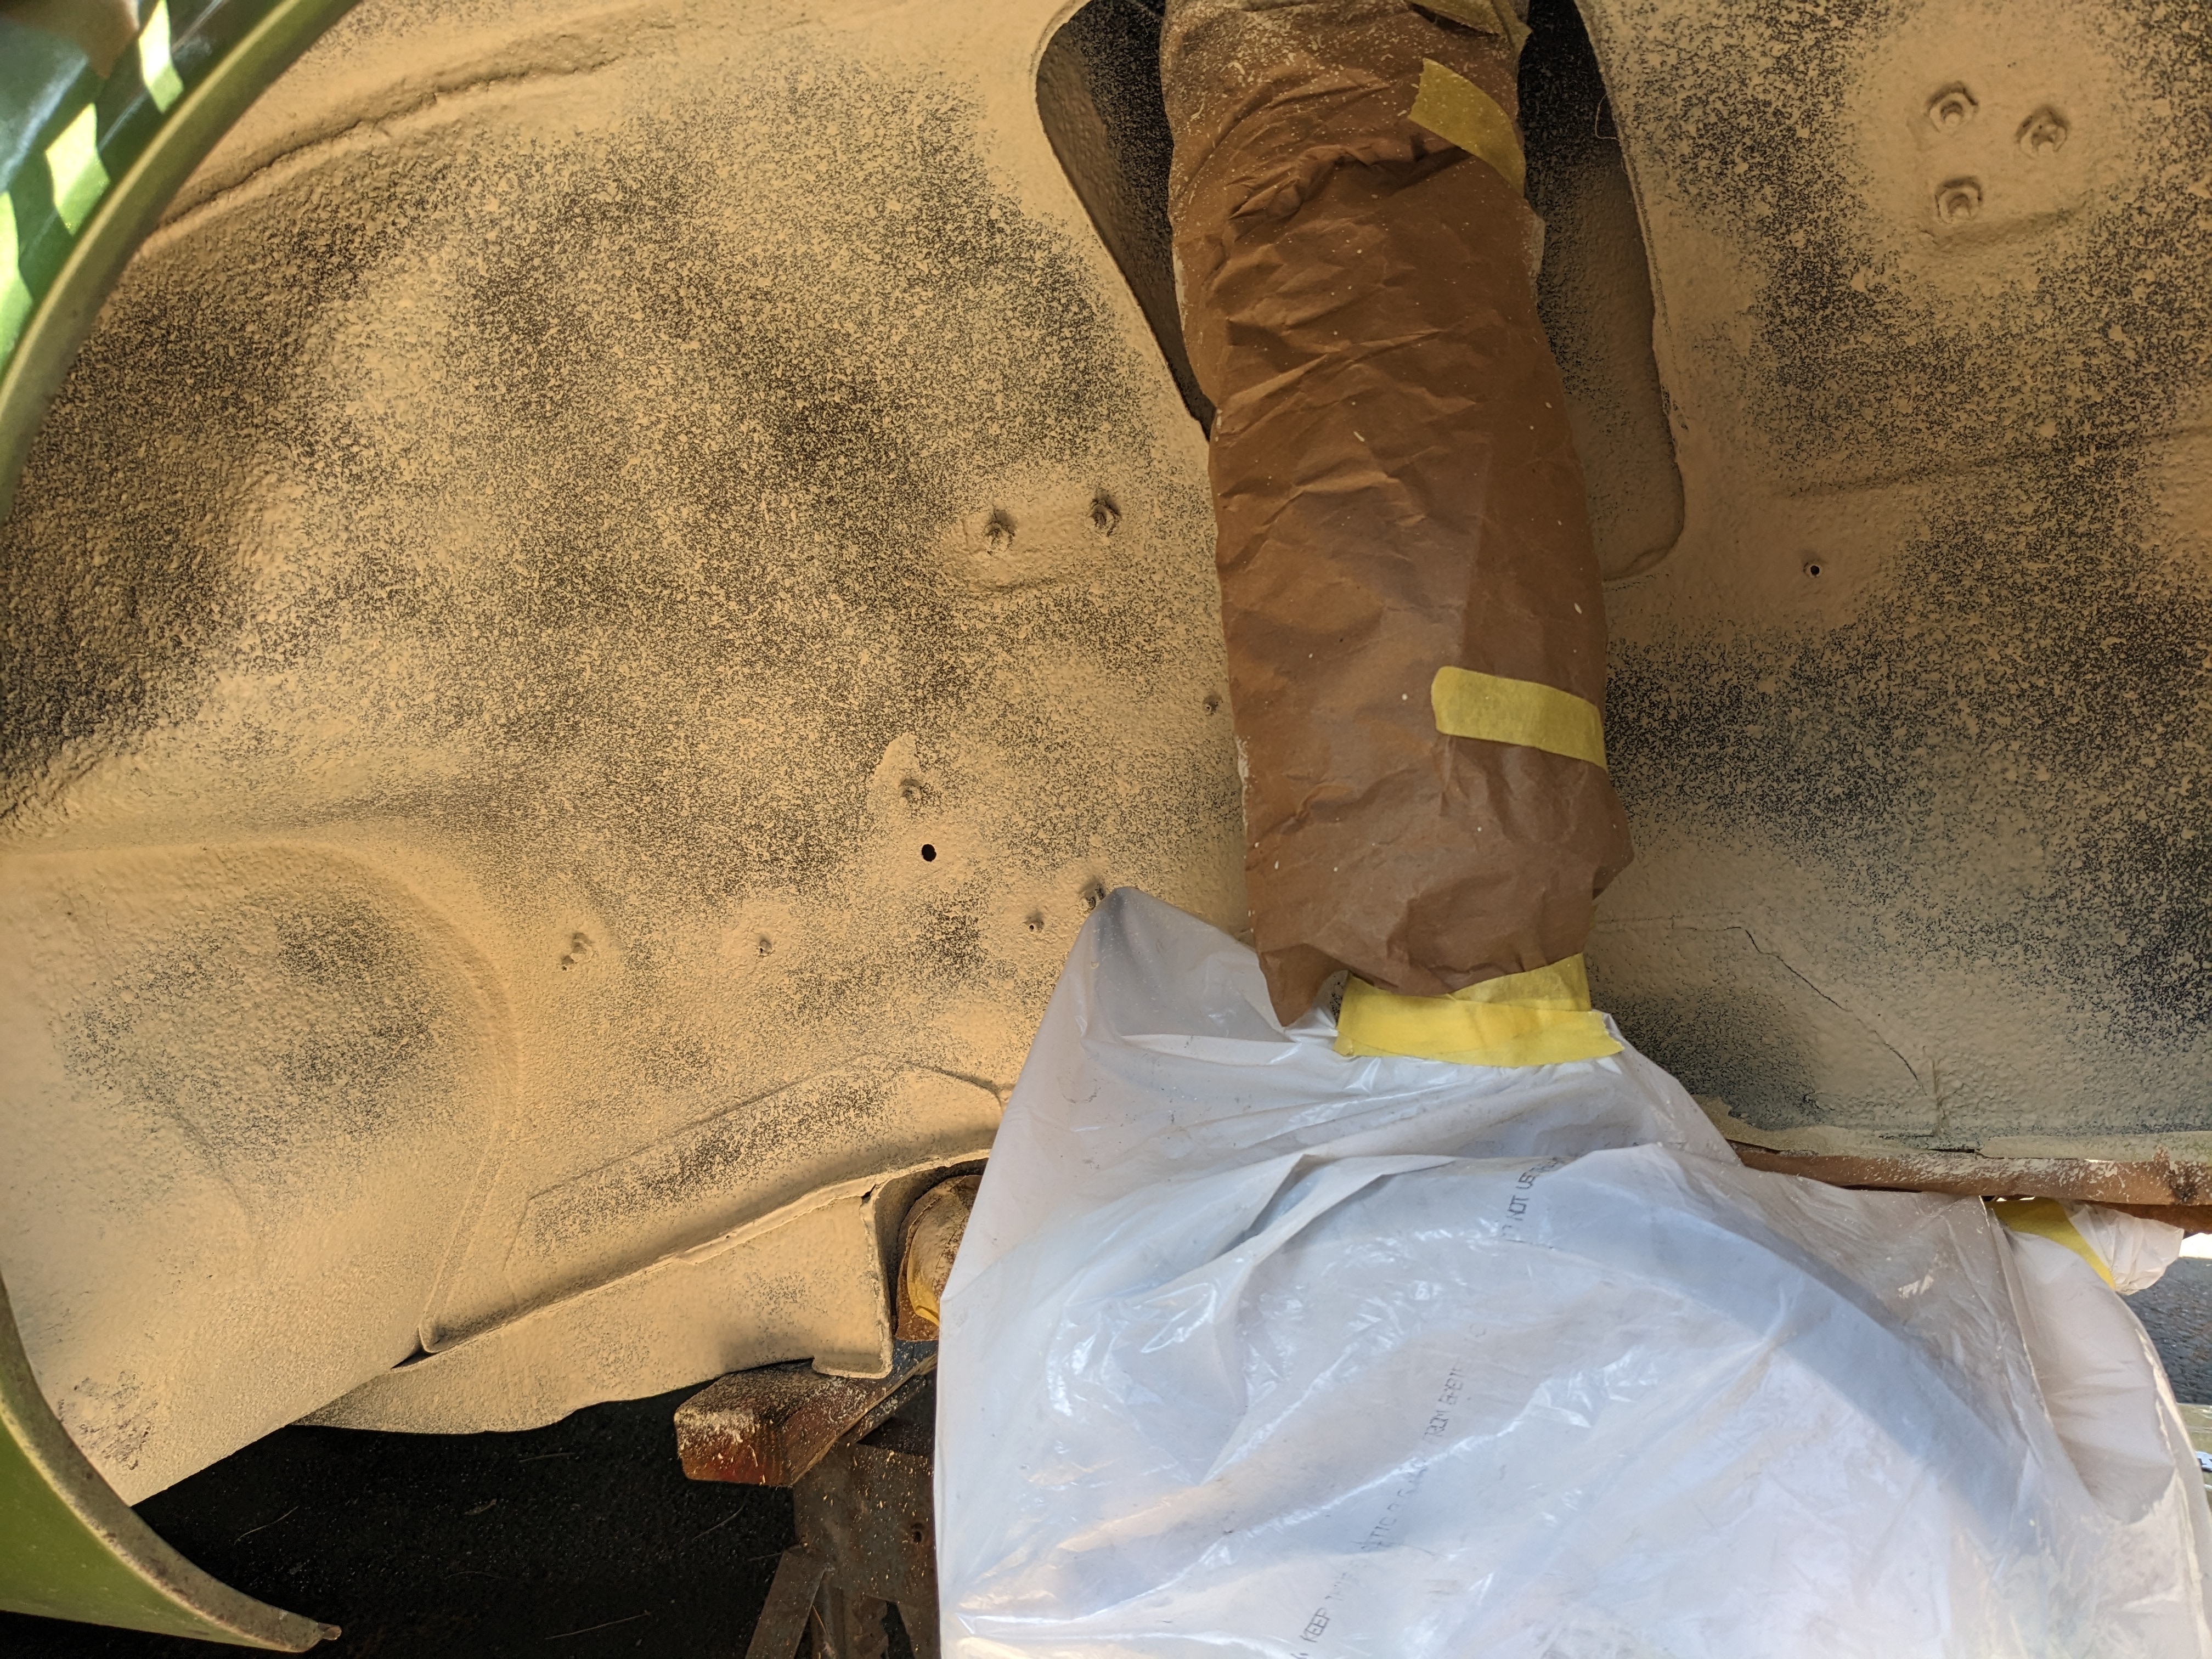
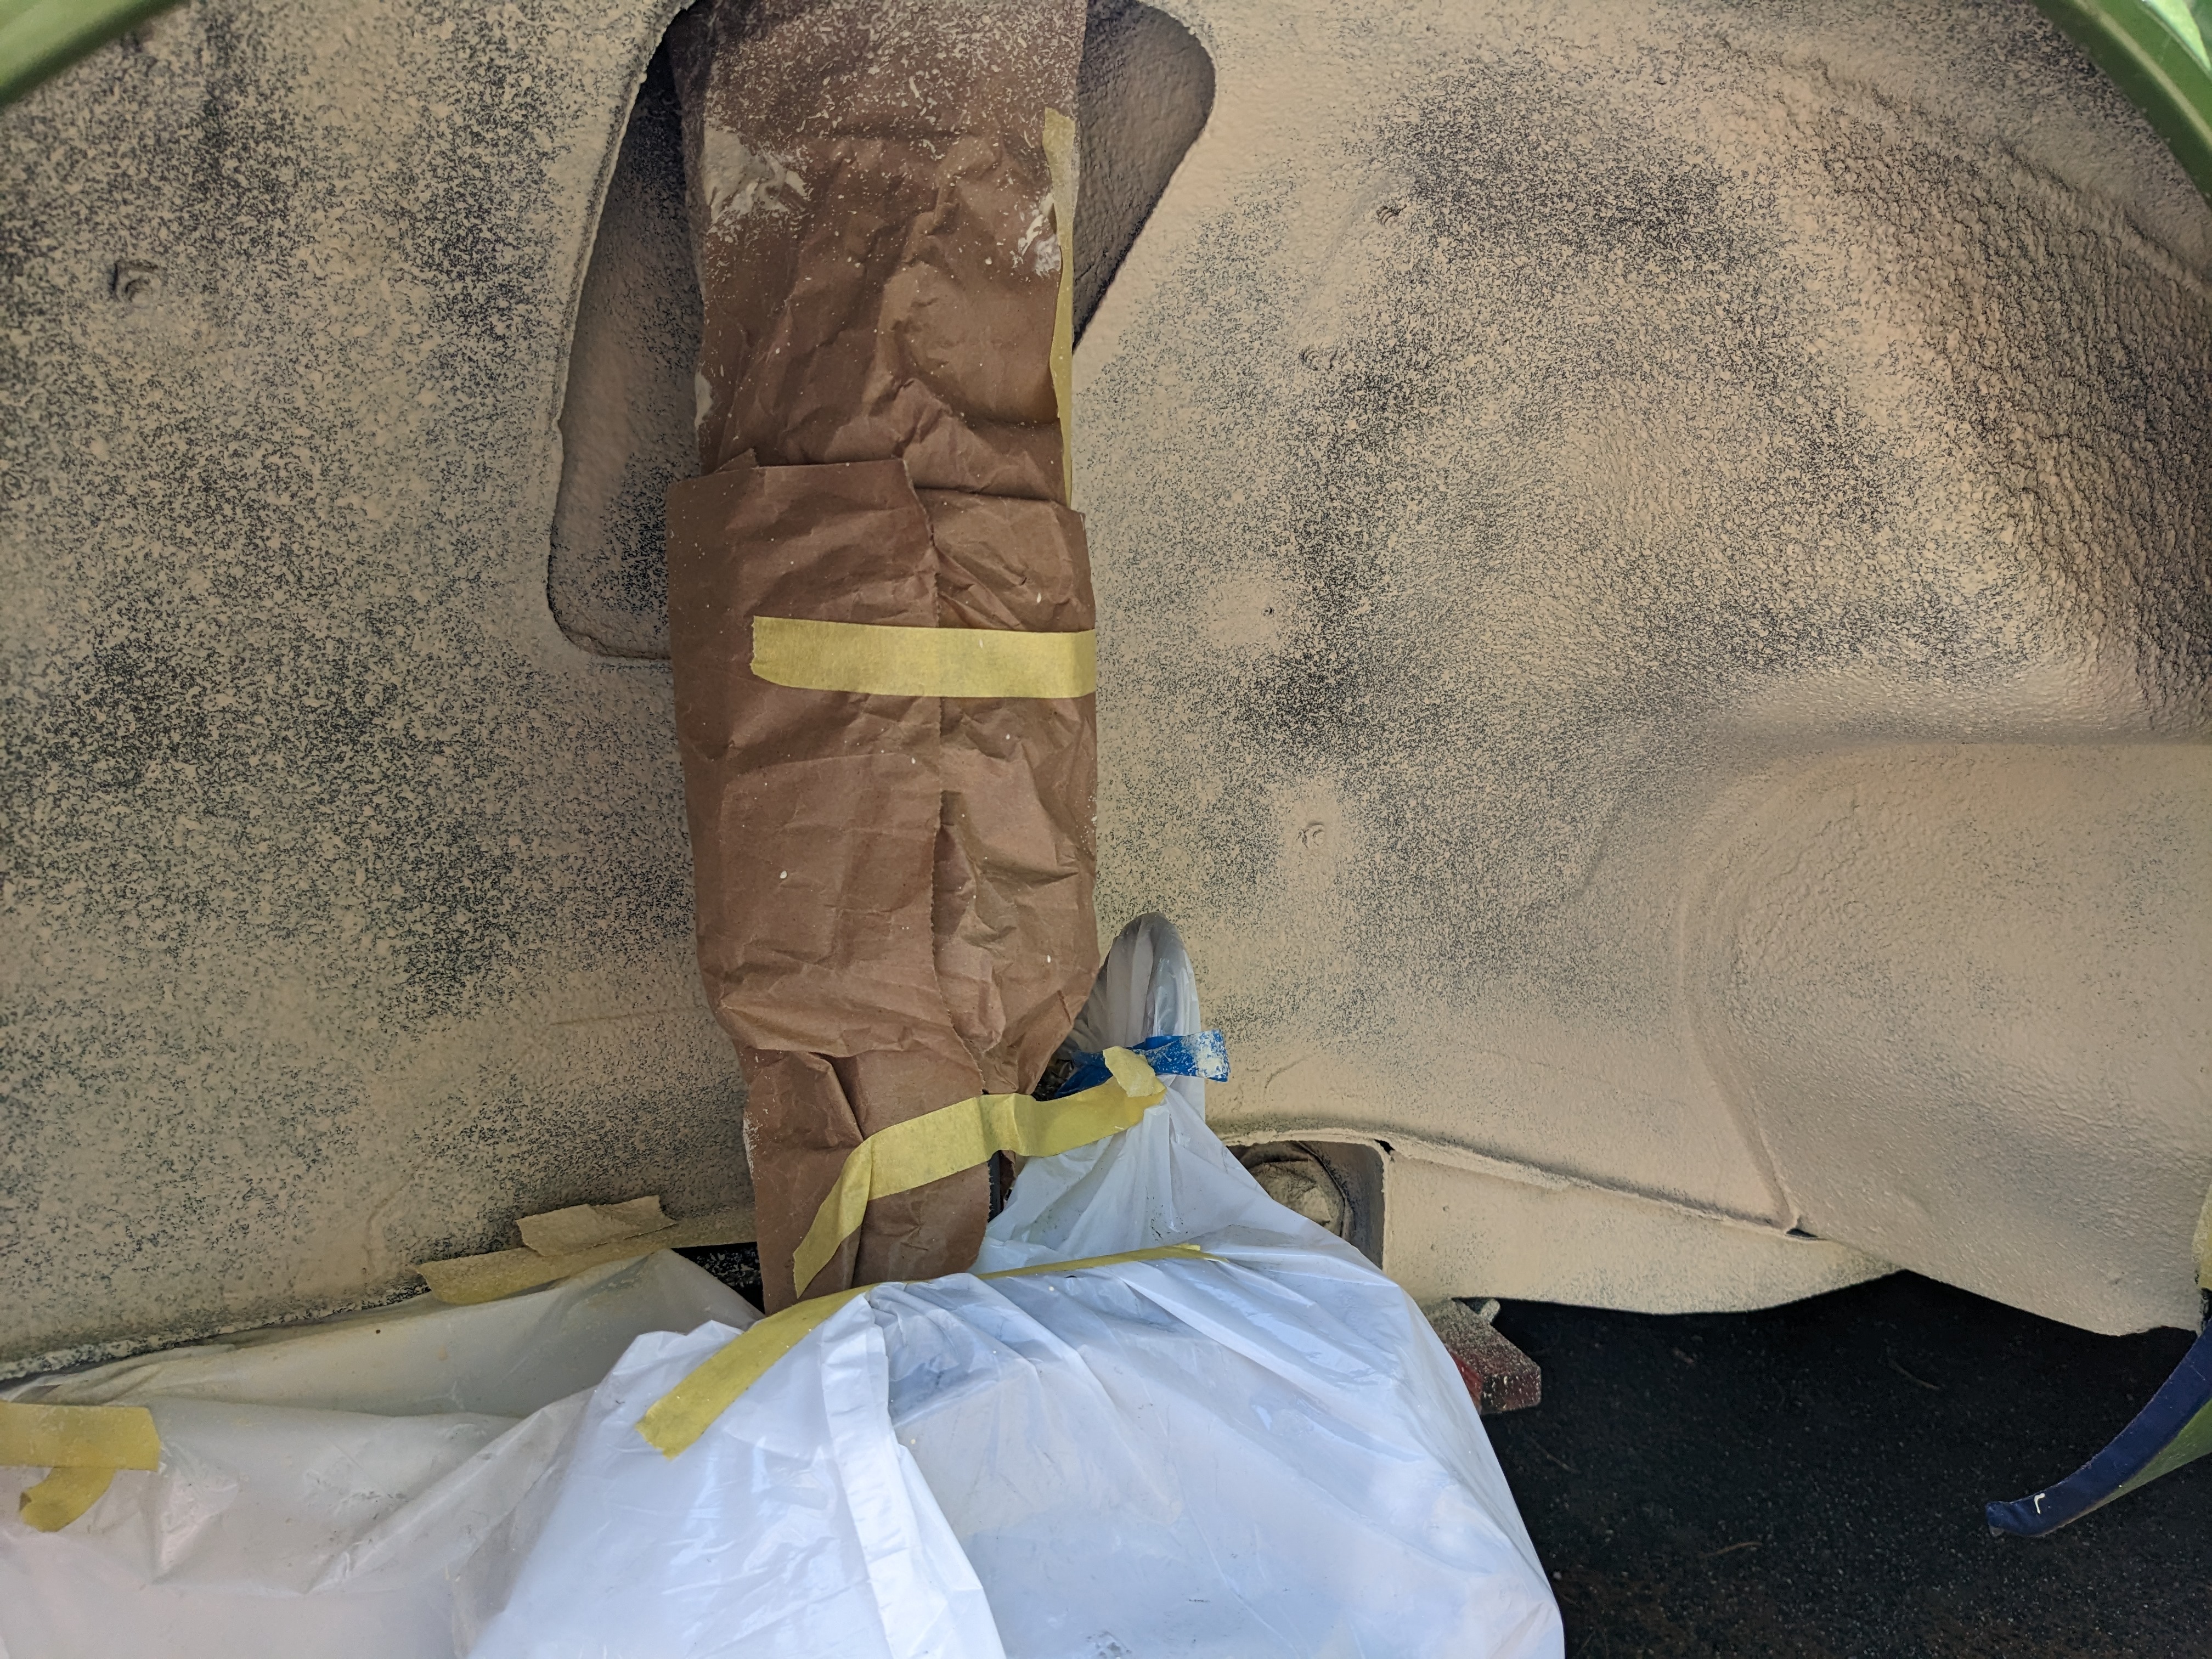
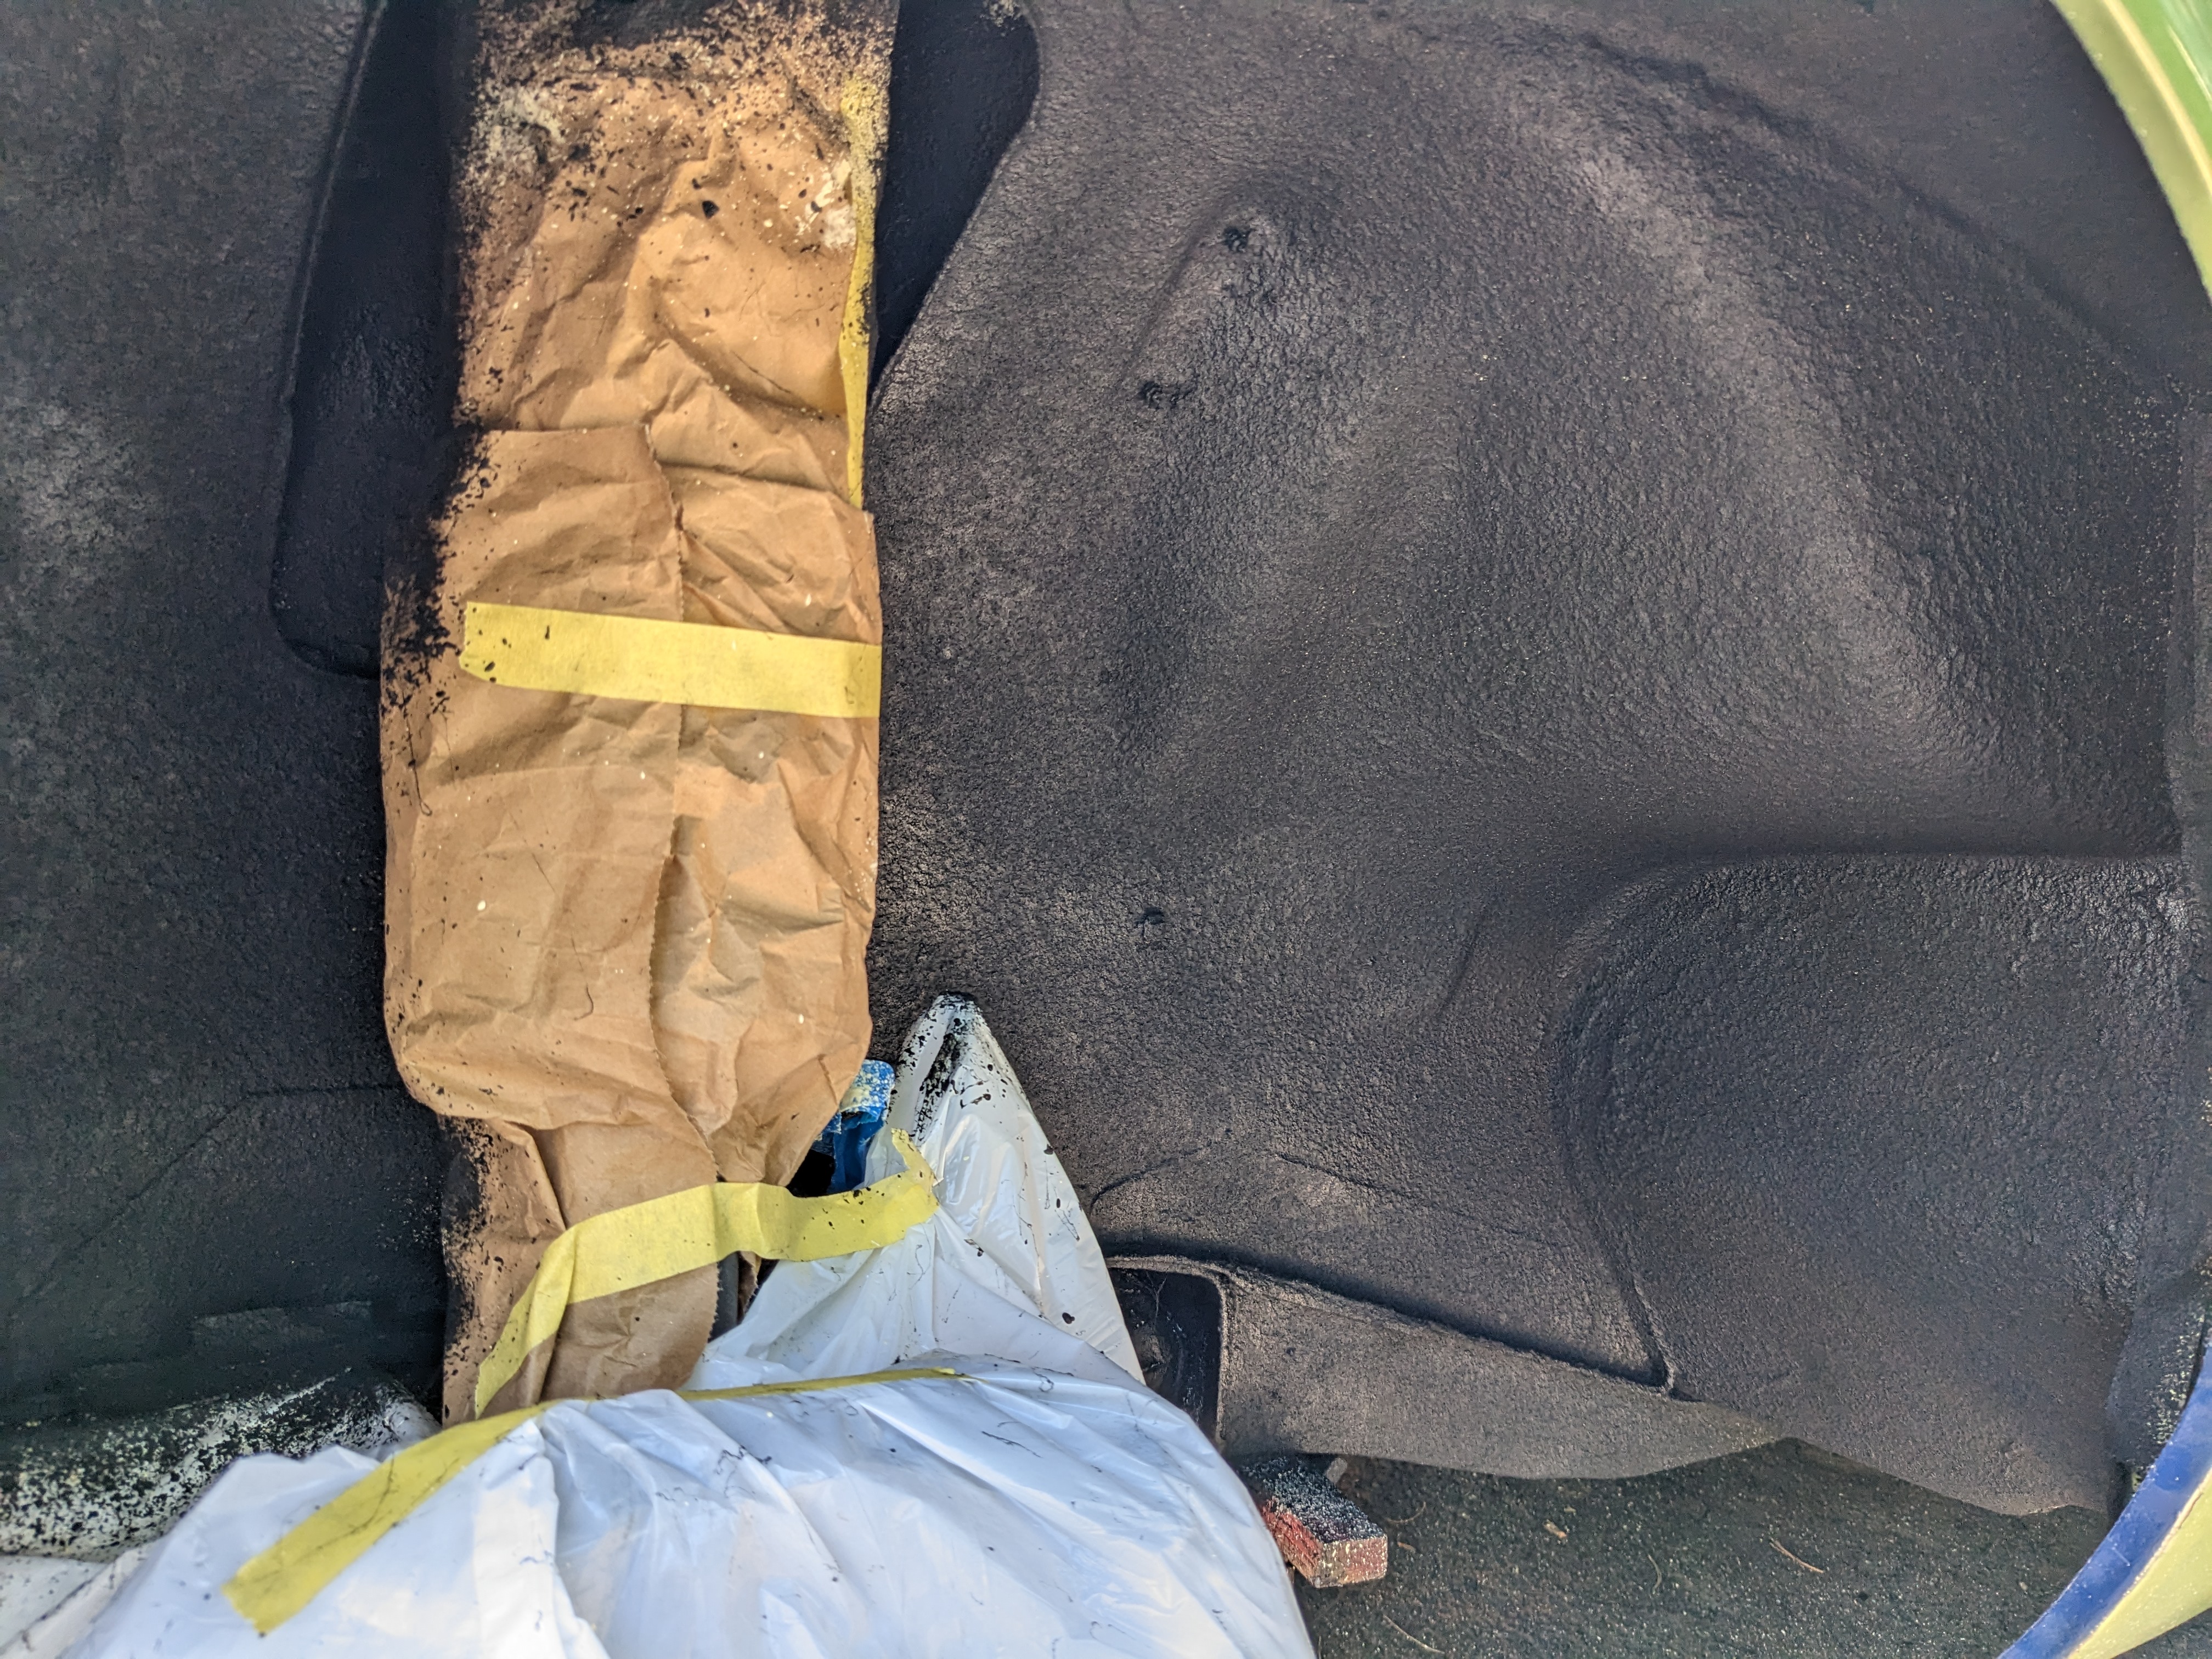
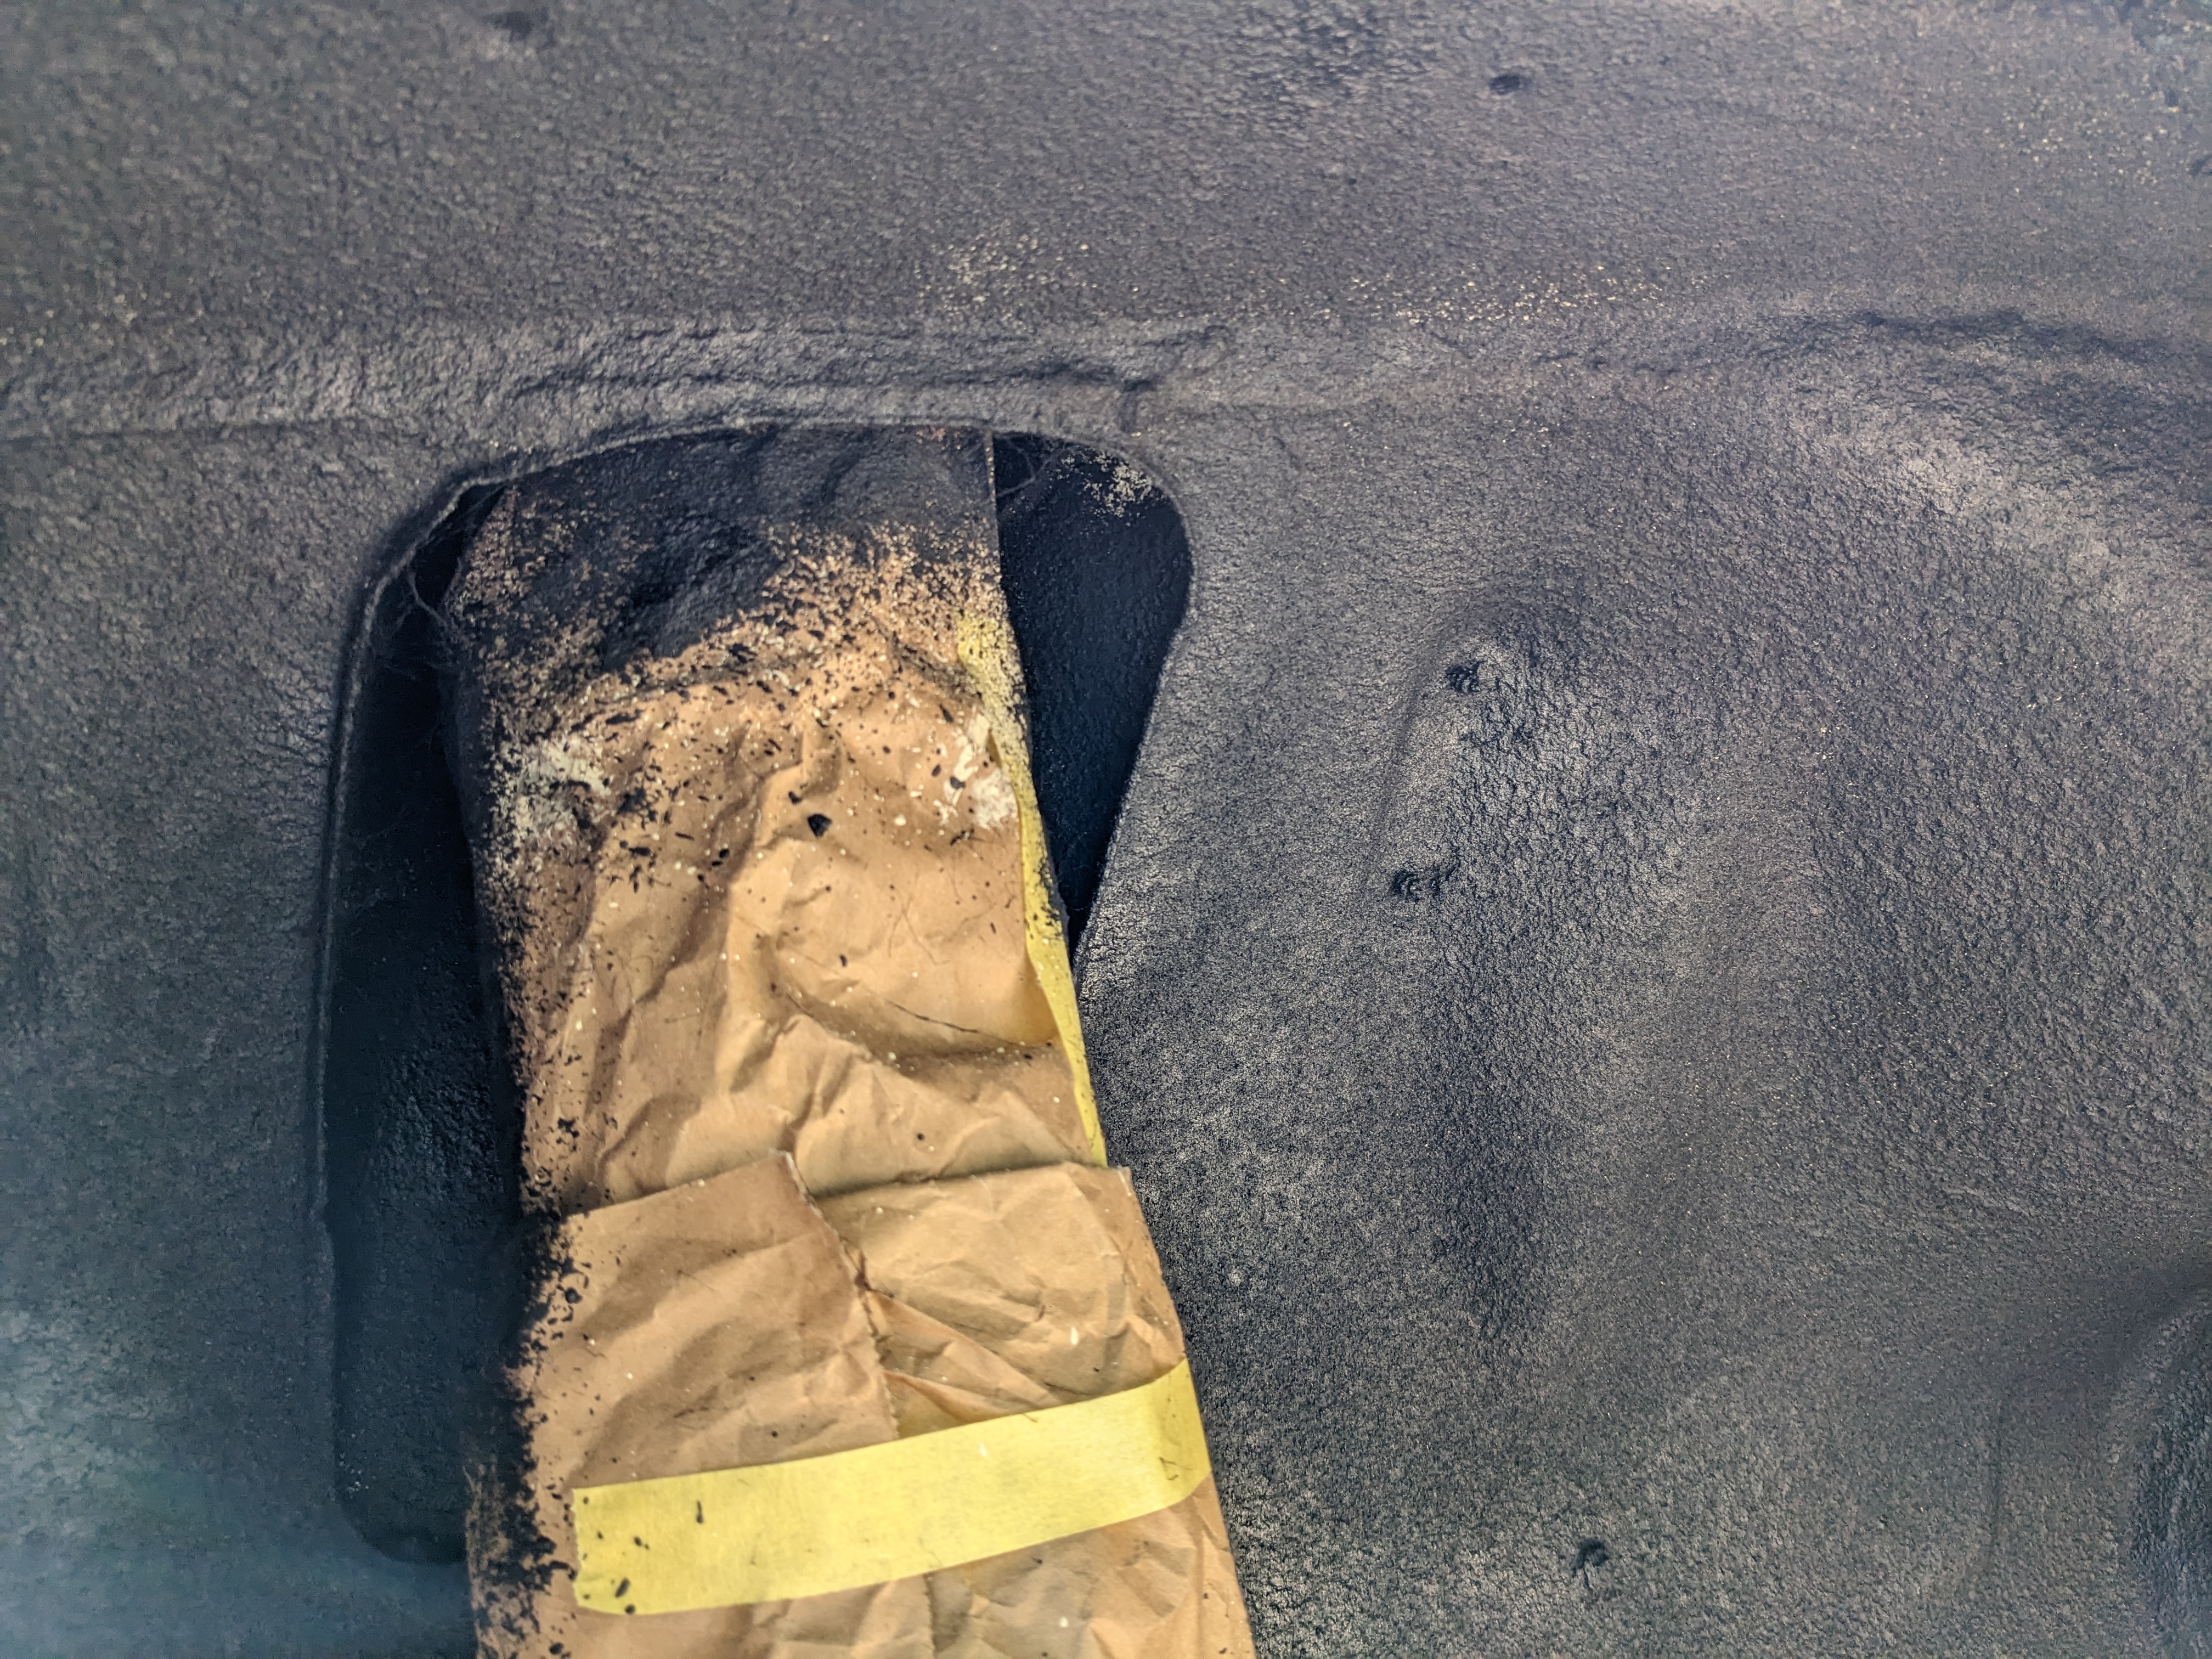
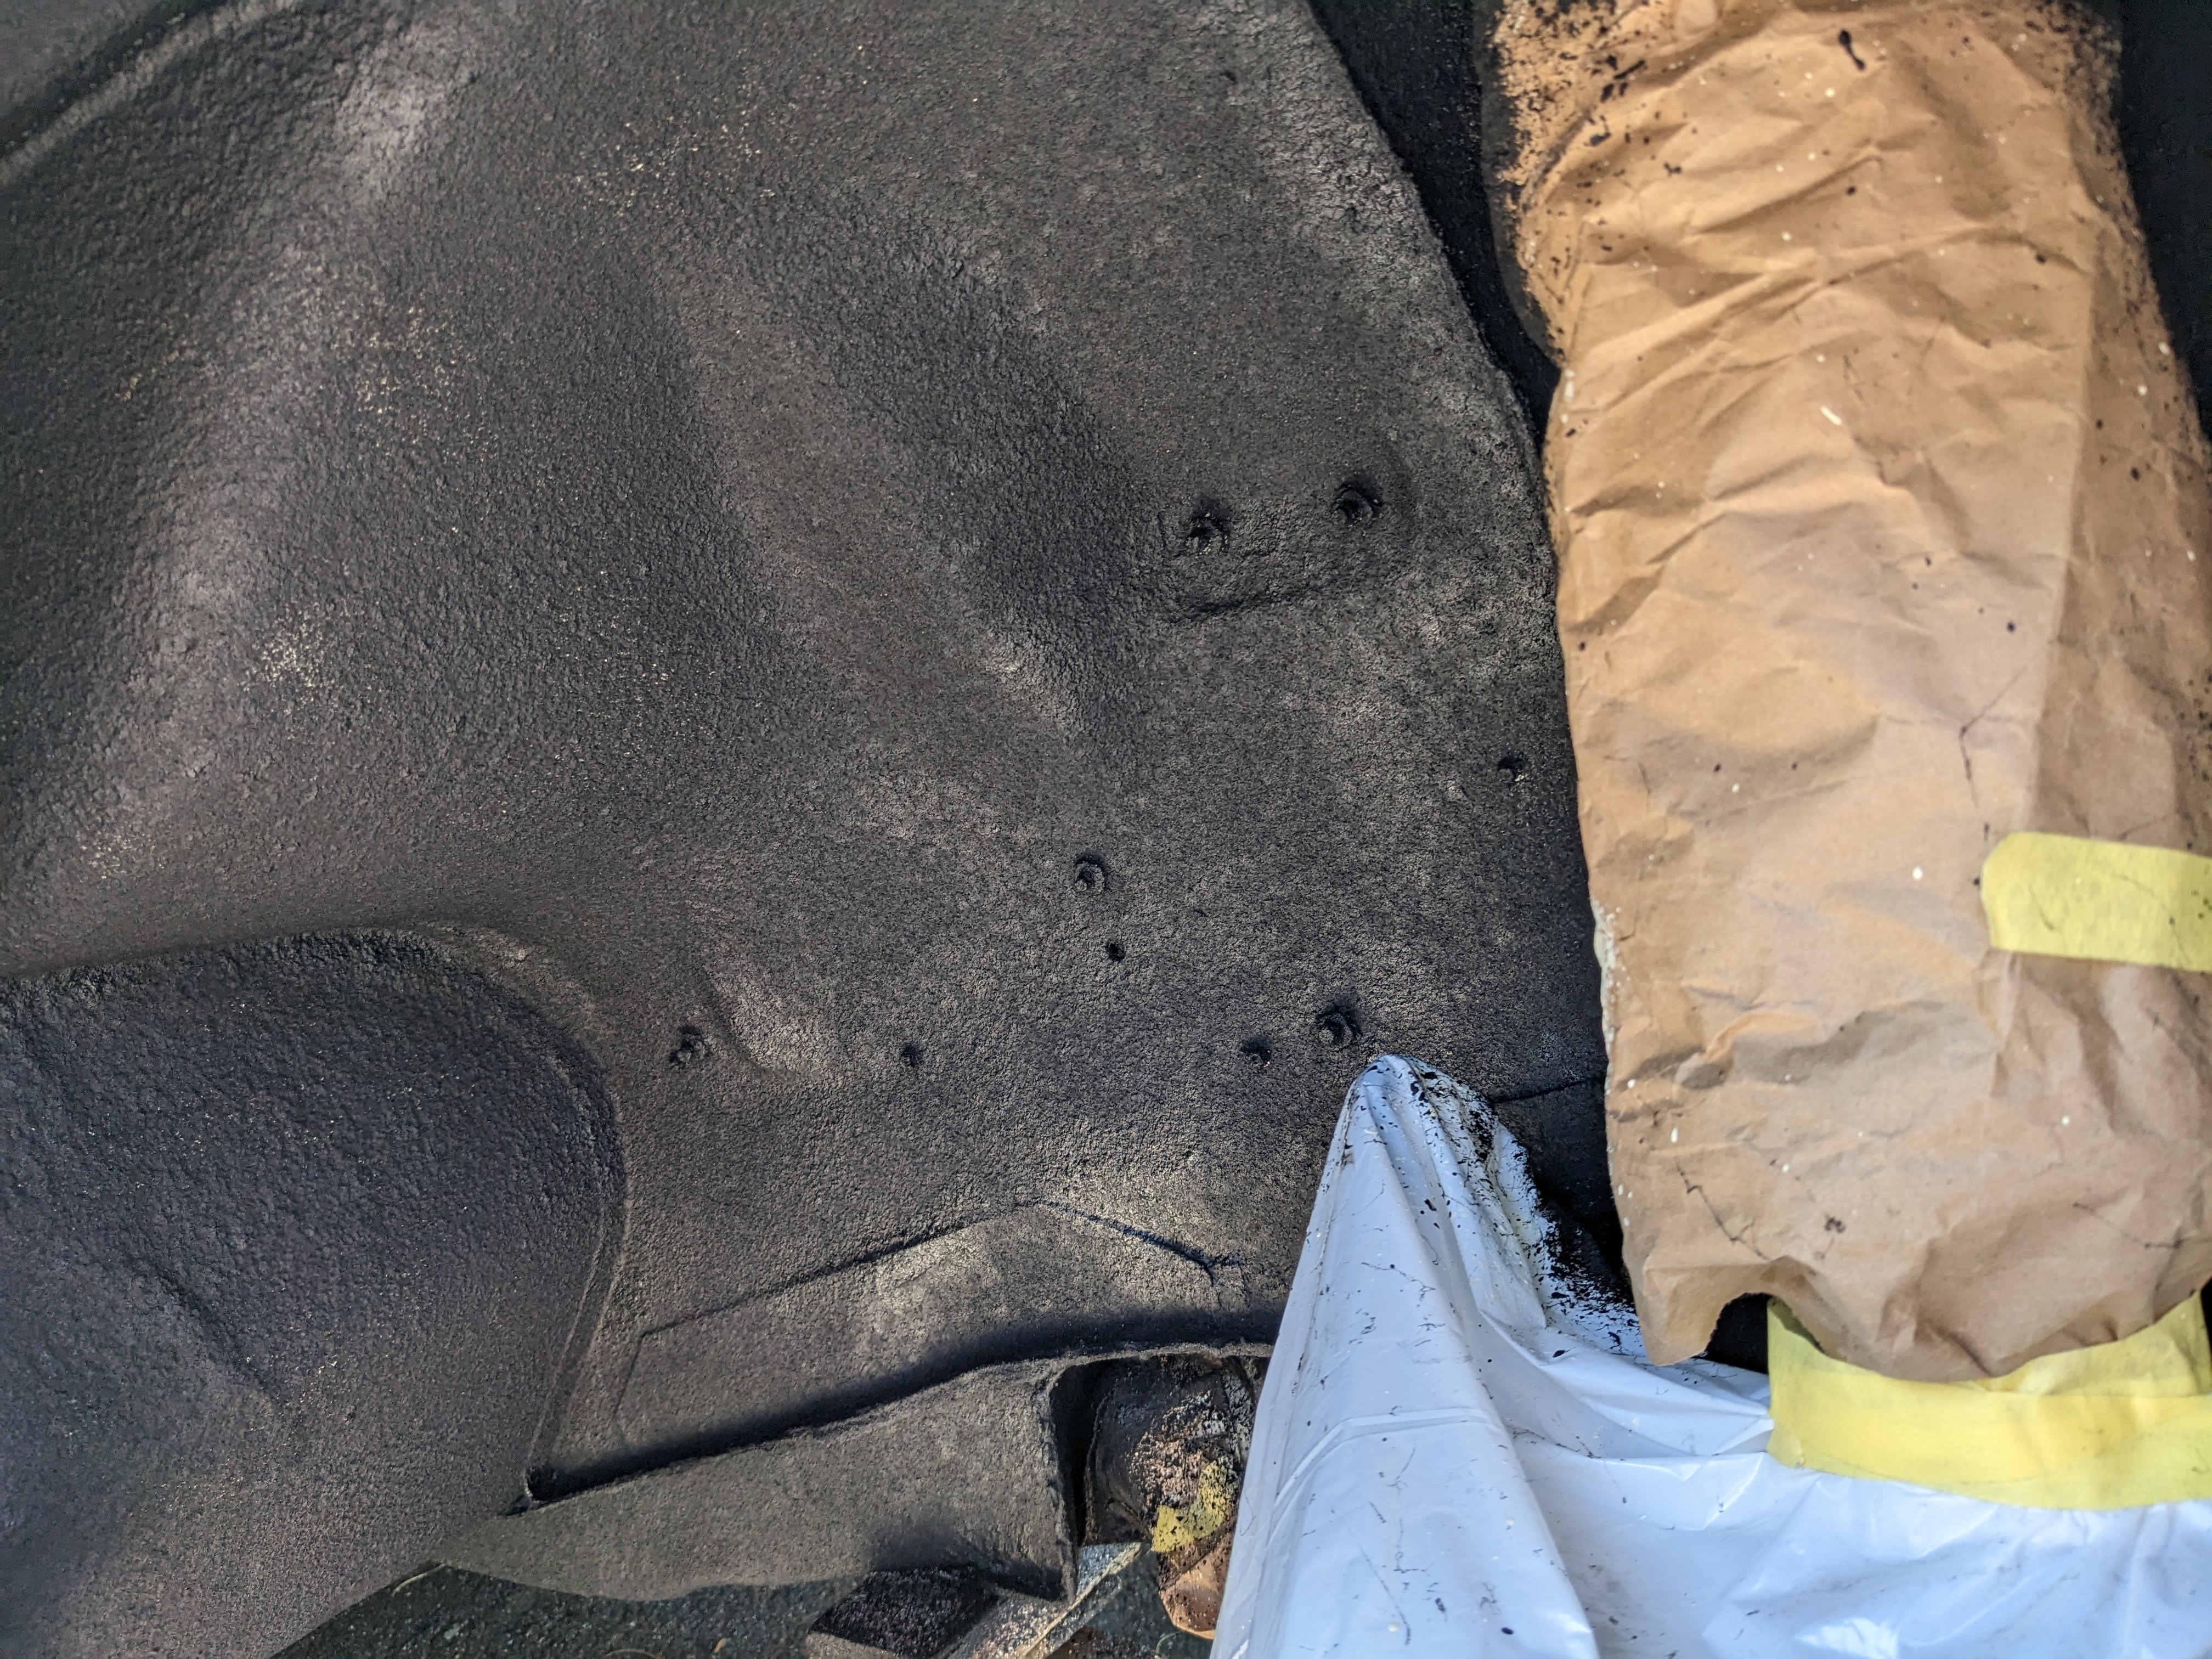
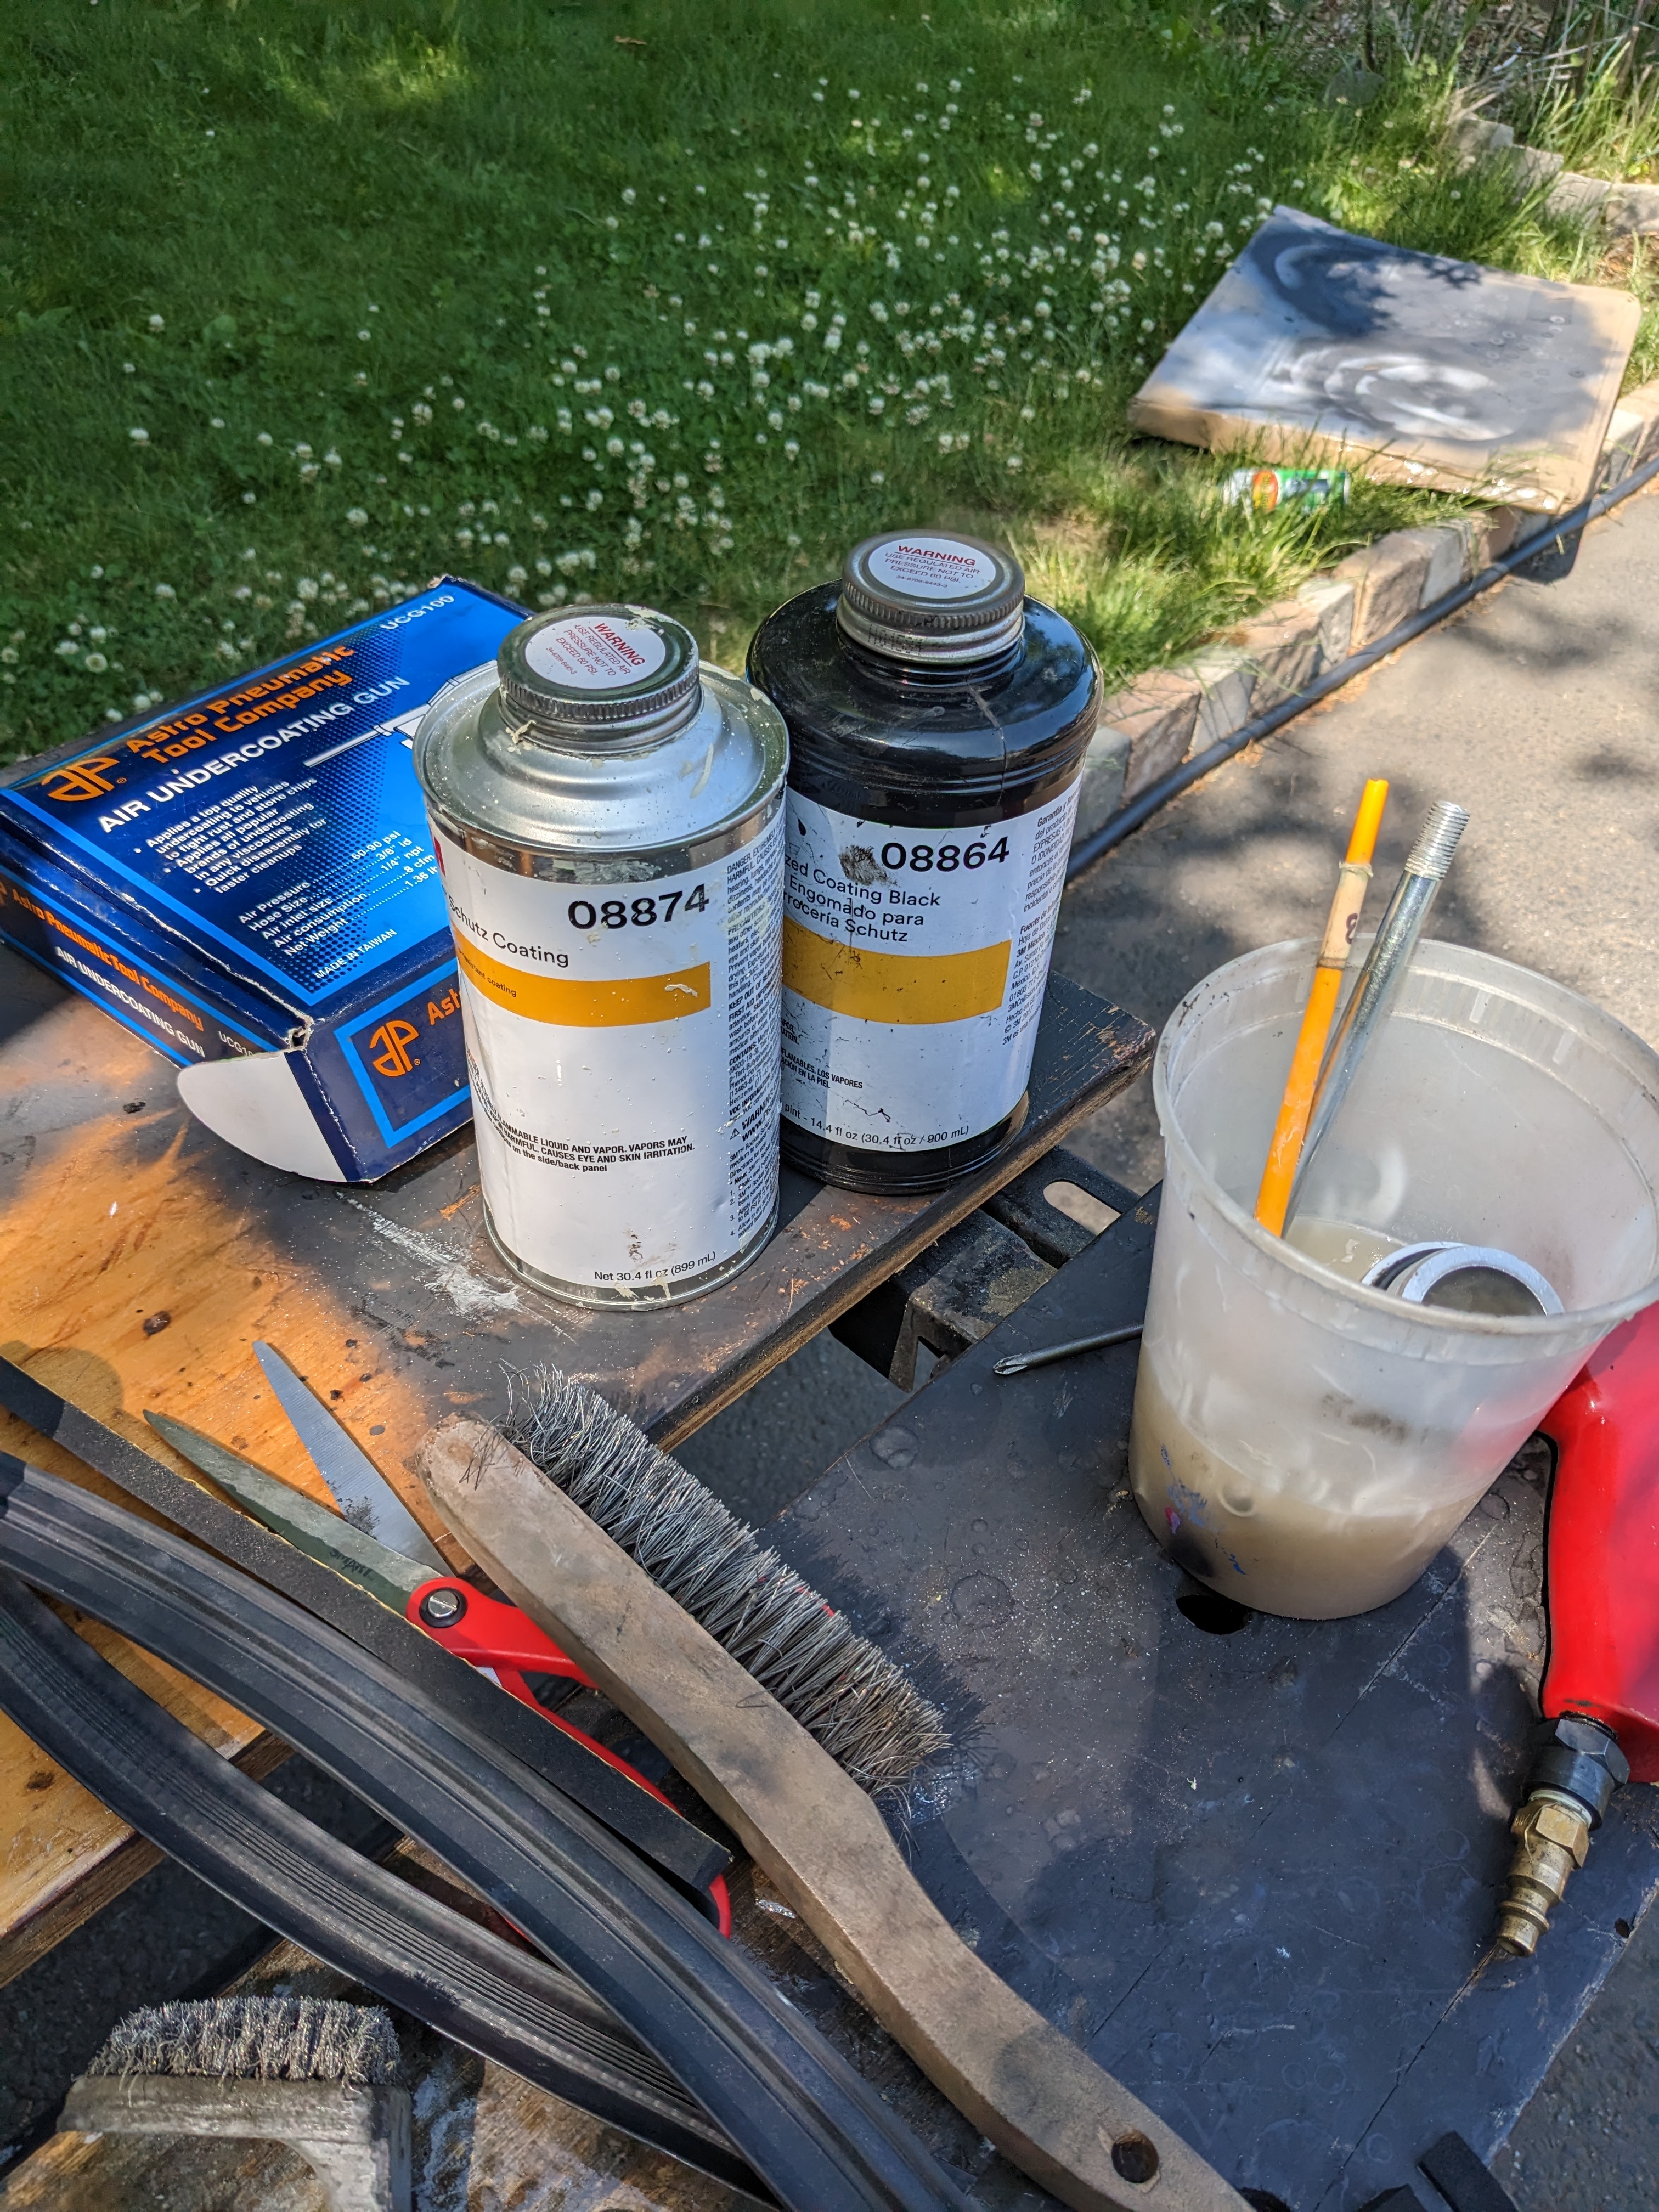
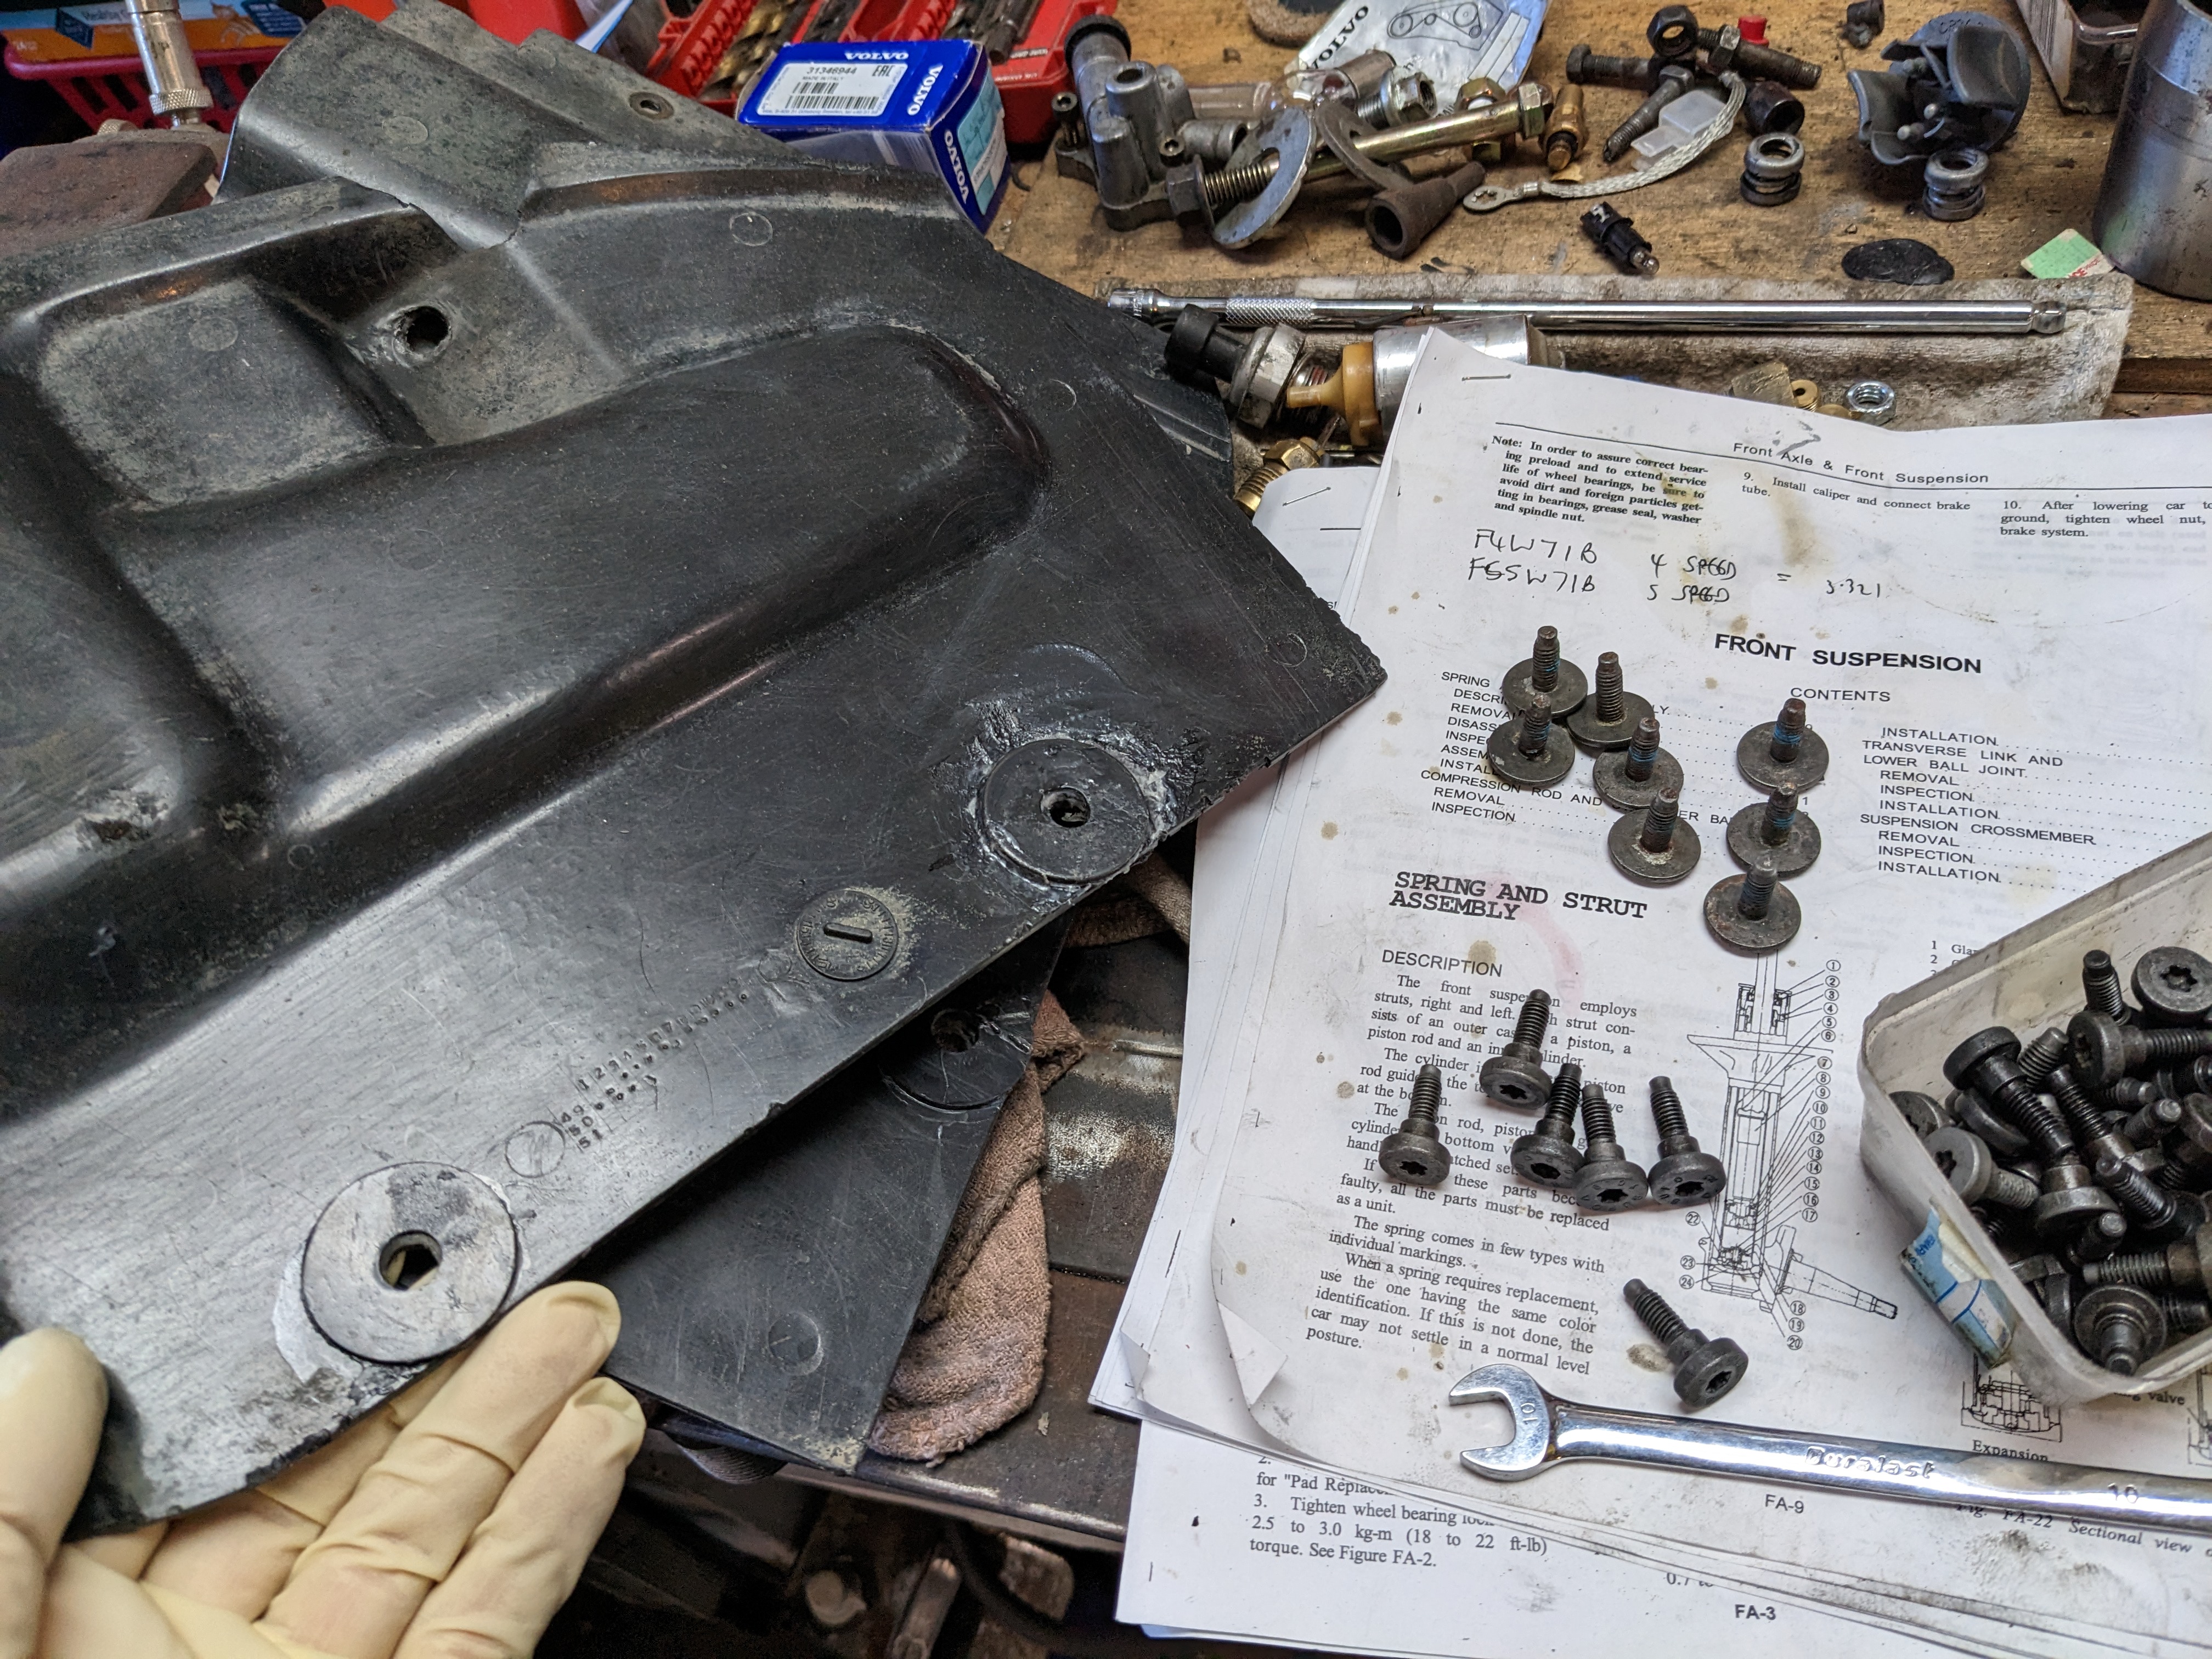
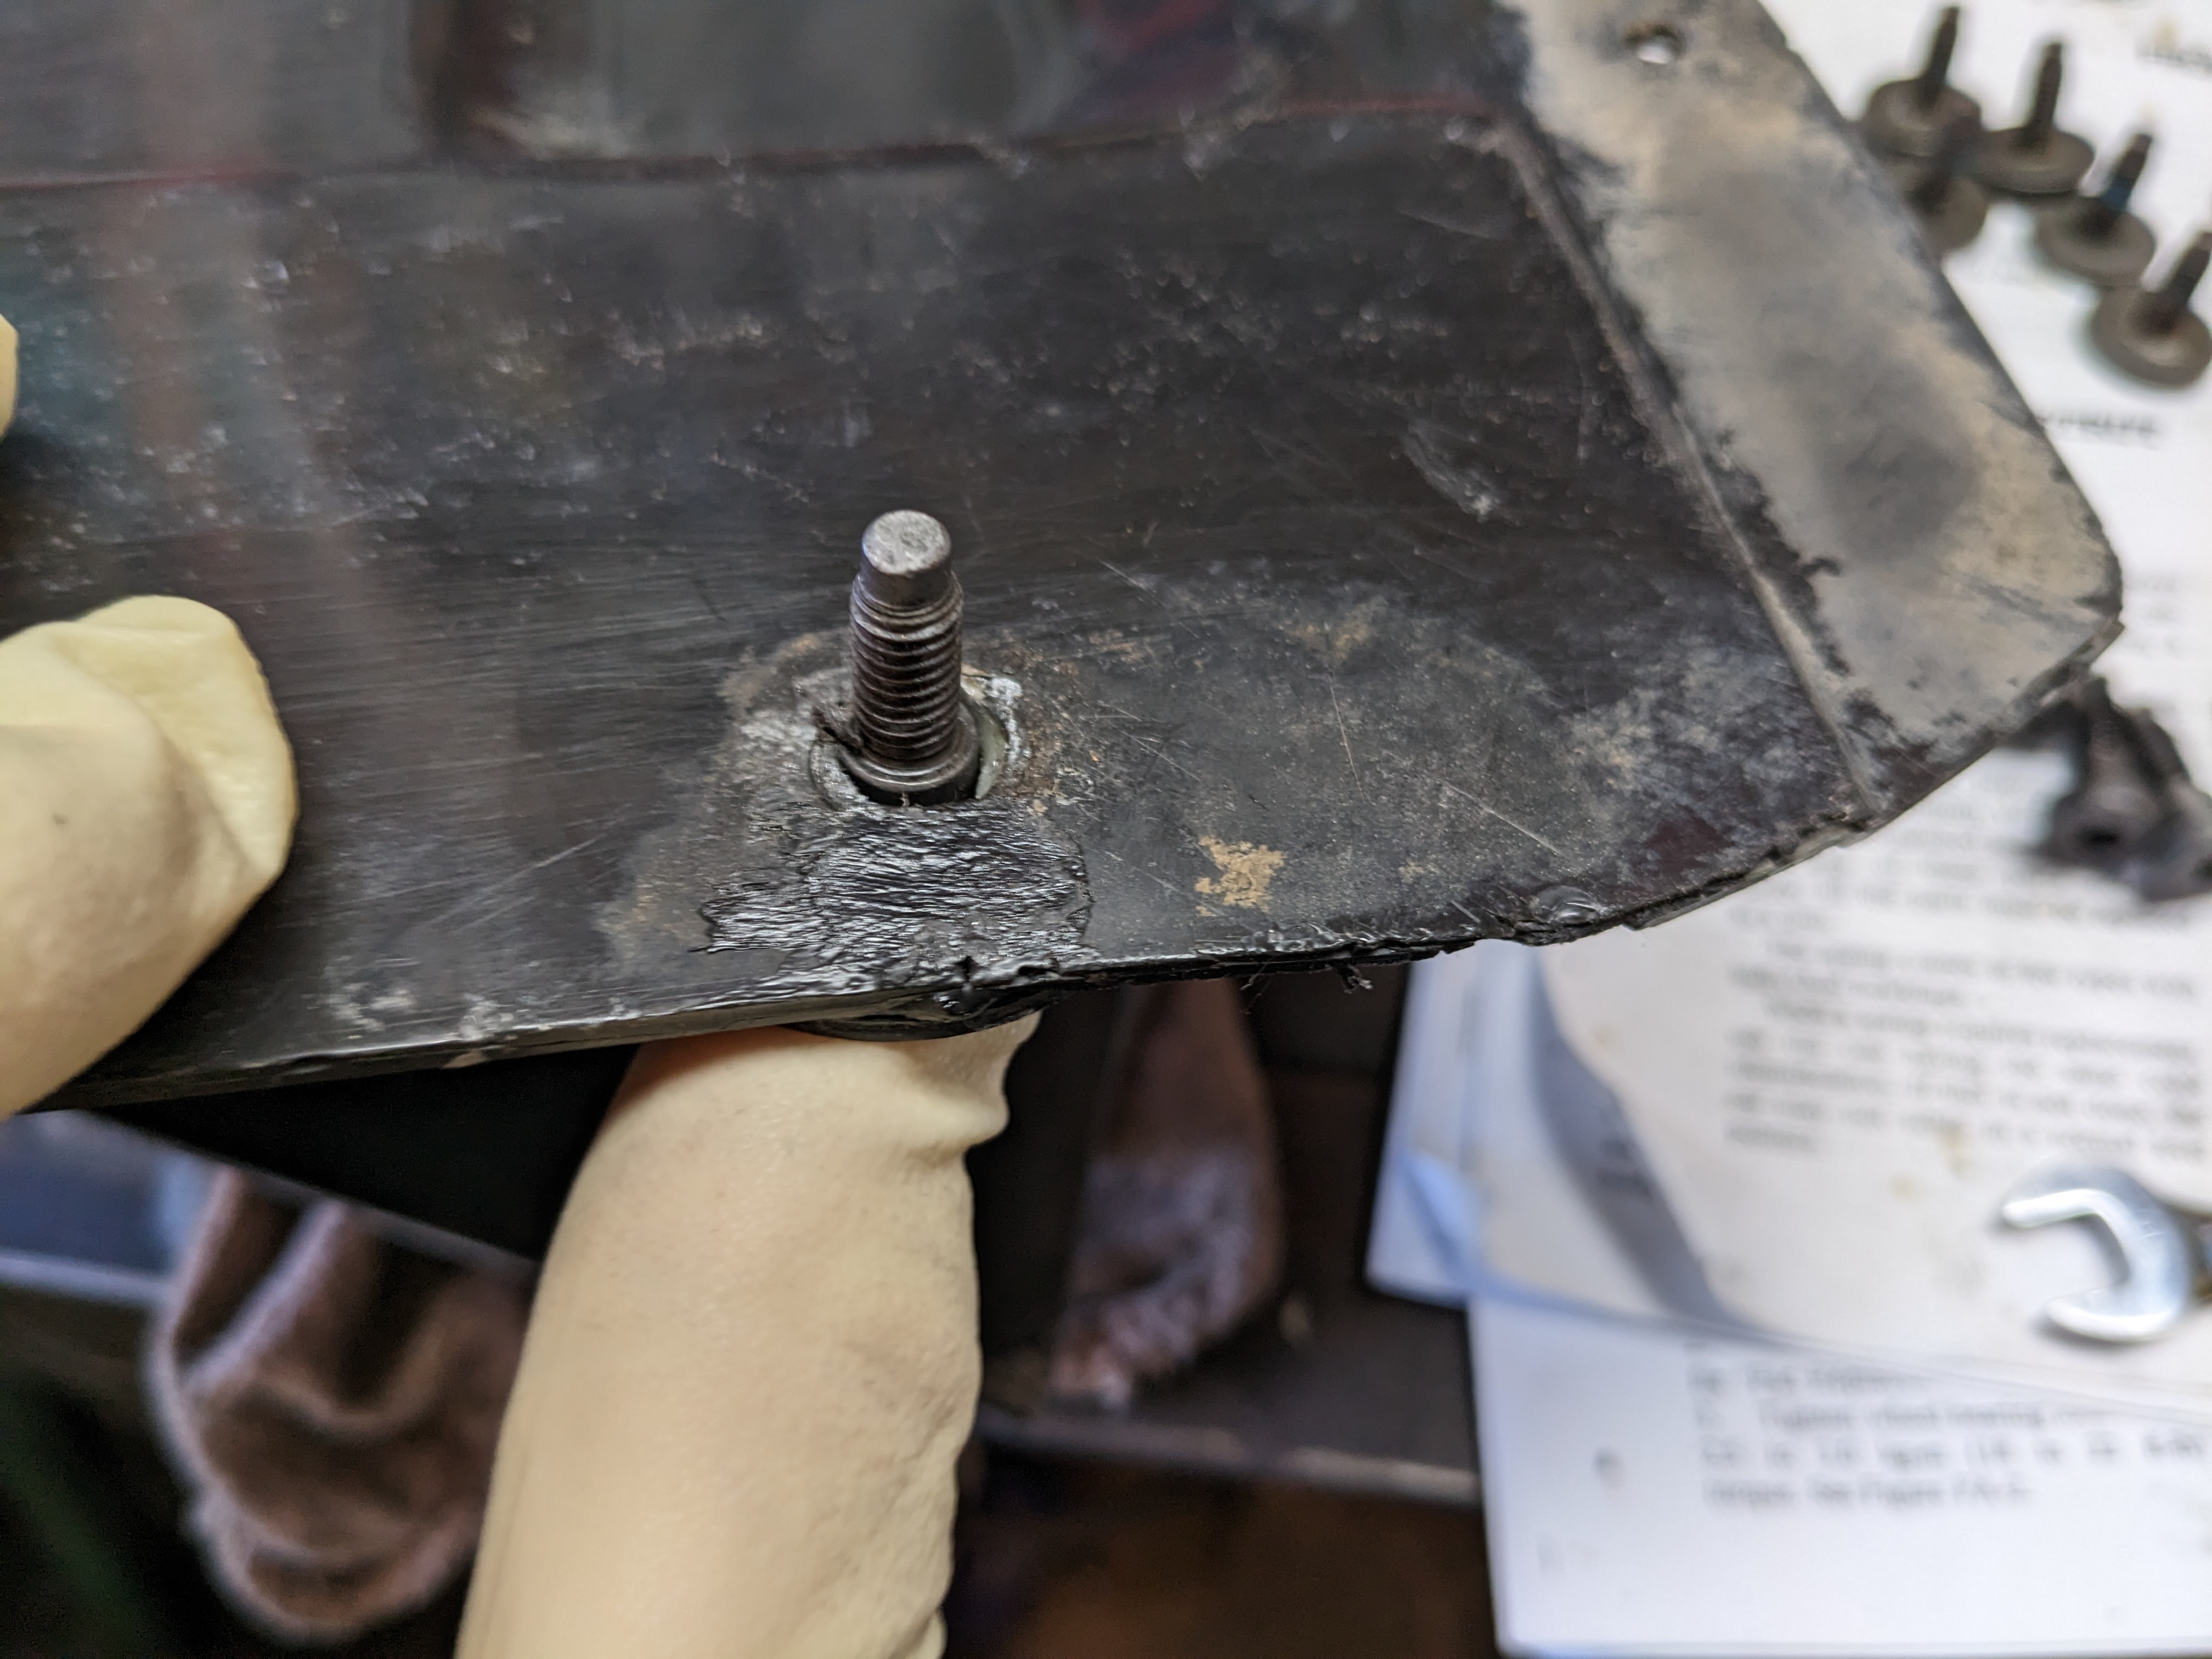
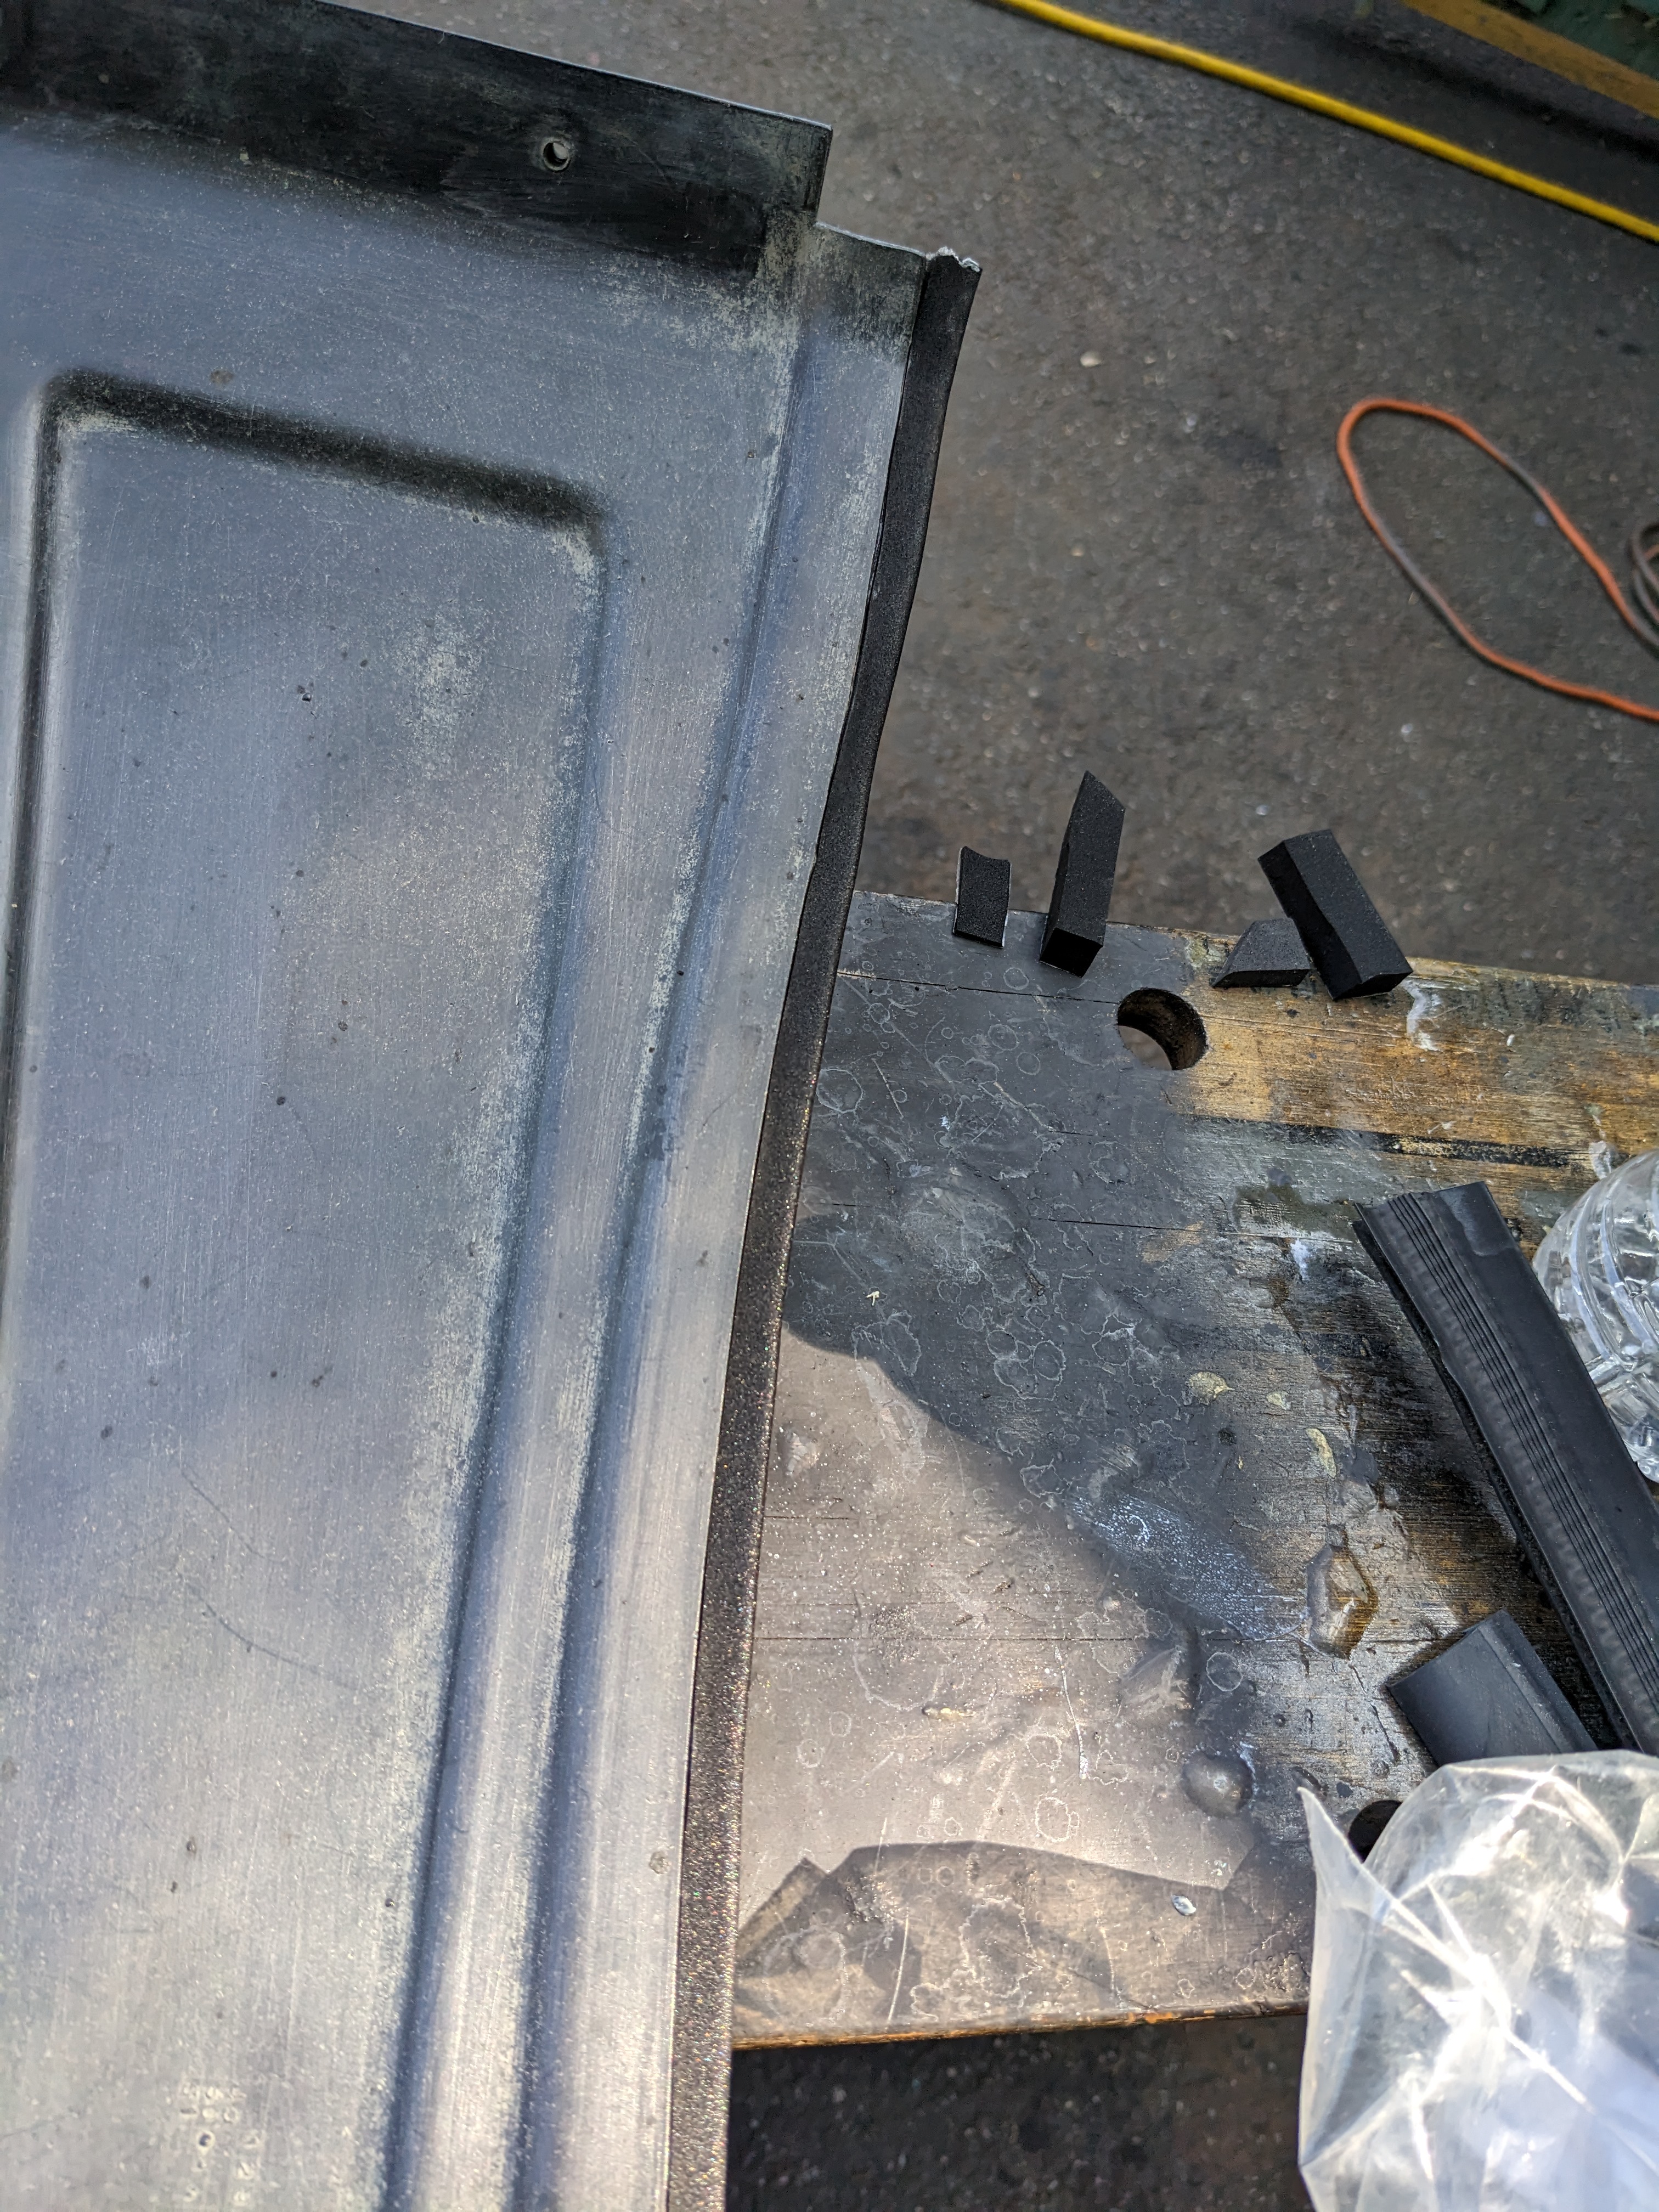
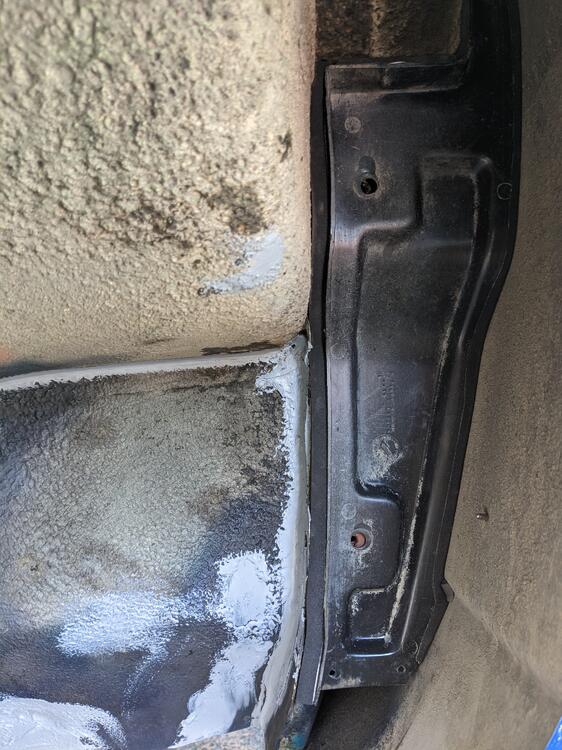
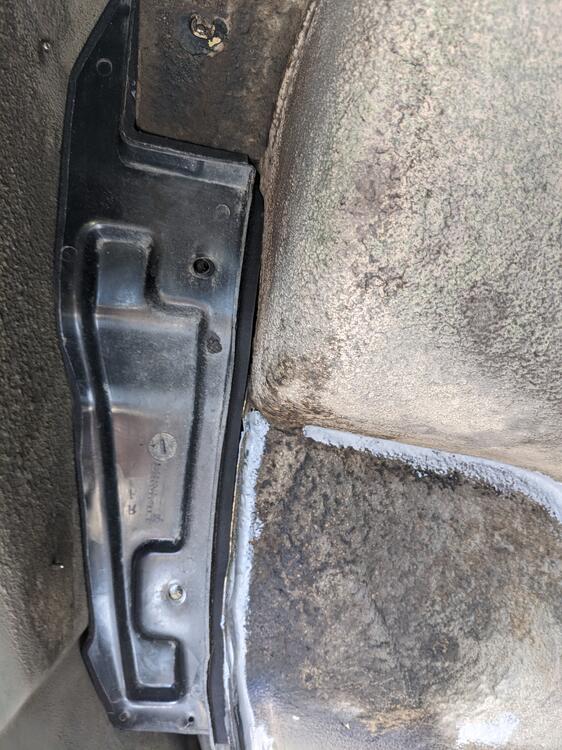
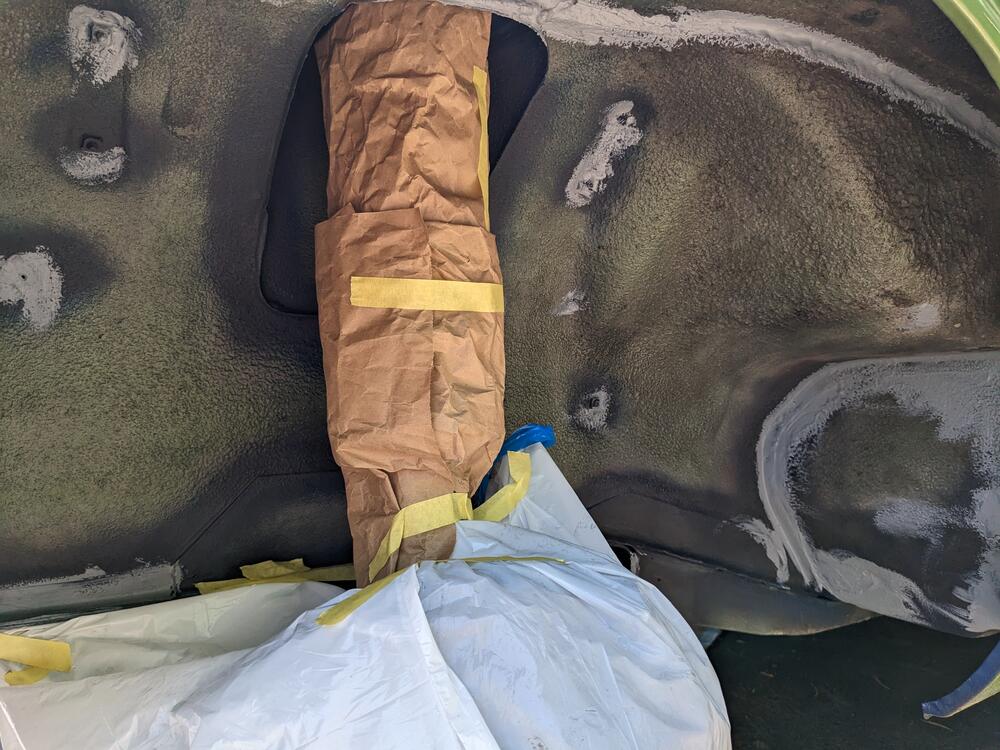
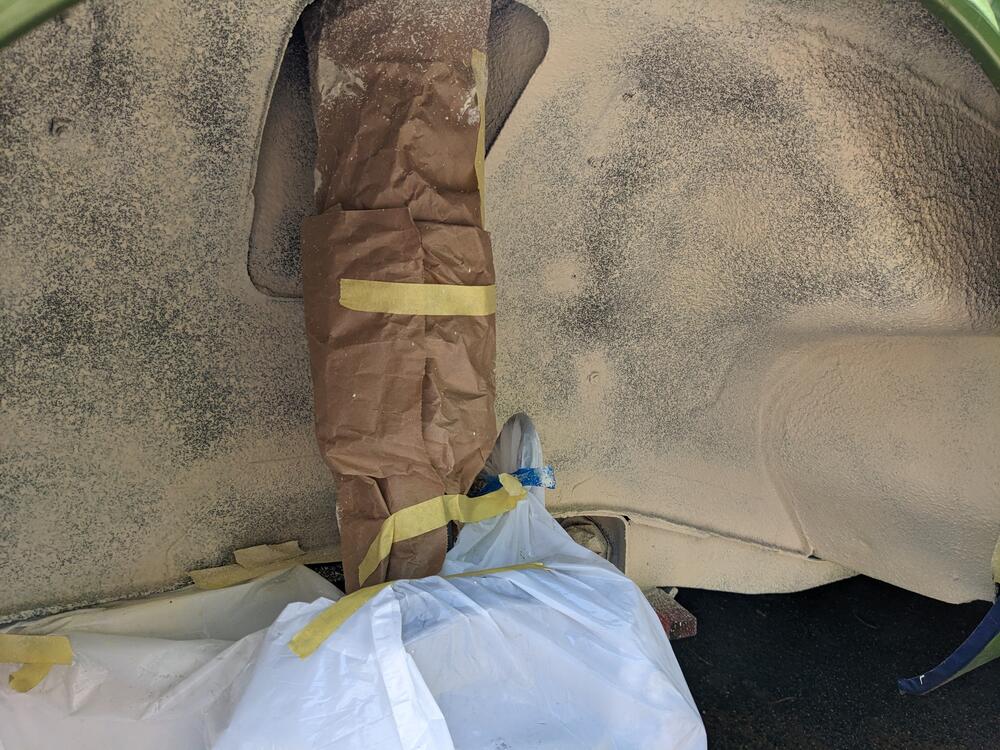
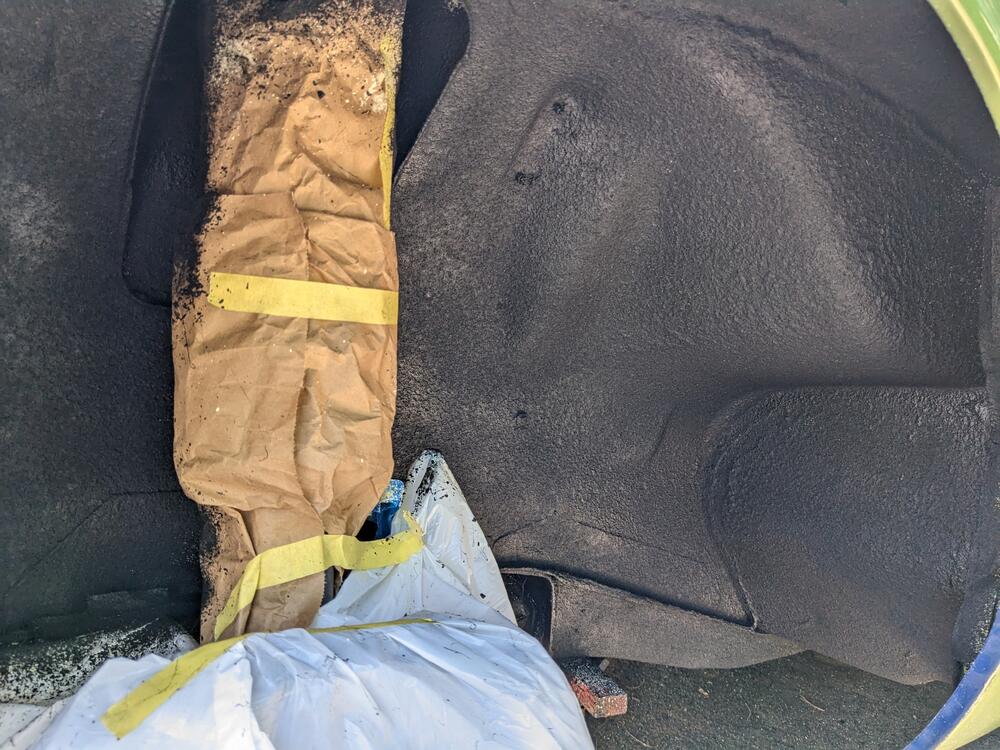
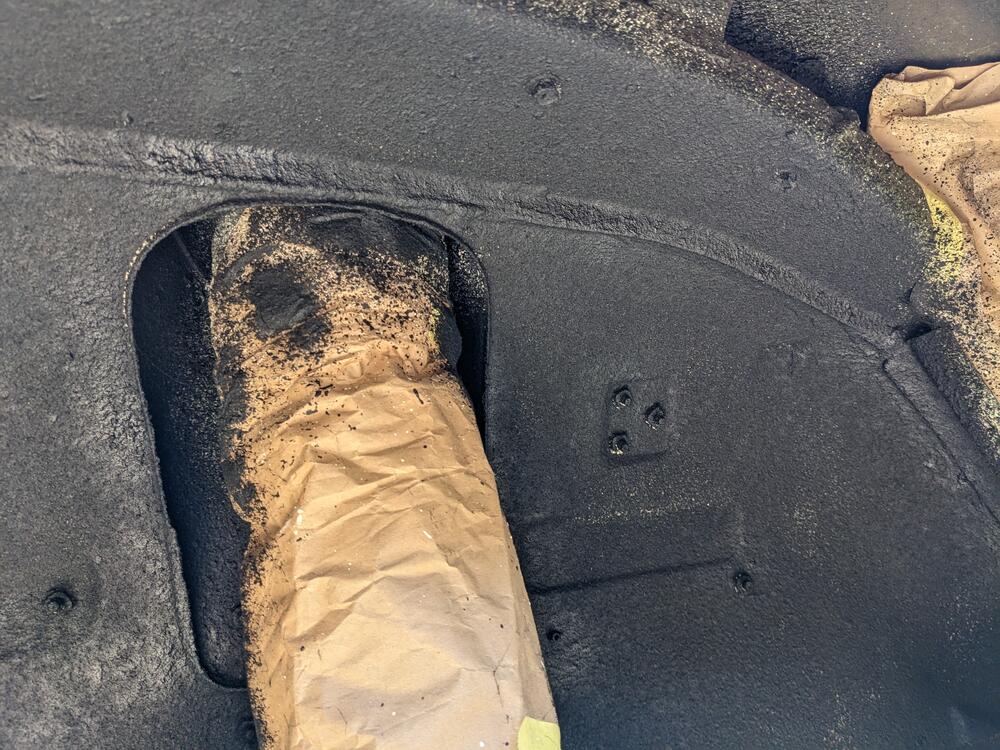
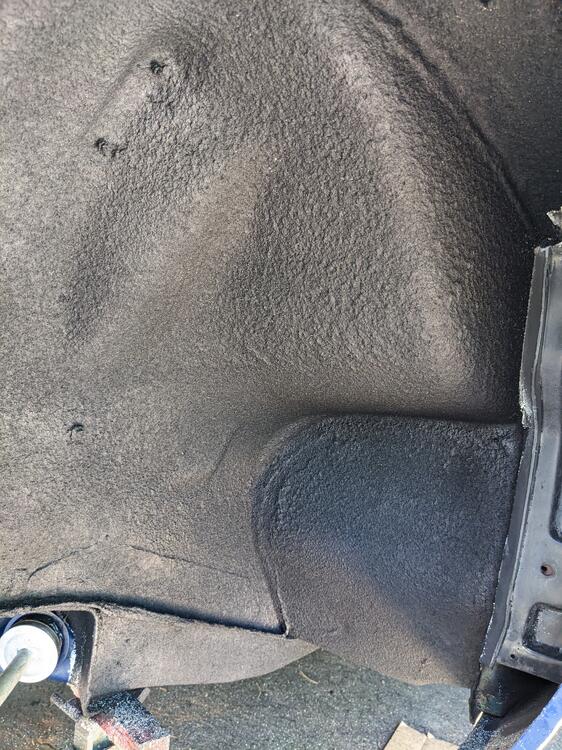
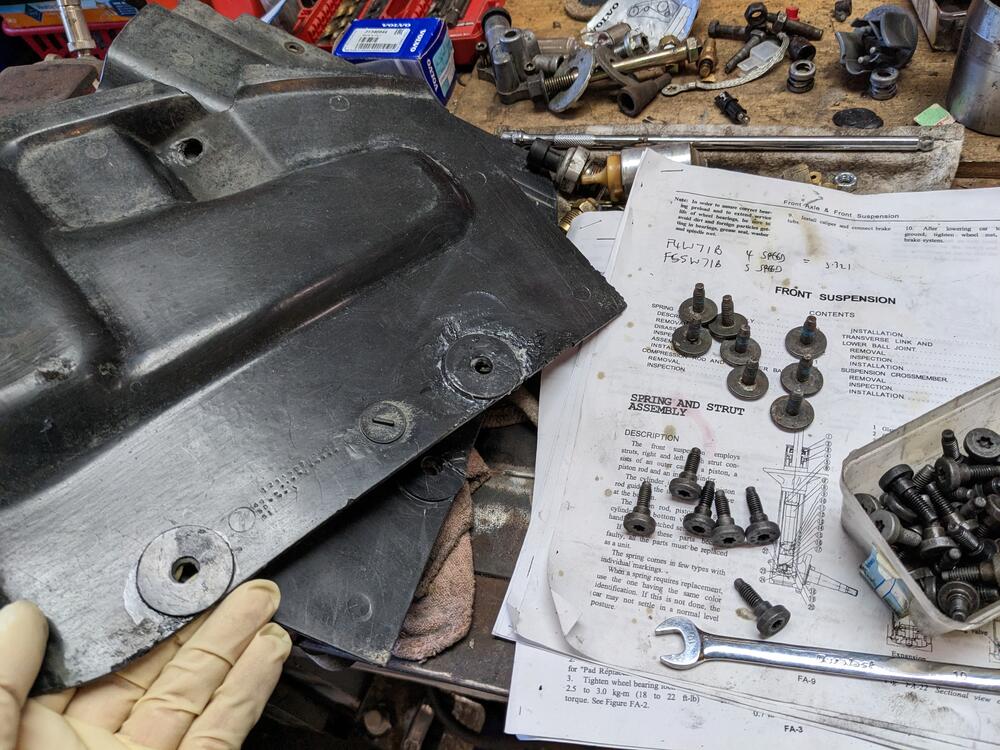
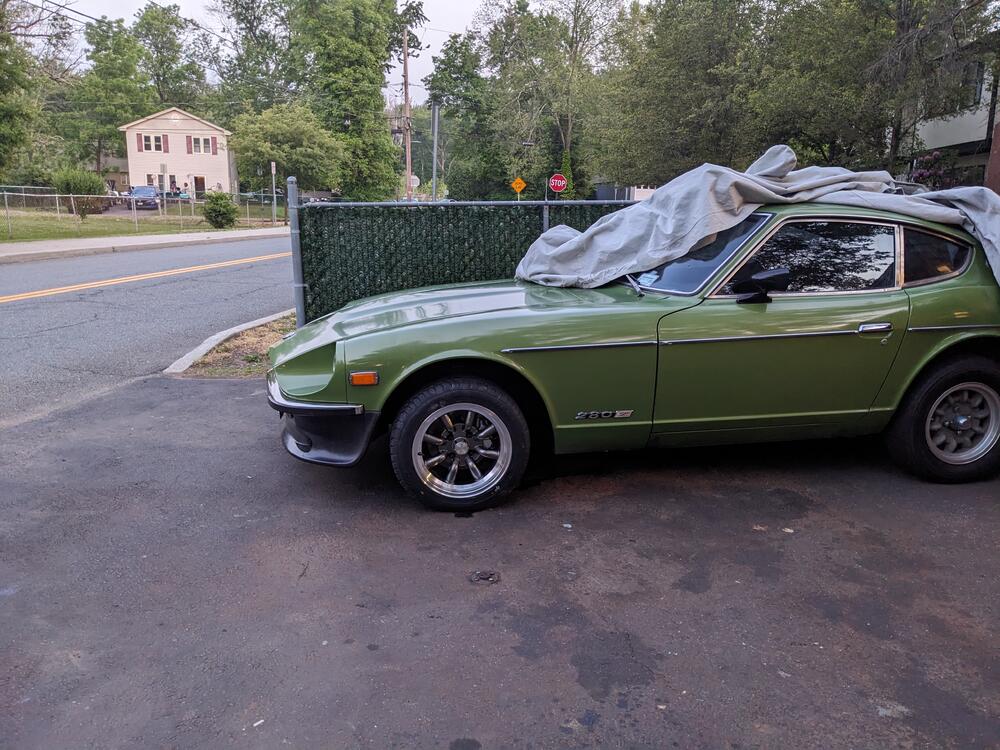
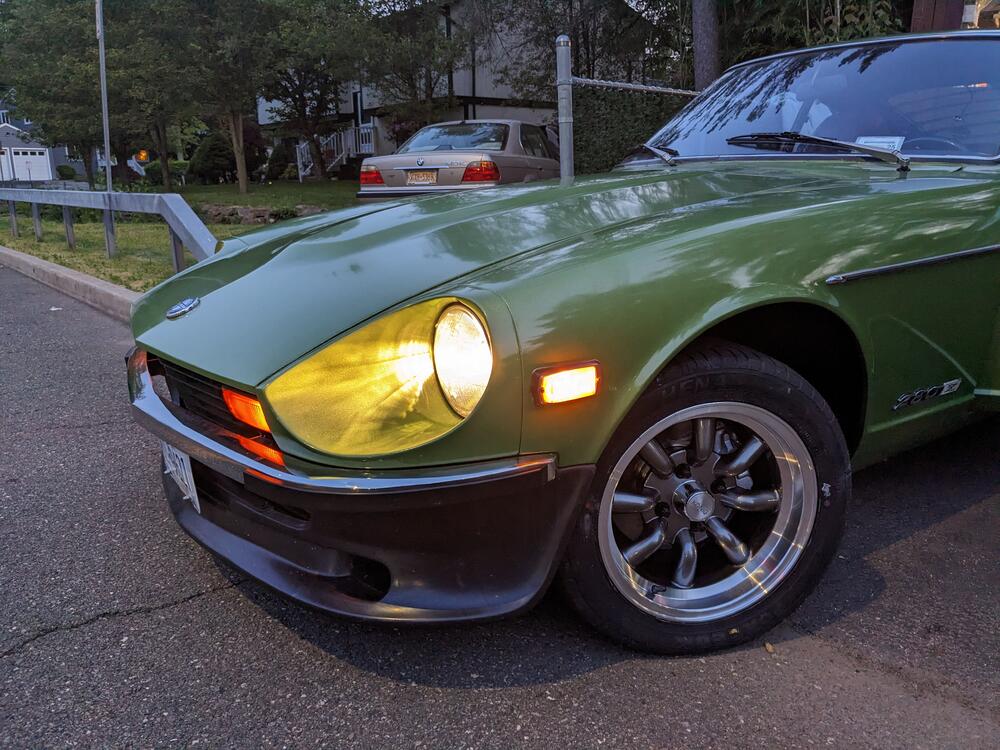
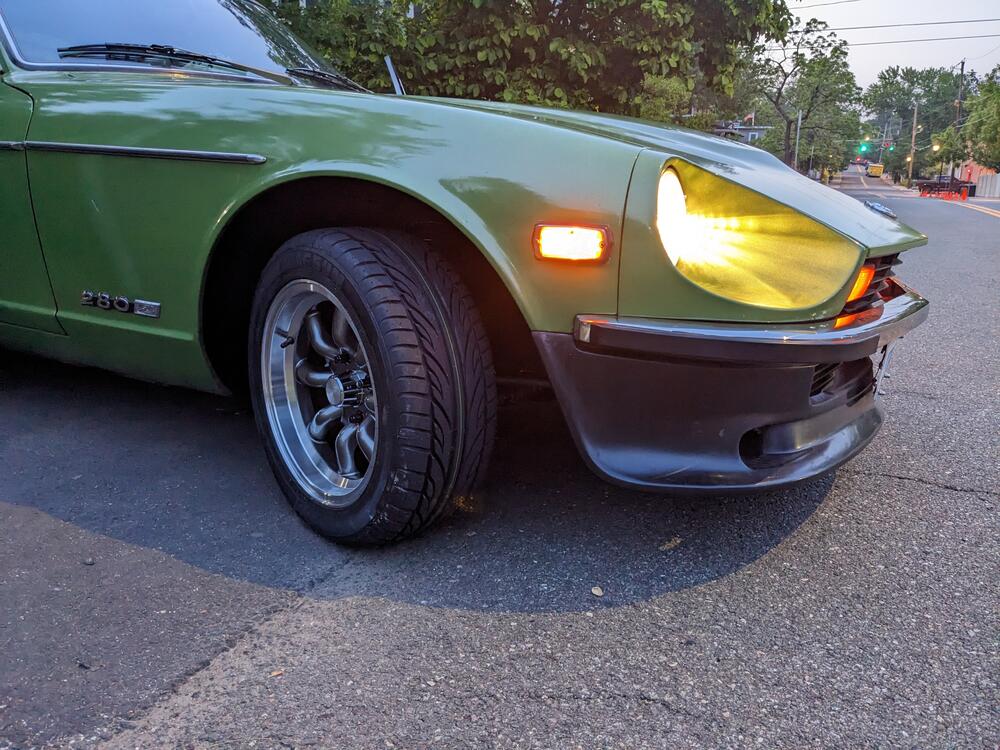
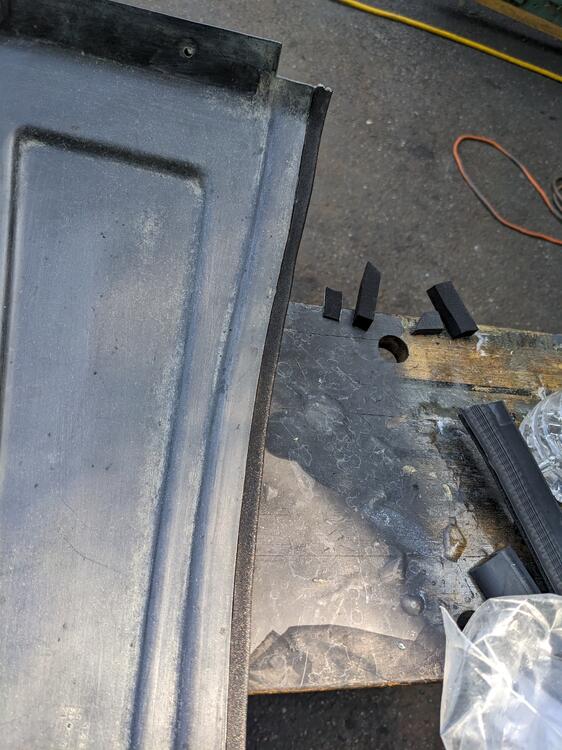
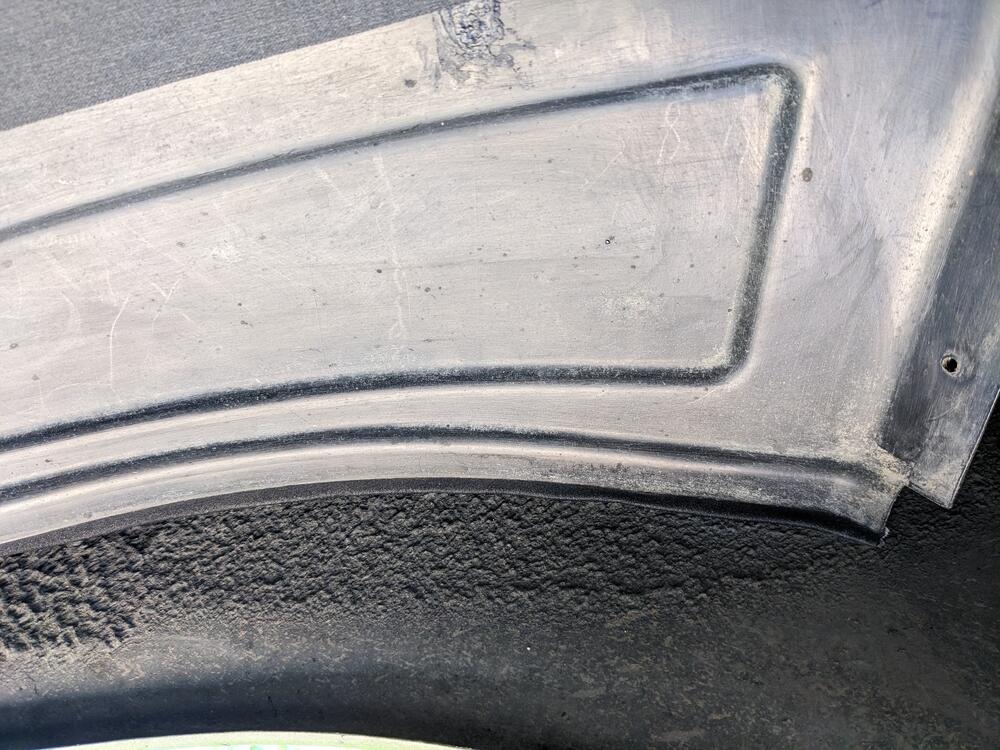
Got the brakes bled, then worked on the fender liners & the wheel well coating. Did some plastic weld repairs to the cracks around the mount points Added closed cell foam to the inner rear panels, they are not exactly a snug fit by any means added a foam lip for the main panels, they also don't seal against the fender as supplied. I looked for an EPDM lip, but the ones I have are too bulky. I've since found one online, so I'll revisit that when I remove the fenders in the future reinforced the forward sections with plastic washers. Also using Volvo M6 hardware with large heads, to spread the load Shouldered hardware - prevents crushing the liner Scrubbed the wheel arches with a wire brush, then prepped the undercoat with lacquer thinners to help the Rocker Shutz adhere wait 45 mins then apply undercoat Put the Konig on to find that the backside of the hub doesn't clear the Toyota S12 calipers. Had to add a 1/8" spacer to each side


 1 point
 -
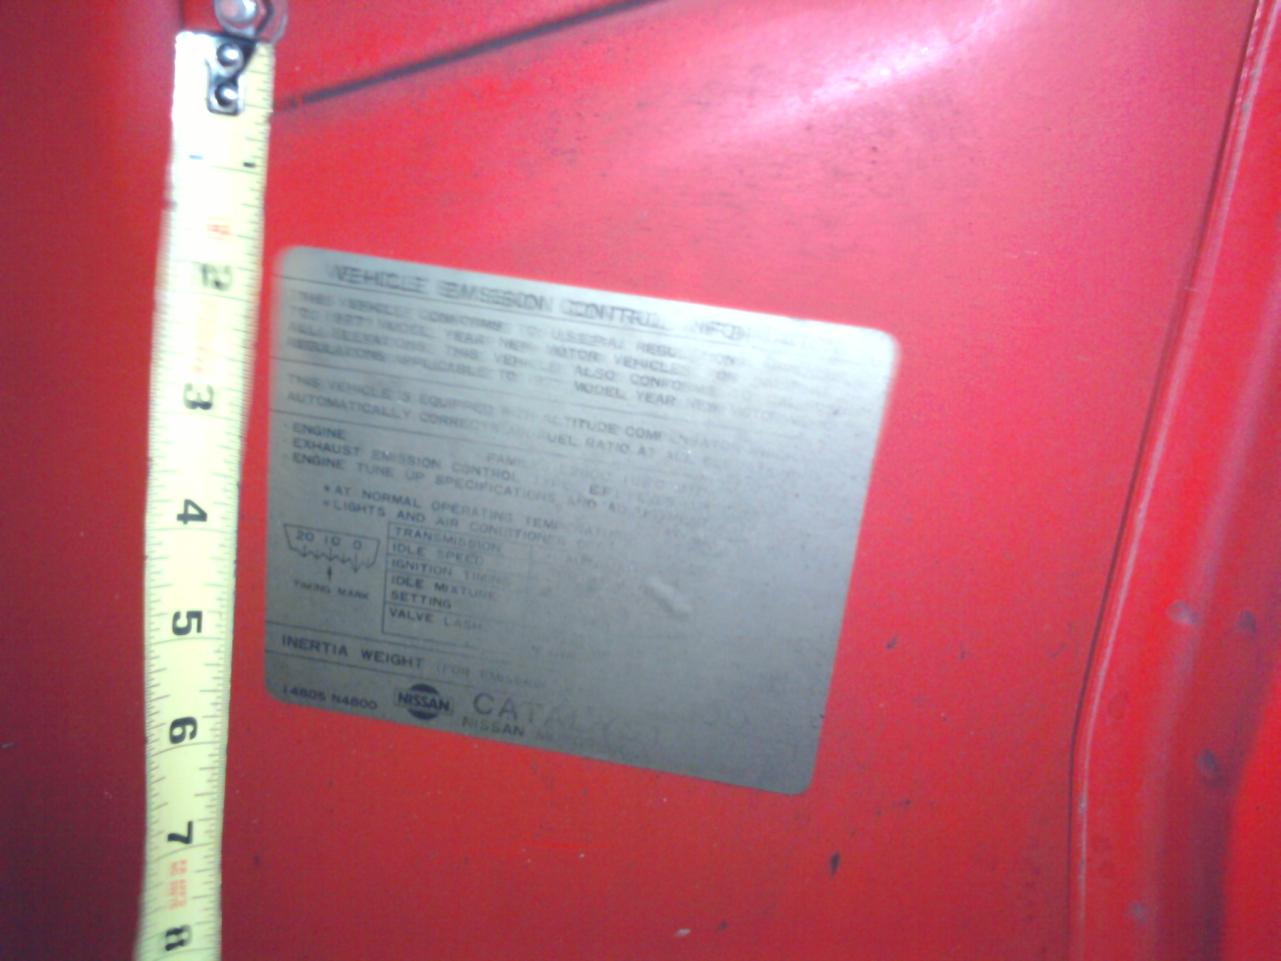
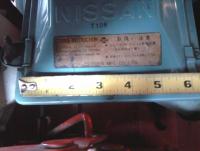
1 pointFrom the online parts catalog: Two versions for the 240Z, one version for the 260Z + '75-76 280Z, and one version for the '77-78 280Z. These parts typically have the P/N molded on the inner side of both pieces.
 1 point
 -
1 point
-
I don't have that relay harness, just the stock harness for that circuit. The only issues I experienced with some LEDs is that I had some type 1157 red LEDs fail so that they lit both "elements" at once. I chose a different brand that's in the list and experienced no problems since then. I first started using LEDs over 13 years ago and have no regrets. You may find corrosion in some or all of your side markers. I think that is part of the issue with the circuit overall.1 point
-
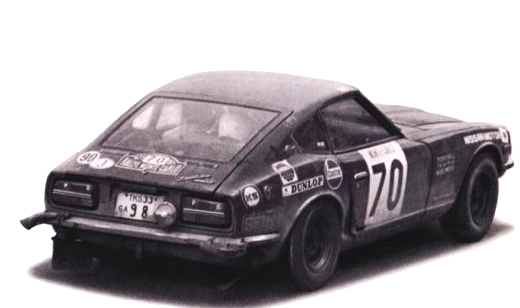
A wise choice, in my opinion. It can be difficult to know where best to wind the clock back to, or indeed whether the clock should be stopped in just one place... Kevin Bristow faced a very similar dilemma when he acquired 'TKS 33 SA 3640'/'PTE 337L'/'HS30-00879', his 1971 RAC (and more...) Works 240Z rally car. He had to contend with period-repaired damage, deterioration and further damage - caused by decades laid up - as well as a few missing parts. He finally targeted a restoration of the car to the way it was immediately prior to the start of the 1971 RAC Rally, but - pragmatically - also including some of the patina and minor modifications it received in its post-71 RAC rallying career, each of which has its own story to tell us. I think it turned out well. The trick is to avoid throwing out the baby with the bath water.1 point
-
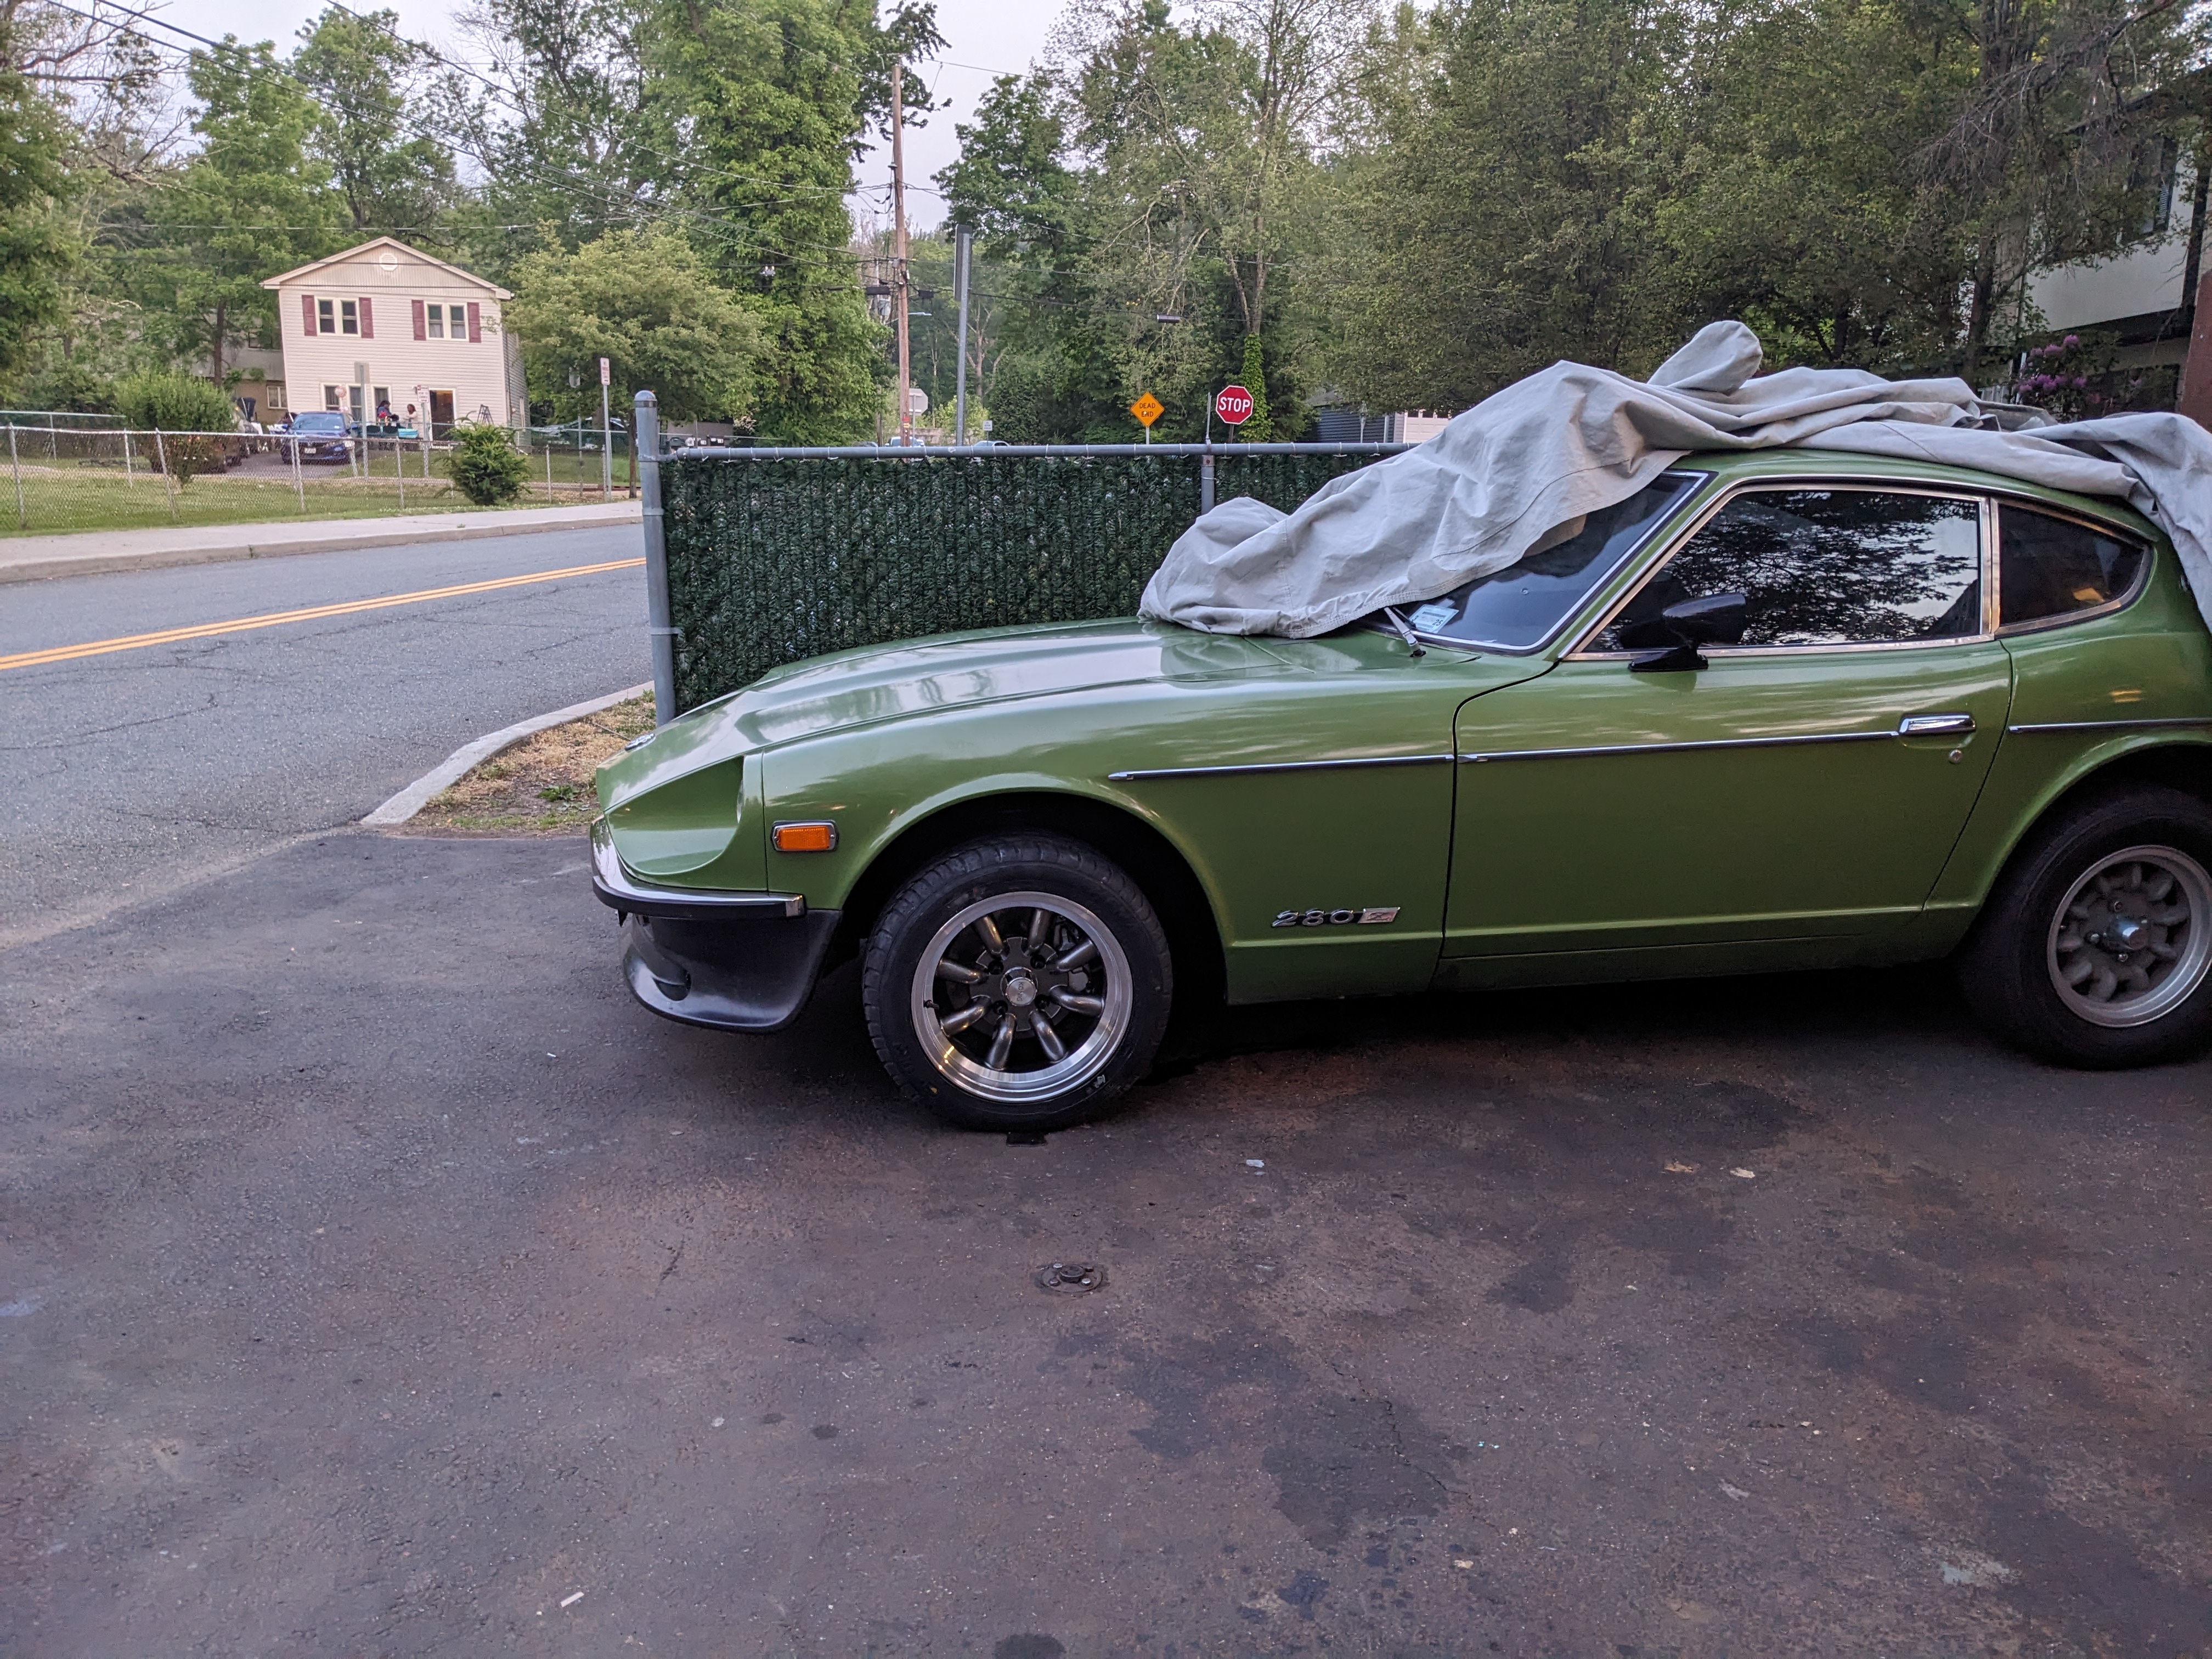
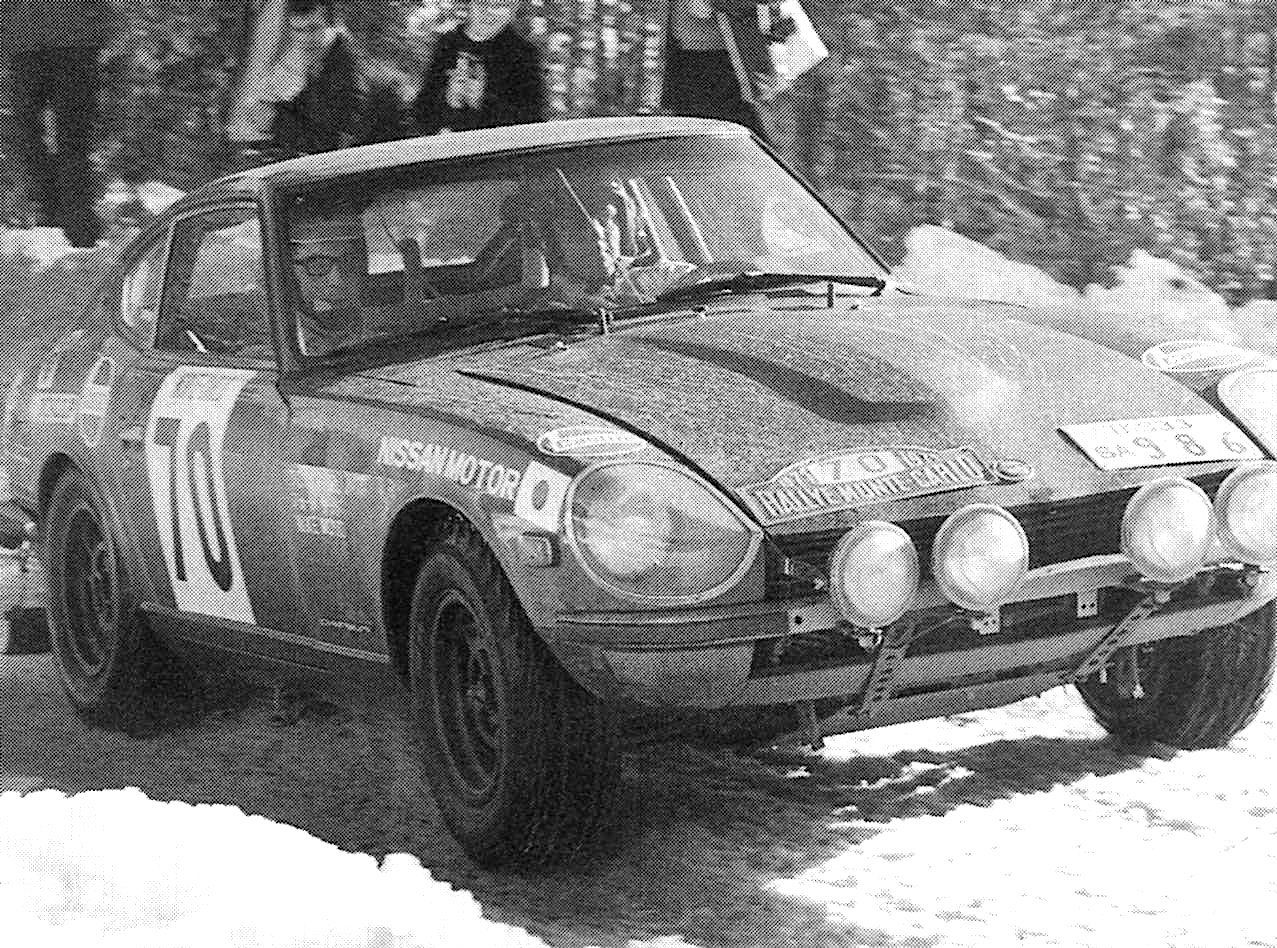
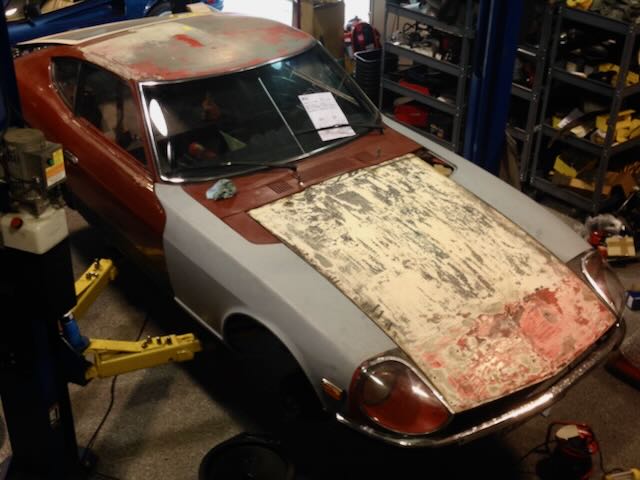
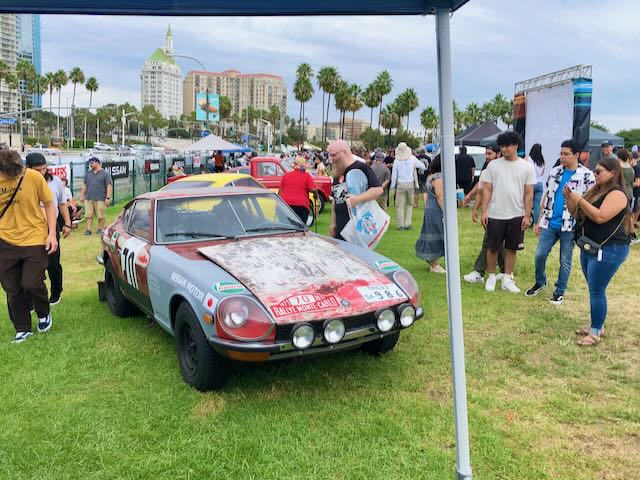
It’s an interesting question- one that I’ve given quite a bit of thought to over the past few years. here are some long-winded thoughts on the subject: When I previewed the car at JCCS in 2022 (see picture 4), by far the number one comment I got from onlookers was "Leave it as-is, and don't restore it”. I really appreciated these comments, because I myself had considered the very question “Can I leave the car as-found, and do just enough to get it running?” Short answer: I could probably make that work in some fashion, but not really in a way that makes much sense to me from a historical perspective. if I left the car as-is, I really wouldn’t be “preserving” much of any historic rallying patina. To explain: the interior appointments of the car was largely salvageable (and will be preserved, apart from the metal work) but most of the original exterior patina from its rallying days was already long gone, and any originality that was left was unlikely to be usable without a complete overhaul. The rally “patina" that was displayed in 2022 in the form of racing stickers and fog light mock-ups was largely applied by me to give event-goers an idea of what the car looked like in period. The car is REALLY rough (see picture 3, on the lift), and IMHO, beyond the sticker appliqué, there’s really almost no exterior patina that evokes its past as a Works Rally car. The damage on the dogleg and doors raises perhaps a slightly different question, but I personally feel it can also be considered in the same vein. Someone had already repaired this damage to the door and body in Spring 1971. Fast forward to today, we’re really only looking at their “fix”, and not the original hit. So. I pose the question: do I leave the fix as-is, re-damage it so it looks like the hit in the 1971 Monte, or fix it properly? I think if the car had any authentic “Post-Monte” patina, or even “Post-RAC” patina left, it would be much easier to re-create, preserve, or otherwise highlight damage such as this dogleg, and I’d have a much tougher time deciding which condition to restore the car to. However, In this case they’d already applied the fix by April 1971, and rallied it with the fix in-place. Further: apart from retaining its RAC ride height, and a few dents in the floorboards, IMHO the car really has no other external rally patina showing- it’s pretty much all gone. Given all this input, my current plan is to restore it to 1971 Monte Carlo “Pre-Race” condition (picture 1 below, credit unknown), while keeping as many of the original and period pieces as possible, restoring them to their pre-race state as best I can. This restoration target will likely include properly repairing the dogleg, and saving the original “repaired" piece for my wall. But I’m still open to hearing opinions, so I’d love to hear yours if you think differently after hearing my thoughts. Just to note, this restoration target is slightly different from an “As-New” condition, which I’m not really sure is even possible, given that these cars were hand-assembled and field-tested. IMHO “As-New” would probably yield a less interesting and inaccurate result.

 1 point
 -
Correct, the OE flashers are usually a aluminum can. They typically have a metal tab for a small screw to mount to a surface. The new ones usually have a plastic case, no mounting tab. You can glue a tab to the case for the mounting screw.1 point
-
The OE cans are "thermal" - they use a bi-metal strip that heats and cools at differing rates depending on the flow of the electrical current. They usually operate more slowly at idle and then speed up as engine revs increase. The newer units are termed electro-mechanical, operate at a constant rate independent of the engine speed.1 point
-
Many of us have used VC for electrical connectors, especially for 240Zs. They announced that they will need to increase prices in February, and they encouraged people to place their orders before the price increase. Fortunately for me, I just restocked before they announced the future increase.1 point
-
Just did my '71 tail light panels in December - although not sure if it's the same color shade used on the 280s. Sanded the panels, sprayed Rust-Oleum Ultra Cover Flat Gray Primer, wet sanded, sprayed Dupli-Color Perfect Match BFM0360 Dark Shadow Gray (CX) replaces T299, let sit for a day and then sprayed with Rust-Oleum Ultra Cover Matte Clear. I'm pleased with the results in terms of color and texture.1 point
-
1 pointI'm trying to figure out what mirror was used on this car sold at Barrett-Jackson I. 2018 by mc classic cars found a u tube video and some other stuff on it but can't seem to figure out what mirror it is
 1 point
 -
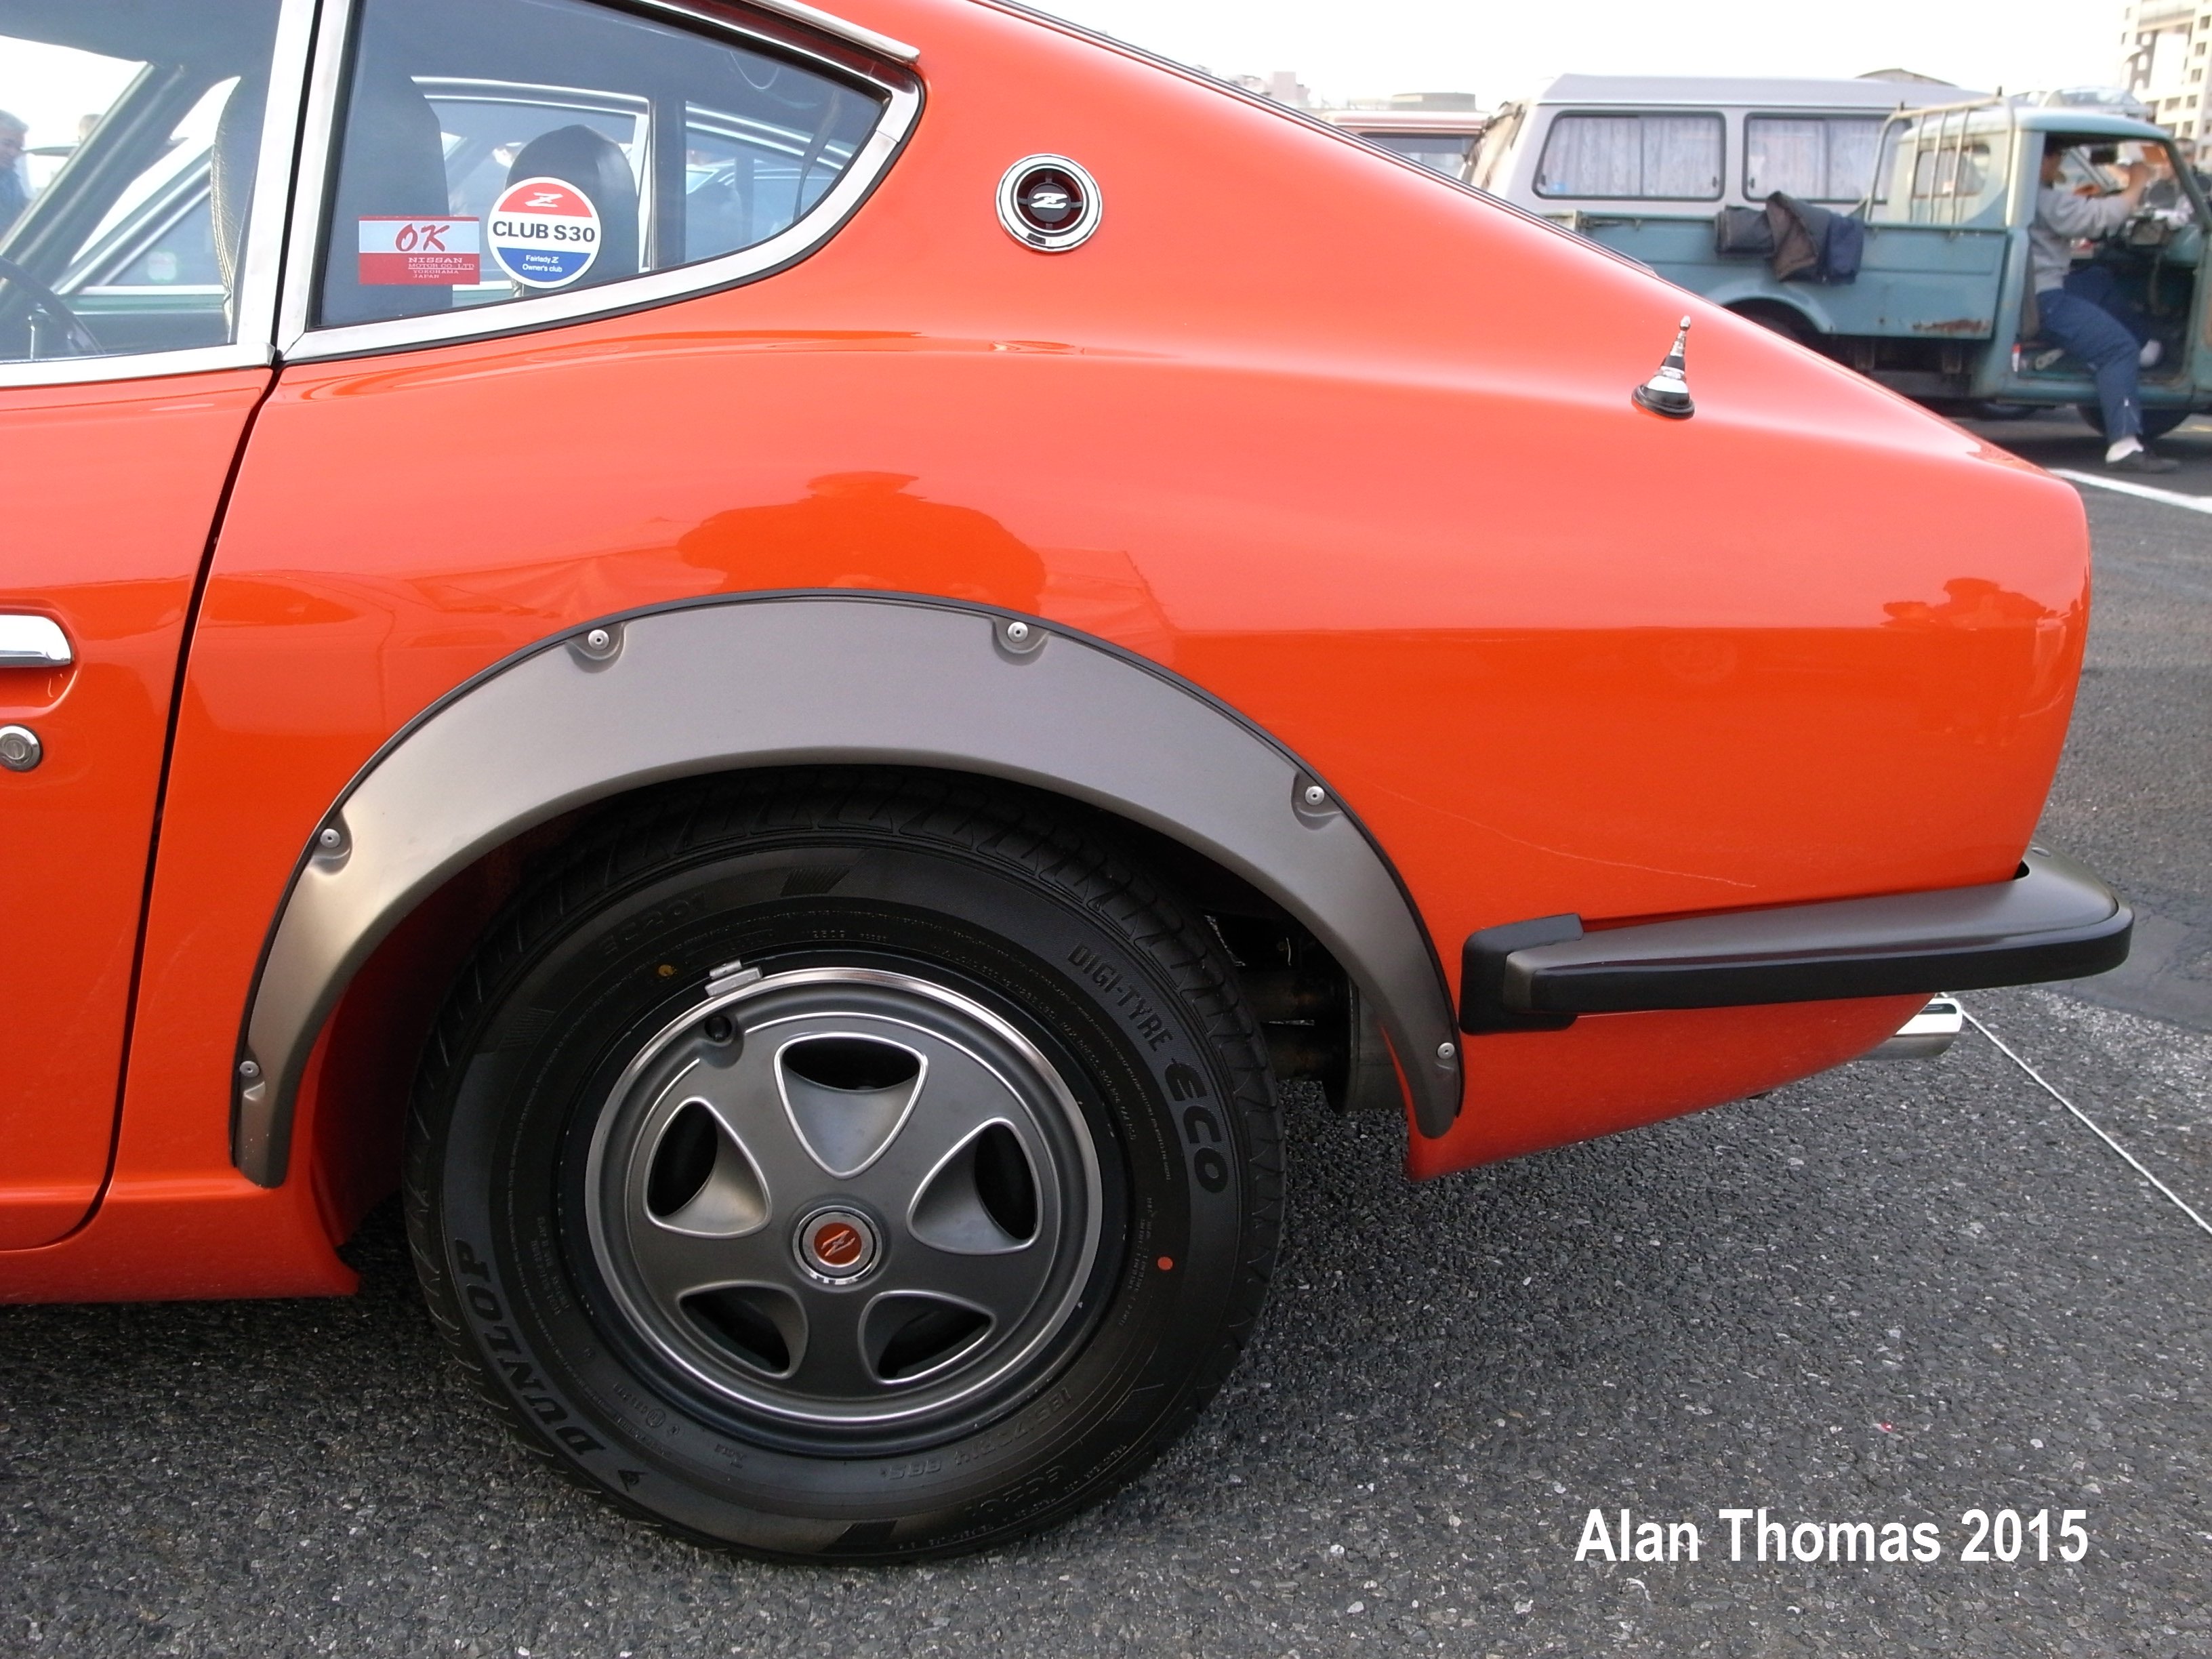
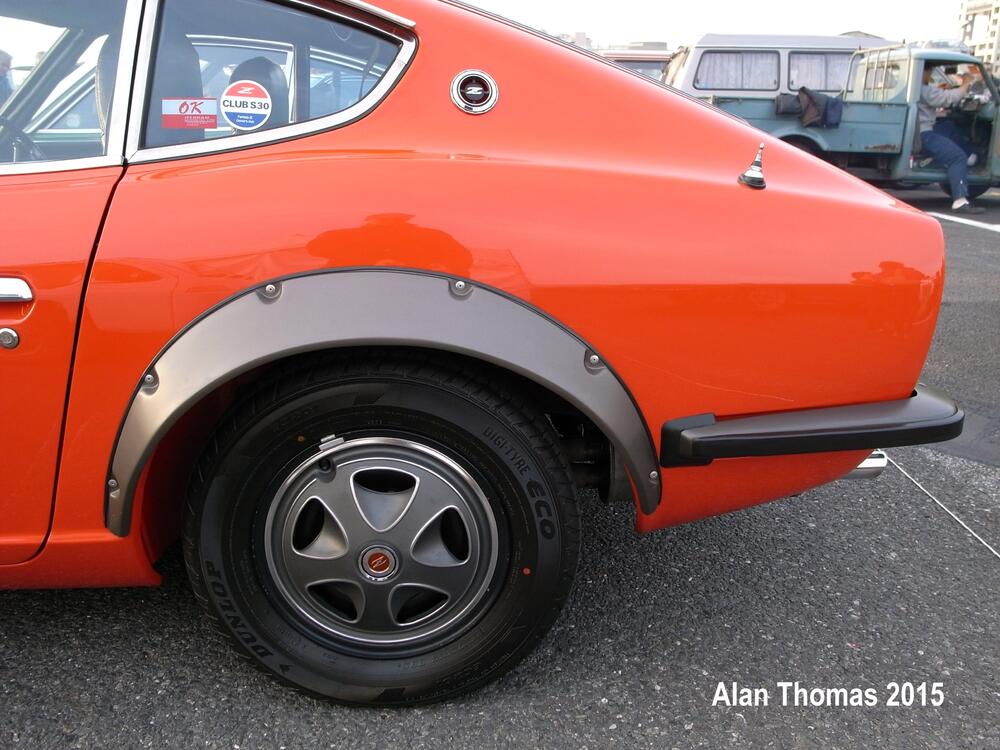
So you should have the swage line to work to, and the Overfender will pretty much find its own position once you find the reference points. Two of the fixing points (Nissan riveted the Overfenders onto the body, but you might want to use another fixing method) are almost ON the swage line, or are just below it. The Overfender overlaps the swage line at the uppermost peak of its curve. At the ends of the Overfender, the forward-facing end positions just above the dogleg and the rear-facing end drops down way below the bumper. Hopefully this photo will help. It is a genuine HS30-H model Fairlady 240ZG and the mounting position is the factory one. The owner chose to insert some black welting between the Overfender and the body - which the factory never did - but hopefully you can still clearly see the body swage line as it runs along the body, the overlap of the Overfender and the two uppermost fixing points which are your reference for the height of the Overfender on the body:
 1 point
 -
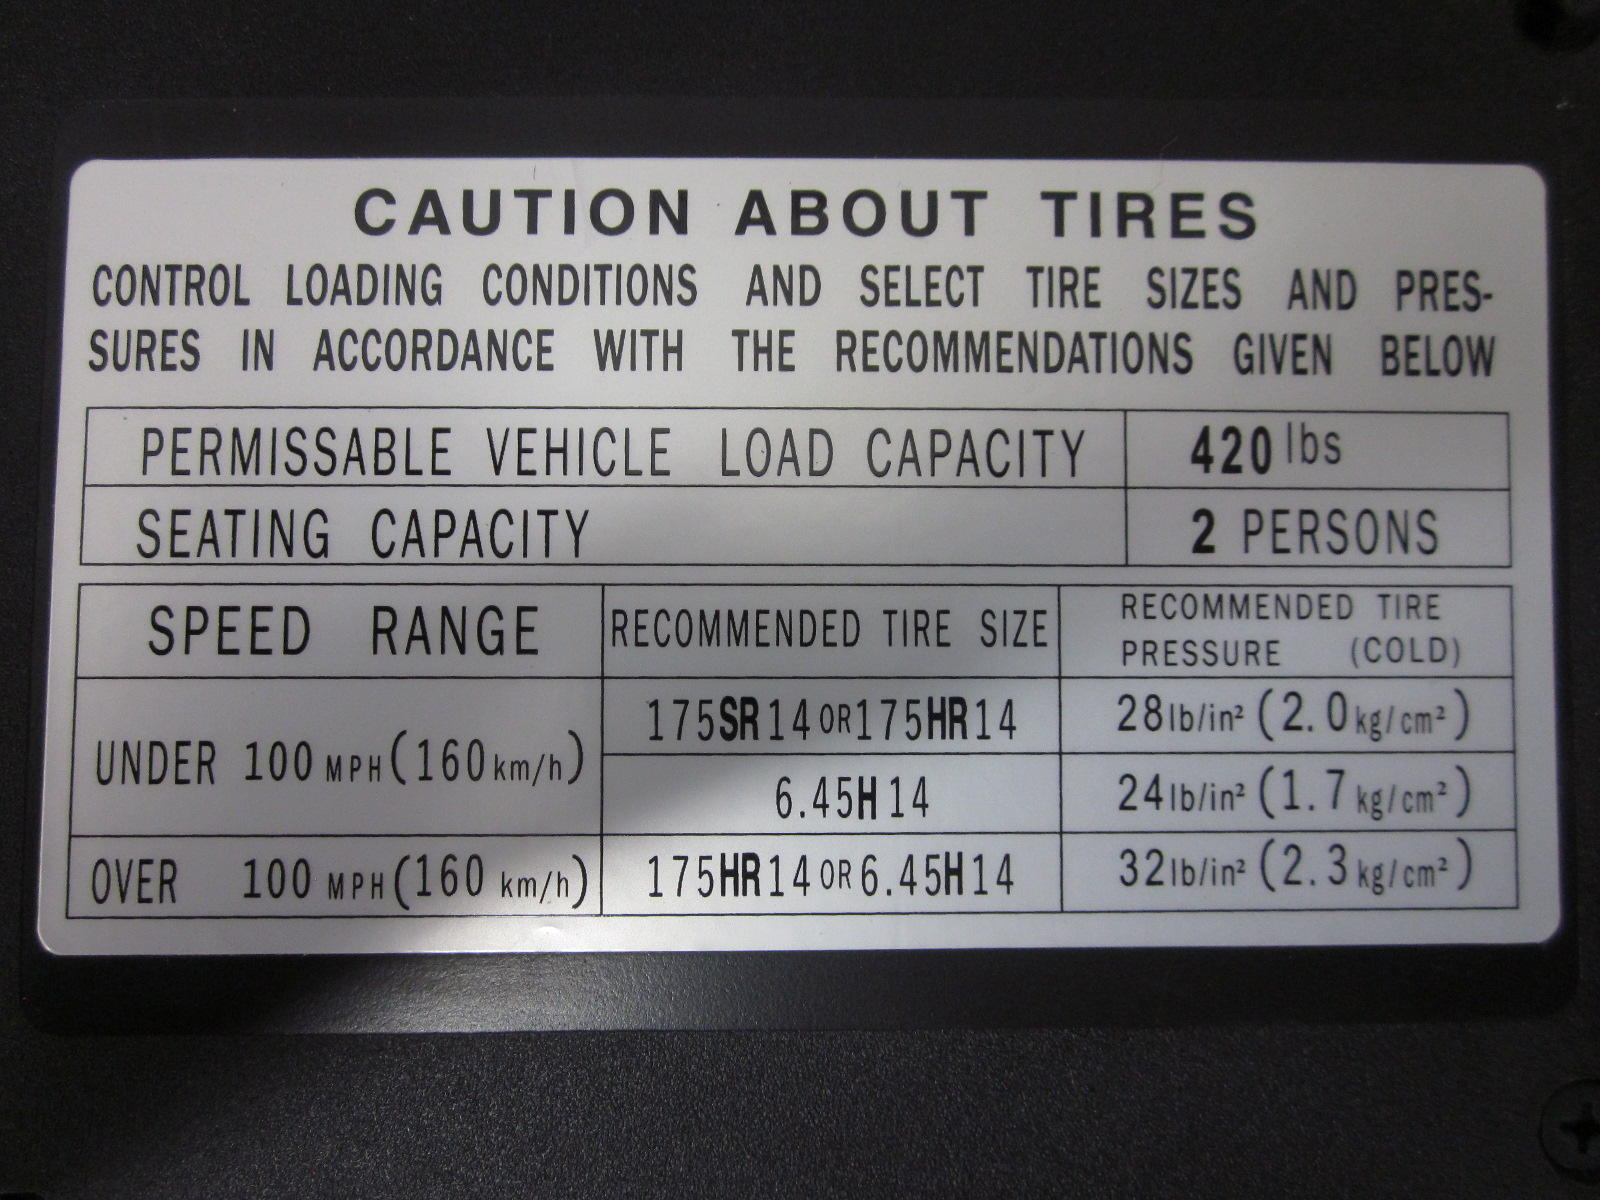
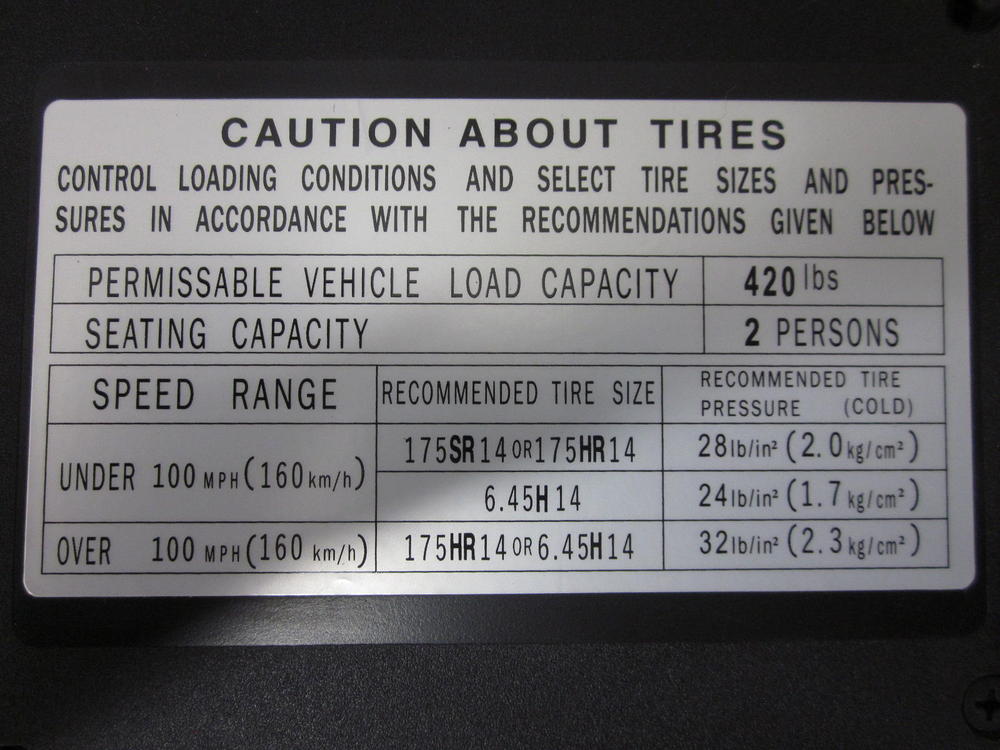
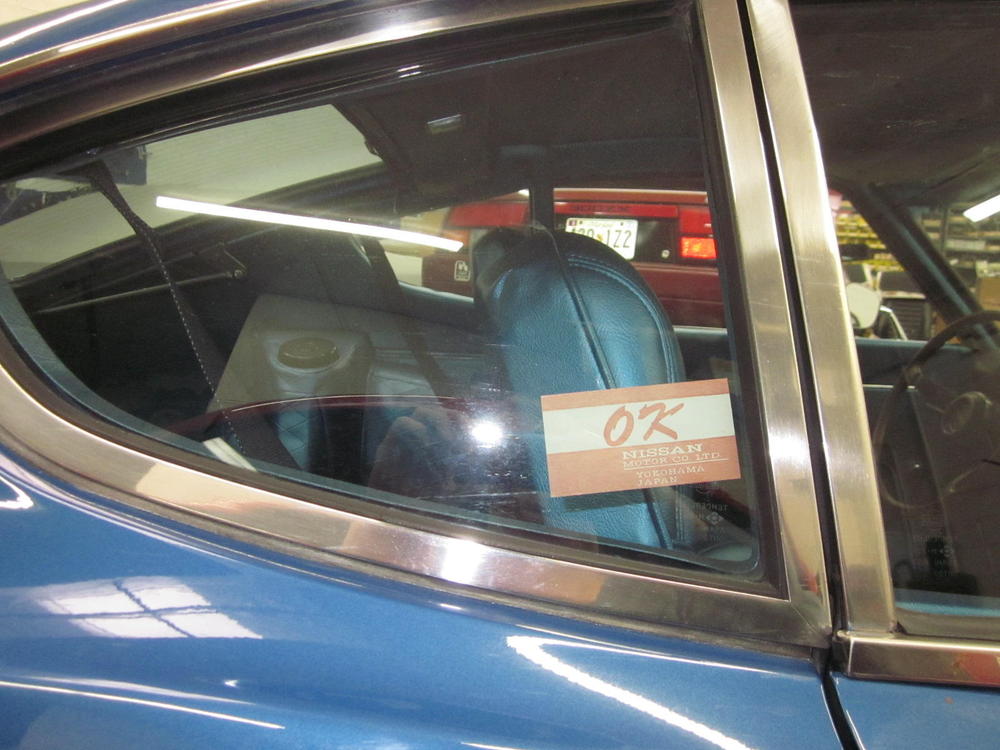
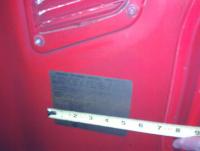
1 pointThe VAST majority of the OK decals were scraped off by the guys in the wash rack before the Z was delivered to the happy new owner. Therefore just about every time I sell one of my reproductions my customer asks me where, exactly, it should go on the right quarter window. Before I give my recommendation I stress that the guys on the assembly line weren't to exact about location. Over the more than 40 years Banzai has been in business I've been very lucky to have a large # of original owner cars go through my shop. A couple of days ago another landed in my shop. It's a blue on blue mid 71 build correct down to the hubcaps. It does have dealer installed a/c. This picture of the factory installed OK decal is an example of what I'm talking about regarding placement! I've also included a picture of our latest offering, 240 tire info decal. Unlike the decal offered by our would be competitor in B.C, ours has the correct font.
 1 point
 -
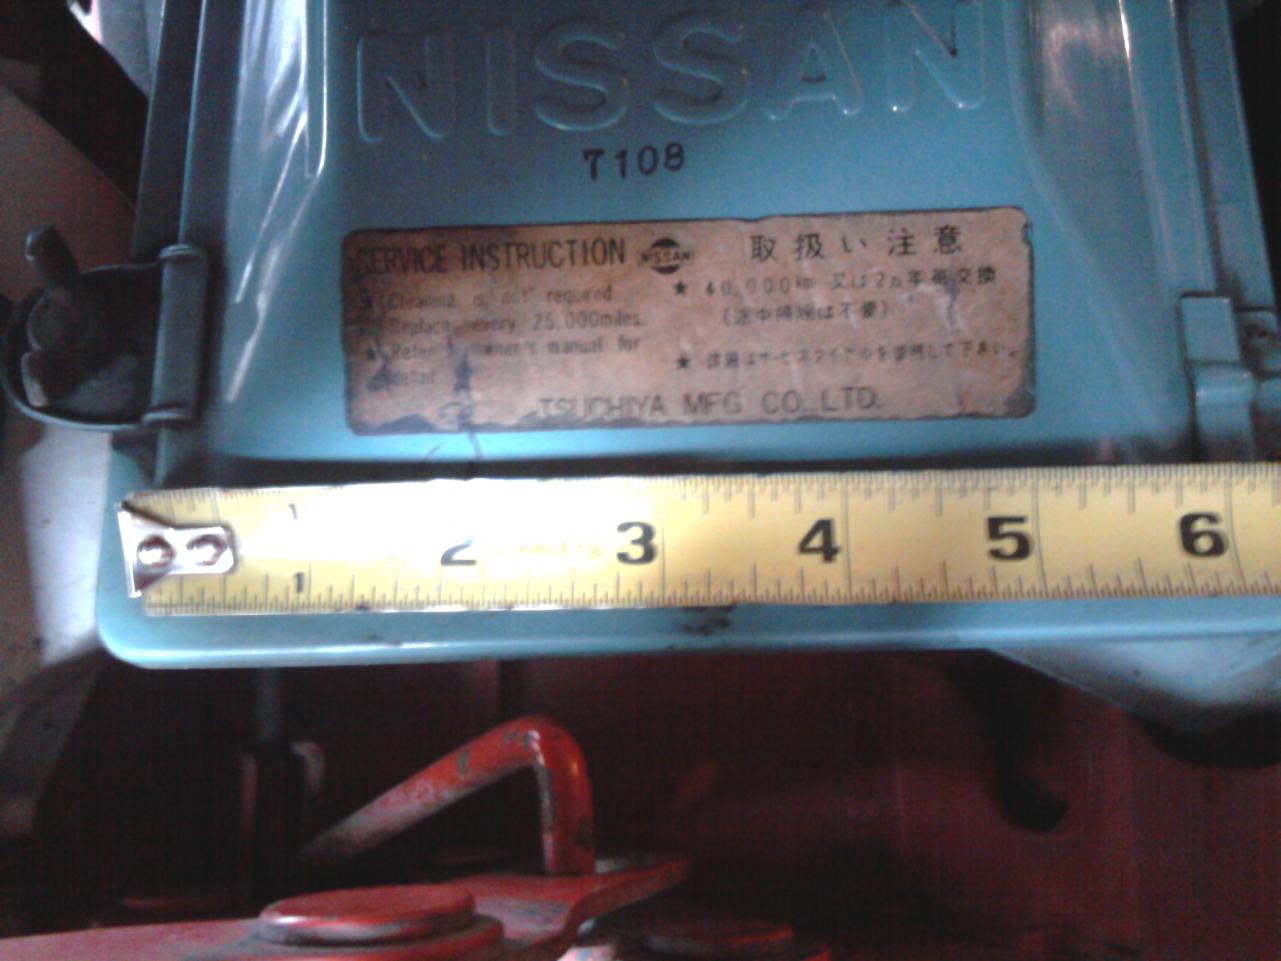
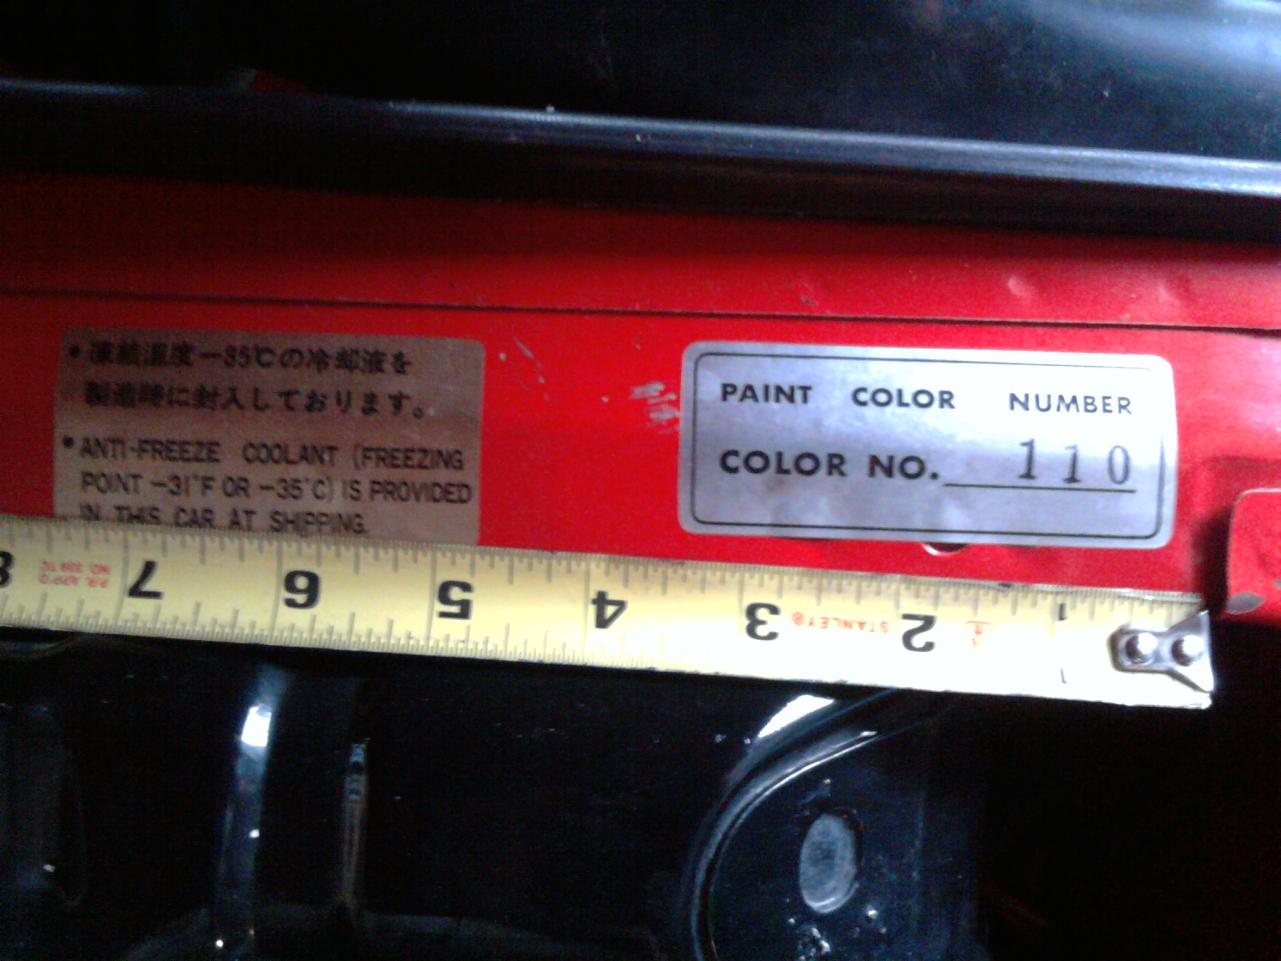
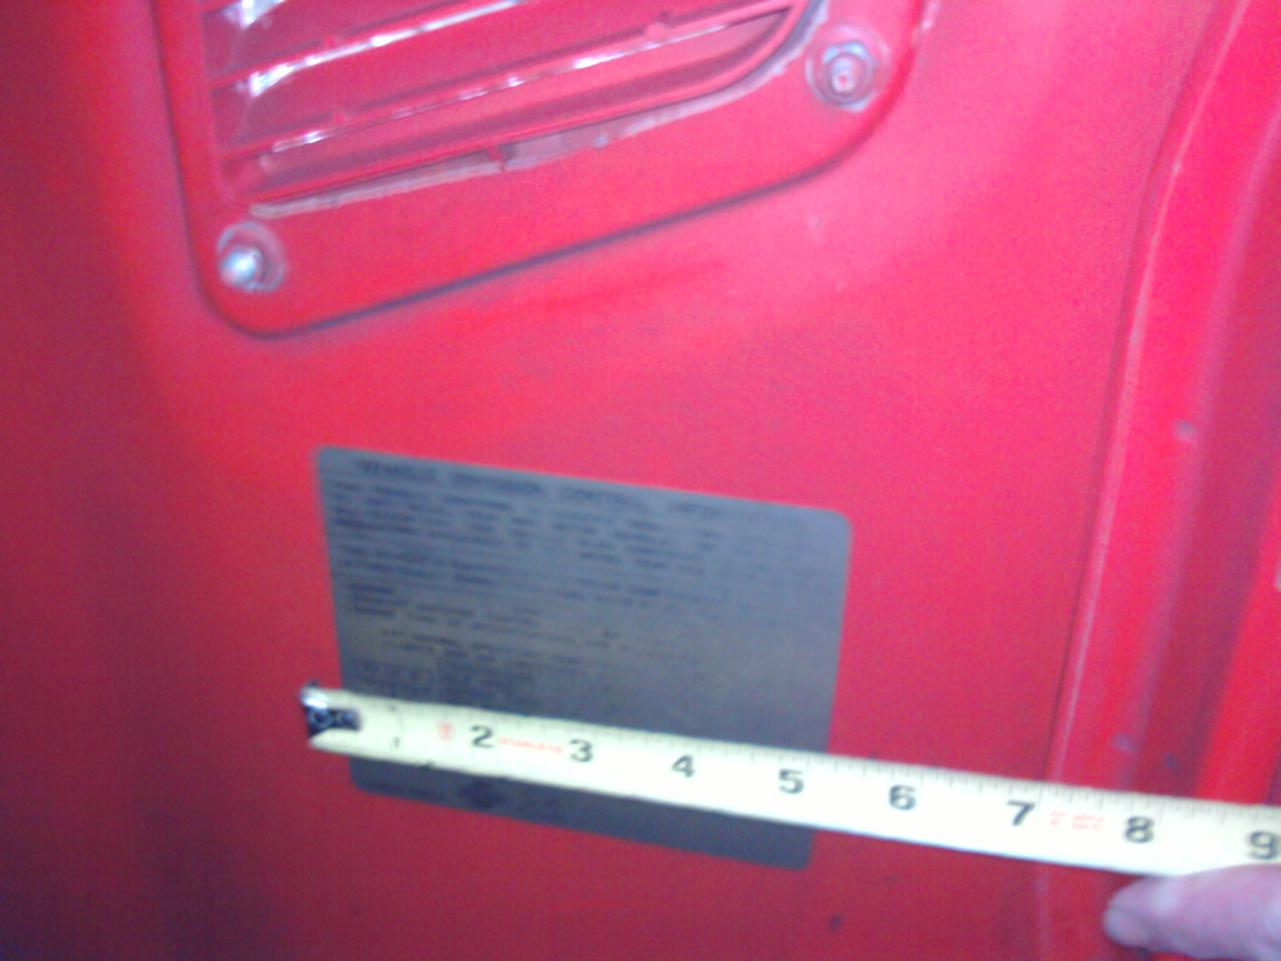
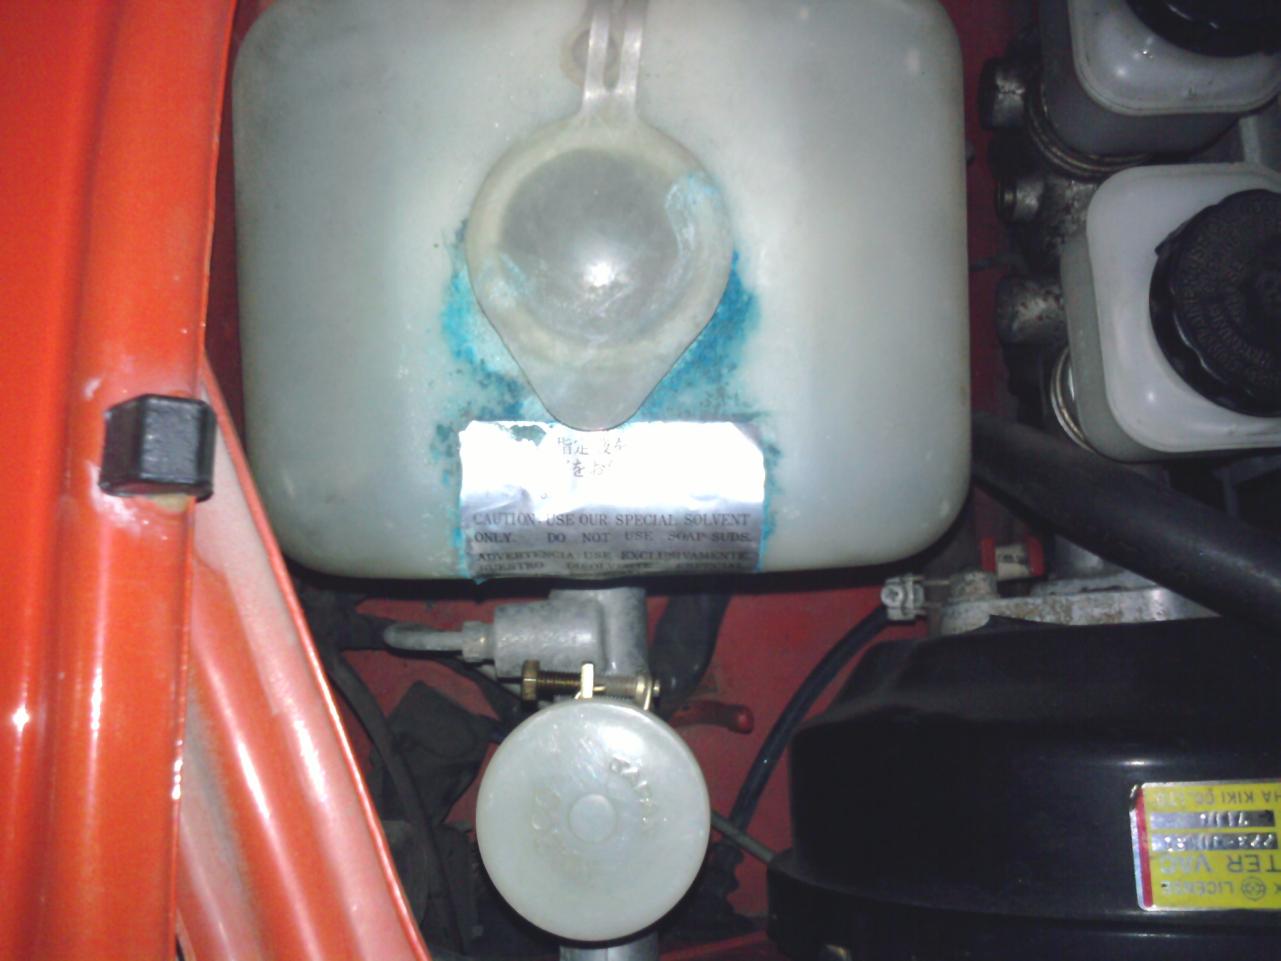
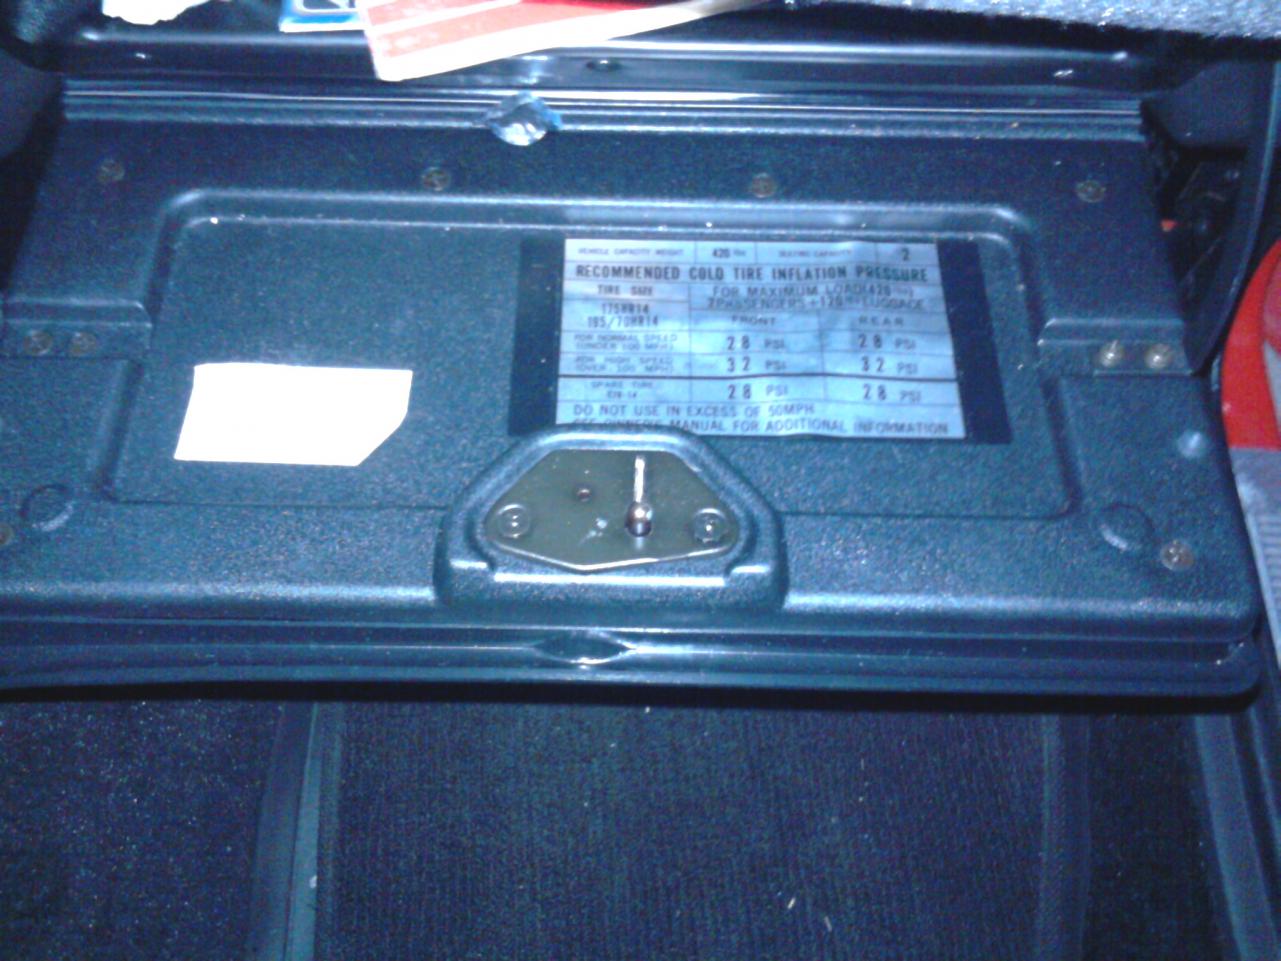
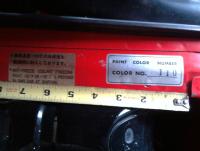
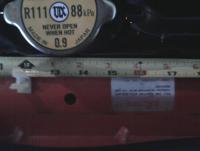
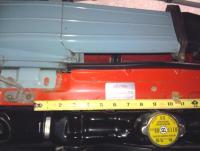
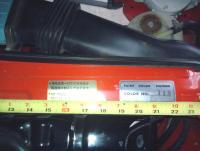
1 pointThese are from a '77. The car has been repainted by a PO. I can't validate if the decal replacement is accurate and some of the labels maybe repro's. These photos are only of decals, not any of the metal/riveted plats and they are the only ones I can find in the engine bay and glove compartment. I hope this helps. I think it is a great idea to document and develope an archive of placements to assist others in their resto efforts. Again, I'm not suggesting that my photos are proving authentic placement, just showing you what I have...

 1 point
 -
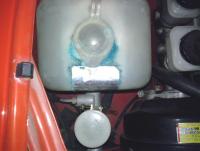
1 pointDisconnecting the relay will make the light go out because the circuit is then open. That doesn't mean the relay is bad. Check the caps on the master cylinder that monitor the fluid level. They can also go bad.1 point
-
1 pointDan, I think degreasing is one of two important steps in reworking your emblems. The other step is being able to scuff the chrome surface so the paint has something to grab onto. In addition to a degreaser, here are the tools I used to prep small parts and these can be economically purchased from an Auto Paint Supplier. FWIW, I've painted a number of parts here in Phoenix and haven't had any issues with peeling paint. I painted a chromed aluminum bumper from a BMW, E-30 years ago. All I did was sand the chrome with 220 wet/dry paper, cleaned and then painted it. No primer, no prep solution, just painted it. I had the car for four years after I painted the bumper and it looked great right up to the day I sold the car. Never had any cracks due to heat expansion either. Good luck with your emblems. Bruce
 1 point