


Leaderboard
-
.JPG.cfcada9cf1c1b502df3f5f2f2ca3ff36.JPG)
SteveJ
Free Member10Points9,646Posts -
dmorales-bello
Free Member4Points627Posts -
Captain Obvious
Free Member2Points10,081Posts -
HS30-H
Free Member2Points5,509Posts


Popular Content
Showing content with the highest reputation on 05/23/2023 in Posts
-
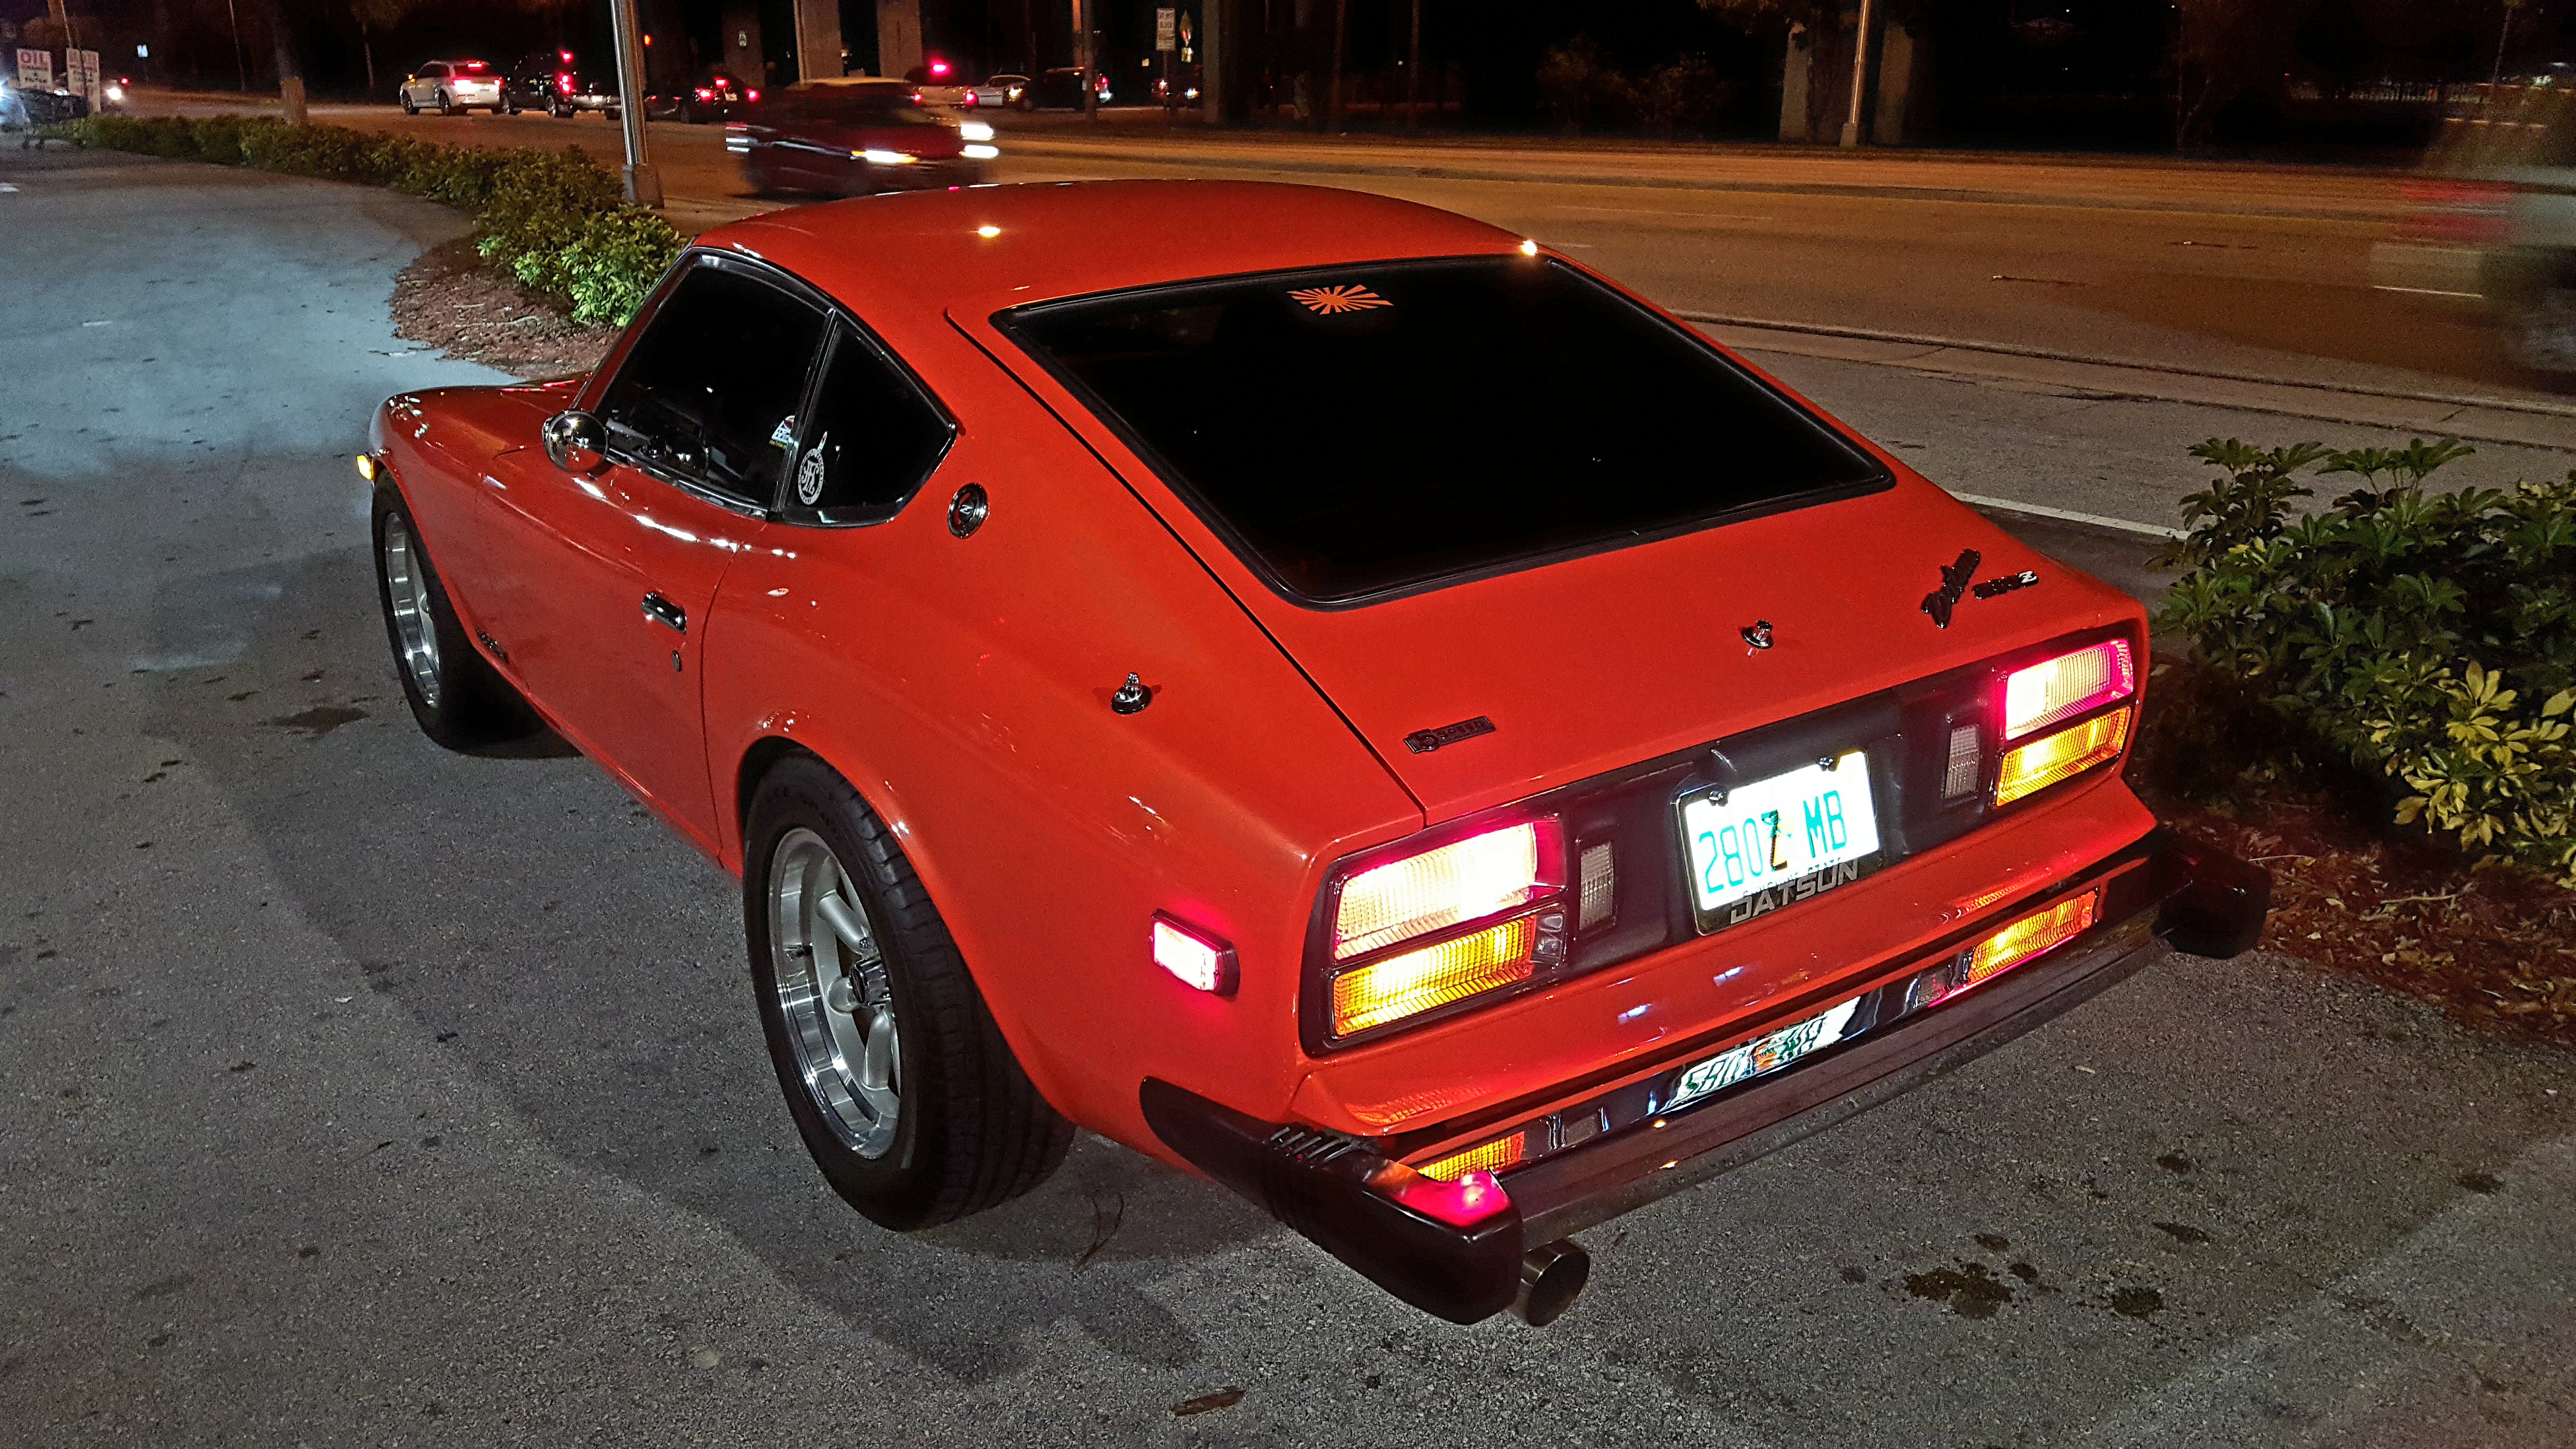
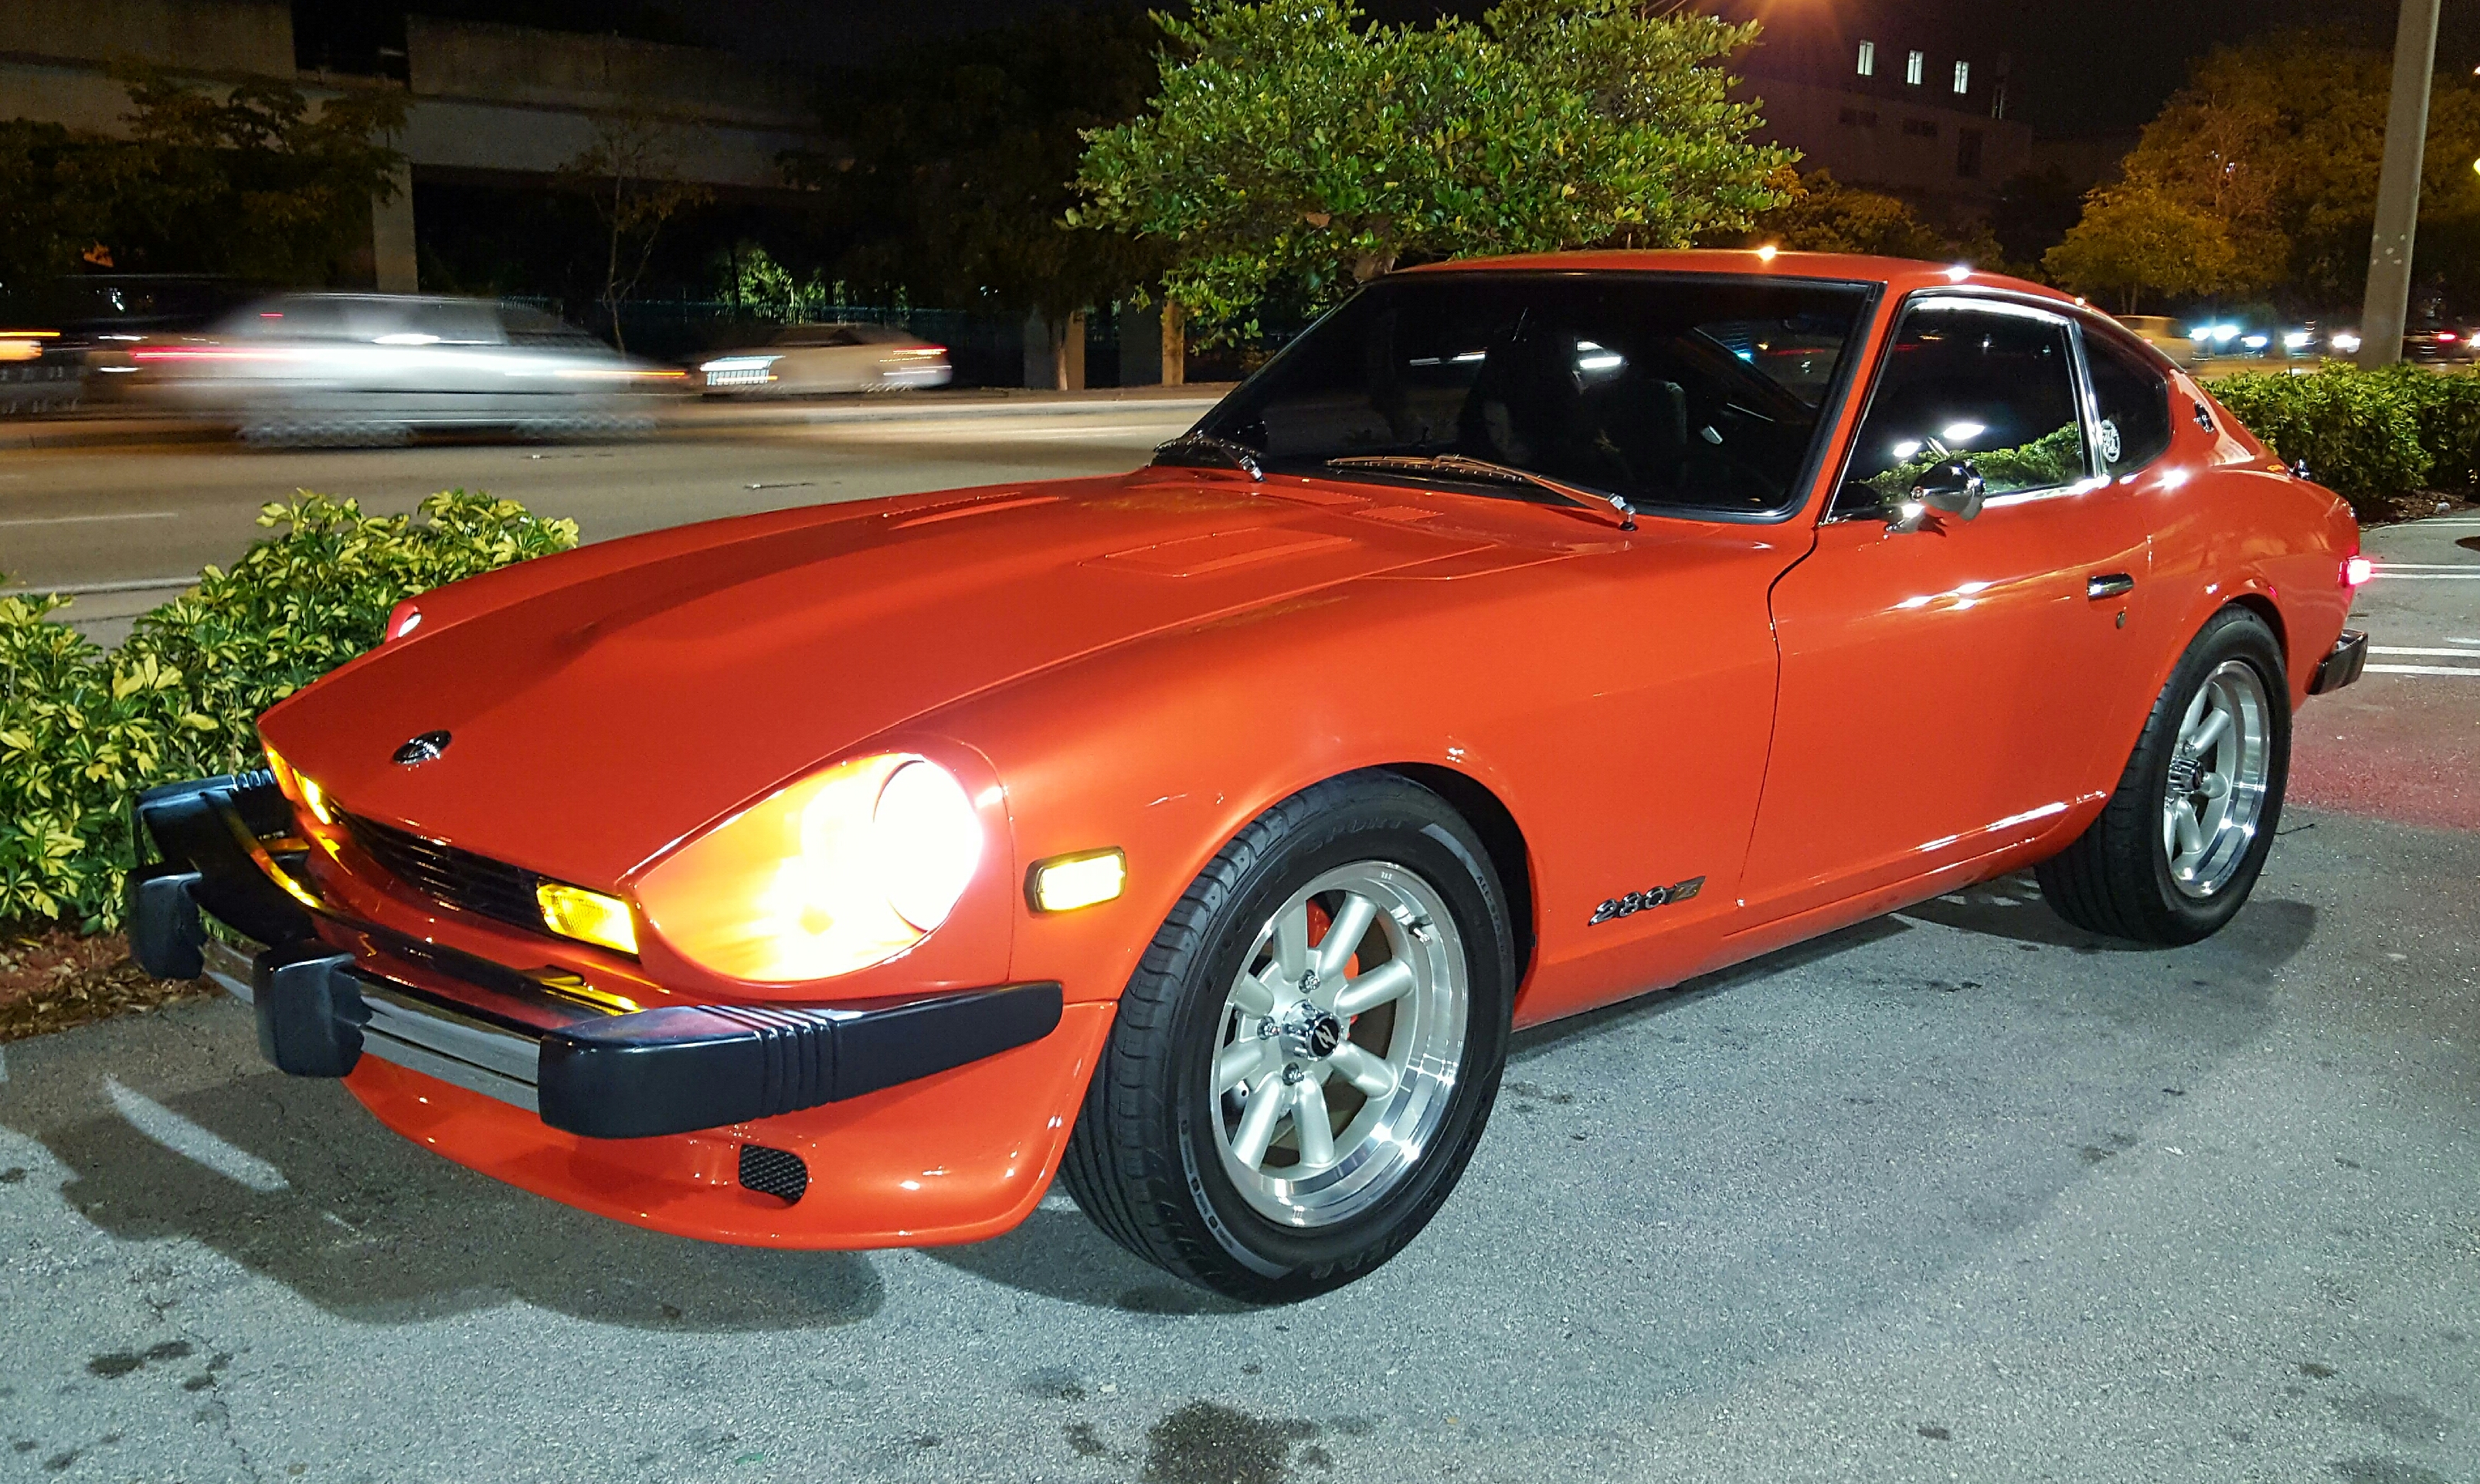
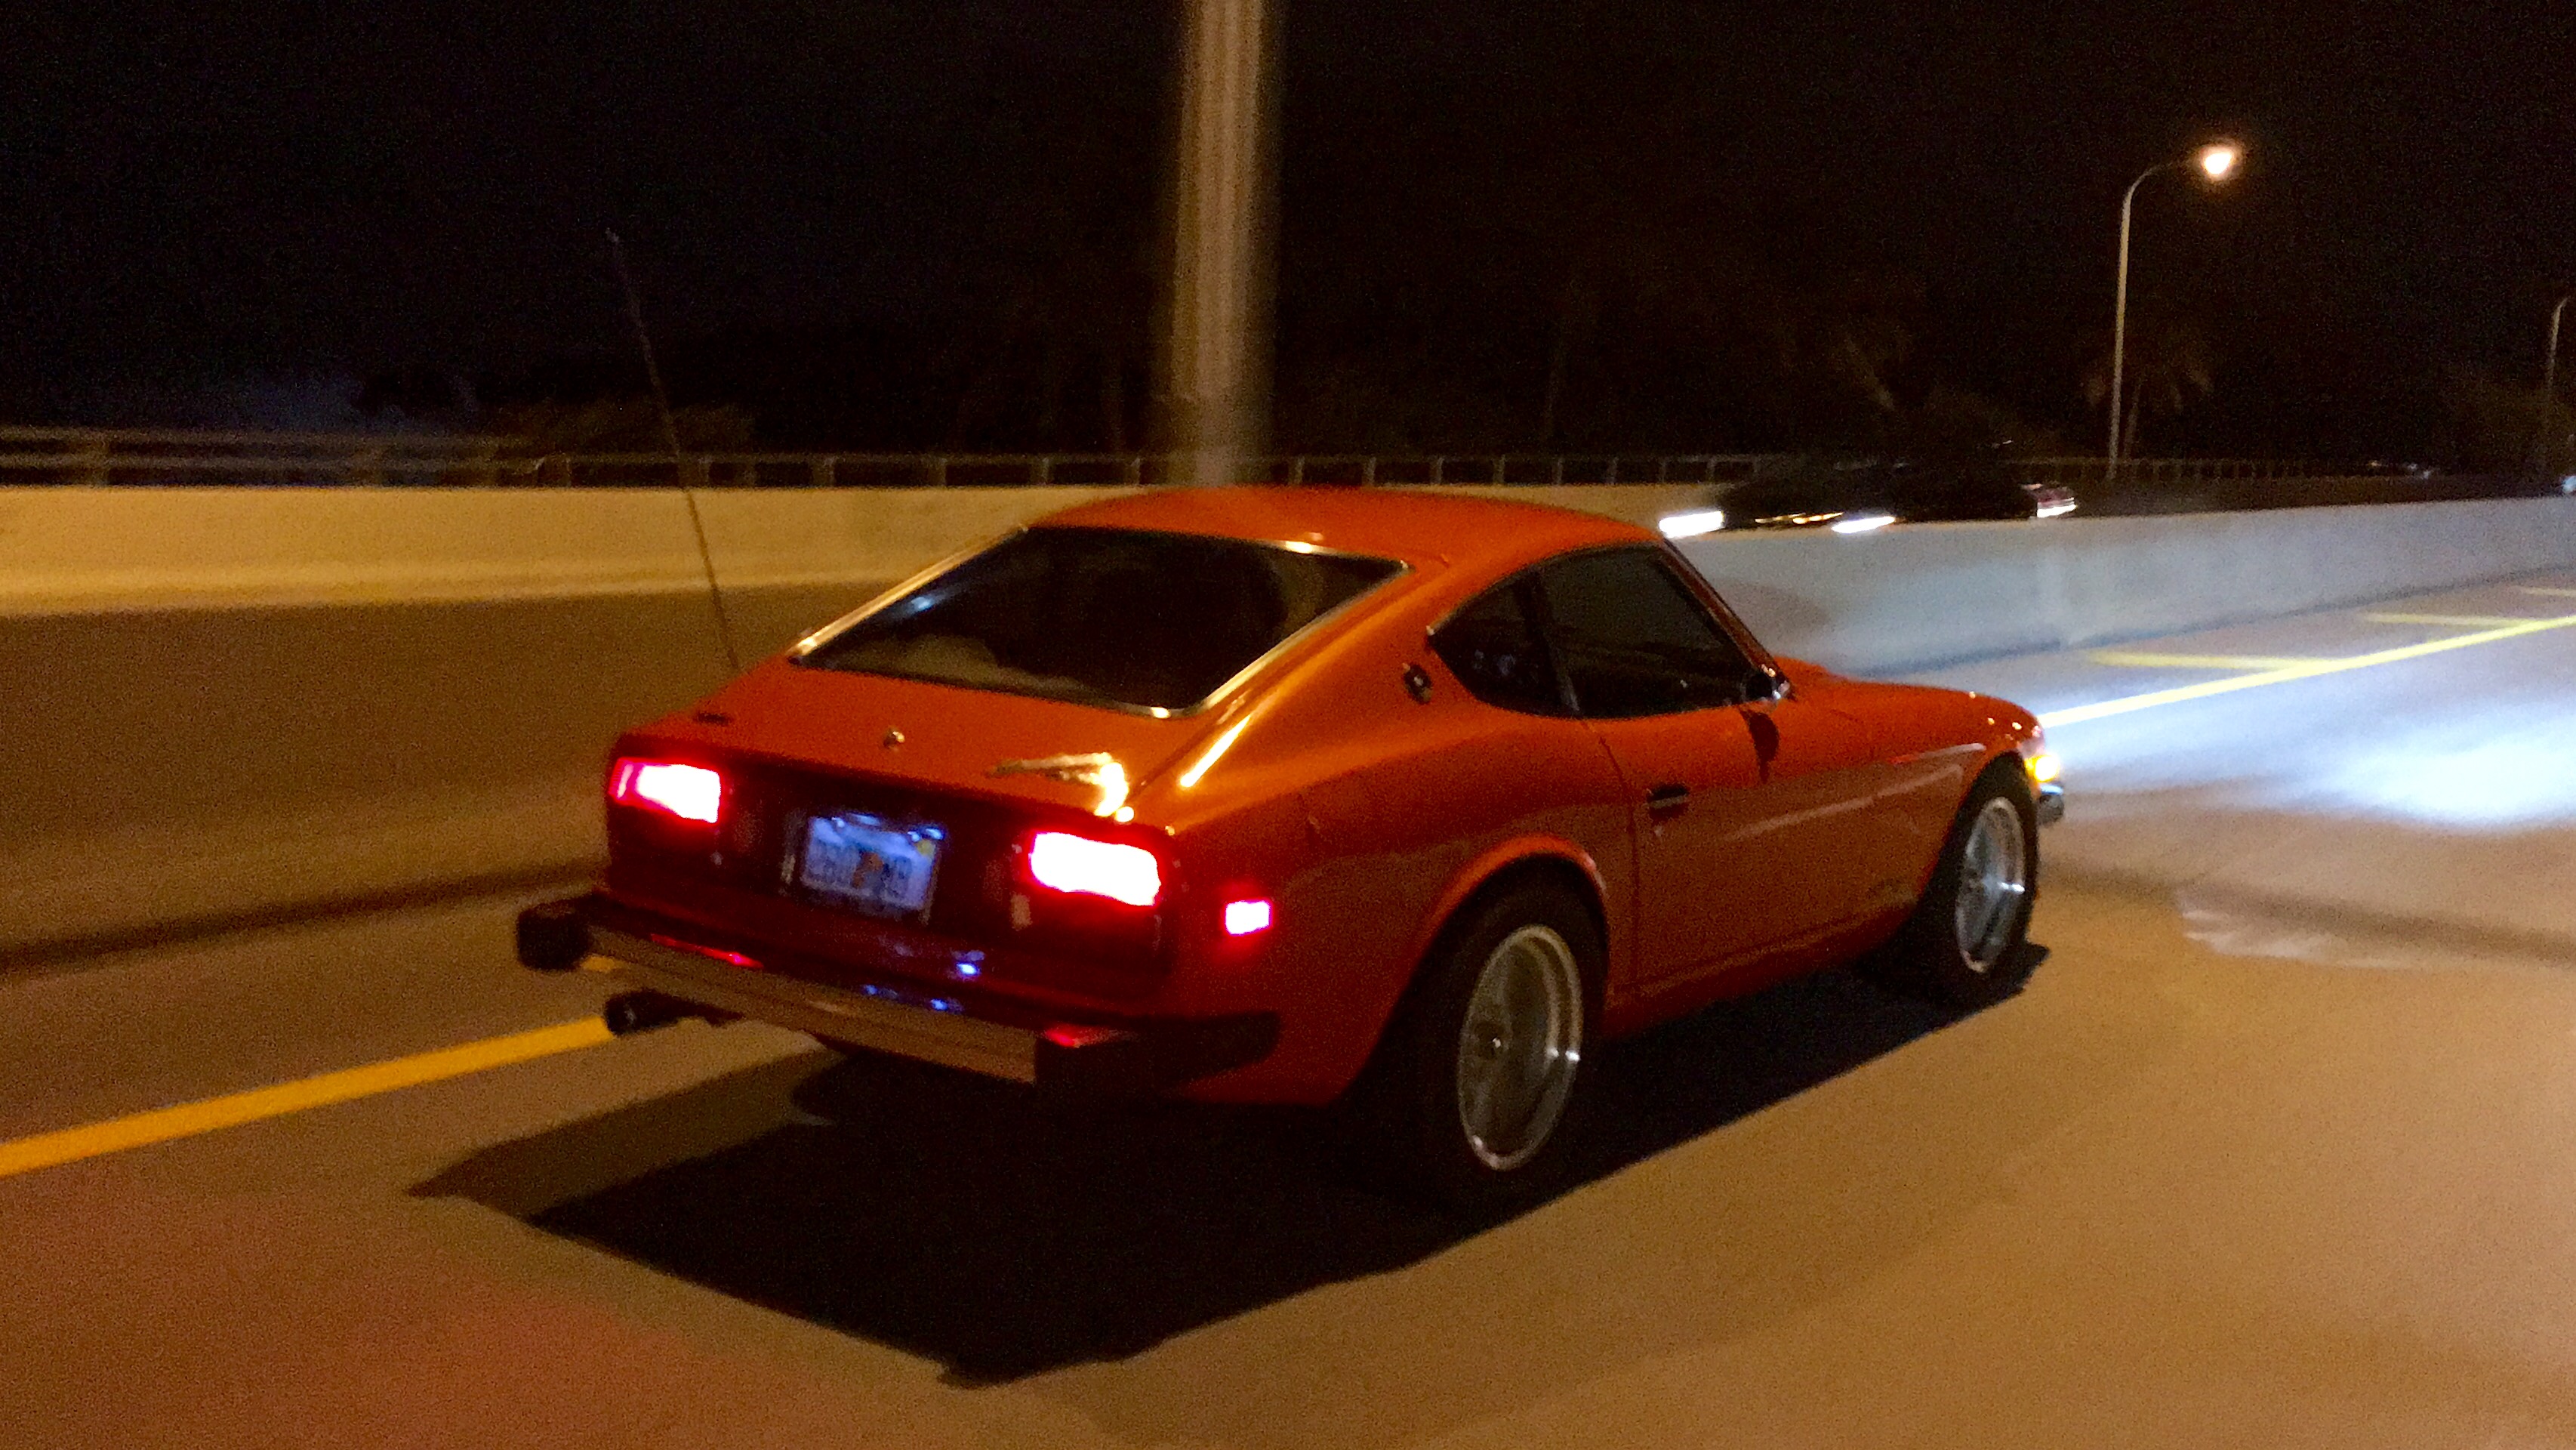
I got everything cleared away from around the Z, so I could take it on a test drive. I have the trans filled with AC-Delco Friction Modified Synchromesh Transmission Fluid. It is pretty quiet, especially to the old one with worn out bearings. I need to drive the 240Z to compare the two since they both have 720 pick-up 5 speeds now. Anyway, there were no issues rowing through the gears. Happy camper status has resumed. Oh, and I also fixed the exhaust leak by using all three bolts and a gasket between the header and exhaust.4 points
-
2 pointsIMHO you will reap more advantages undercoating than not. Better sound insulation and more of a protective layer from flying debris that may chip your paint exposing bare metal to possible rust. Ultimately it's your call. Franky, I rather side on longevity over vanity especially on a section of the vehicle that is prone to road damage and really won't see unless one is crawling underneath.2 points
-
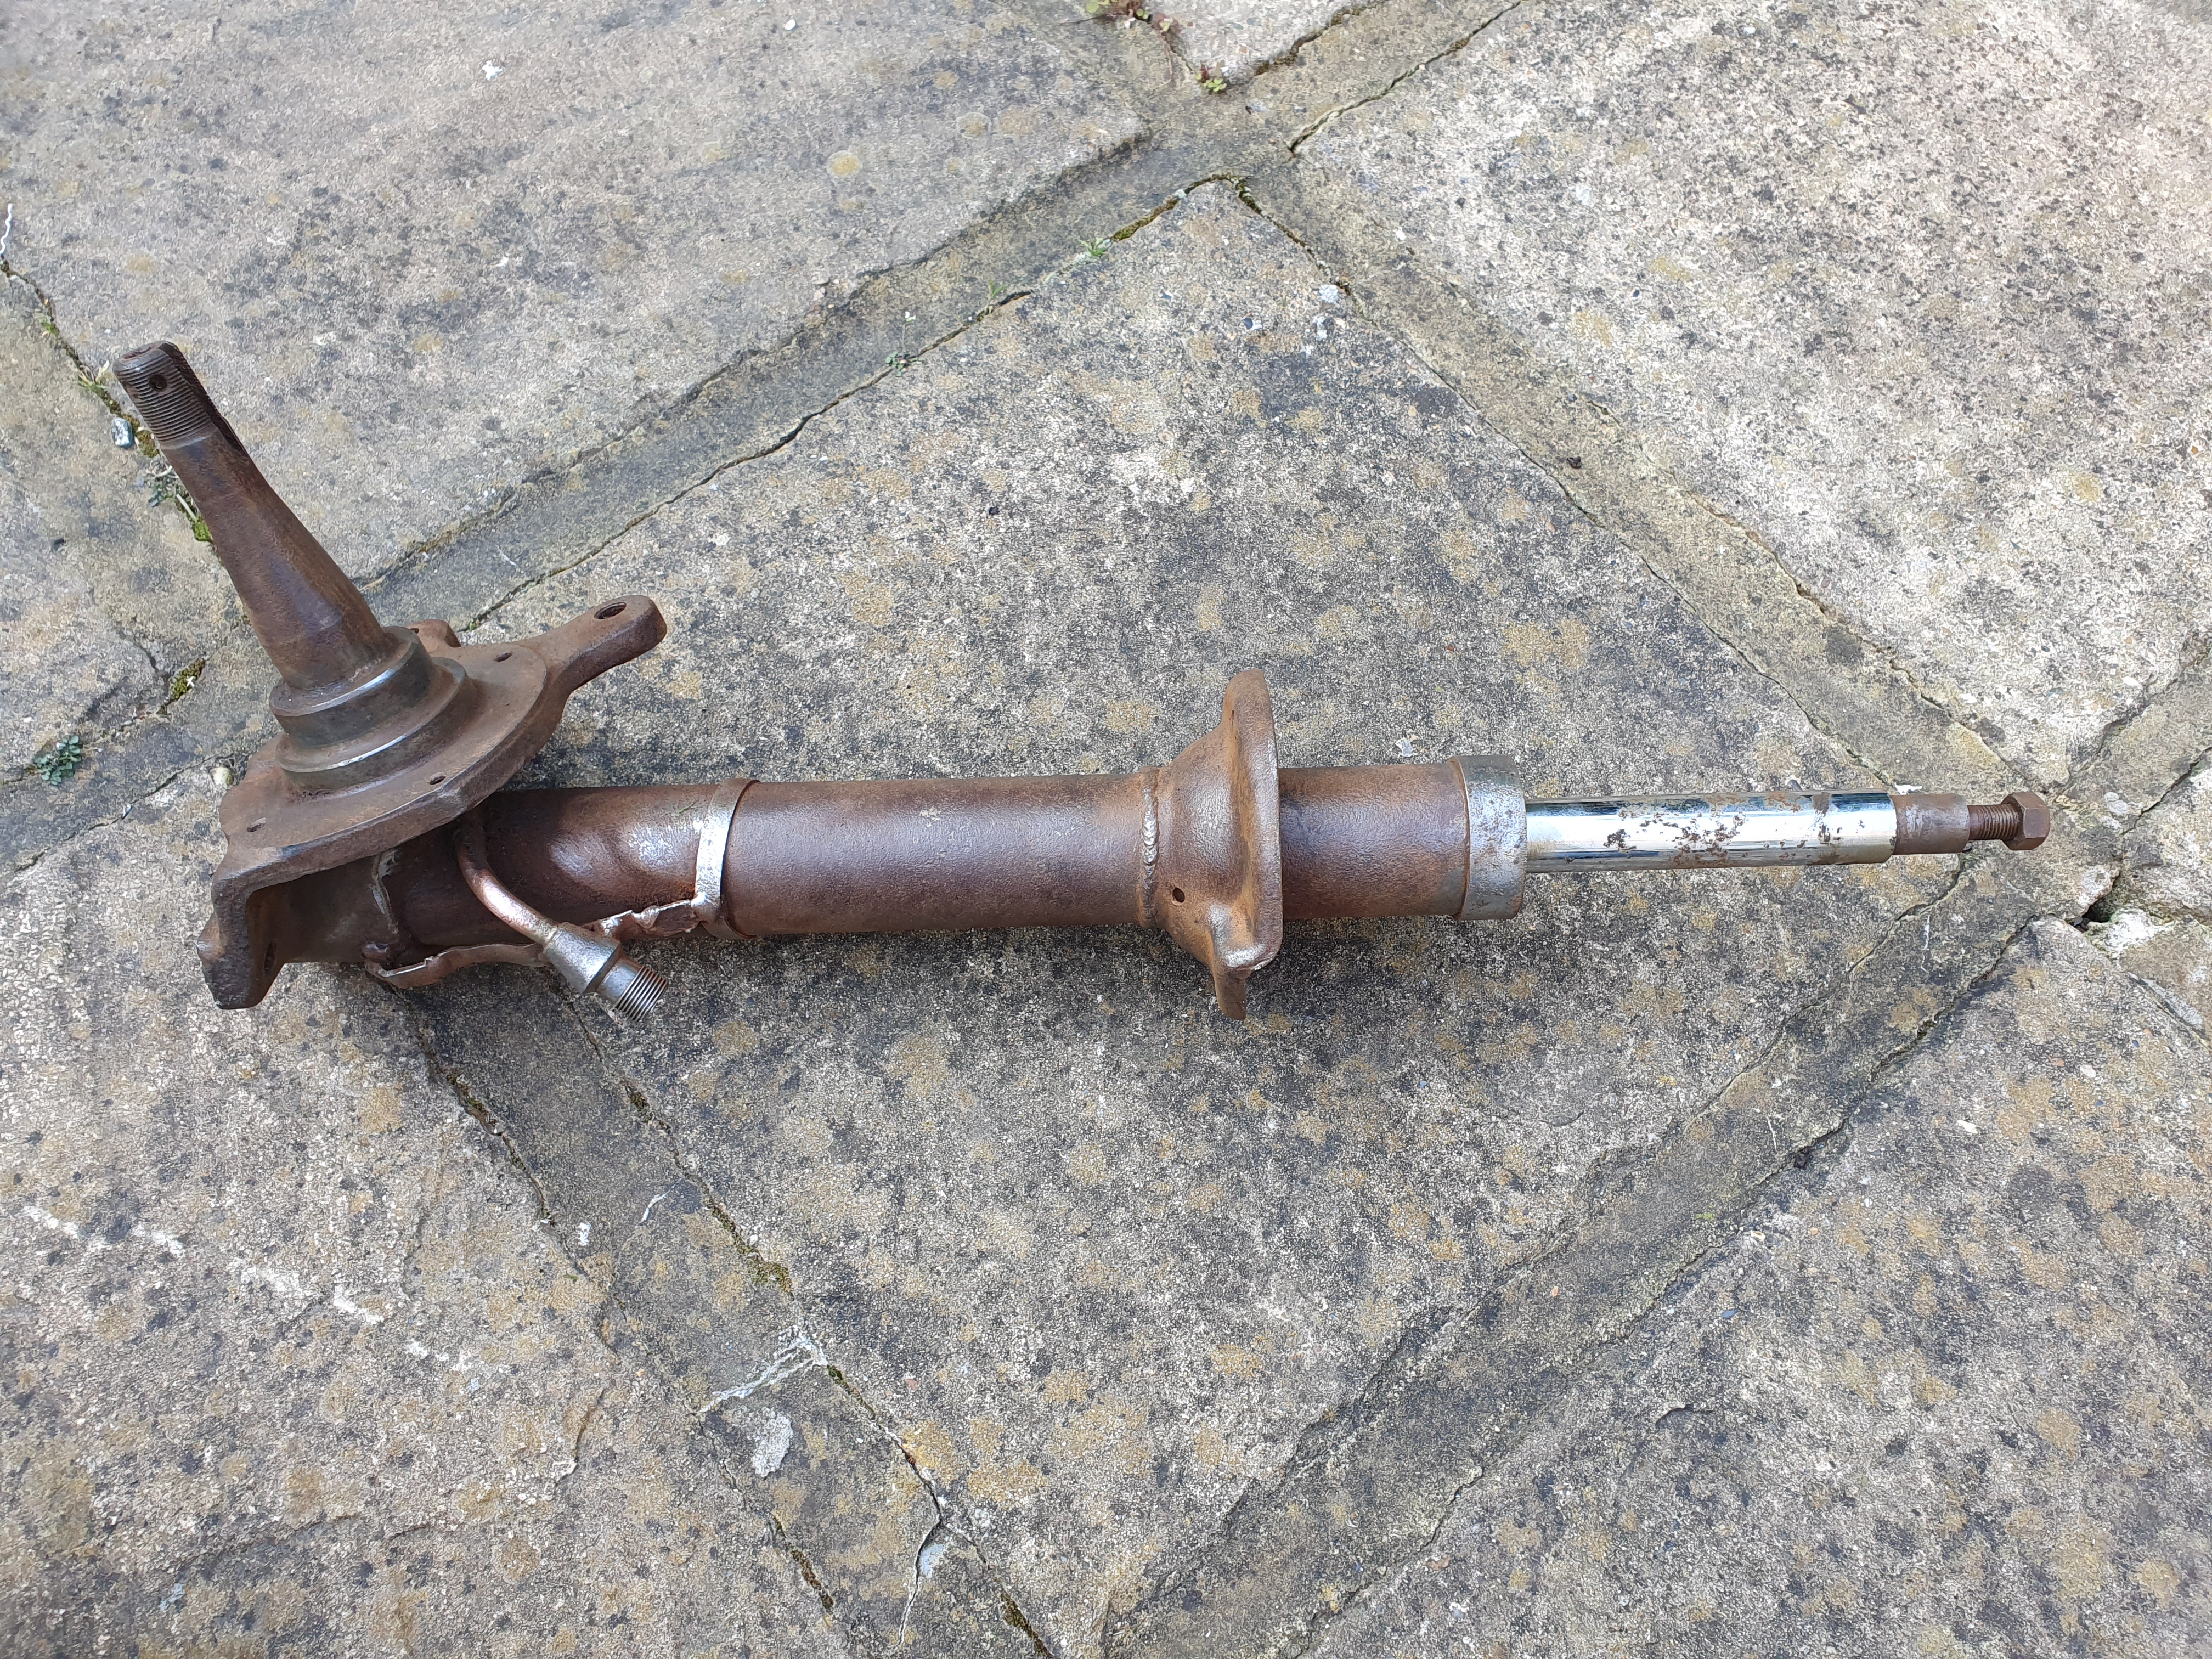
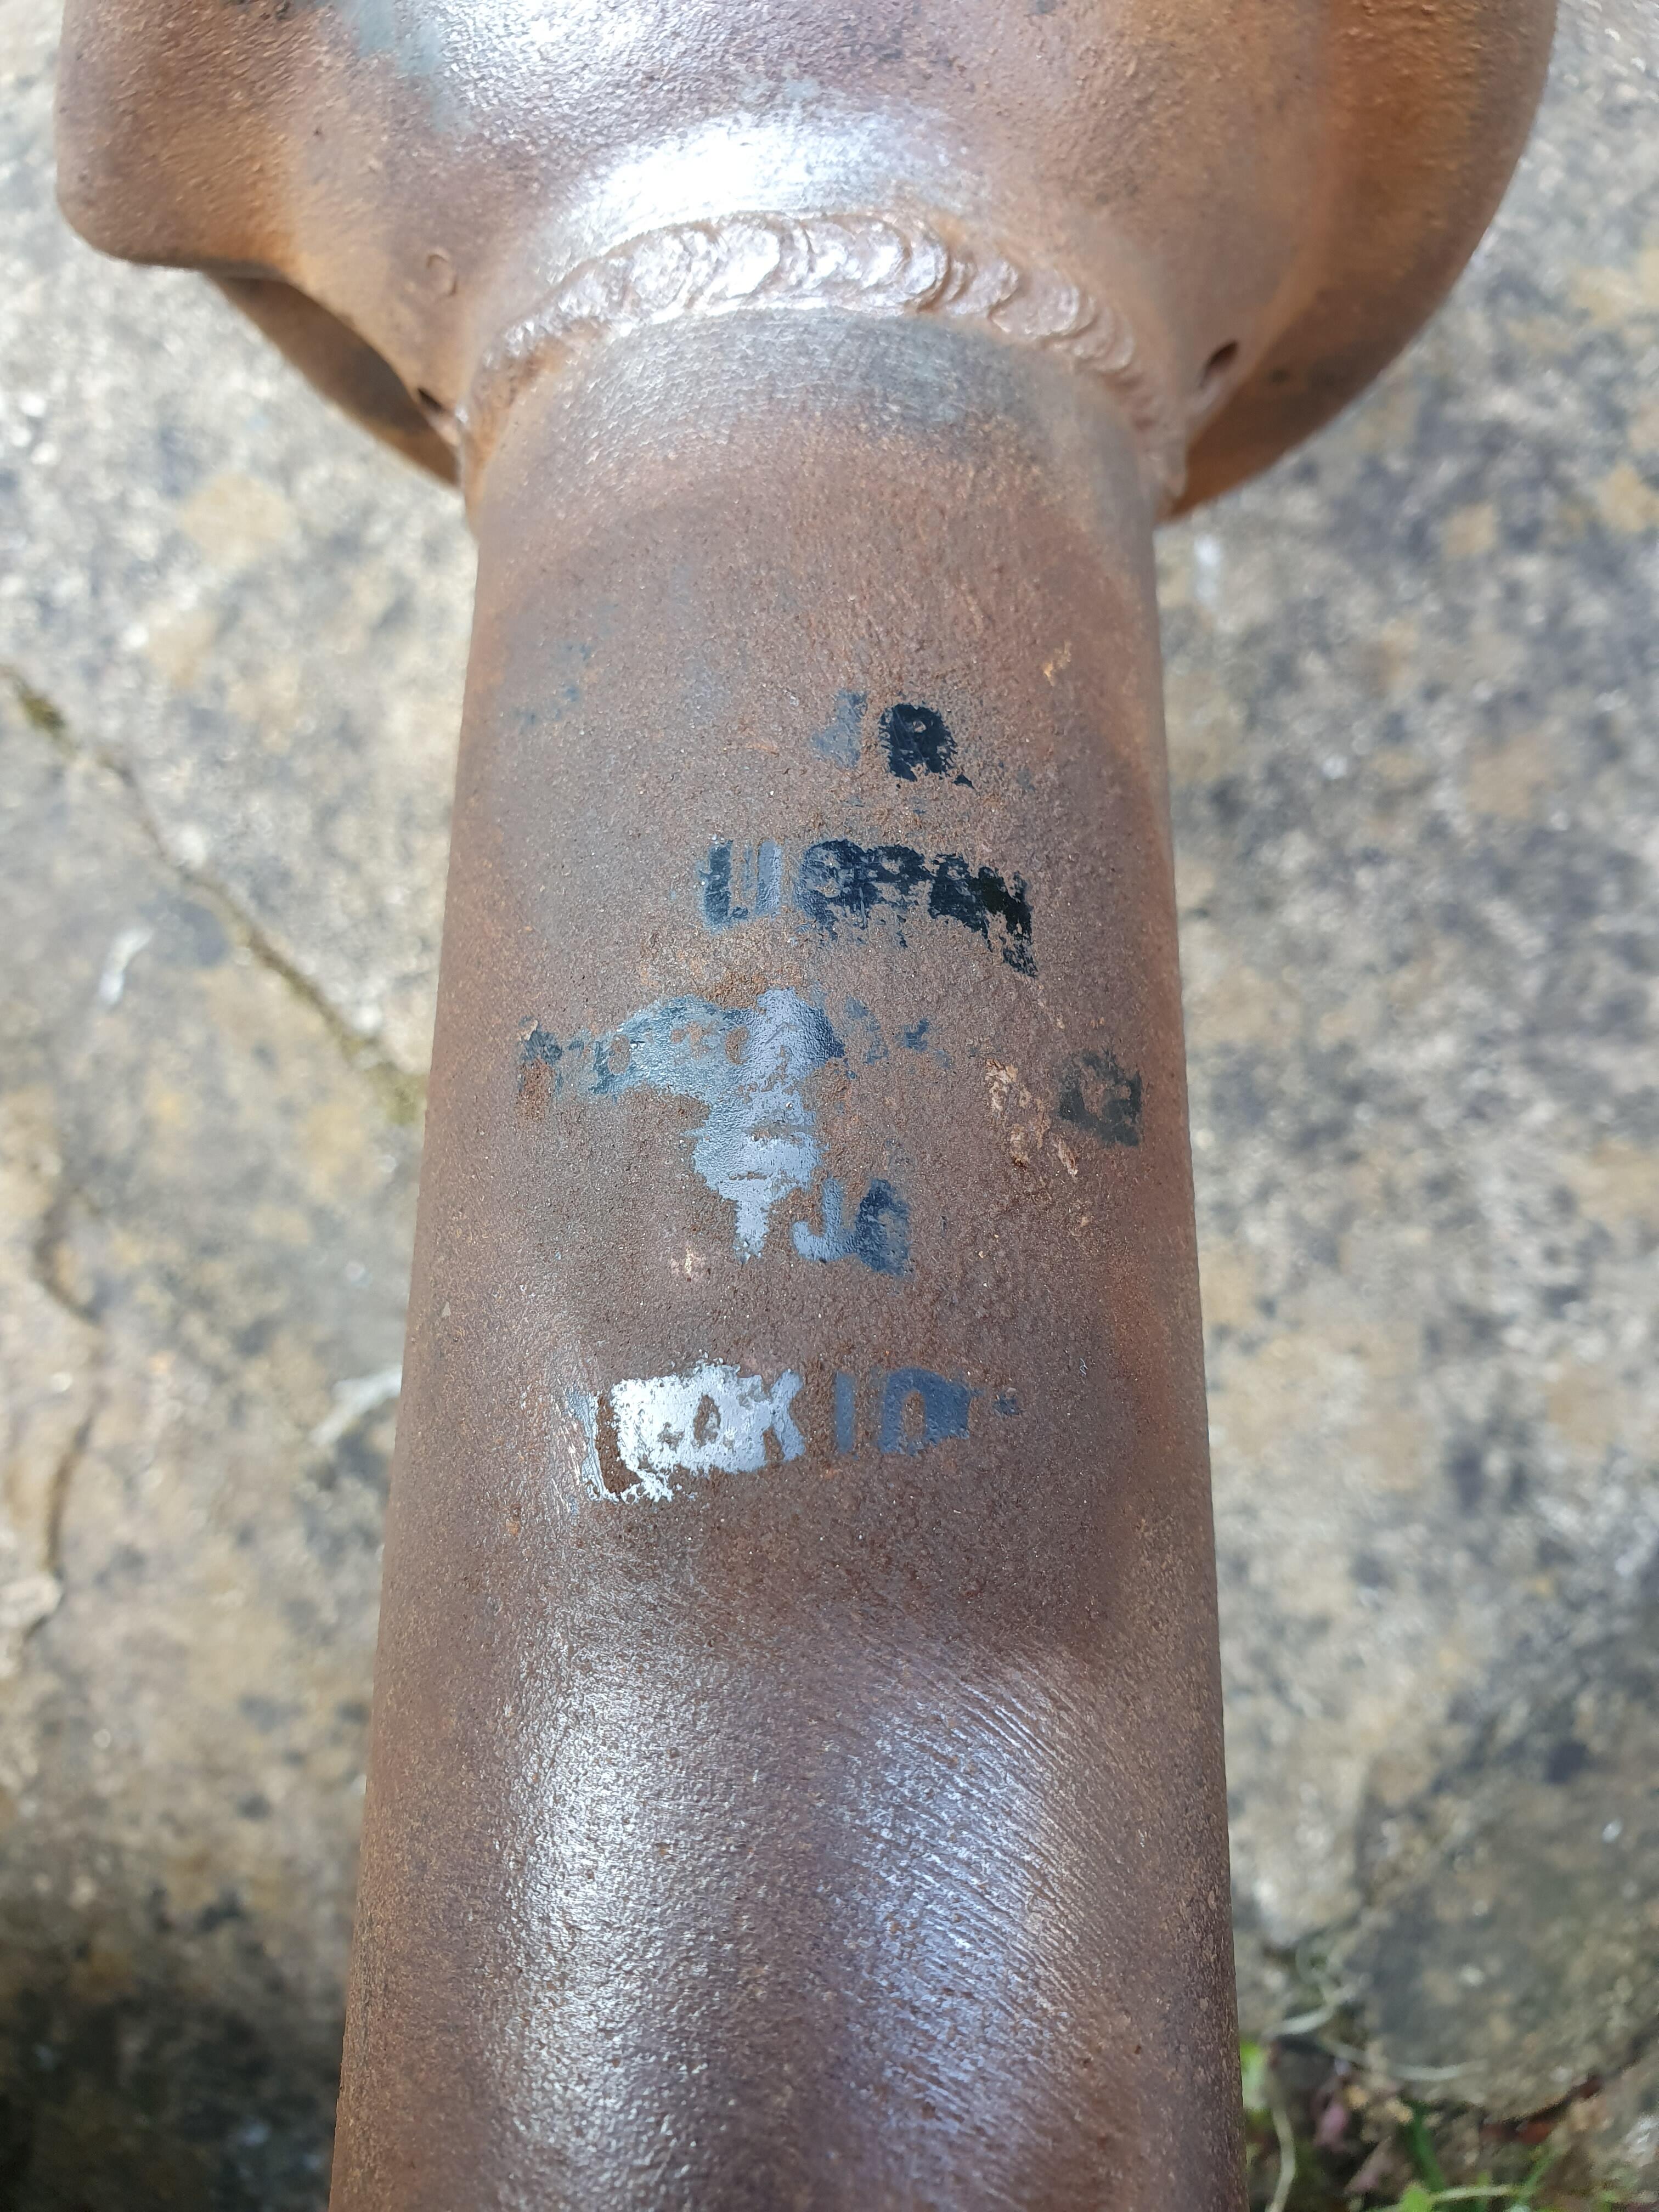
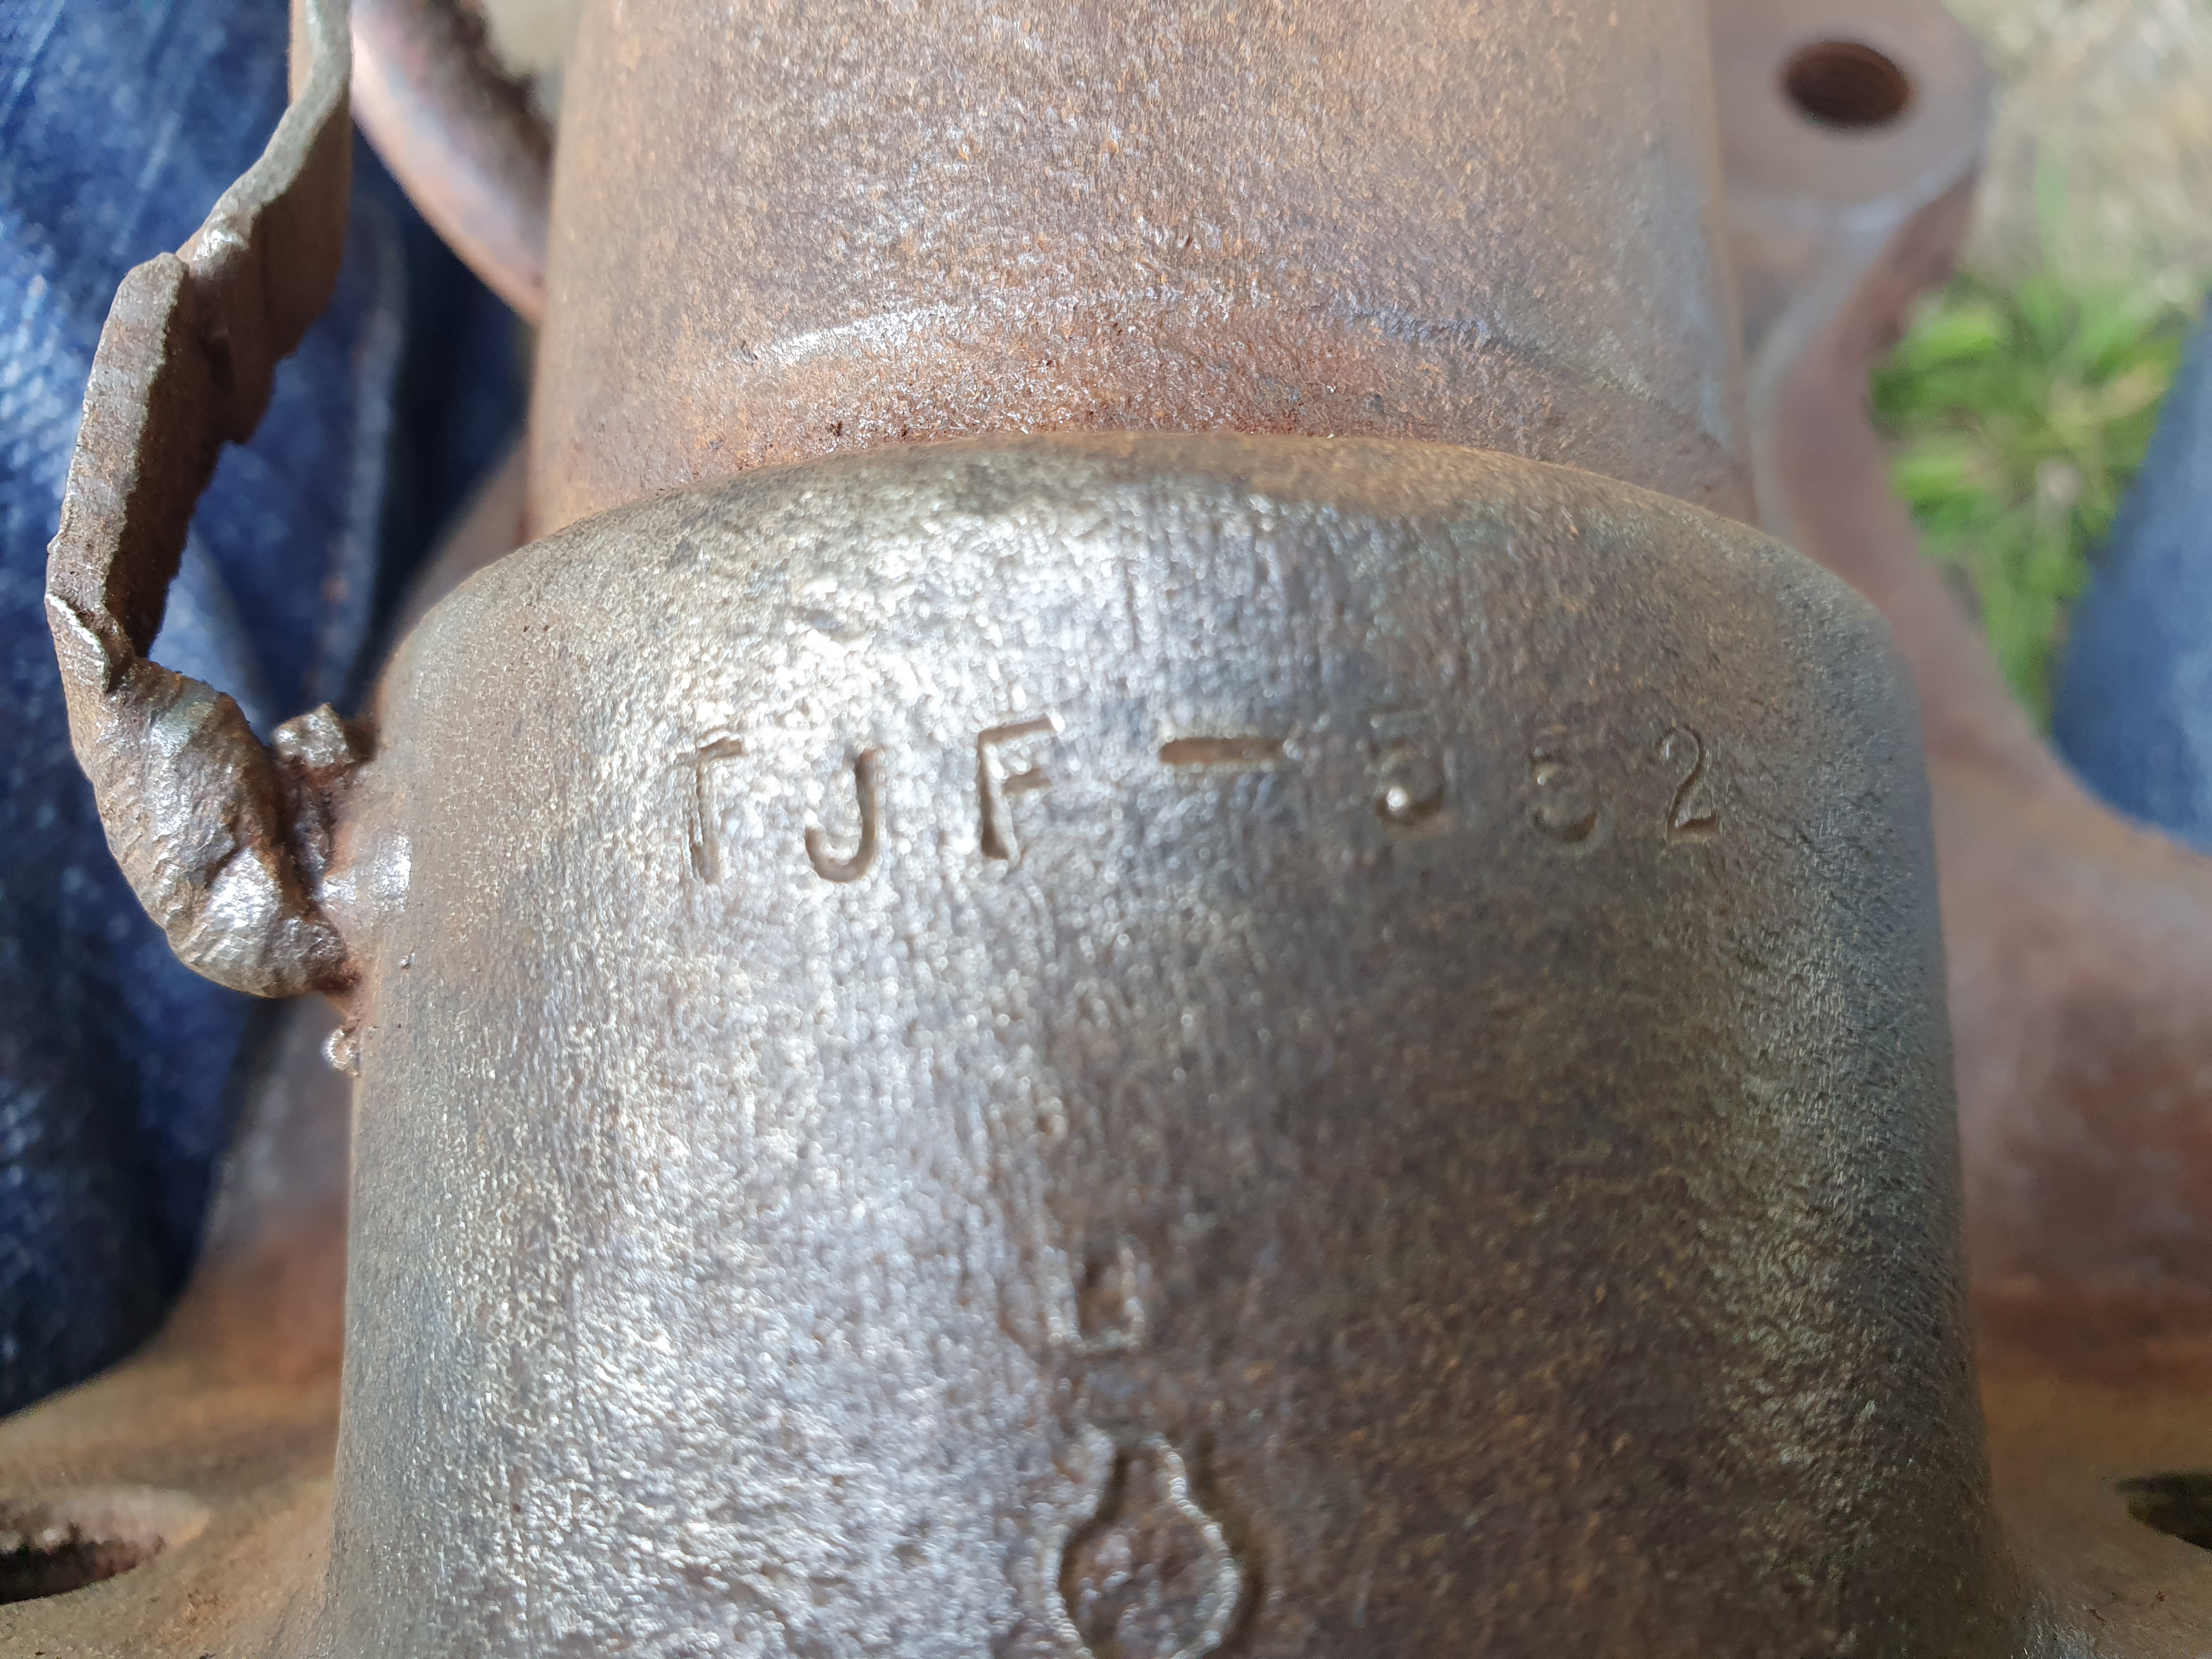
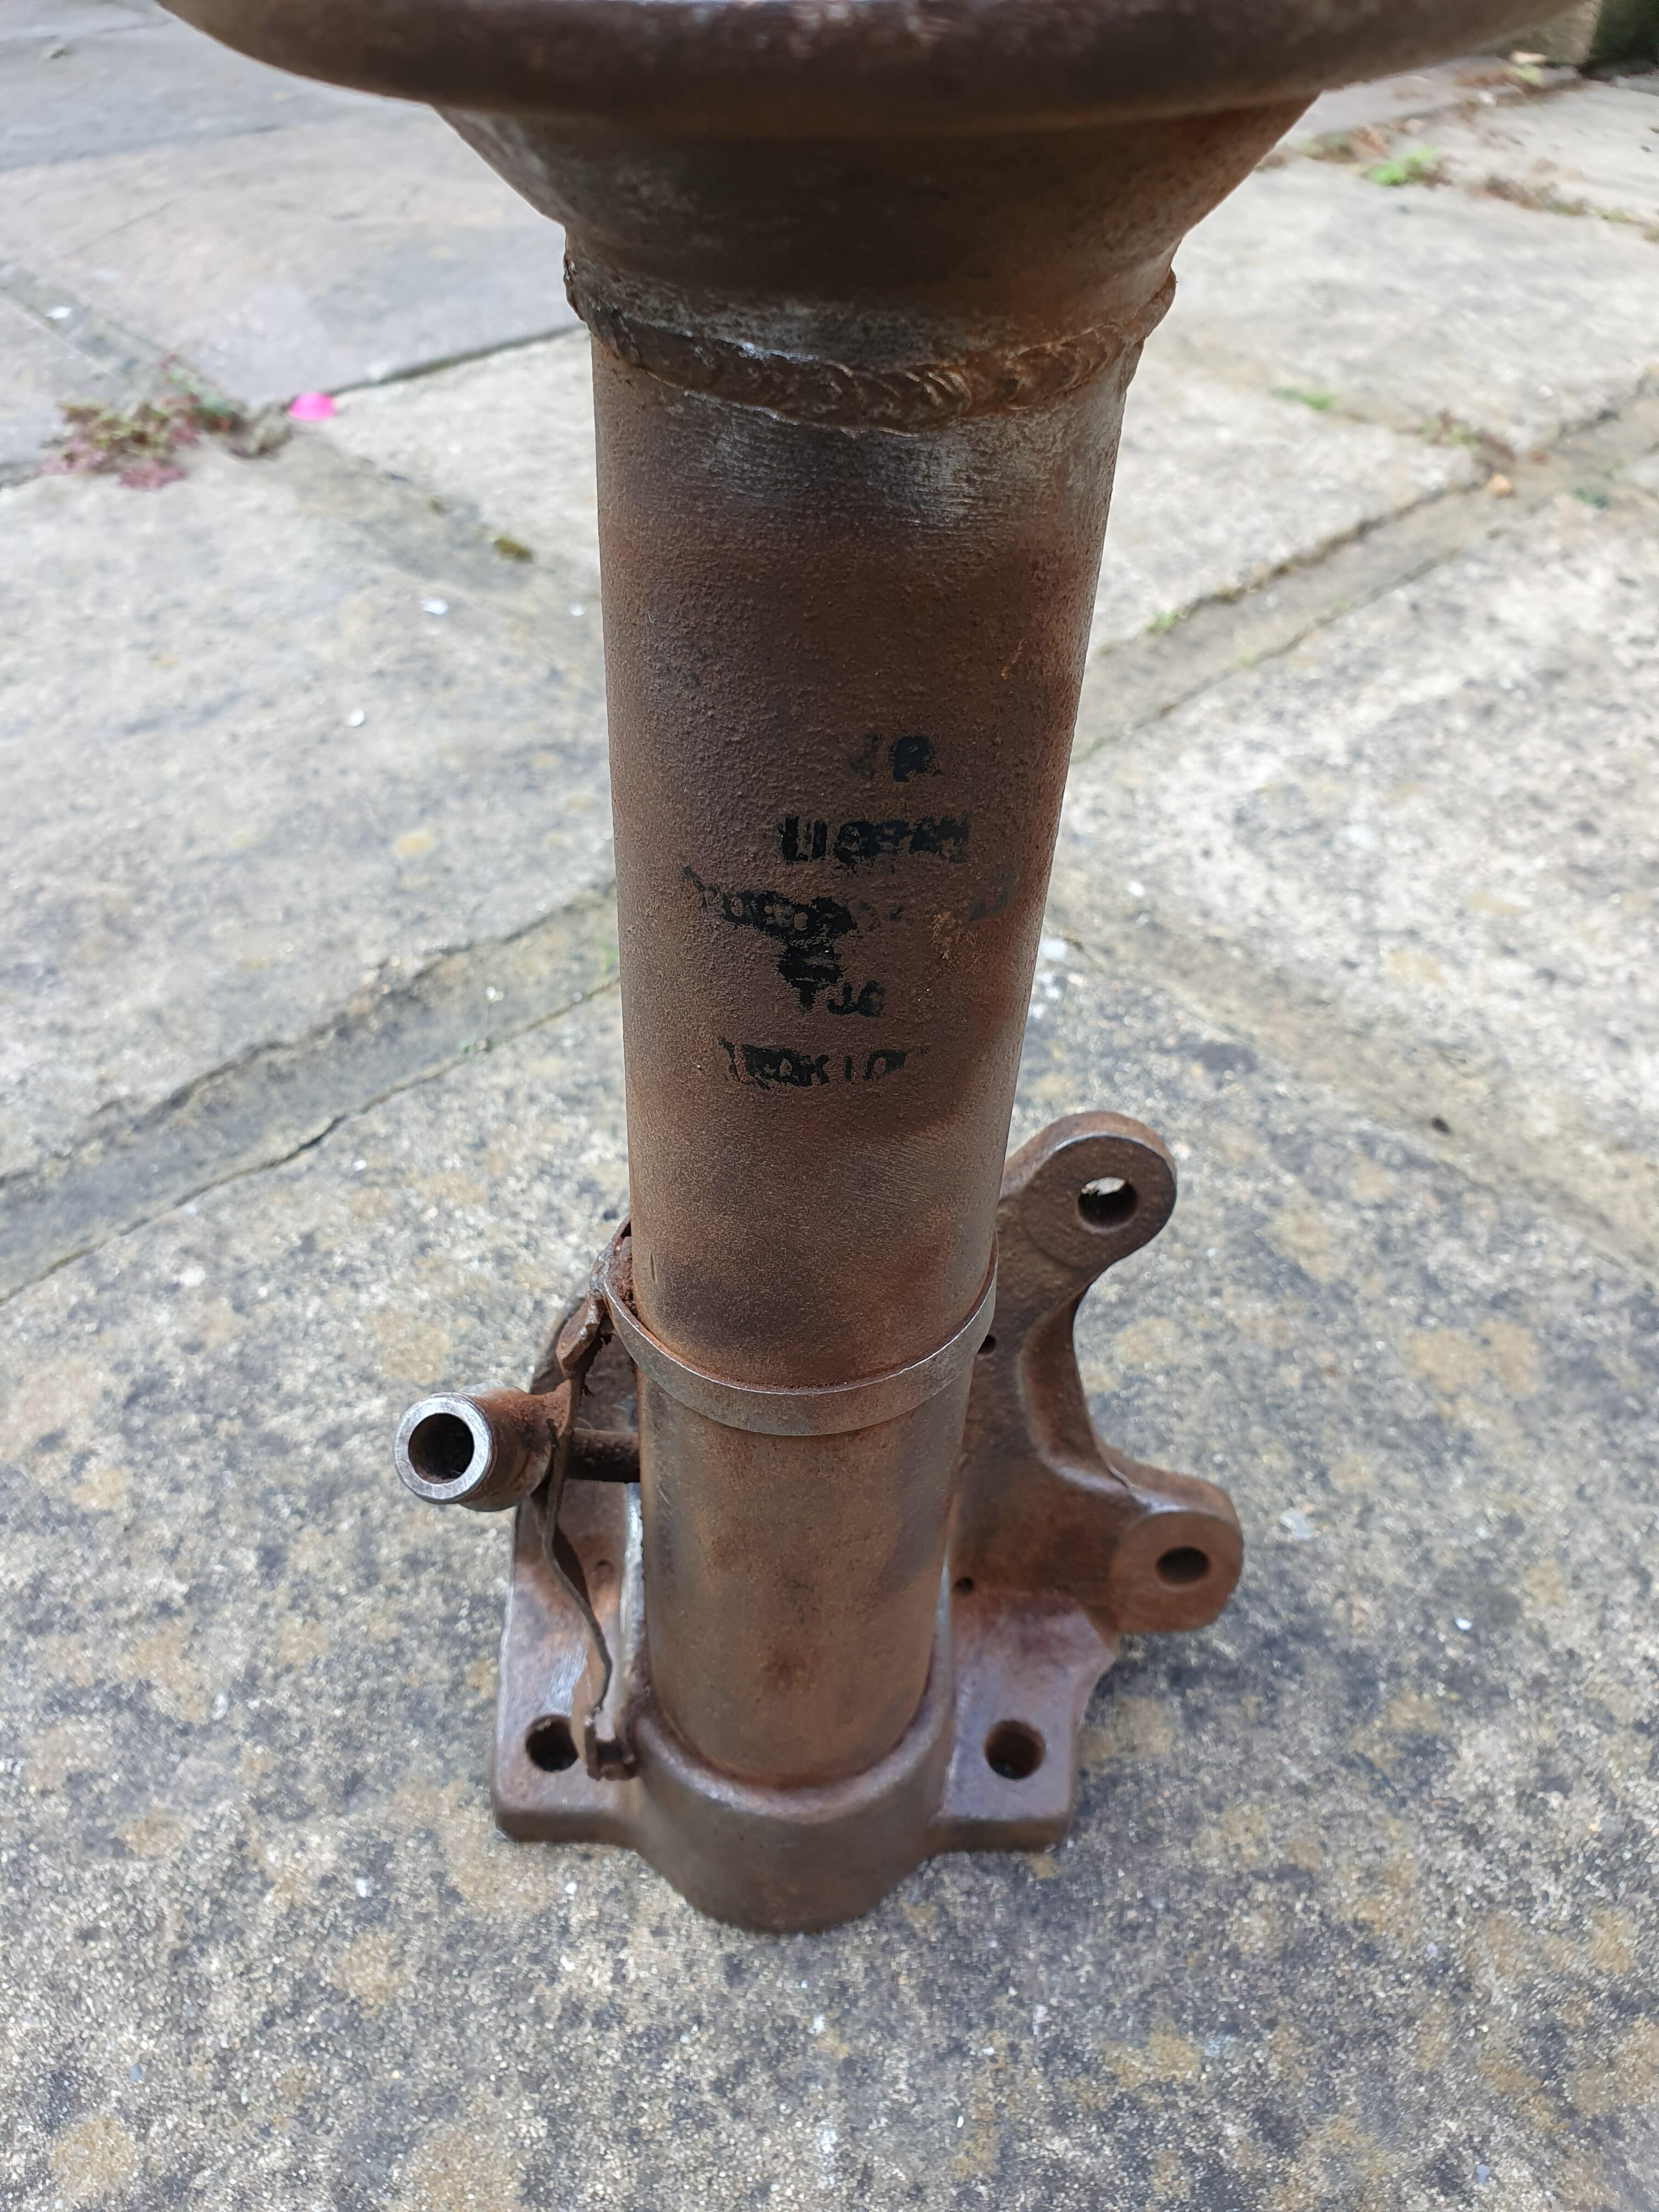
Here's a further reference piece from Ye Olde Black Museum of Original Works Artyfacts. Another 'short', oil-filled, non gas-charged, fixed-platform Works front strut. It has lost its original DYMO labels, but there are some Turin Shroud type witness marks in evidence. I can certainly read 'NISSAN', 'TOKICO' and a 'TKJ' prefix which corresponds with 'TKJ-552' stamped into the spindle casting. This would correspond to the '70 and '71 season fixed platform type Works struts. 'A' and 'B' dimensions, also the strut tube diameter, are same as the Y0901-54302 I posted earlier, but this time with a beefier damper rod at 25mm.


 2 points
 -
2 pointsSo here are some target areas: Missing grommets for the fuel tank vent lines Missing grommets from the wiring harness to the fuel pump/fuel sending unit Missing bolt that goes through the body (with a change to aftermarket seatbelts Bad/missing grommet for the throttle Bad/missing grommets around the heater hoses or wiring harness in the engine bay2 points
-
1 pointMost Ford vehicles have inertia switches. If you want a high volume auto factory made piece. No offense to the Amazon parts but I'd rather have a used (by time only) Ford part than an untested part. Typically behind the kick panel on the passenger side. The red button is visible so that it can be reset. Salvage yards would have hundreds.1 point
-
1 pointInertia switch: https://www.amazon.com/gp/product/B07RBK4873 The only catch is that you have to re-pin the switch because they put it on normally open contacts. It's relatively easy to change.1 point
-
1 pointI had my car painted last year with a color tinted Raptor finish underneath. I am very satisfied. Did it for the very reasons DatsunZGuy pointed out.1 point
-
1 pointThanks SteveJ! I’ll get to work on that. I know on my 77 that the fuel pump should only be running when the engine is running or on start but it would be nice to have an alternate means of cutting the fuel if for whatever reason is this system fails, and to stop potential thieves. You gotta remember what I do for a living. We have triple redundant safety and operational systems on most areas of aircraft. Short story: When the F-35 engineers came out to the ship while we’re were doing operational flying (Harriers). We had hours of conversation with them about the new F-35 design (this was 2003 timeframe so early in design stage). They had no plan to put a backup generator for emergency electrical power or an standby attitude gyro). The engineers comment when we quested those decisions was “you won’t need them because the primary generator, engine and Inertial Nav Sys will never fail.” The laughter in the room amongst the pilots was deafening. 20 years later the F-35 has all those redundant systems except it still has only one engine . The engine that was never going to fail has already led to several crashes of a $150 million aircraft. I love engineers but they aren’t the one that have to operate the machines they design. I already have the 78 fuel rail on my car because is used less hoses.1 point
-
1 point@Yarb For your project, I would advise doing it differently. You'll want a different connector and an inertia switch, too. I'll send you a PM when I get home and can get all of the part numbers/sources.1 point
-
That's why I call it "paint jail". You never really know when you'll get out1 point
-
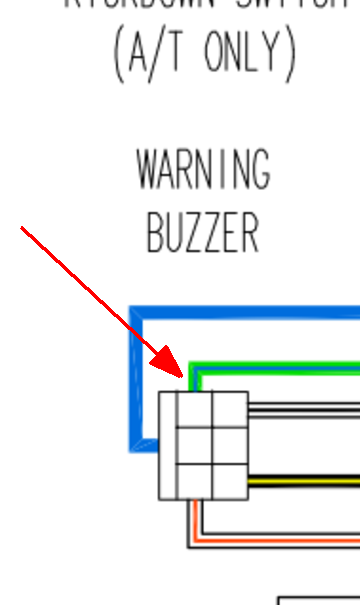
1 pointYou could install one without too much trouble. Just intercept the fuel pump wire here. That connector is on the driver's side under the dash. The green/blue is the fuel pump positive. Here are the parts I suggest: 14 gauge wire (green would be good. 2 of these connectors: http://www.vintageconnections.com/Products/Detail/78 You only need 1, but you may need an extra male terminal. A switch. I would go with a 20A switch like this: https://www.amazon.com/dp/B0BGX6Z3Y1 Back the terminal for the green/blue out of the 6 pin connector with a small jeweler's screwdriver. Put that terminal in one of the connectors you bought. Assemble the switch in this order: female connector - wire - switch - wire - male terminal into the 6 pin connector where the green/blue wire was. When the switch is on, the fuel pump has power. When the switch is off, you killed fuel pump power.
 1 point
 -
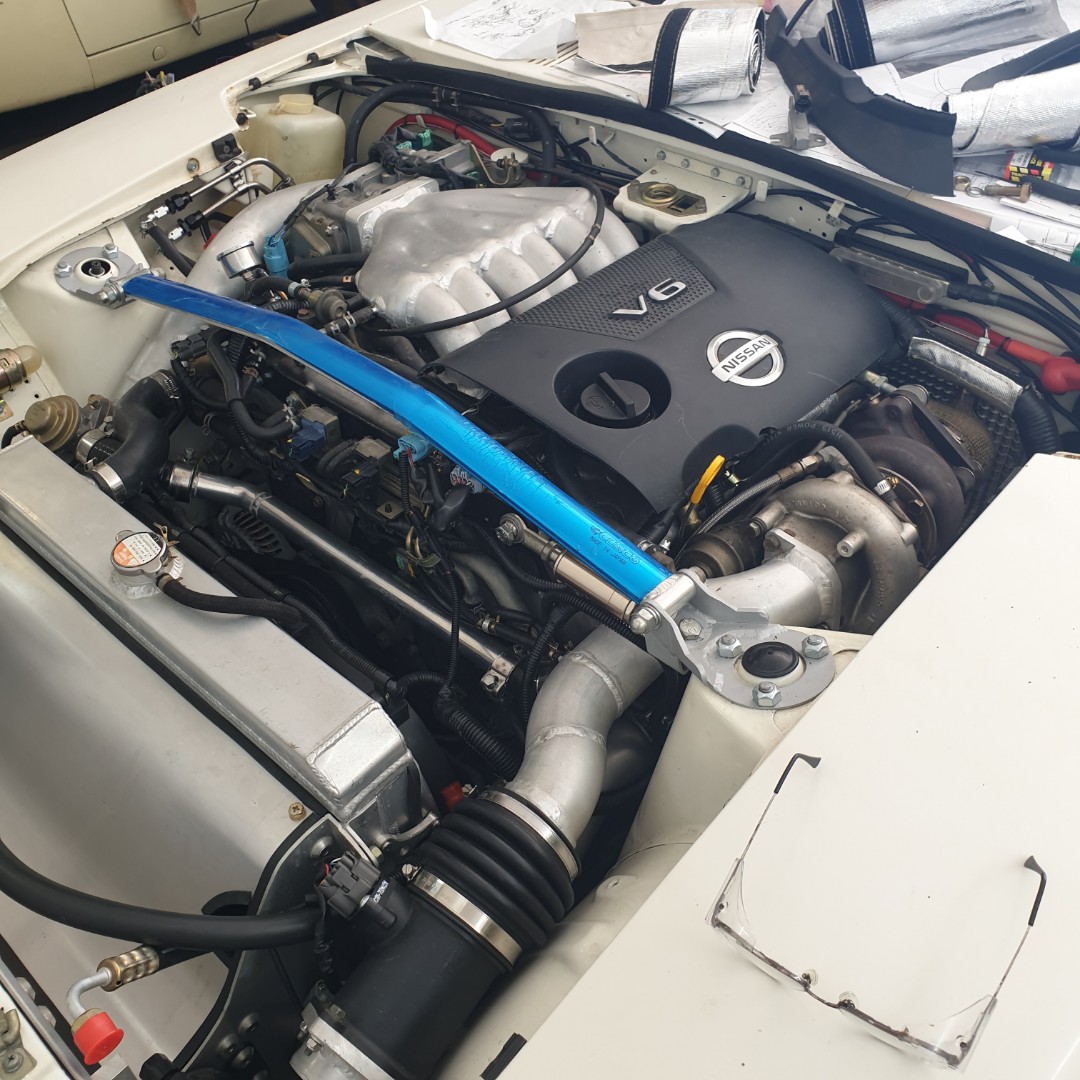
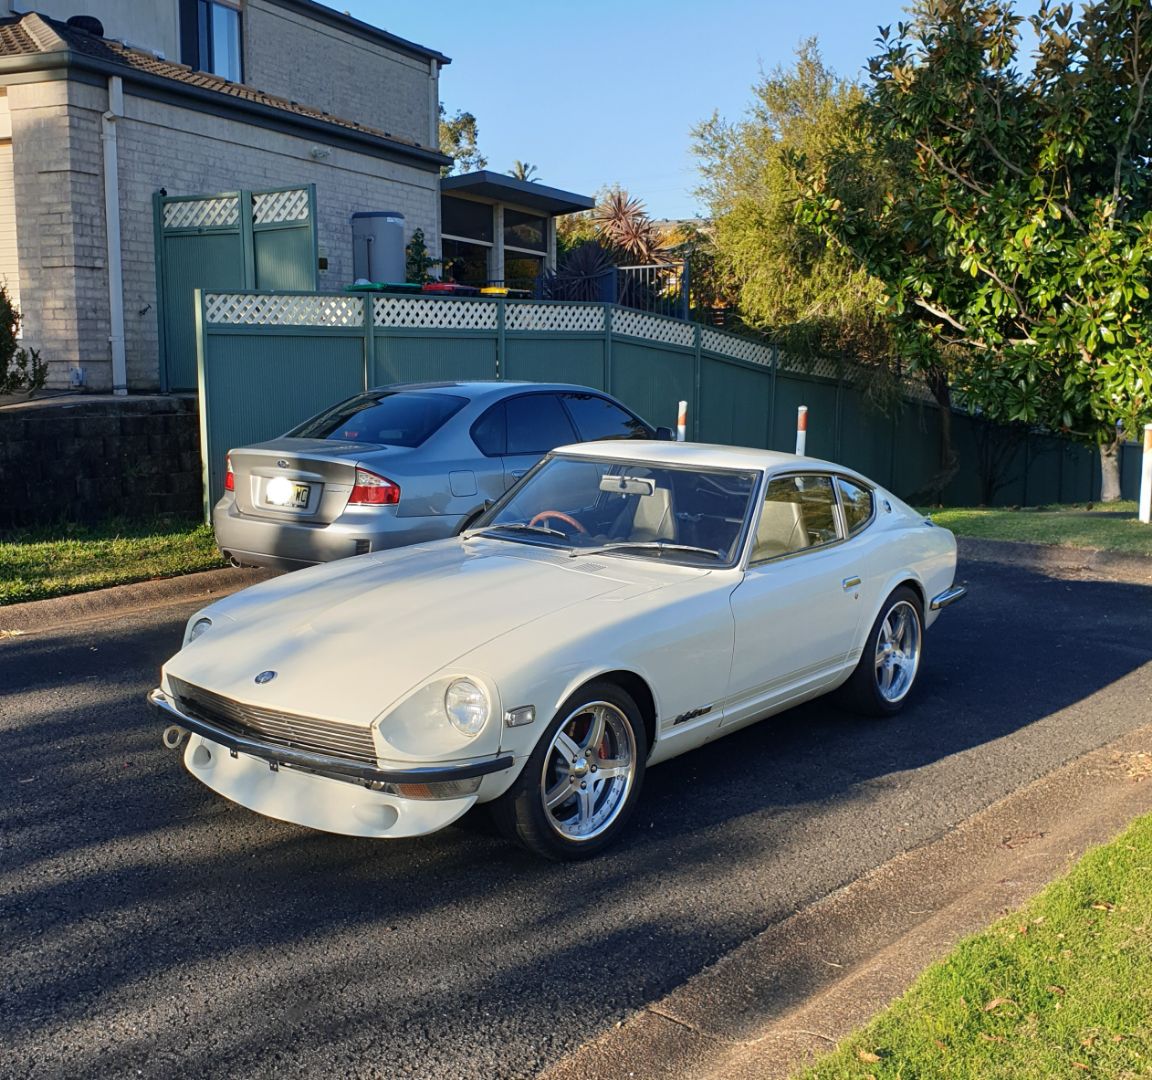
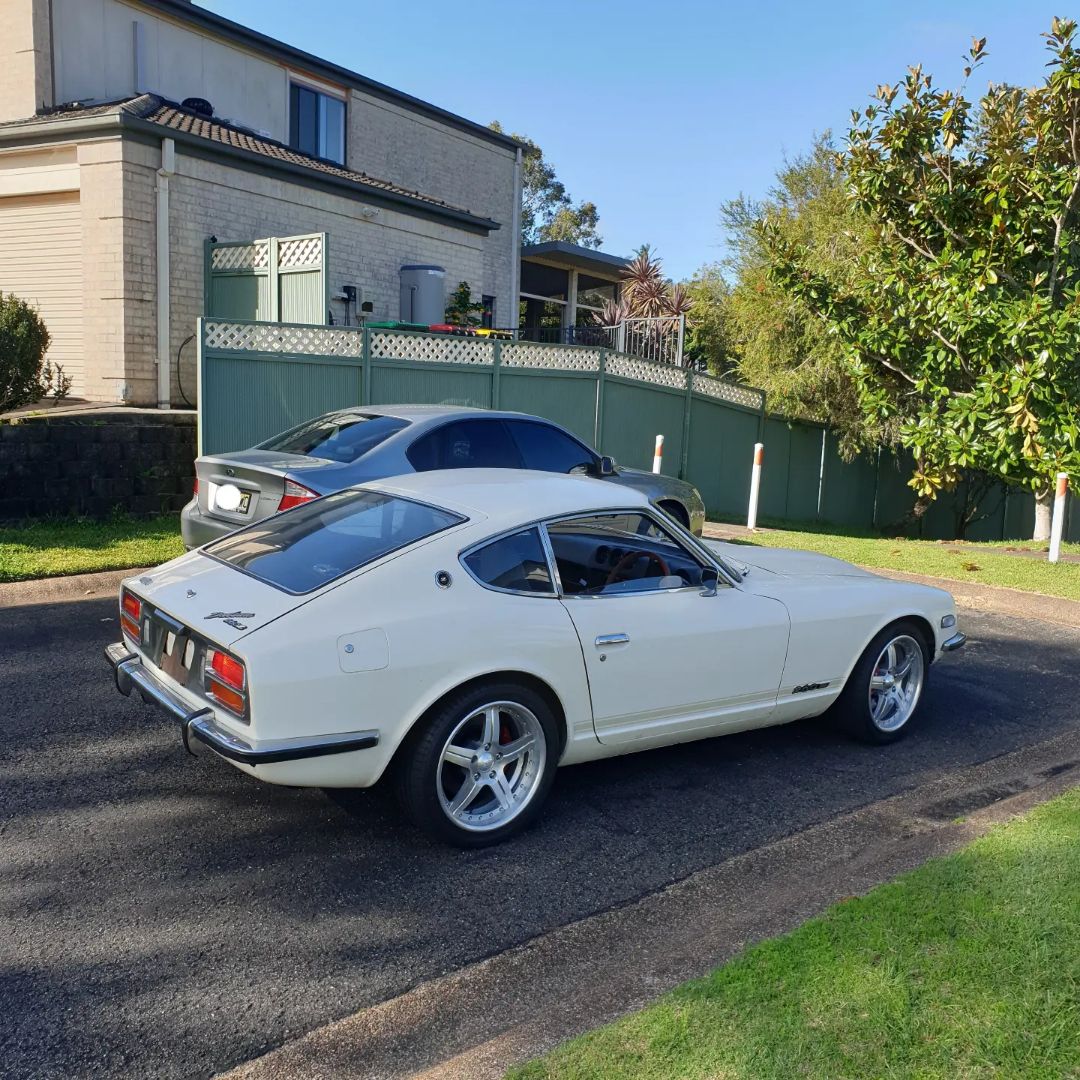
1 point1 pointThanks for the explanation and photos. It takes a brave man to drill a 3mm-dia hole down the 6" length of a wheel spindle.1 pointPaintshops over here have a scedule, you go on a big board with all the other cars. So no weeks or month's later.. Once i was at a painter for my work long ago and there was a hobby car that one day should get painted.. the next year i came there.. it was still in the corner.. haha but the owner had told them to paint it when they were low on jobs that needed to be done.. hahaha.. Lesson, never tell a carpainter it does not matter when he does it.. it never gets done! (not that you did this!) Your shop just does not keep their end of the deal.. pfff... (They would have painted my last car i tell yah!)1 point1 pointYes, it is having hopefully its last engineer inspection tomorrow, then a few more tests.


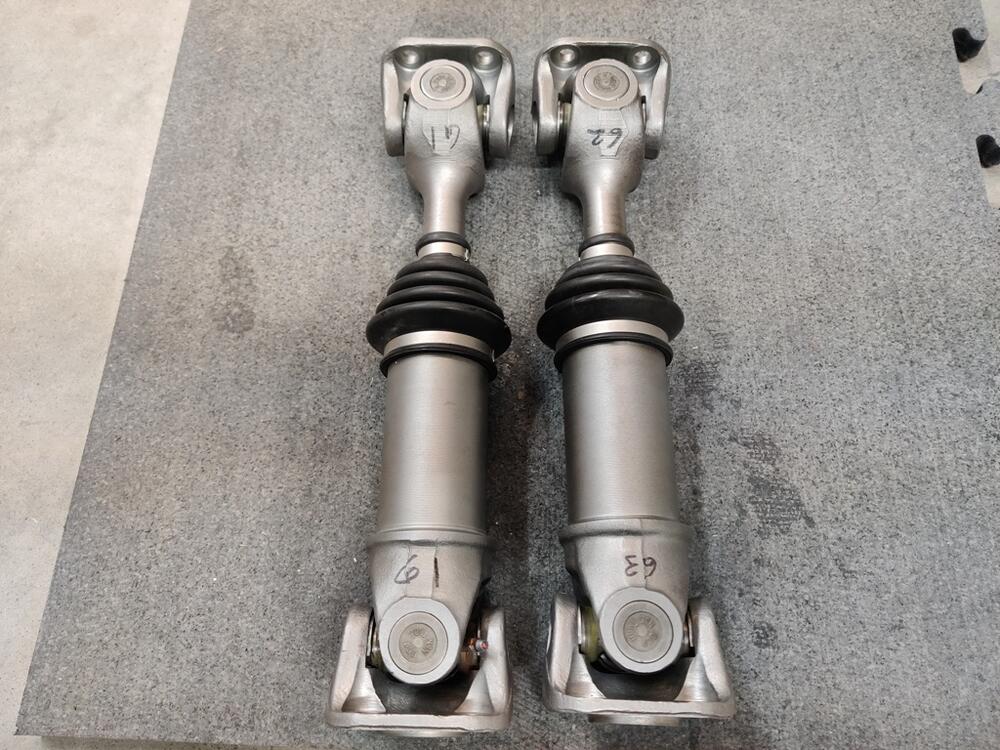
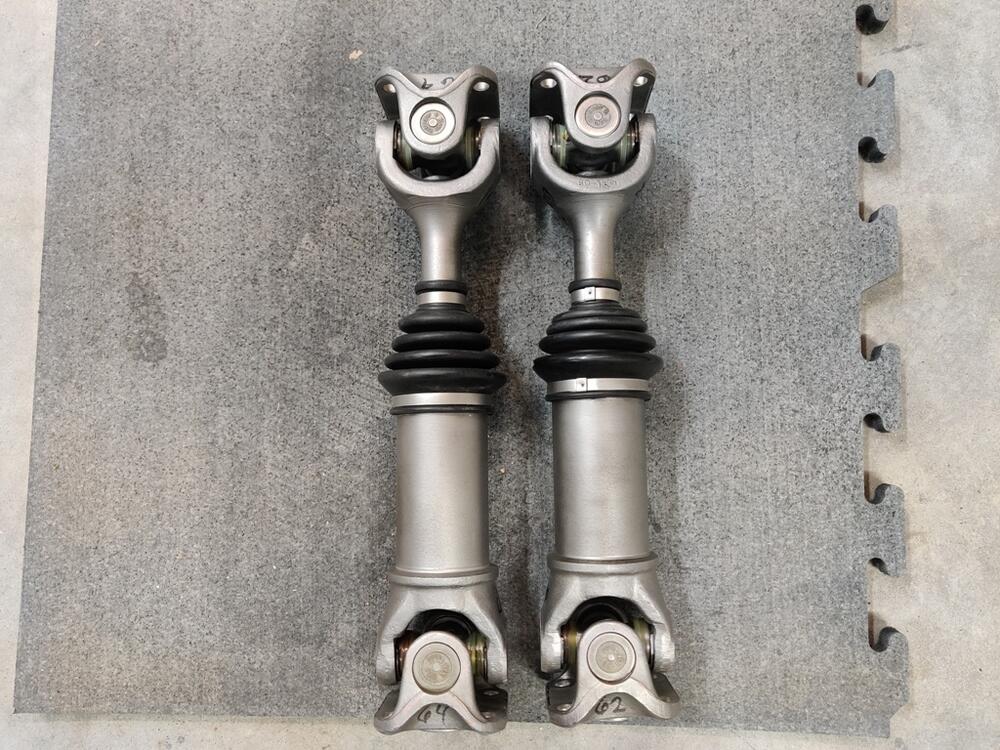
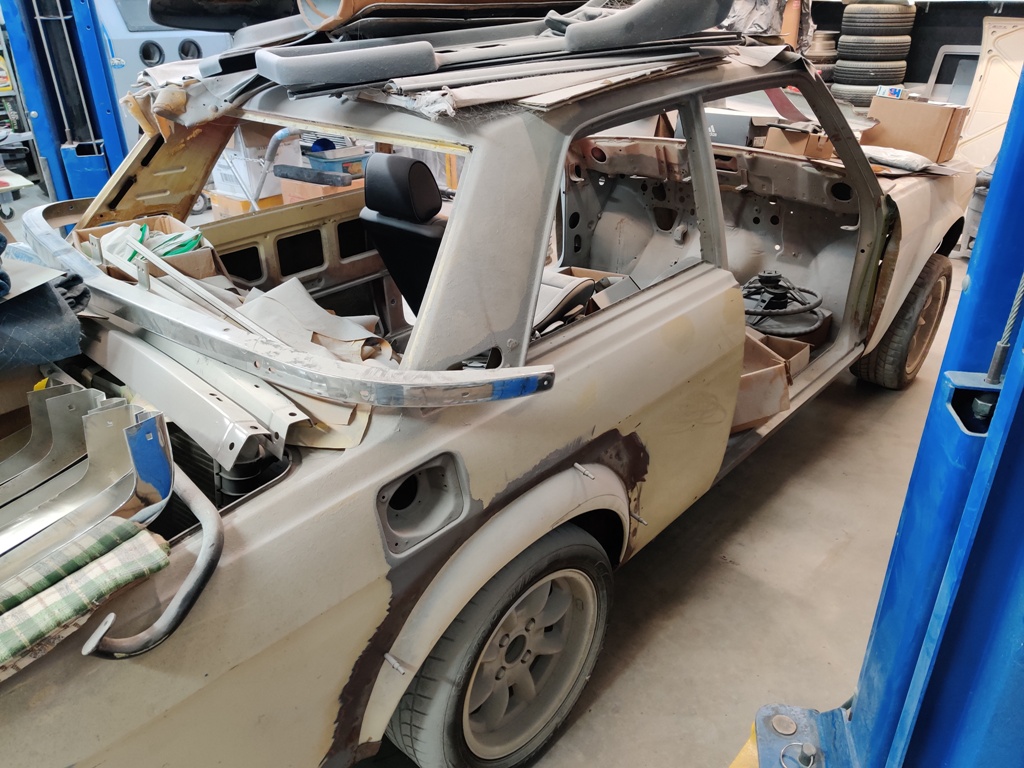
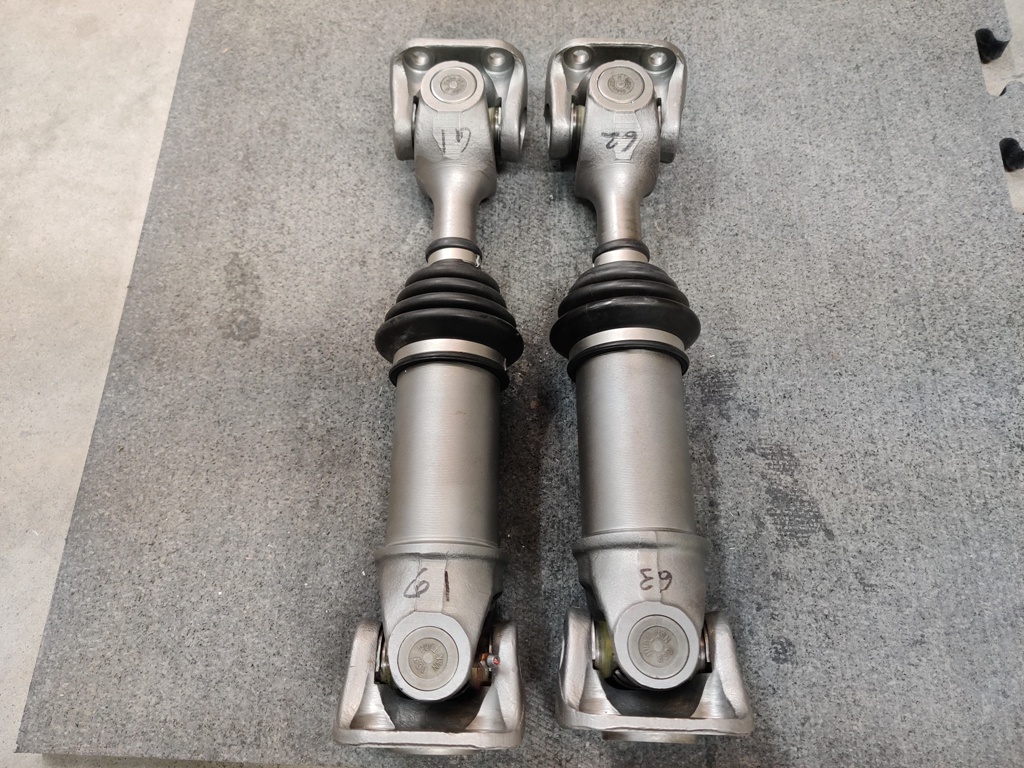
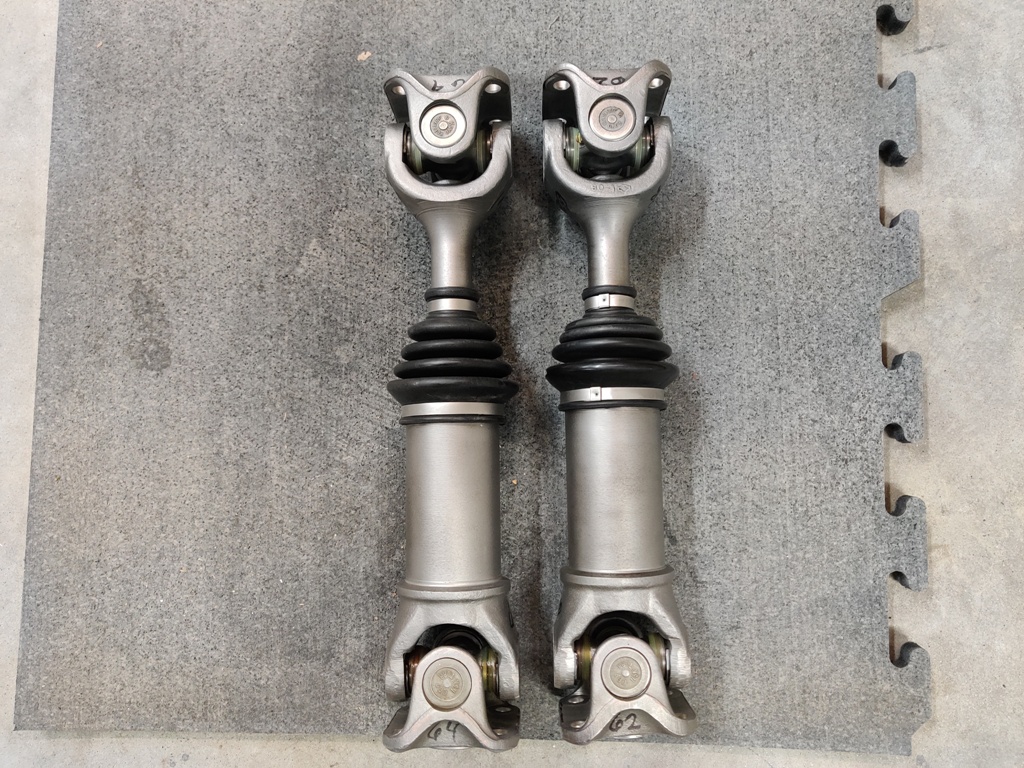
 1 pointI have finished installing the new OEM U-joints in my axles. Here is a separate thread about it if you want to check that out. It took roughly 12 hours to do what I thought might take 2. The snap rings are a pain in the butt, and the odd angle on the axle output flanges make u-joint removal and installation in a press way more difficult than it should be. Plus, getting the tolerances right, and measuring to confirm they are, takes a lot of time. Definitely best to get all that done before priming and painting them. I am actually thinking of sending them off to have them balanced, so I will likely hold off on priming or painting them until they come back. After he better part of a day and half of working on them, I decided to clean up the shop a bit. This "shelf" for some of my 240Z parts is incredibly dusty after years of doing body work on the 240Z in my garage: Someday, not too far off in the distance, this will become my primary project!

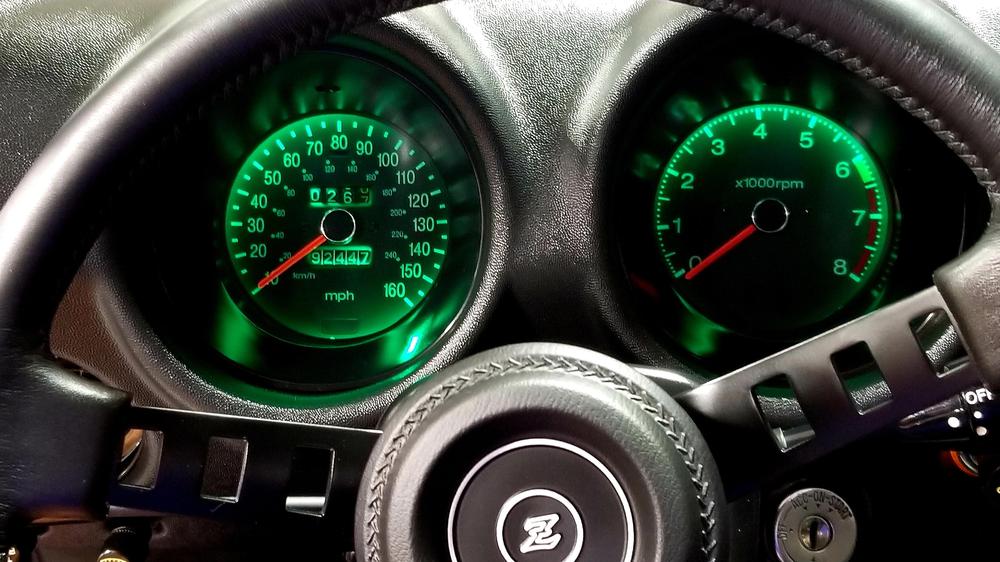
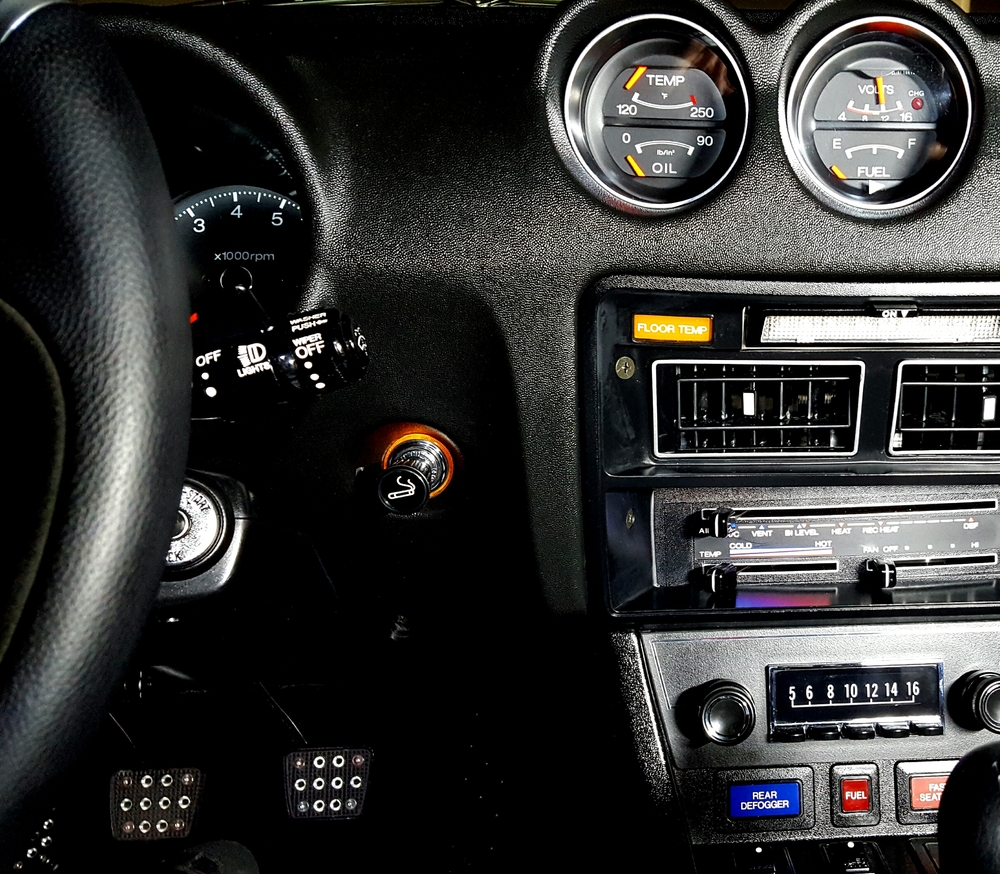
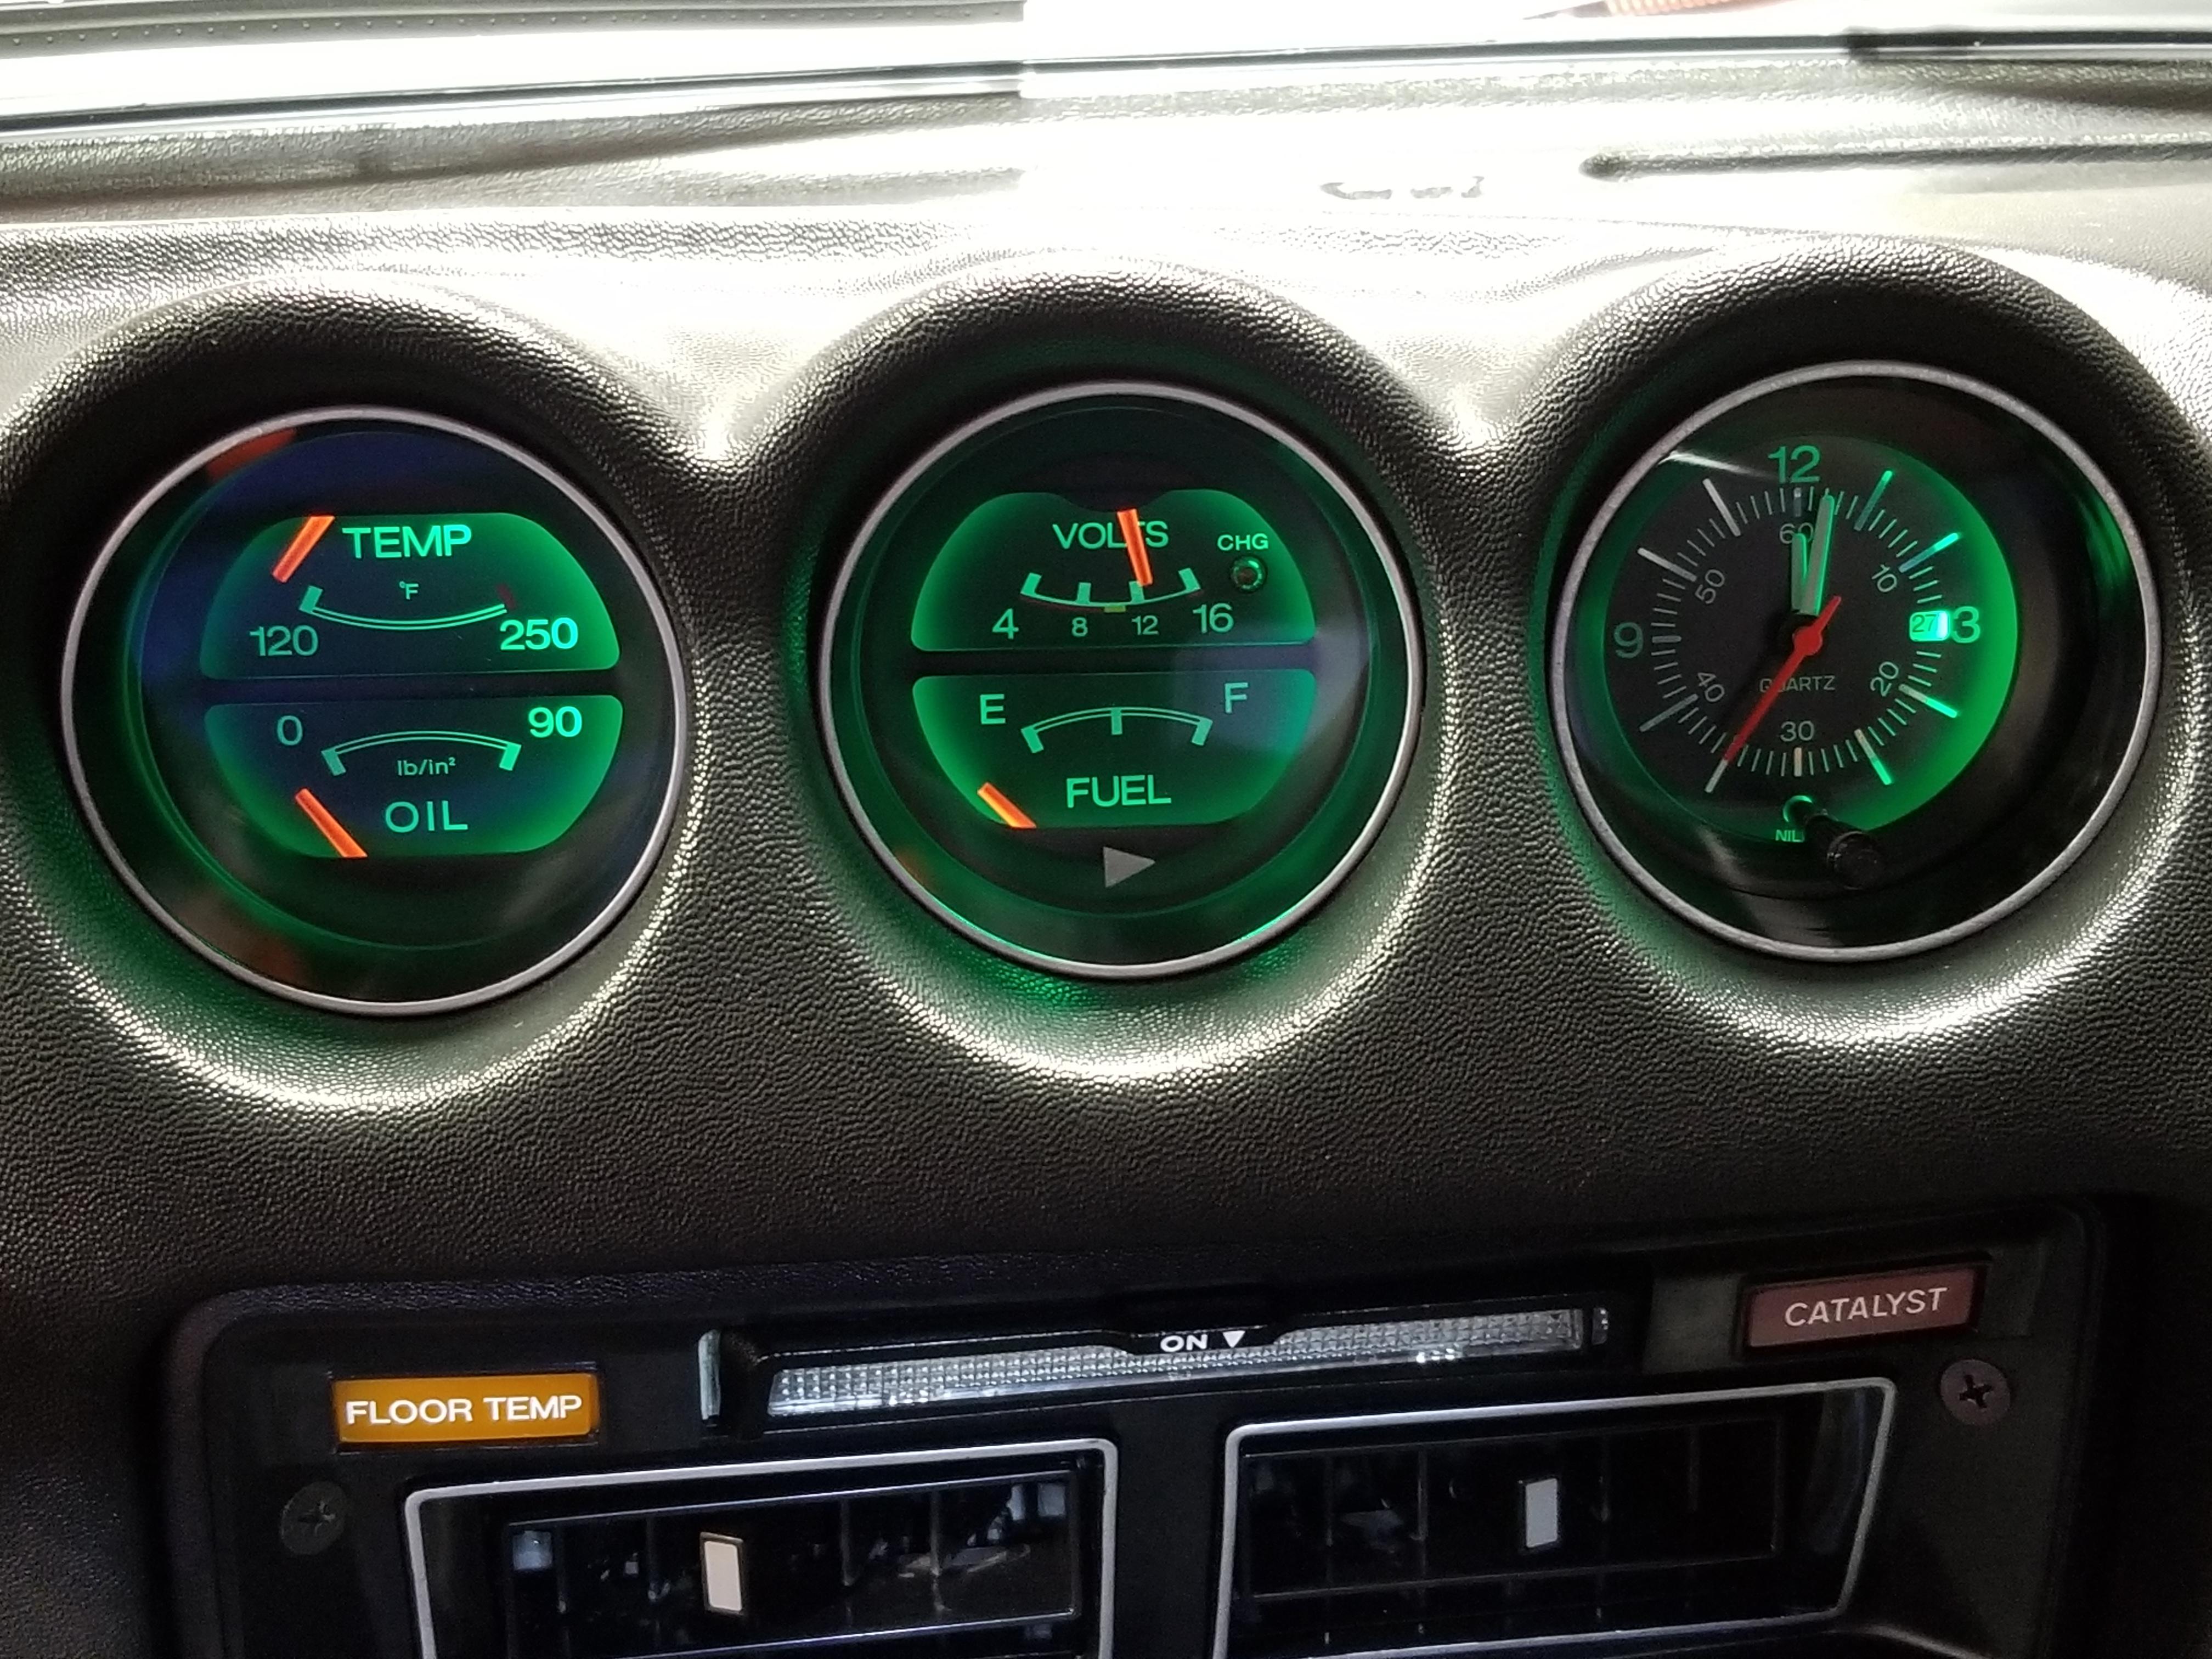
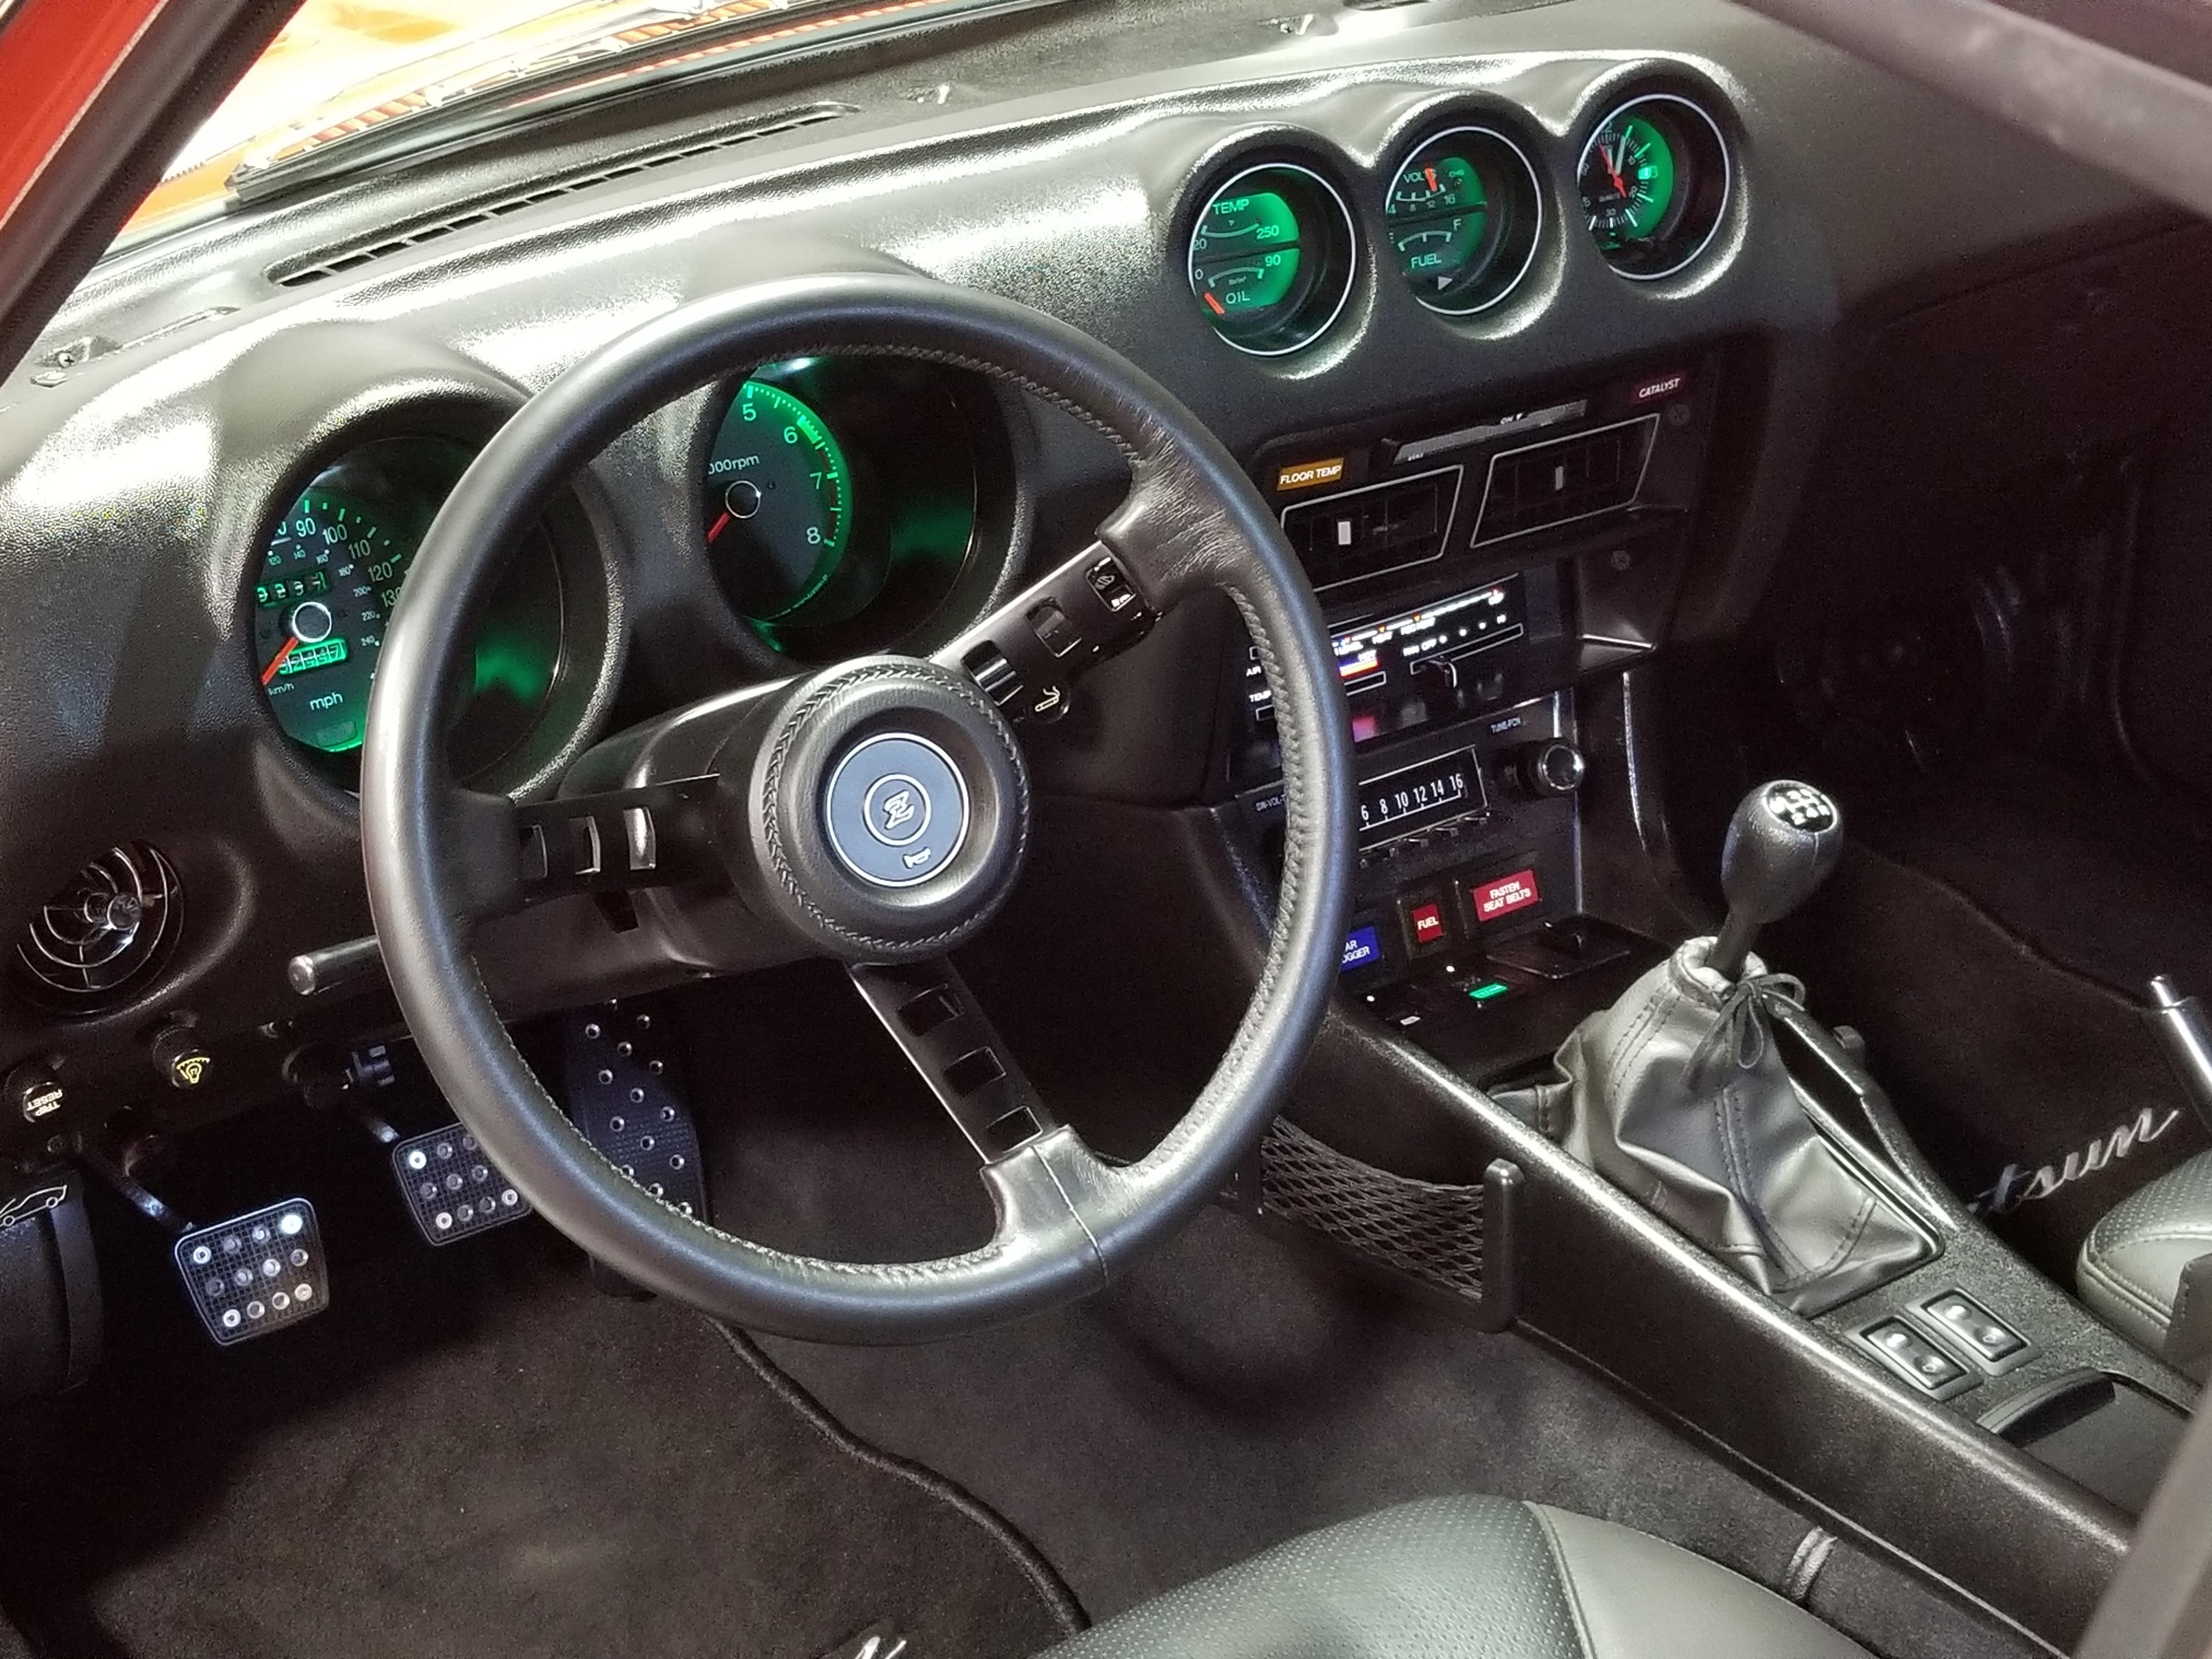
 1 point1 pointI took the plunge and purchased LEDs to replace the exterior lights, except for the plate lights. So far I replaced all but the lights under the bumper. I'll probably get to those this weekend. I did check the current flow with the LEDs, and it is now 2.6A. I didn't measure the current before the switch, but I estimated it to be approximately 7.9A. (For the record, I was expecting about 2.9A at this point of changing out the lights.) I purchased all of the bulbs from Superbright LEDs. Here is what I selected for my 260Z Front side markers - 67-A9 Rear side markers - 67-R9 Rear stop/tail 1157-R12 Rear turn 1156-R12 Rear tail 67-R9 Front turn 1157-A12 Reverse lights 67-W9 License plate 67-W9 Of course, you need to make sure the electrical connections in your car are in good shape. Also, check the sockets of the side markers. They can and WILL get rusty. I have some replacements sitting in my garage. They will go on my car VERY soon.1 point1 pointUpdate on this old but always pertinent post: As per @2377kn preference on his research on green LEDs, I got hold of some of the same bulbs from Amazon (bulb # 6 in his post) and went back to green lighting on my gauges in an effort to dial back the "mod" in restomod inside the cabin. Along with the Datsun Comp steering wheel and the original shift knob on the short-shifter shaft, the green instrument lighting fits right in and everything looks proper.

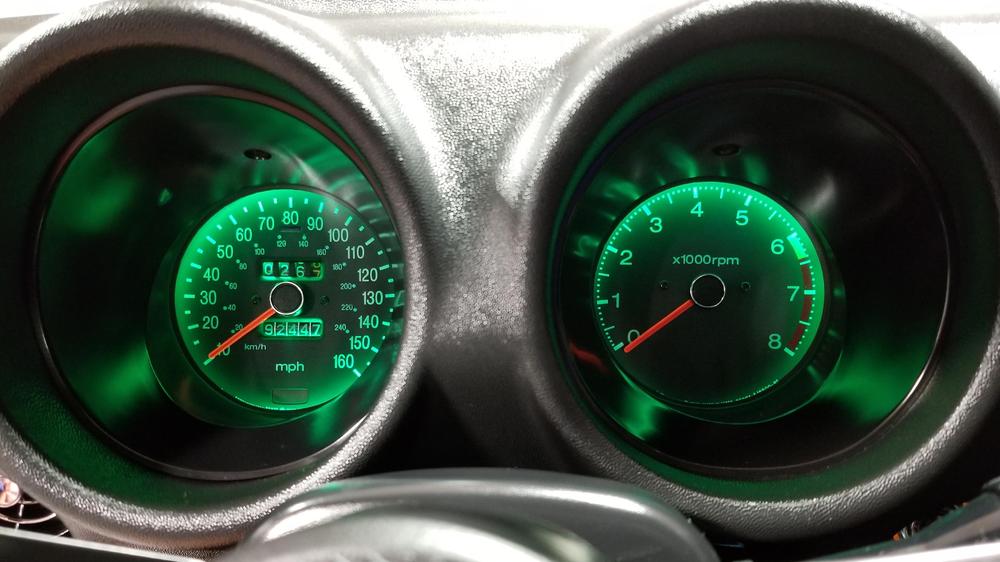
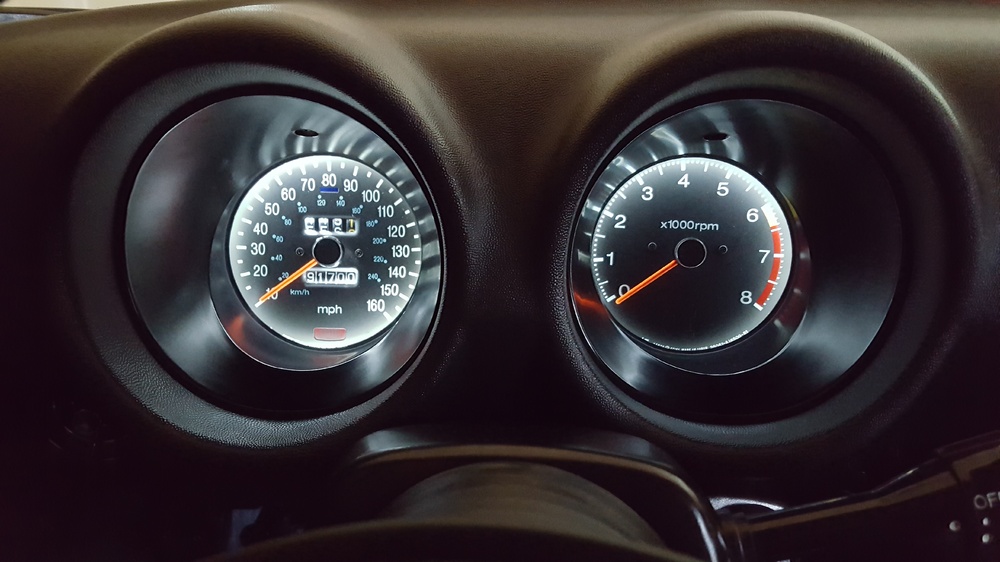
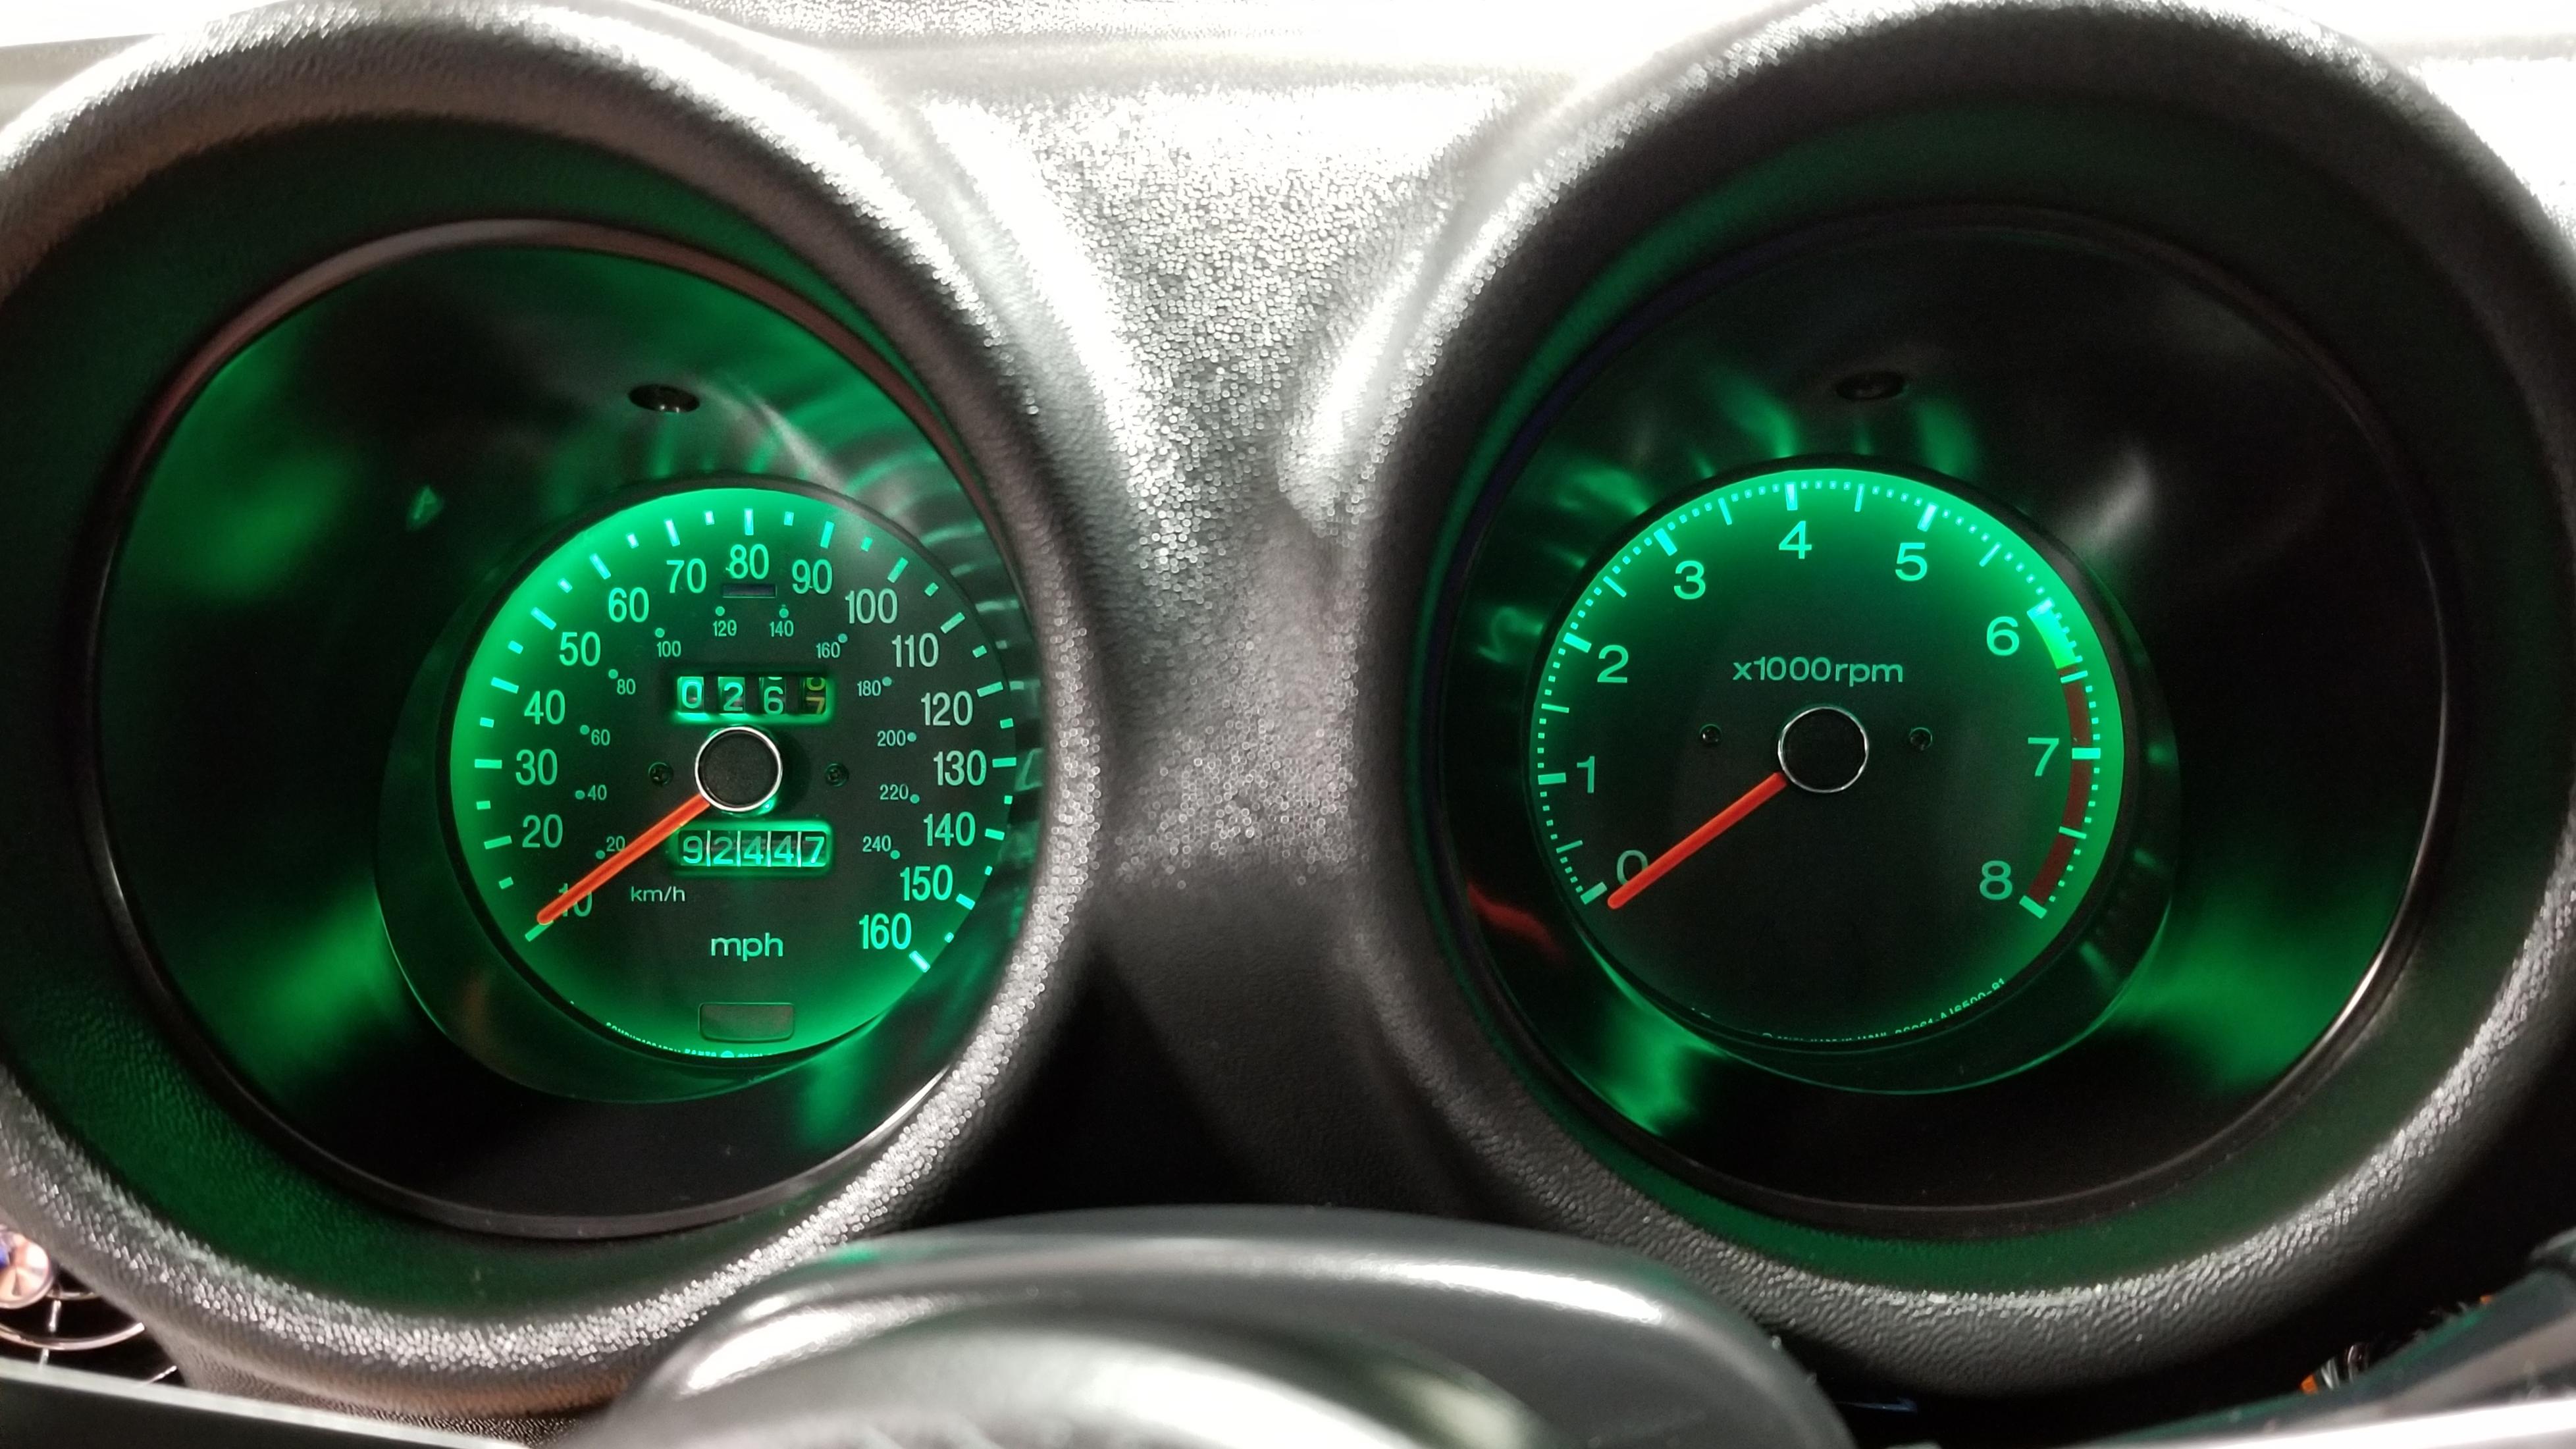
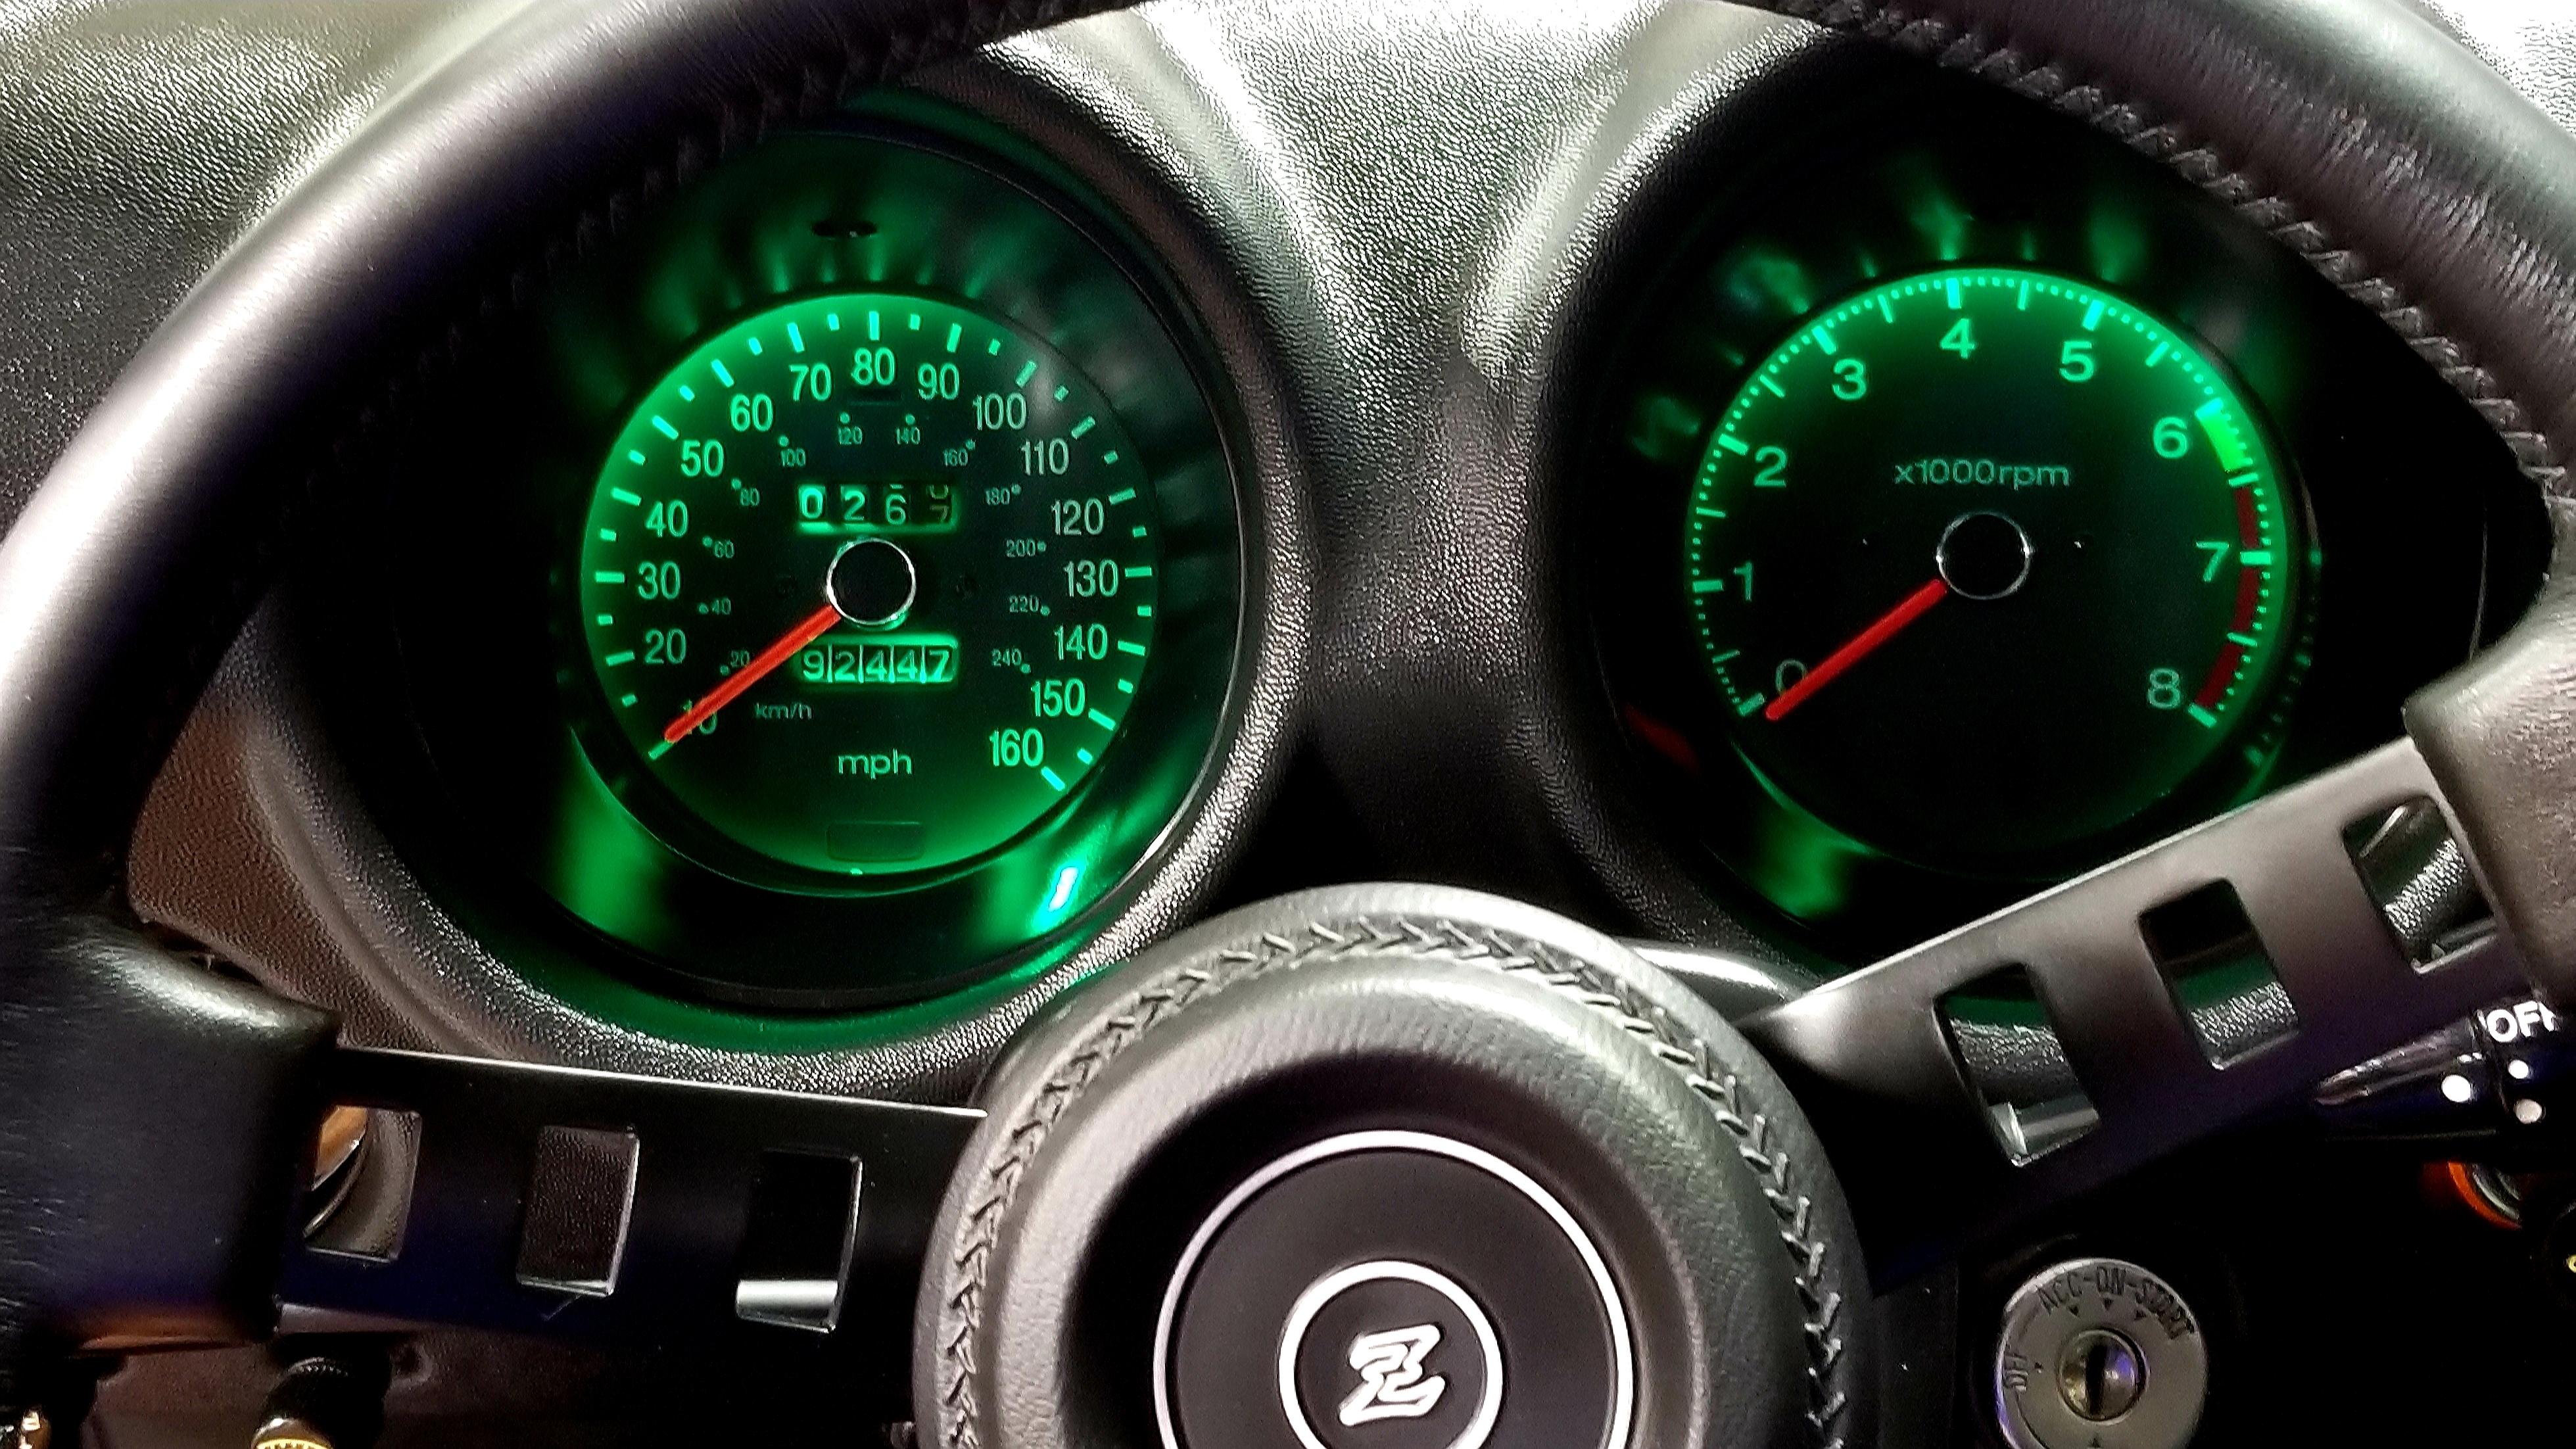
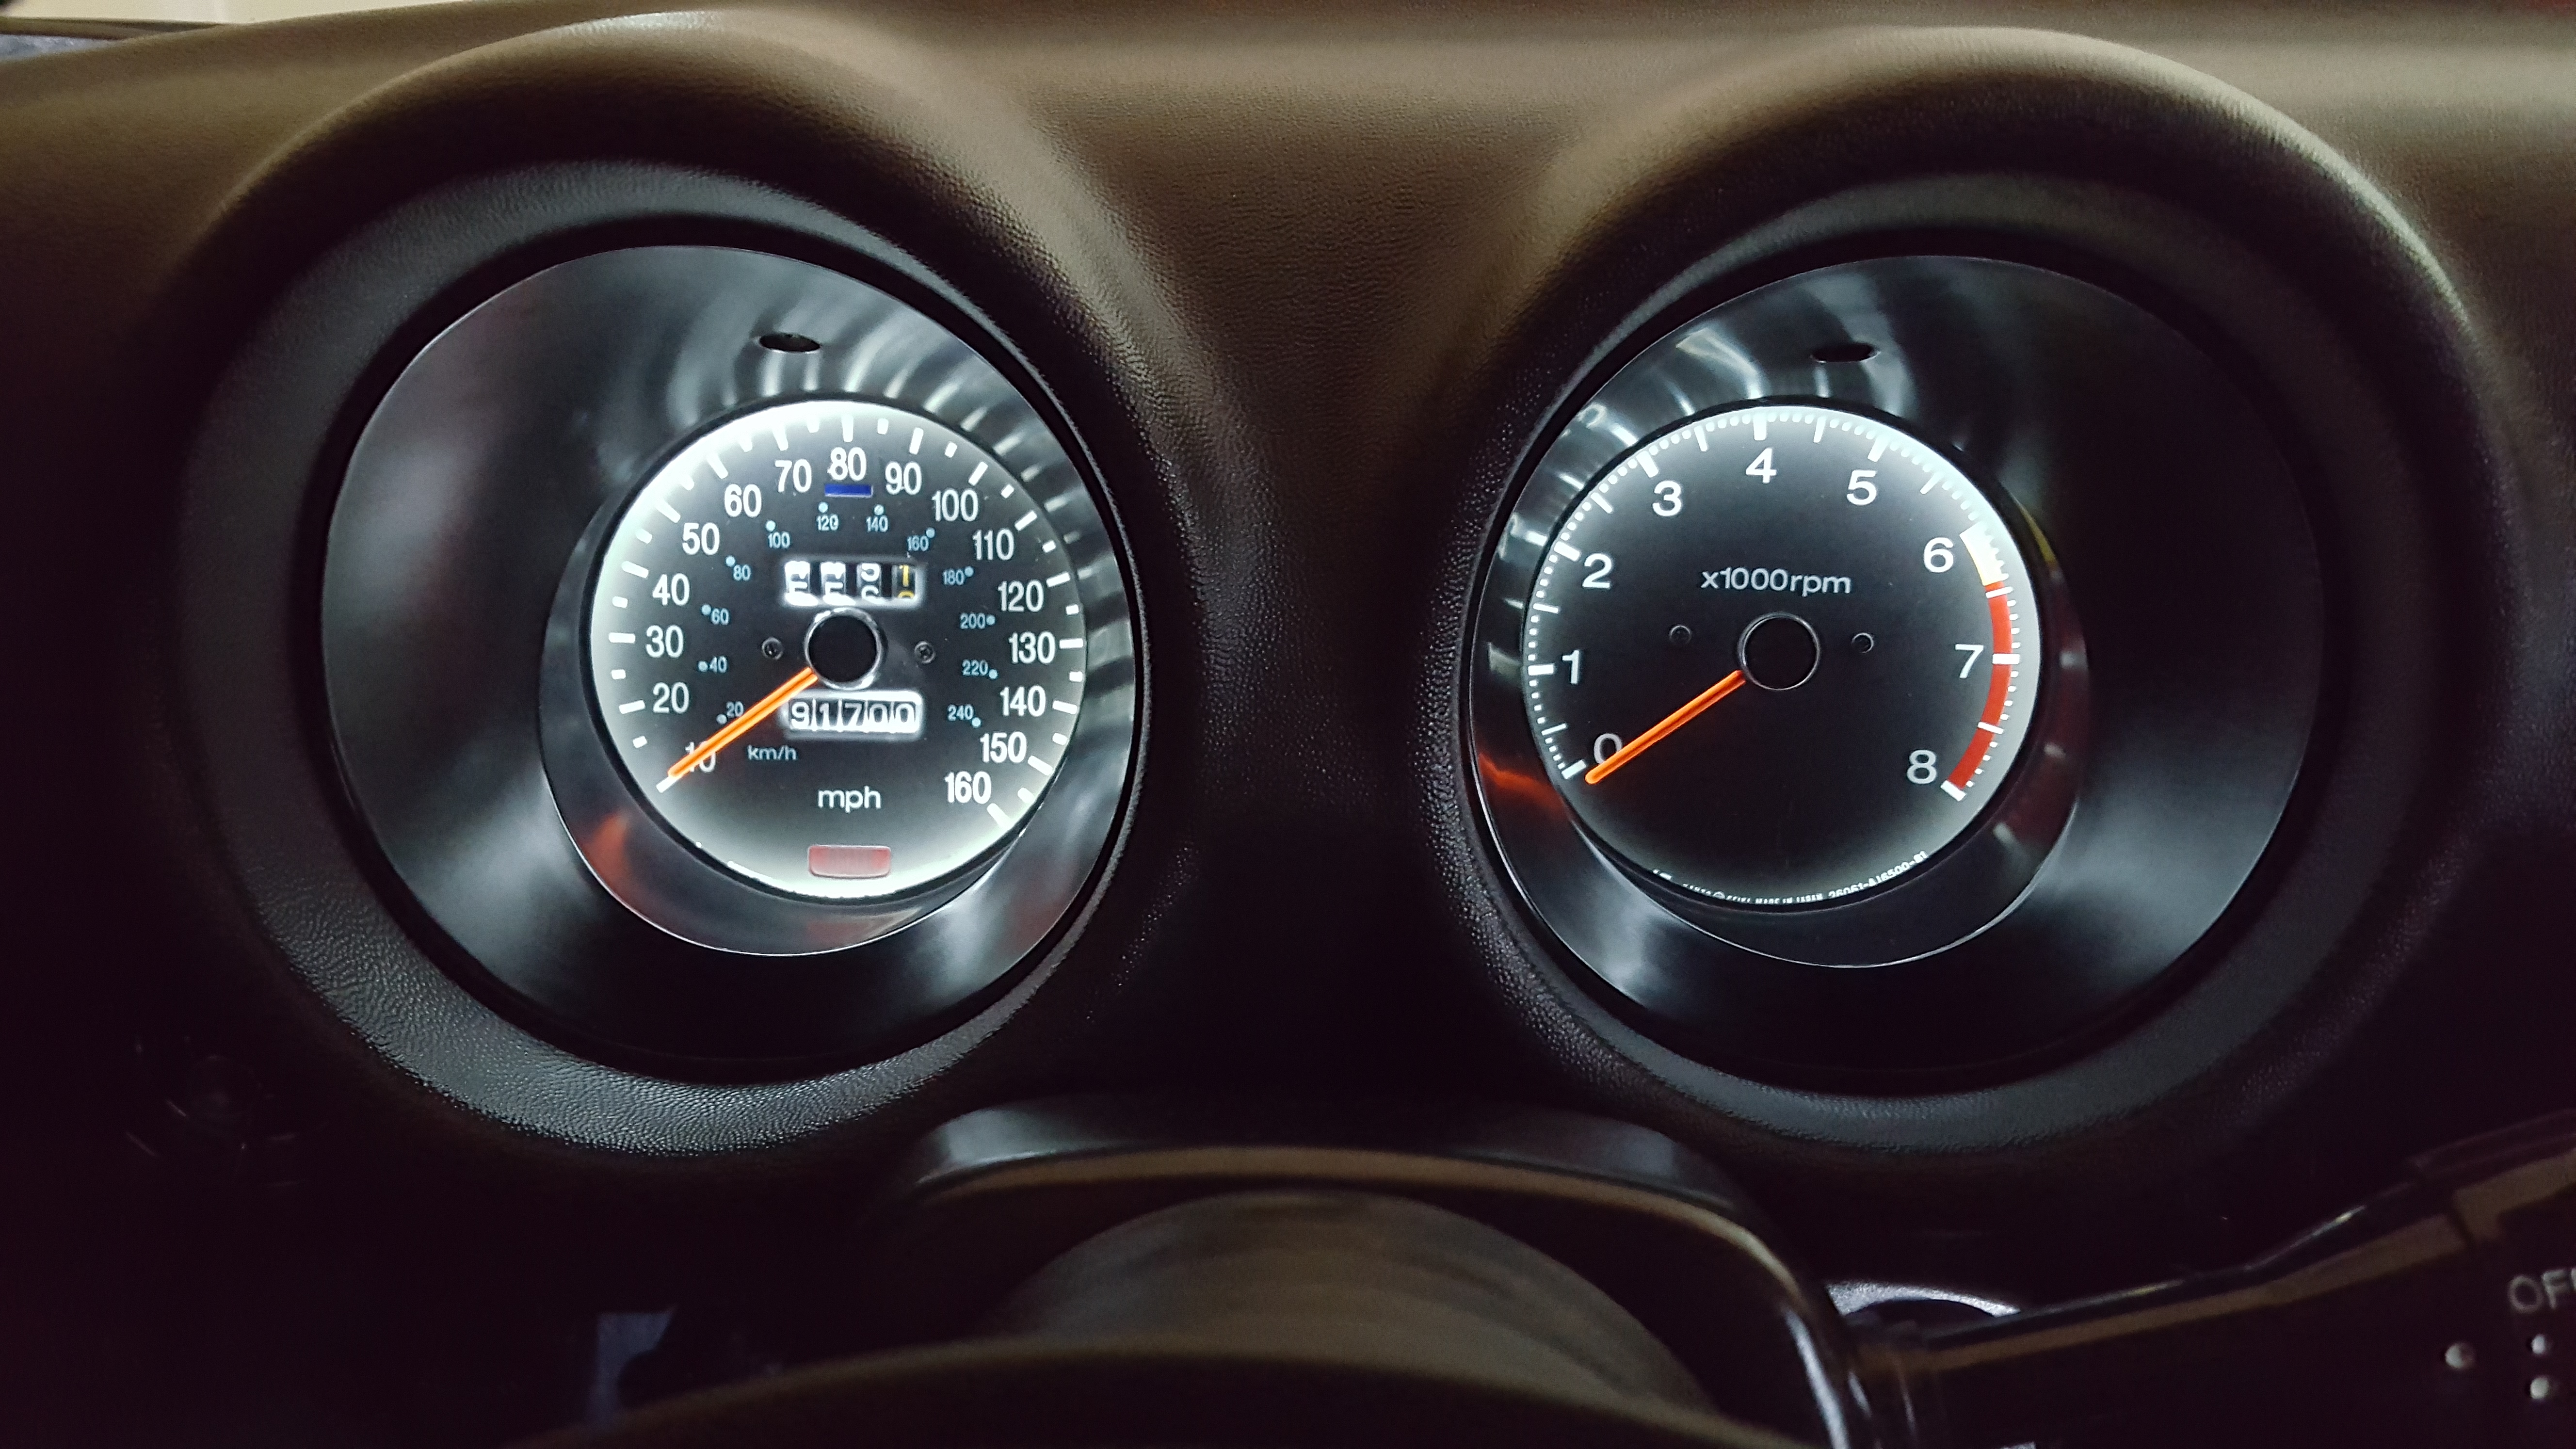
 1 point1 pointMe too. I didn't want halos around the gauges. I just wanted even brightness and maybe just a little brighter than stock. I reloaded a couple (crappy camera) pics of mine: Obey the speedo with no dead spot!!1 point1 pointI guess I am old school. I just like to only see the markings on the instrument illuminated, not the face or the enclosure. Like this: Not this:
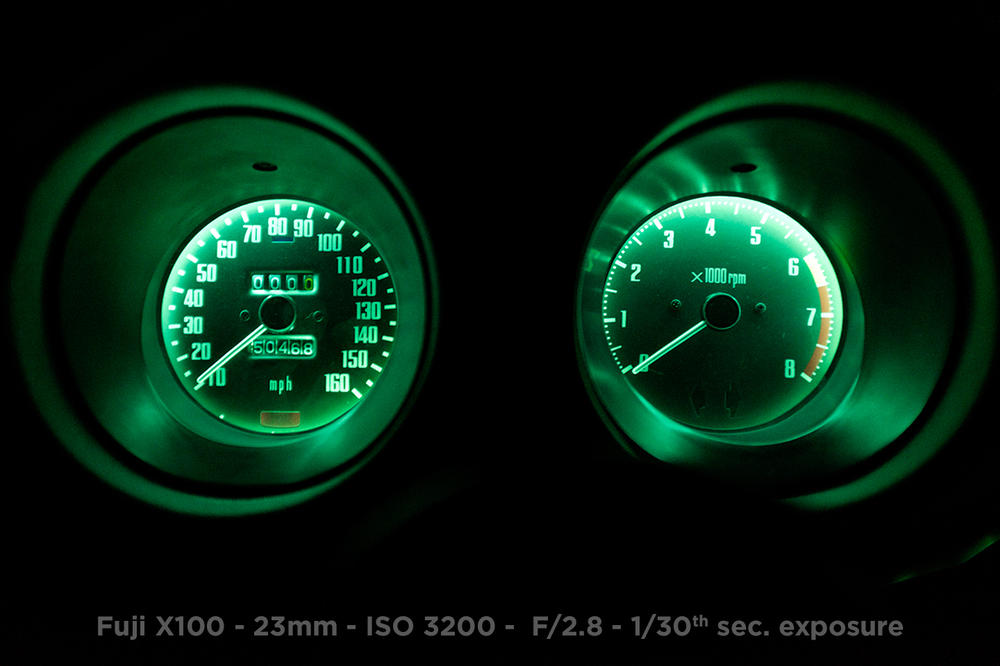
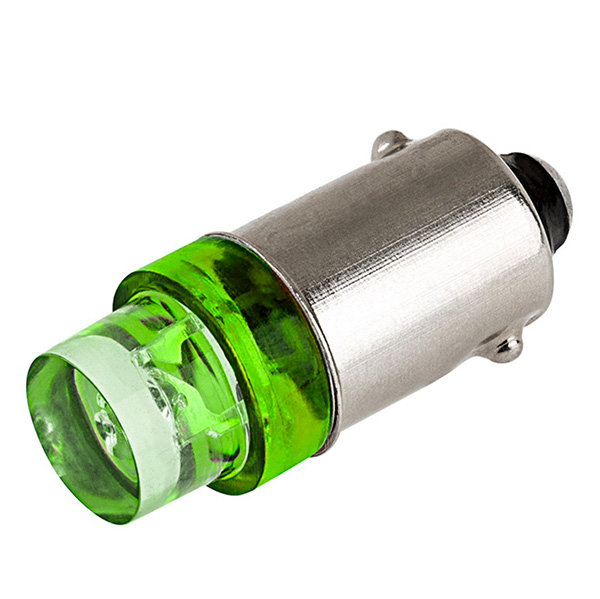
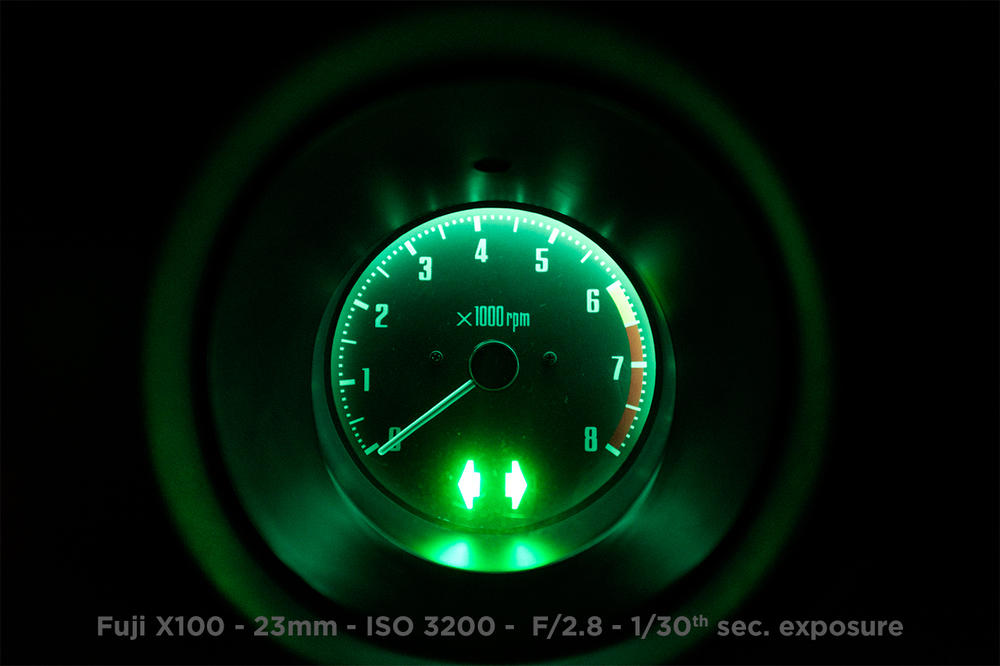
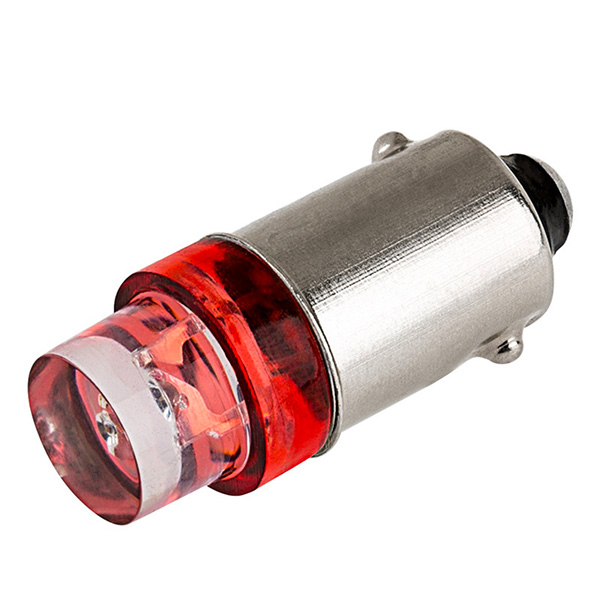
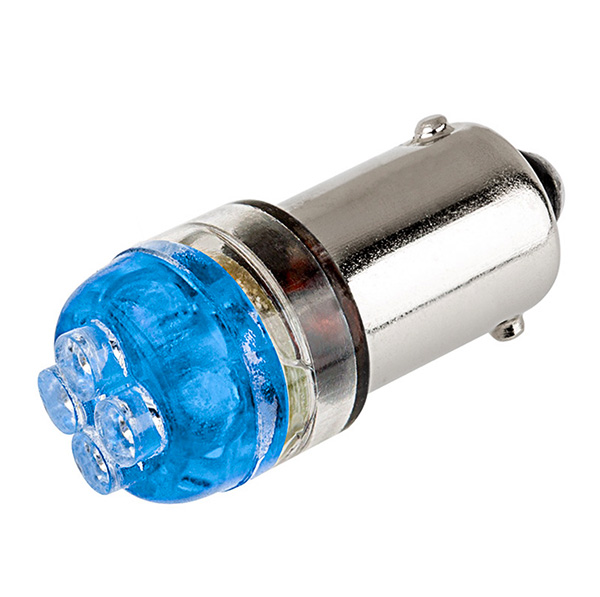
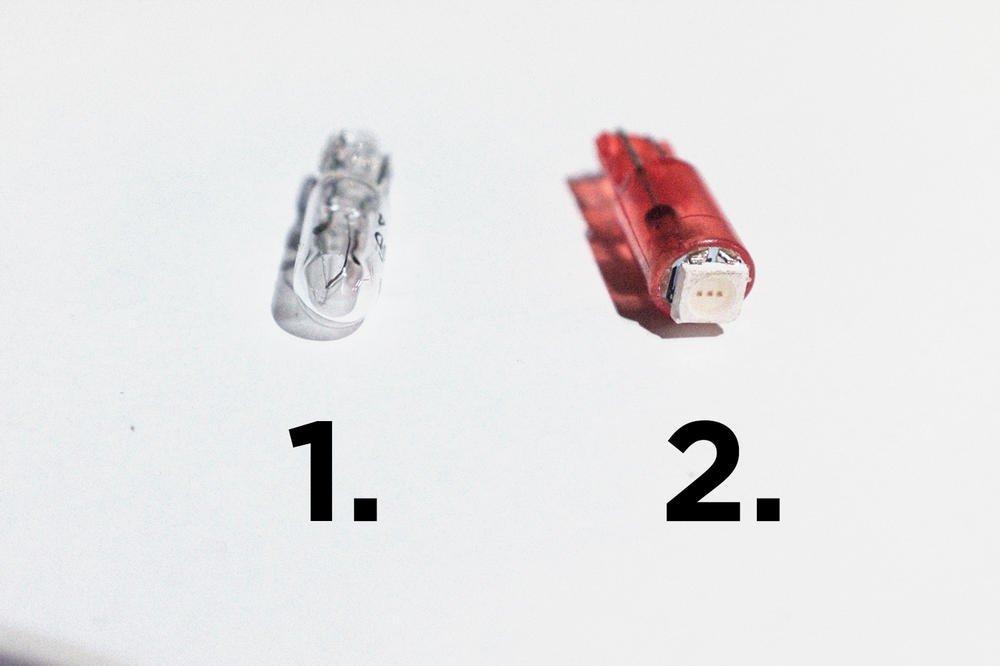
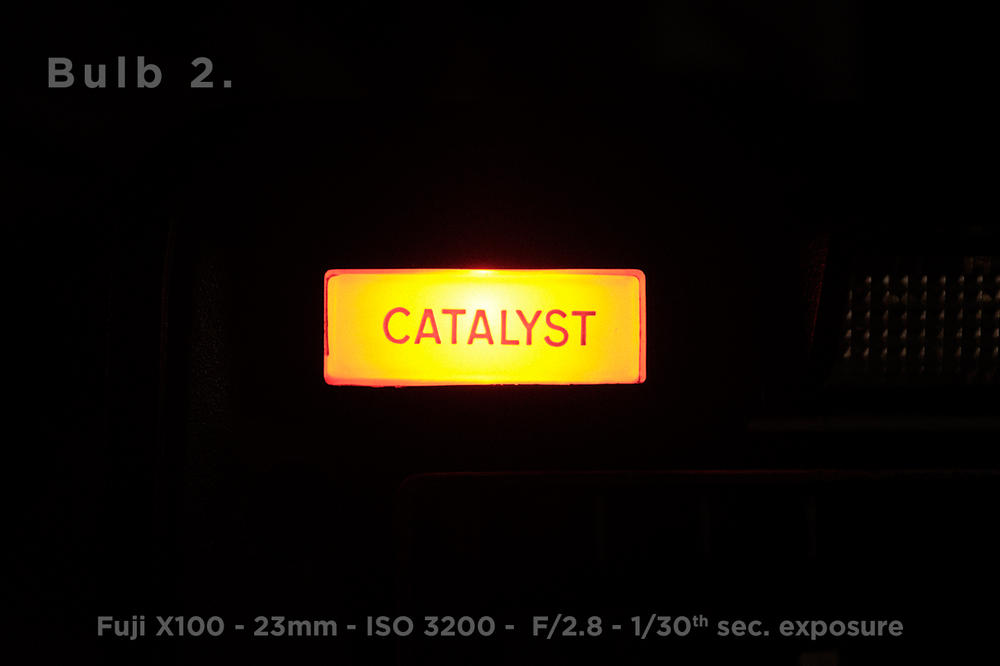
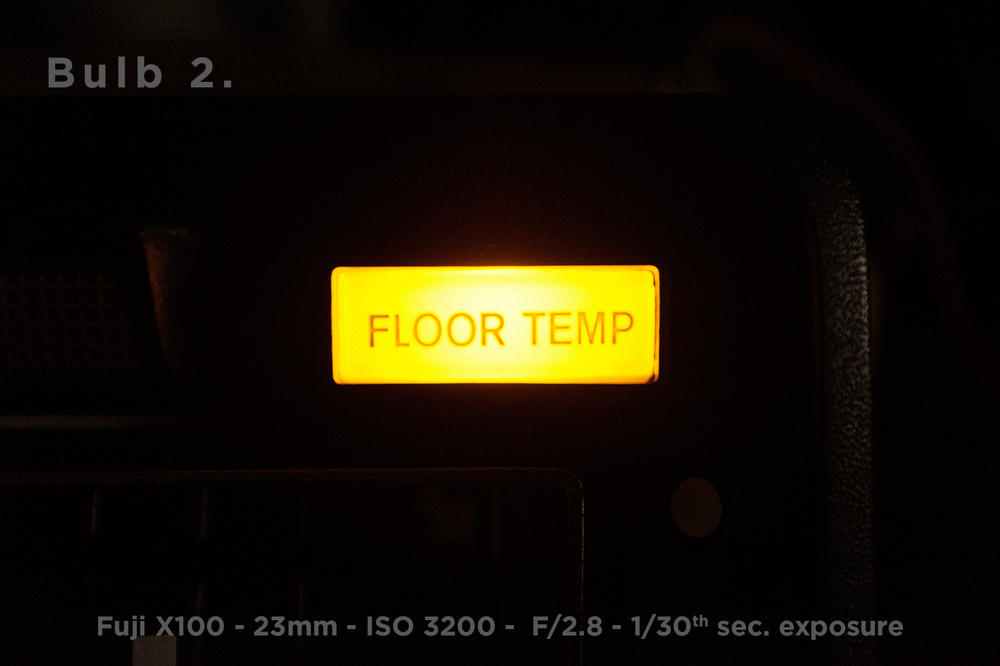
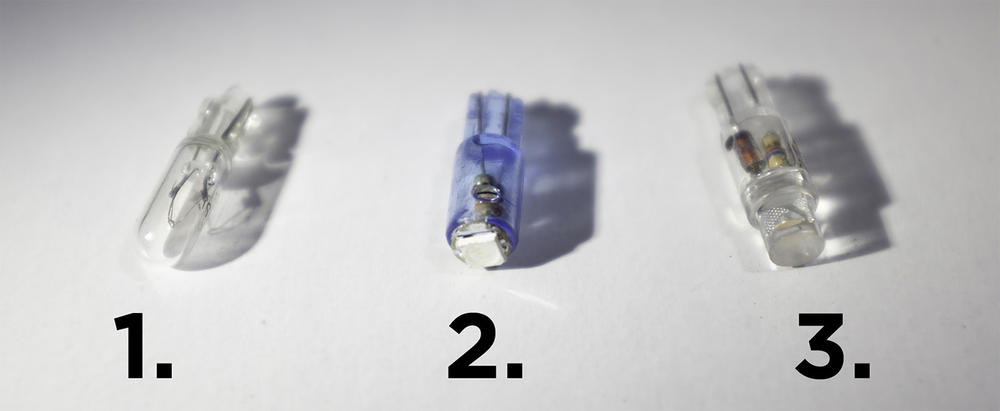
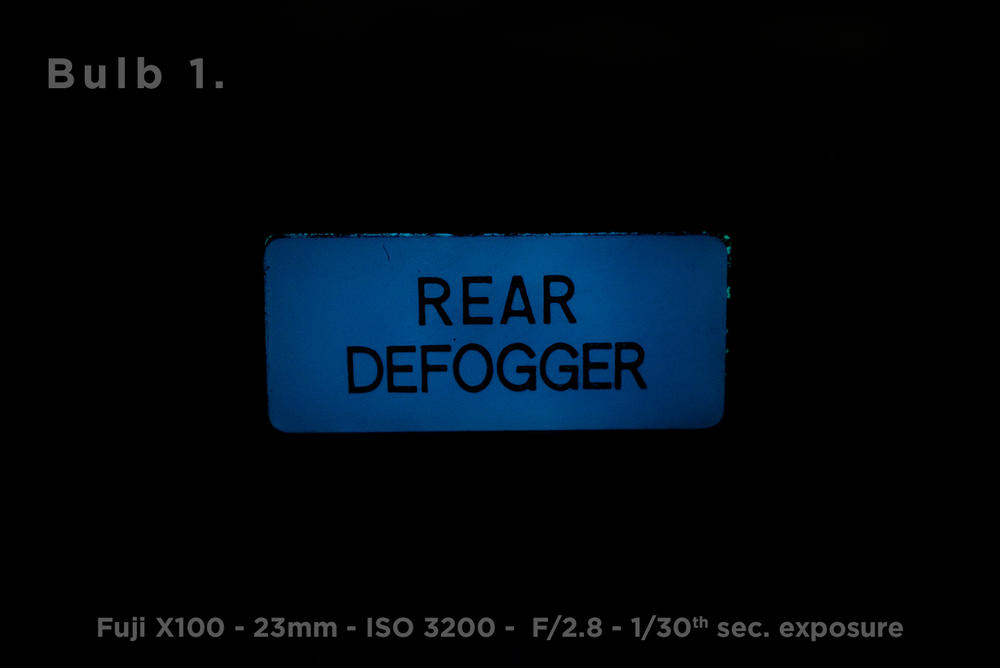
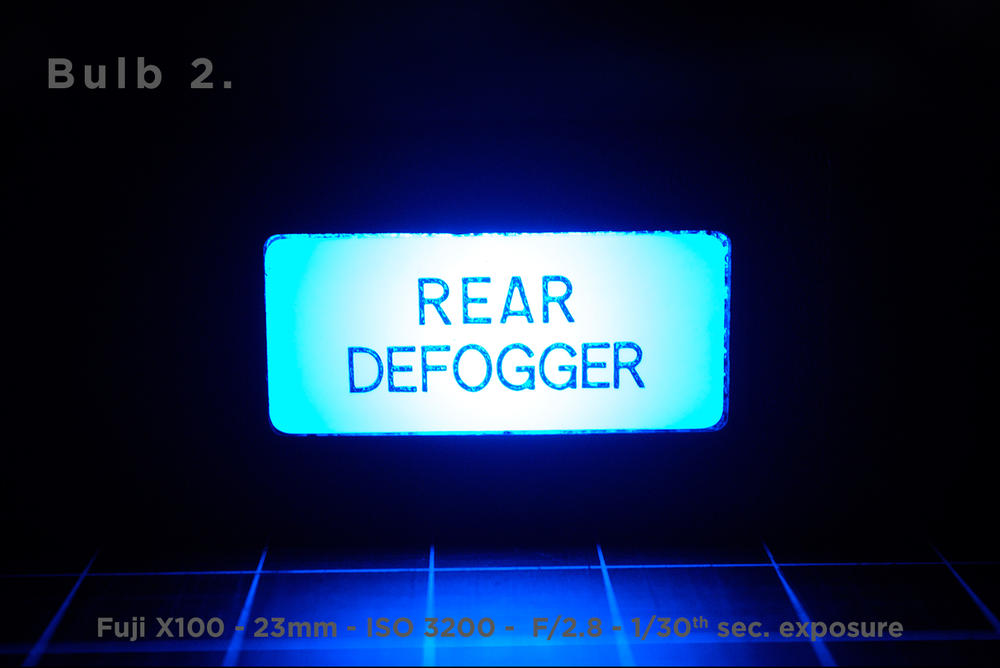
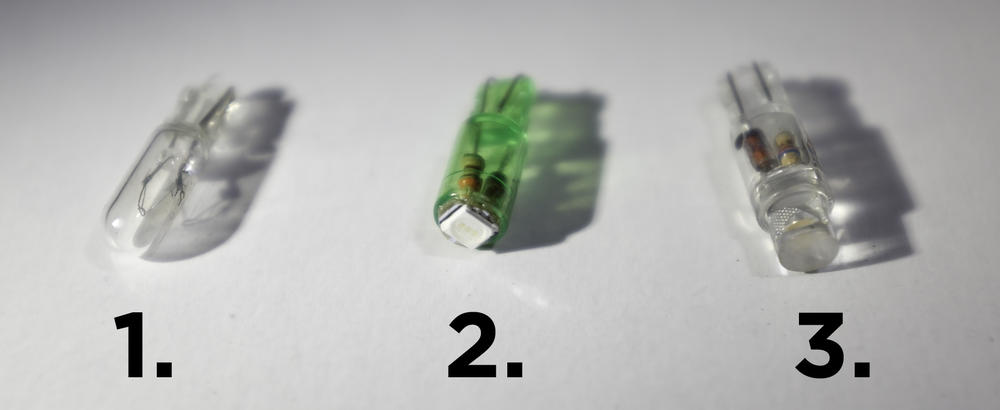
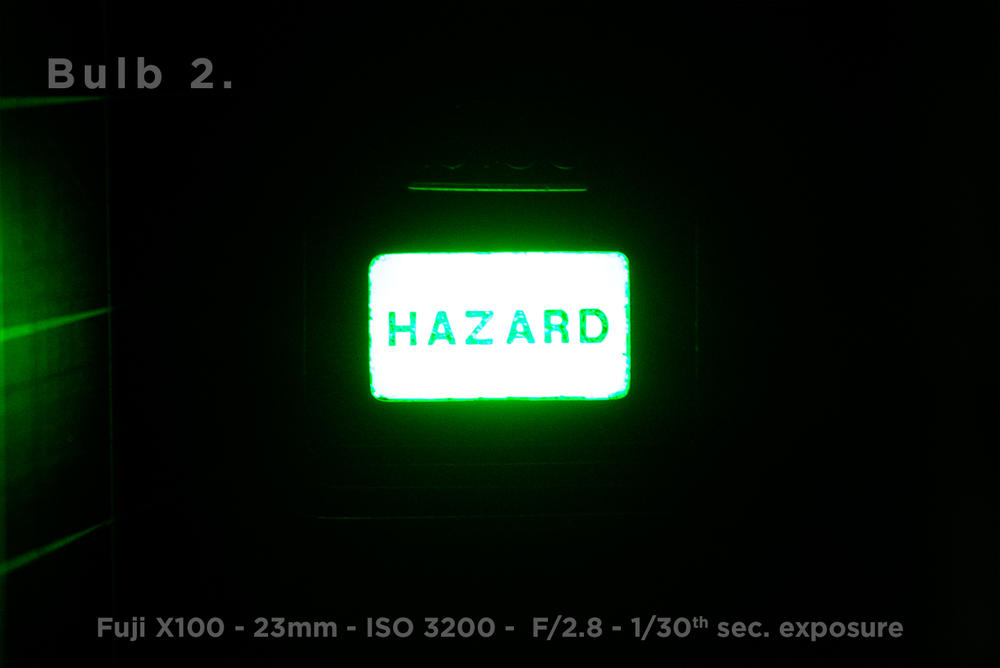
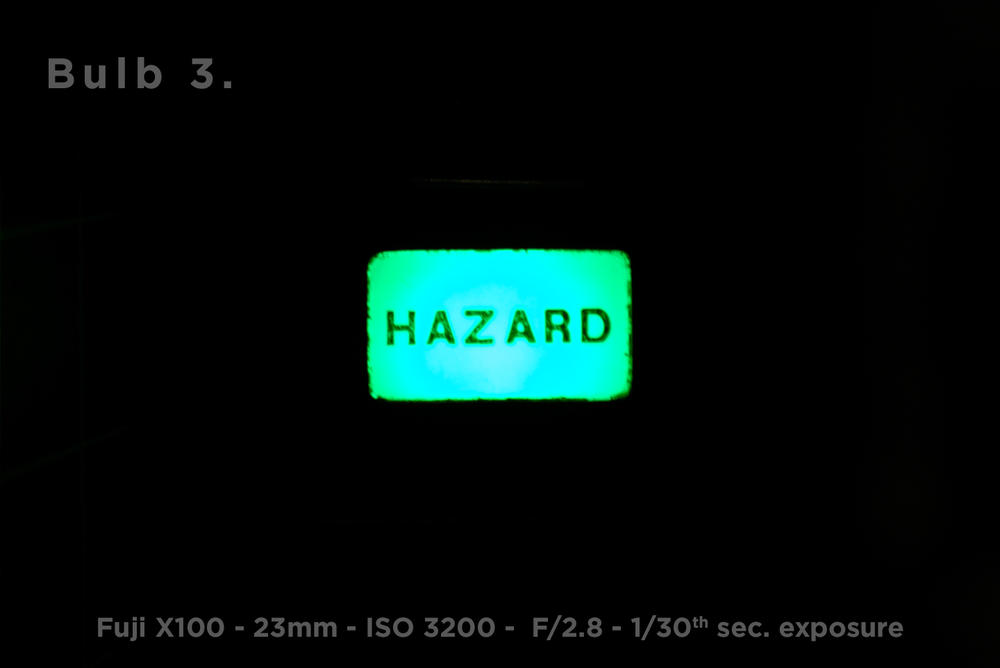
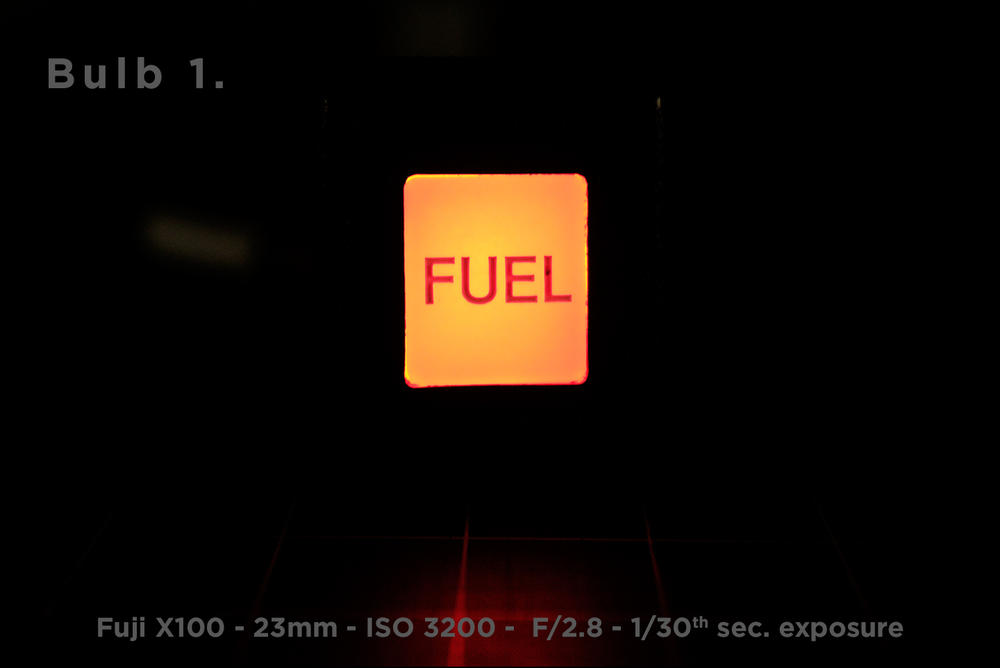
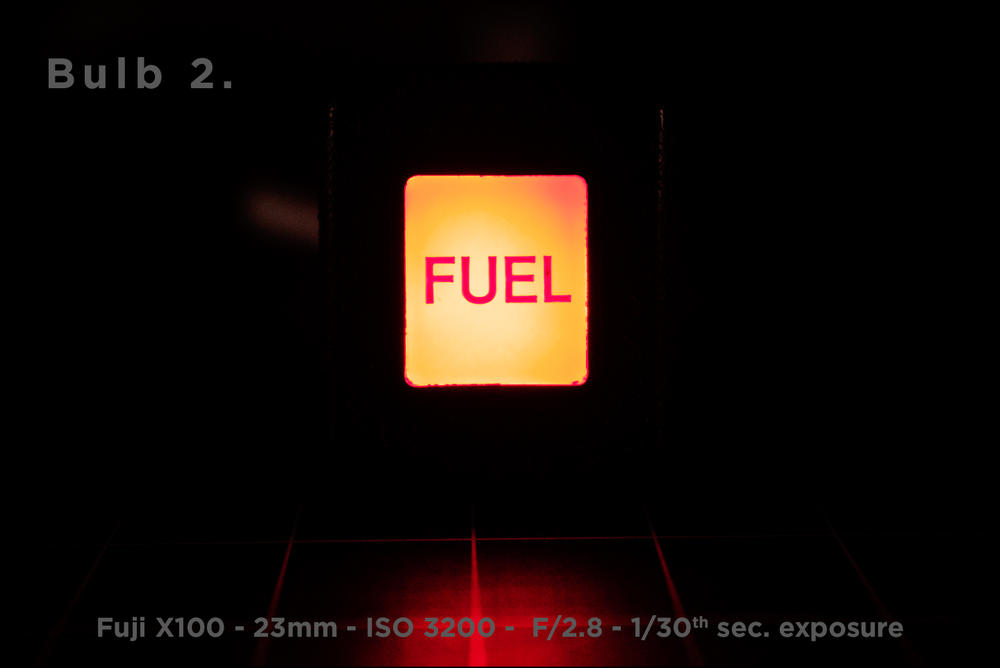
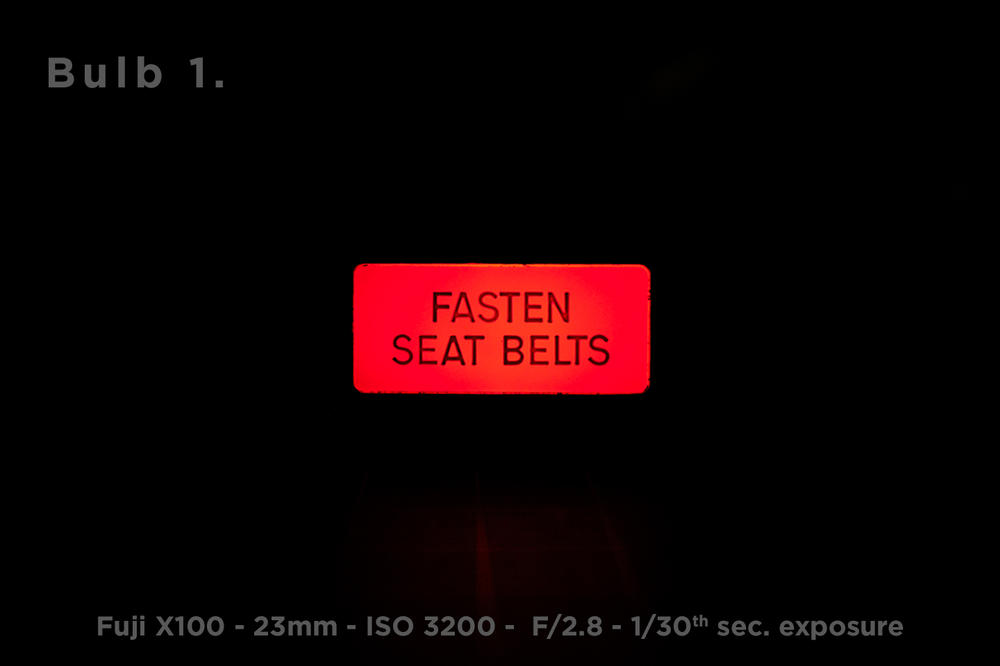
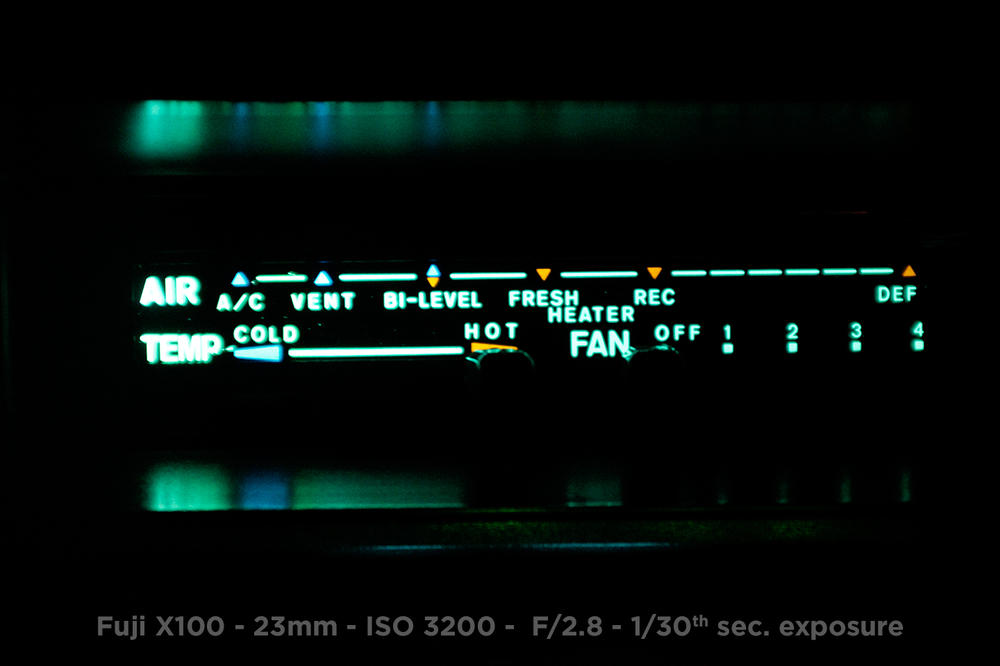
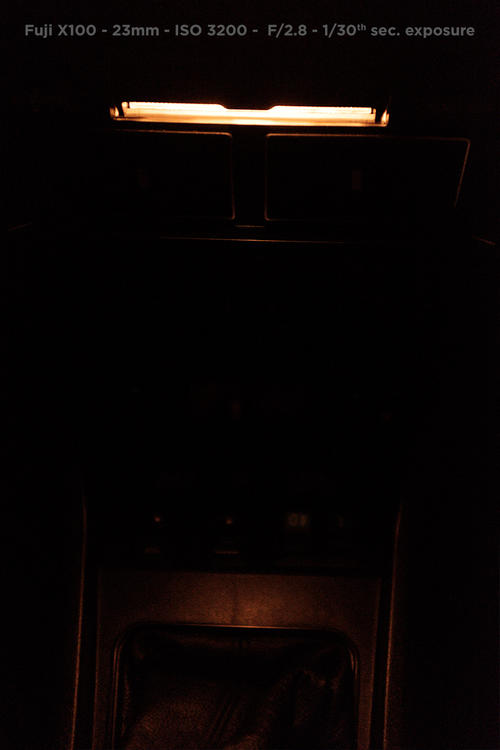
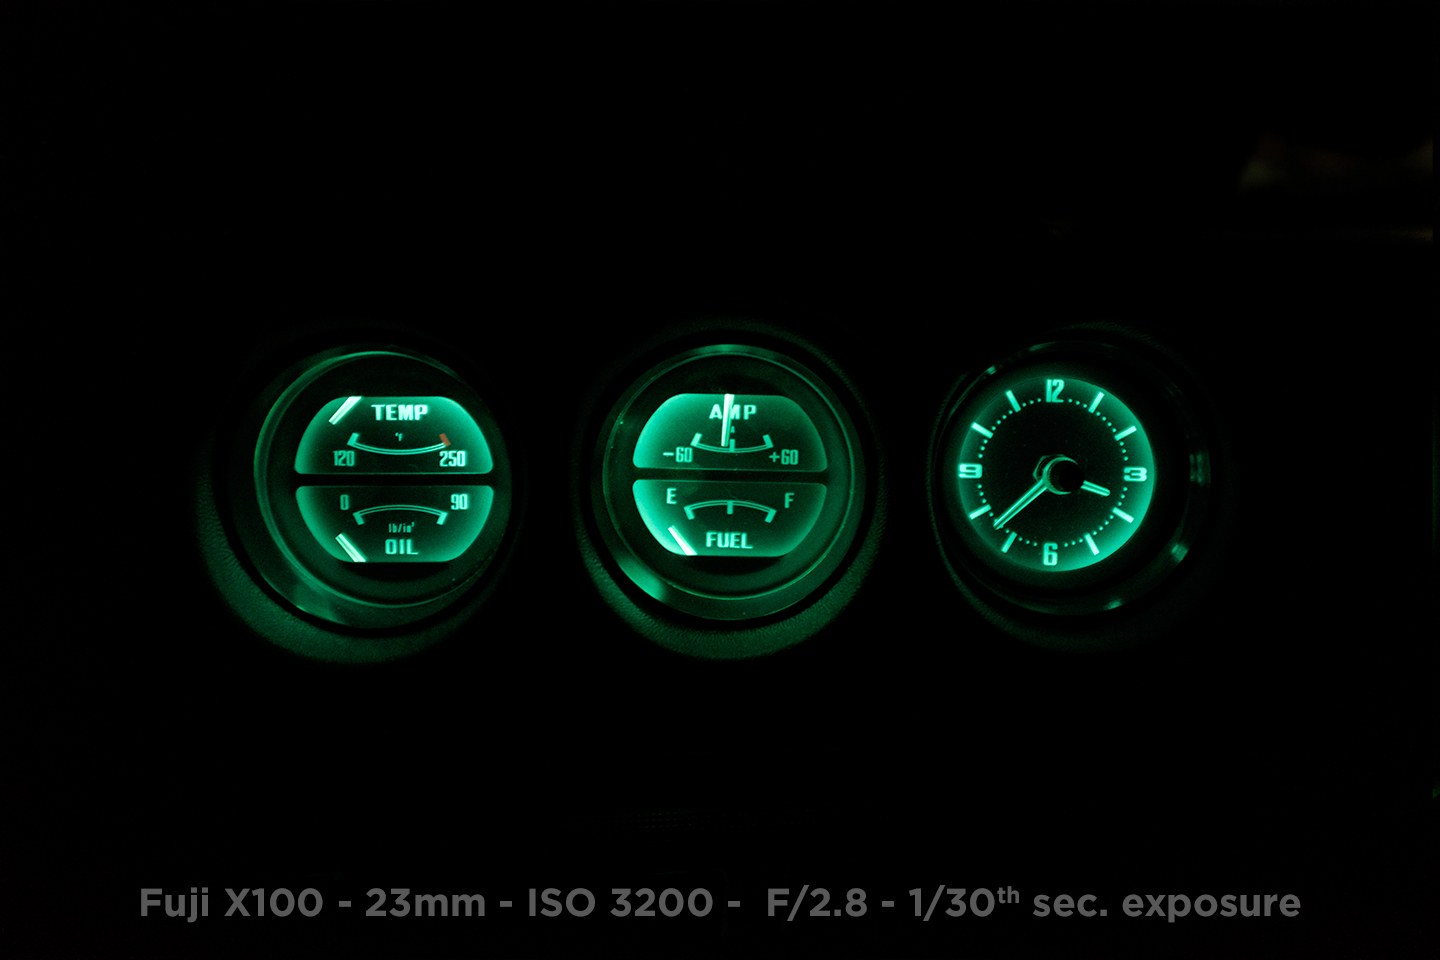
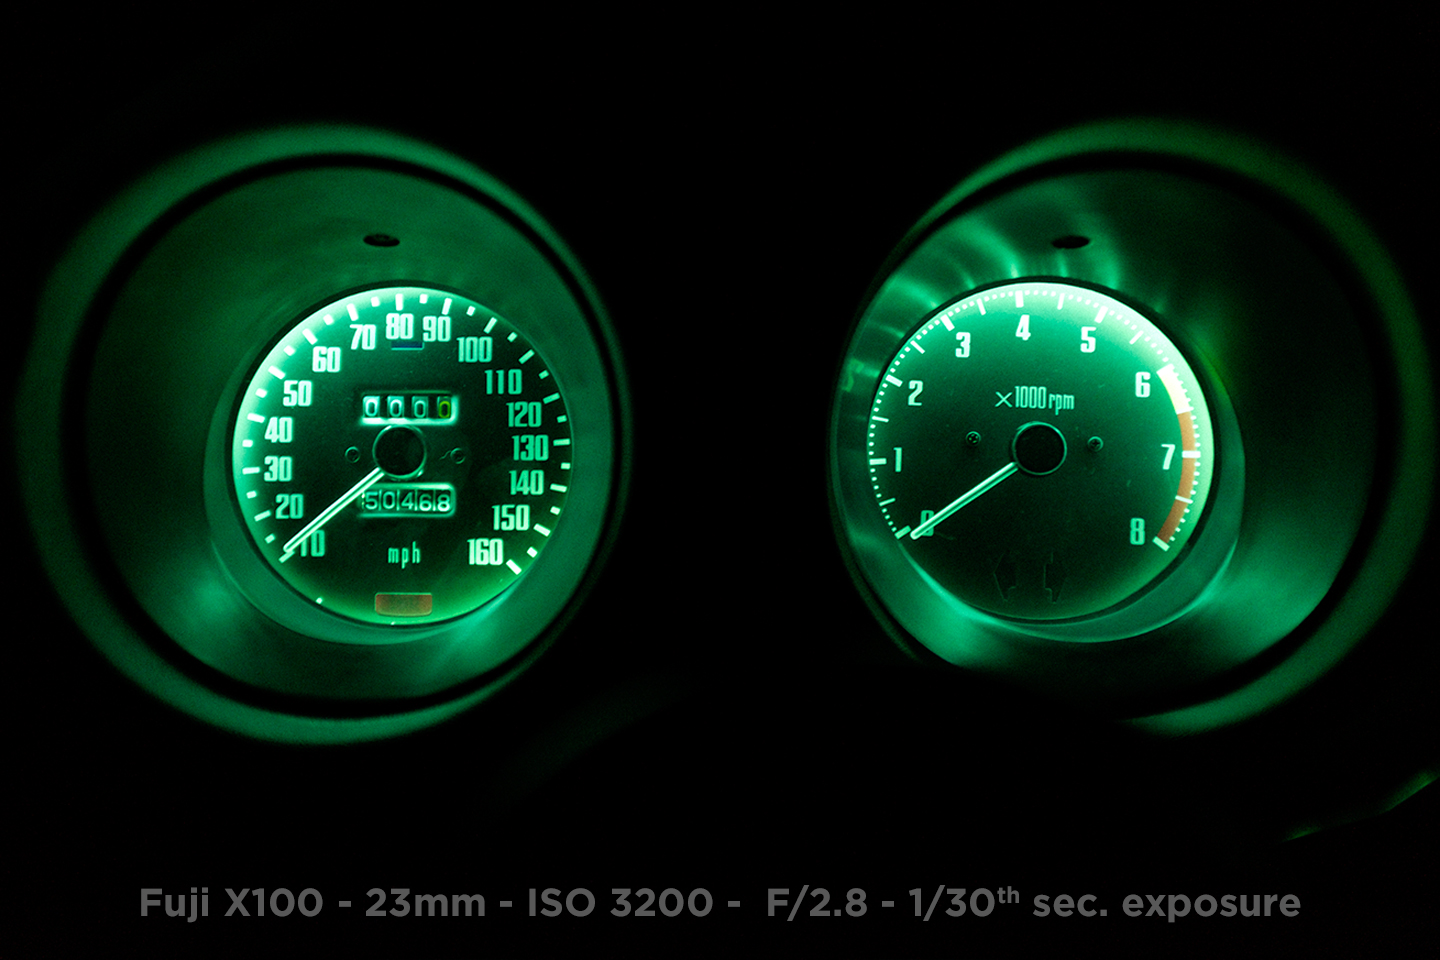
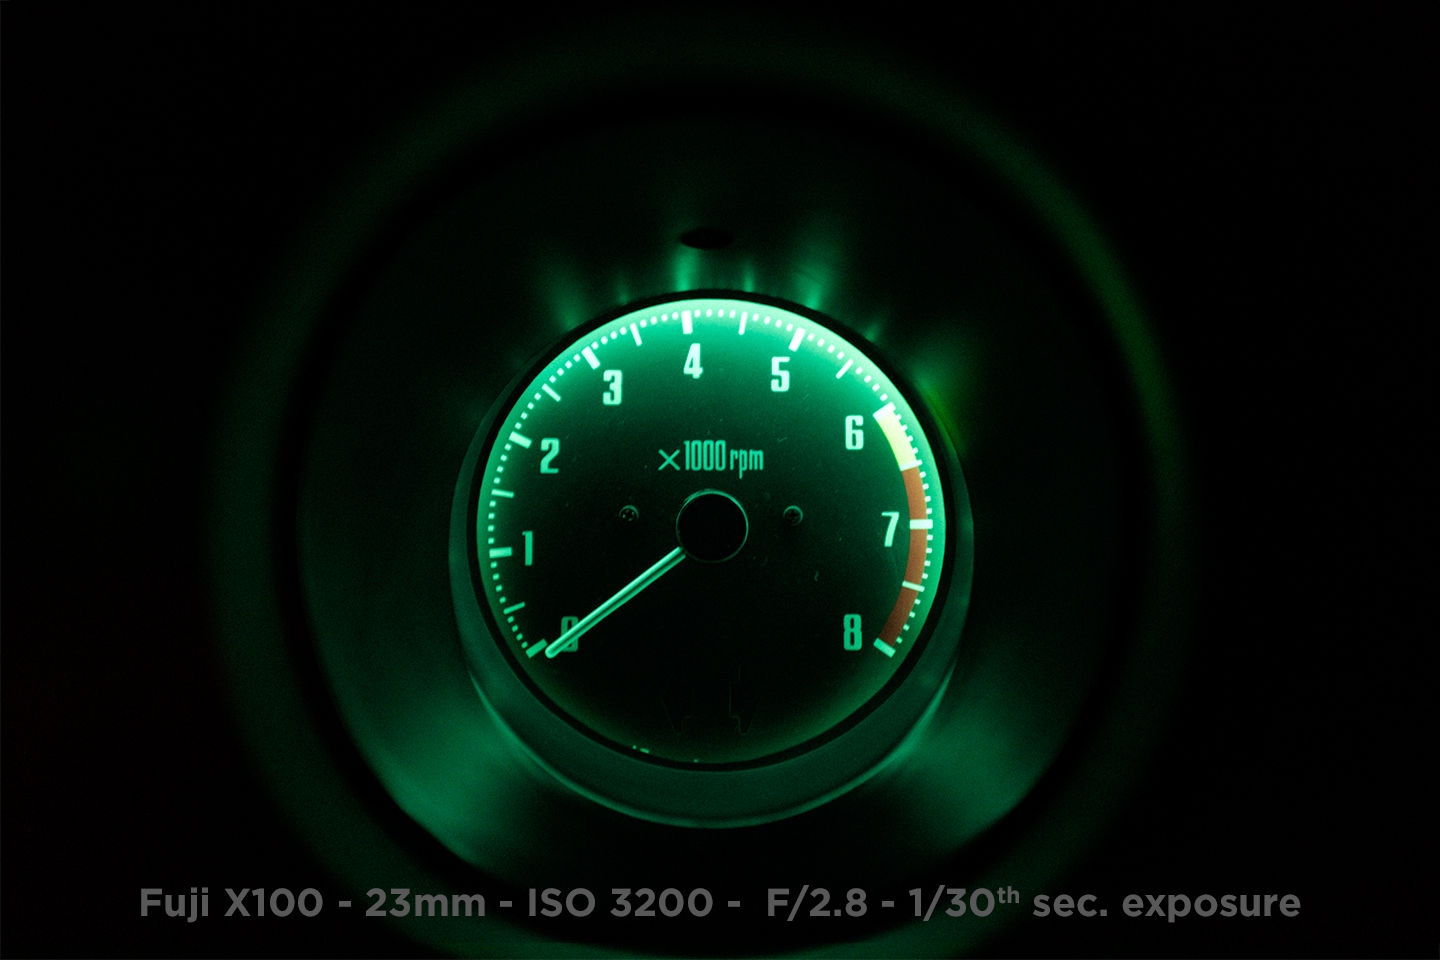
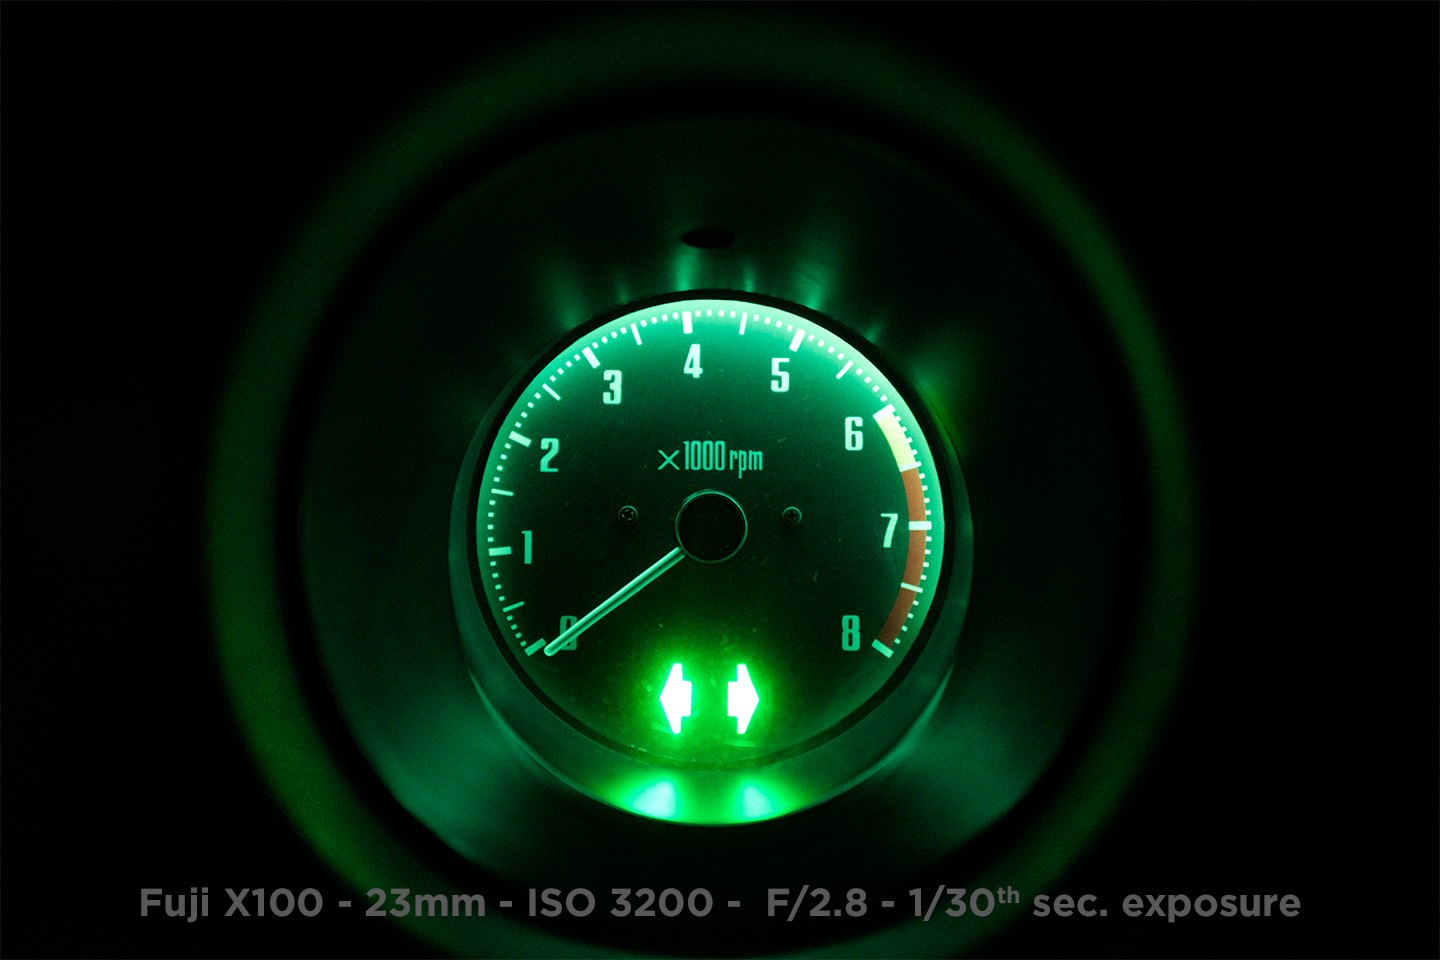
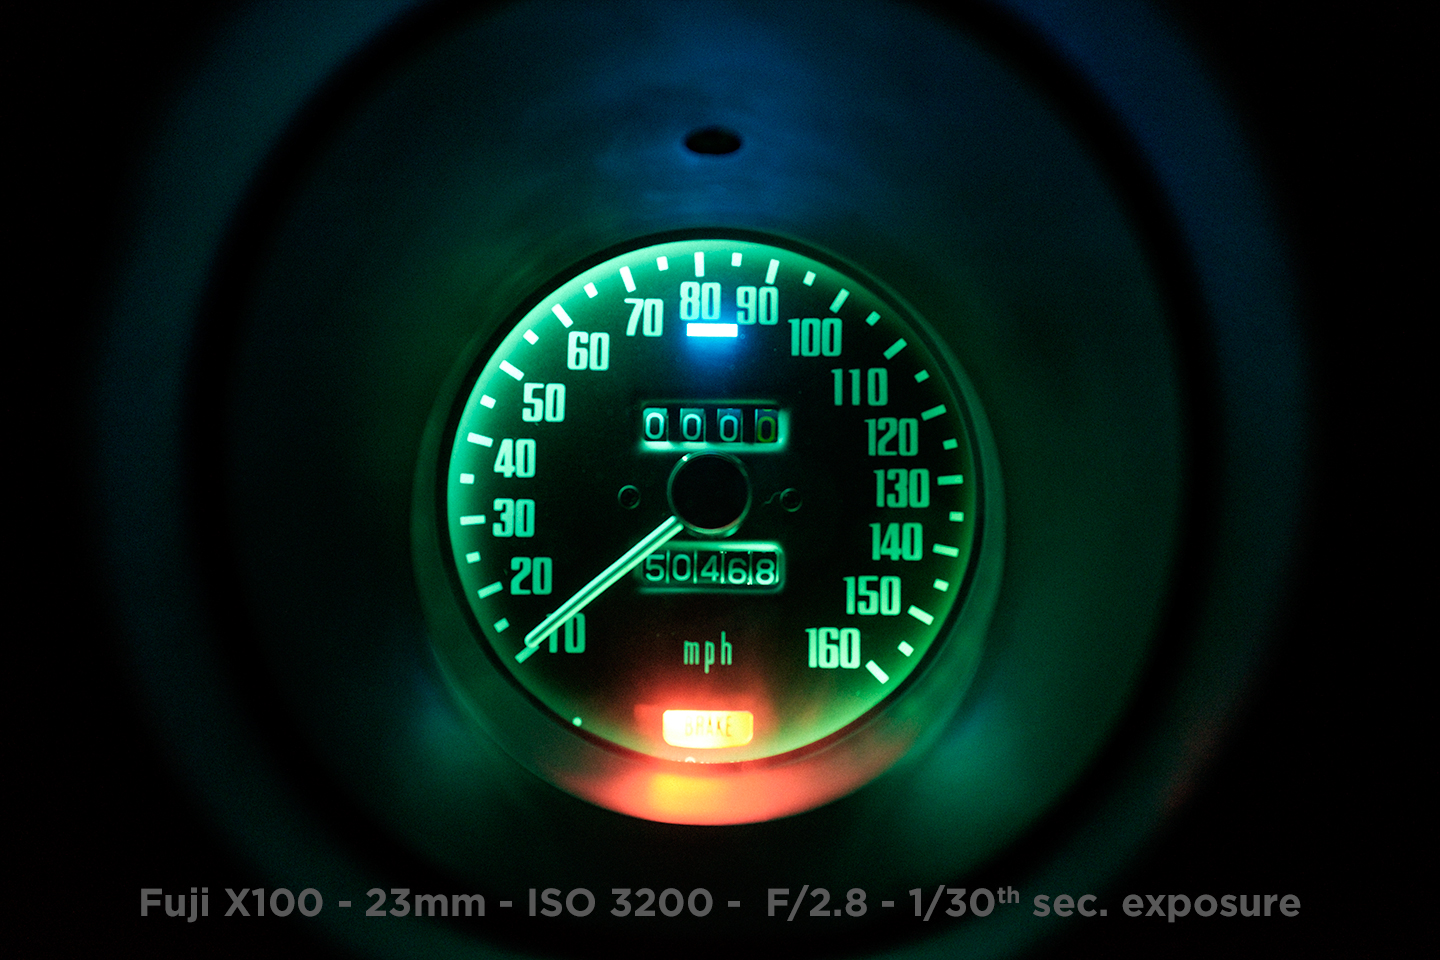
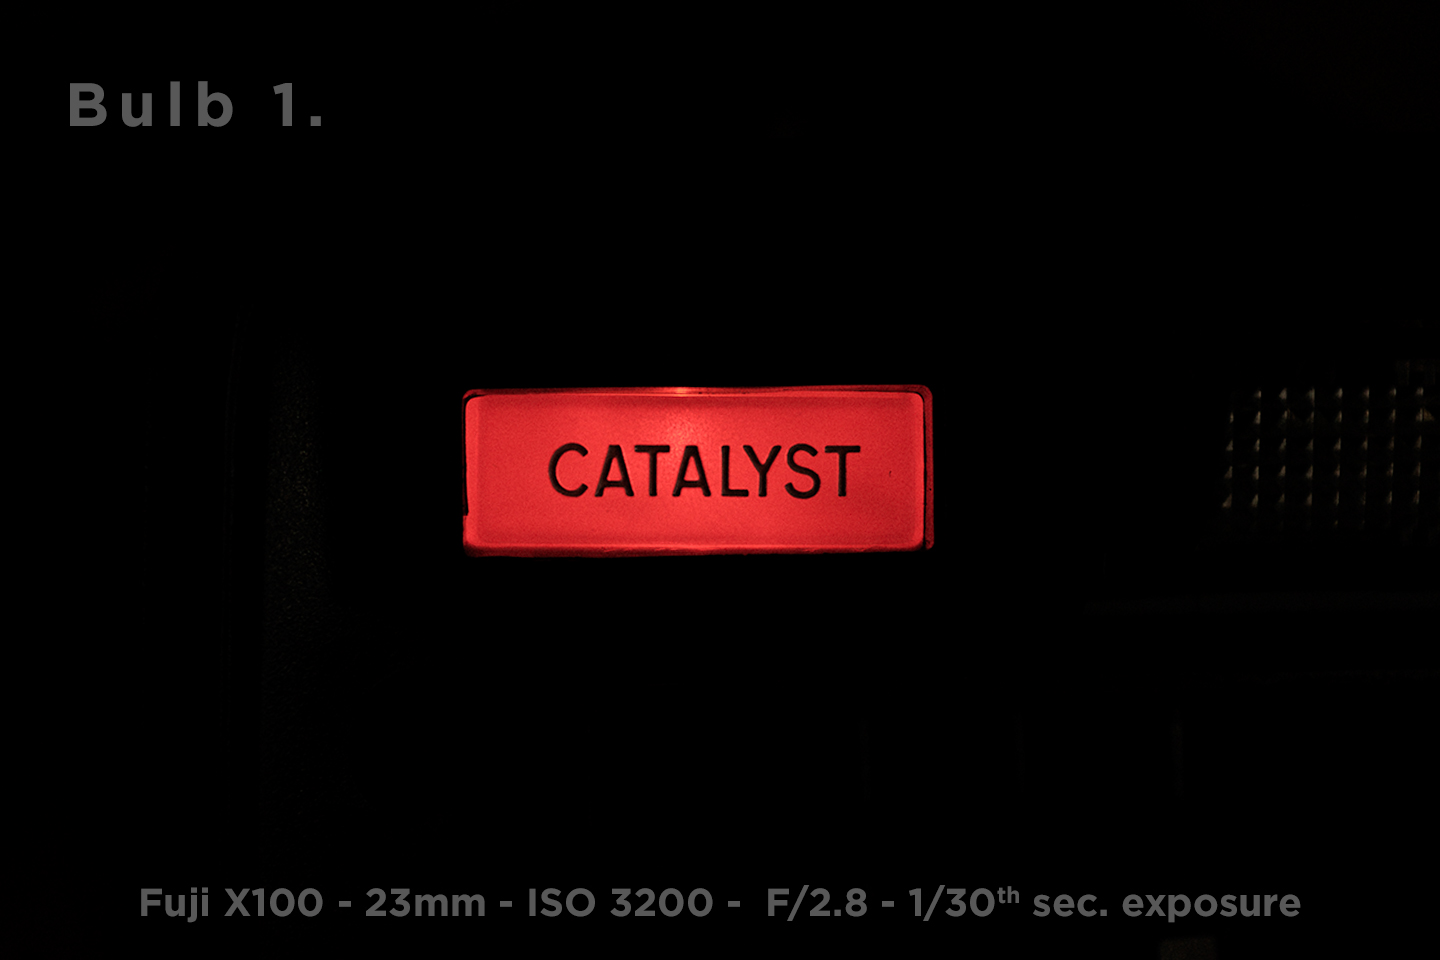
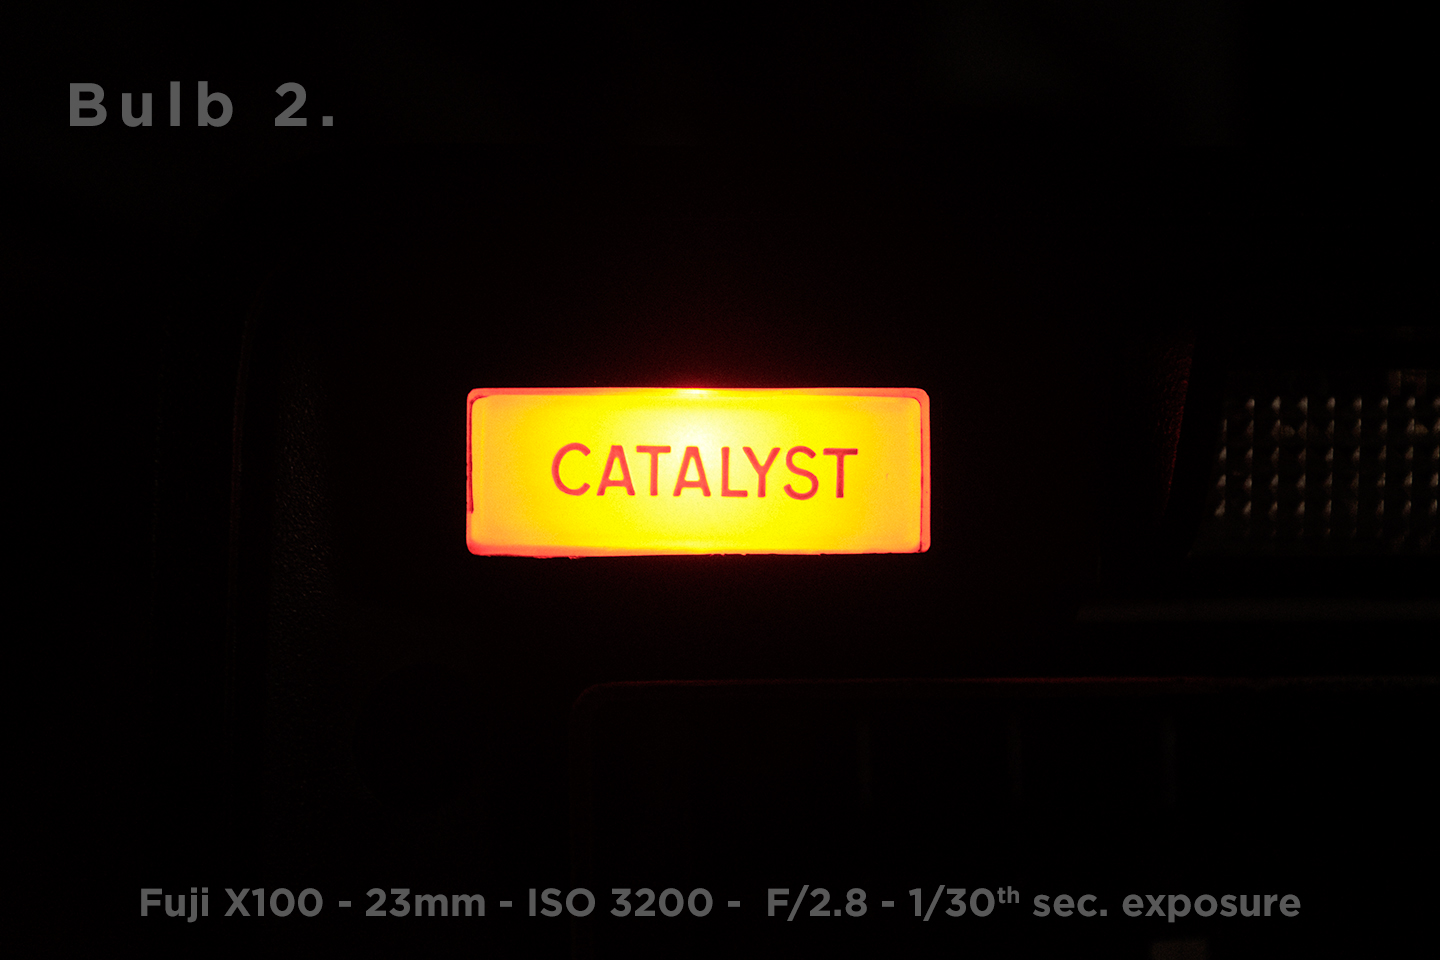
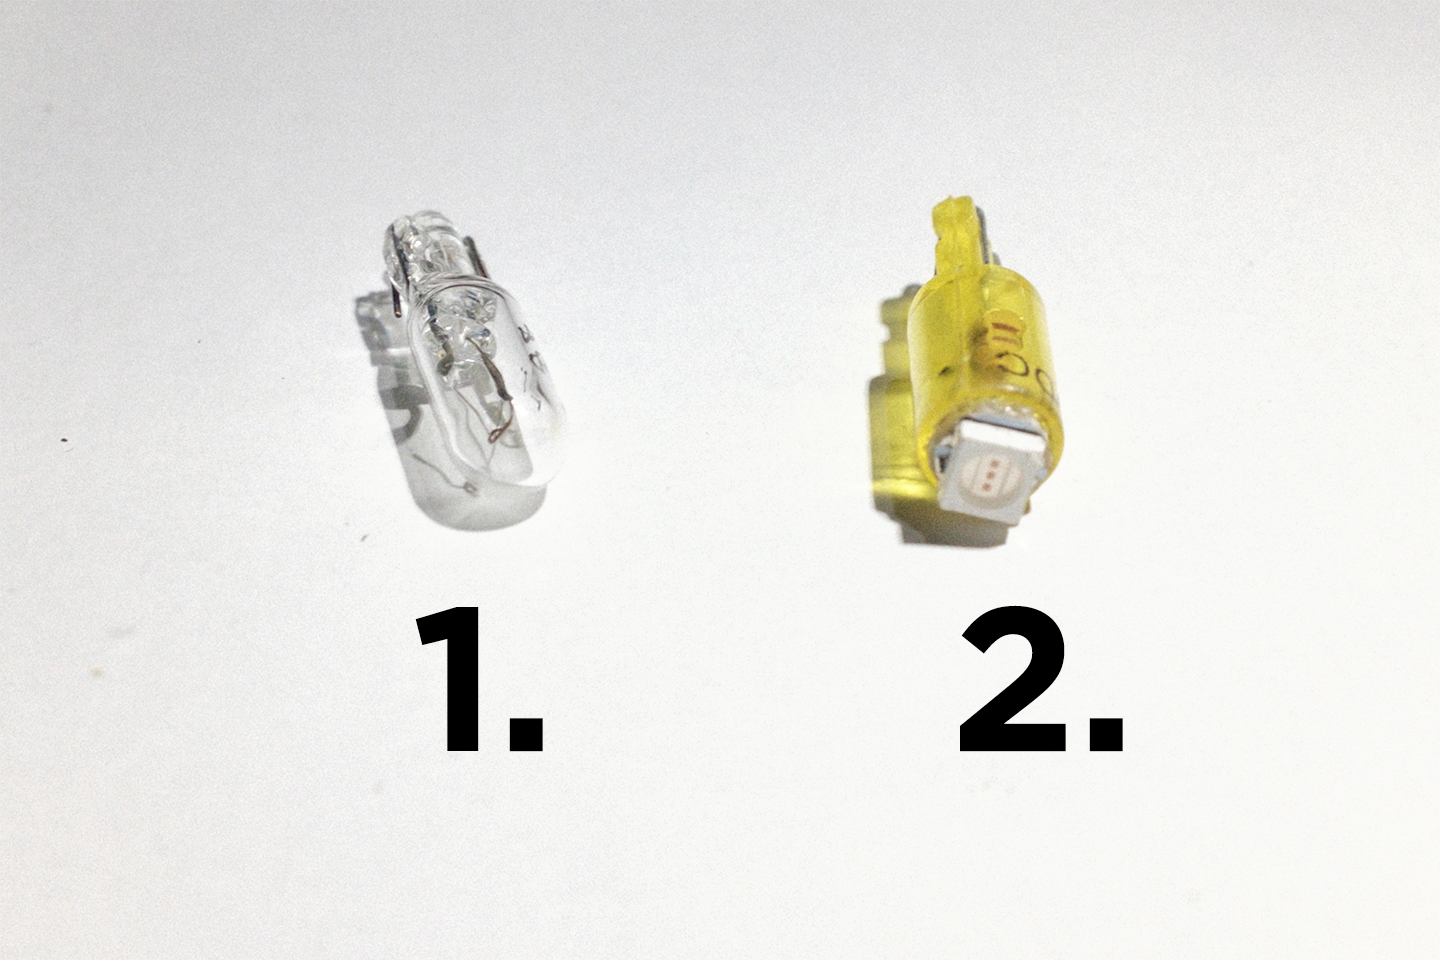
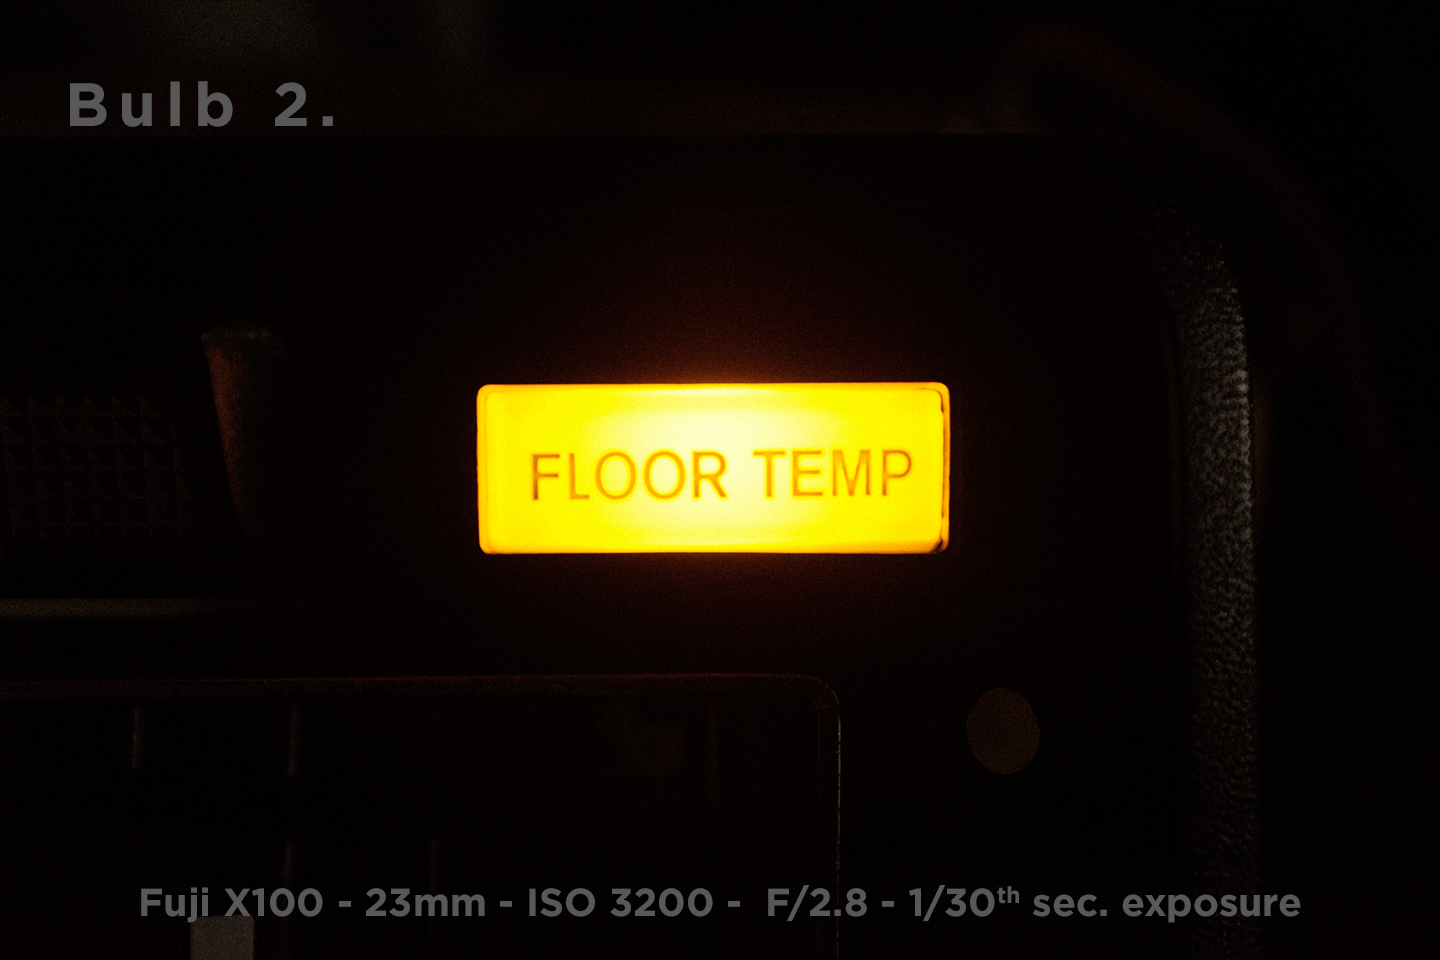
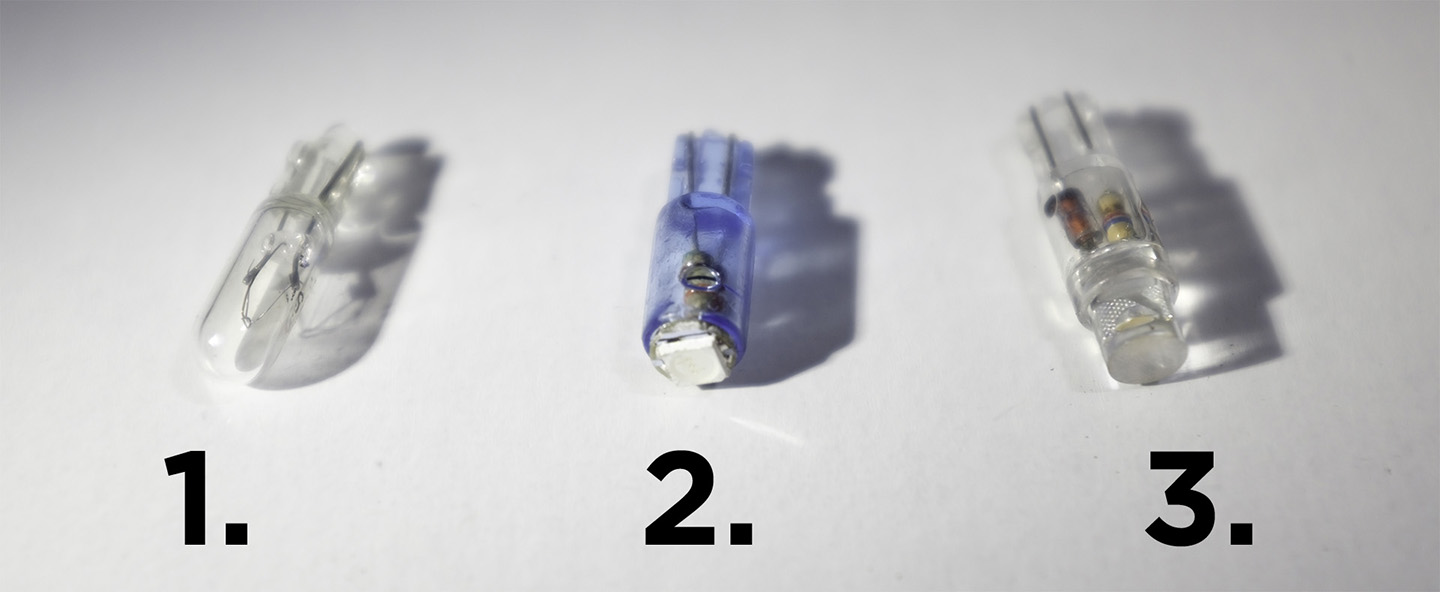
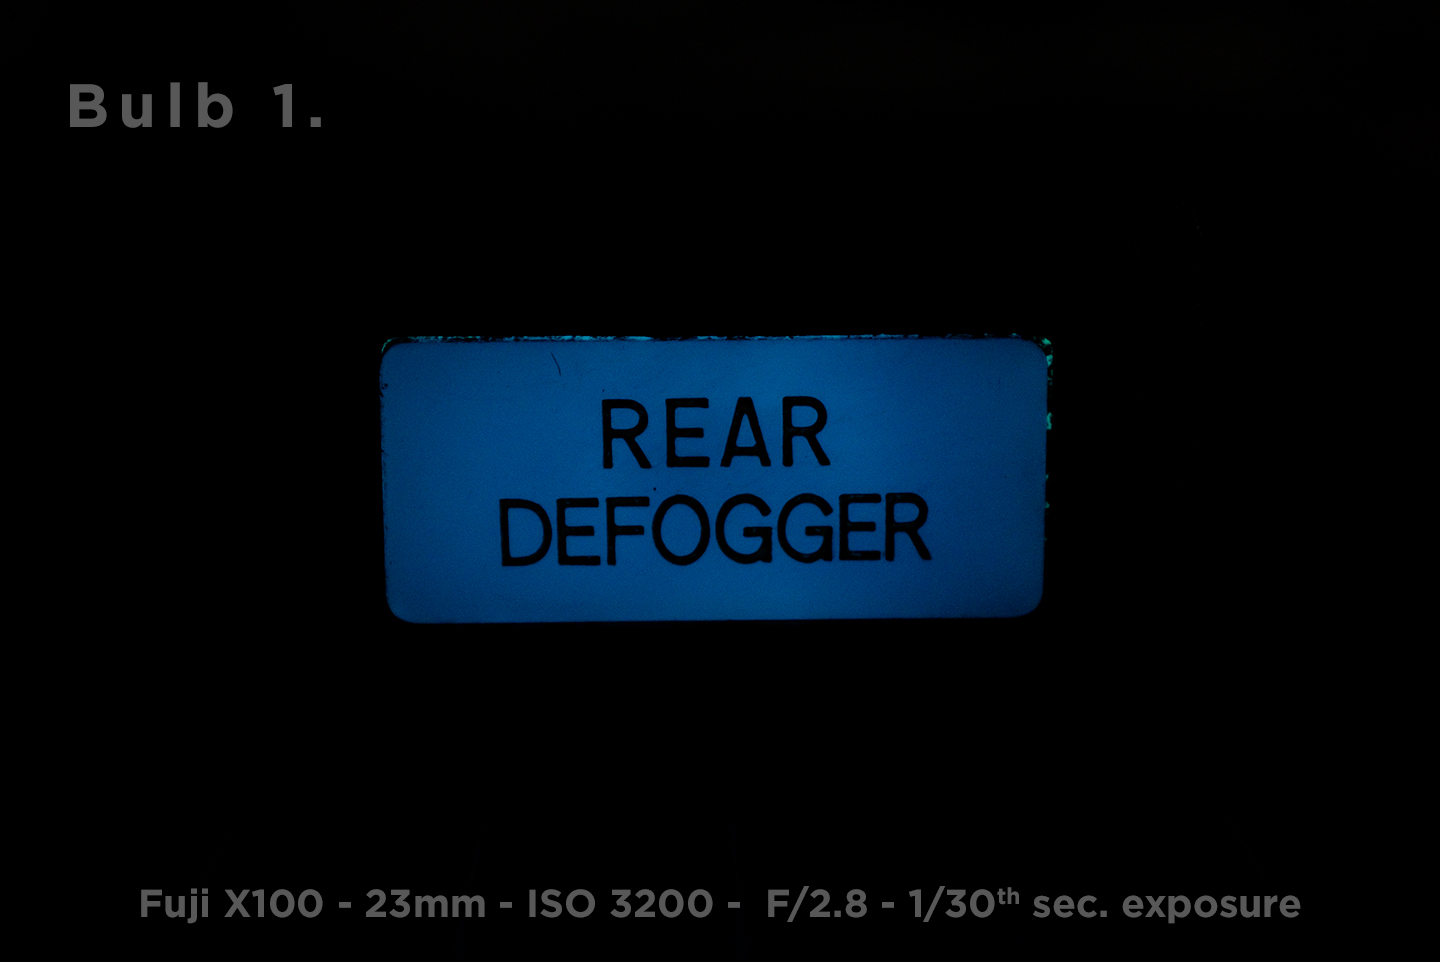
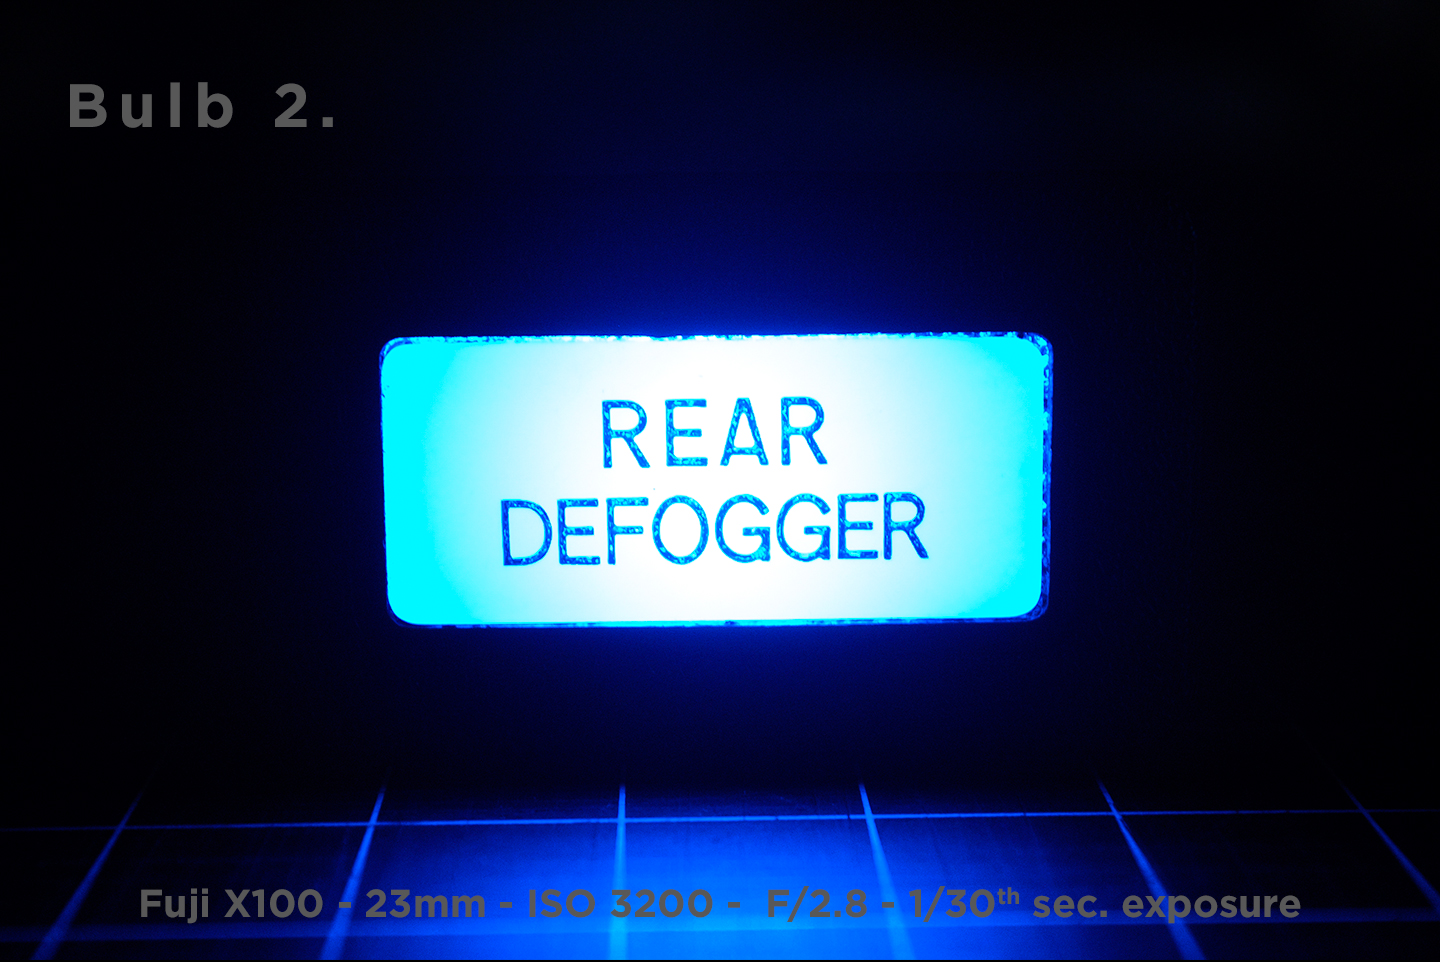
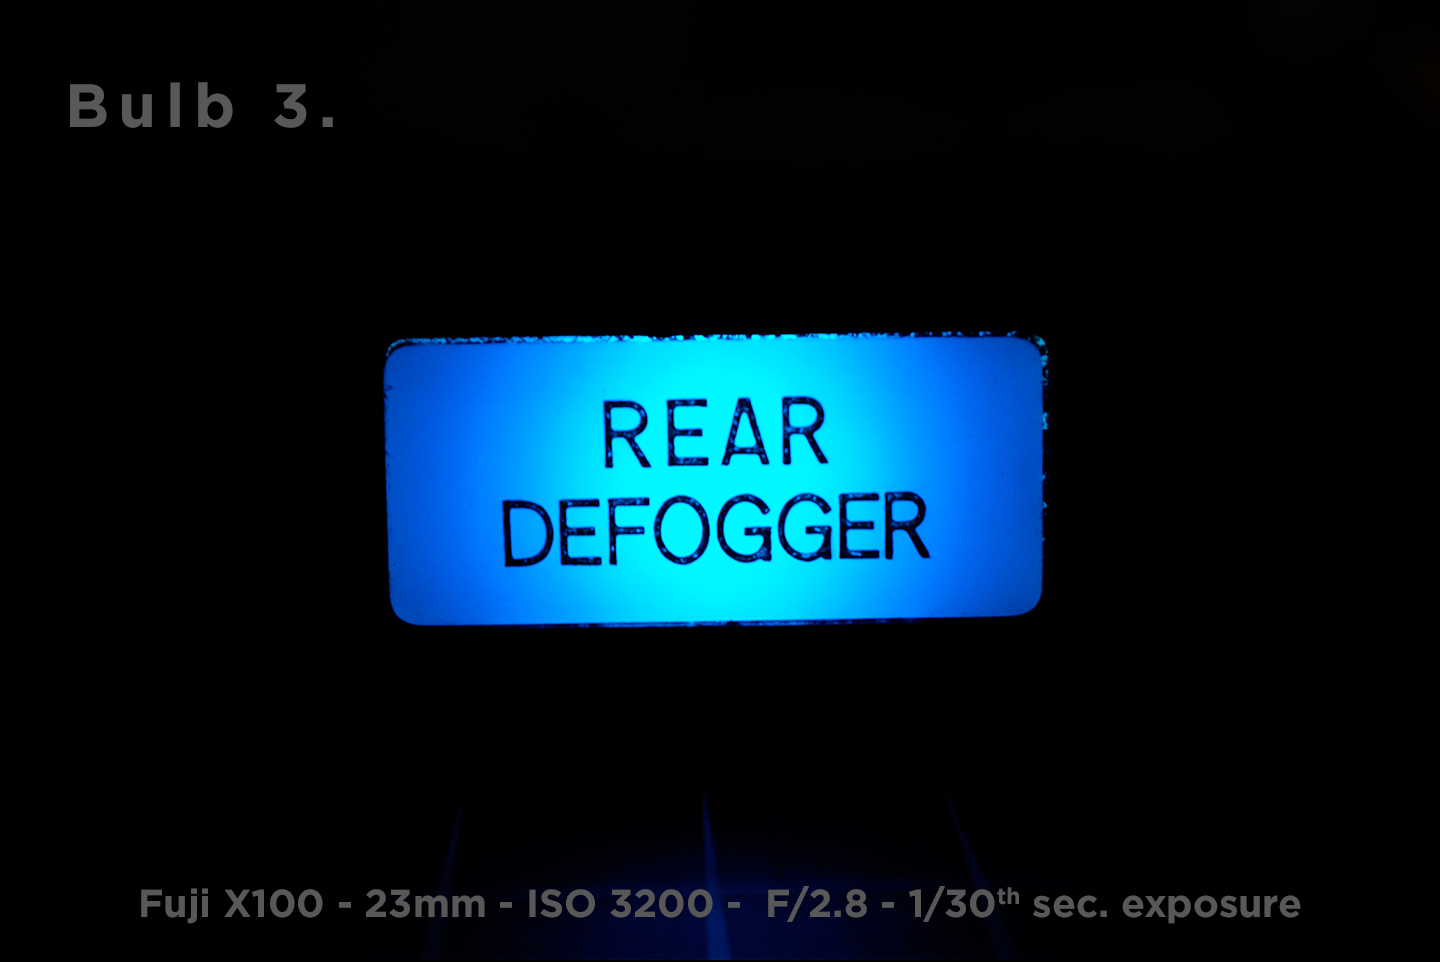
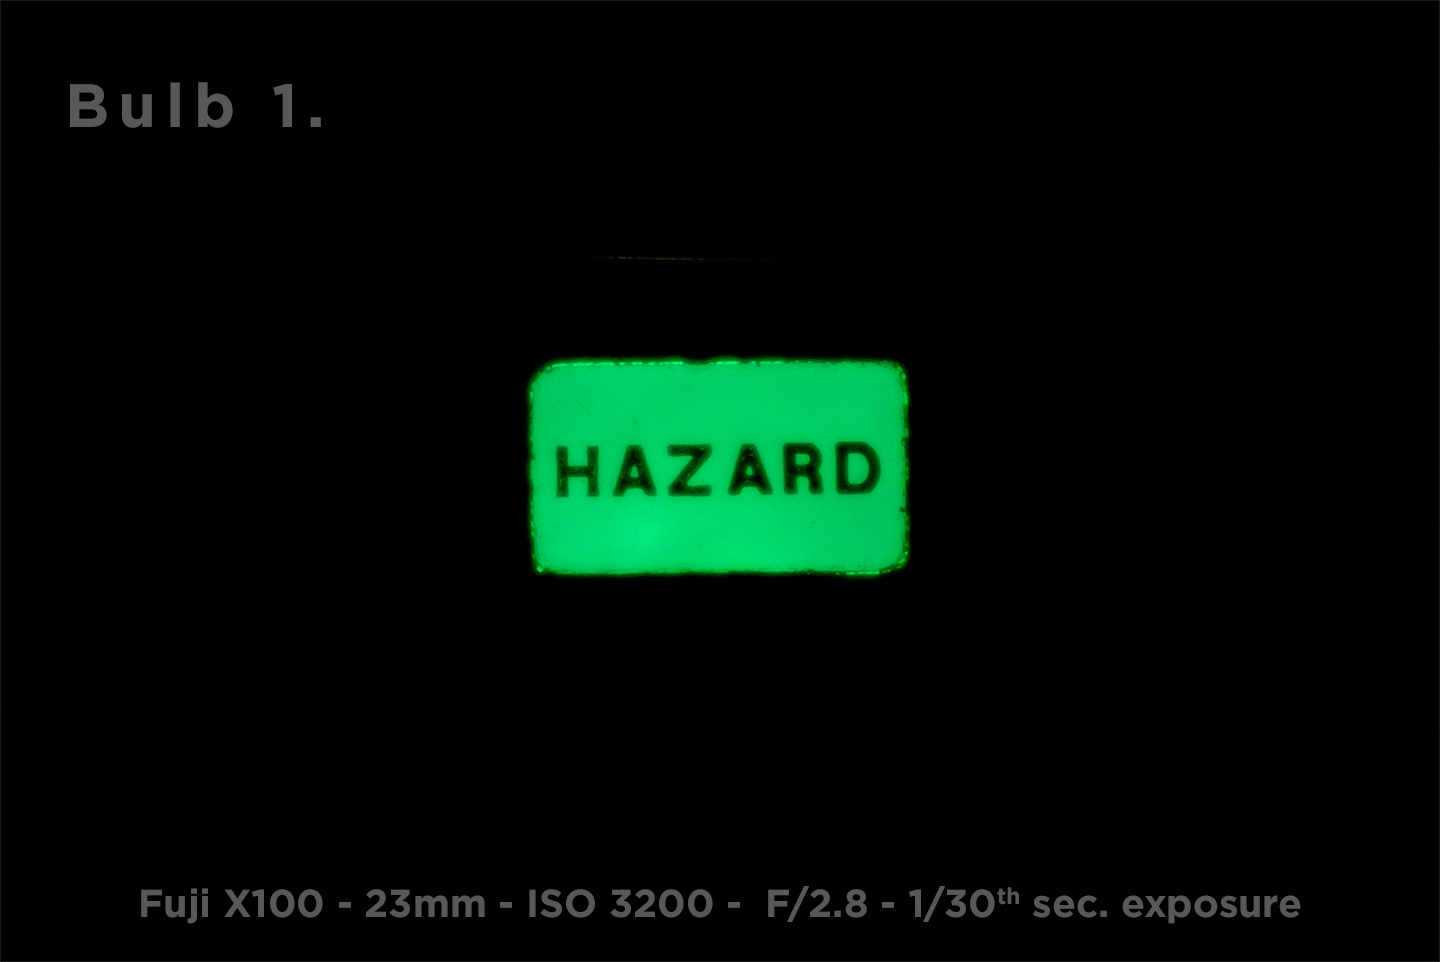
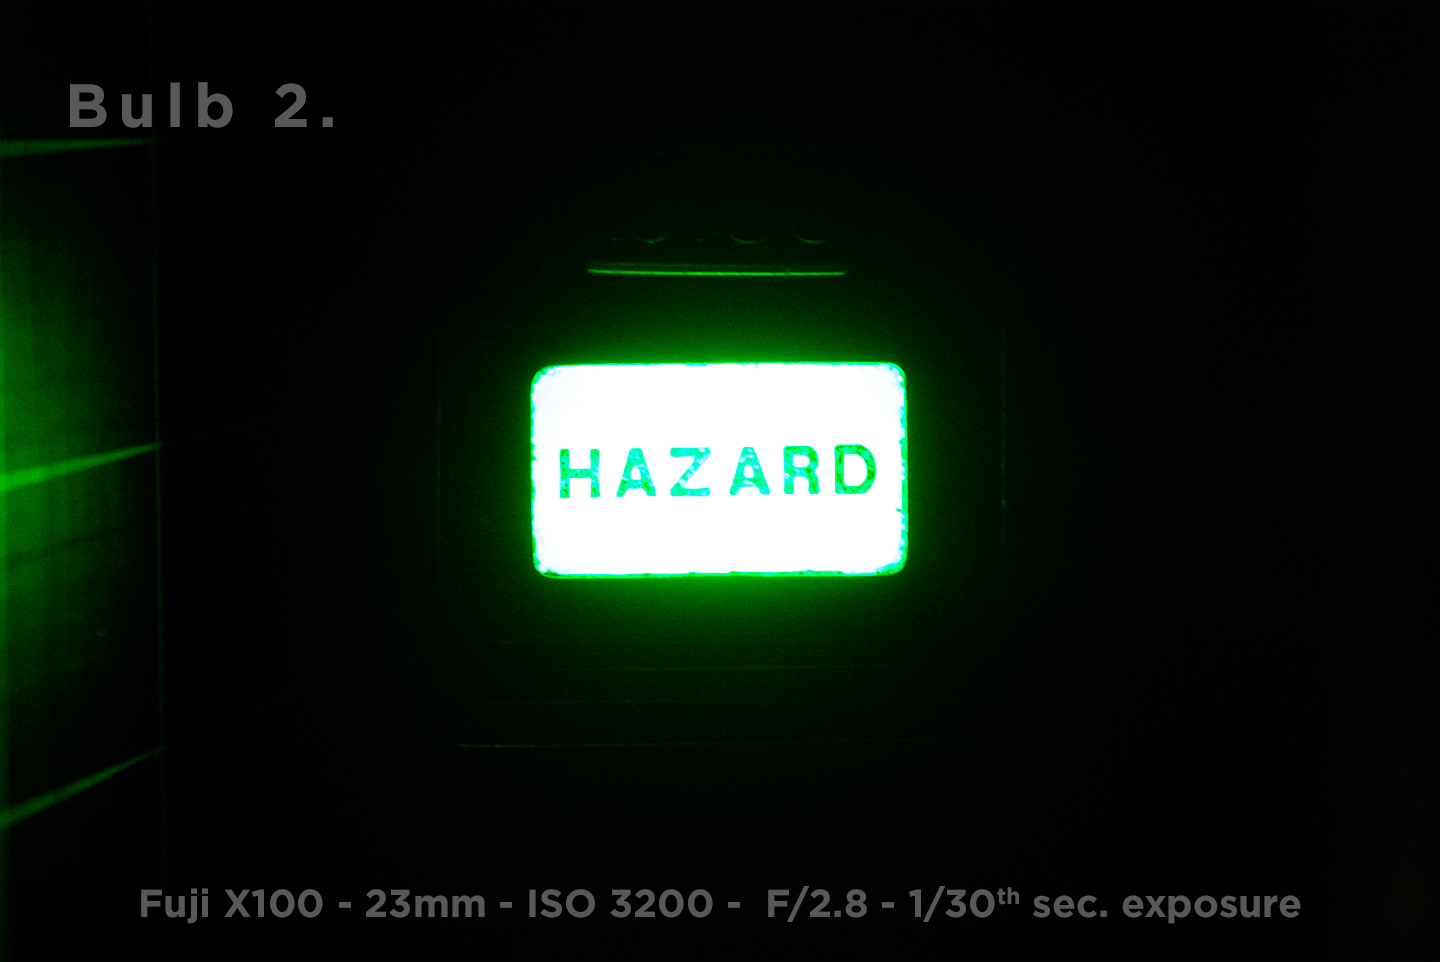
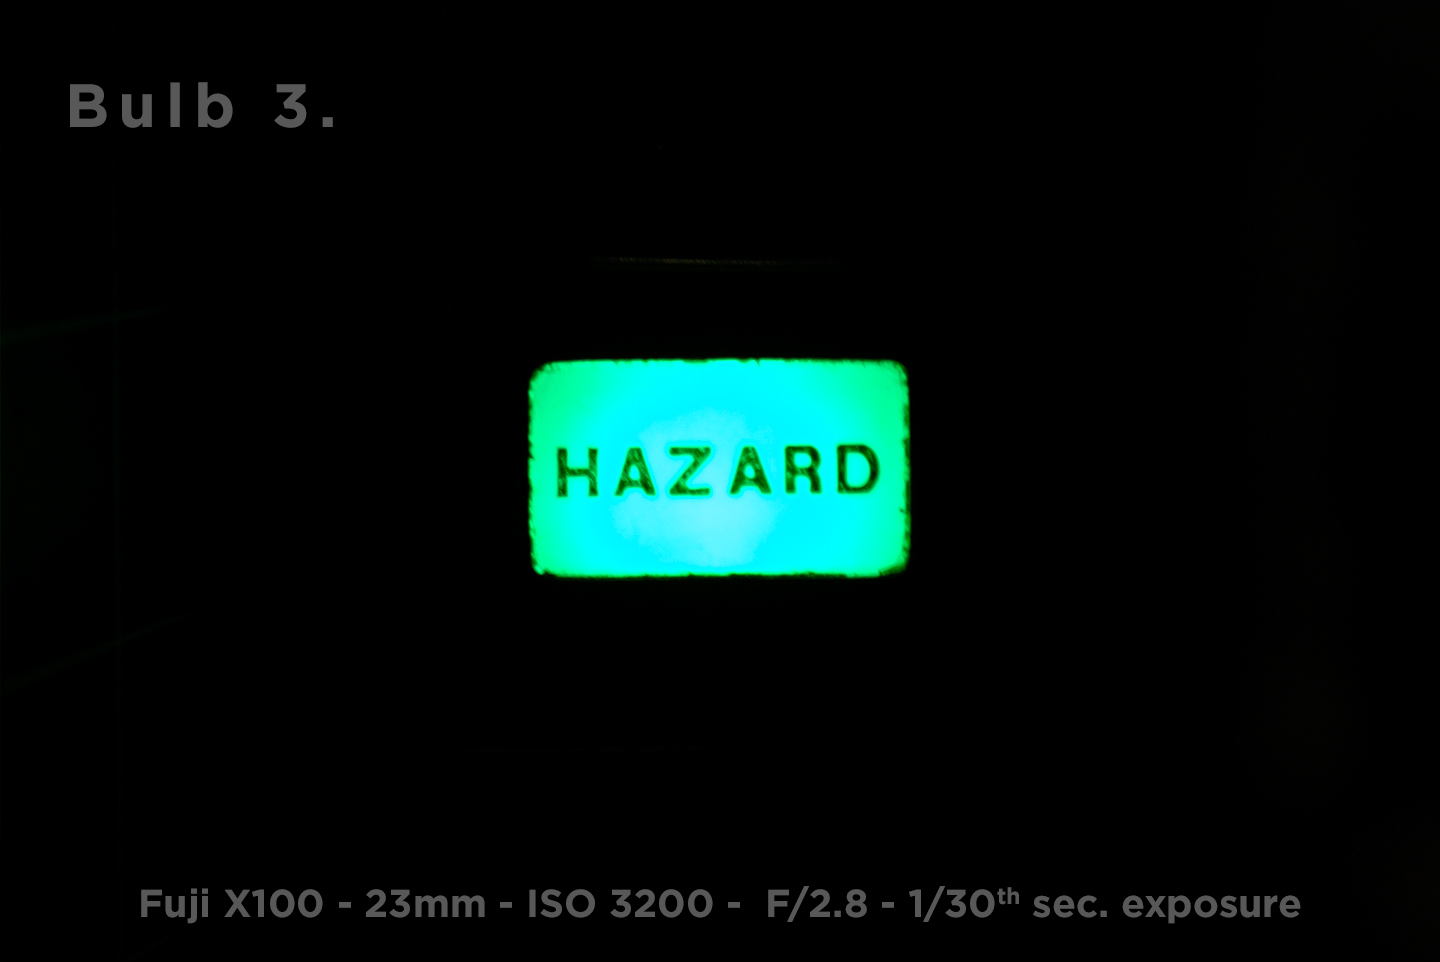
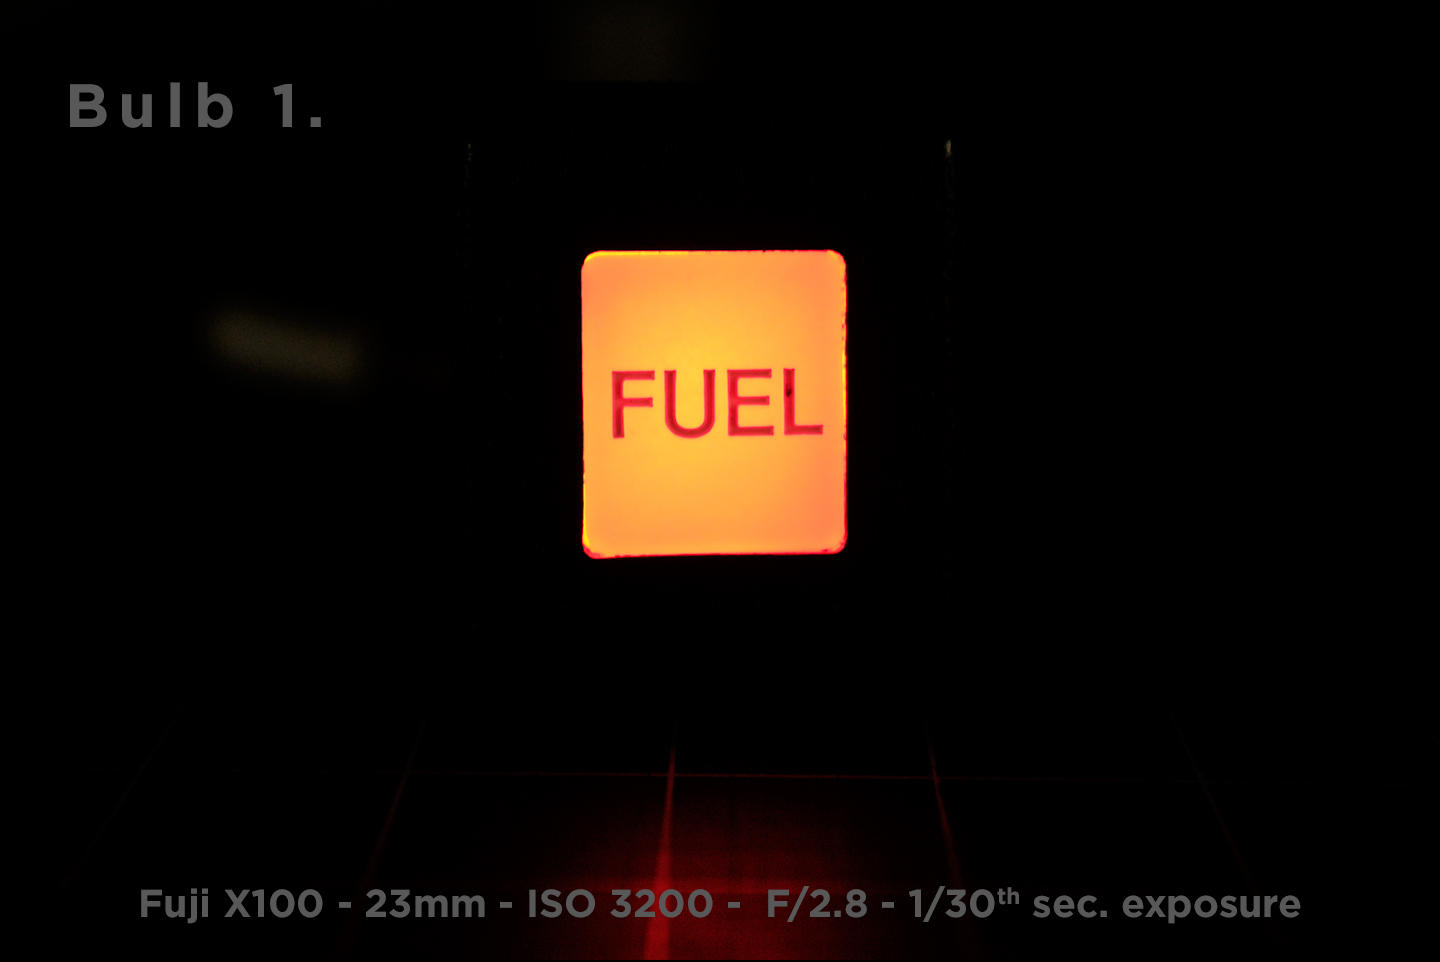
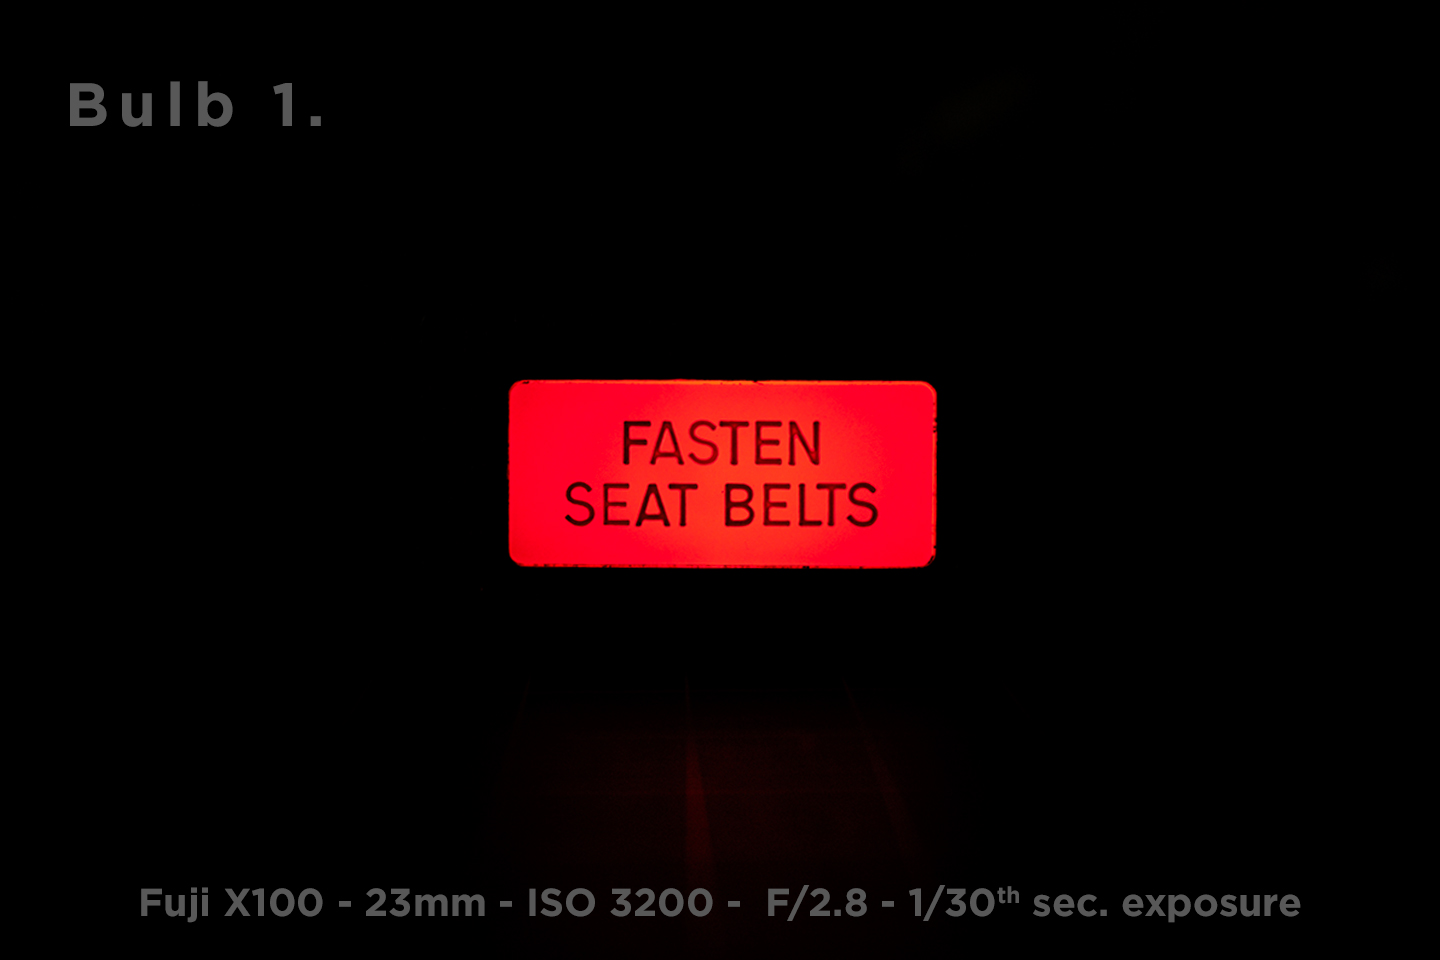
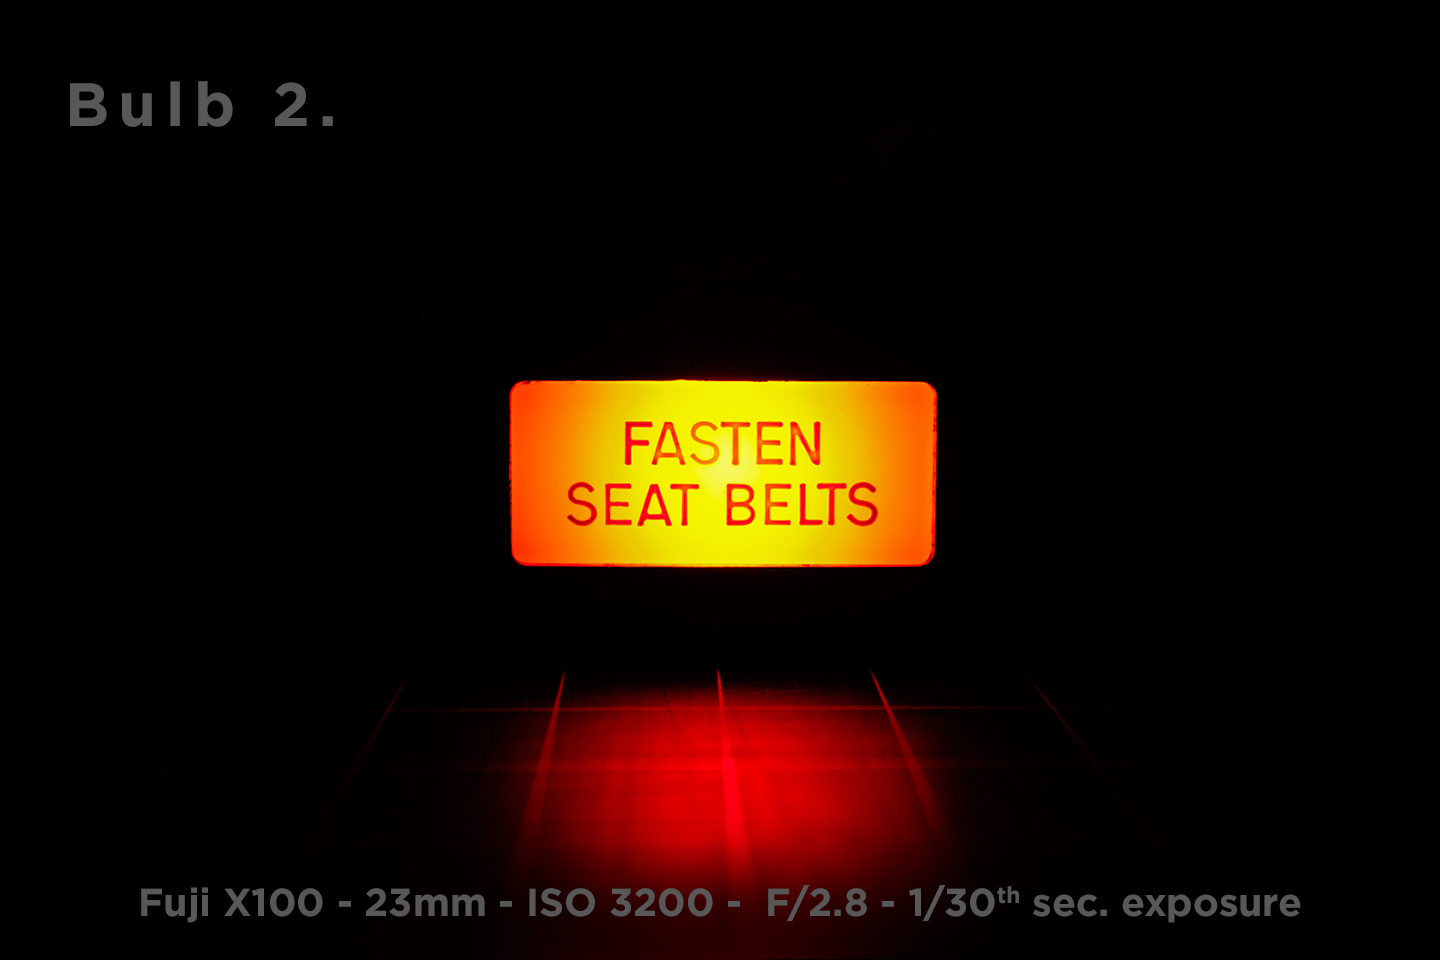
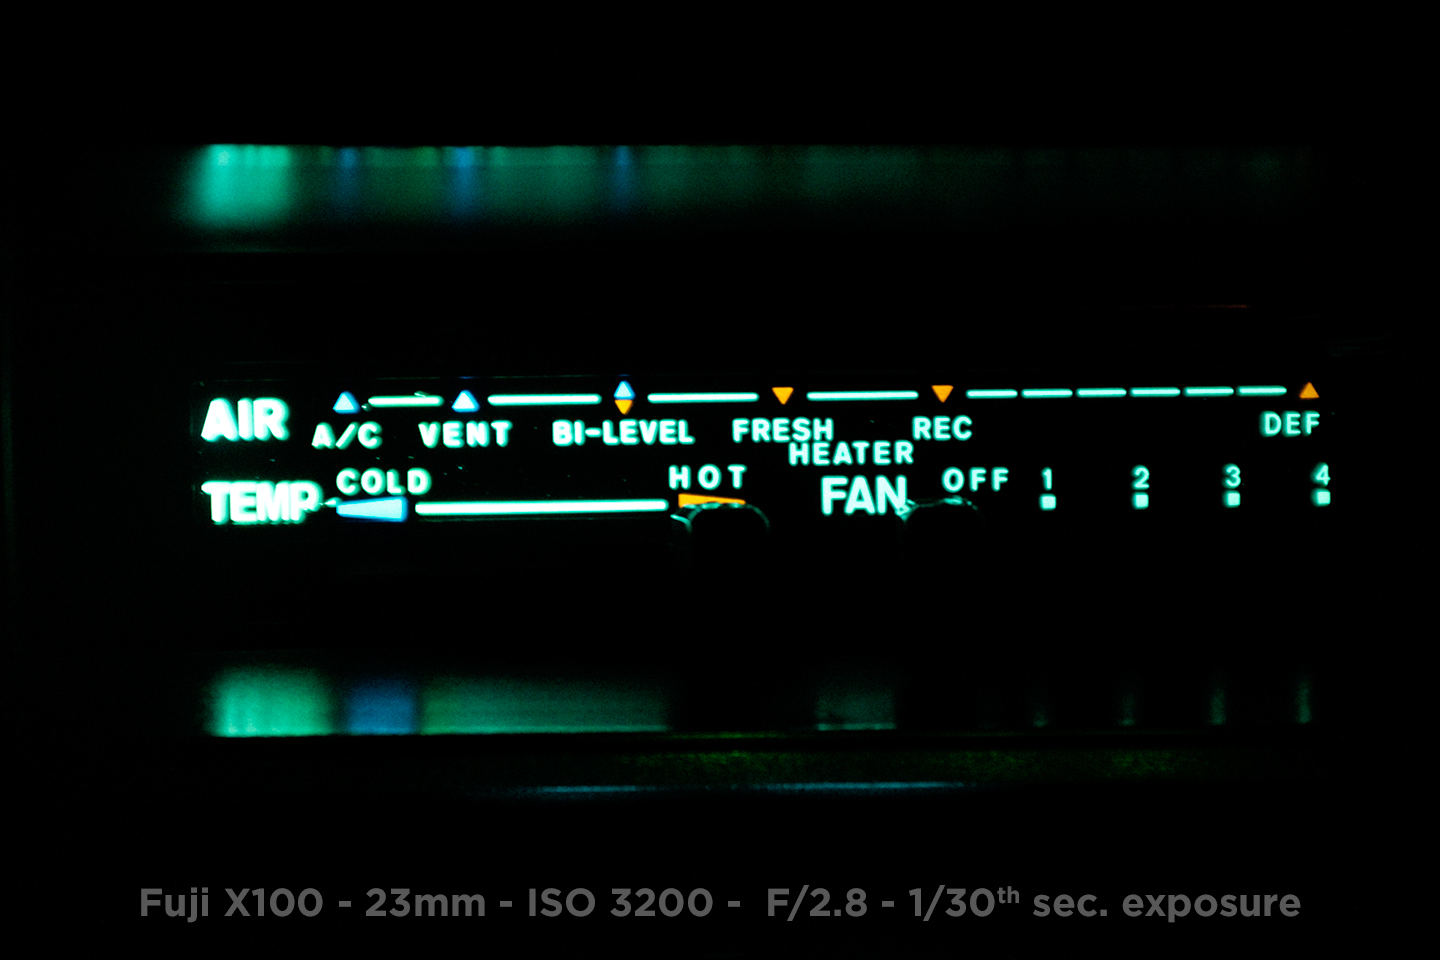
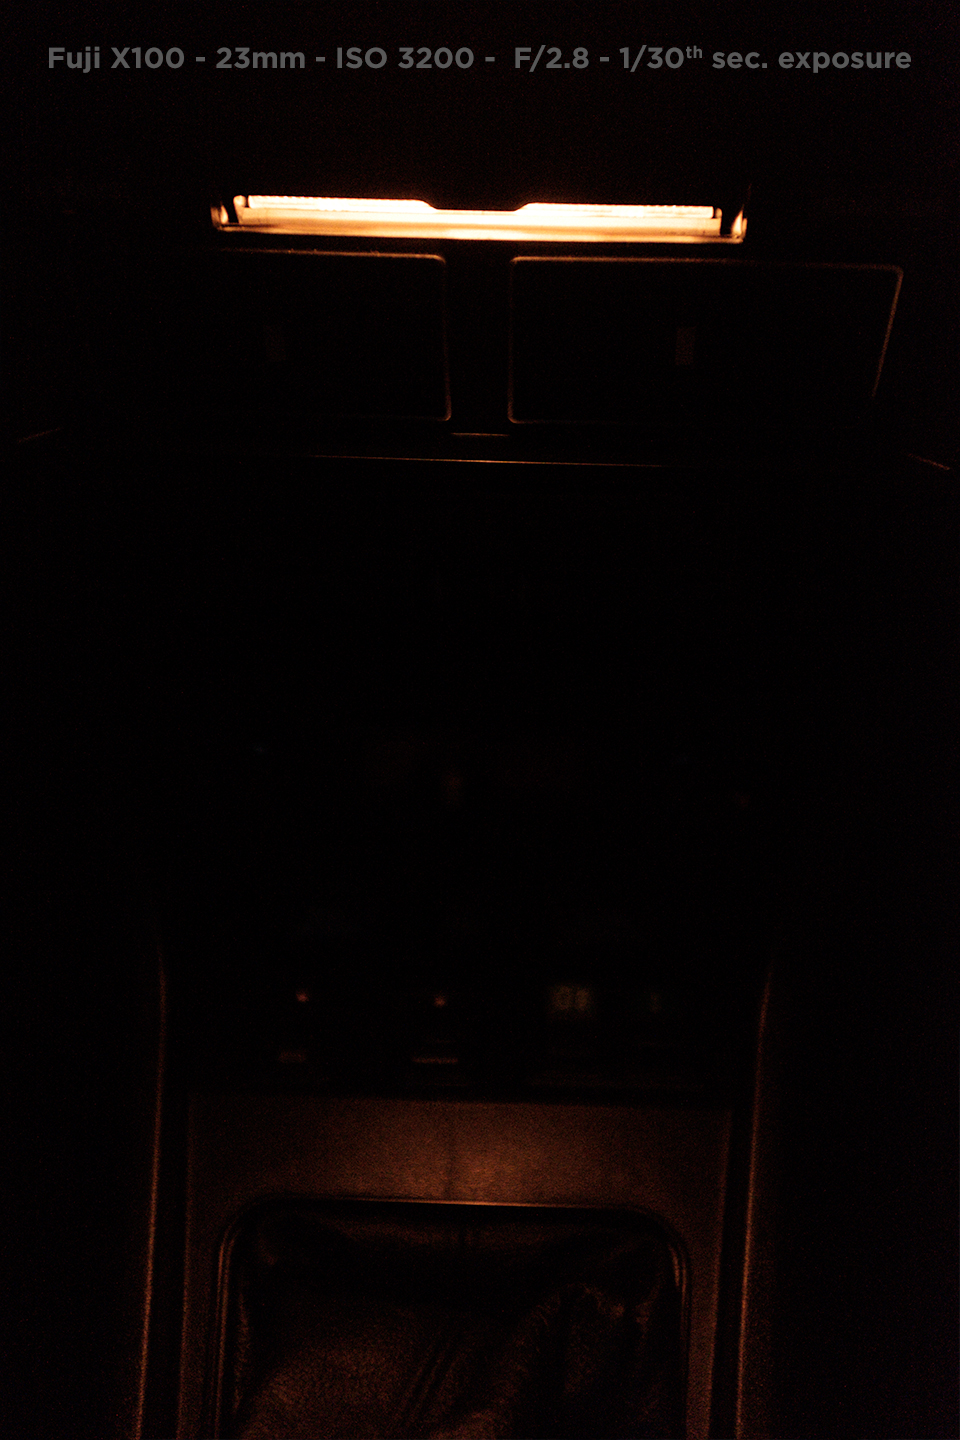
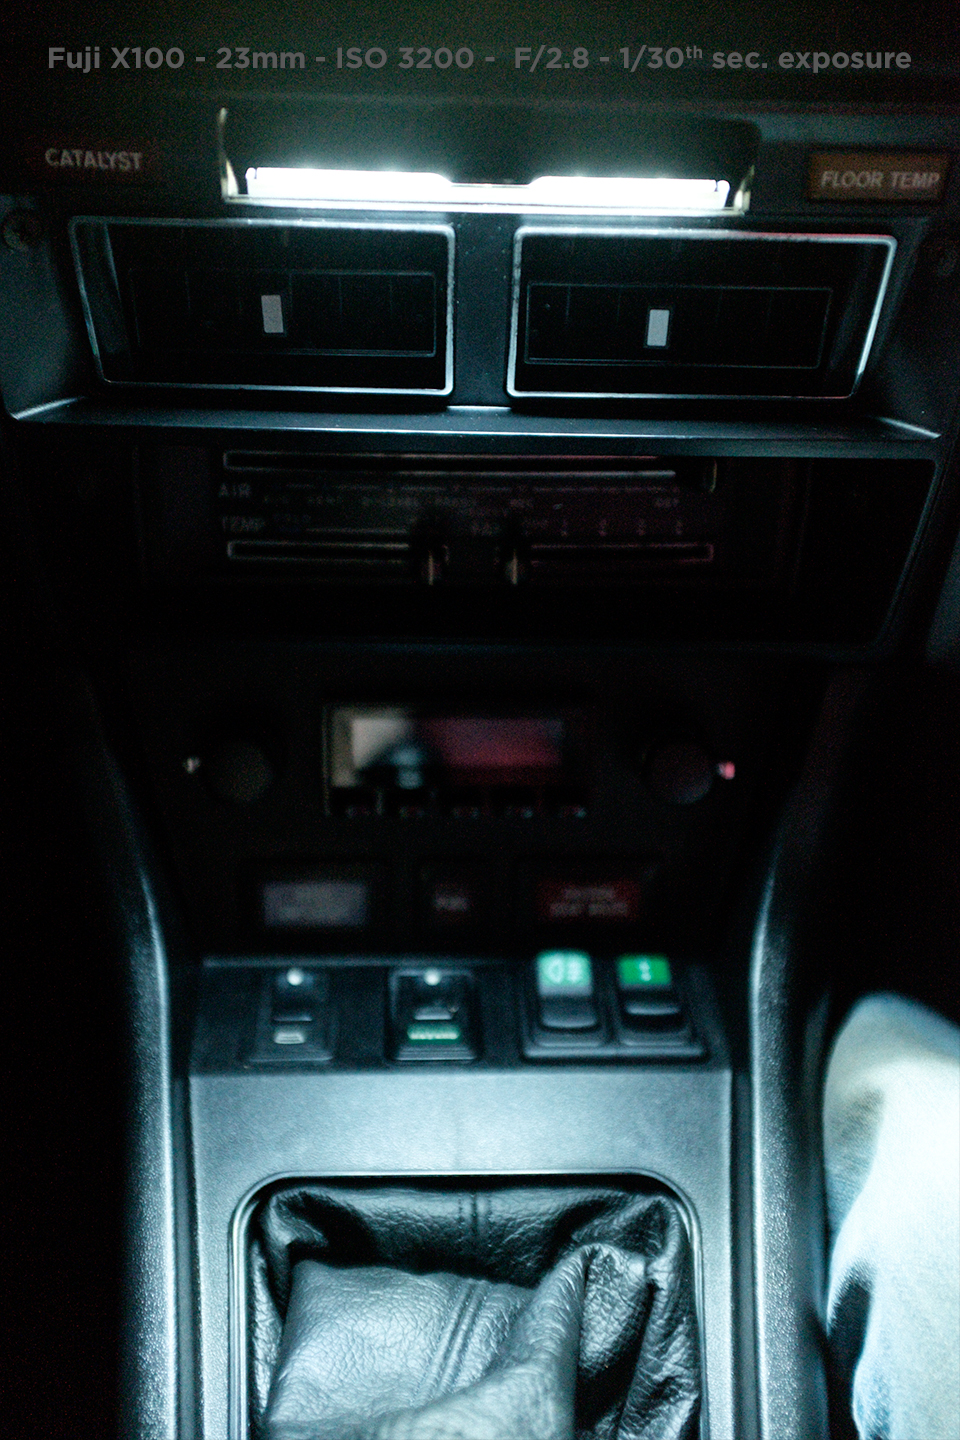
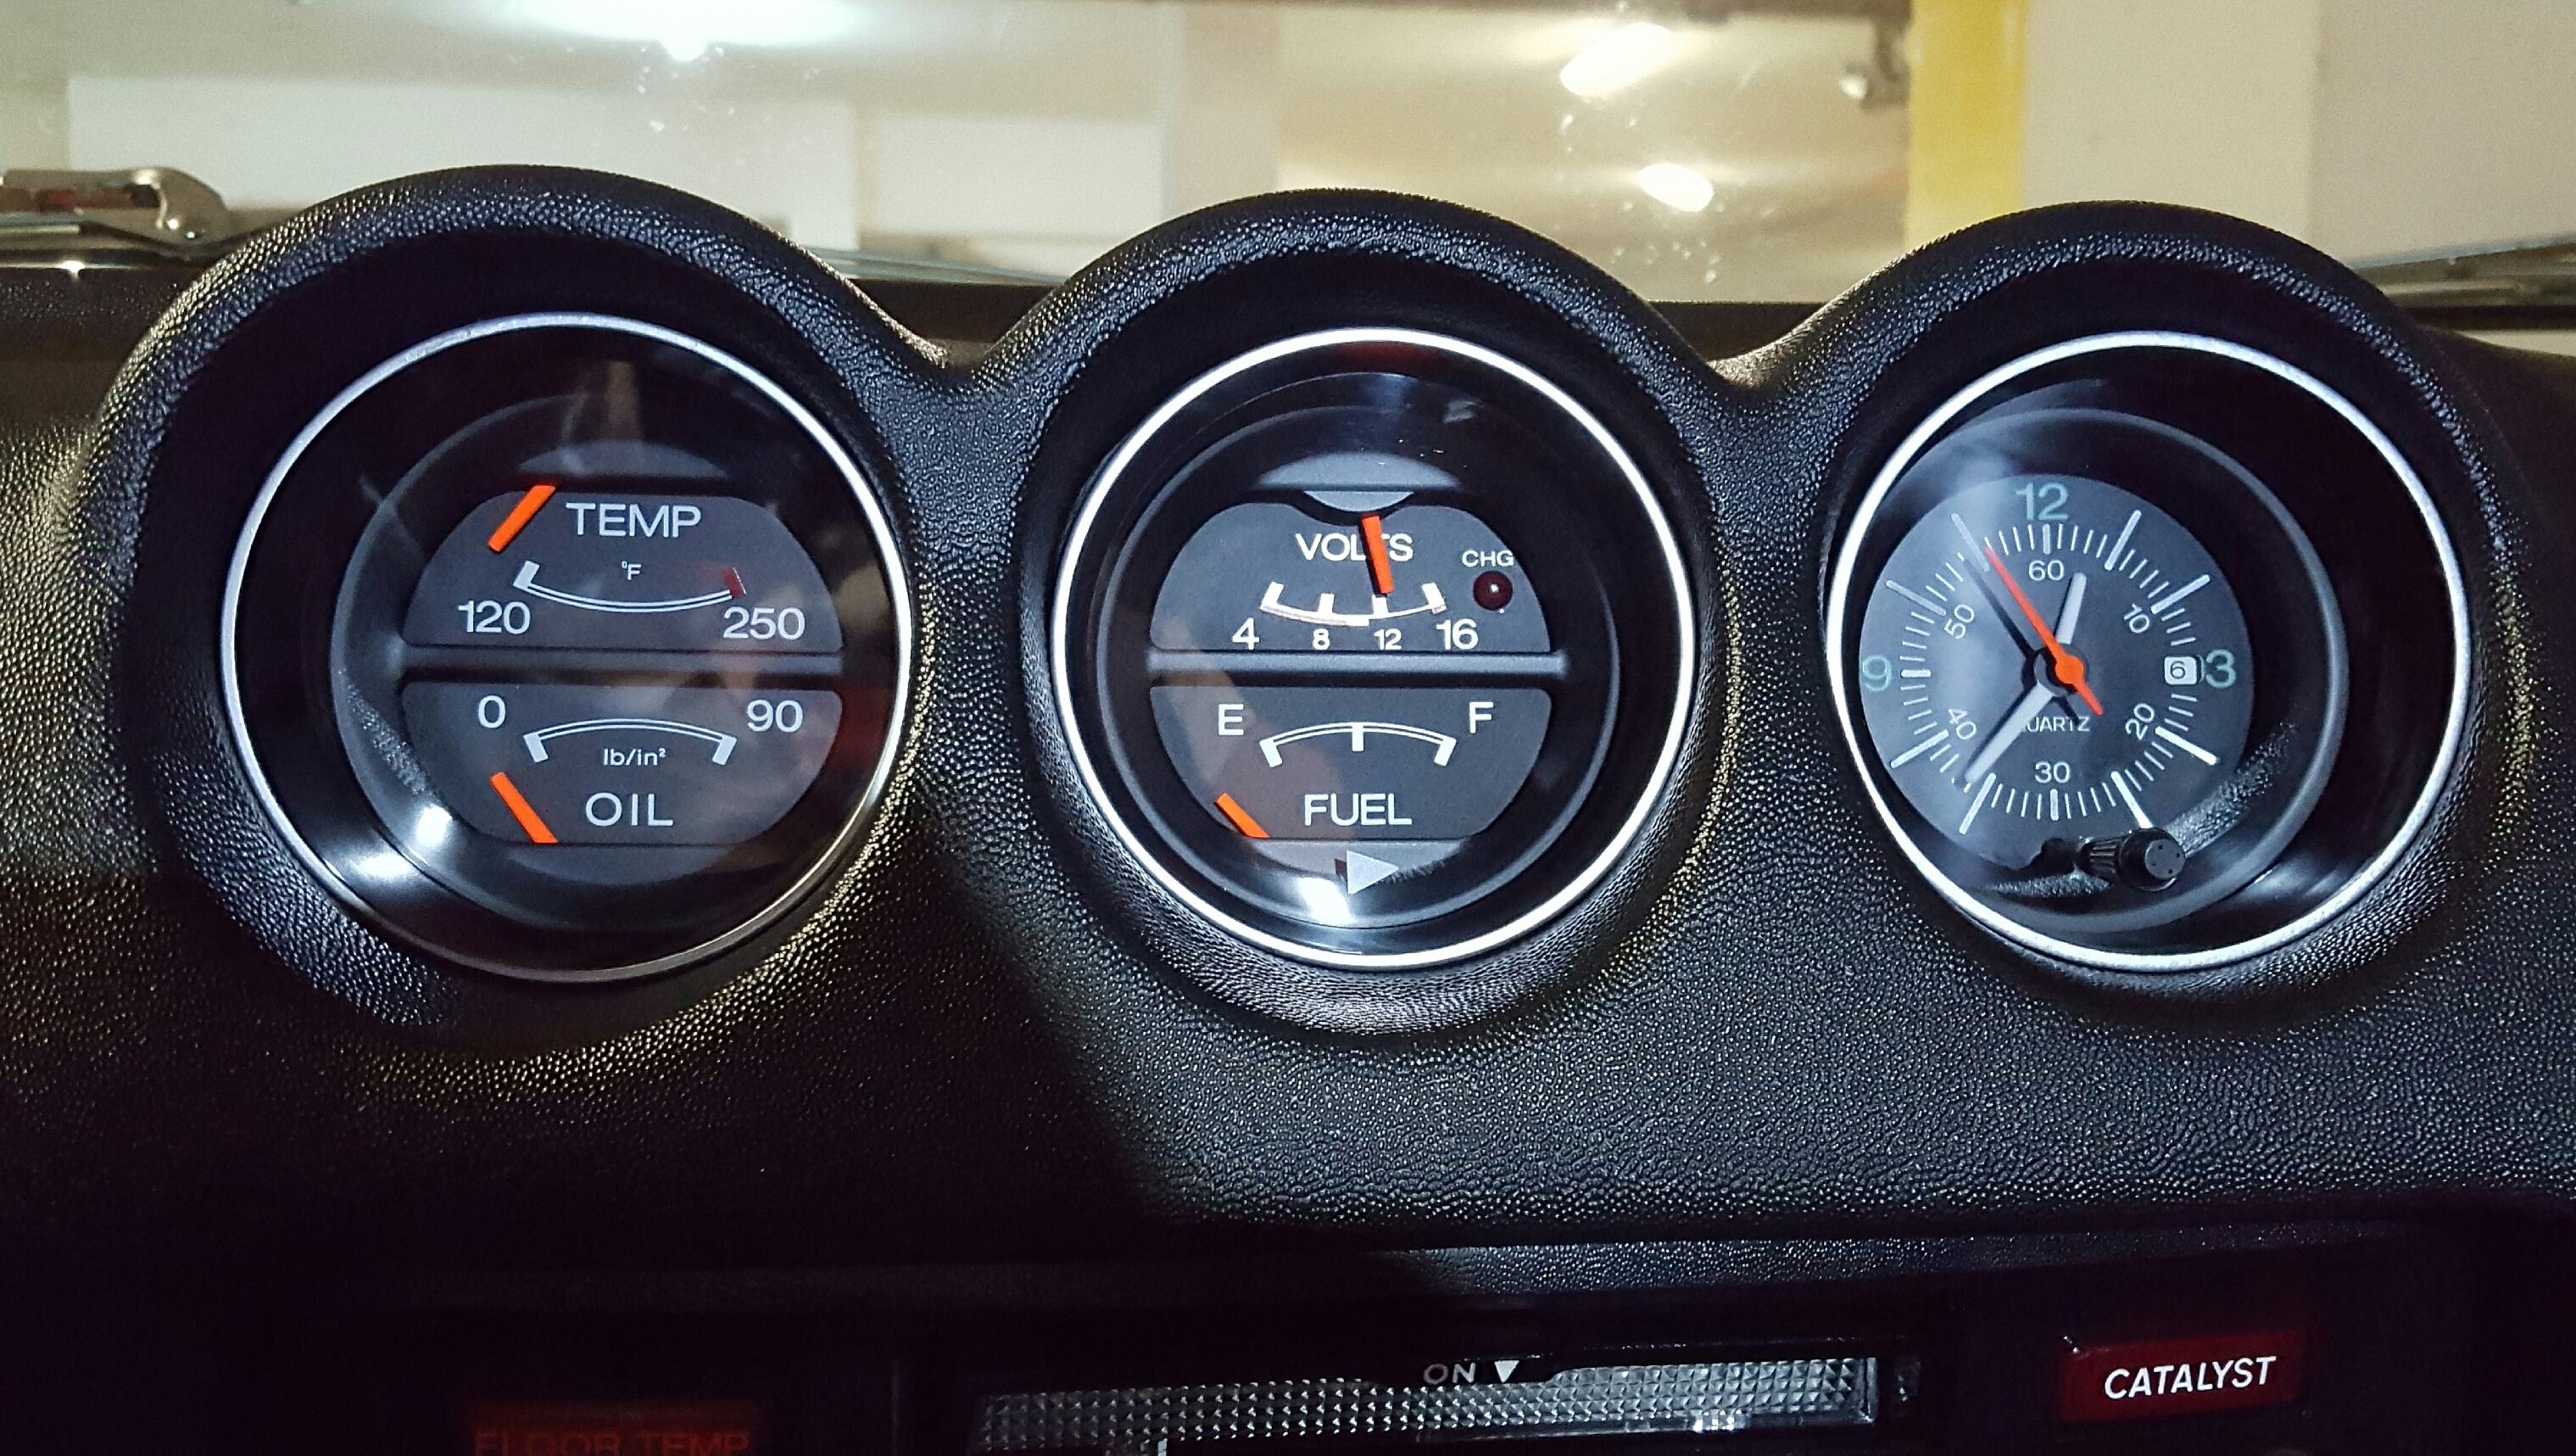
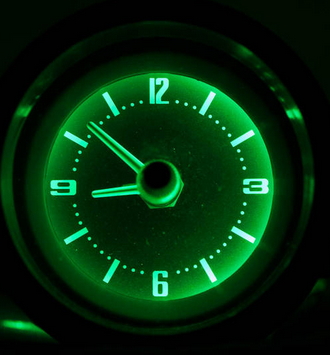 1 point1 pointGot some more pics of my gauges and other lights inside the cabin. Again, all the following pictures have been shot in manual exposure mode with a white balance set at 5000K. Here’s a pic of the three small gauges with bulb number 6 from my previous post. Here’s a pic of the speedo and tach. I also put LED bulbs in the turn signal indicators, high beam indicator, and brake warning light in the gauges. I tried a couple different bulbs but forgot to take before and after pictures. These are what I used. For the turn signals I got green bulbs from superbrightleds.com. https://www.superbrightleds.com/moreinfo/ba9s-ba7s/ba9s-led-bulb-1-led-ba9s-retrofit-car/3/#/attributes/15 Green. 90°. 4 Lumens. BA9s These bulbs are perfect. Obviously brighter than the stock tungsten bulb, but not overpowering. Got a red bulb of the same variety for the brake warning light and the fuel warning light. Again, brighter then stock but not too much. For the high beam indicator I went with a different style bulb then the turn signal lights and brake light. https://www.superbrightleds.com/moreinfo/ba9s-ba7s/ba9s-led-bulb-4-led-ba9s-retrofit-car-classic-car-bulbs/6/ Here’s a pic of the speedo with brake light and high beam indicator lit up. Since my car is a 1975 California car, it has a floor temp warning light and catalyst warning light. Here’s a pic of the bulbs tested for the catalyst warning light. Bulb 1. - Stock tungsten 74 Mini Wedge Bulb. Bulb 2. - Red LED 74 Mini Wedge Bulb. https://www.superbrightleds.com/moreinfo/miniature-wedge-base/74-led-bulb-1-smd-led-miniature-wedge-retrofit-car/227/ The stock bulb is really dim. The LED is much brighter. Even though it does not show in the pic, it is nice and red when seen in person. Here’s a pic of the bulbs tested for the floor temp warning light. Bulb 1. - Stock tungsten 74 Mini Wedge Bulb. Bulb 2. - Amber LED 74 Mini Wedge Bulb. https://www.superbrightleds.com/moreinfo/miniature-wedge-base/74-led-bulb-1-smd-led-miniature-wedge-retrofit-car/227/ The stock bulb is really dim. The LED is much brighter. Here’s a pic of the bulbs tested for the rear defogger light. Bulb 1. - Stock tungsten 74 Mini Wedge Bulb. Bulb 2. - Blue LED 74 Mini Wedge Bulb. https://www.superbrightleds.com/moreinfo/miniature-wedge-base/74-led-bulb-1-smd-led-miniature-wedge-retrofit-car/227/ Bulb 3. - Warm 3000k LED 74 Mini Wedge Bulb. https://www.superbrightleds.com/moreinfo/instrument-cluster-gauge/74-led-bulb-1-led-miniature-wedge-retrofit-car/226/ The Stock Bulb is really dim. Bulb number 2 is way too bright for a bulb that will stay on and not a warning light. Bulb 3 is perfect. Brighter than stock, but not overpowering. To the naked eye its really similar to the look of the stock bulb, just brighter. 3000k is really close to the 2800K color temp. of tungsten bulbs. Here’s a pic of the bulbs tested for the hazard light switch. Bulb 1. - Stock tungsten 74 Mini Wedge Bulb. Bulb 2. - Green LED 74 Mini Wedge Bulb. https://www.superbrightleds.com/moreinfo/miniature-wedge-base/74-led-bulb-1-smd-led-miniature-wedge-retrofit-car/227/ Bulb 3. - Warm 3000k LED 74 Mini Wedge Bulb. https://www.superbrightleds.com/moreinfo/instrument-cluster-gauge/74-led-bulb-1-led-miniature-wedge-retrofit-car/226/ The stock bulb is really dim. Bulb number 2 is way too bright for a bulb that will stay on and not a warning light. Bulb 3 is perfect. Brighter than stock, but not overpowering. To the naked eye its really similar to the look of the stock bulb, just brighter. 3000k is really close to the 2800K color temp. of tungsten bulbs. The fuel warning light is a standard BA9s tungsten bulb. Here’s a pic. I replaced the stock tungsten bulb with the same one used in the brake warning light inside the speedo. https://www.superbrightleds.com/moreinfo/ba9s-ba7s/ba9s-led-bulb-1-led-ba9s-retrofit-car/3/#/attributes/15 It’s brighter than stock but not excessively so. Here’s a pic of the bulbs tested for the fasten seat belts warning light. Bulb 1. - Stock tungsten 74 Mini Wedge Bulb. Bulb 2. - Red LED 74 Mini Wedge Bulb. https://www.superbrightleds.com/moreinfo/miniature-wedge-base/74-led-bulb-1-smd-led-miniature-wedge-retrofit-car/227/ The stock bulb is pretty dim. The LED is much brighter. Even though it does not show in the pic, it is nice and red when seen in person. The cigarette lighter socket and the HVAC controls both use 194 Wedge bulbs. I don’t have a pic of the cigarette lighter socket but I do have one of the HVAC controls replaced with an LED. This is the bulb used. https://www.superbrightleds.com/moreinfo/boat-miniature-wedge-bulbs/194-led-boat-and-rv-light-bulb-6-smd-led-tower-miniature-wedge-retrofit-106-lumens/2489/4112/ The map light was also replaced with LED’s. When I had my combo switches re-built a couple years ago I sprung for the map light LED from Dave at www.datsun-240z-upgrades.net. Here’s a pic of the stock bulb. Here’s a pic of the LED bulb from datsun-240z-upgrades.net. It’s way brighter and the map light is actually very useful now. The only interior bulbs not replaced with LED's in my car are the dome light and the glove box light. I swapped an LED in the glove box light but it did not work. The polarity needs to be reversed and I didn't get around to it yet. Here's my bulb count so far for a '75 2+2. Speedometer: (2) BA9s bulbs for illumination (1) BA9s for High Beam Indicator (1) BA9s for Brake Light Indicator/Warning Tachometer: (2) BA9s bulbs for illumination (2) BA9s for Turn Signal/Hazard Flashing Indicators Temp/Oil Gauge: (1) BA9s Clock: (1) BA9s Amp/Fuel Gauge: (1) BA9s Catalyst Light: (1) 74 Mini Wedge Floor Temp: (1) 74 Mini Wedge Rear Defogger: (1) 74 Mini Wedge Fuel: (1) BA9s Fasten Seat Belts: (1) 74 Mini Wedge Hazard Switch: (1) 74 Mini Wedge Cigarette Lighter Socket: (1) 194 Wedge HVAC Controls: (1) 194 Wedge Glove Box: (1) BA9s Map Light: (1) Might be 194 Wedge, not sure on size, replaced with LED from datsun-240z-upgrades.net


 1 point1 pointThey look as bright as most current car instruments look which I really prefer. I hadn't realized how dim the stock instrument lighting was in my original "77 280Z (which I sold 37 years ago!!) until I first drove my "new" '78 280Z at night 2 years ago. An update was urgently needed. Even though the dimmer knob is functional in my set up, I keep it full on all the time as well. I have also swapped for LEDs every single exterior bulb (including headlights). I'm sure my 39 year old electrical system appreciates it.

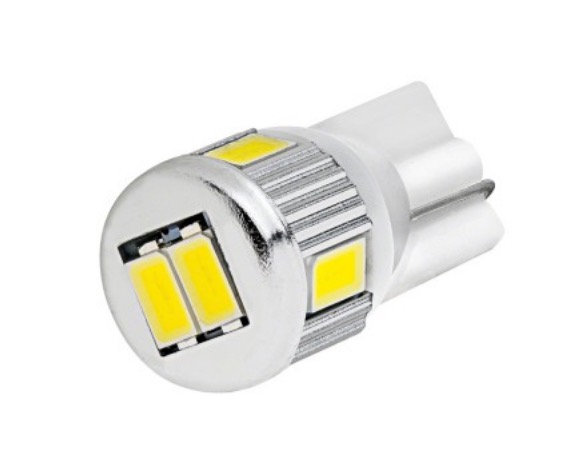
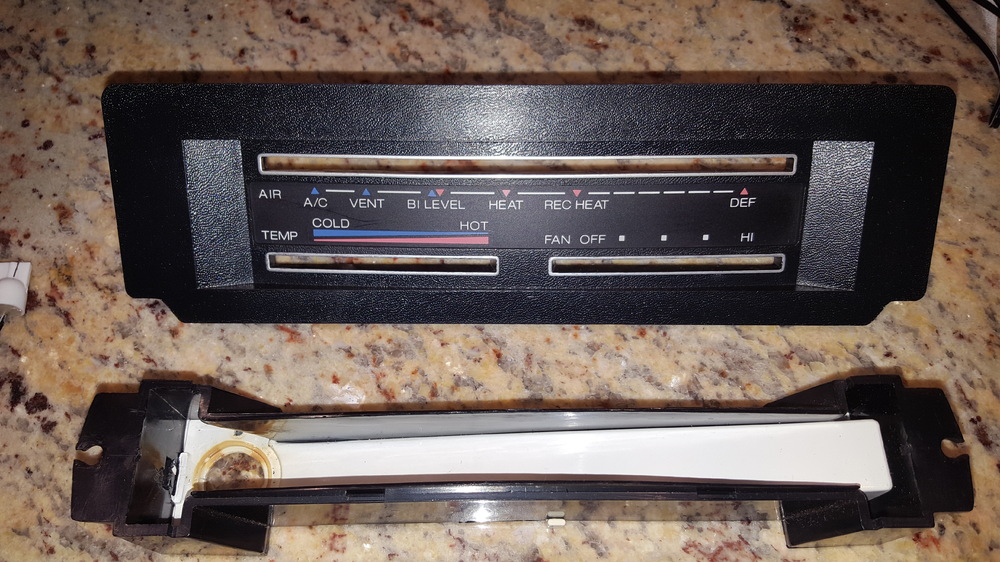
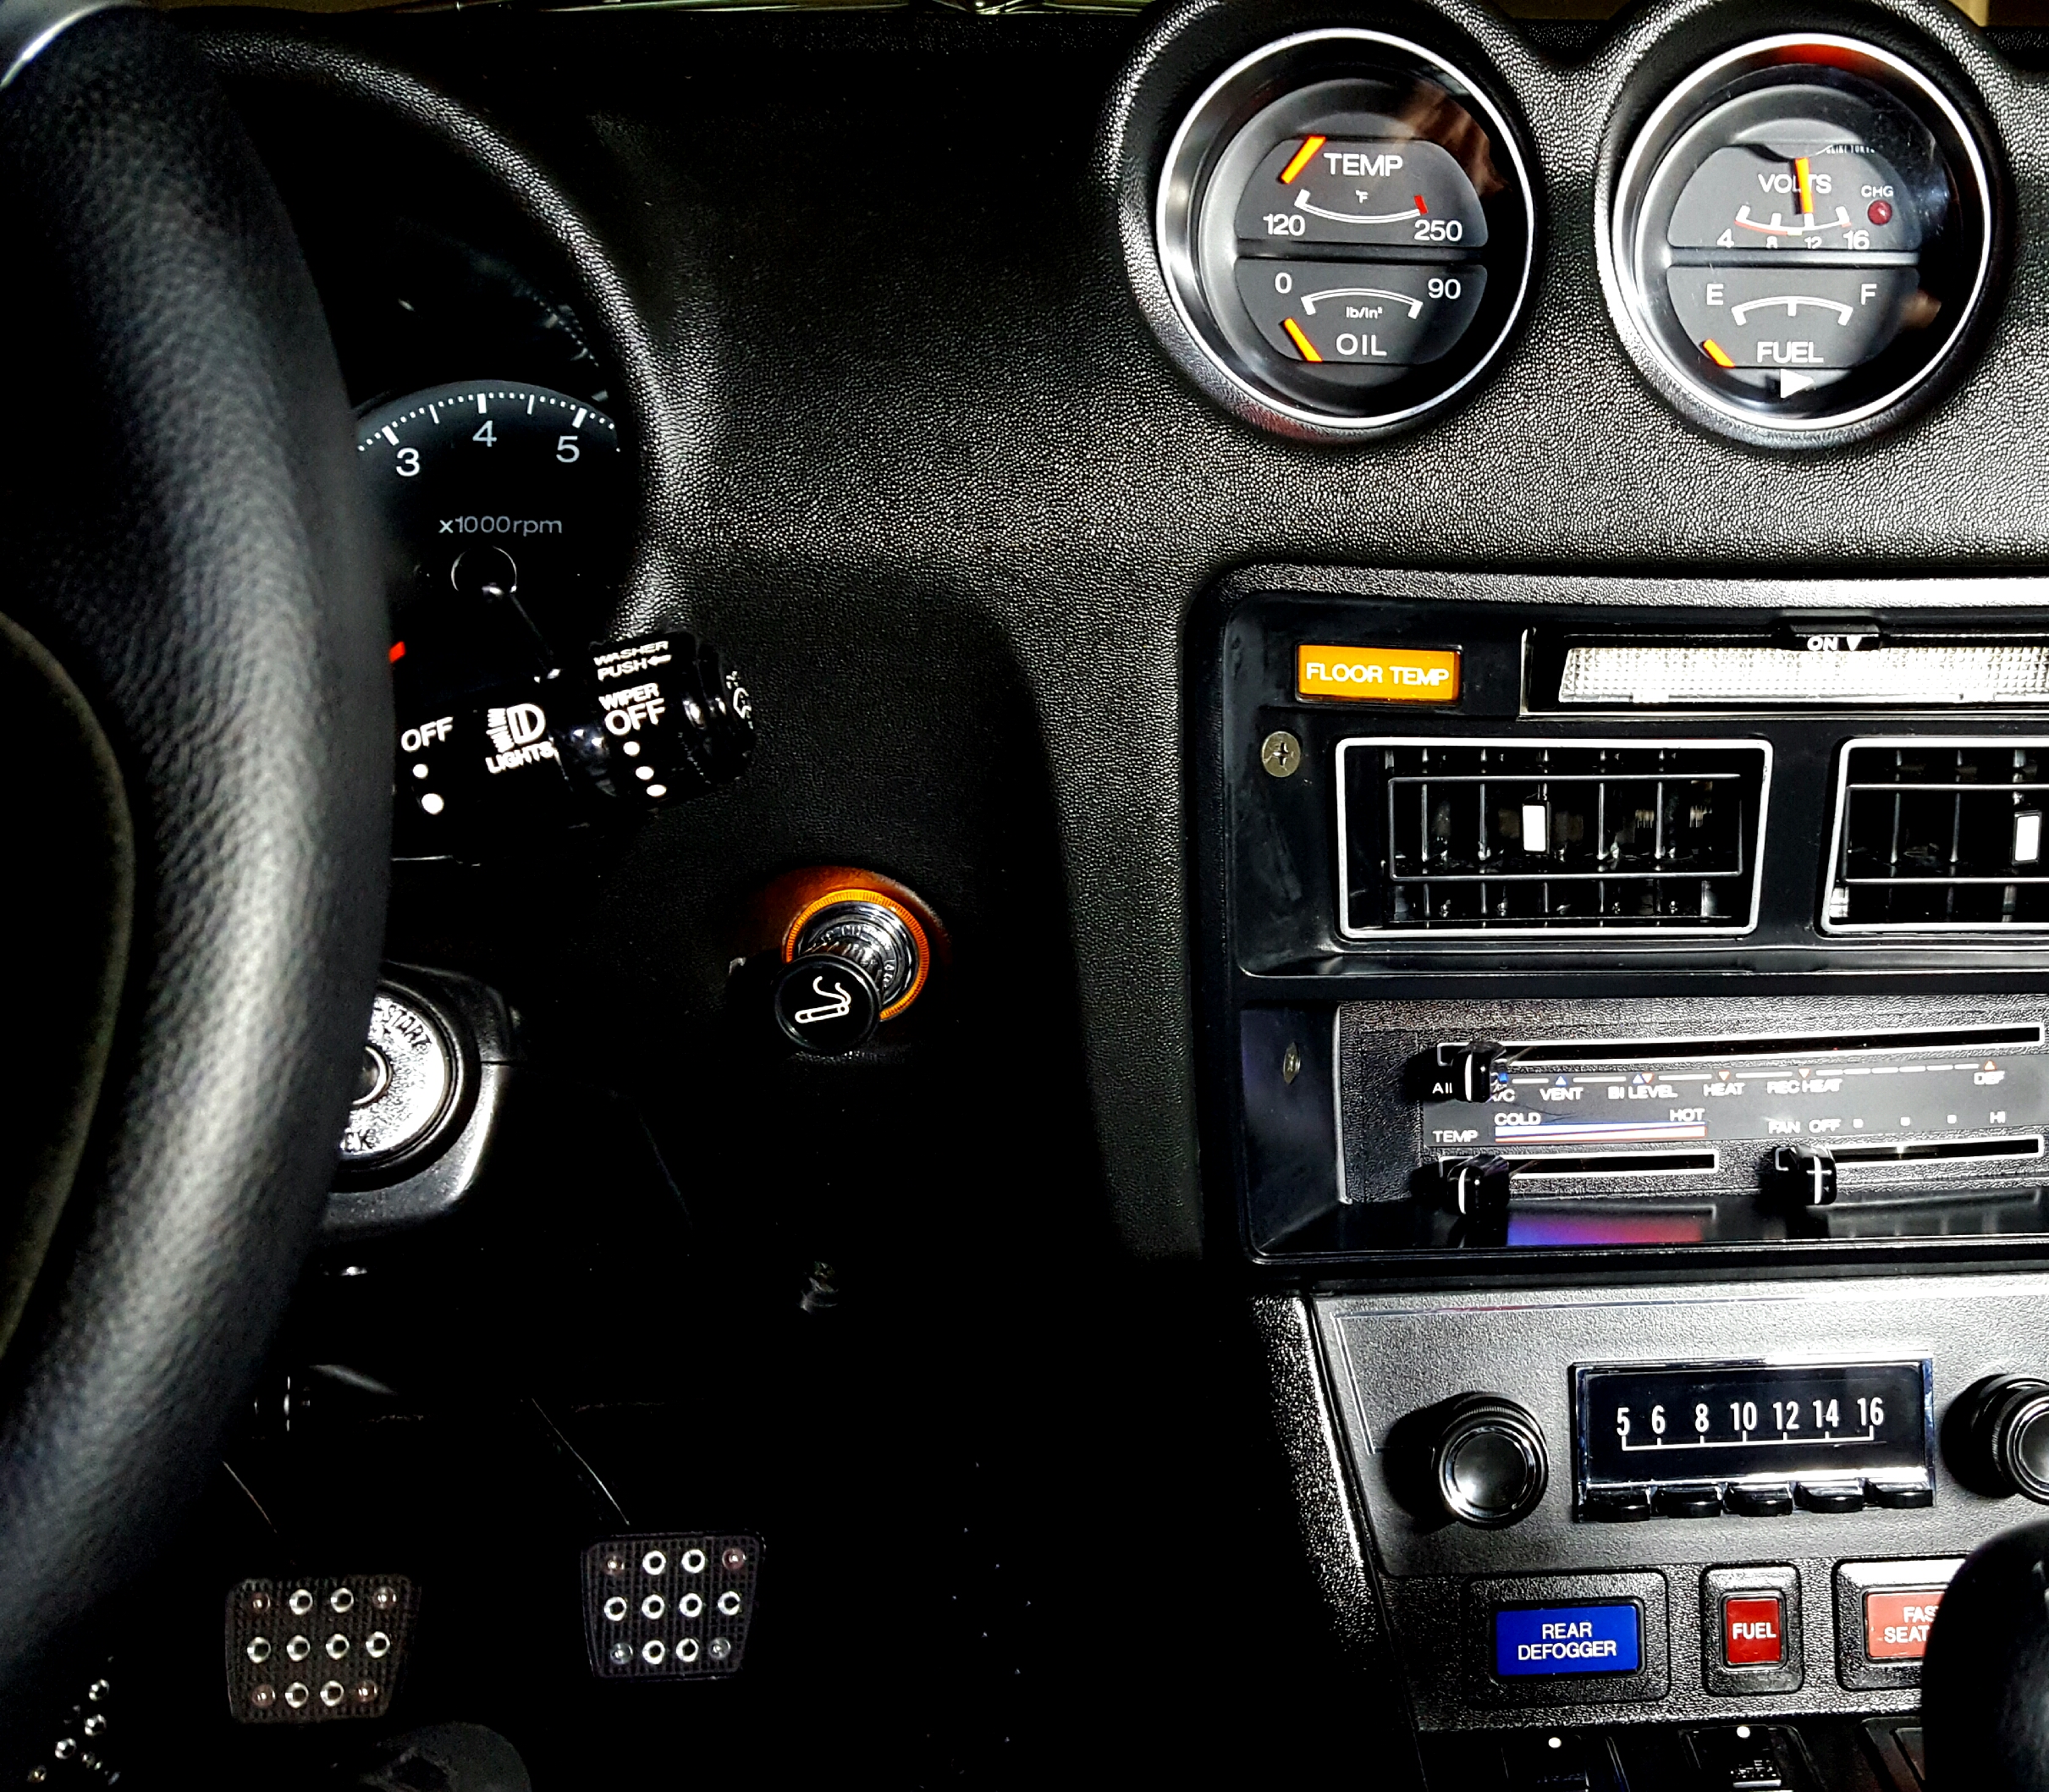
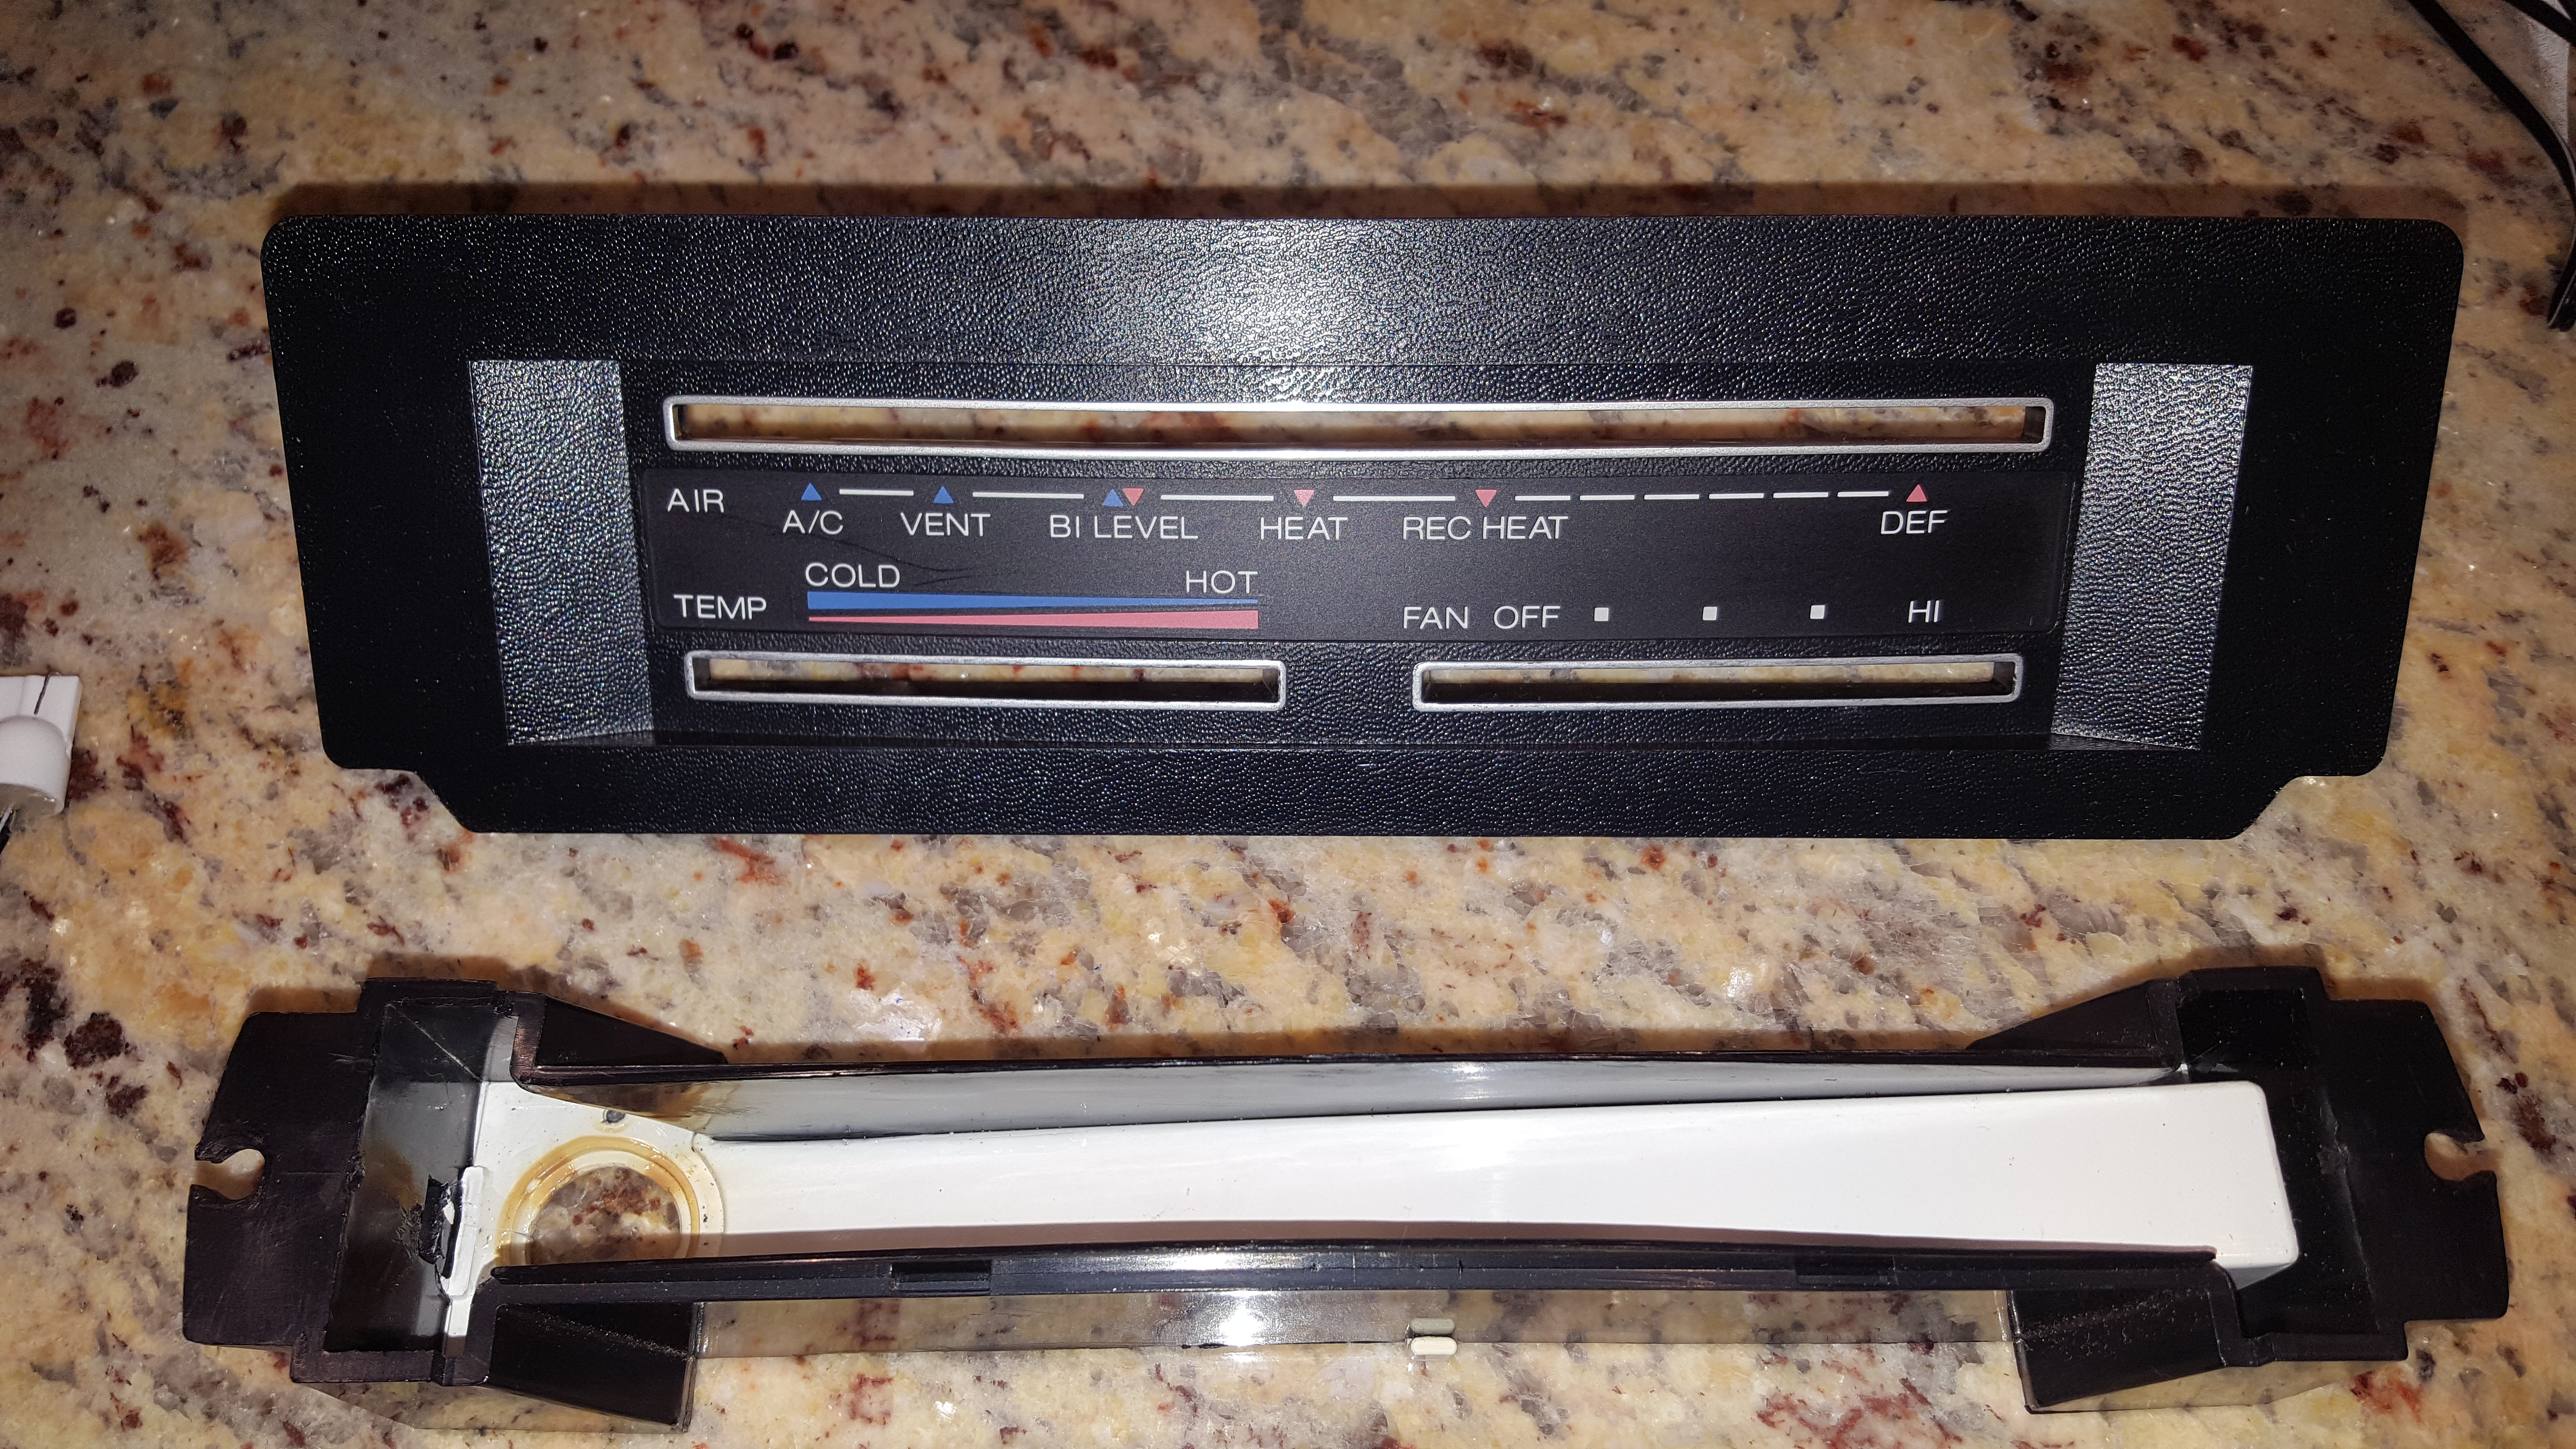
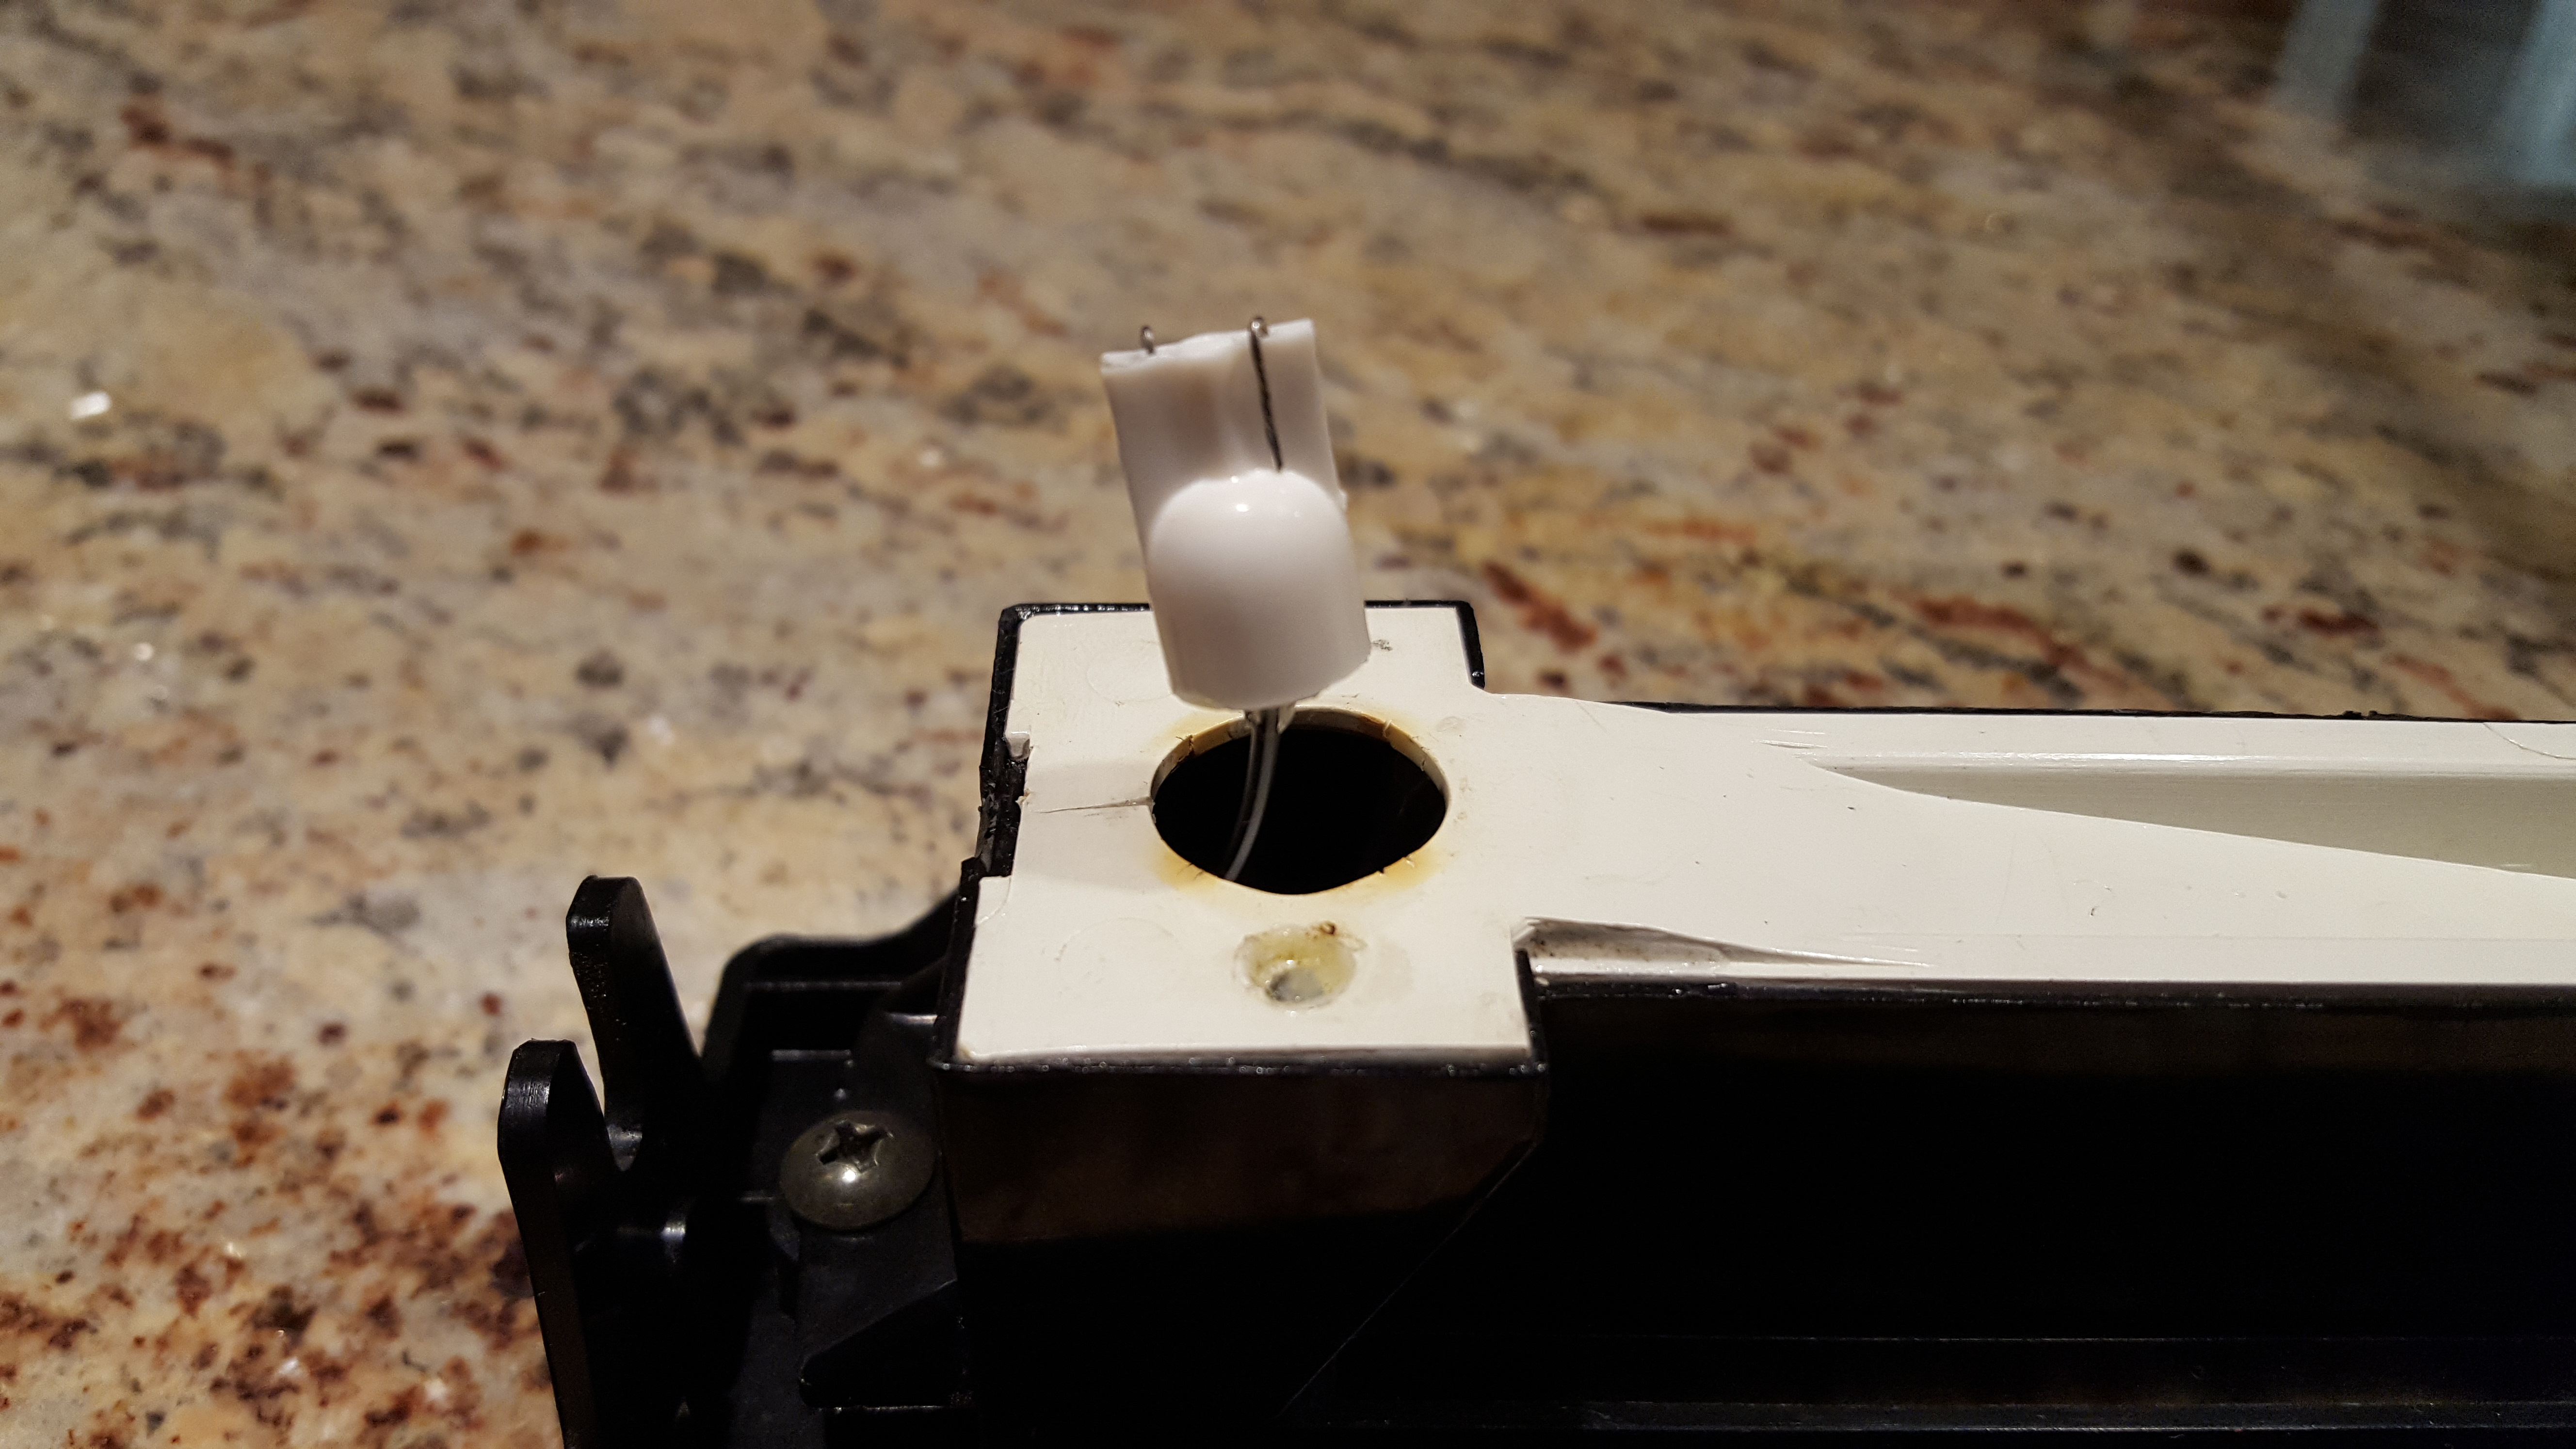
 1 point1 pointOnce all those LEDs were in the dash, I realized the illumination from the HVAC control and cigarrete lighter were almost invisible. I had a BAS9 five LED bulb in the HVAC control already so I bought some LED strips and a BAS9 adapter socket, lined the HVAC housing with aluminum tape and got it to light up nicely to match the rest of the instrument panel in intensity. I had neglected the cigarette lighter. I found a vintage identical replacement with an illuminated trim ring but still used the original lighter element, swapped it's incandescent bulb for another BAS9 LED and added a bit of flair to it as well. Dave
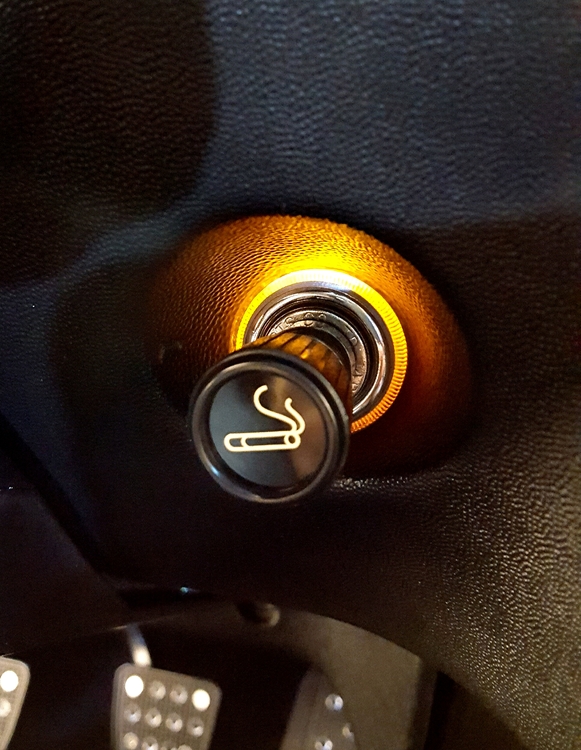

 1 point1 pointI went with all white LEDs in the instrument panel to unify the look of the LEDs on the maplight, courtesy light and glovebox light. Since I painted all my instrument needles fluo orange to match the second hand in the calendar clock, the white light picks up that orange nicely (much crisper than with green light). I left the original incandescent bulbs in the turn signal arrows because I just needed their green color to come through and they looked bluish with the white LEDs. The charge light on my voltmeter is also the stock bulb. If you have some incandescent bulbs in the circuit the light dimmer switch actually works much better than with all LEDs.
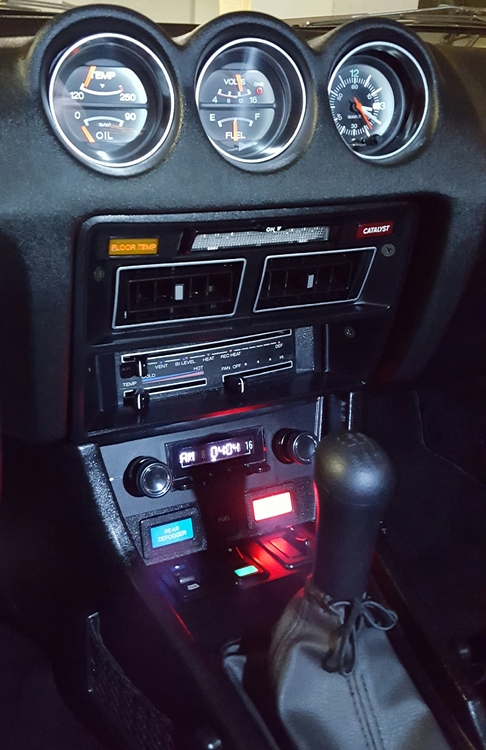

 1 point1 pointMatt, I notice the shade issues with LED's. My eyes have always disliked the bluish hue to the "white" LED's. I just have a hard time seeing with that kind of illumination. Seems like I lose contrast or something. For my dash lighting, I used all "warm white" LEDs (color temp around 3000K?) and they are much better. I tried them for the first time on the road earlier tonight and I really like the way the project turned out. I'm out of time right now, but I'll try to post details next time I'm logged in. I also had an eighties vintage GM and all the instrumentation was amber (red/orangish). It was neat for a while, but I also drove eithgies vintage Acura/Honda and they used white. I liked the white better than the amber.1 point1 pointThat's one of my next projects -- LED conversion. It's a simple thing and will add so much life to our crusty electrical systems. About LED fade: Strictly speaking, LEDs don't really fade (much). They just keep cranking away until one day they fail. However, that's not true in practice with WHITE LEDs. White LEDs are really blue/near UV LEDs that are coated with phosphors. When the phosphors are hit with the higher energy near UV and blue light, they fluoresce at a variety of longer wavelengths, adding to the blue light that comes through the phosphors to create white light. Over time the phosphors degrade significantly, resulting in very dull light. So when you convert to LED bulbs, make sure to buy the ones that come in colors (e.g. amber or red) wherever possible. They'll keep their brightness very well, as compared to their white counterparts. OH, and flashers: The electronic ones are VERY cheap and easy to substitute. Both the turn signal and hazard flashers are under the dash (at least in my '78). I got generic electronic ones and made mounts for them out of PVC pipe. They sell load resistors to run LED lights with thermal flashers, but I don't know why anyone would want to go through the trouble/expense of LED conversion and then load the thermal flashers with power resistors -- except maybe to be kinder to the bulb sockets.1 pointAfter pinging the paint shop once weekly for many weeks for an update, I slowed to every other week. Responses were all the same - haven't started yet. I stopped asking. I finally got an email on Friday, requesting door latch, hatch latch, hood latch hardware and hood springs, and attached to the email were two pages of issues that they noted - I assume that is their punch list so far. Along with that, they made mention of maybe starting on June 22nd. Just venting here for a moment, but if I could have had the car in my possession from when I dropped it off on February 19th until say... the third week of June, I could have had it absolutely PERFECT. I busted my arse to get it done back in Feb, and "ran out of time" on my punch list for no good reason at all. Why did I deliver it then? That is when they told me to! Ugggghhhhhhhh! It is the same thing with my Honda S2000, by the way. I dropped that car off... I don't know, maybe 5 weeks ago to have some frame straightening work done. They said they would get to it in about 2-3 weeks. Follow up with them 3 weeks later - they said we're looking at at least 3 weeks. Ugggghhhhhhhh! Why can't these businesses do better with their timelines? Remember my parts plater? G_d - took more than 6 months to get that done and back to me! Oh, and the new engine for my other 240z - haha... it has been nearly 7 years now. At least that has been done and sitting on an engine stand bolted to a pallet for 6 months. Ok, end of rant. So, the update for this thread, the paint shop may start on their part of the work towards the end of June. 😑0 points


Important Information
By using this site, you agree to our Privacy Policy and Guidelines. We have placed cookies on your device to help make this website better. You can adjust your cookie settings, otherwise we'll assume you're okay to continue.