Leaderboard
-
Patcon
 Subscriber
 5Points11,142Posts
 -

Diseazd
Free Member4Points3,362Posts -

wheee!
Free Member4Points4,607Posts -
DatsunZGuy
Free Member2Points930Posts


Popular Content
Showing content with the highest reputation on 04/30/2023 in all areas
-
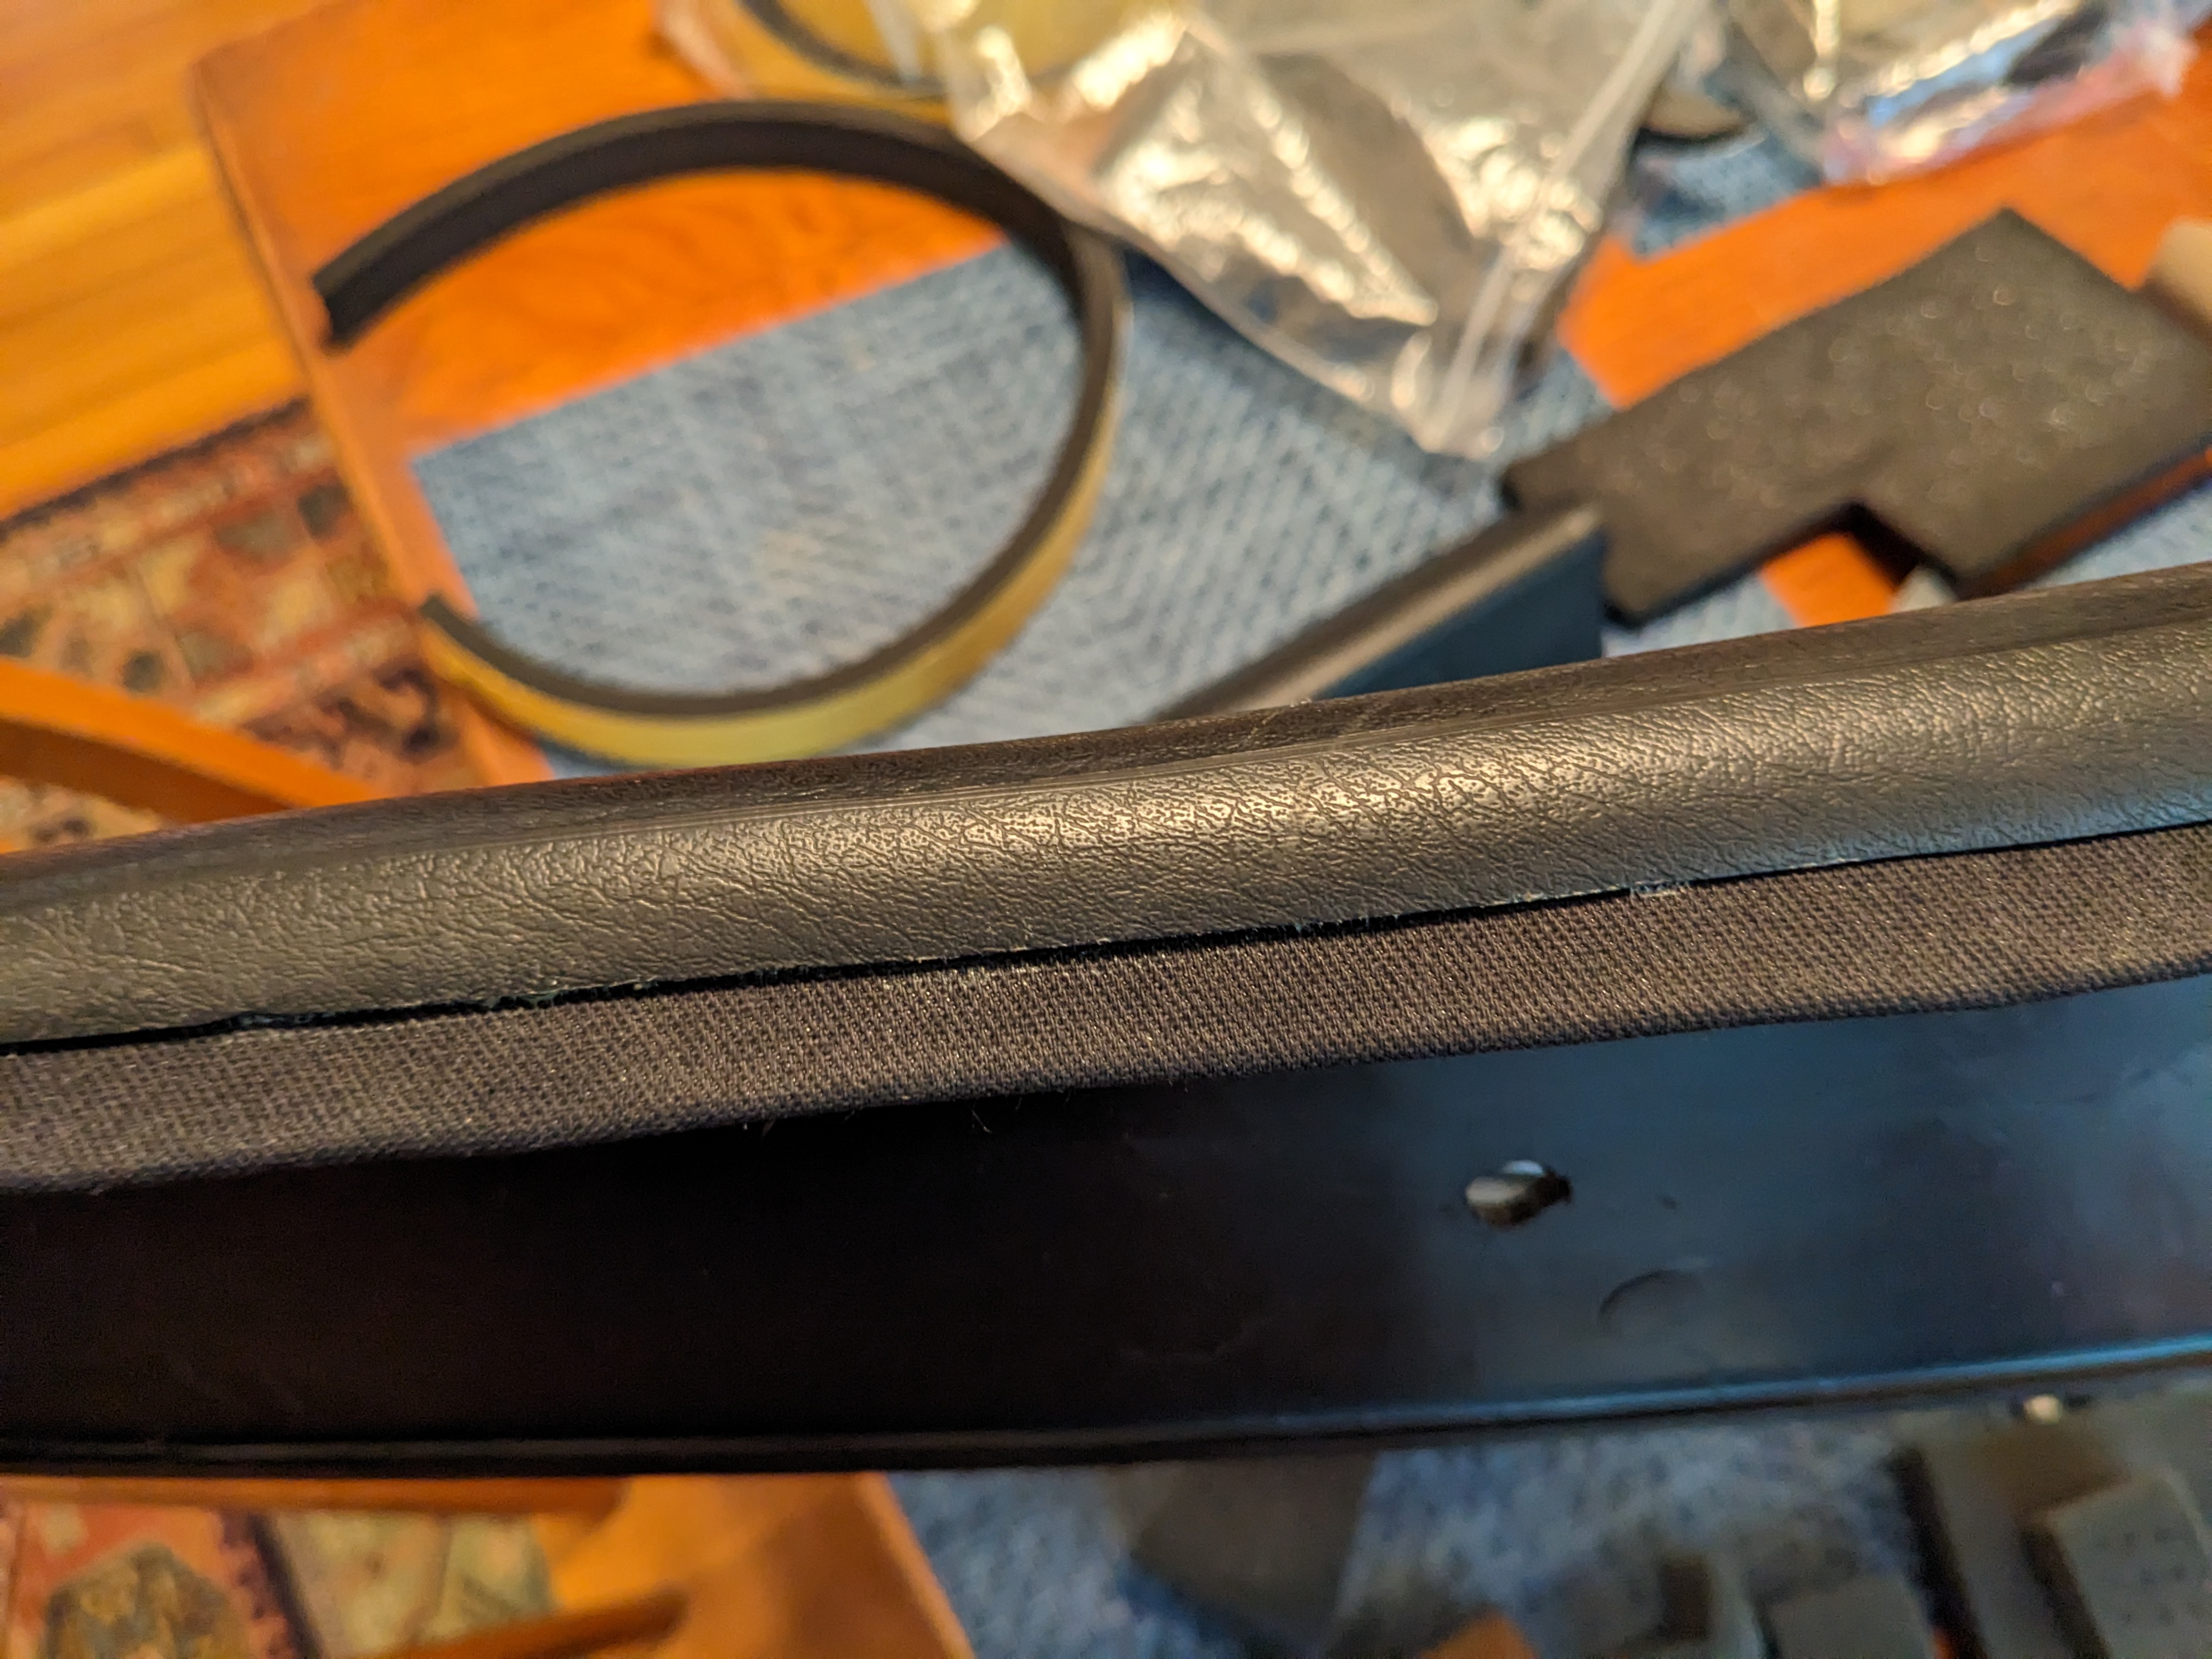
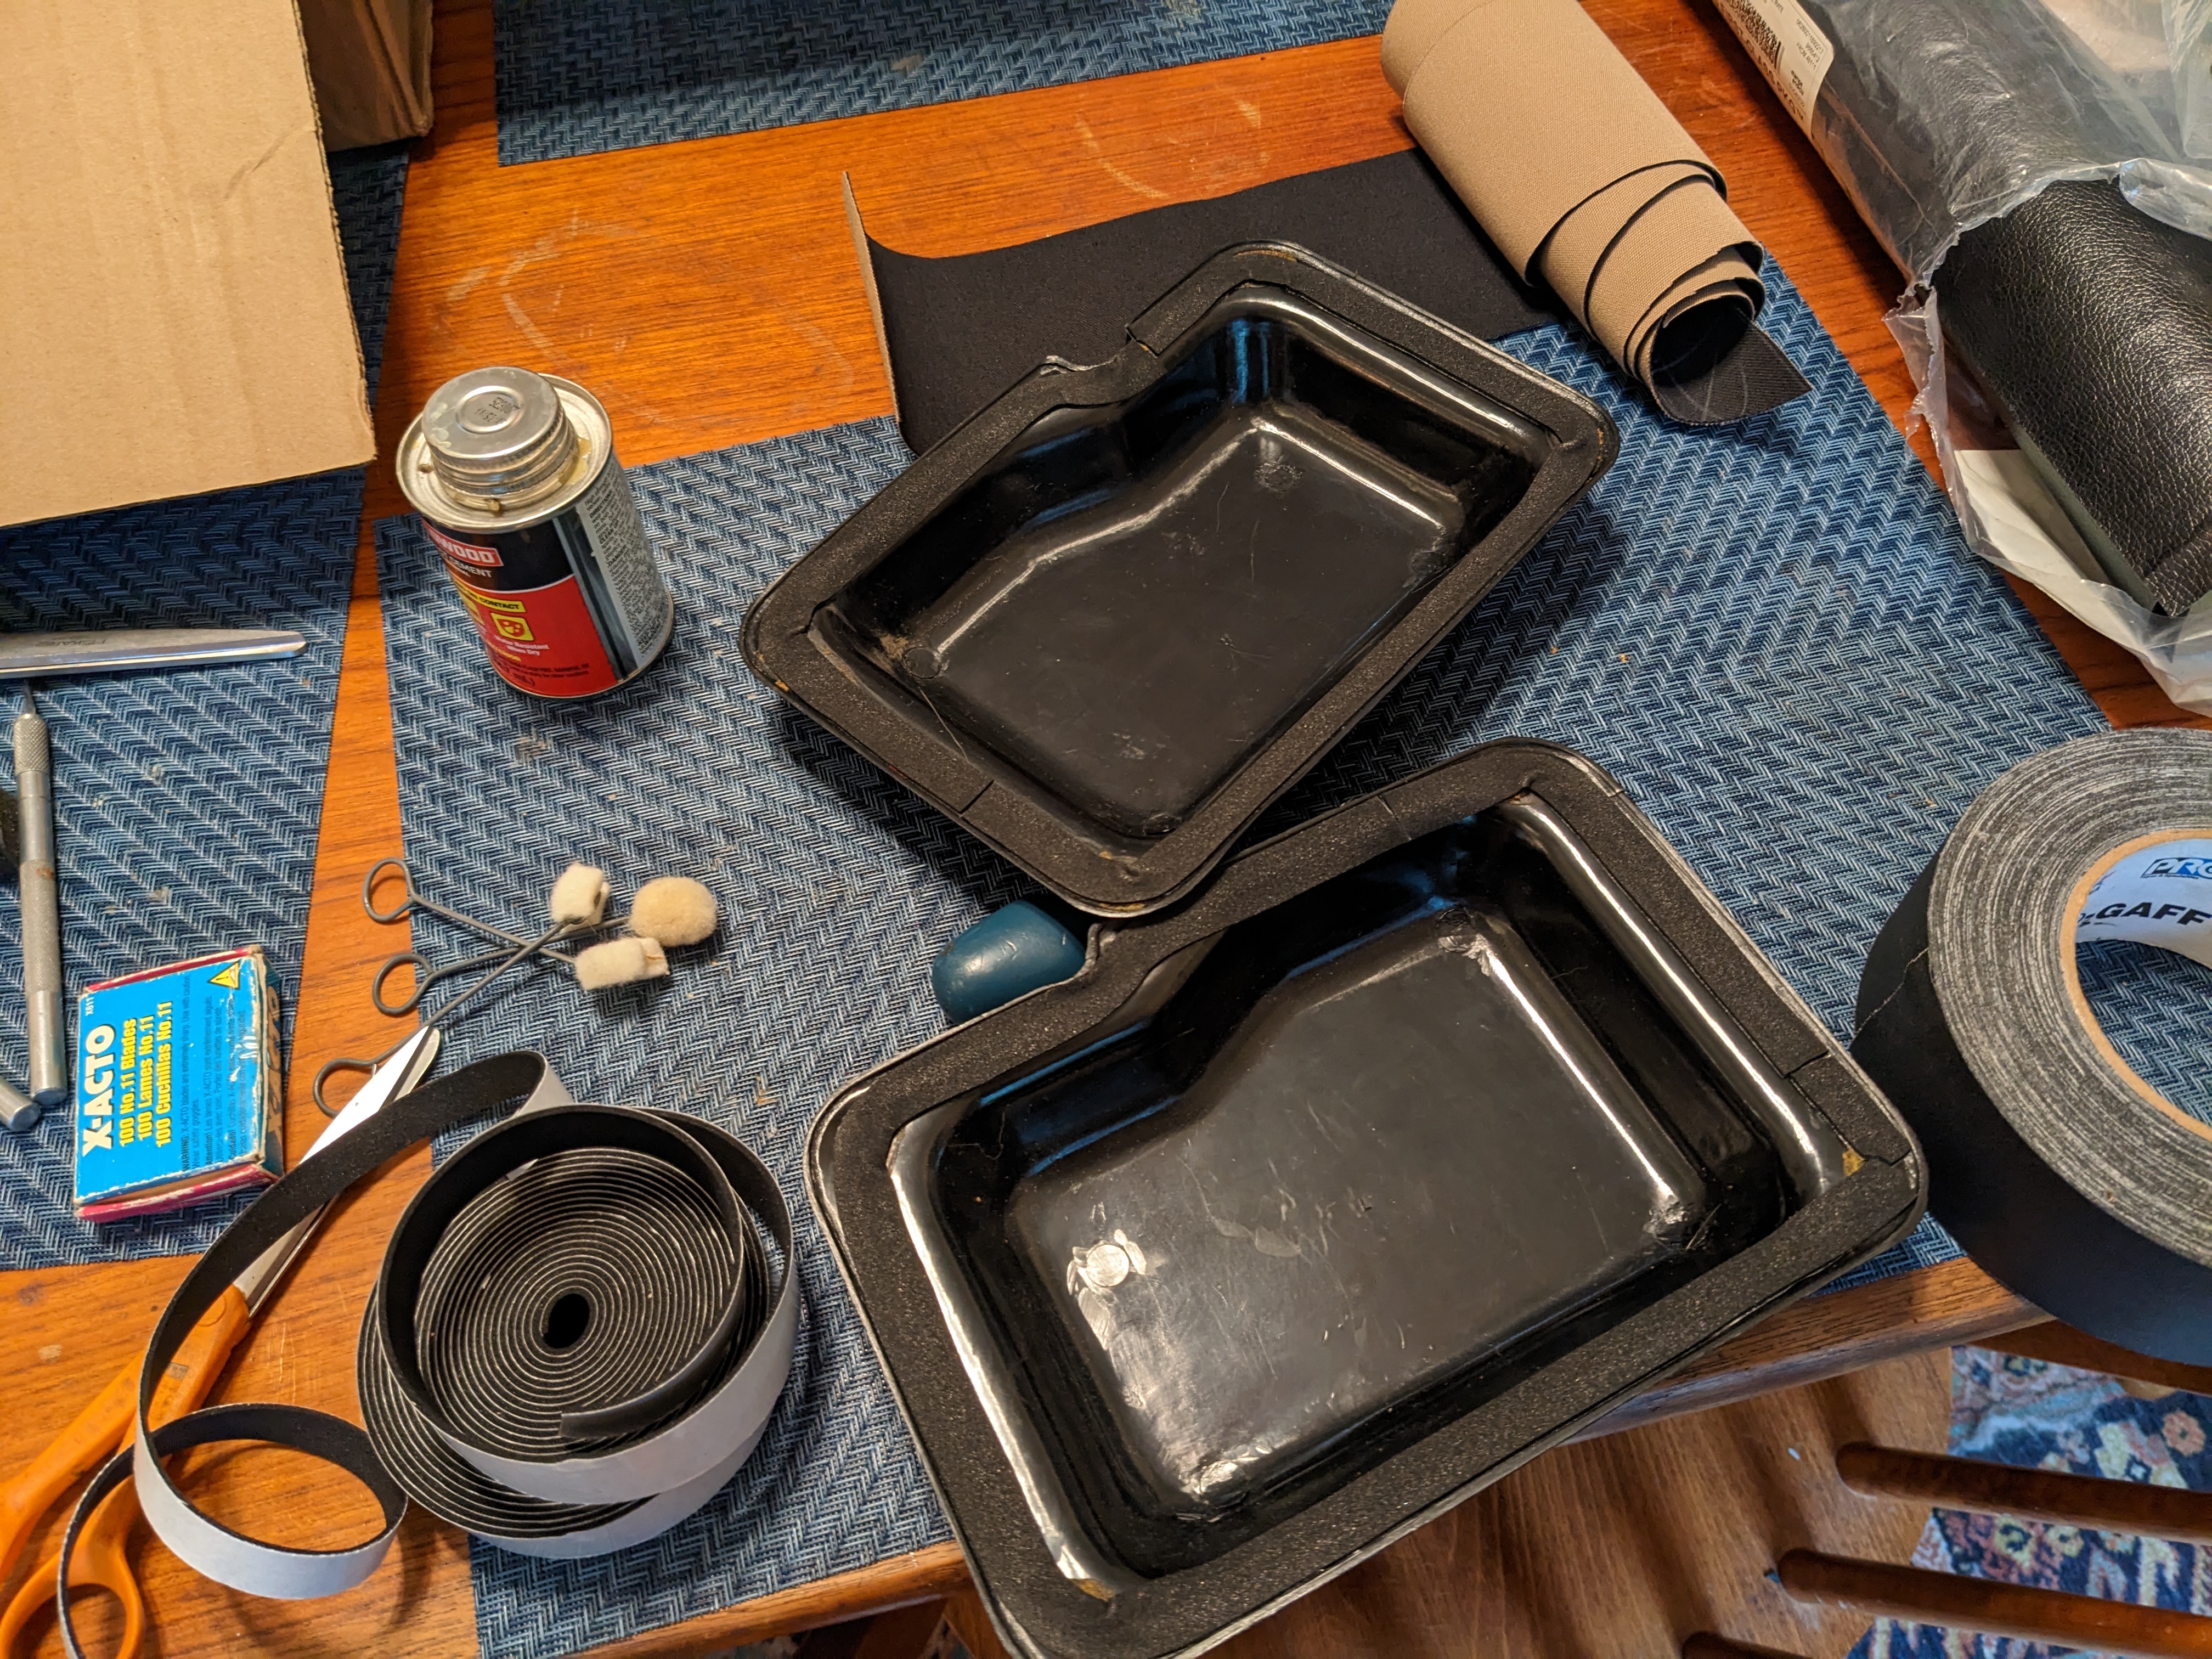
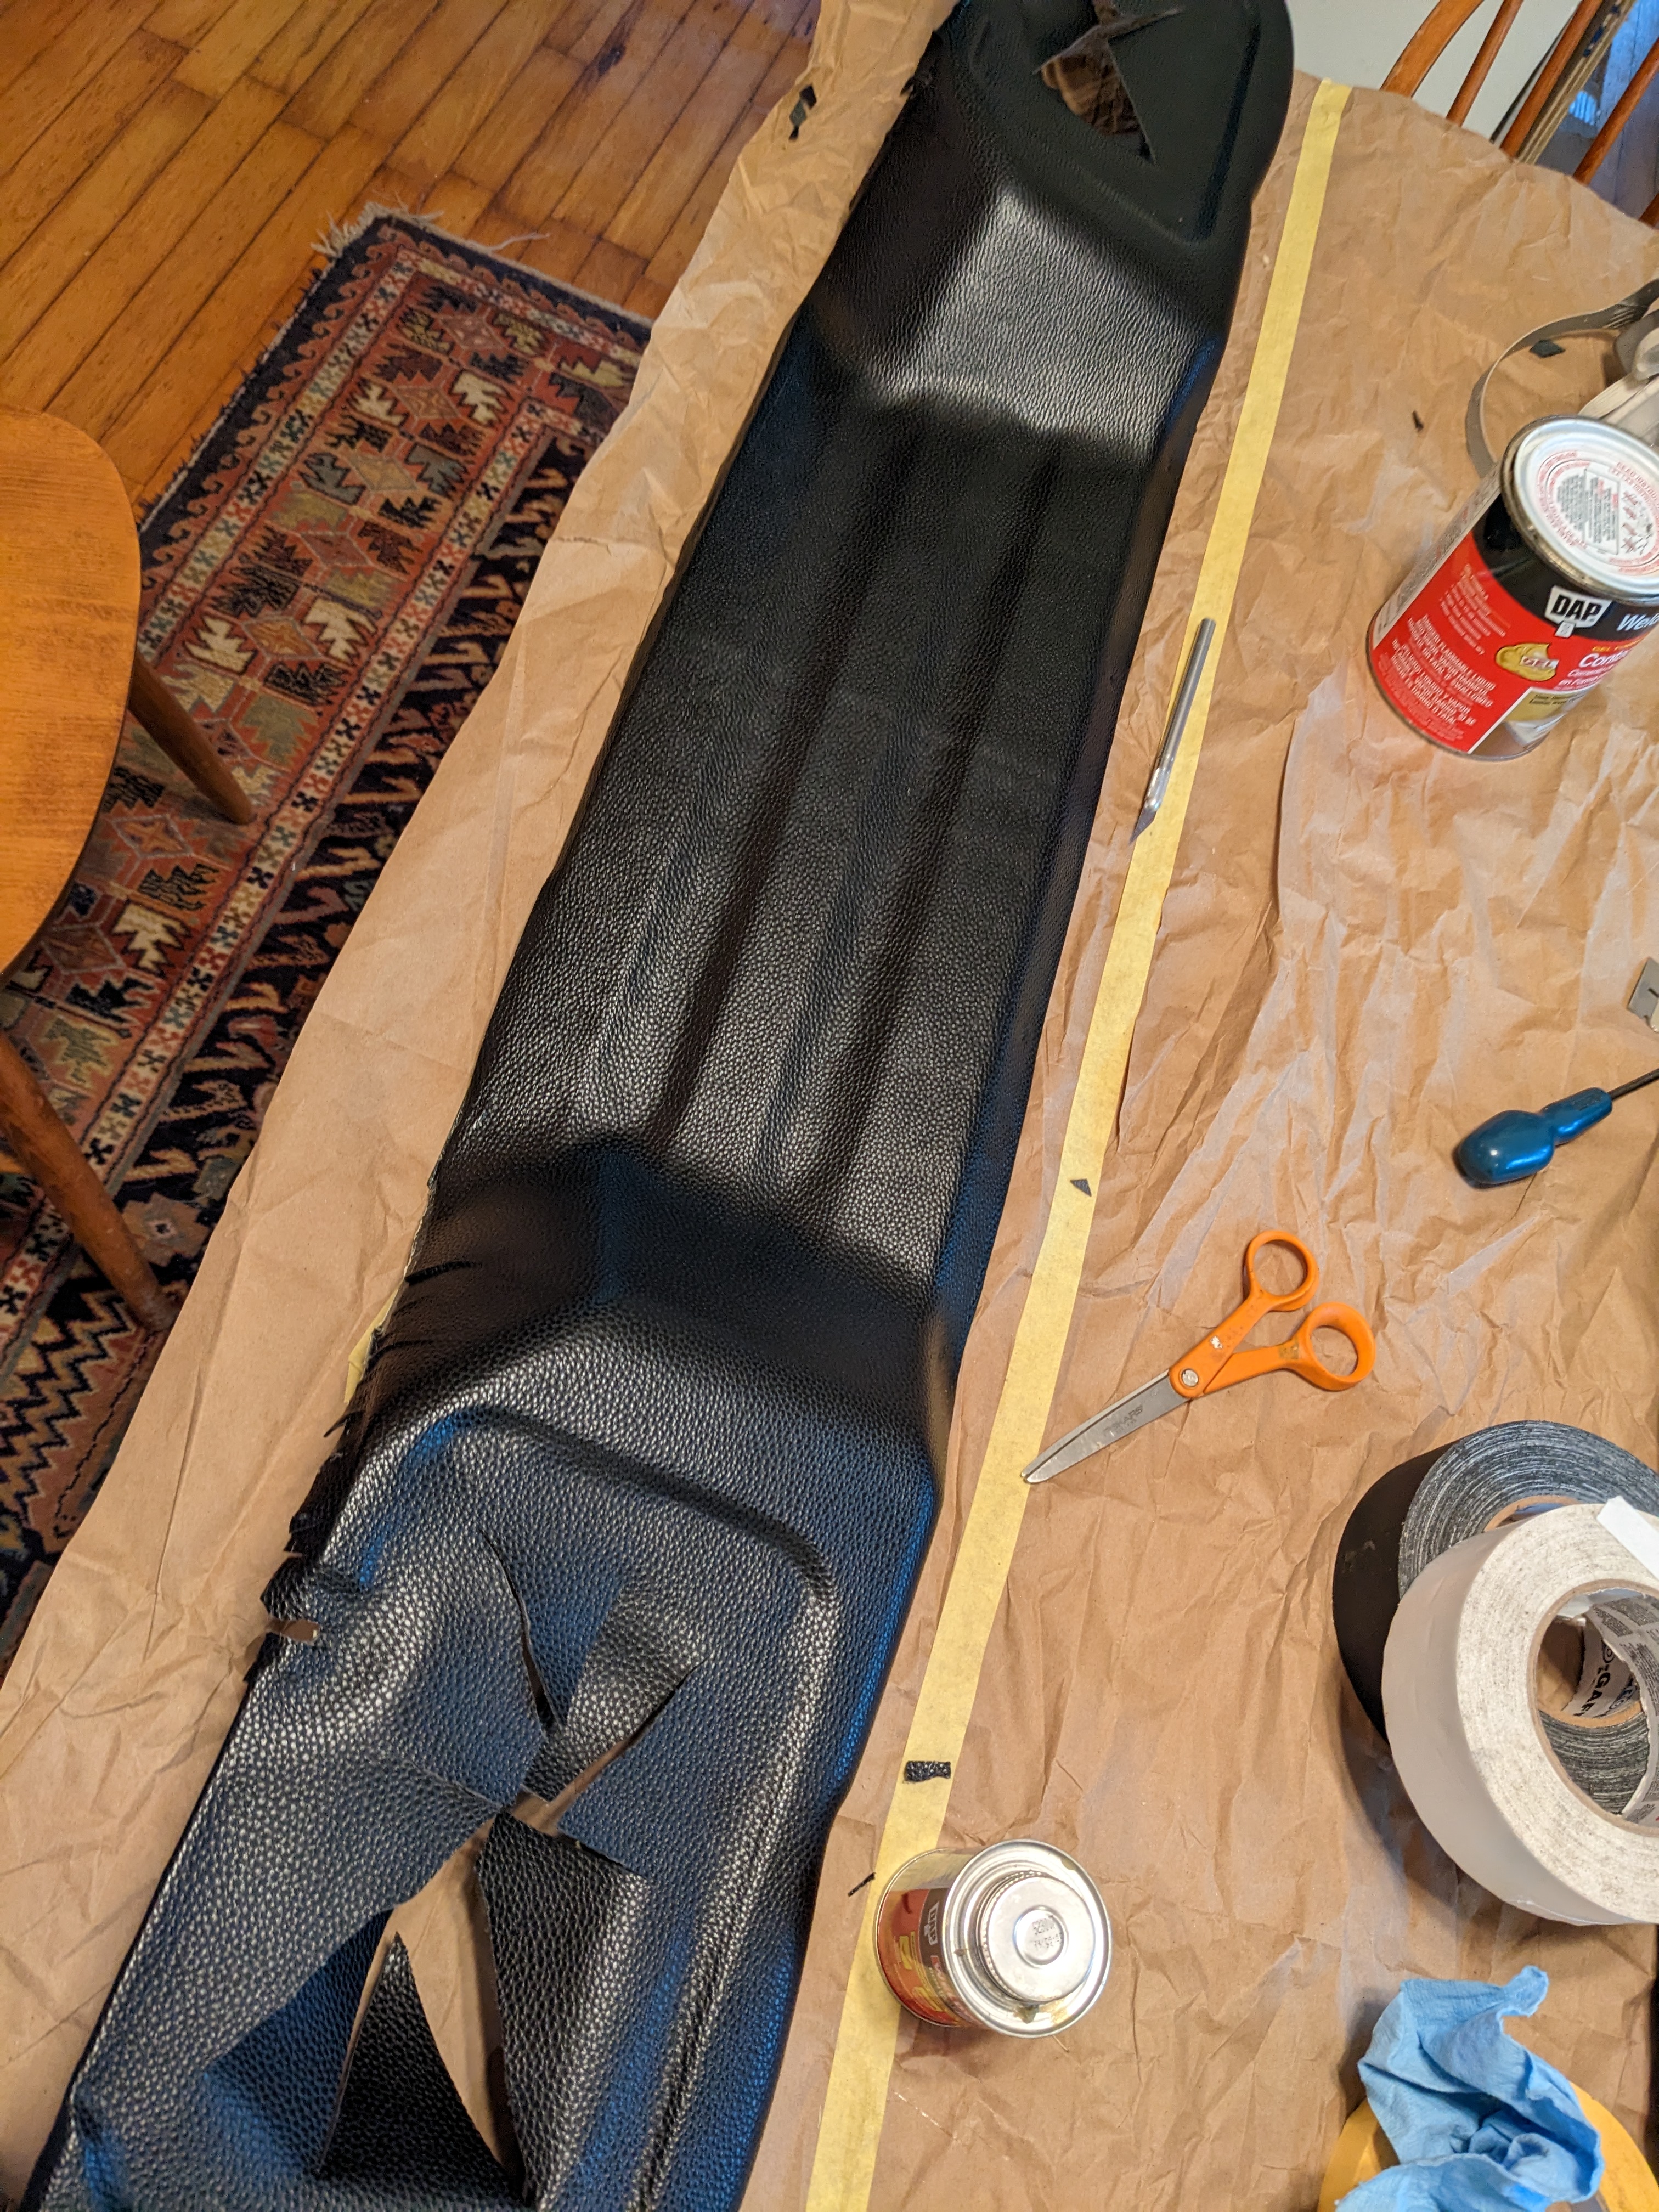
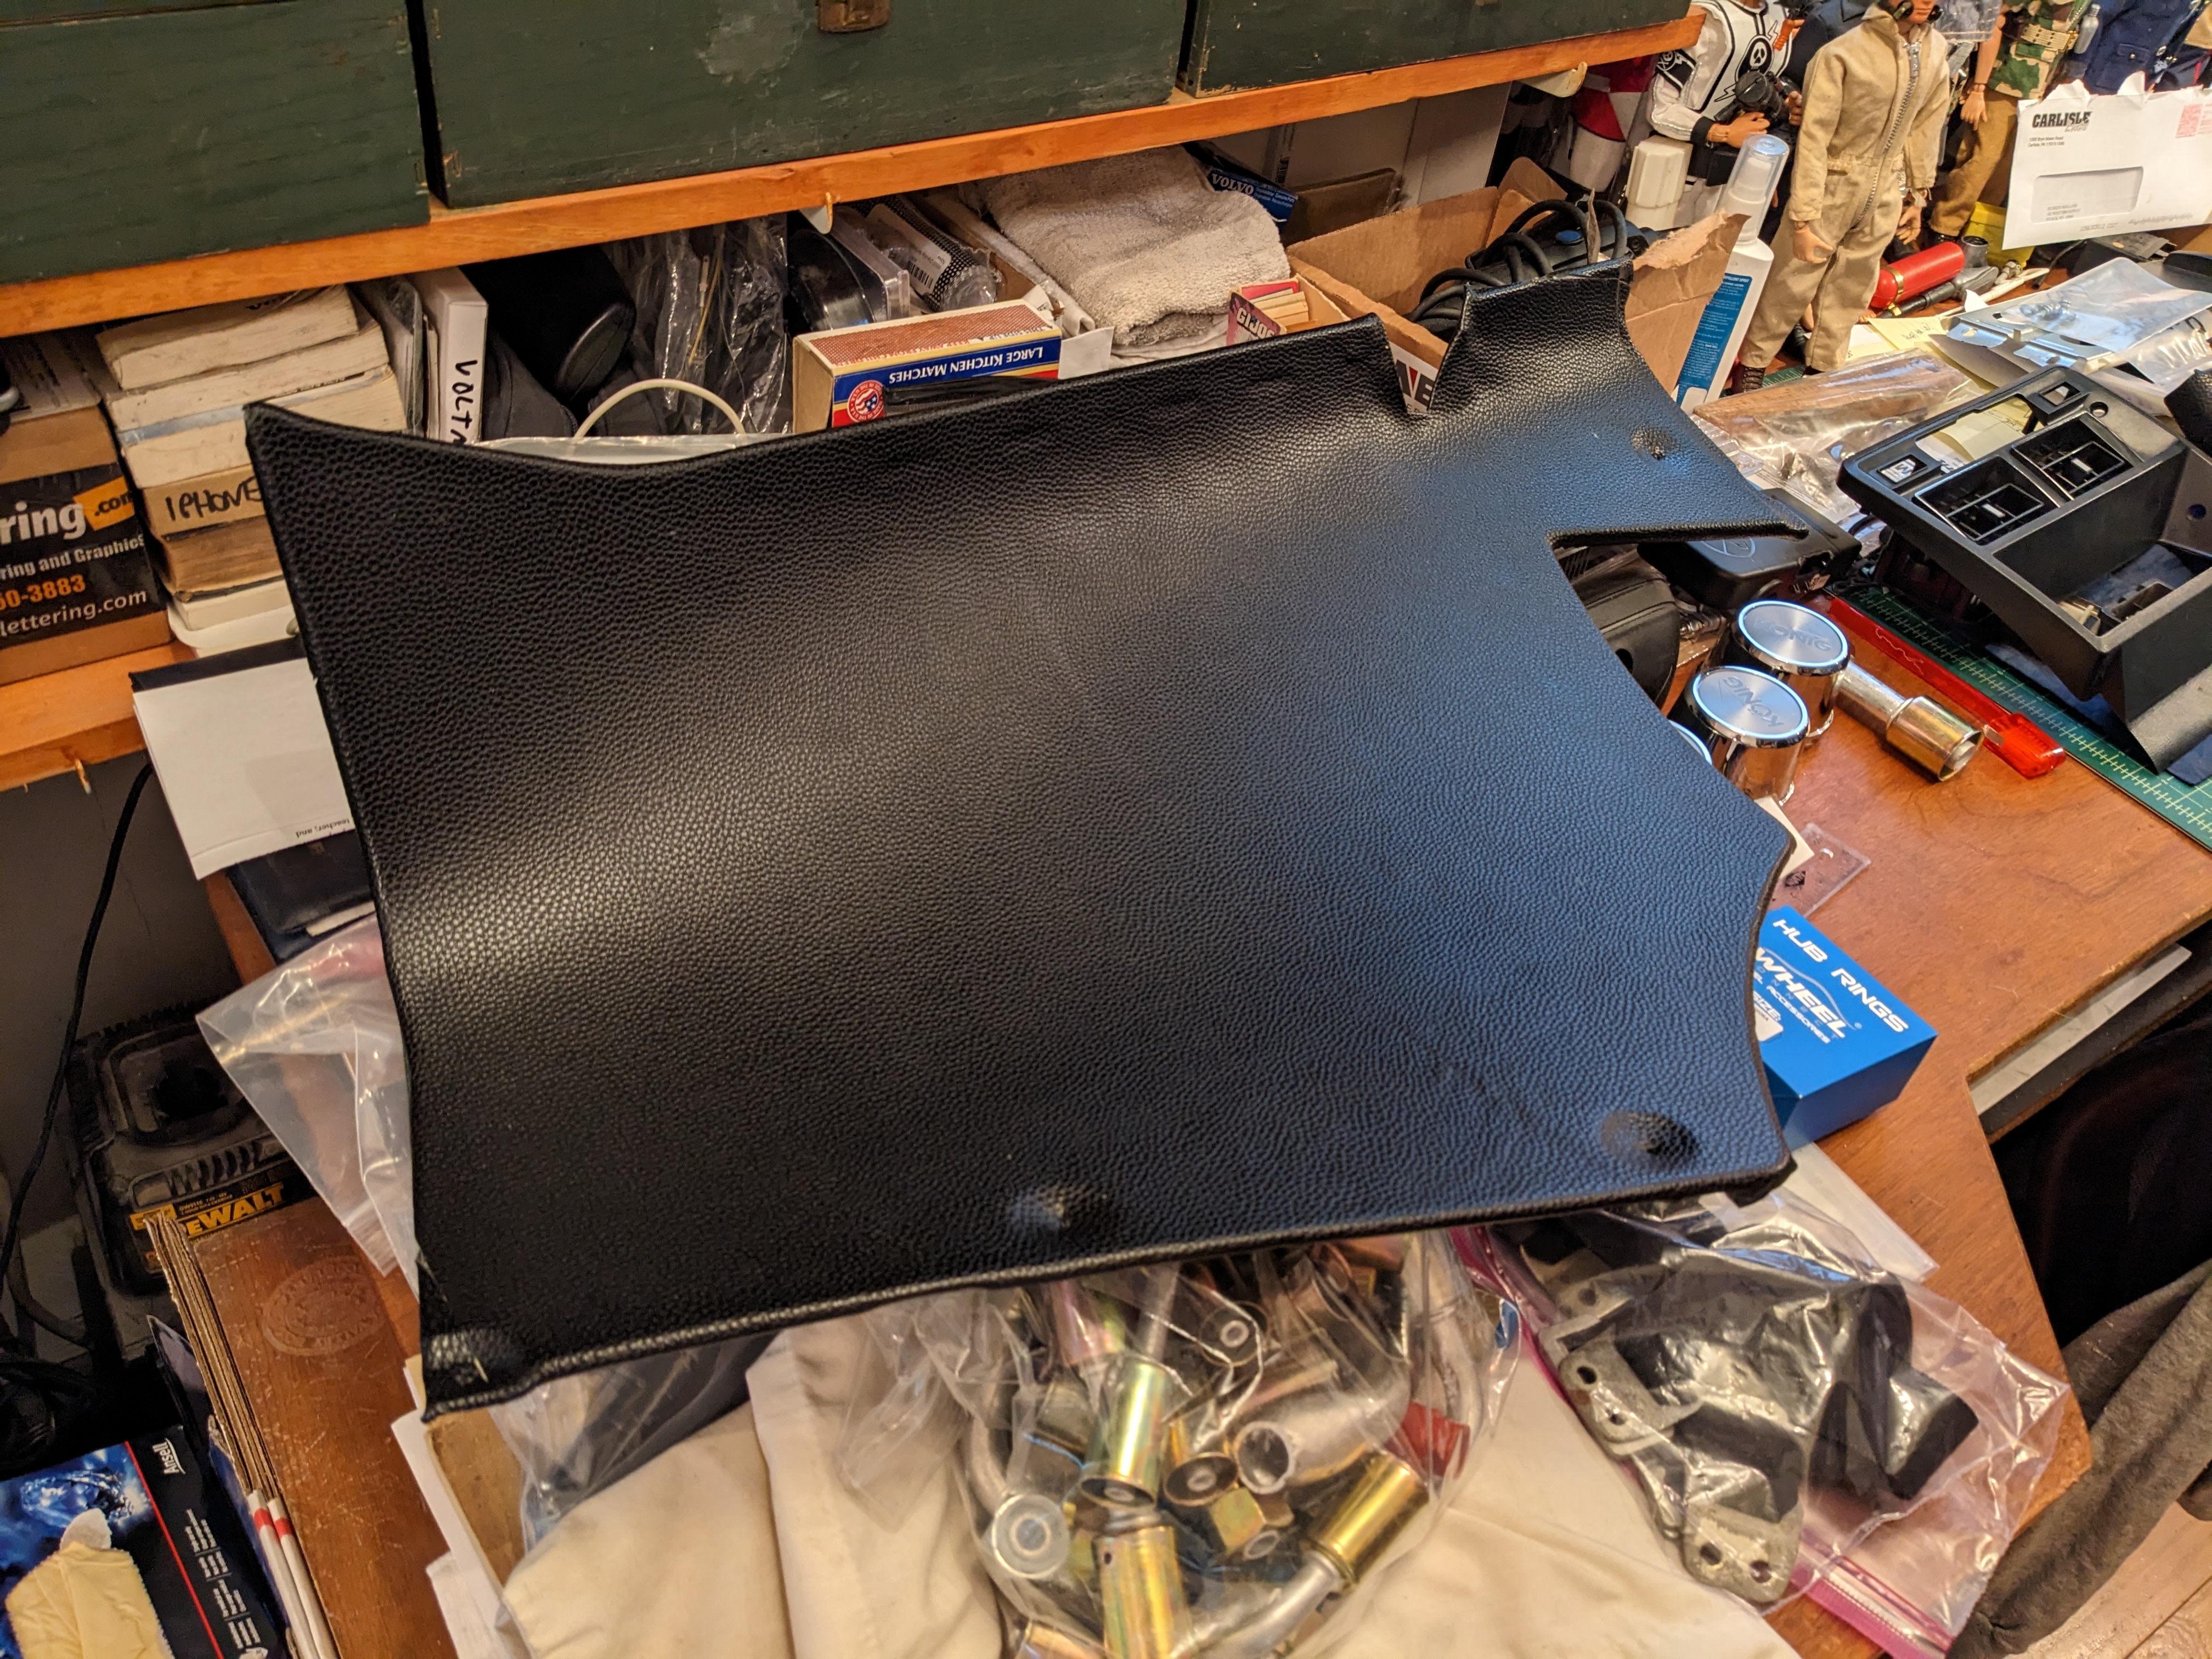
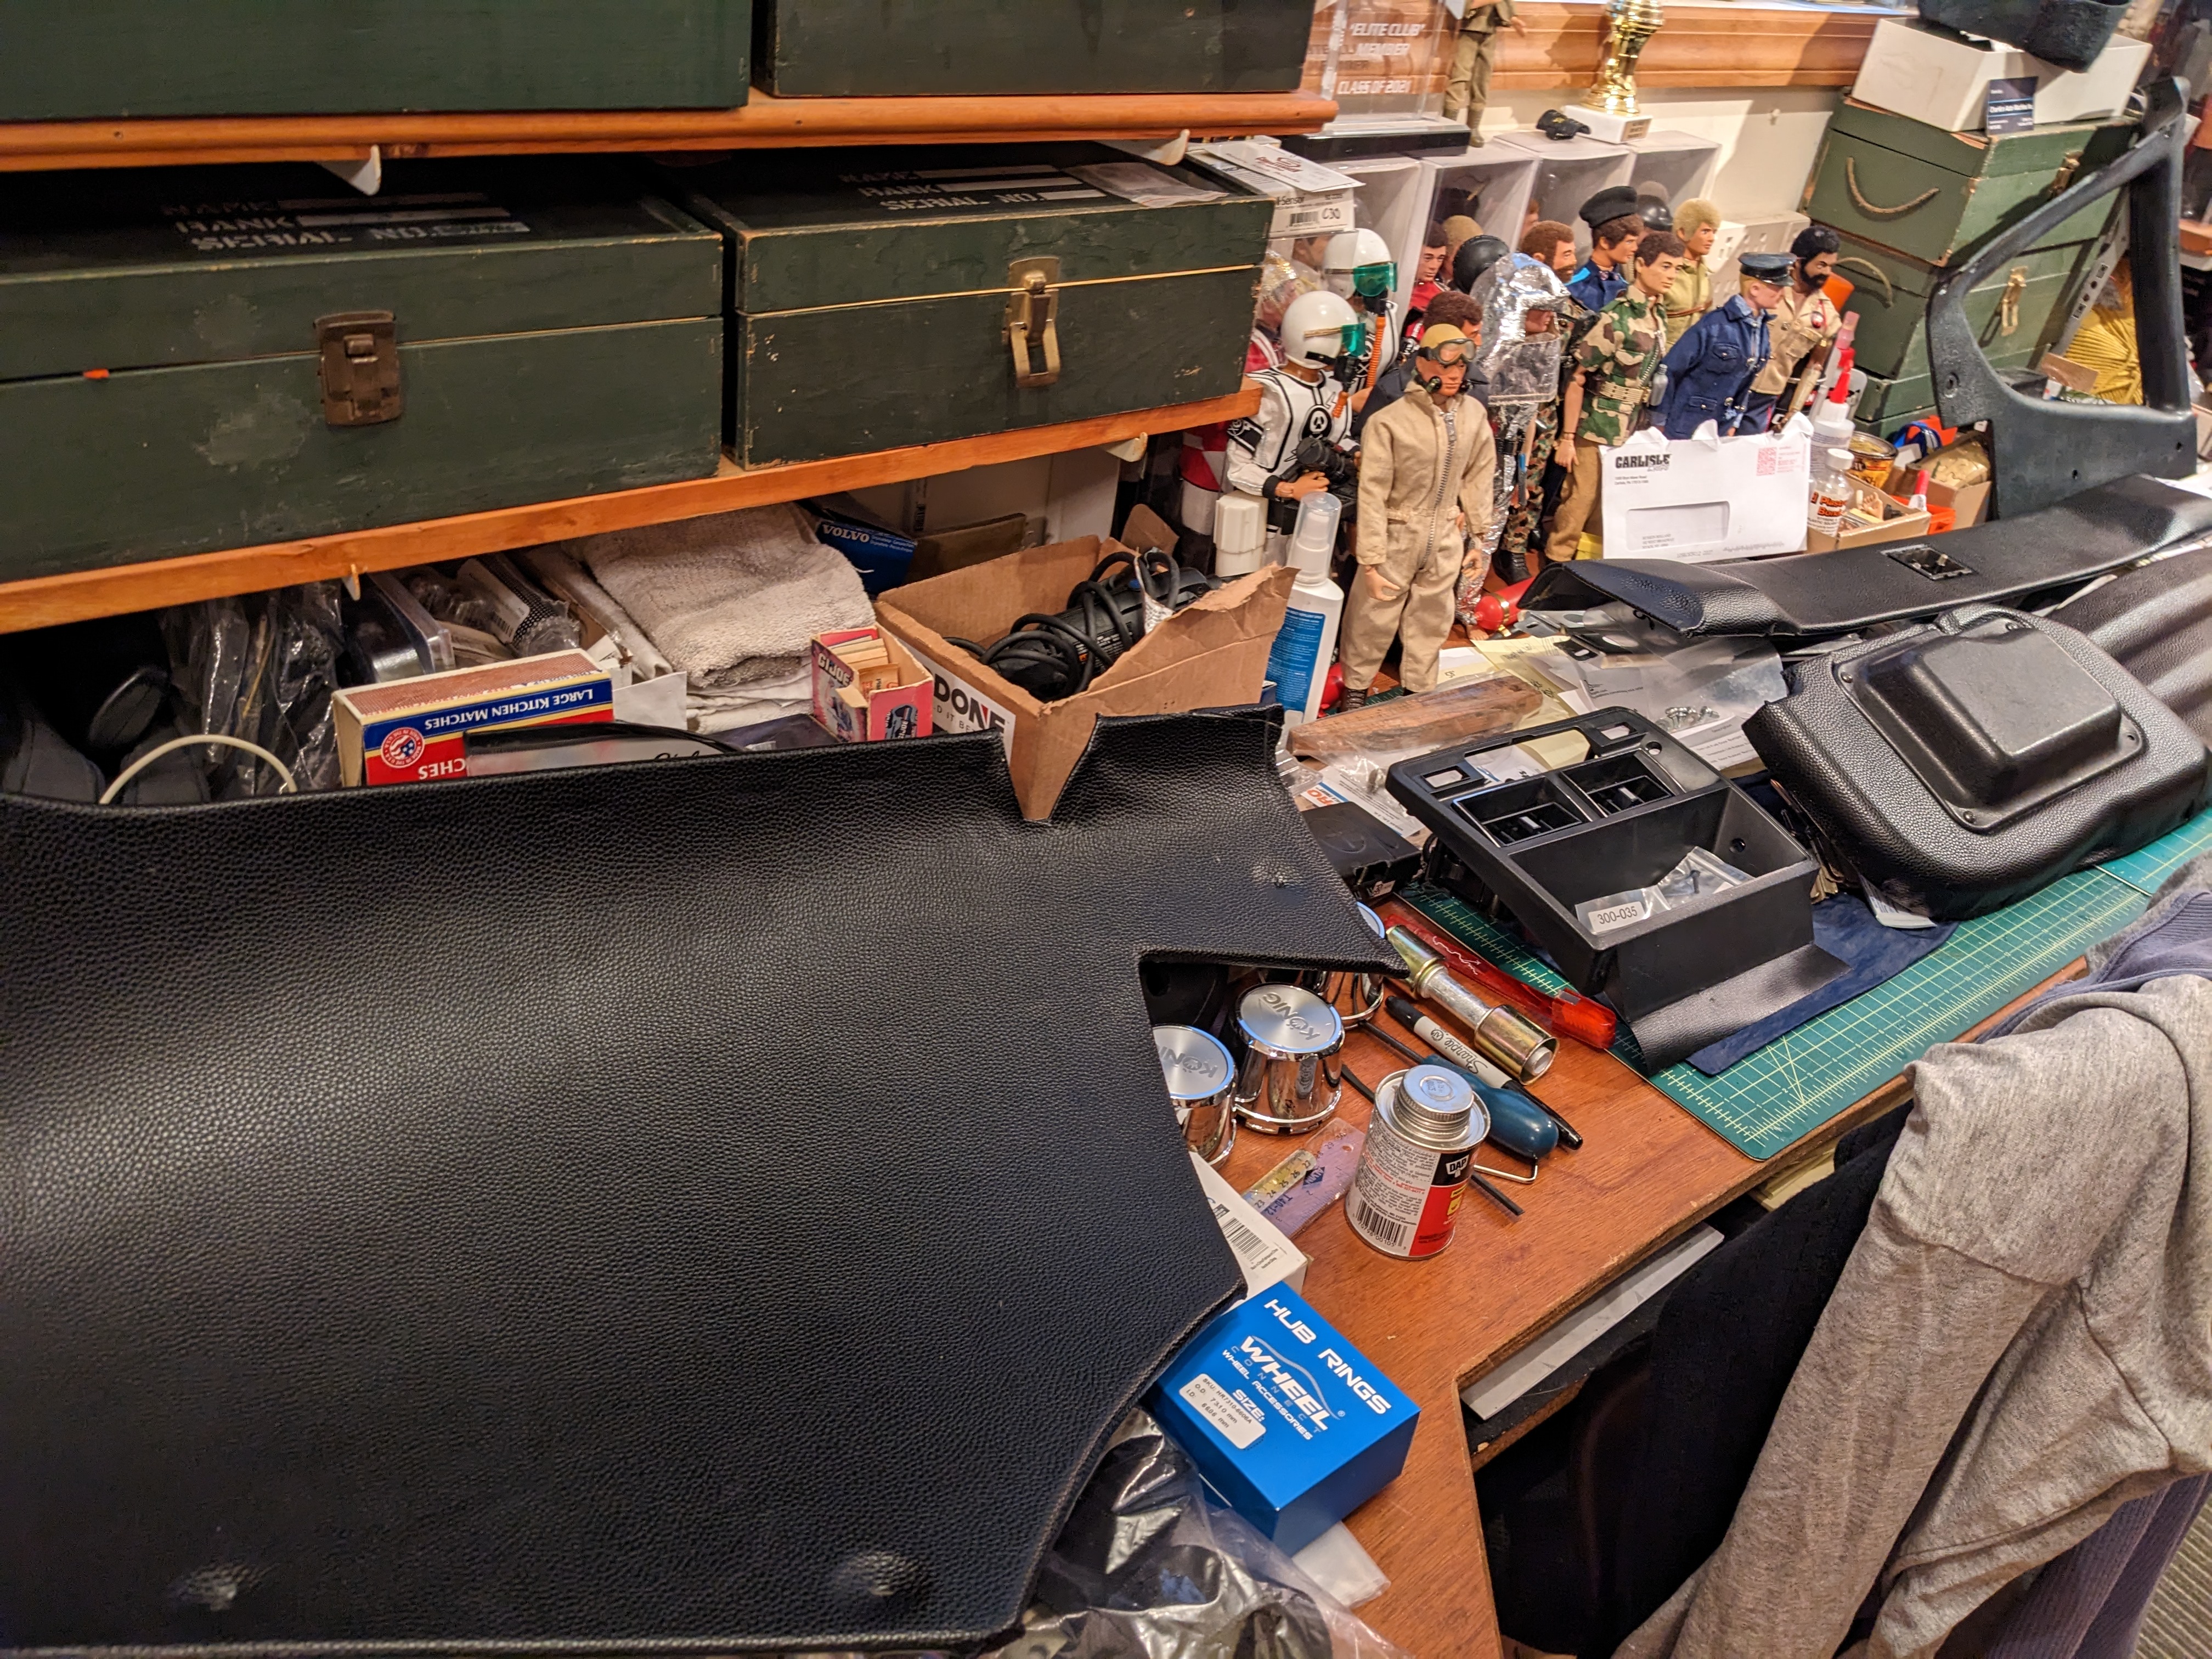
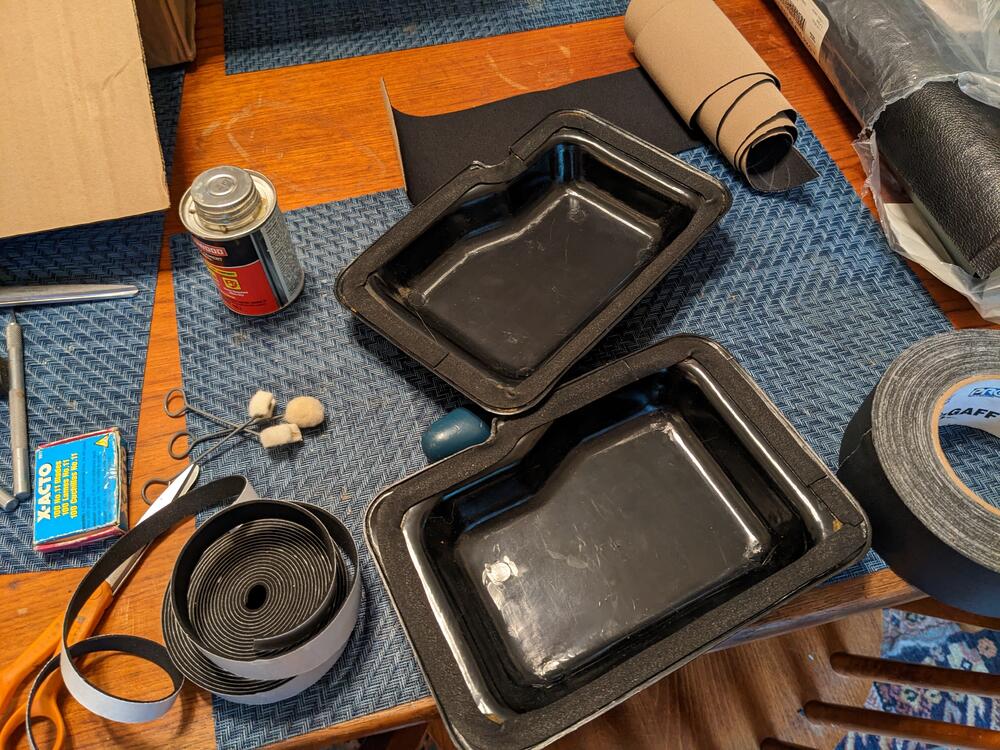
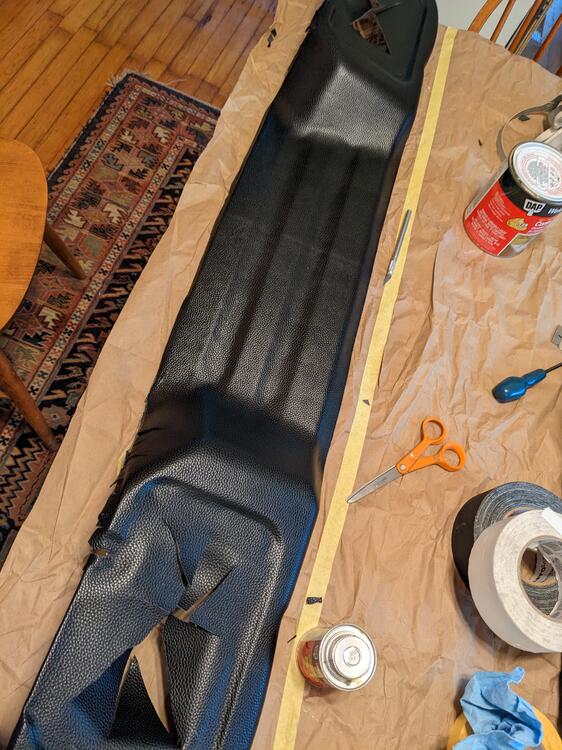
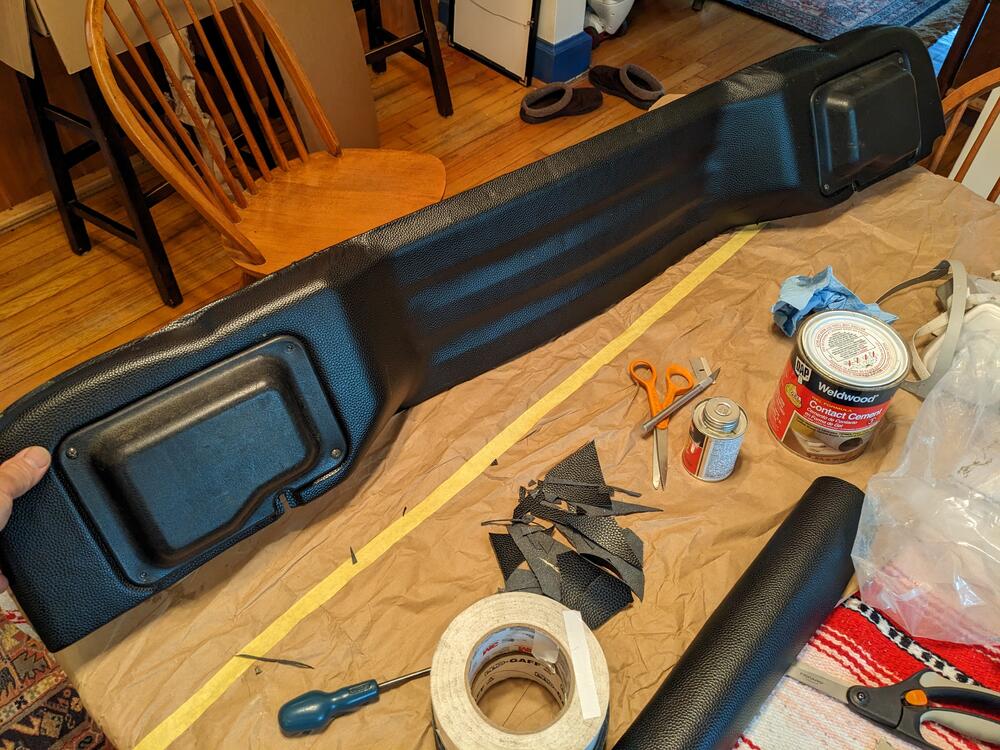
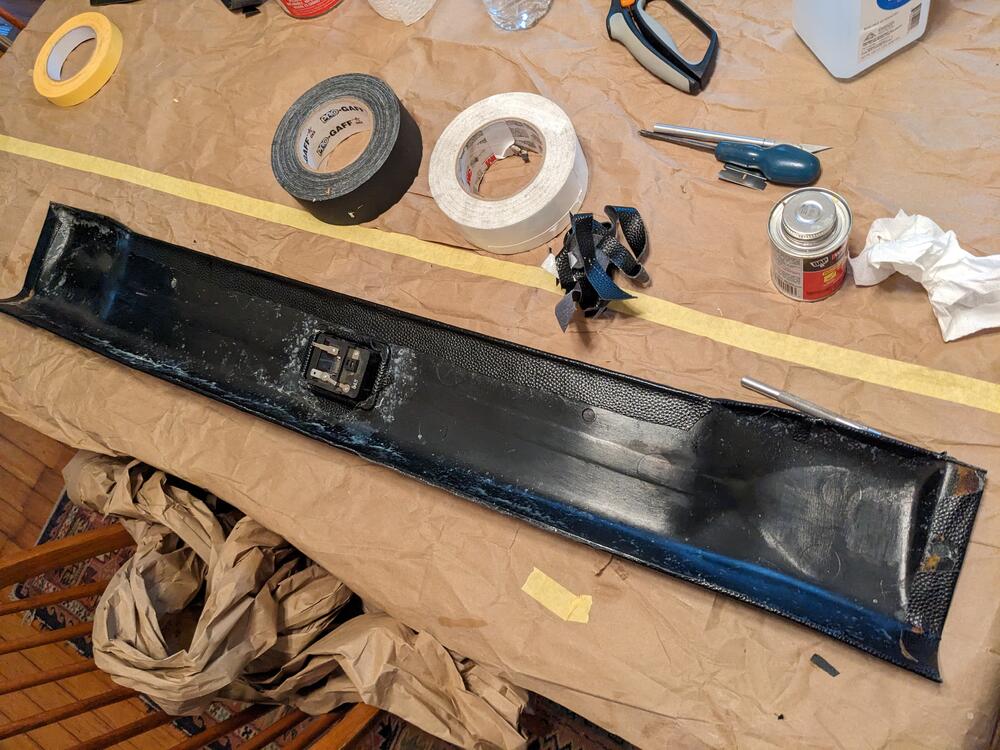
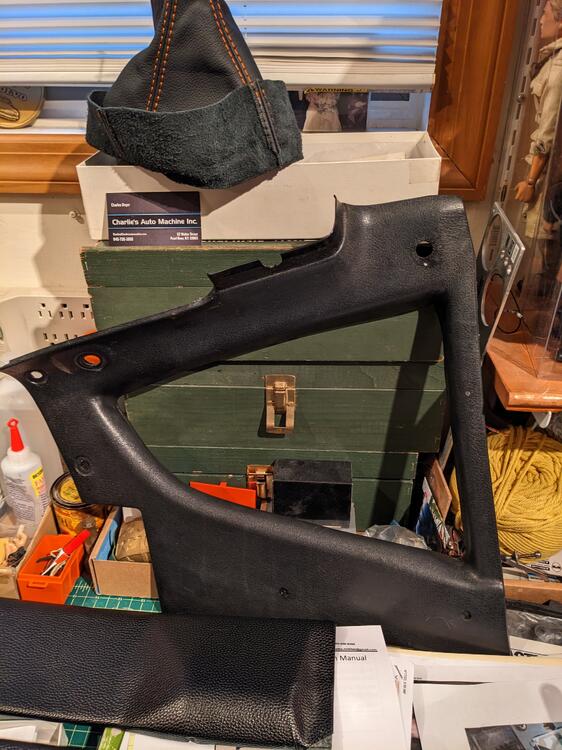
2 pointsSince it's been rainy all weekend I've been working inside on vinyl covering for the all-plastic 280Z hatch area panels. Closed cell foam to replace the old foam padding. added a canvas edging where the hatch inner panel sits against the opening - I don't like that one can see the mount hardware & gap between the inside of the glass & the trim, hopefully this will fill it undecided on covering the 1/4 glass trim, so many curves it will be a PITA to cover closed cell foam on the lamp access covers roof hatch trim tail lamp cover panel left rear hatch area panel. The right side is going to be a bitch.


 2 points
 -
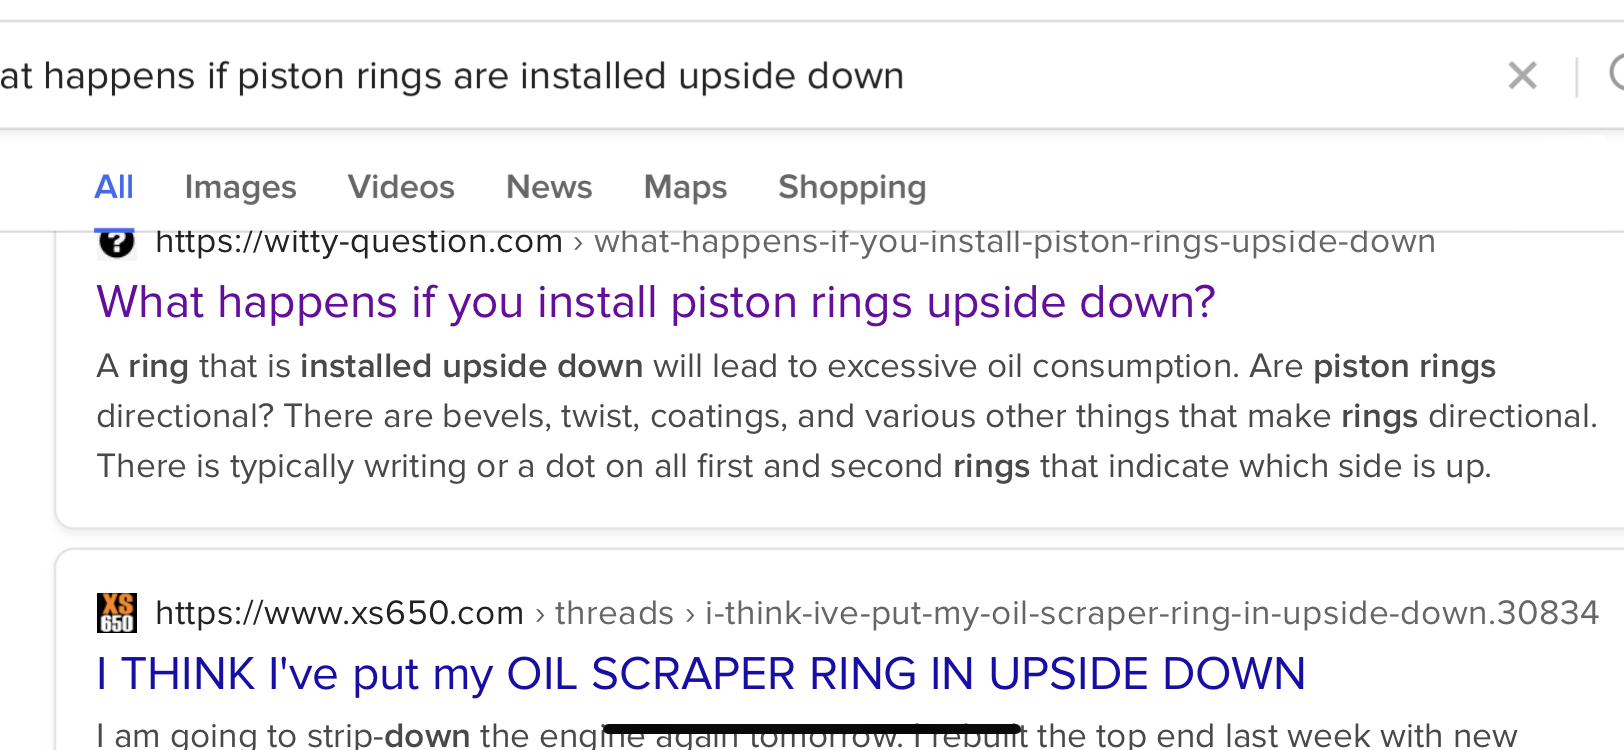
2 pointsOil control rings are tricky to install with that quirky little separator, but if I had to guess with all the oil in each exhaust port ……that’s your problem. I always install top of the line piston rings when I do a build. Hastings are the worst and Total Seal are the best! IMO rings and bearings should be the absolute best items in a new build. Good luck with your next build….Charles is a champ for helping you.2 points
-
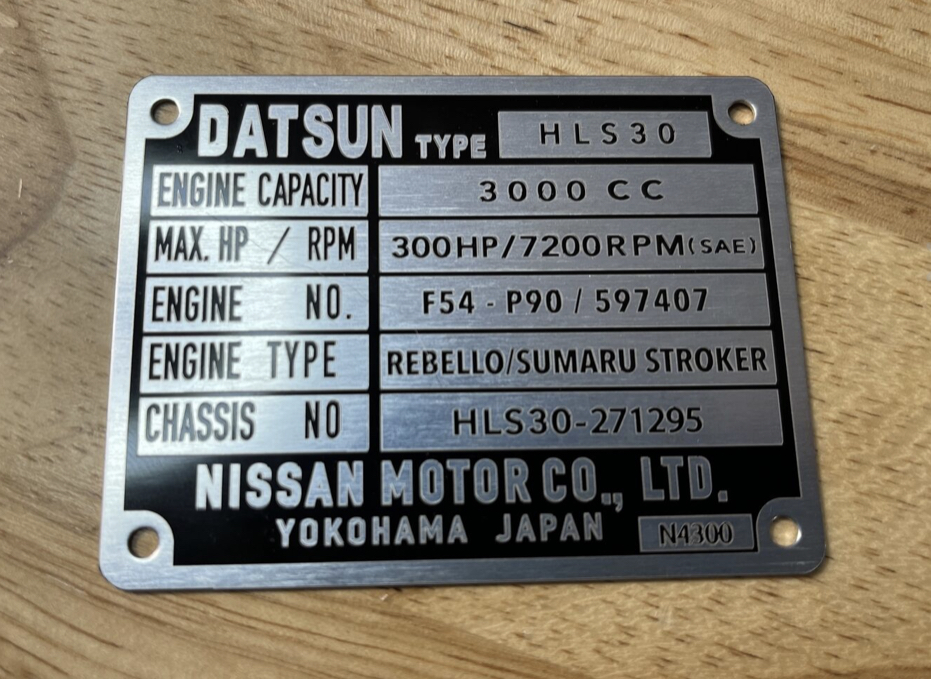
2 pointsAnd the piece de resistance, a new engine plate for that must have bling!
 2 points
 -
Older cars without catalytic converters are not going to burn newer fuel as efficiently. In fact, one of the main jobs of the catalytic converter is to change hydrogen sulfide into sulfur dioxide, which has no odor. I just returned from a local cars and coffee event and pretty much every car older than 1980 smelled like it was running rich while driving past. The bottom line is our Z cars will seem to run rich when compared to their newer contemporaries . Better to run it bit rich than going too lean and risk engine damage. IMHO2 points
-
1 point
-
Thump on the tank to make sure you have gas. The gauge could be off. Mine is. If you haven't yet, put a Fram G2 filter right out of the tanks supply hose. That way you can see if it has gas if this happens in the future. Take the gas cap off and see if it'll crank. Sometimes the vents get clogged after cleaning and sealing the tank. Try sticking a red straw off a spray can, WD-40 type, down the vent bung on the float chamber. If the carb has fuel that straw will be "bouncy" feeling. Good luck with it. I couldn't get out my neighborhood for a week until I figured out my problems.1 point
-
1 pointhttps://store.totalseal.com/collections/ring-sets Nice chart here https://www.rpmrons.com/Total Seal Rings.html#79 https://www.racetep.com/totalsealframe.html1 point
-
1 pointHi Charles ……. totalseal.com I can’t remember where I bought them, but I think I bought them direct from Total Seal. Seems to me they can make any set you need if you give em the specs. If not, you can call them and ask who stocks them. The oil ring retainers are really easy to match up and the rings are top quality. I hope the builder installed the other rings right side up (letters on top).1 point
-
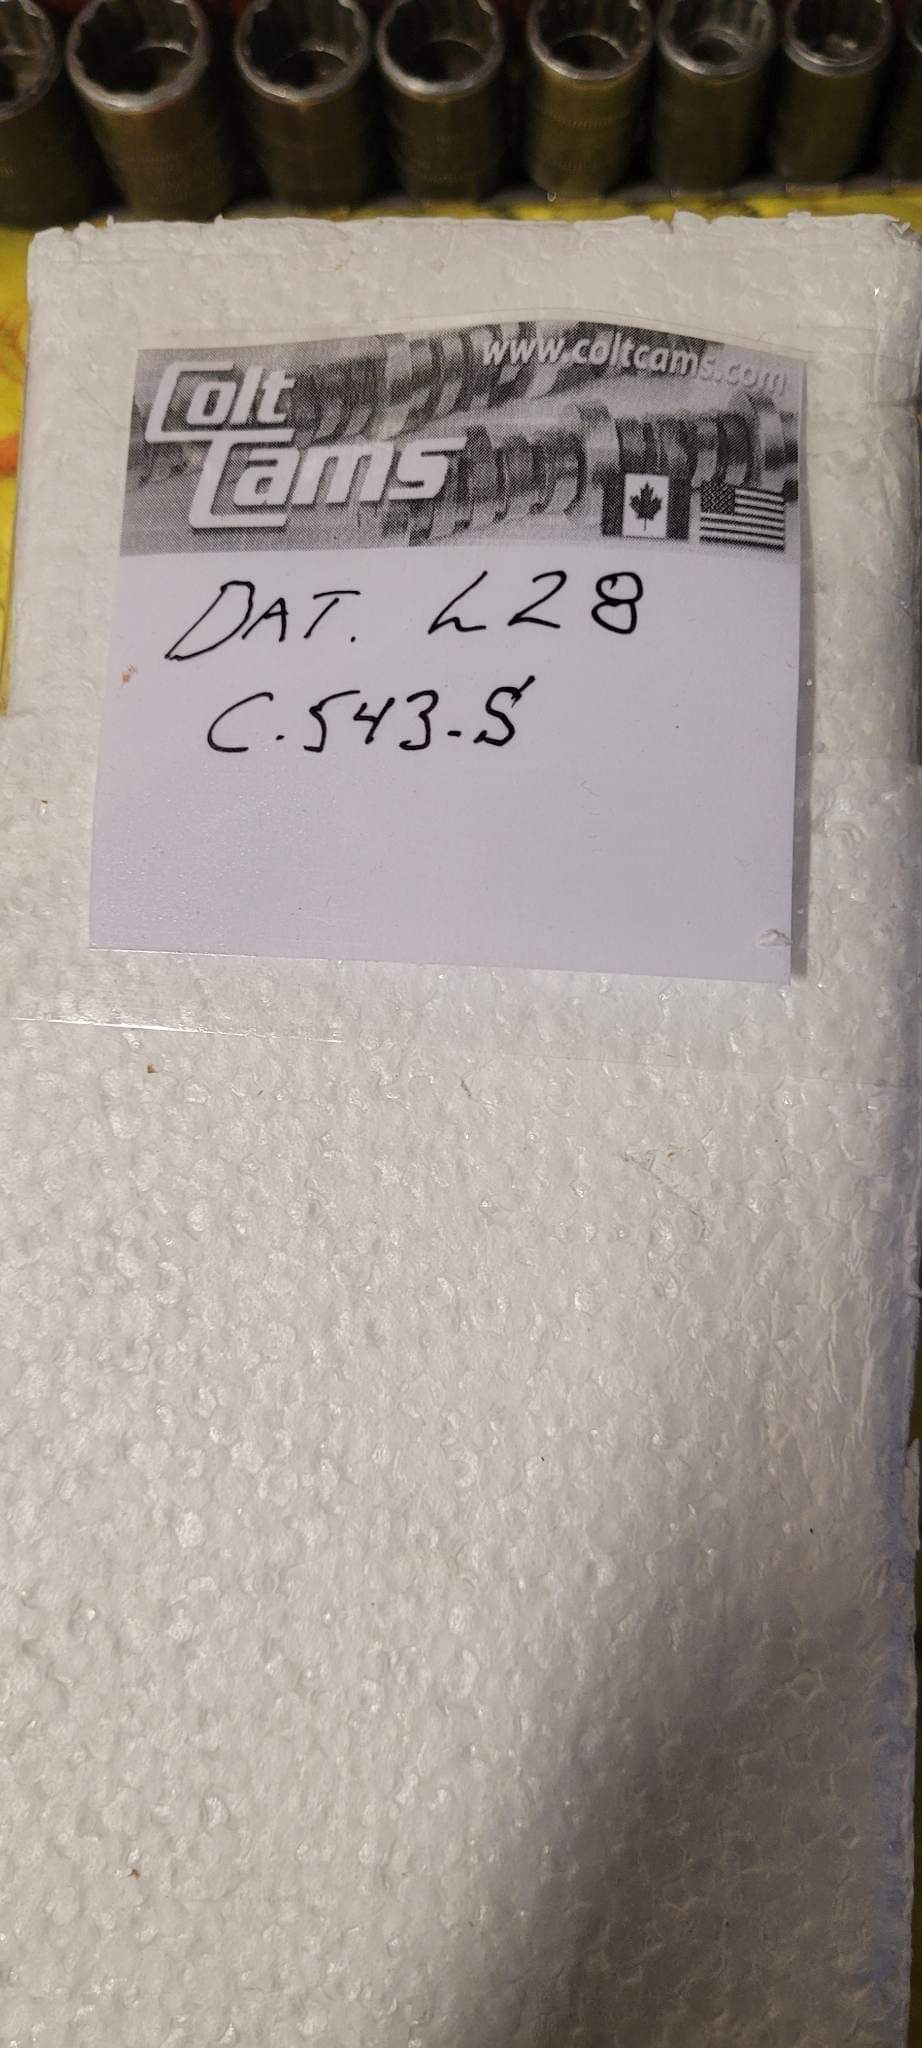
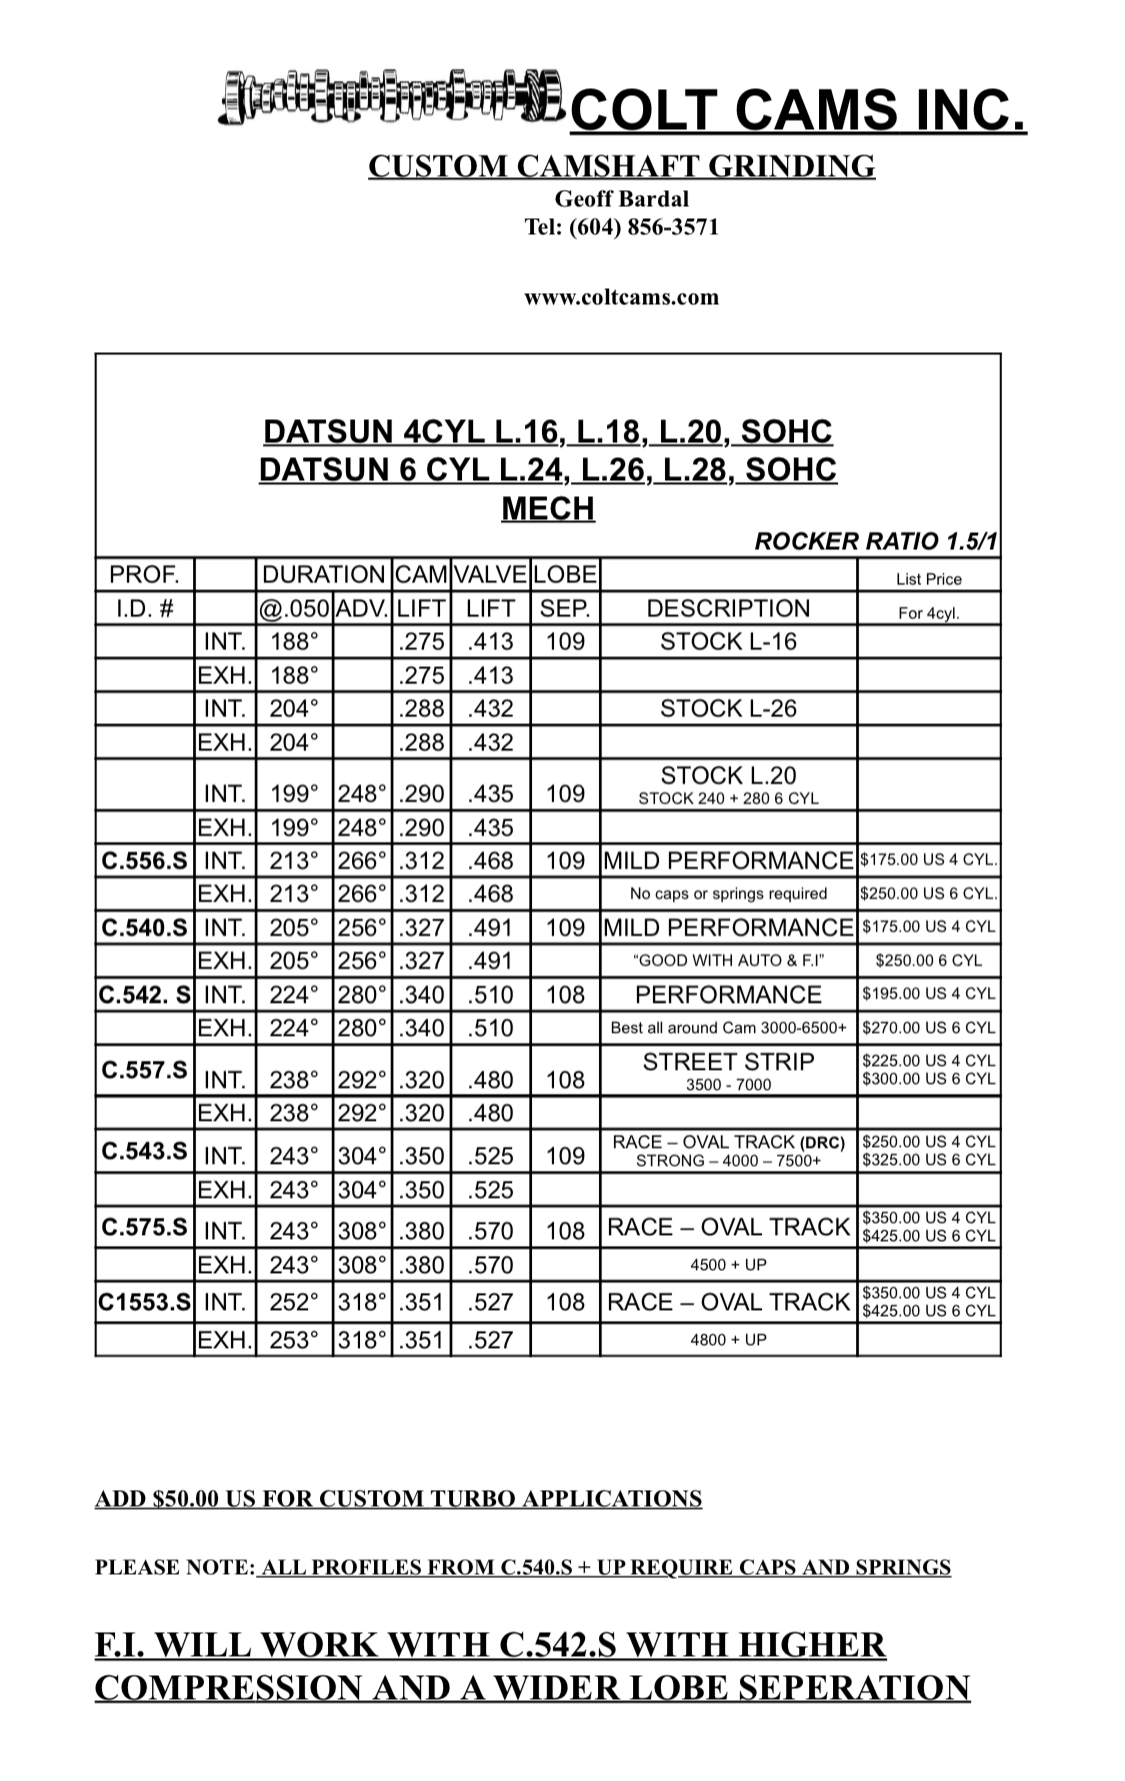
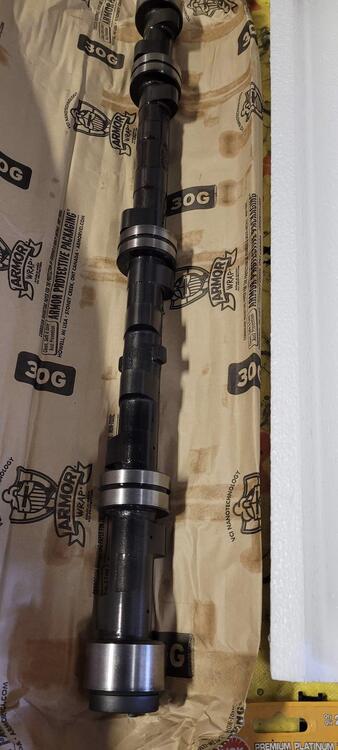
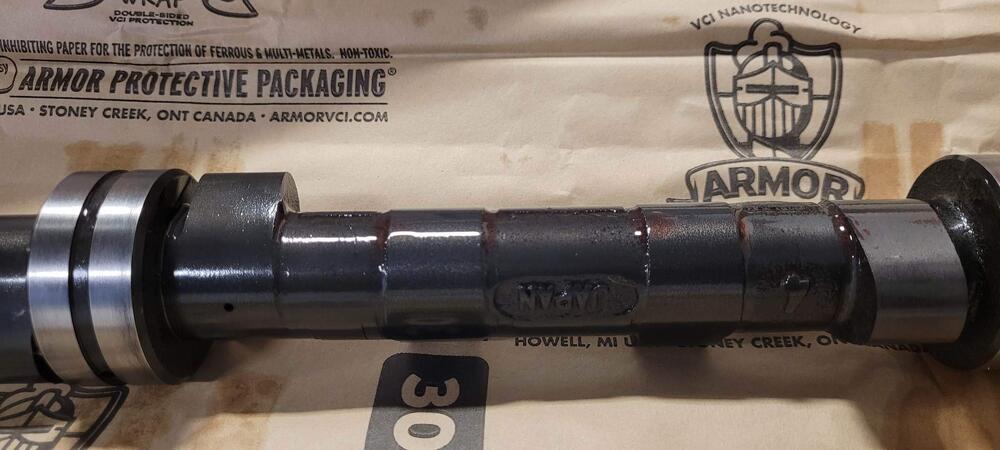
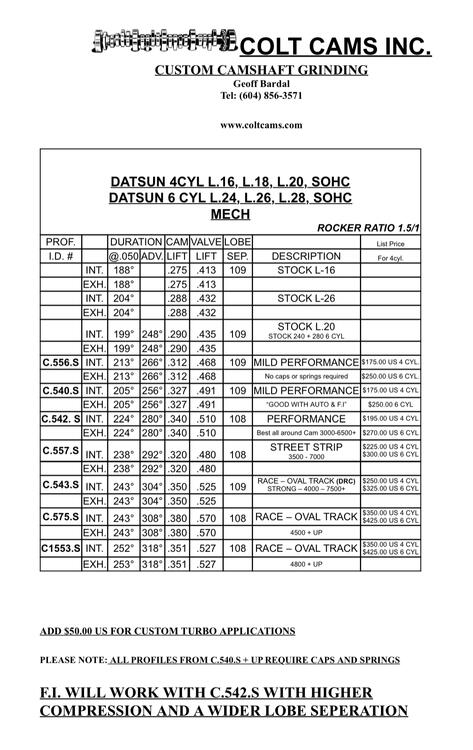
1 pointChamber size is 46.5cc and I have a brand new Colt Cam in street/race spec to replace the overly aggressive Norris cam.

 1 point
 -
1 pointSome more news from Reg at the shop! The P90 is back and looking good. Compression will be 10.77:1 with a 1mm gasket.

 1 point
 -
I put a few gallons a year in my '72, it's 93 with 10% ethanol. To be honest the most problems I've read on here is a result of low fuel chambers. Get the floats right then you can adjust the carbs & timing correct. I tried and tried for a month then went to basics like my Dad taught me, now it's rock solid.1 point
-
1 pointThe fact that it didn't smoke at first but smokes more and more as it runs, makes me think they have self destructed1 point
-
1 pointWow. Makes me really wonder if the oil control rings were installed properly. I can't imagine they wore out that quickly, but maybe put in wrong somehow? In any event, the answer will hopefully be forthcoming soon.1 point
-
1 point
-
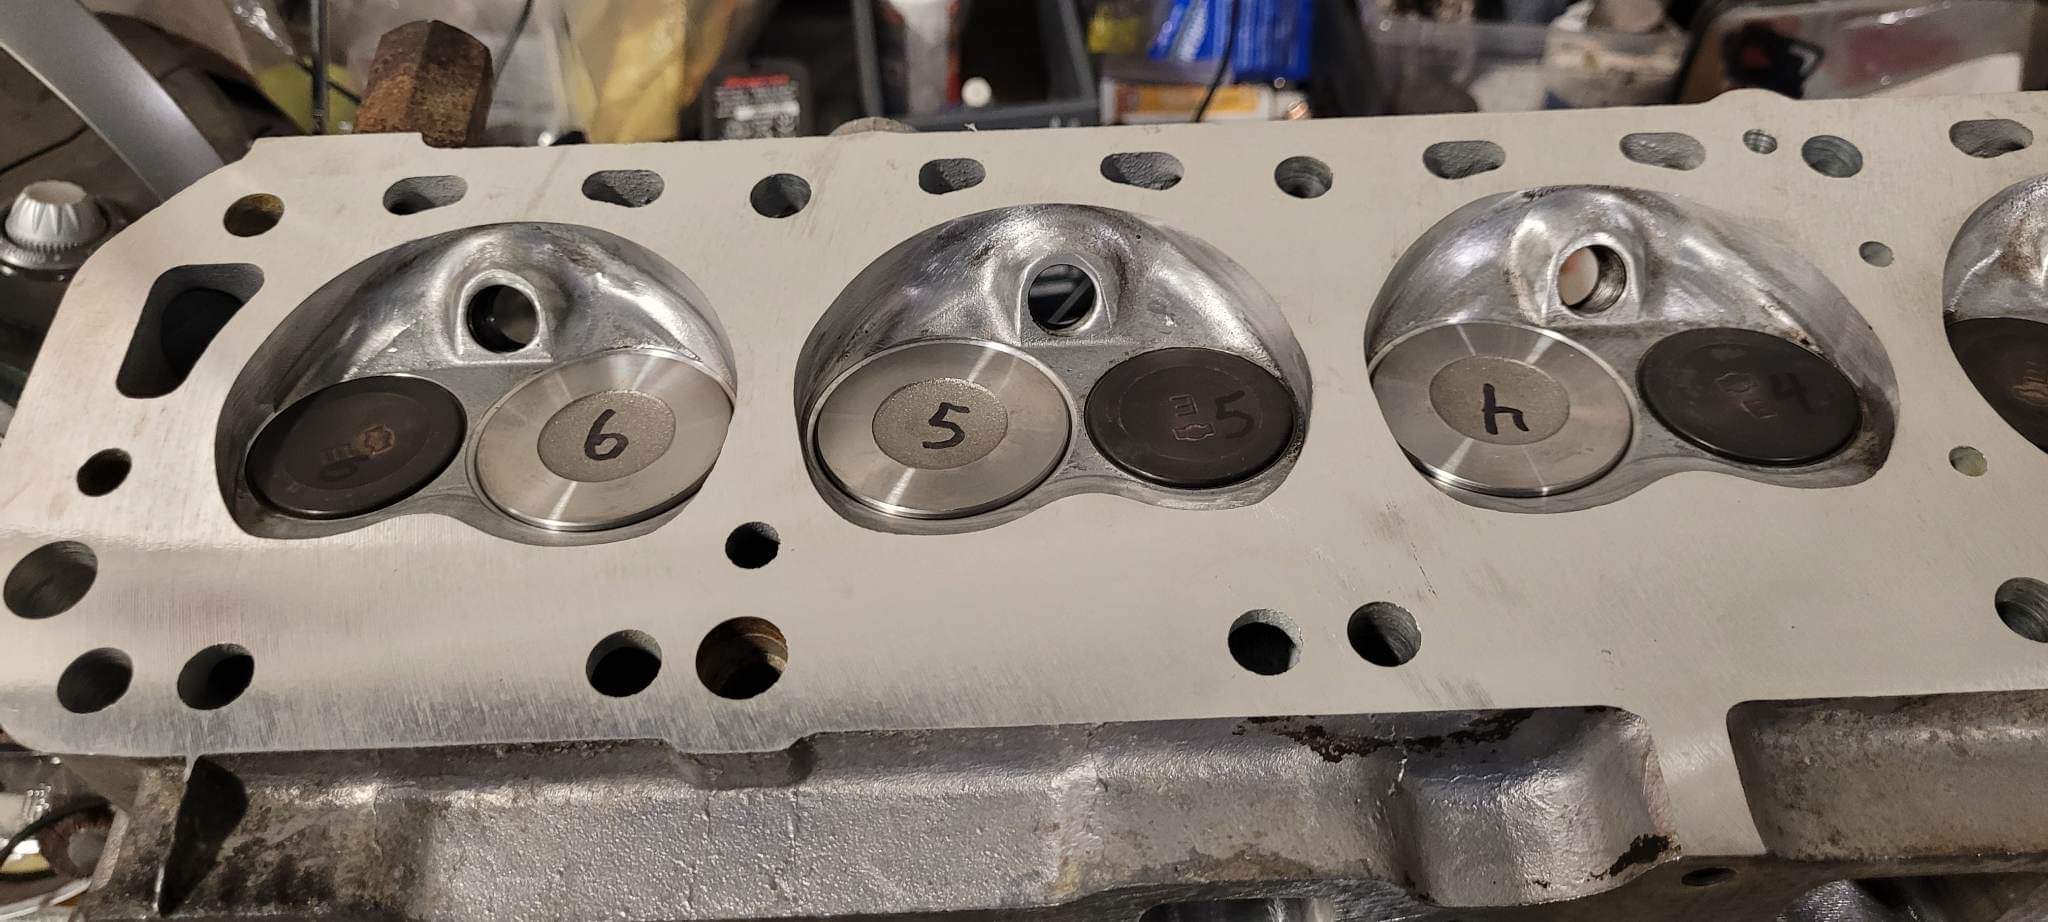
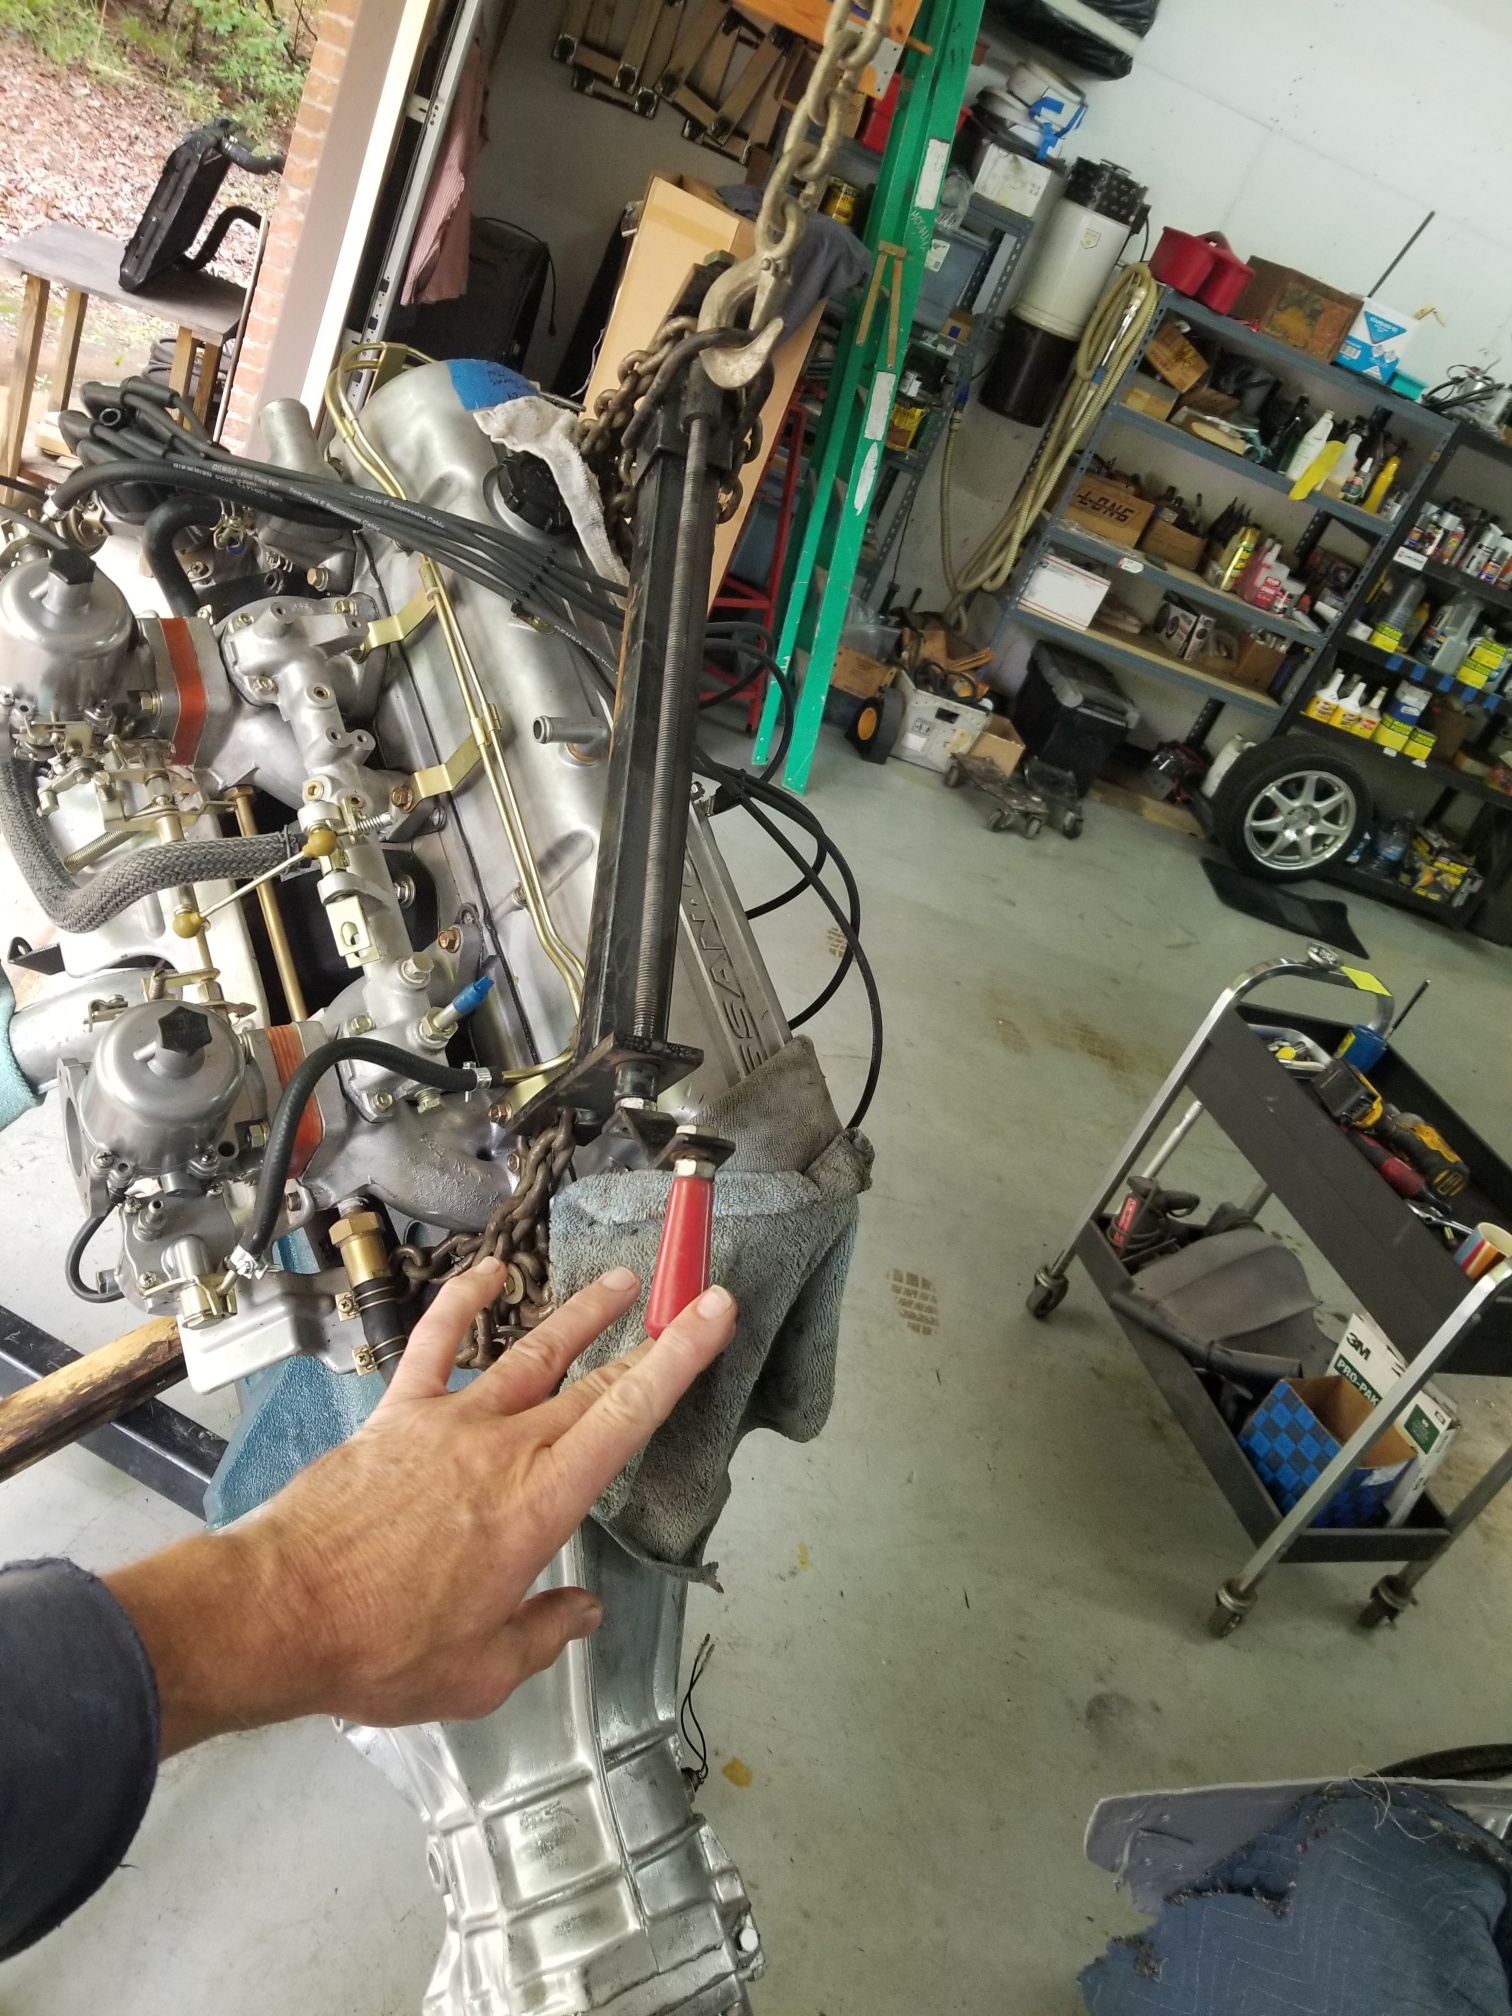
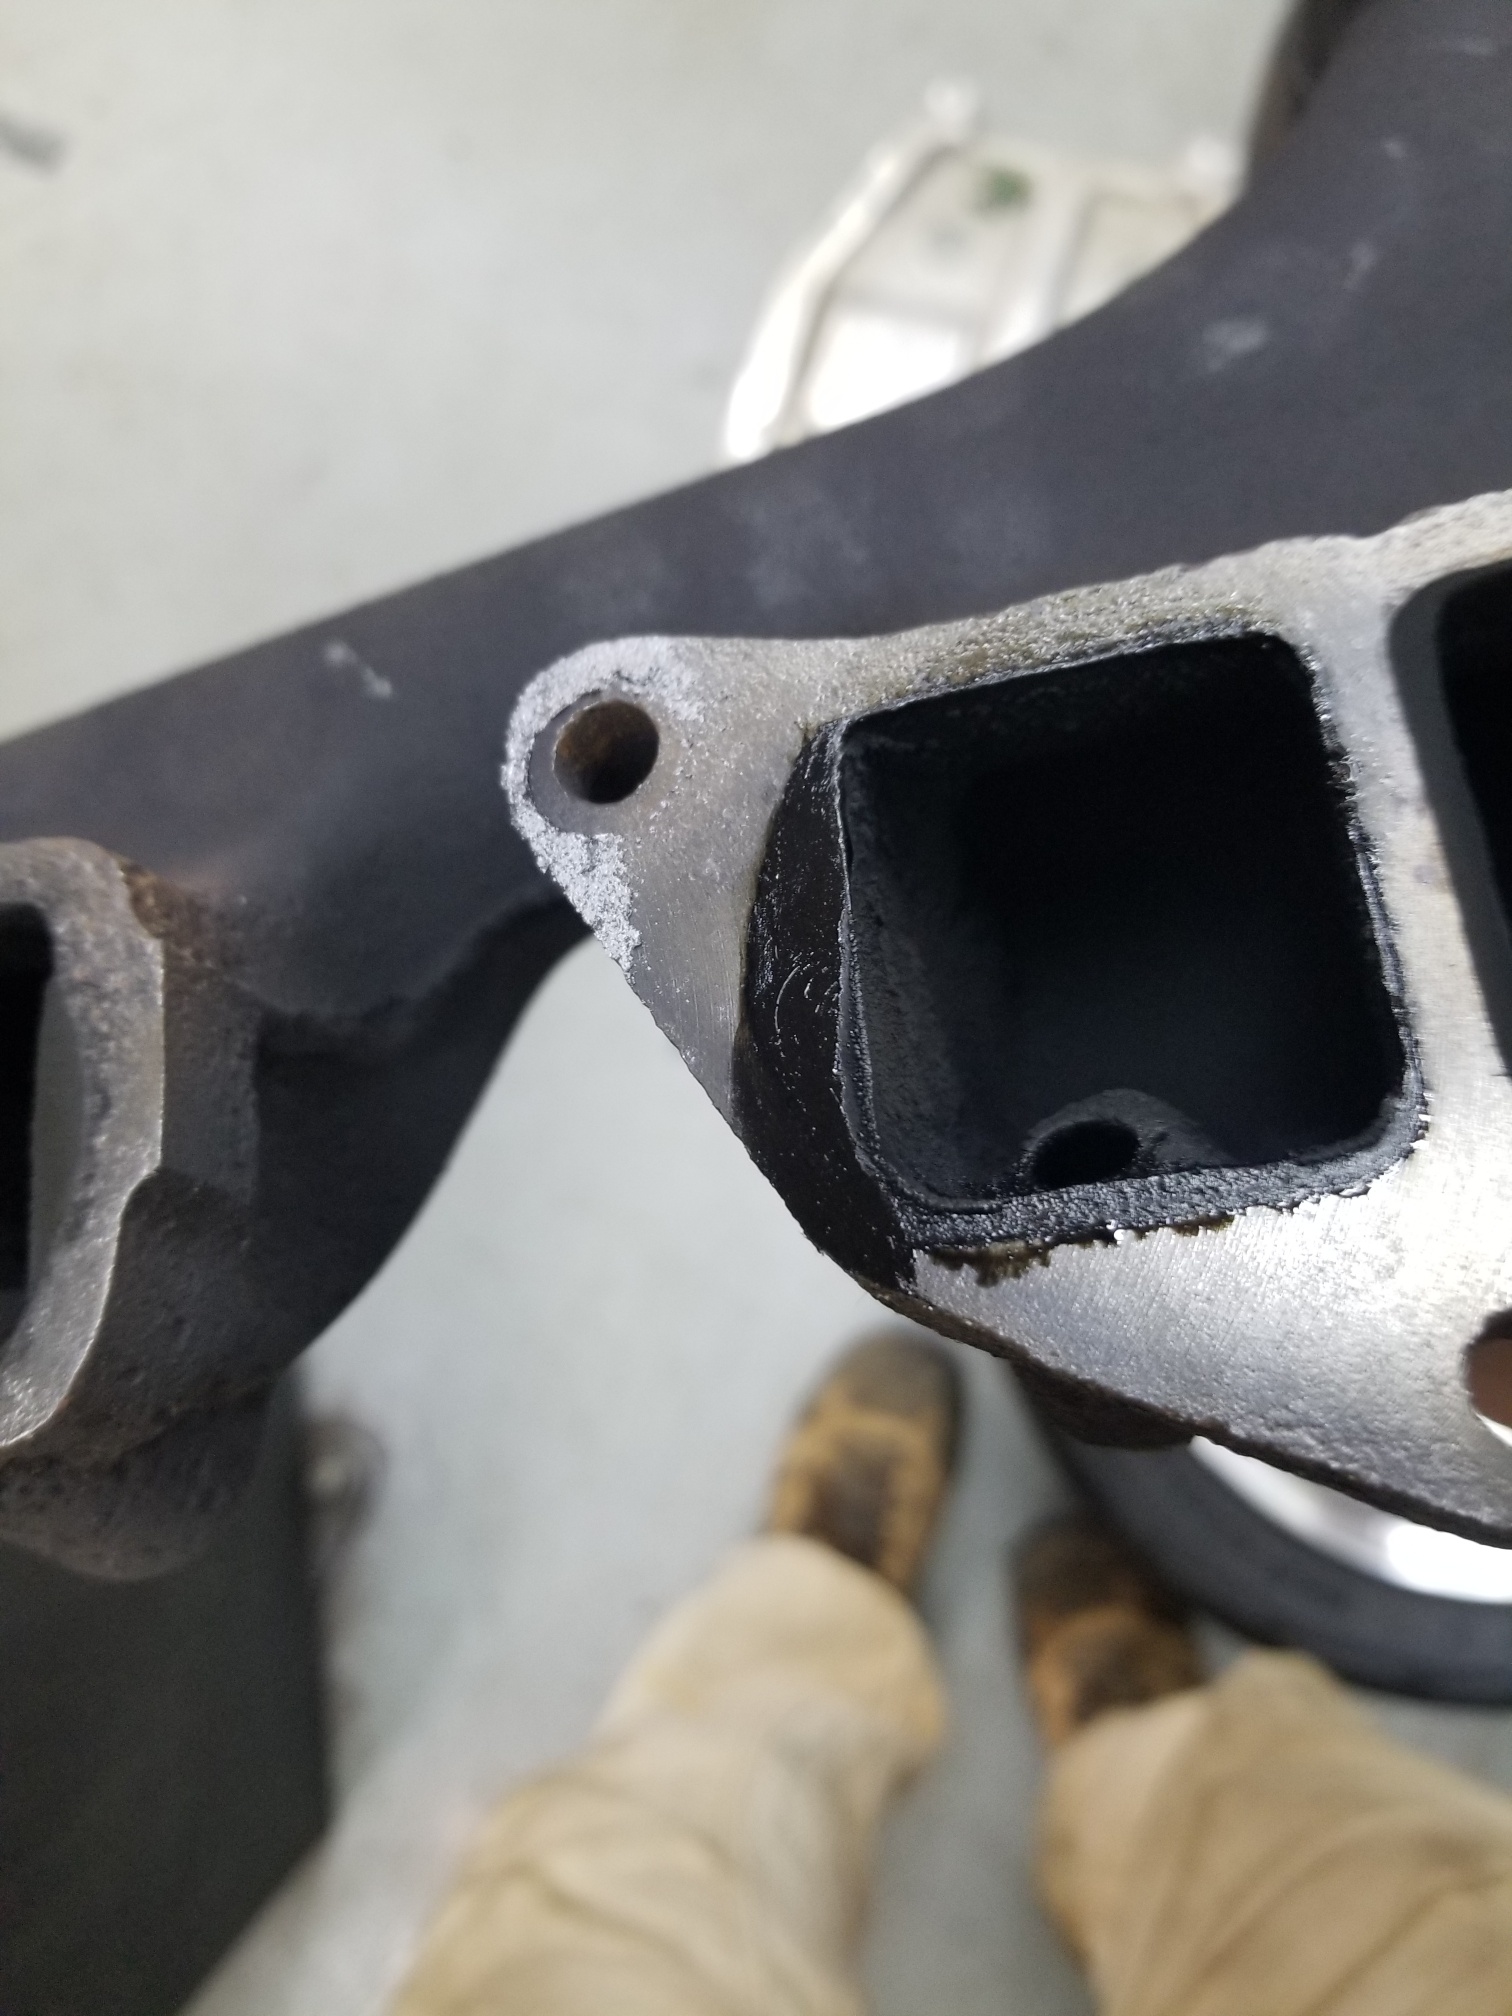
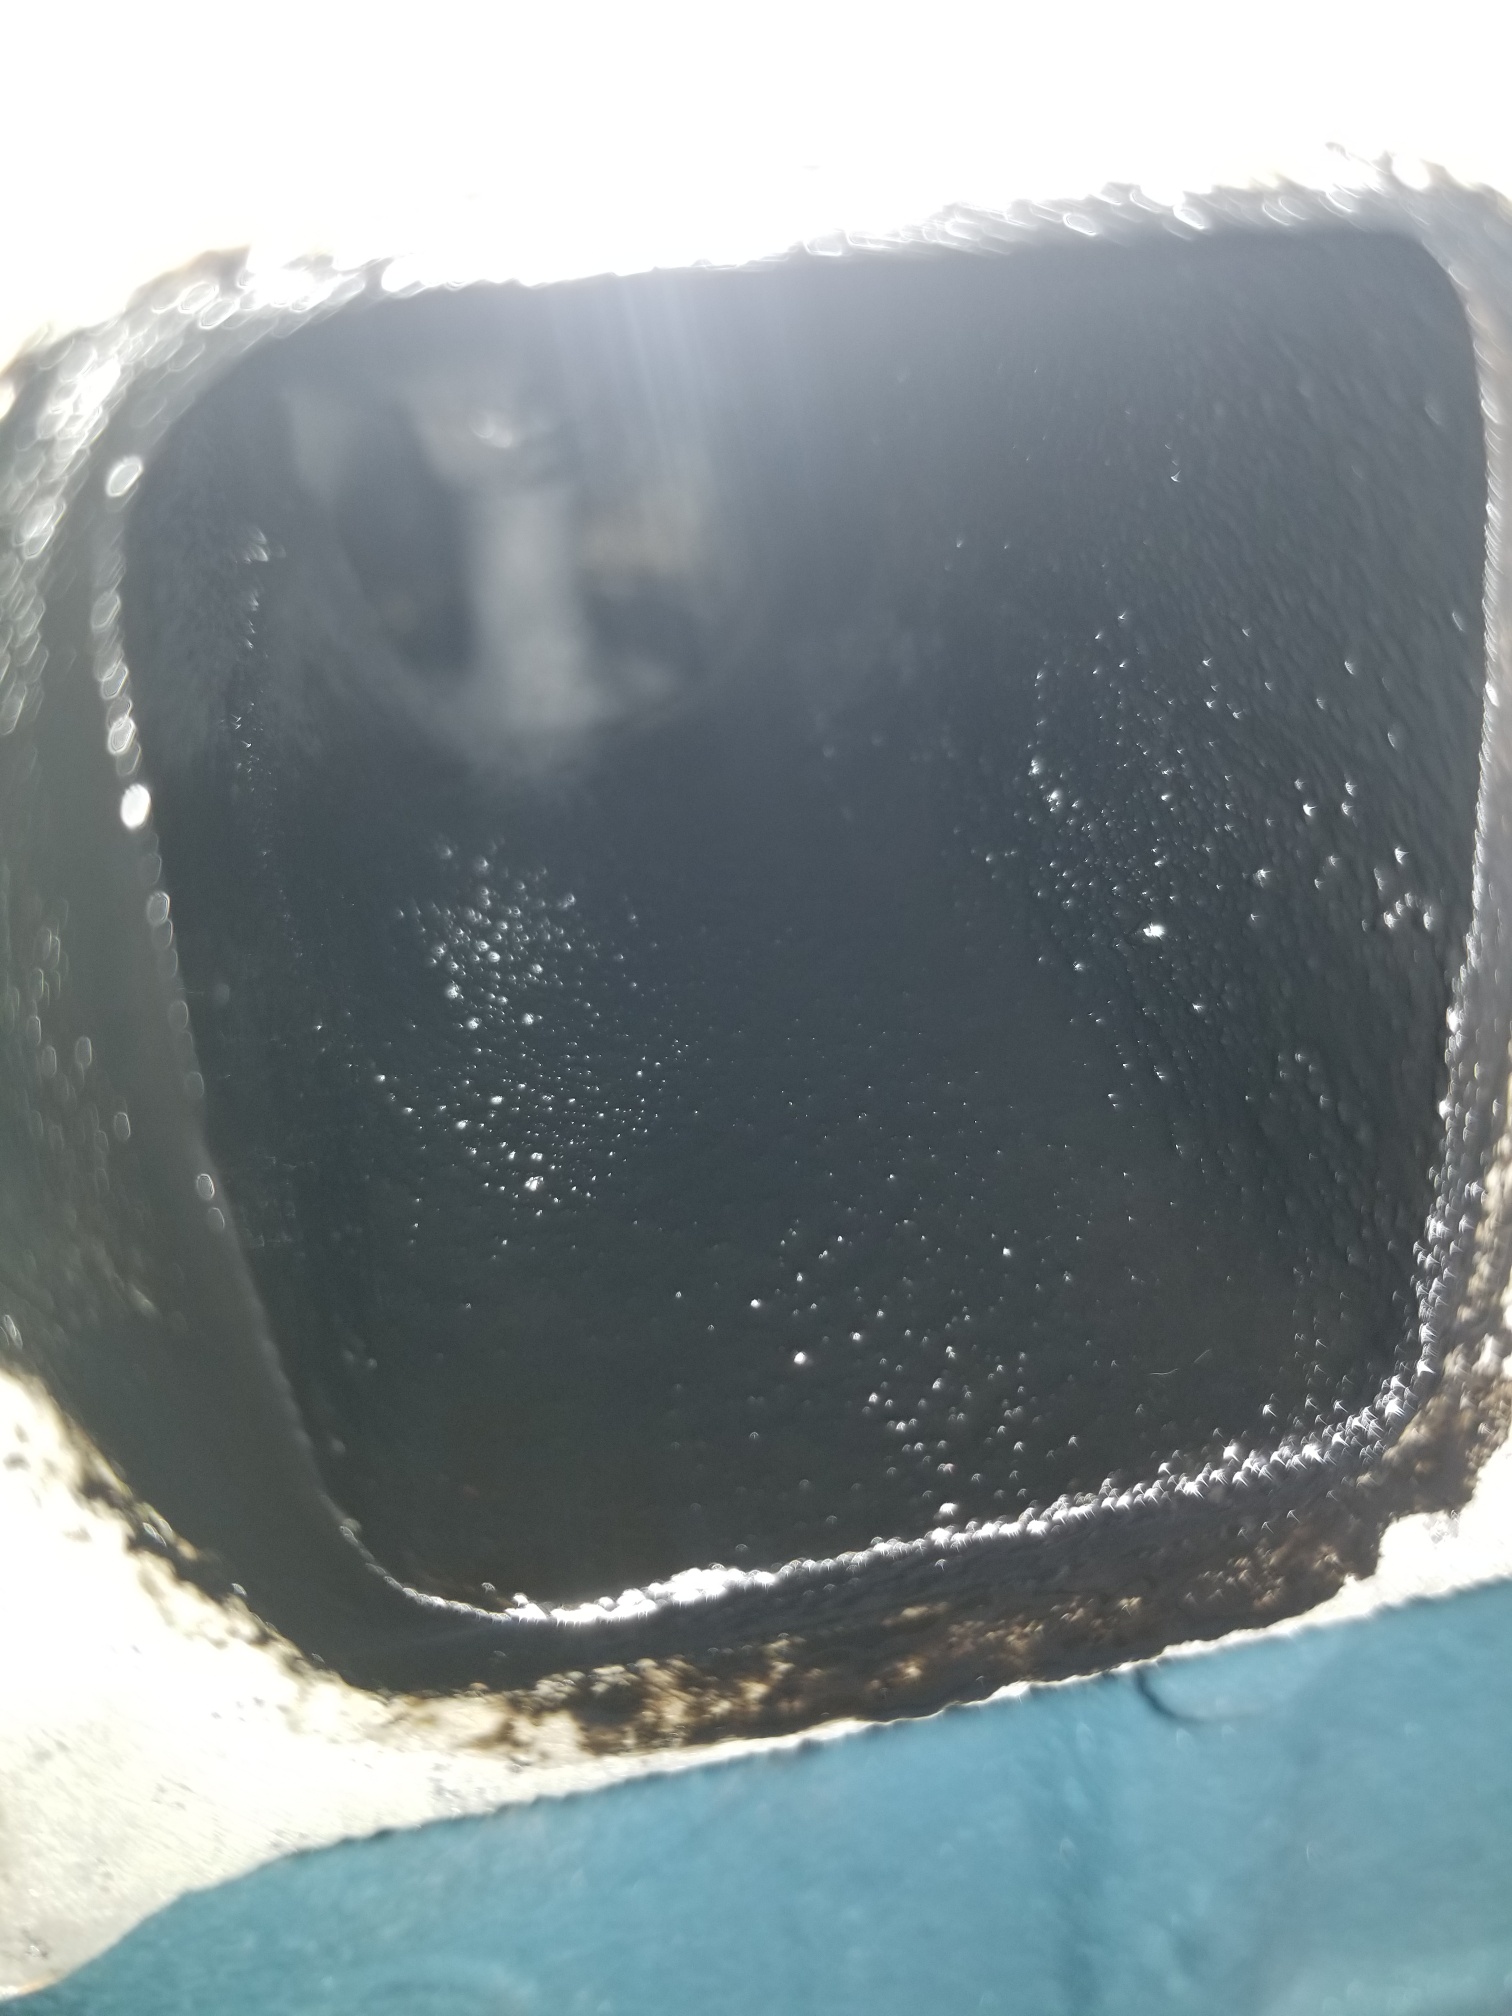
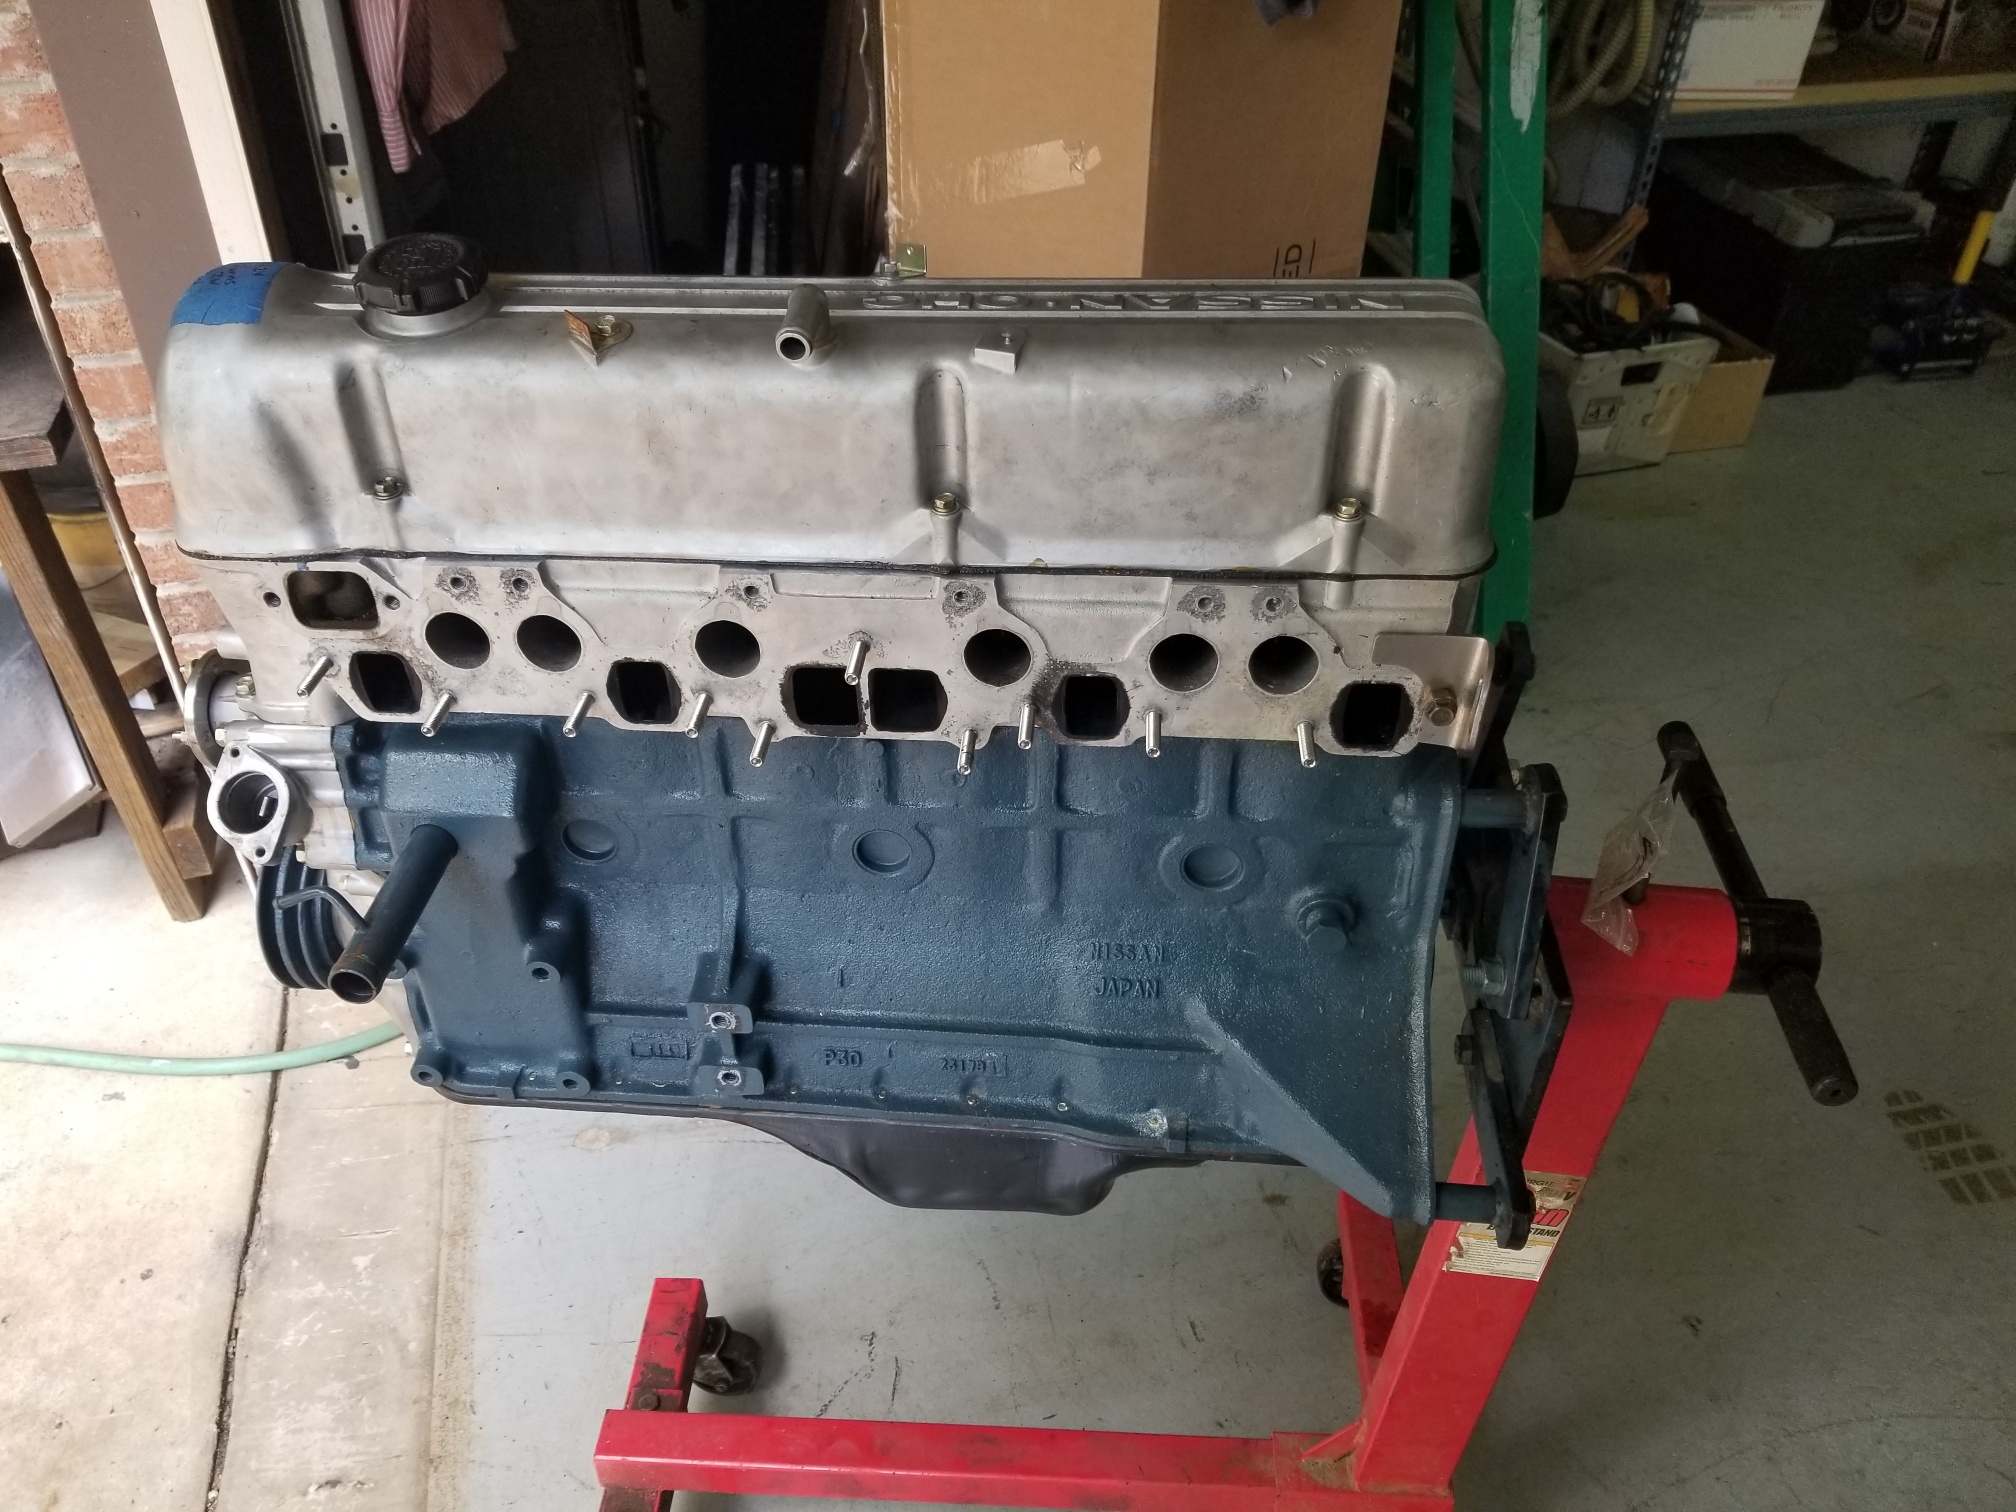
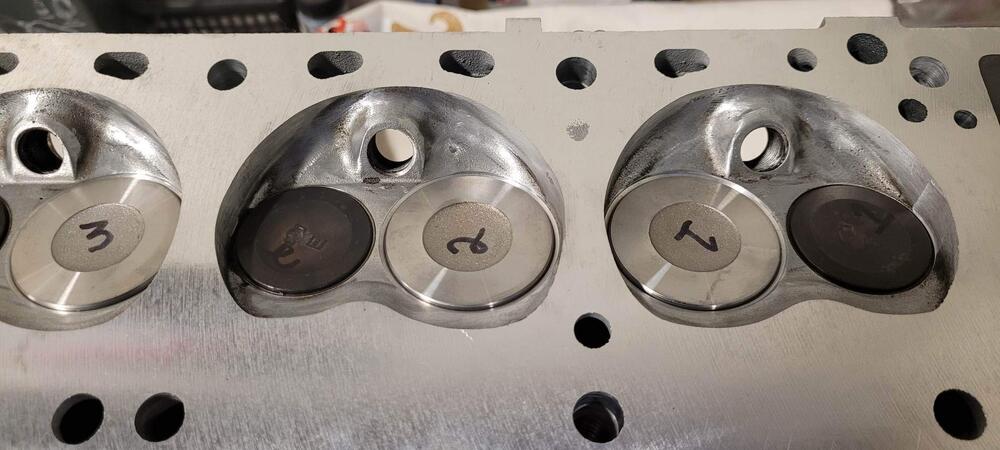
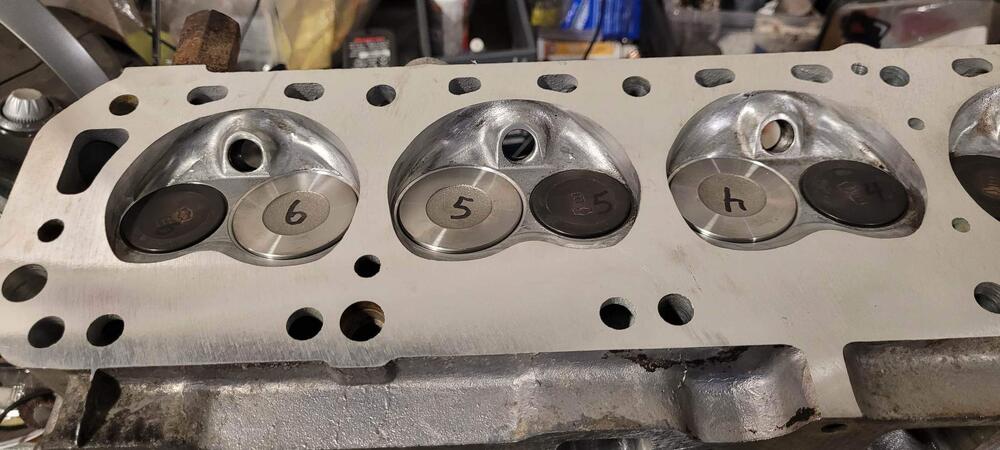
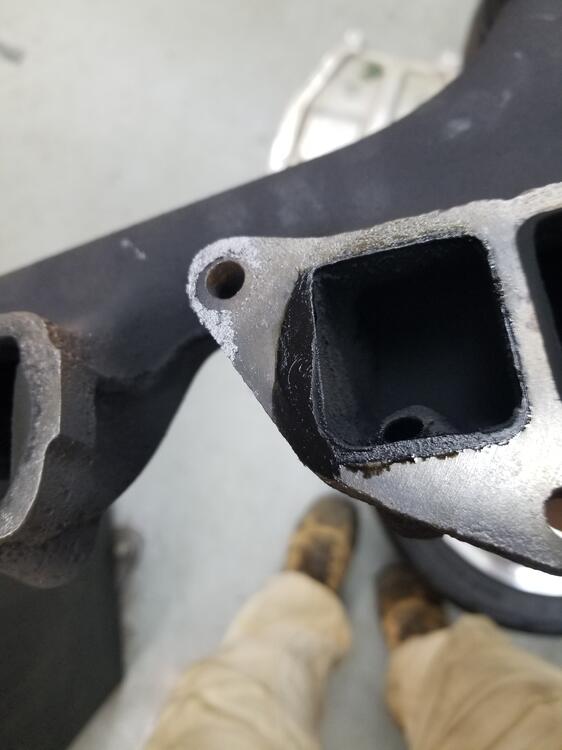
1 pointSo I don't want to get ahead of Ernest but I'll post up some info from today. I went and helped him get the engine out. We tore it down to the long block The intake valve stems were really clean looking. The exhaust ports looked really wet! It's a little hard to see in this picture. That is actually a puddle of oil in the exhaust port! This is actually liquid like oil that was seeping down under the gasket. Pretty much all of the ports had the same situation. The PCV hose was nice and clean. I would say all of this is coming from the bottom end and it's not isolated to one cylinder. To me that rules out a broken ring or bad ring indexing or something isolated like that. This is an issue across all the cylinders. I also don't believe the engine builder is going to be the issue. He's apparently been building races engines for probably 40+ years. If I had to guess, I would suspect the oil rings destroyed themselves. Possibly poor quality rings... Will be interesting to see what he finds when he tears it down


 1 point
 -
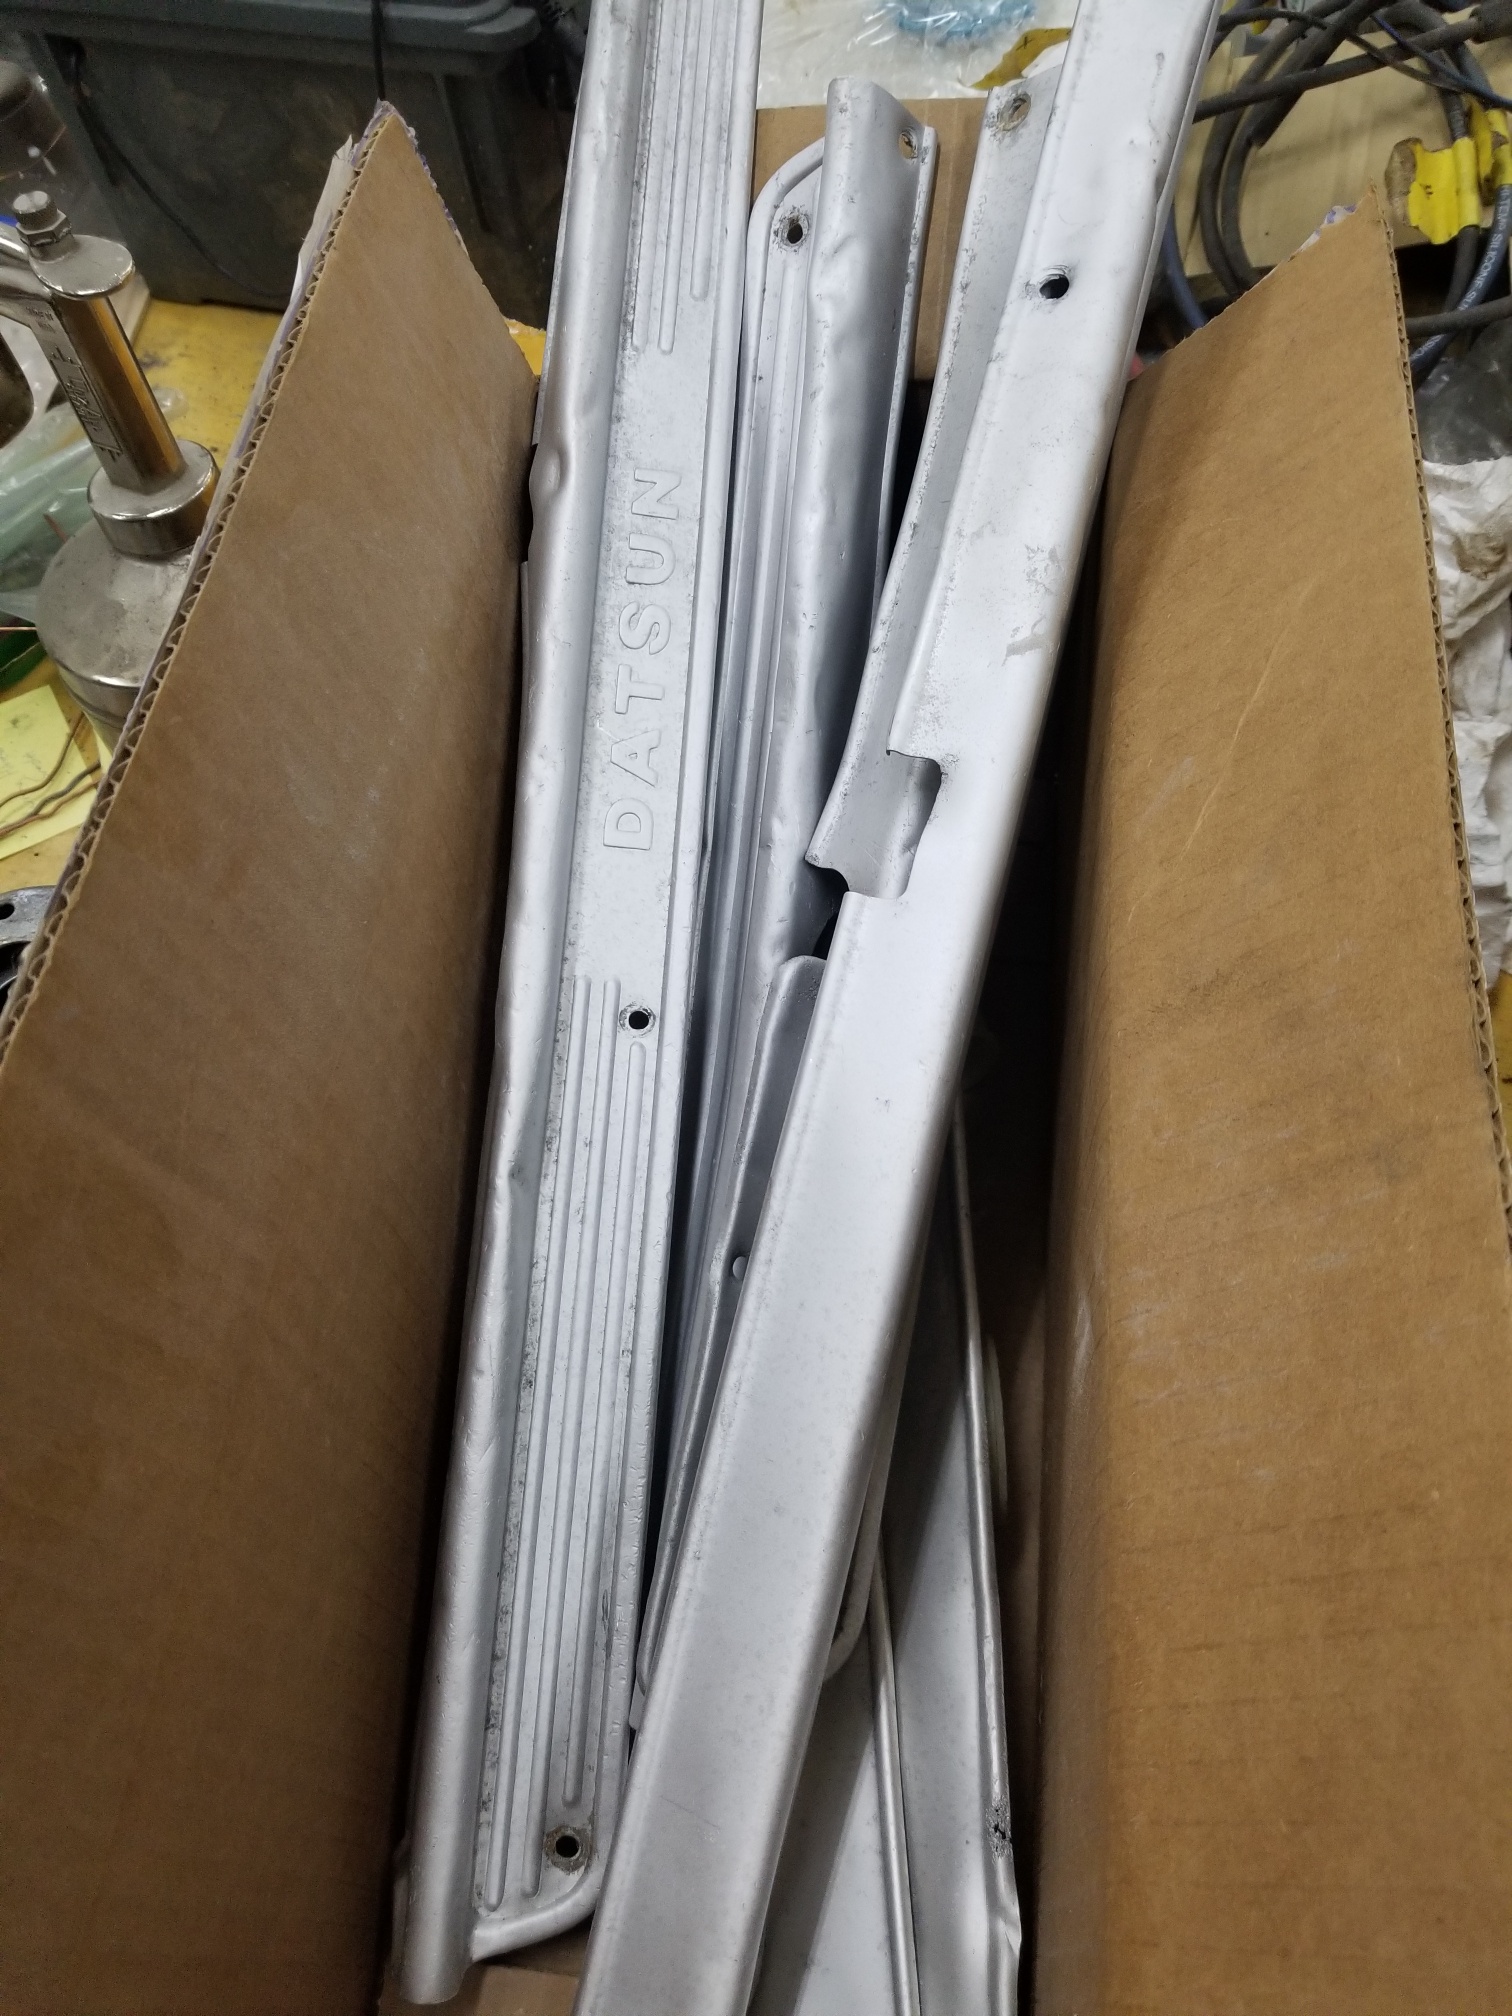
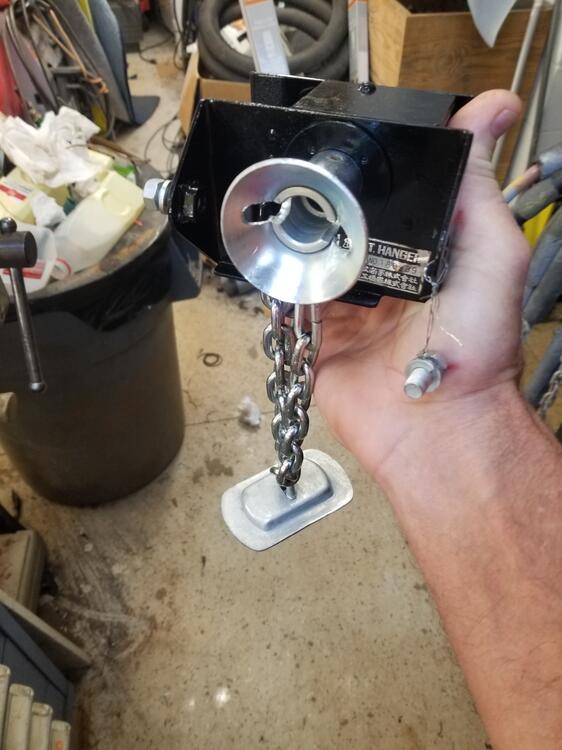
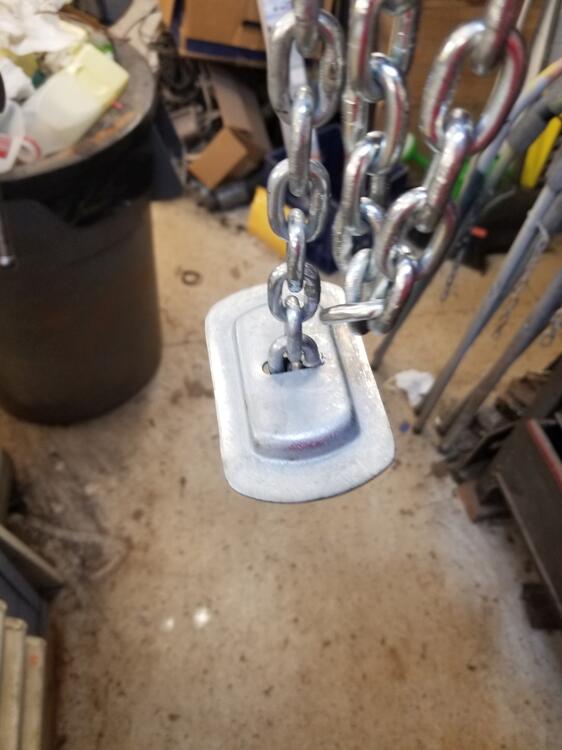
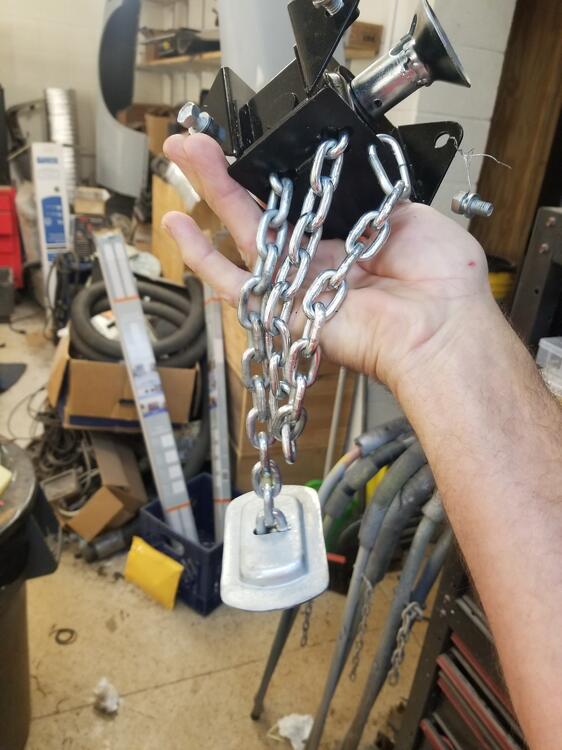
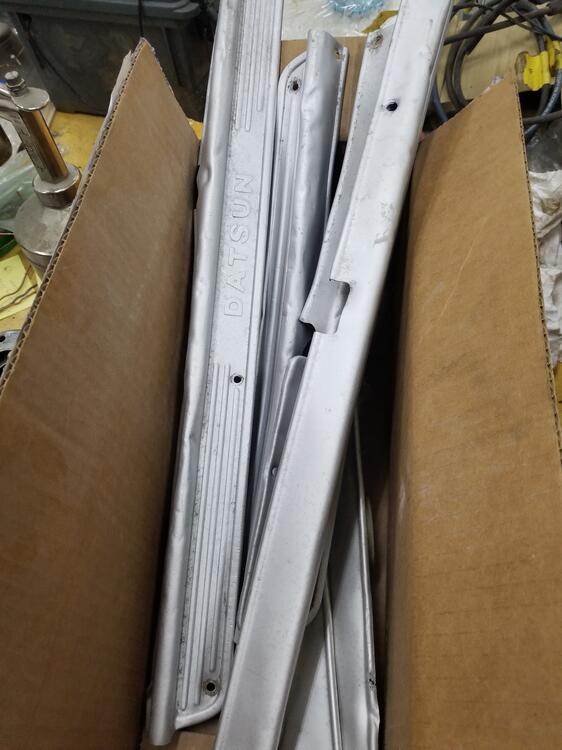
1 pointI also took his spare tire mount apart last weekend and replated and painted everything. The chain was tough to plate! I really should have done it in the barrel plater and I don't have enough amperage for a part that big. So I had to do it in sections and that made it sort of inconsistent. But like Cody said it will be up under the car I also started on the door sill tin at Ernest's
 1 point
 -
I checked my book shelves, it didn’t mention who but BMW507. Did you read my report of a dinner with Mr. Yoshida and Mr. Tamura? I believe no one has ever been told about story of Mr. Goertz’s work before. He didn’t say what to do about S30. Also He didn’t show any single sketch for S30. He couldn’t, because he left Nissan well before the styling study of S30 began. He would never have been able to answer how and why for the styling details of S30. Because he wasn’t involved with the team. Kats


 1 point
 -
Use 3M weatherstrip adhesive to attach the rubber seals. A nylon scraper works well fro removing the residual adhesive from the previous installation, and, as you mentioned, softening it with a solvent will make removal easier. Use a high quality carbide drill bit, cutting lube, and keep the drill bit speed very slow. Take your time. Any heat from drilling will work harden the stainless, ruining the drill bit, and making drilling with a fresh bit next to impossible.1 point
-
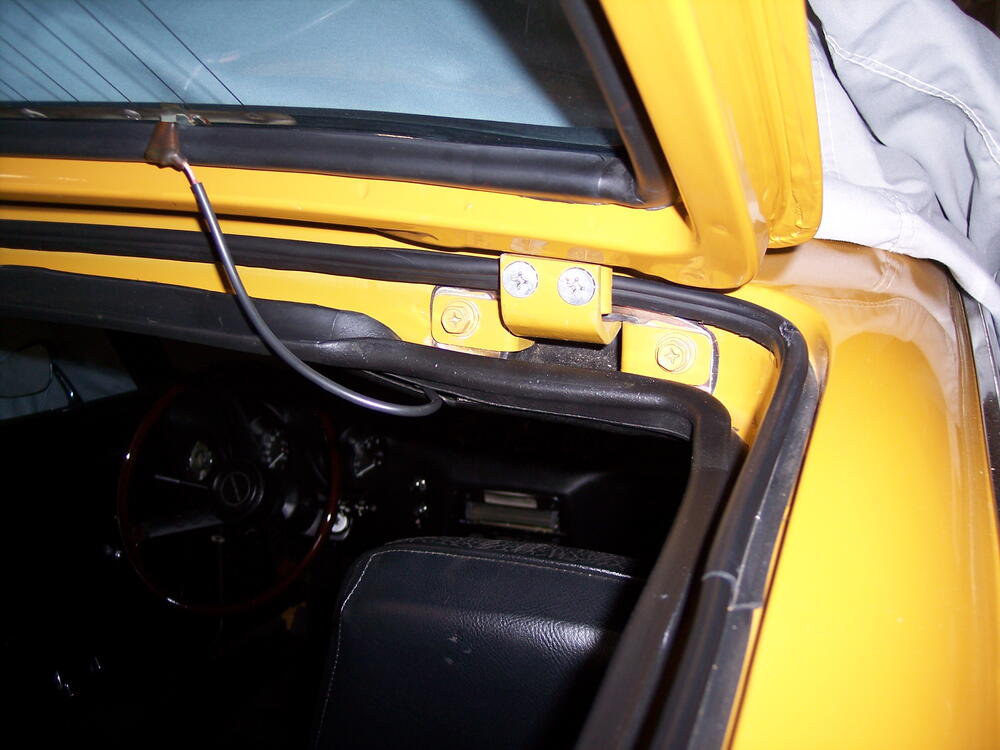
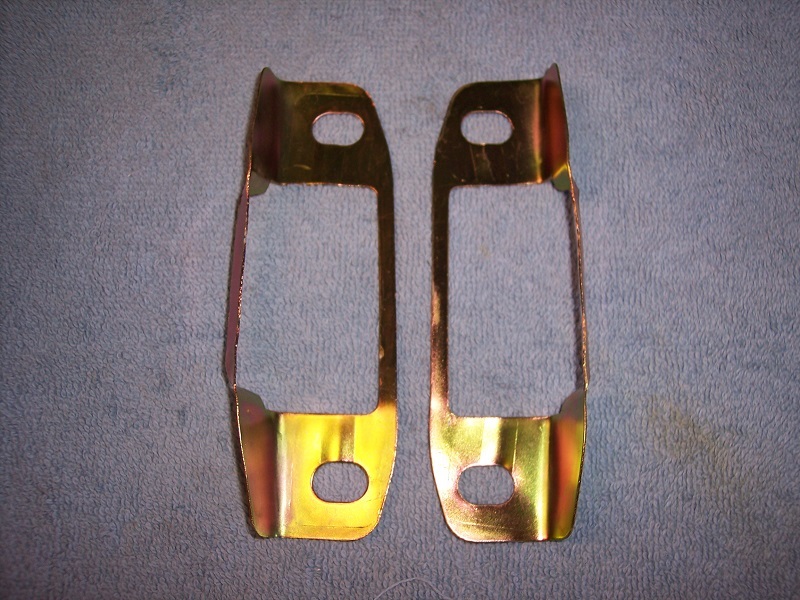
The hatch has two seals - outer and inner. The outer seal is small and installs on the pinch weld seam aound the hatch. The top portion is usually bulb shaped to fit snugly against the hatch flange so rain is channeled to the sides and down to the slam panel. Your pics show this seal is missing. In my pic I also have bulb-shaped outer seal on the sides as well as the top. The rust you show inside at the hinge are suggests your hatch hinge boots are compromised and should be replaced. These plates are an important part of the hinge boot install. They fit between the hinge and the boot and prevent the boot from being distorted when the hinge bolts are tightened. Unfortunately the plates are not available as a separate P/N. They came to Nissan as an assembly with the OE boots. As to your squeegee strip install, pop rivets work very well to secure the rubber strip to the door trim. Space them about every 4". This is far easier than working wirh wire or attempting to re-use old staples. The same approach works well with the fuzzy strip at the top of the door panel.
 1 point