


Leaderboard
-
xs10shl
Free Member5Points339Posts -
HS30-H
Free Member4Points5,509Posts -
.JPG.cfcada9cf1c1b502df3f5f2f2ca3ff36.JPG)
SteveJ
Free Member4Points9,646Posts -

siteunseen
Free Member3Points15,115Posts


Popular Content
Showing content with the highest reputation on 12/03/2022 in Posts
-
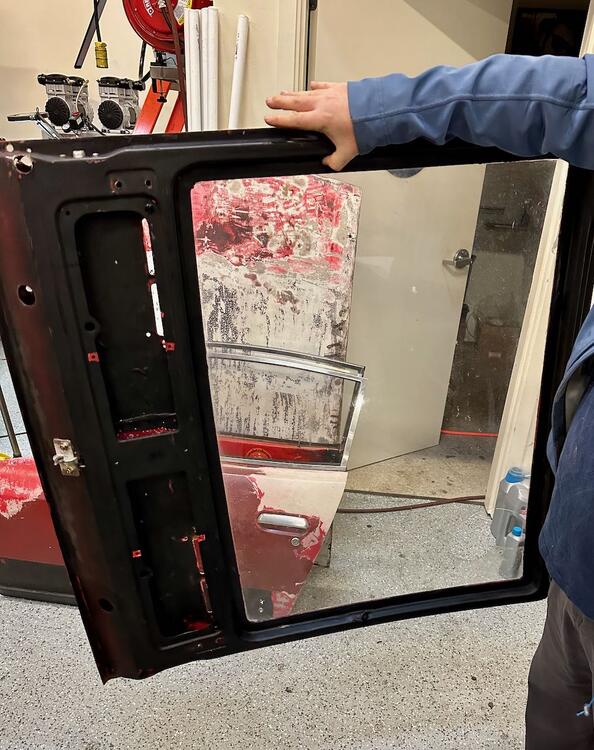
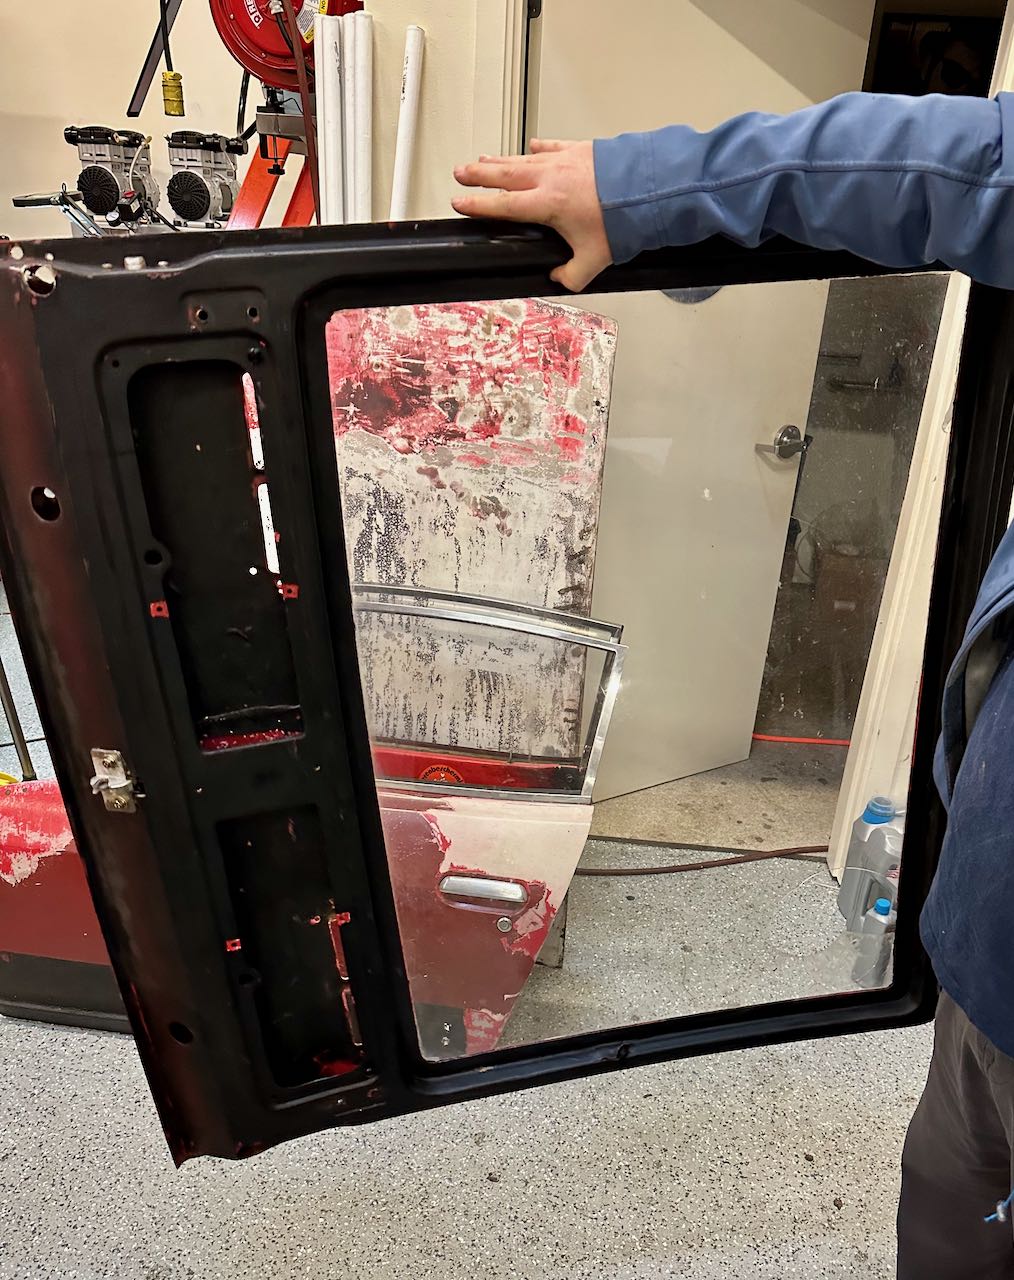
Works Lightweight cars made extensive use of fiberglass panels and acrylic windows to reduce curb weight. As an example, the rear deck is made of fiberglass, with an ultra-thin acrylic window bonded to the frame. It's quite light - I can hold it with my thumb.
 3 points
 -
2 pointsDepending on how far you want to go to retain the OEM setup, there are restoration shops that specialize in restoring brake components for cars that parts are no longer available for. You send your calipers to them, they bore the cylinders and press in stainless steel sleeves, then bore and hone them to the correct size. Pistons are either refurbished, or replacements turned out on a lathe. Probably not cheap, but with the stainless steel they shouldn’t give you any trouble ever again.2 points
-
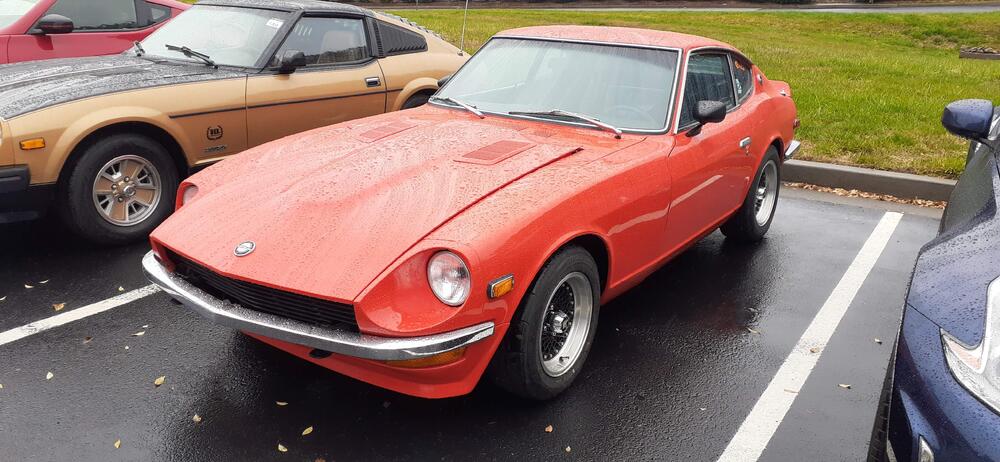
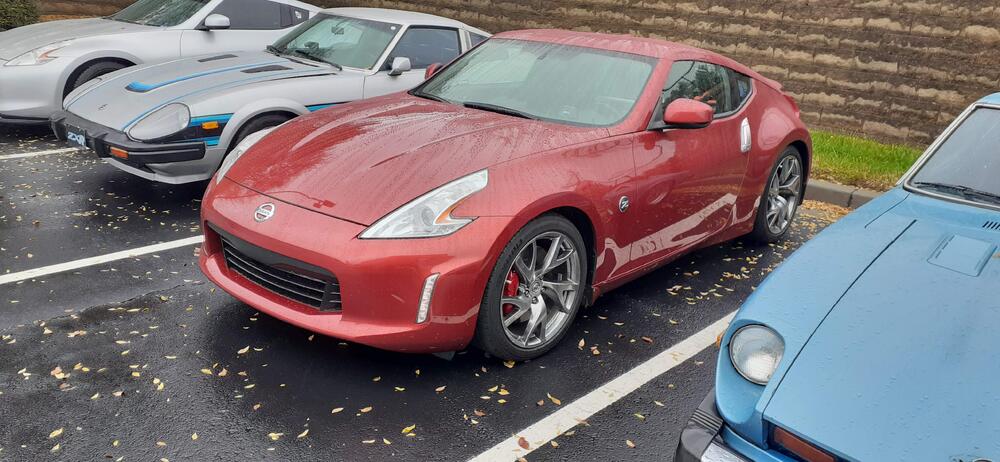
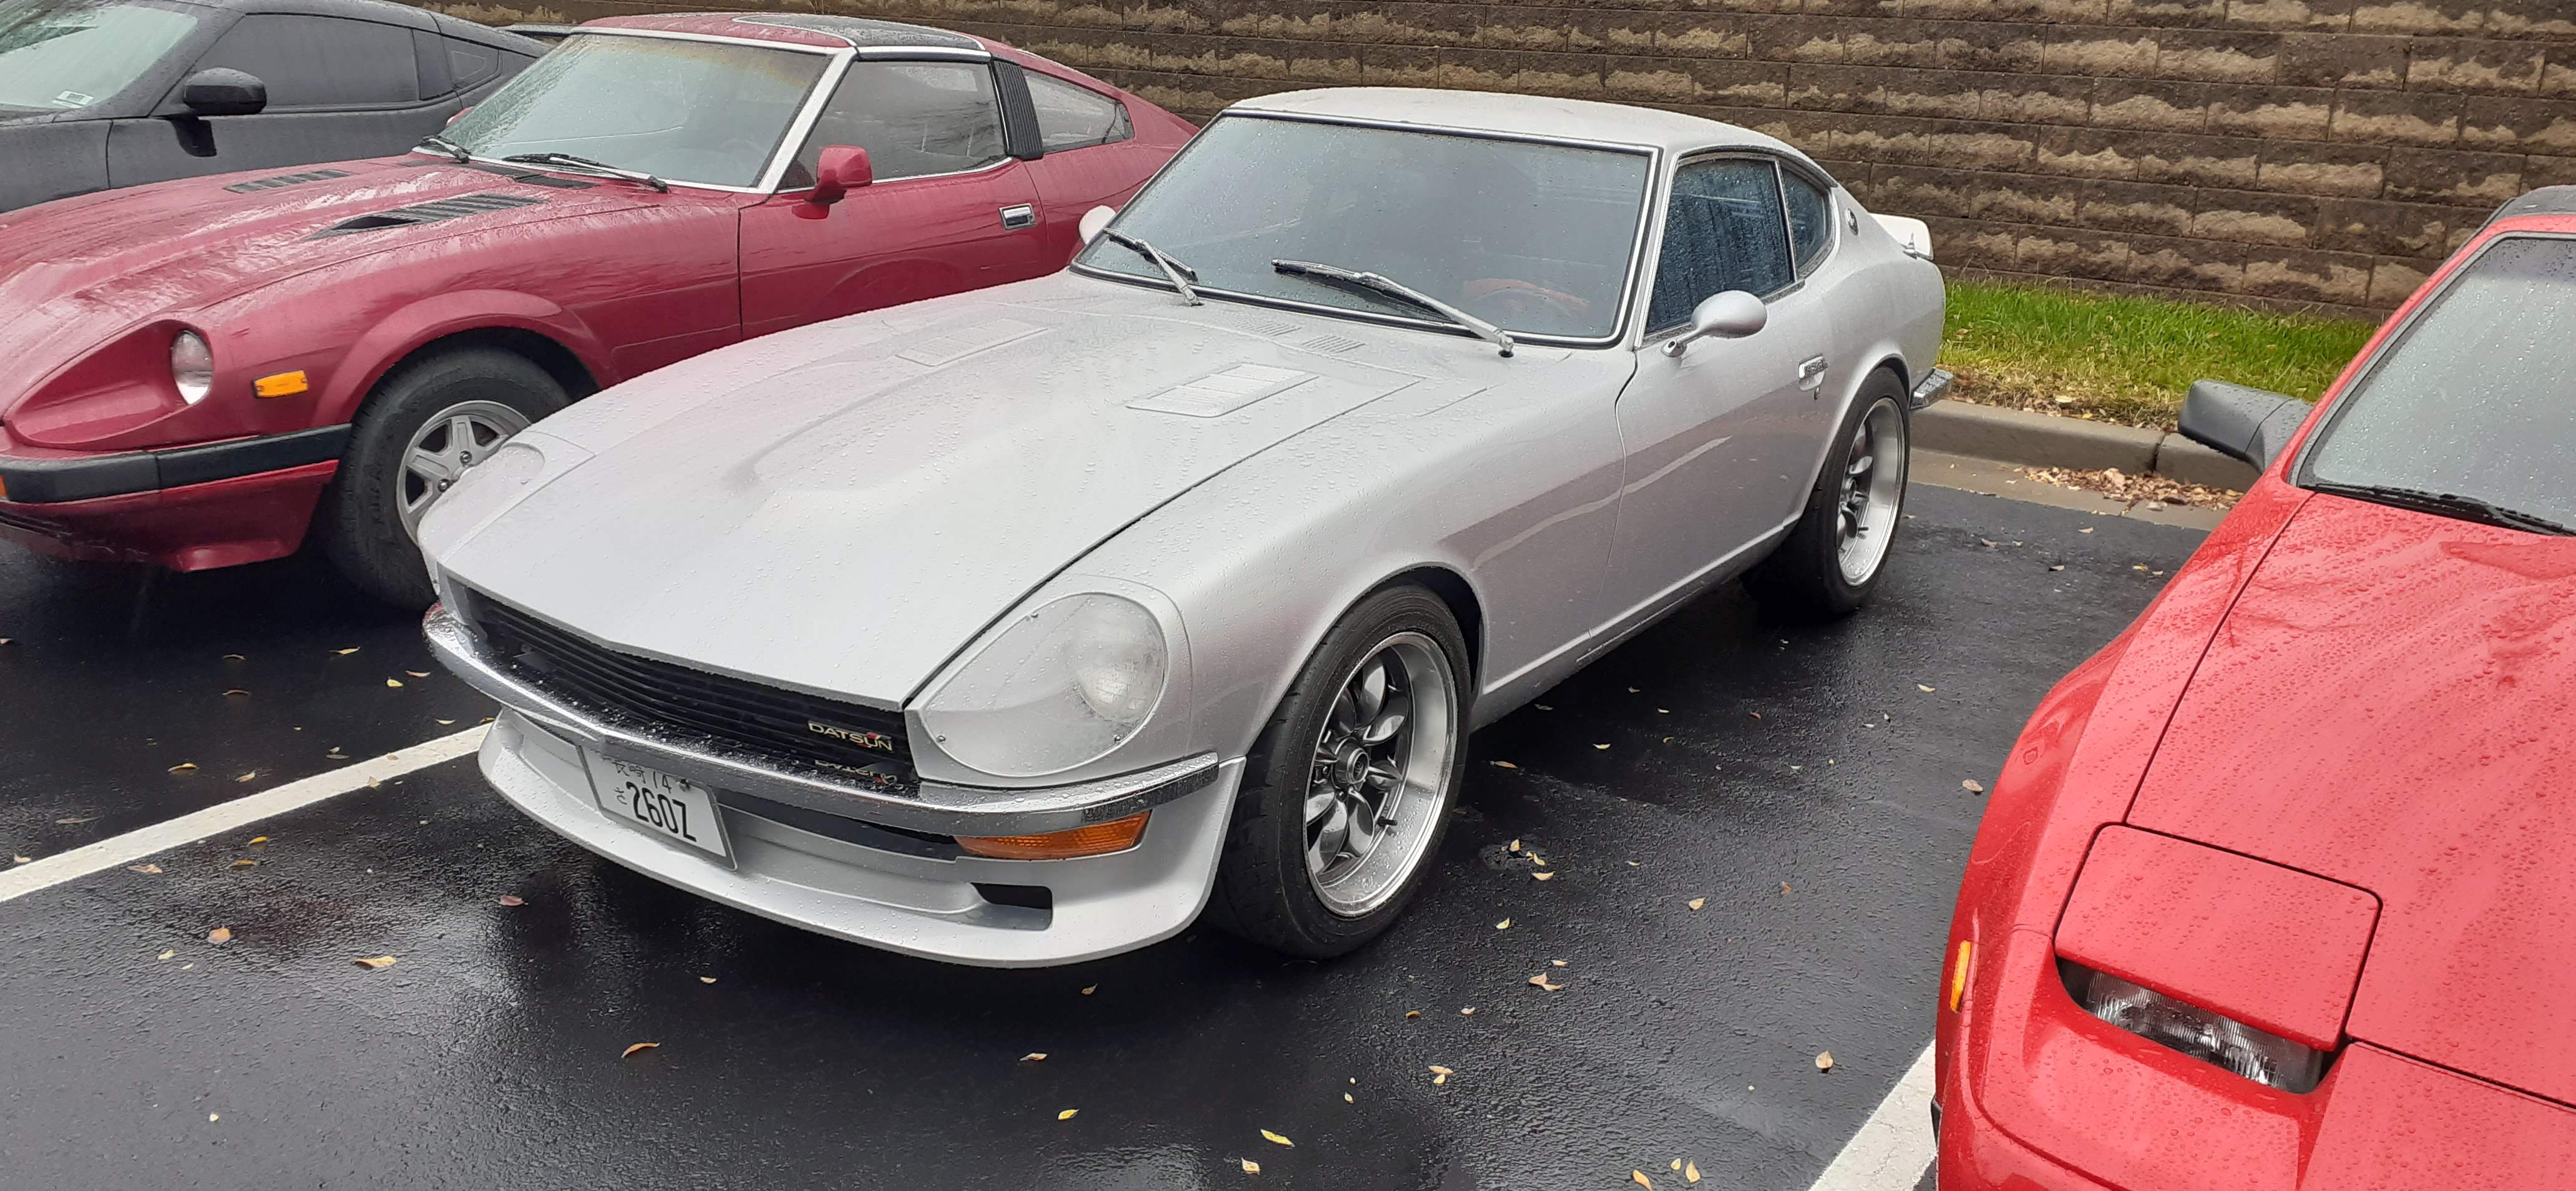
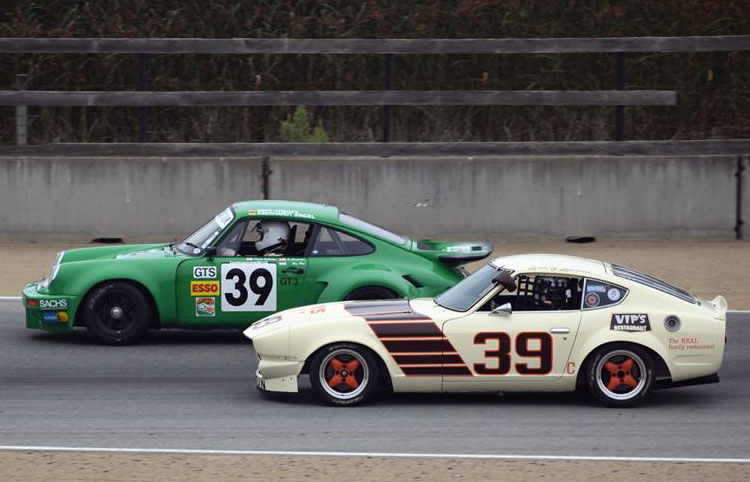
Gateway Classic Cars invited the Georgia Z Club to be the featured club at one of their monthly meets, Caffeine and Chrome. We ended up in the December slot which was nice because it's also the holiday party for Gateway Classic Cars and their Toys for Tots collection. Despite some rain, we had around 28 cars total show up. The funny thing is that the regular crowd stayed home because of the rain, so it became an ad hoc GZC holiday party with Gateway supplying the food. We managed to fill three boxes with toys, too. Here's a link to an album with photos of most of the cars that showed up today: https://photos.app.goo.gl/CLAHn9vzgg3PxeqSA

 2 points
 -
Stock (roadgoing) 432-R tailgate was steel, of course. It had the acrylic window and used the stock window rubber (sans stainless trim) to hold it in. Nissan Sports/Race Option tailgate was FRP and had the standard shape lip, so could accept the stock window rubber and either stock glass or acrylic window. That matches what I've seen too. The FRP tailgate used by the early Works rally cars must have been a dedicated moulding because of that different window-mounting lip. It allows the bonded acrylic window to sit pretty much flush with the outer surface of the tailgate. Somewhere I've got photos of a Works lightweight car with a bonded window that has very small screws embedded (covered) in the bonding material for a belt-and-braces solution.
 2 points
 -
2 pointsFirst, here's how to make sure which black/white wire is which. Make sure you have the green/white and both black/white wires disconnected for this test. When you have identified which black/white goes to the coil, make sure it and the red wire of the Pertronix are both mounted to coil positive. The black wire from the Pertronix should be on coil negative. Make sure the other black/white is firmly connected to the green/white. Check resistance between the distributor body and the car body. It should be <1 Ohm. Then if the car doesn't start, you'll need to find a helper. Measure voltage to ground at coil positive while trying to start. It should be between 10 and 12 volts. Measure voltage to ground at coil negative while trying to start. It should fluctuate a lot if the Pertronix is functioning properly. If the car doesn't start, take clear photos of the wiring around the ballast resistor and coil. Also make sure you haven't pull the coil wire out some from either the coil or the distributor.
 2 points
 -
Exactly. I firmly believe that is the reason so many of the heads on the carbs, hose clamps, etc are so screwed up (pardon the pun). It is because someone used a Philips head screwdriver. JIS fits the head.2 points
-
1 point
-
1 pointI feel like this brake set has been on CL for months, maybe the owner will ship... 👀 https://sfbay.craigslist.org/sby/pts/7563156495.html https://sfbay.craigslist.org/pen/pts/7556712122.html1 point
-
https://www.yelp.com/biz/williams-autobody-and-paint-san-mateo These guys do a lot of the body work for the "historic racecars" that are around during Monterey Car Week, they might have what you need... if you get it do update us 😉1 point
-
1 pointAll we know is that there's still no contact with the colony, and a xenomorph may be involved.1 point
-
1 pointThose are pretty corroded. Although the corrosion in the bore is probably a bigger concern than the corrosion on the piston1 point
-
Correct...the exterior body color.1 point
-
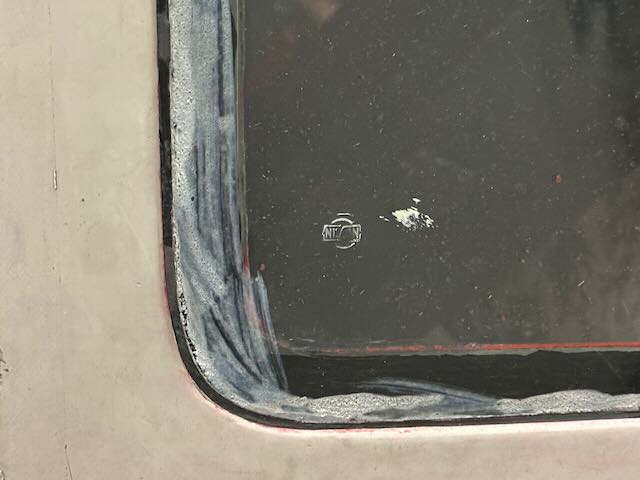
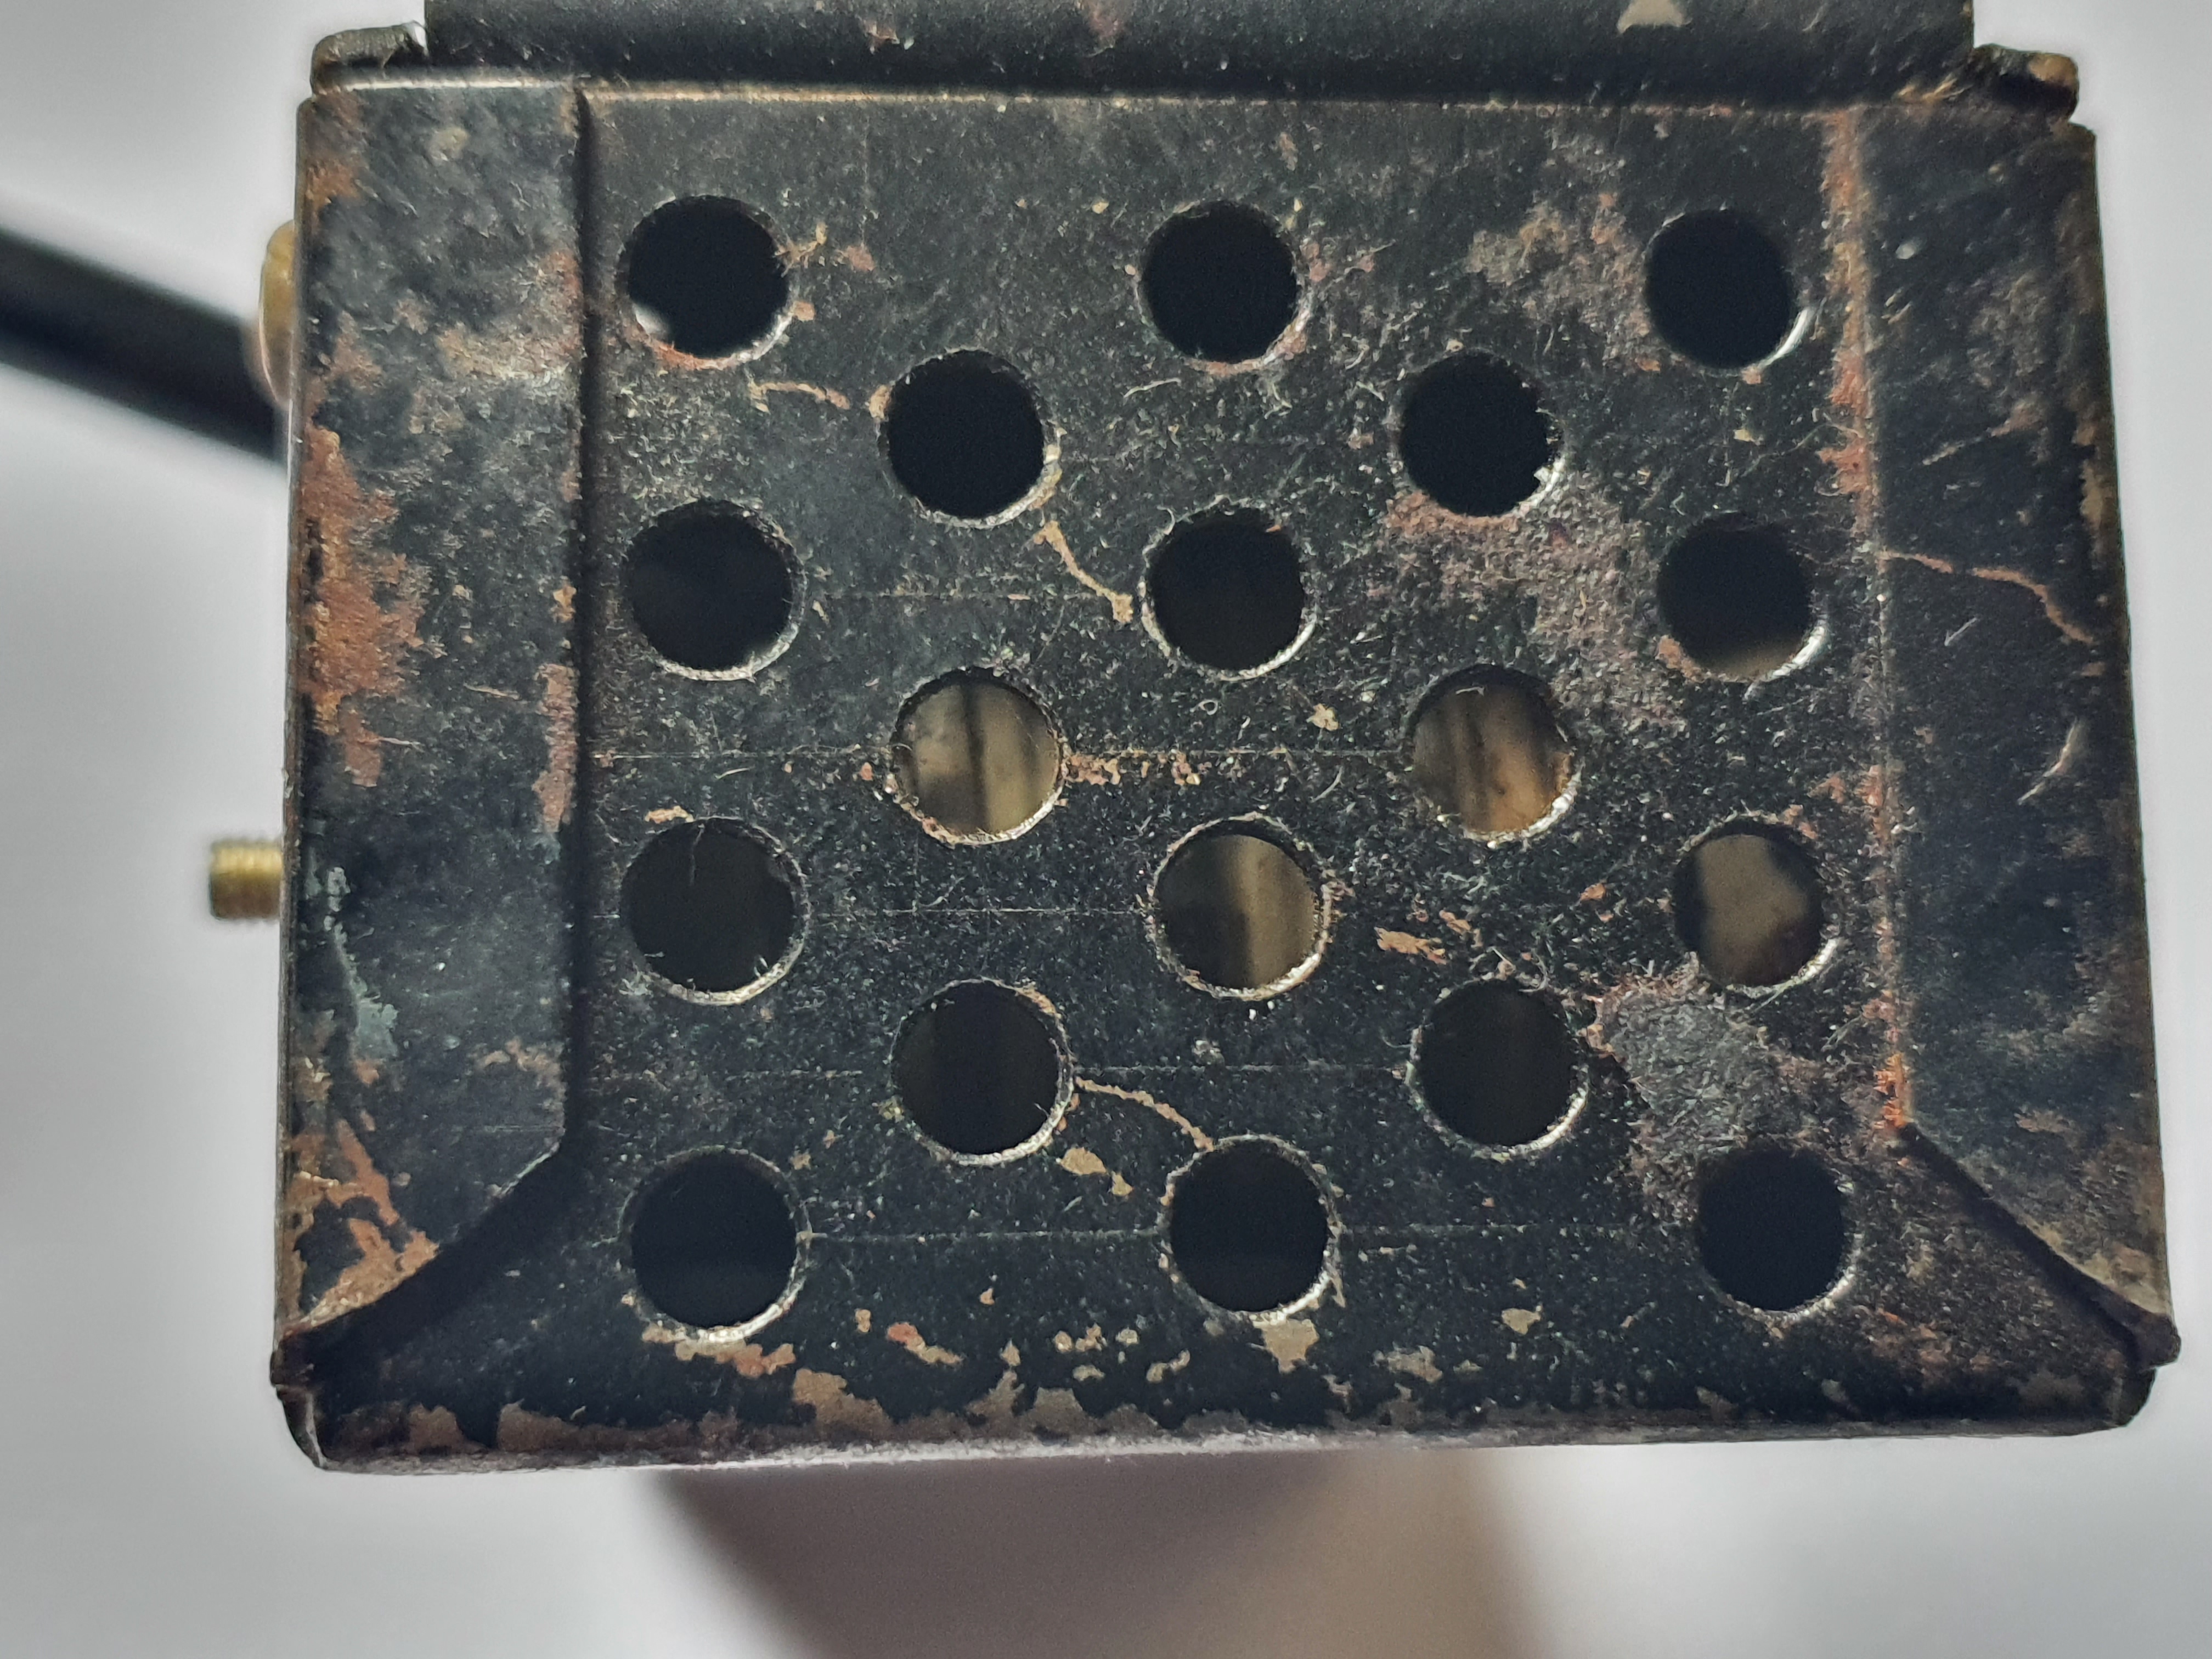
Since that's an electrical part from a Works rally car, I would not place too much faith in any level of industrial standardisation being directly applicable. They are a law unto themselves! A lot of that stuff was either hand-made or involved some level of modification over stock. I doubt the dots on those screw heads are anything to do with JIS standards.1 point
-
The one with the single dot is a "misprint" the other dot just fell "into the groove".. (Haha..madonna!!) 😂 I don't know why it has 2 dots.. maybe someone wanted to give their nuts and bolts this so they can recognize their own bolts and screws? (or maybe they are extra hard or strong..)1 point
-
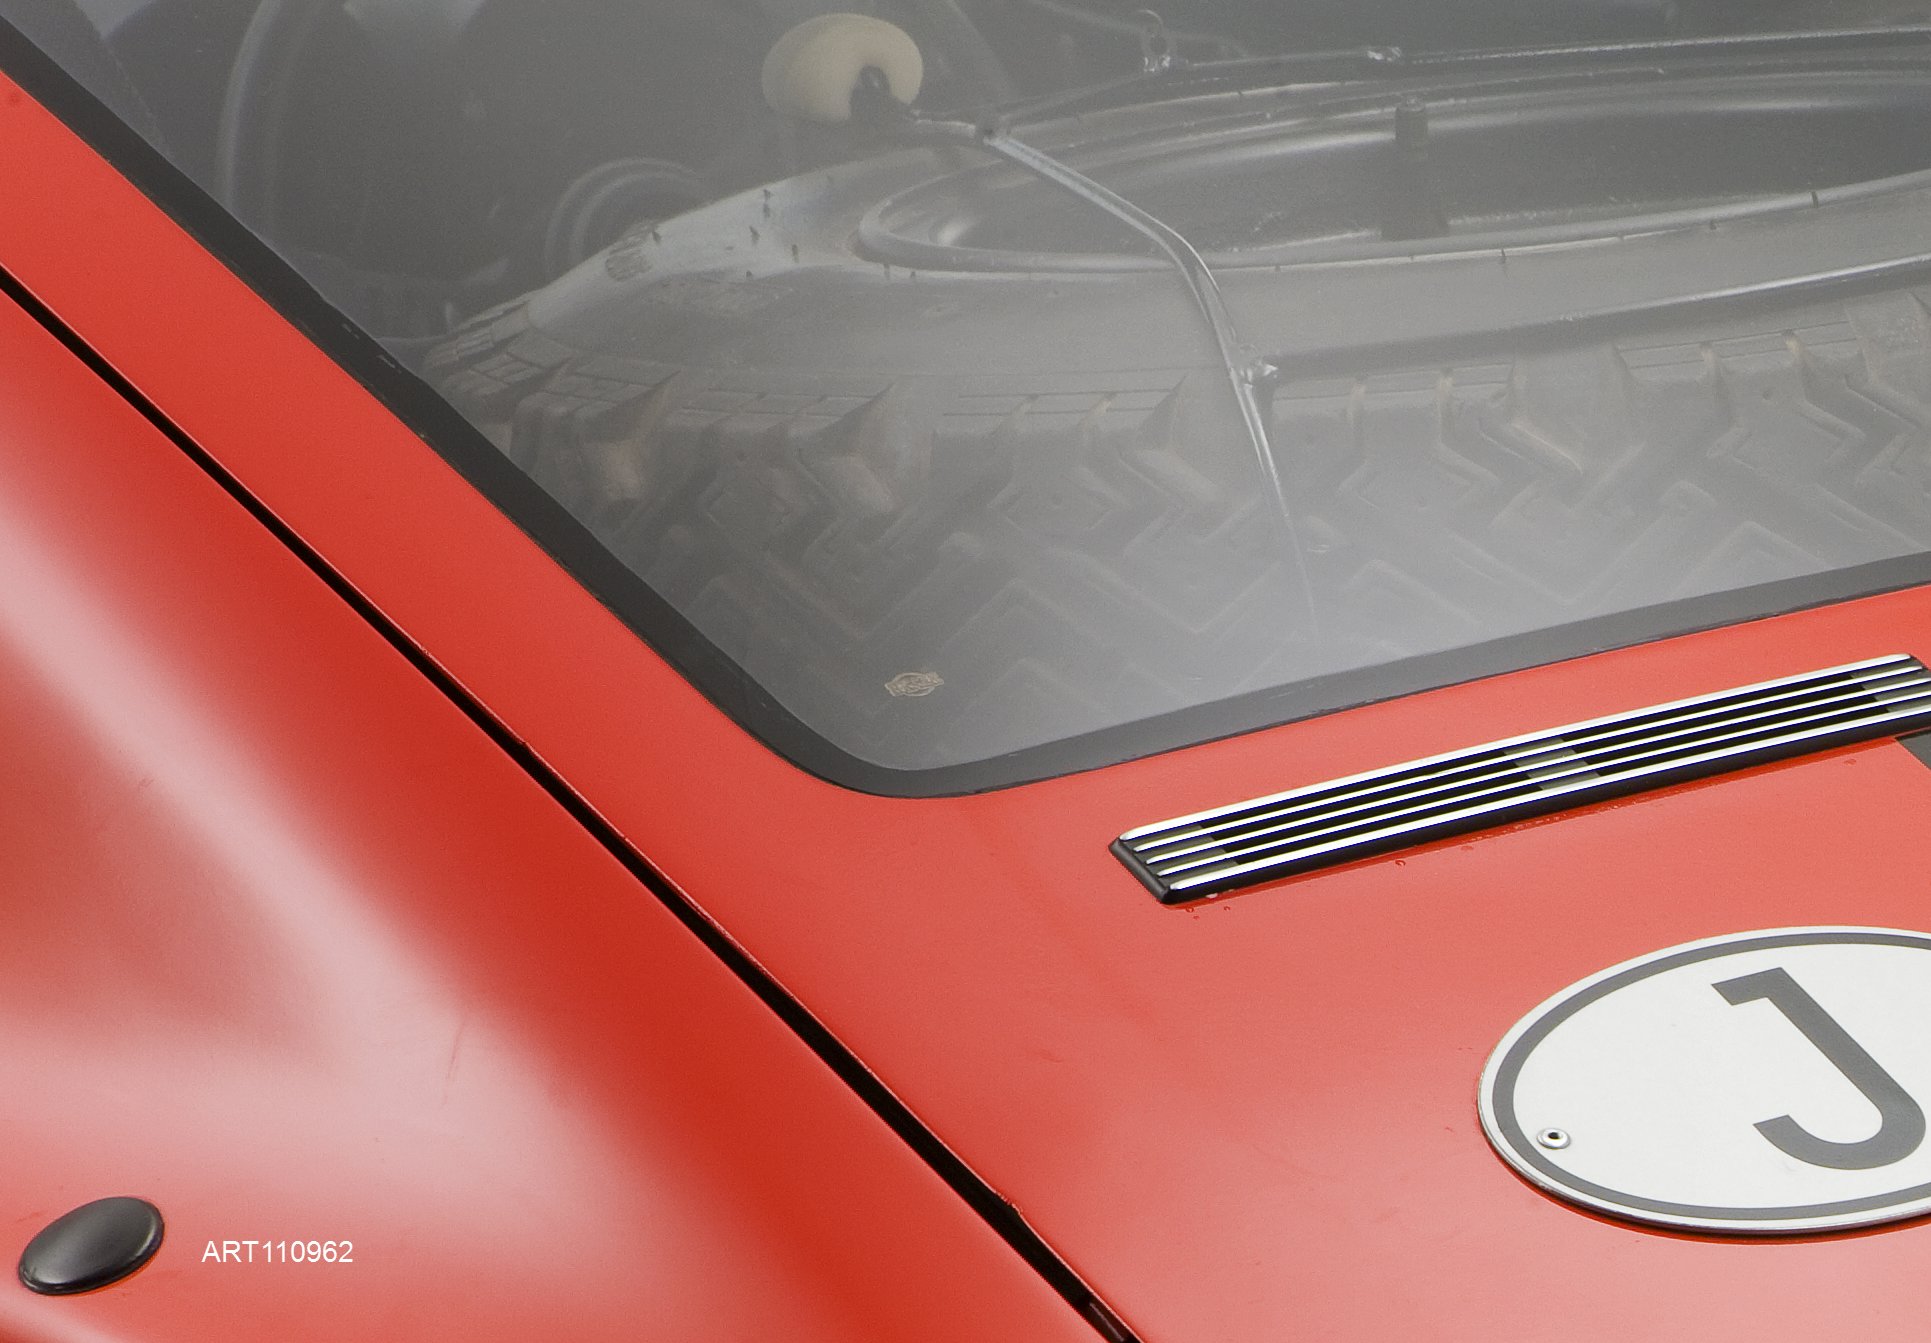
Yes, pictured - not very well stamped, I'm afraid. Tailgate permutations for Z432-Rs over the production life of the S30 are a slight mystery to me, so I'll invite others to chime in with info. From the parts manual, a Z432-R with lightweight decklid would have a fiberglass frame, an acrylic window a little thinner than a stock piece of glass, and a standard rubber gasket to affix it into the frame. The Lightweight Spec Works cars did it differently - they used an even thinner piece of acrylic (perhaps half as thick, by my estimates), bonded directly onto a lip on the decklid frame, without using a gasket (refer to picture)- essentially making the frame/acrylic a single piece. This feature is visible on pretty much all the 1970-71 period photographs I have of the Works cars, so I have come to believe it's the likely procedure the Works team used on all the Lightweight Spec cars. The acrylic is so thin, that there's really no way it would be rigid enough to stay in place using just a gasket. In addition, I'm not sure that this exaggerated mounting lip on the frame was a part of the standard PZR frame - it's possible that this batch of decklid frames were modified specifically to allow for the two pieces to be bonded together. I just don't know the answers yet - more research is required. The above is all a bit geeky, so I apologize for deep-diving into the minutia. Unfortunately, my acrylic was ruined by a former owner, who cut a 6" hole for what appears to be a fresh-air venting system. Thankfully, I have a "very used" standard PZR acrylic window. So, in order to fix my existing decklid, I'm going to have to cut off the old acrylic, and bond on the new, thicker one, or bite the bullet and replicate the existing acrylic piece using thinner material. Right now, I'm leaning towards the latter, for consistency.
 1 point
 -
You're close to Jackson Pollack big money skills. The Z window chrome would make a good frame.

 1 point
 -
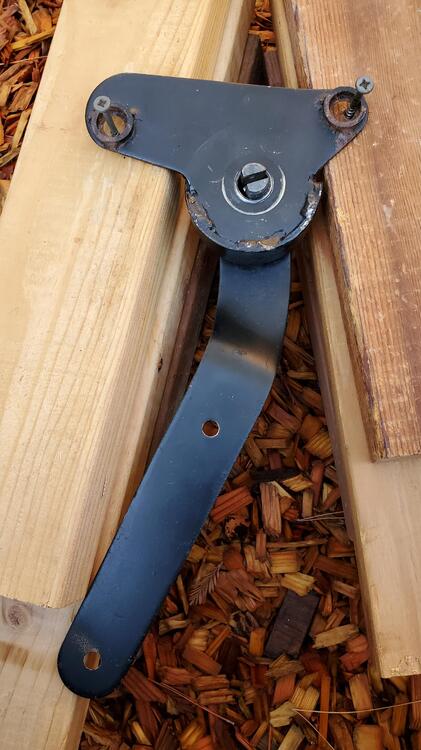
Well I’ll be horn swaggled….. All the invented drama for nothin’ Been watching too much reality TV apparently. When seat back is all the way forward, no tension. Nothing happens until you start pushing it backward. Duh…. I’m going to go take some apart just to laugh at them….1 point
-
1 point
-
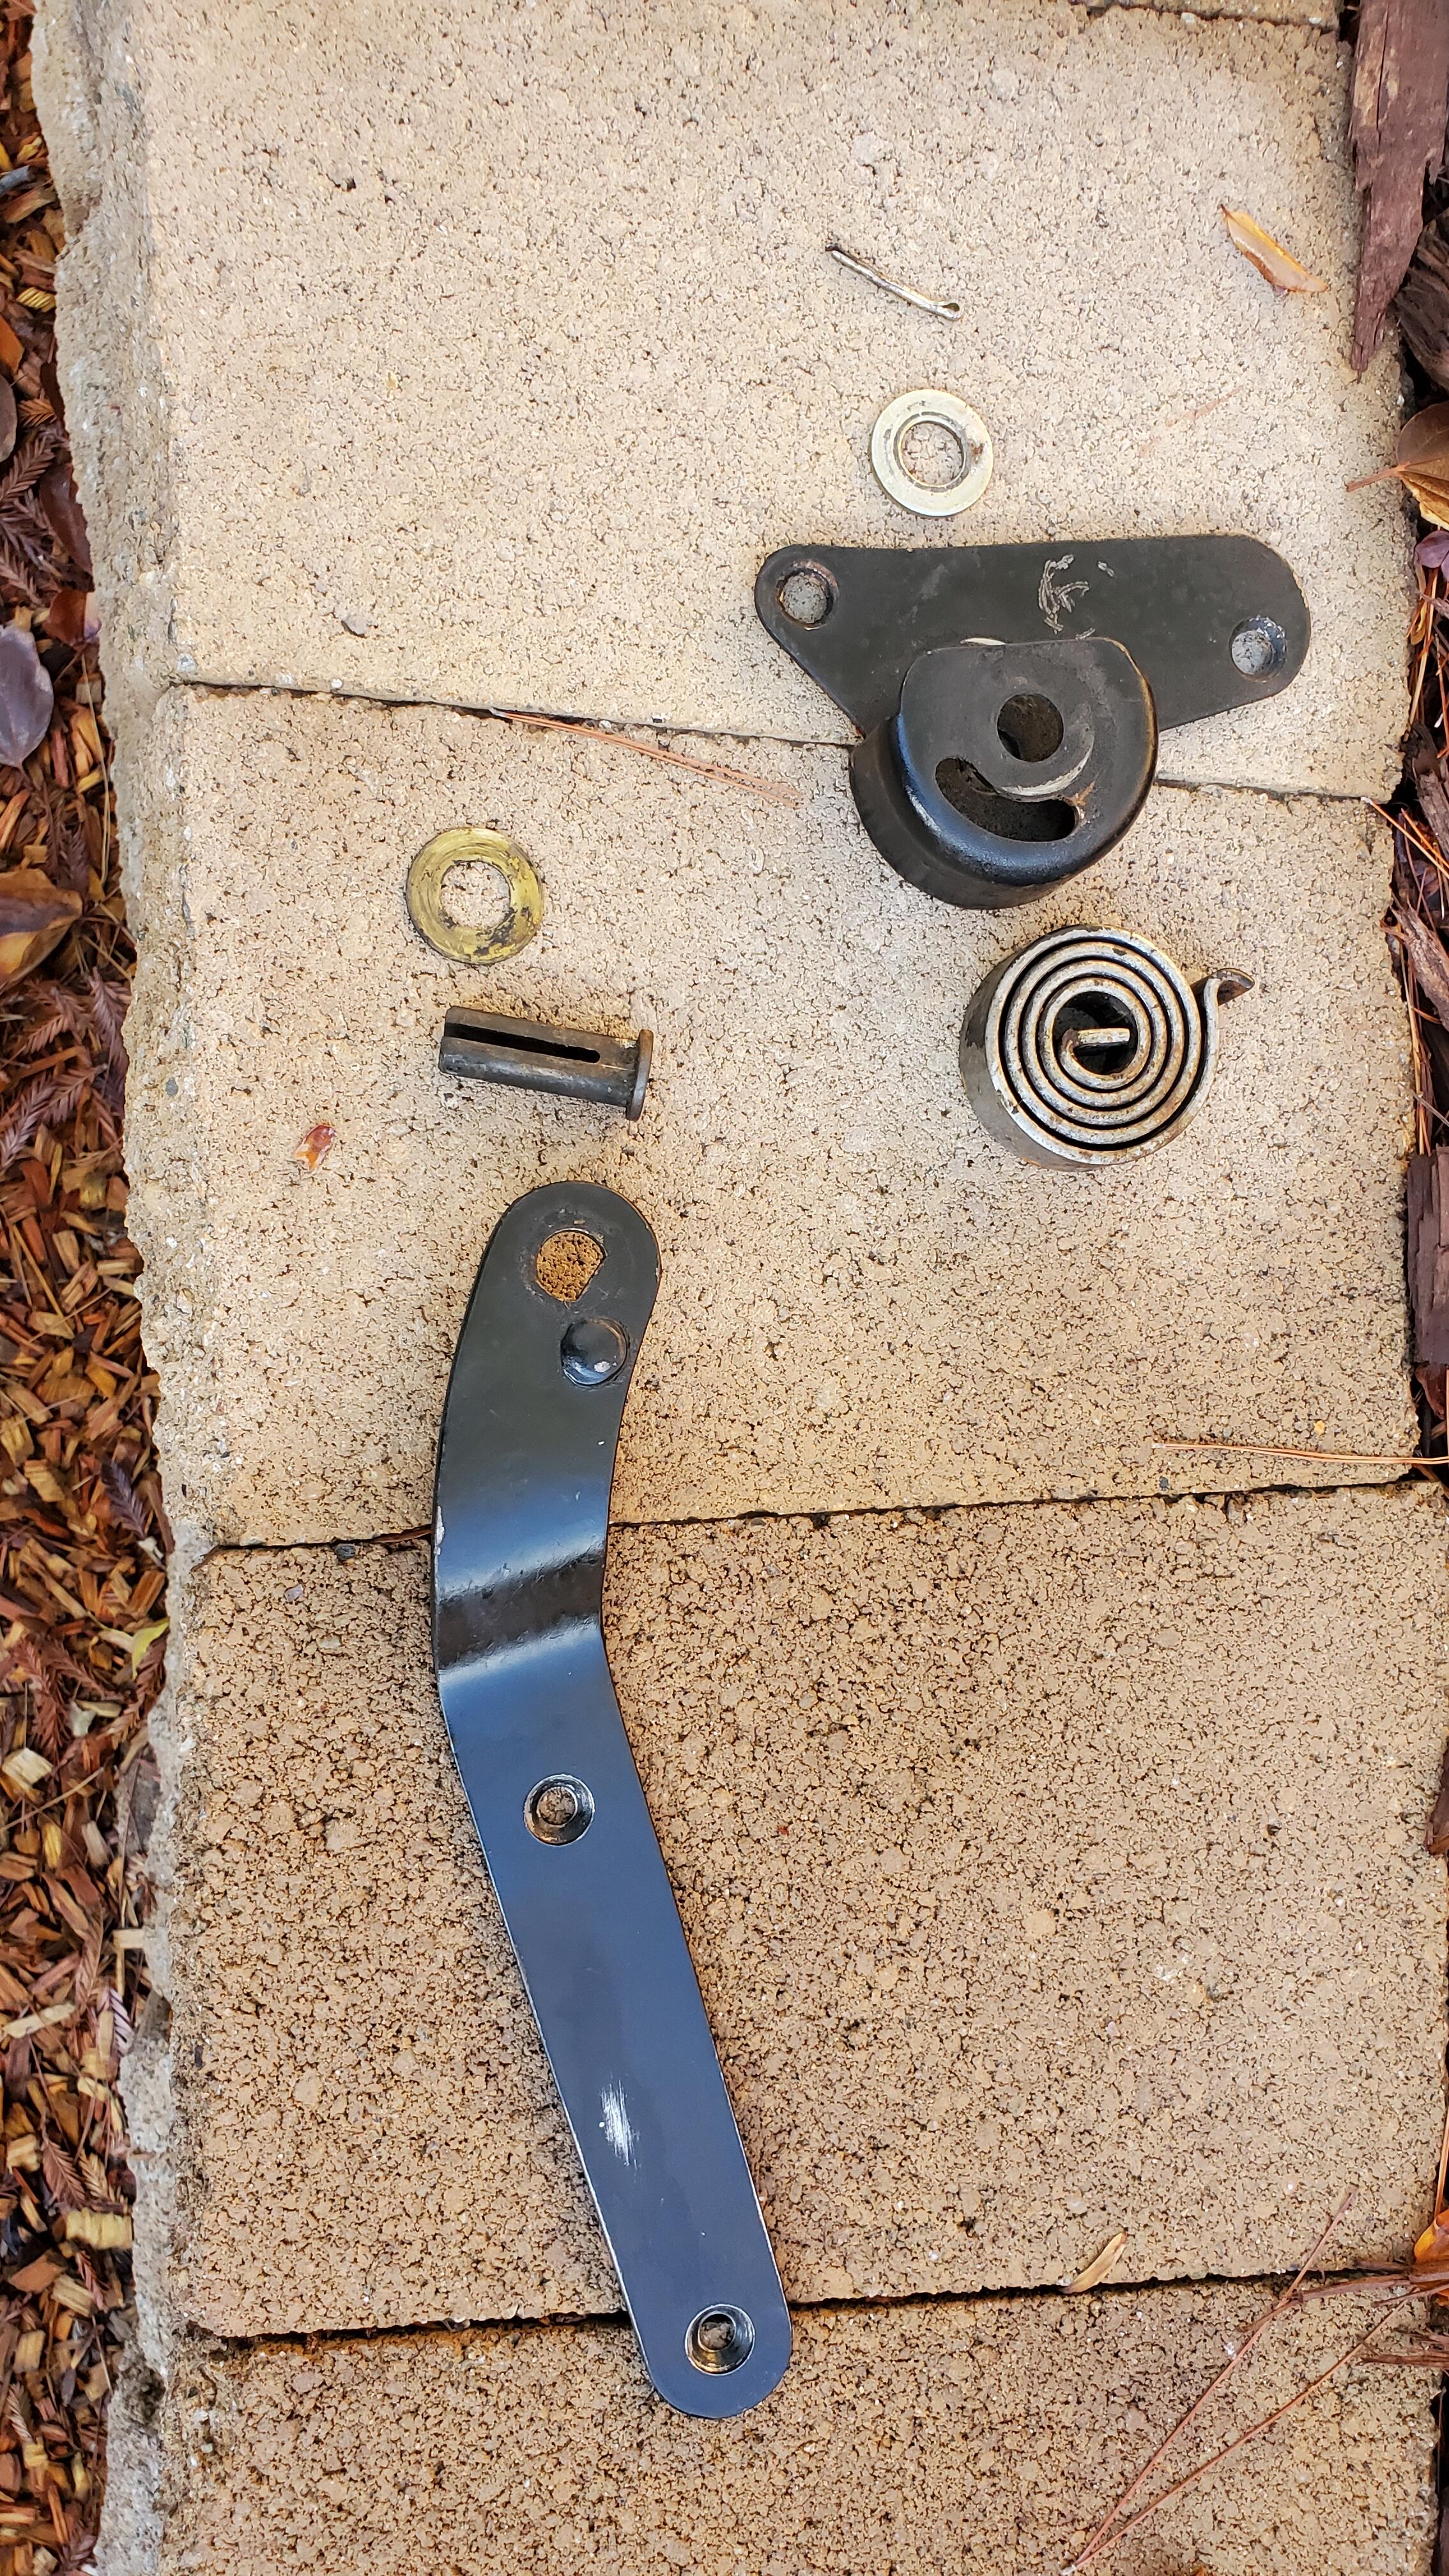
OK so i took a chance since cafebaltimore seemed to have no issues. Well, he was right. No danger nothing to worry about. Since i had no bench i went and made a makeshift set of blocks and just put it between there thinking the worst that could happen was the spring would unwind violently sending the base spiraling out of control. Set it up as shown to have some control over the base, pulled the cotter and washer and just a slight tap with a hammer dropped the pin out and nothing happened. the tension coil isn't under tension until you assemble it. second picture is all the components. piece of cake. Now i can clean and repaint as needed.
 1 point
 -
1 pointFWIW, the 'AM' in the part number shows they're aluminium, which doesn't have a great reputation (although eventually, they'll be all there is).1 point
-
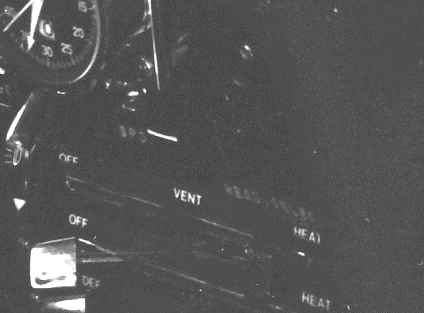
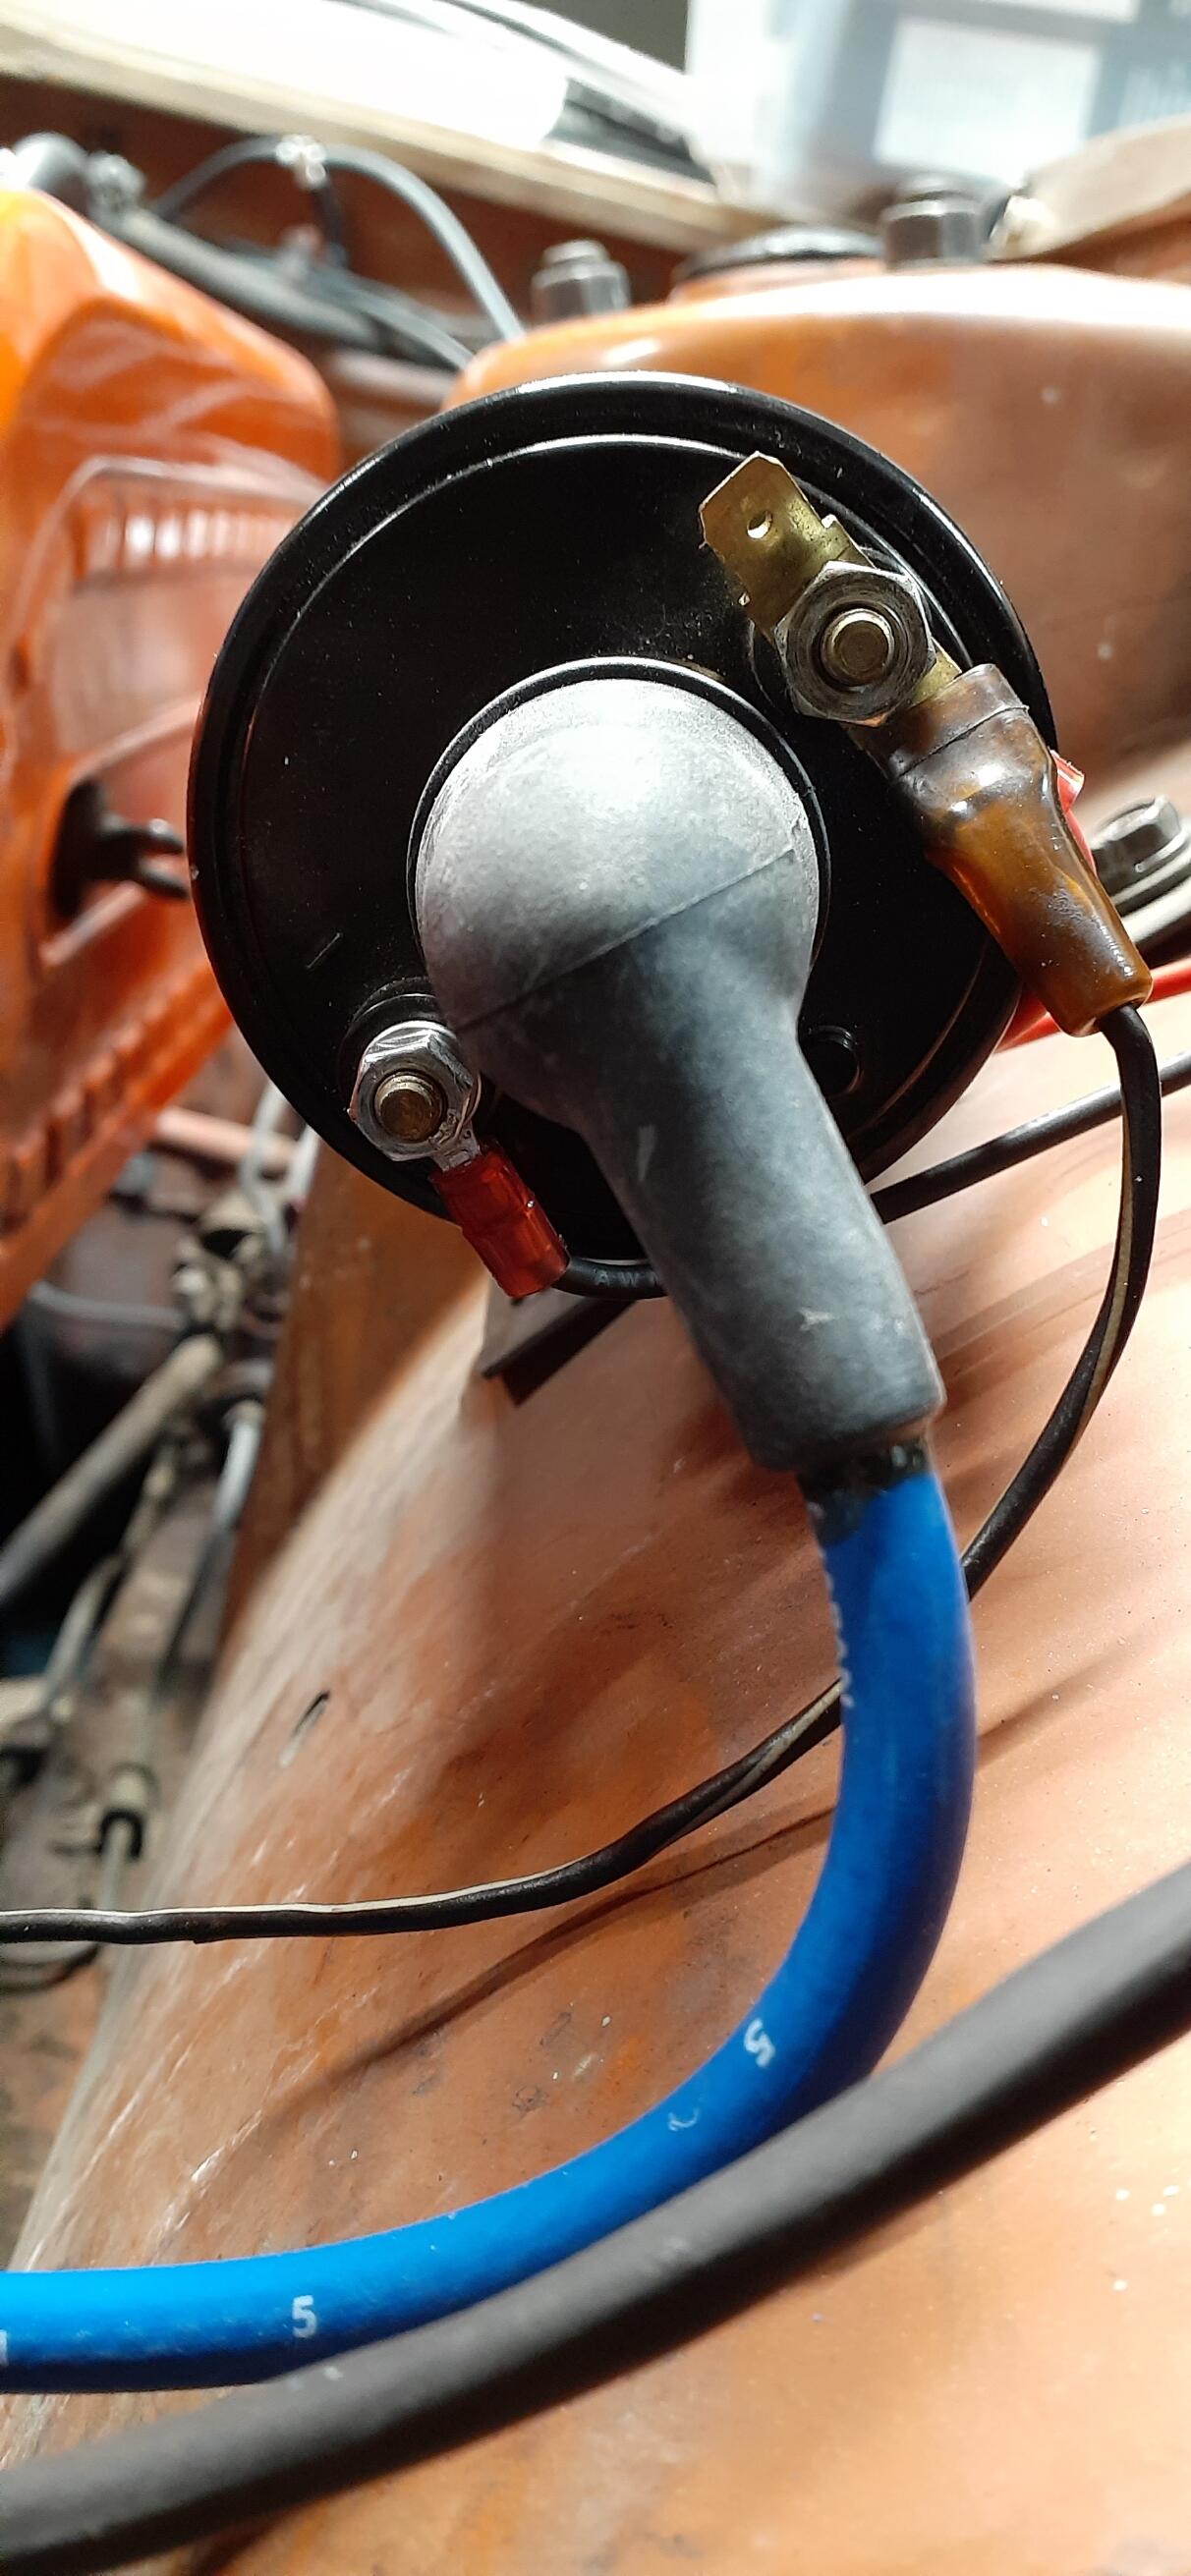
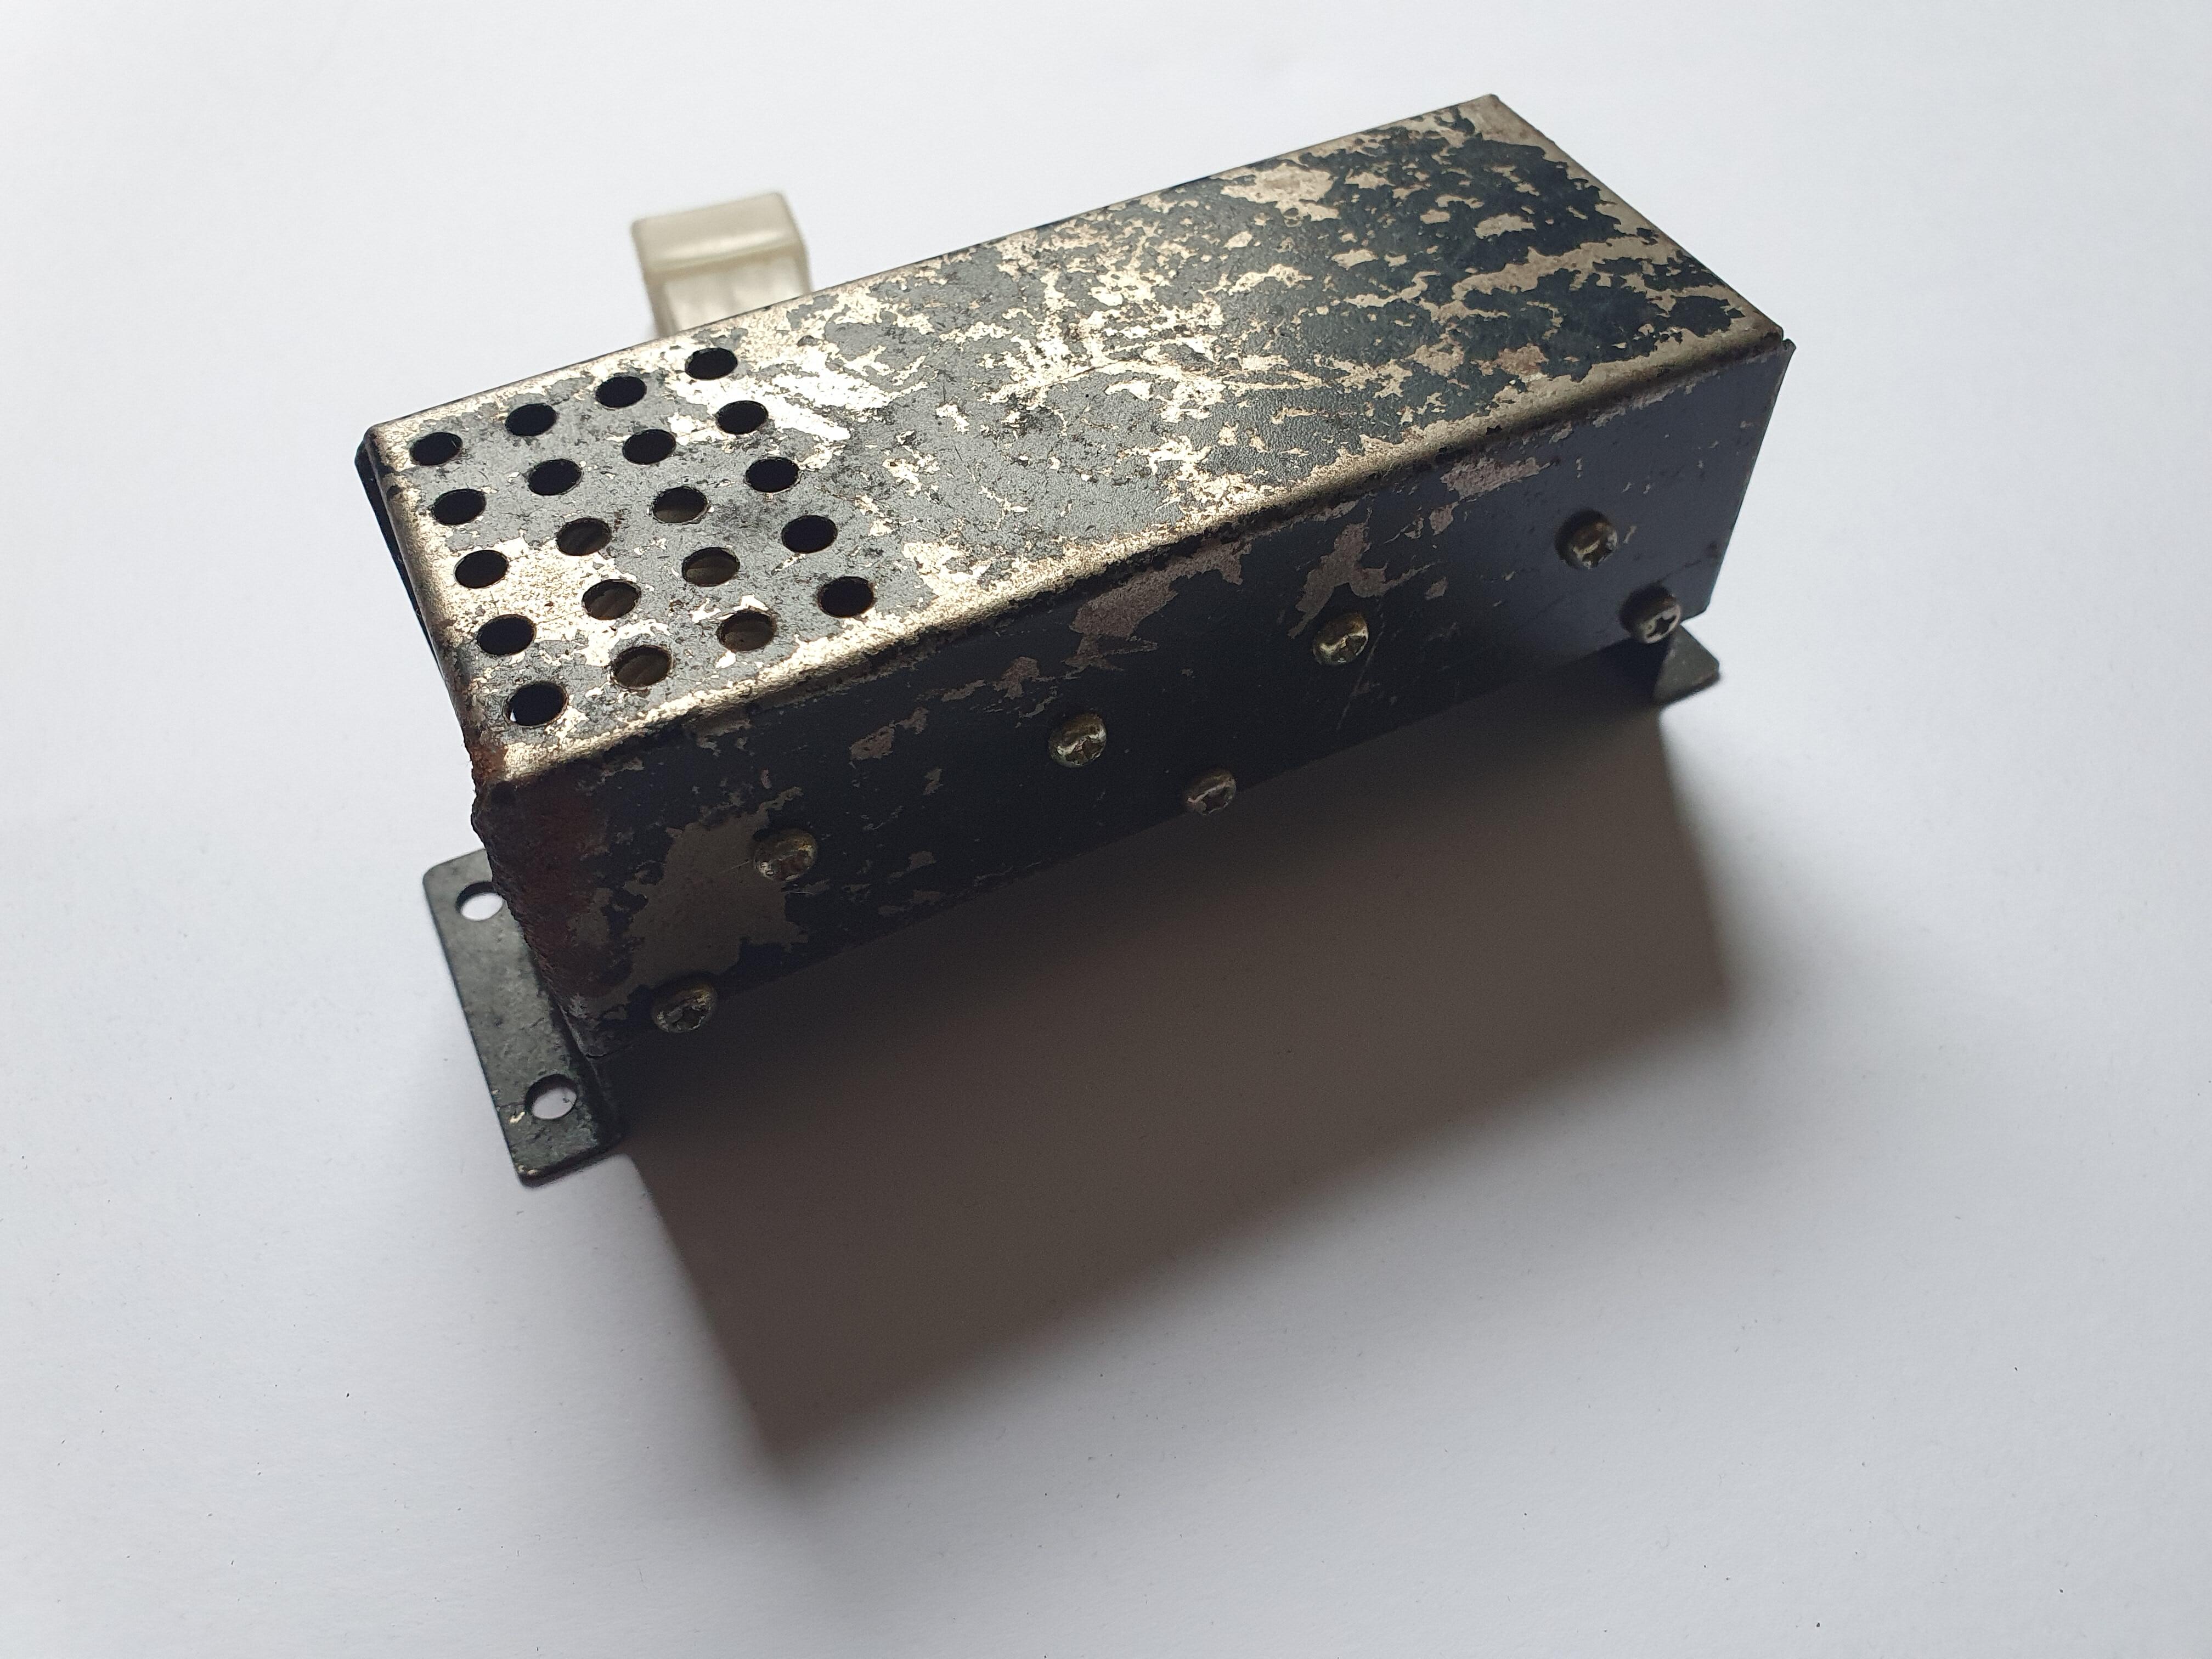
1 point@HS30-H Thx for the info. Part of my confusion is that I mis-remembered the labelling on the console, and when I re-examined my pictures, the dial was labelled "HEAD.SELECT", and not "HEAD RHEO". My confusion lay in the fact that the internals of the box appeared to contain resistive wiring, making me think of it as being some sort of rheostat. In sort, the stalk is as you described, and works as expected when the "Head Select" switch is off. It's also possible that there is a jumper cable I'm missing that somehow wires combinations of the 6 lights together in one easy-to-us switch - and that how I've got it wired now is incomplete. I've included a closeup of the console dial here for others to look at, with the "HEAD.SELECT", so folks know what is being discussed. Sorry for the dark picture, it wasn't very bright to begin with.
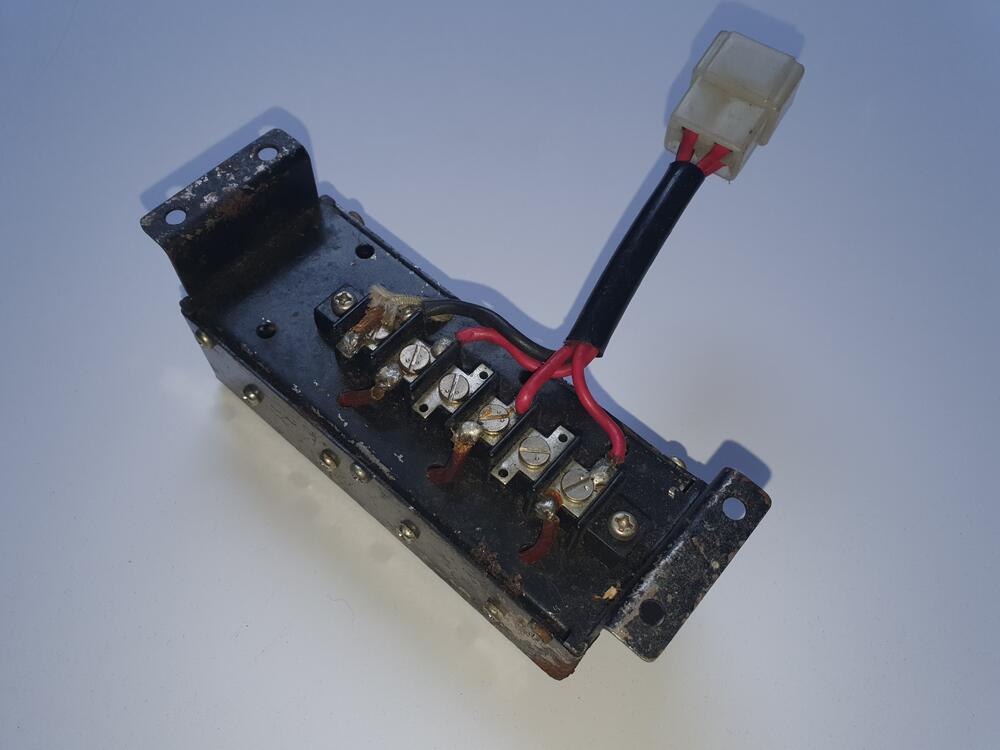
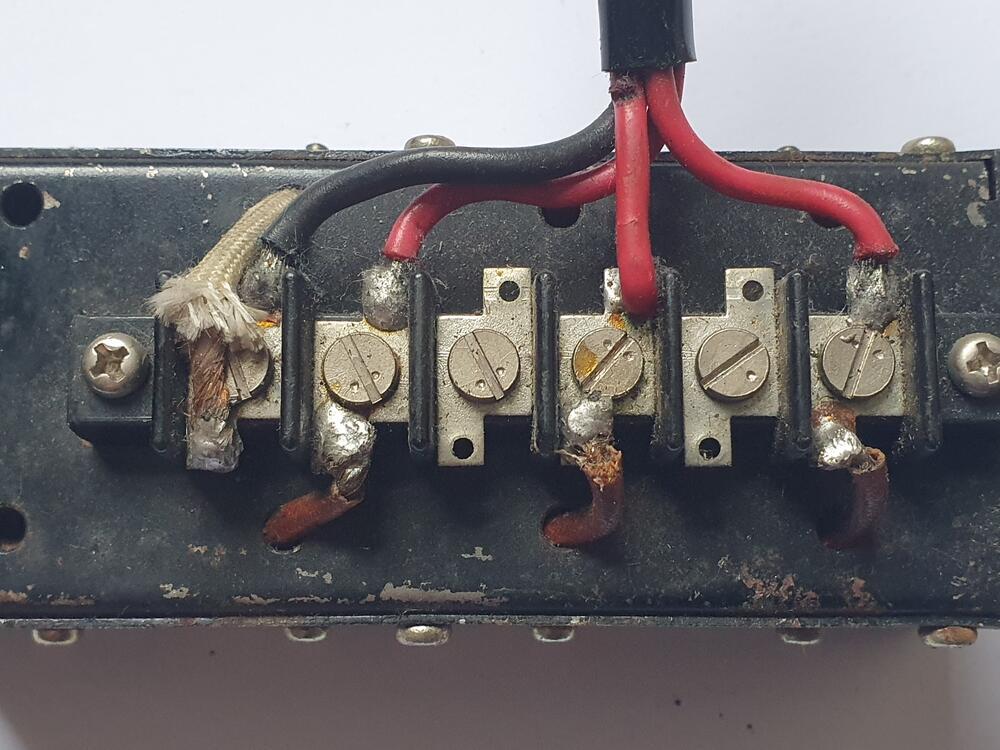
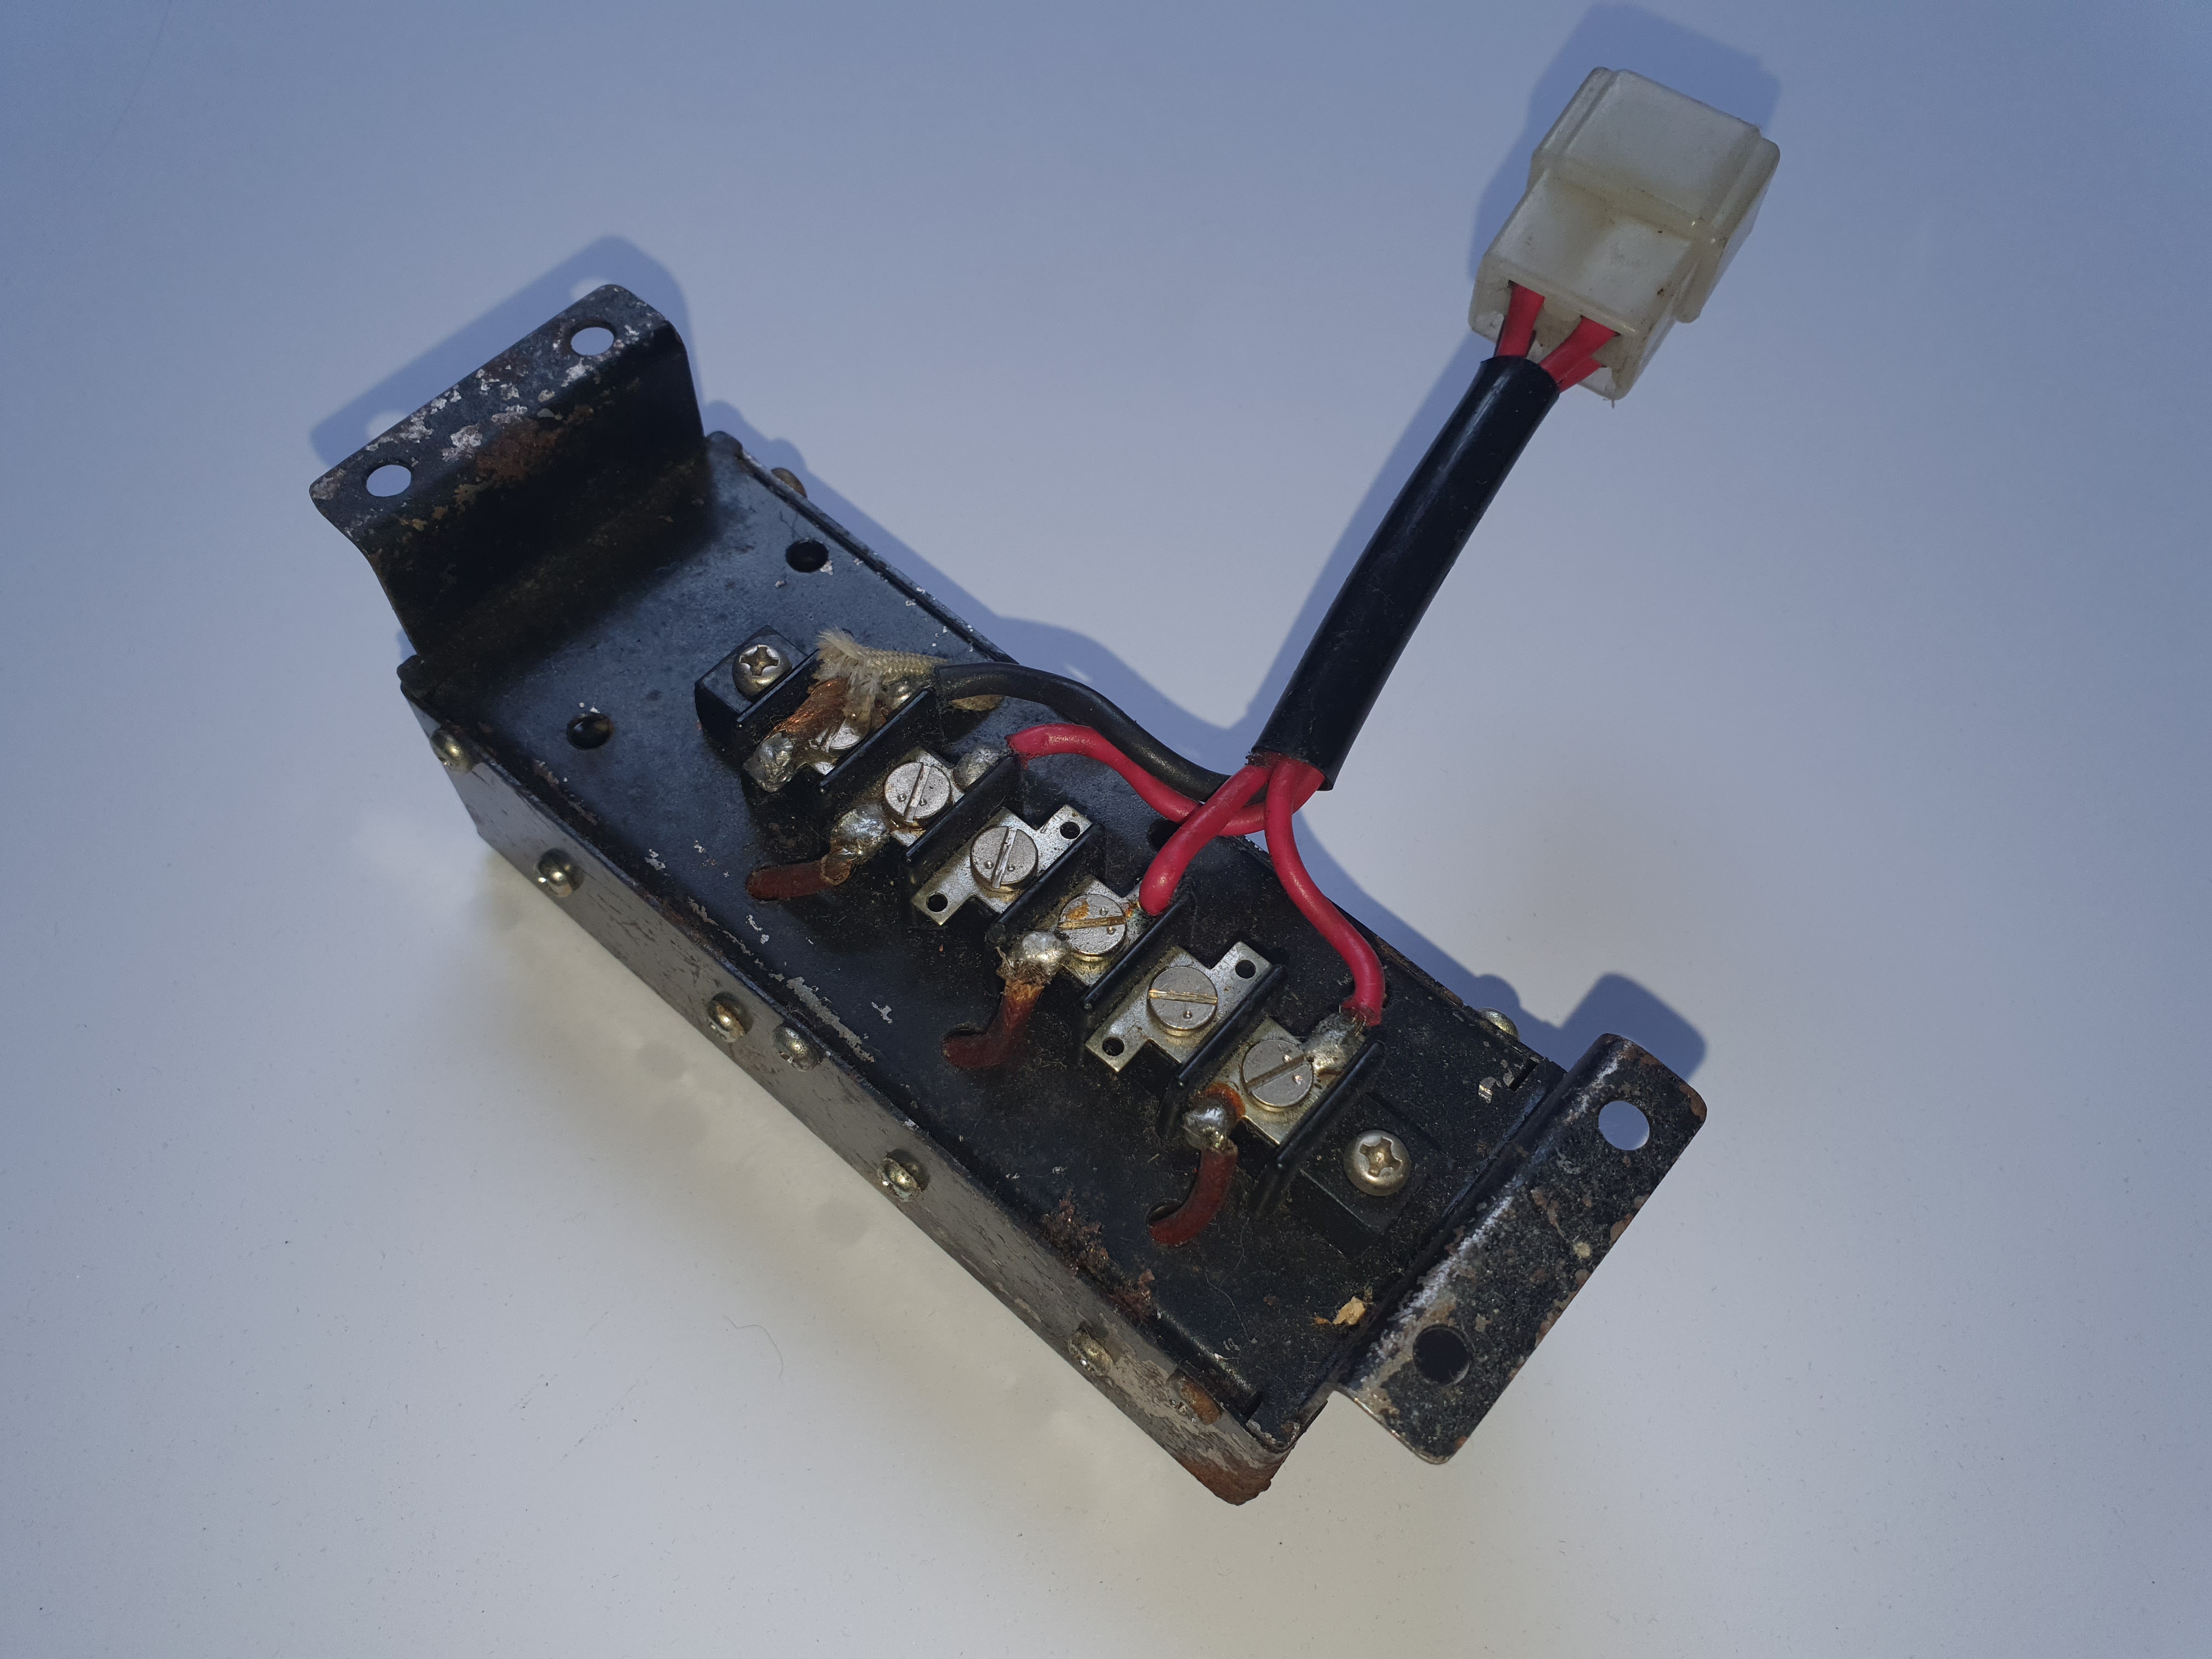
 1 pointAs mentioned privately, I honestly think this is case of mistaken identity. The dash control labelled 'Head Rheo' is - surely? - the dimmer switch for the navigator-specific auxiliary lighting ('P' Light illumination for maps, timers and Haldas). I don't see any reason why it would be necessary to have a rheostat-controlled dimming function of headlamps, spot lamps and fog lamps on a rally car. I've got one of the 'mystery' boxes too (leftovers from Works activities here in the UK) and - notably - the wire colours are different than on yours. I have three reds and a black going into a square 4-spade male connector: Referencing a factory carnet import inventory for the 1971 RAC Rally, I see Works part number 'Y9821-22438 Diode a**'y' which seems to fit the bill as it is listed amongst other auxiliary lighting parts. Would it not be more likely that this Diode box acts as a one-way 'gate' in the lighting system of the car, helping to protect against switching combinations that would otherwise overload/mess up the wiring? I'm absolutely not any kind of expert on auto electrics, but it seems to me that there's a lot going on with the Works rally car lighting system that is not apparent to us on the outside looking in, and certainly so with regard to the different combinations of lighting possible with the column switch, the individual fog & spot lamp switches, a master lighting switch and the push-to-pass momentary switch that (I think?) you have on the end of your car's indicator stalk?

 1 pointScored new in box Interpart Mulholland shocks for the 240Z on EBay. Had been searching a few years for some fronts and up pops a set of front and rear. Will be great with the full BRE suspension setup I have.1 point


Important Information
By using this site, you agree to our Privacy Policy and Guidelines. We have placed cookies on your device to help make this website better. You can adjust your cookie settings, otherwise we'll assume you're okay to continue.