Leaderboard
-

siteunseen
Free Member5Points15,115Posts -
jfa.series1
 Subscriber
 4Points2,733Posts
 -
xs10shl
Free Member2Points339Posts -

Racer X
Free Member2Points1,877Posts


Popular Content
Showing content with the highest reputation on 11/03/2022 in all areas
-
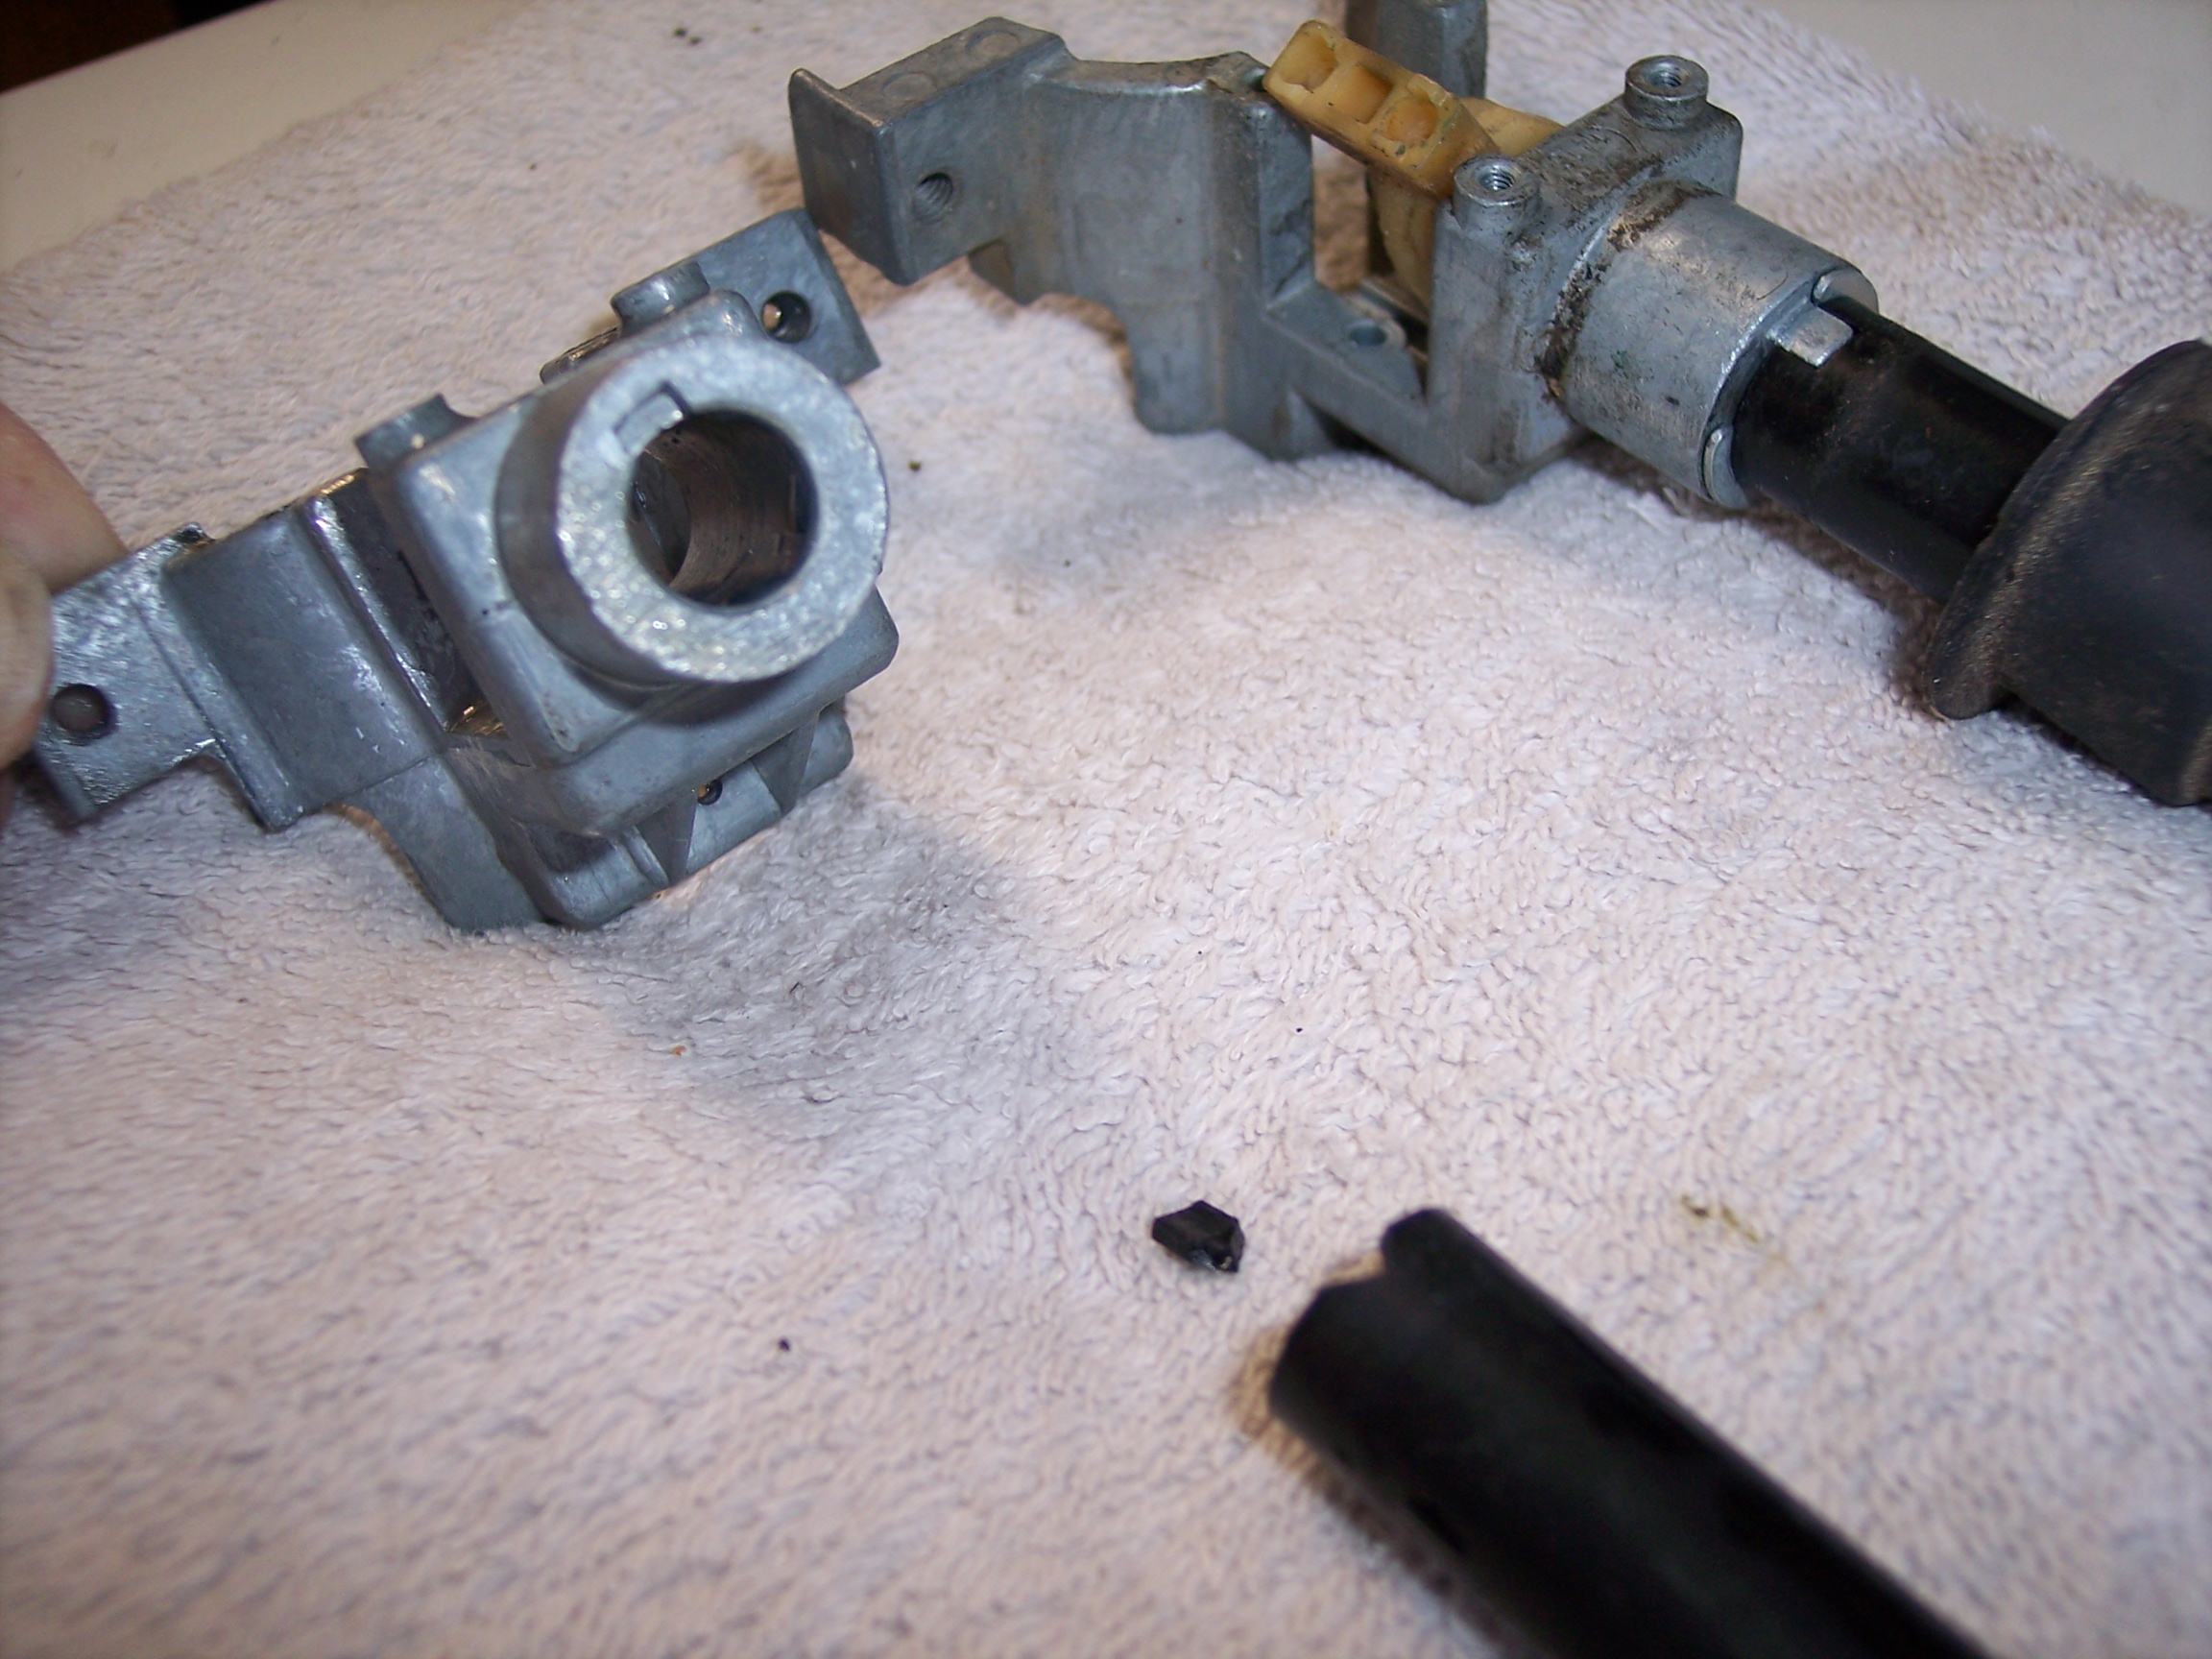
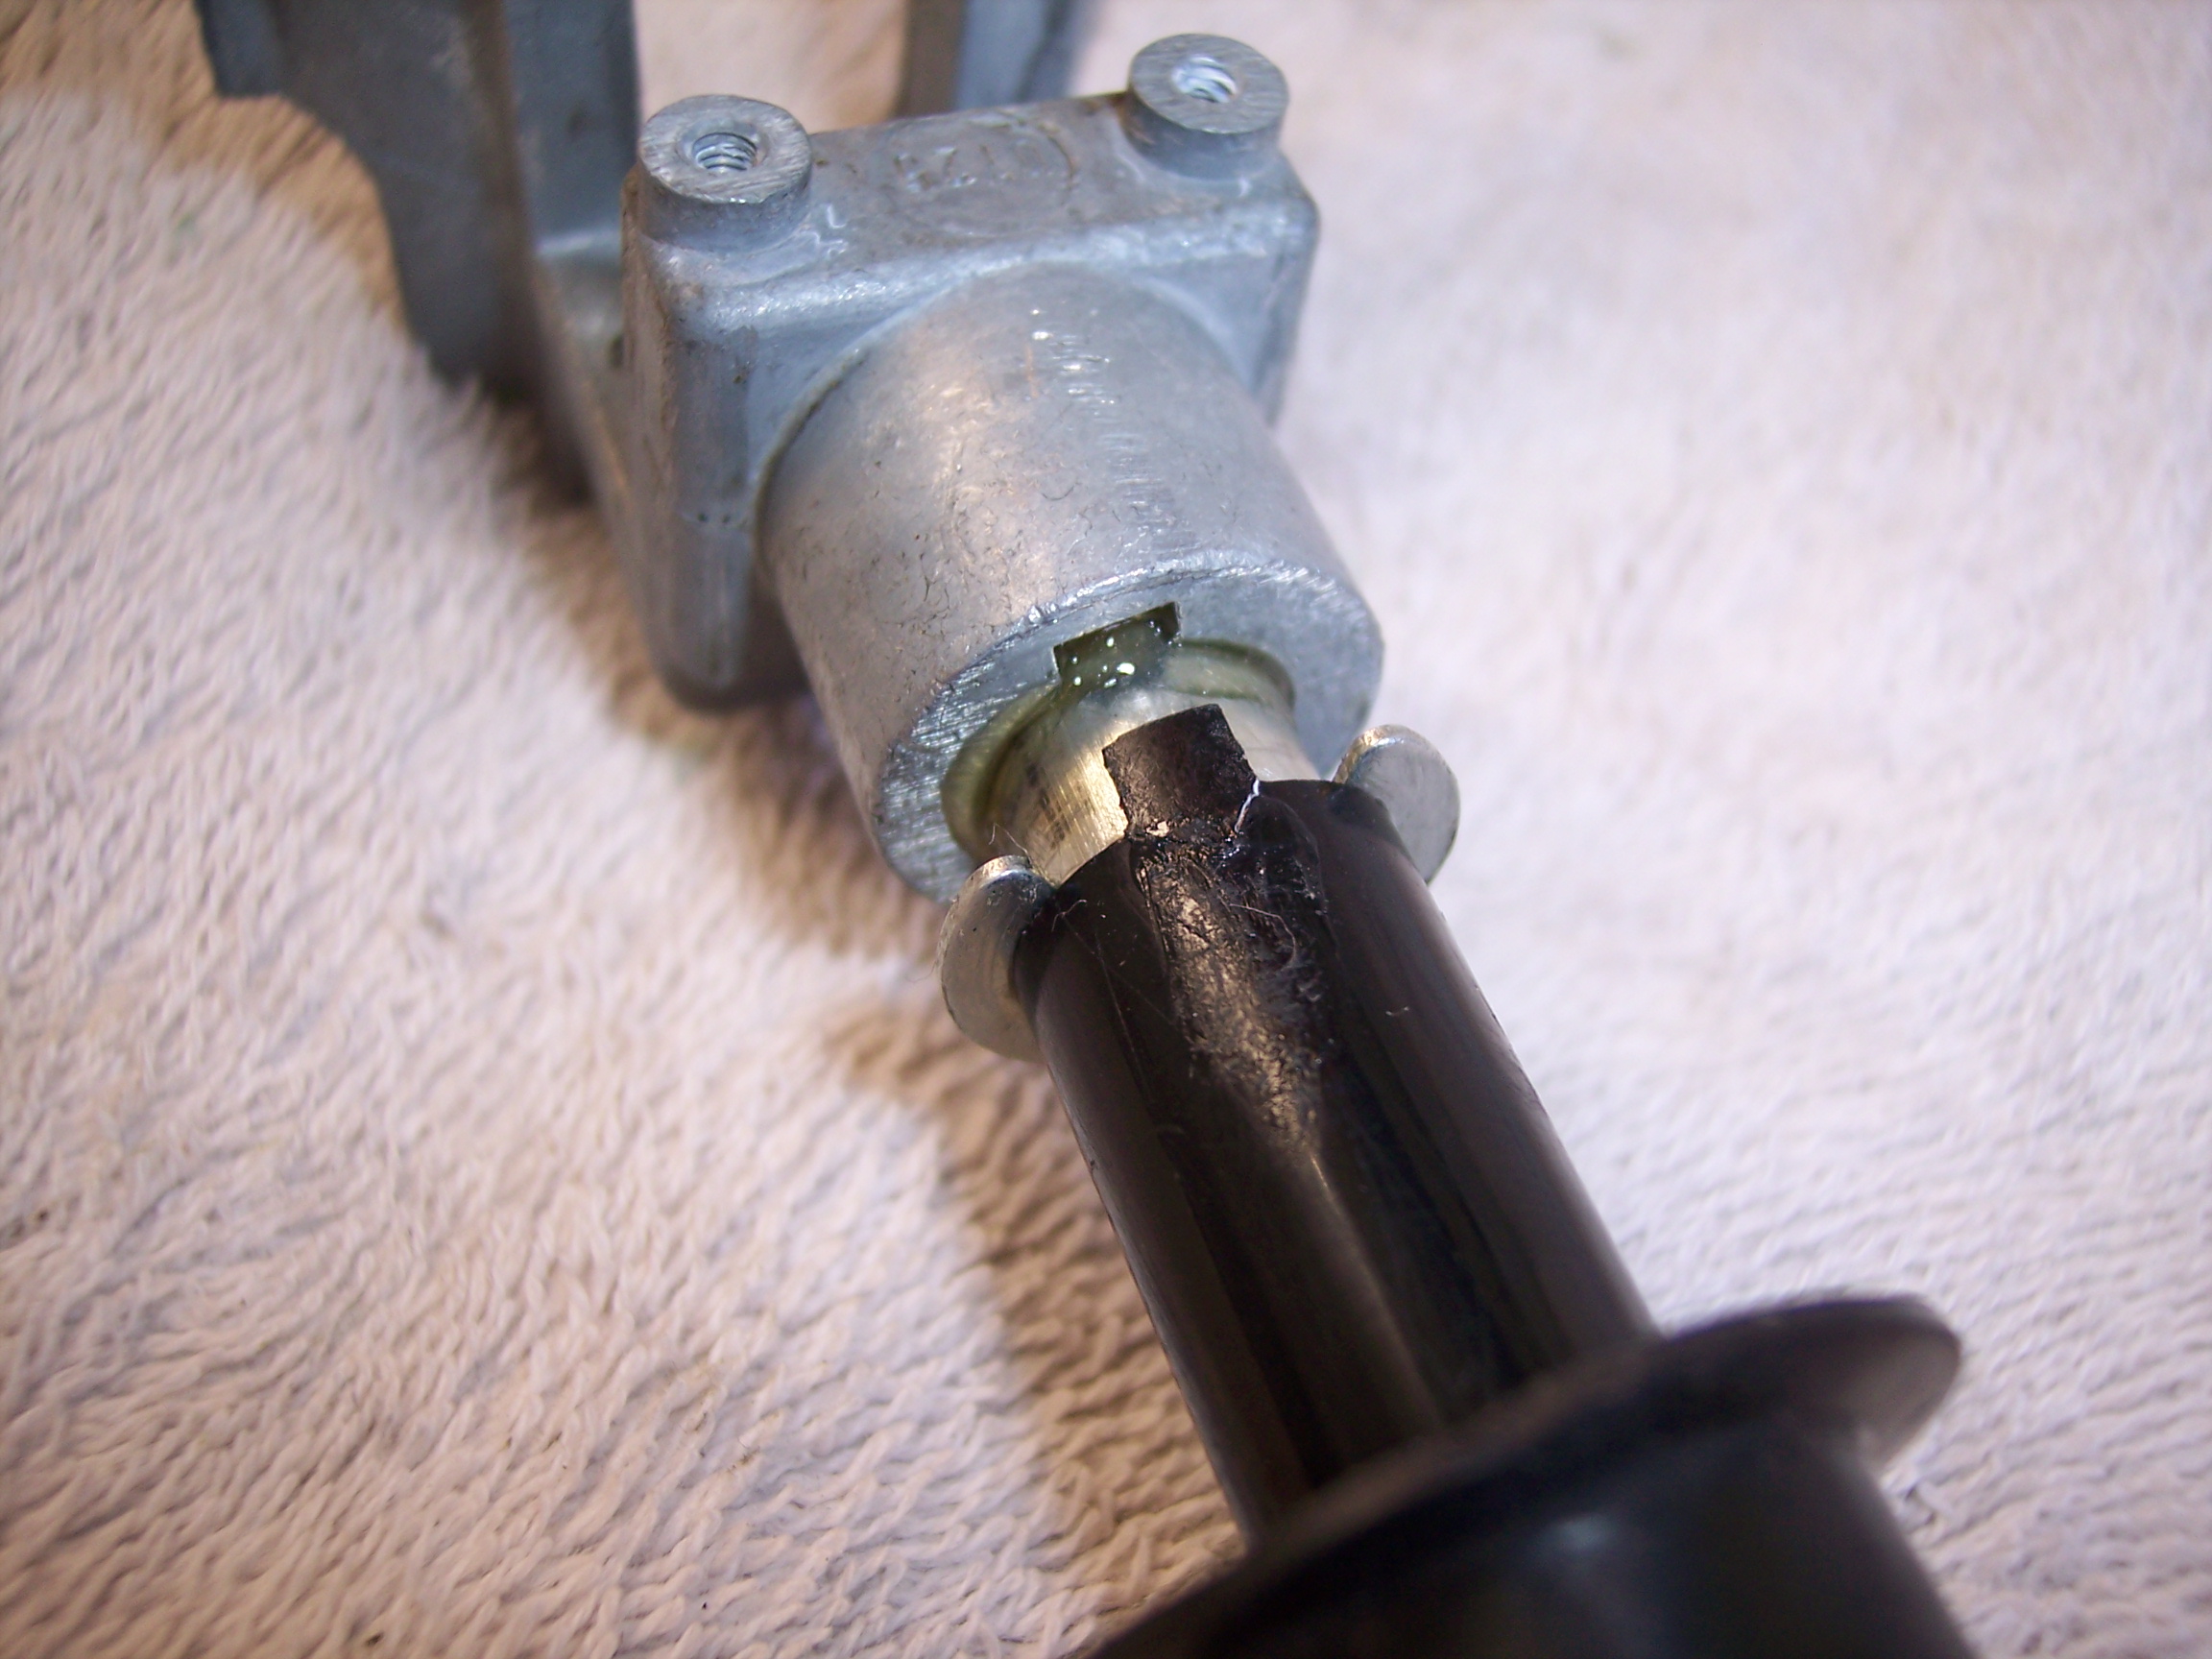
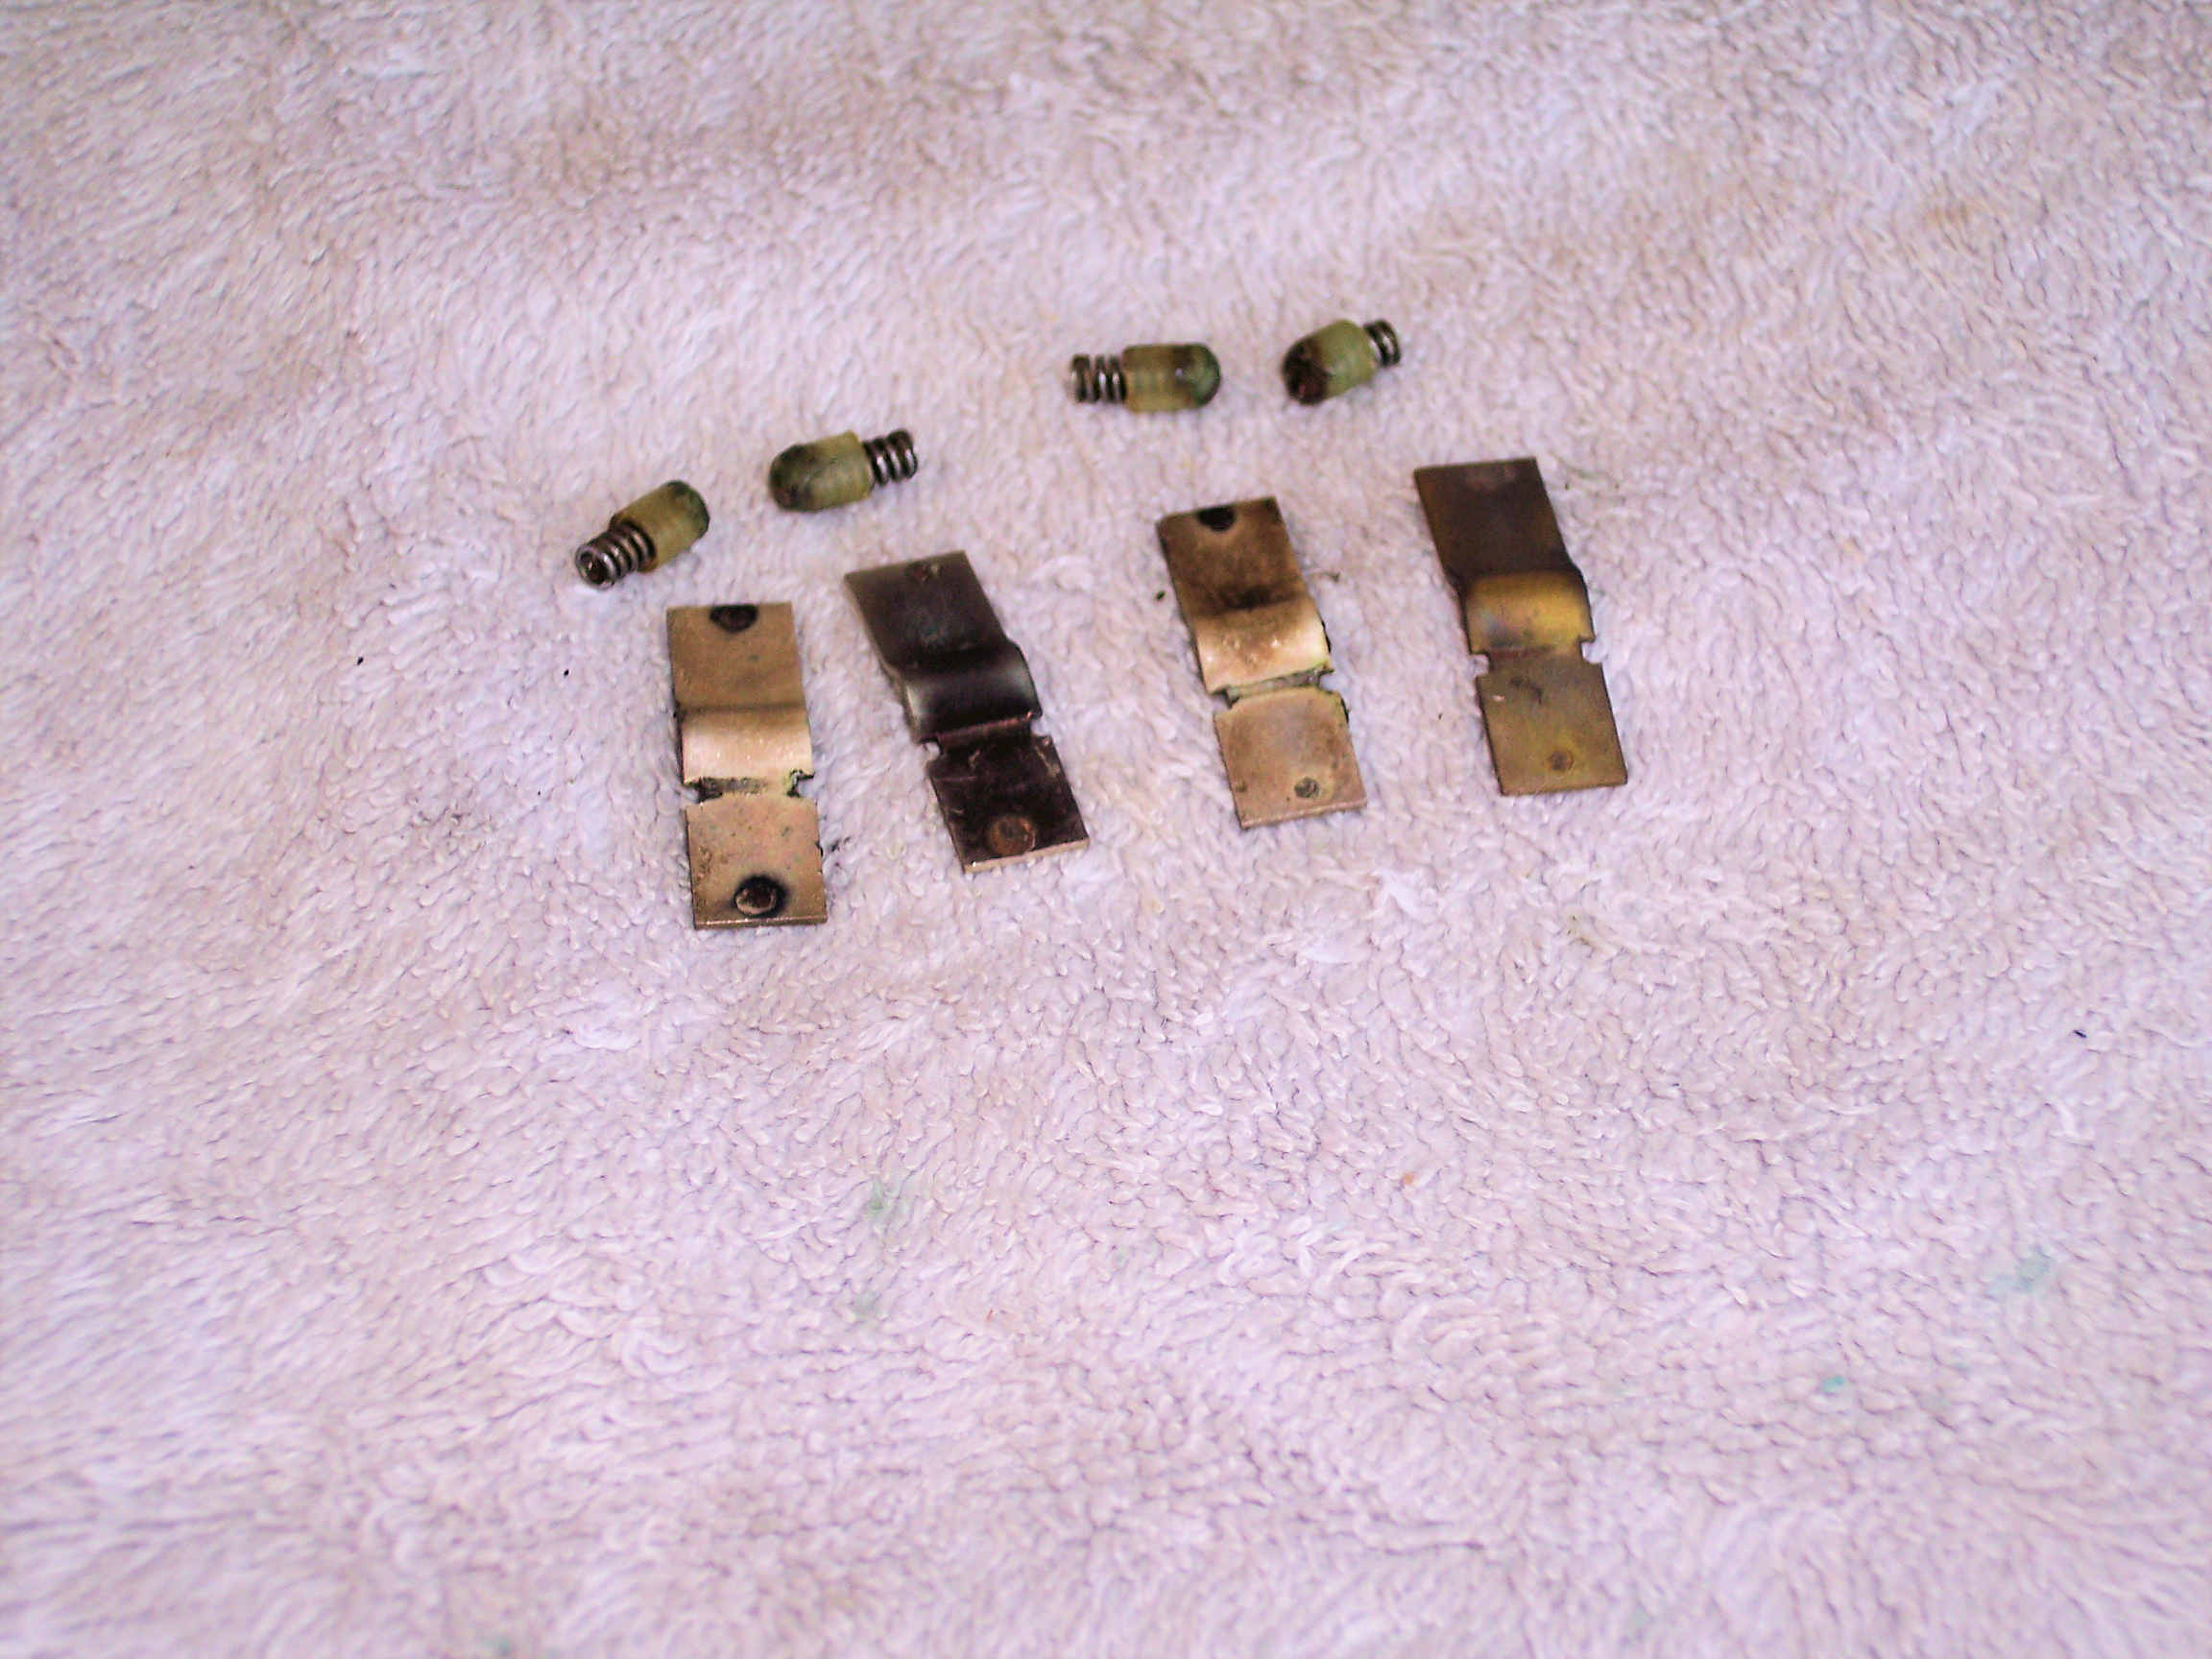
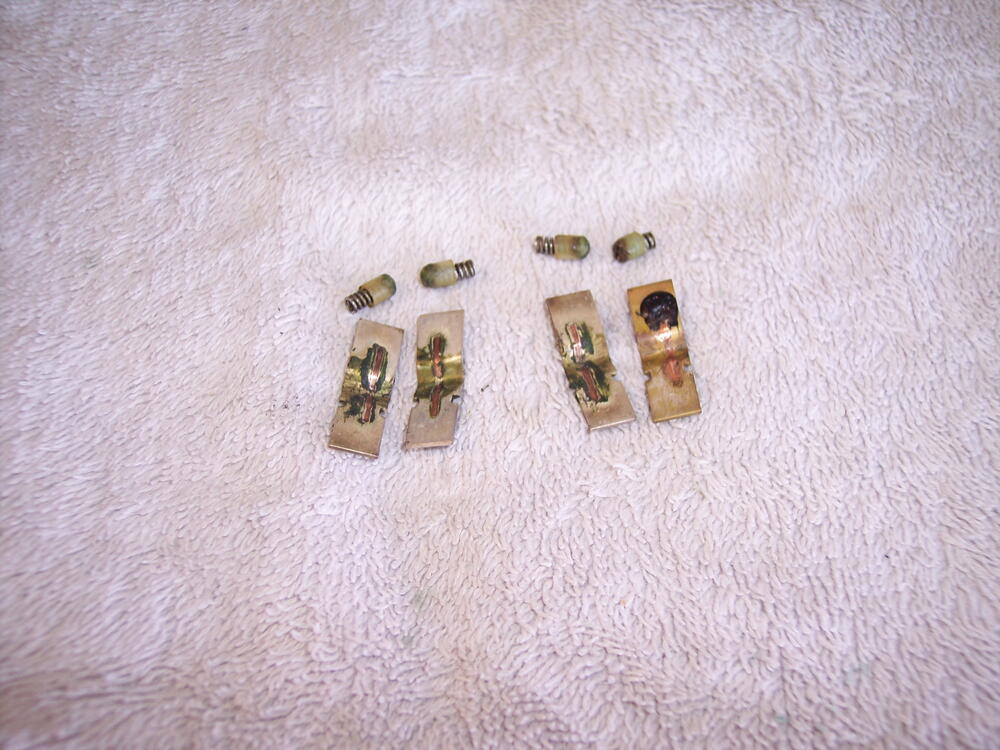
3 pointsI'm working on a combo light switch dated 0Y (Nov. 1970) and came across some design deficiencies, one of which I posted about previously: The plastic stalk is indexed to the frame with an extended tab prone to breaking as it did on this one. Fortunately, the broken tab was retained in the boot. I took a shot of the frame compared with an April '71 switch where the design flaw was corrected. With the repair completed it was ready to be reassembled: The early design also had wiring deficiencies with light gauge wires, pictured on the left with the April '71 on the right: Here are the switch internal contact bridges with the remains of a melted nubbin: And the contact side of the bridges with a lot of carbon buildup: Note also on the early switch the discolored red wire. That one is providing high amp power directly to the contact point. That was changed in the redesign with power entering via the bridge pivot point. With all the high amp current being pushed thru light gauge wiring its no surprise that resistance built up and fried the poor nubbin! The early design was superceded in January 1971 and later changed again for the '72 model cars.


 3 points
 -
1 pointBit late now, but a trick is to not install the new seal all the way flush so the seal lip rides on a new un-marked part of the crank snout. Use in a pinch, not the world’s best solution. I fully agree you are doing the right thing with this extreme case to use a speedy sleeve.1 point
-
1 pointHere's an instalation tip: When you are ready to fit them back into the car, apply some lube to either the car or the outside of the seals to allow them to fit into the car body more easily. New seals are going to be a bit fat and will resist seating into the curves of the car body. It will help greatly to have a buddy on hand to press and hold the windows in place while you fit the screws.1 point
-
1 pointI've used two sets of MSA quarter winder seals with no problems. They fit well. Disassemble the windows carefully, clean and buff the frames and the body of your car really well, reassemble and install. Take your time with the tiny screws on the frame and where they mount to the body. They are "fiddly" and can be stuck and stripped easily. Use some pen. oil to lossen them.1 point
-
1 pointIt might be. But that's why separating things will help. Thousands of people, across many brands beside Datsun, have converted their points to the Pertronix system with no problems. Your problem wouldn't be a general points versus electronic issue. DutchZ is just being philosophical.1 point
-
1 pointI think the front cover seal causes that wear. Maybe cheap seal or wrong size? Anyhow some people put a sleeve on. I found this, maybe helpful?1 point
-
1 pointI have one, it is for sale for 1 billion dollars or trade for a puppy and world peace.🤪1 point
-
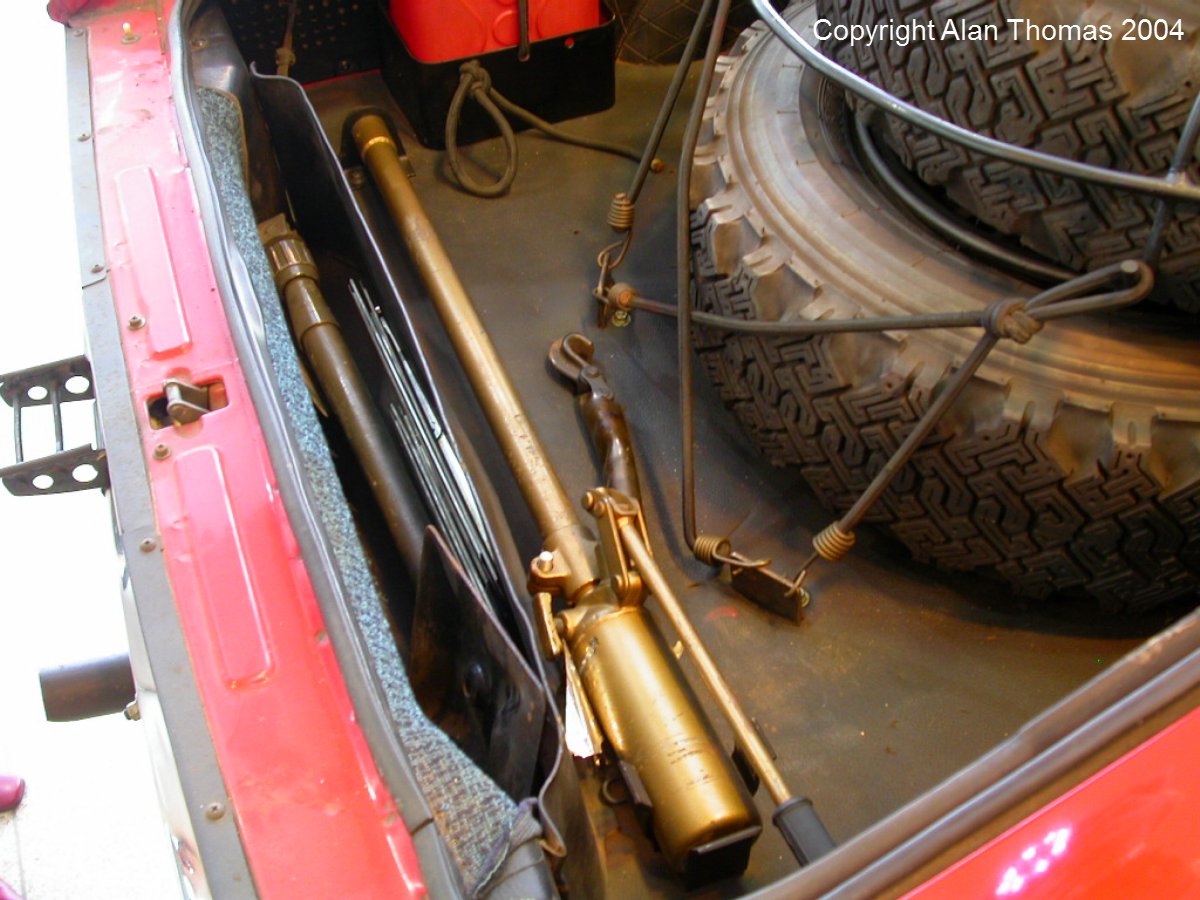
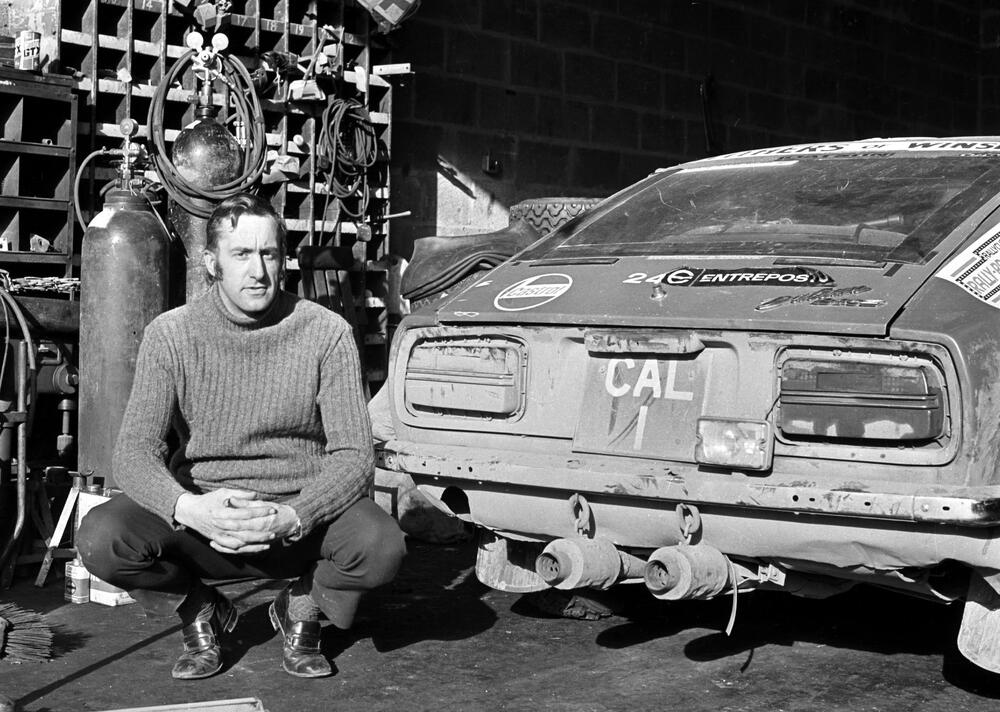
In fact it seems it was restricted to the 1970 RAC Rally and 1971 Monte Carlo Rallye batches of Works cars, as the 1971 East African Safari Rally batch and onward batches of cars didn't have the cut-away finisher panel holes. There was clearly - as is so often seen on these cars - an evolutionary process going on here. The very first batch of cars sent overseas - for the 1970 RAC Rally - featured the cut-away finishers, but not the extra self-tappers. Instead they had threaded studs inserted where the normal fixing screws would thread into (those pesky...) captive nuts in the plastic lamp housings, and butterfly nuts were used to hold them in place. This allowed the lamp units to be removed fairly quickly without having to take off the finishers: Obviously the 1971 Monte Carlo Rallye batch (an event where rear quarter damage was more likely) improved on this with the addition of spring nuts on the body and self-tappers passing through the plastic lamp housings, so it was no longer necessary to fiddle around undoing butterfly nuts inside the car. Better! However, for the 1971 Safari they reverted to uncut rear finishers. The finishers were secured by self-tappers (rather than the stock plastic rivets) so could at least be removed fairly easily. That area of the car was a good place for storage. They tended to store the onboard jack near there, as well as a host of spares, ropes, jack base, shovel etc housed inside a fabricated pocket. LOTS of storage on these cars:

 1 point
 -
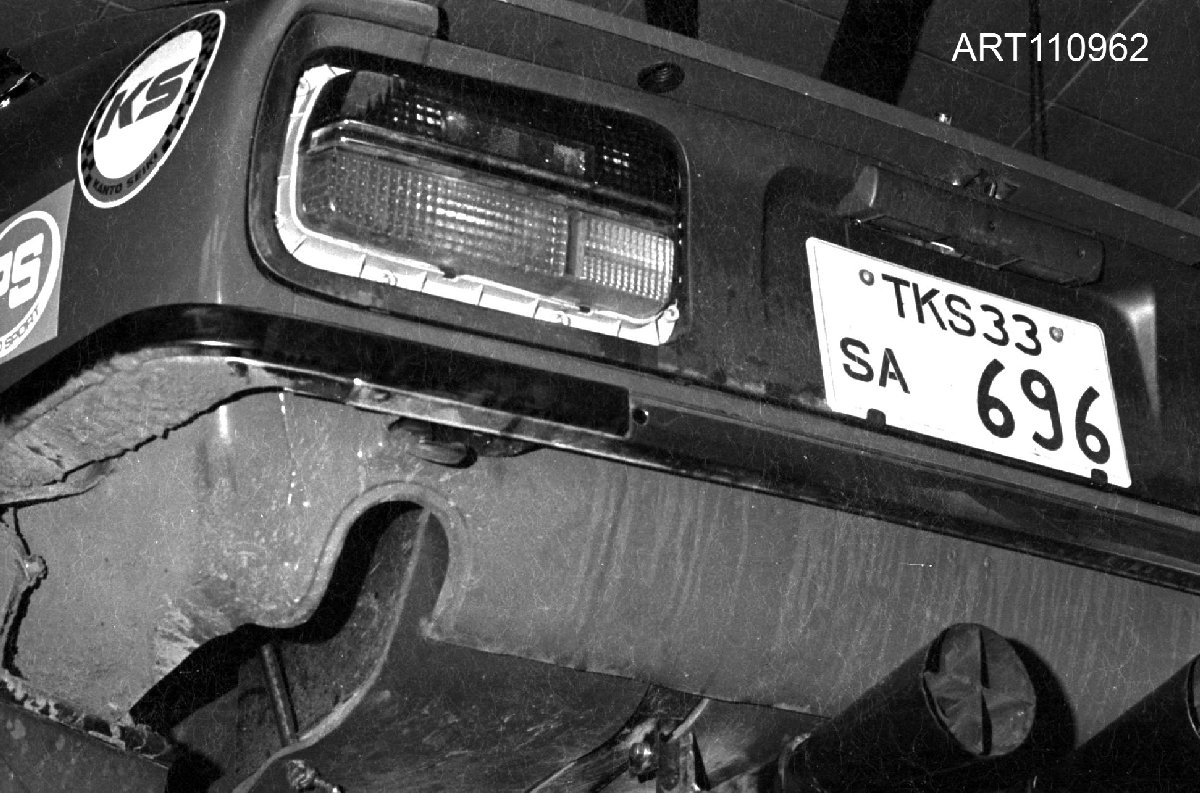
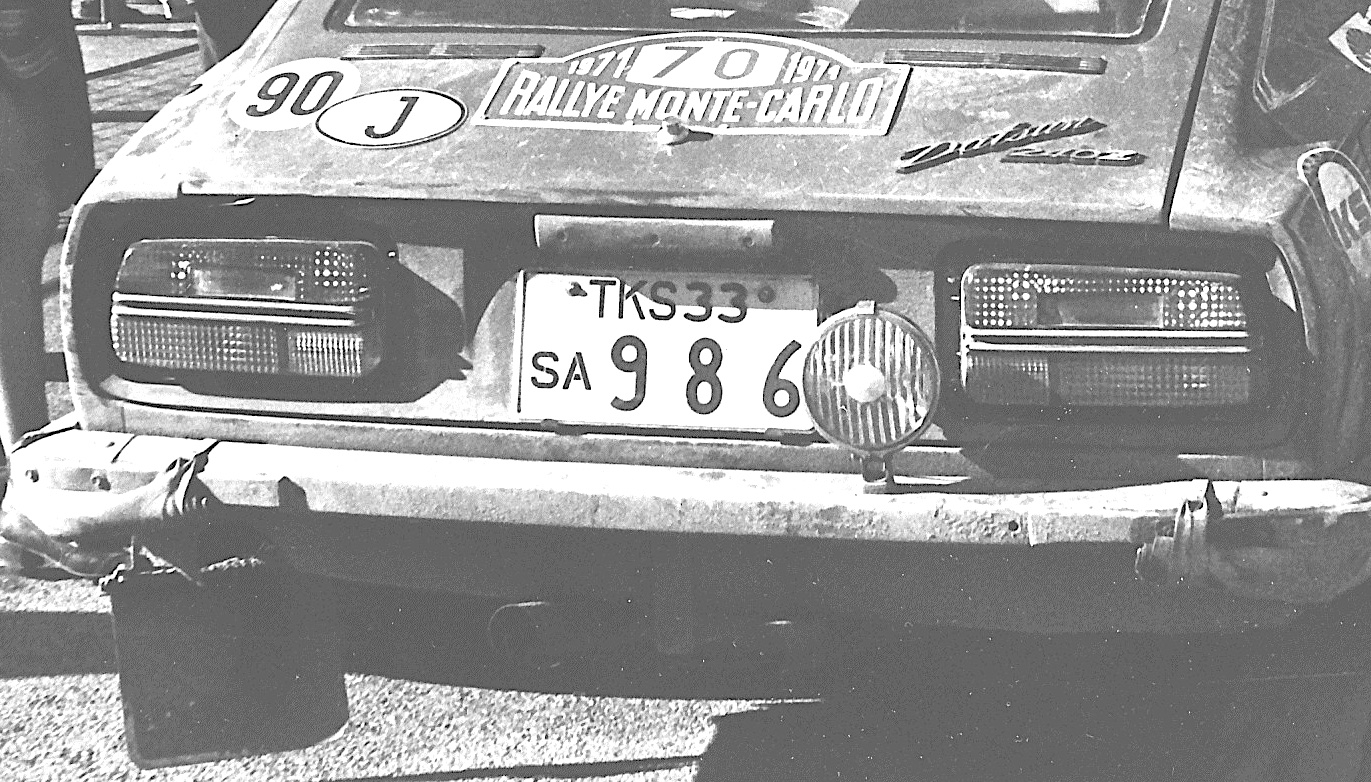
Yep, an enlarged tail light opening in the rear exterior panel, thru some time in 1971, I believe. (I referred to it as a "valance" in my post, but I edited the post for consistency.) Works rally interiors that I've seen were almost fully trimmed out, perhaps to keep with the illusion that these were production cars. The interior panels themselves of course don't weigh much, and the Works team used rubber mats in place of carpeting/sound insulation. The panels also served as protection for the wiring harness, fuel lines, etc., and to keep miscellaneous spares and tools from falling into the wrong places. Period photos of trunks that I've seen were crammed with all kinds of supplies needed for field repairs - oddly enough, not so different from the strategy I employ when I go on a road trip! Here's a picture of my car during MC '71, showing the same rear tail panel, featuring enlarged holes for the tail light assembly. (credit: Nissan Global Media)
 1 point
 -
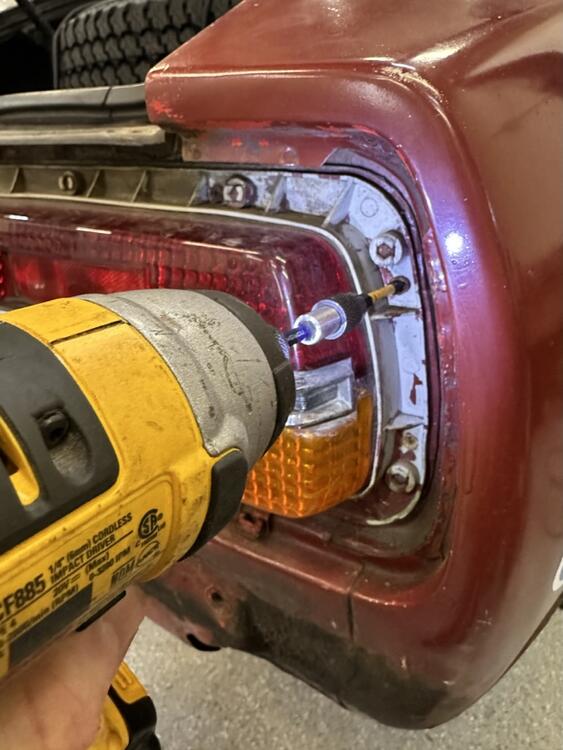
I'm surprised that they ran with the rear interior panel.?!? What I just noticed is the enlarged tail light opening in the exterior finish panel. Also on the car in your post 81. They must have wanted access to the housing from the outside of the car.1 point
-
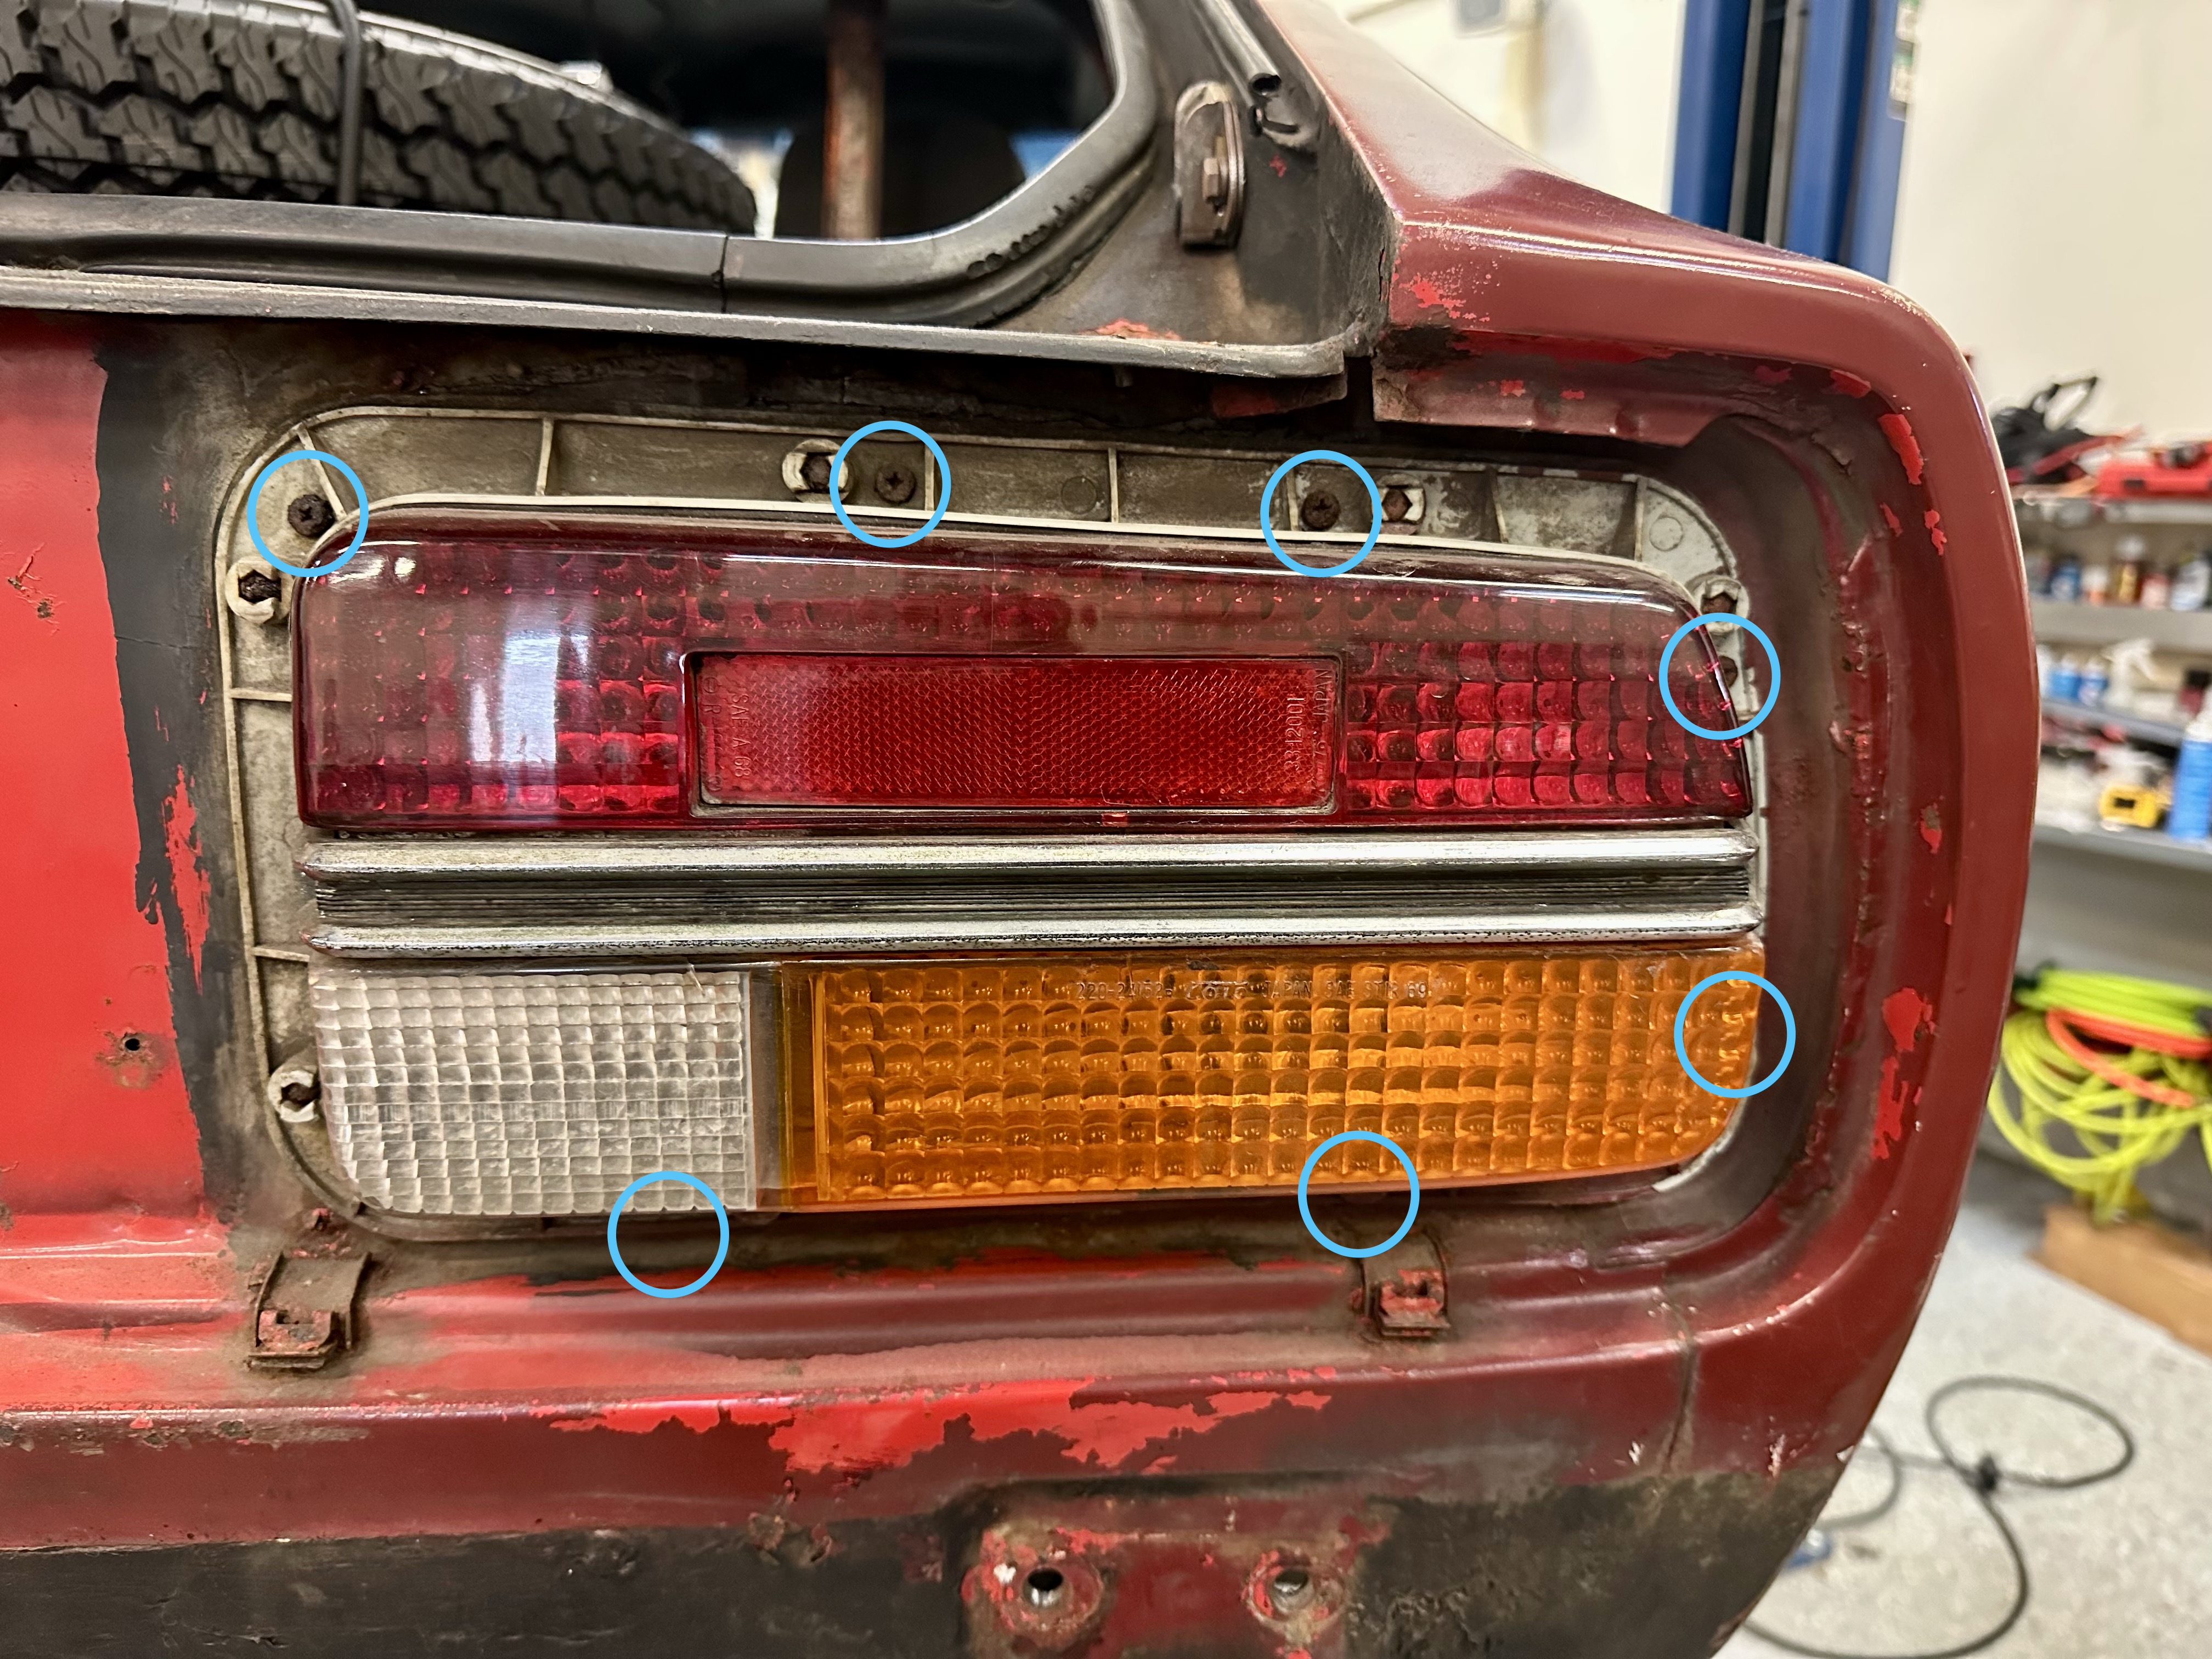
Here's a fun little detail seen on the early cars. The rear light pods were affixed from the rear of the car (sometimes using sheet metal screws?), so they could be removed from behind and outside. I imagine there were several reasons for this: surely, to facilitate the changing of a bulb without having to open and unload the trunk. Perhaps also: to provide an easy way to swap out the entire assembly, should it be damaged during the rally. I'm not entirely confident that the lights were always affixed with screws, as I have not seen them affixed this way on another car. For example, the included picture of an earlier car does not appear to have screws, but it does have the quick-change rear panel installed. From what I can see with my car: they appear to be original to the car, or at least installed in-period. That said, it's possible that the lights were held in place using other means, such as being just loosely glued in place, and could therefore be pulled off by hand, without tools. But this is just a guess. From what I can tell, all the rally cars campaigned in 1970 and 1971 had this feature. I don't exactly know with what car the practice ceased, but around late 1971, Nissan stopped fitting a rear panel which could accommodate this feature. I assume they also eliminated the "external-change" feature along with it, but perhaps they just eliminated the custom rear panel. Another possibility is that the feature remained, but that Nissan perhaps altered the lenses to be removable from the housing. Again, this is just speculation. If someone is willing to go tug on the rear lenses of Nissan's cars and see what happens, perhaps we can get a few answers!

 1 point