Leaderboard
-
jfa.series1
 Subscriber
 6Points2,734Posts
 -
Jason240z
Free Member2Points489Posts -

siteunseen
Free Member2Points15,115Posts -
w3wilkes
Free Member2Points972Posts


Popular Content
Showing content with the highest reputation on 09/04/2022 in all areas
-
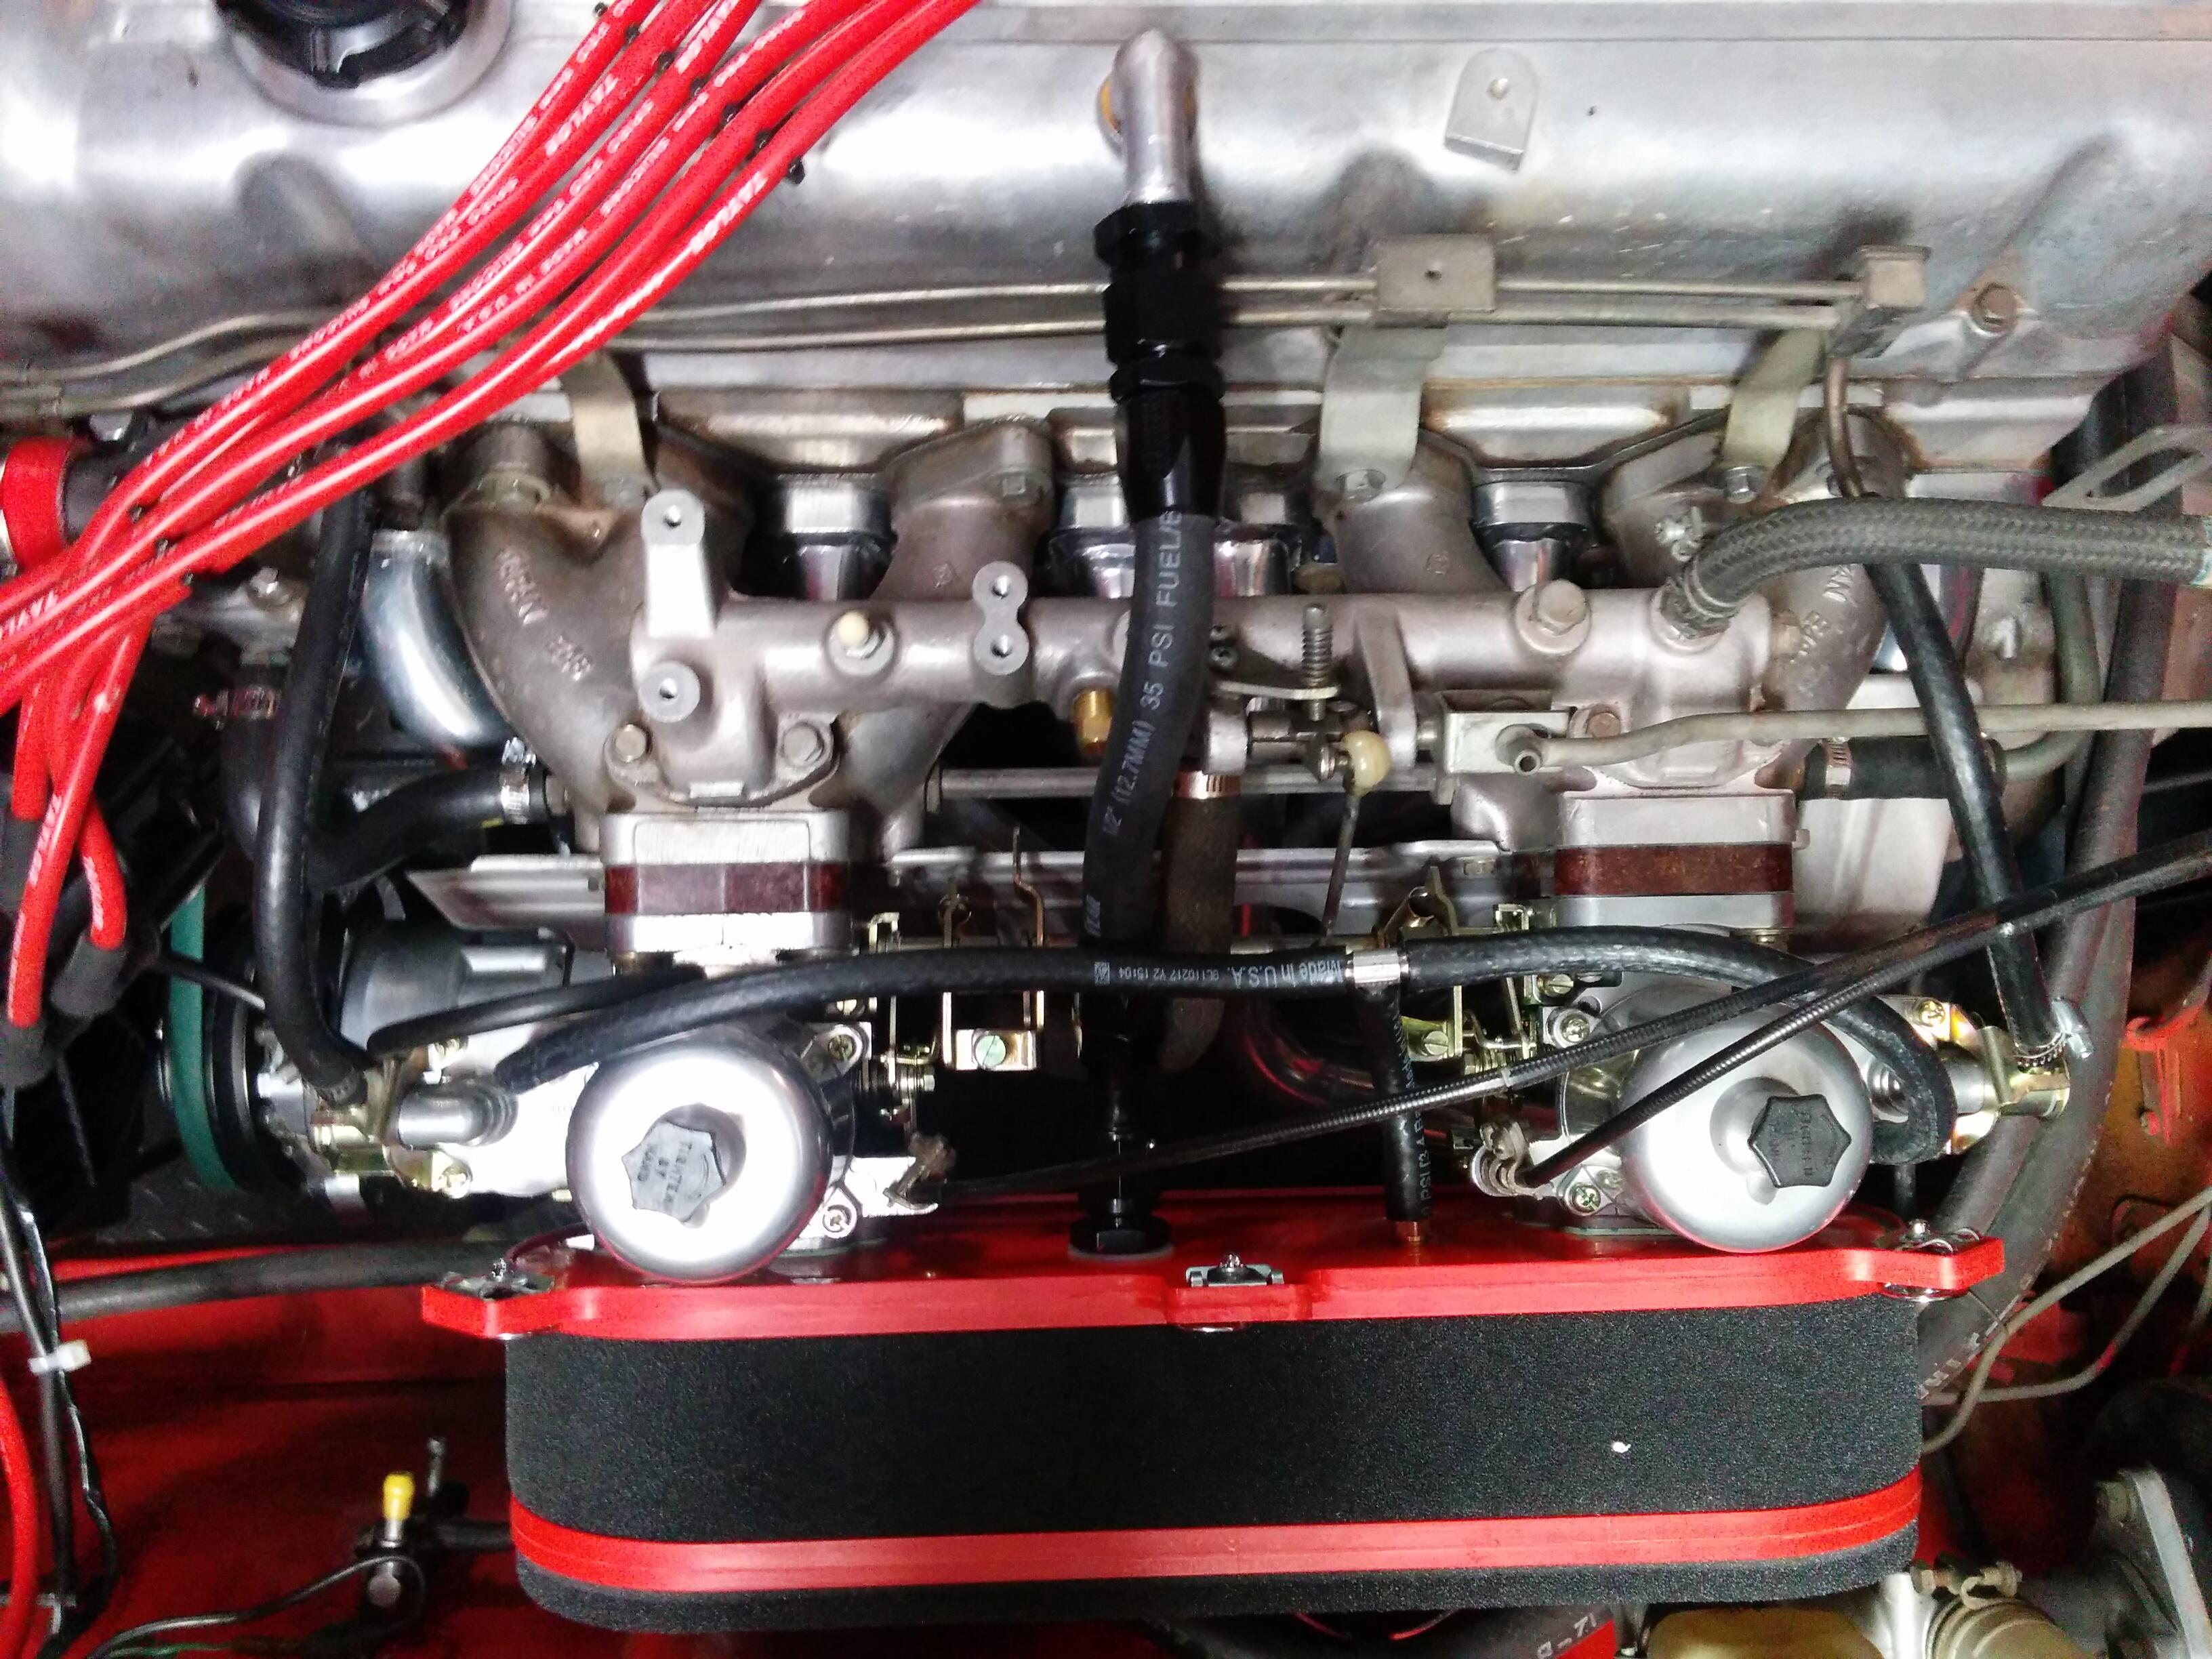
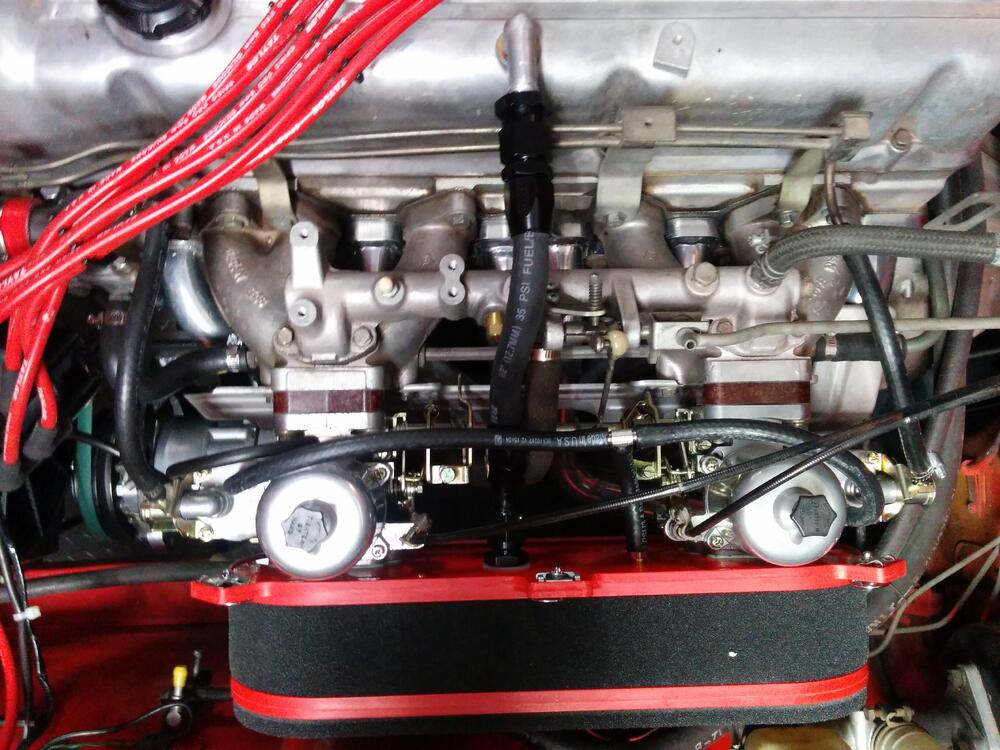
3 pointsThe stock air filter housing checks all the boxes: - Cold air supply to both carbs, well protected from the exhaust manifold heat - Fittings for the carb overflow hoses and crankcase vent hoses - Air horns to smooth the air flow into the carbs - Efficient filter specifically designed for the carbs3 points
-
2 pointsI did the ITG dual and have air horns inside. Float bowl vents and valve cover vent attached similarly to the original but I did have to drill the back plate for the vent fittings.
 2 points
 -
2 points
-
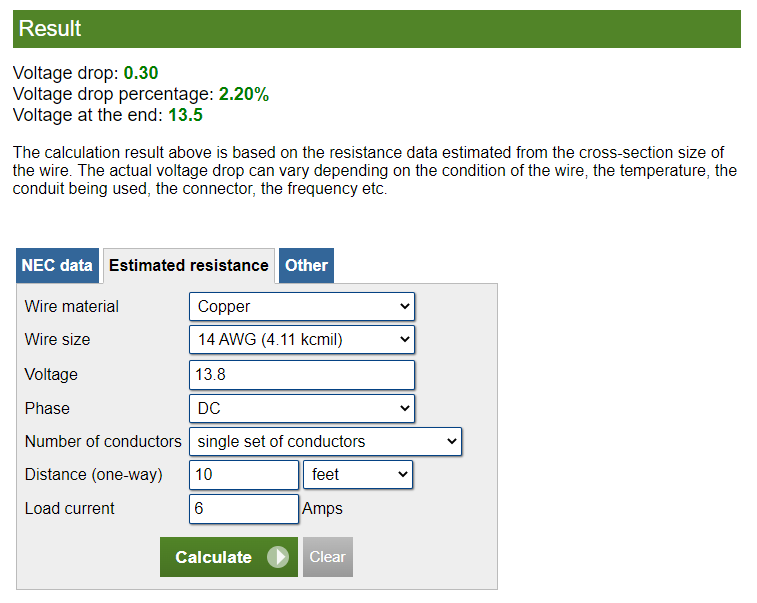
2 pointsJust be aware of what gauge wires your terminals are designed to take. Doing some quick resistance calculations, you are upsizing a lot of wires with little to no benefit. You may end up with an issue getting your engine harness through the hole in the firewall. (Keep in mind that it will probably be easier if you put the pins in the connectors after you get the harness through the firewall.) You may want to check out a voltage drop calculator like this: https://www.calculator.net/voltage-drop-calculator.html Choose estimated resistance. I did a quick calculation for the headlights with a swag for the distance and used incandescent sealed beam ratings. The voltage is 13.8 because that is toward the low end of operating voltage while the car is driving. Many of your circuits for the engine harness are grounded close to the load, so this calculator would overestimate the voltage drop. The battery/charging system are your highest current circuits, so the larger gauge can easily be justified. No other circuit comes close especially if you change the parking light circuit to LEDs, as that is probably the biggest continuous draw you would see. Other high draw circuits: Fan (14 AWG is fine, but you might be better off with 12 AWG) Fuel pump (This is about 10 A or less. 14 AWG would work.) Headlights (depending upon whether or not you switch to LEDs. LEDs would drop this circuit to about 3 A.)
 2 points
 -
2 pointsMy dealer was Jack Crew Trophy Datsun of Dallas. He made the decision to pull the car from delivery, pack it with options, and stick it on the showroom floor (sound familiar???). In addtion to the Spook and spoiler, it had front and rear bumper overriders, A/C, tape stripe, console arm rest, and an 8-track unit with cheesy speakers stuck to the rear deck. Topping it all was a set of 10" wide alloys with race rubber mounted. I knew the tires were not street legal so I made a deal to put the stock wheels and tires back on the car and swap out the 8-track for a Datsun AM/FM head. With the big wheels and tires gone, the price became workable with my trade-in and the car became mine.2 points
-
2 pointsI like the original. You have all the hose connections already there. They are a little tricky getting the cover and filter in place but once you get the carbs adjusted right you won't need to remove anything for a long time. The filters are still available from Nissan too. https://www.courtesyparts.com/oem-parts/nissan-air-filter-16546e32102 points
-
The rear bushings aren't that bad other than the outers. You will need to get the old mustache bar bushings out. Fire is messy, but works. Good luck!1 point
-
1 pointyou'll spot the laser measure, I've got these sitting lower than standard seats. however they still need to go a little lower due to them not 'squashing' as much. brake clearance. 280mm under 14" wheels Cleaned up the tank and had it painted had some detailed bits made Driveshafts shorted1 point
-
1 pointAs a glacial update..... life has got in the way over the past few years, the below brings me to where I'm at.... Disc bells and brackets designed painted up the front panel 'factory style' had the radiator treated to a triple pass copper core. had a bit of a faff getting the finish correct on it. got there in the end. fitted the rear bumper antagonised over seats for a few years(Sorry Alan T!). However using one of his pics I managed to get something made in the same sort of 'feel'. The dream What I ended up with1 point
-
1 pointShould be about 29 - 31 psi with engine running. That would mean that the vacuum reference is not fitted to the FPR. Which mean the engine is tuned lean and when you open the throttle the fuel pressure does not increase like it should, leading to a lean stumble. You need that vacuum reference on the FPR.1 point
-
Haha that’s what I was afraid of. I have someone coming by to help get me started on understanding it all. He is going to show me how to read a wiring diagram also. I’ll text everything to make sure it’s running right. I’ll let y’all know what fixes if all. i figured the car was also having secondary issues of the ignition switch going bad too. Glad I’m at least somewhere in the right area.1 point
-
1 point
-
I likewise went with Interior Innovations and chose to go with black with red stitching and Z emblem to tie in with the red exterior. I'll be doing leather door, dash, shifter boot and center console over the next few months but had to go with J-F customs since Interior Innovations didn't have the measurements to do the dash. I'll be spending a lot of time on the door panels because it looks like to match the diagonal pattern on the originals, I'll need to learn how to sew foam-filled channels on the leather and figure out how to patch the speaker holes a PO cut in the door card.1 point
-
1 pointPeter and Gail moved to Oregon though. They’re in Henderson NV currently but I remember a few years back they talked about living in Oregon.1 point
-
1 point
-
That video didn't download. Most people create a Youtube channel and upload their videos to it. Makes them easier to view. Sounds like a nice project especially if it really only has 36,000 miles.1 point
-
1 pointA couple of thoughts: I put a 5spd from a Maxima (same as a '81-'83ZX) in my '73 and also put in an R180 diffy from a 200SX (4:11-1). I bought a red pinion gear to match the rear end from Oliver at Z Specialties and I had to rotate the pinion housing 180 degrees and cut a new slot in it with my Dremel to secure it for the pinion to engage the drive gear inside the tranny. I did NOT have to make any cuts in the trans tunnel for the shifter to clear (I believe that is only required for early series 1 cars). I used the shifter from my 4spd. I am running 205-60/15 Bridgestones on 15X7 Rota RBs and my speedo is accurate. It has been a very successful swap, fairly easy to do and a lot of fun in the canyons around northern Colorado. Cheers, Mike1 point
-
1 pointThere is beginning to be some misinformation. Go to http://datsunzgarage.com/engine/ I cut and pasted this section from there but it left the pictures out. Read all about the transmissions and the speedo gear section. Chris is using the wrong word for the speedo drive gear. The pinion gear is in the rear diff and is a major event and you do not want to fool with it at all at this time. __________________________________________________________________________ Nissan called the '77-80 trans a "wide ratio" while the '81-83 was called a "close ratio" 5-speed. The early one has the lowest 1st/2nd gears for acceleration, but a wide spread between 2nd and 3rd. The later one has a taller 1st/2nd but a tighter spread between 2nd and 3rd. It also has a much taller 5th for cruising. Your choice. According to a Z Doc friend who rebuilds transmissions the early 5-speed is a 4-speed with 5th and reverse sharing the same fork. He said it's common for people to "blow" 5th gear as the fork is weaker. He stated the later 5-speed is a genuine 5-speed which is stouter. I call the early one a 280a and the later a 280b to keep them straight. Keeping the speedometer correct Everyone gets confused about how to calibrate the speedometer after swapping differentials, it's actually very easy. The speedometer is metered by a plastic, toothed cog on the end of the speedometer cable that screws into the transmission. This cog is paired with the differential, not the trans. So it doesn't matter which trans you have, all you do is select the proper cog for the rear-end ratio you have in the car. While they are colored for easy identification, the Nissan dealer only has them in their parts list as "17, 18, 19, 20, or 21" tooth cogs. YELLOW is the 16 tooth for the 3.36 BLACK is the 17 tooth for the 3.54 BLUE is the 18 tooth for the 3.70 WHITE is the 19 tooth for the 3.90 RED is the 20 tooth for the 4.11 PURPLE is the 21 tooth for the 4.38 Don't rely on a junkyard Zcar to have the right colored cog ~When in doubt, count the number of teeth~ NOTE: There are 2 different aluminum cog "sleeves", a '75-80, and '81-83 with different cog "offsets". If you look closely in the picture above notice how the red cog is offset slightly to the right, and the blue to the left. This means you must keep the sleeve with the transmission it came in, and only swap the cog. Otherwise the cog may not mesh the proper way inside the trans. On 240's, you will have to cut about 2 inches of metal from the front/right edge where the shifter goes through the trans tunnel when using a 5-speed. Otherwise the throw into 5th gear will hit. This cutting is the price of a 5-speed trans and is not a big deal at all, the console covers it.1 point
-
1 pointI believe the ZX came out in '81. You should pull the cross member off your 4 speed and put it on your 5 speed. Keep the drive shaft from your 4 speed since the 5 speed has the same dimensions. I used the shifter from my 4 speed as well (my tranny is an '82) You will need the bend in it or it (a newer, non bent one) will hit the front of the tunnel hole. Make sure the throwout bearing collar, fork and pressure plate all come from the same car-doesn't matter which one, but they all need to go together. As stated in one of those posts, the 3.36 will be a bit tall for a 5 speed. As stated, if you swap the diff, change out the speedo pinion gear to preserve accuracy.1 point