


Leaderboard
-

Zed Head
Free Member7Points19,238Posts -
.JPG.cfcada9cf1c1b502df3f5f2f2ca3ff36.JPG)
SteveJ
Free Member4Points9,646Posts -
inline6
 Subscriber
 3Points1,282Posts
 -
BoldUlysses
Free Member3Points344Posts


Popular Content
Showing content with the highest reputation on 08/16/2022 in Posts
-
2 pointsLast year to be build in Japan. 83 changed to Nissan and built in the US. Dutch you would fit in a King Cab2 points
-
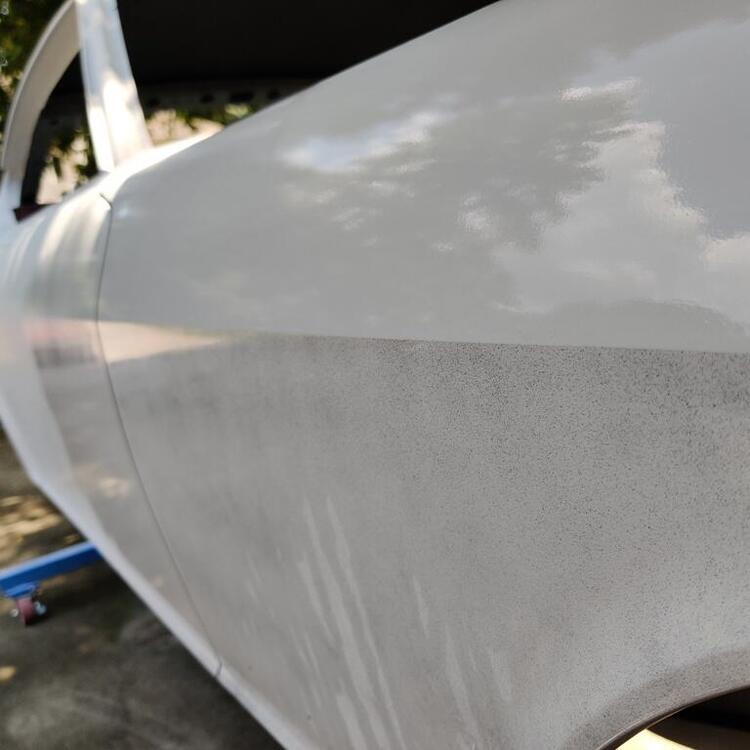
This past weekend, I finally felt it was appropriate to do some wet sanding. Up to this point, I have done all body work sanding dry, with grits of sandpaper including 80, 120, 180, 240 and 320. Mostly, I have used 80 grit and then 120 grit on body filler. And mostly, I have been using 180 grit for everything else. I have been using 240 grit and 320 grit on fender lips and other areas which require more precision, such as where the forward edge of the body belt line terminates on the front fender. Truthfully, I have likely been too conservative in that regard. I have learned a lot about doing body work, as I knew I would. I just wish I could have learned faster. Anyway, it was exciting to do some wet sanding. For wet sanding, I am going over the whole car with 240 grit first. As I go, I am seeing small areas which will need a bit more primer filler. However, I am seeing the end of bodywork on this car coming... finally. I am trying to make sure my belt line is consistent and sharp. I don't believe I will keep it this sharp when it is to be sprayed with color, but I think it is a lot easier to round off a consistent, sharp line to achieve a consistent finished shape than to attempt to round off a line that is not entirely consistent, if that makes sense. Right side front fender (pics 1,2,3: front to back, back to front, back portion of fender close up of beltline): (pics 4,5, and 6: middle portion of fender close up of beltline, front portion of fender close up of beltline, close up of termination of beltline At the termination point above the wheel well opening, the belt line dips downward a touch. That should be easy to fix (to be made straight instead of dipping down) by wet sanding the area that still has guide coat on it. I just need to be careful there.


 2 points
 -
2 pointsErnest, Steve makes the parts that are out of stock when you order them. He is a one man show2 points
-
1 pointI've had one of @zclocksunits in my car for over 10 years. Great workmanship, well worth the investment.1 point
-
1 point
-
1 pointSo awesome! Realized I’ve watched quite a few of your YouTube videos over the years. I just moved out to Knoxville Tn from central Ca mid June. Drove all the way with a 16’ Penske with the Z on a trailer and my fam in our Highlander it was quite the move to say the least. Trailered the 280 to Zcon for the peoples choice Saturday just to be apart. What a good time! Bummer it’s in Cali next year, maybe it will be an excuse to visit family. Well maybe we will meet in person one day, and thanks again for the help!
 1 point
 -
1 pointI used a small, specialty paint supplier who mixed up a custom batch of vinyl paint using a small swatch of my car's seat vinyl as the basis for the colour blend. The resulting colour match was perfect and the application (standard HVLP gun) was trouble-free. I did this job five years ago and the vinyl paint still looks as good as when first applied. The paint specialist (Parasol) is based in Toronto, Canada. You should be able to find a similar supplier in the U.S. south-east. Try looking for boat upholstery specialists.1 point
-
1 pointNeed a picture showing your engine and pulley. It is possible the wrong pulley was used, or, the outer part of the pulley has moved on the rubber, and it actually contacted the timing indicator. You may need to replace the pulley. *edit* I went back and watched the video again. The pulley appears to be too close to the indicator. Check the alignment of all the pulleys with a straight edge. I believe you will find the damper pulley rubber is failing, and the outer ring has migrated rearward.1 point
-
1 pointThe closest I could find with a quick search was here: https://zcarsource.com/seat-upholstery-set-240z-70-73-butterscotch-vinyl-new/1 point
-
1 pointIn the U.S.A. 👍 Over here in europe it did.. but not for a long time.. (I've got an early model s130120*** serial number and was delivered with a N42. Later on the 13 number/letter serialnumbers came in a s130. Mine has also no cat. or EGR. standard.) Yes, i get what you mean, there were no N42's on the 280zx in the states, but over here there were! that's what makes all those sites only mentioning american spec's worthless for us euro's, there were different set up's on z cars.. but hey, i don't have to tell you that! 😉1 point
-
Well after hours of reading over numerous attempts and lots of admiring of z parts porn photos I finally got through this build thread! what a journey and very enjoyable, Loved seeing all the cool parts you've collected and don't want to know how much you've spent on them all! cant wait to see more progress on your build. Ryan1 point
-
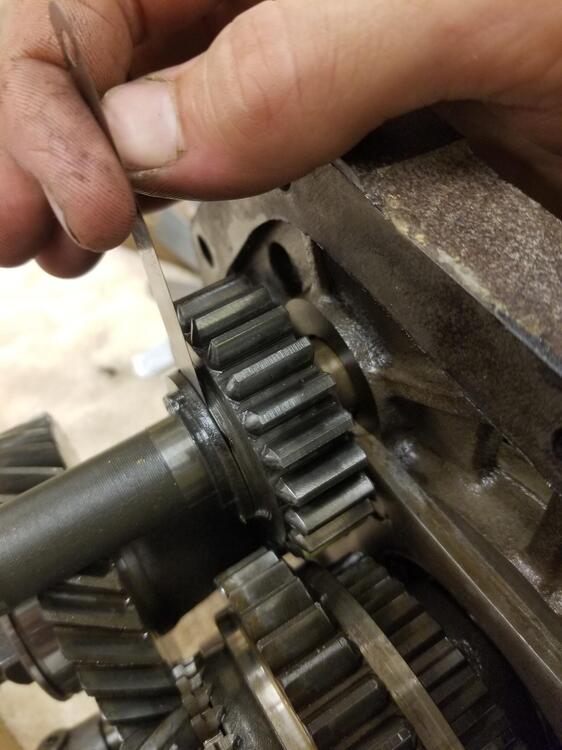
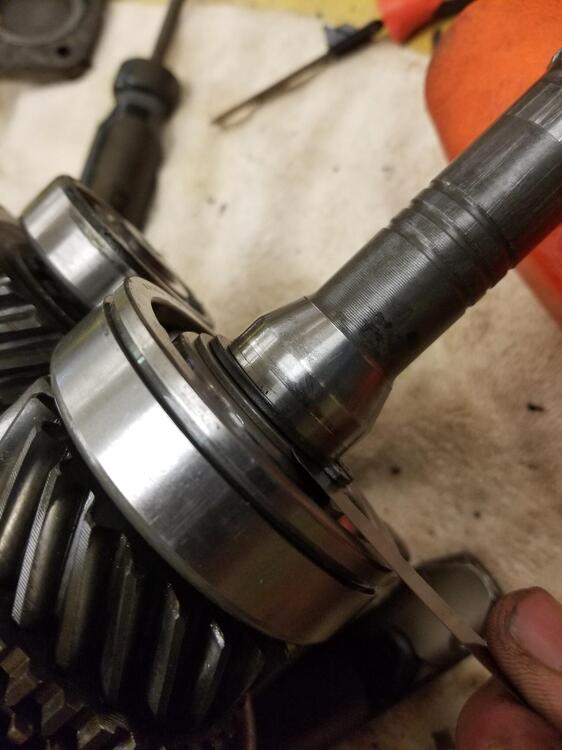
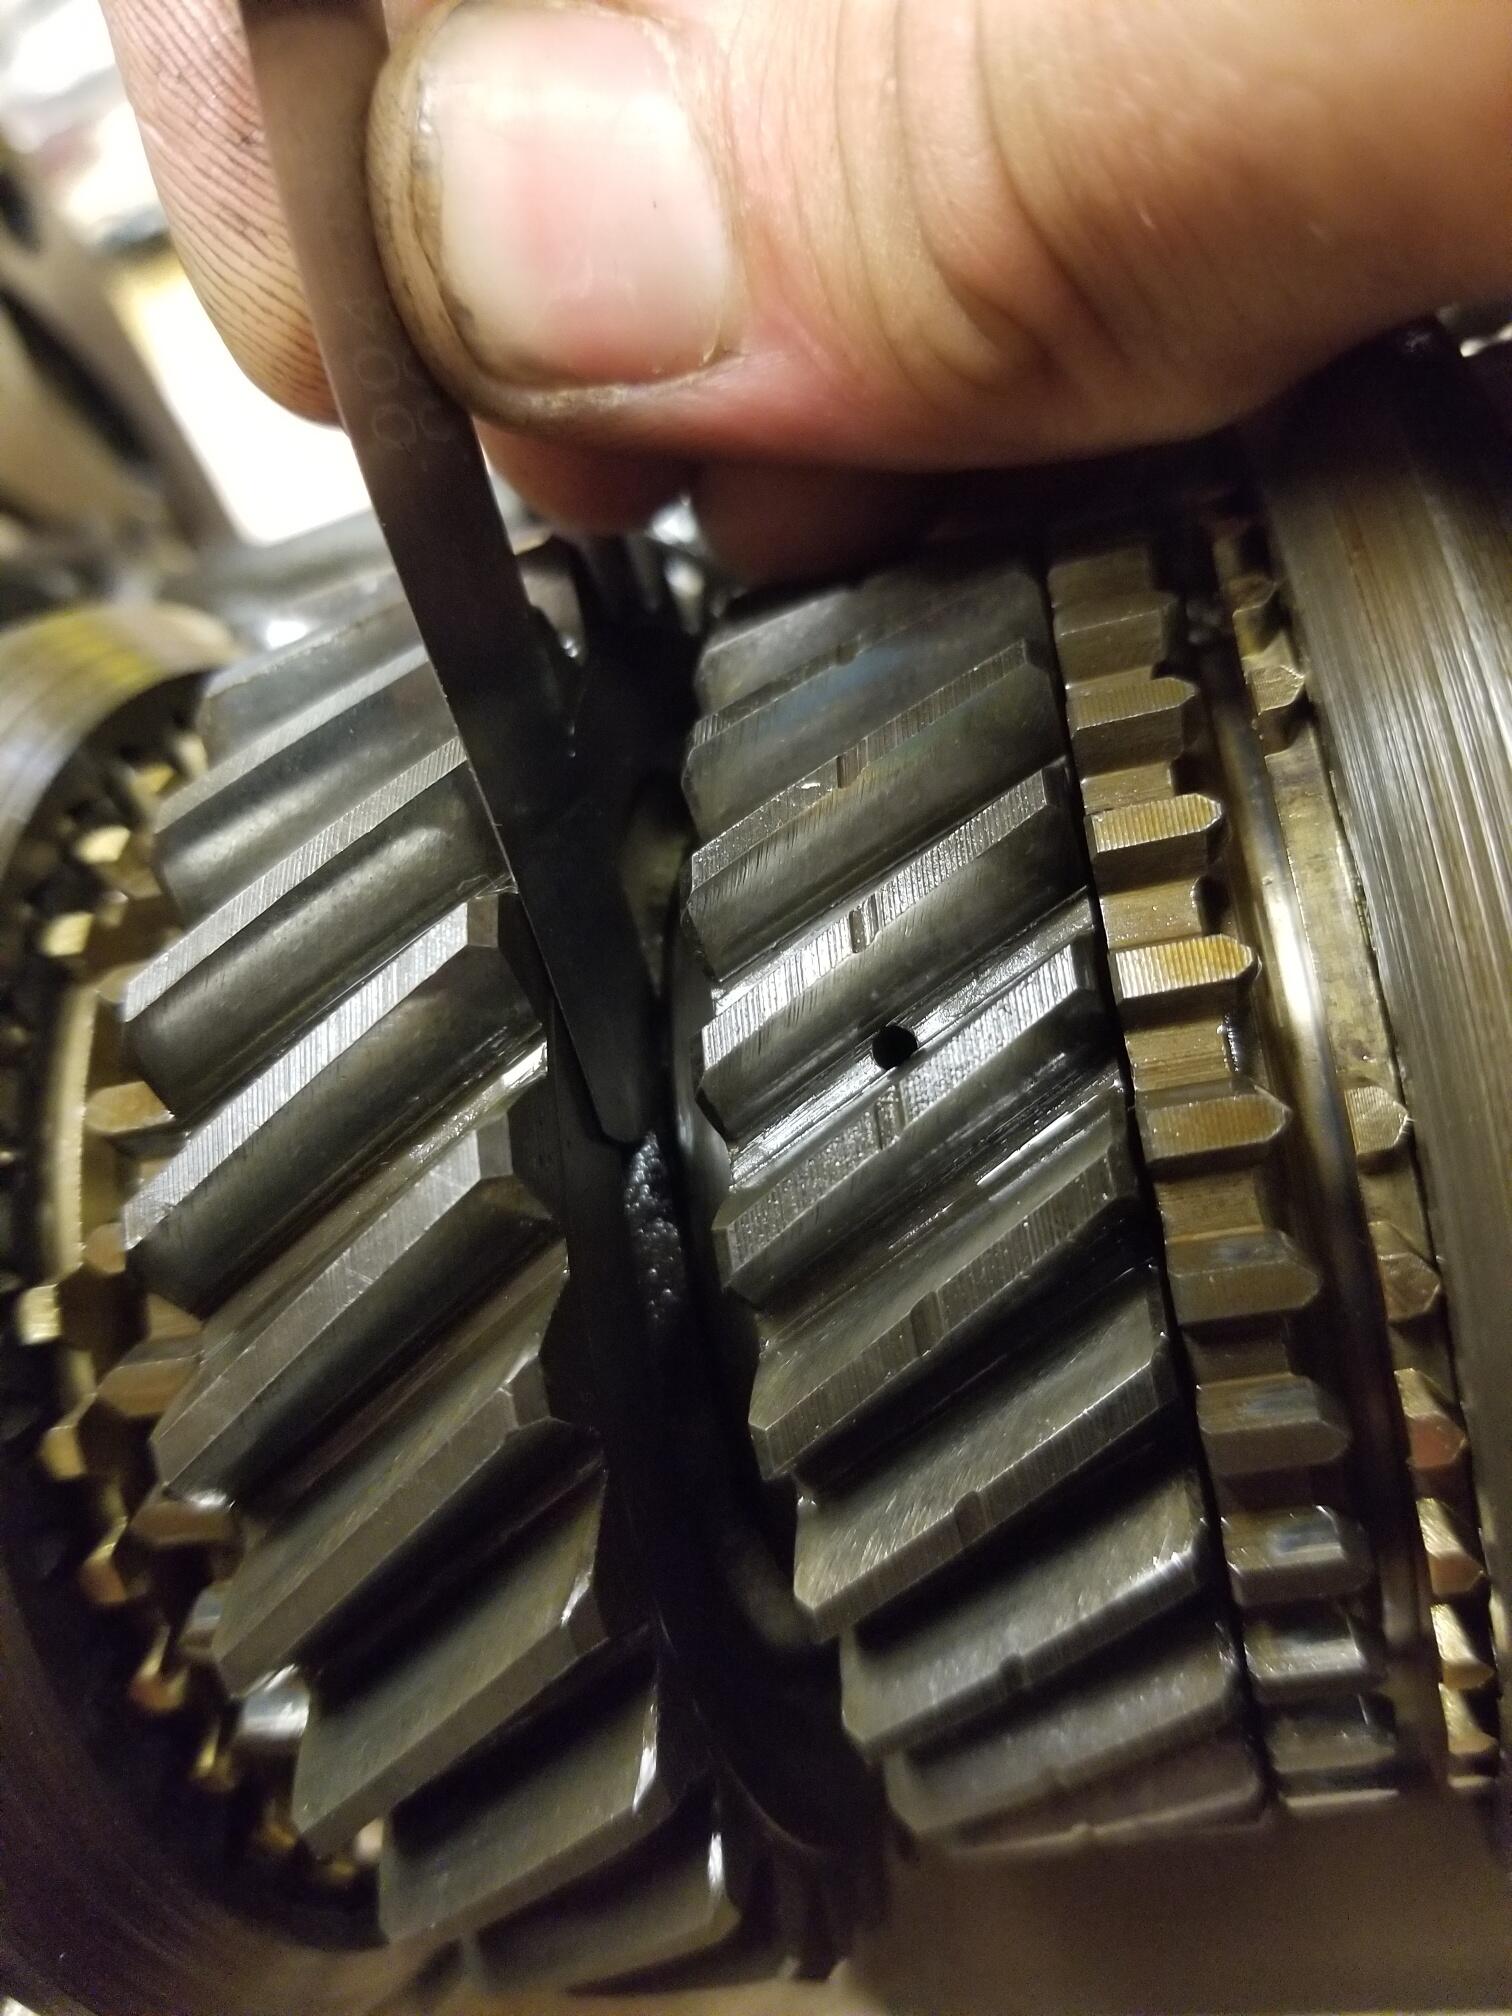
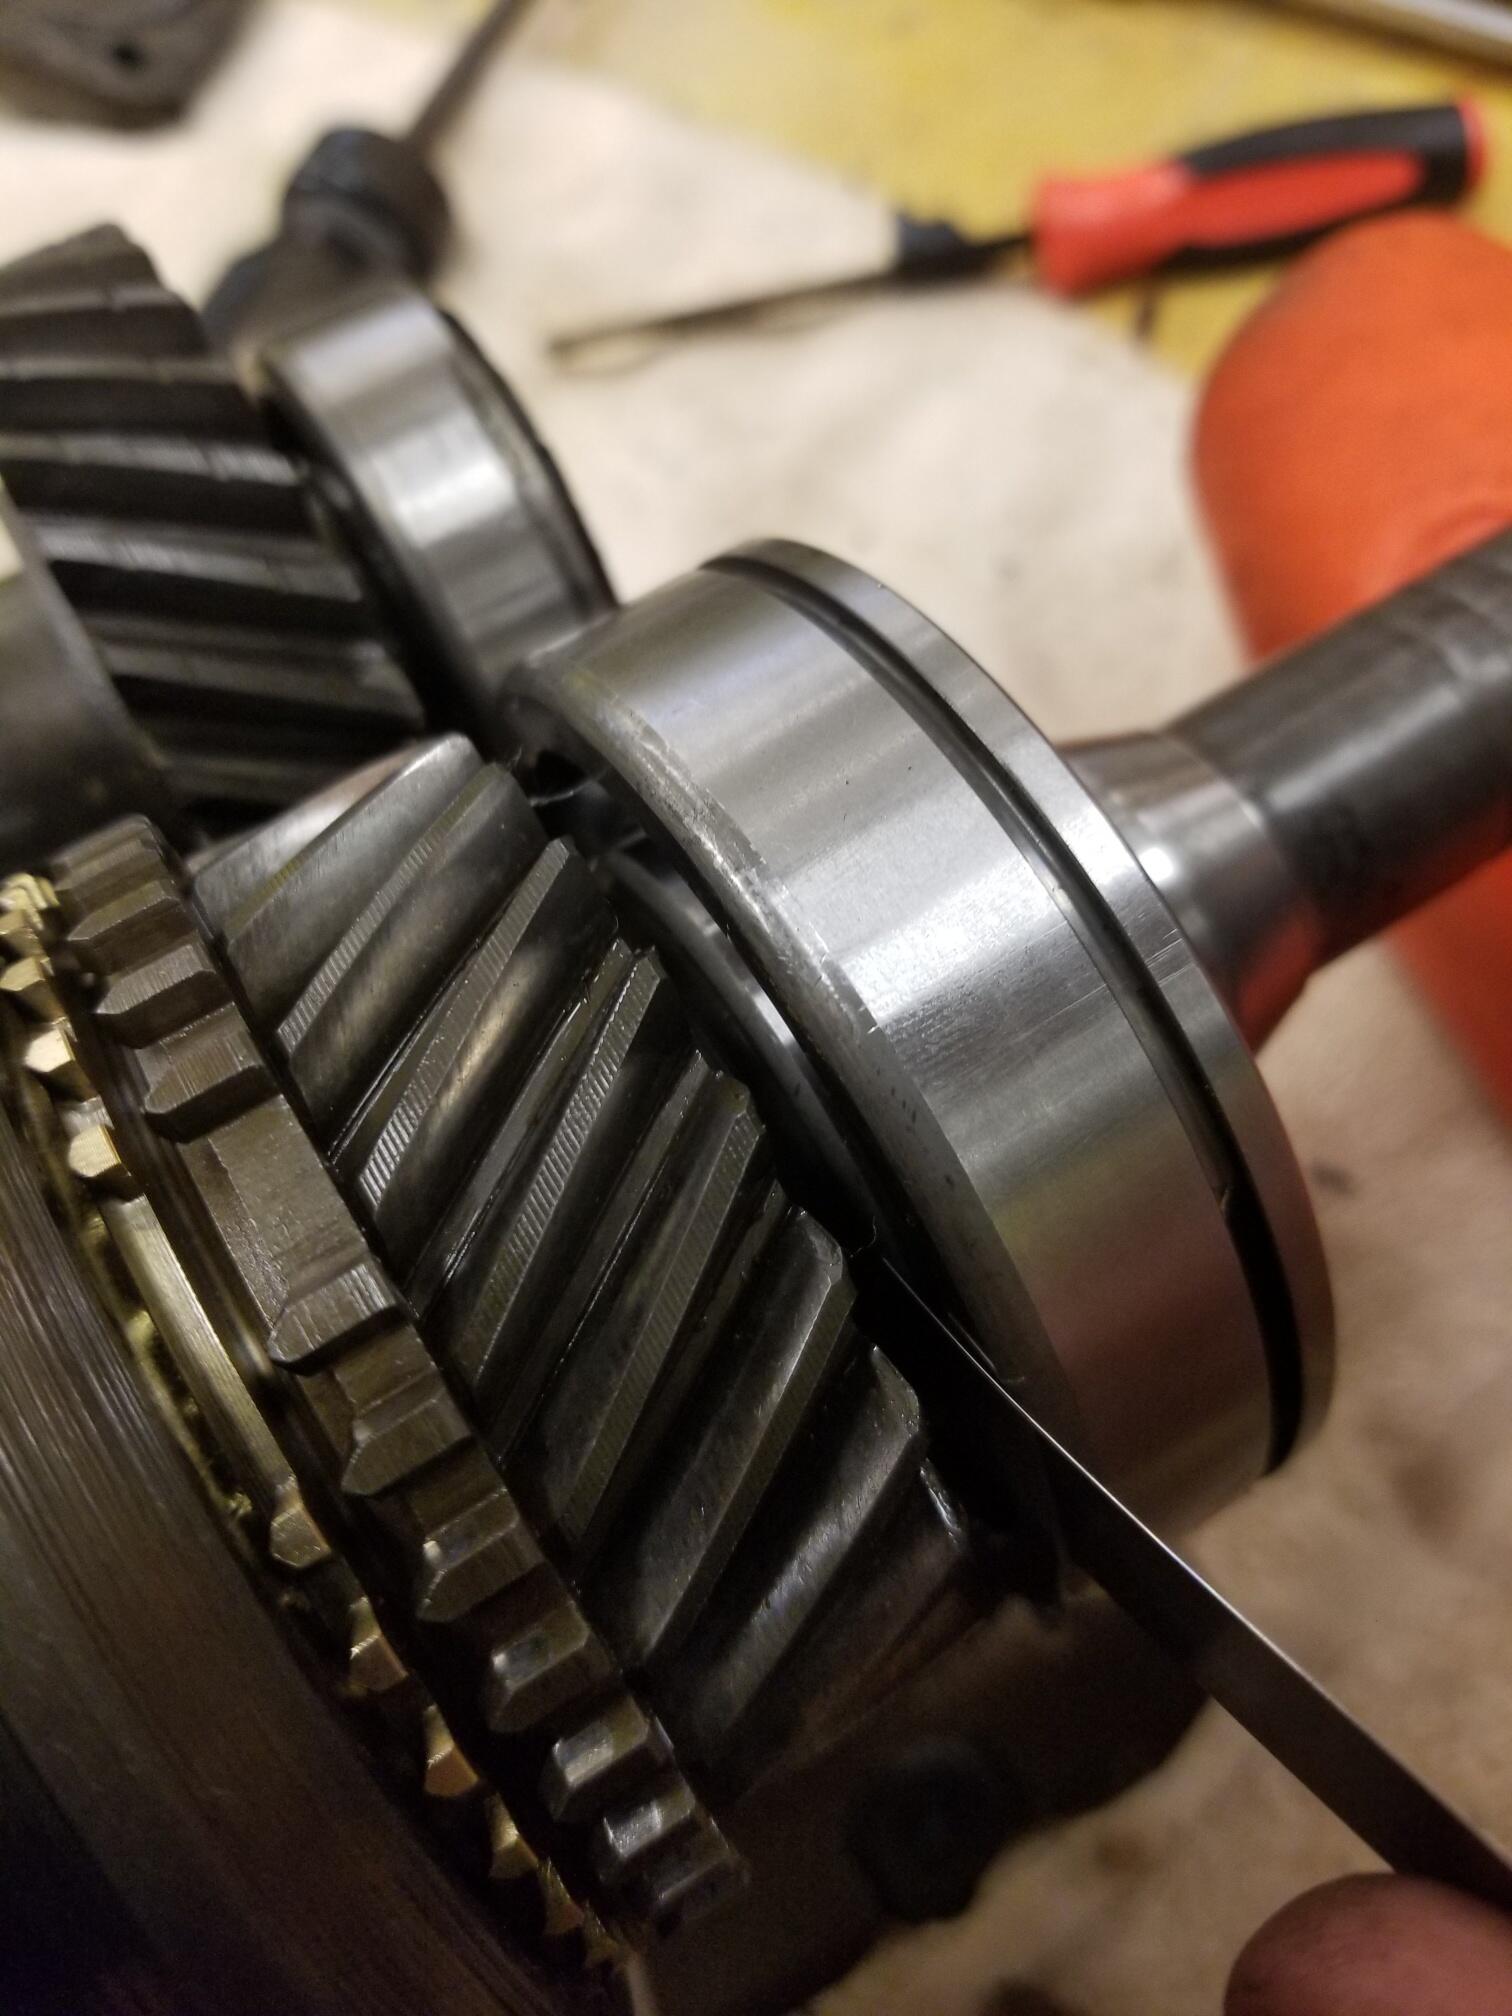
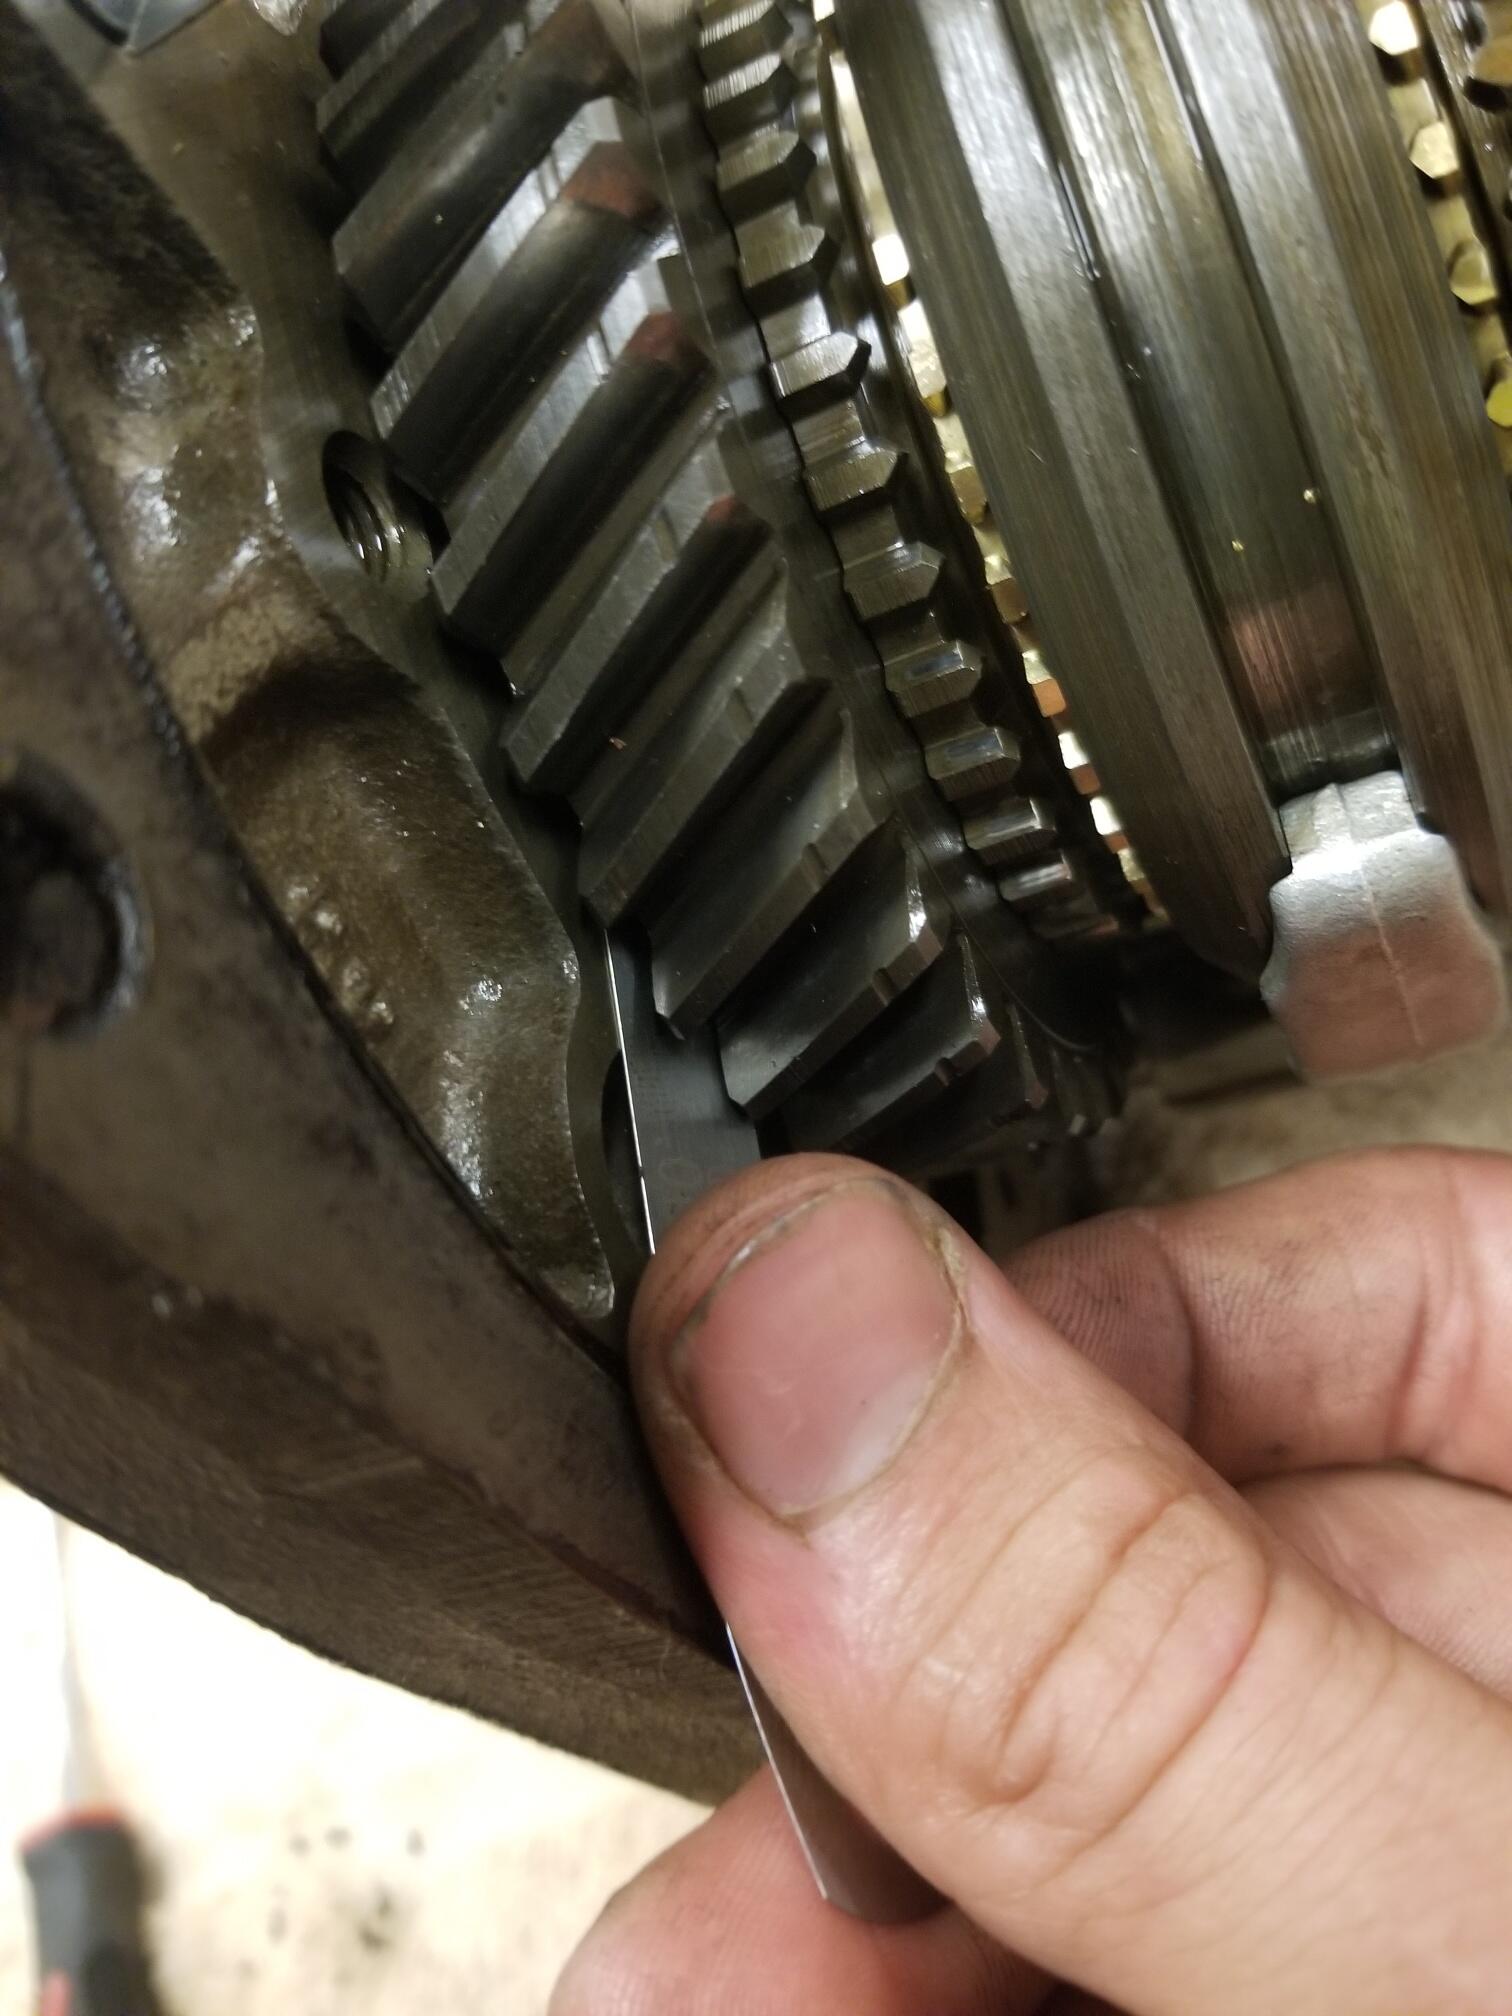
1 pointEasiest way to gain the right clearance on the rear gear is to add a shim between the large washer (in your photo you are holding it with your finger and thumb). If you buy the thin brass shim stock you can cut a washer with a good pair of scissors. Add the shim stock to the gear side of the washer to add clearance. When I'm home I will take some photos of what I mean with Plastagauge and how to use it on the bearing.1 point
-
1 pointPretty sure that CO has posted that you can't just put a plate on the BCDD mounting area. There are passages that will still be open, that you have to block. Pretty, pretty, pretty,sure. But not positive. Search around on Captain Obvious and BCDD.1 point
-
1 pointCharles, I will get a list together and give him another shout. Thanks.1 point
-
Dang. Bought a new shift knob a while back (has a slight imperfection, but I spent a lot for it - so no interest in spending a lot for another). Keep hoping I can find someone with NOS Jute. Not likely, though.1 point
-
1 pointFor the IAC, if you need a switched source, the black/white at the voltage regulator is a better choice. That wire is electrically the same as the black/white that goes to the ballast resistor. The only thing is that the wire at the VR goes through the fuse box before going out to the VR. If the insulation ever gets damaged, the fuse should give some protection to the rest of the wiring.1 point
-
1 pointSo can somebody confirm that I am checking these in the correct spots? 1st gear 2nd gear 3rd gear We don't have enough clearance on this side of the gear but there is extra on the front side between the bearing and clip Reverse 5th gear We do not have enough clearance at this location. We only have 0.0025" versus min .0122"


 1 point
 -
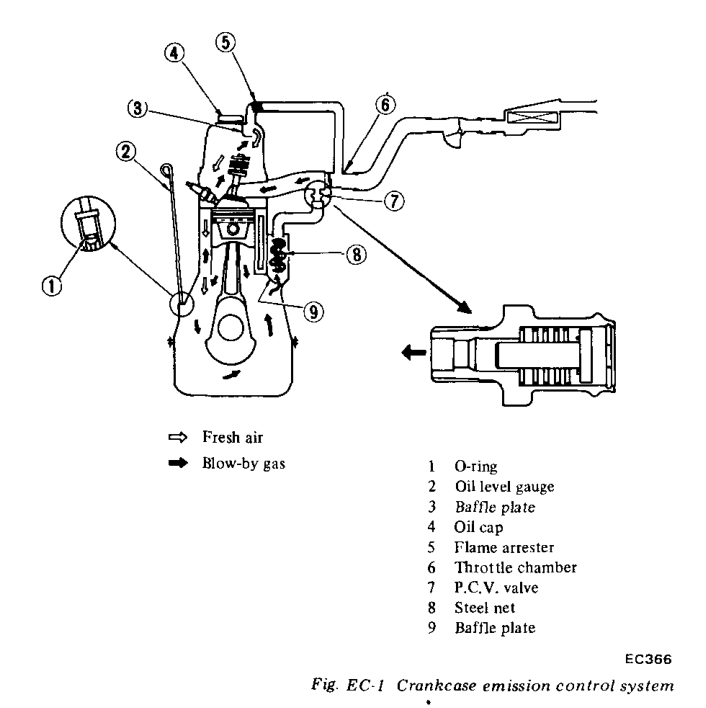
1 pointThis is the most likely cause of the noise. The system is not "intact". During normal operation of an engine with normal blowby there won't be very much flow through the valve. Just enough to clear out the gases.
 1 point
 -
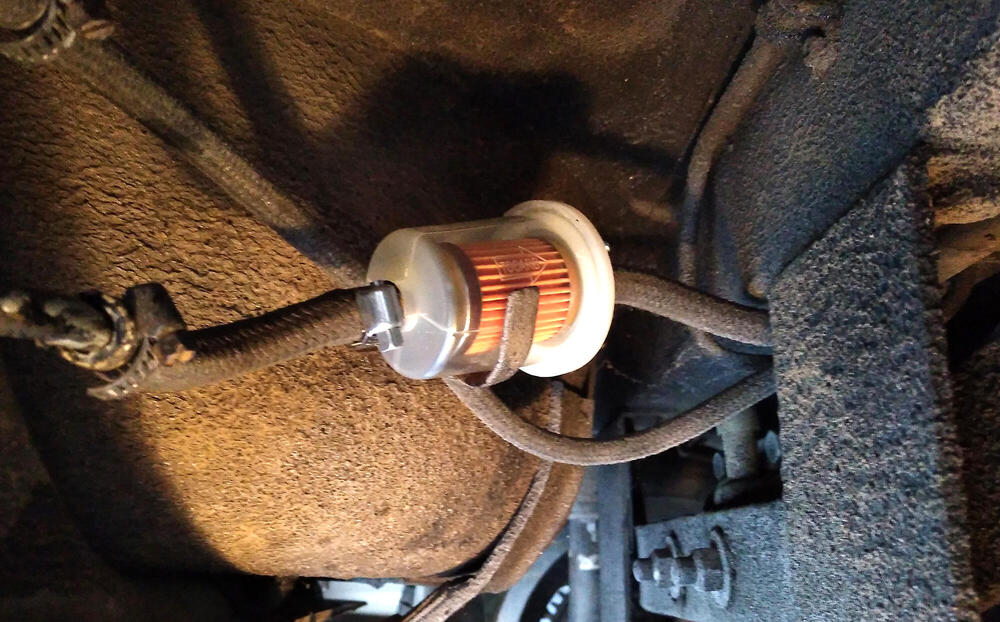
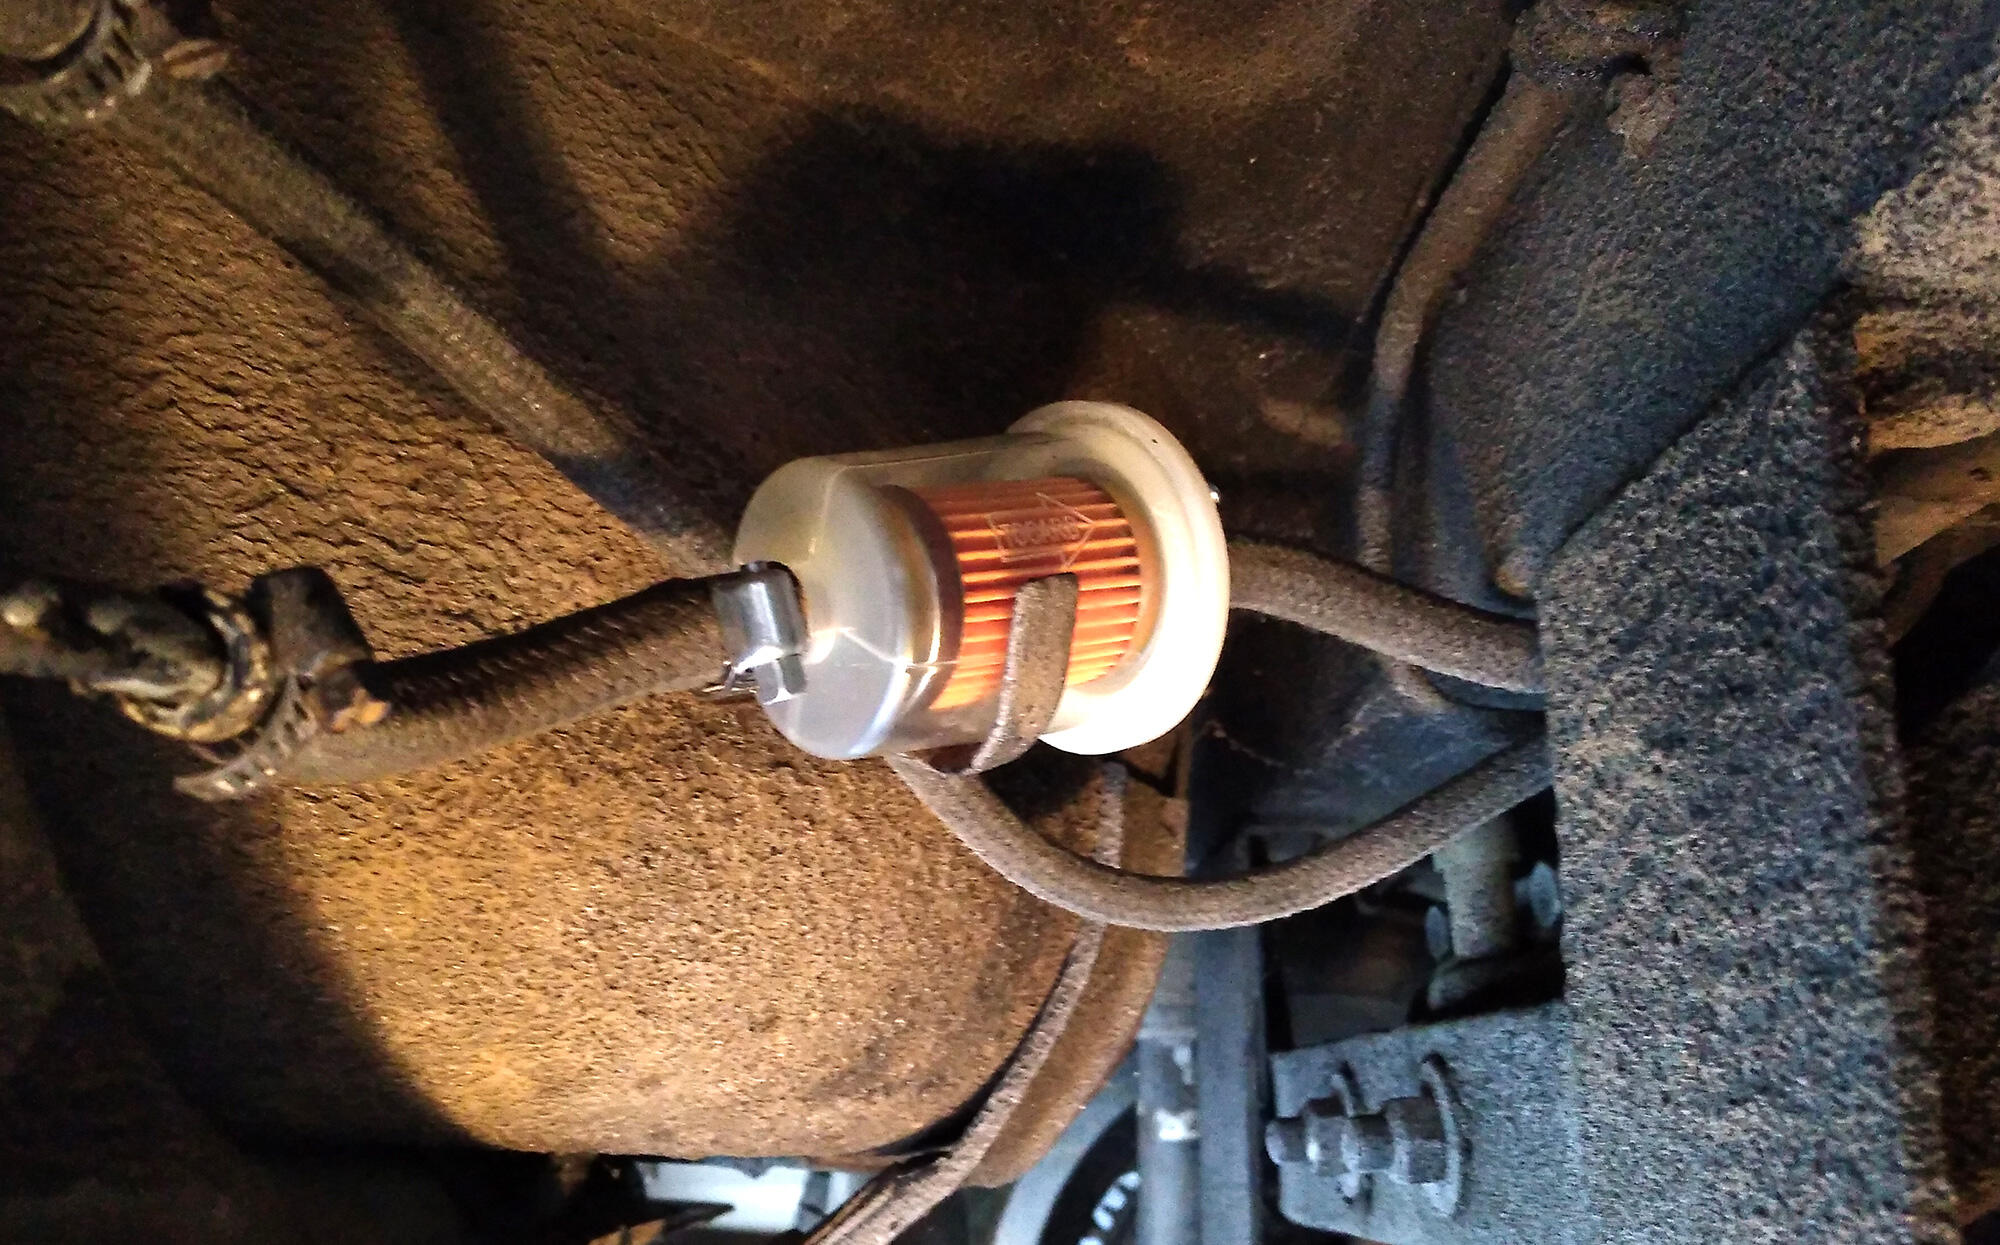
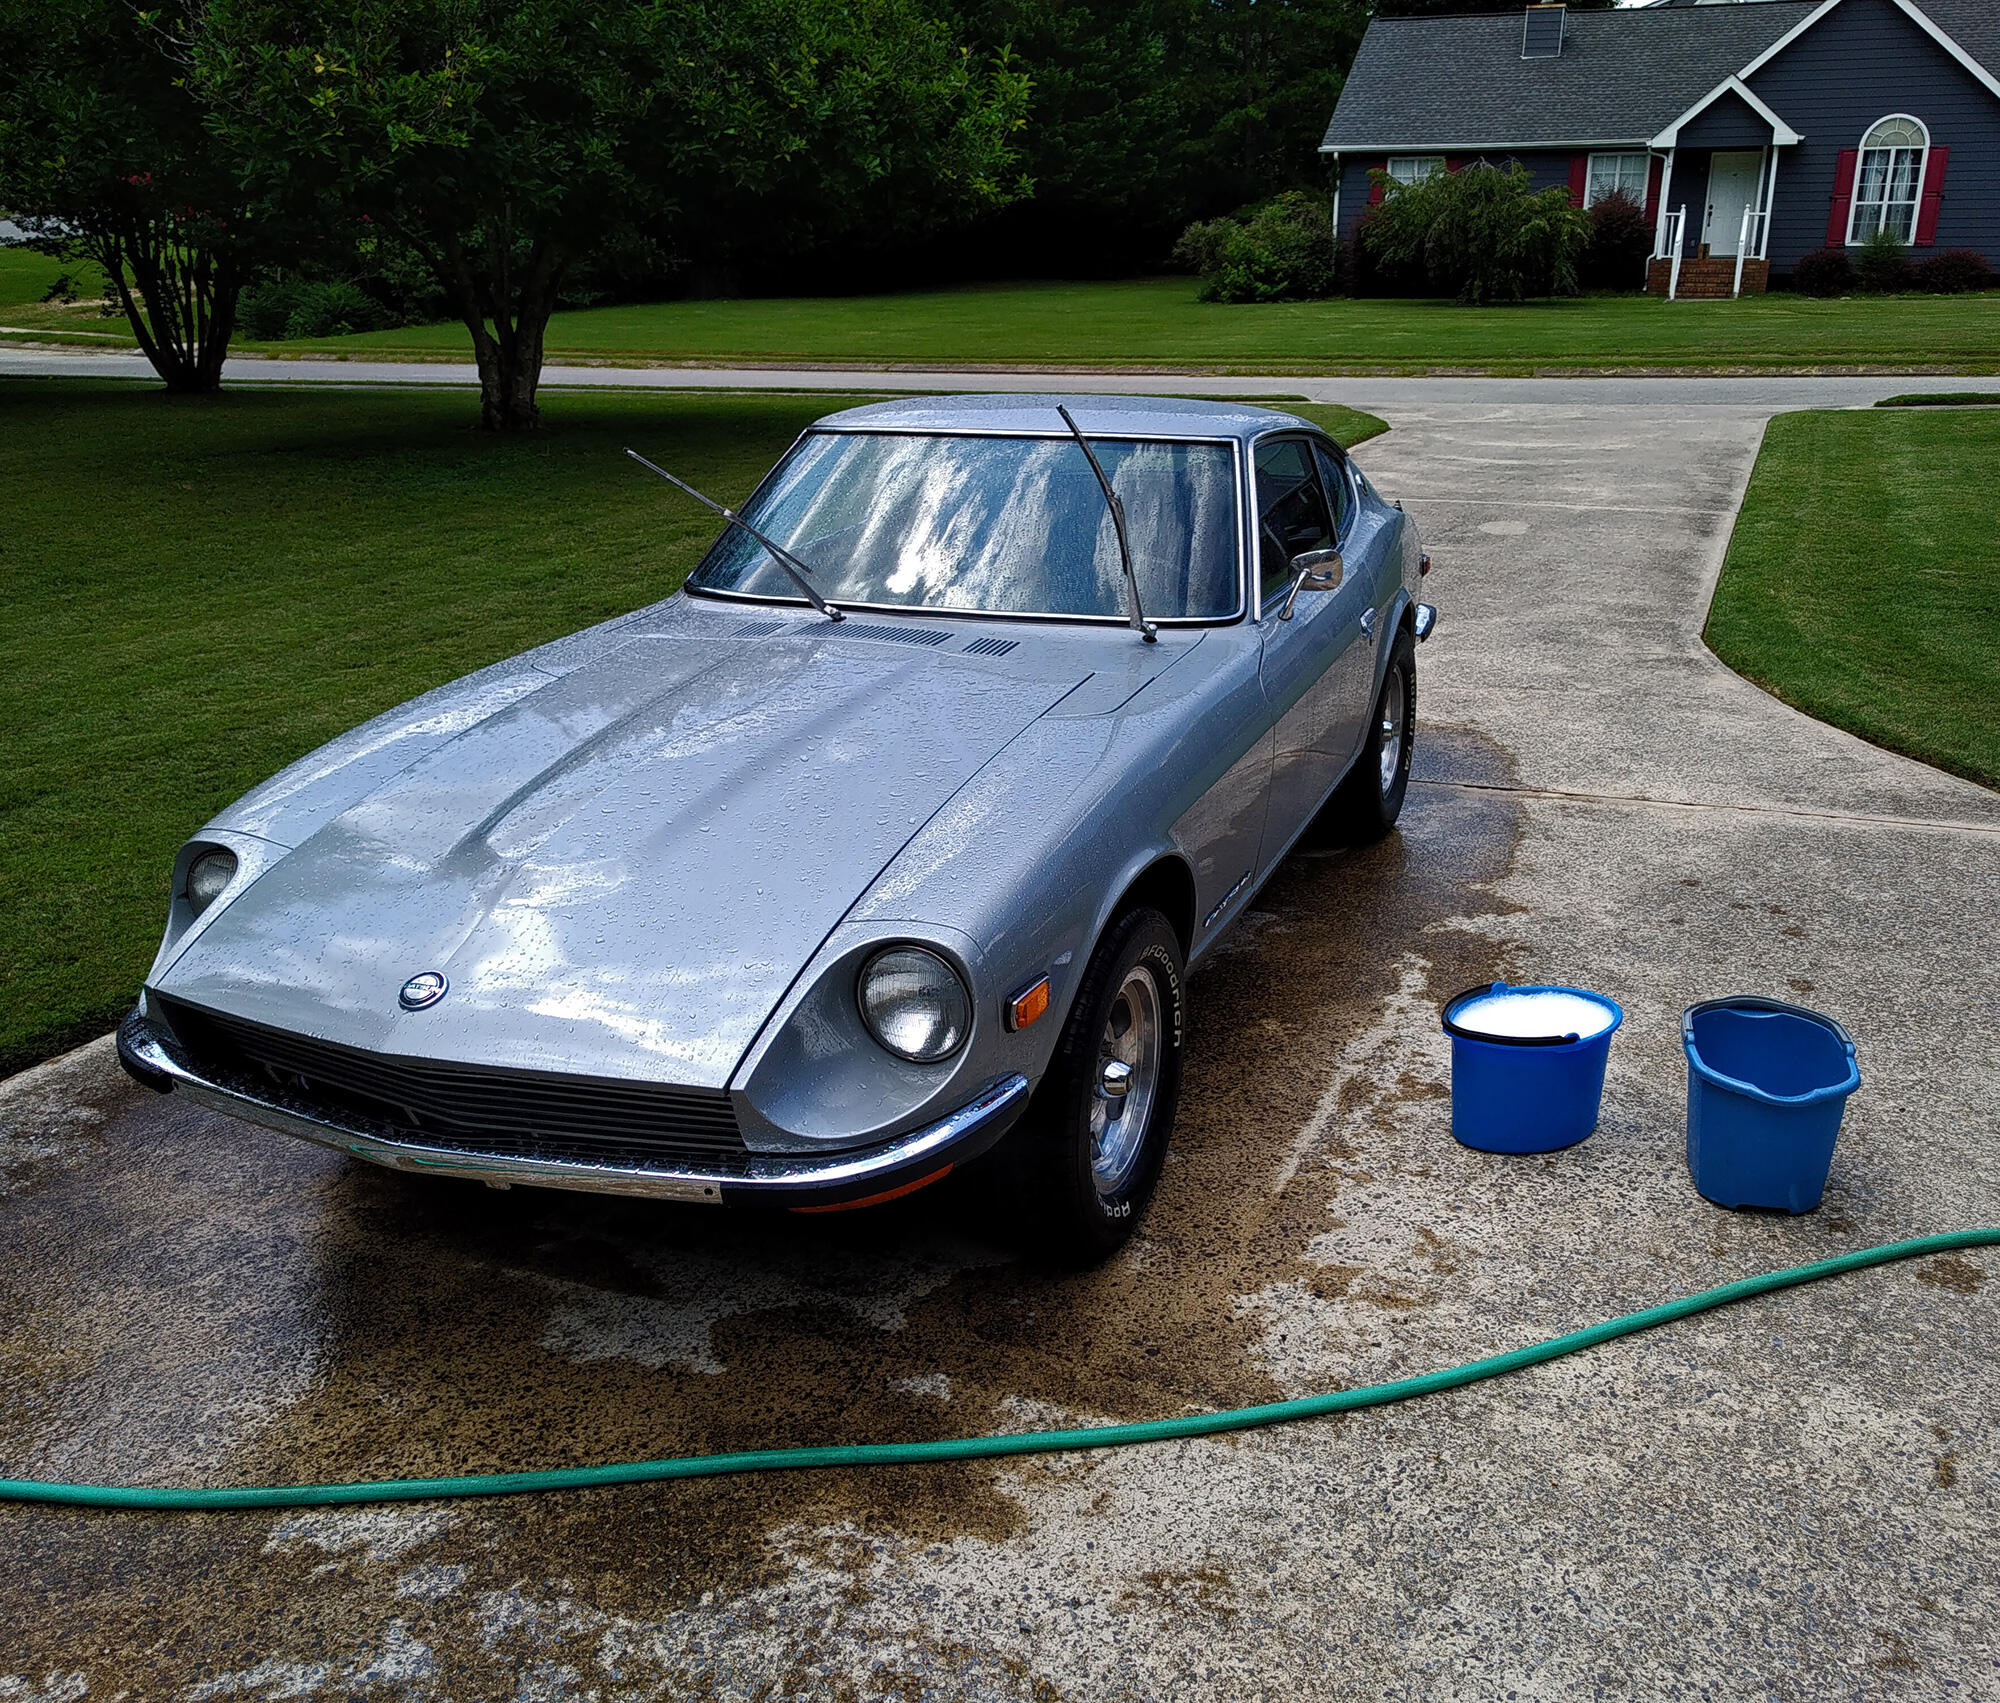
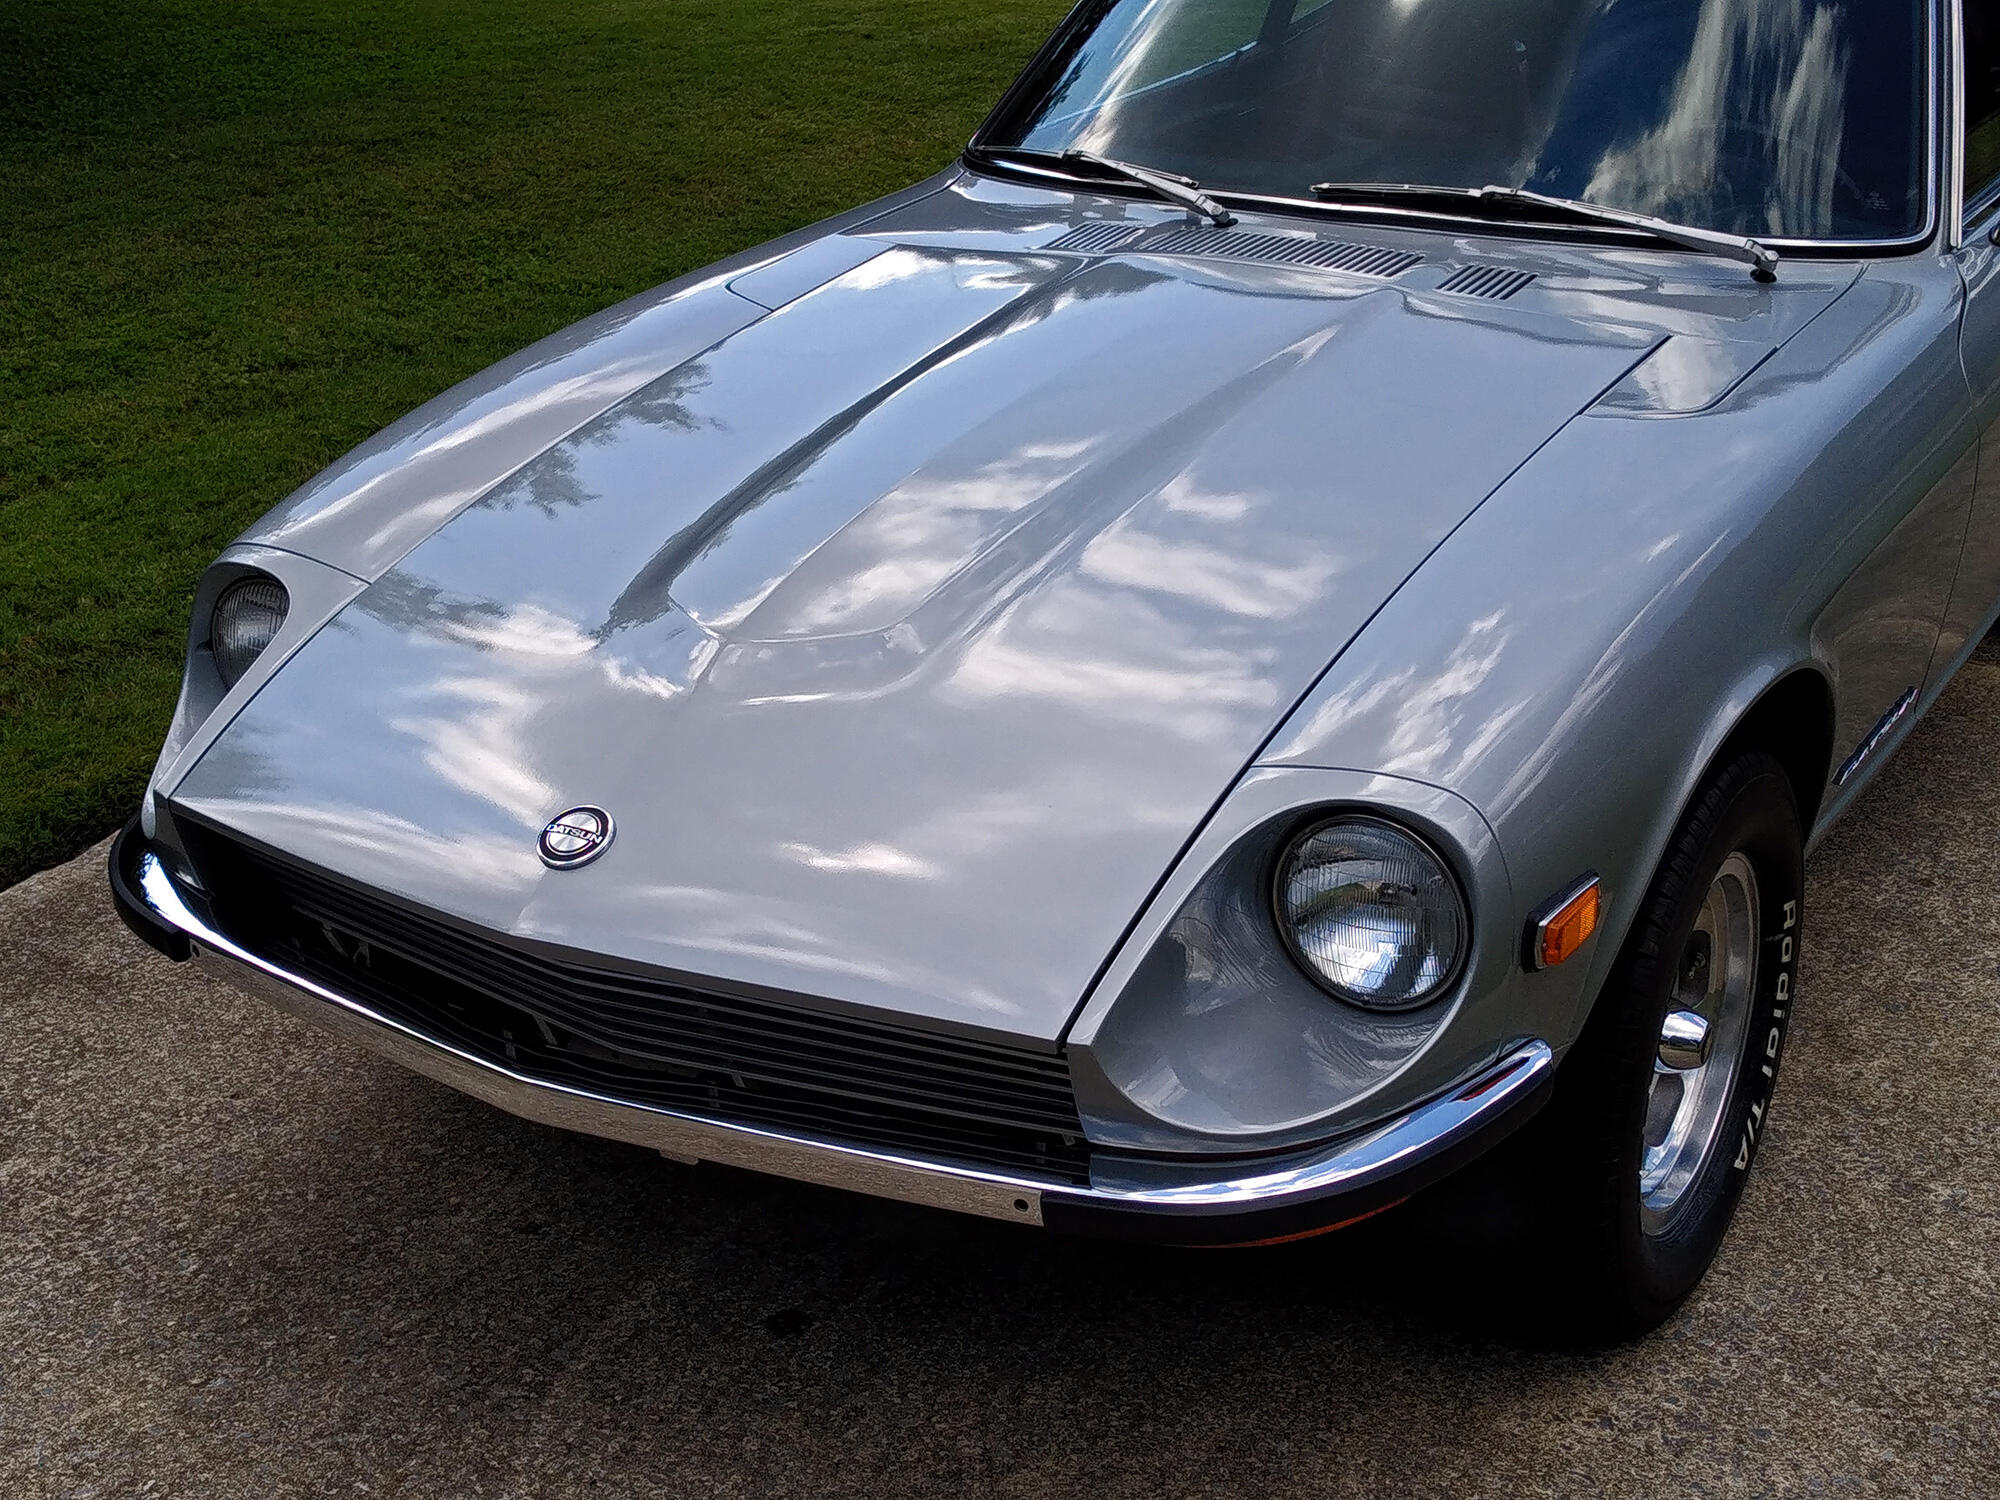
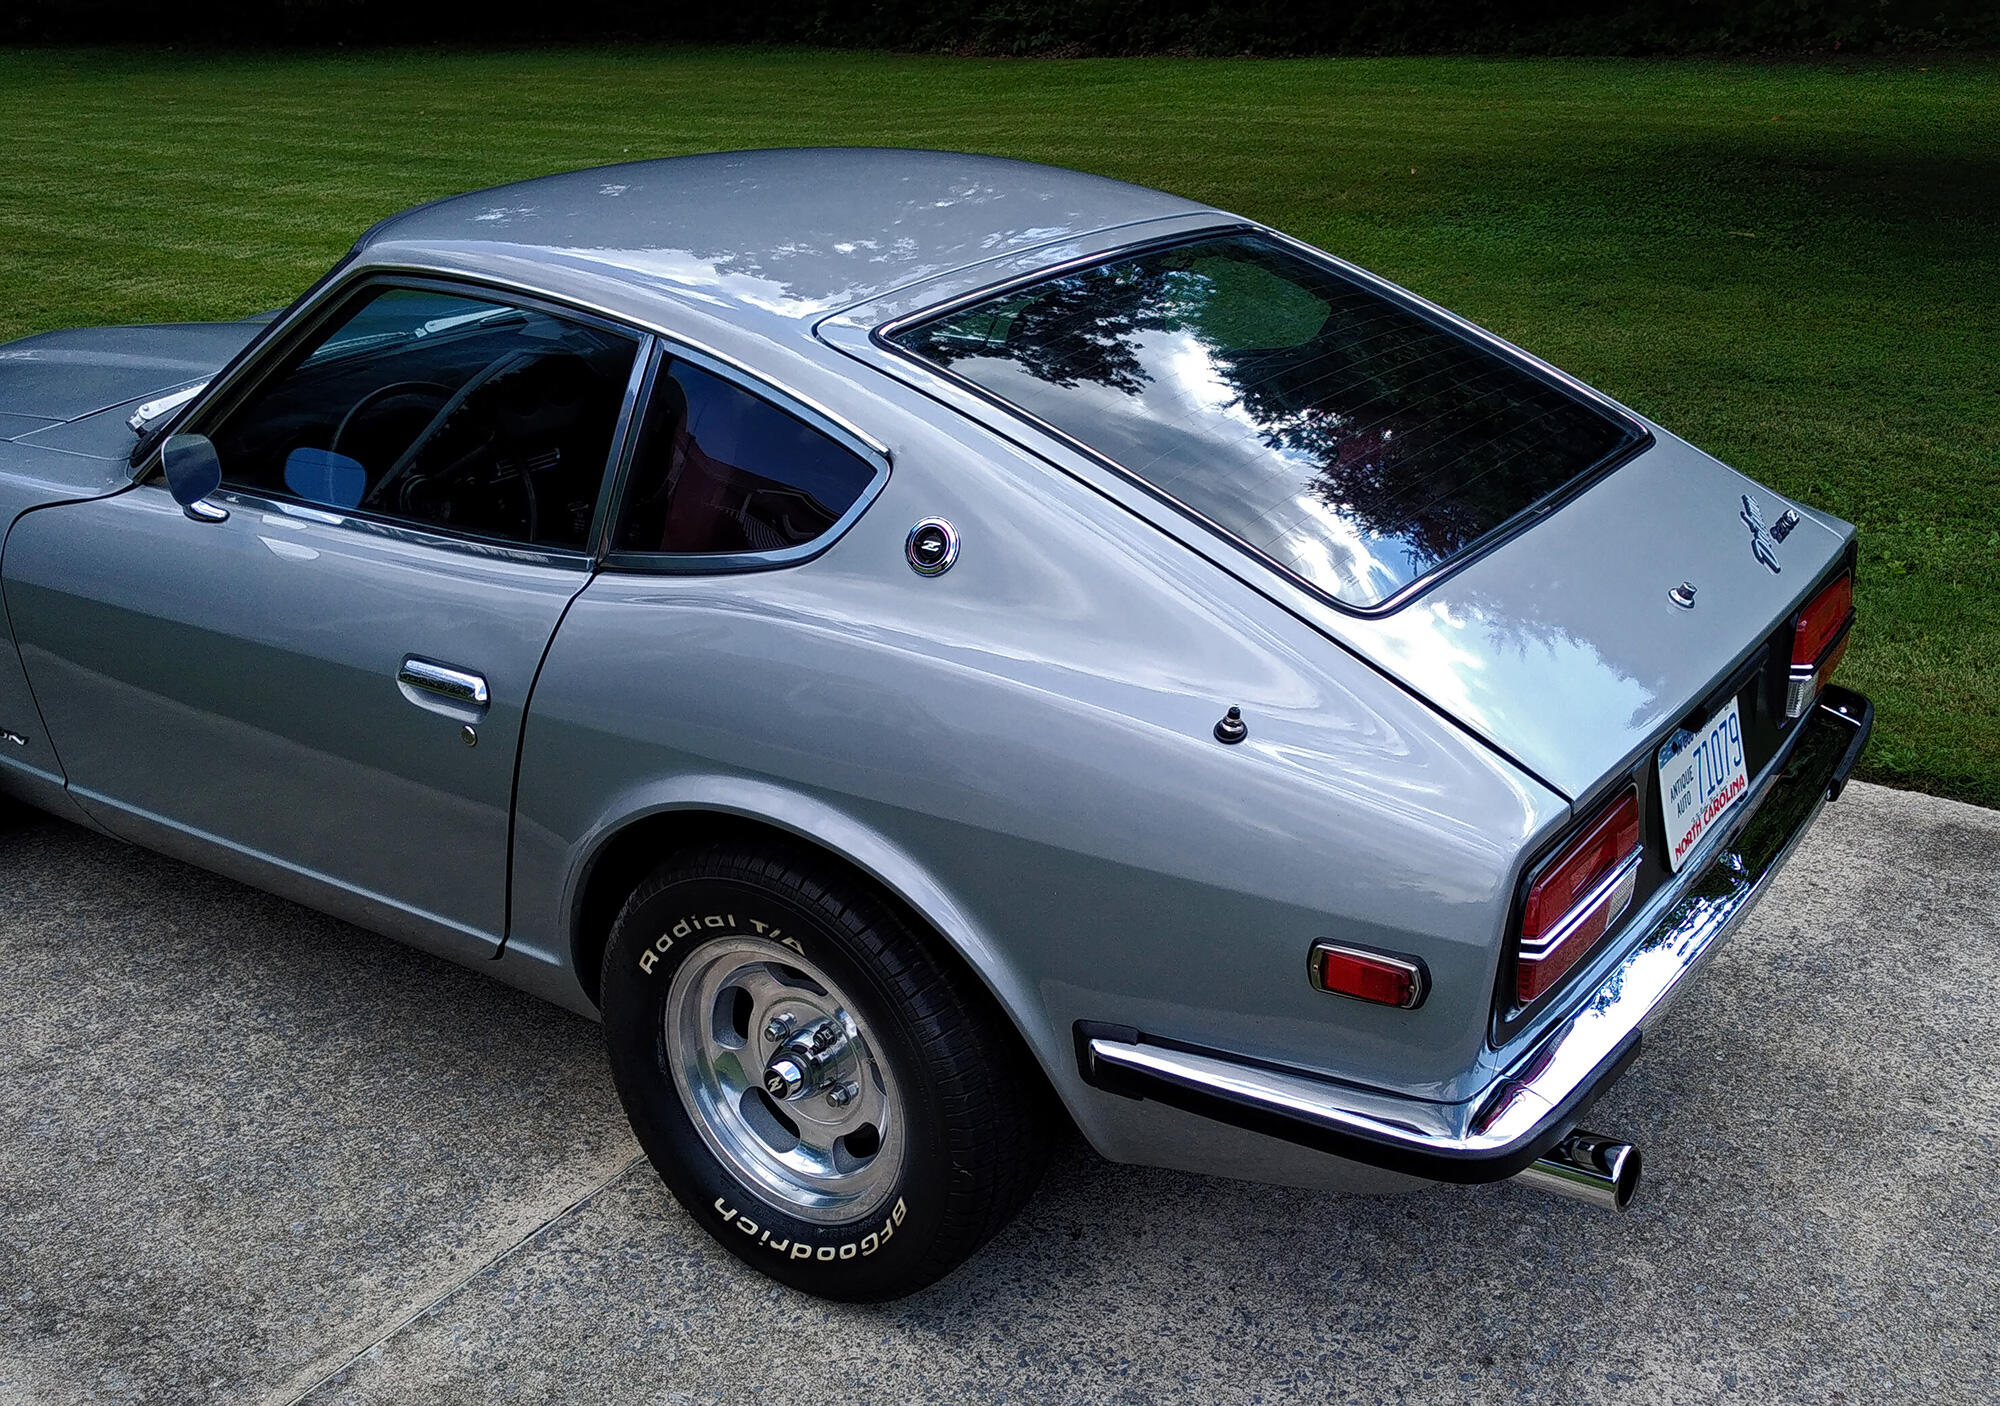
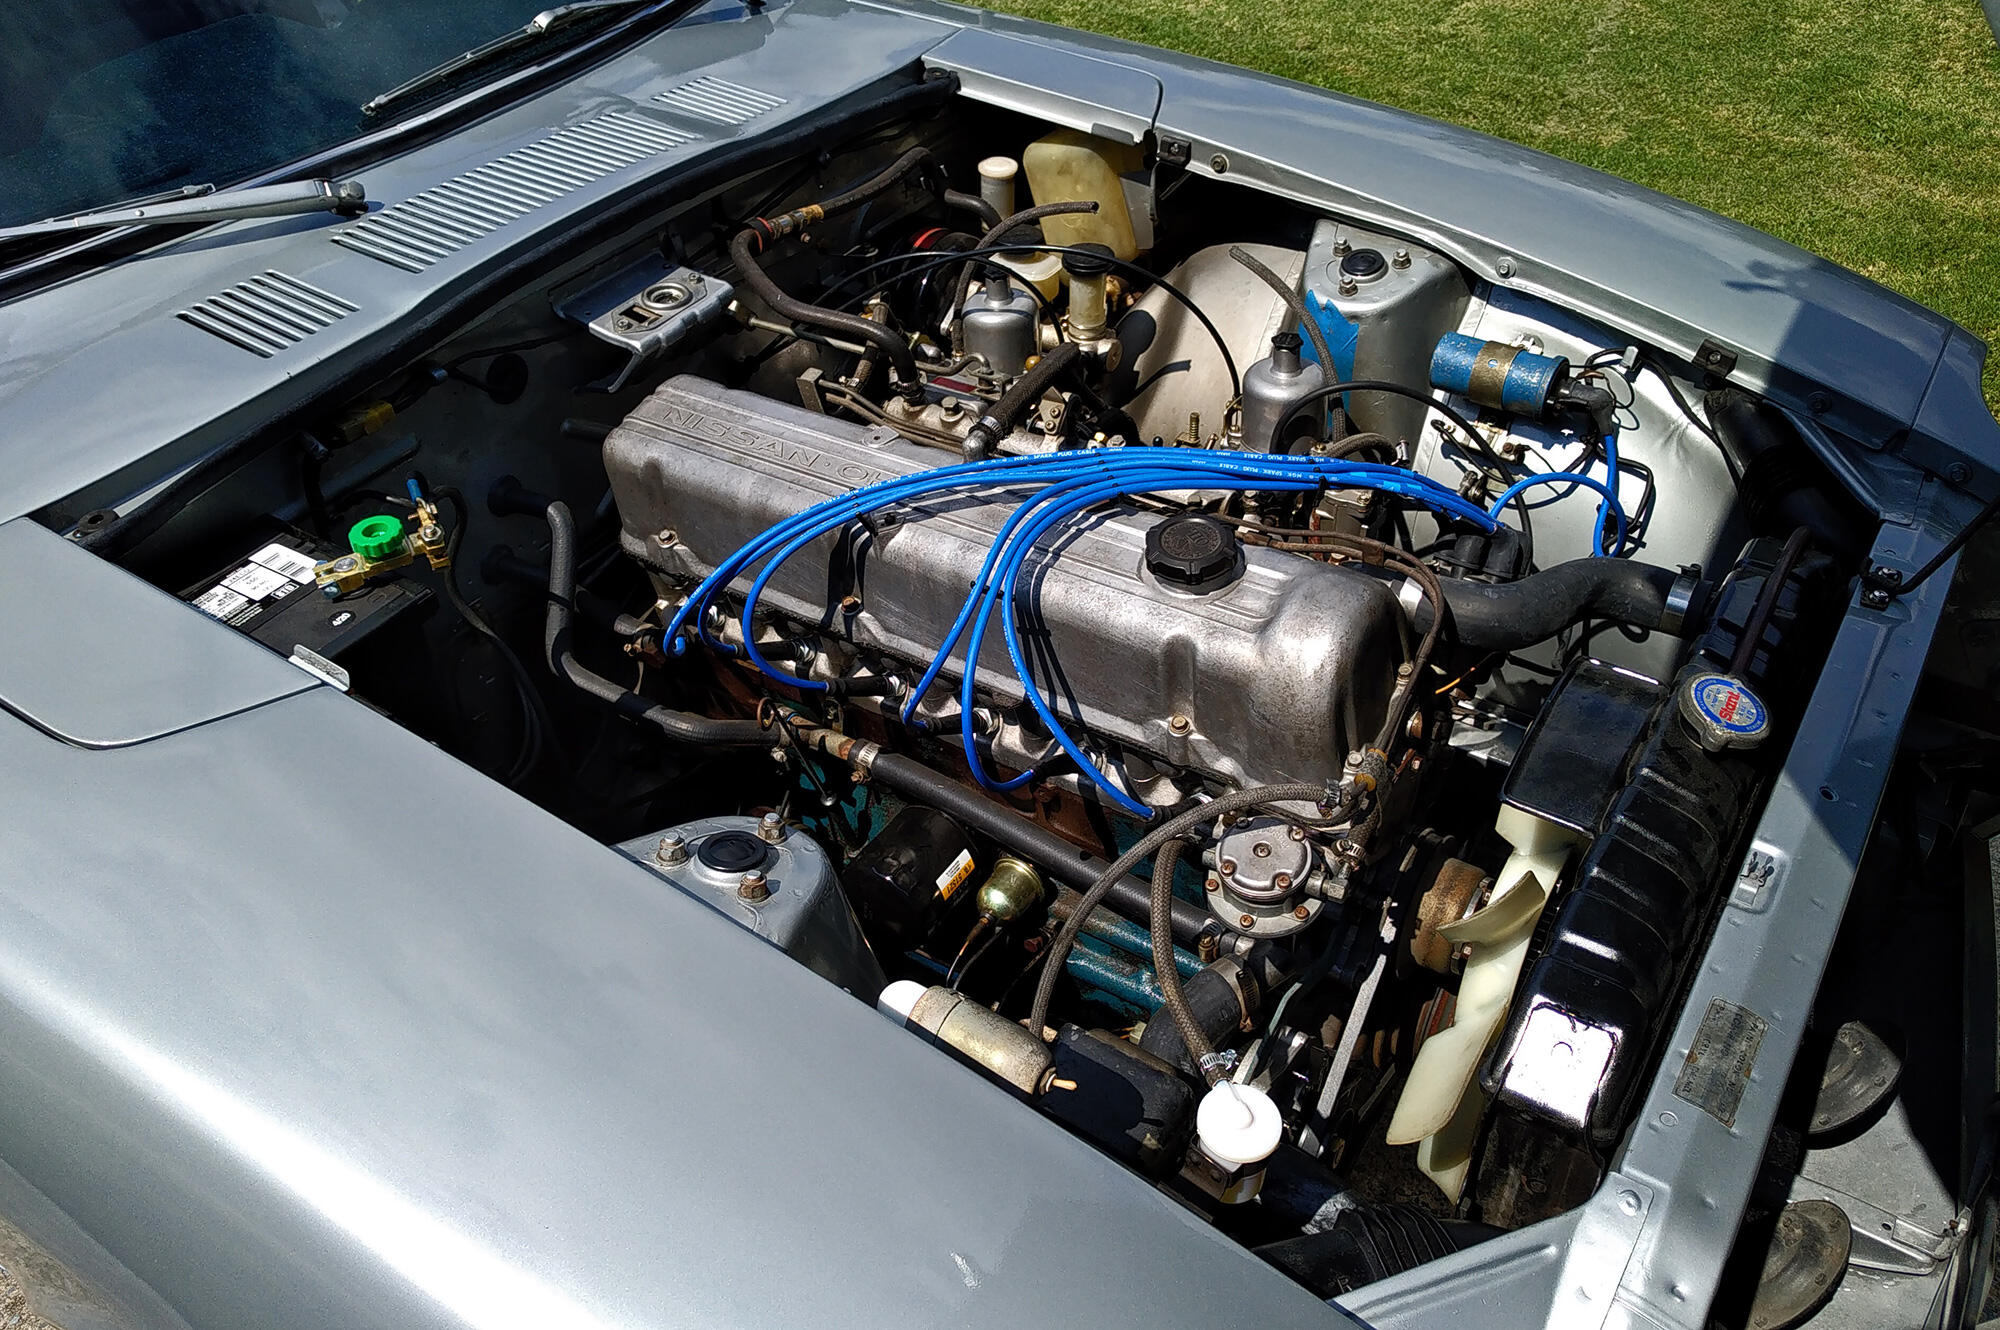
1 point1 point1 pointHere in North America - 1975-1978 we had the 280Z. From 1979-1983 we had the 280 ZX. Because of our every more strict emissions control regulations over the years there were significant changes to the L28E's and L28ET's. The N42 head came on the 280Z, not on the 280ZX. http://zhome.com/ZCMnL/tech/head.htm http://zhome.com/ZCMnL/tech/128combo.html1 pointSo I think I may have it sorted out. Don't want to speak too soon though... I installed an extra fuel filter inline next to the tank. I also installed a new primary fuel filter and the new fuel sender unit, o-ring and lock ring. I had to re-solder one of the connectors and use the heat gun on the rubber boots to get them soft enough to push over the terminals. I also blew out all the fuel lines with my air compressor turned down to 40-50 psi or so. Started the car after a bit of cranking to fill the filters, and it seemed to run...OK. Still missing and hunting somewhat, but I got it into a state where I could drive it around the neighborhood. After some more tinkering, it was alright, but then it died again the way it did last week. I coasted into the driveway and pulled the top off the rear carb fuel bowl: Dry as a bone. 😡 Really frustrating, but then I noticed that I forgot to put a hose clamp on the fuel pump inlet line. Also, it was kind of loose. I wonder if the fuel pump had been sucking air, creating a kind of vapor lock condition in the fuel lines? Regardless, I put a clamp on it, and the car seemed to run a lot better. I was able to drive it down the road a little ways and it didn't threaten to die at any time. I didn't want to get greedy so I came home and decided to wash it. It's the first bath it's had in almost 20 years. The paint cleaned up really well and looks fantastic; the painters did a great job with it. There are a couple of tiny water leaks but nothing major. I don't plan to drive it in the rain anyway. Current engine bay status: Yes, that's blue painter's tape protecting the left shock tower from getting scratched by the air filter wingnut.


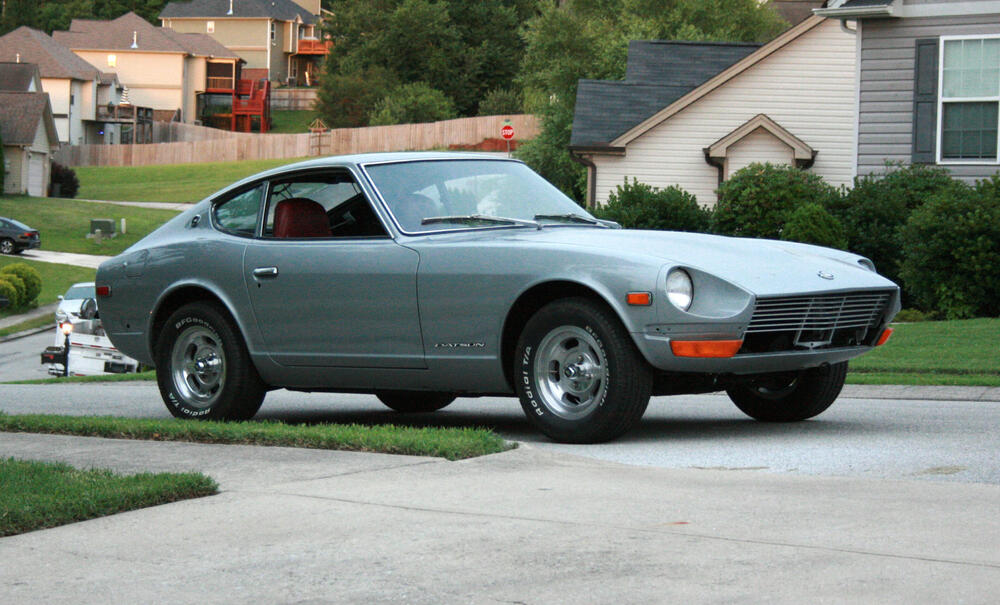
 1 point1 point1 pointWhat happens if you just raise the RPM while sitting in neutral? Can you get the needle to go up and down without a load? It kind of looks like what you might expect if the radiator was not actually removing much heat. Is your heater core intact and connected or has somebody "bypassed" it? The bypass allows coolant to pass through the block and back to the pump without passing through the radiator. Effectively reduces pump capacity. Another thought is that the water pump impeller blades are shot and not moving much coolant.1 point1 pointAn air pocket would reduce heat transfer, and the reading would go down. The sender works by decreasing resistance in proportion to the increase in temperature. Do what Steve @madkaw said.1 point1 pointBizarre for sure . Laser temp gun to verify readings . Not sure what to suggest other than replacing the sender sensor to start1 point1 pointYou might already know this , but there is a set screw in the back that adjust the audible tone . I inadvertently did a hey what does this do [emoji23] and screwed mine up . But once I set it back in it’s rightful place my set seems to work fine .just incase you get lucky and the set screw just needs to be adjusted . Sent from my iPhone using Tapatalk1 pointSo the forum software won't let me edit the first post in the thread (where I wanted to place this image), but I figured I should share anyway. My mom found this a couple of months ago. My parents driving away from their wedding in the Z, May 1974. They'd had the car for about a year and a half at that point:
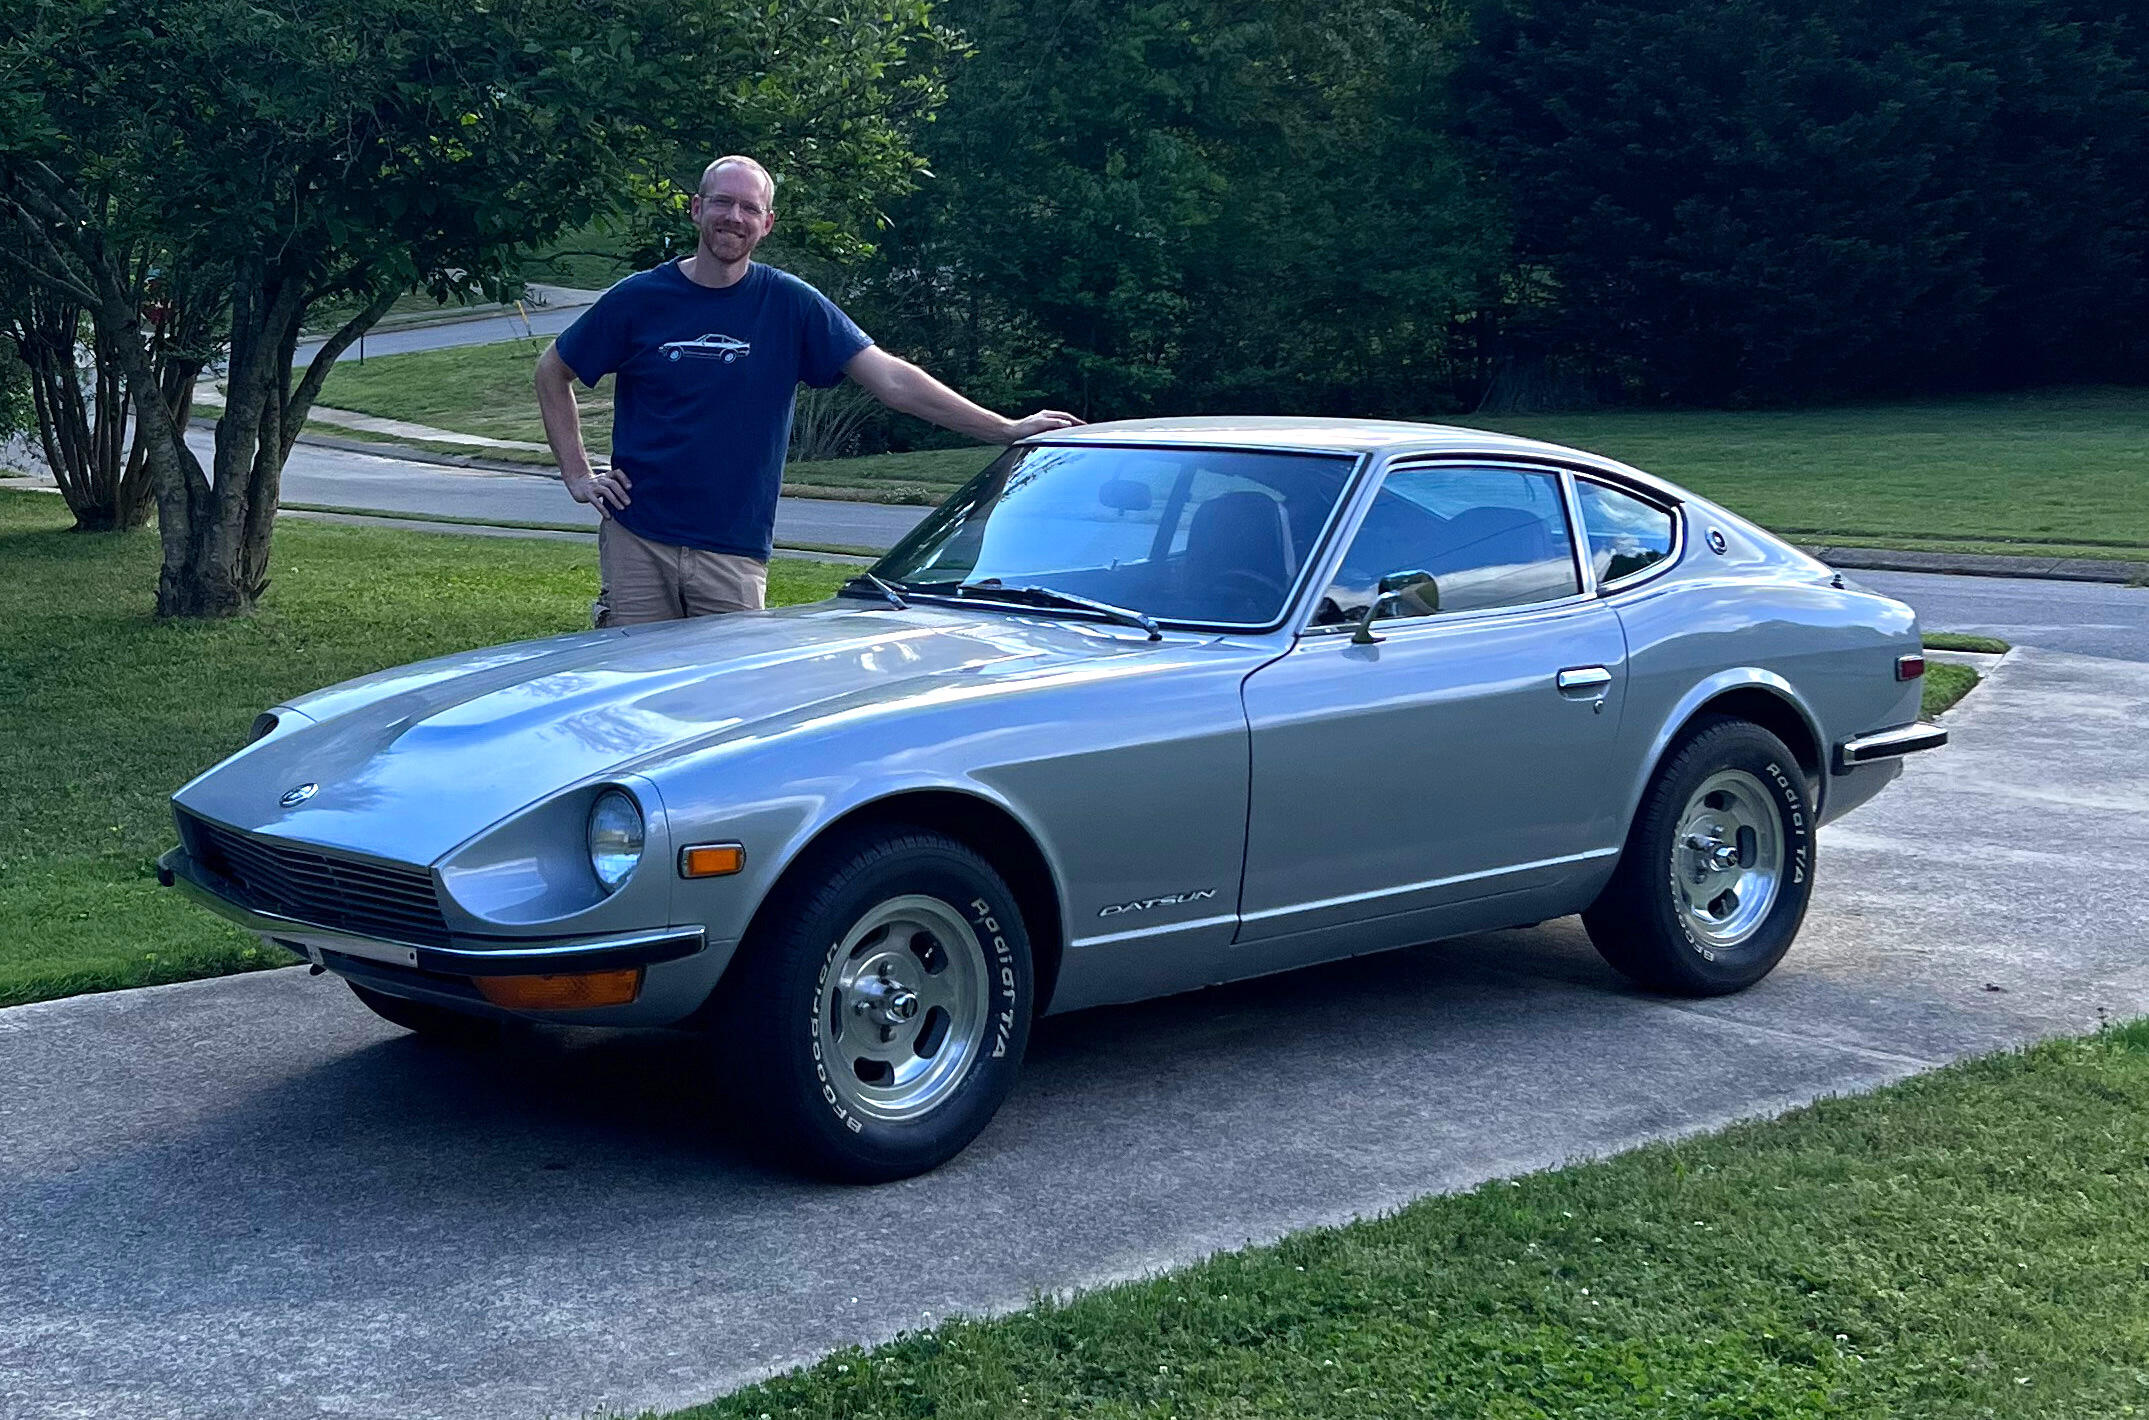
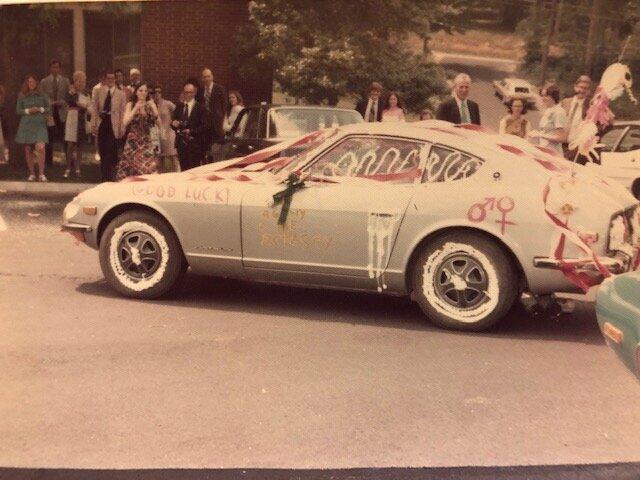 1 pointSome more progress, some with pics and some without: Seat belts bolted in. I have some M3 x 0.6 screws on order for the mechanism covers for the seats. Carpet-style dash cover added. The guy who was going to sell his crack-free dash backed out, so I'm going to have to go to Plan B (or C or D). New handbrake boot installed. Found the shift pattern emblem for the top of the shift knob, reattached. Realized I connected the wiper motor arm 180 degrees off (it's nice when the wipers go DOWN when activated), fixed. Driver's door adjusted. It took a really hard slam to shut before; it's better now, though still not as good as the passenger door, which is 100% PERFECT. Need a bit more love. Inner and outer door sills on (thread here) I did my best to clean the outers, but they still have some "patina." I'm OK with it for now. Still working through some electrical issues, as detailed in this thread. Drove it around the neighborhood last night, and it's like a different car compared to when I first got it back on the road in mid-2020: Then, it could barely make it up the (shallow) hill in front of the house, and it was misfiring all over the place, no brakes, etc etc. Now, it brakes and turns very well, and has only some slight misfiring when warmed up, all of which I'm hoping to dial out when the Colortune arrives and I get it timed perfectly. And once I get all the lighting operational, it will be fully road-worthy. So excited. Finally persuaded my wife to take a pic of me with the car. Here's your intrepid scribe next to the car that will have been in the family for a full 50 years come October:
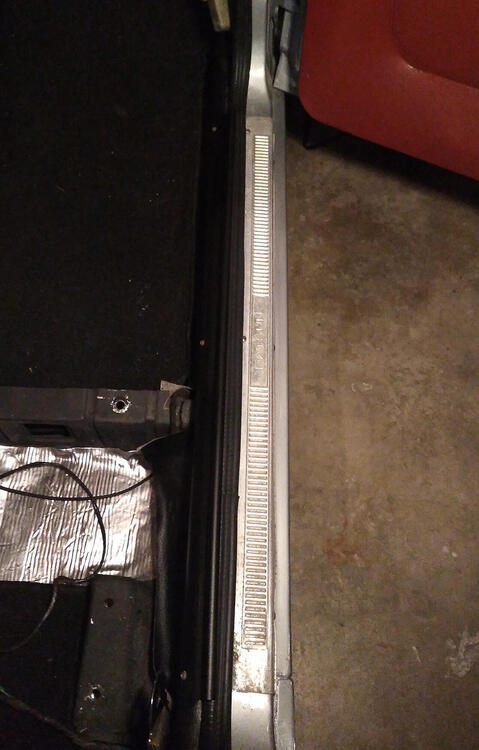
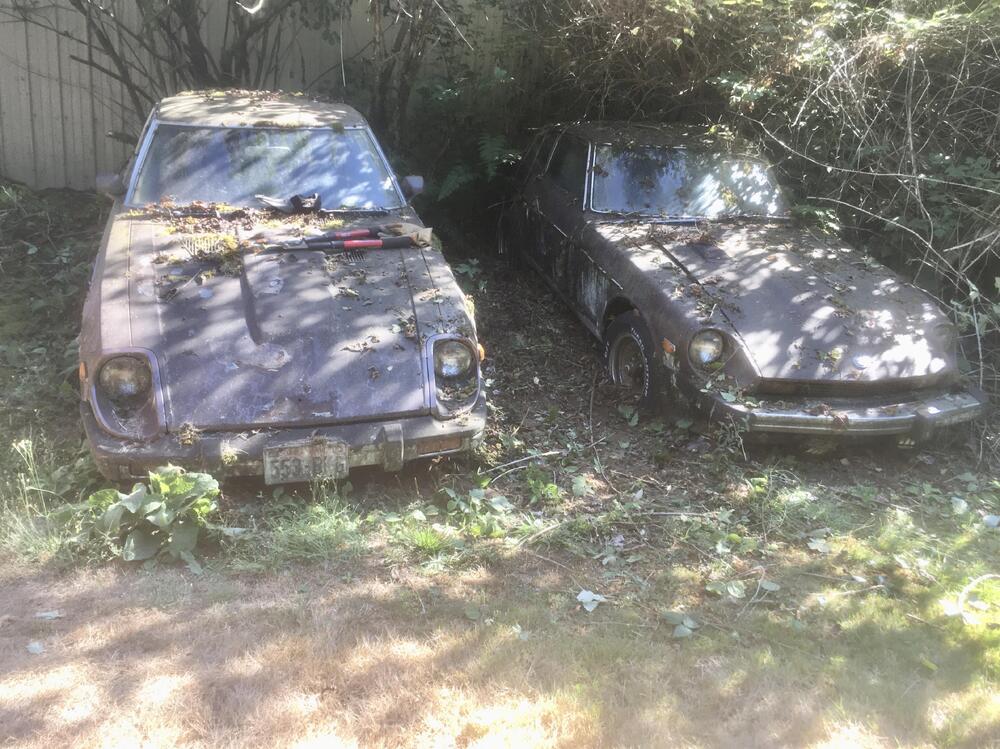
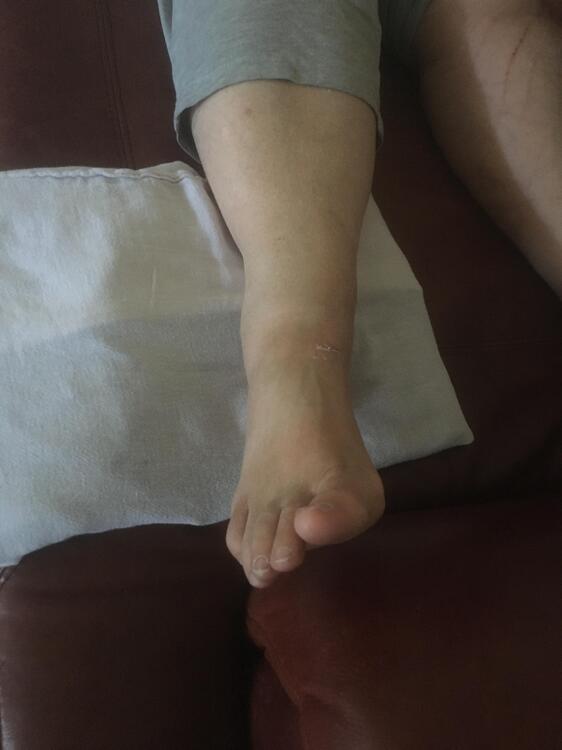
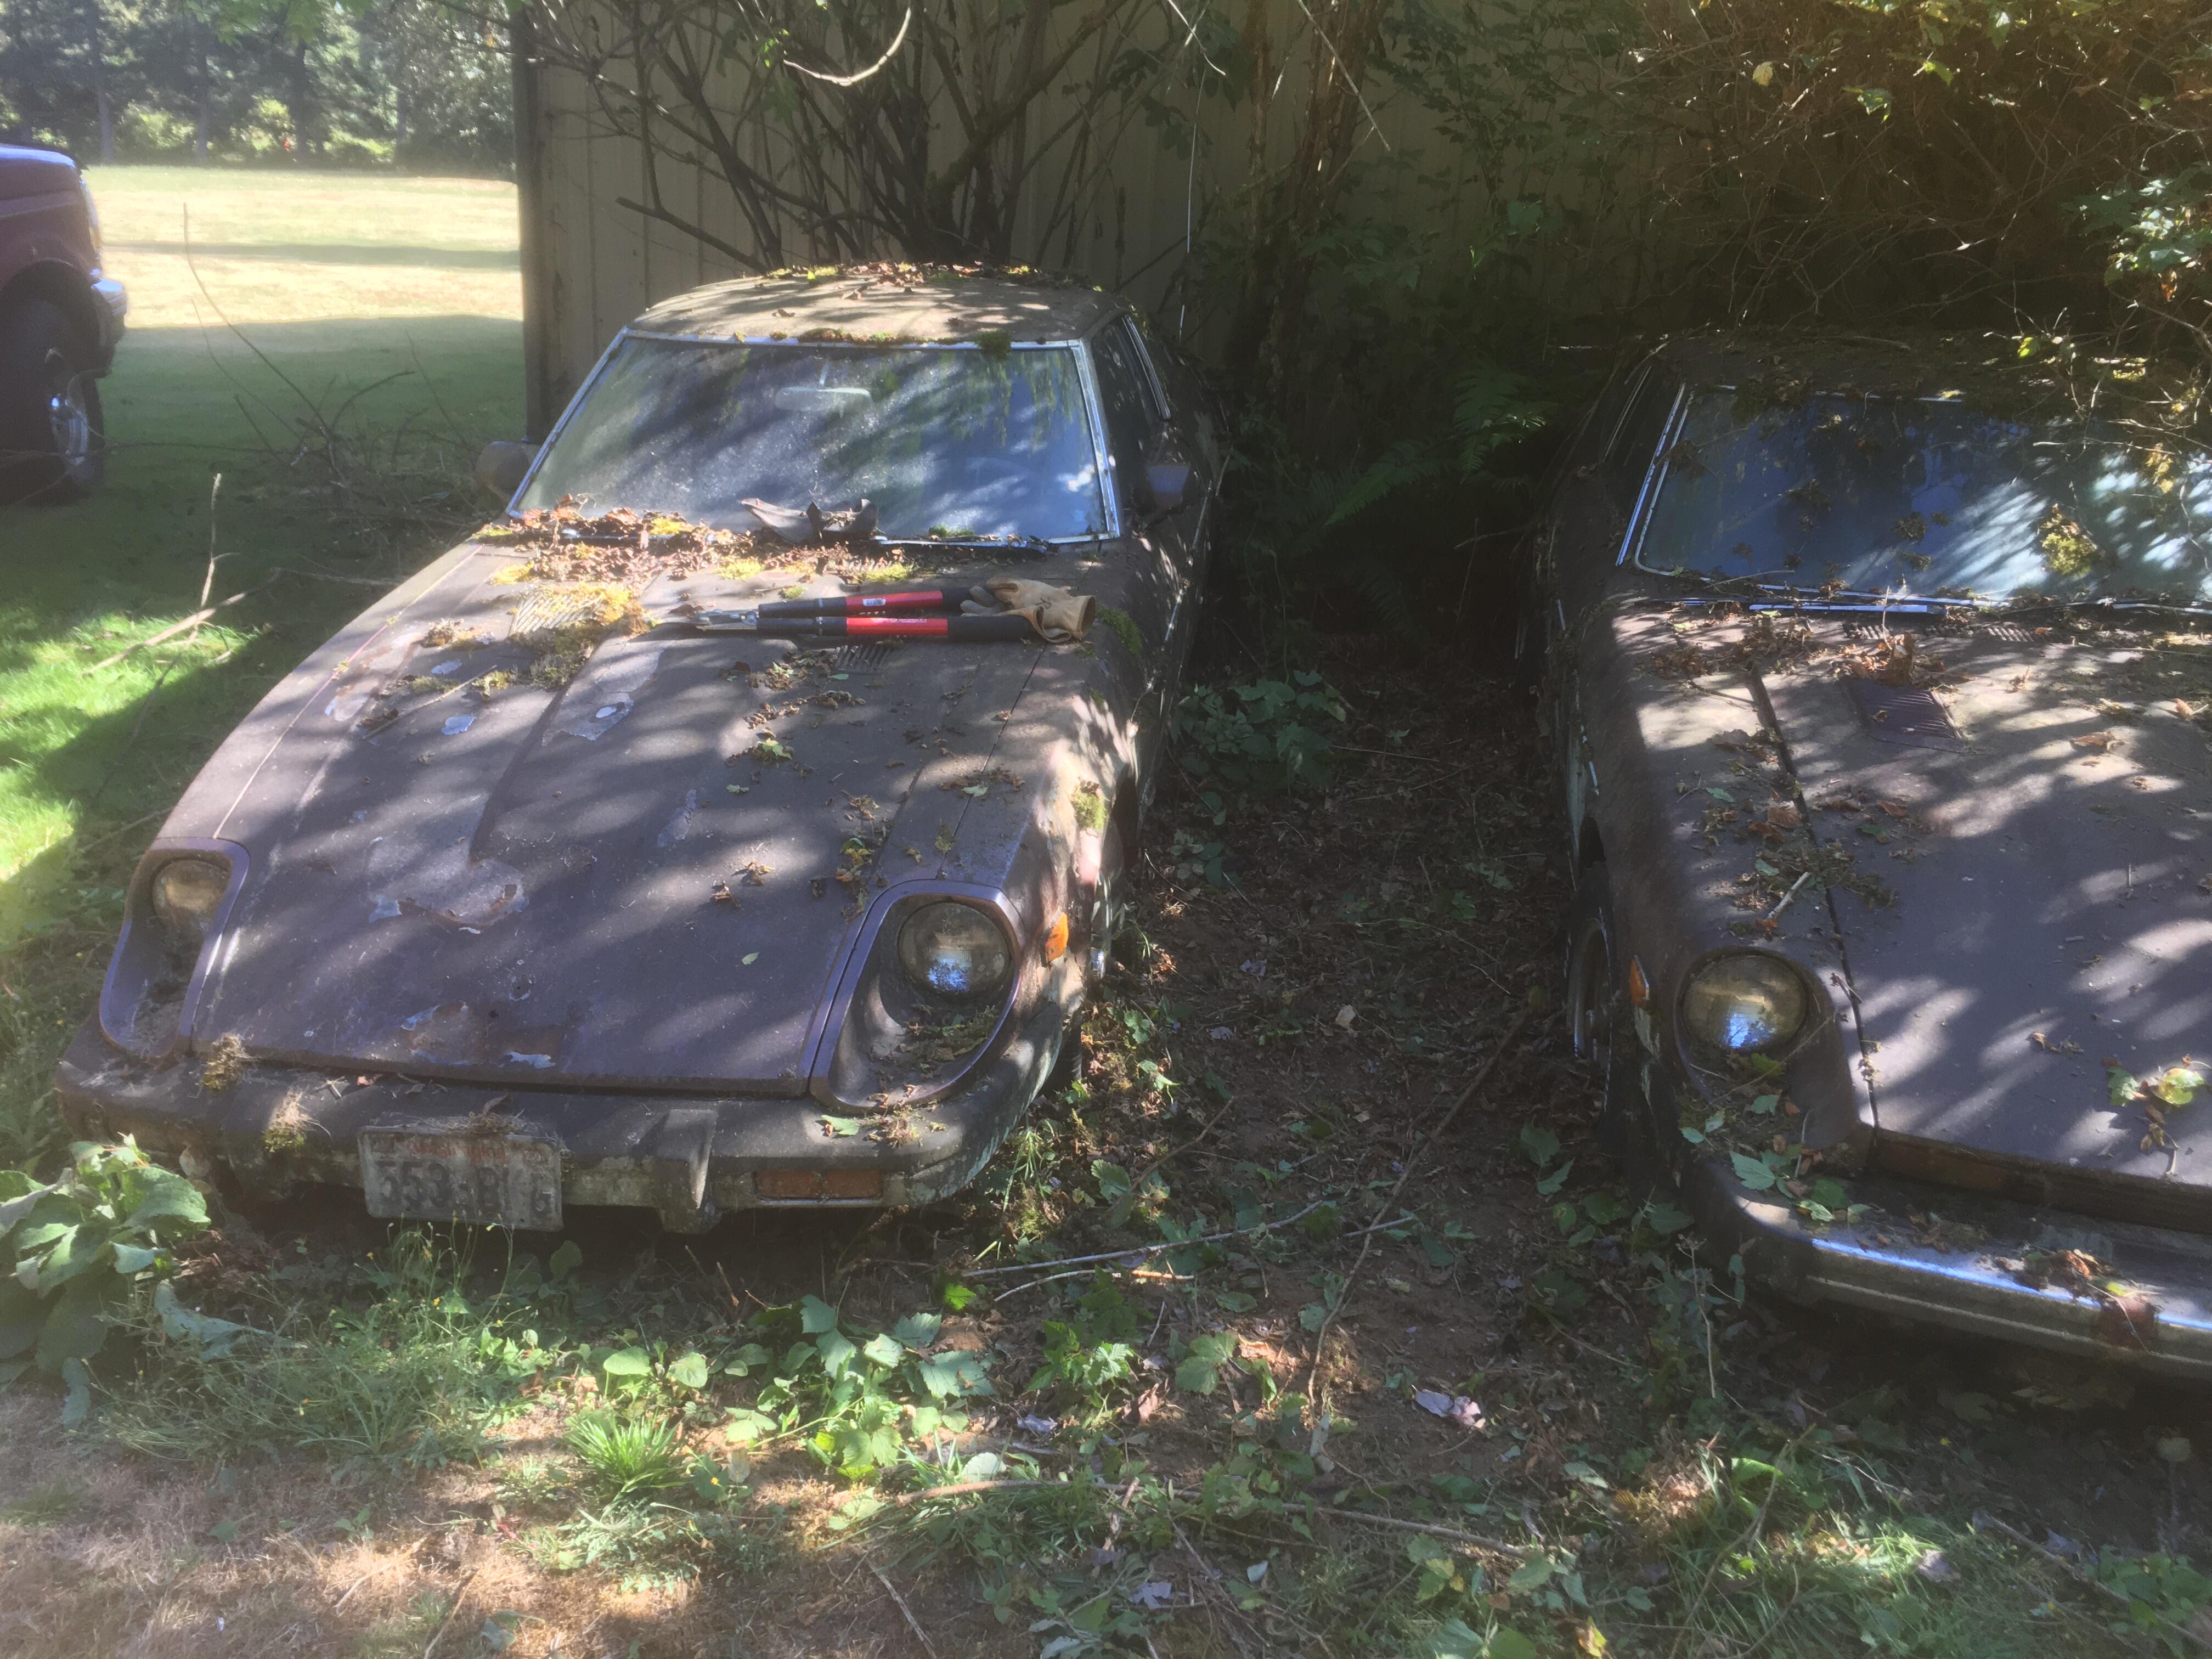
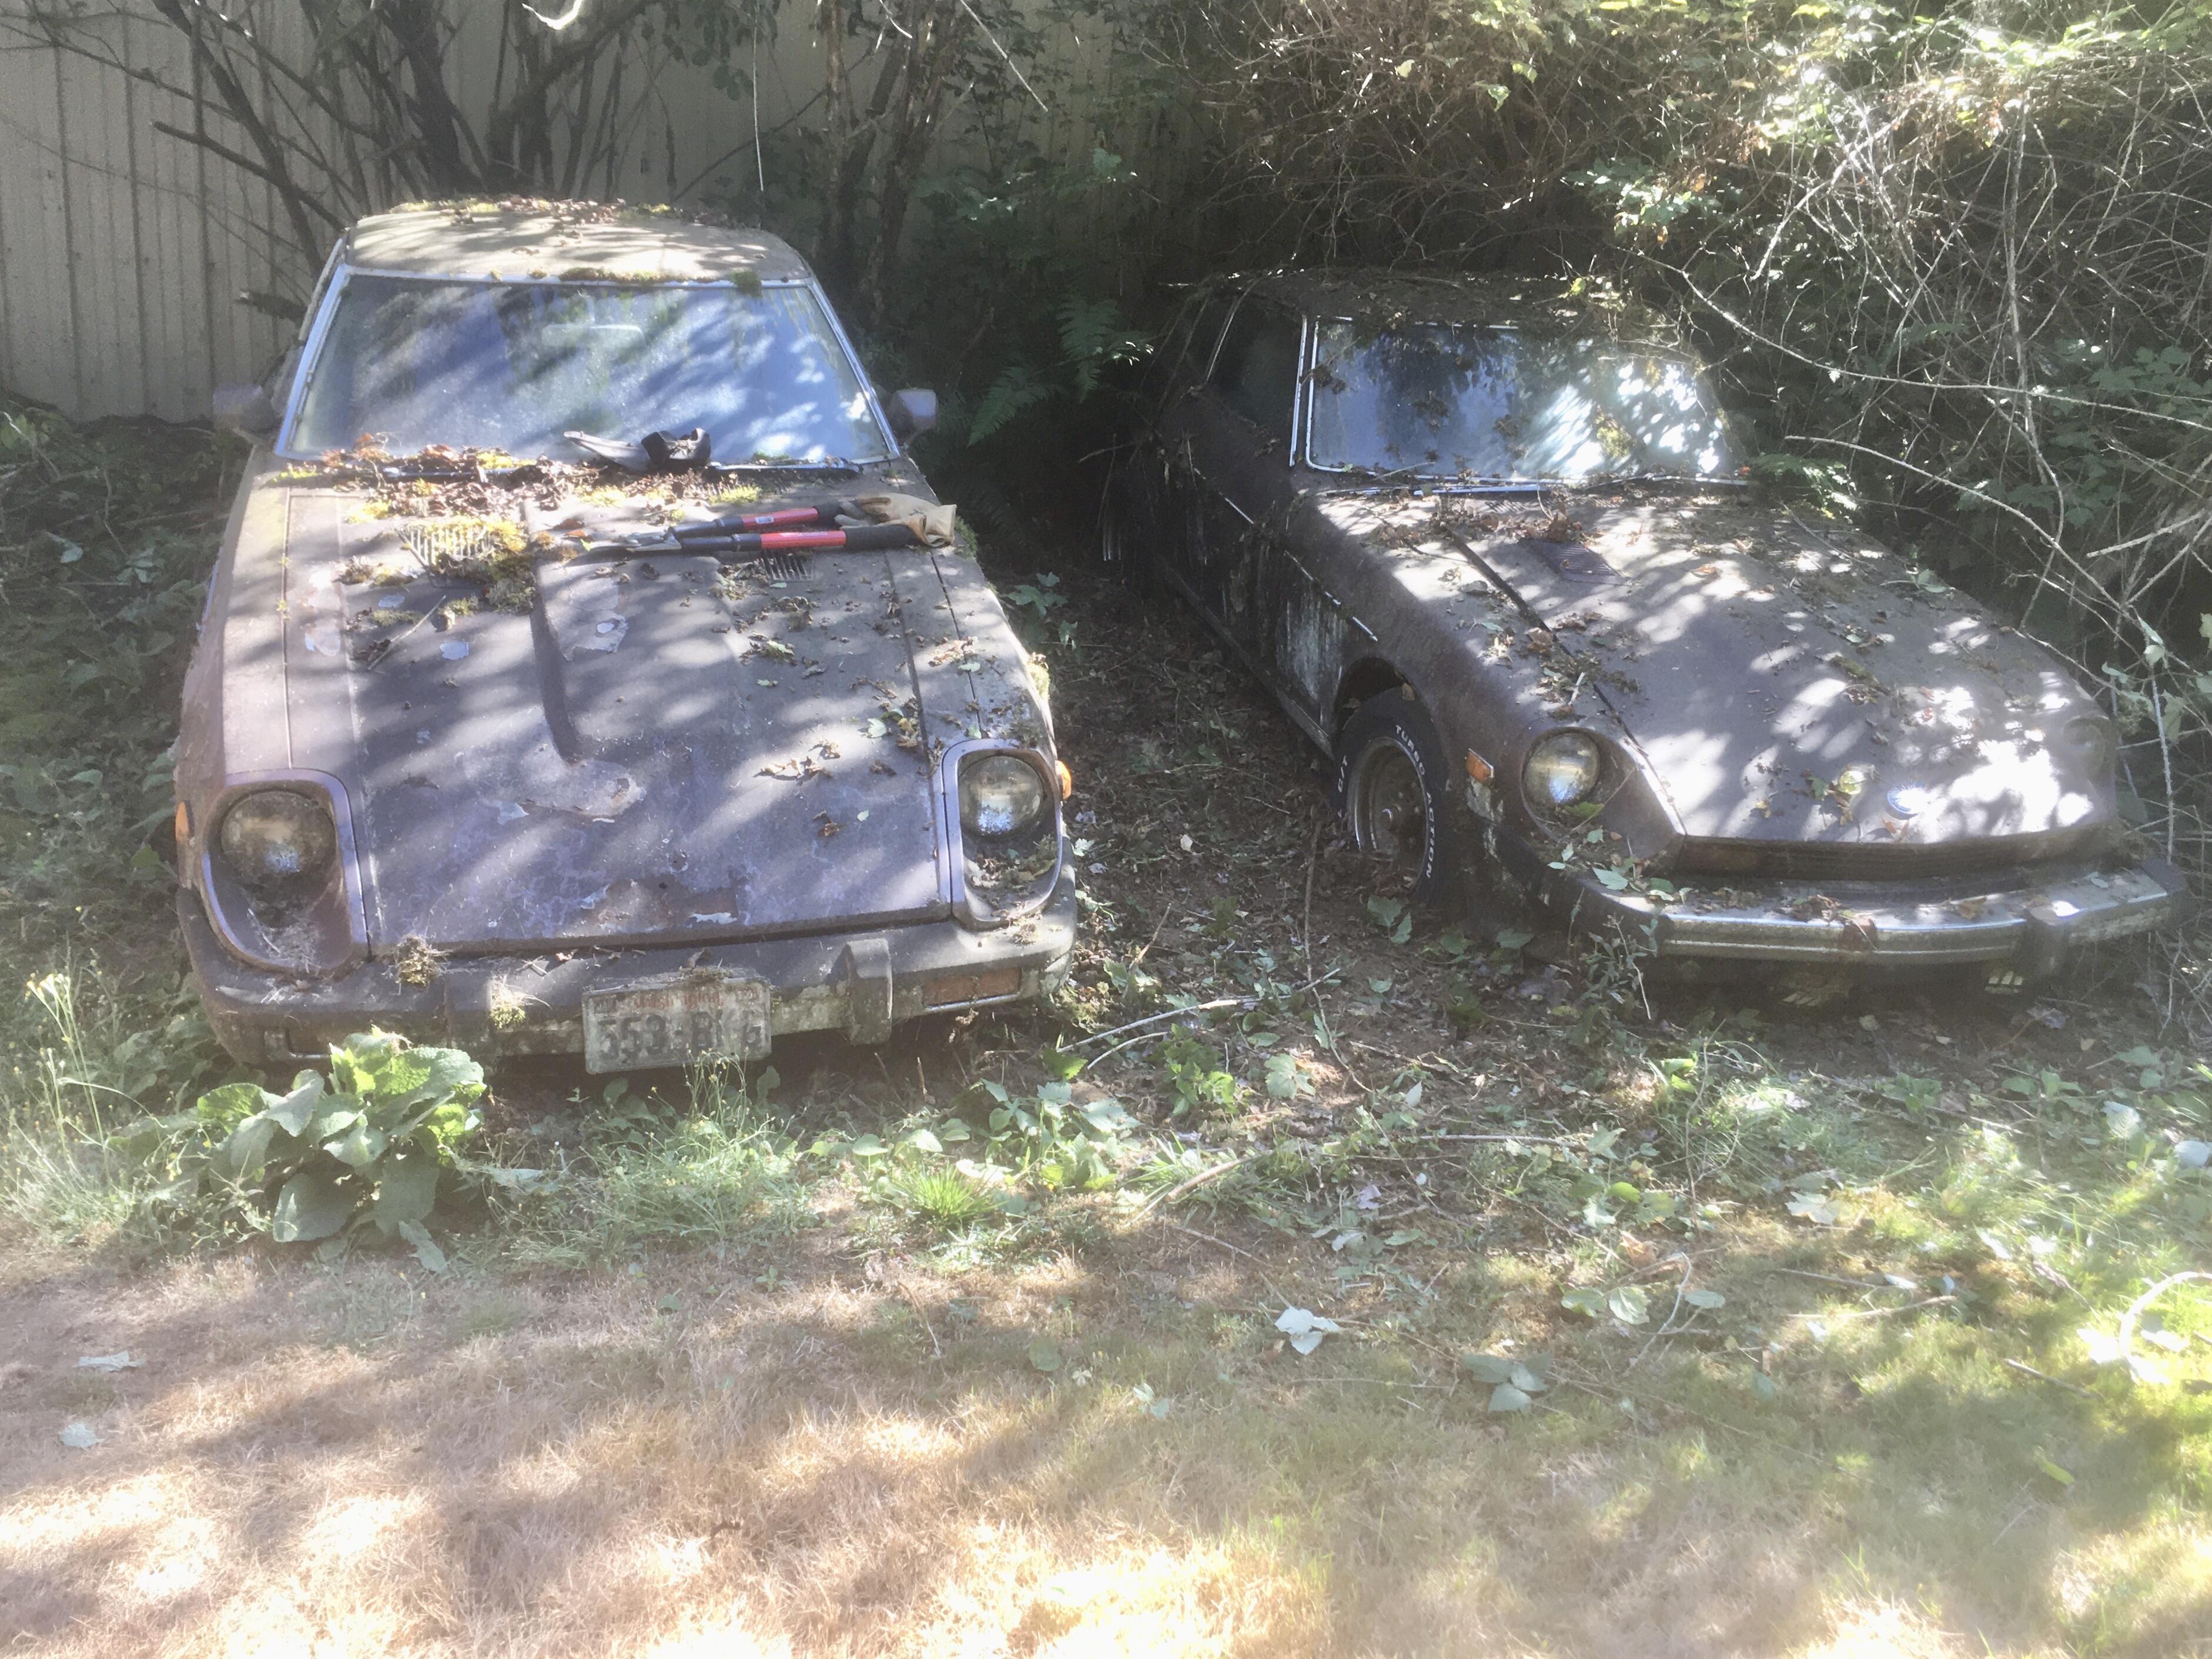
 1 pointStarted clearing brush yesterday. Got the ZX free, and half of one of the 280Zs exposed. Six more to go. I stopped to take a break, texted Mrs. Racer some progress pictures, then went into the shop to take a break. Had a race on the TV. A few minutes passed, and I heard what sounded like someone in distress. Turns out Mrs. Racer was coming out to see the progress, slipped and fell on the back porch steps, and broker her lower leg/ankle. I had to call the aid car, they hauled her to hospital, and we were up all night. Now I am missing work to get her into see an orthopedic surgeon. Good times, eh?

 0 points


Important Information
By using this site, you agree to our Privacy Policy and Guidelines. We have placed cookies on your device to help make this website better. You can adjust your cookie settings, otherwise we'll assume you're okay to continue.