Leaderboard
-

Zed Head
Free Member3Points19,238Posts -
emccallum
 Subscriber
 2Points428Posts
 -

siteunseen
Free Member1Points15,115Posts -

Racer X
Free Member1Points1,877Posts


Popular Content
Showing content with the highest reputation on 06/24/2022 in all areas
-
That would be because the coolant plate underneath the AAR has heated up. That means that the valve is not binding. All signs point to no electrical power through the AAR heating coil. Unlikely that a vacuum leak would disappear when the engine warms up. Just trying to be helpful.2 points
-
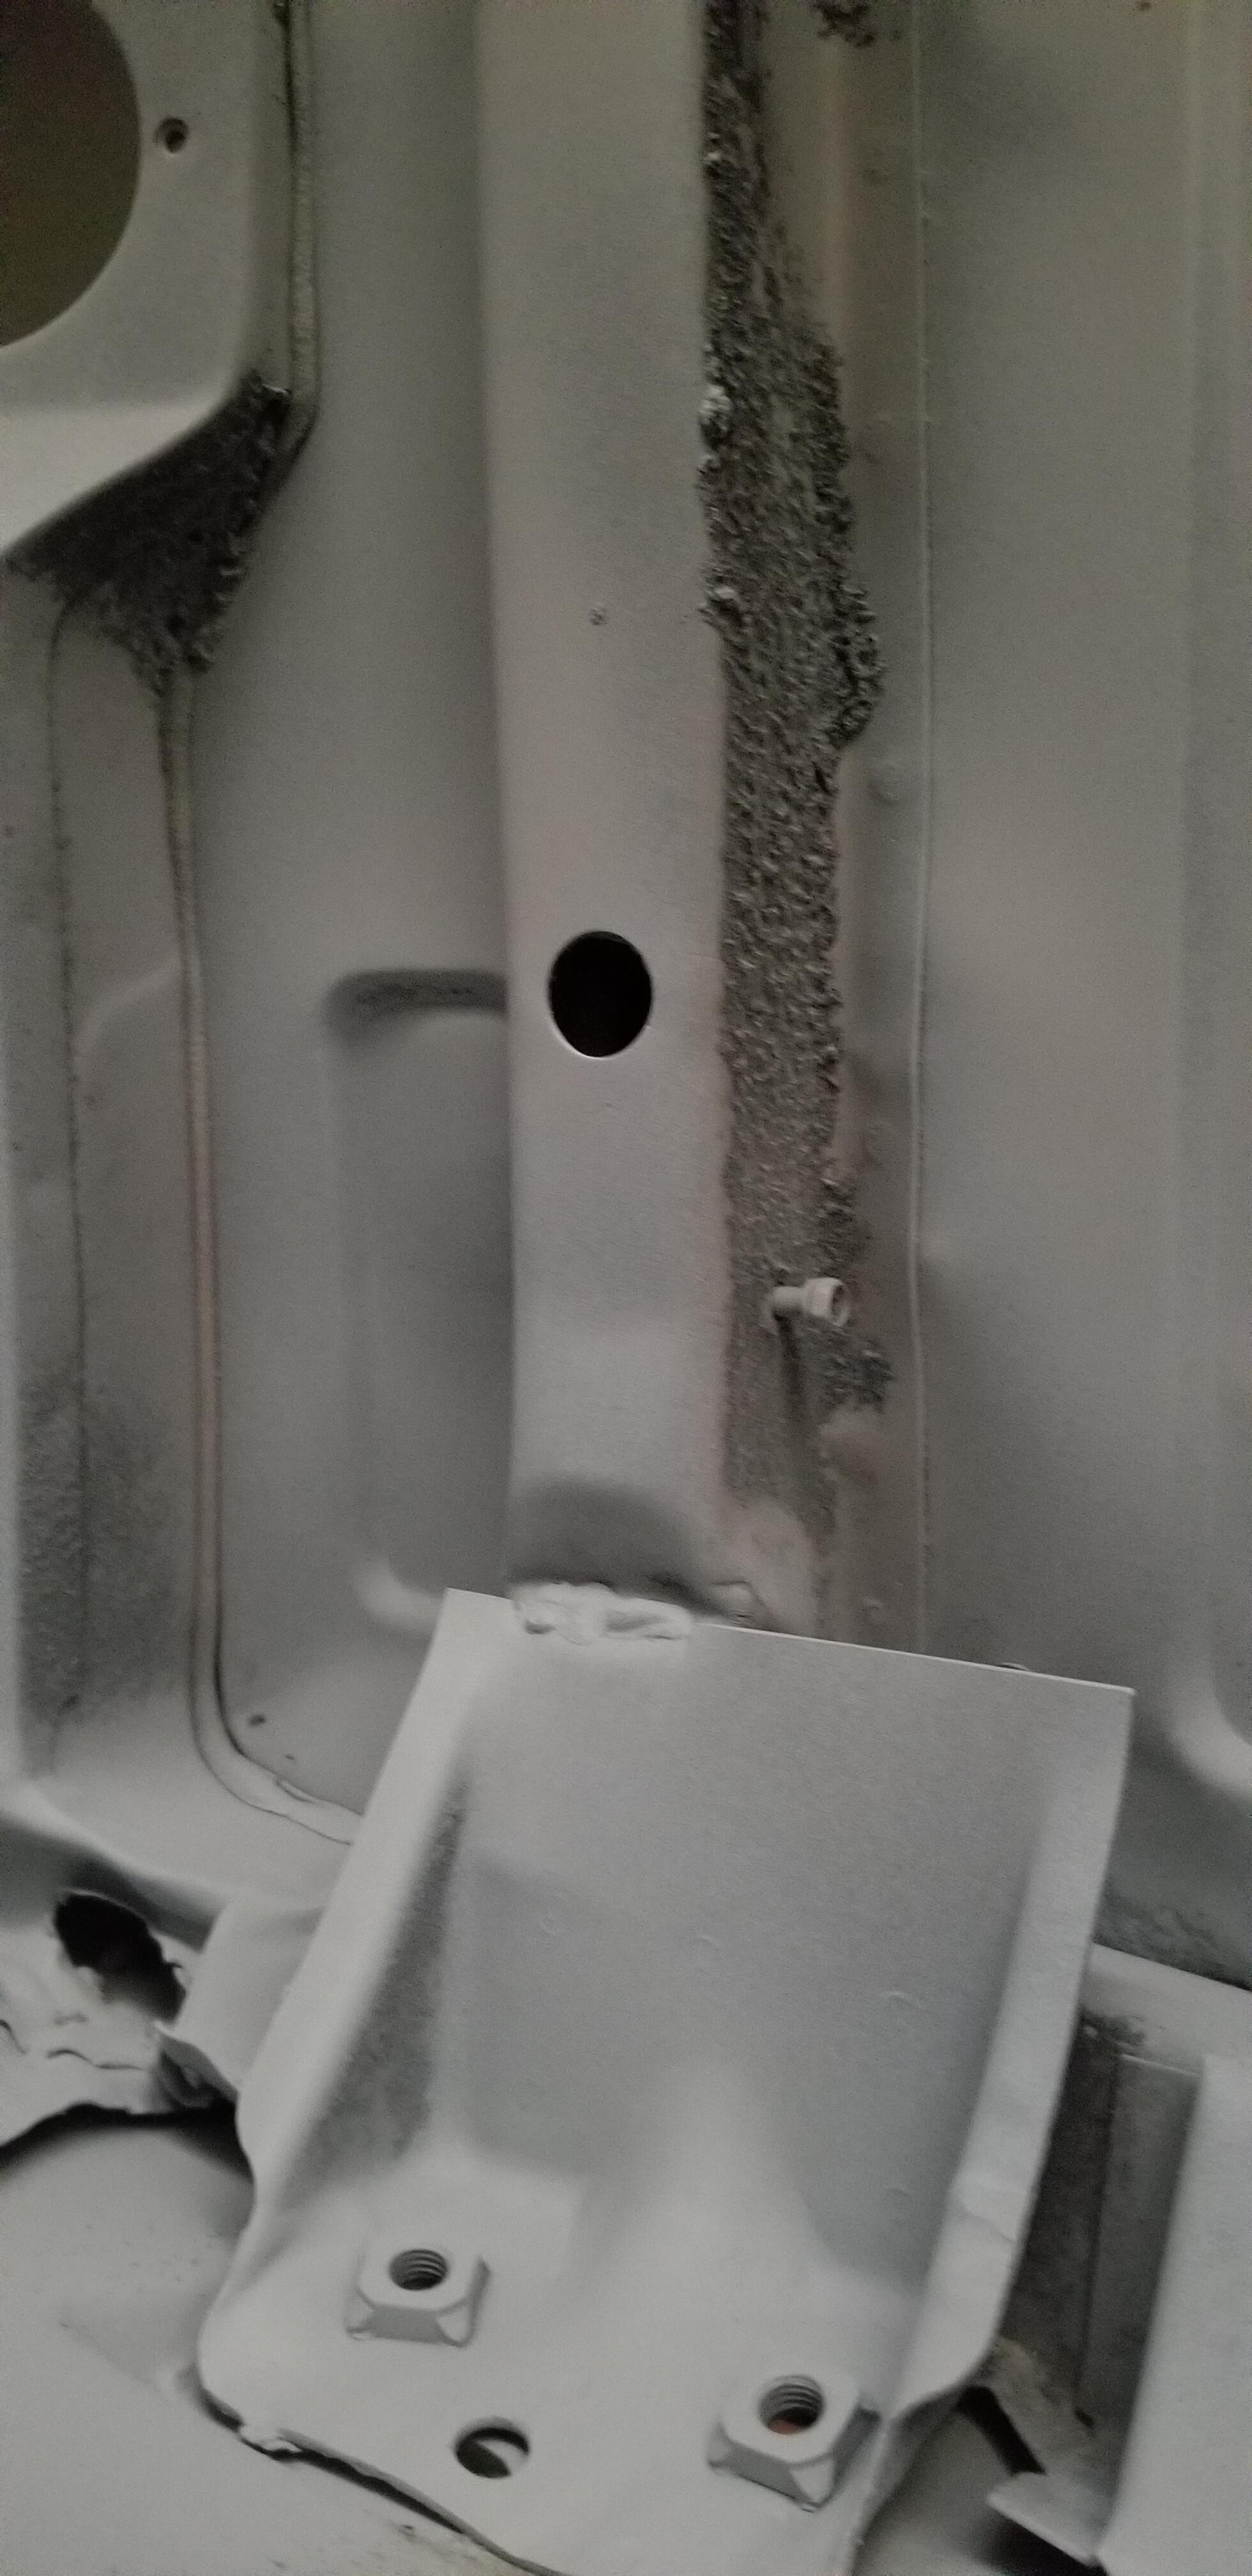
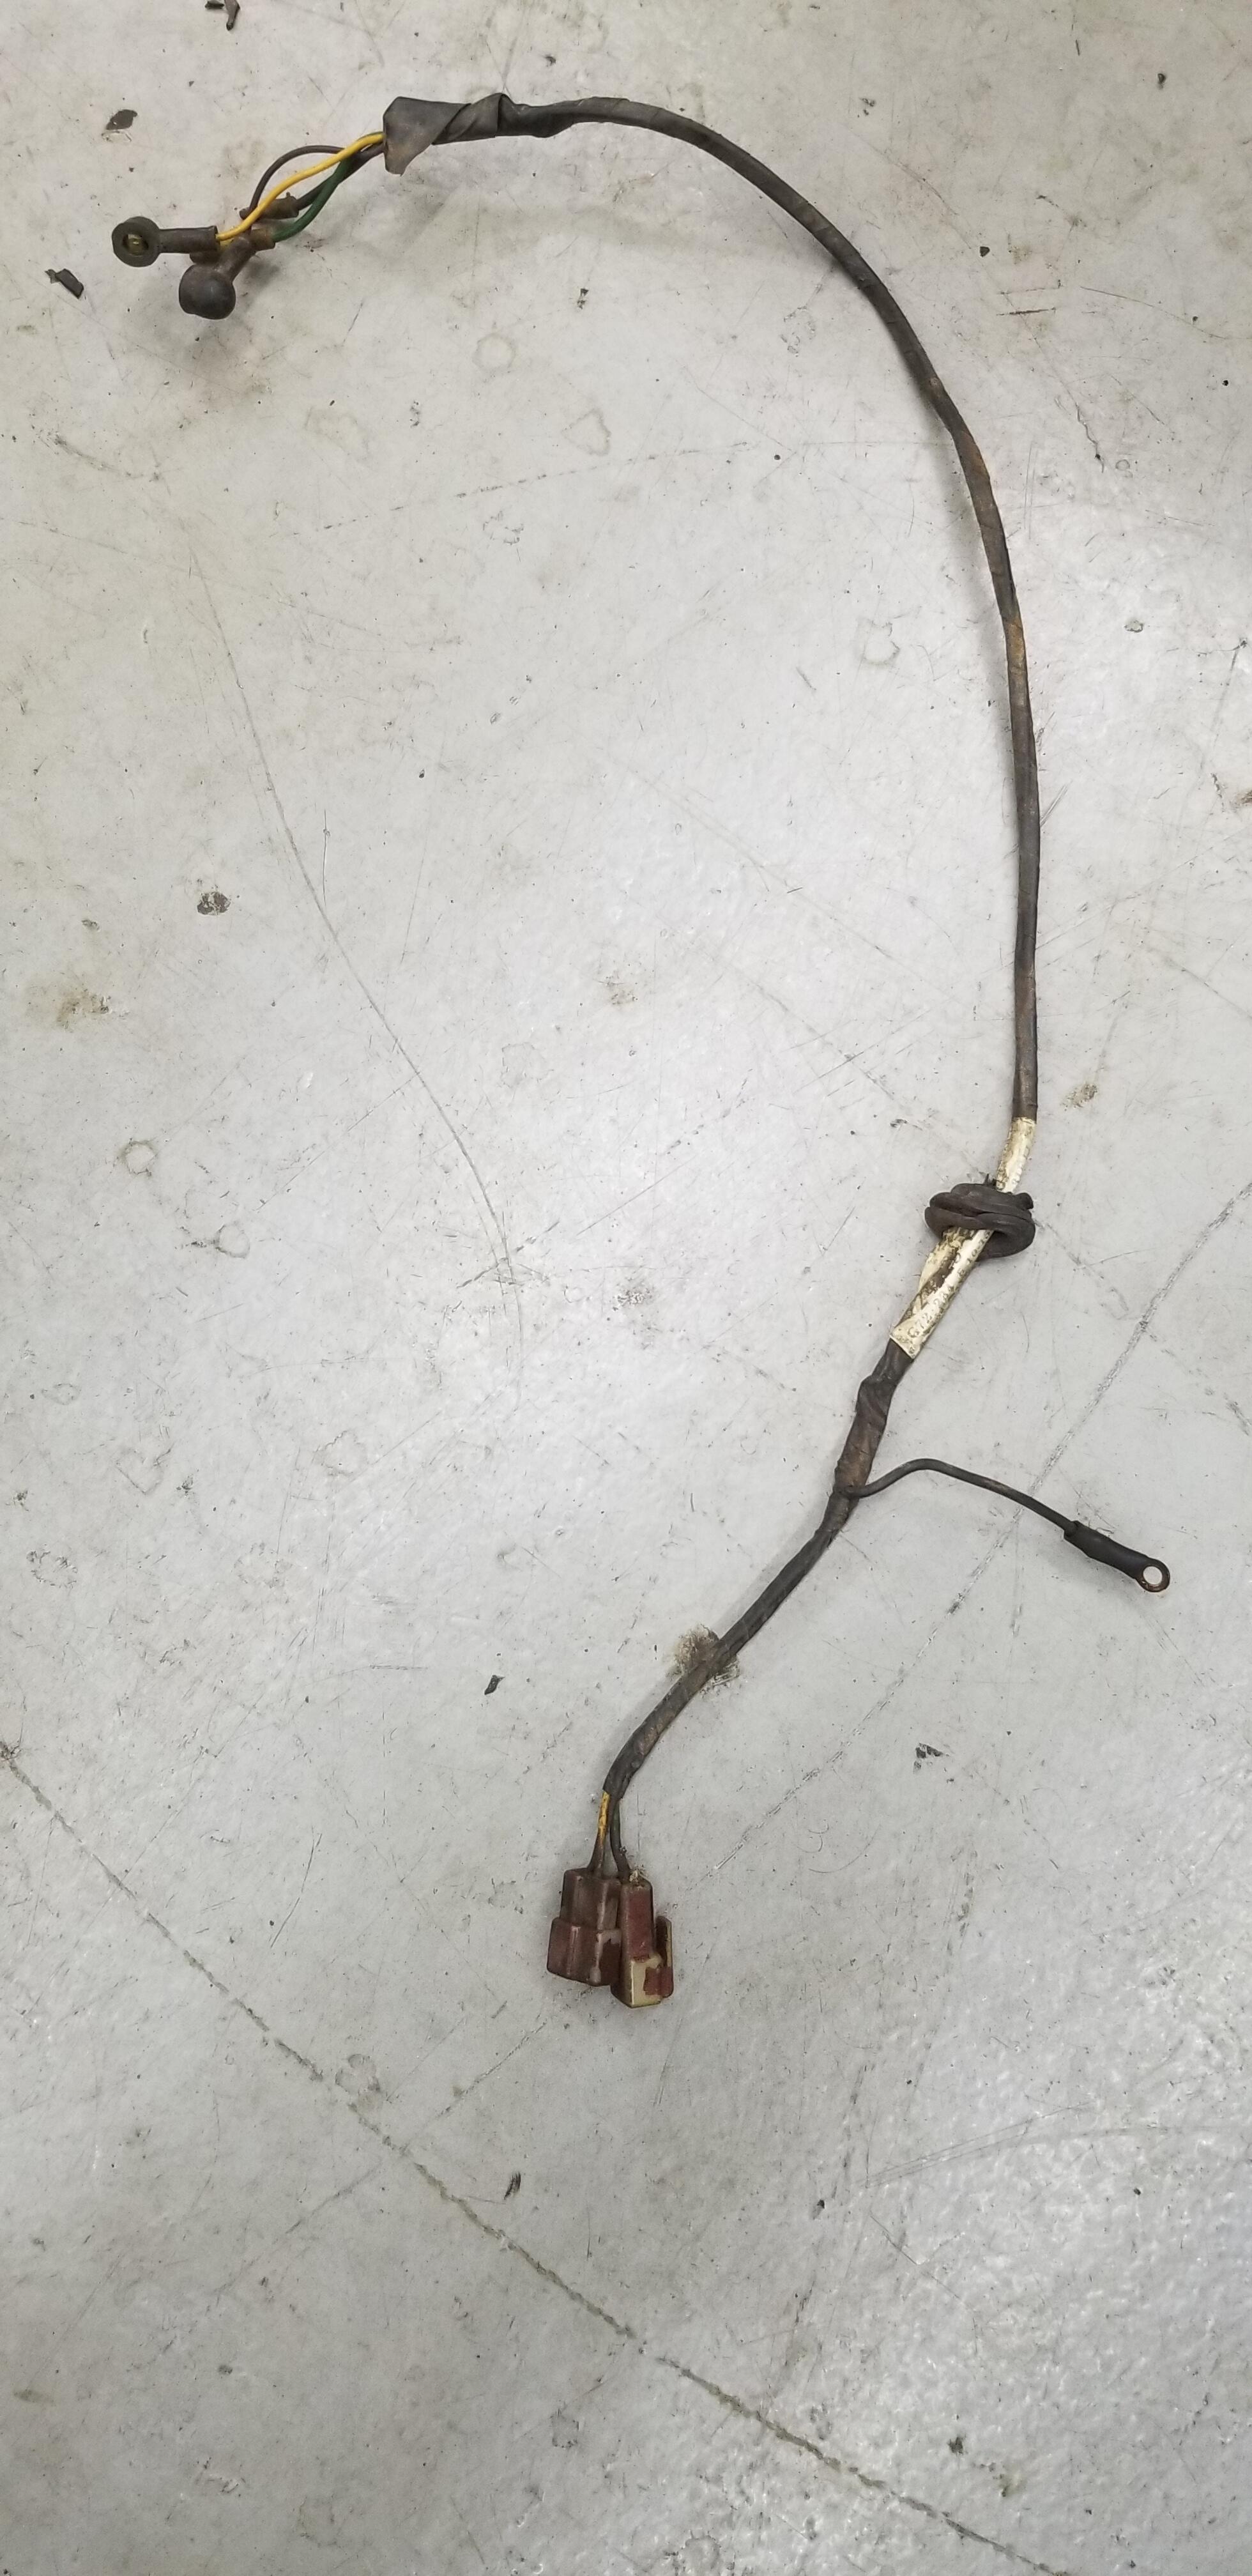
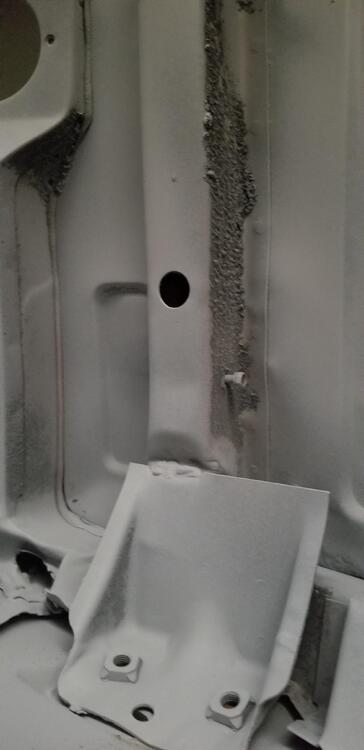
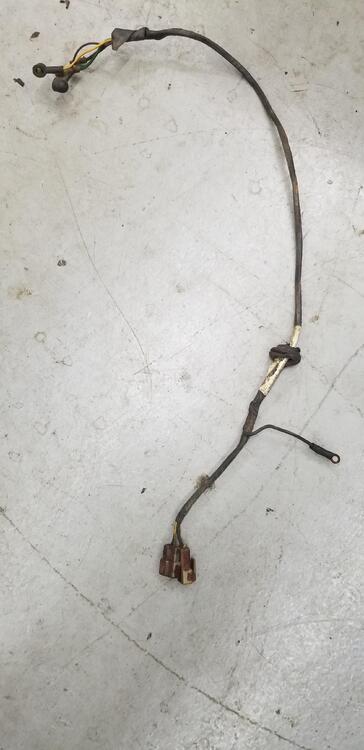
I am not 100% positive but very, very sure the first picture is the bolt that holds the ground in the right rear corner of the car. The second picture is the wire harness that goes from the right rear taillight area to the fuel sender unit. It has the ground wire.
 2 points
 -
Aux Air Regularor.....Aux Air Valve same thing. It sitson a plate that is bolted to the intake manifold and antifreeze flows thru to help it heat up and close sooner. Look for the small hoses below the AAR.1 point
-
Some sources call it the Auxiliary Air Regulator. AAR. If you look closely at where it attaches you should see a plate underneath it with heating cooling lines attached.1 point
-
1 point
-
Been on an overseas trip for the better part of the last month (France!). Just now getting back into this... Supposedly there's a ground on the chassis rail near where the filler neck comes into tank. I can't see any evidence that one ever existed (no screw hole, stud, nothing) and no ring terminal on the harness either. No evidence of a ground near the antenna mount, either. HOWEVER: Some progress, maybe? I unplugged all 4 side marker lights, and........the dash lights, front (under bumper) markers and taillights came on when the combo switch was turned to the middle position! And fuse stayed intact! Brake lights and turn signals are still inop, but it was FANTASTIC to see that pale green glow from the dash lights. Gonna try to plug in the side markers one at a time and see if I can isolate (that part of) the problem.1 point
-
I've always had good results on aluminum and most other metal with lacquer thinner. 6 Z pistons fit perfect in the bottom of a five gallon bucket. Cover with the thinner and put a lid on, it evaporates pretty quick and stinks too, after a few days I blow them off with my air compressor. They look like new. A few years ago it was $9.99 a gallon at Lowe's, now it's $25.1 point
-
I am not at all current on 240Z values in the Netherlands nor most of Europe - however I do know that Chris Visscher at S30 World on Facebook - has spent a small fortune restoring several 240Z’s. I’m sure he expects to get at least $150K+ for the cars they complete. The war in Europe may put a serious damper on the economy, which in turn will lower all Classic Car values for some time… nonetheless the 240Z’s are relatively inexpensive as 50+ year old classic Sports Cars go.1 point
-
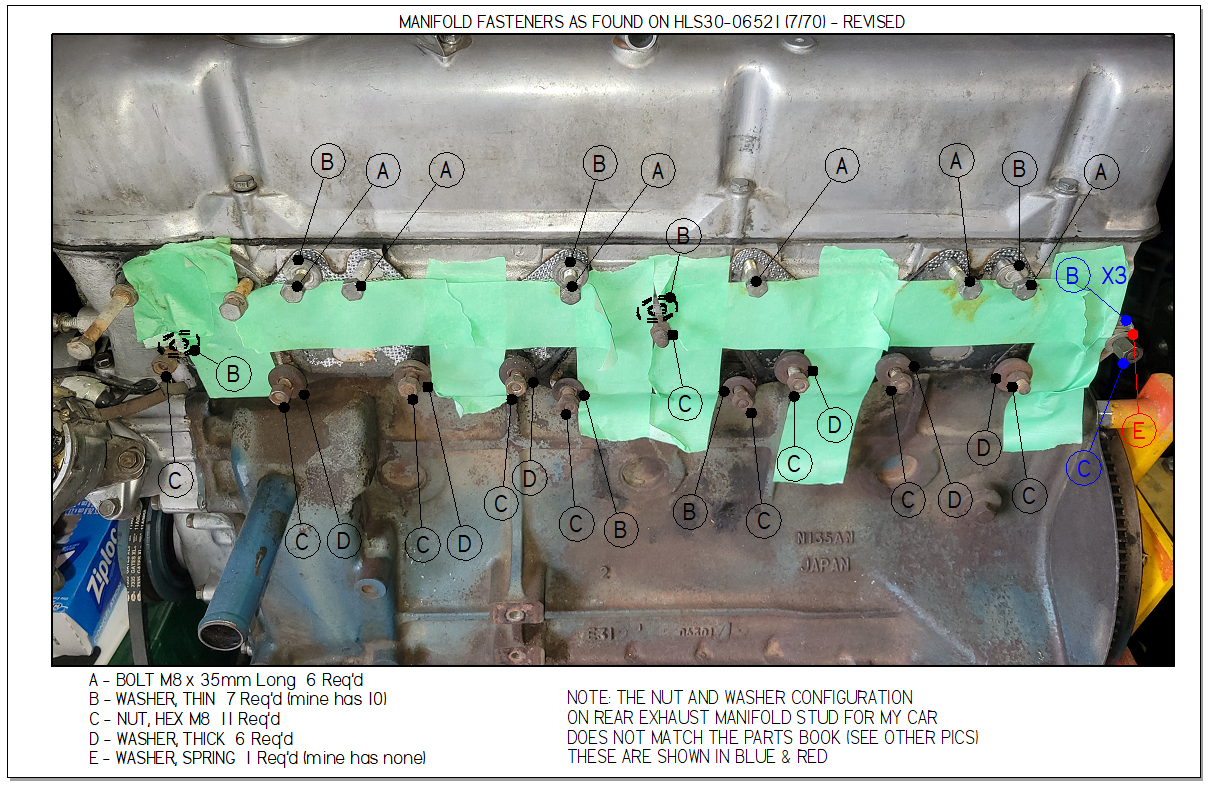
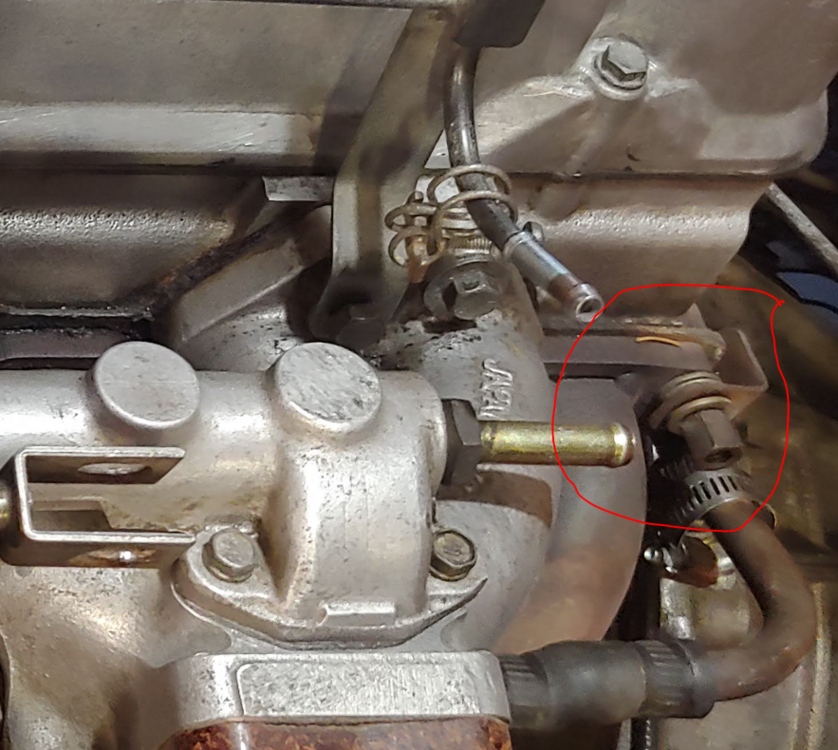
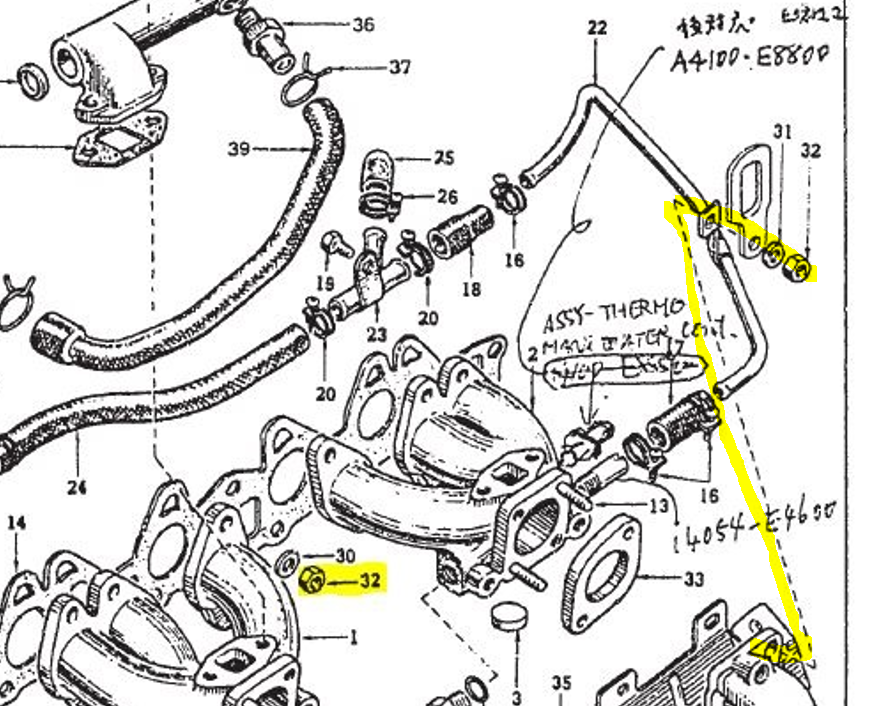
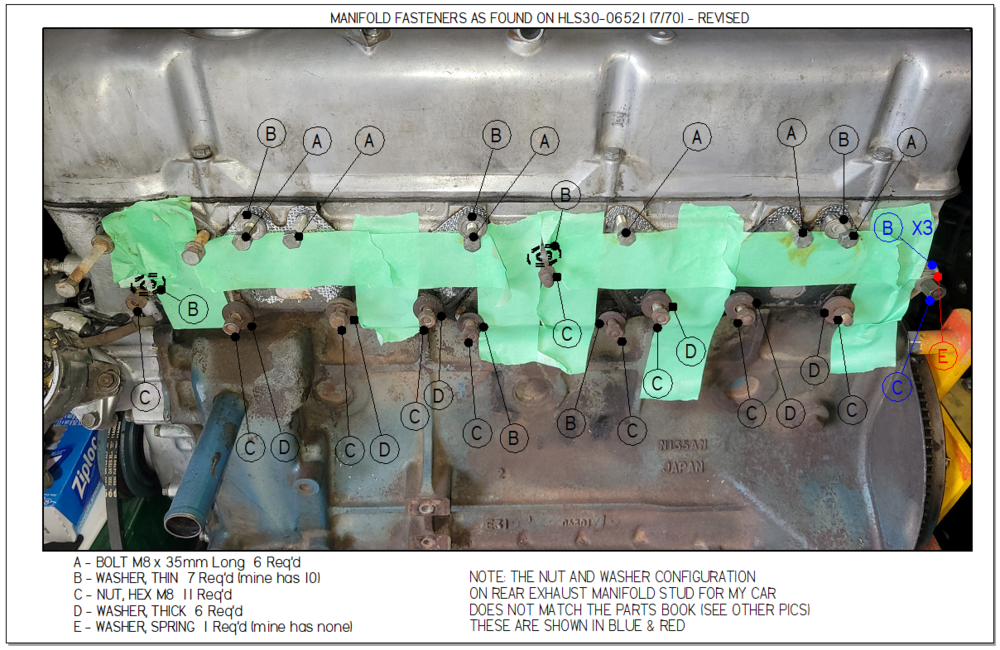
For reference, as I promised in post #33 here is a picture marked up with the bolt, washer and nut locations as they are on my long time own 7/70. EDIT - center top stud changed to "B" thin type as observed by @inline6 see post #48 below, thanks Here is picture of the nut and washers noted above in blue and red. In the parts book the exhaust manifold stud in this location supports the coolant pipe that goes around the back of the block and the rear engine lifting lug. and no flat washer is used, just a nut and lockwasher. The JDM parts book show it more clearly than the N.A. book.
 1 point
 -
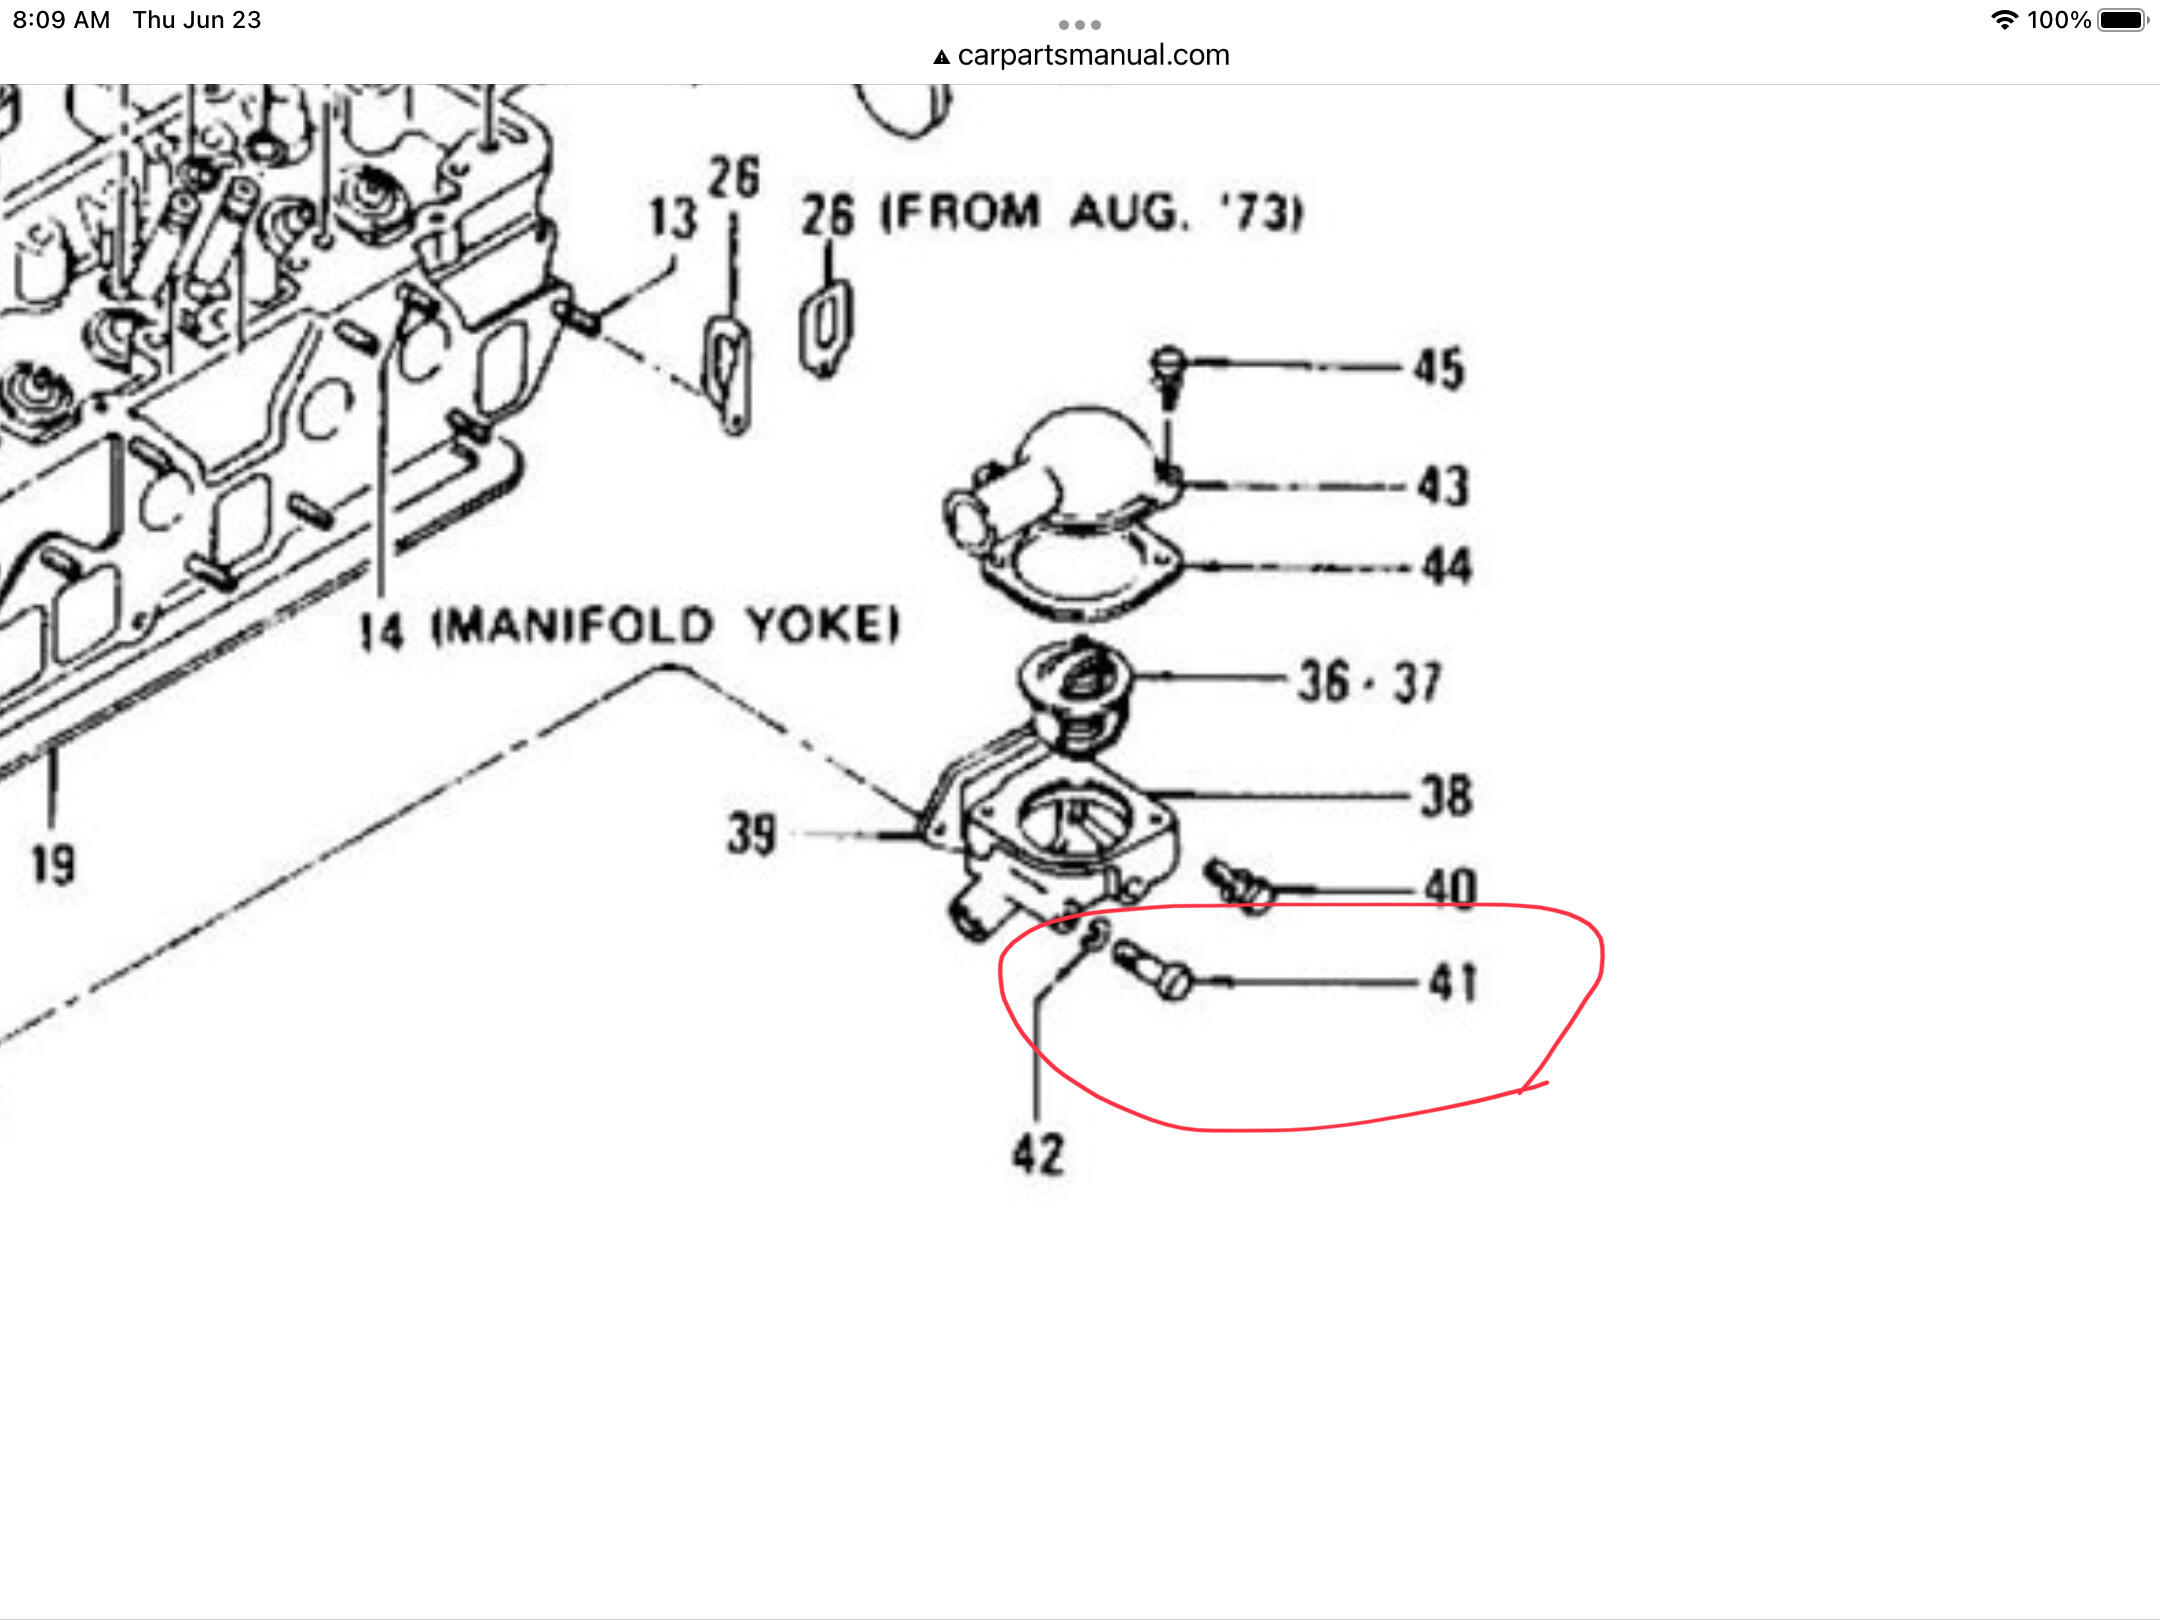
Remember to be extra careful when selecting the longer of the two thermostat housing to head bolts! It penetrates the head and can come in contact with the timing chain guide. More than one unfortunate soul has broken the guide in the process. (Cough cough) The right length is under 70 mm IIRC, something like 63mm? The fiche part number is not a 08xxx that gives you the bolt spec as least not in the fiche I have : 11063-21001 #41 in this fiche, #38 in the fiche shown above.
 1 point
 -
1 pointWhenever I have had engine block work done, I have given the machine shop the cylinder block, complete rotating assembly (crankshaft, connecting rods, damper pulley, flywheel and clutch cover). The machinist sourced and fitted the pistons. The machinist and I had a clear understanding of what I wanted, including the piston configuration. I was given everything after the work was completed, including rings and bearings, and prior to assembly I checked bearing clearances and ring end gaps.1 point