


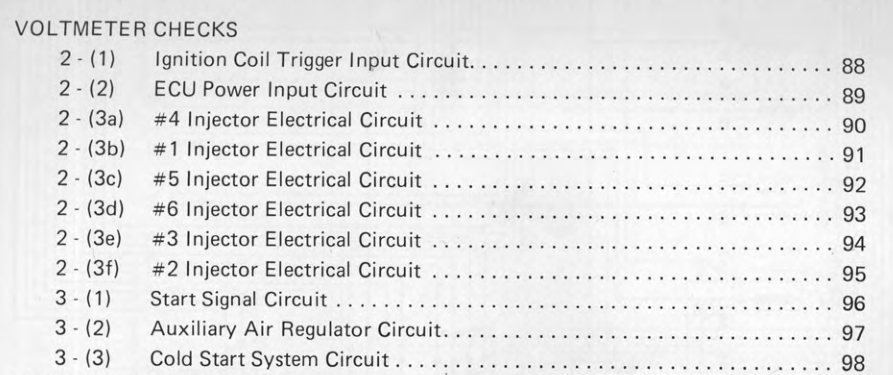
Leaderboard
-

Zed Head
Free Member8Points19,238Posts -

siteunseen
Free Member4Points15,115Posts -
Captain Obvious
Free Member2Points10,081Posts -
Patcon
 Subscriber
 1Points11,142Posts


Popular Content
Showing content with the highest reputation on 04/04/2022 in Posts
-
2 pointsYou guys are reminding me of something I see on some of these youtube repair videos. You can see proper voltage but it's best to put a load on the circuit to make sure the current is there. The guys that seem to know make up their own test lights with a headlight bulb. A cruddy connection might show proper voltage, especially with today's digital meters. But it disappears when a load is on.2 points
-
2 points
-
Sounds like you have the wide ratio FS5W71B which is the original version 5 speed for the 280Z. The test you did with the clutch disengaged (depressed) tells you your problem is inside the transmission. You can determine if your problem is in the cluster shaft or main shaft by driving through all the gears. If a bearing in the cluster shaft is damaged it will be noticable in all the gears except forth gear. The bearings that tend to go first are the bearings in the adapter plate in the centre of the transmission. If could be the adapter plate bearing for the cluster shaft or the main shaft. Check for metal in the oil.1 point
-
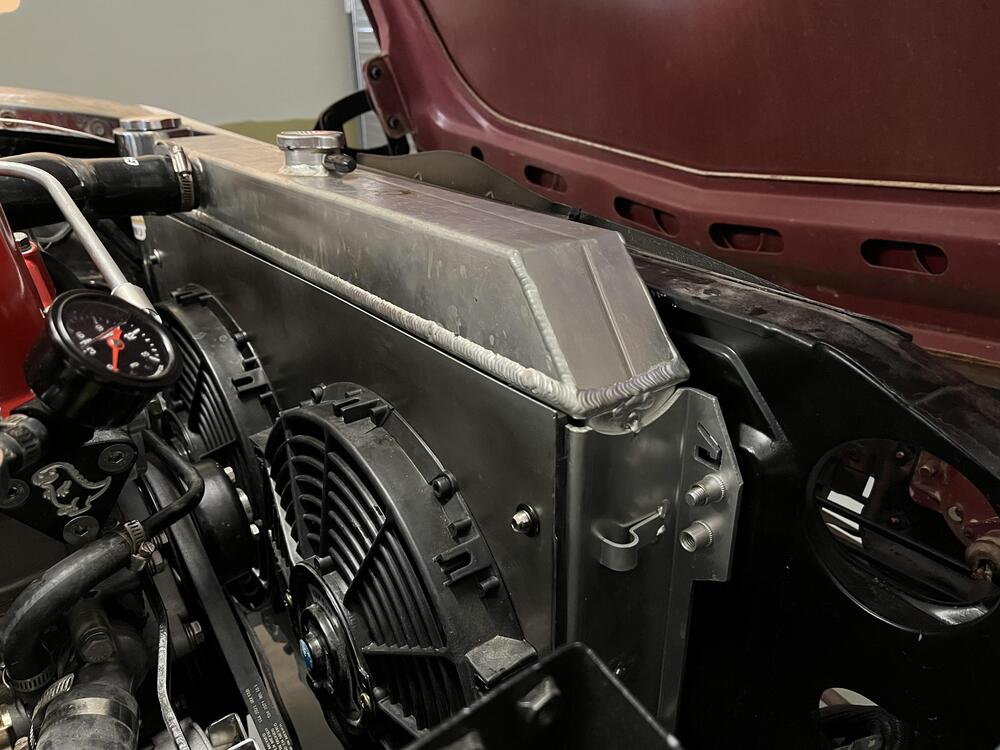
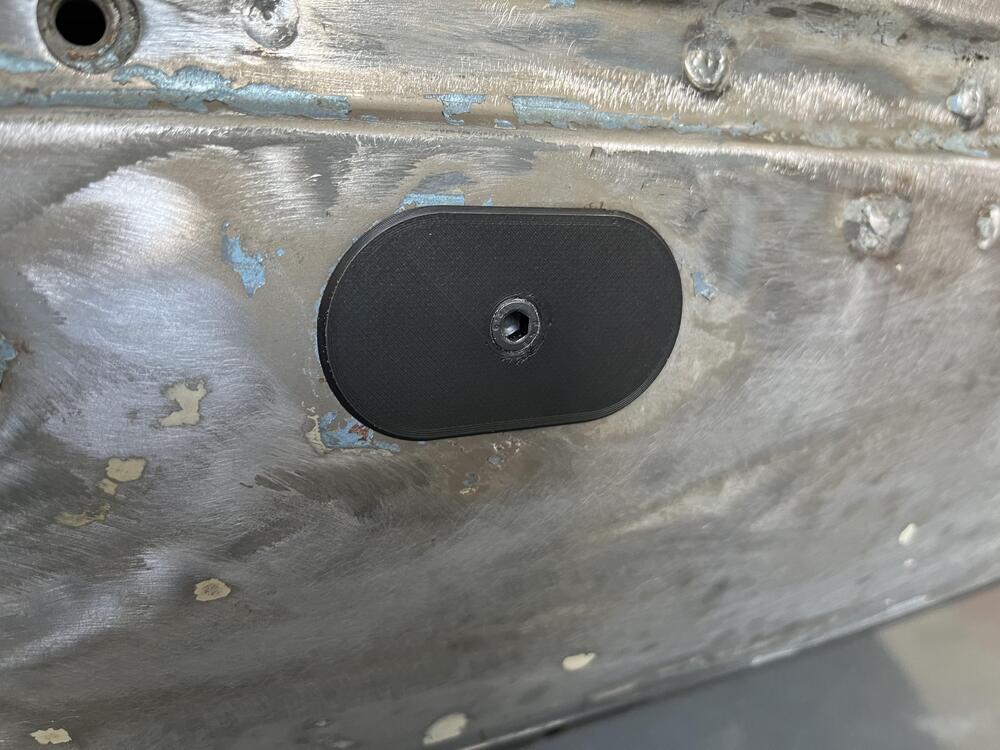
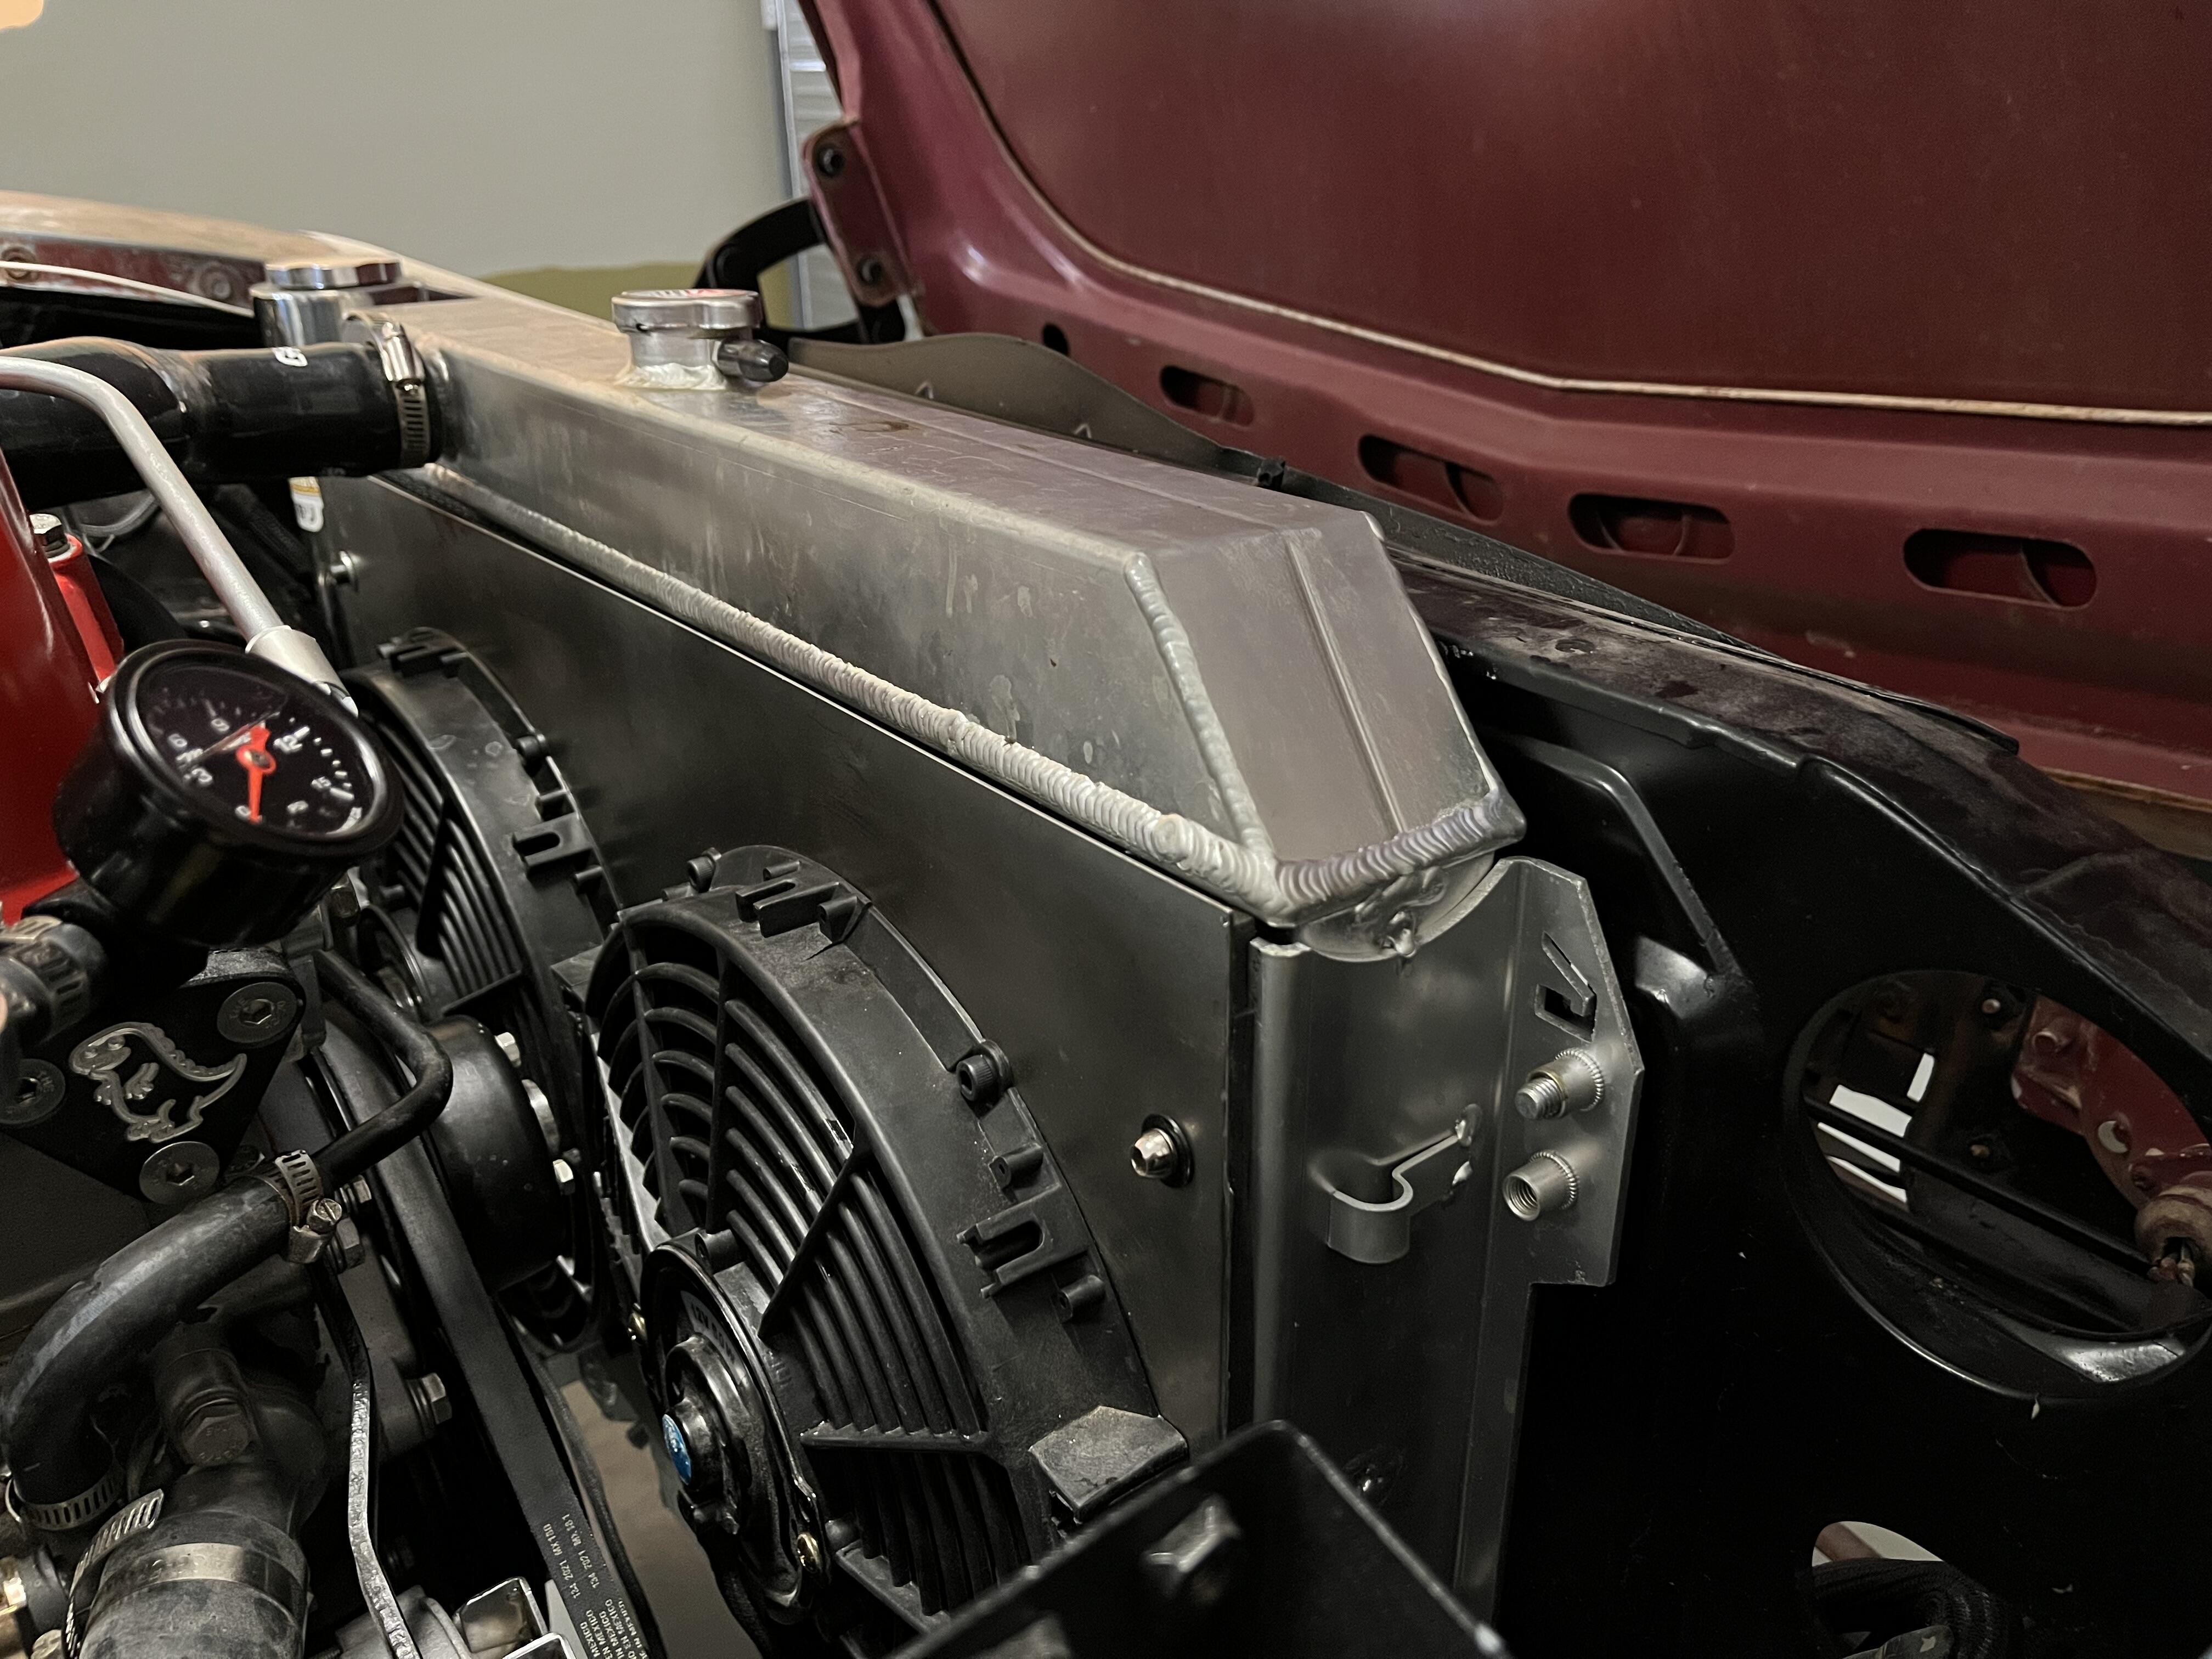
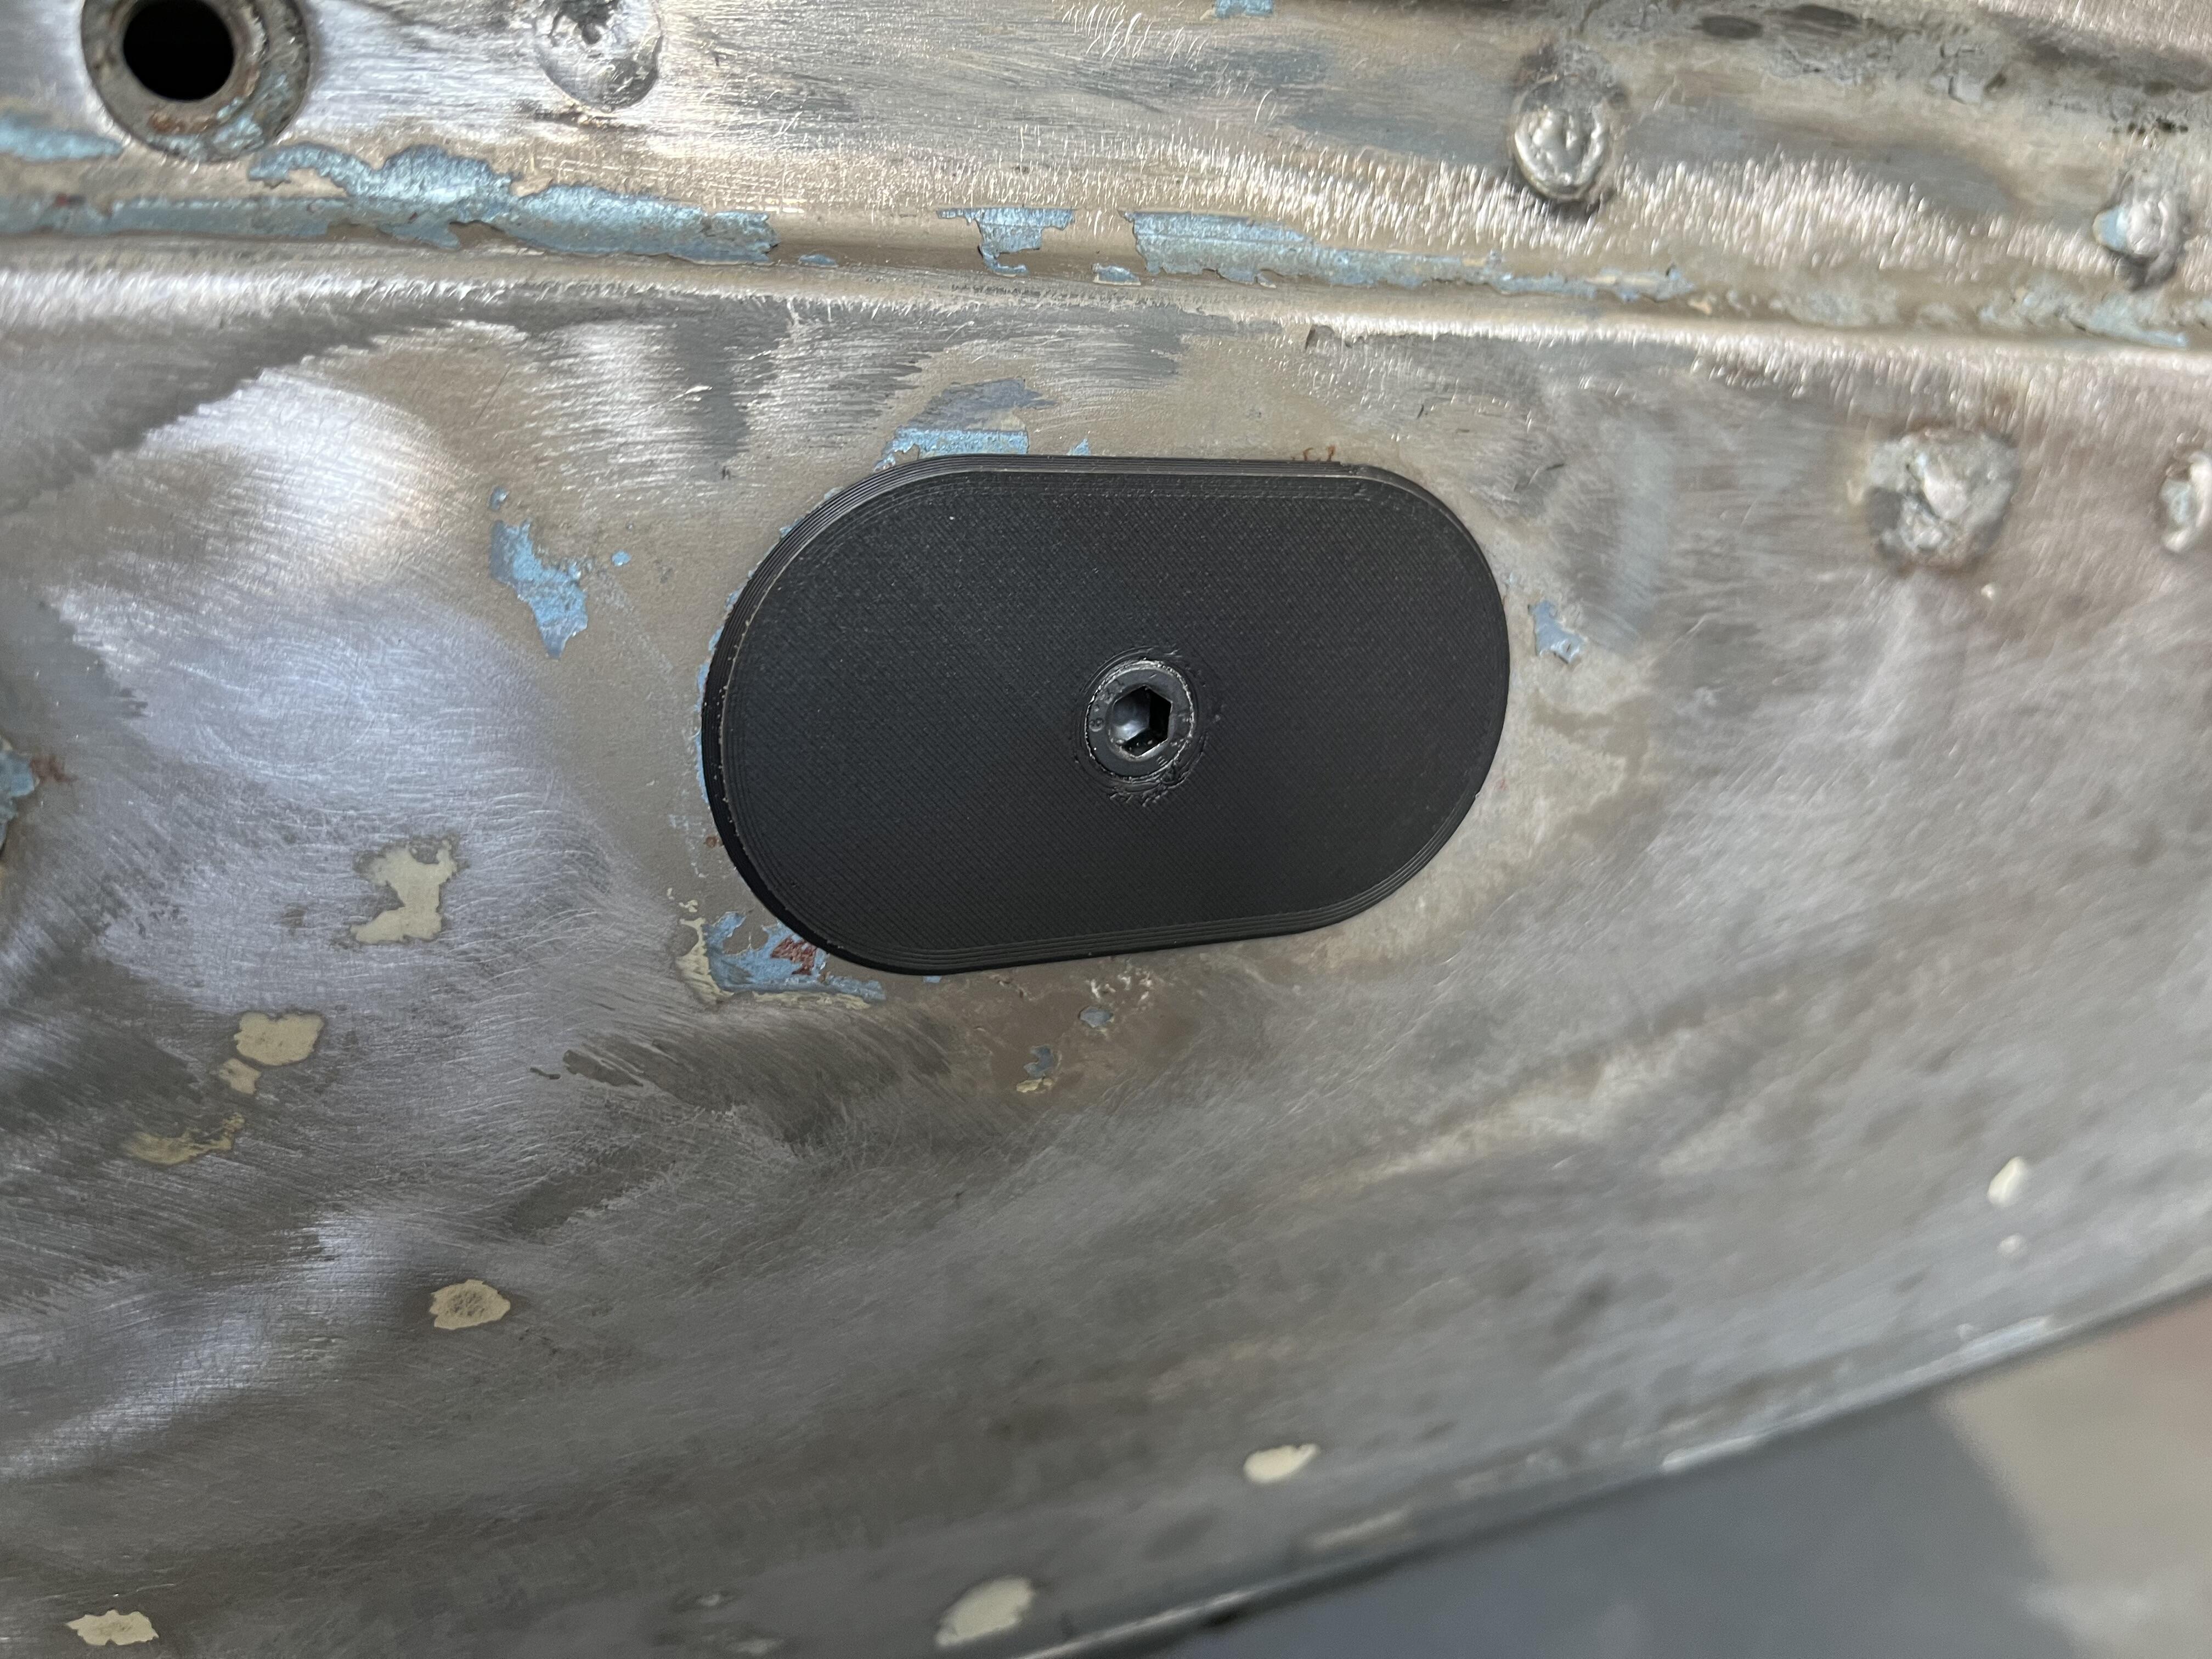
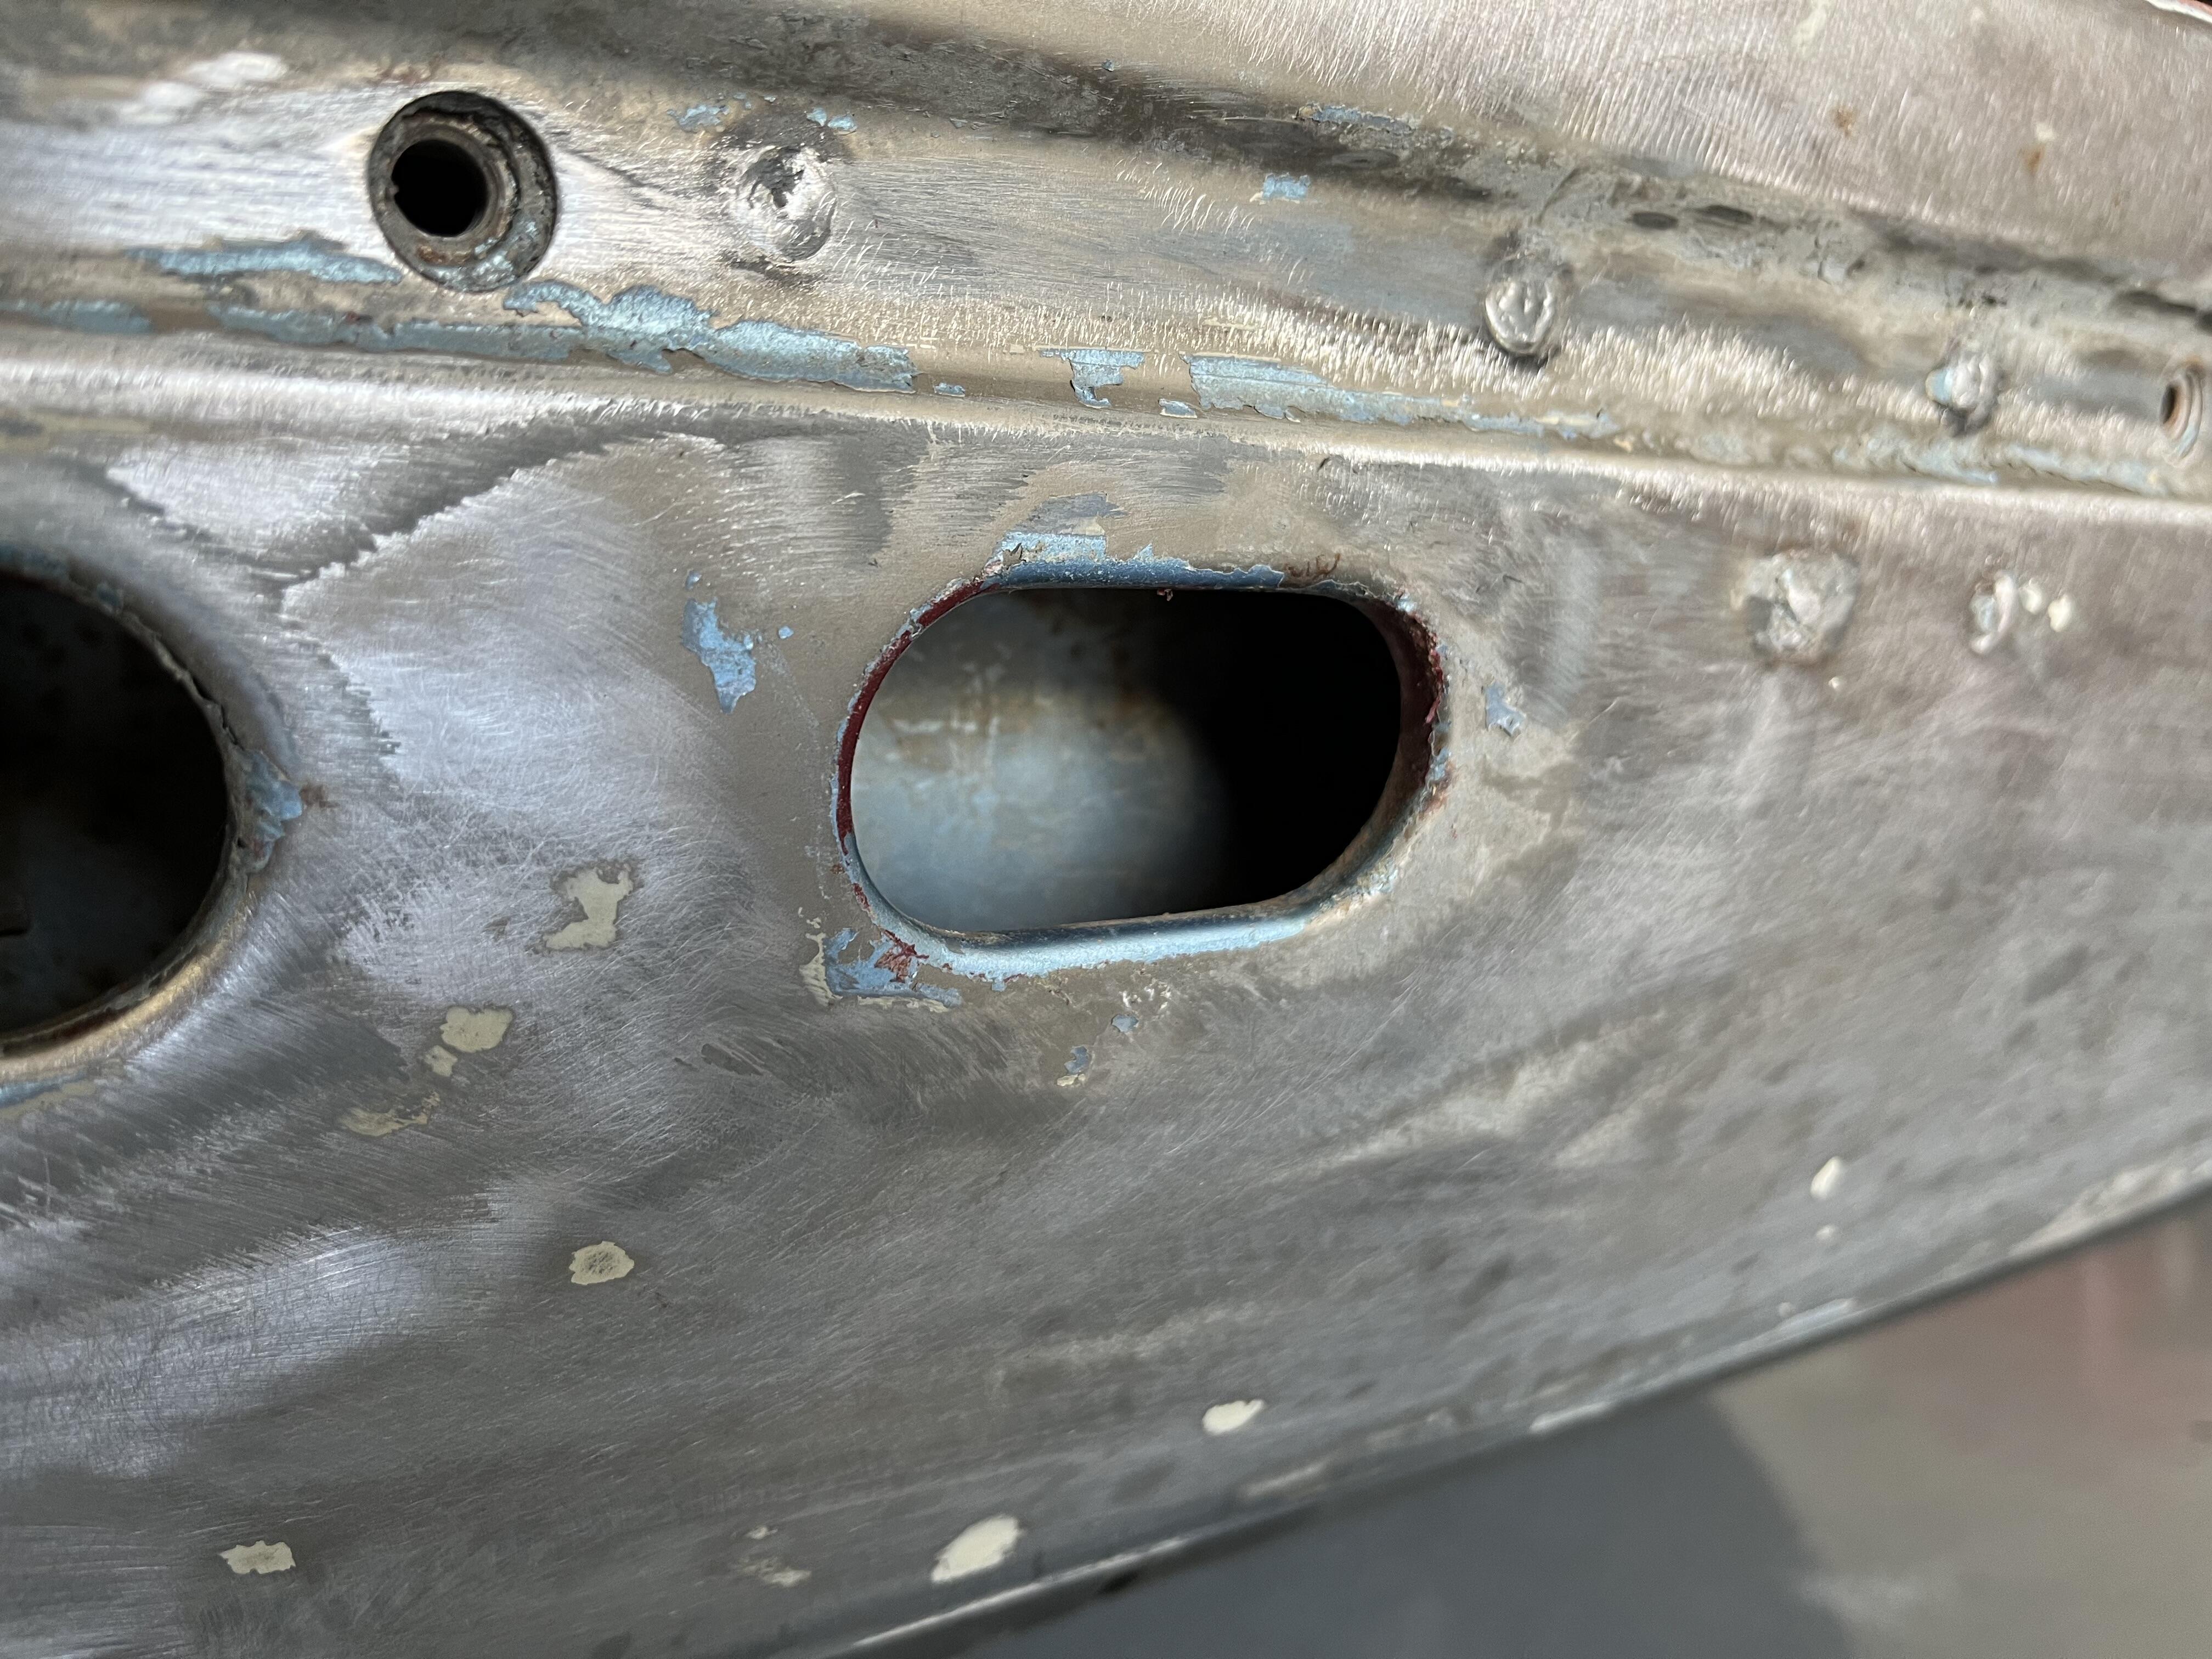
1 pointI forgot to post an update to my Z since the head fiasco! I was able to get the new gasket installed and torqued all studs/nuts appropriately. I chased my threads and a few had some gunk so it was a worth while job. Zero smoking since! I was so relieved. I did some more research on other platforms and it seems like it is a common issue on the ARP head studs. I assume it is a combination of user error with some dirty threads and what not. Regardless, times are good and I have been able to finally take the car out for a spin longer than 1 minute! I was having some high temp readings with my radiator setup. Nothing too crazy, but sitting towards the M on my TEMP gauge. Since I am running no shroud, I did a quick DIY with some left over aluminum and foam to get a seal. I am now always running right in the middle temp. I also grabbed a generic overflow container and just waiting for the line to show up in the mail. Other than that I have been busy working on some new bumper plates and other misc. fill plates. I originally used a snap in design but the tolerances were so tight that I would occasionally run into broken clips or a loose fit. I switched up the design to be a two piece clamp style. This will give me room for any variances in peoples bumpers while still providing a nice solid mount. My goal for this design was to provide a bolt in solution. I know many people don't have access to a welder or don't want to sand their paint, weld, repaint. While this doesn't provide as flush and clean of a look, it is still better than a gapping hole in my opinion. These are sandable, paintable, and wont warp due to heat. Here is an example for the small bumper holes, but I have created plates for all the rear bumper ones, even the awkward side bumper mount holes, as well as for the side indicators. I hope to start selling these soon! Up next is tackling the bushings and suspension. I am looking to see what people think of my setup: Koni Yellows from MSA with Eibach Springs. I am hoping I will have a level look when running no bumpers, I read alot about this issue but it is hard to find an exact replication. All of my isolators are shot so now is a good time to run 240z style all around if it will help with leveling the car. I am also considering Vogtland springs. Wheels I am torn on 15x7 with 225/50r15 or to run a 205/50r15. Smaller tire will be lighter and easier steering but I do like the meatier look of the 225's. Full Energy Poly Bushings. But I will run the softer TC rod bushings on the backside. TechnoVersions Diff mount as well.
 1 point
 -
I'm going to guess that the jolt was a ball cage/retainer on one of the adapter plate bearings. People often find pieces of the retainer when they do a fluid change. The transmissions seem to just keep going though, it's amazing how destroyed they can look but still do just fine when new parts are installed. Draining the fluid will probably tell you something. Look for metal shavings and flat pieces of metal. https://www.researchgate.net/figure/Main-parts-of-ball-bearing_fig1_2895407441 point
-
1 pointI haven't been super active in the forums, but I attend to the reported posts when I get a notice. We're pretty open here, so not sure yet how to filter spam. Maybe have to approve posts or something for a while, but that's more work for management. We'll see.1 point
-
1 pointand I have a video for that! https://www.youtube.com/watch?v=wsaP95p4q88&ab_channel=DaveWM1 point
-
1 point
-
1 point
-
1 pointHe did. (Along with a bunch of other fantastic trouble shooting efforts!) That's why I'm thinking the break is somewhere further up inside the harness. If I were there, I would stick the meter in the connector and start retching the harness around and looking to see if I could see the issue. I'm thinking that it might be a green corroded crimp connector somewhere inside the harness?1 point
-
1 pointI was thinking it was an intermittent break inside the wiring harness (somewhere further up into the harness than right at the connector). But I didn't suggest that because I could not reconcile that with the following: I could explain how connecting the #1 connector onto the #2 injector might cause that injector to work*, but the part I really couldn't deal with was when you put the #2 connector onto injector #1 and it did NOT make that injector start working. That's the part that caused me not to pursue that avenue more thoroughly. *small break inside the harness causing an Intermittent connection.1 point
-
1 pointRacing green ? Nissan forgot the green long time ago, but I hope it becomes available again . Kats1 point
-
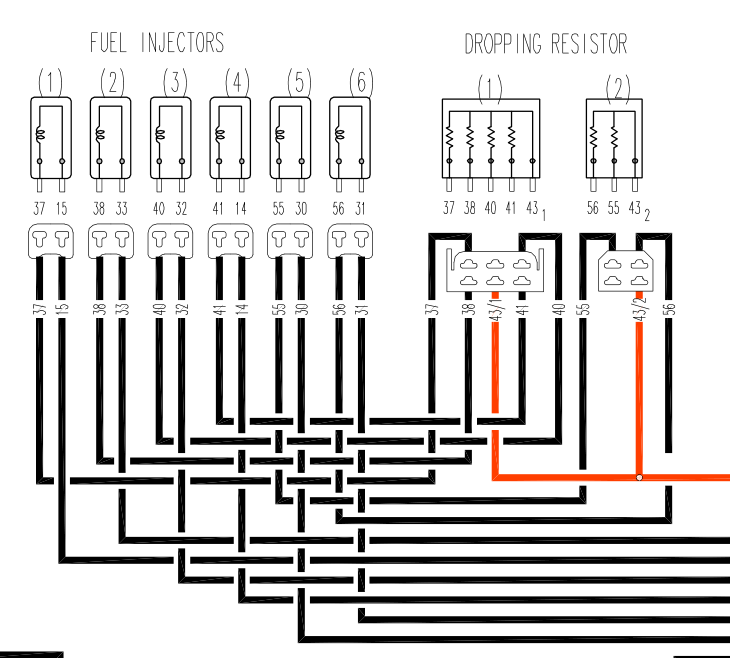
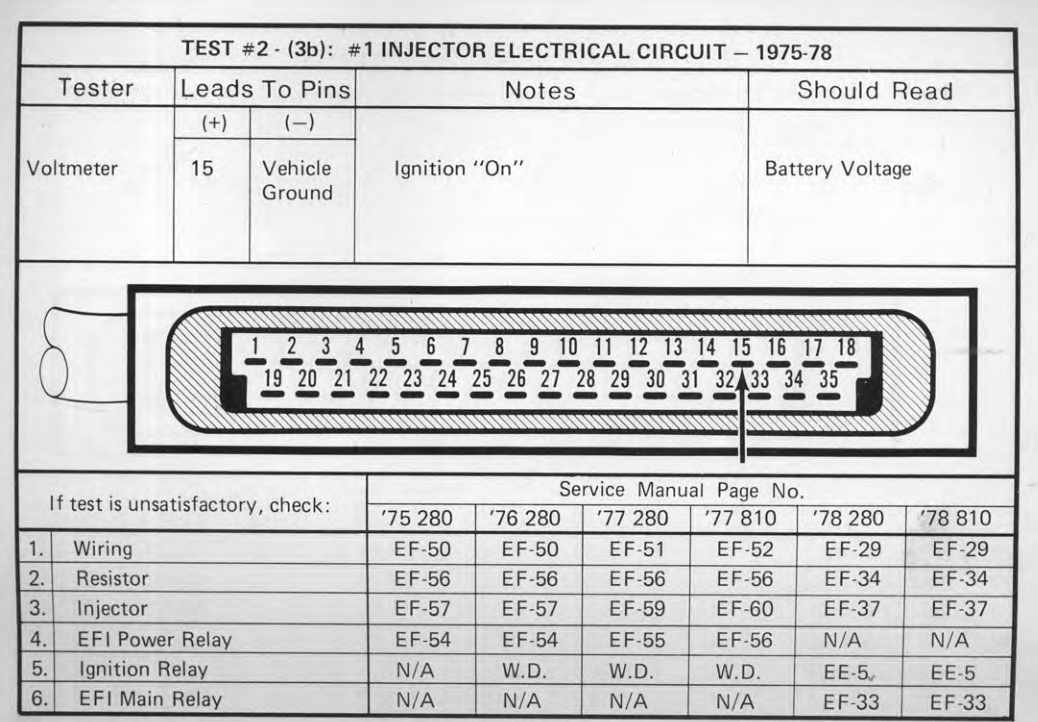
1 point1 point1 pointBut you do bring up a good point about the grounding part of the circuit. You could have power but no ground. You can measure voltage at the ECU connector also. That will test the whole circuit. If you have voltage there then your theory about the ECU fits. Then you can get out your magnifying glass and check the trace back to the transistor.1 point1 pointYou might want to clear them to keep them from oxidizing again Eastwood has some non yellowing clears in different sheens1 point1 pointLooks like they are not color coded. So, your best bet is to unplug them all and confirm continuity for each power wire to each injector. Then check the wires in the dropping resistor itself if you find that all injectors have continuity. You'll have to remove the resistors for that. The problem would be either in the dropping resistor assembly itself or in the harness on the way to the injector plug. Edit - just noticed that #1 should come from the resistor with five wires. Just keep narrowing things down... If the drawing is correct you can even tell which pin is #1 by its position.
 1 point1 pointThanks for the advice on the steel wool Patcon! Freez74, scrubbed with toothbrush and simple green, then used Macs Brightener... came out great!! thanks! MUST use outside or VERY well ventilated space.
 1 pointThanks Zed. I won't have to climb thru my storage building again. I just found this from zkars too while you were posting.
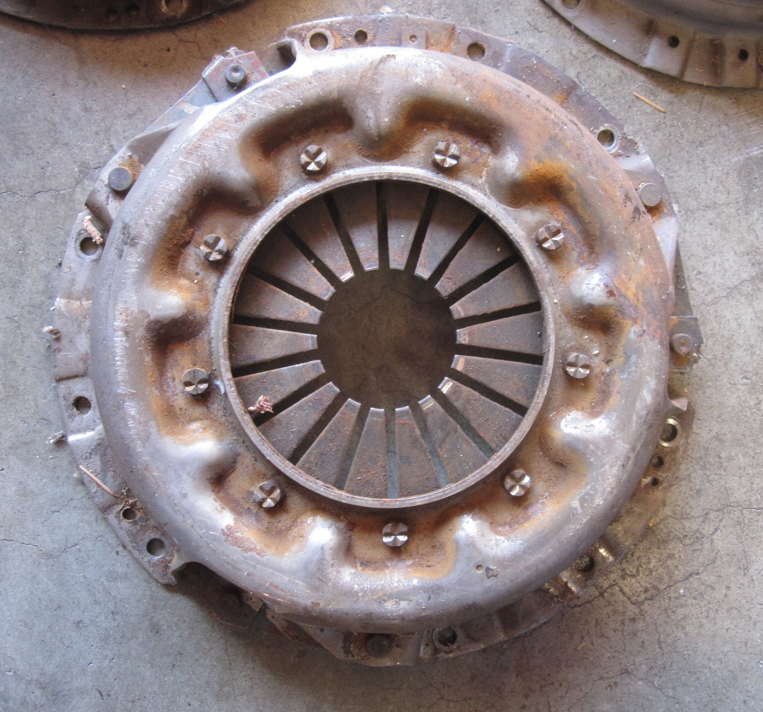
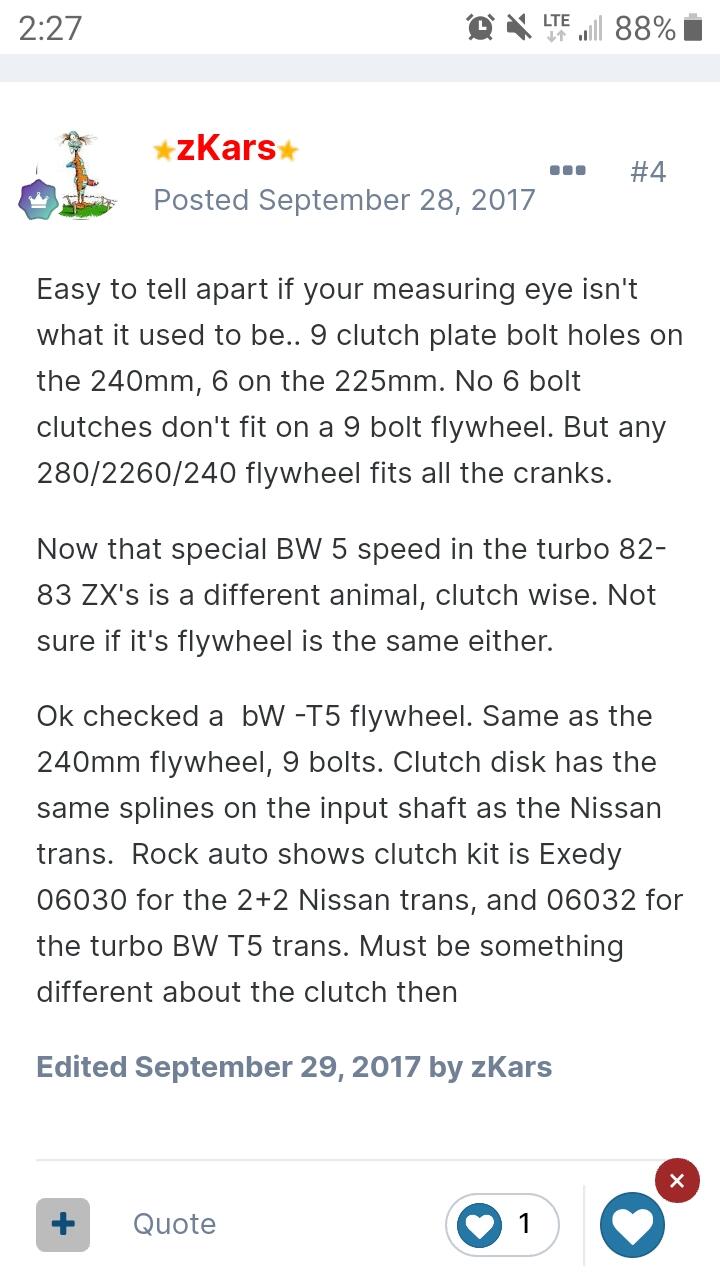
 1 pointCliff's method works. Another is the bolt pattern. Nissan did not drill theirs for both. 225 is 6 evenly spaced bolt holes, 240 is 3 sets of 3. 225 240
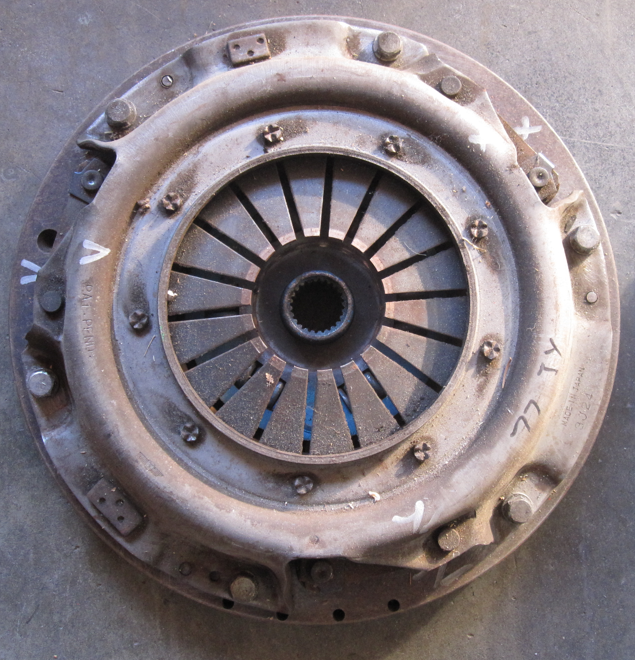
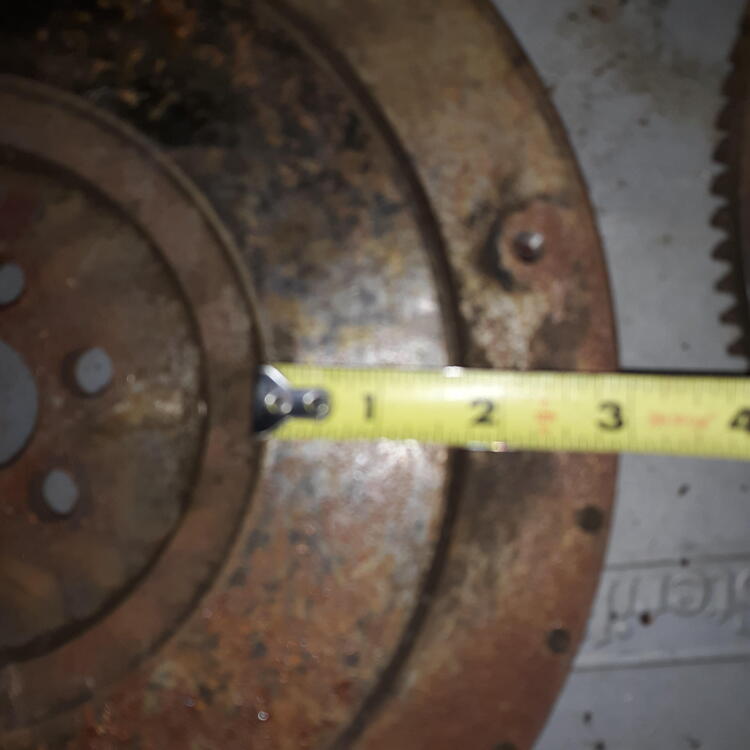
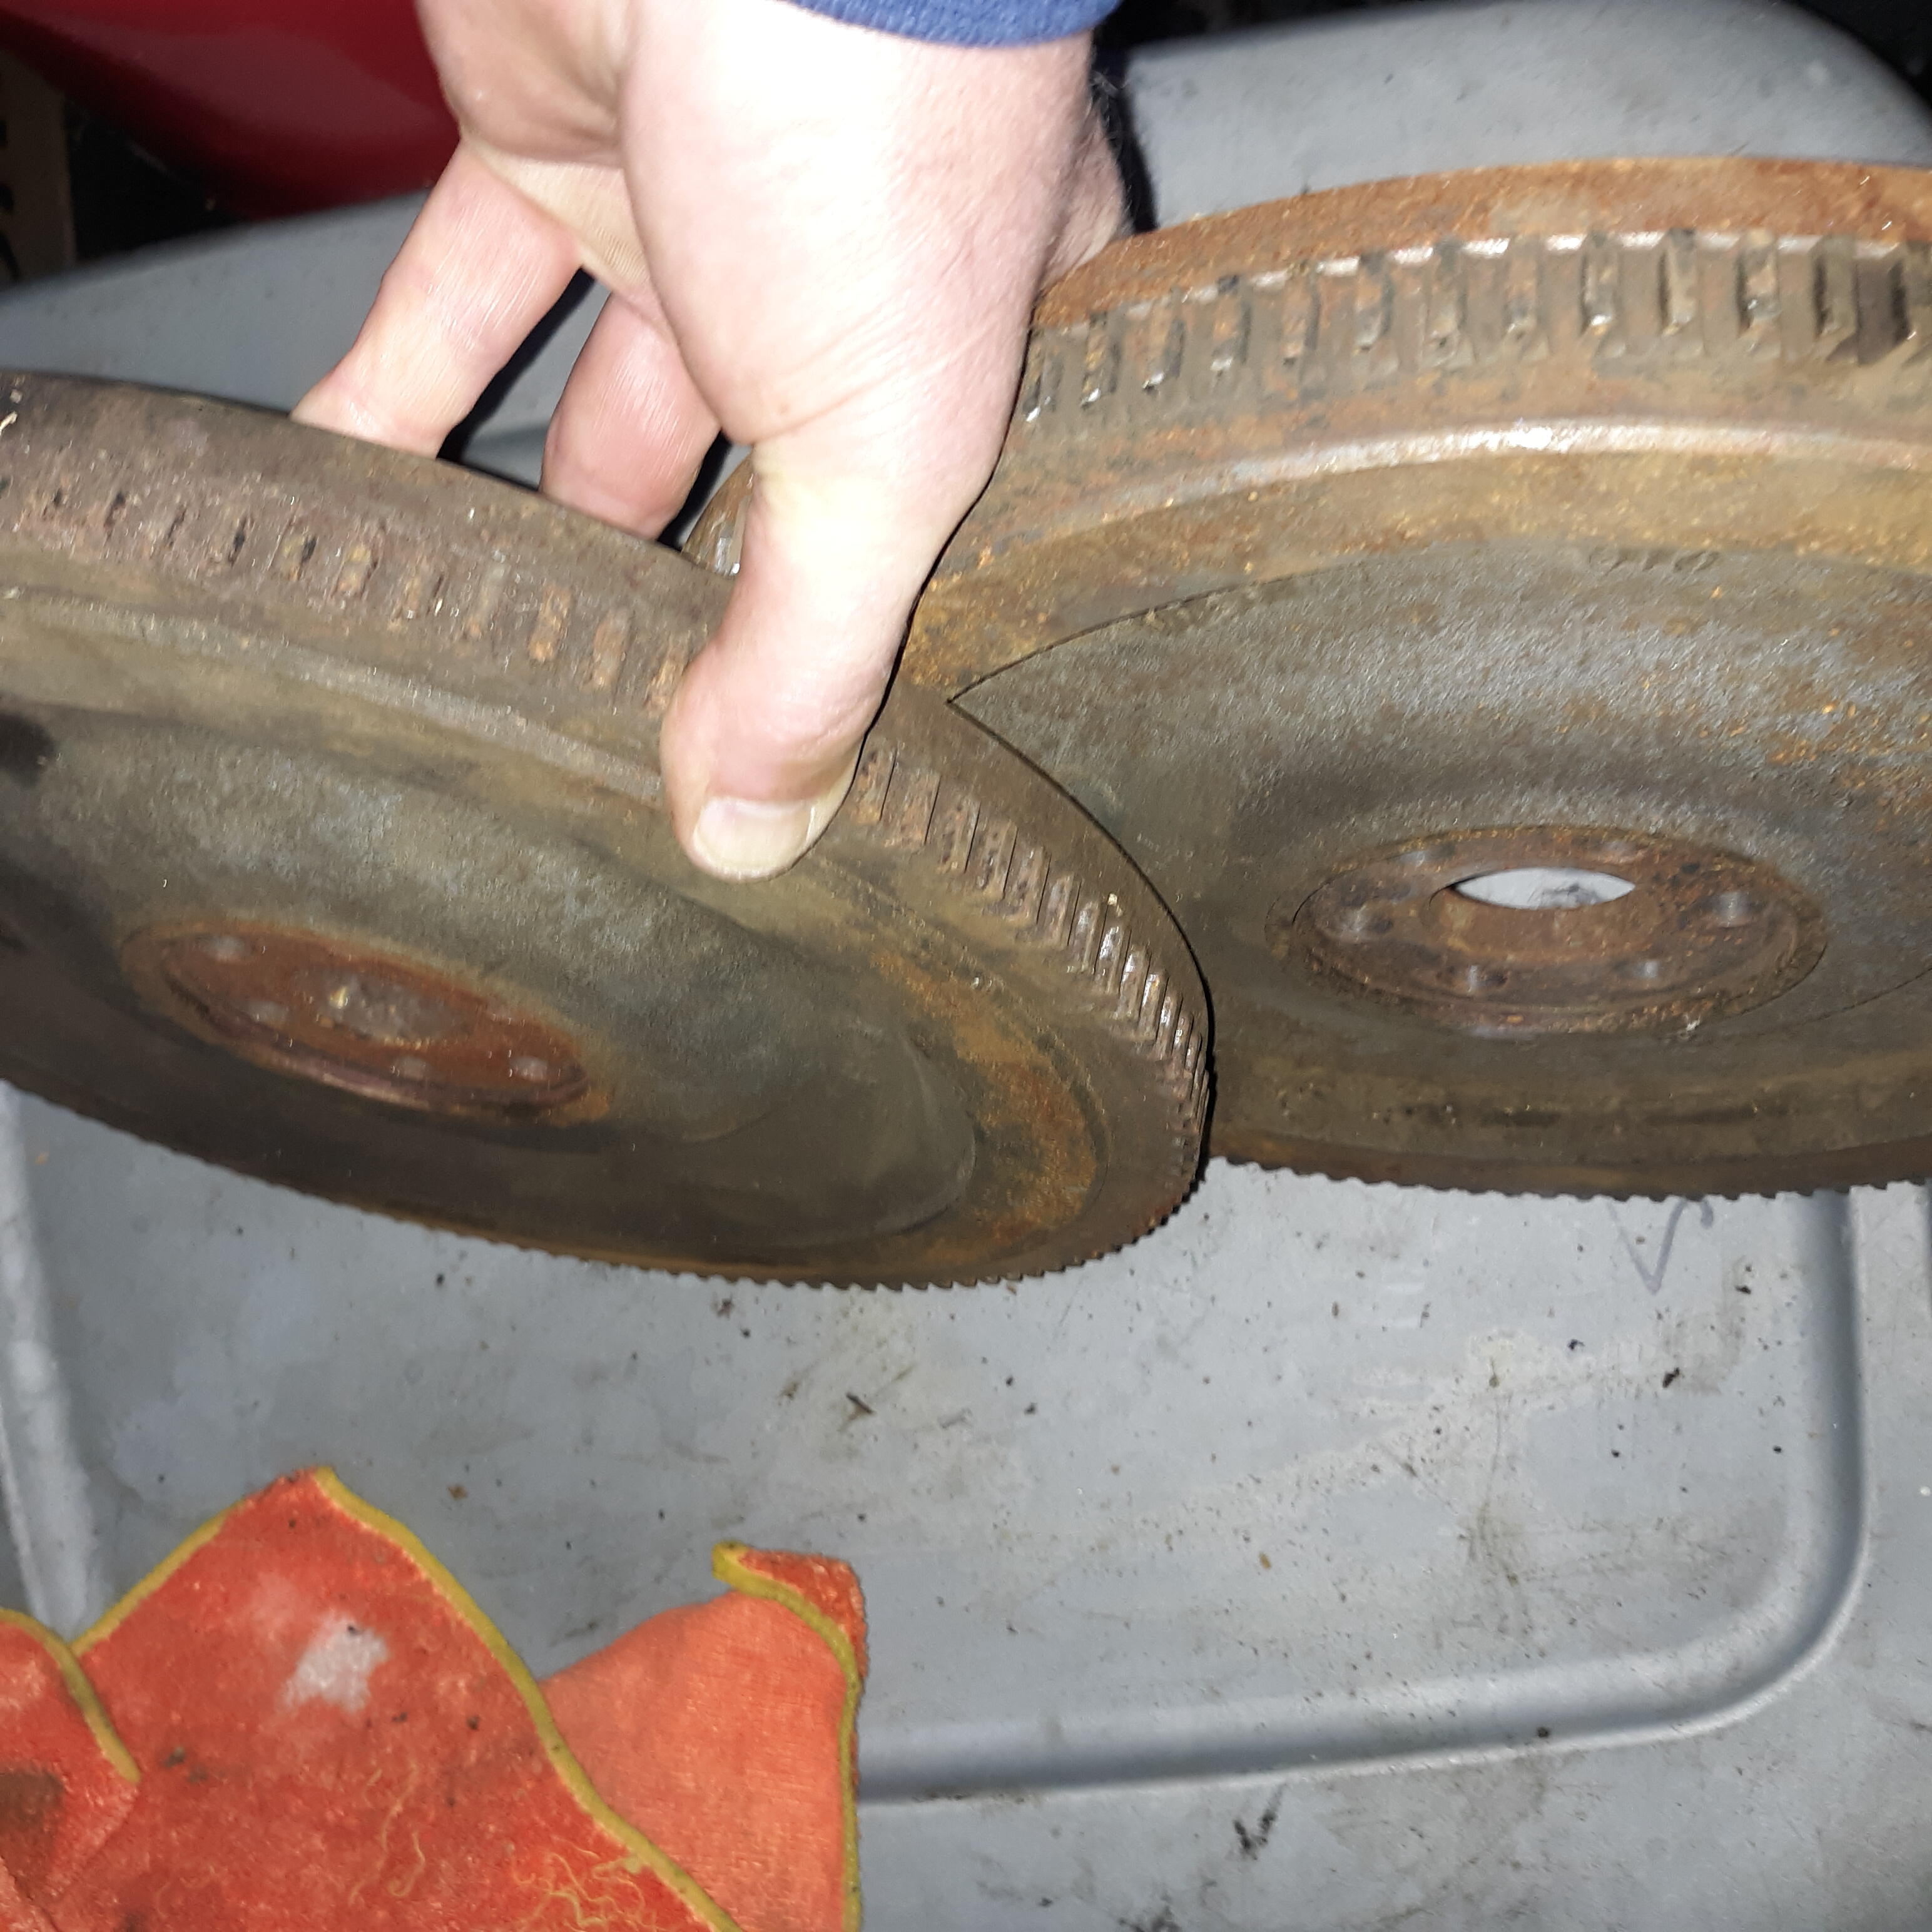
 1 pointLooking at my 225 and 240mm hubs, yours looks like a 240mm. I took some measurements of the friction disc of both and a crappy pic of the difference in the hubs. Hope it helps. 225mm 240mm
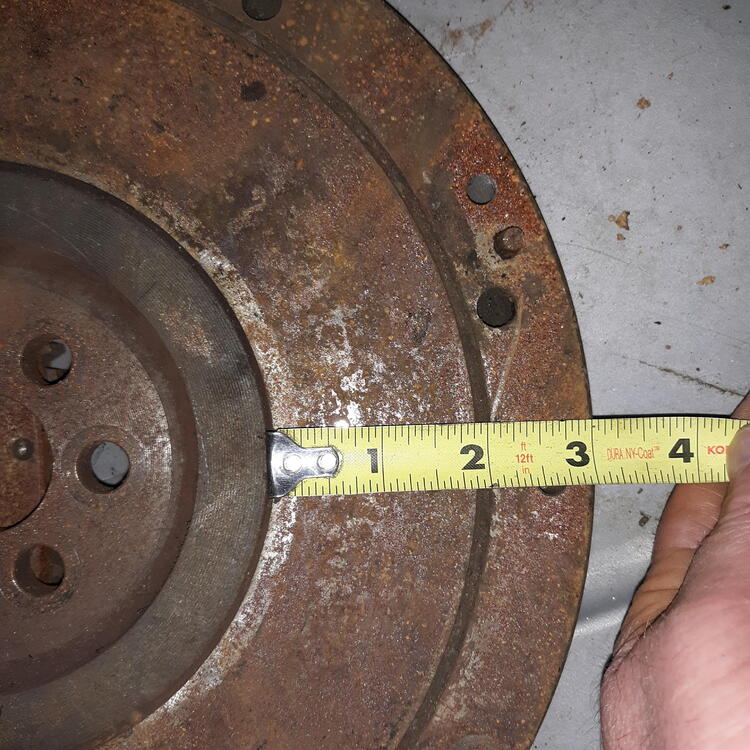
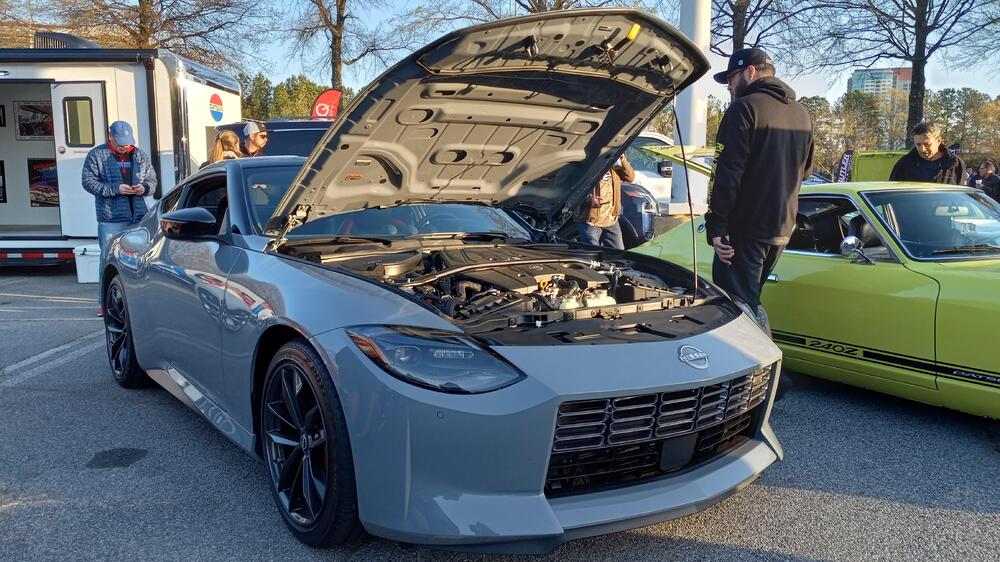
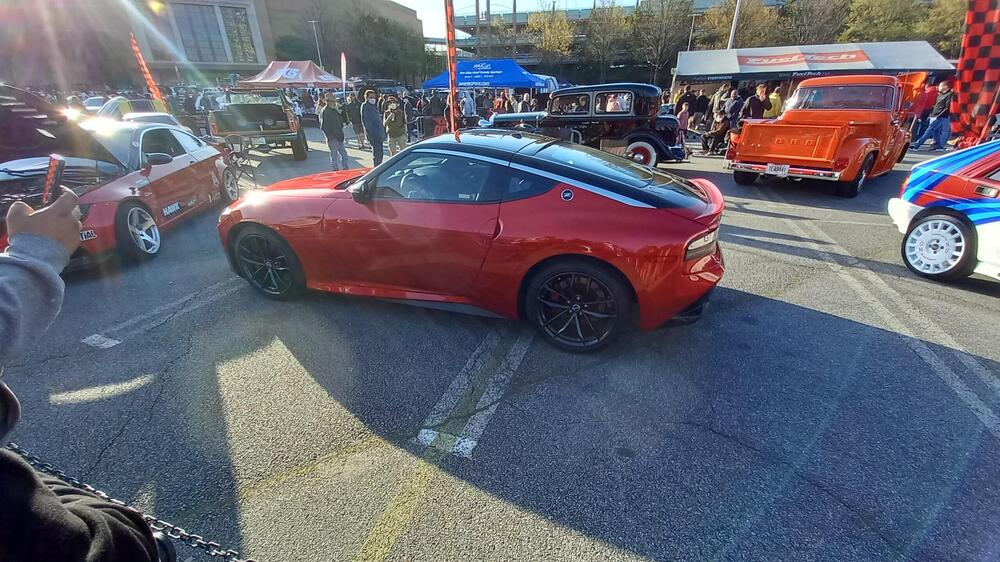
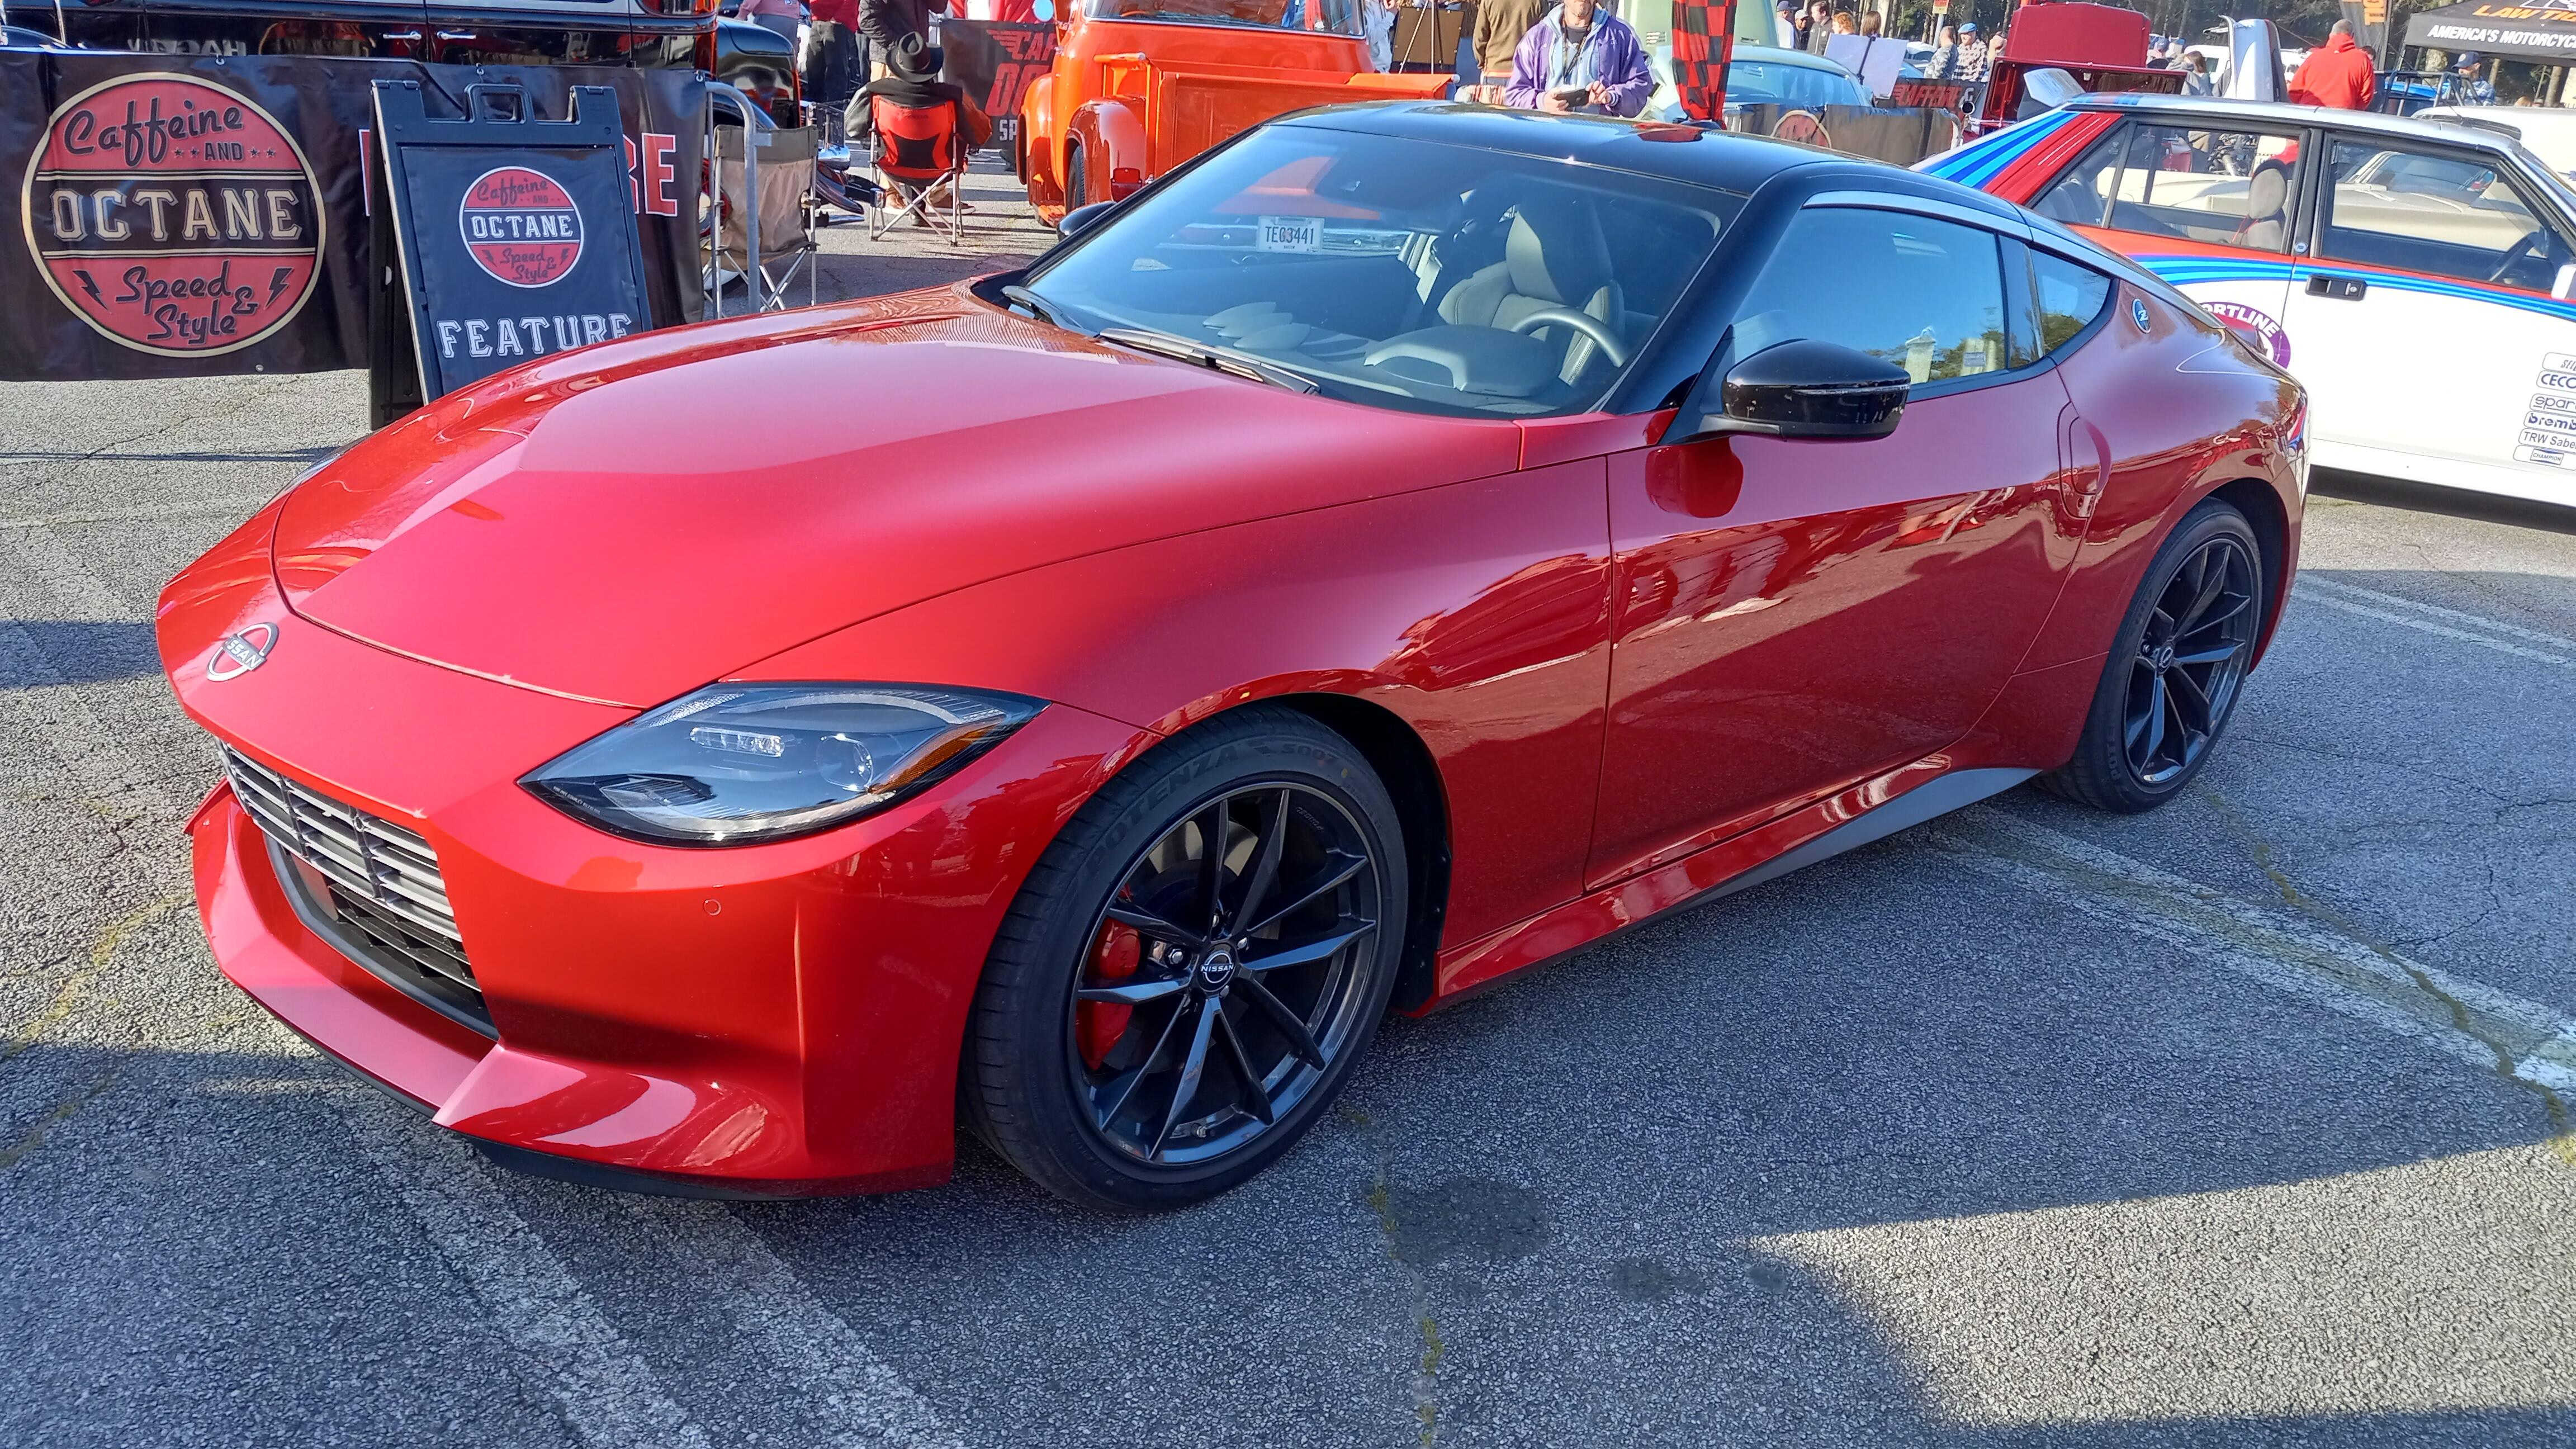
 1 point1 pointSo they had the red and the grey Zs at Caffeine and Octane this morning. It was great to see them in person and sit in them. The wife wasn't thrilled with the seats, but I thought they should be a great incentive to me to lose some more weight. I found the ergonomics of the driver's position to be excellent. If you have a 370Z, you won't be surprised by much of anything on the interior. That's not a bad thing to me. I think the cars look very nice in person. I don't have a problem with the large mouth on the car, but I wouldn't mind if they put a vestigial bumper on it to break it up. My thought is that we can expect to see that on a refresh in the future. The Nissan people there want feedback. I was telling one of the product planning guys the color I was hoping to see for a Z. He hinted that if I'm patient, I will be rewarded. That's perfect because I'm not in a rush to join the current new car buying frenzy. If you want a gasoline powered Z, this may be the last model you can buy.
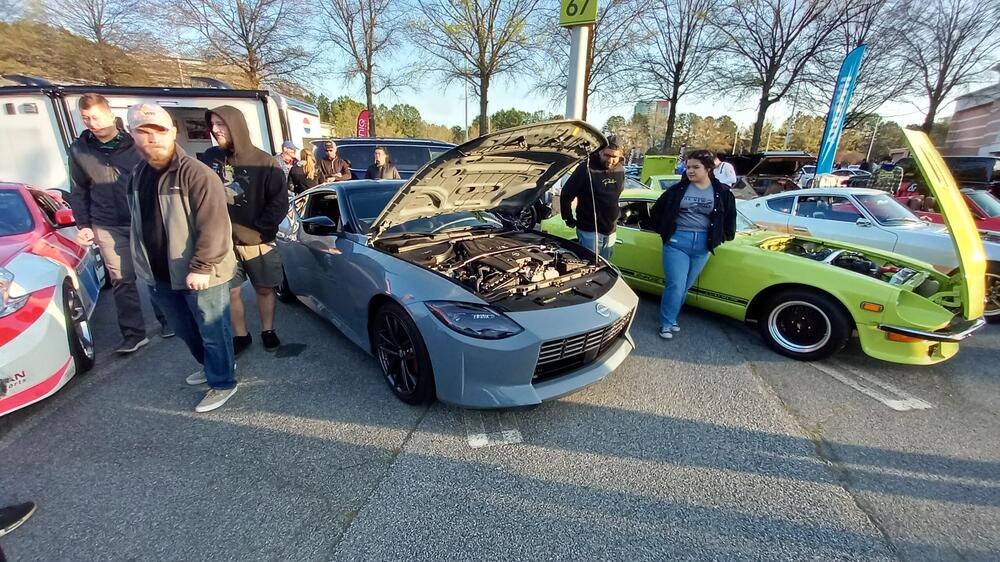

 1 point1 pointOke guys, Kats will be looking out for some parts. It seems the Datsun Roadster early 5 speed used the same internals, the one in the picture attached. IF somebody here from the club has one for sale, or one with good parts, I am also interested.. gr bart
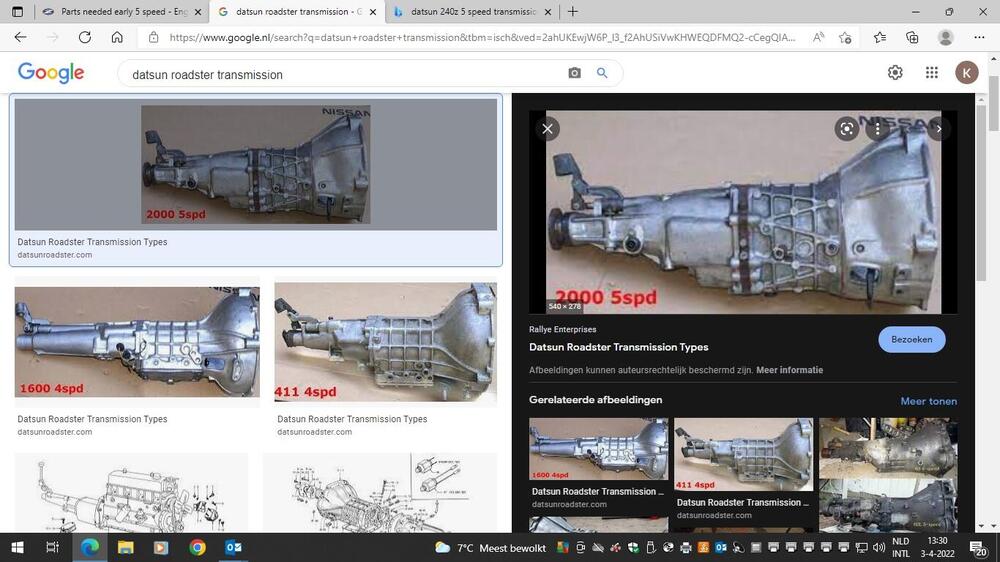 1 point


Important Information
By using this site, you agree to our Privacy Policy and Guidelines. We have placed cookies on your device to help make this website better. You can adjust your cookie settings, otherwise we'll assume you're okay to continue.