


Leaderboard
-

DC871F
Free Member5Points676Posts -
inline6
 Subscriber
 5Points1,282Posts
 -
conedodger
Free Member4Points12,516Posts -
Jeff G 78
Free Member4Points3,007Posts


Popular Content
Showing content with the highest reputation on 01/03/2022 in Posts
-
4 points
-
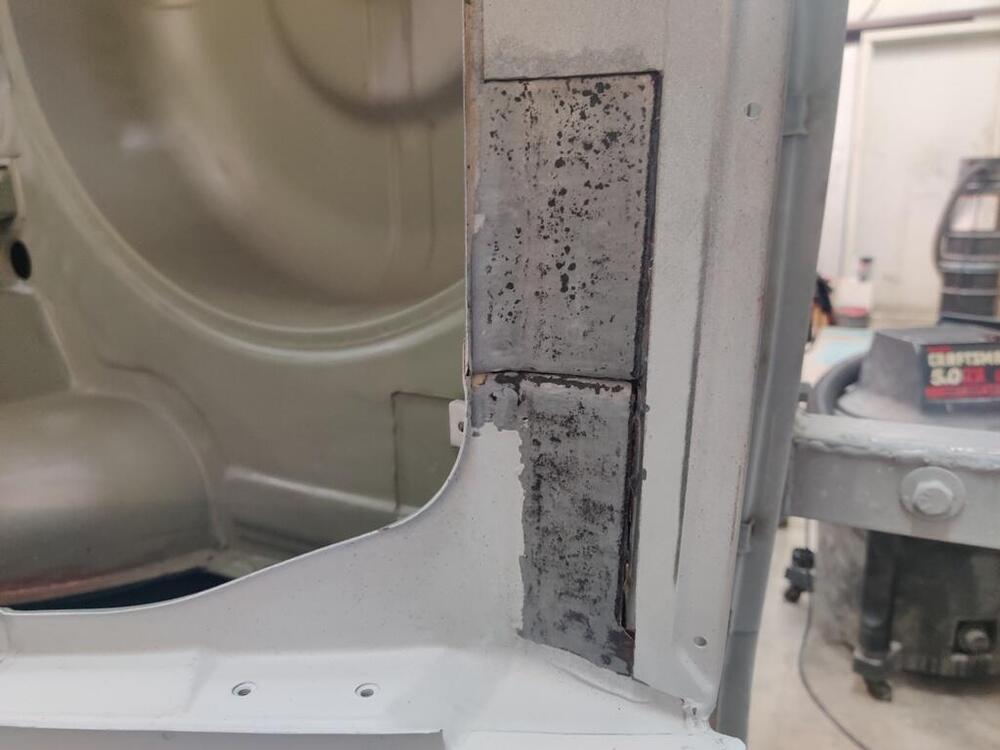
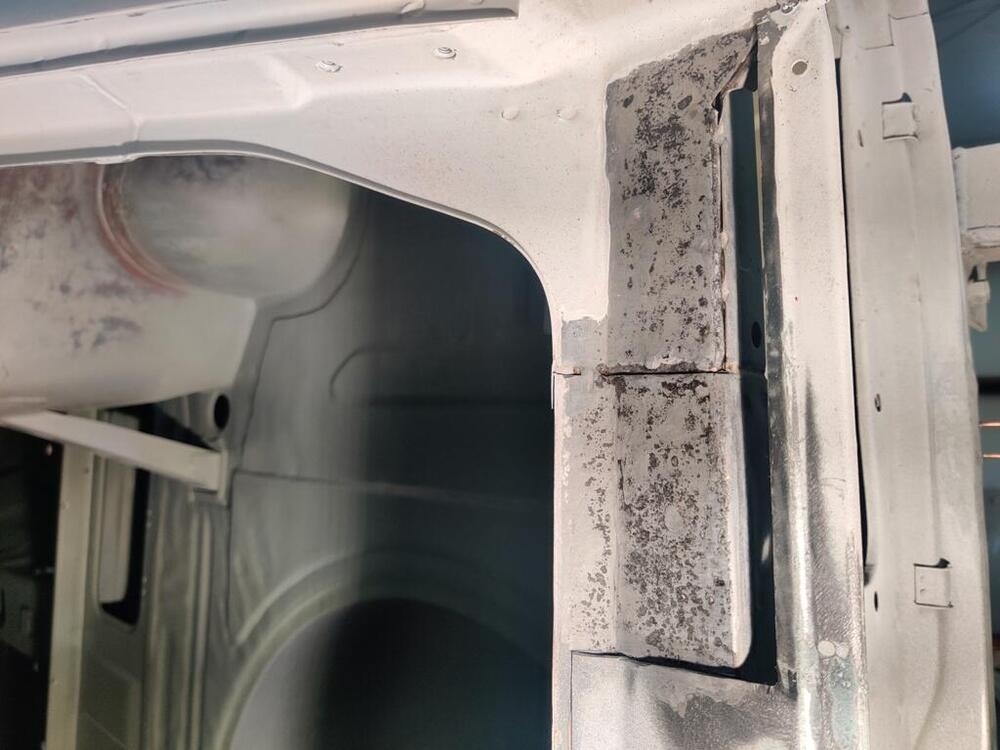
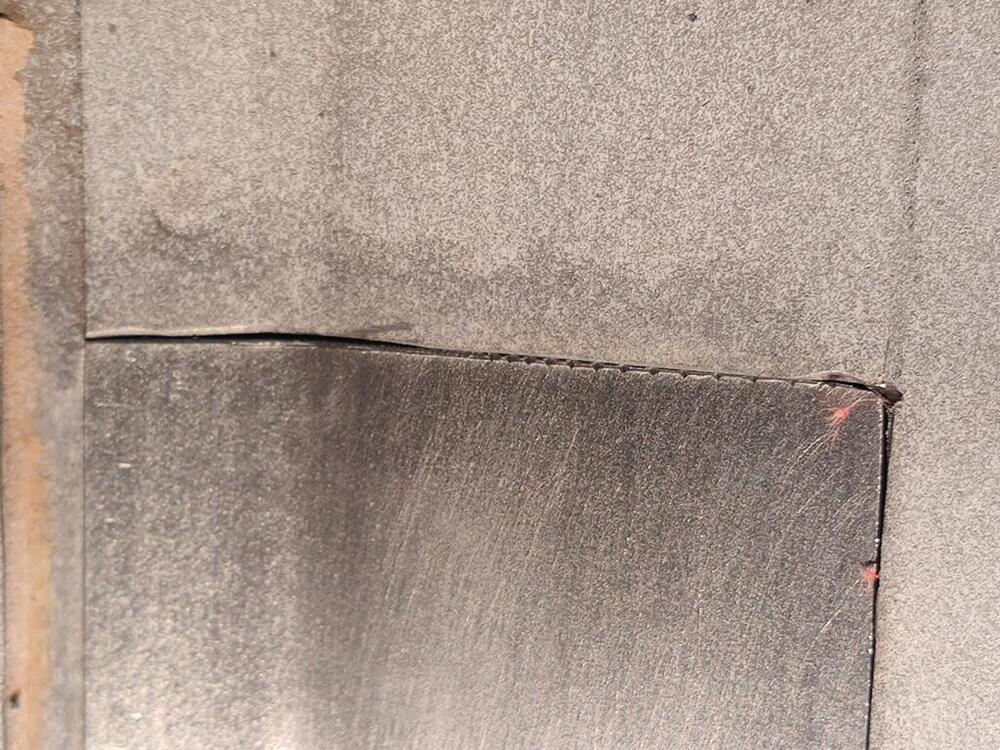
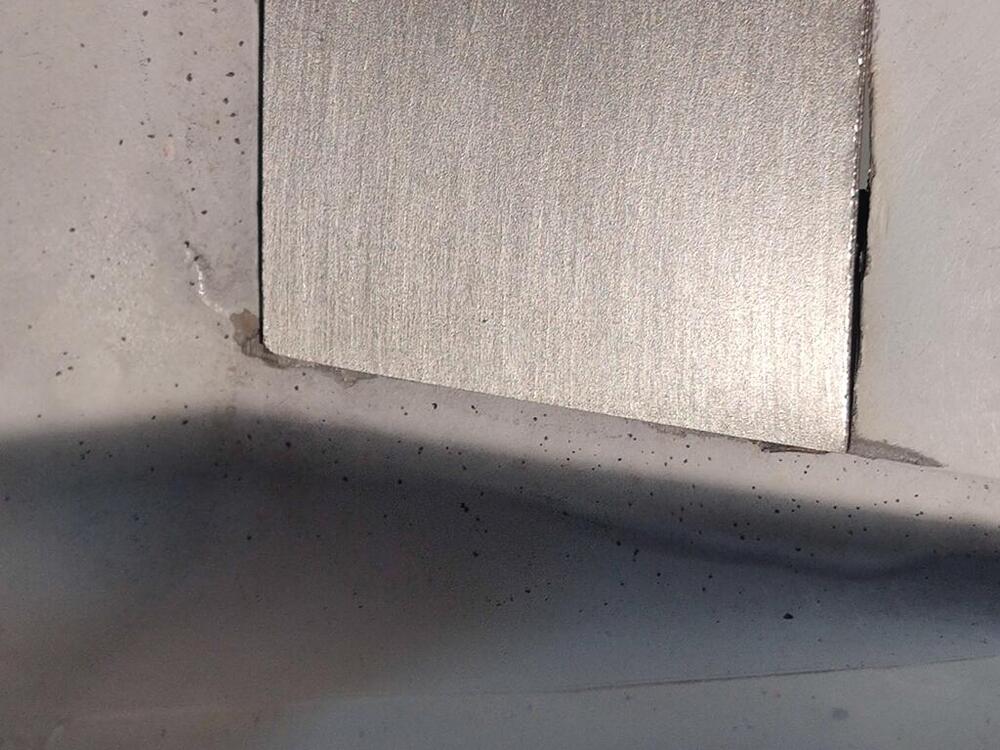
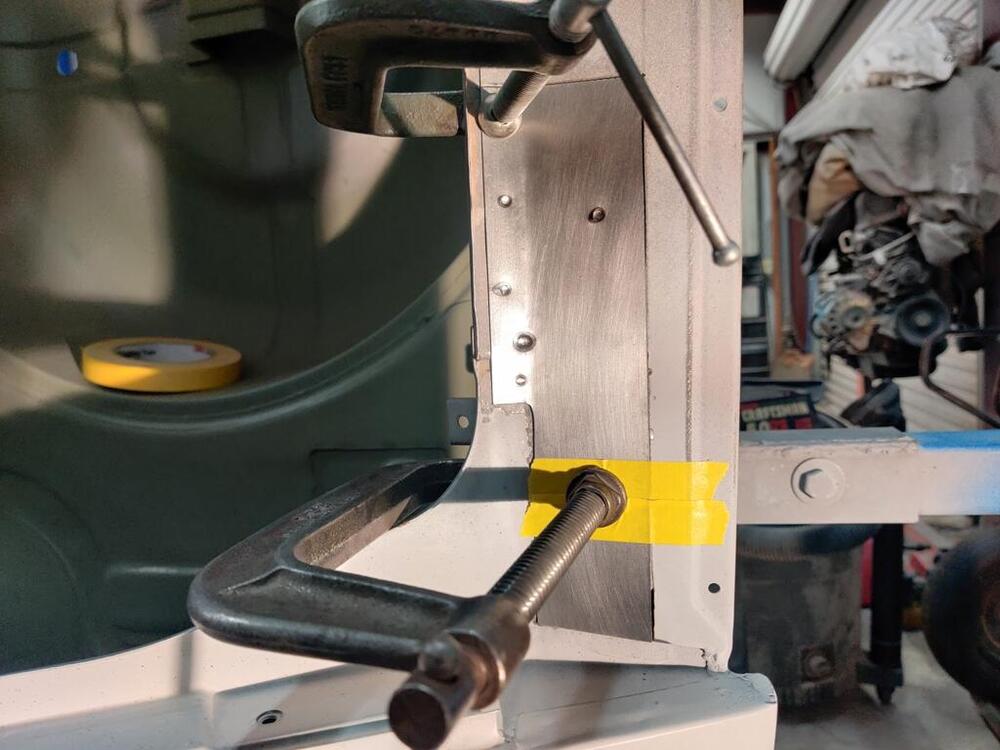
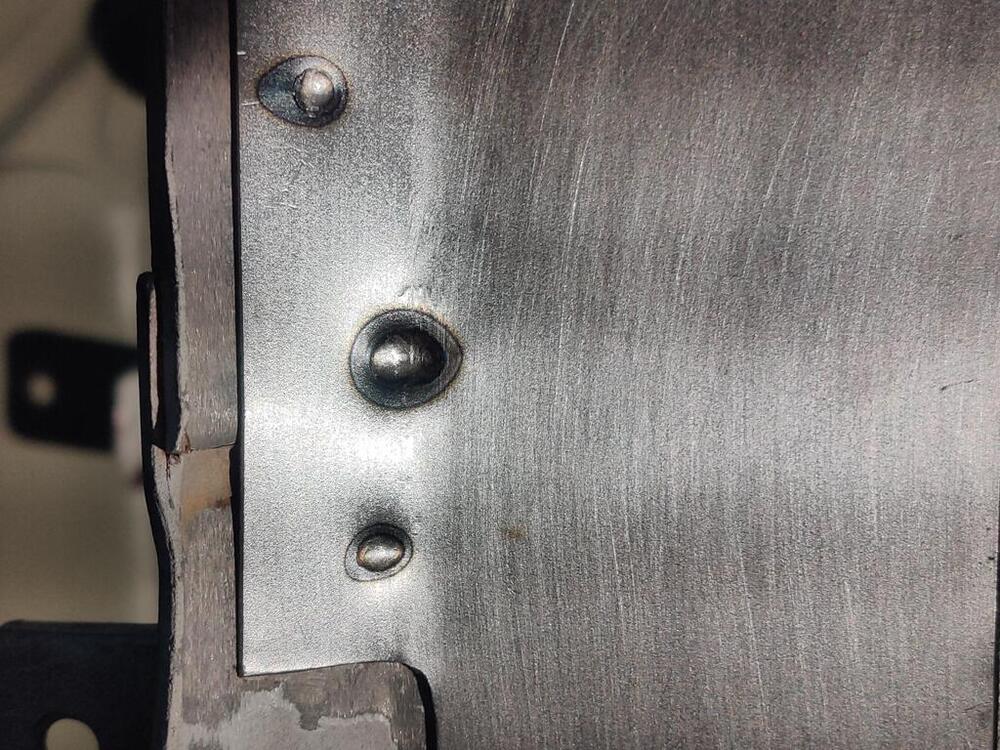
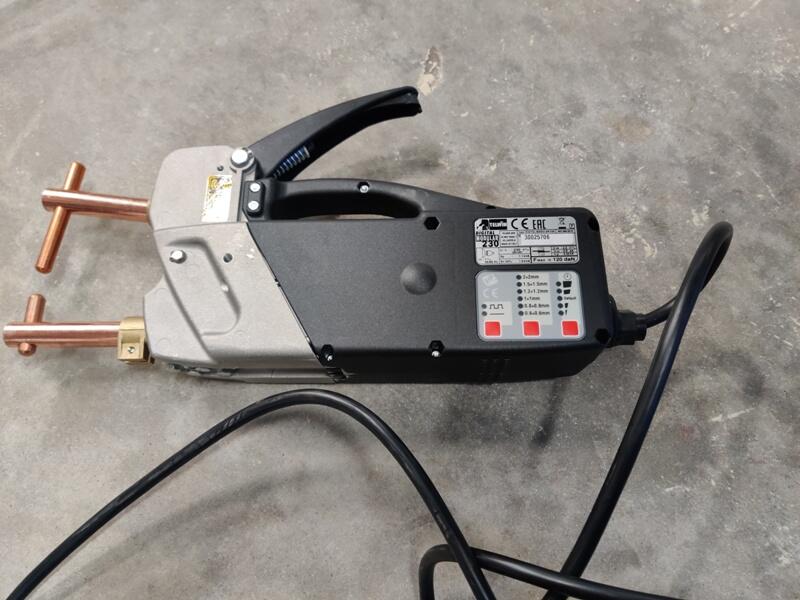
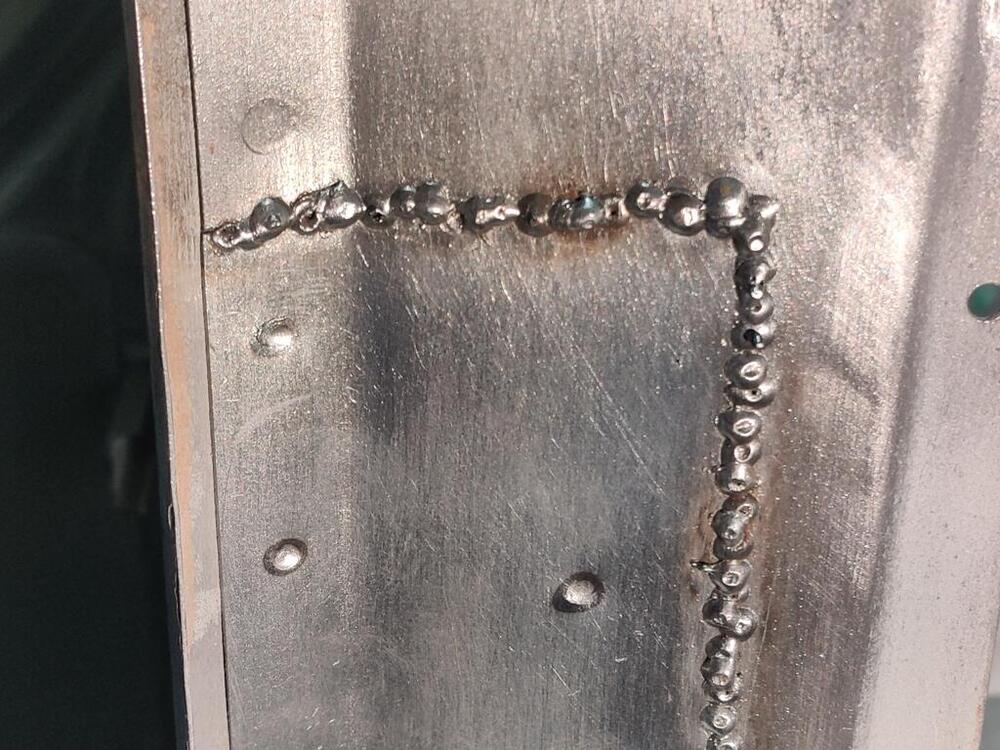
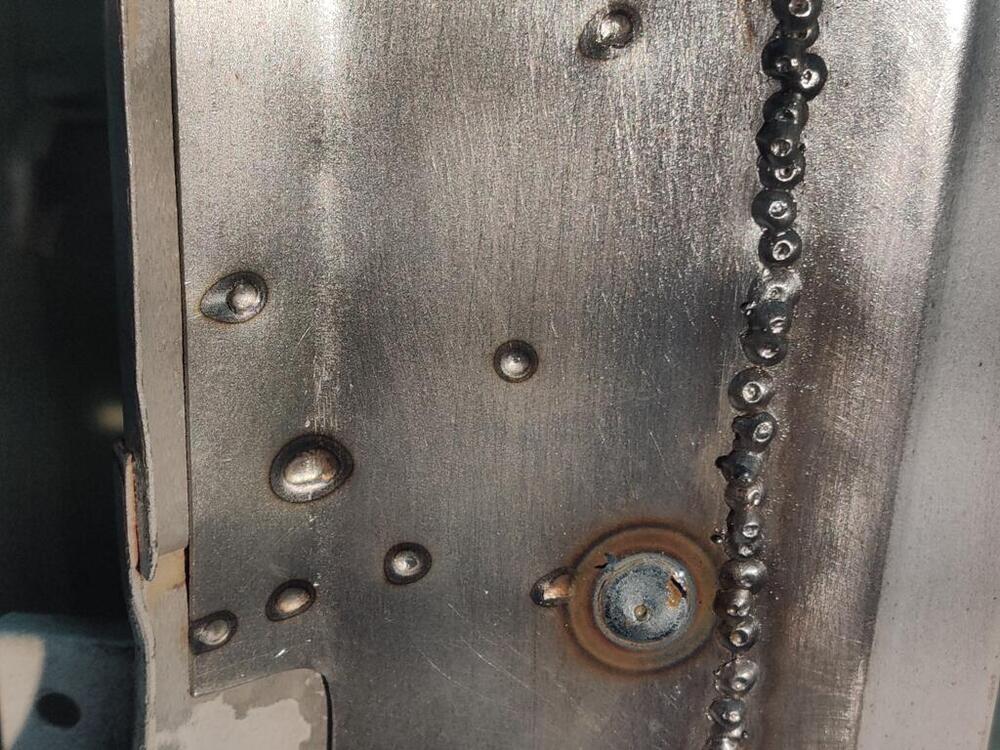
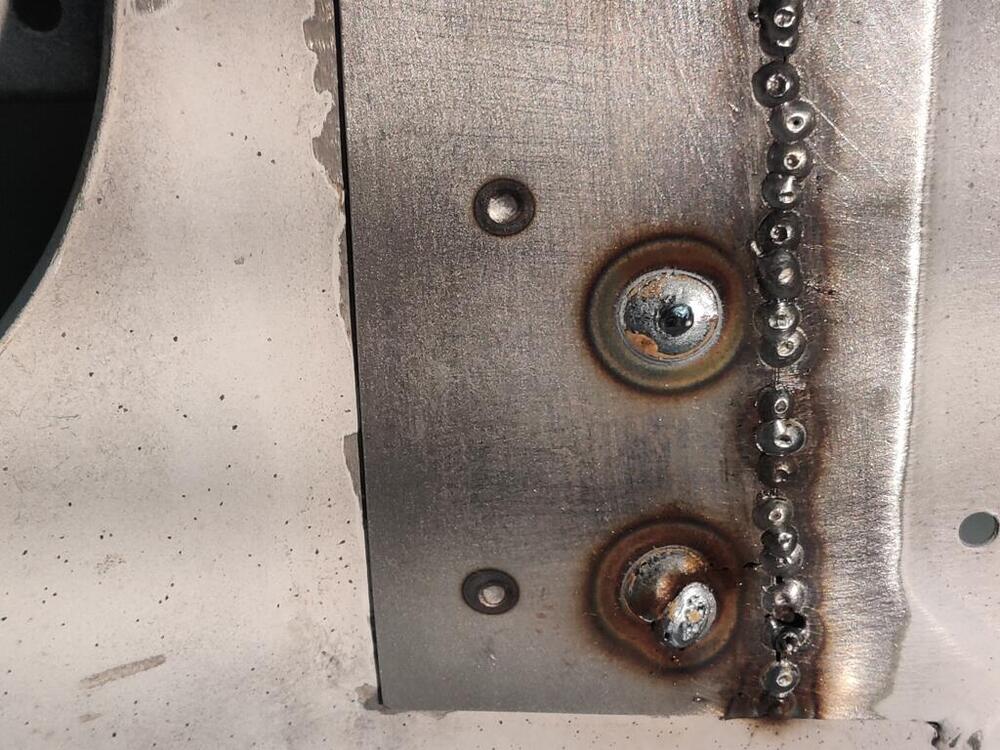
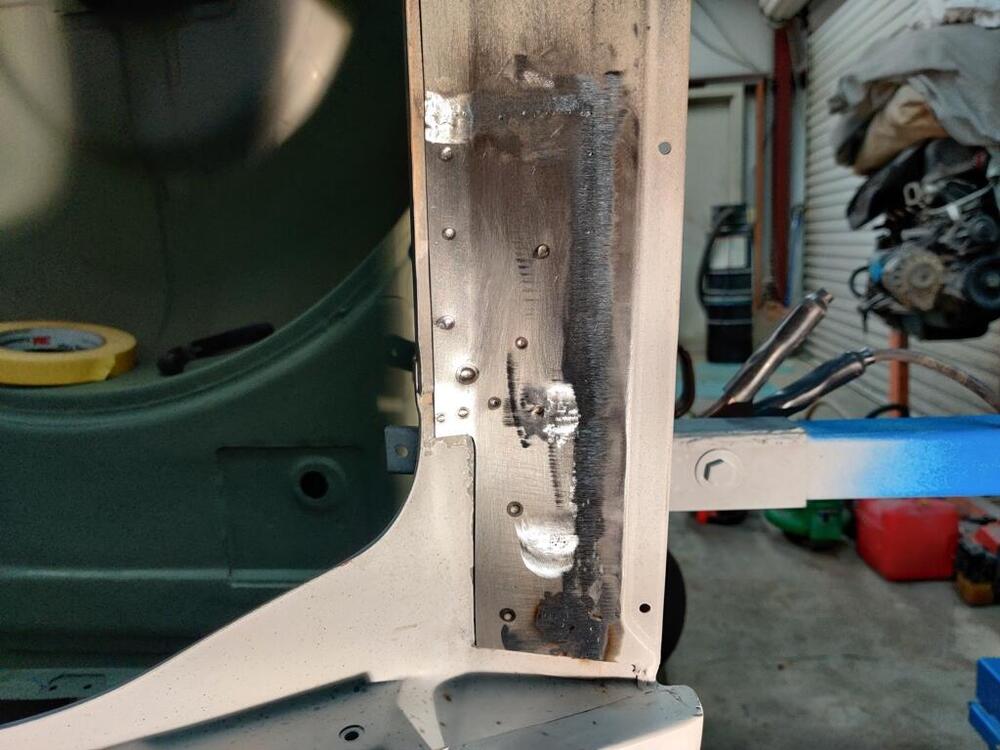
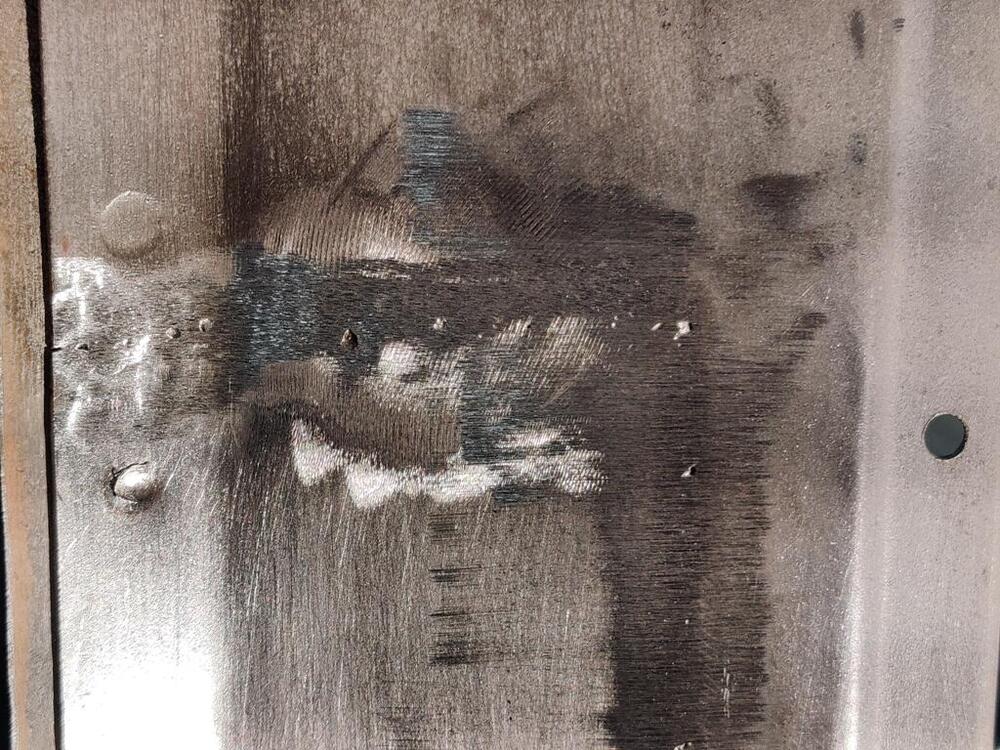
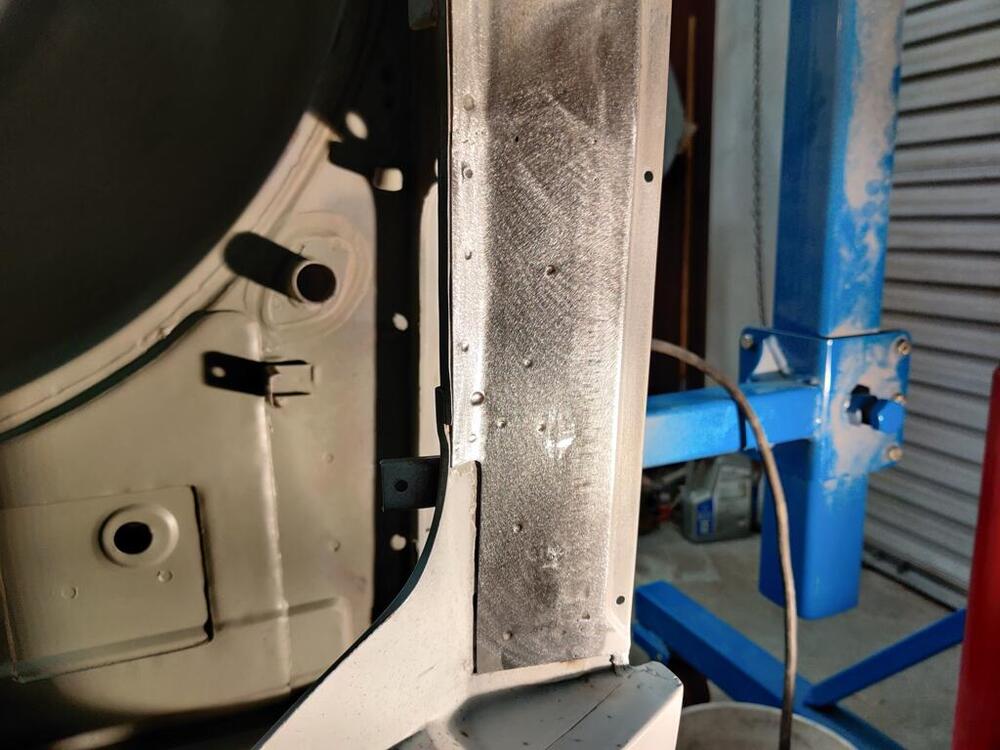
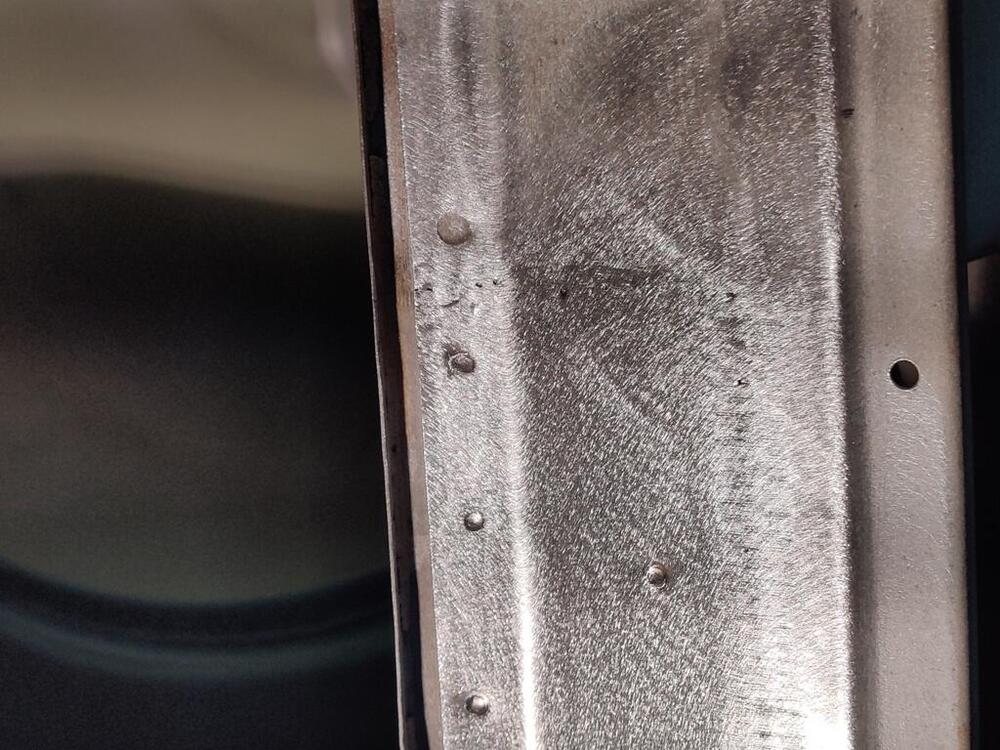
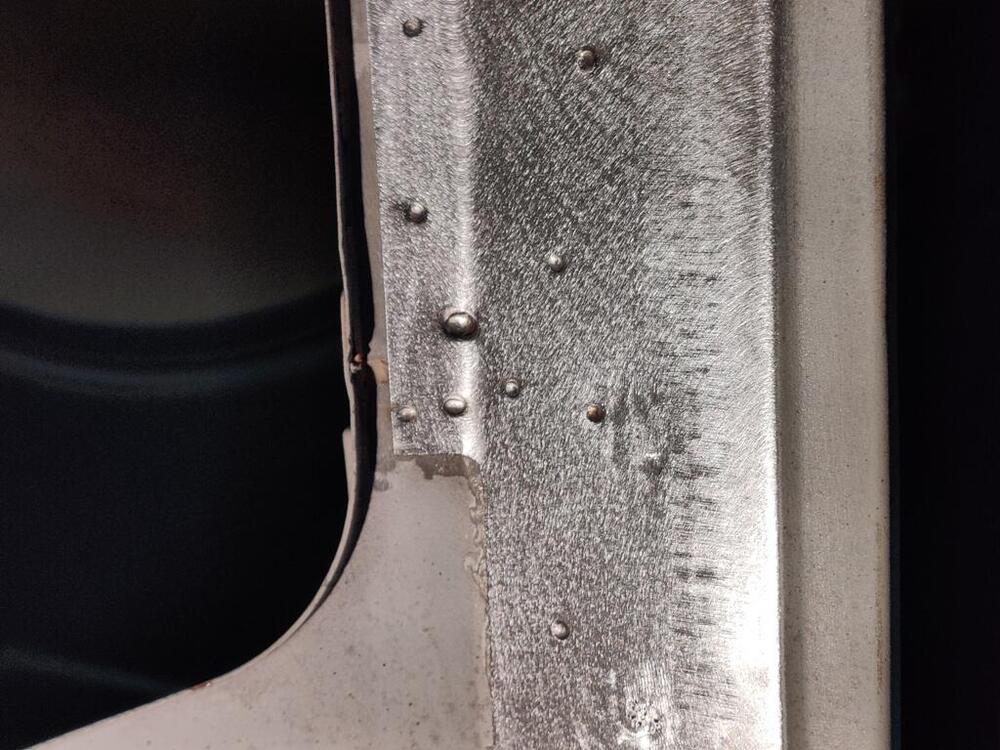
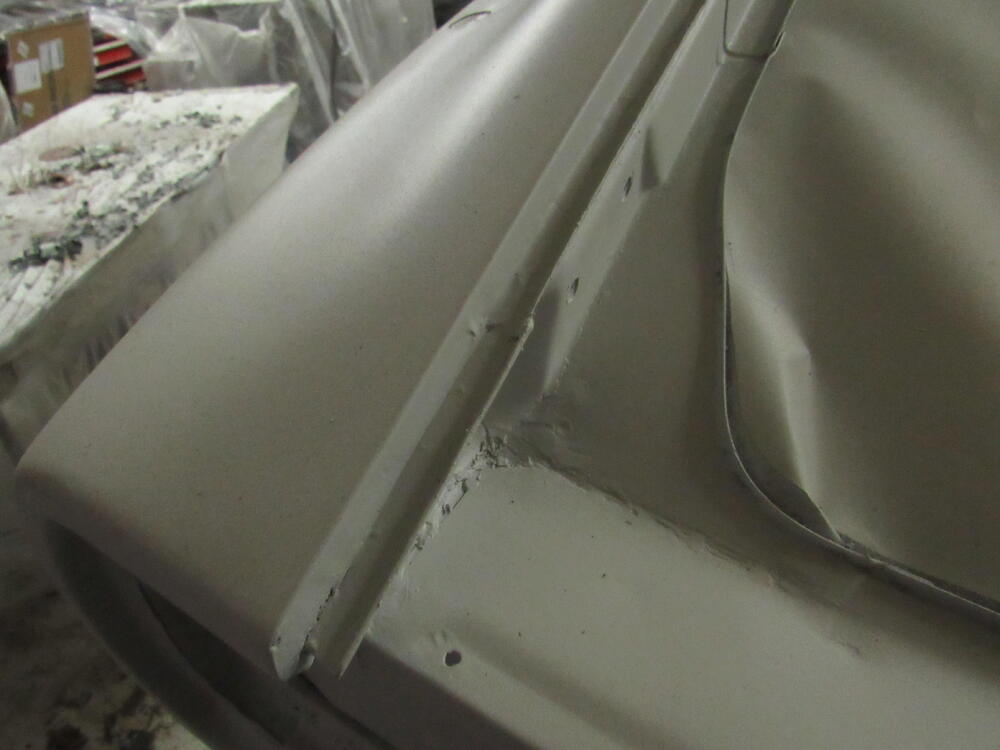
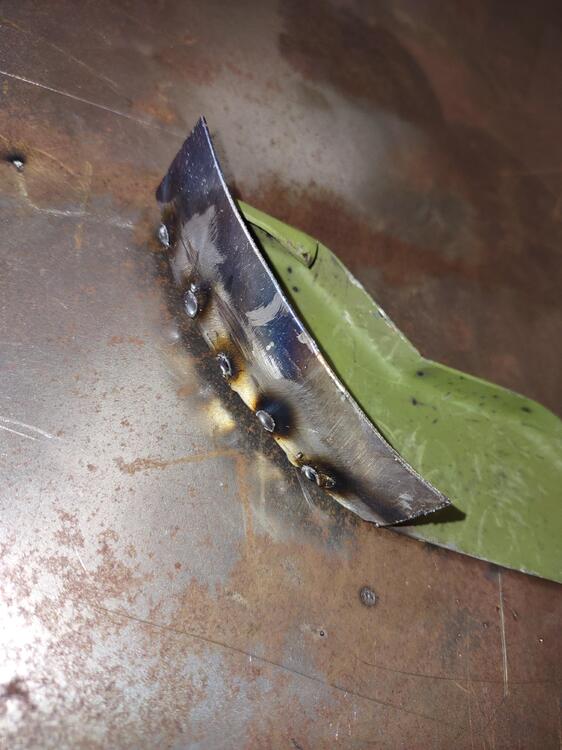
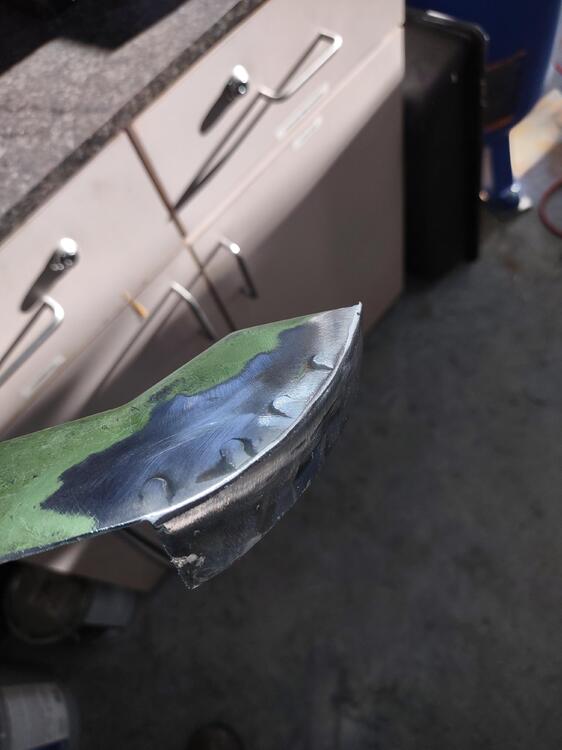
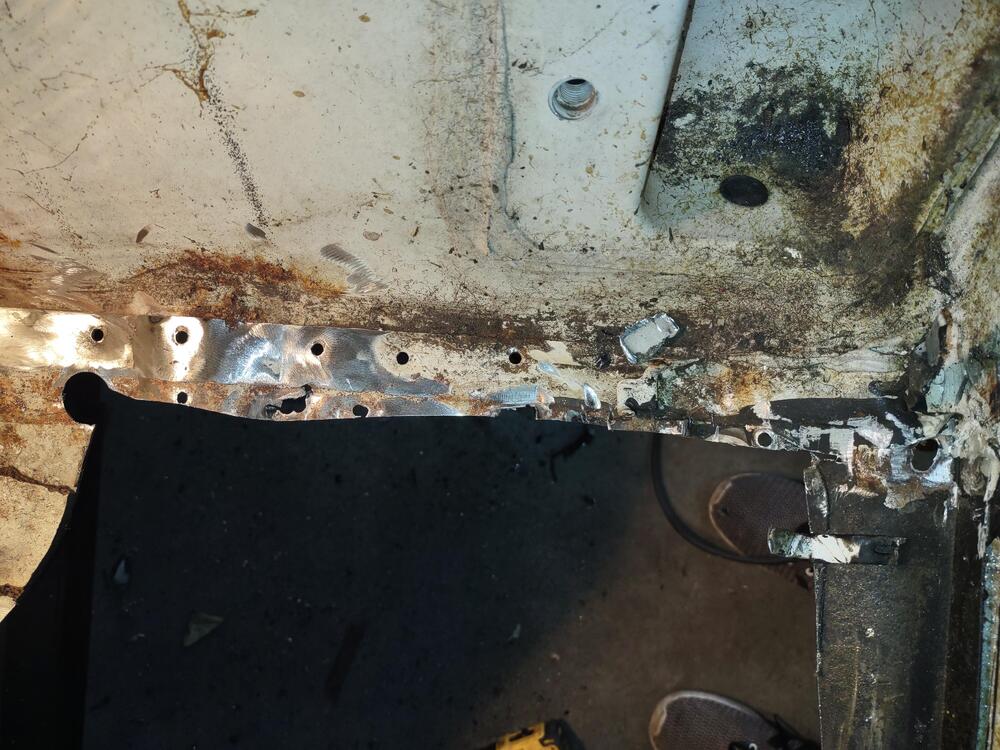
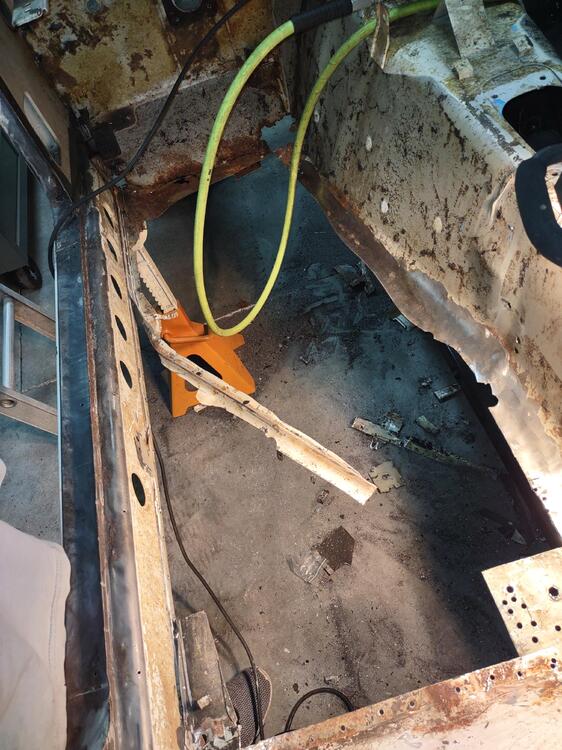
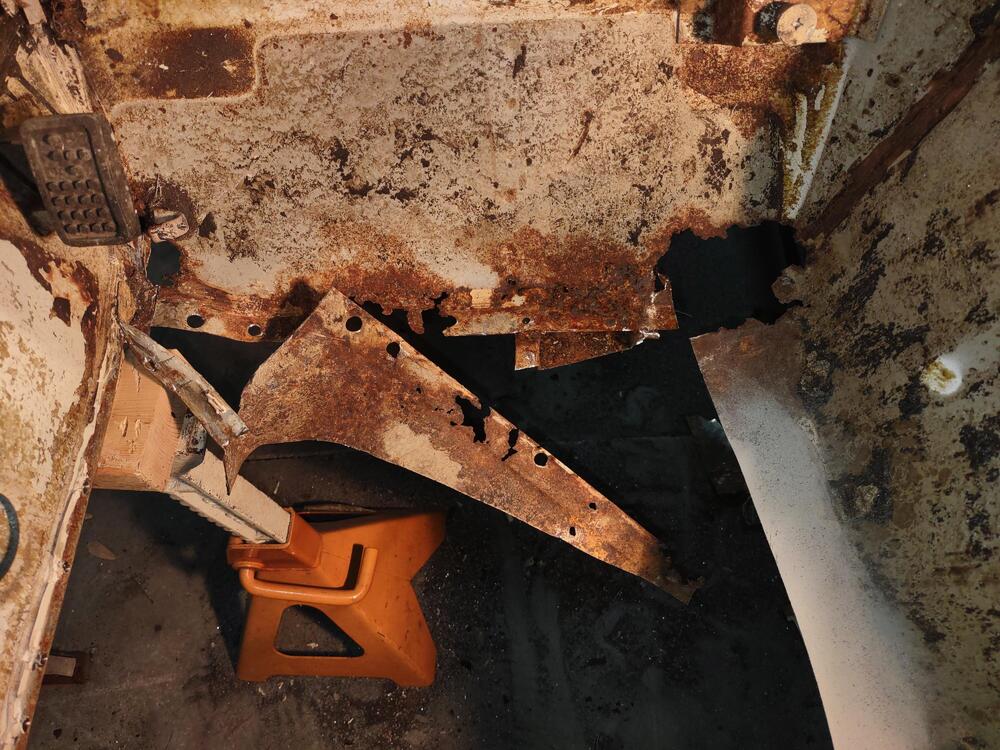
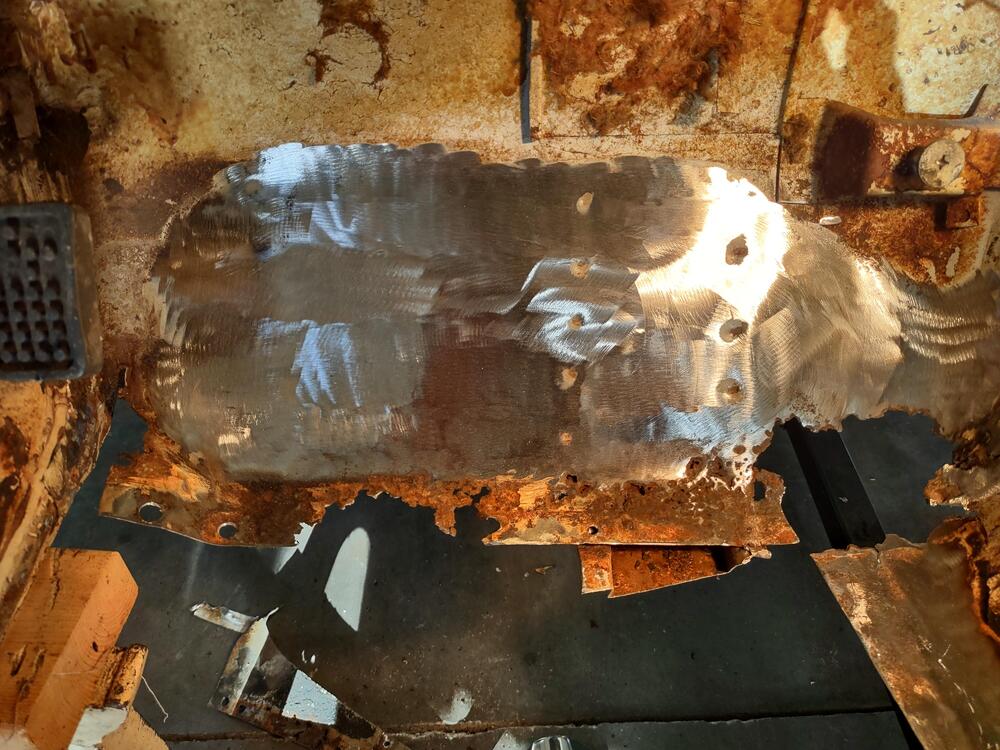
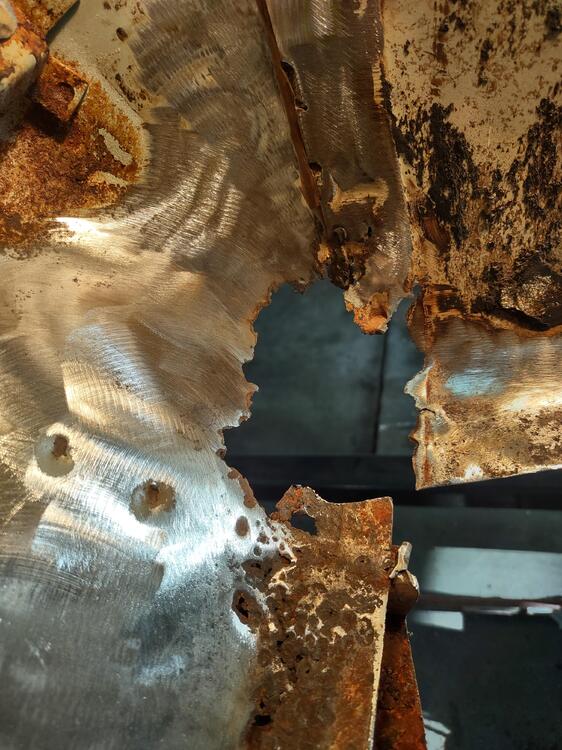
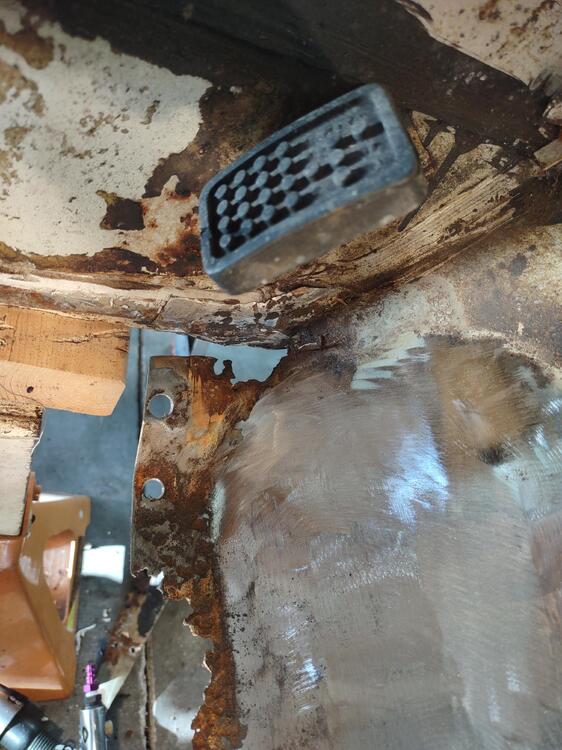
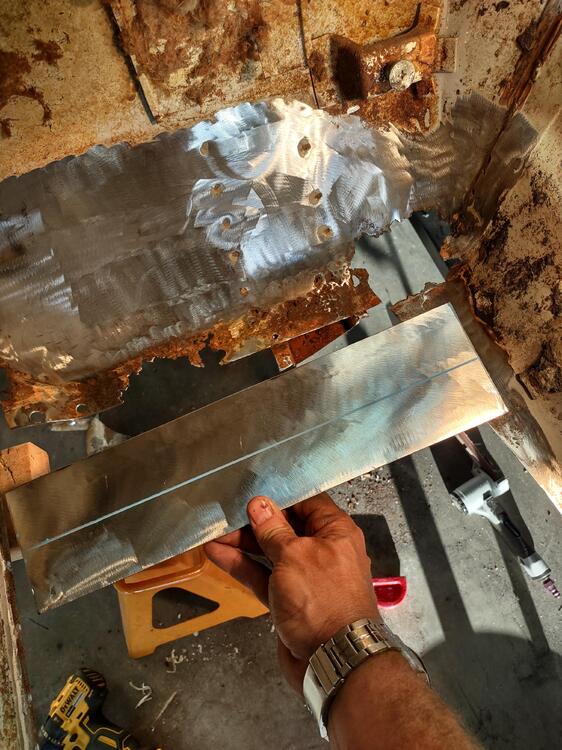
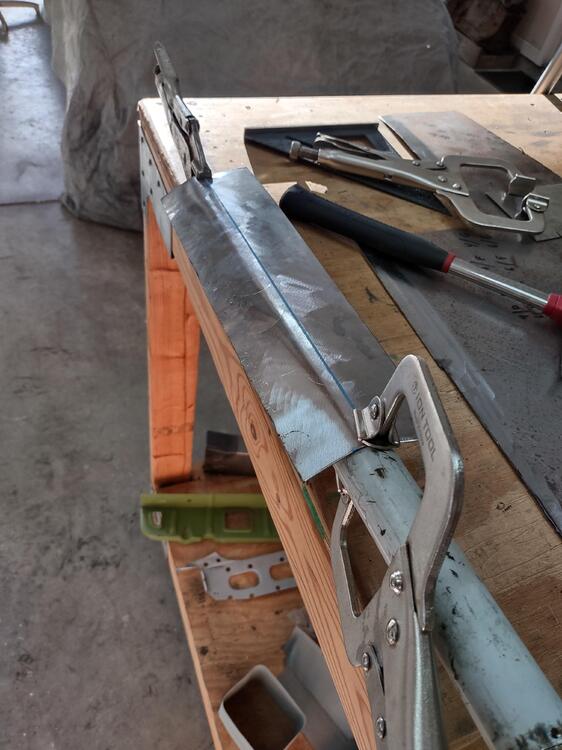
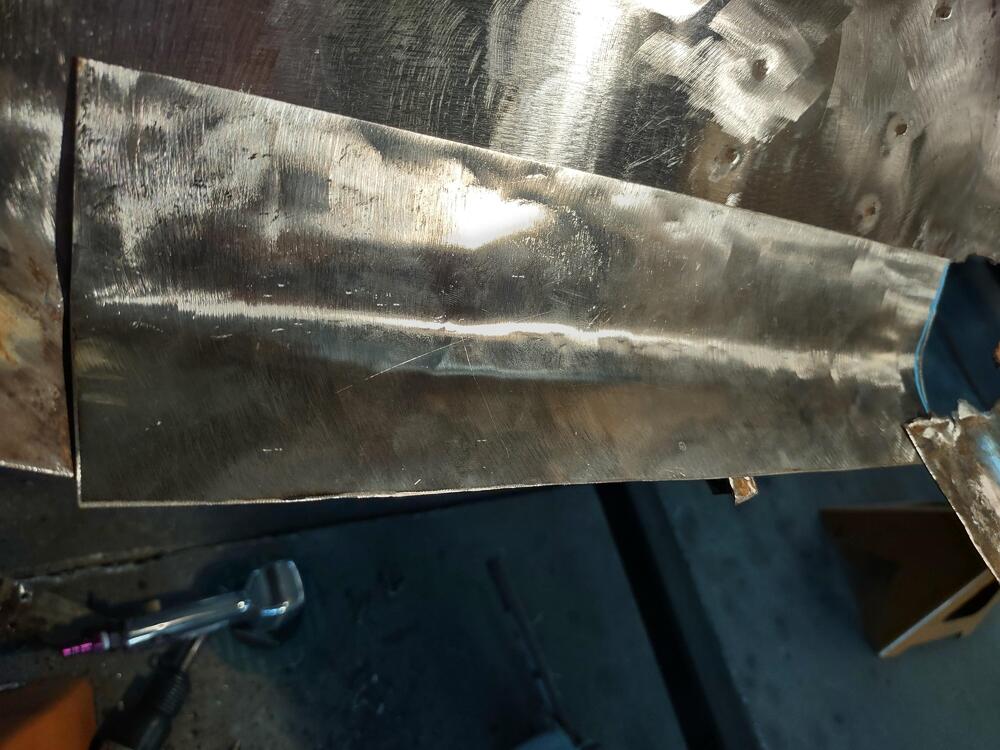
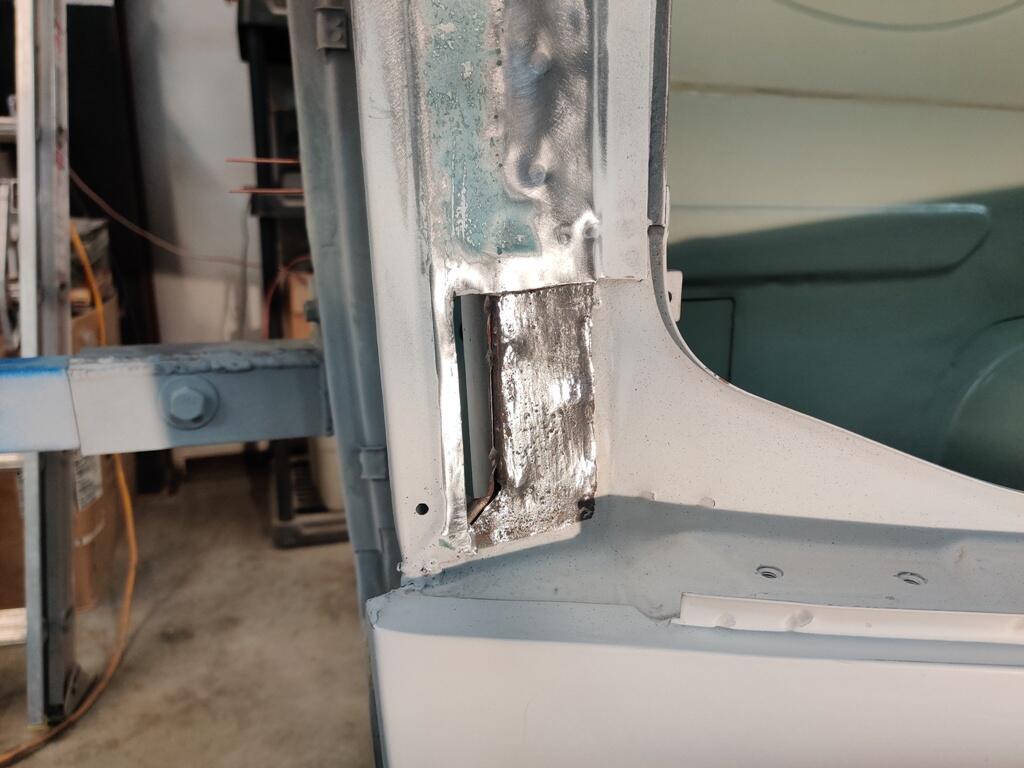
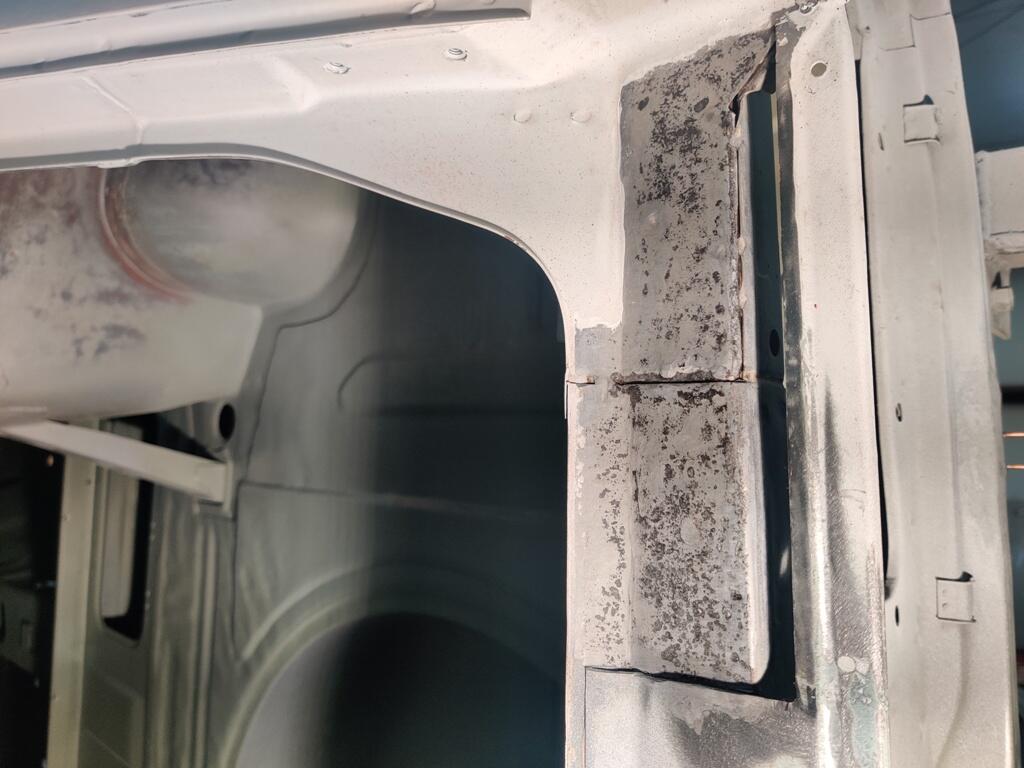
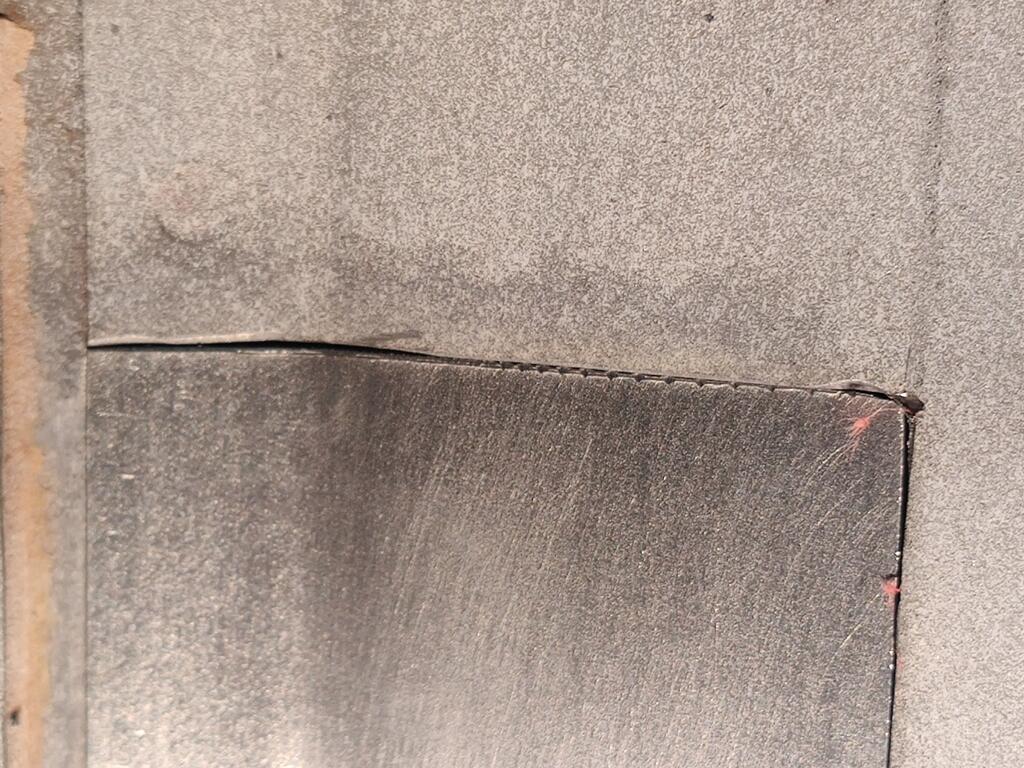
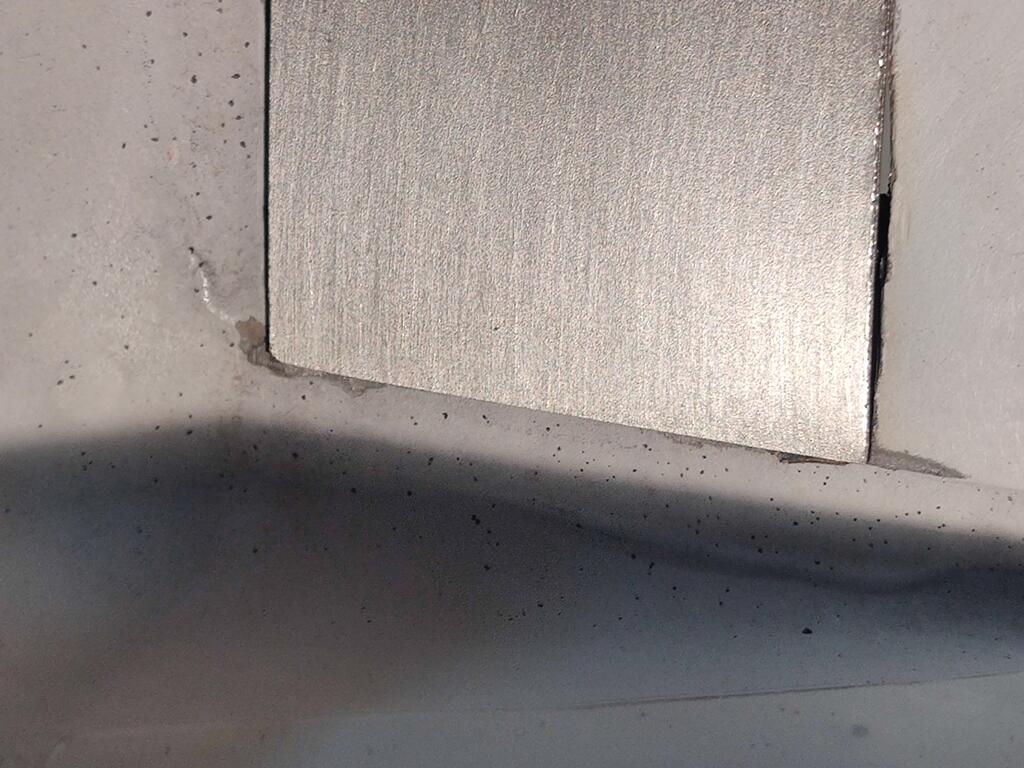
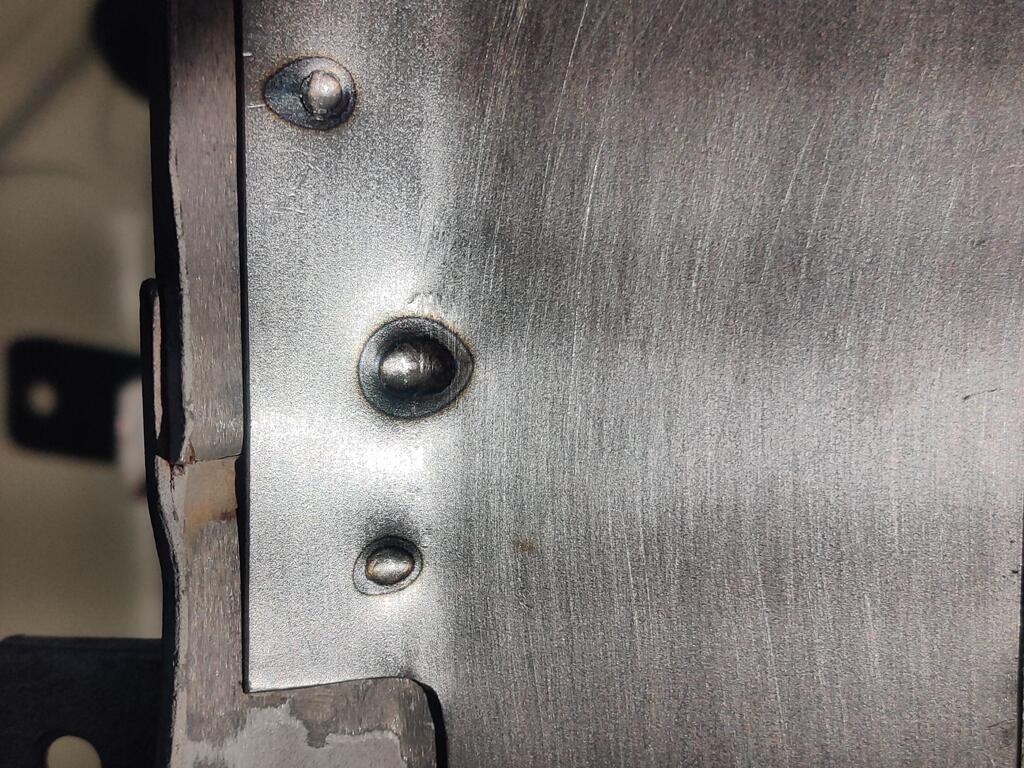
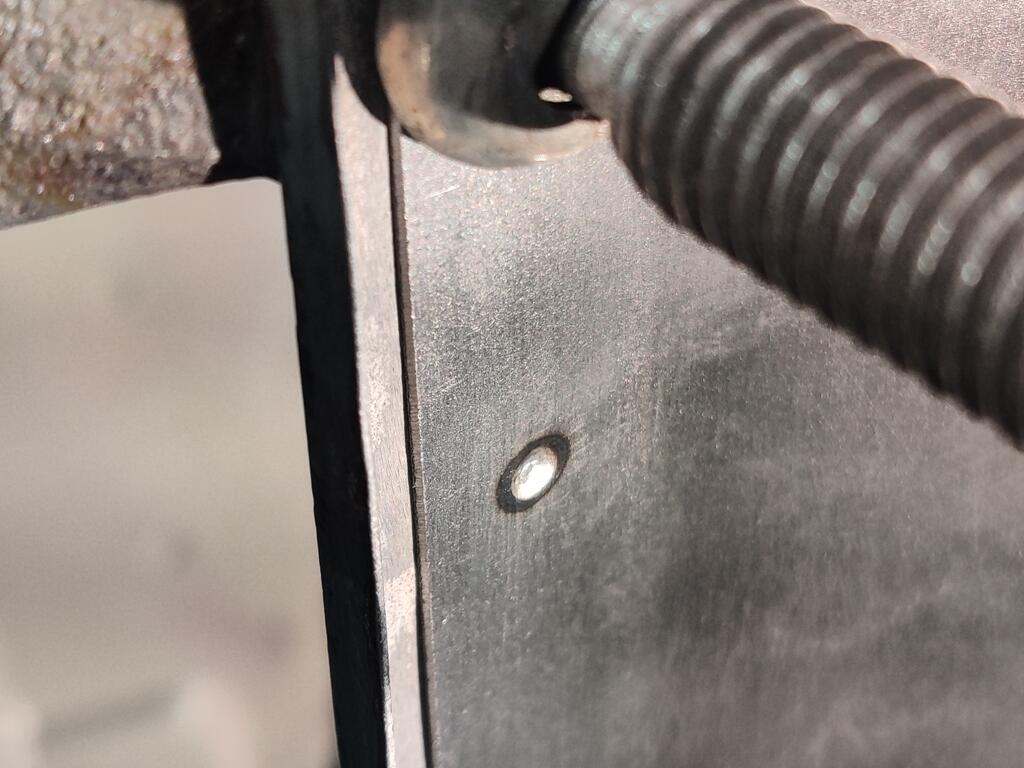
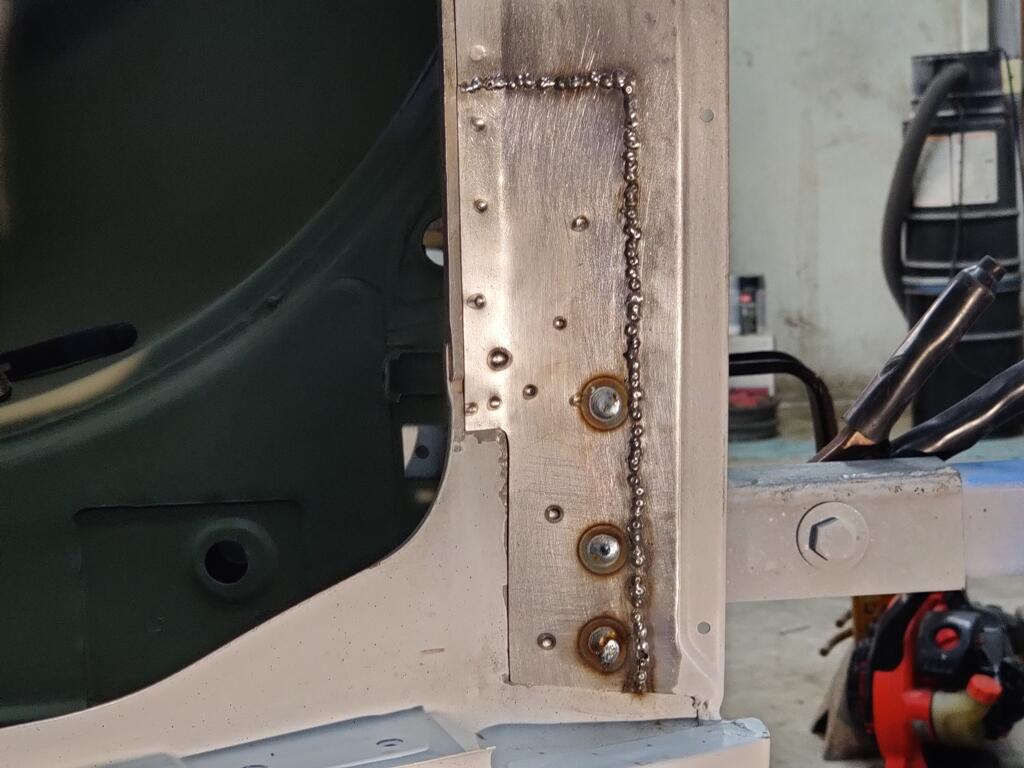
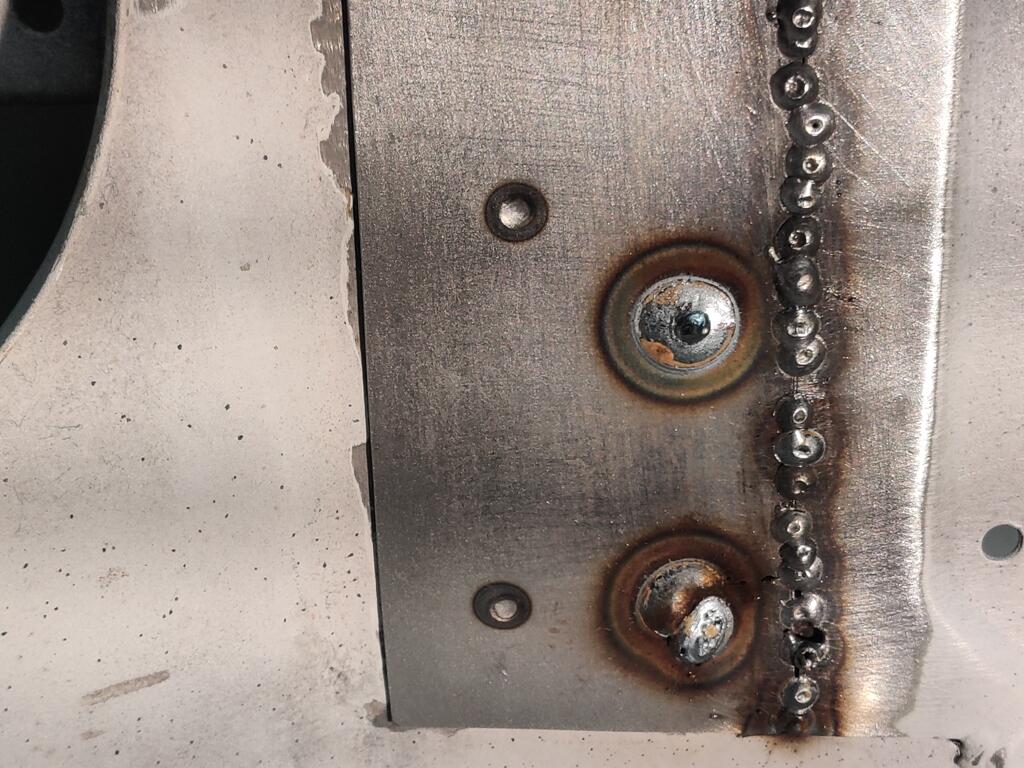
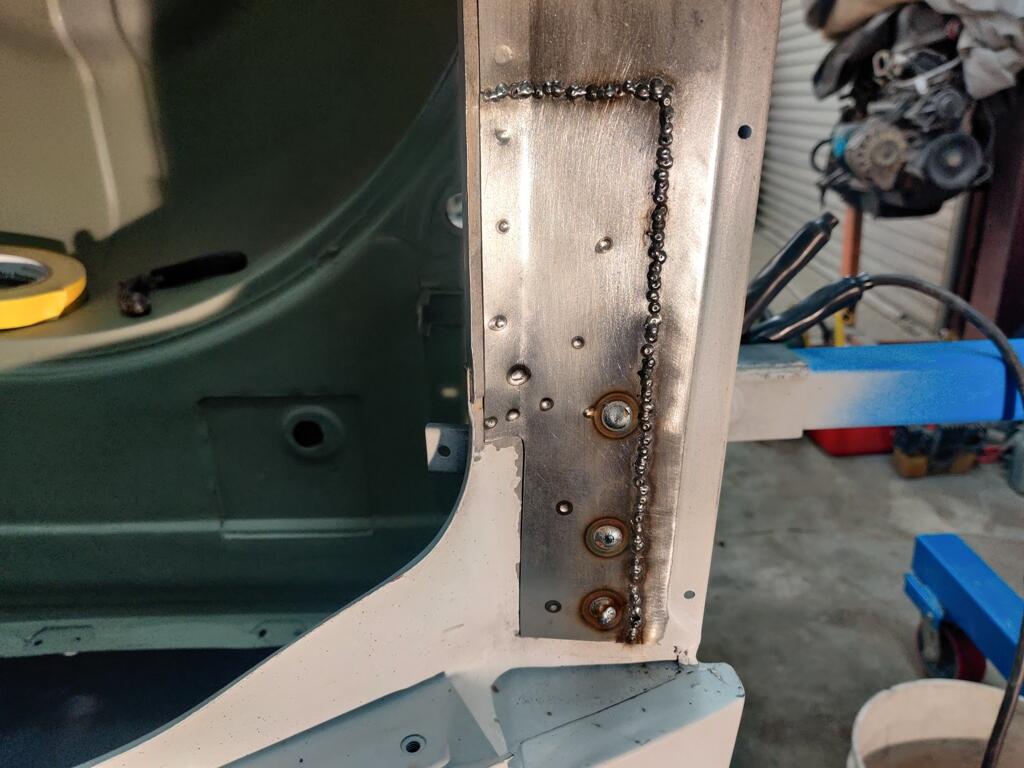
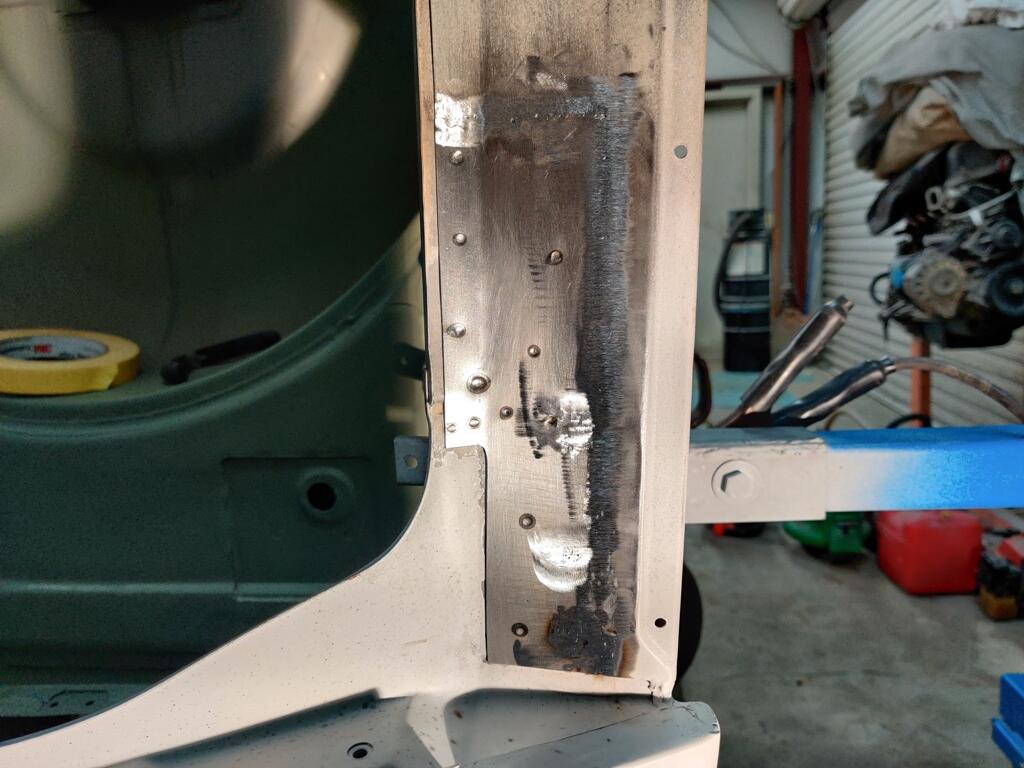
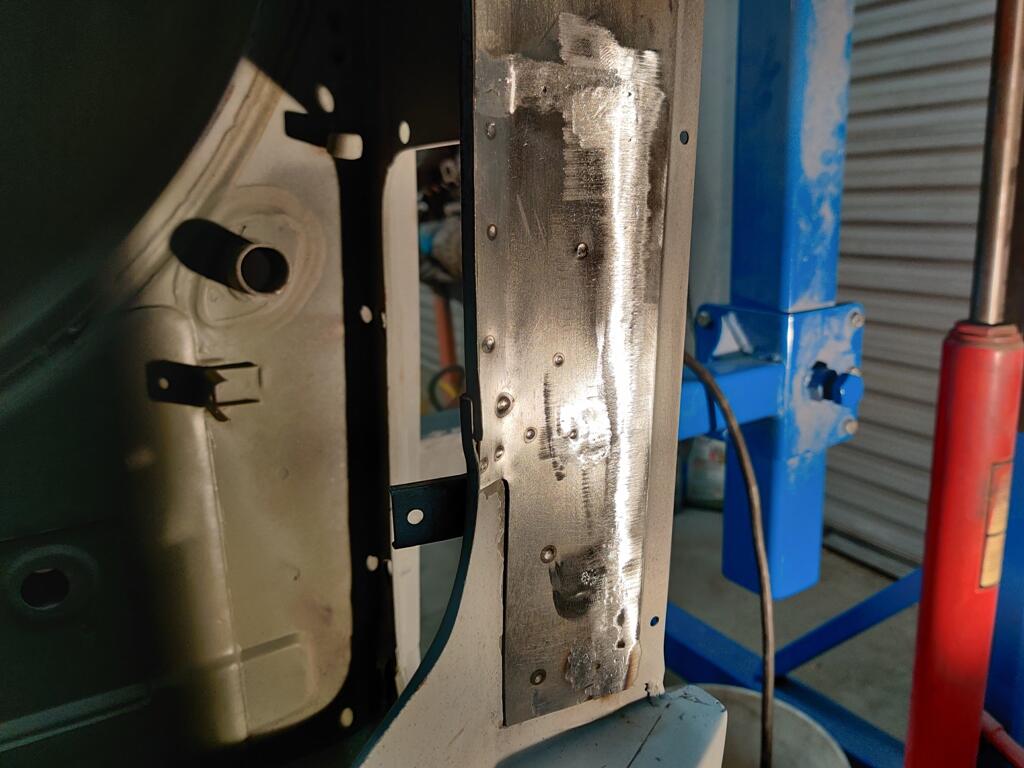
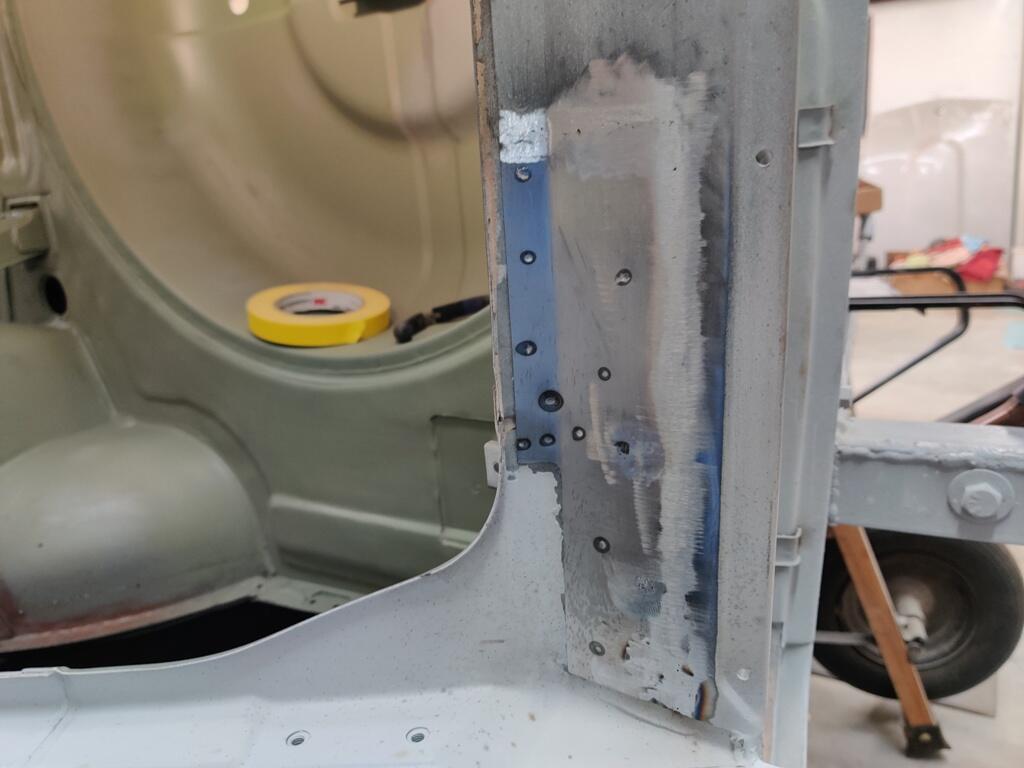
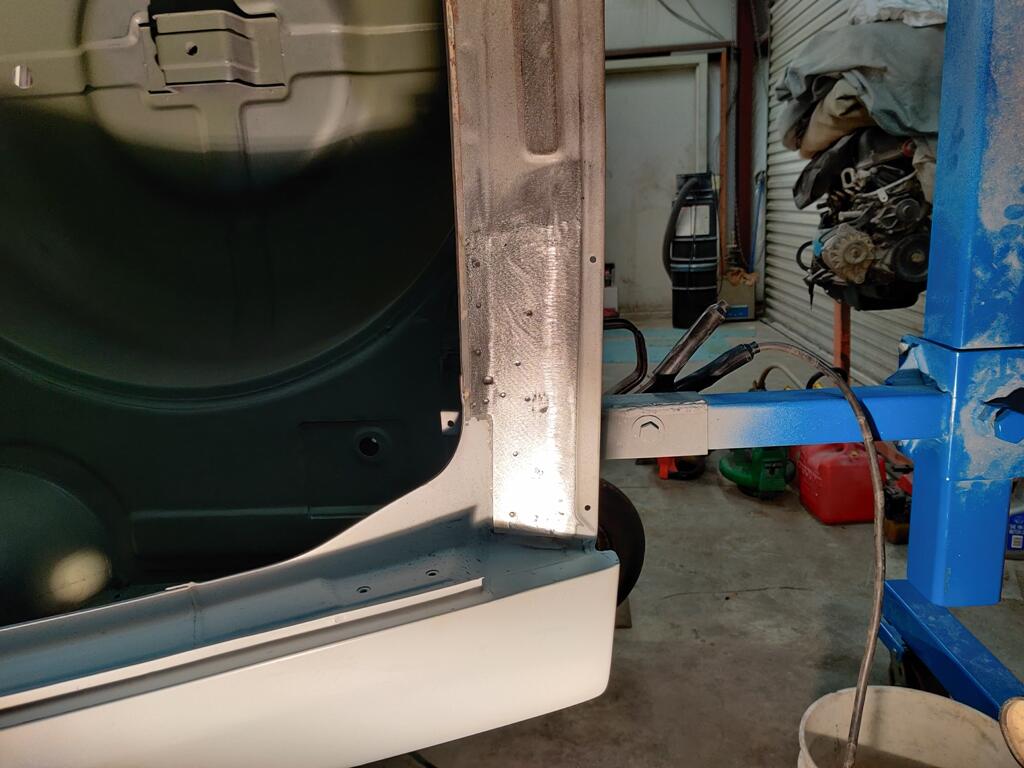
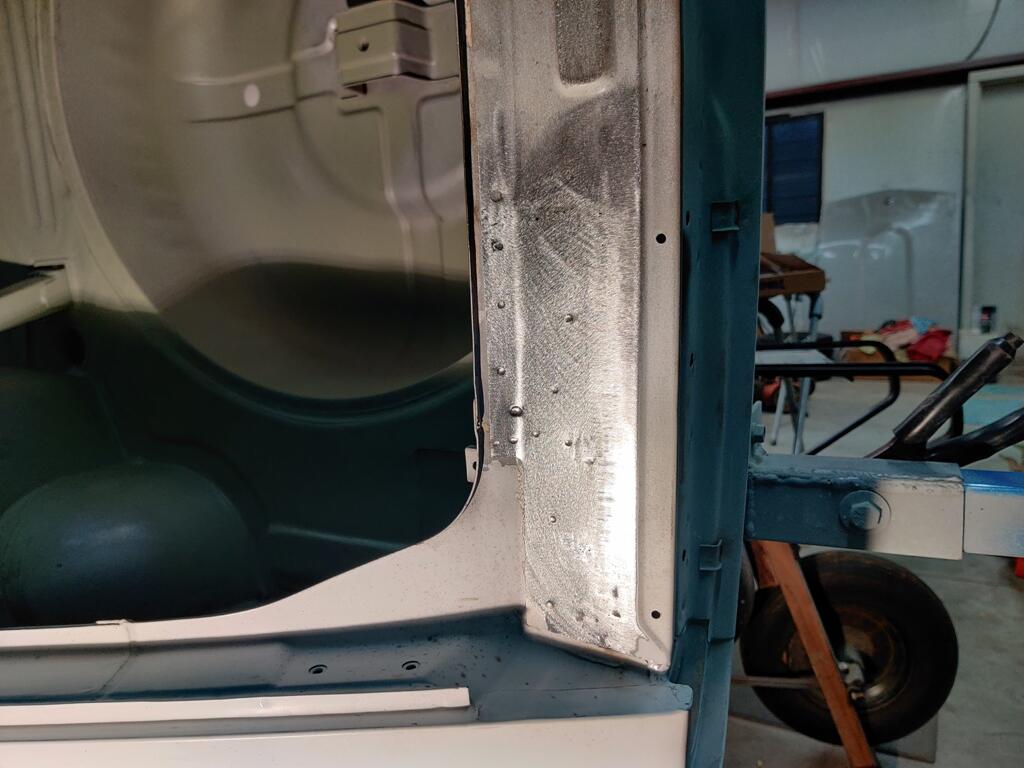
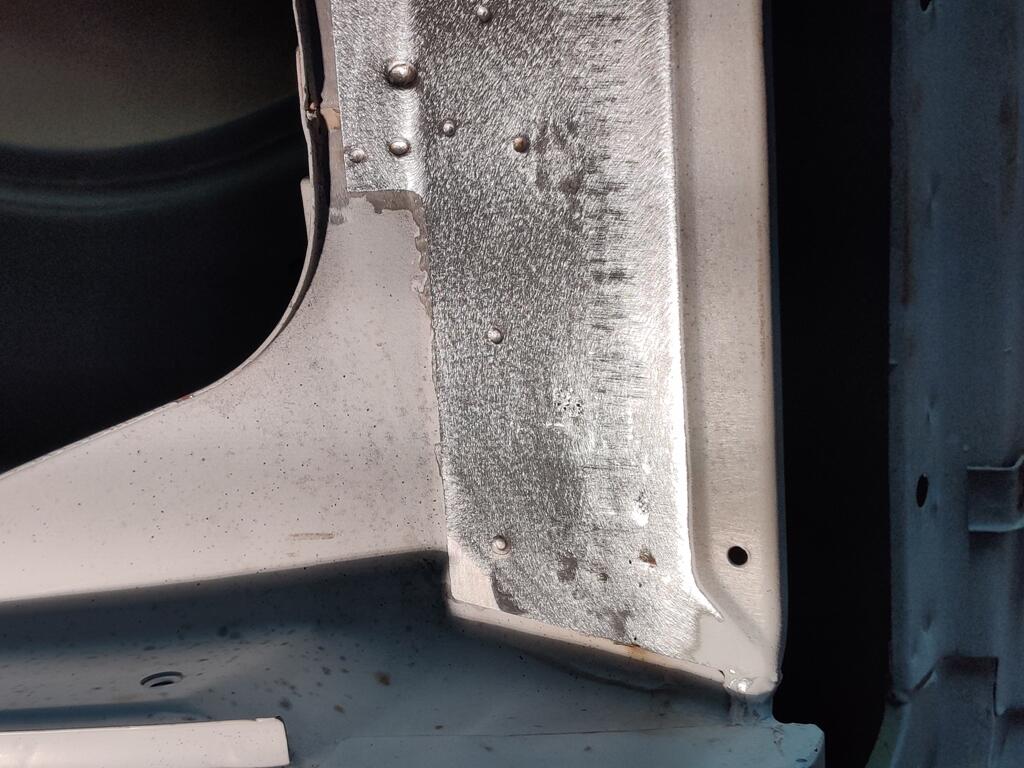
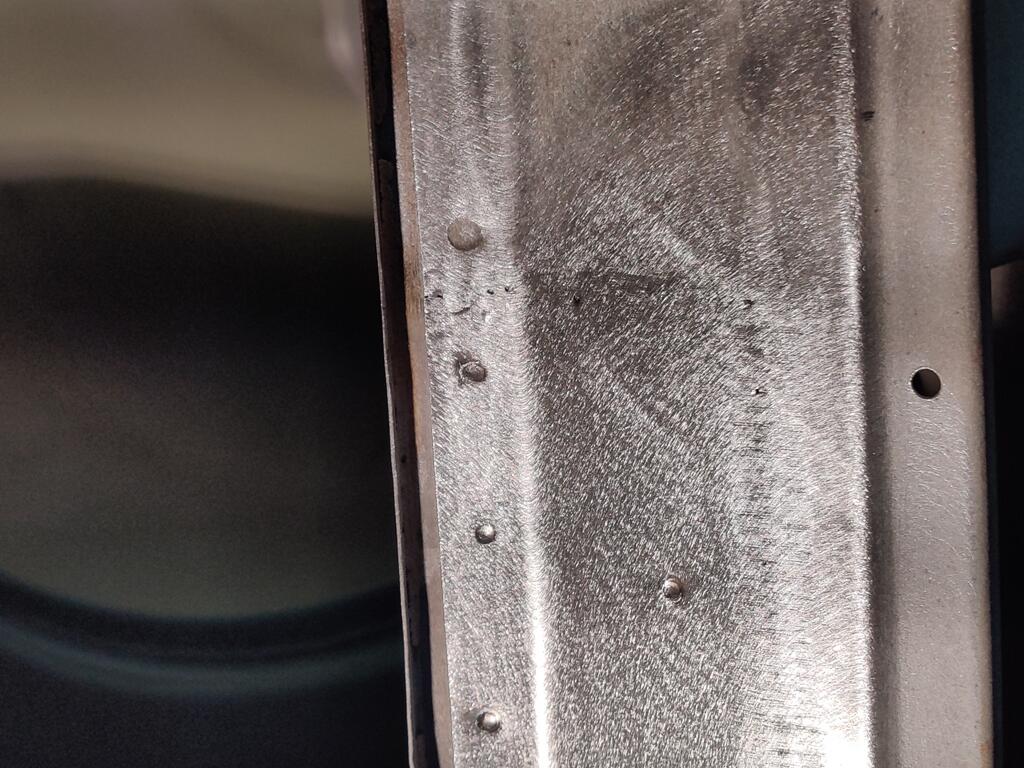
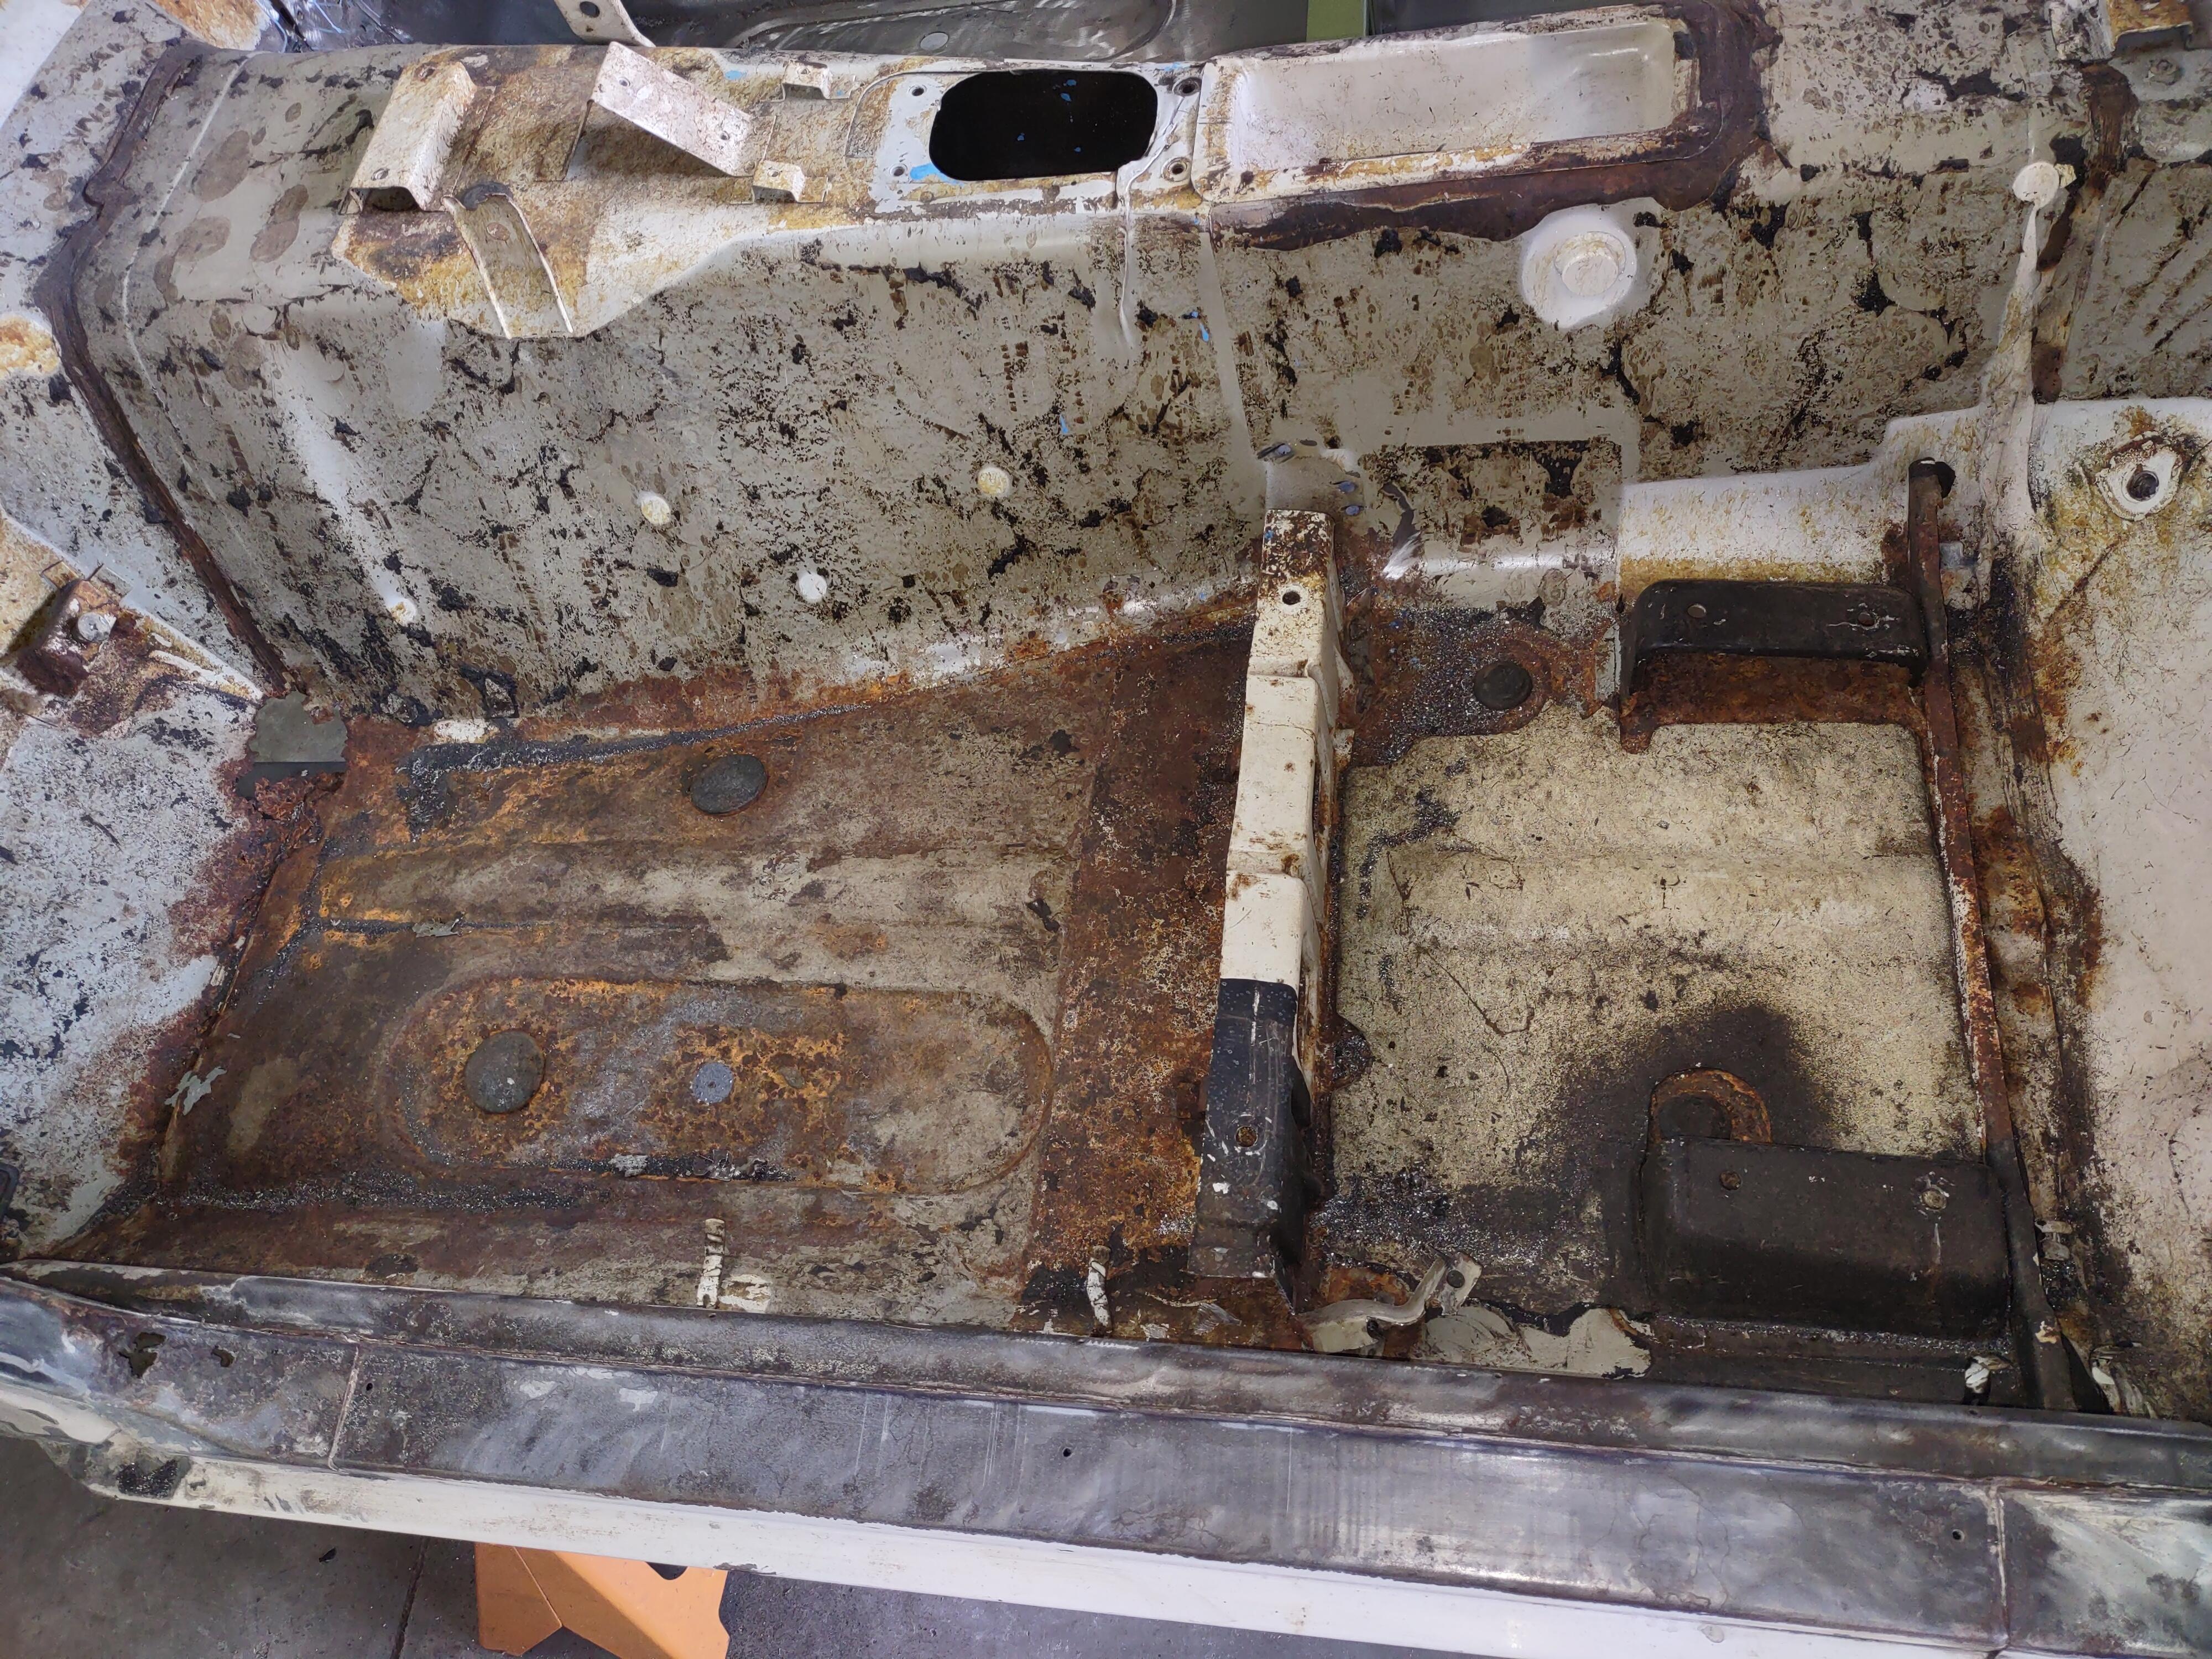
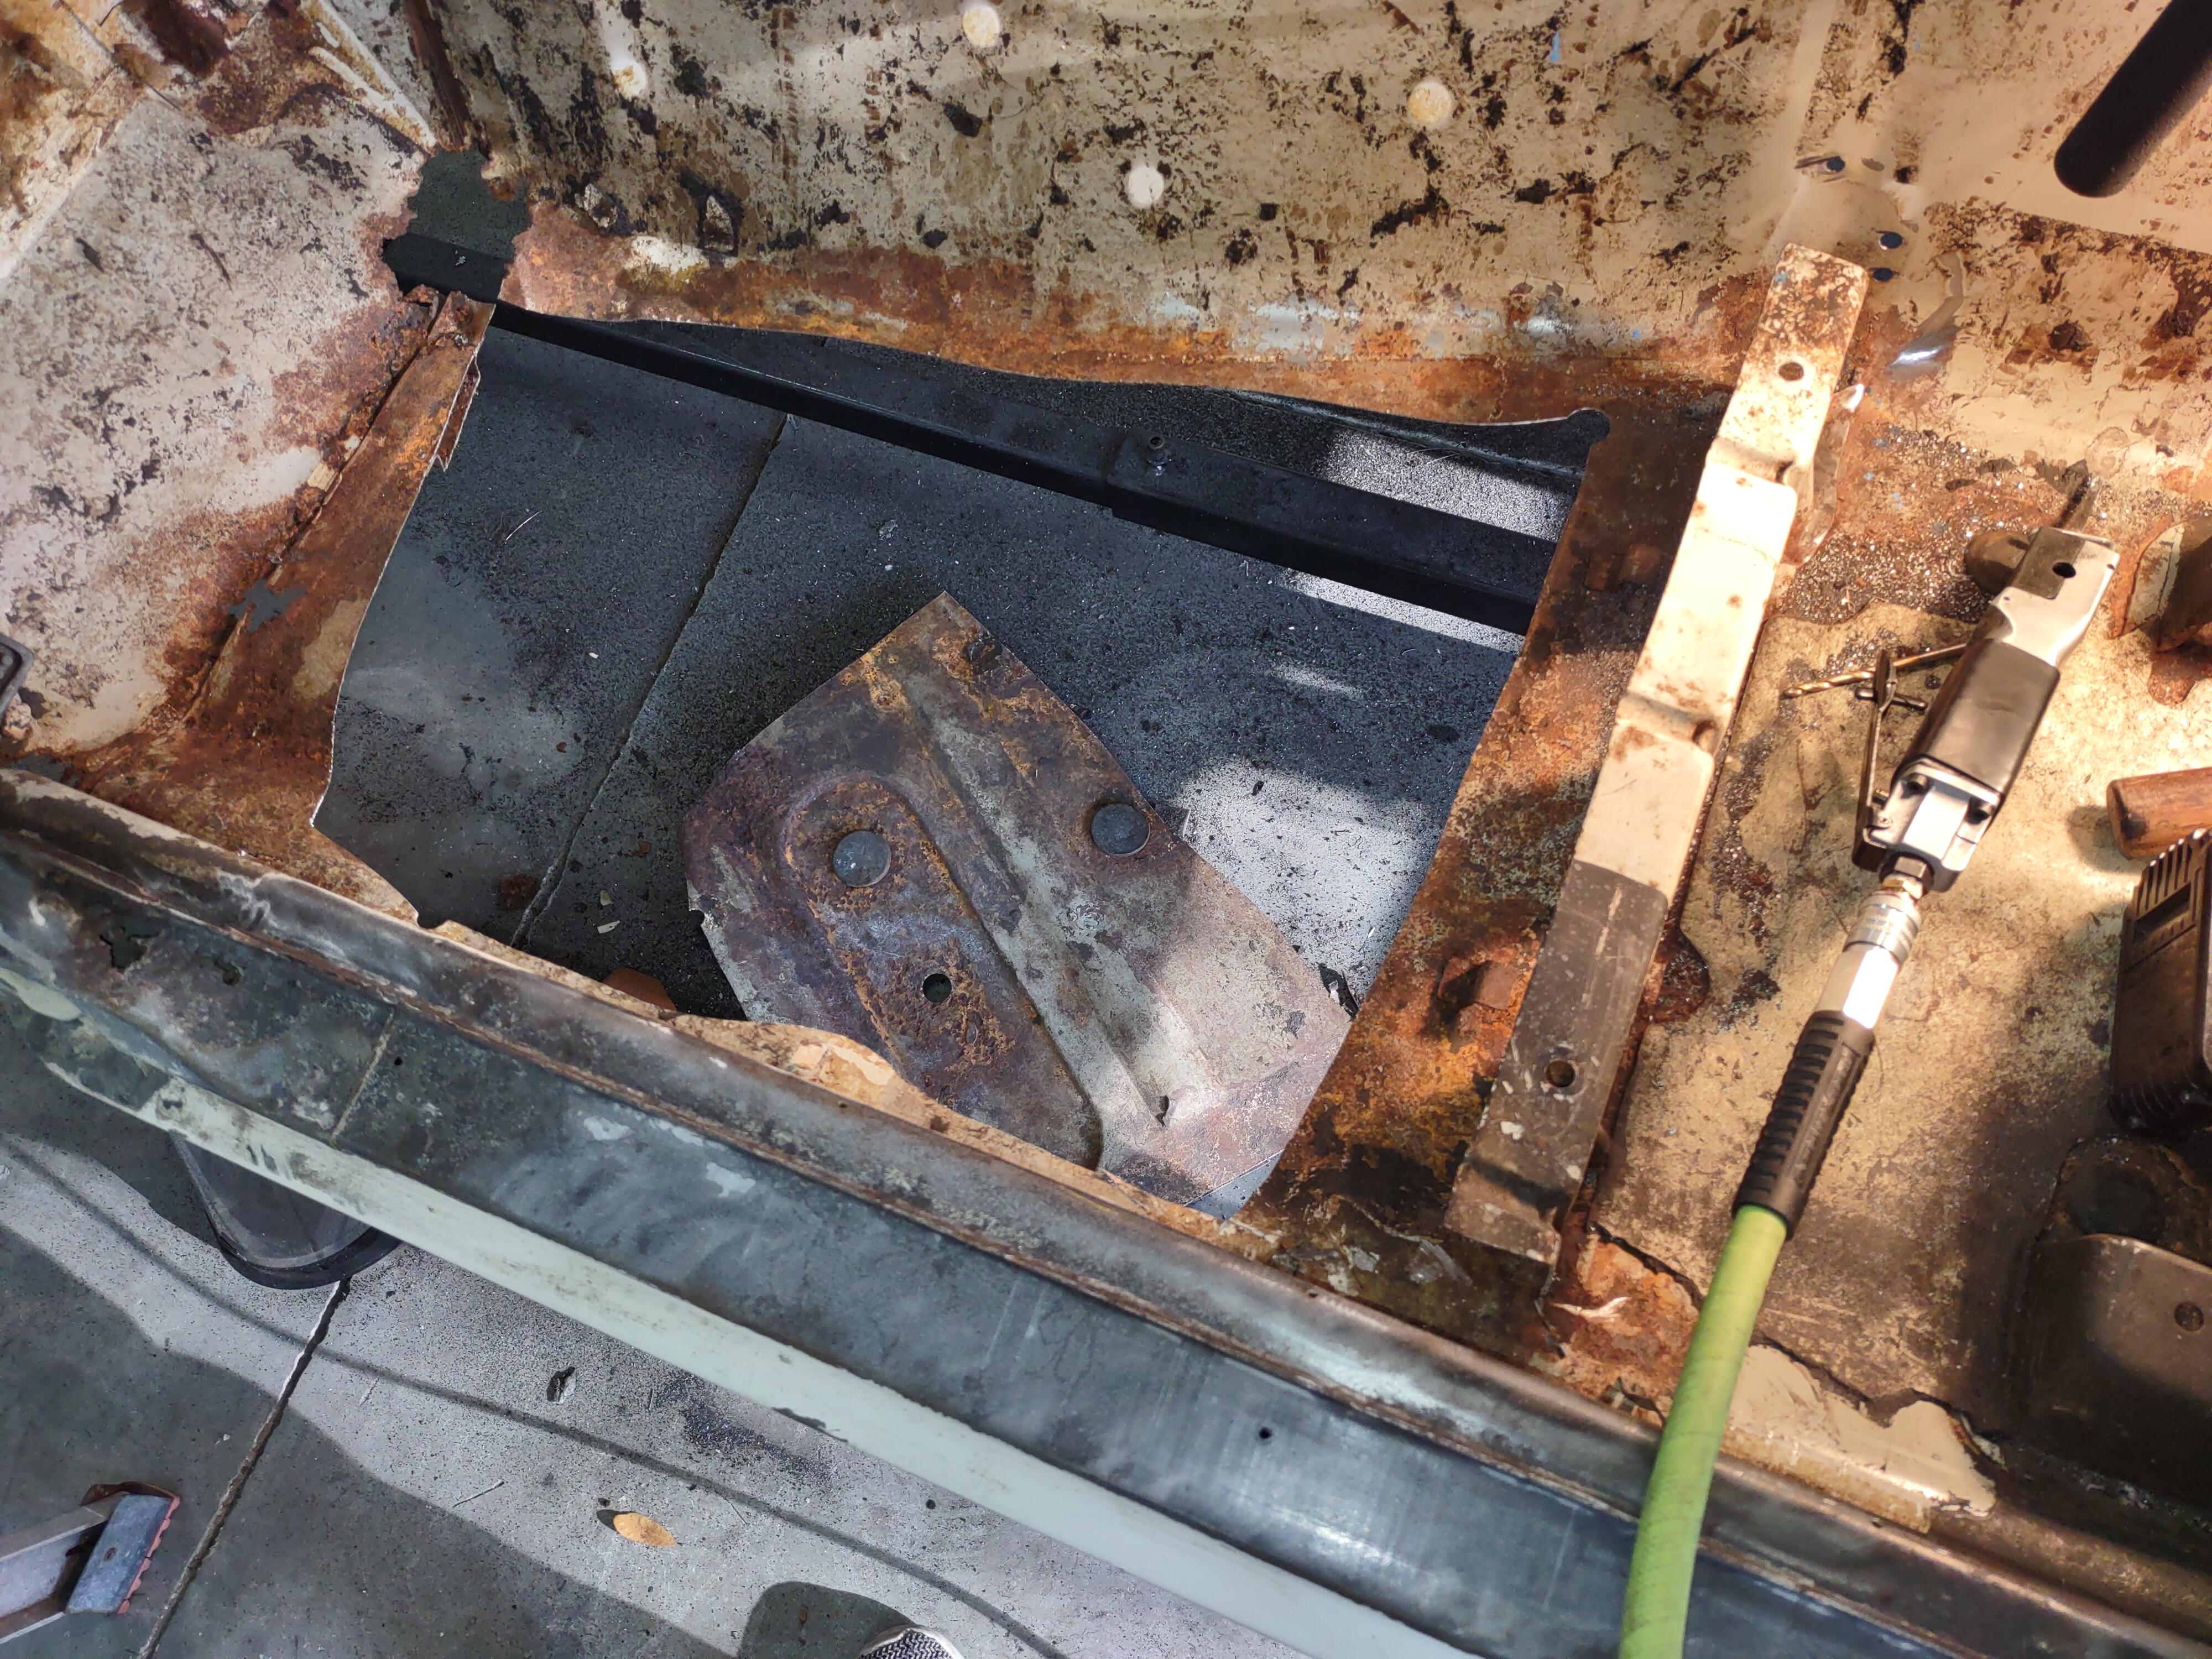
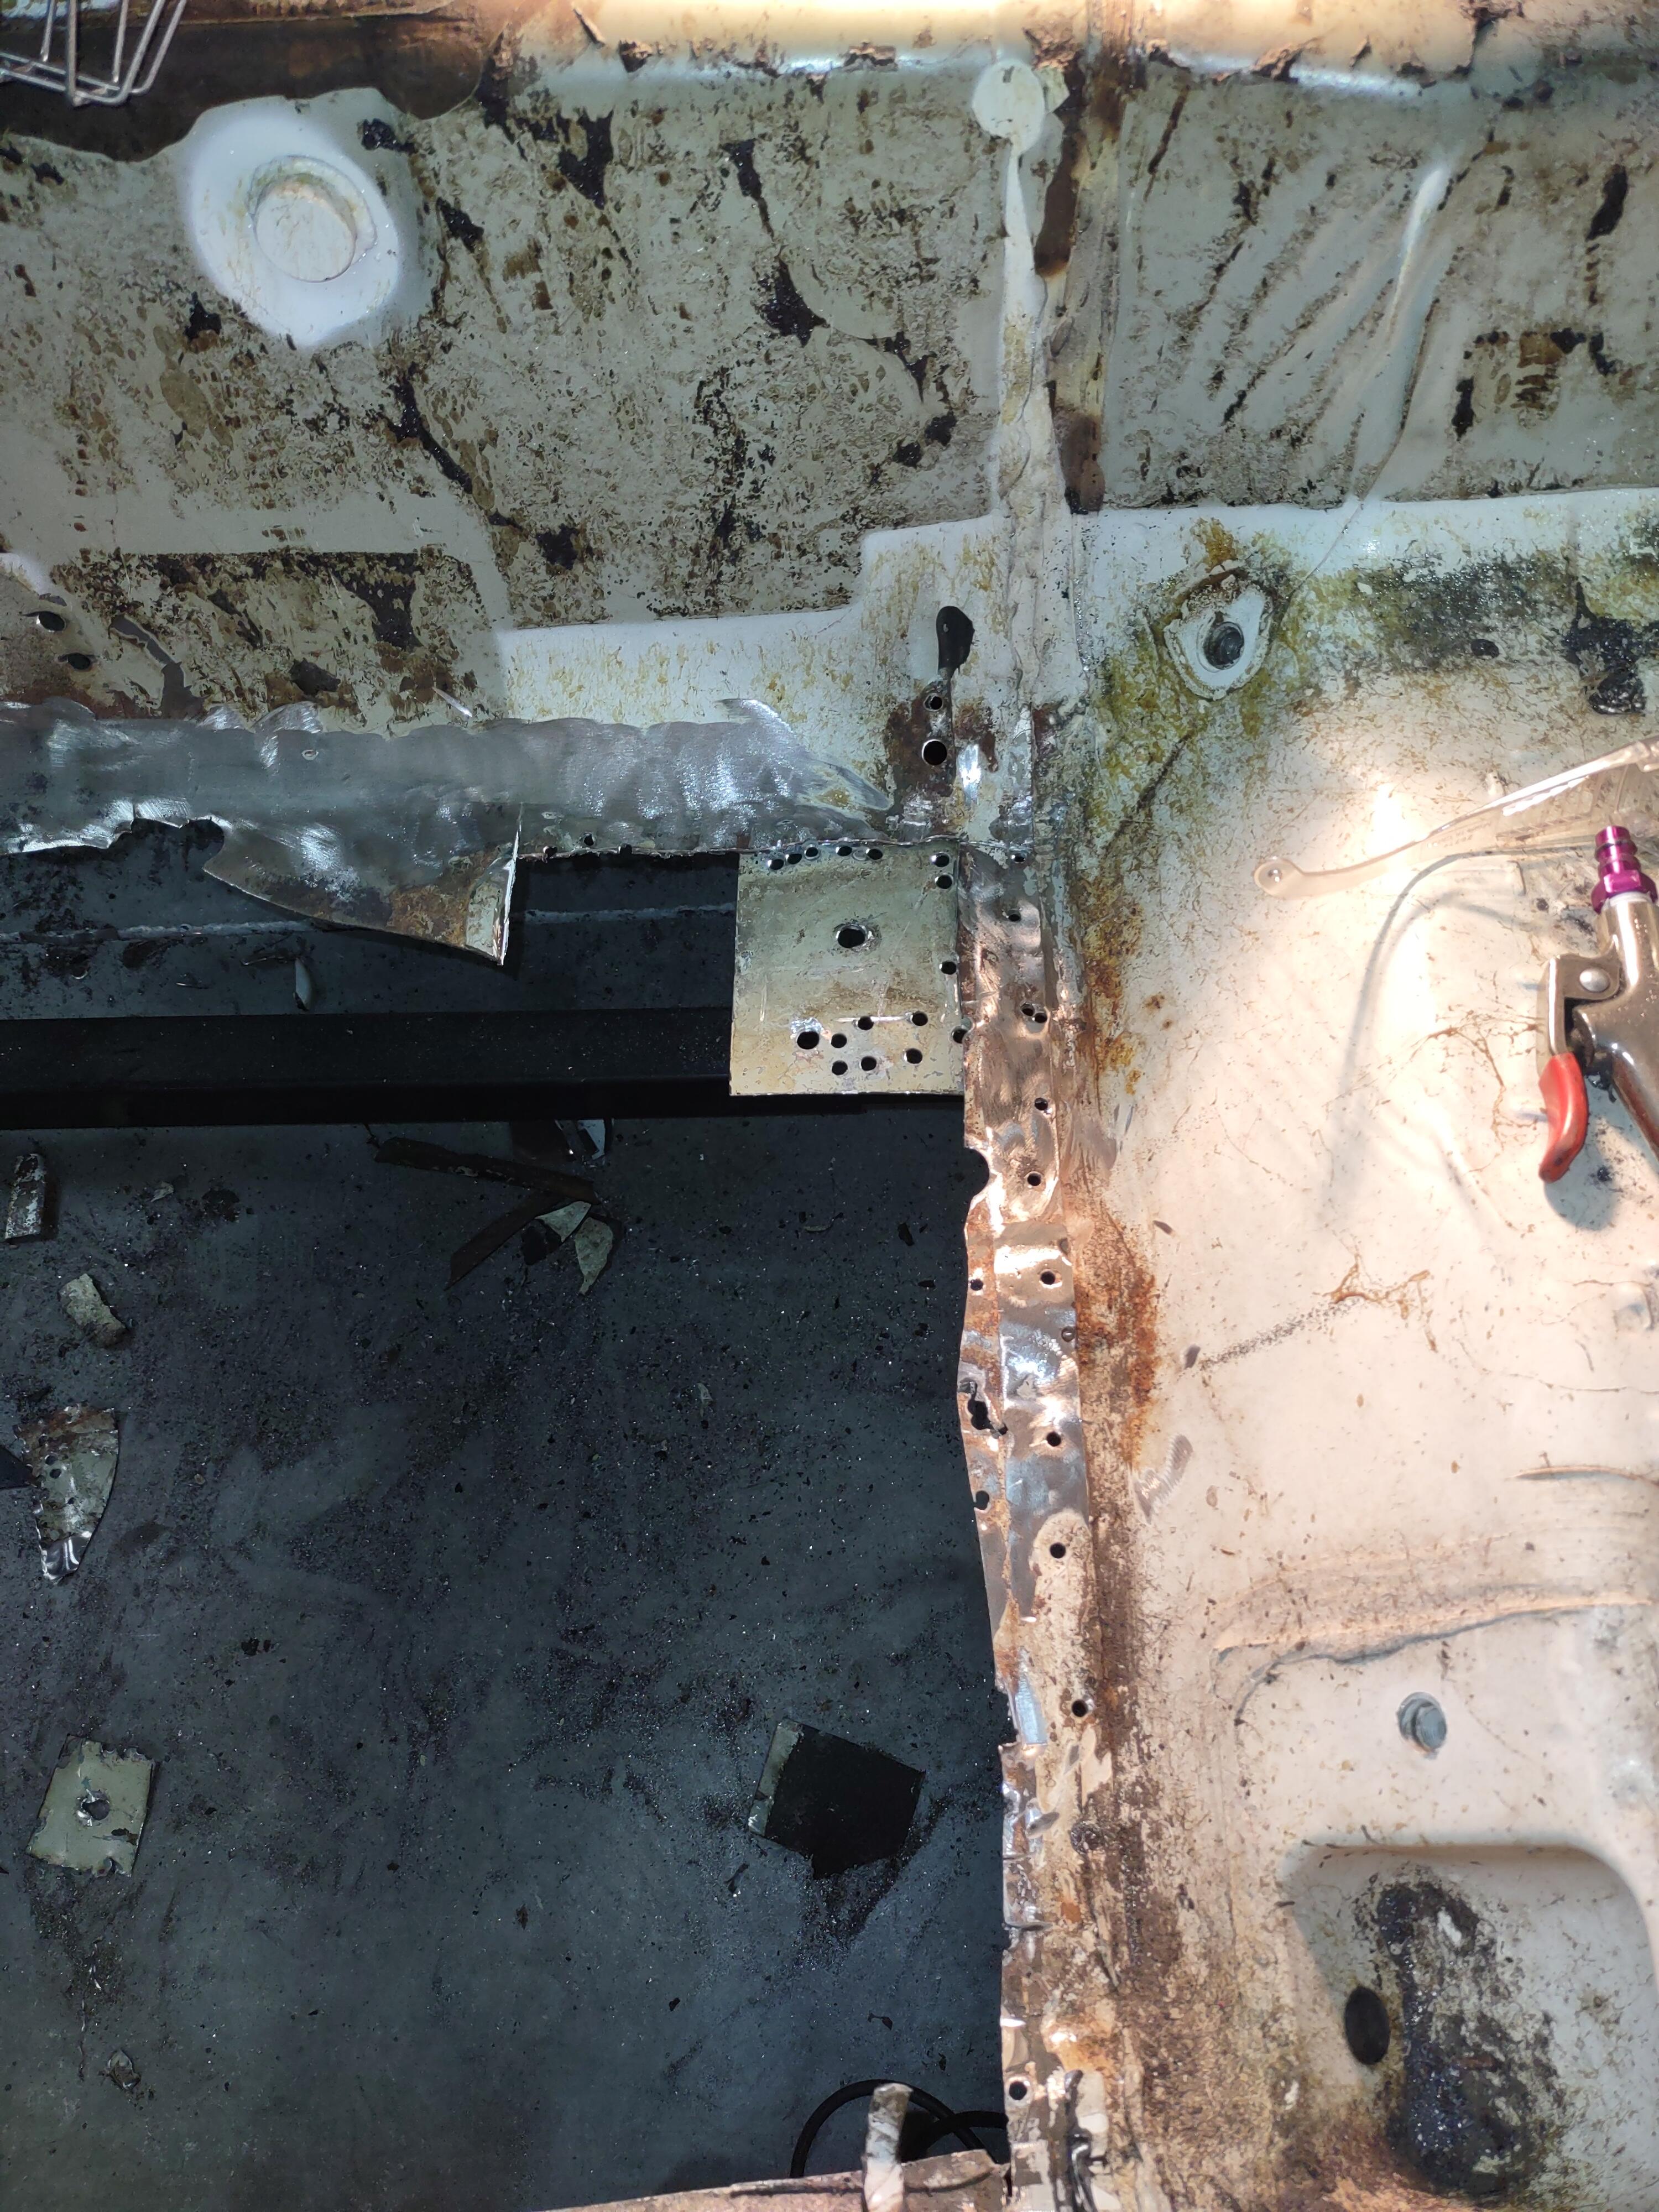
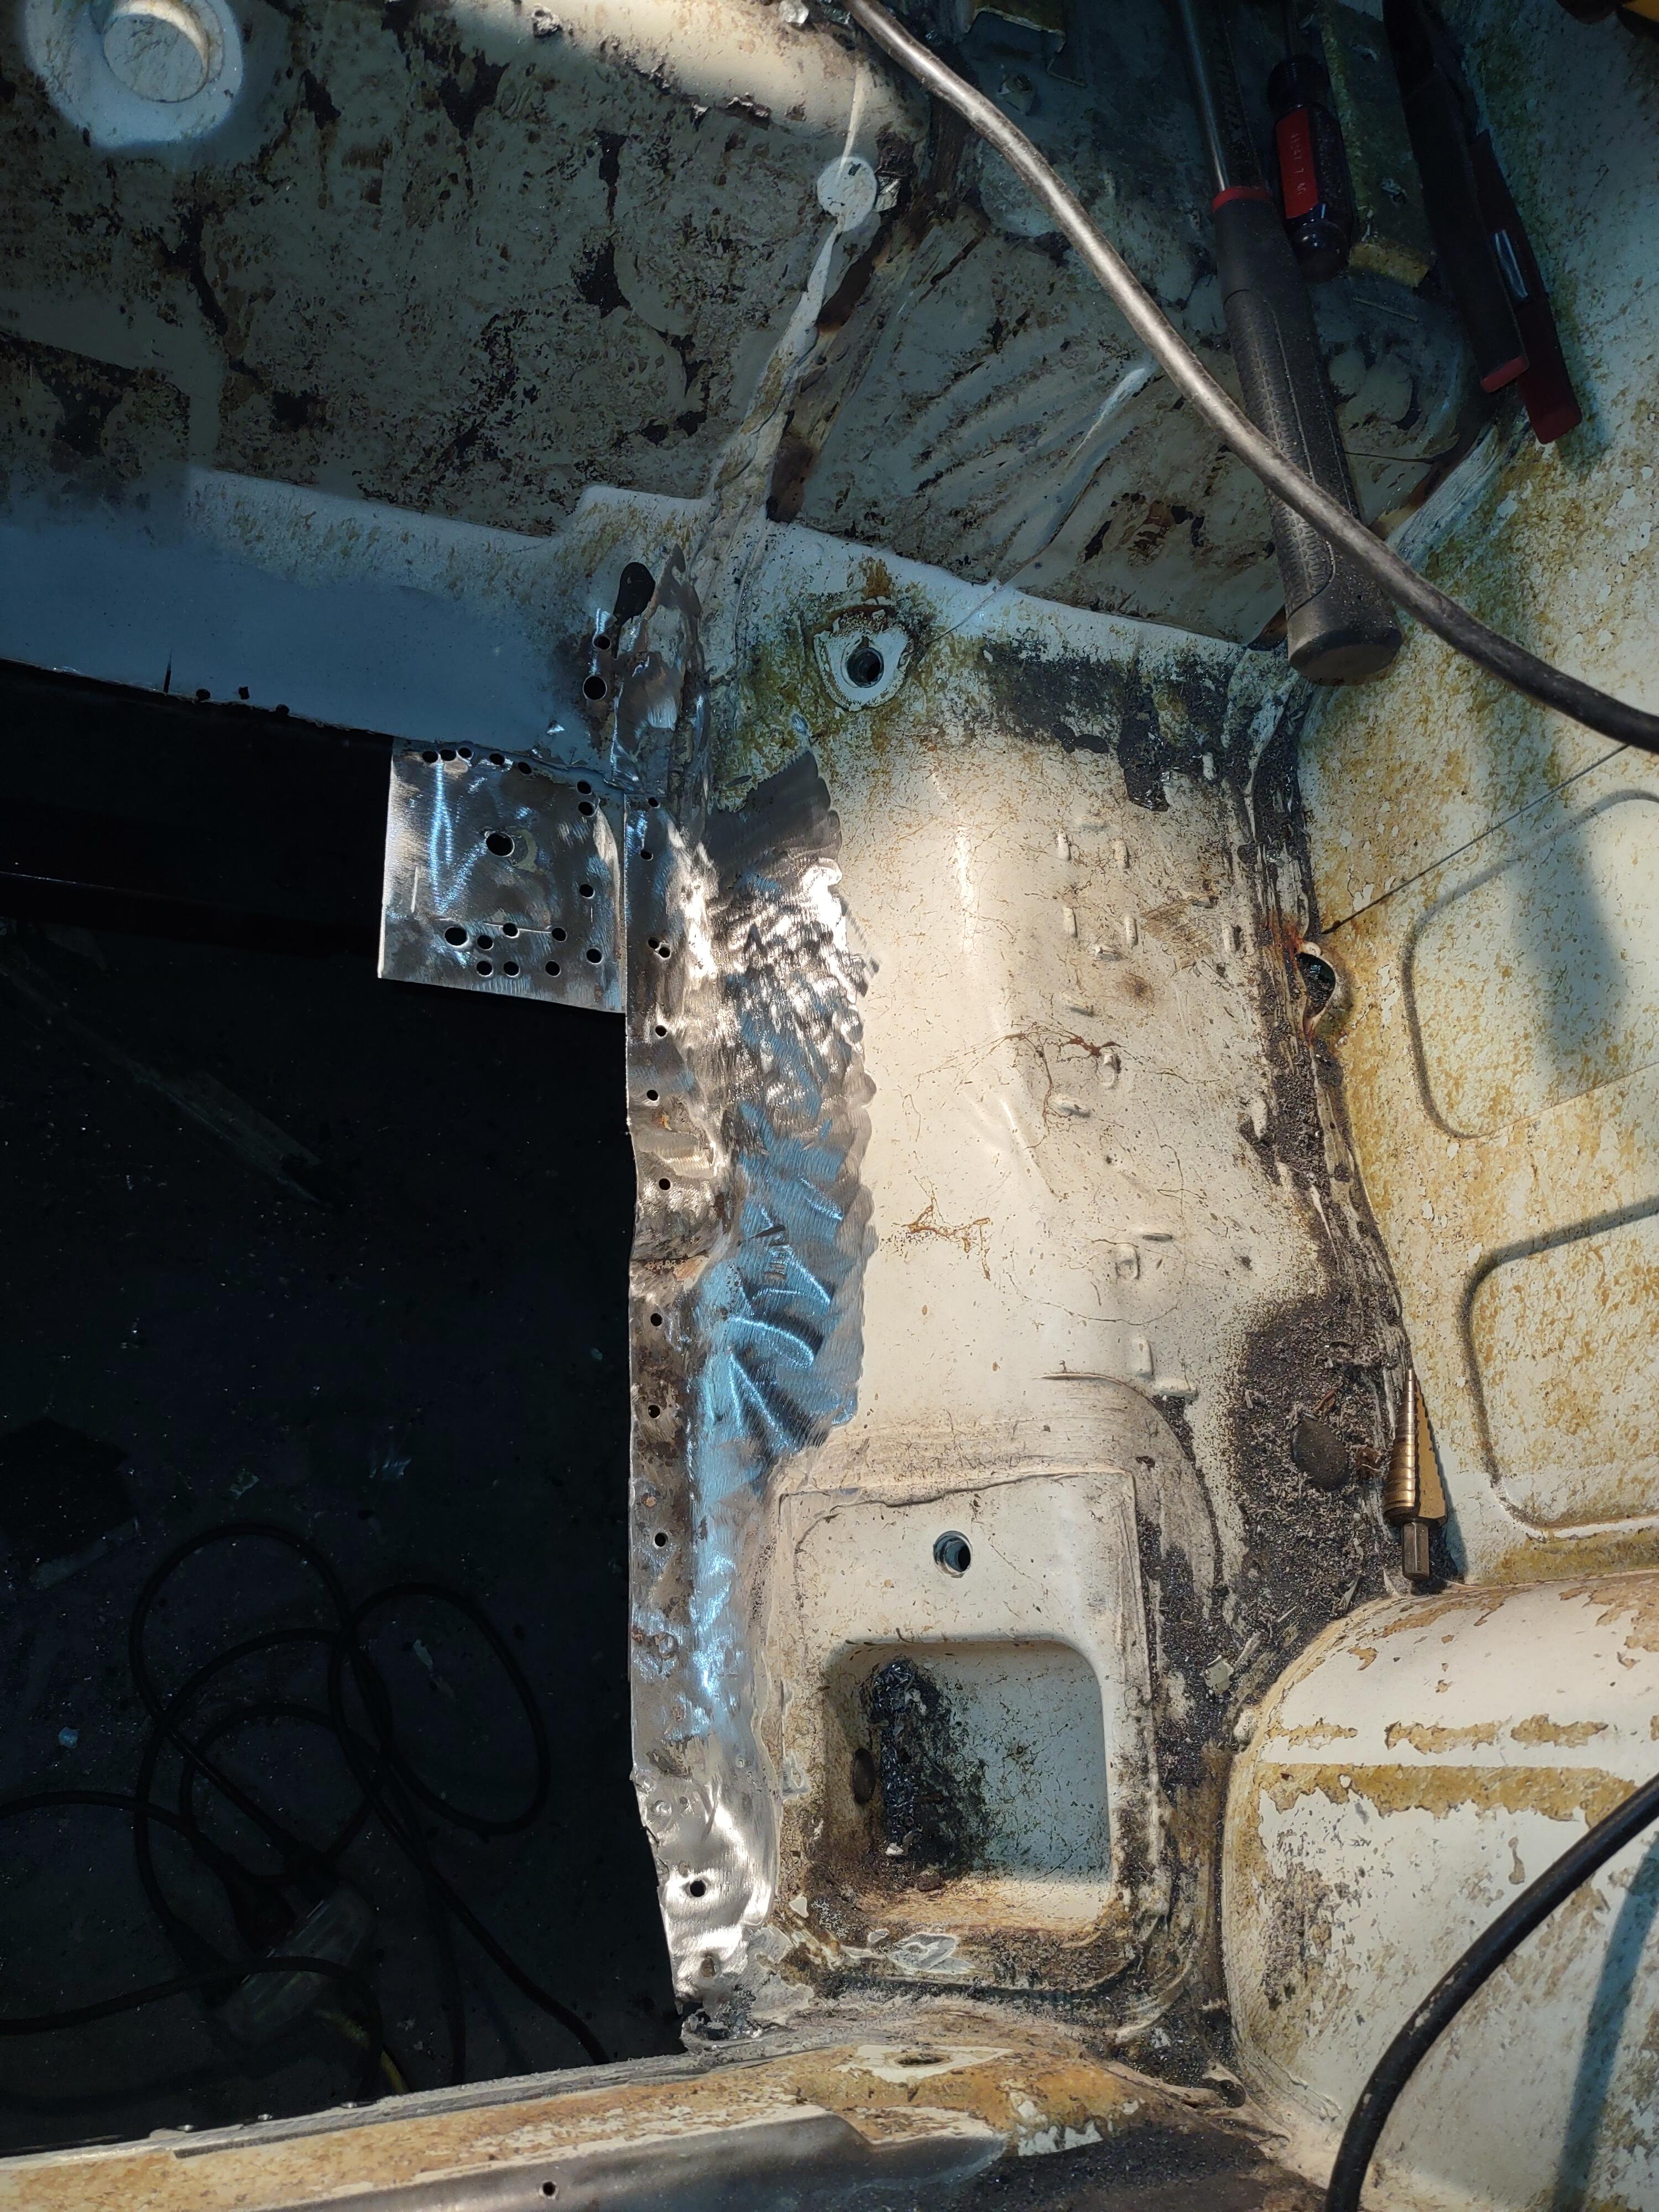
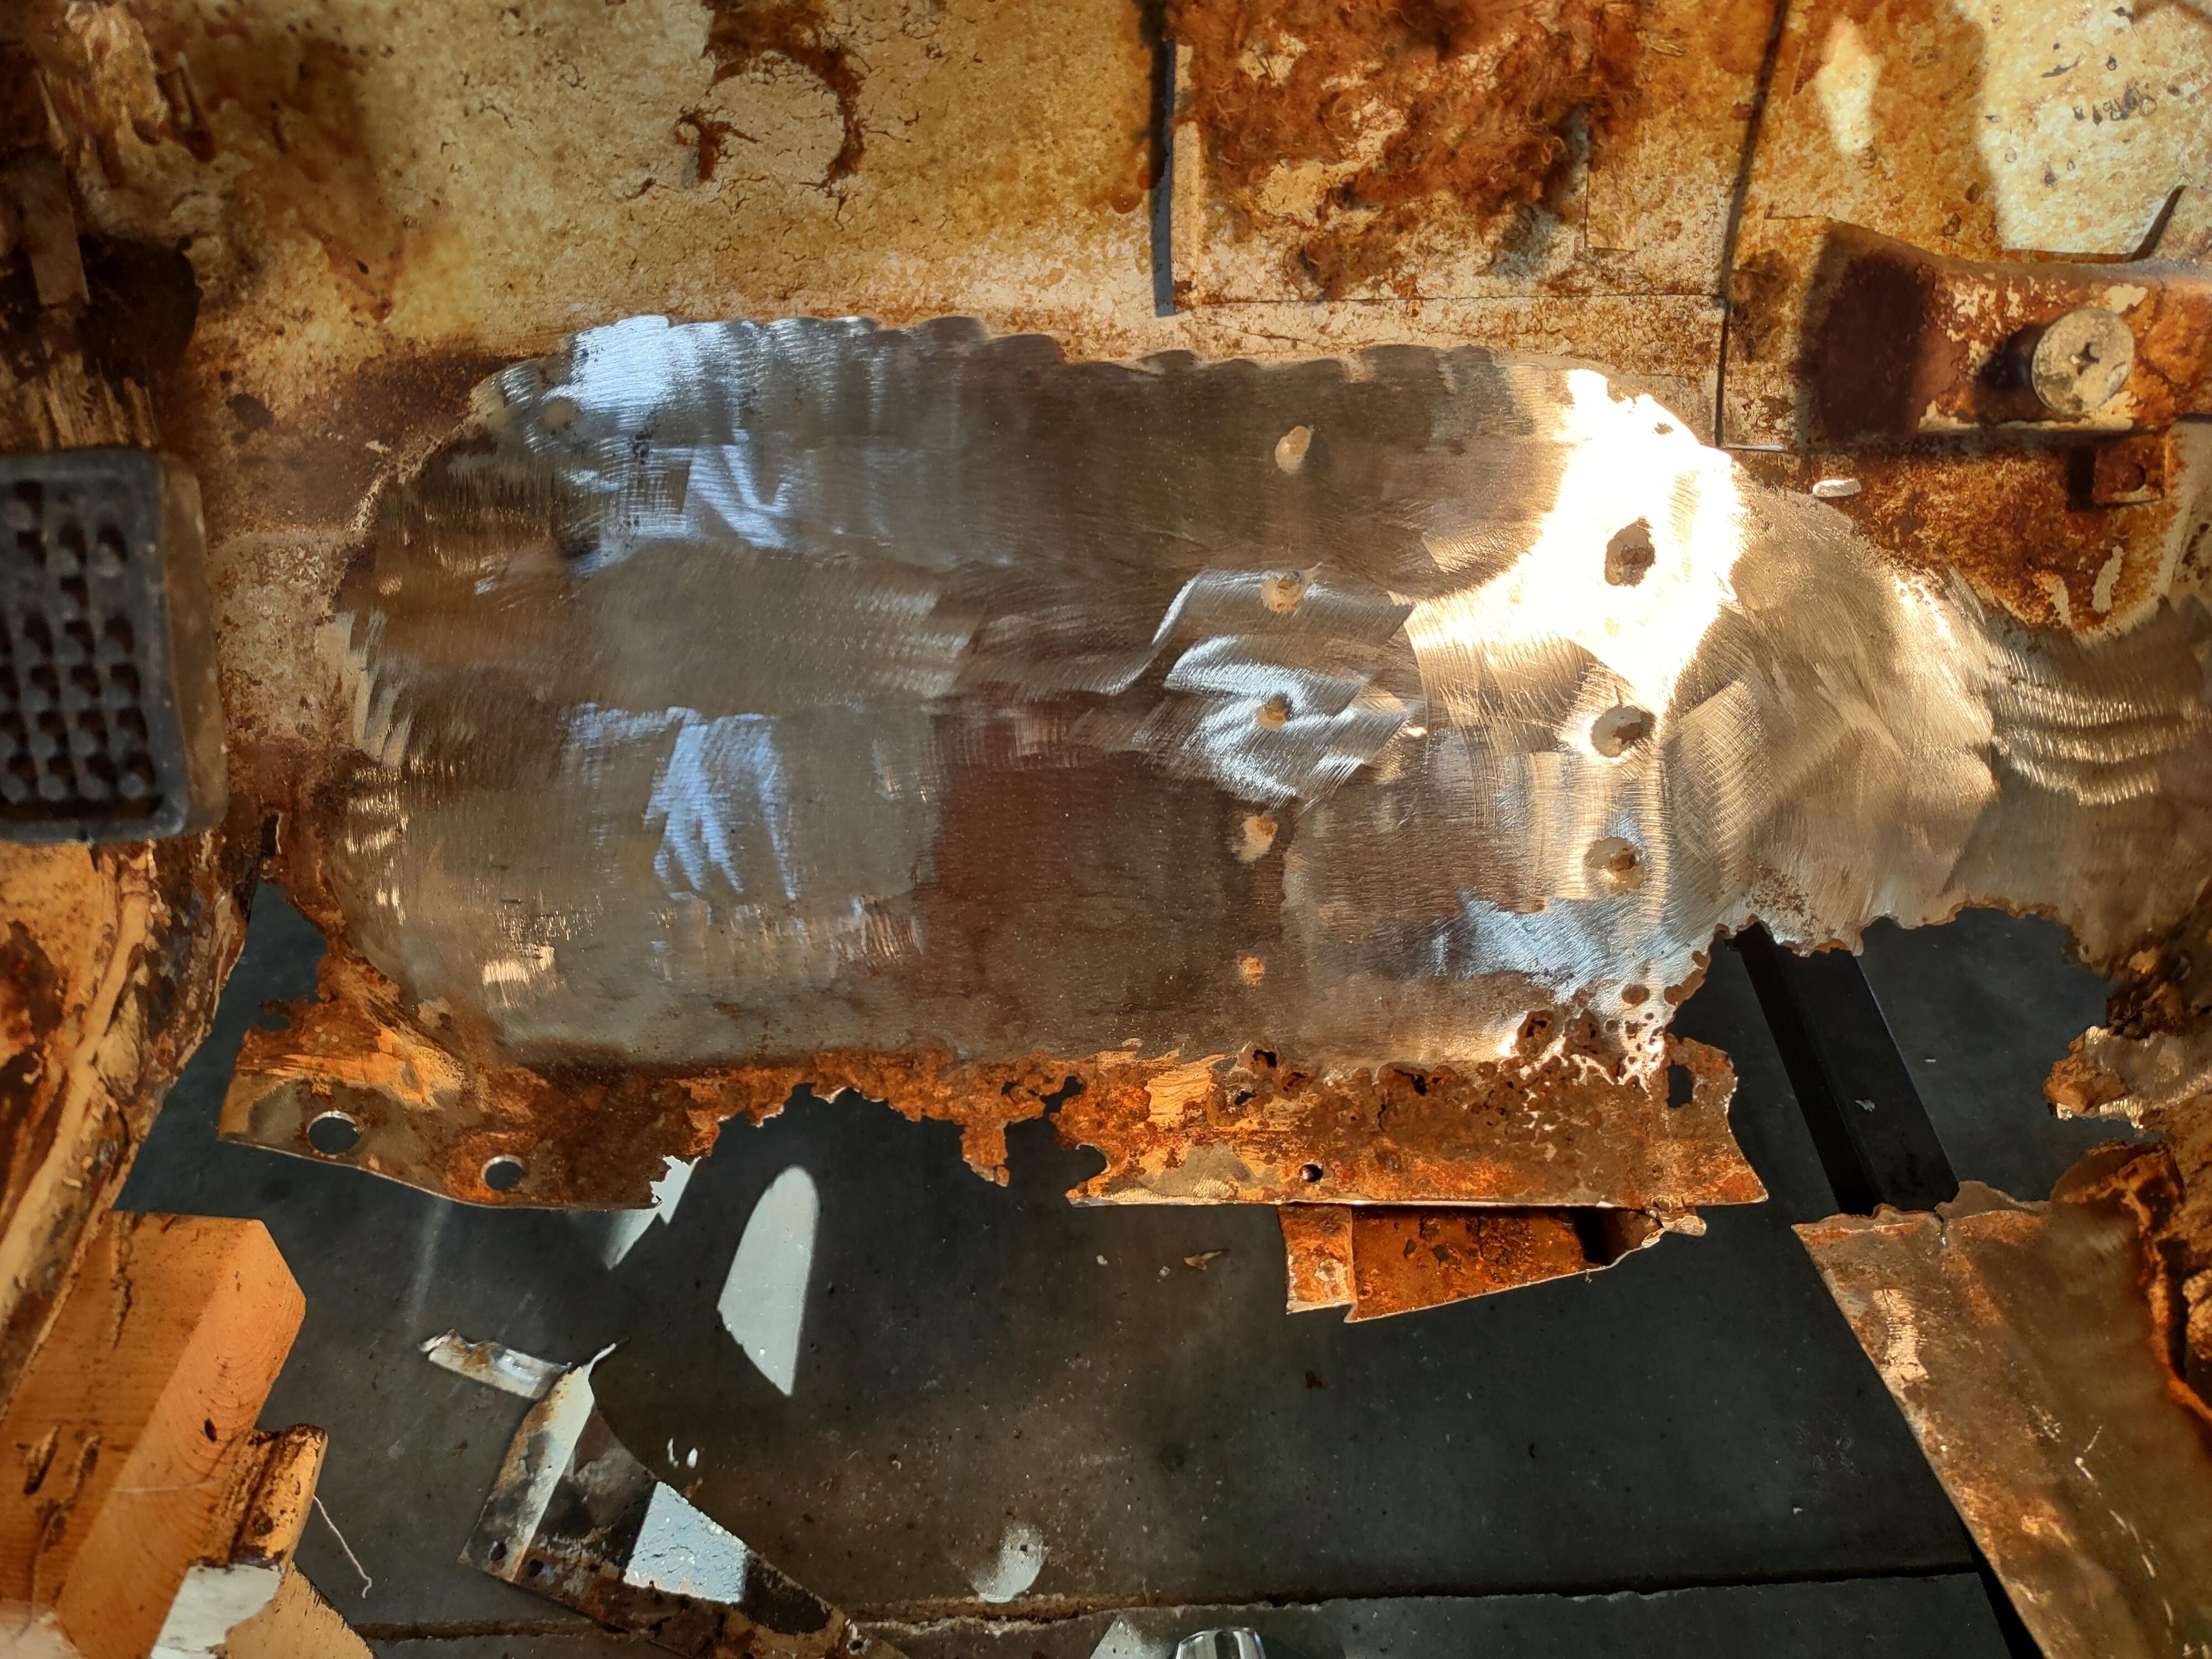
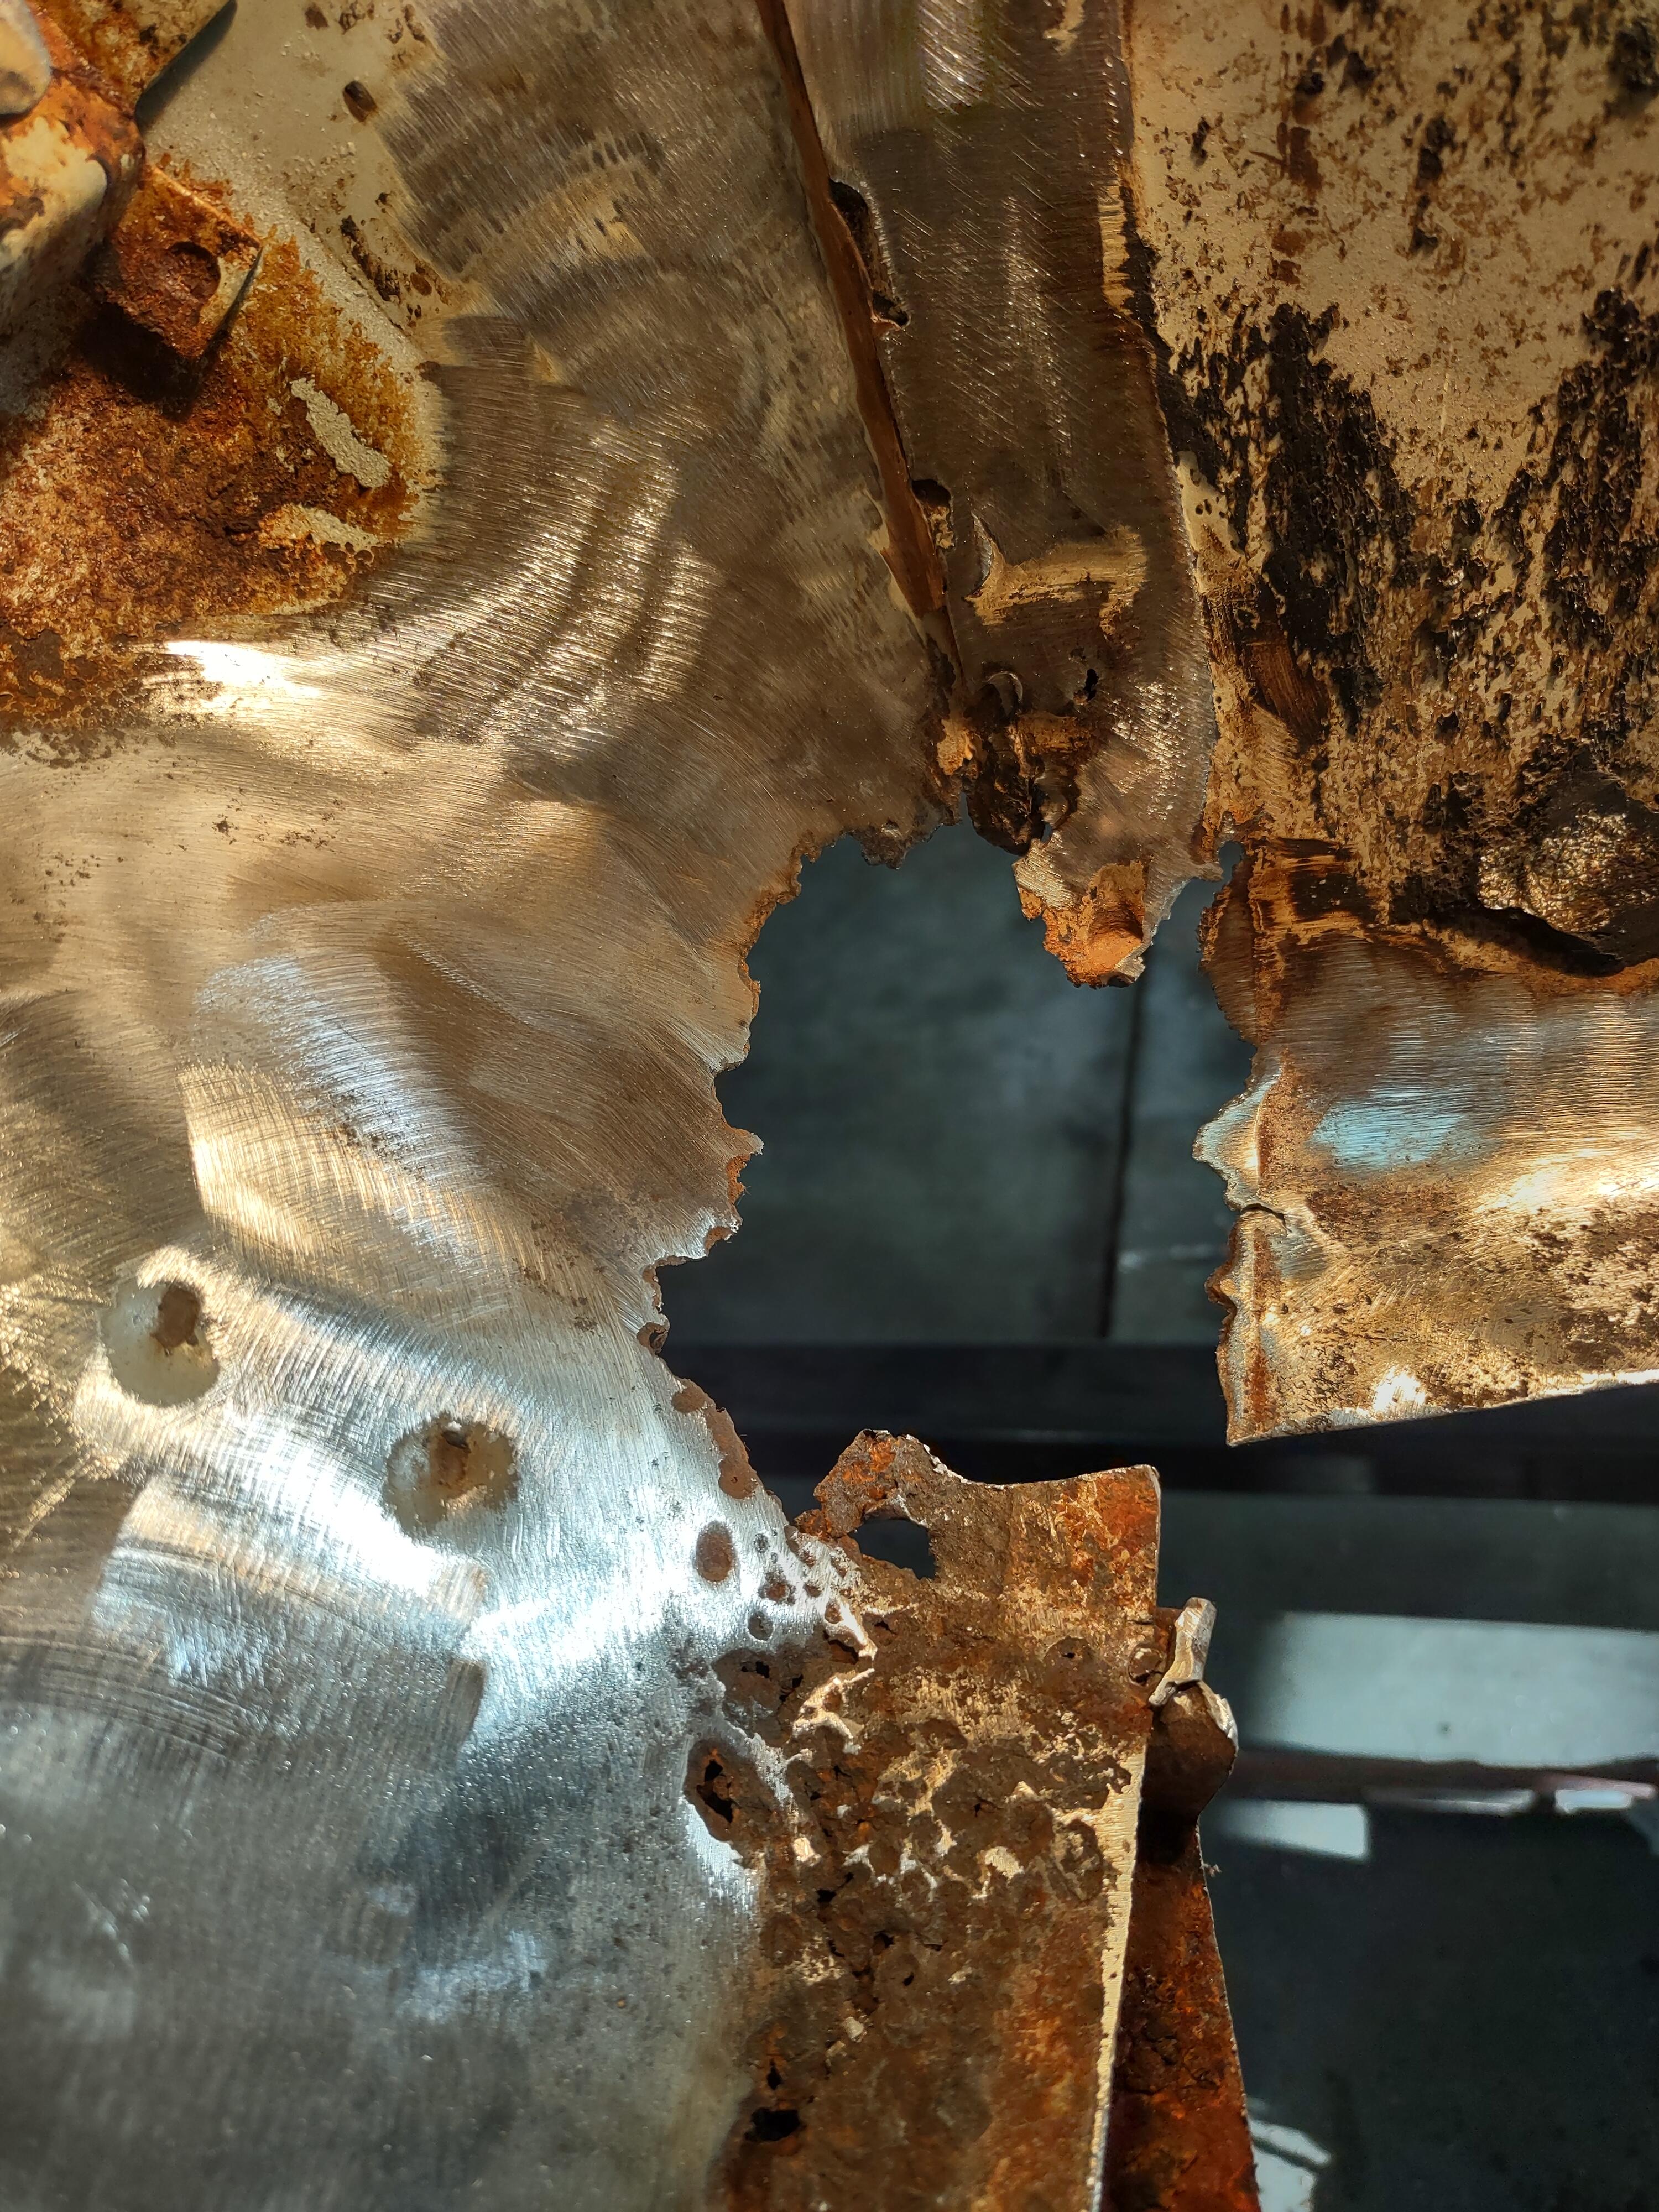
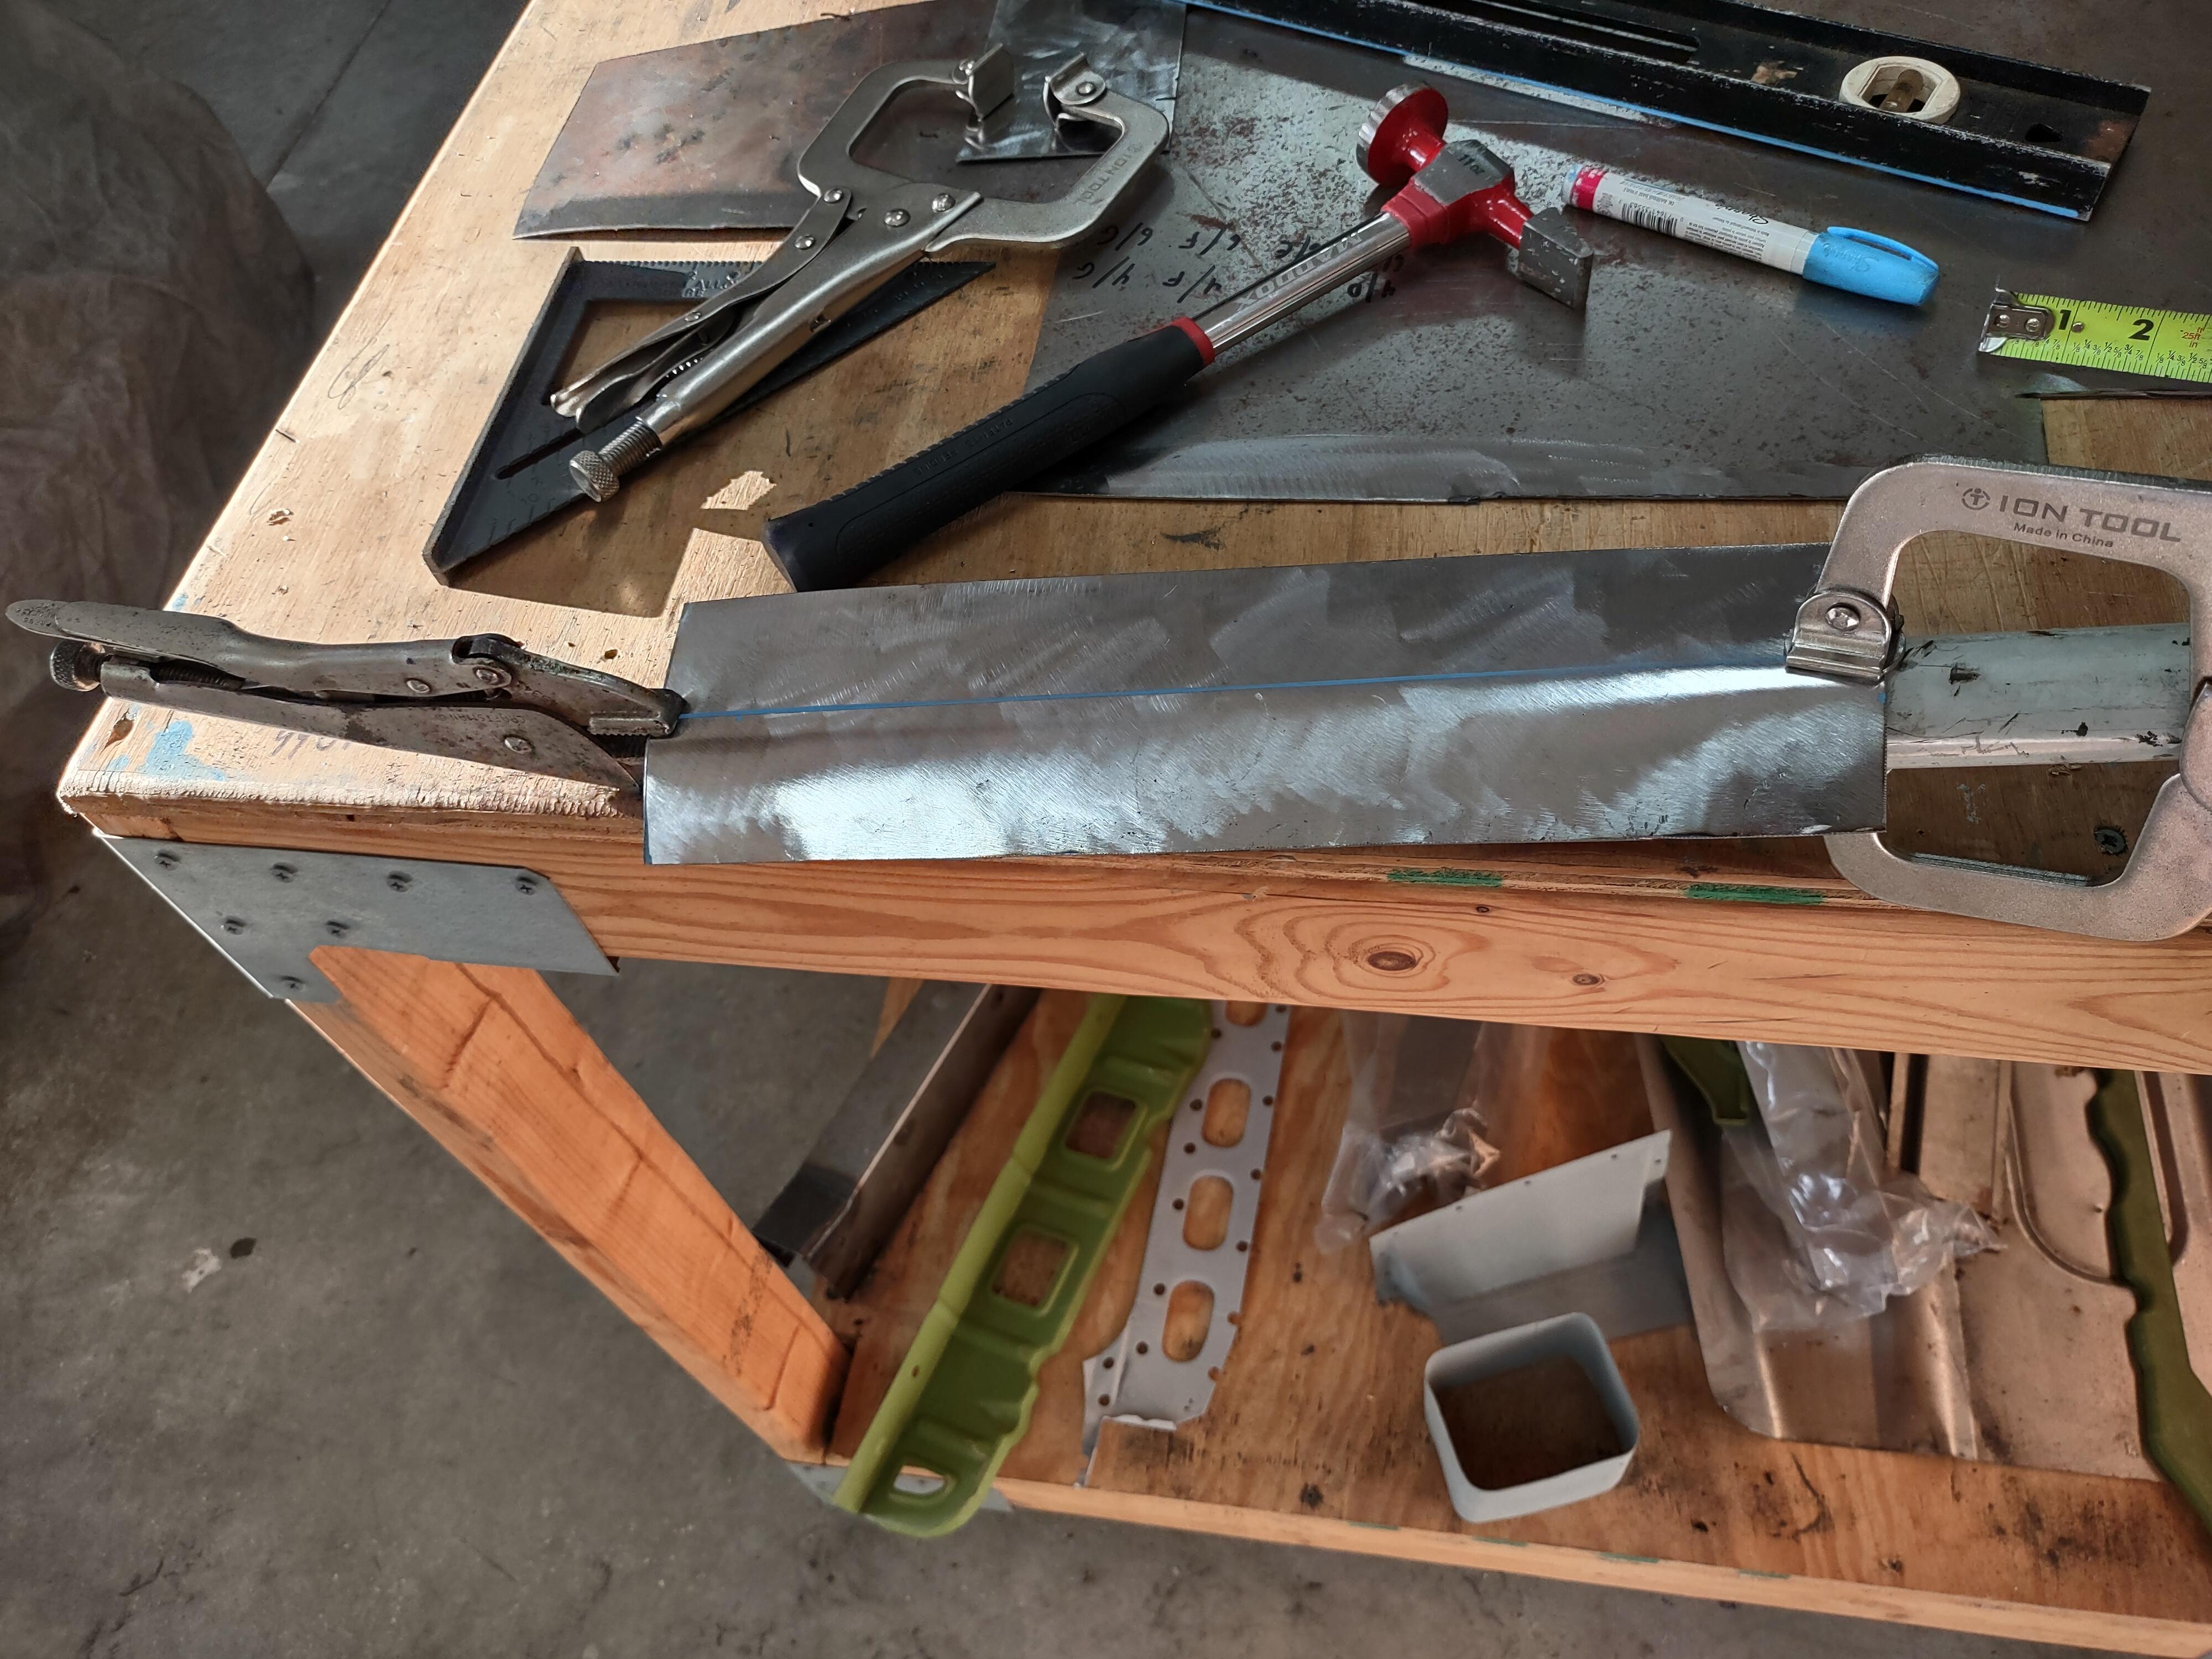
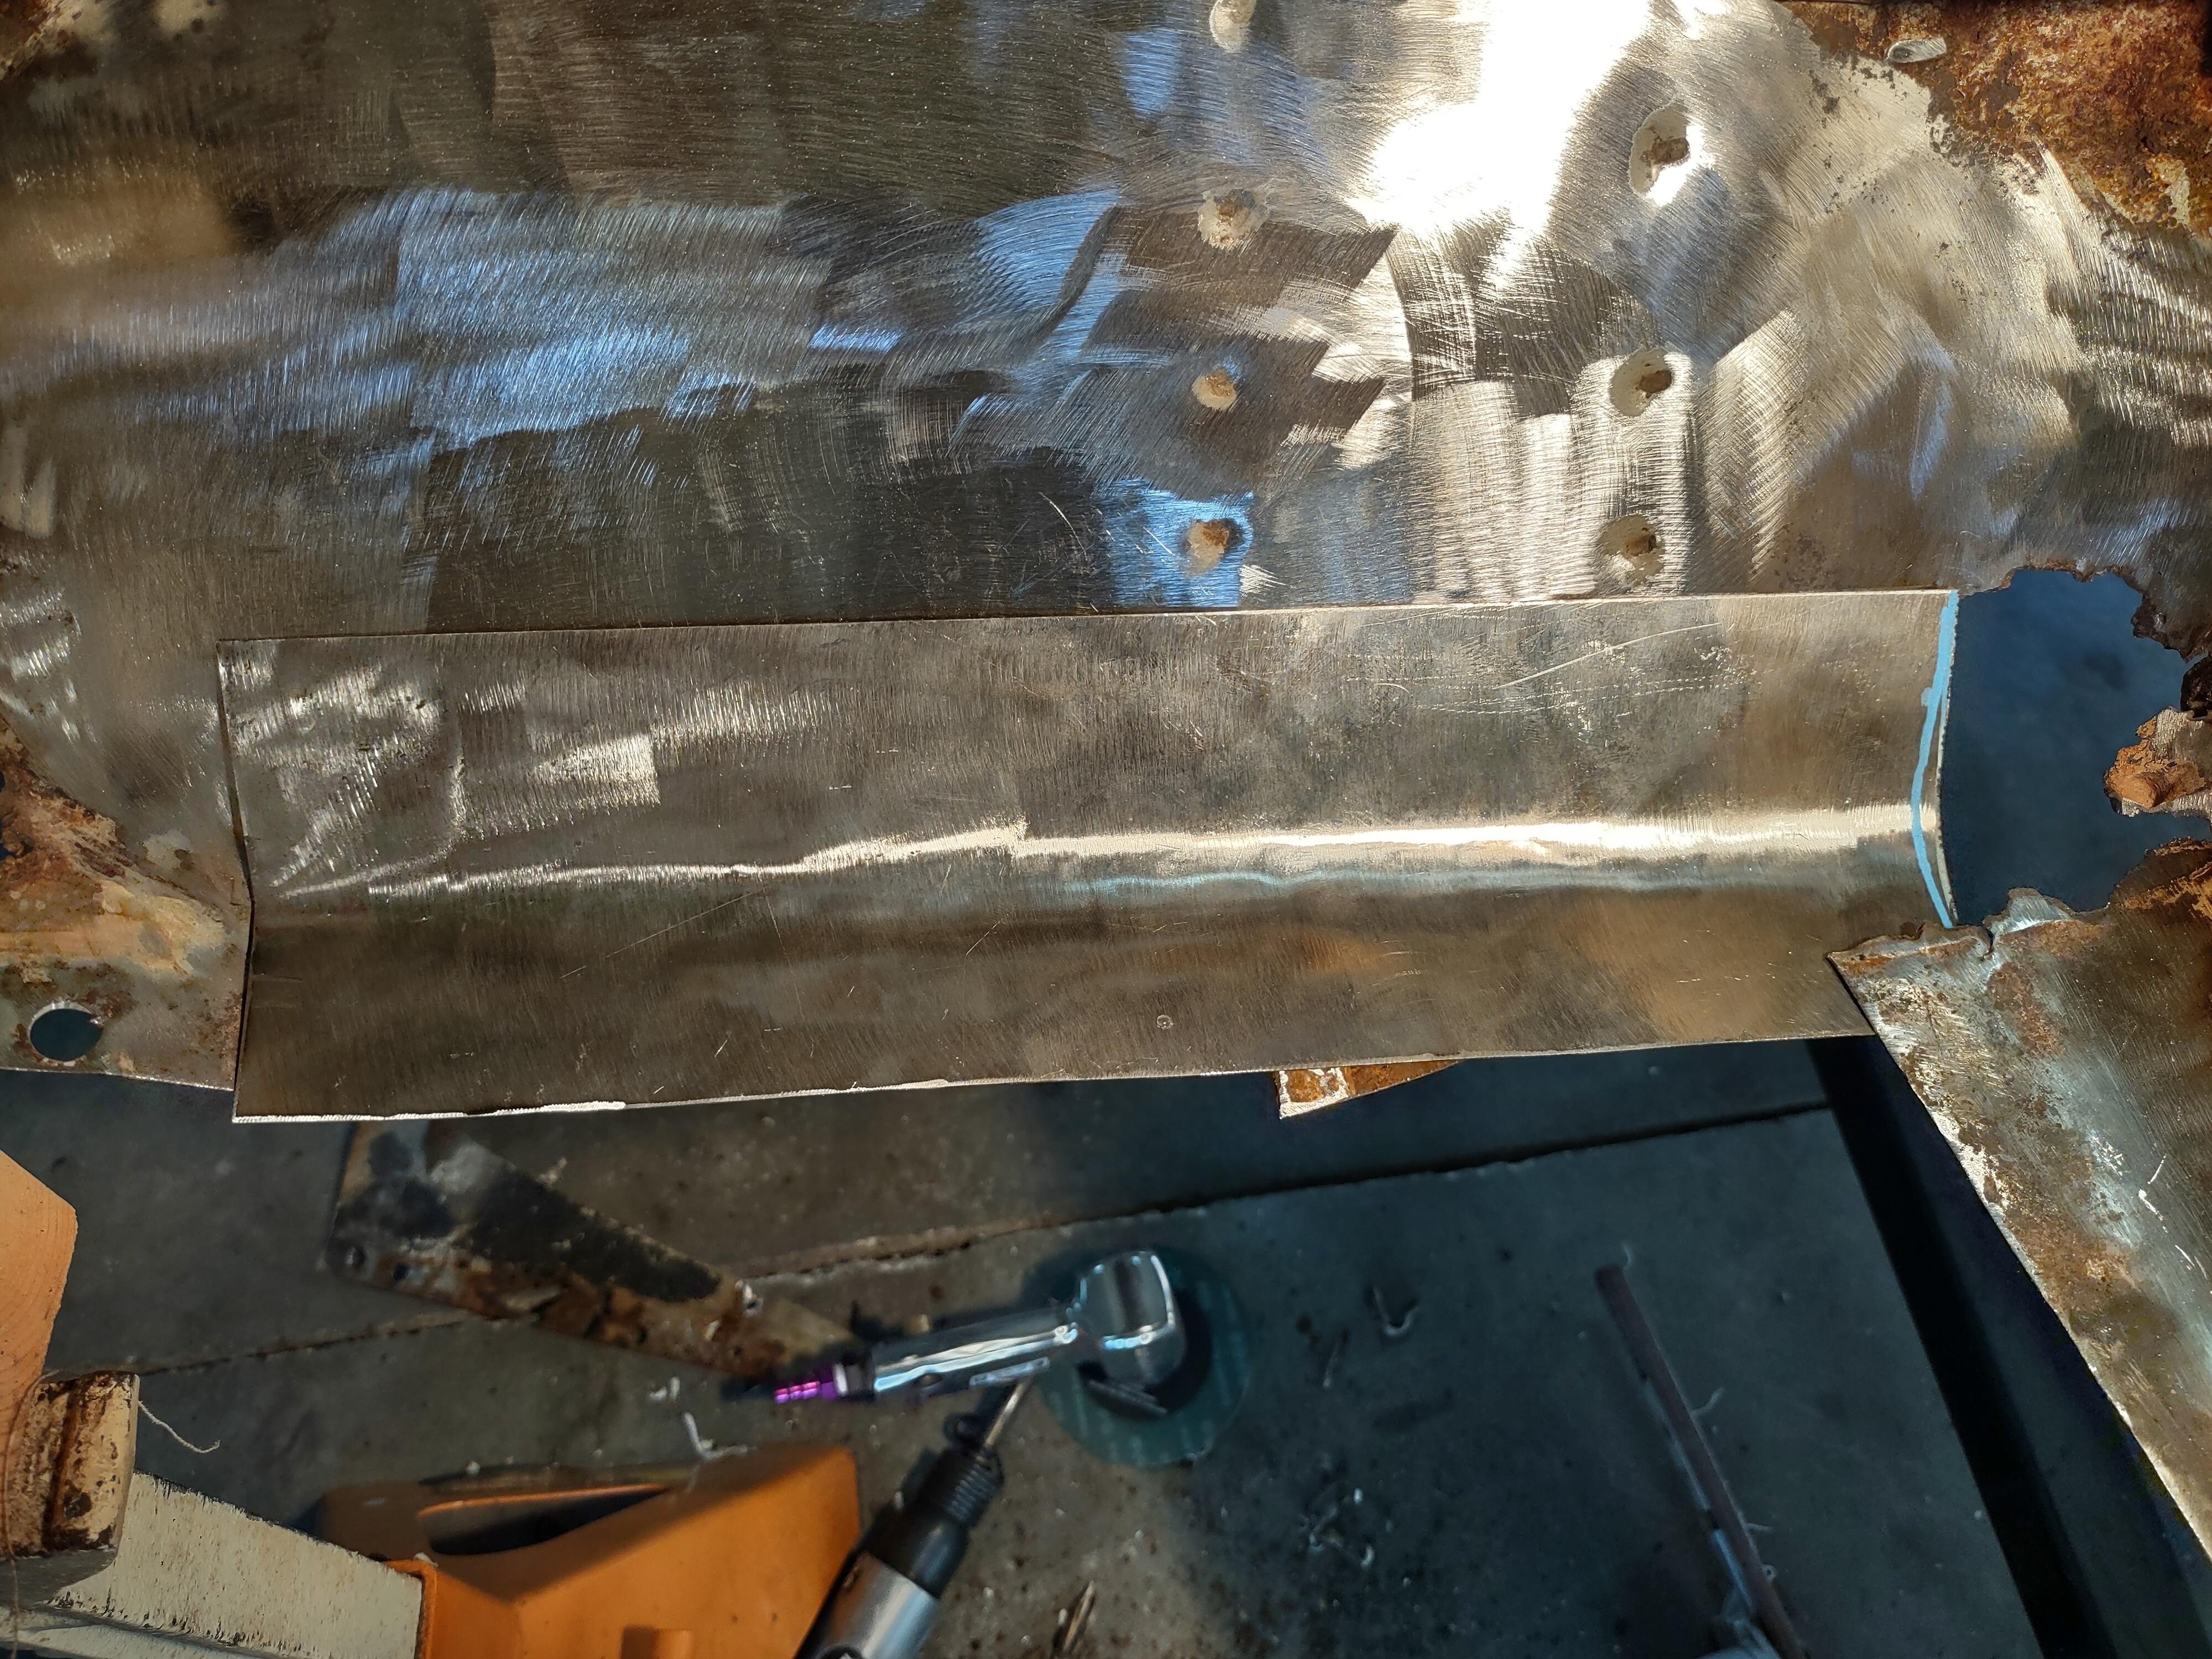
Good stuff. CAD skills to even a beginner degree are something I wish I had. While I thought I was done with metal work, I decided to revisit a repair I made to the tail light panel where it forms the ledge inside the hatch opening. My repair in the passenger corner was one of my early metal repair efforts on this car. As I am now focusing again on the tail light panel - it has received the least attention so far, I decided that the inside corner areas were not up to par with the rest of the car. Because the car received a light impact to the rear at some point, the sealer under the ledge had cracked, and gave an opening to moisture. So, in the hatch corners, the metal had obviously rusted in between the panels, causing the ledge (in the corners) to puff up a bit. This area on the left and right is what I am talking about: After cutting away the old panel sections, and grinding away the rusted metal, I used a chemical treatment to neutralize the remaining spots of rust. Then, I fabricated a patch panel. I spent extra time getting the fit as close to dead on as possible. Then, I decided to use the spot welder I bought (a while back now). It does a good job, for sure, but when I purchased it, I was hoping it would replicate the factory welds. Unfortunately, these spot welds are notably smaller in diameter. Still a cool tool though. It won't reach everywhere, of course, so I put a few rosette welds (large round welds next to the mig weld seam) to finish putting welds back in the factory locations. Most of these spot welds are in the factory locations, but I also put a couple of extra ones. 🙂 A whole bunch of pictures follow: After grinding away the extra, I used 80 grit on a DA Sander to give the entire repair area a nice texture. I feel better about this repair than leaving it the way it was. Now, I just have to repeat for the right side. It will take several hours.


 4 points
 -
2 pointsMy TRS-80 had no way to access the internet. But, that was OK because in 1983 I didn't know what internet or email accounts were. I could save programs on floppy disks that were floppy or on a cassette tape recorder. It was a simpler time. No cable TV, cell phone, satellite radio, or internet monthly bills.2 points
-
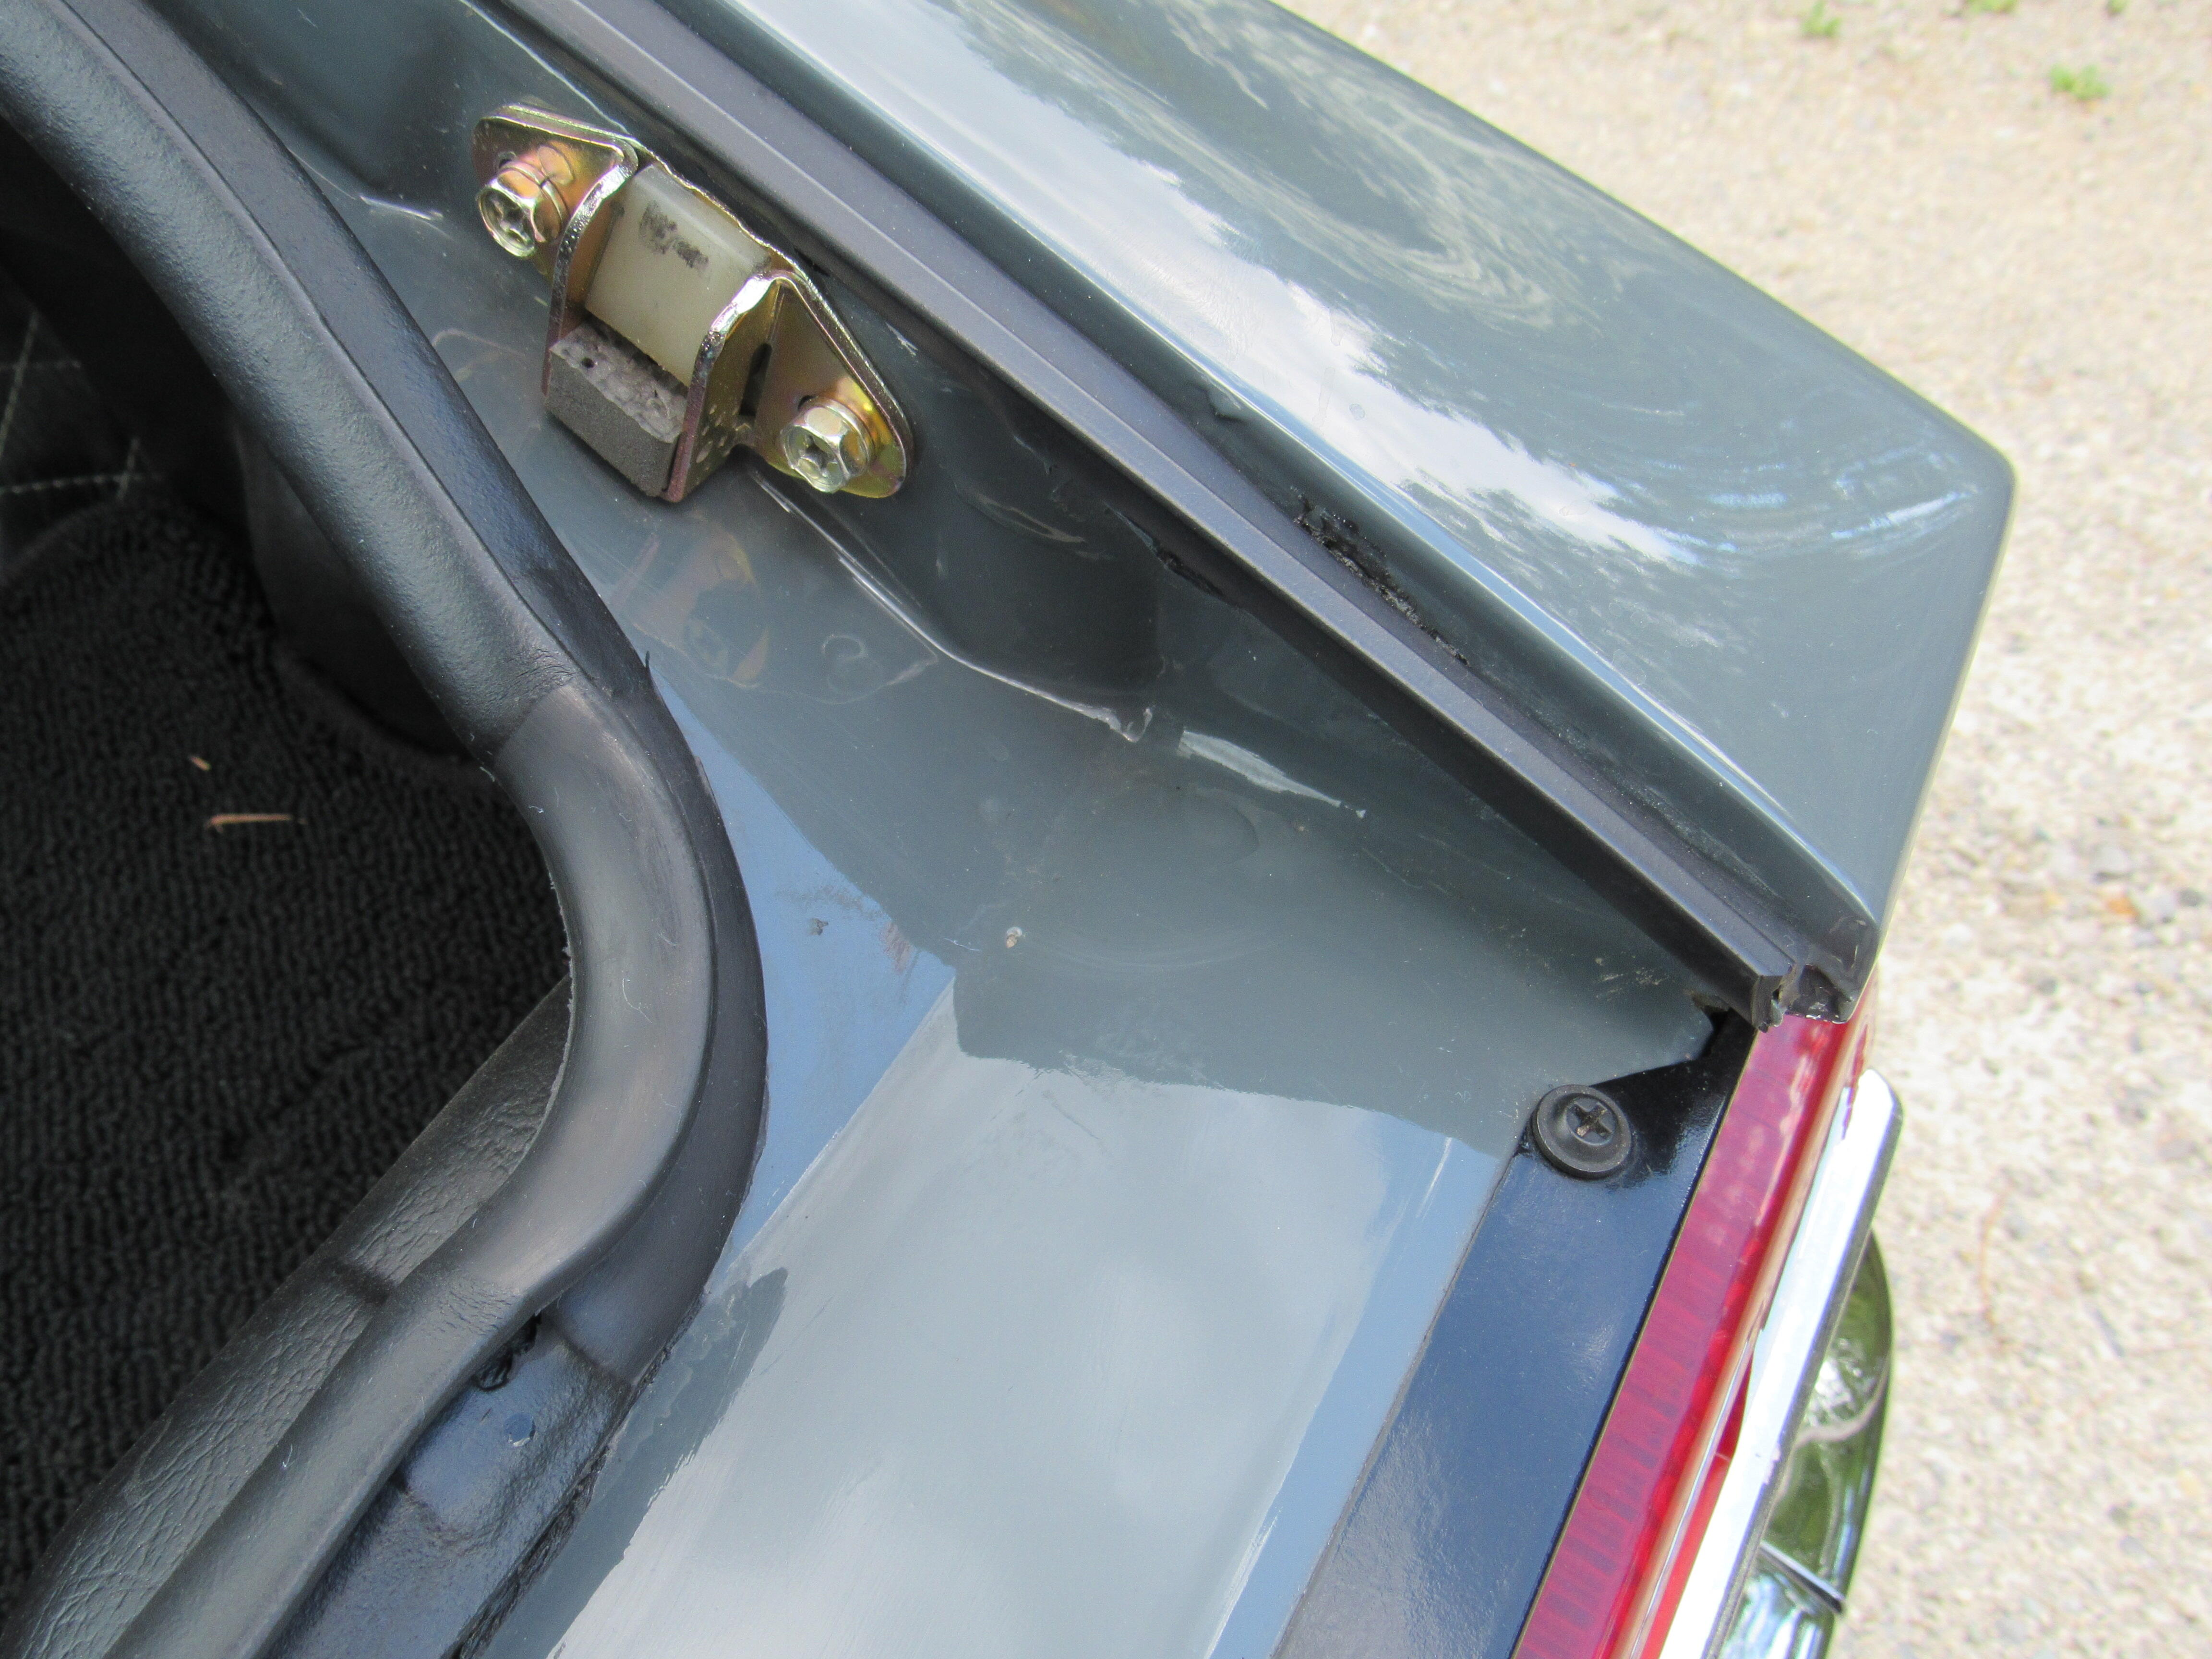
The reason that a lot of Z's rust out in that area is because the rain gutter ends too soon and dumps water right on to that spot and that spot also slopes back in toward the car so the water just sits in a pool until it evaporates. I started adding an extension on to the rain gutters to remove the water completely.

 2 points
 -
1 pointOkay, let's try this again. The car has a 4x114.3mm STUD pattern. Are the wheels you found a 4x100mm HOLE pattern? If so and they are a +25mm offset, then you could try to find a set of bolt-on spacers that convert from 4x100 to 4x114.3. Most of them are 40mm though which would push the wheels out way too far. You will spend more for those wheels plus spacers than if you simply find the right wheels. +25mm offset wheels always look funny on a Z even when spaced out properly. You need the deep dish look IMHO.1 point
-
1 pointMy "Datsun Guy" is over two-hours away from me and I always says a little prayer he stays healthy 🙏
 1 point
 -
I can beat totalZ and ebay pricing. Send me PM and we’ll discuss1 point
-
1 pointSorry to say, there are few of us dinosaurs left and we're facing extinction!
 1 point
 -
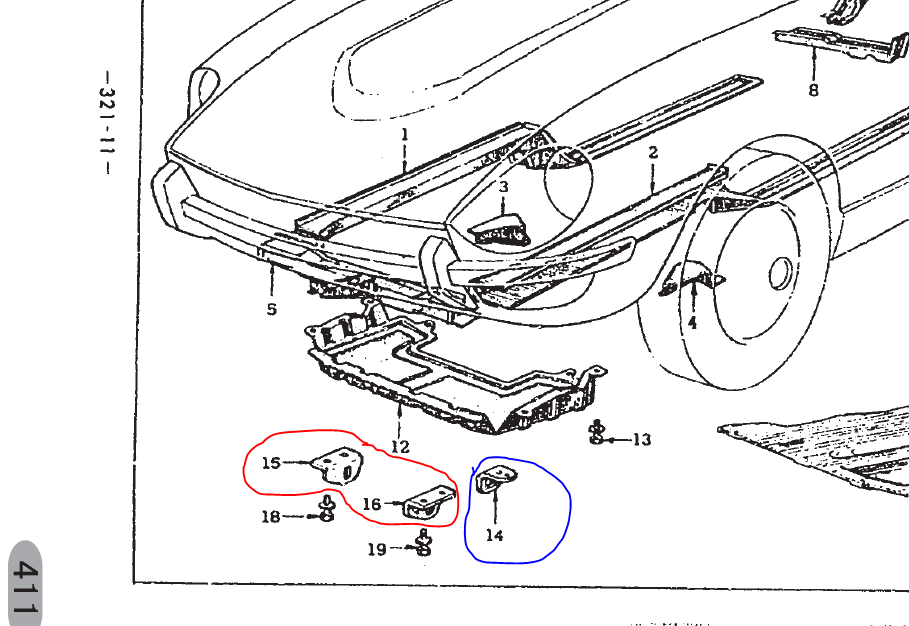
1 point1 point1 pointBefore I had a floppy drive, I would spend hours and hours typing programs in for games from magazines. With no dri e, I would play the games for a few hours and then shut the computer off and lose it all. Fun times!1 pointAh... that is pretty slick. A very smart and elegant solution.1 point1 point1 pointI had a Merlin! I loved that game. My first computer was an Atari 800 back in about 1980. I had a modem for accessing bulletin boards at a whopping 300 baud. More often than not, I'd get some sort of phone static and lose the connection before actually finishing any downloads.1 point1 point1 pointI bought the dual fan, shroud and 3 row radiator from MSA. It came with a Auto Cool controller. The temp sensor is like a foil thingy that wedges between the radiator output and the hose. I believe this is where the coolest water is leaving the radiator.1 point1 pointRegistration is open for ZCON 2022. I got myself and my much better half registered. http://zcon.org/conventions/2022/registration/1 point1 pointThis might help from the 1973 JDM parts book, early circled in blue, 1973 circled in red. I would assume it was the same for North America. It's not shown very clearly in the N.A. parts book.
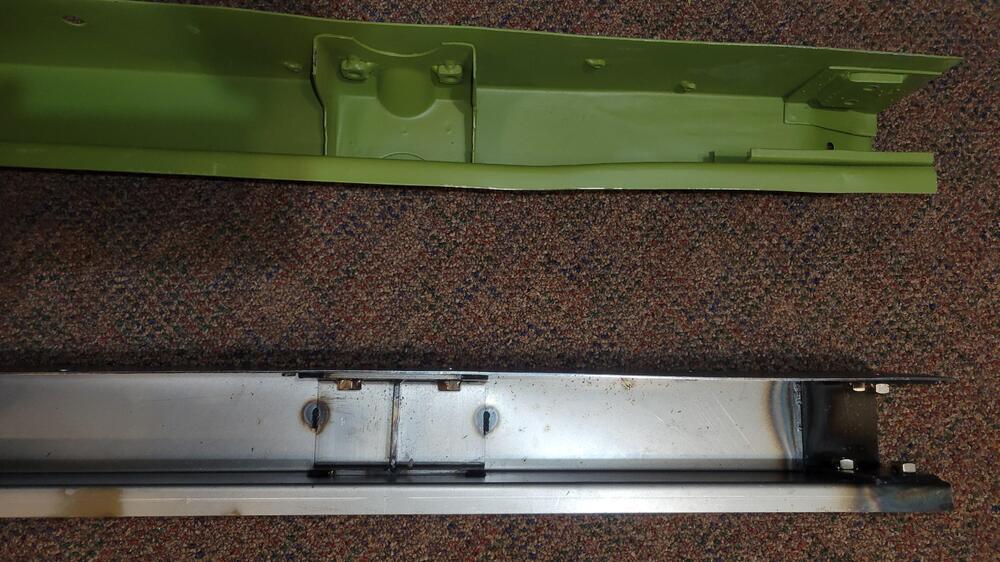
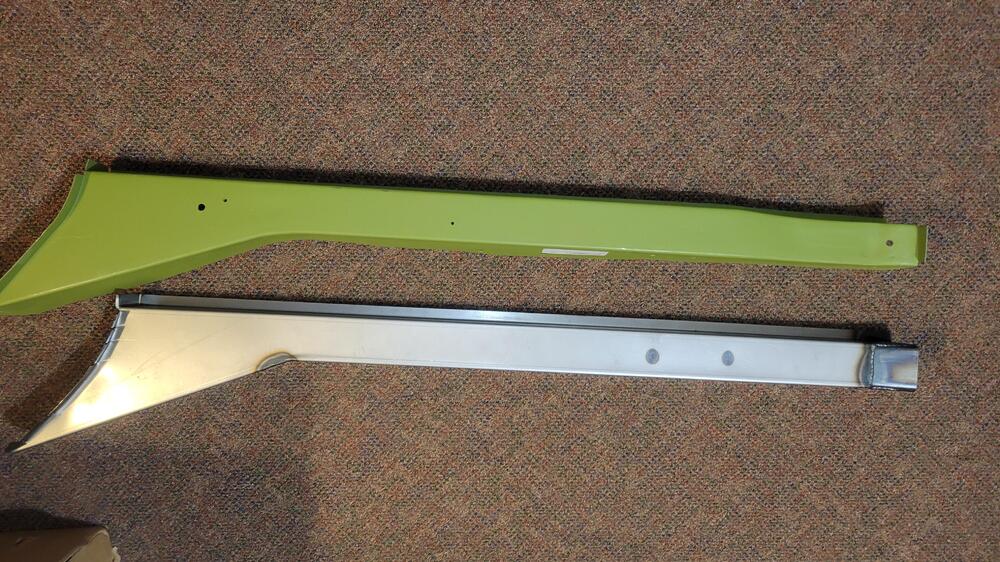
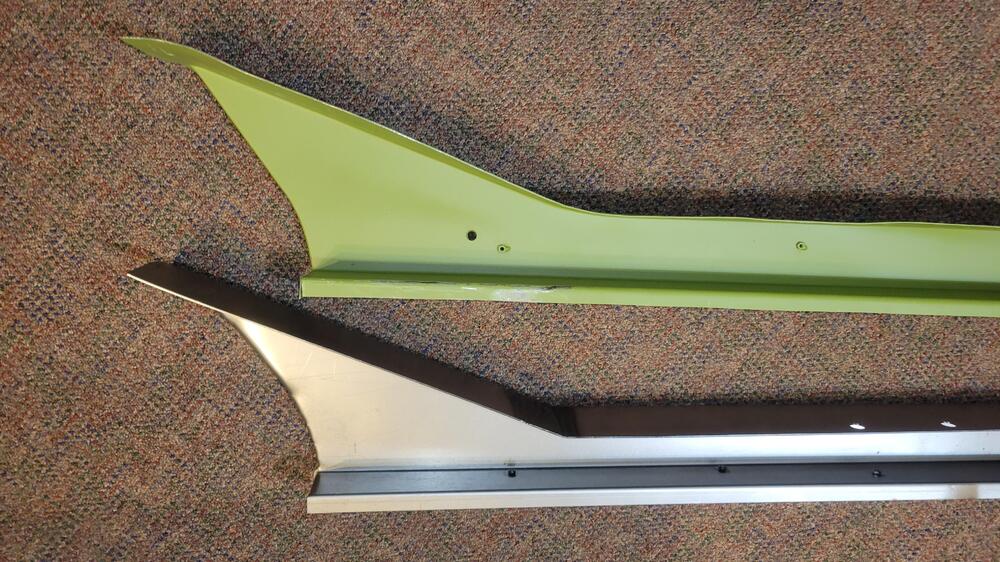
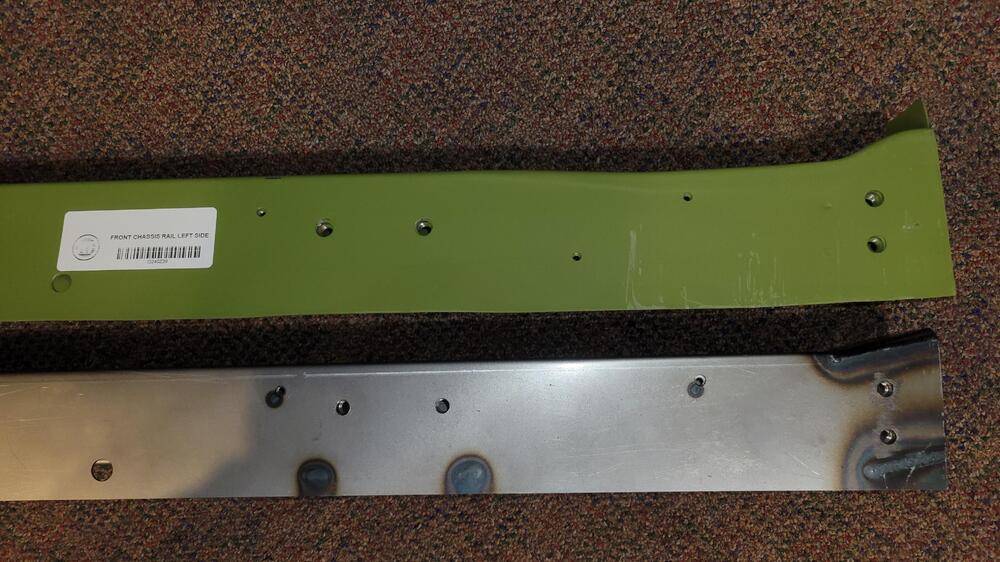
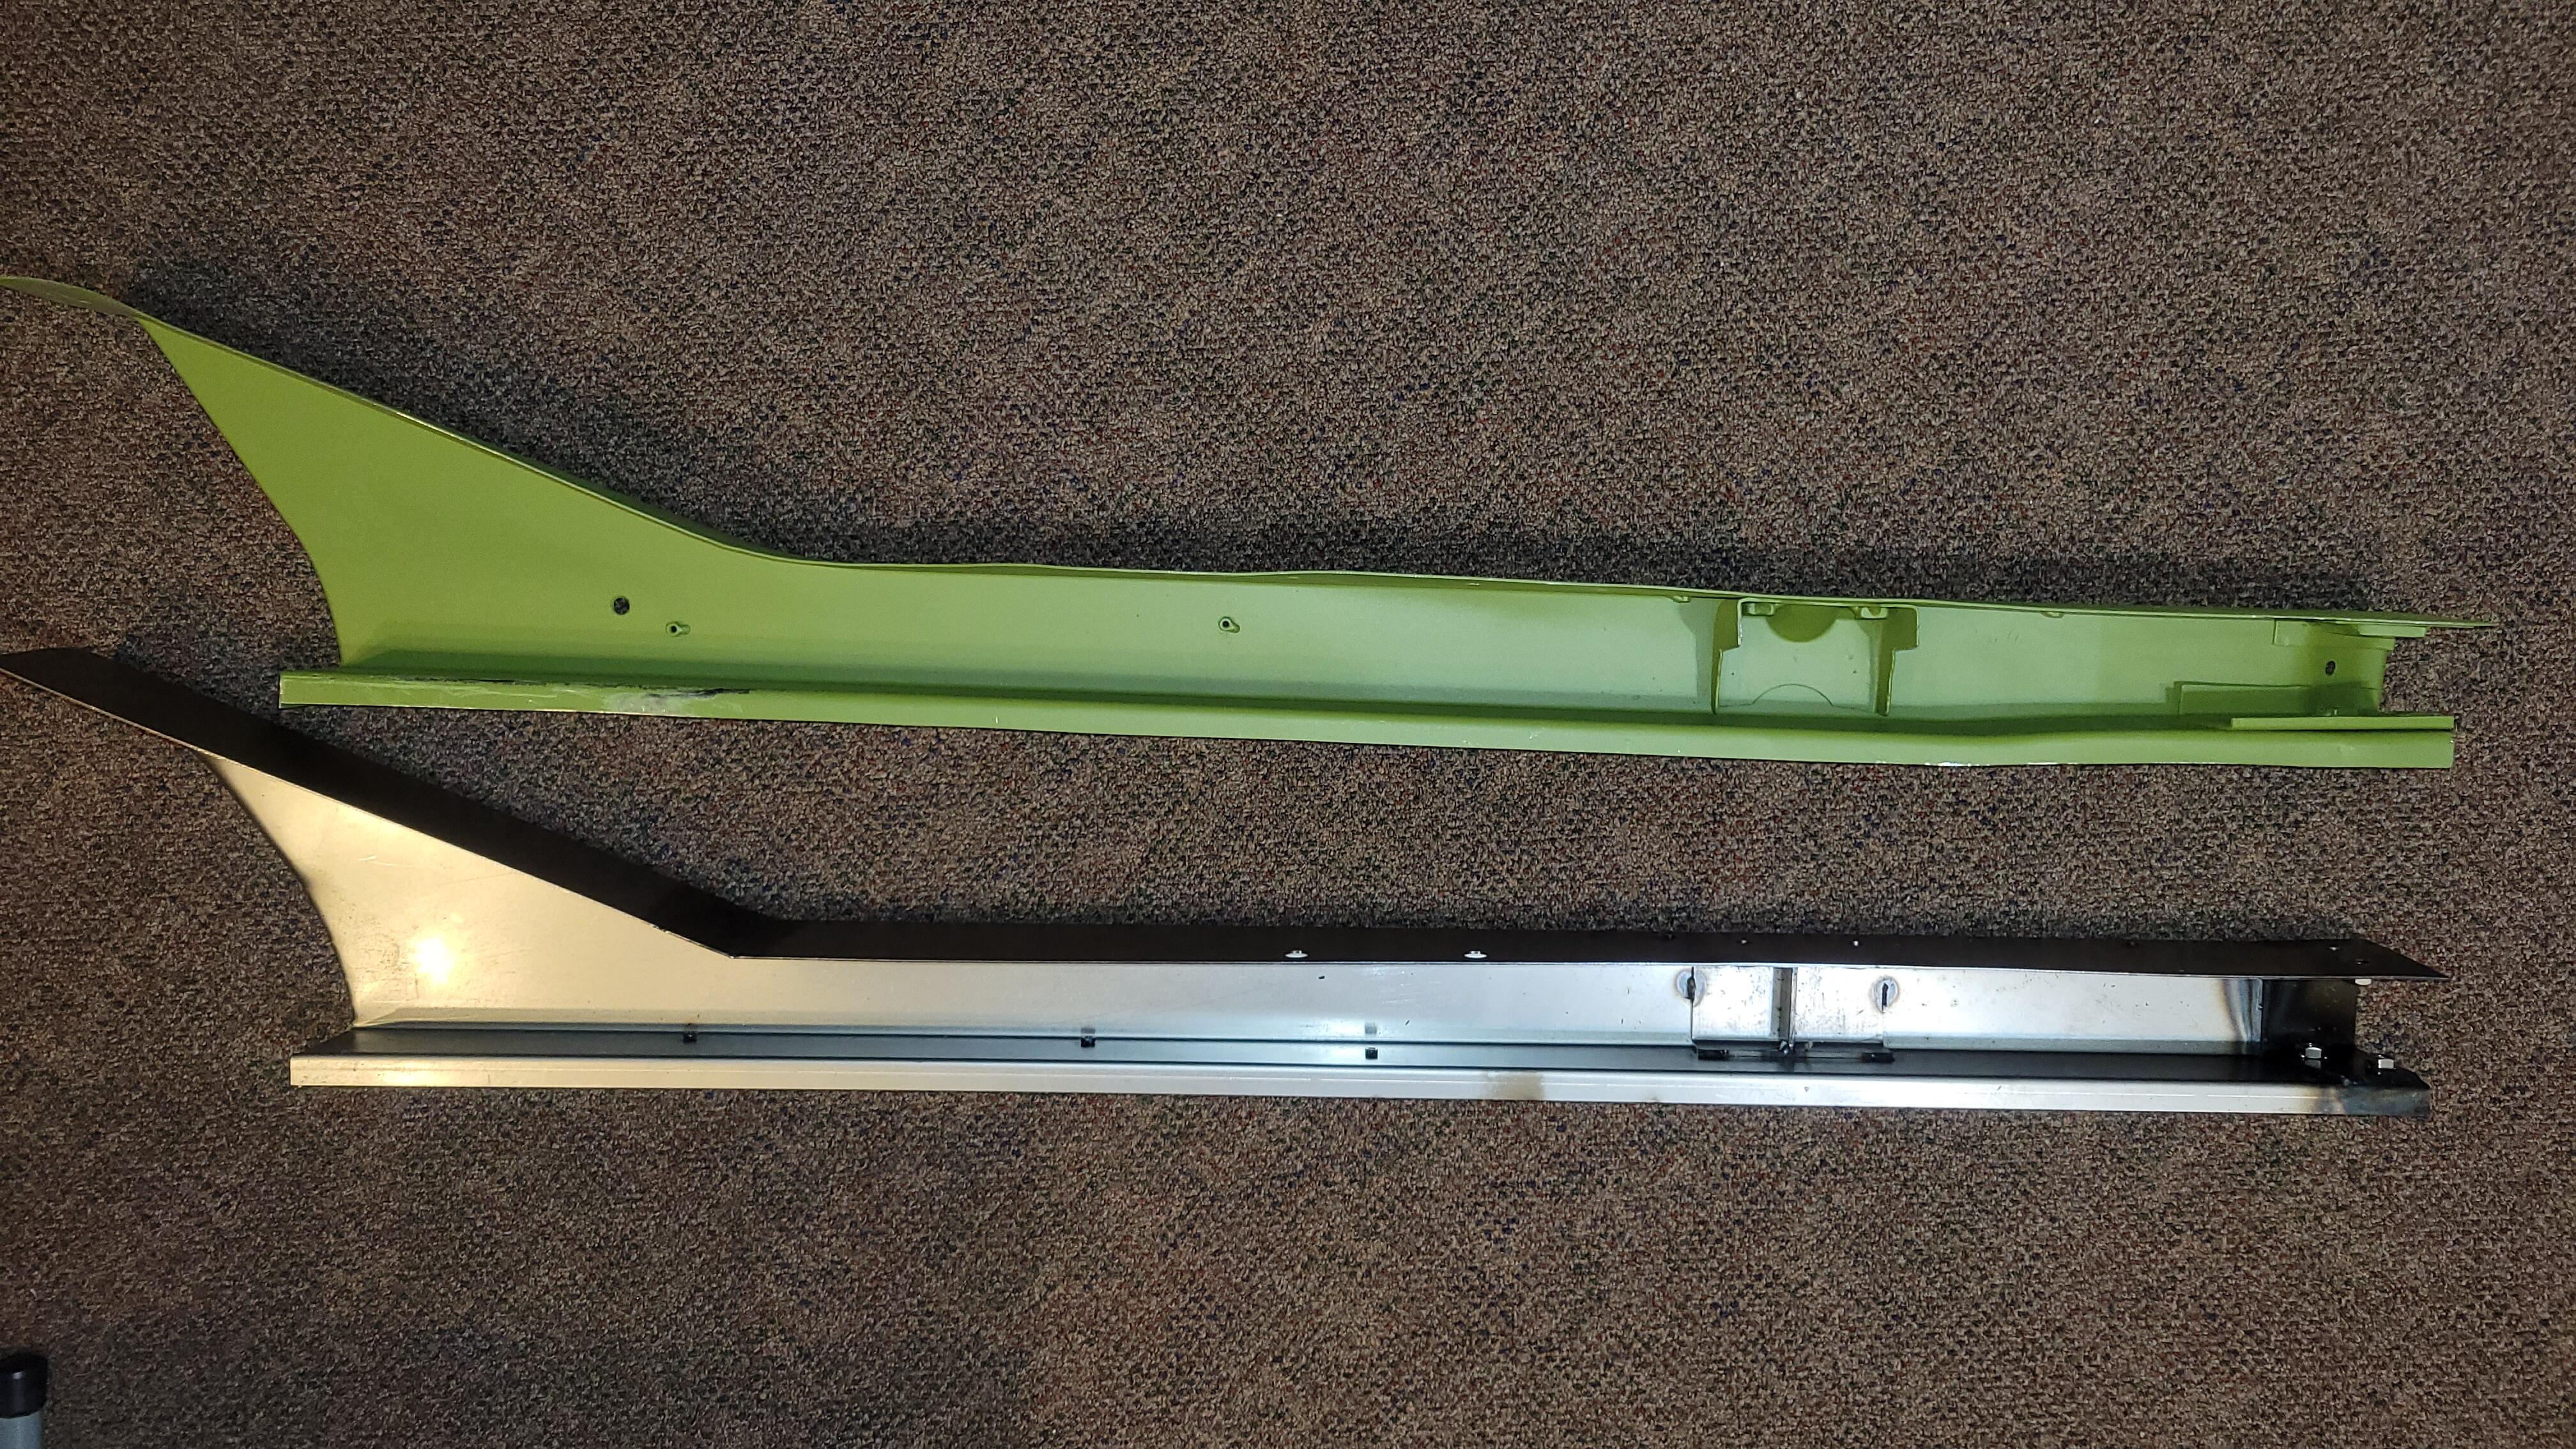
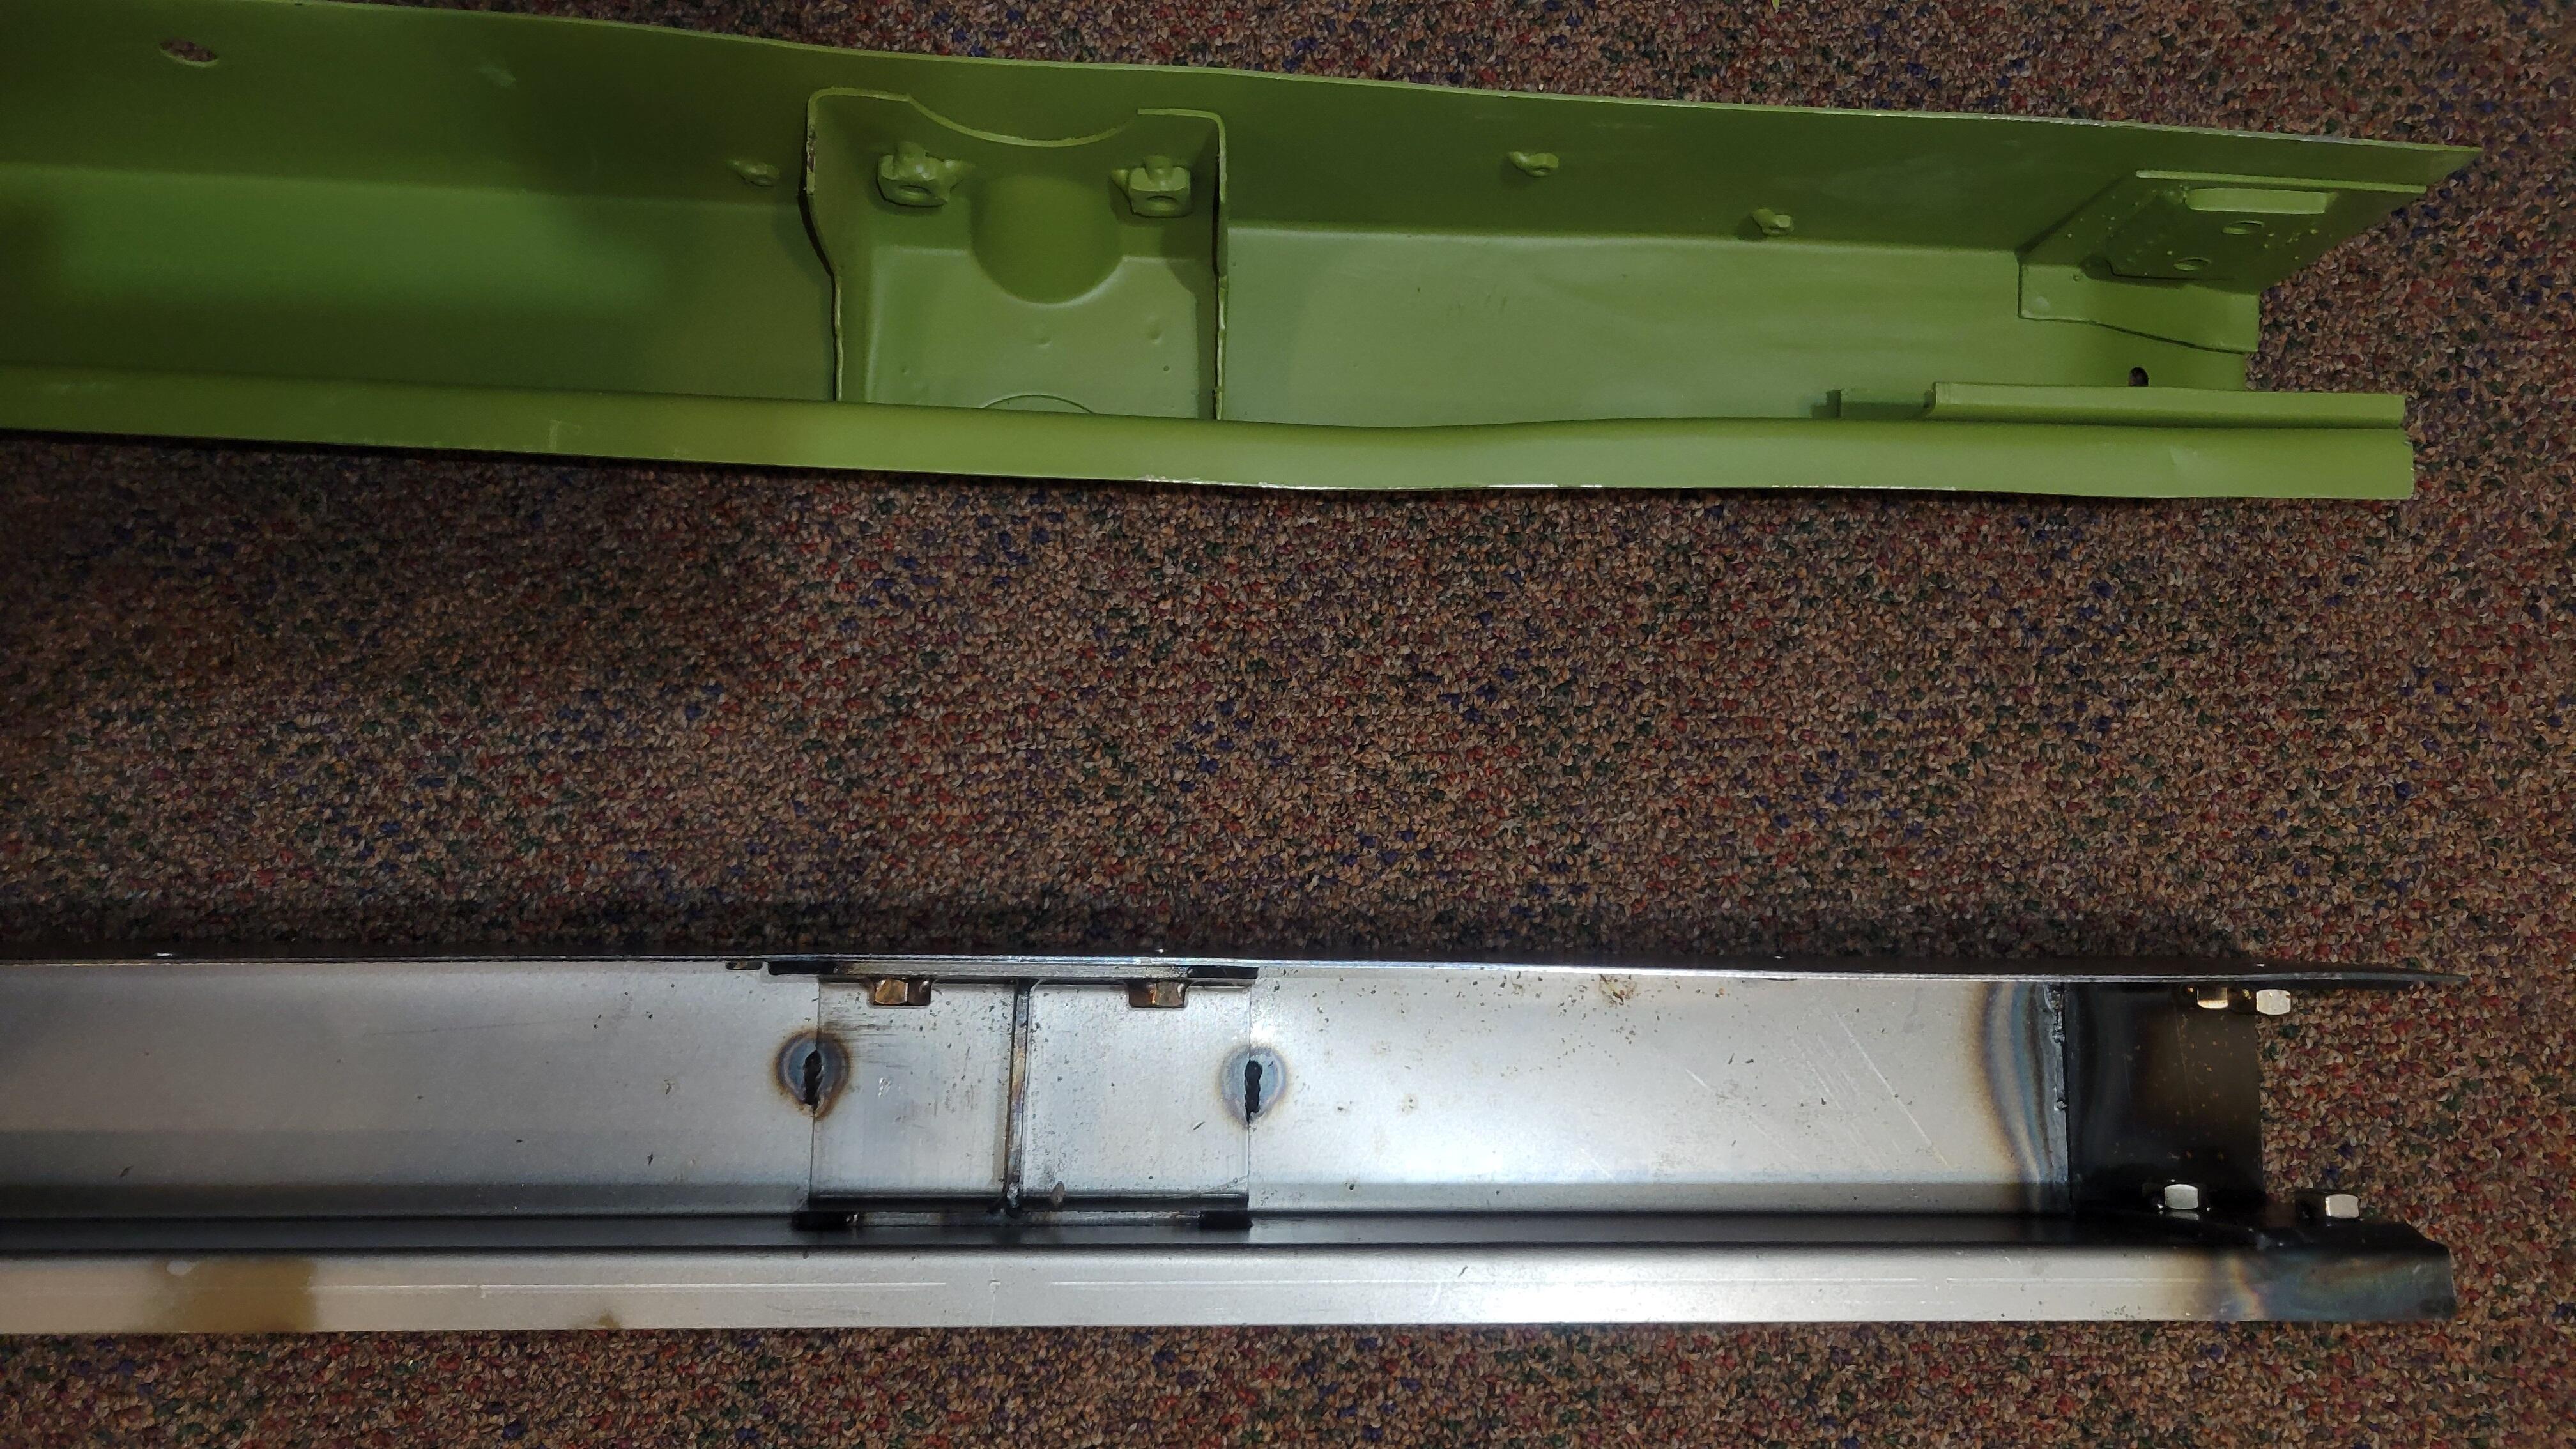
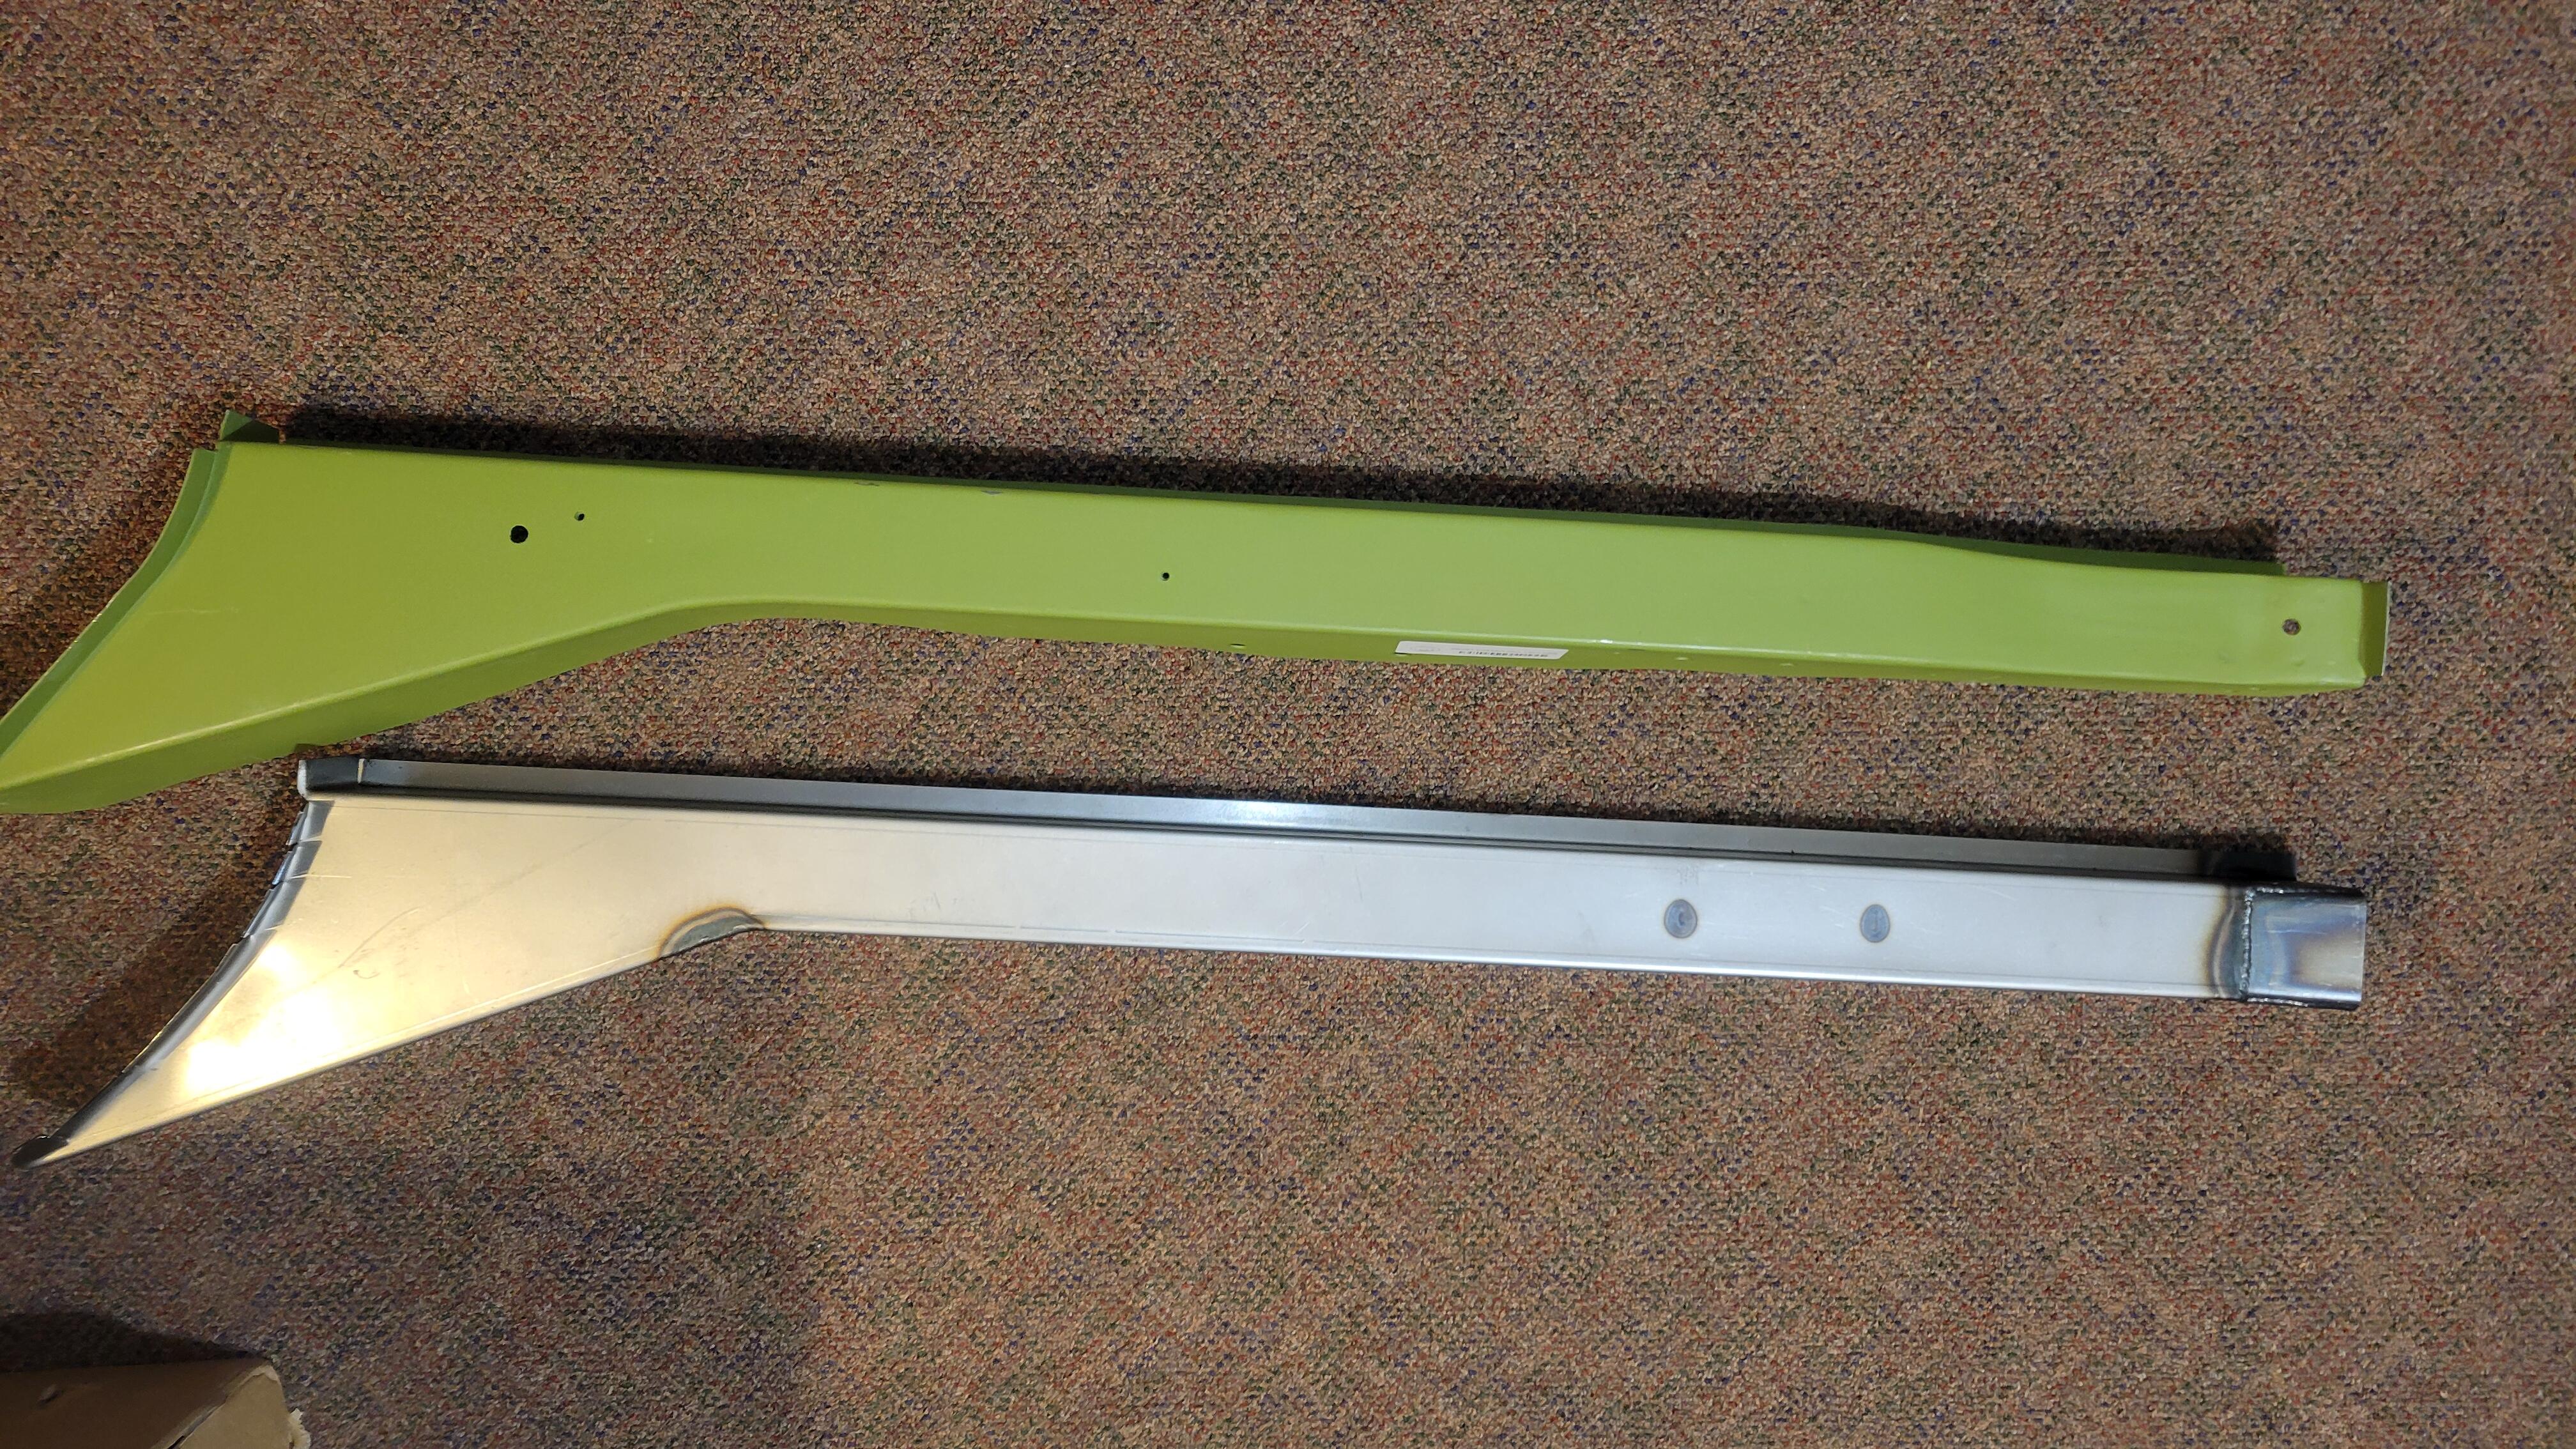
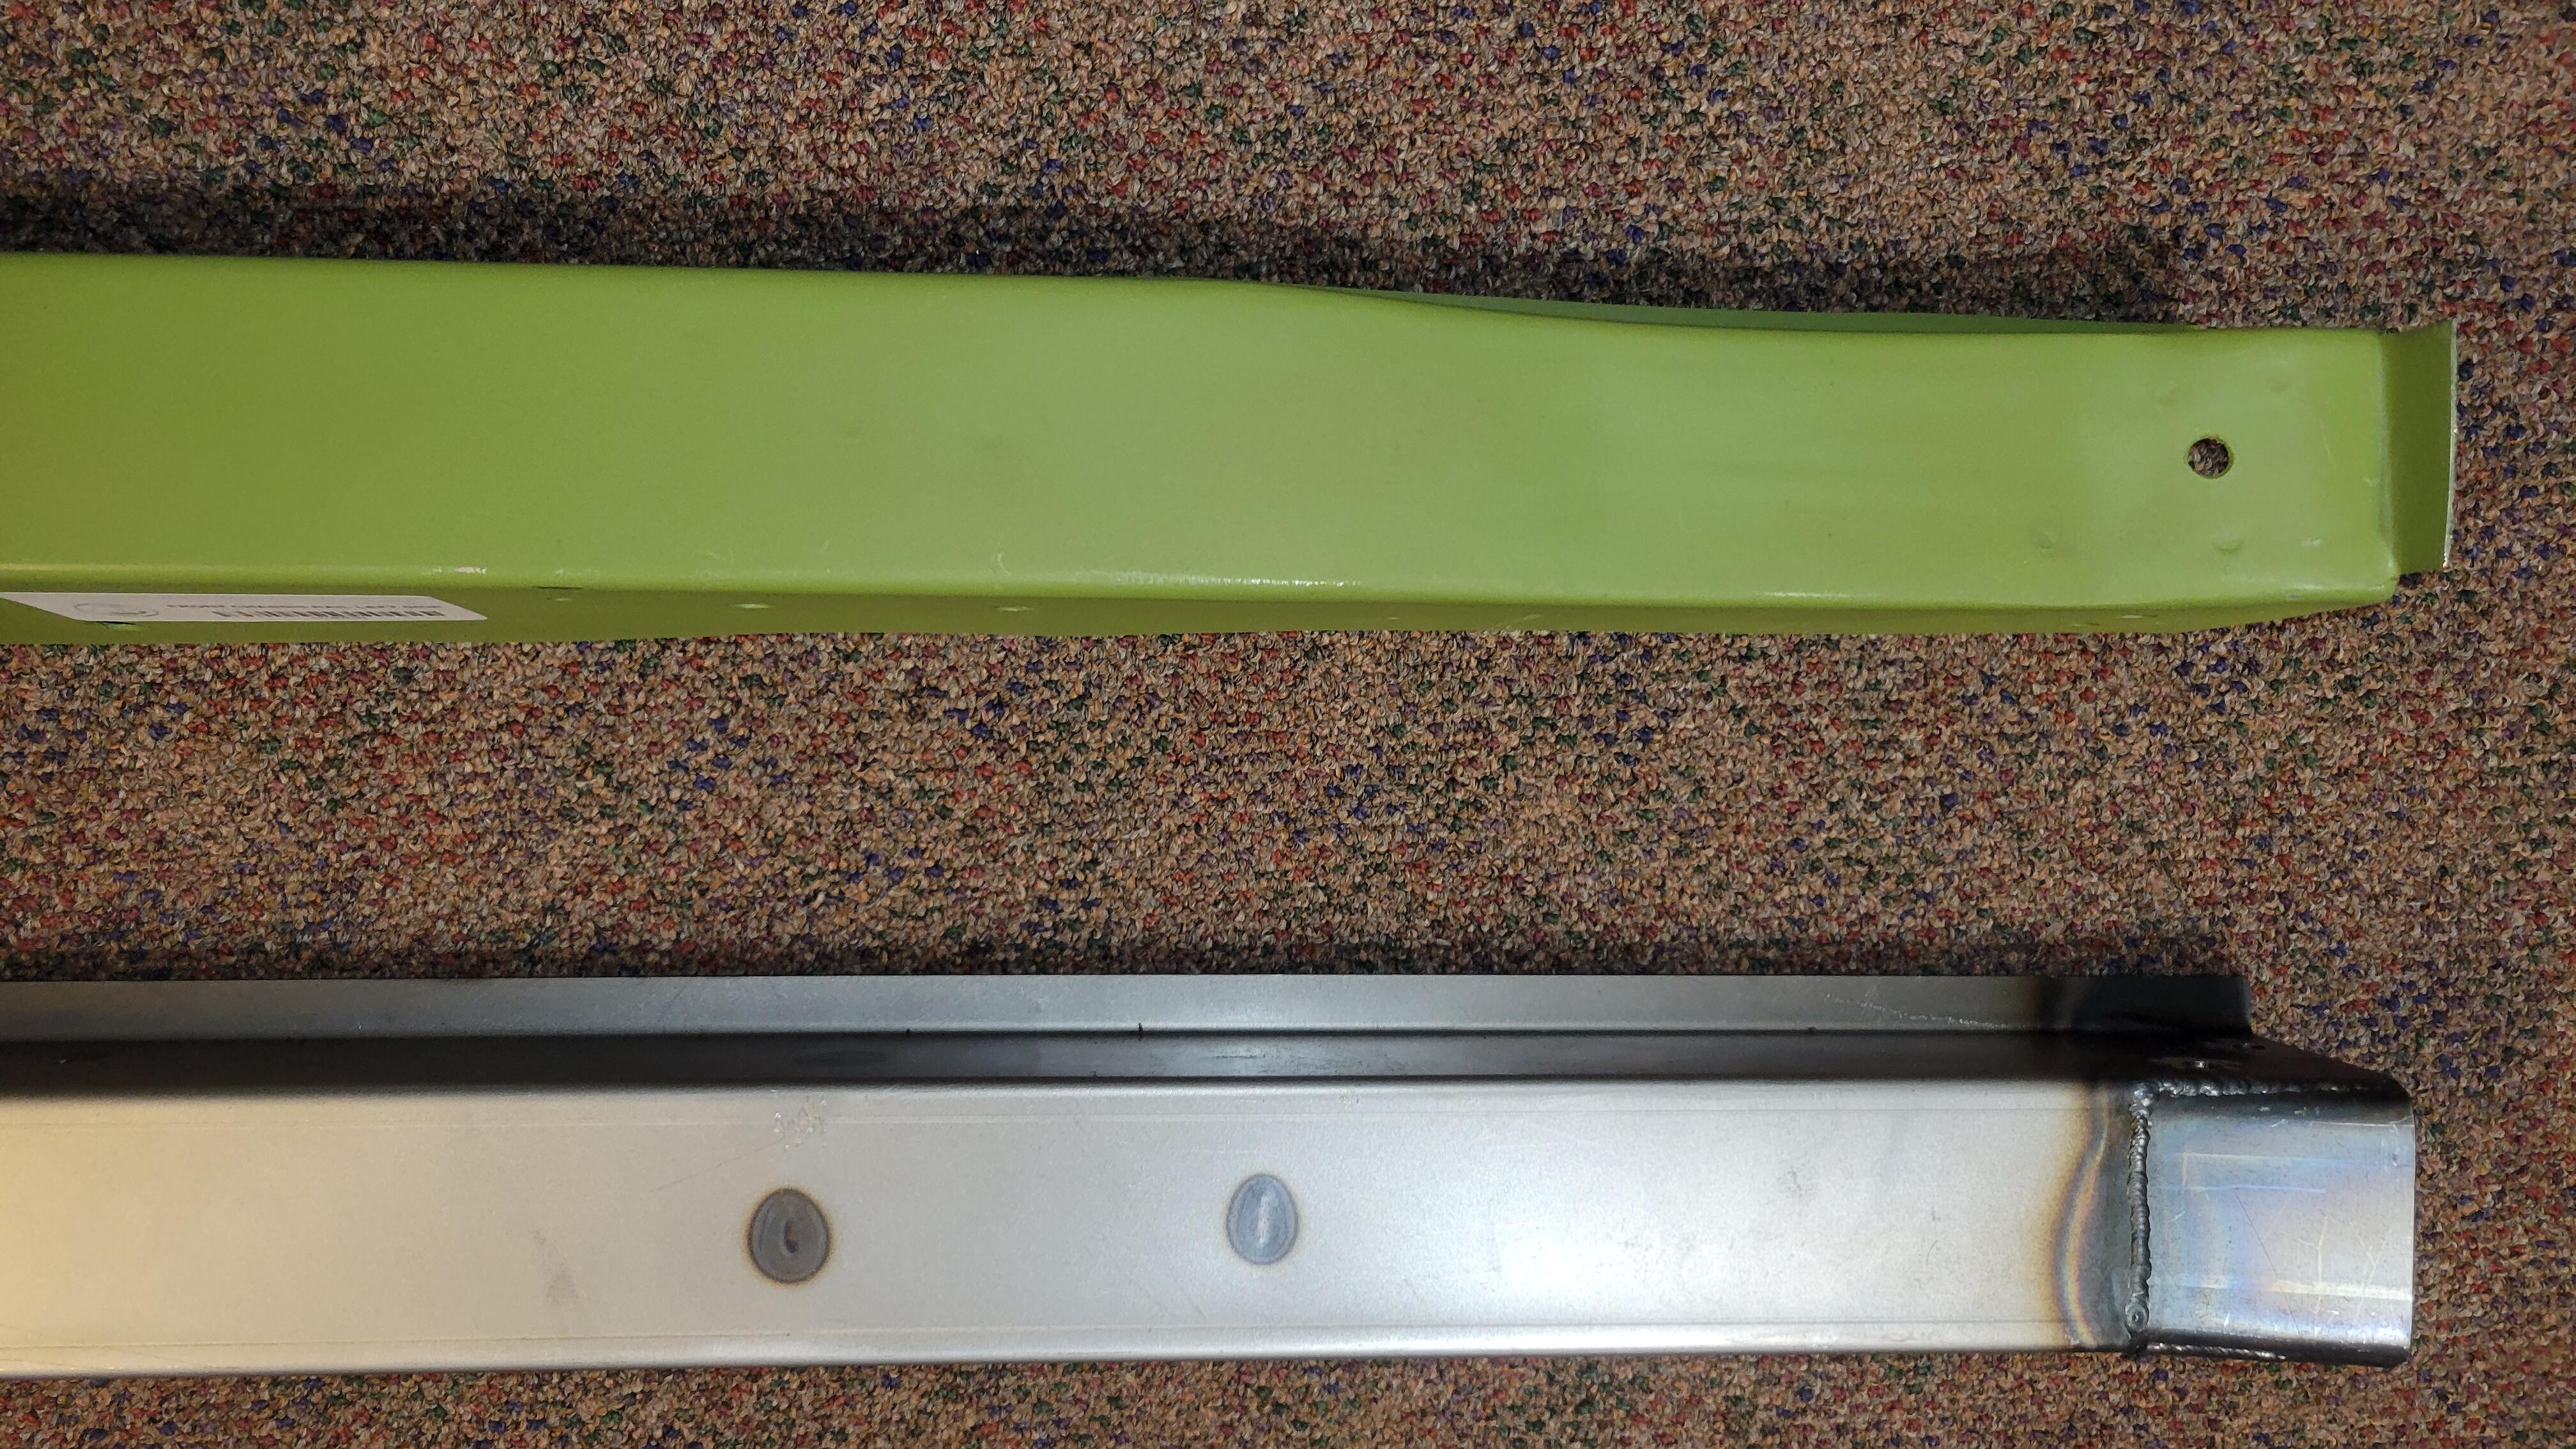
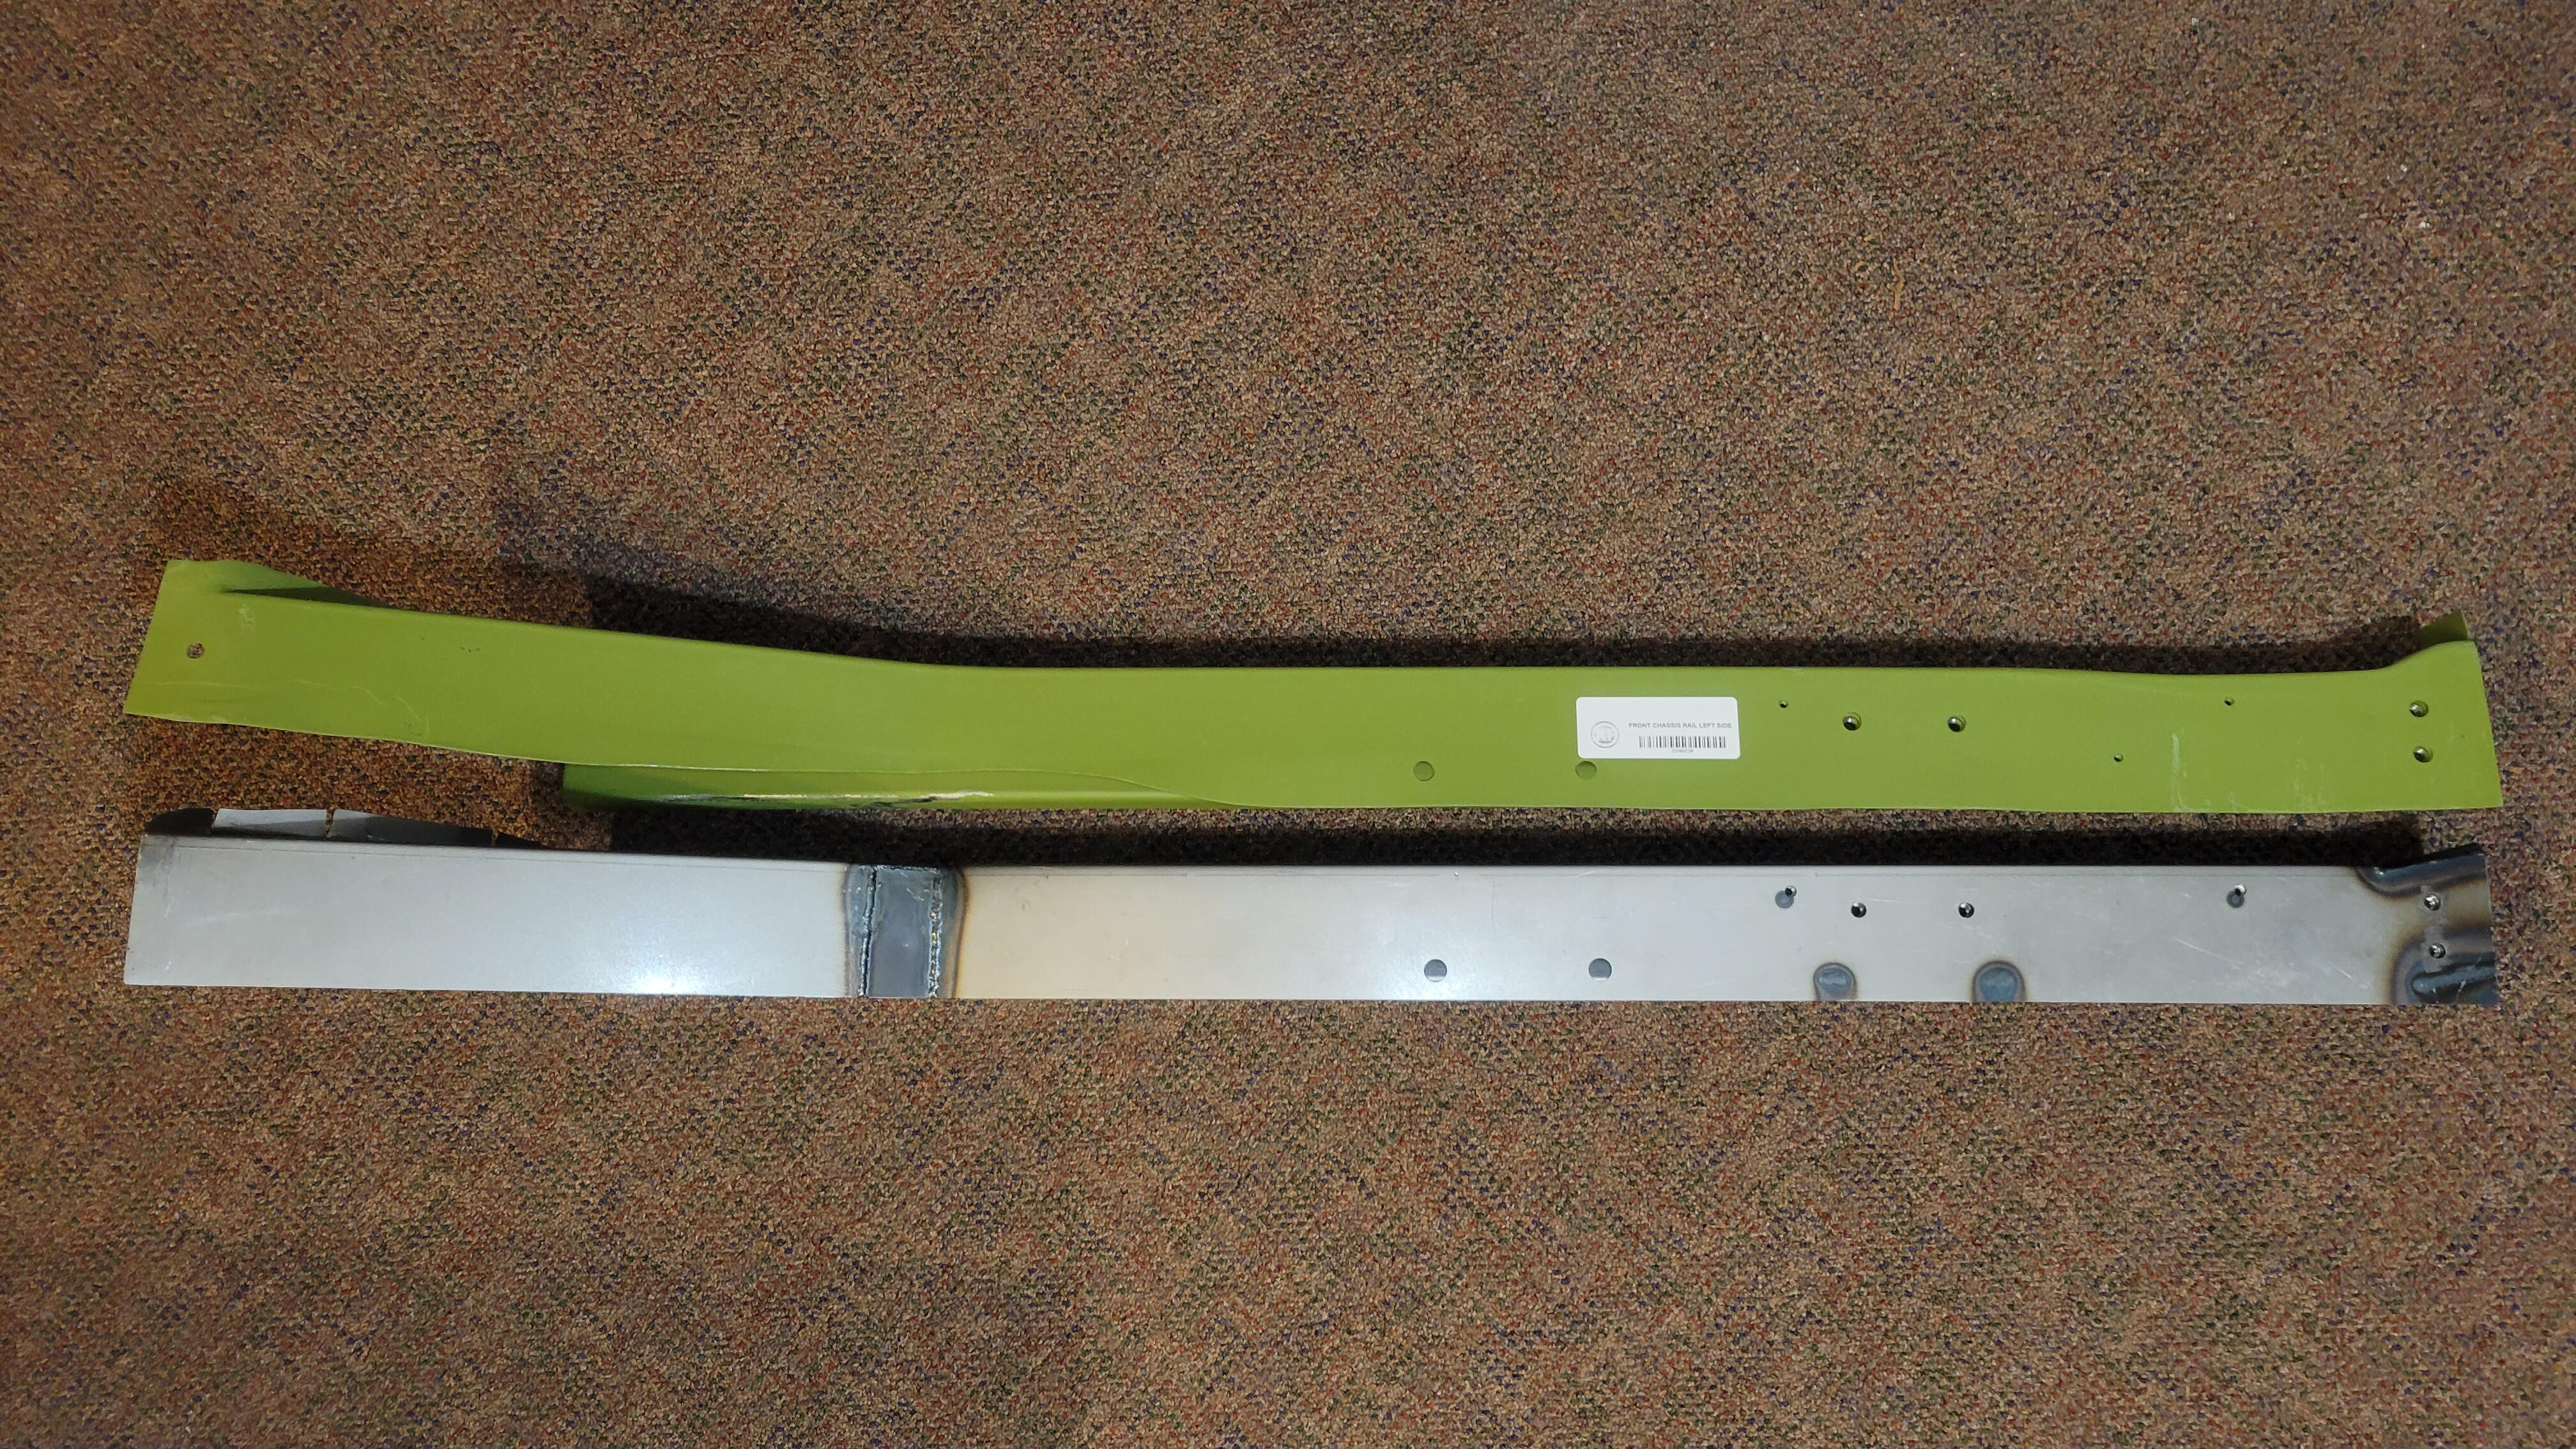
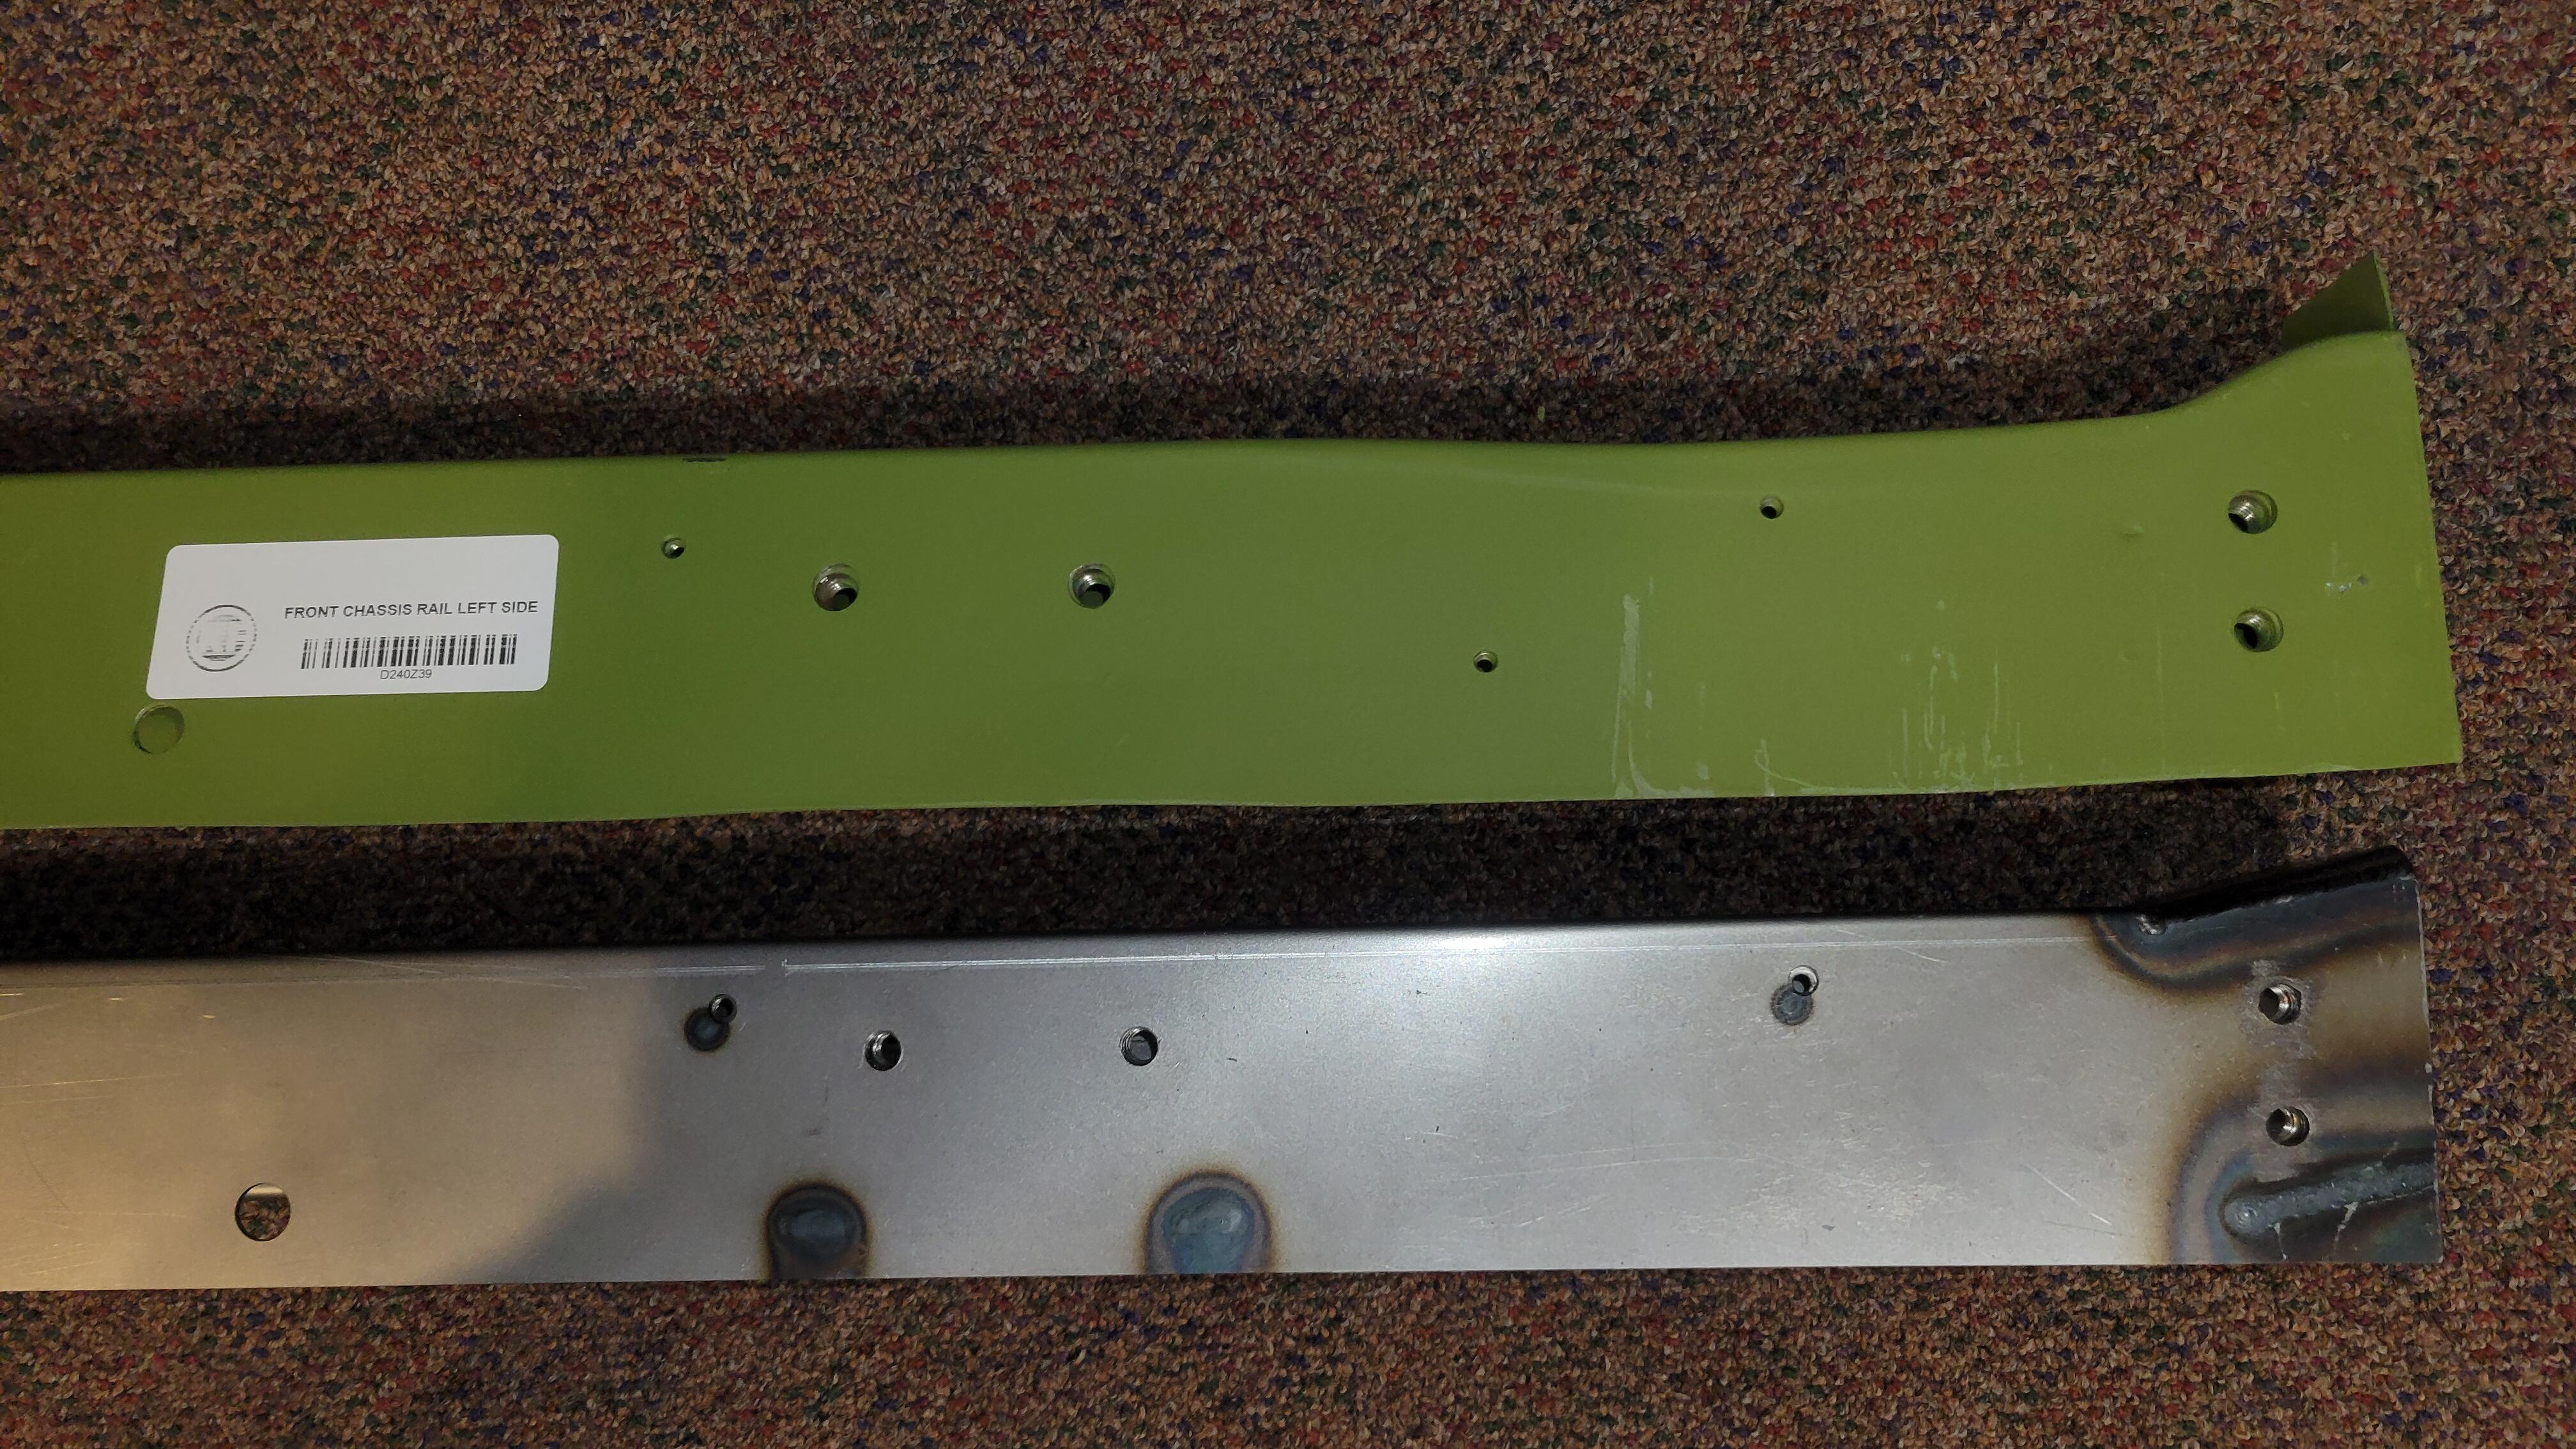
 1 point1 pointSince I now have both, here is a set of pictures comparing Klassic Fab rails with Zedd Findings. Both appear very good, but the KF rails are definitely much closer to original, at least when compared to the rails on my 1970. The ZF rails are more of a "universal' fit for 240/260/280, as they are formed, they are very straight. The KF rails I received have a little waviness to the lower horizontal flange, but it's not a show stopper. Regarding the shape of the rail near the rad support, I only just now noticed that in addition to the width being narrowed, the height is actually shorter as well. You can see this clearly in the pictures.


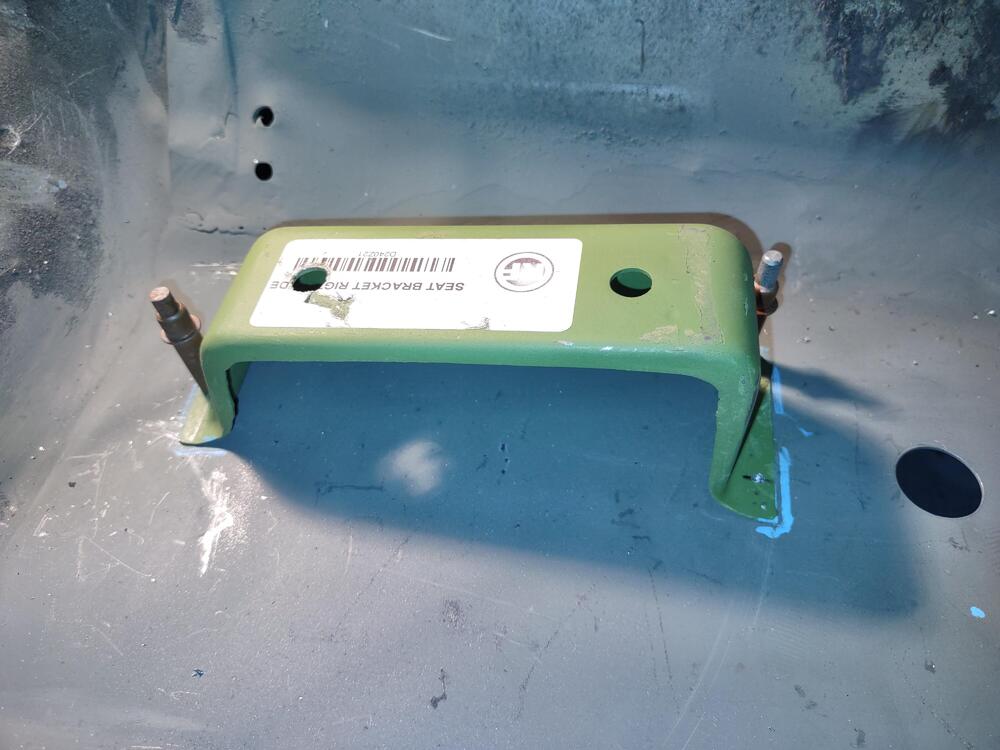
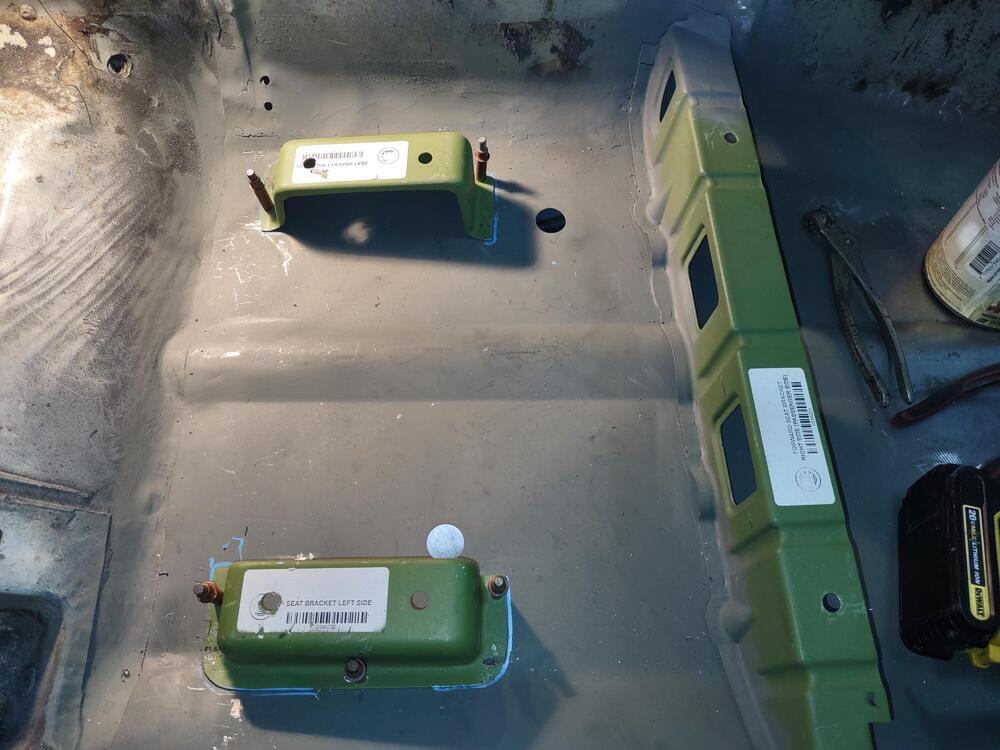
 1 point1 pointWorking on seat mounts for passenger side and since I just ran out of welding gas, I went ahead and cut out the driver's side floor and got it cleaned up. Started the patch panel for the forward foot well to fix up the rust where the floor pan welds up to. Smoked turkey for Christmas dinner. Had to share
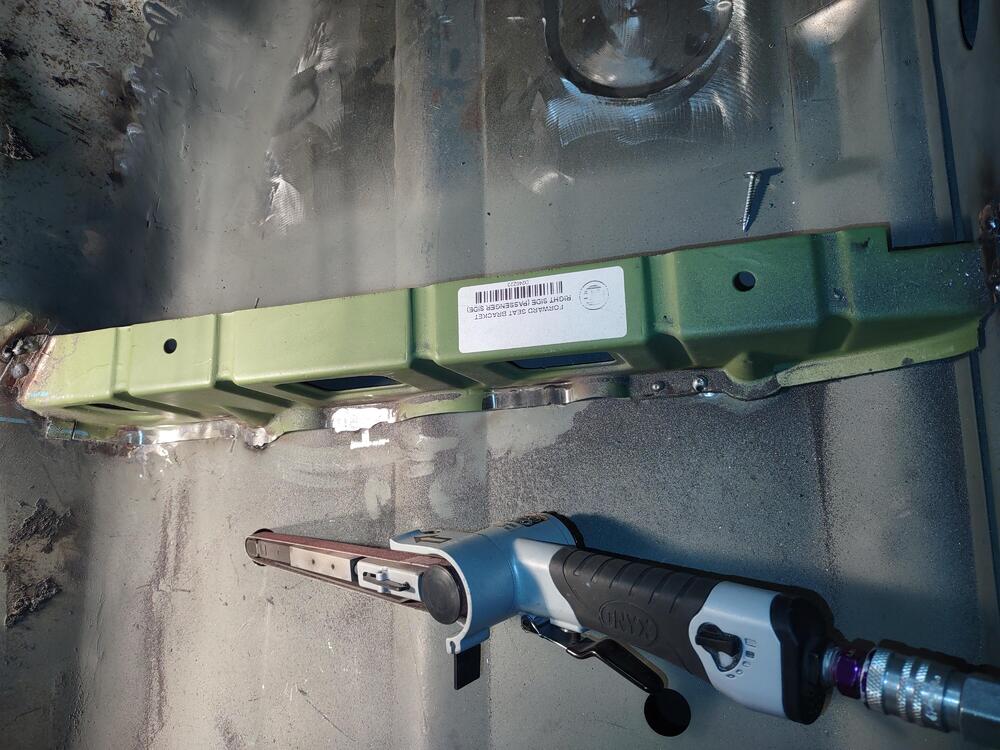


 1 point1 pointJohn, before you pull the trigger on your fuel tank, consider this place... http://www.gas-tank.com/ Lifetime warranty, had a tank done last year, talked to them on the phone, they were very familiar with the 280 / 240 tanks. They have many locations, I think I sent the one I had done to PA. Worked out great for me. Jim's 2 cents1 point


Important Information
By using this site, you agree to our Privacy Policy and Guidelines. We have placed cookies on your device to help make this website better. You can adjust your cookie settings, otherwise we'll assume you're okay to continue.