


Leaderboard
-
.JPG.cfcada9cf1c1b502df3f5f2f2ca3ff36.JPG)
SteveJ
Free Member4Points9,646Posts -
SupremeCling
 Subscriber
 4Points27Posts
 -
dmorales-bello
Free Member2Points627Posts -

CW240Z72
Free Member2Points229Posts


Popular Content
Showing content with the highest reputation on 08/30/2021 in all areas
-
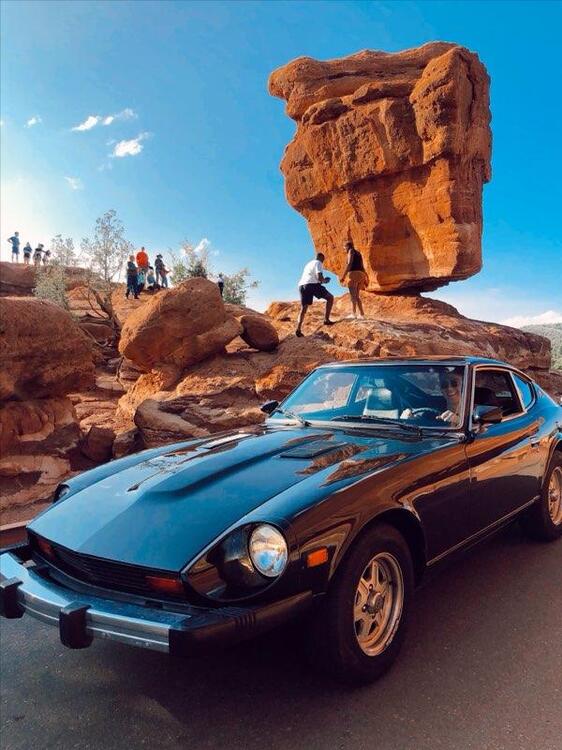
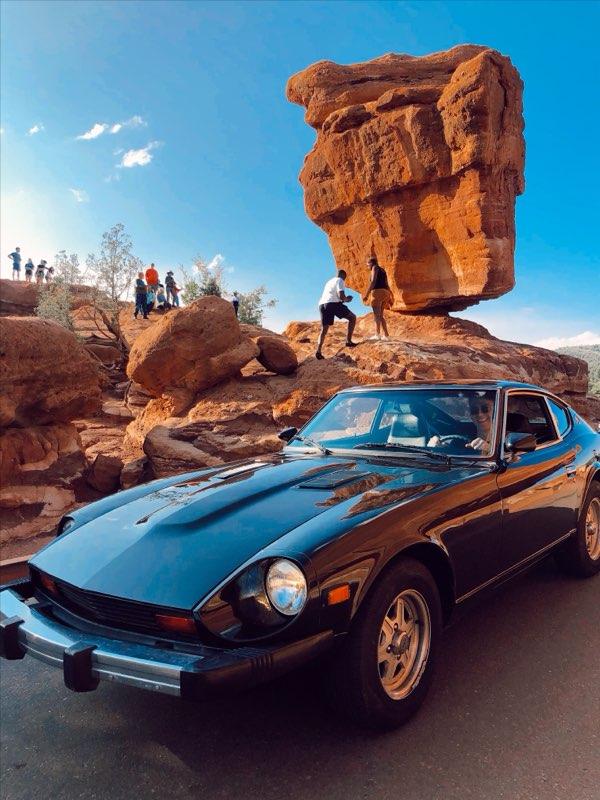
4 pointsHello, My name is Seyler from Colorado, and I am an S30 addict. I am glad to finally be here, as I now own my first S30, a Black Pearl. While I have fed my addiction on my own for some time, I know I will need help to manage my addiction. I only hope to be able to pass along the help I receive to those who will also need help with their addiction in the future.
 4 points
 -
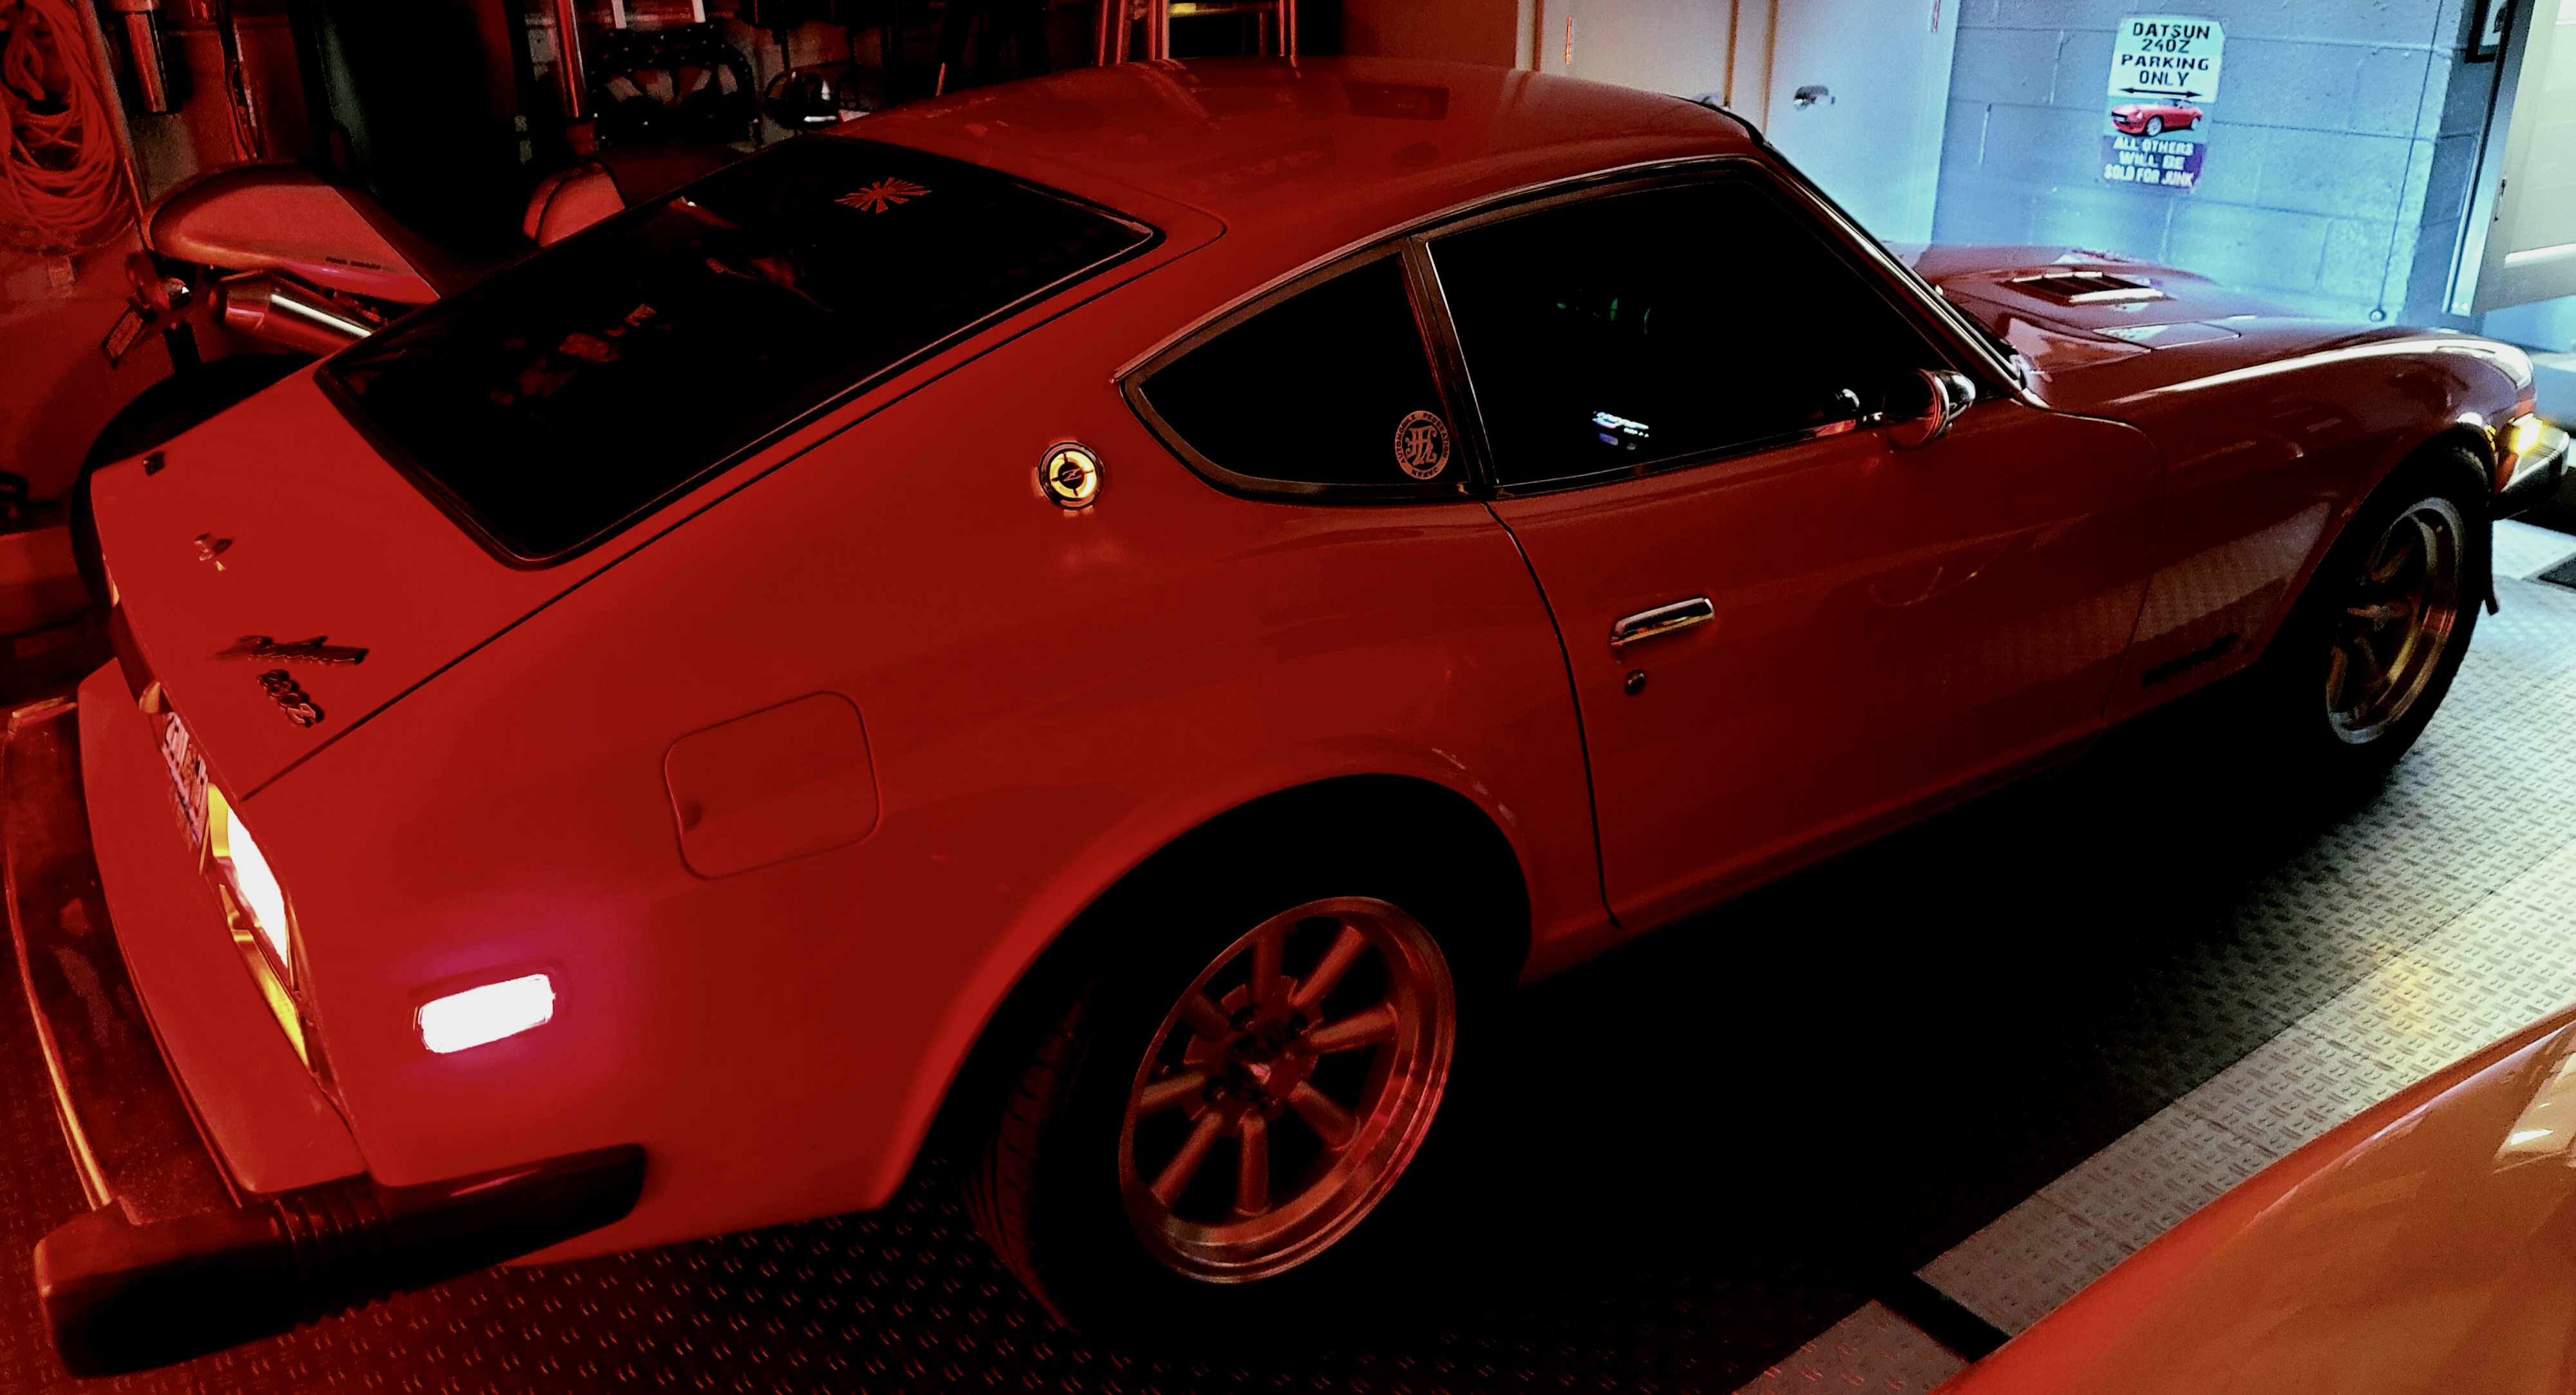
3 pointsI decided there was enough time in the day to do a few more little things to the Z. I changed the oil, inspected the reverse switch (no continuity in reverse), and changed out the sending unit at the gas tank. Since I knew I replaced the reverse light switch many years ago, I decided to figure out if it might be a part number issue. I searched CarPartsManual.com for the reverse switches for the 4 speed and the 5 speed. A previous owner swapped in an early 5 speed. It's the same part number. I ordered the switch from Courtesy Nissan. I'm hoping that the aftermarket part I tried 24 years ago was just not made correctly. I'll find out in about a week or so. Aside from trying the new switch when I get it and replacing the intake manifold gasket next Saturday, I'd say my odyssey of getting the 240Z back on the road is pretty much complete. I owe a lot to my local friend, Tim McGovern, and all of the people who have posted here over the years, especially Philip @240260280, for all that I have learned. It's simply amazing all of the knowledge I have accumulated over the last 10 years.3 points
-
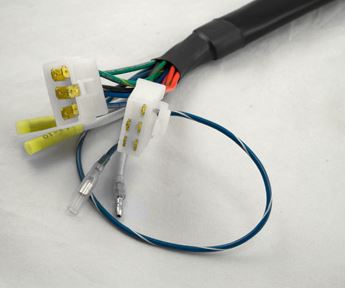
2 pointsSide project I’ve been working on during the dash rebuild on the Z is upgrading the original fuse box. I went ahead and ordered the blade style of fuse box offered through MSA. This upgrade as been discussed in other threads on this forum, one topic being the connectors used on the new fuse box. Looks like apart from the bullet style connectors used, I’ll end up having to swap out the other ones for the correct ones used originally on the car. The 6 pin plugs use the latching style of connection. Fortunately Vintage Connections offers the correct non-latching connectors to mate up to the existing harness. Not a huge deal, but details like that would drive me nuts. They also offer the correct blade style connectors needed to swap out the two crimp-on connectors also supplied with the new fuse box. The other topic discussed about this fuse box is the fact that it’s physically larger than the original unit, so much so that the factory cover will not fit over the box. Again, not a huge deal, but I want to make any update on the Z to look as factory as possible. As an attempt to fix this, I modeled up an adapter plate that can be used to mount the original cover to the new fuse box. The idea being I could use mount the adapter to the new box through the mounting screws, and then snap the original lid to it just as the factory did. It will take a few iterations of tweaking the part, but with a personal 3D printer updates are easy to test. I’ll report back once/if I get a design that I’m happy with.

 2 points
 -
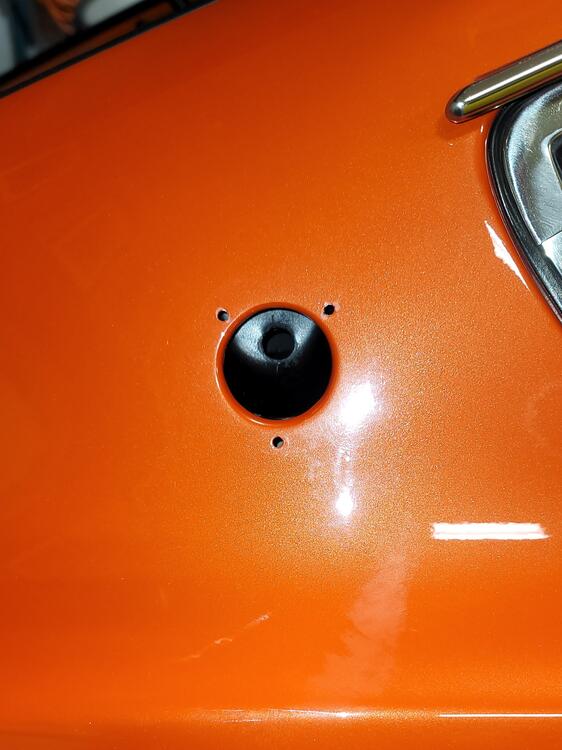
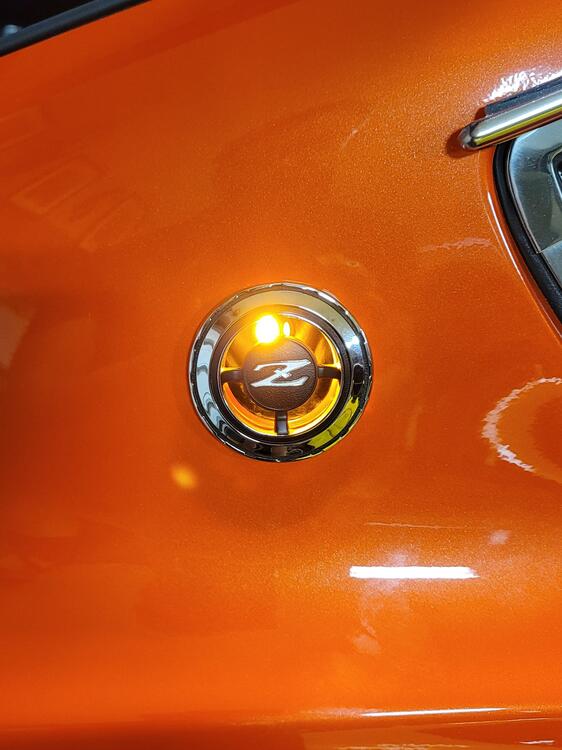
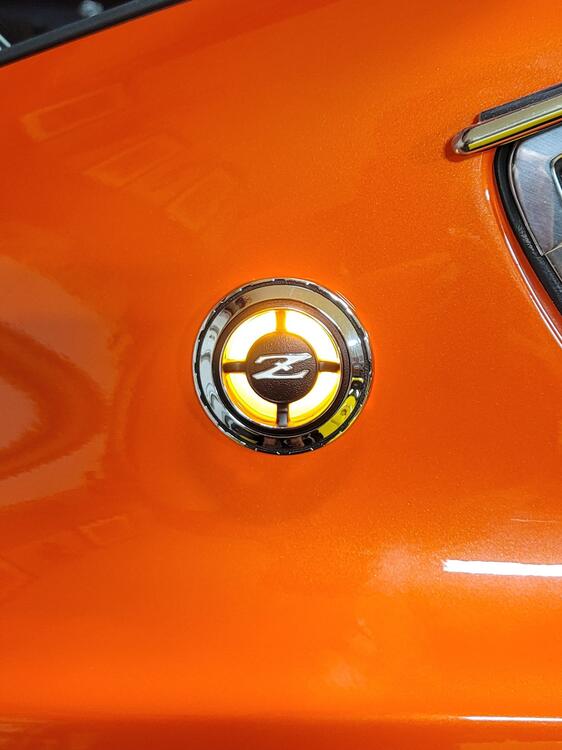
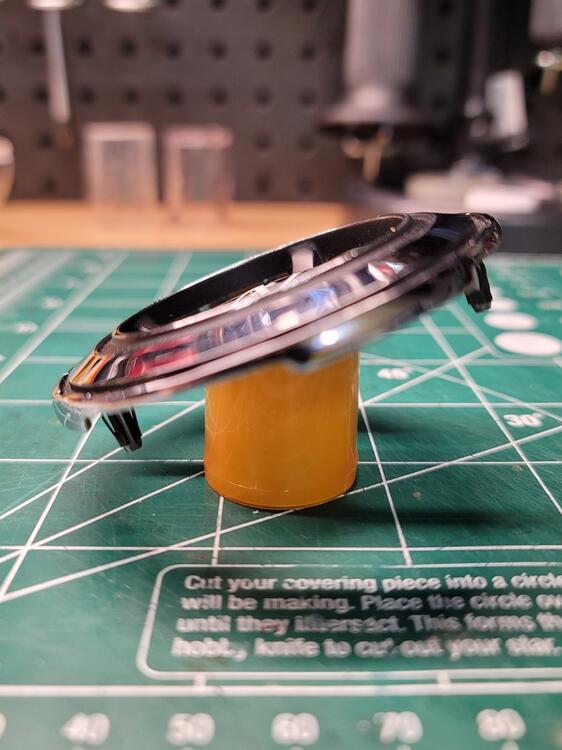
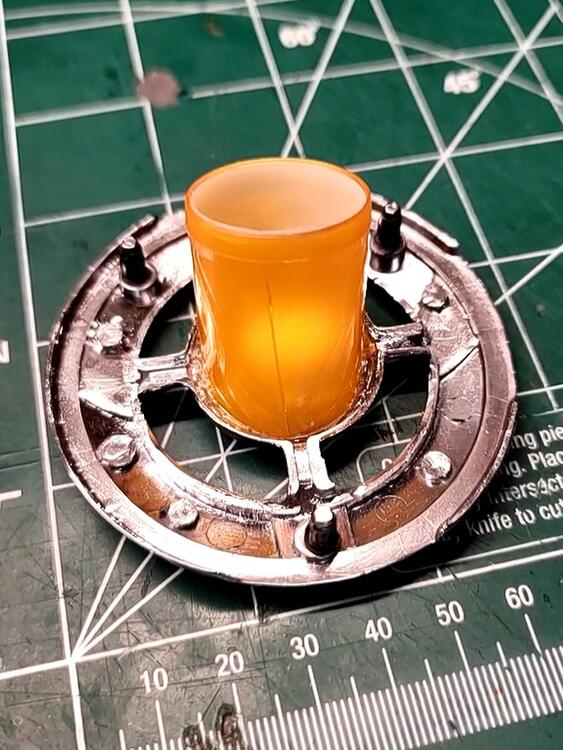
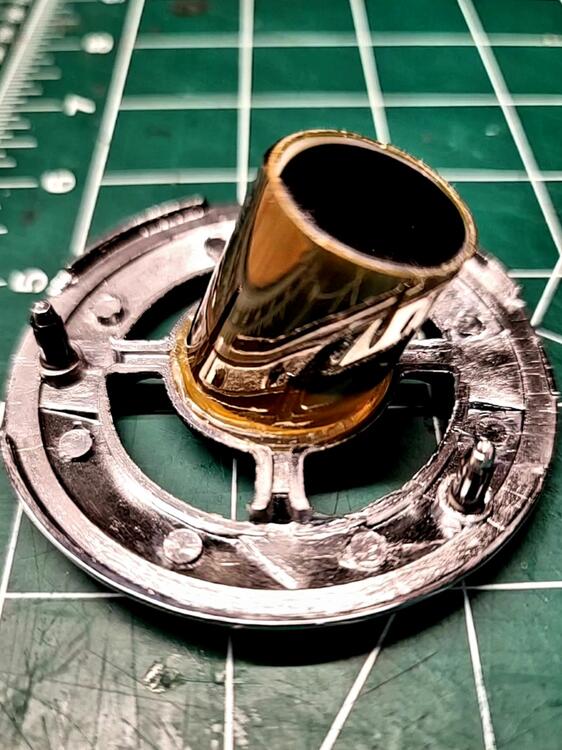
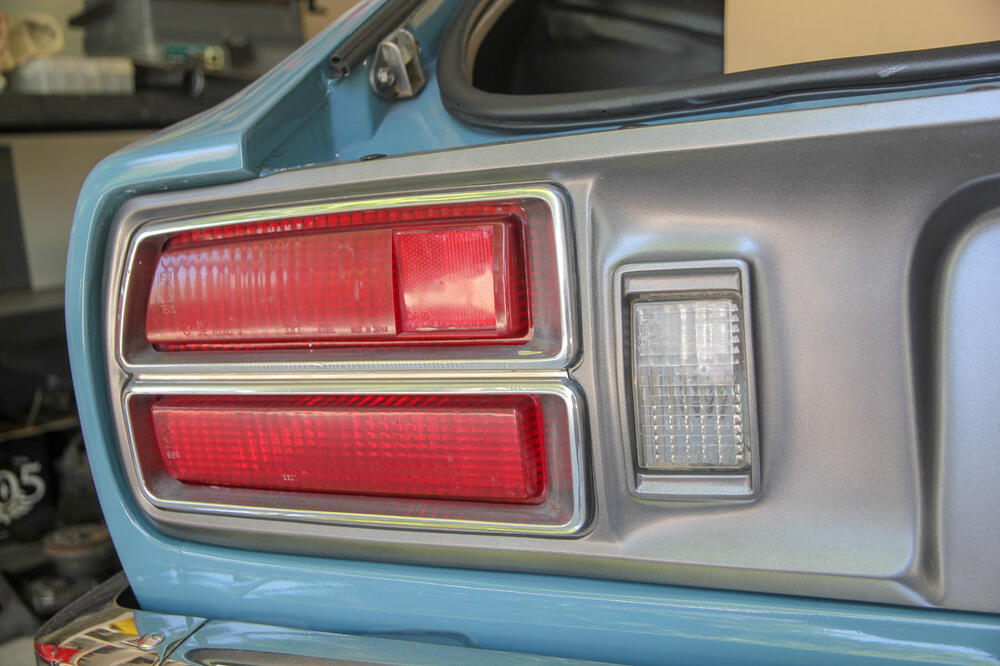
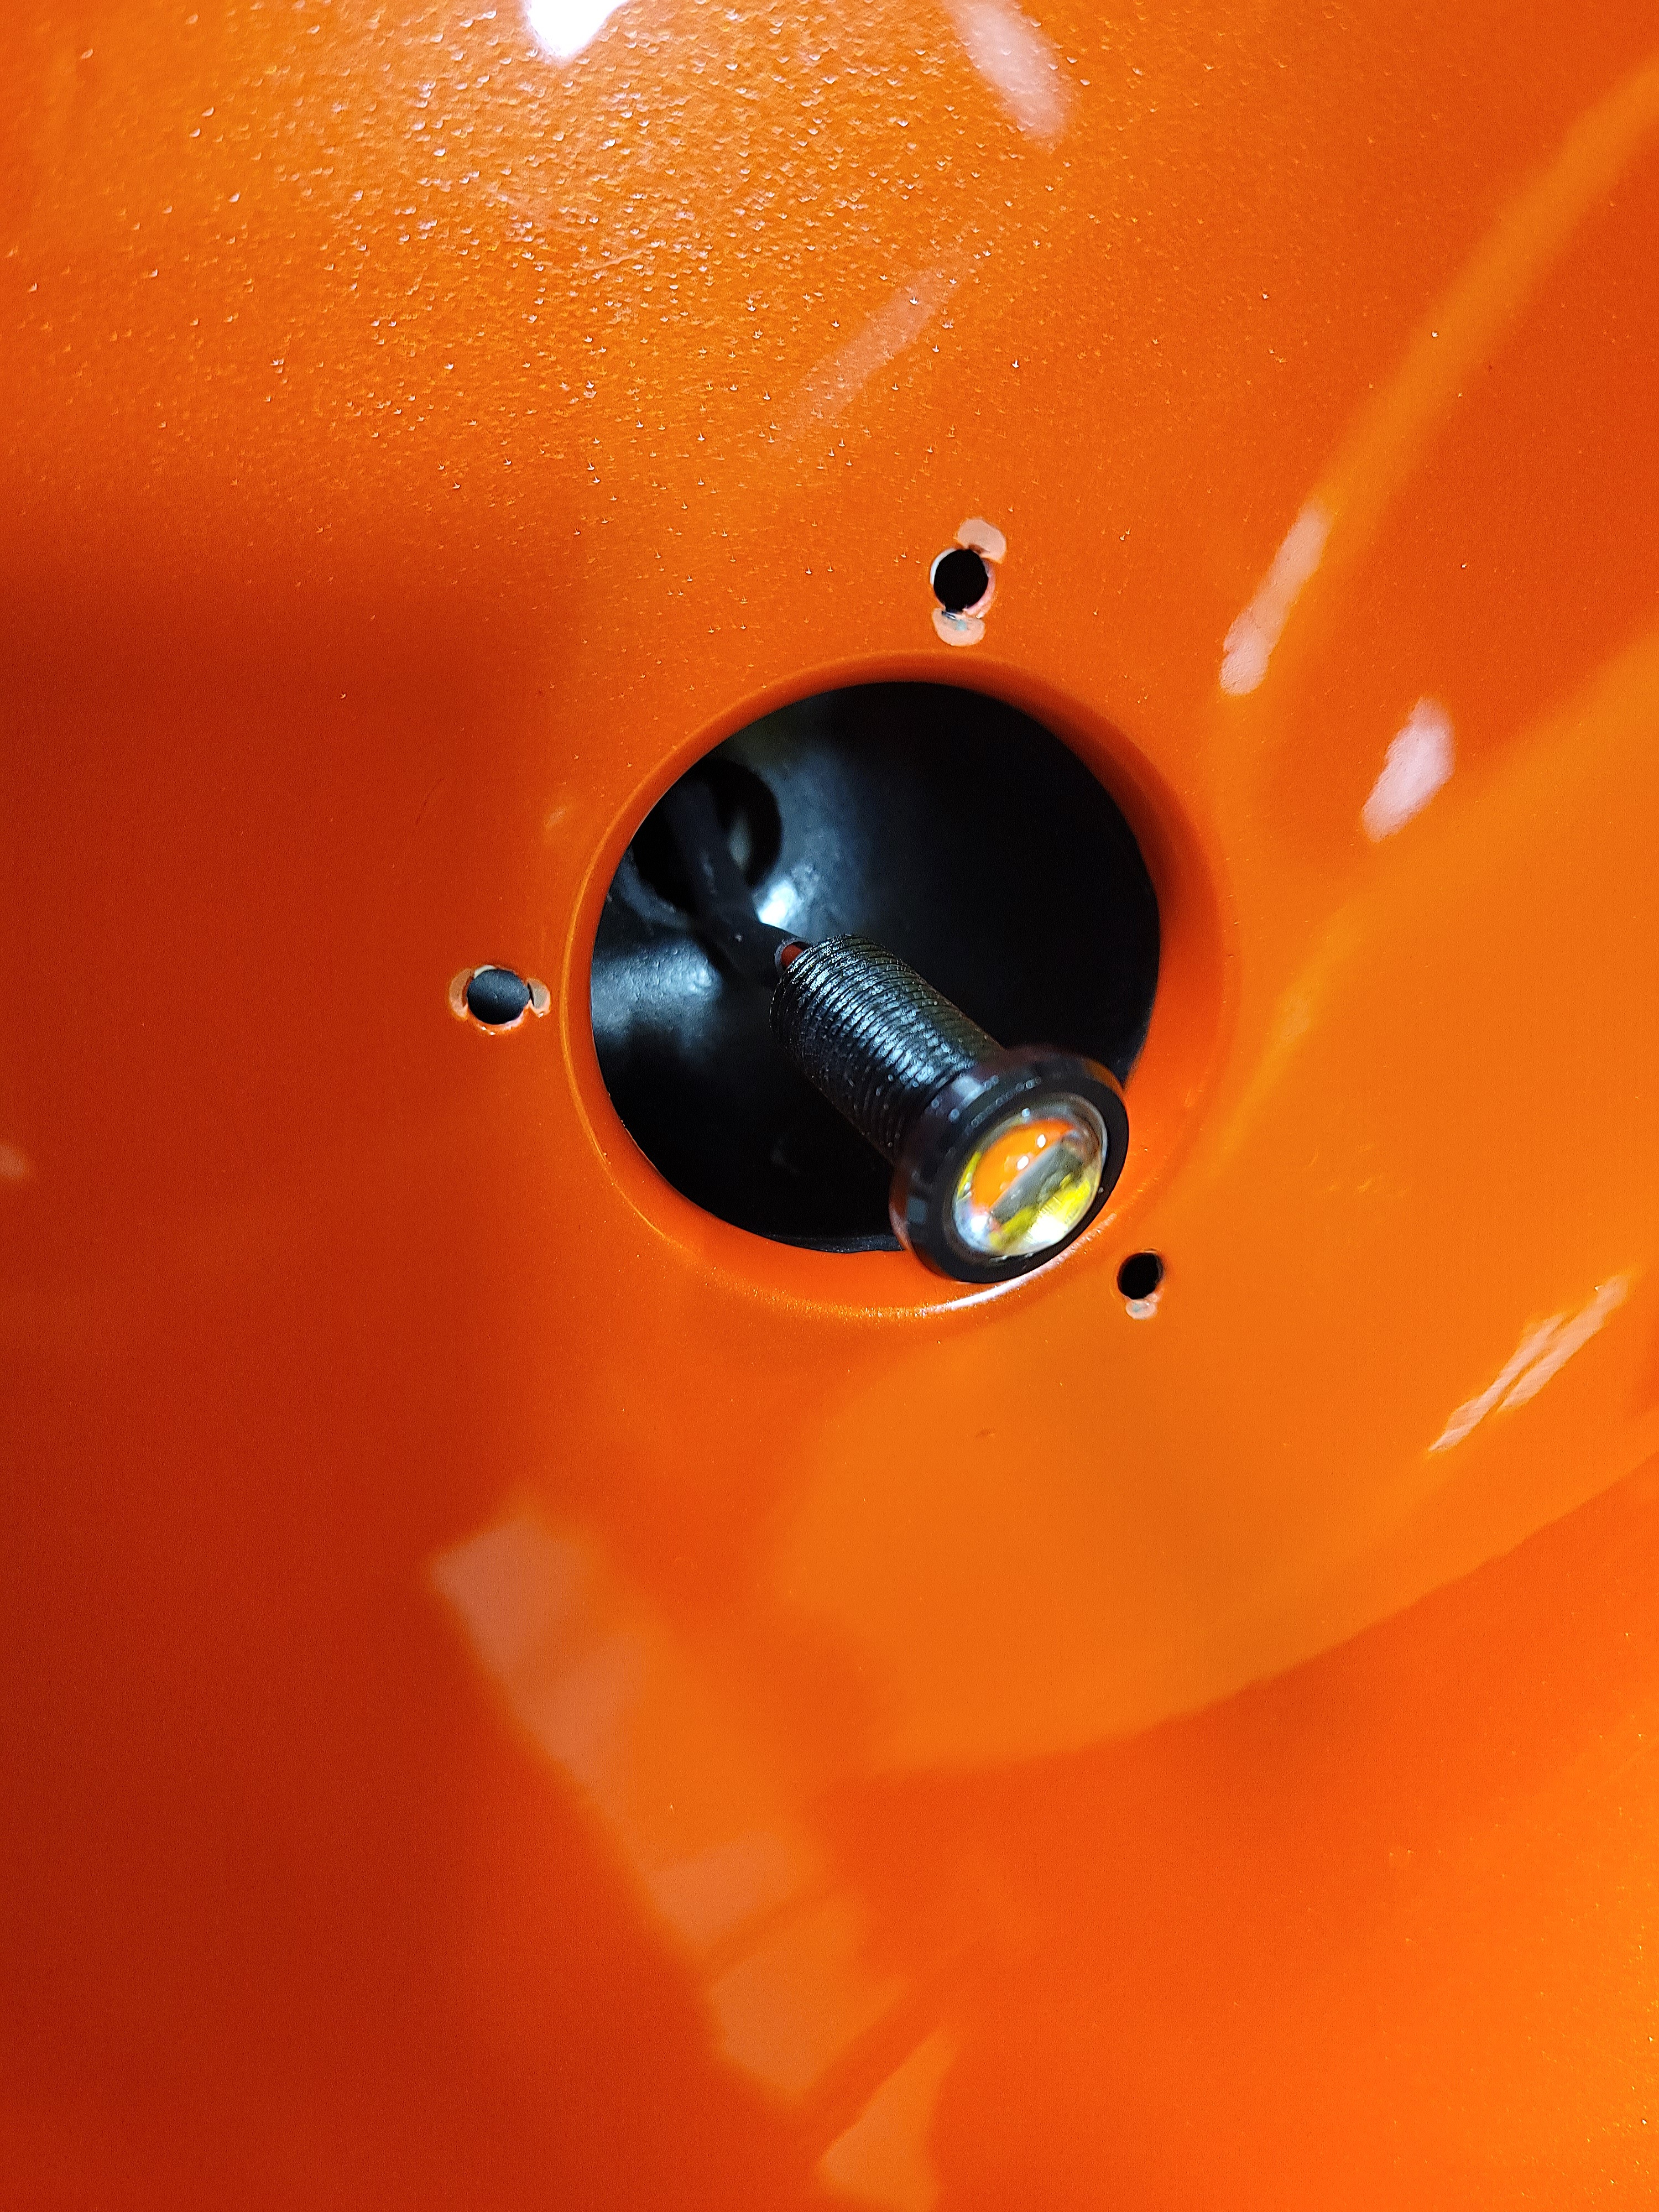
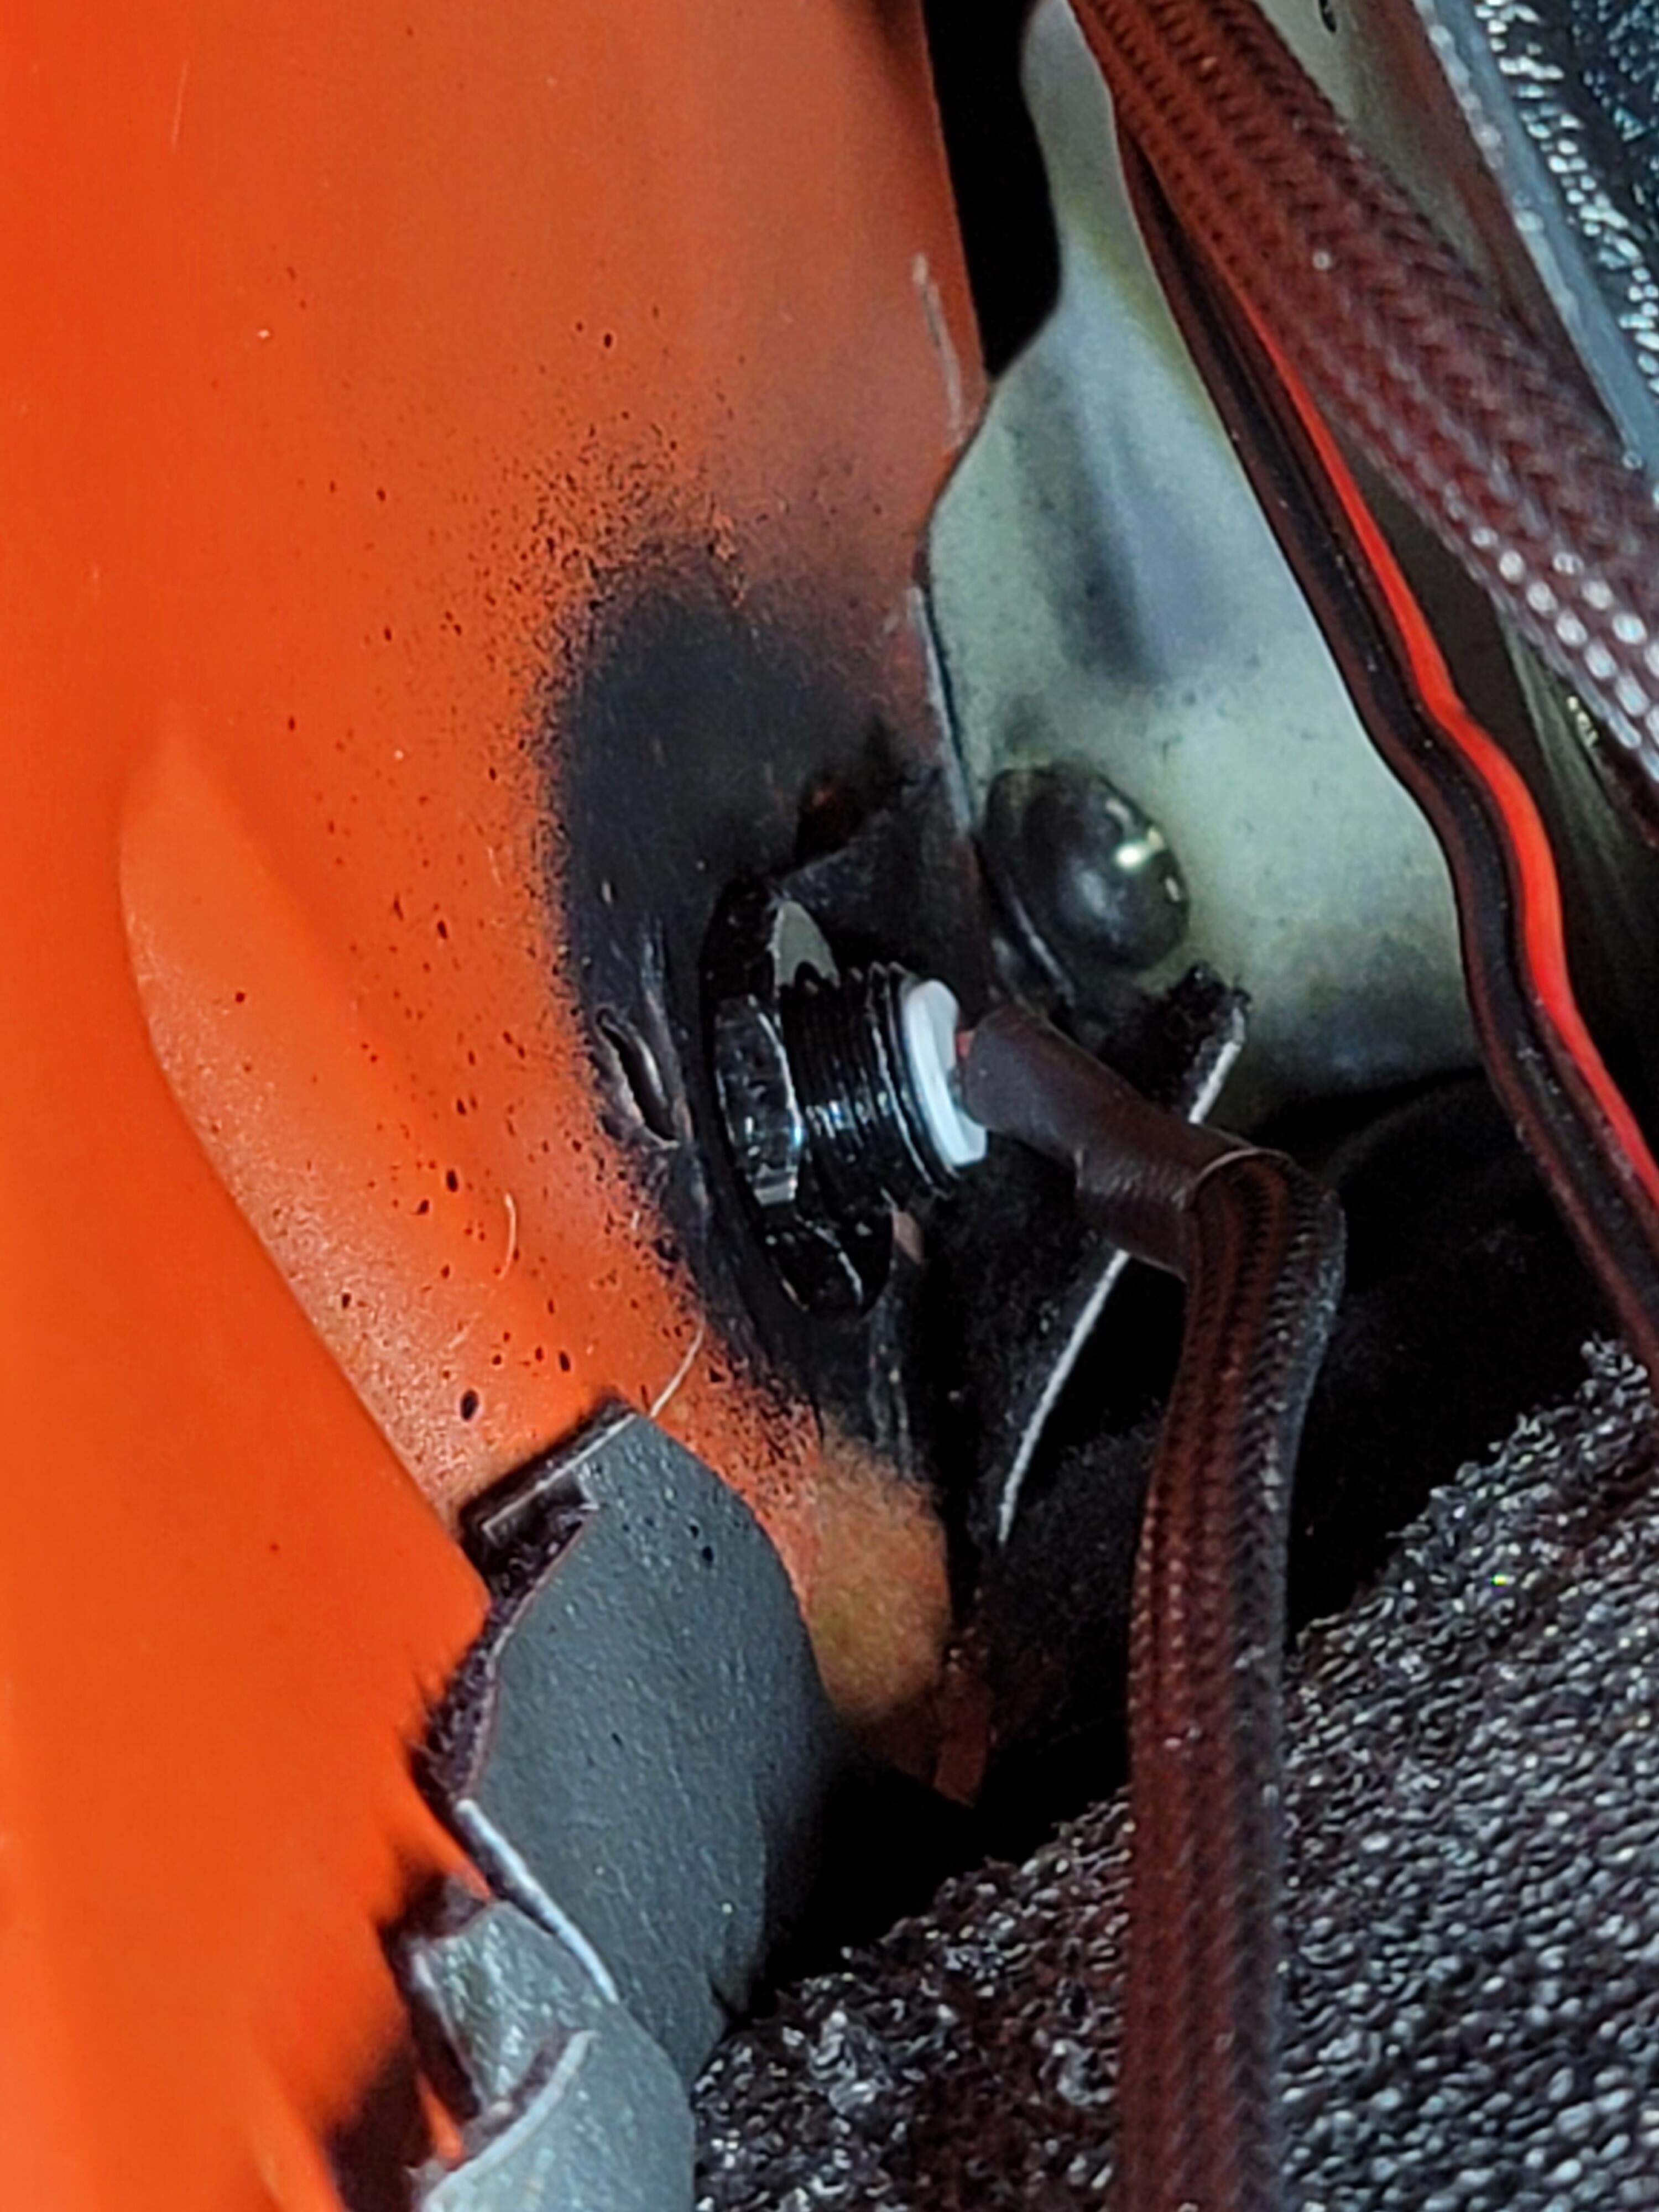
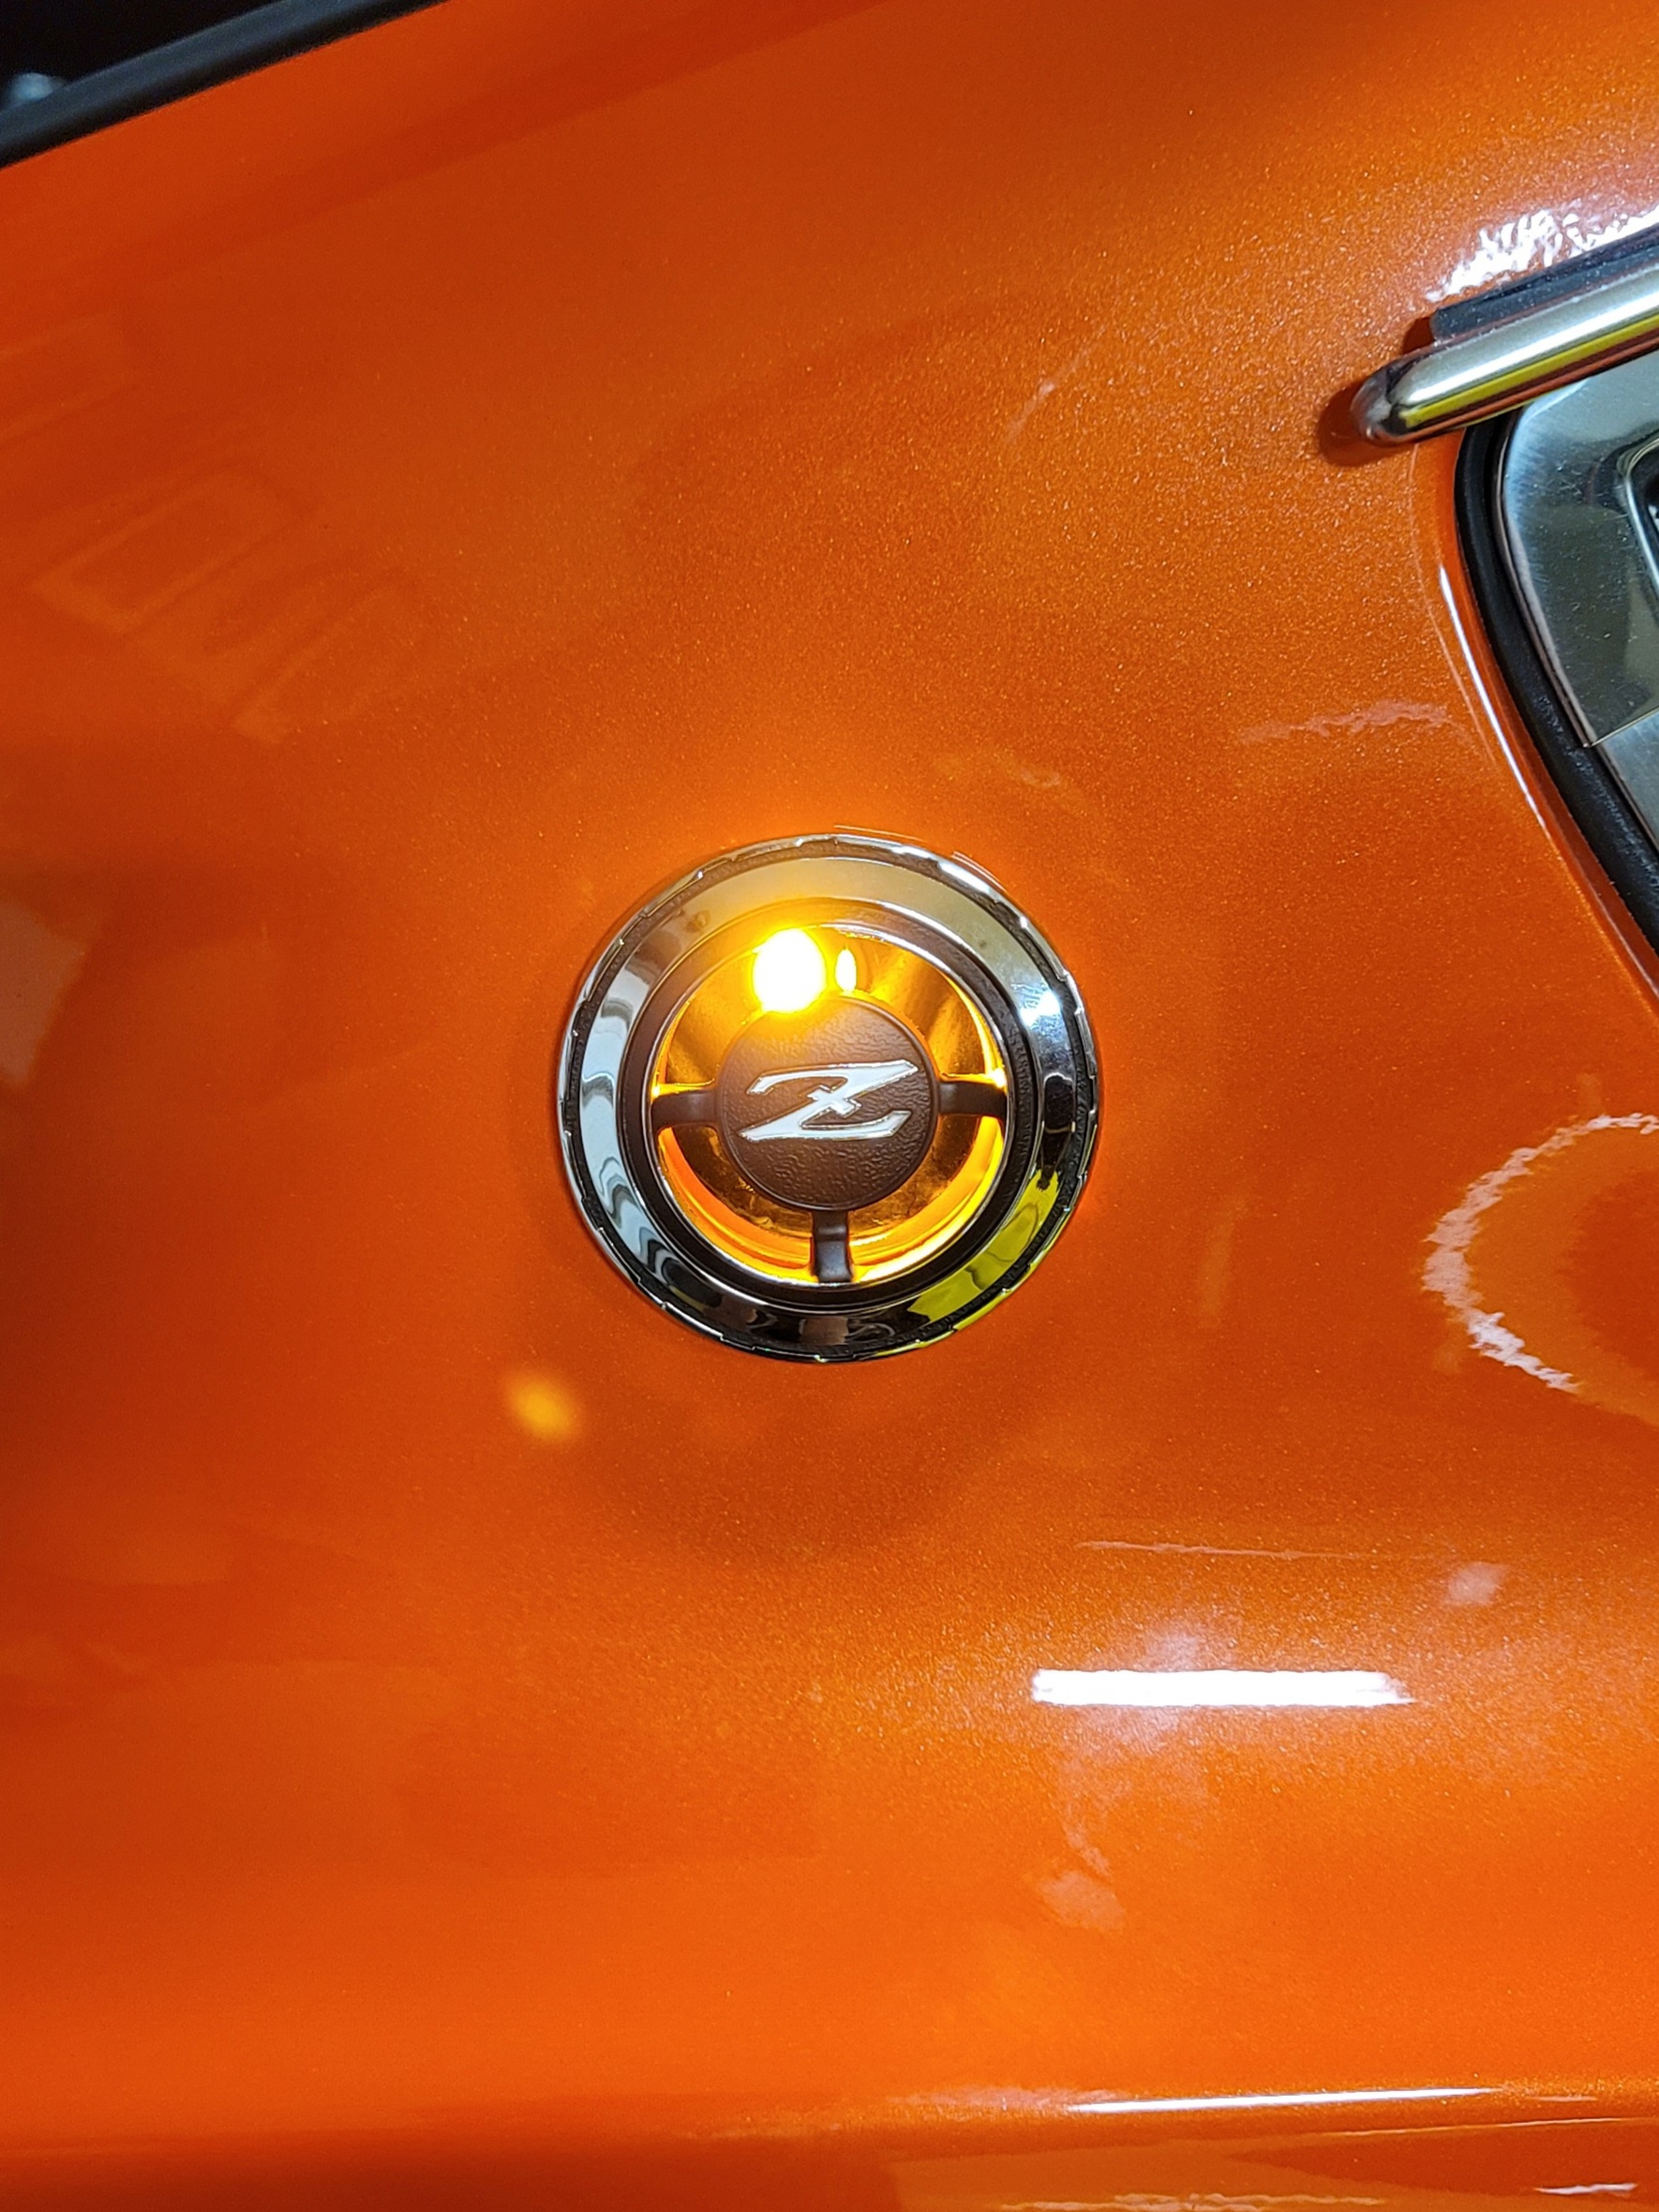
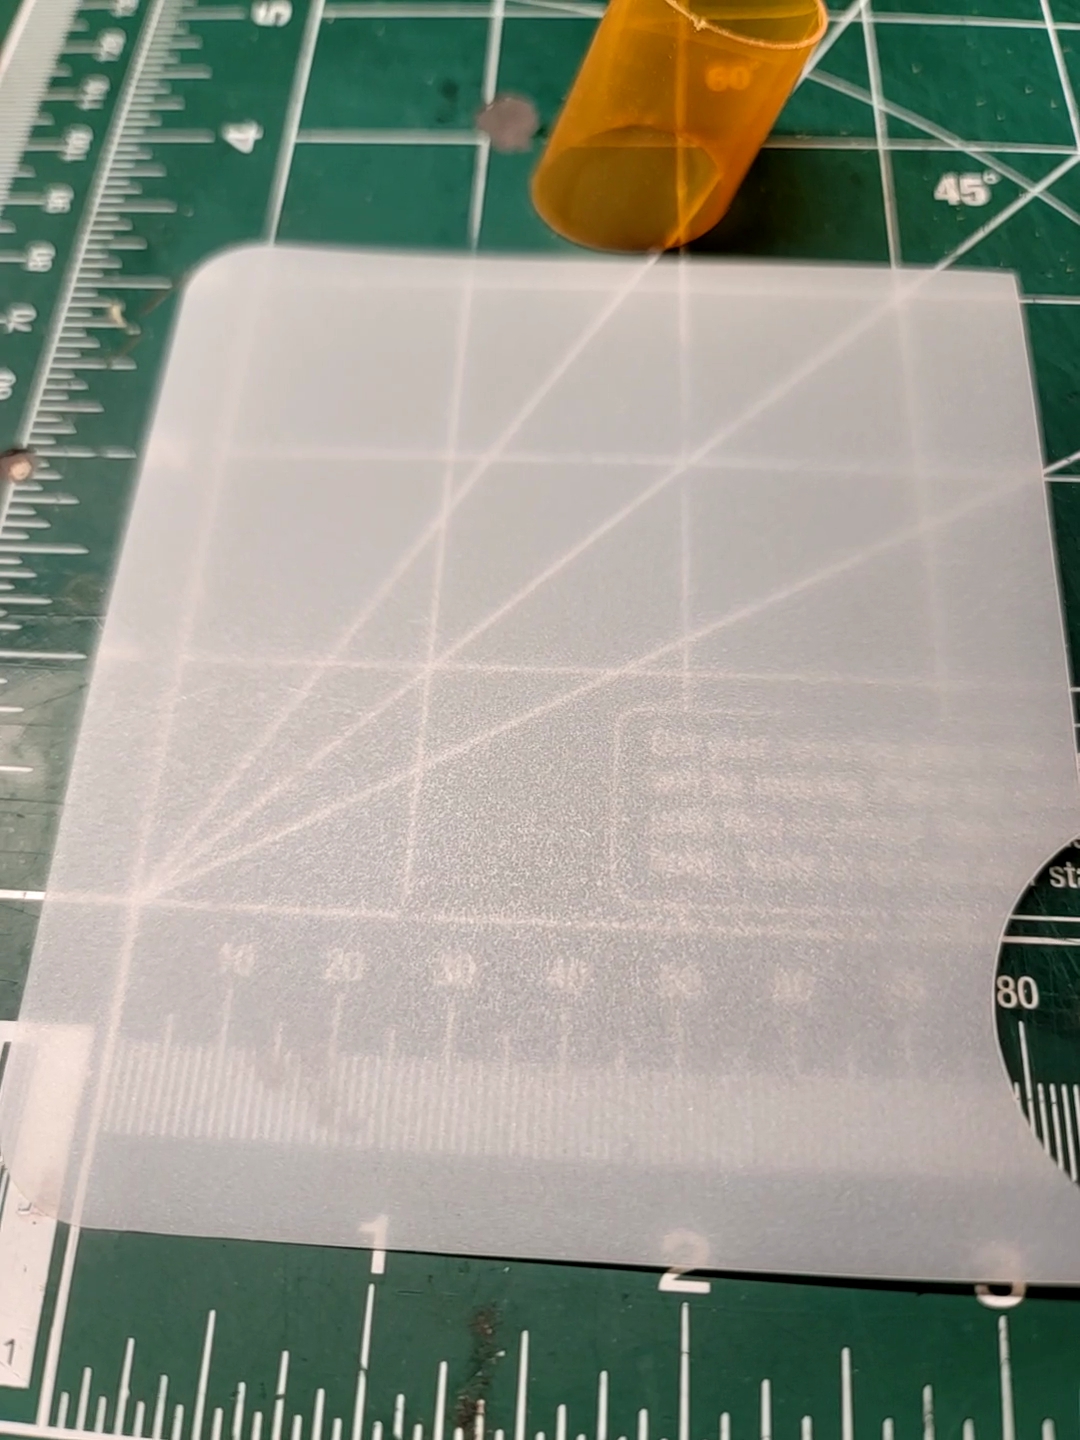
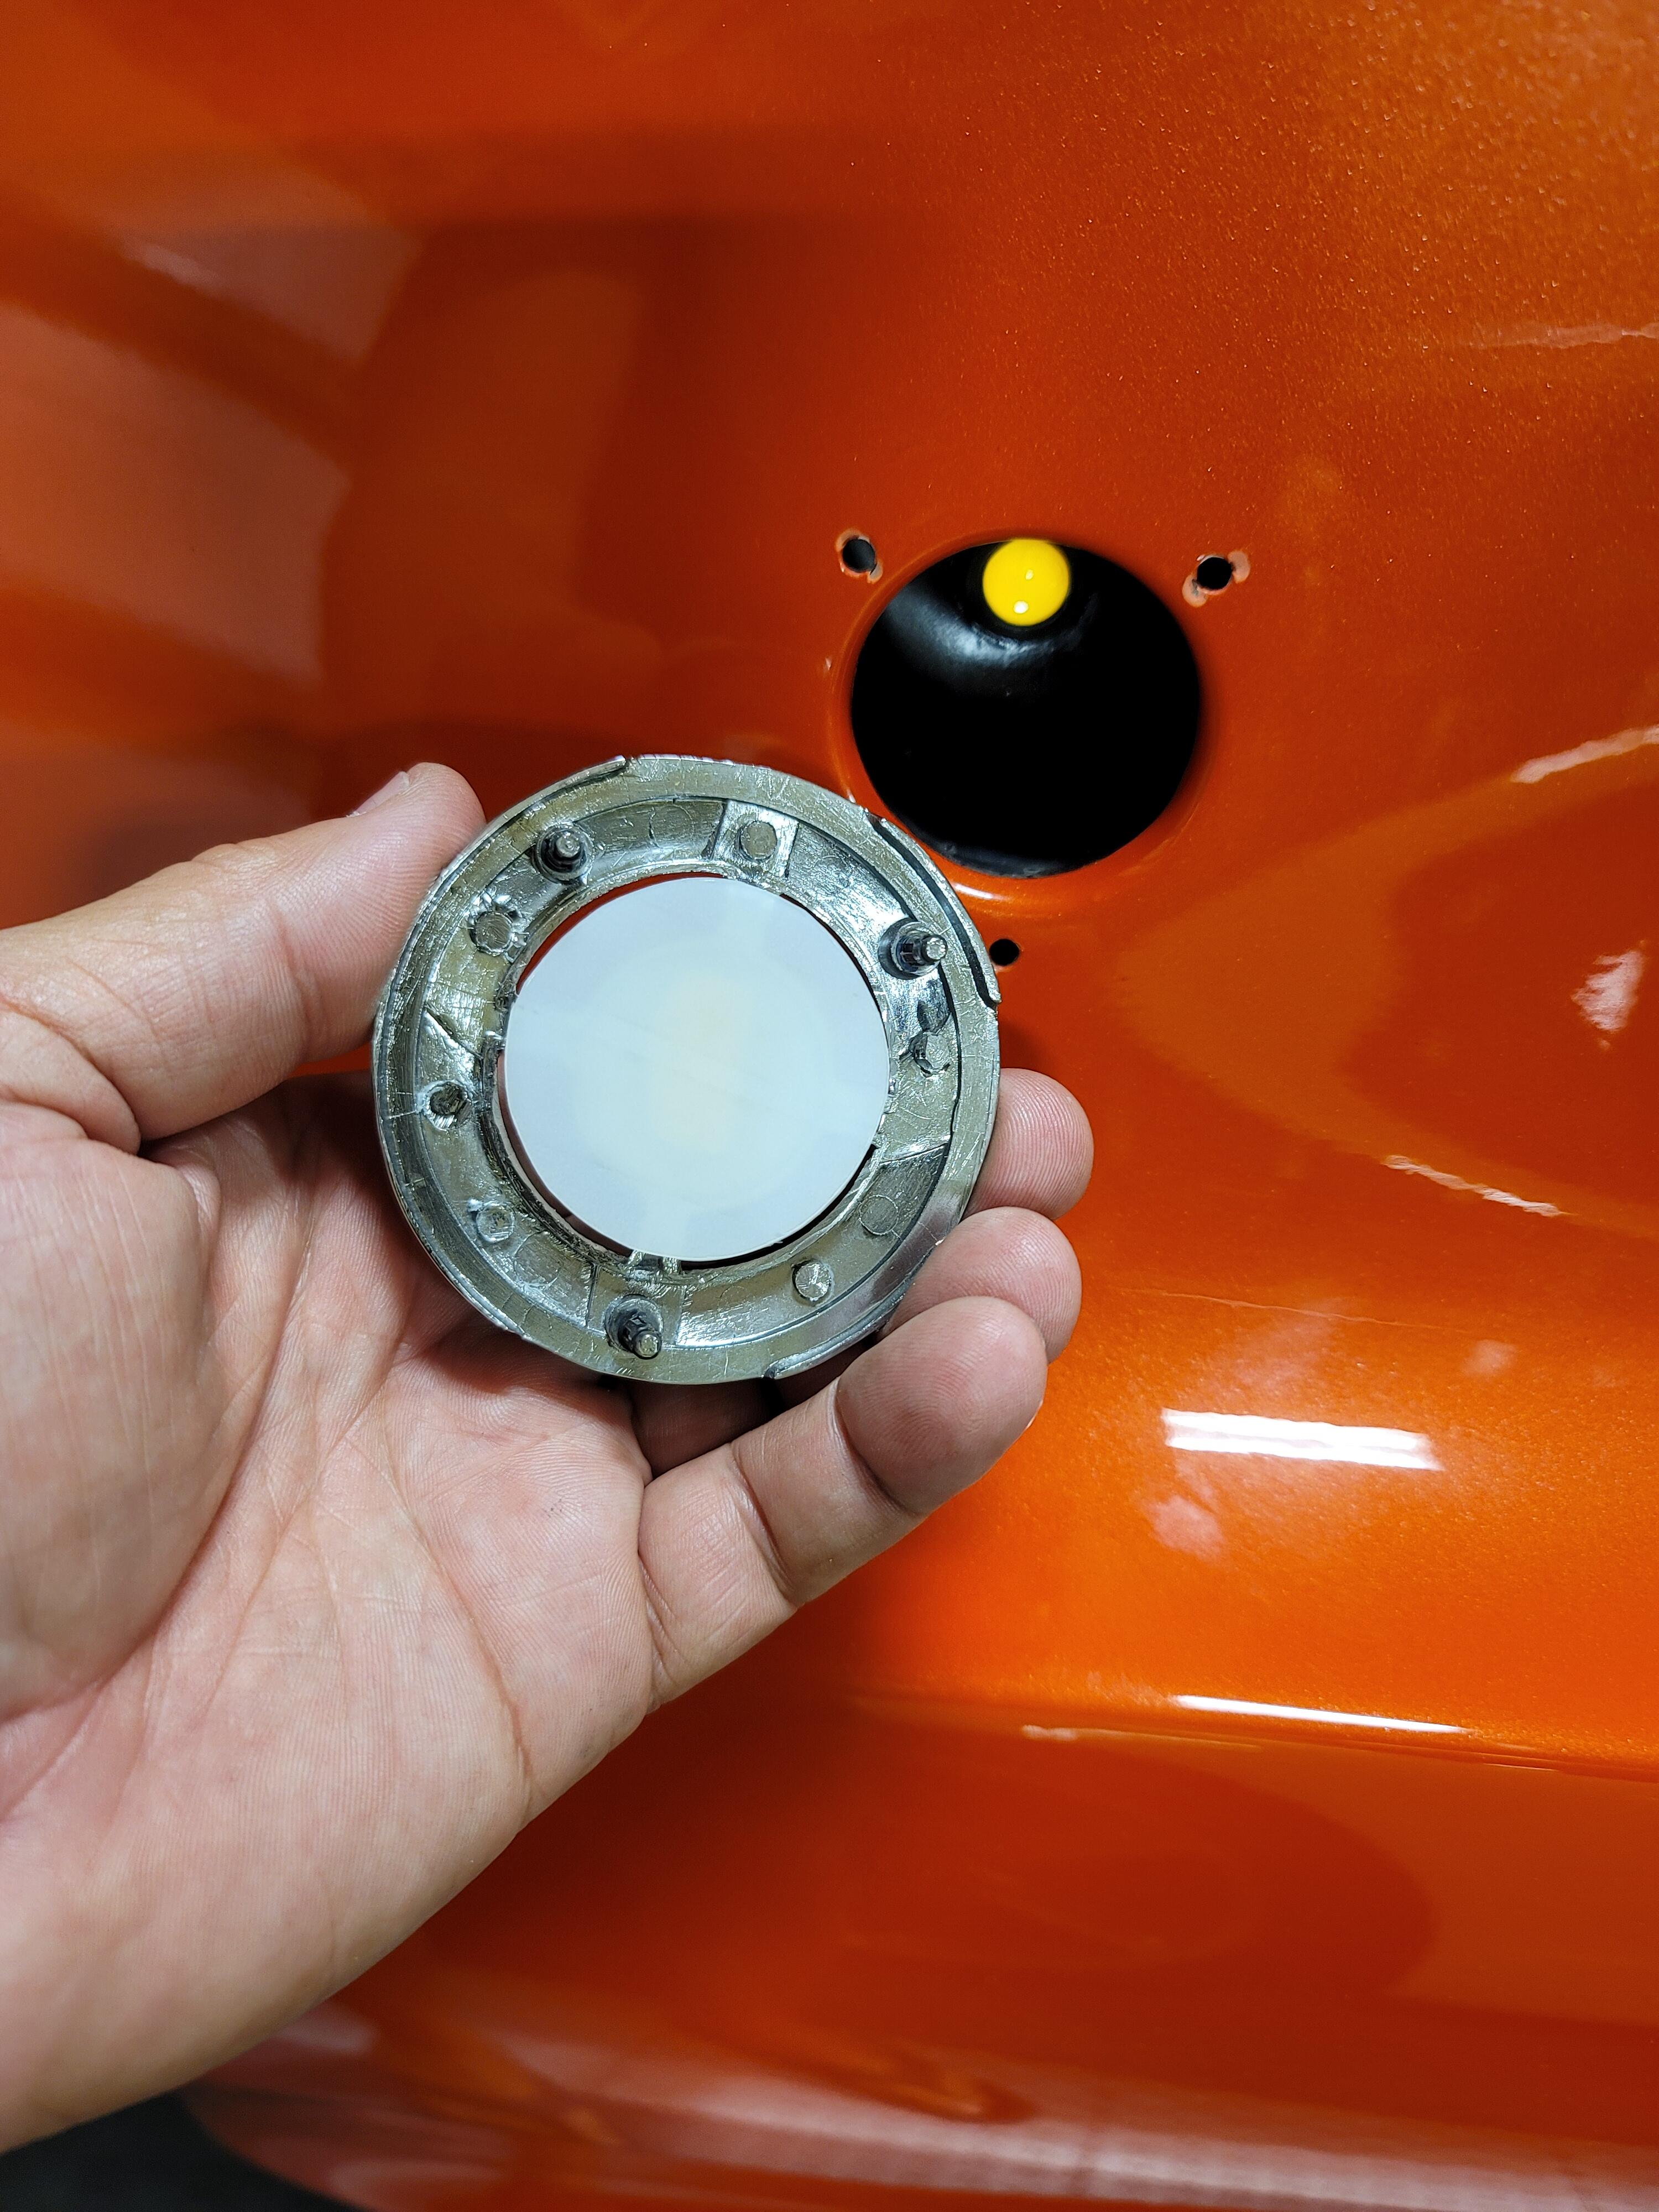
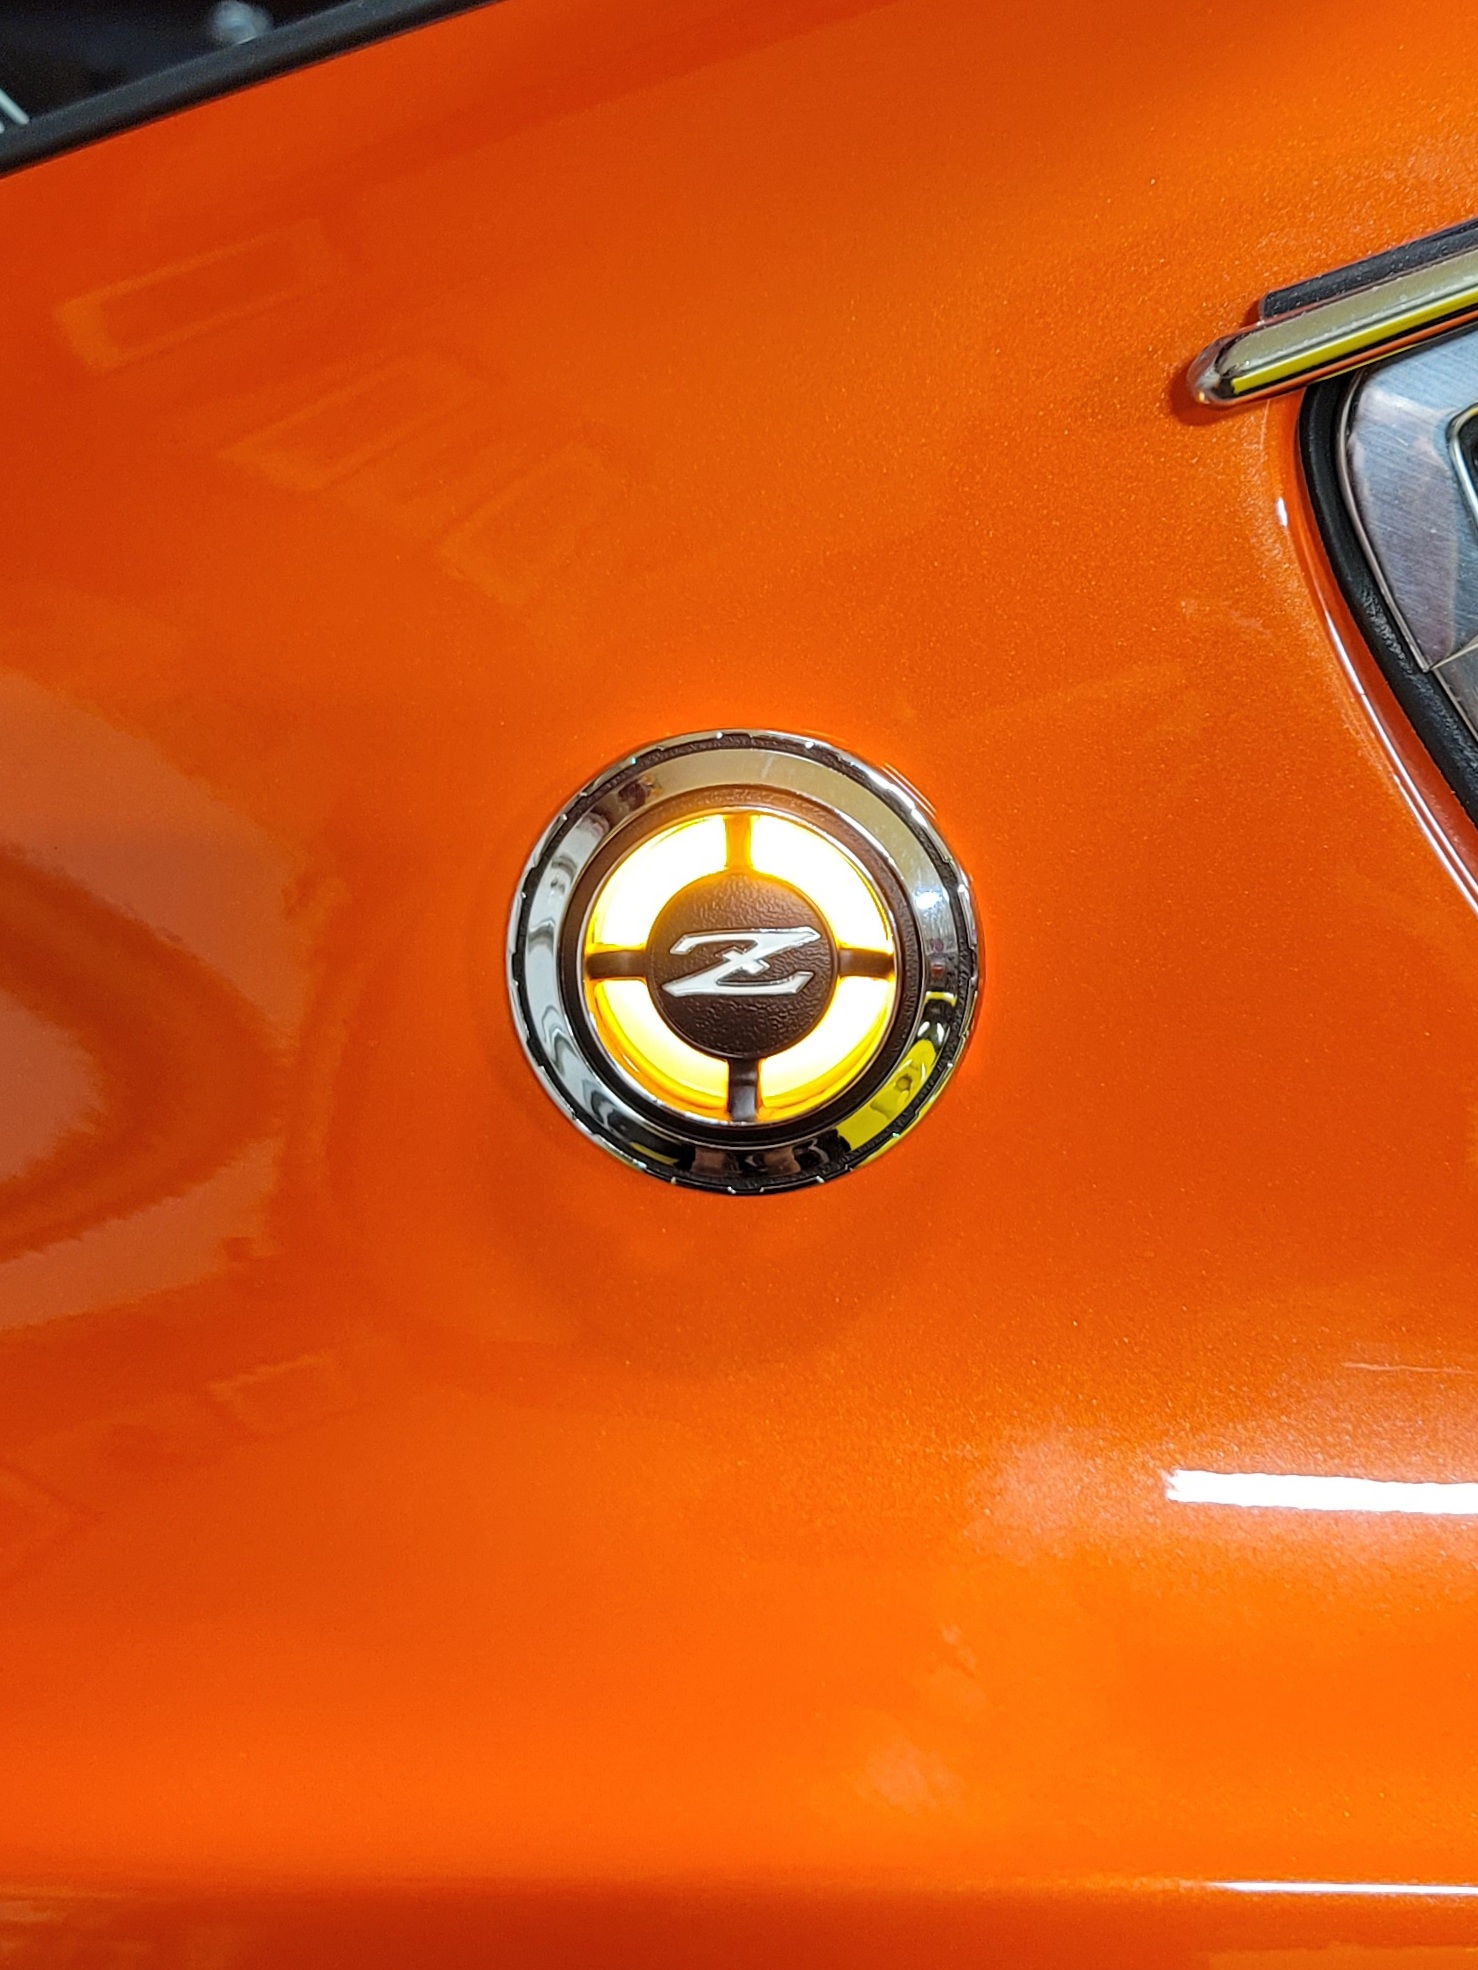
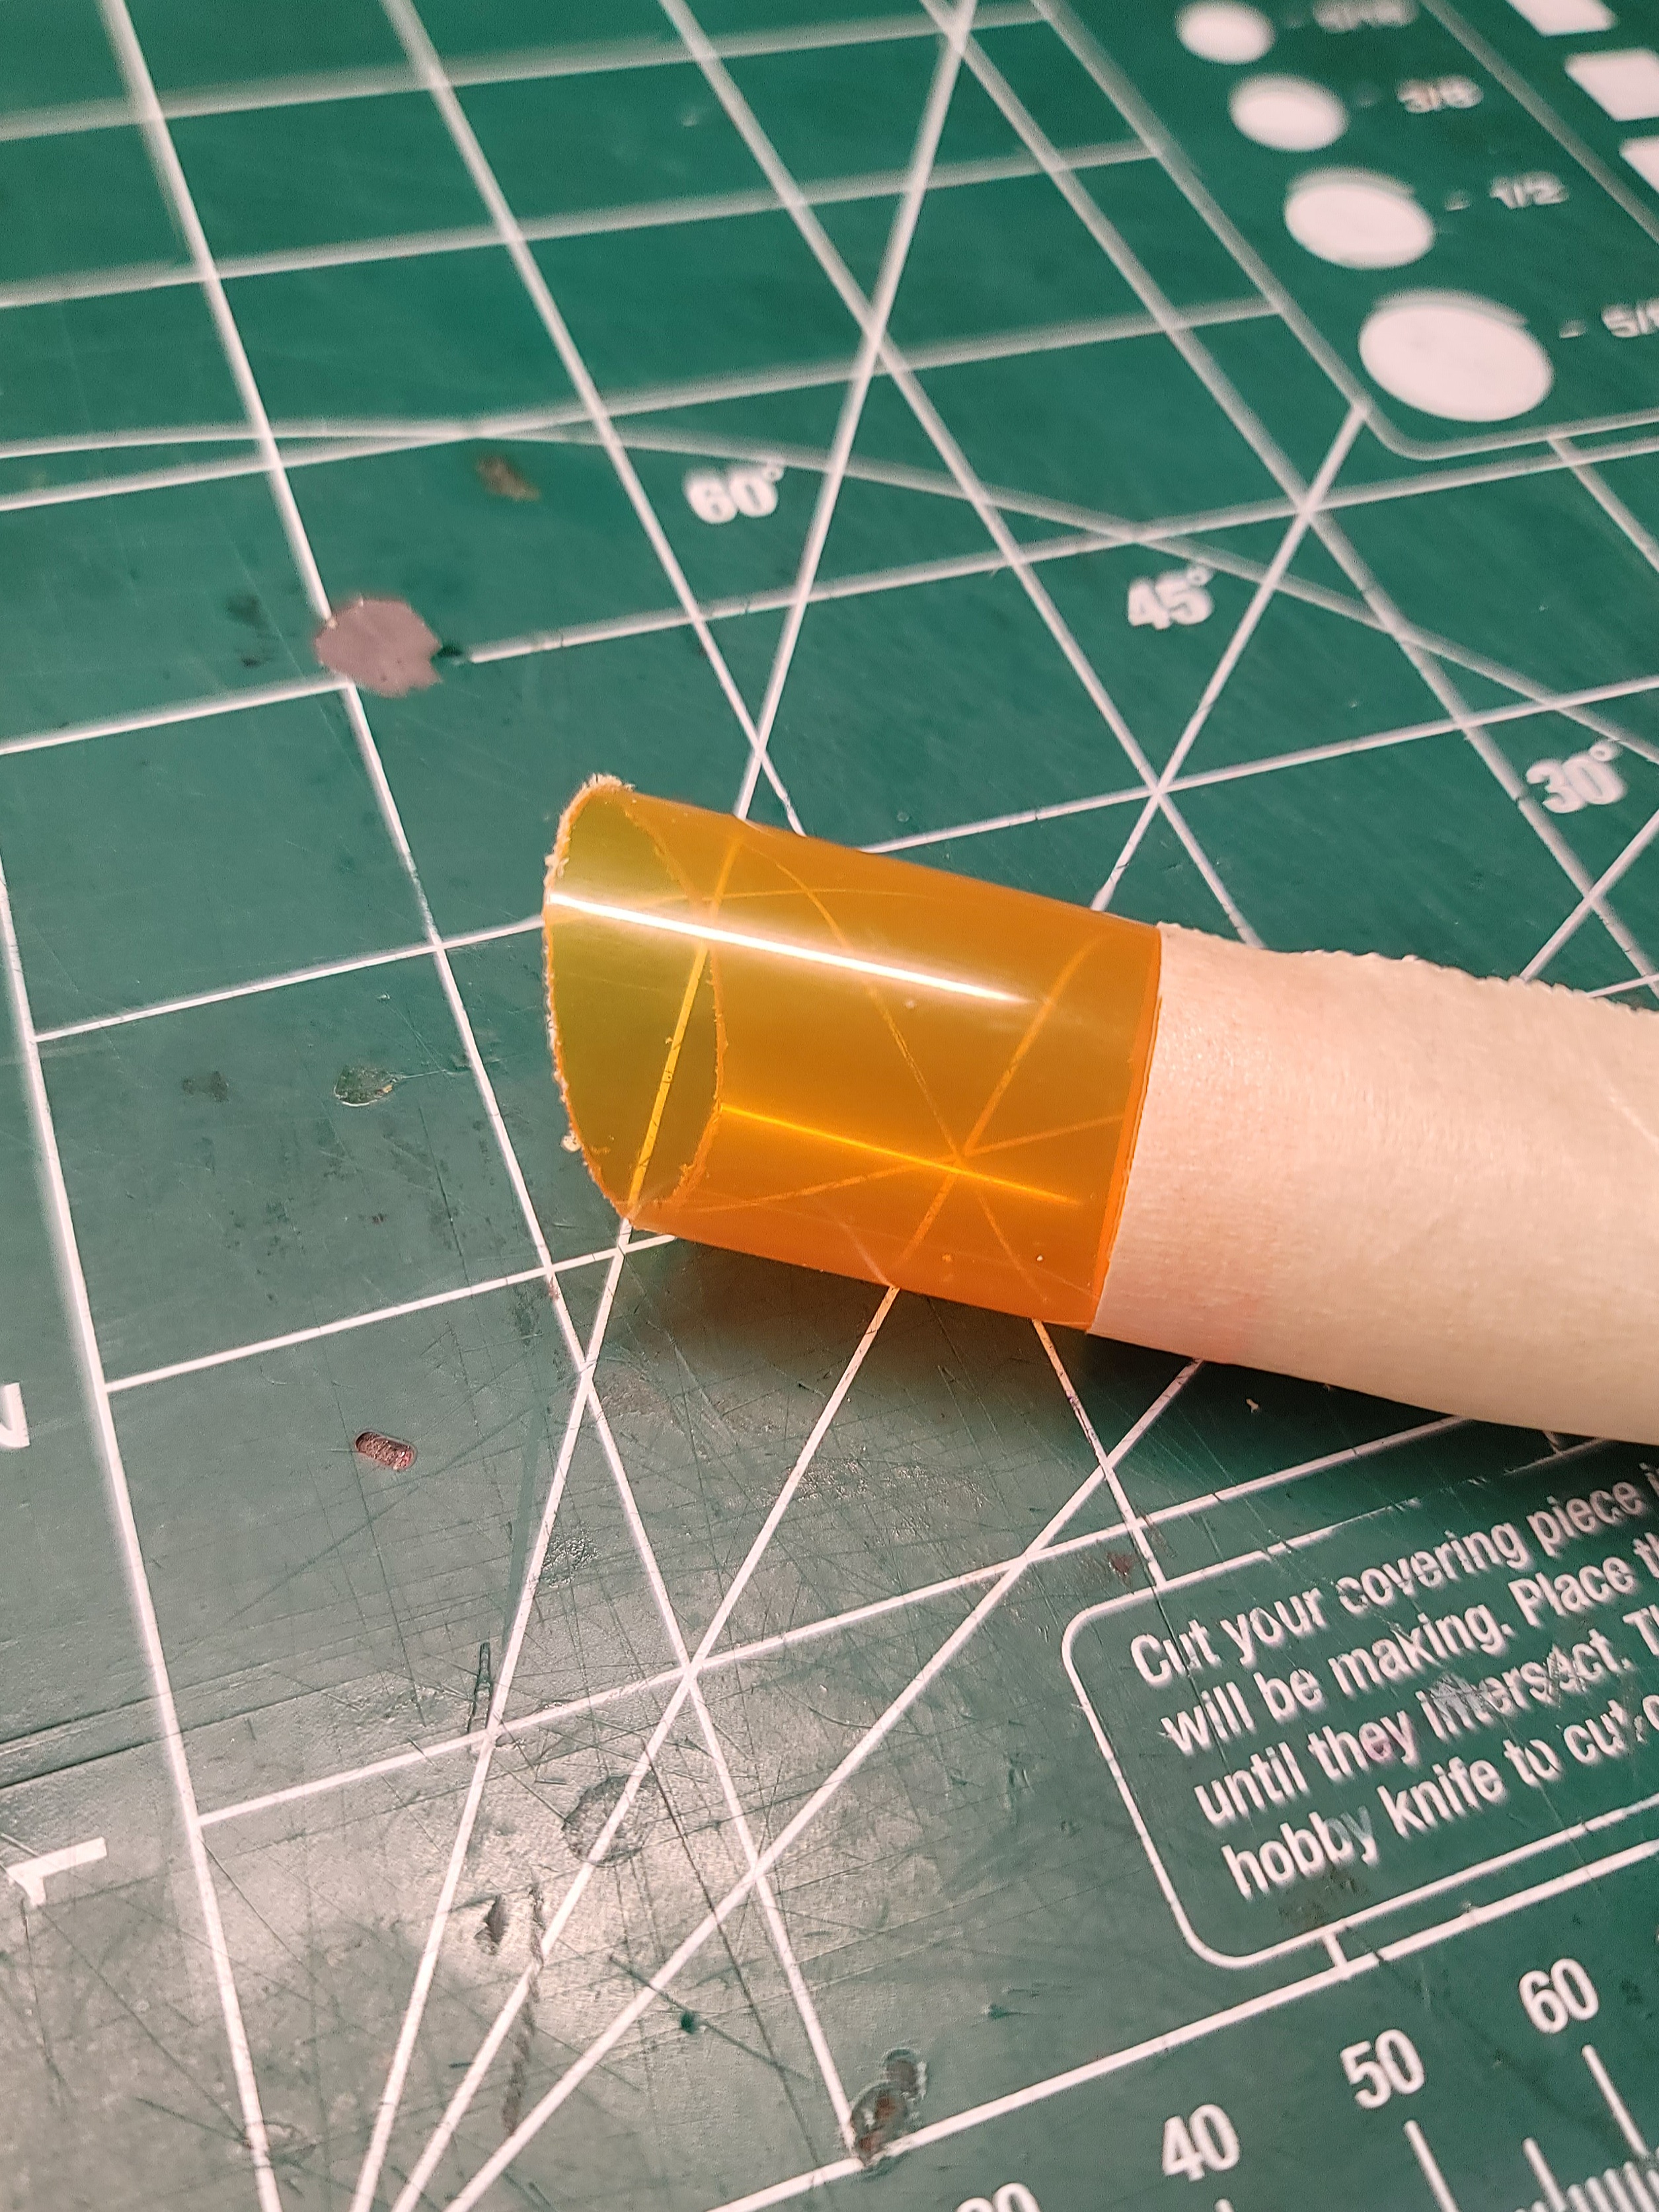
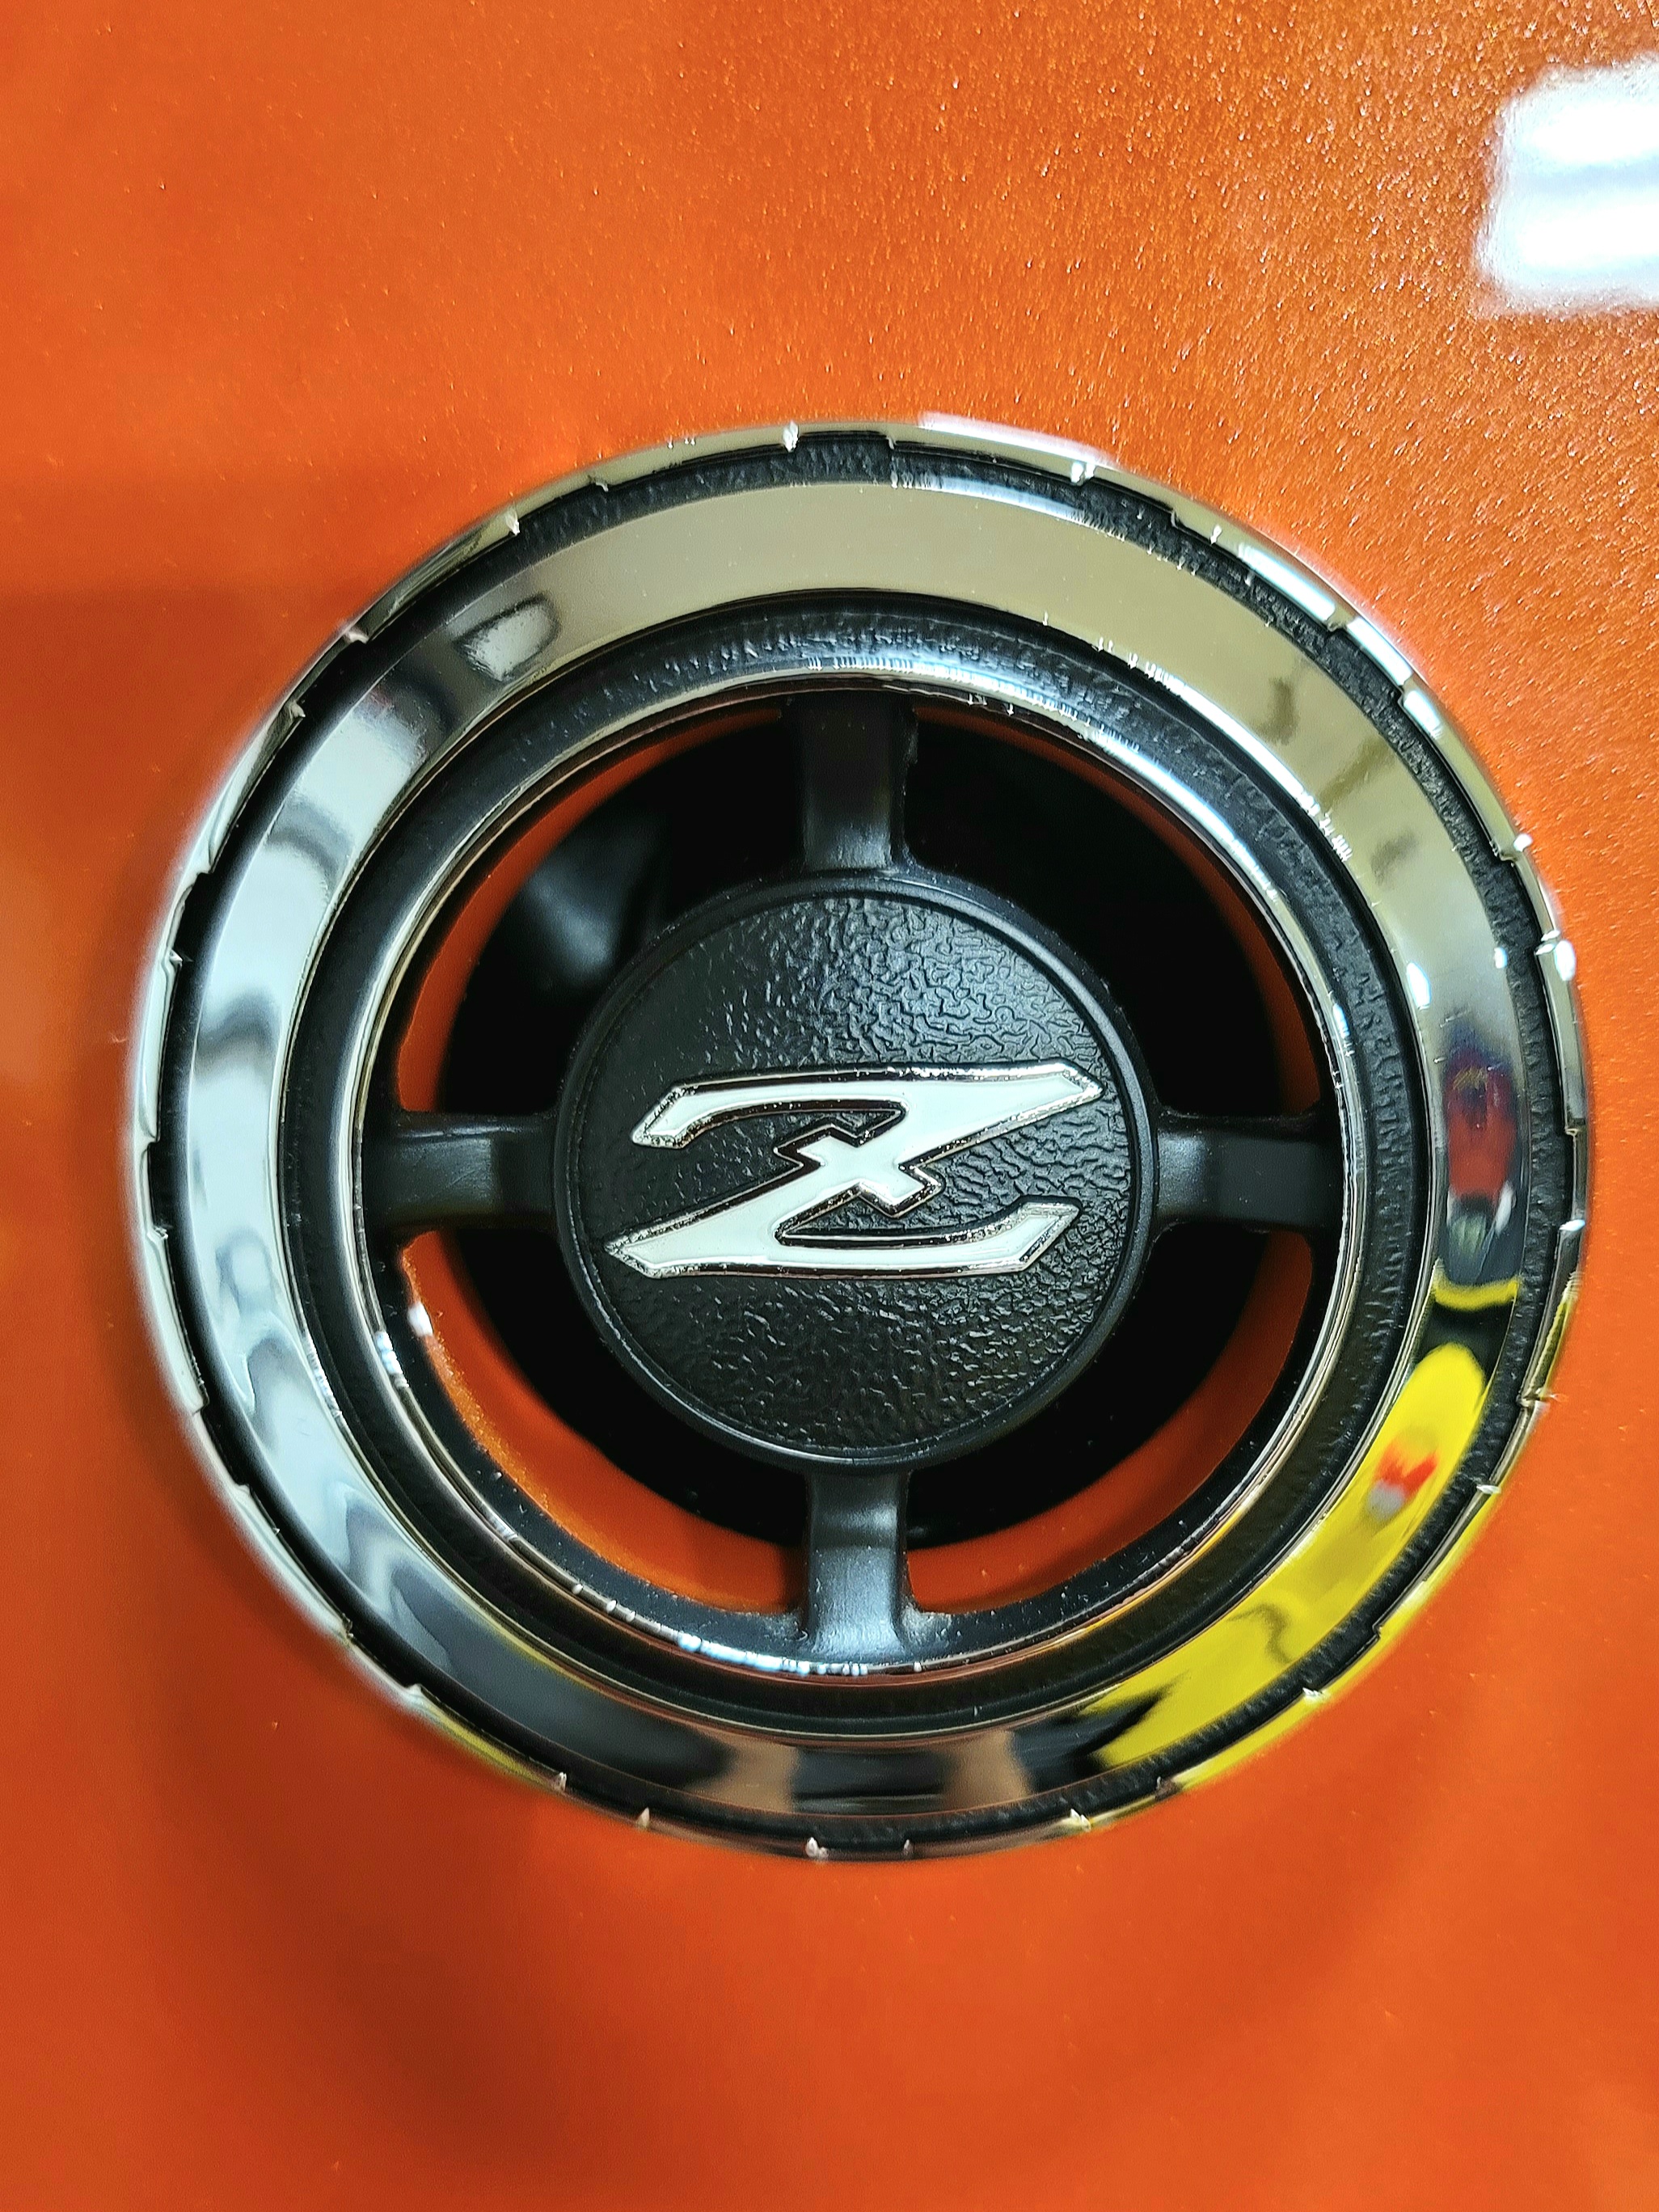
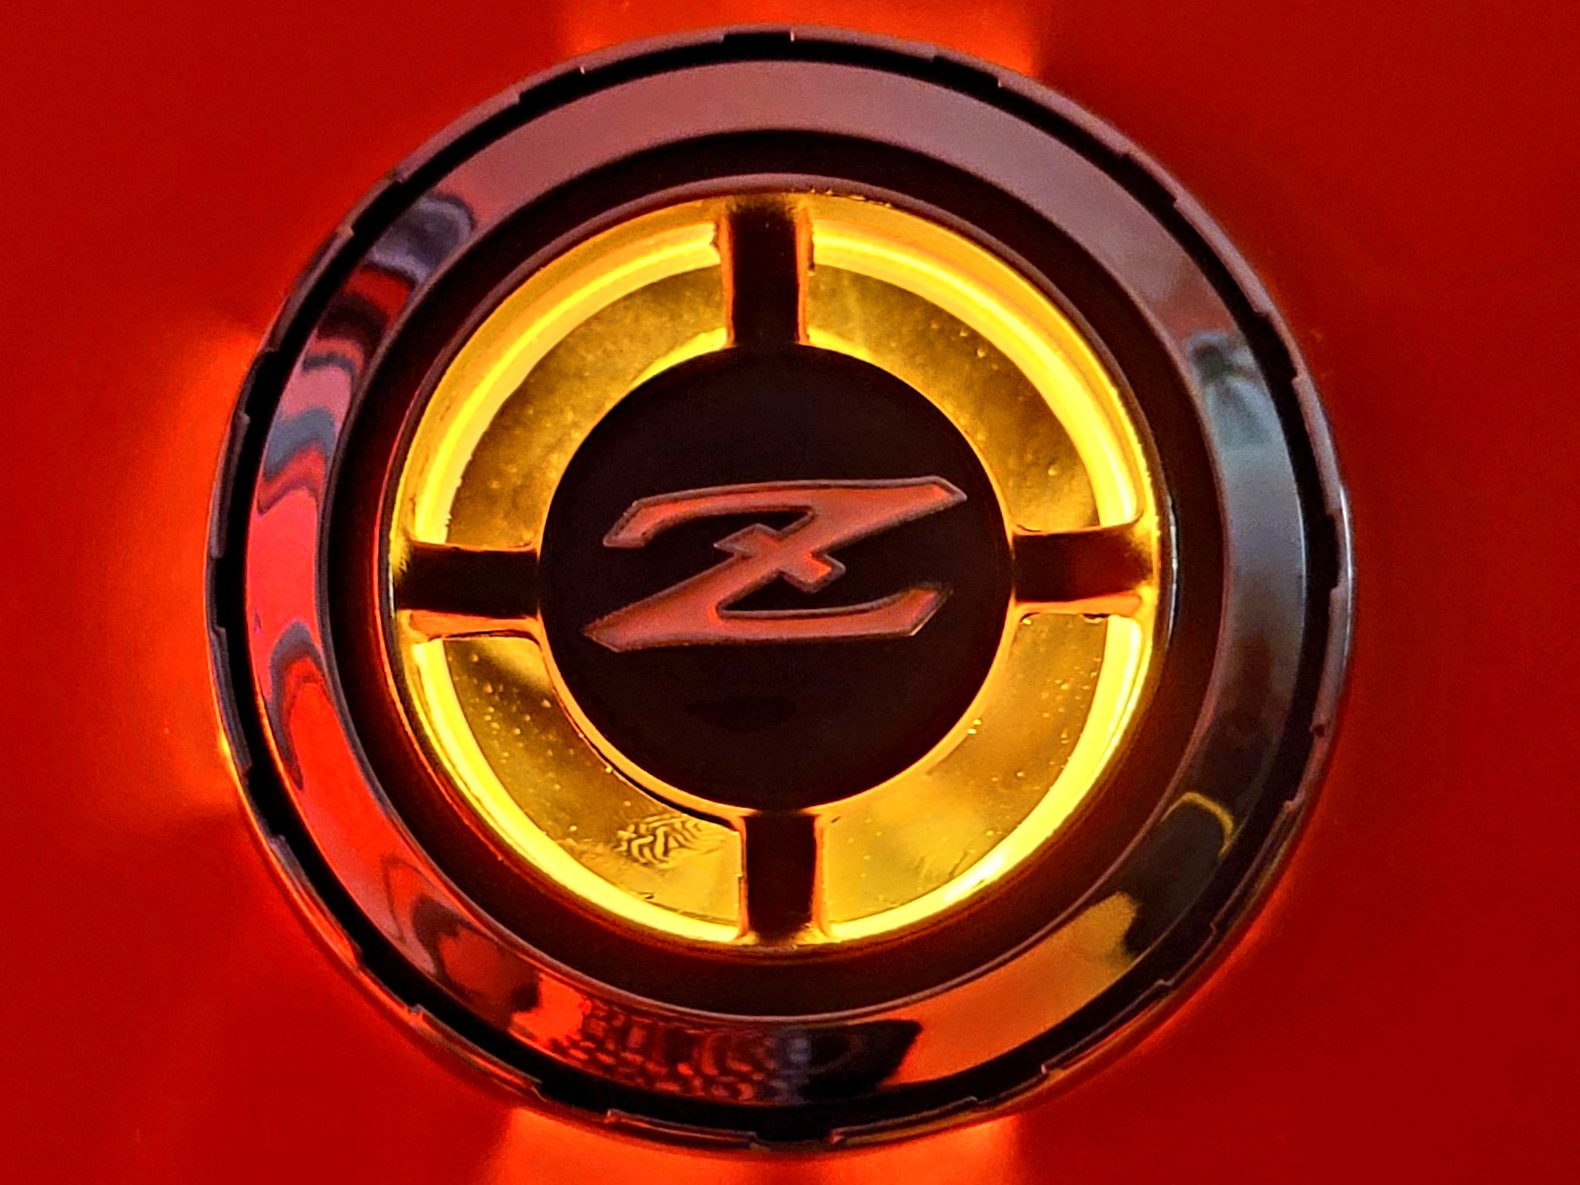
2 pointsI came across an IG post that caught my eye in which a fellow 280Z owner had LED lighting behind the Z emblems rearward of the quarter windows. Turns out a garage in Las Vegas that does a lot of Datsun work (Harmon Restoration) had done the work for him and would sell a kit with an amber LED bulb for each side which included all wiring with proper Datsun plug connectors for a seamless installation onto the rear lights harnesses. Since I love LEDs and this looked like a novel idea I ordered one such kit which I received a couple of weeks later. Their original kit was meant to work as an auxiliary turn signal light but I didn't like that idea, doubting it's legality and usefulness. I asked them to wire my connectors so they would work in conjunction with the parking lights, which they did. First I checked the lights by plugging them into both tail light harnesses (all good), then I loosened the interior plastic panels so I could run the new wire harnesses forward. After prying the Z emblems off, I carefully drilled 5/8" holes at the center of the vent holes and a second steel panel immediately behind it. I lightly sanded and repainted (satin black) the vent holes making sure the raw metal edges were covered inside and out. After applying a generous quantity of black silicone sealant around the light stalk, I installed it from outside and secured it with the included nut from inside the cabin. I finally put my interior panels back in place and reinstalled the Z emblems. When I tested the installed light the LED was way too bright, even brighter than the parking lights, and the glaring bulb was very visible in many angles! Not what I had hoped for at all! After some thought I came up with 2 light diffuser ideas. The first was a simple circle of "frosted" .5mm thick white plastic glued to the back of the emblem. It looked great when illuminated (although still too bright for me) but the white plastic was plainly visible when the light was off. Additionally, this option may have obstructed the air exiting the cabin to a certain degree. My final option was to construct a cylindrical "diffuser" which would hide the LED, direct light to the back of the emblem, reduce the intensity of the light, not obstruct airflow, and be pretty much invisible when the lights were off during daylight. I used a 3/4" amber translucent plastic tube (small prescription container), cut out to the correct length and angle. I then introduced a piece of the frosted white plastic inside the cylinder to diffuse the light, but covered 2/3 of the inside of this plastic with black duct tape allowing light to exit only at the end immediately behind the Z emblem. Lastly, I covered the outside of the tube with a layer of mirrored tinted window film so it would allow light to exit but reflect the black paint from the vent holes on the outside, rendering it close to invisible once installed. The diffuser was then hotglued to the back of the Z emblem and reinstalled on the car. It worked as intended and I now have subtle amber indirect illumination behind the Z vent emblems that don't telegraph any alterations during daylight or when the lights are off. I realize this isn't orthodox at all but I really like the cool factor on my restomodded 280Z. Sent from my SM-N986U using Tapatalk


 2 points
 -
1 point
-
1 pointDriving a car is dangerous stuff. Probably the most dangerous thing we all do every day. Soon our cars will drive themselves and the death rates will be fractional of what they are now.1 point
-
1 pointSo it looks from your photo, that you need all of the sheet metal under the cowl.1 point
-
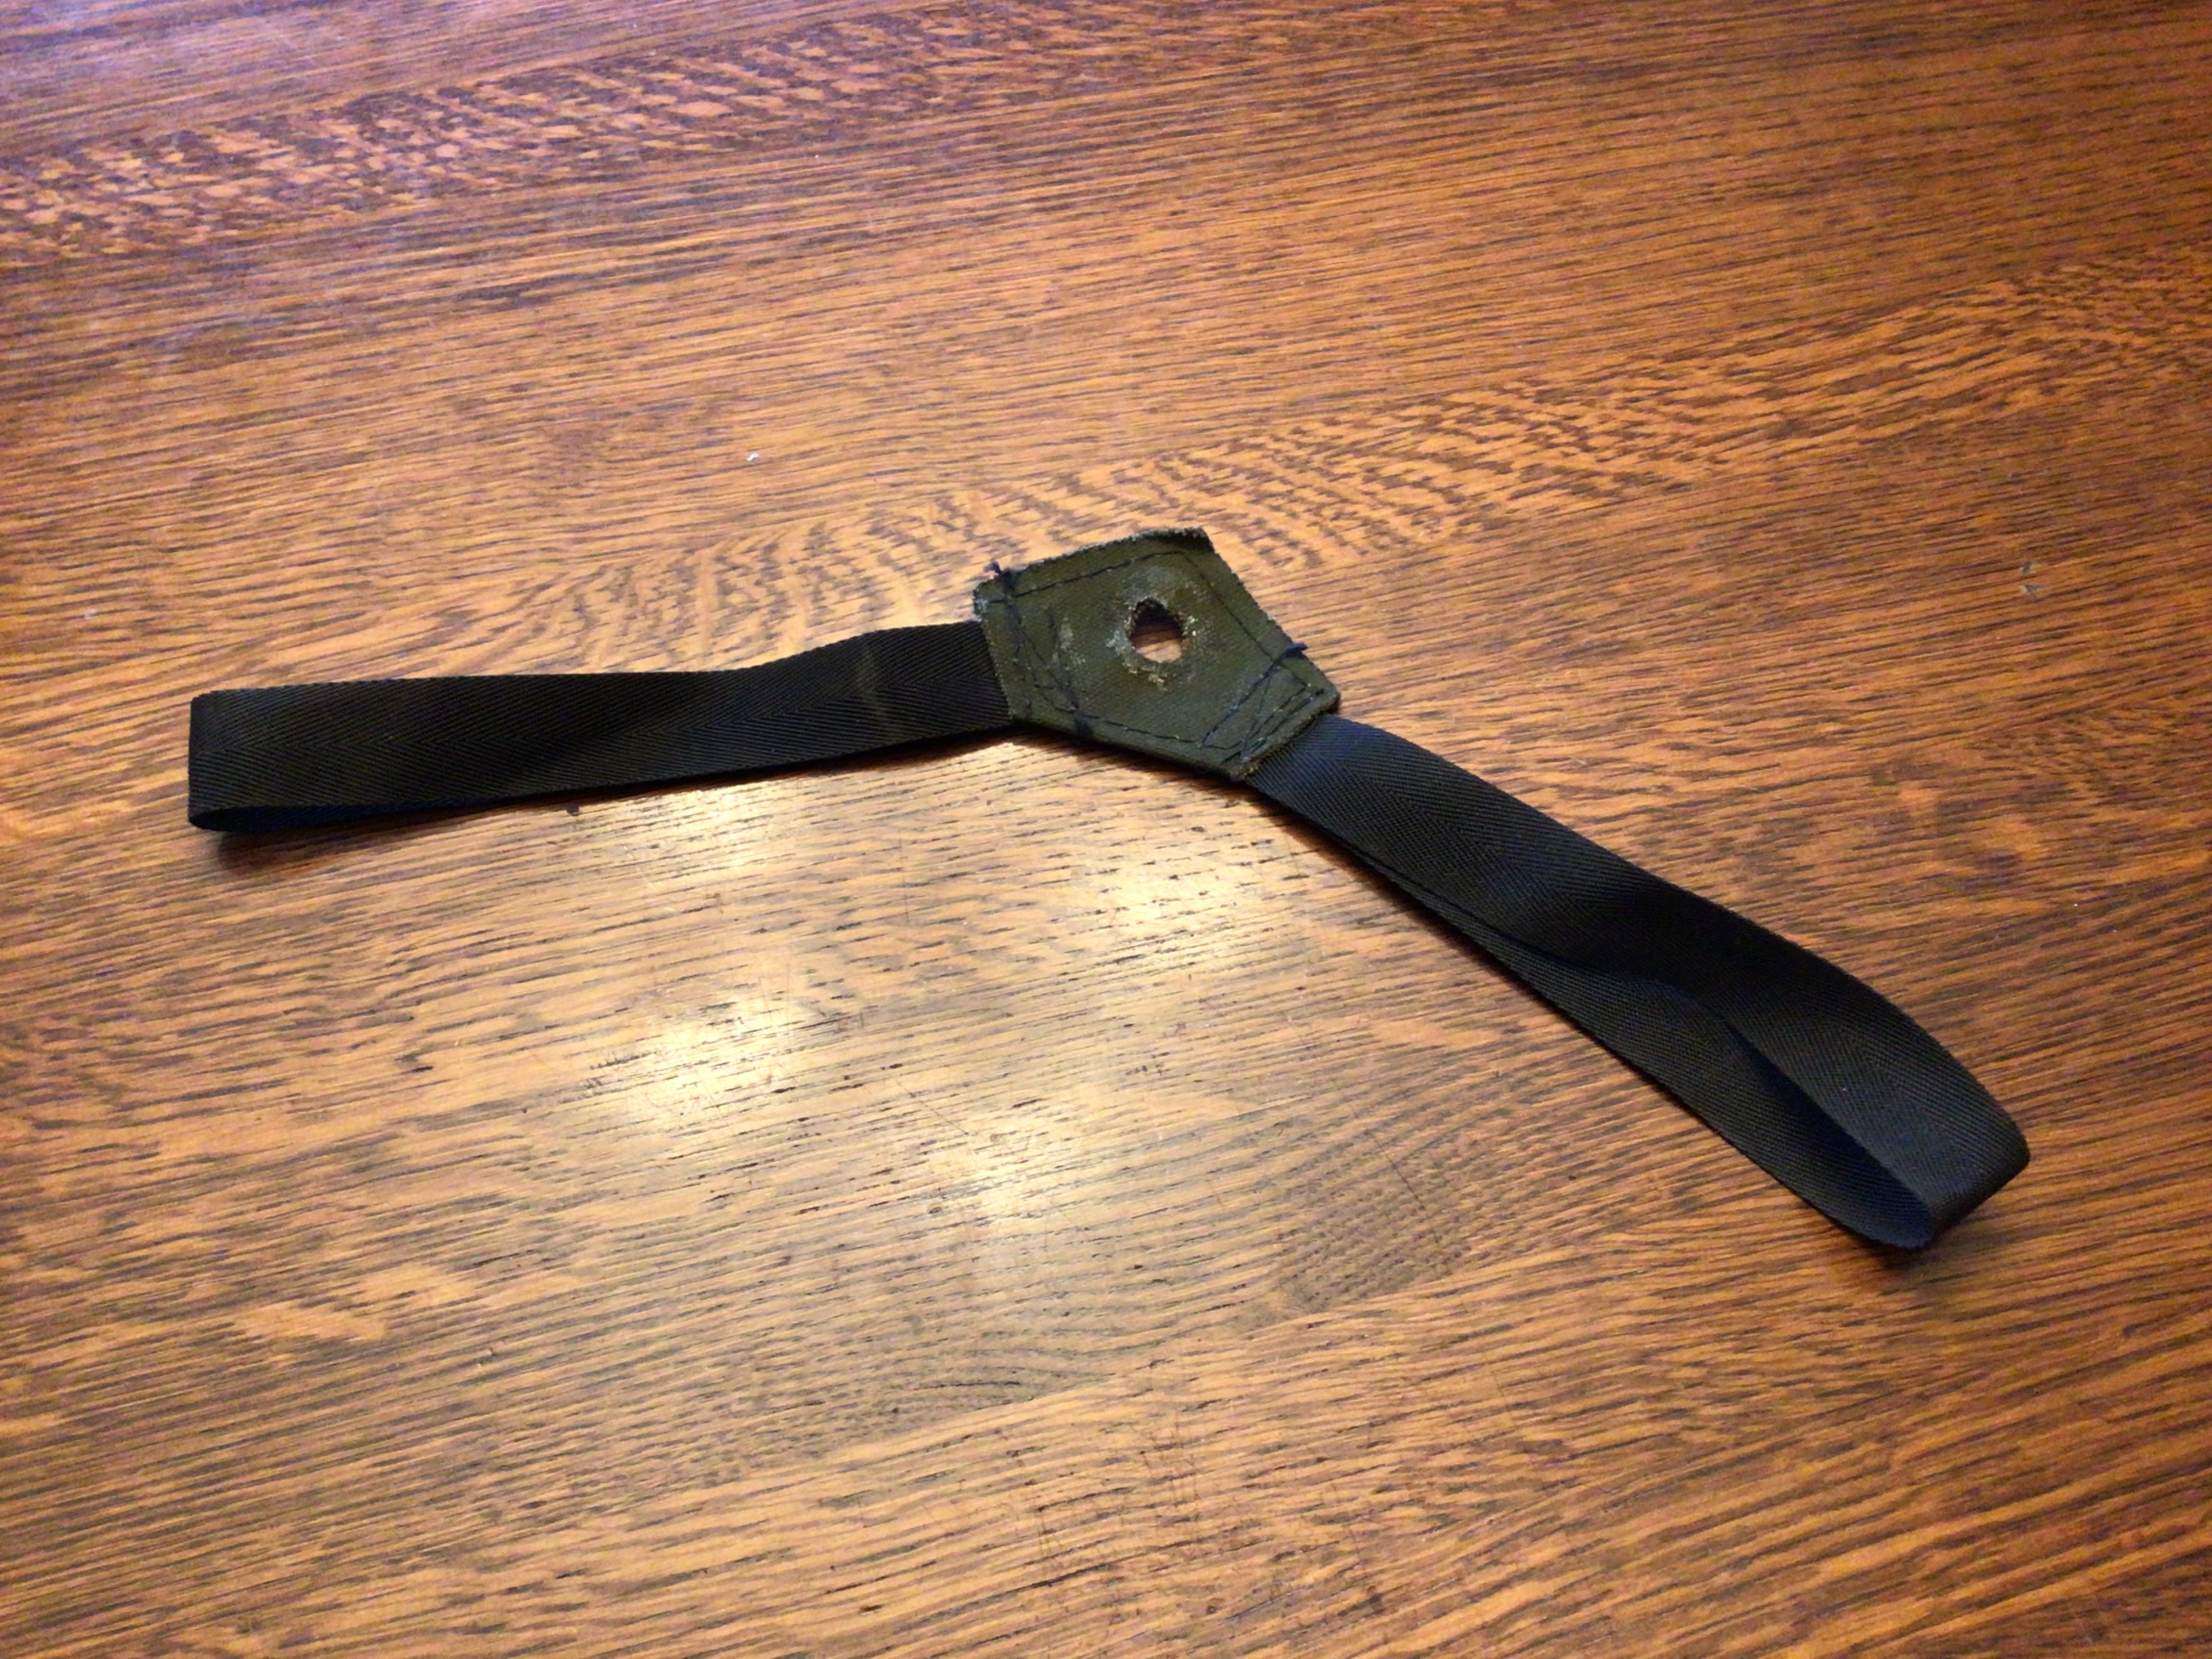
Dark green canvas, black webbing, crude sewing. Pretty basic
 1 point
 -
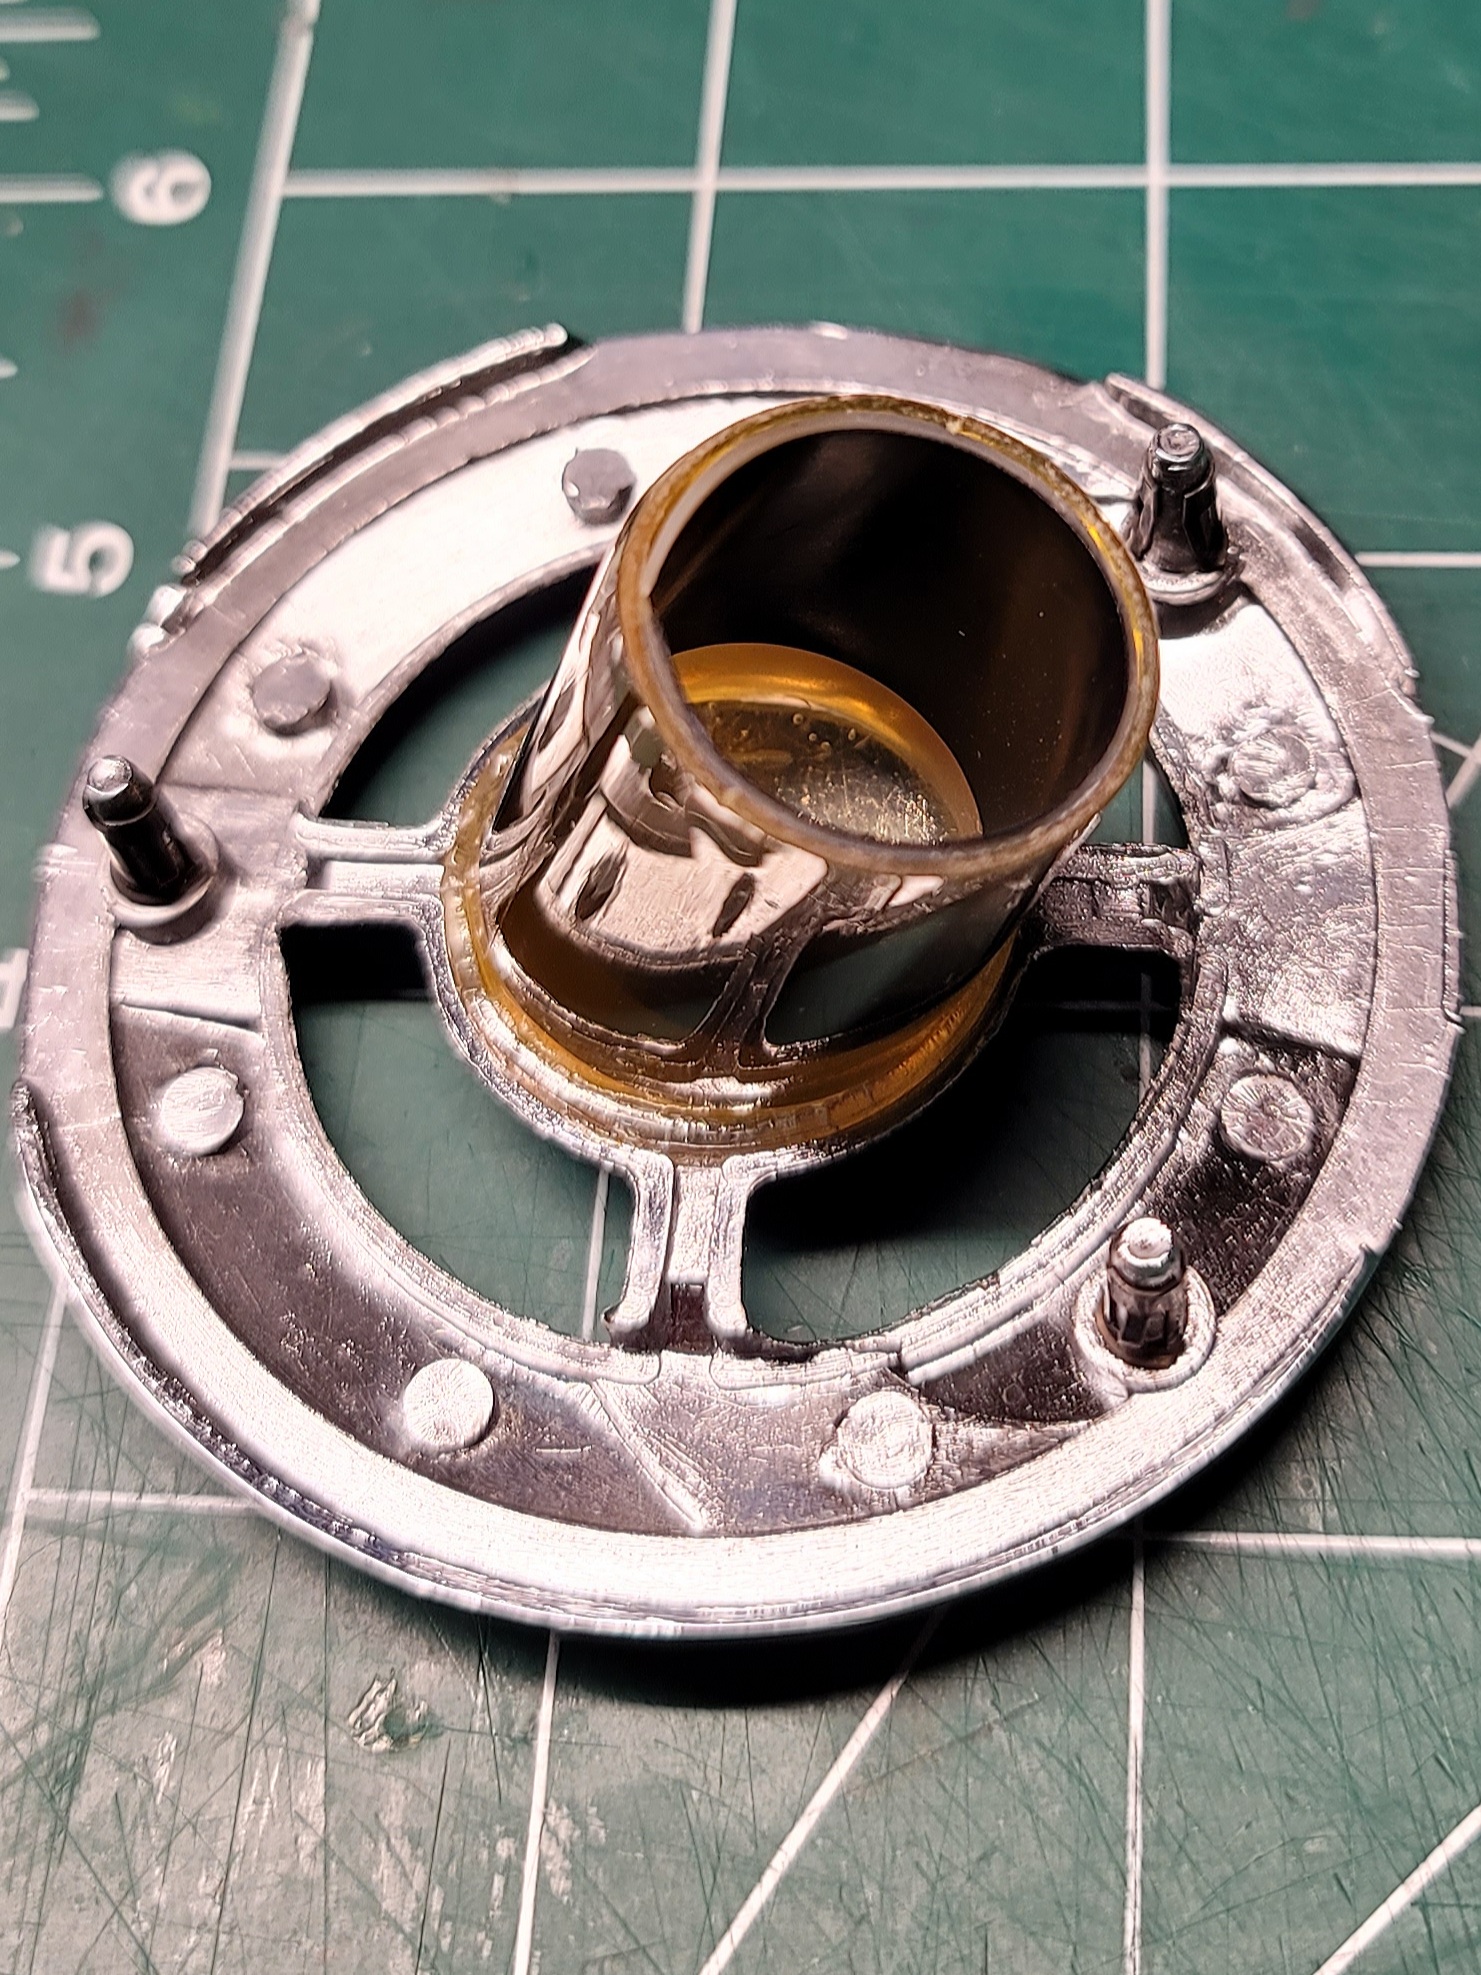
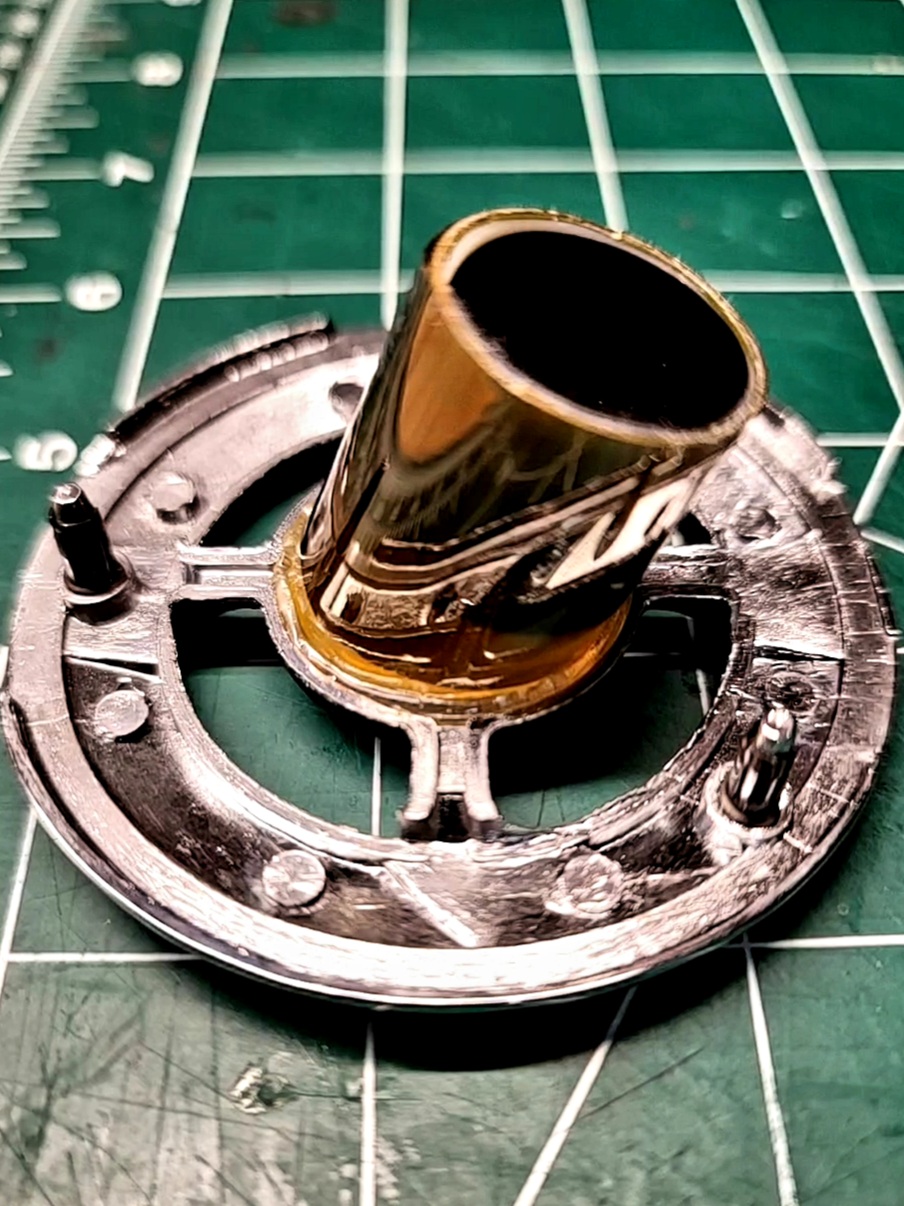
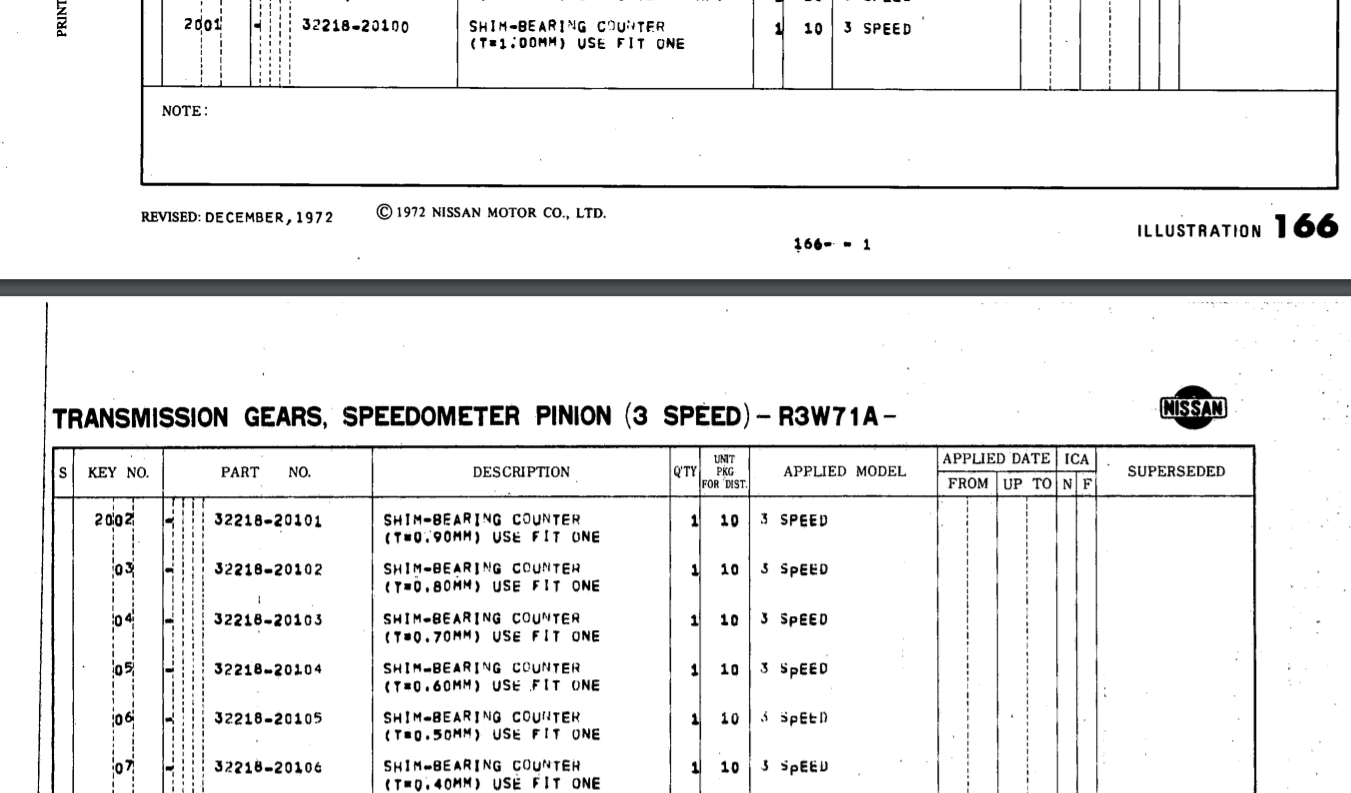
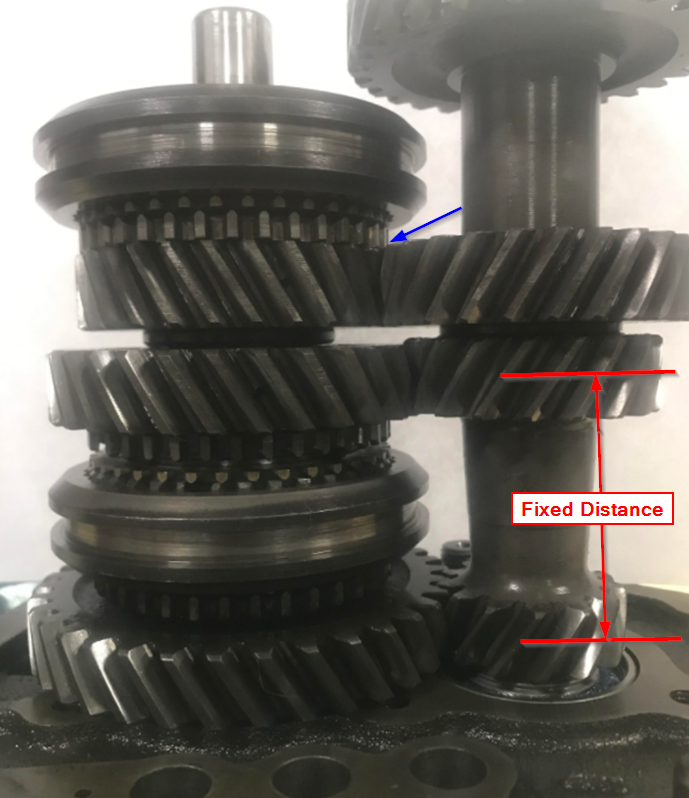
@EuroDat @Zed Headhopefully I haven't exhausted your patience on this thread but I have an interesting update. After digging through quite a few old parts catalogues I actually found the OEM thicknesses for #19 from my previous post in a catalogue for the R3W71A of all things. Here are the part numbers from carpartsmanual: And the parts catalogue with thicknesses listed for those part numbers: I believe I mentioned it already, but the current shim #19 in my transmission has a thickness of 2.65mm, where the OEM range given is 0.40-1.00mm. This brings me back to the gear mesh alignment question, here is another shot of my gear alignment with the 2.65mm shim installed and the new adapter plate bearings in place: Seems to me the effects of the thicker shim are most evident on the second gear mesh, pretty easy to tell since the countershaft gears are at a fixed distance as part of the shaft itself. I also noticed on third gear where I drew the blue arrow that the gear teeth are very close to the synchro assembly teeth. I see no chipped teeth or damage but feels like my thicker shim pushes those too close to each other, maybe some rubbing there caused the noise I heard? My current thought process is to put a 1.00mm shim in for #19, reassemble and check measurement "A" from post #57. What confuses me a bit is the F4W71A seems to be the inverse of the F4W71B when it comes to shim #18. Notice above only one part number is given for #18 on the A type. Still searching for an OEM thickness for that part (32224-20100), but that must have been one of the changes from A to B type. Thoughts?

 1 point
 -
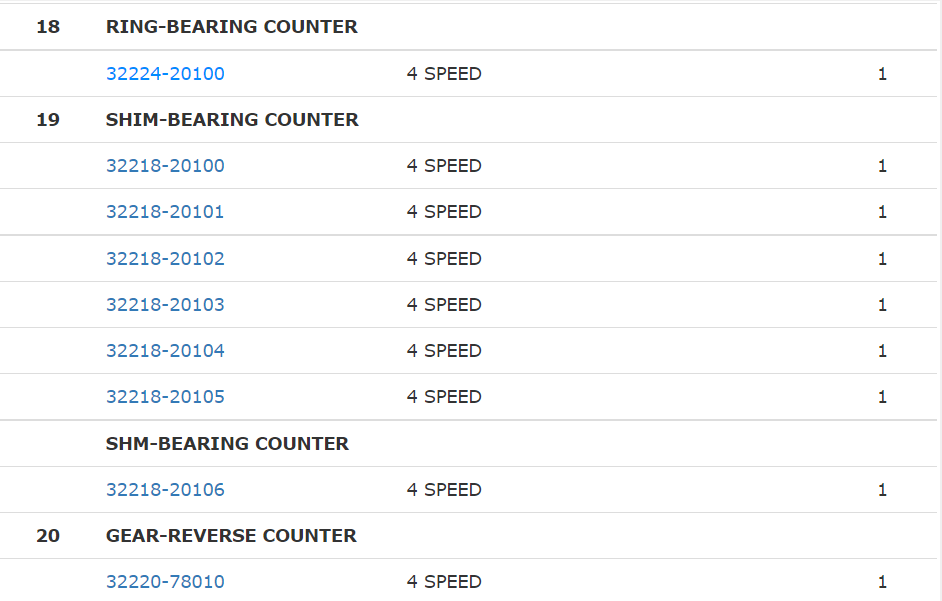
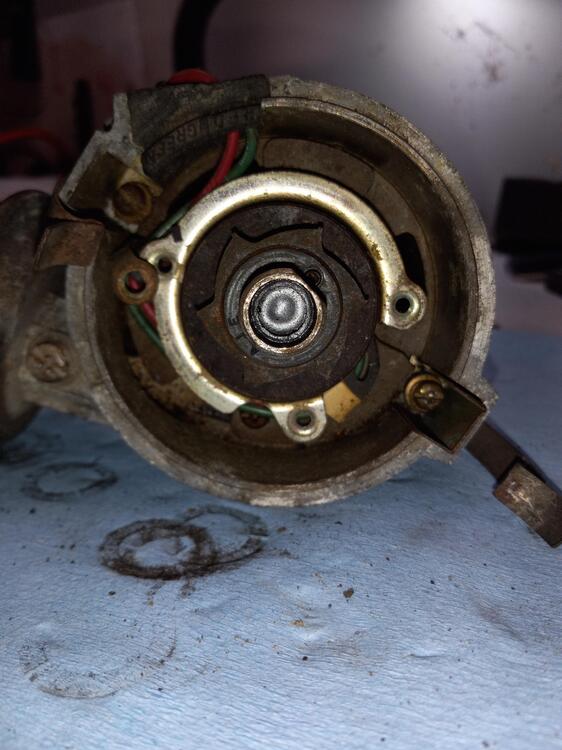
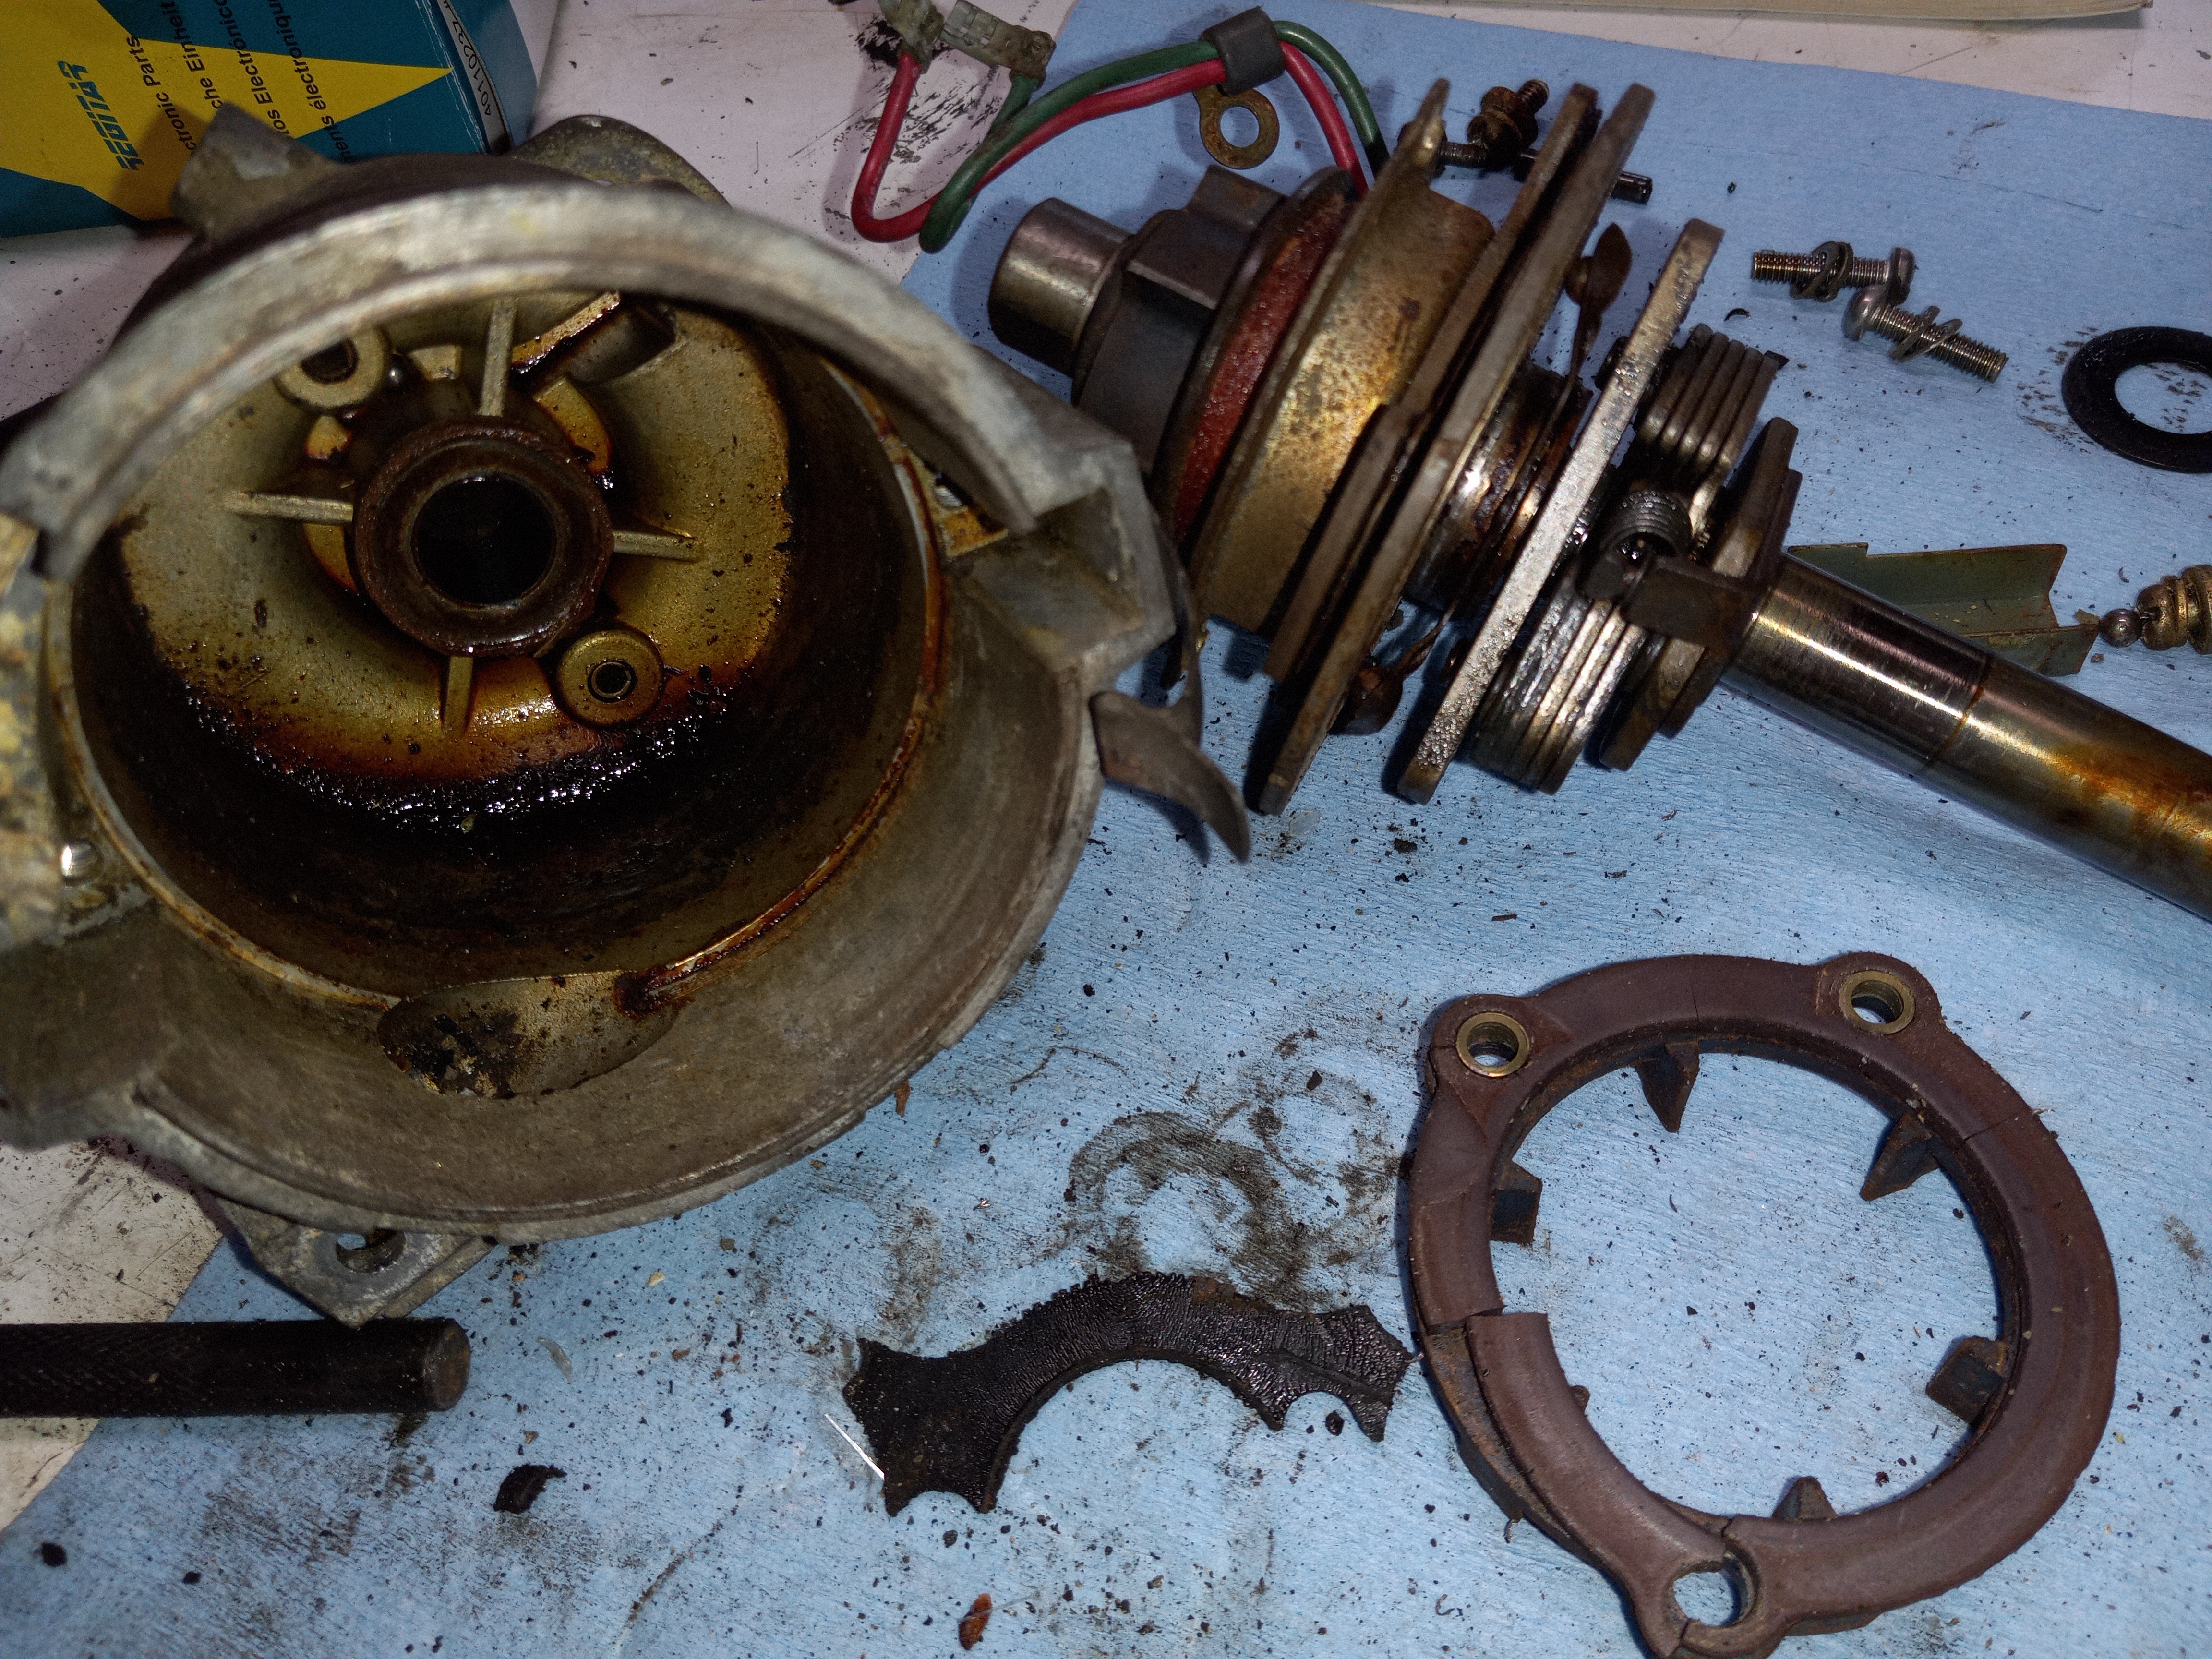
1 point1 pointThanks for the information Zed, Here is where i am today , I pulled the Dizzy and looked it over I figure welp at the very least I need to get the moister and dirt out of there. Below are the pictures of what it looked like , as I started to dissemble it I noticed it had been messed with the screws were rounded and the bottom pin was burred. After taking everything apart and cleaning all the parts put in the new ignition module i purchased in anticipation of this issue , I resembled it to see if it helped , or at the very least to send out to get rebuilt. when I put it back in the car voila I GOT SPARK! I have fuel pressure ....... but its still not running . a little fuel in the intake manifold and hot dog shes running . so now i have to chase down the fuel issue. side note the dizzy did have a broke magnet and it will need to be replaced the little bearings also were cruddy, once i get her up and running again I would take her on any long trips with out fixing those parts better. Again thanks for all the input guys .
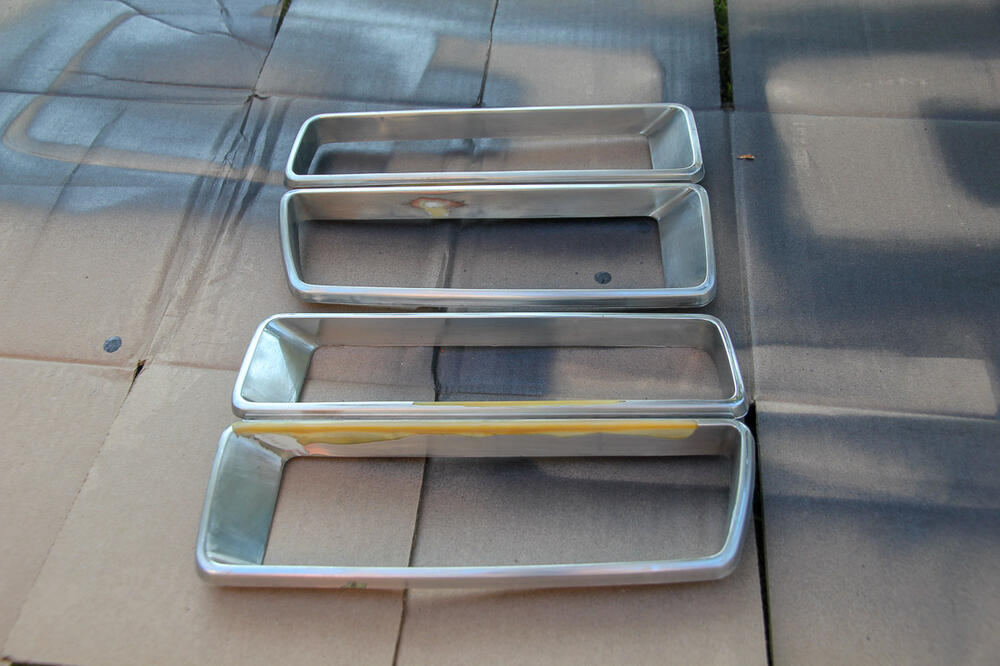
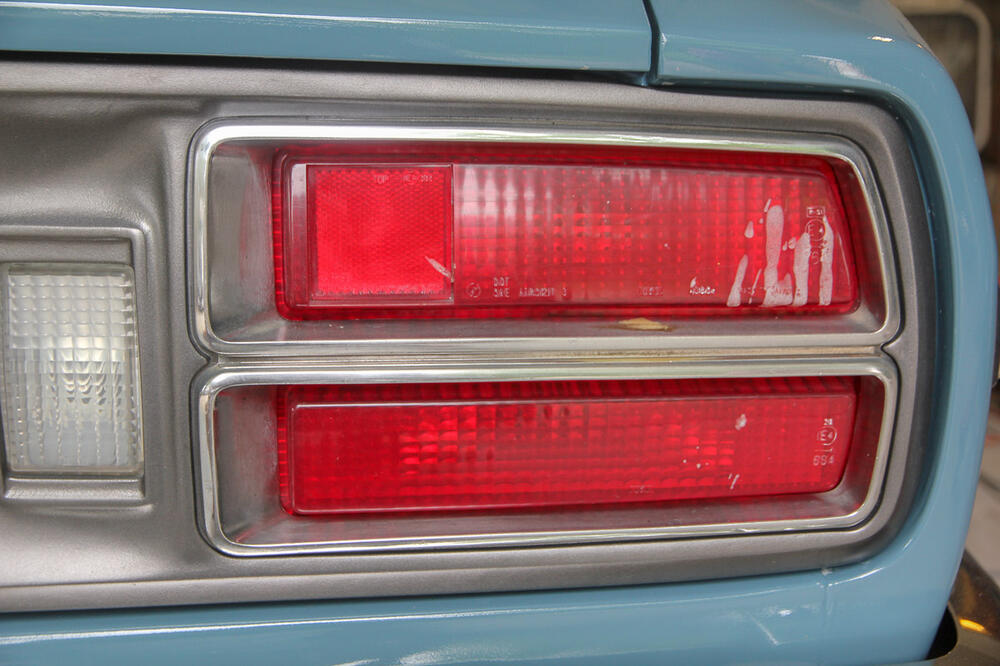
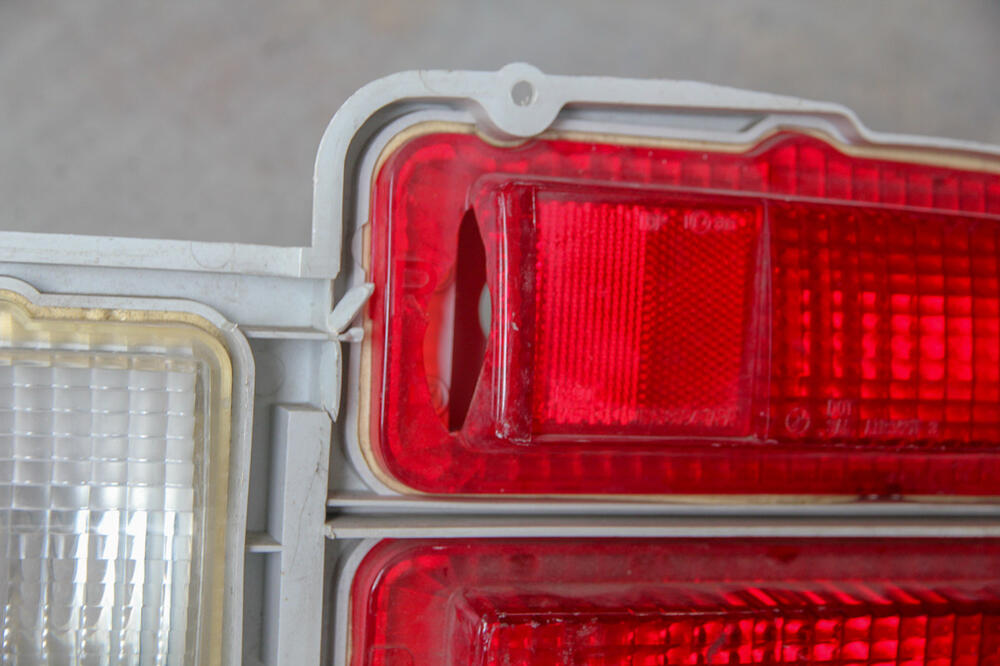
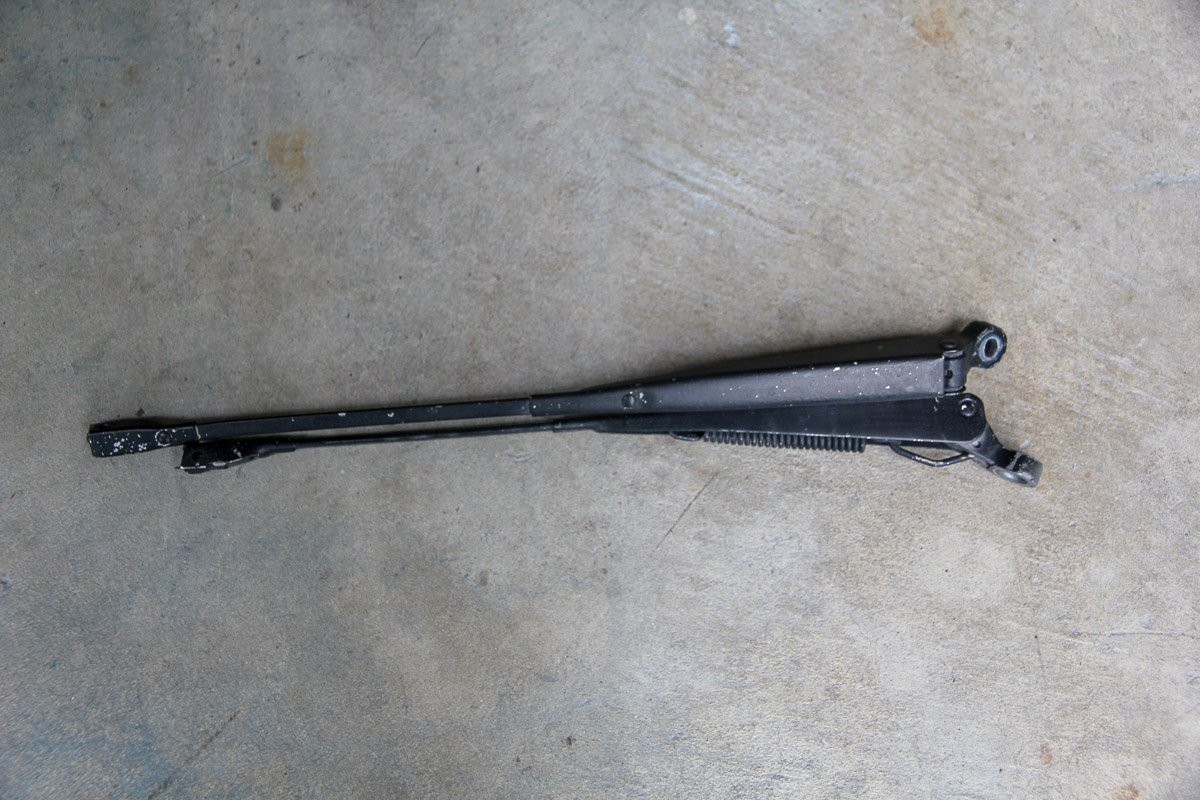
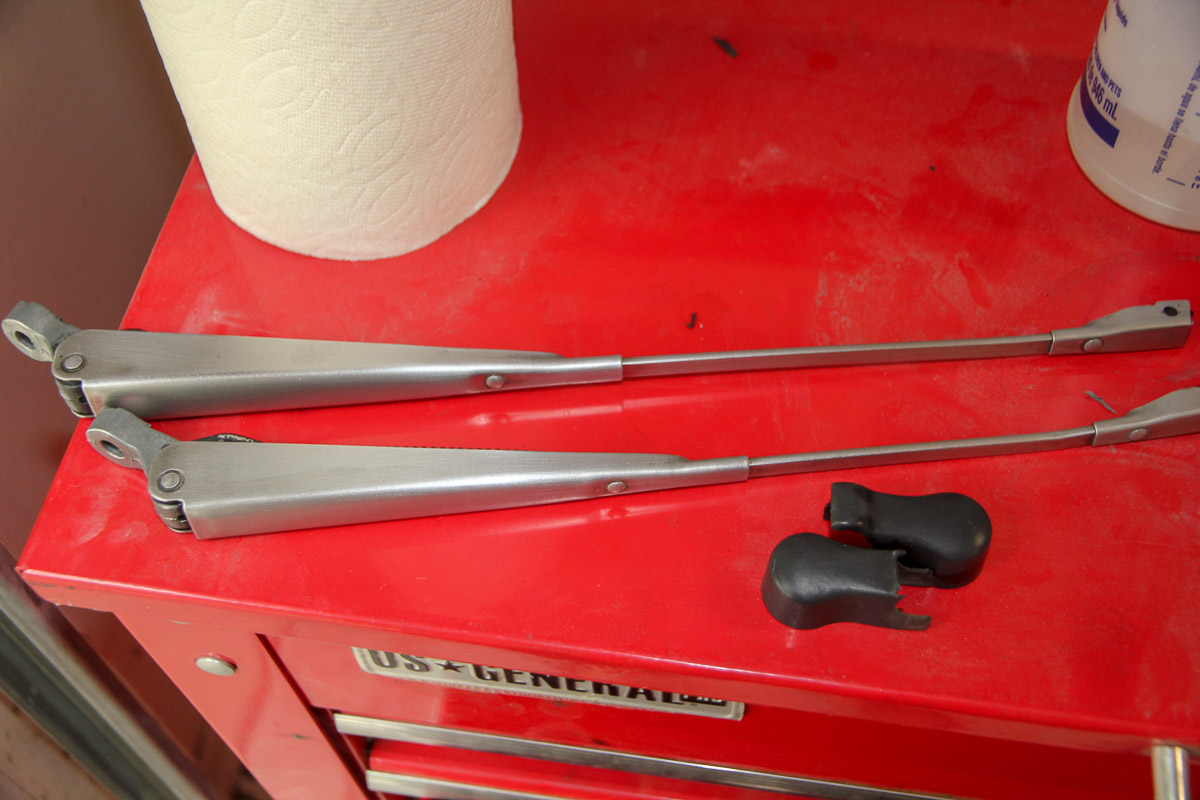
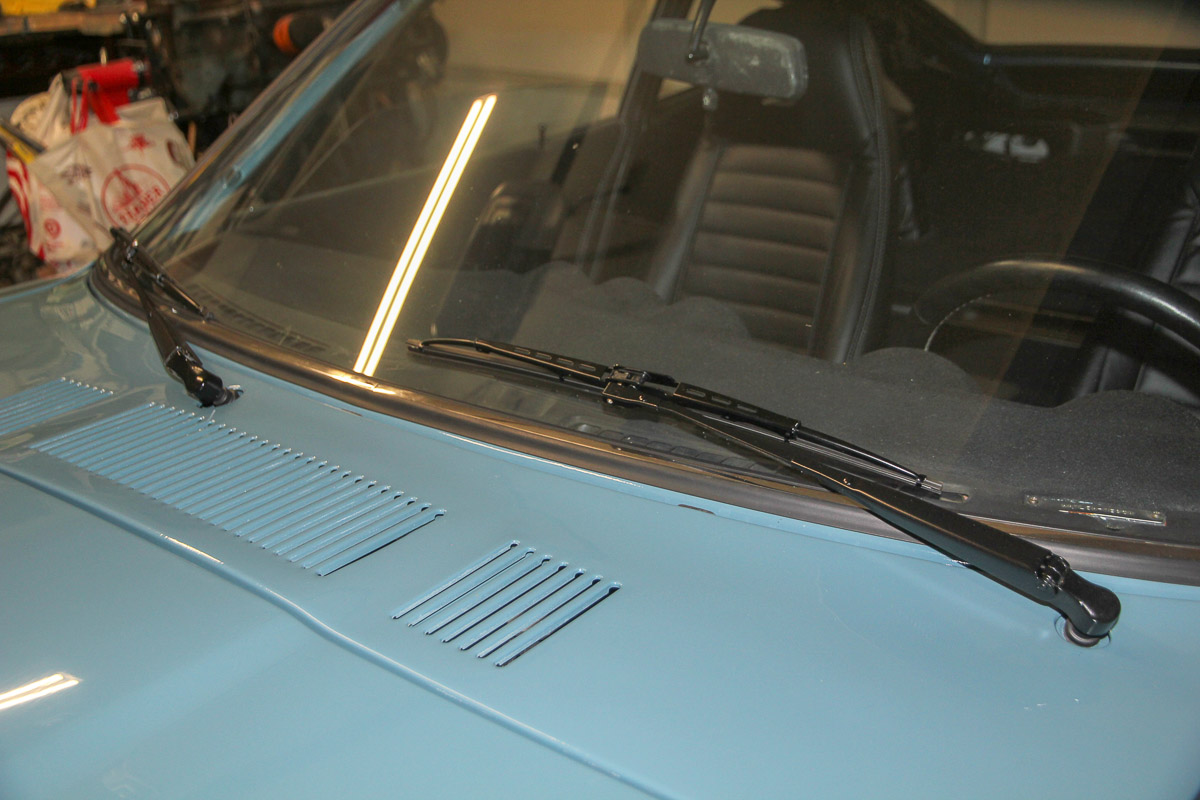
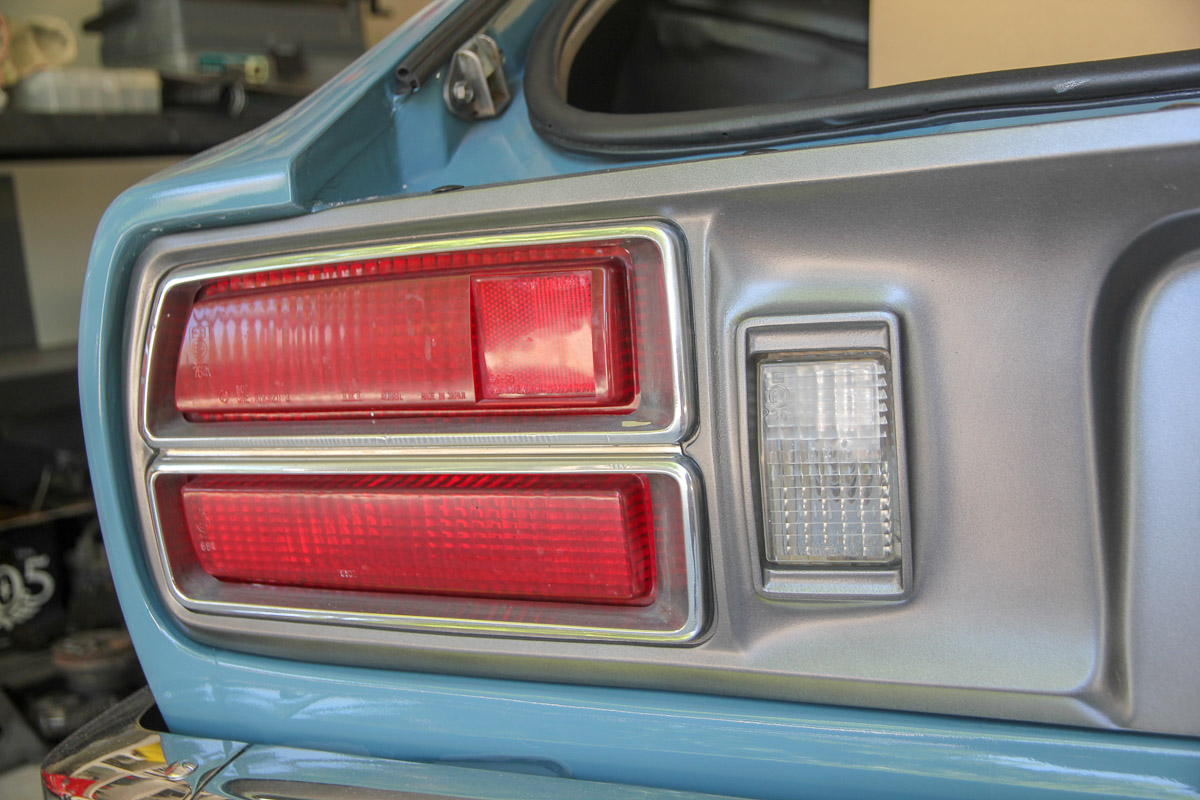
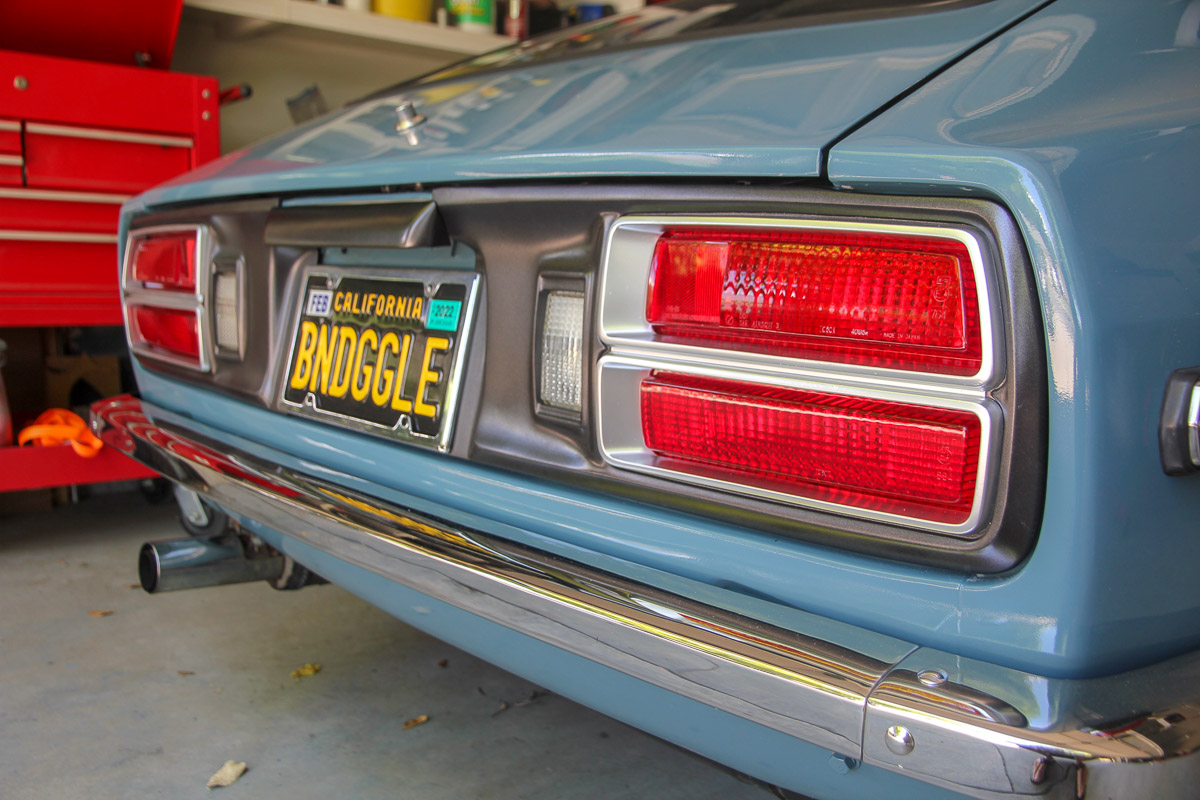
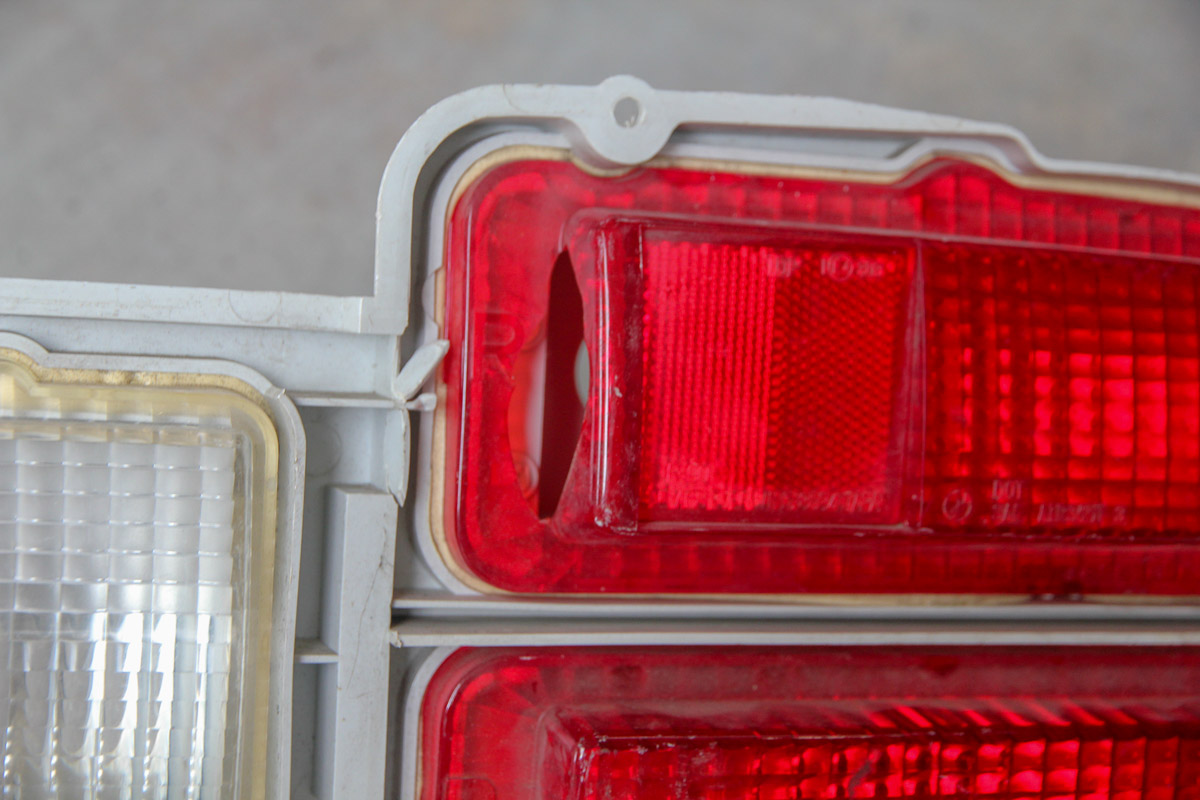
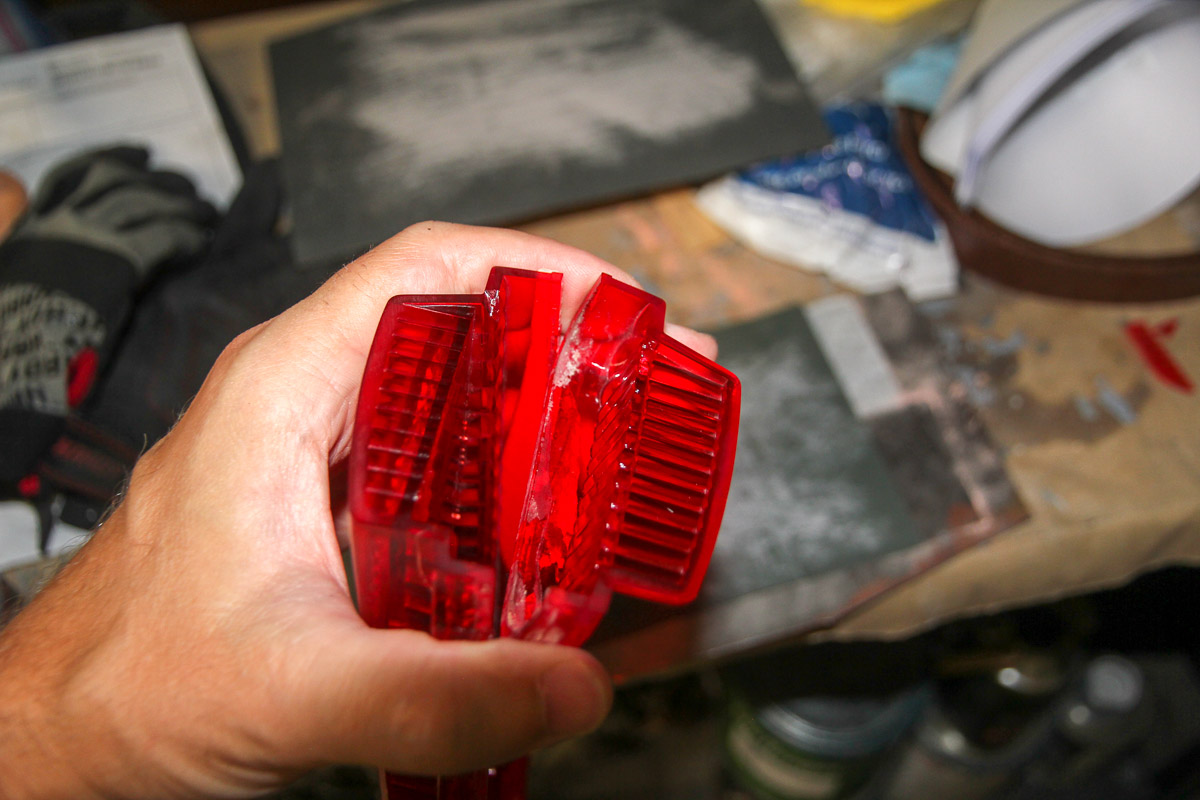
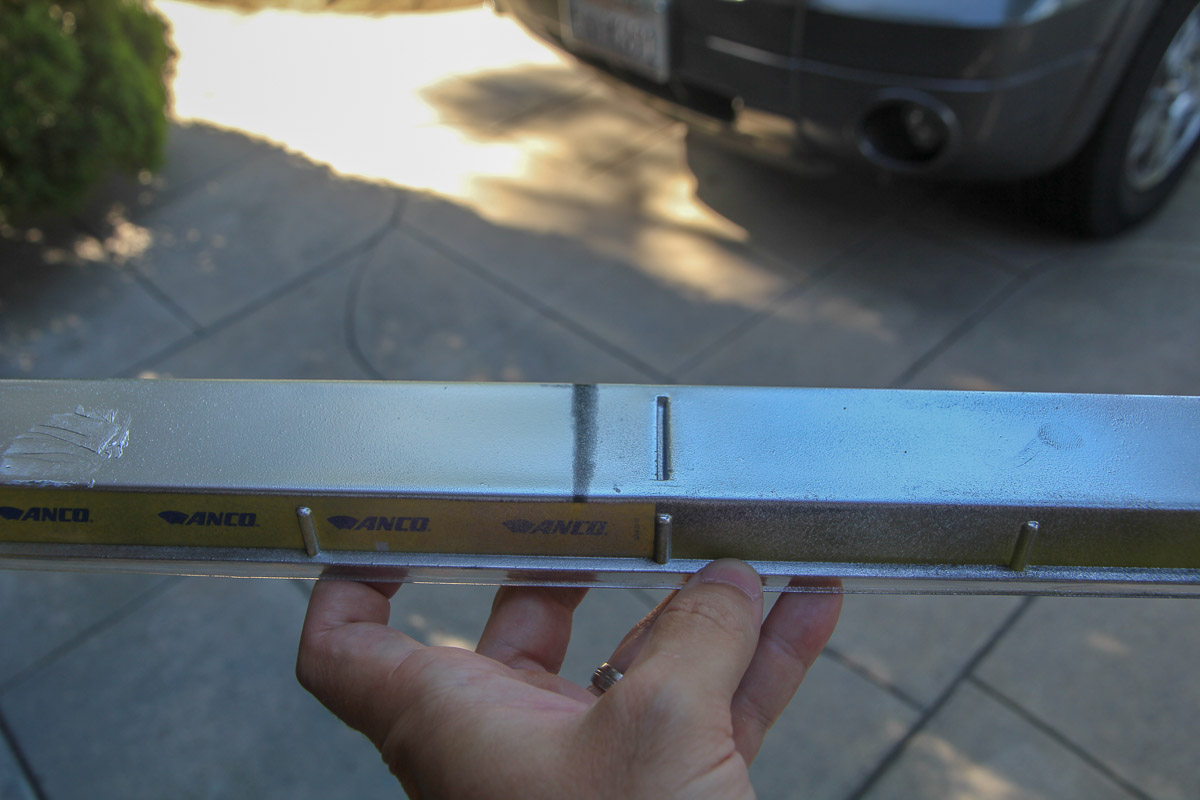
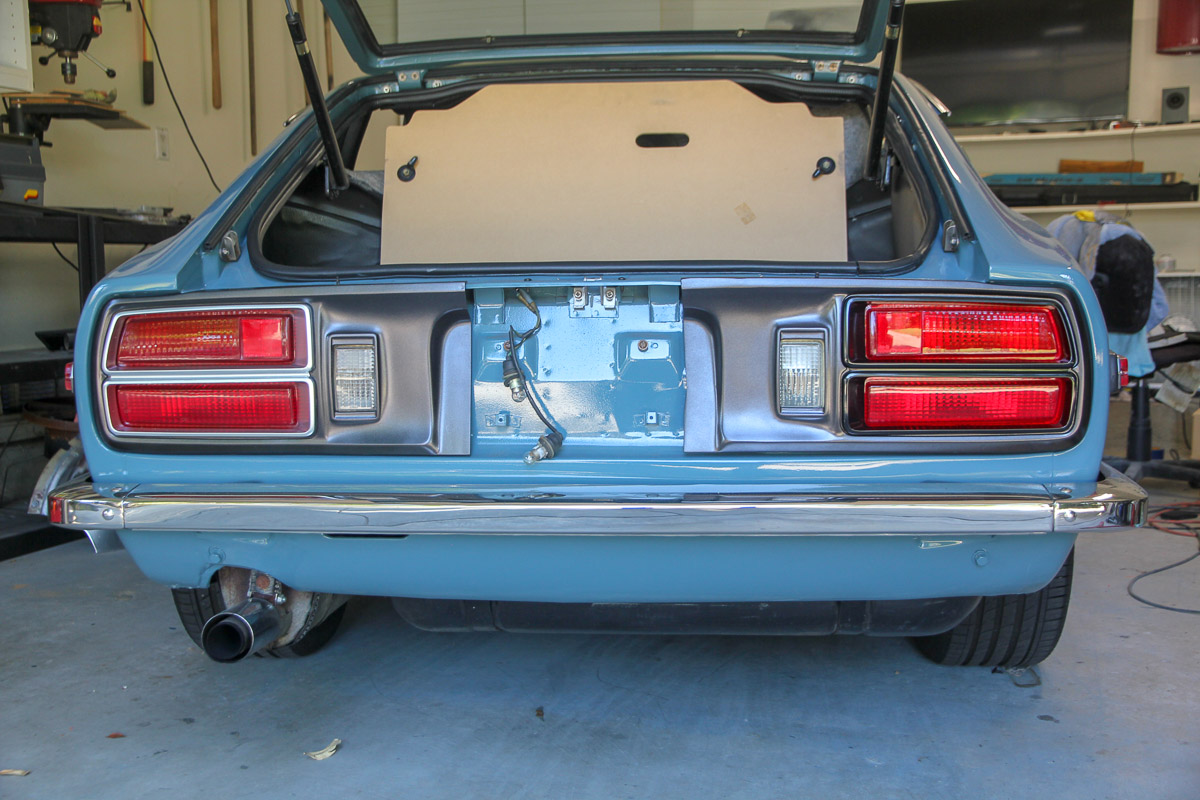
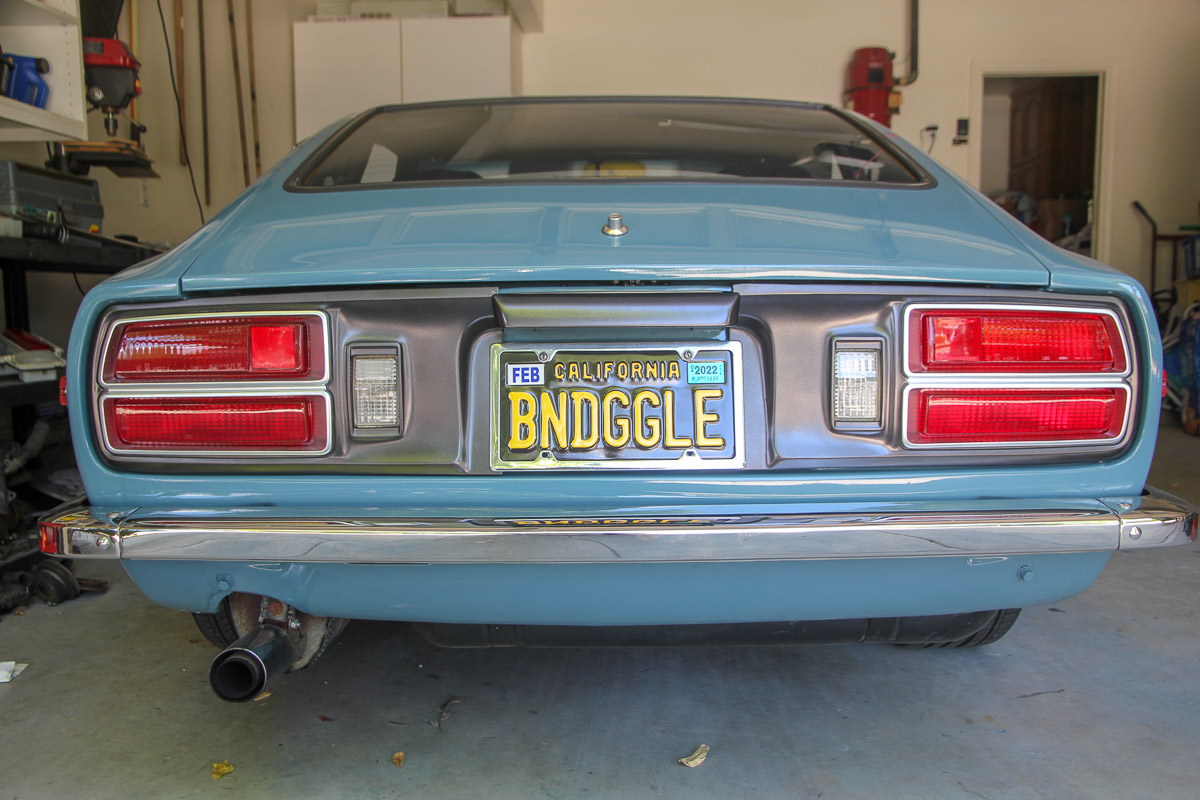
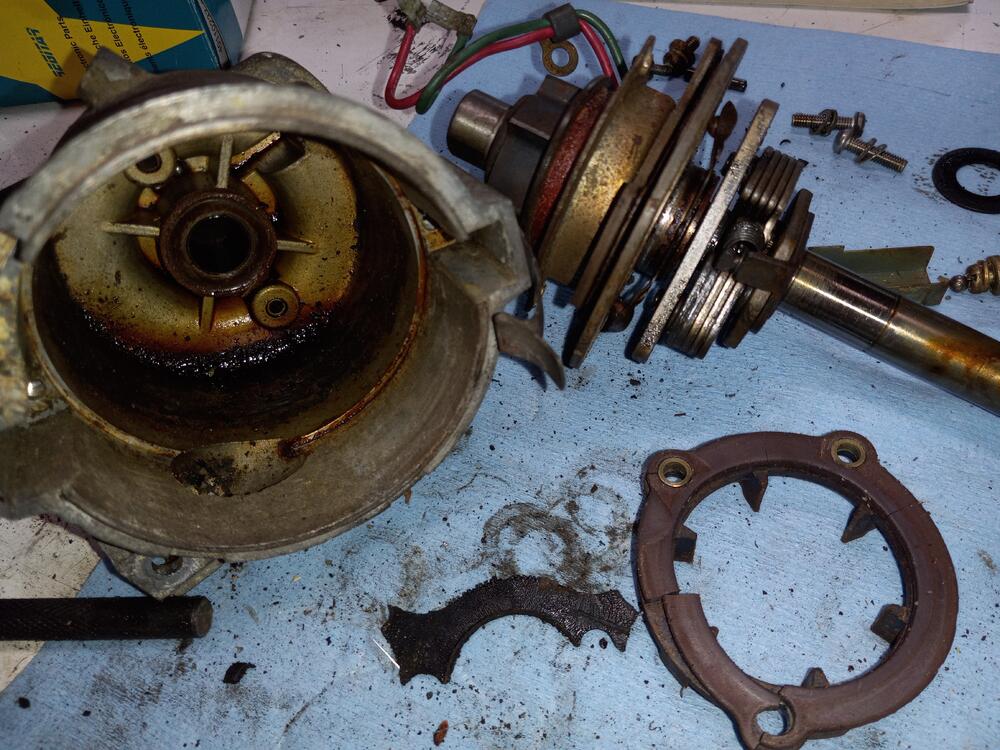 1 pointI don't have the stomach (or budget!) to take on big projects like audio or motor right now, so I'm keeping idle hands busy with some of the little things that have been bugging me for a while but never got around to fixing. Stripped the ratty paint off the wiper arms and hit them with some satin black and put on new blades that'll probably never be used. Someone commented on them this morning, so time well spent. On to the tail lights, which were really bringing the exterior down. Something had melted the right one, the chrome foil on the bezels was lifting and torn and the lenses (esp on the left) were rather faded. I also wasn't crazy about the graphite color I used on the panels -- too light, and too matte. So I ordered a new (used) tail light assembly from Z Car Source and was not too happy to find that the one piece of it that I really needed was also the only part of the new one that was damaged 🙄 Ended up cutting the broken end off the new one and then super glued on the end from my old one. I tied to match up the seam with the lens pattern and it's...good enough. Meguiar's polishing compound brought the lenses back to life. I used Duplicolor Perfect Match GM Iridium on the panels, which I'm much happier with. The bezels I'm still not sure about. I bought 3 different kinds of "chrome" paint, which are all just silver (here's a test of two -- Duplicolor and Krylon. Not chrome and not even close). Supposedly you can get better results applying it over gloss black, but it didn't matter. I thought about leaving them black, but it was a little too 1980s retro for my taste. I can live with them for now, but might try wrapping them in chrome vinyl one day. Still, I'm a lot happier with the view back here now.


 1 point1 point1 point


Important Information
By using this site, you agree to our Privacy Policy and Guidelines. We have placed cookies on your device to help make this website better. You can adjust your cookie settings, otherwise we'll assume you're okay to continue.