Leaderboard
-
Captain Obvious
Free Member6Points10,081Posts -
grannyknot
Free Member3Points5,158Posts -

Dave WM
Free Member3Points3,591Posts -
Jimmy Z
Free Member2Points4Posts


Popular Content
Showing content with the highest reputation on 05/09/2019 in all areas
-
6 points
-
3 pointsI commend them for that, rather wait and get as perfect as possible. I hope someday the Z after market is supported the way 60's American muscle is. You can practically build a brand new 1969 Camaro from the jegs catalog.3 points
-
Well my bodyshop is an excellent guy, but he surely takes his time to get all the details right. I love that, but i want my car back before i retire. That's why i always search for the best possible solution to make life as easy as possible for him. Lately i often saw those yellow panels from UK popping up on various sites. One of the "problematic" areas is stil the Rear lower valance. I got one from MSA so far and it's ok for most of the "american" restaurations i guess, but not for me... The main problem beeing that the Curvature from the original lower valance is missing. I thought i'd give it a try and got it today: I'm surprised about how different it is and how great it looks. Also got confirmed that it's the original sheet metal thickness as the cars came with. You can clearly see the "curvature" in this picture. The main difference aside from that is the "lip" at the bottom end (see first picture) and the more accurate shape at the exhaust area. Here's panel from MSA, see the differences? All a bout the details.. I really can recommand the yellow one above. They don't have a website but i often see these (and many other 240Z parts from them) pop up on ebay and various facebook pages. Price is also nice if you ask me ?2 points
-
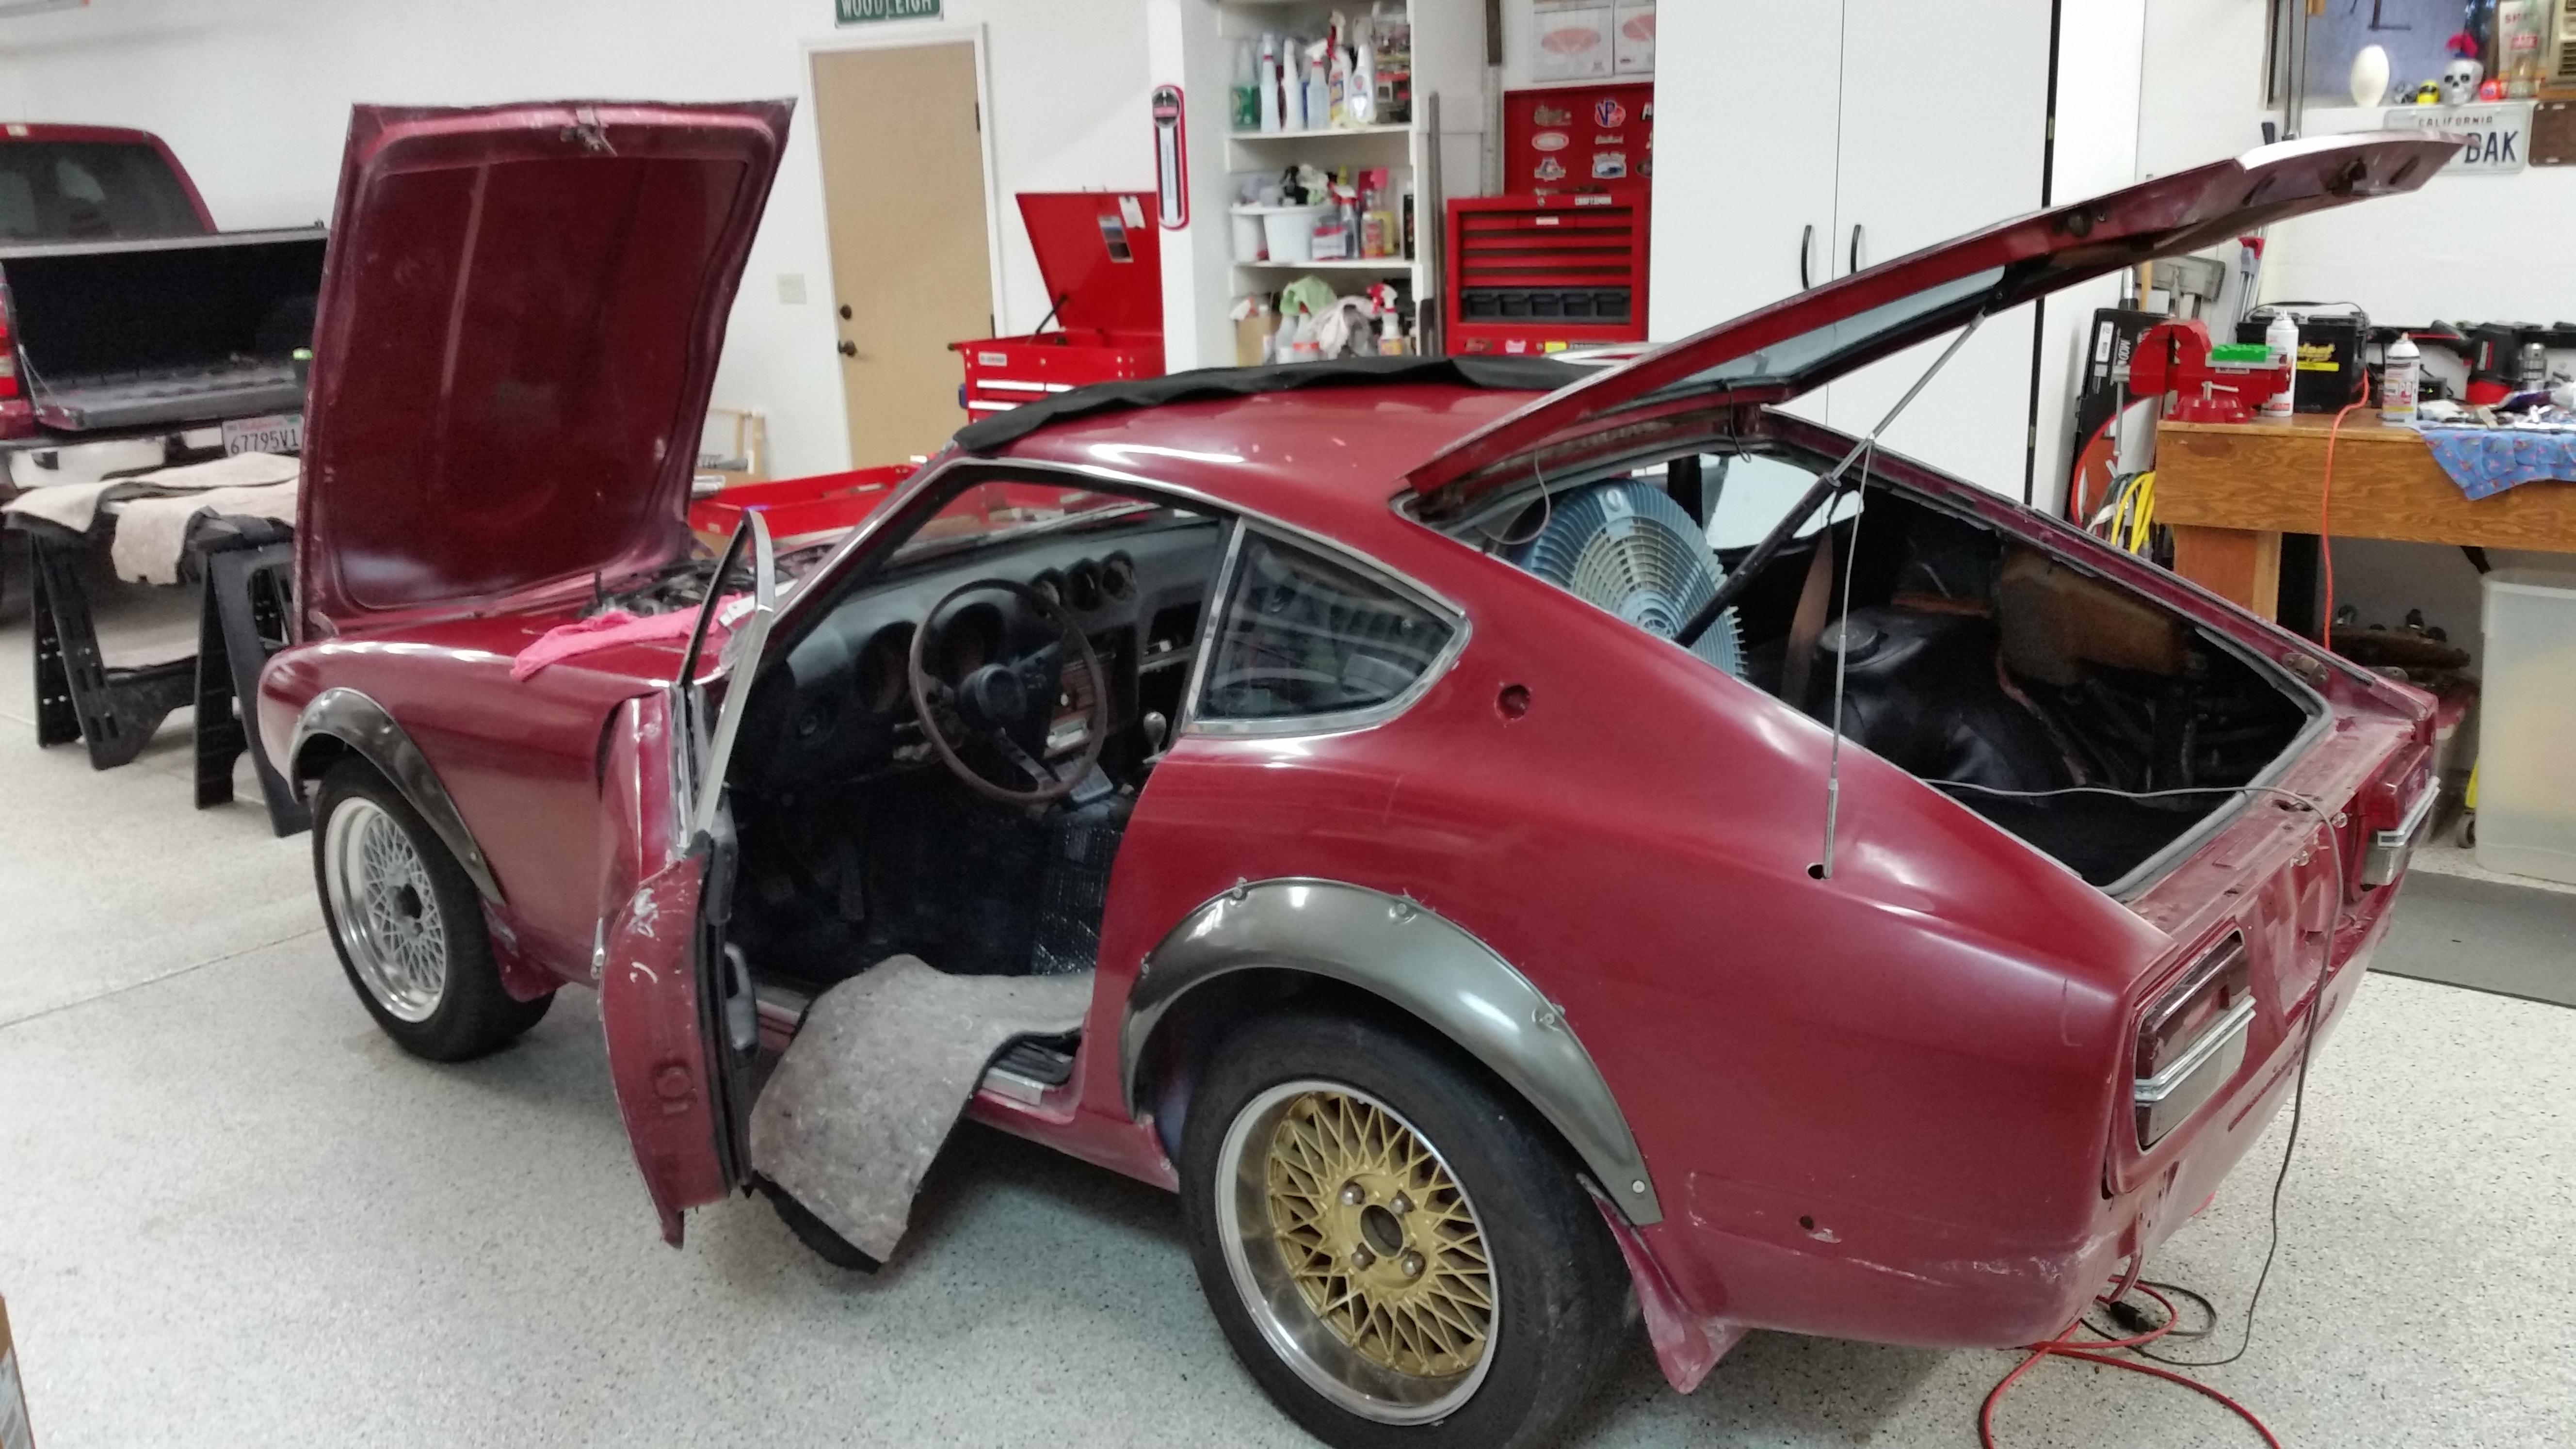
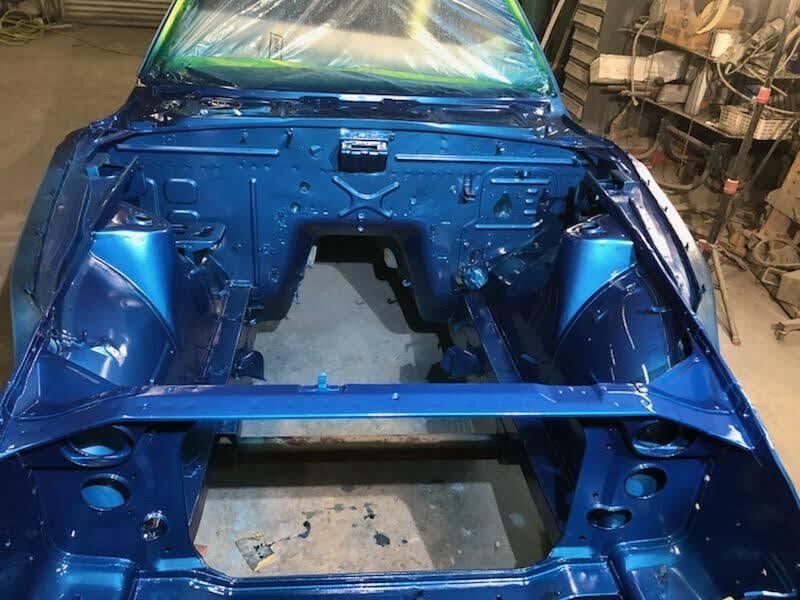
2 pointsA long story, but I finally have the car back from the the body/paint shop and am in process of re assembly. I've completed the plumbing (installed new stainless fuel, brake, and vent tubes) and am ready to install the brake booster and master, and bleed the brake system. Still a ton of stuff to do to get the car back on the road, but will get the brakes buttoned up before I put the motor and trans back in the car. The booster was finished as promised, and came back looking far better than what it did before the refurbishing. I repainted it, and it's been sitting on the bench for months waiting to go back to work. I'll update this post with photos and results as soon as I get the brake system buttoned up.
 2 points
 -
2 pointsThe upper stainless steel trim with the squeegee can be removed by inserting a small screw driver in the end of the trim and levering off the top of the pinch weld, once you have it started lay something like a popsicle stick on the flat lip just below the trim to protect it and carefully pry up. The inner fuzzy is attached to the door card with heavy staples, while difficult to pry up the folded ends of the staples it can be done then fuzzy is pried off.2 points
-
1 pointFor balancing the carbs here are a few quick and dirty methods I use when I don't have a flow meter or WB A/F meter: Setting Idle 0 Assume good plugs, valve adjustment, no vacuum leaks, good fuel pressure and float levels set correctly. 1. Remove air box 2. Warm up car and remove all linkage connections so that the carb's throttle plates are resting on their set screws. 3. Adjust each set screw so that the suction felt when you put your knuckles against the throat of each carb and feel the air flowing between your fingers is the same on both carbs. 4. Stick you head down between both carbs and listen to the intensity of air whistling sound from each carb. It should be the same amplitude 5. Repeat 3&4 until happy and your rpms are 600-800rpm (exact rpm should be suited to your taste and performance when moving from stop or what the FSM states... your call baby) Setting Off Idle 6. Reconnect linkage 7. Make sure the screw from the fast idle servo is not pushing on the throttle rods (that screw is the one next to the front carb). 8. Turn the fast idle screw at the center of the linkage (way up high) so that the car is idling ~ 3000 rpm 9. Adjust the balance screw on the linkage (next to the back carb) so that the air flow is the same in both carbs (as you did in 3&4 above) You can also observe the point at which both throttles open when you push the main linkage. The balance screw should be set so that both throttle plates open at the same time. Setting Mixture 0. Warm up car 1. Screw both jets all the way up to the top 2. Screw the jets down 2.5 turns (default starting point) 3. Take the car for a run and listen closely for popping in the exhaust (rich), popping in the intake (lean) and note power 4. Screw both jets up or down 1/2 turn and take another run to see impact. 5. Repeat 3&4 and do 1/4 adjustments until you are happy 6. Take the car for a spirited 30min drive with plug wrench then while driving fast on a long stretch, hit clutch, kill motor then pull over to side of road, look at all plugs and compare colour. If there is a difference between the front 3 and rear 3 then the fuel jets need tweaking. Adjust the darker 3's carb by turning up the jet to lean the mixture a 1/4 turn If all plugs are too dark then turn both jets up 1/2 a turn. 7. Repeat 6 until you are happy. All plugs should be the same colour and very light brown. Listen for popping out the front to tell if you go too lean. Don't worry, you can take your time and do this leisurely over a couple of days to fine tune and colour match your plugs. Power and Timing 1. Fill up with premium gasoline 2. Advance timing to 10° BTDC 3. Grab a 10mm wrench 4. Take car for a run and note power 5. Pull over and use 10mm wrench to advance timing a bit (turn distributor clock wise) Don't worry about a timing light 6. Take it for a run and note power increase and listen for pinging under load (try acceleration on a hill to force a load) 7. Repeat 5&6 until you are happy with balance of power vs. pinging 8. Check plugs again. You may need to add more fuel to get the last bit of power 9. Make note of timing at idle using a timing light. Follow Up 1. Turn each jet up and count turns. Record these numbers for future reference then turn the jets back down. 2. Measure timing with a timing light at idle with no vacuum advance and at 3000 rpm Record these numbers. Aim for 36 to 38 maximum degrees at 3000rpm. 3. Measure engine vacuum and record number. 4. Measure air flow (with proper device) and record numbers 5. Measure O2 with WB at idle and at various RPM's underload and record numbers. 6. Re-balance carbs at idle and 3000 rpm's with airflow meter. 7. Adjust jet height using WB O2 sensor. 8. Close mouth of each carb (one at a time) set rpm to 3000 and run rough on one carb and measure with WB. Compare both carbs and strike balance. (AF ratios should be the same and rpm's the same when running on one carb) 9. Do the "lift each piston 1/16" and compare how engine behaves as well as "Norm's lift each piston fully to disable" trick to also compare each side to the other's behaviour. 9. Measure 02 with WB at various rpms' under load and select or augment needle to taste. Repeat 9 until happy with WB and butt dyno performance. 10. If you have the luxury of a dyno then use it. 11. Once jets and needles are set Blueprint (measure evertyhing) including depth of jet from bridge of carb with vernier caliper's depth gauge.1 point
-
1 point
-
1 point
-
1 pointOk, update. As I mentioned above, I hesitated to order my 240z dash as they didn’t seem to have much of an online business presence. I live in Arkansas and Hung is in NorCal. I ended up on a business trip out west and Facebook messaged Hung I wanted to come by to by a dash. He said that was fine, didn’t always communicate quickly, but did eventually respond. He said he was out of 240 dashes but did have a blem dash. I stopped by and talked to both guys and asked about the 280 restock and they say they continue to have quality issues and won’t sell them if they aren’t right. 6 weeks is a good estimate on them. I did look at the blem dash and bought it. Hung is shipping so I’ll advise when I receive it. I took a pic of the gauge cluster on their 280 test fit to show some of the gap issues they are having. Overall, I’m satisfied and think they are trying to do the right thing, they just don’t communicate well. The pallet is 240 dashes going to Europe.1 point
-
1 pointSearch "Quick and dirty SU tuning". @240260280 put it together. As Zed Head stated above, start with a thorough tune-up using 240260280's method to eliminate the obvious. Not you @Captain Obvious we could never replace you.1 point
-
I got my Kia motor from RockAuto and installed it last fall. Used a metal nibler to make it fit. Got it all hooked up with the factory connector and turned it on. The new motor made some noise but didn't make much difference in air flow. Did some testing and determined it was spinning the wrong direction. Swapped the pins in the connector and tried it again. Tons of air blowing after that. If anyone does the upgrade and doesn't notice a difference try swapping the pos / neg that feed the motor.1 point
-
I had the car out on Wednesday night for a few more tweaks before the weekend. The induction pipework was a bit too blingy for my liking and didn't match the stainless bend, so I removed it and gave it a matt brushed finish to tone it down a bit. I'm sure this will be a bit marmite.... I've also repositioned all of the jubilee clips to hide the tensioners etc to tidy up the bay. Overall I'm very pleased with the results, looks more of a finished product in my eyes now. After recently finding another dodgy wheel nut I got fed up of all of the issues I've had with several of them and have now replaced the entire set with new steel wheel nuts for peace of mind. More boring little bits but I removed the choke baseplate to clean it up and fit some rubber feet to remove a vibration/rattle which had been driving me mad while driving and did the tyre pressures thinking of the weekend. Car should be all good for Saturday and now has rolling road time booked for next Wednesday evening to check where we're at, I'm hoping to give the car a quick service with oil and plugs beforehand as well just to make sure we're in good order. In the meantime though, bring on the weekend! IMG_9949 by Mark Woodrow, on Flickr IMG_9952 by Mark Woodrow, on Flickr1 point
-
Well we're back again, its been another busy but productive weekend. I'm pleasesd to say that the car now has a fully functioning forced cold air intake fitted! I just wanted to start by giving a shout out to Richie, I completely hijacked this setup from his recent work and used his suggestions and parts list to make this possible. It goes without saying that this setup is entirely custom, with all of the parts having been sourced from ebay with the exception of the airbox from MJP (this effectively comes in flatpack form though). This setup previously seems to have only been used on tripples rather than SU's from what I've seen to date though... First up was to protect the airbox itself, arriving in naked firbreglass it looked a bit dull and looked like it would benefit from some protection. Also the lip of it was white in places from the raw finish and gave it a rugged look, having gone round with a black shapie everything was blacked up to match in. Following a quick degrease and a few coats of laquer using a rattle can in the garden the results the next day were much better and give it a more premium finish. Saturday afternoon started by getting the carbs back to basics to allow me to get in with some masking tape to make a transfer outline of the bolt holes and carb intakes before transfering this across to a cardboard template of the airbox. Having carefully cut this up I could test fit the cardboard for fitment until I was satisfied, with that done I transfered the outlay onto the airbox backing plate marking it up with a Chrome Pen. So as to not rip the fibreglass up, a dremel was used to drill around the areas before opening up the gaps annd sanding them back to get the desired fitment. This was a bit of a sod and took some patience as you only get one shot to get it right. With that done the rubber sealing trim was installed and the clips/brackets that secure the airbox offered up for positioning and drilling, being patient with the dremel and drill got all of the holes in place. These has now been locked down using M4 Bolts and Nylocks on the inside to give a flush fitment and cause the least disturbance while remaining removable. Long term if there's no issues, I'm still tempted to move to rivets however we will see. Come Sunday, next up was taking the CRX induction pipe to mark up and chop up using an angle grinder. With my small one out of action the hacksaw came into play as the 9inch grinder I had turned out to be too man for a precision job. This was a case of more patience and conservative cuts to get the desired length (I still think the pipe may be a tad too long with the airbox being very snug pushed up against it). In order to hold it in place a silicone joiner hose was inserted through the bulkhead, this was an absolute just fit and had to be heated in hot water to be made pliable enough to slot in place and is now going no where. With alot of squeezing the ali pipe was dropped in place with some pushing, pulling, cursing and swearing before being tightened up using jubilee clips. With all of that done, all that was left to do was cut the 90 degree bend pipe out of the front to fit up a suitable cone air filter, the pipe was a bit too heavy duty so took some time with the grinder but seems to have done the job. This slotted in place with jubilee clips and has had a generic ebay red 3 inch cone filter added onto the end. Having covered it in K&N filter oil it looks to be more than up to the job of keeping out all necessary debris and flies etc. Only time will tell how durable it will be! Overall it seems to be gone very well, its snug but has good clearance in all of the right places. I may cut down the pipe from the airbox to the bulkhead to allow for easier fitment and removal going forward however its ready for the shows this weekend. Having taken it around the block it seems to be running smoothly however the extended roadtest of a couple of hundred miles should reveal all. Fingers crossed I can get it to a Dyno soon to have a proper tune up and see what all of our hard work has gained us, the performance certainly seems stronger. In other news we're getting close to our big brake upgrade on the front, pads have arrived, fitting kit cleaned up, disks and brackets on their way. I'm just waiting for the brake calipers to be done by BiggRed and then we'll be looking to get them fitted up. More than likely a job for next week to take the pressure off assuming the clipers arrive before then... Fortunately the car is all fueled up, polished and stowed away in the garage for the weekend waiting to go this year, no more water pump fixes at 11pm the day before please! A little detail I've been meaning to do something about for a while now! IMG-9845 by Mark Woodrow, on Flickr IMG-9875 by Mark Woodrow, on Flickr One Template IMG-9818 by Mark Woodrow, on Flickr Test Fit IMG-9820 by Mark Woodrow, on Flickr Transfer Across IMG-9823 by Mark Woodrow, on Flickr Cutting IMG-9825 by Mark Woodrow, on Flickr IMG-9830 by Mark Woodrow, on Flickr IMG-9847 by Mark Woodrow, on Flickr IMG-9848 by Mark Woodrow, on Flickr IMG-9834 by Mark Woodrow, on Flickr The business end! IMG-9858 by Mark Woodrow, on Flickr IMG-9864 by Mark Woodrow, on Flickr IMG-9884 by Mark Woodrow, on Flickr IMG-9891 by Mark Woodrow, on Flickr IMG-9901 by Mark Woodrow, on Flickr IMG-9920 by Mark Woodrow, on Flickr1 point