


Leaderboard


Popular Content
Showing content with the highest reputation on 06/03/2017 in all areas
-
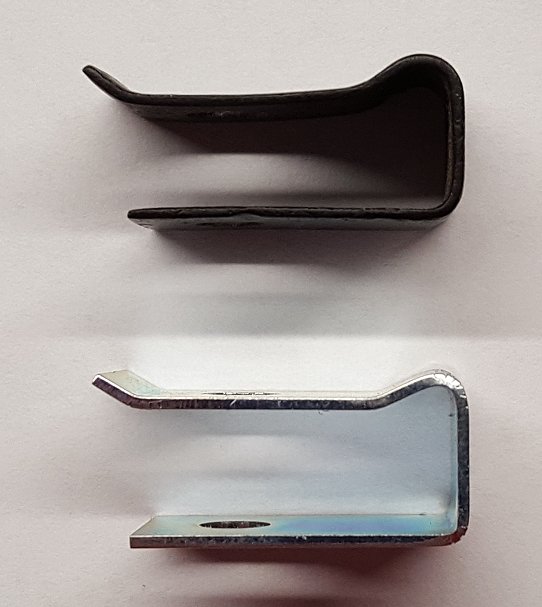
2 pointsApparently they were part of a short-lived factory air con prep, relocating the horns to make more space for the condenser. 74820-E4201 was a factory replacement 'one size fits all' front crossmember/lower radiator support panel which incorporated them. It was superseded in 7/72. They are a little odd because they seem to be more often seen on cars that have had replacement crossmembers/lower rad supports fitted than on cars that left the factory with them...2 points
-
That's what terrifies me, most vets go into law enforcement.1 point
-
1 pointThis source says that GM used that code on 327's and 350's. So that fits. 3970010 http://www.nastyz28.com/sbchevy/sblock.html Where's texasz? He was going to have his site back up in a little while. @texasz1 point
-
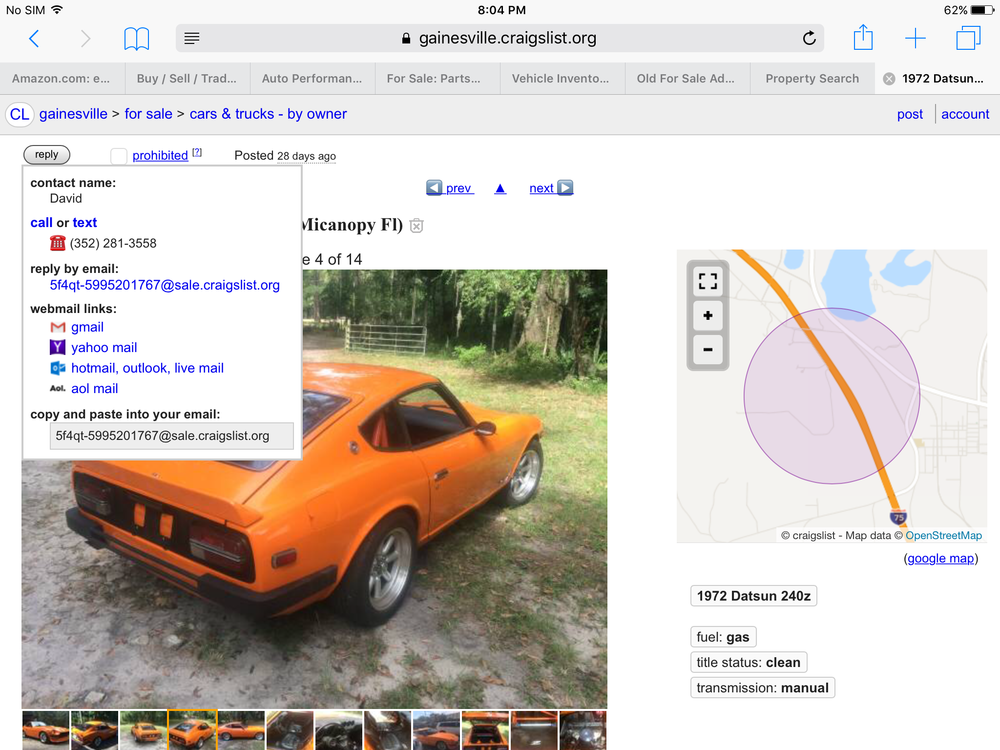
1 pointYou can probably get that price or higher from somebody who comes out and inspects it in person. The key, I think, is to make it easy to do. Tell people where the car is located (Northern Idaho is a whole different world from Southern, Eastern or Western), all the details of how it runs, when it's available for viewing, are the tags/tabs current so it can be driven, will it do a long drive with no problems, etc. Could be a fun road trip and a ride home in a "new" Z. You gotta give that critical information though. Looks like Idaho carries over previous brands (obviously, from the picture) - http://itd.idaho.gov/wp-content/uploads/2016/06/SalvageFactSheet.pdf
 1 point
 -
1 point1 pointHi Kats, The pistons can bind if the domes are out of alignment. The way to check is to remove the plungers then lift and drop the pistons with your fingers in the throat on the bottom of the piston lifting it up and down. You should be able to feel any binding. The final calibration check is to lift both up to the top and release at the same time. They should "clunk" on the bottom at the same time. If not, it is possible that the margins have carbon or that the domes and pistons were mixed up at some time (or the springs are not matched or the nylon stop washer is missing in one). Sometimes you can swap the two pistons and the fall calibration will work better. Pistons and domes are matched in the factory but wear and mix-ups do happen. Binding is usually caused when screwing down the domes. If the dome is clocked (rotated) too much from its natural position, or if one screw is tightened too much at one time (to tilt the dome toward it) then binding will occur. The trick to optimally installing a dome is: 1. Fit the dome w/o screws and rotate it cw and ccw while visually noting the stopping points. You can mark with a pencil. Usually there is ~ 1mm of arc in each direction from the center. 2. Insert the screws to their middle depth (ensure no pressure on dome flange) and repeat the rotating the dome to note the stopping points. 3. Turn all 4 screws down evenly and in a cross pattern (like lug nuts on a wheel) but again, do not tighten so that the dome can not be rotated. You just want the screws to apply minimal pressure and just kiss the flange so that you can still rotate the dome but this time with a slight resistance caused by the screws. 4. Rotate the dome while lifting and dropping the piston. Note that in the center of rotation, the piston will not bind. This is where you want the dome to be. 5. Once the dome is in the sweet spot, Turn all 4 screws down evenly and in a cross pattern (like lug nuts on a wheel). Be sure to give each only a 1/4 to 1/2 turn at a time. Continue lifting and dropping the piston to ensure all goes well. 6. After both domes are screwed down, do the drop test to ensure both fall at the same rate. 7. Add oil and the plunger then repeat the drop test to ensure both fall at the same time. Finally, when considering an oil, the important item to note is what the damper does: It only slows transitions of the piston to smoothly meter fuel. Here are the key transitions: 1. Engine vibrations: without the damper, the pistons would shake in the dome and wear it out the edges. 2. Road bumps: without the damper, the pistons would clunk up and down when going over bumps and dips causing the fuel flow to change radically in short bursts. 3. Acceleration: the damper reduces the fuel metering during acceleration by keeping the needle deeper in the fuel jet orifice. Another opposite effect of the delayed piston rising is the increase of fuel flow caused by the manifold vacuum creeping forward of the throttle plate to draw more air over the annular fuel puddle. This also increases the venturi pull of the fuel as more air is now flowing over the bridge and through the smaller opened area above it. The net effect is more fuel during the acceleration stage but not too much. 4. Deceleration: the damper increases the fuel metering during deceleration by keeping the needle higher in the fuel jet orifice. Another opposite effect of the delayed piston falling is the decrease of fuel flow caused by the manifold vacuum being stopped completely in the throat by the closed throttle plate. The result is less air to draw from the surface of annular fuel puddle as the venturi pull of the fuel is low (Less air is now flowing directly over the bridge and through the very large opening area above it. The net effect is reduced fuel during the deceleration stage but not too little. Ultimately the damper oil you chose will only be noticed during acceleration. Thicker oil will enrich the acceleration mixture, thinner oil will lean the acceleration mixture.1 pointChris, you might do yuorself a favor by leaving it alone and let Matt have a look at it. You still have other work to do, which you are very good at. I look at it this way. I could spend a lot of time and frustrating effort doing it myself, or get someone that knows what he is doing do it for me, then spend my time on the stuff I can do. Oh and it has taken me years to figure that out. Im a hard learner....1 point1 pointThis car was on Craigslist for awhile and then on eBay and I don't think it sold. You can call and see if it's still around. I think he was asking 12 or 13k. This was a screen shot from March 4th.
 1 point1 pointCan you and your son do any work yourselves? Do the two of you have time, money, and desire to do work yourselves? You have decided you want a Z but there are a few things to be considered. We are all enthusiasts here and would never discourage someone from buying a car, but as well we are REALISTS. Either you will pay a lot of money for a car that needs nothing, or you will pay relatively little money for something that needs a lot! If someone has done all the work and has a jewel he will want a jewelers price for it. I paid 2k for mine back in 1994 and I am still working on it today just to improve and keep it all in one piece. First figure your price point. Remember it is your price point not someone else's. Answer the 2 questions at the top of this response. I don't think anyone wants to see the two of you end up with buyers remorse or a pink elephant. Personally if I'm going to spend more than 17k for a vehicle it would have to be a new or nearly new vehicle, not one of these cars that could need quite a bit of work just to make it a safe daily driver let alone performance enhancements. Look around a lot. A car that is in better shape structurally will have spent it's life in the desert southwest or some other dry climate. If it spent it's life in a humid climate like the one you posted it will more than likely need (some) metal replacement to some degree. I bought both of mine because they were complete, one sat for at least 7 years and the other one I'm not quite sure how long but I knew what I was getting myself into, even more so the second time.
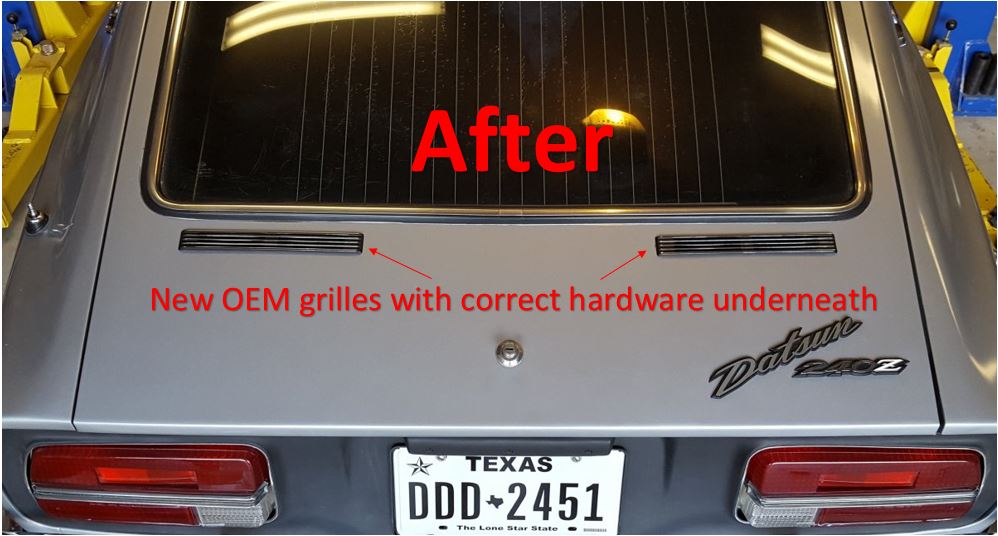
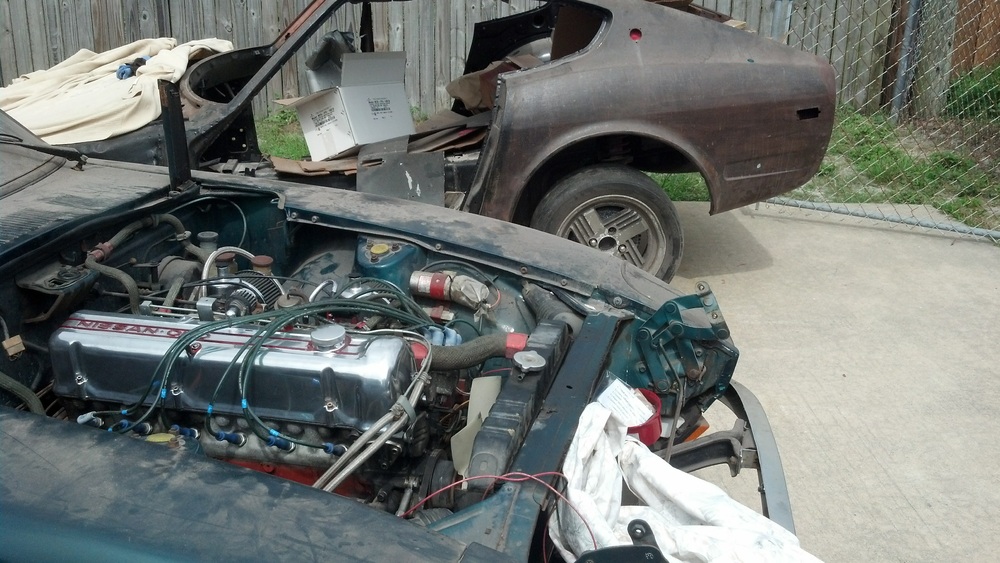 1 point1 pointGood point. So I have decided to limit my search to Florida, where I can drive to inspect and potentially have a mechanic inspect. So, that limits my market quite a bit. There is 1 on BAT auction in Miami that is a time capsule. 31,000 miles 1970 240z! But the bidding is at 26k with 6 days left. Too rich for me. And we want a semi daily driver. Not a museum piece. Sent from my iPhone using Classic Zcar Club mobile1 pointIf we're playing, here's a couple of shots to prove Takata - like most Japanese companies - were working on Christmas Day 1969. Nissan part number was 86800-E7201, and I think it should be fairly easy to guess on what variant of S30-series Z this was stock equipment:1 pointWhite / Red drool. Man, I think you should buy these little gems and resell to us folks on the East coast. Tell her your working on your retirement nest egg. Granted, they are bigger than gold krugerrands, but just as valuable!1 point1 pointPersonally I don't see the problem in the ball joints ( after all I am still using the old " worn out " ones ), or the entire linkage, but just with the carbs. Mine where done by Ztherapy, so not sure what they did ? Found this on their website: Reman Carb Body 69-72 ½ 240Z 3 or 4 Screw w/ZT Roller Shafts (pair) . But there's no friction in the linkage ever since, and the gas pedal goes so light....it's better than a new car. ( I have to note it is sensitive on bumpy roads, but I anticipate on that by backing my foot off) So I guess the shafts in both carbs ( Original state ) cause to much friction in the whole linkage.. ?1 pointKats, you answer all of my questions, sometimes before I can even ask. The picture above of the correct tag location and orientation is just ------"Perfect". Dan1 pointIt has been awhile since I posted an update on #8011. I have actually been quite busy with various projects on the car, many of which are posted throughout the forums on the site. With each project that is completed the car shines a little brighter or performs a little better. Back in February I was on a mission to seal up the rear of the car to reduce and hopefully eliminate the exhaust fumes that were coming. Additionally, I wanted to replace the hatch vent grilles as the grilles on the car had been drilled and riveted for installation. This project went down a rabbit hole fairly quickly as I discovered my car was missing the unique clips that hold the vent assembly together and provide the locating point for the barrel clips that secure the grille to the car. With the help of some dedicated owners I ended up having a local sheet metal fabrication company make a run of the clips. You can see the entire saga in great detail here -> http://www.classiczcars.com/topic/57001-series-1-hatch-vent-duct-clips-restoration-info-needed/
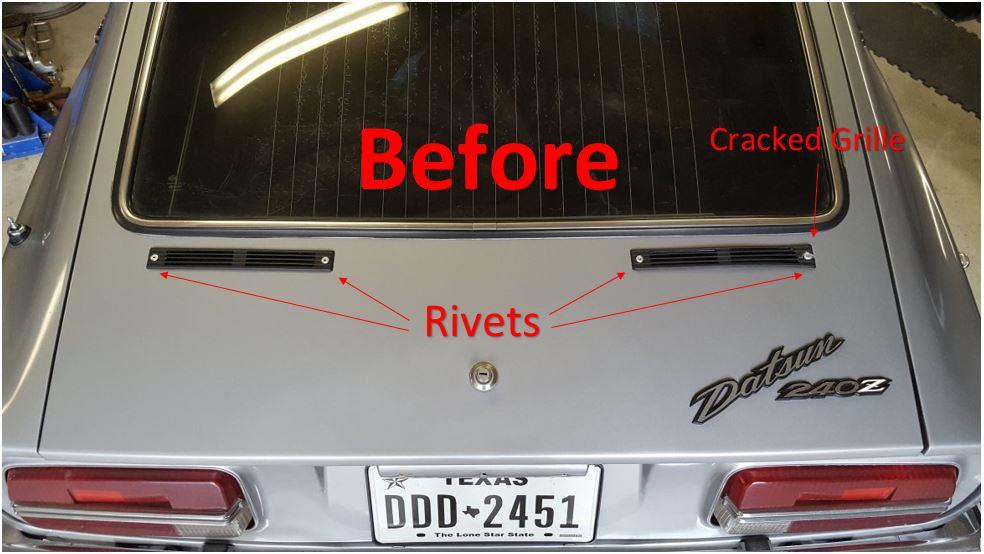
 1 point


Important Information
By using this site, you agree to our Privacy Policy and Guidelines. We have placed cookies on your device to help make this website better. You can adjust your cookie settings, otherwise we'll assume you're okay to continue.