Leaderboard
-

Diseazd
Free Member3Points3,362Posts -
Jeff G 78
Free Member3Points3,007Posts -
Captain Obvious
Free Member3Points10,081Posts -
grannyknot
Free Member2Points5,158Posts


Popular Content
Showing content with the highest reputation on 04/05/2016 in all areas
-
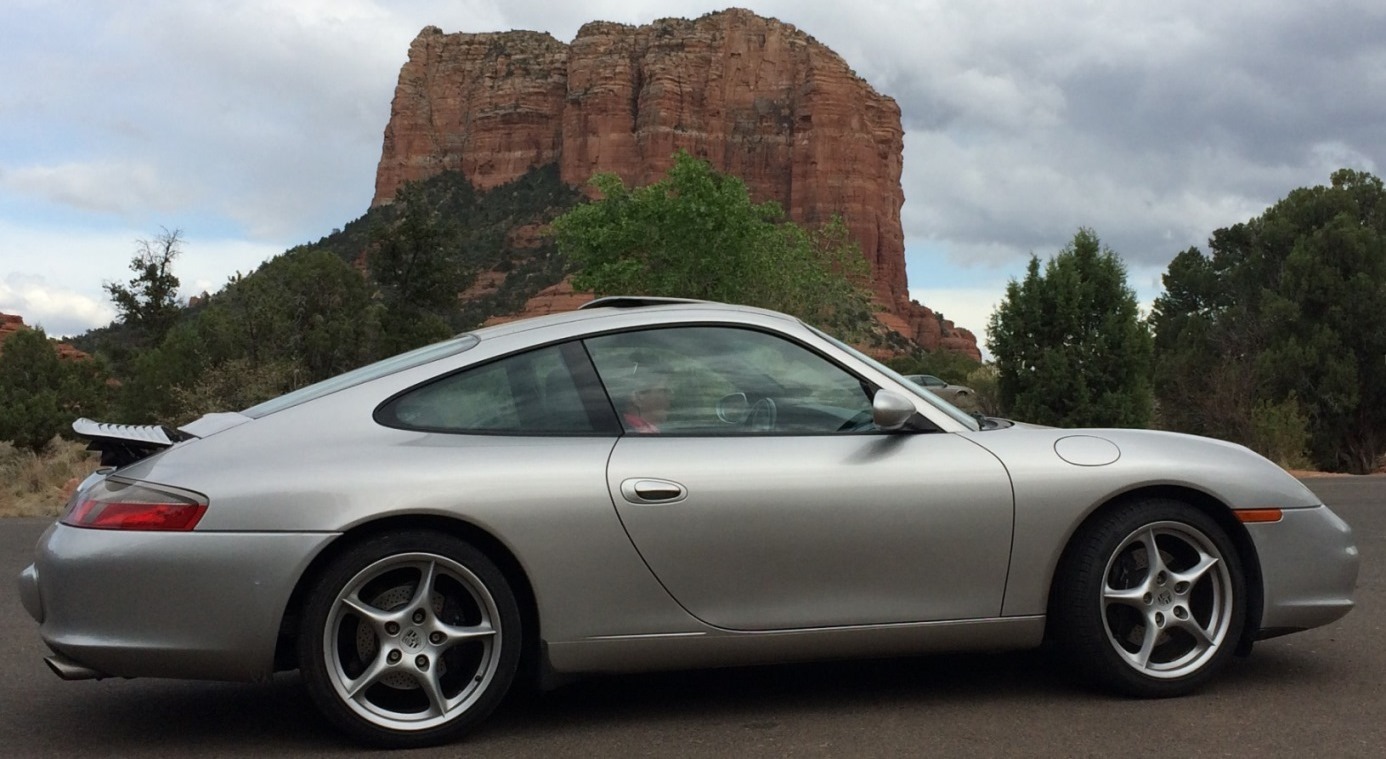
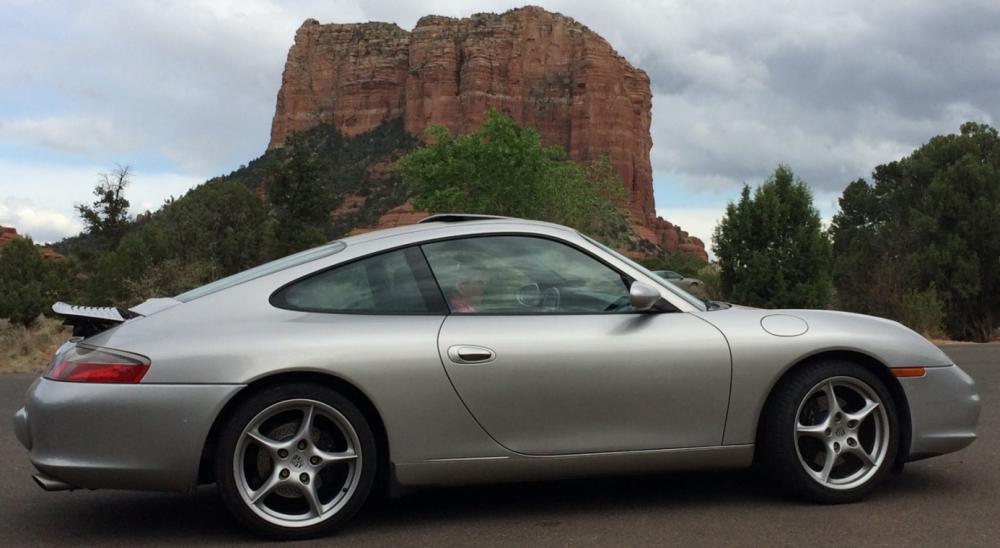
I always look forward to seeing pics of Guy's collection. I haven't done much with the Z cars lately since spring hasn't sprung here yet, but I did pick up a new toy. I bought a 996 and drove it 2000 miles home from Phoenix.
 3 points
 -
3 points
-
2 points
-
1 pointHi Y'all... Today is the day, RedBird had her Nasty oil changed. Whoot, whoot, whoot! It was thought that her drain plug was cross threaded since it wouldn't loosen, and because of that the long delay happened. But it was not cross threaded, just tightened way too much. We are so happy! I was concerned because I was hearing engine noises I thought I shouldn't hear. I finally asked Greg if he would suggest someone, and he told me about Pete that has worked on his Z. (Thank you SO MUCH Greg.) Well, if good enough to work on his Z, that was recommendation enough for me. Anyone think you can feel the car driving smoother? I swear she is. Enough so that I drove the long way home, and for a while pushed her close to 85. I'd never driven her that way, again was thinking of the gunky oil. So this was to flush the new oil thru and thru everwhere, One more milestone behind us. Thank you everyone, I have a wonderful running car thanks to you, Jai1 point
-
1 pointI'm putting in more resistance in addition to what was originally in there, so I'm actually significantly under-driving the LED's. Remember... I'm trying to decrease brightness. I'm thinking that I should never ever have to go back in there again. Not for about 50K hours anyway. My soldering technique is better than the kid in China that put them together the first time and I used enough glue to assure they won't easily twist apart like they did originally.1 point
-
1 pointI'm not sure about the very early cars, but in general, here is what is dimmable: Gauges (speedo, tach, temp/oil, volt/amp/fuel, clock) HVAC panel Radio faceplate Hazard switch green indicator And the gear shift position for the auto trans if so equipped. All the other things including cigarette lighter, glove box, ash tray, map light, high beam and turn signals, etc are non-dimmable and run full brightness at all times. If you leave at least one incandescent in the circuit, you'll get some dimming function even with the original rheostat, and the easiest one to forget about is the hazard switch.1 point
-
1 pointThat's how I have my car set up right now, using the rheostat. I get the light to adjust from about 85% - 100% brightness, but I would leave it at full brightness, because the design of the gauges just doesn't allow enough light to reach the gauge face. On my '78, the ashtray lamp and A/T selector indicator lamp are also dimmable. I can't find the glovebox lamp on my wiring diagram. I think the connectors to the ashtray lamp (in the armrest) and the trans indicator lamp are still behind the radio somewhere and you could install an incandescent bulb to use for something (like footwell lighting) to add to the rheostat capability.1 point
-
It does seem to be a little brown or something. It is a really classic color but it doesn't have the "pop" the 022 has1 point
-
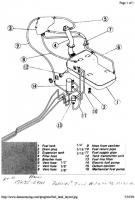
1 pointNot entirely sure how well this works, but it was already on the car when I bought it and the PO generally seemed to know what he was doing when he set the car up, so it stays. It does take in a little oil from time to time though, so it saves mess from accumulating elsewhere in the engine bay. Basically just rubber lines from the crank case and valve cover meeting at a y-pipe, then running into the catch can. I had a K&N style filter on there before, but it regularly became saturated with oil, so I switched to a fancy billet Earl's filter, which handles the job a little more tidily.
 1 point
 -
1 pointAnd as for putting a kit together... You know you won't get good brightness control unless you upgrade to a pulse width dimmer too, right? If you use the LED's with the original rheostat, you'll be pretty much full bright all the time.1 point
-
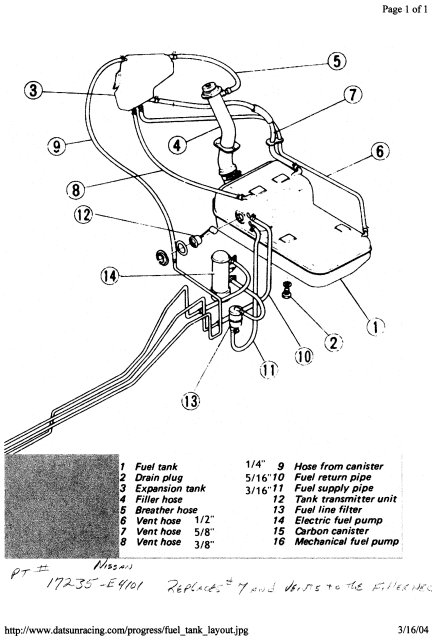
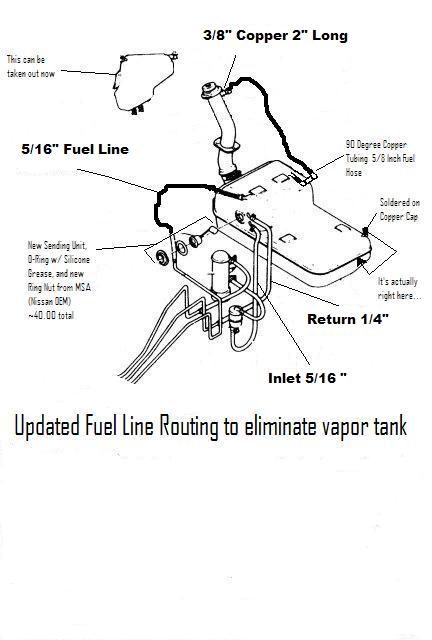
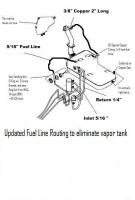
Hello everyone! I hope this article is informative to you. Please refrain from posts until I am done, approximately 10 posts. The main reason for this project for myself was because: 1. Previous owner had replaced the 90 degree hose on top of the tank with non-fuel hose and it was rotted and leaking gasoline. This HAD to be fixed one way or another. 2. Gas tank was 35 years old and, although I have never had issues with rust in the fuel lines, I know if not treated, the tank on the outside and inside would eventually rust (further). I already knew the gas tank on the outside top was rusty. 3. I enjoy working on my Z and if I can make it stronger than original and keep it looking original, I will do that! This project I think accomplishes this, and also at the same time eliminates the evaporation tank, saving about 10 pounds. I am not going to say good/bad on the evap tank, all I know is that my fuel vapors are still being burned correctly and not entering the atmosphere. I will leave it at that. Coincidentally, if anyone needs a great shape Evap tank from a 10/71 I have one! I also have a bunch of the original hose clamps (I used good ol' American style ones--new). 4. Fuel sending unit was leaking a little fuel, and the gauge has always worked oddly, and since it's original I wanted to replace all items, including connection wires, rubber o-ring, retaining ring, and sending unit. My sending unit was jimmy rigged with the wires just twisted to the sending unit posts; I wasn't able to find any of the snapping connections, so I soldiered everthing together, and made some quick releases incorporated to make it better than new. NOT original, but better than new. 5. Learn something about POR15, because I've heard a lot about it, but have never used it and I wanted to see what it was all about. Hopefully some of my tips will help somebody out there. IT DEFINITELY IS THE REAL DEAL--THIS IS A GREAT COMPANY MAKING GREAT PRODUCTS. Get one of their sales magazines, they make some great stuff to keep our Zeds working and lasting! Much thanks go to EScanlon and Beandip, both of which were instrumental in making this project become reality; if not for them, I would not have seen what POR15 could do and how it could help (in person). First 2 pictures show the before and after pictures of tank and the hoses associated. All pictures are 1024x768 reduced to under 300 kb.
 1 point
 -
1 point