All Activity
- Today
-
Odd Bolts in Balance Tube
CO, I have to apologize on what I said about the barb fitting taken off the 260z balance tube. I went back and looked at the balance tube, the fitting I have with 27 tpi did not come from the balance tube, it was in the box of parts and I assumed that's where it came from. You are right, you know your stuff. As soon as I get the brake problem solved I'll get back to my mixture adjustment and vacuum leak. Jim
-
Odd Bolts in Balance Tube
Some thoughts on the above. First, the 1/8 pipe thread specs are very similar between NPT and BPT and they would be difficult to differentiate. The 1/8 NPT spec is 27 threads per inch, while the BPT uses 28 TPI. If you are holding a fitting up to a tap and that fitting only has four or five threads on it (which would be typical), it would be very difficult to tell the difference between 27 and 28 TPI. Second, there were no (what are typically called) "barb fittings" used by Datsun on the balance tube. So if you had something like the below installed, it was a previous owner modification. This is what I think of being called a "barb fitting": So if you had something like that in the 260, it WAS probably 1/8 NPT, but it didn't come from the factory like that. ☺️
-
SN 00042 Restoration; The Older Twin
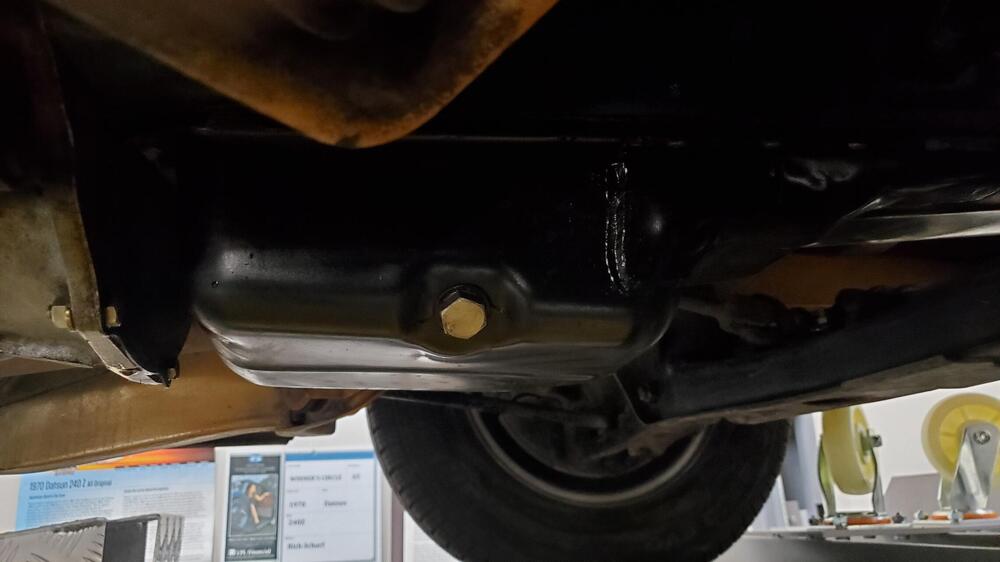
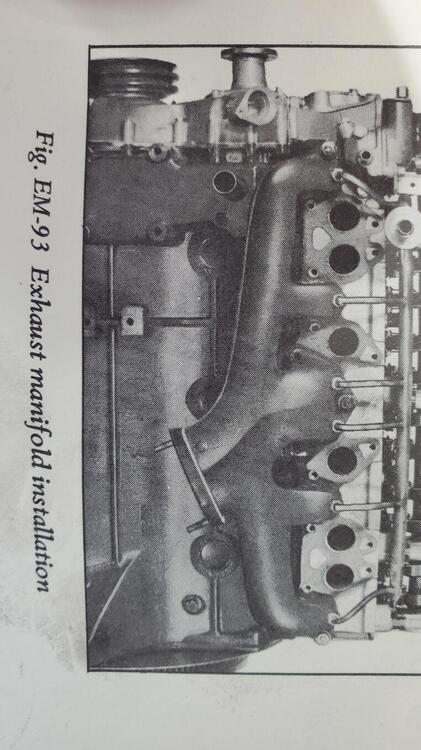
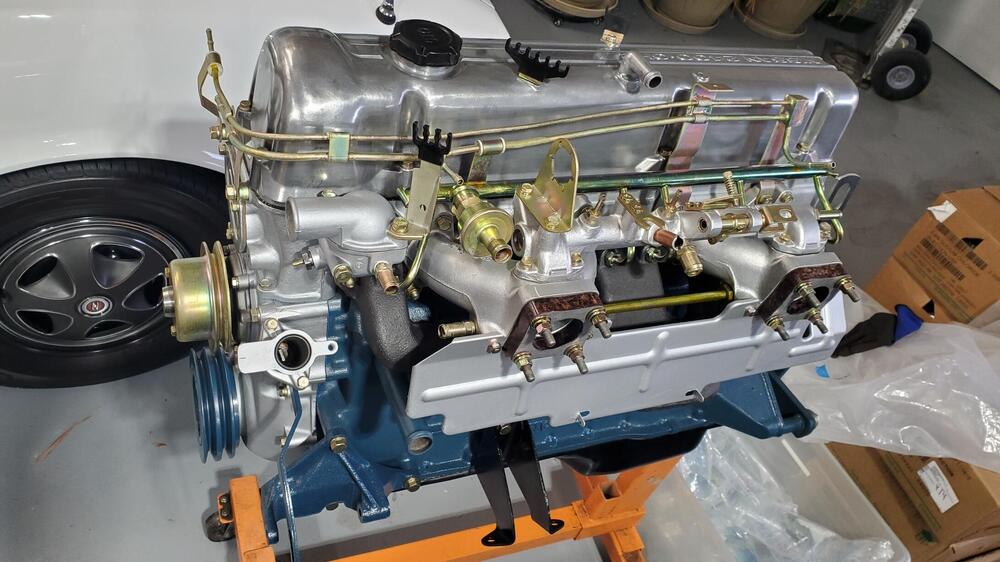
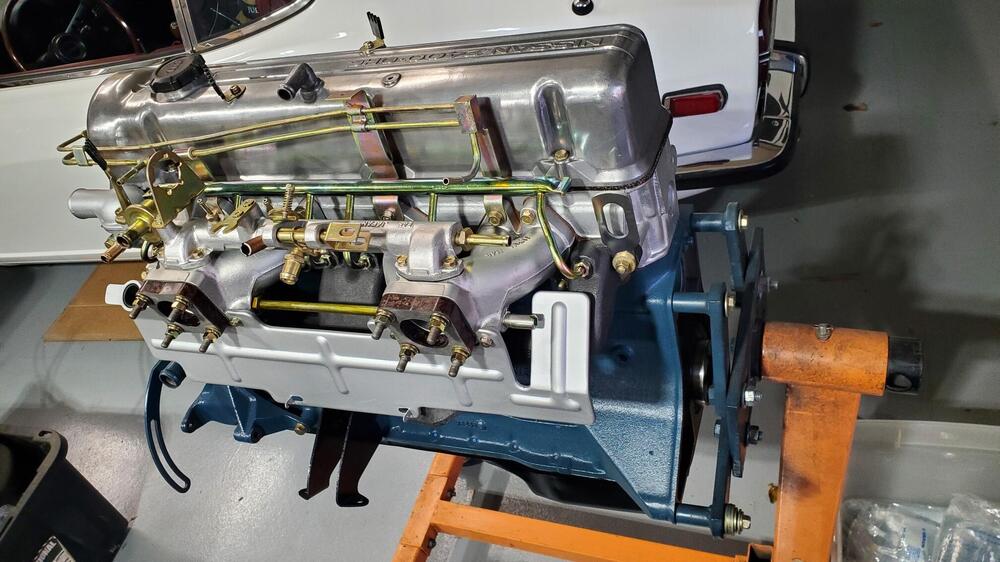
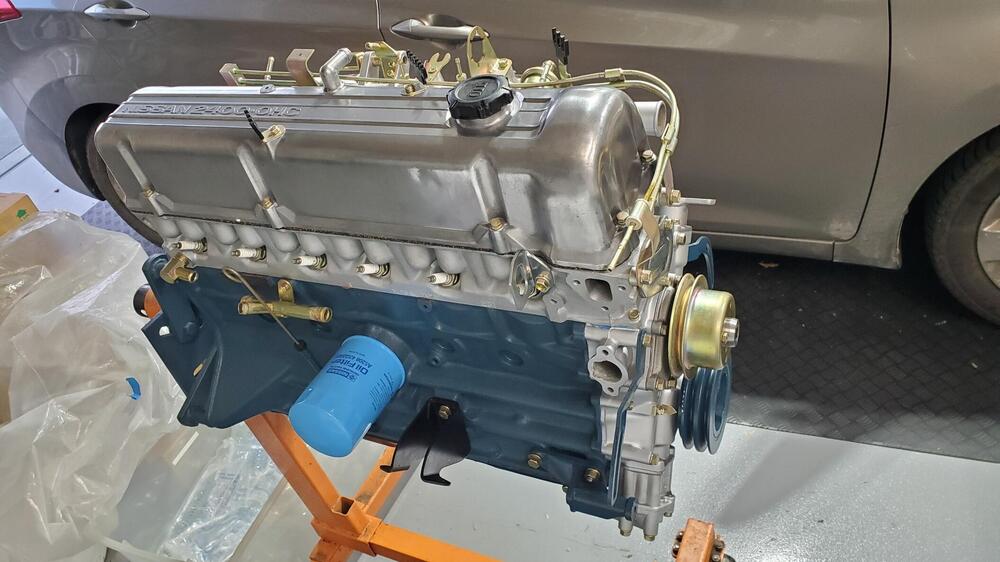
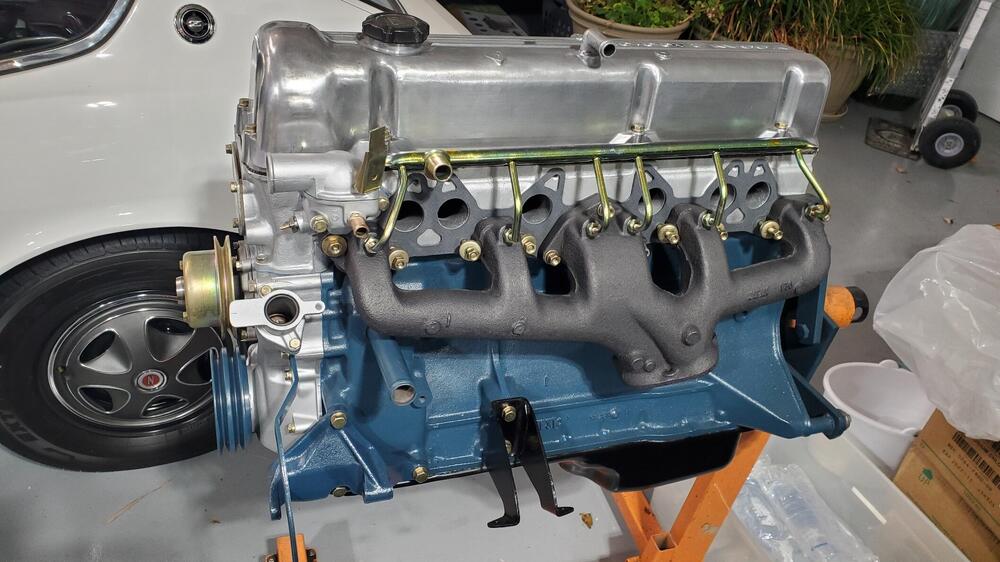
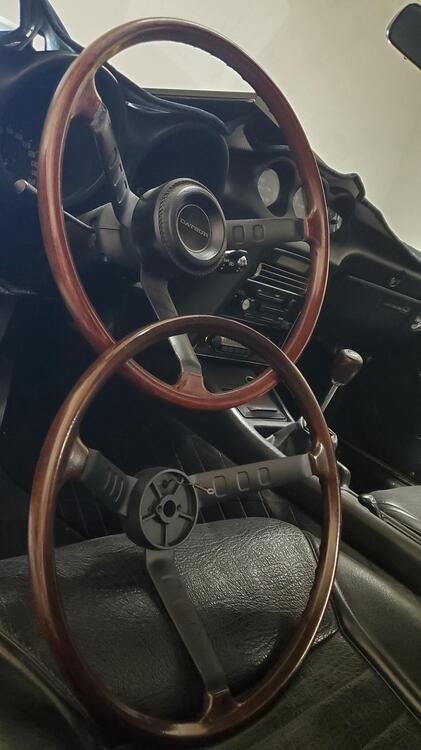
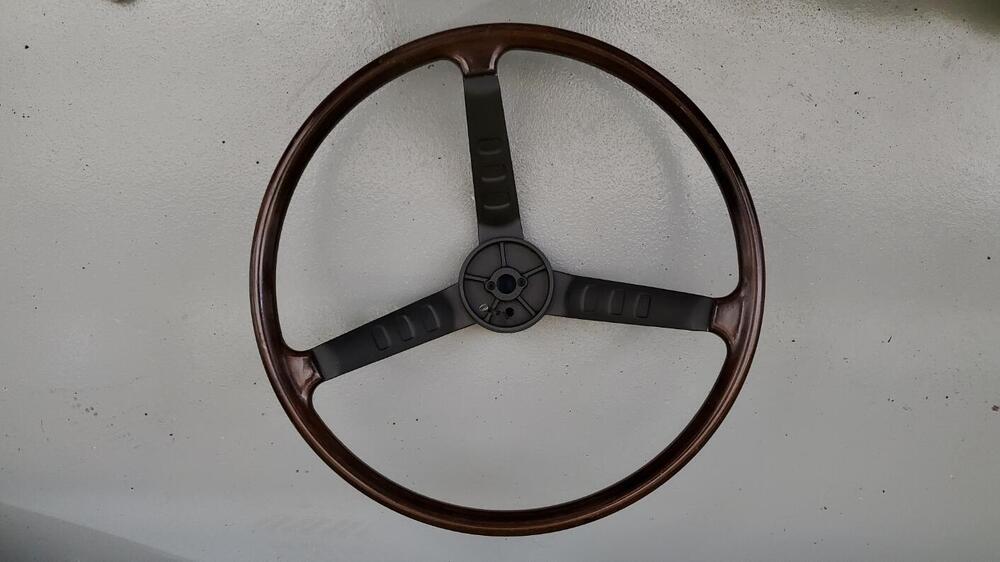
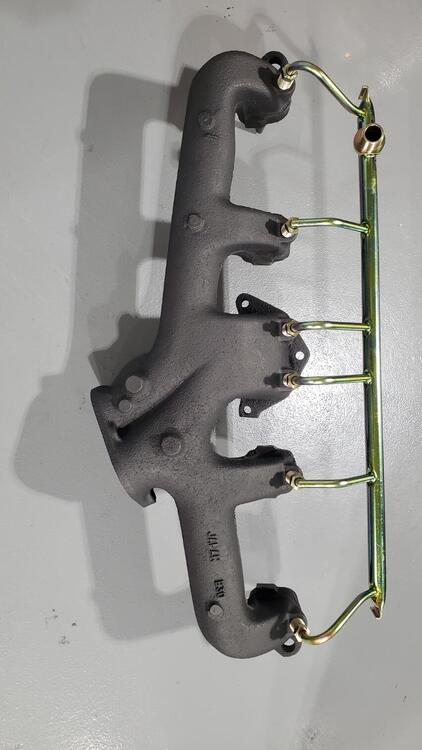
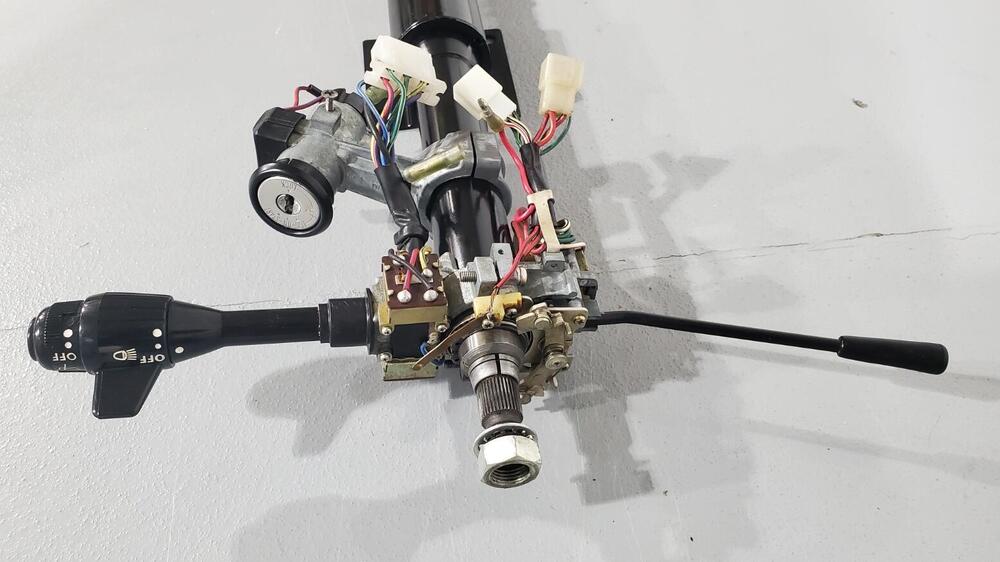
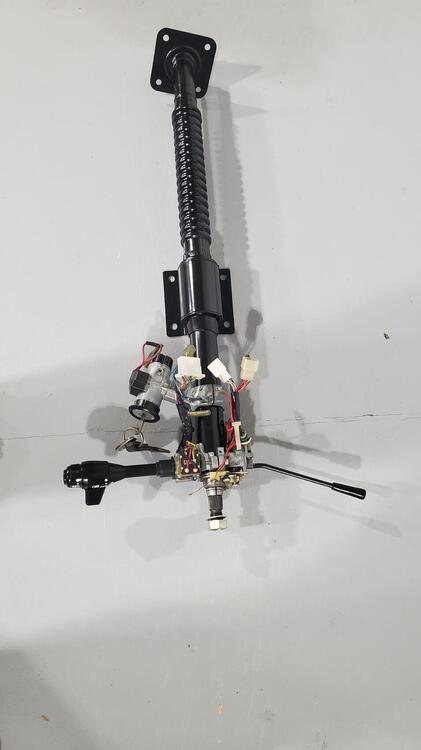
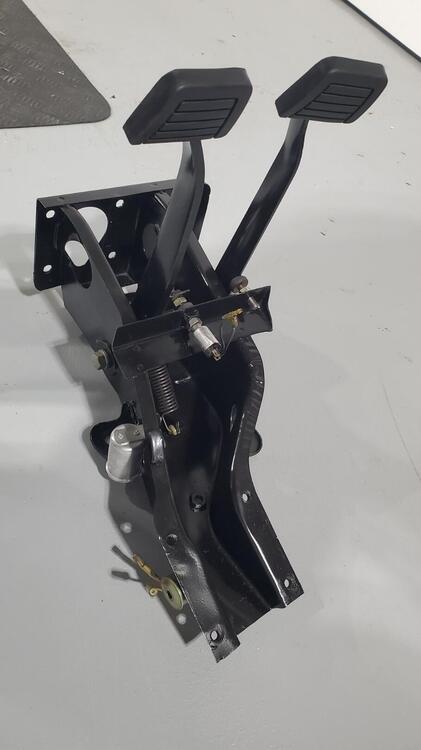
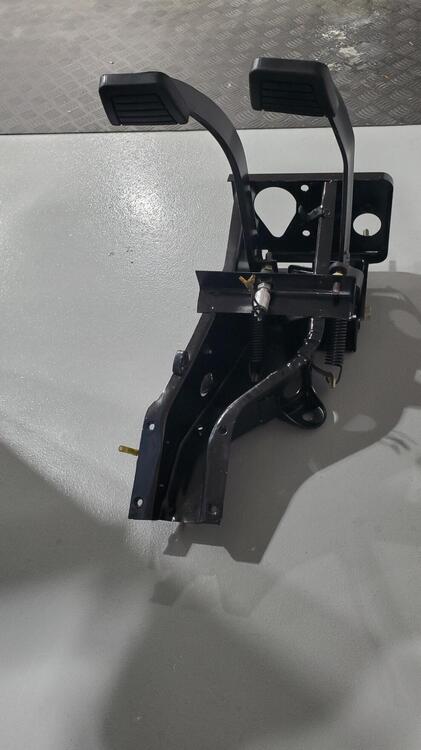
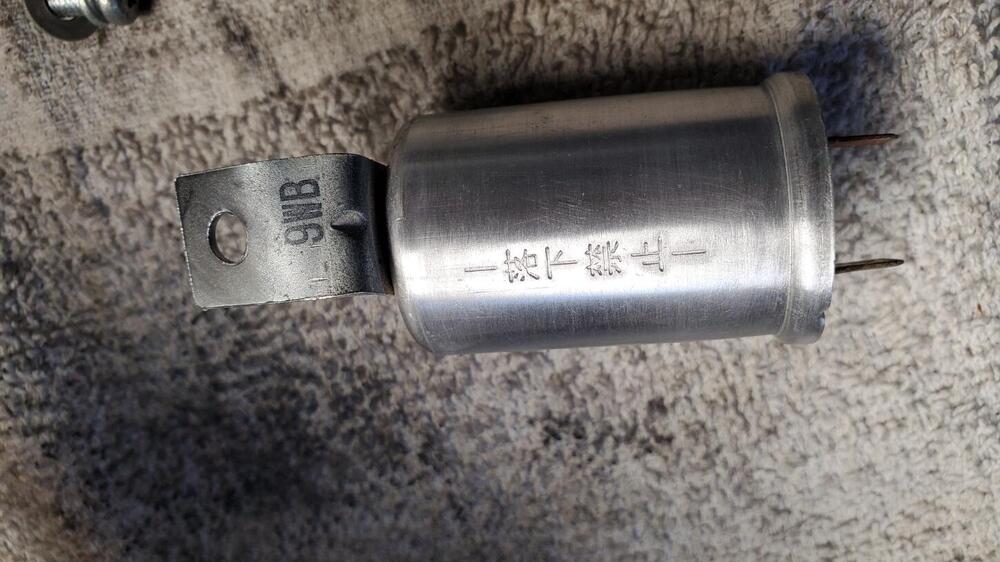
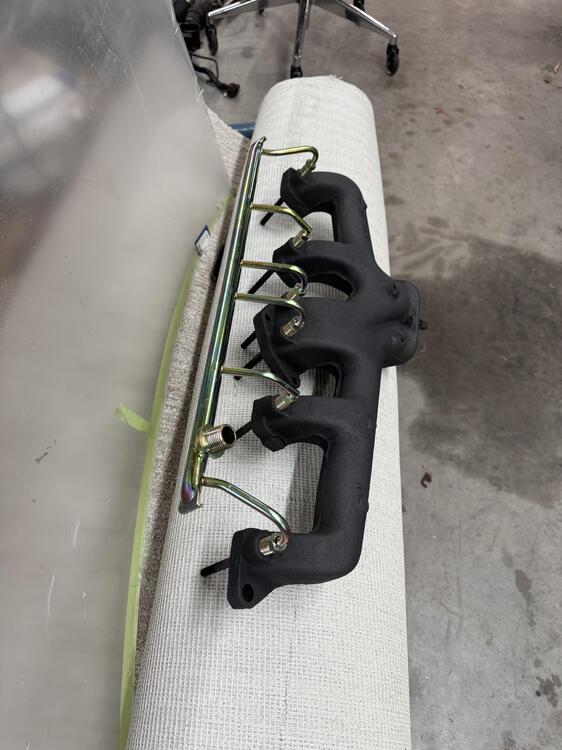
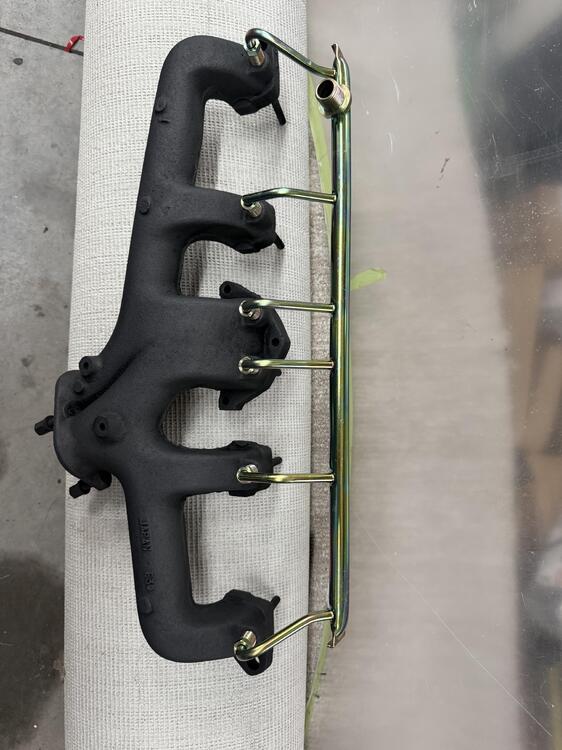
I should have a lot more updates and pics here as I have finished my summer home projects. Also, I am hoping the body and paint will be finished in the next month or two, so we should see some good progress. I appreciate all of the input here. I am always open to advice and the knowledge of those that have seen and worked on these cars in the past. Personally, I will listen to the panel of experts and then move forward with what seems to be the best direction. Also, as most of you know, I own a pretty much un-restored early 240Z that I grew up with since I was 9 years old (in the family for 55 years) , so I have a nice reference vehicle. That being said, I find it interesting that there seems to be a tendency to hold the ZCON judging in high regard. Personally, I do not have a very high regard for ZCON judges. In reality, many of them have never owned an original Z car or examined one closely. As a result, they make a number of mistakes in their judging, none of which can be contested because you do not receive the judging sheets until several months after the show. One of these days I will start a thread here titled "ZCON Judging Errors" and see who weighs in, in addition to the items I would list. A few examples are the deductions on my early Z for the weld lines on my oil pan. (FYI 0042 has the same weld lines so they will probably mark this off too). Another good example is the Franklin mint car losing points for having the 'Silver zinc' coil holder instead of 'Yellow zinc' holder. I have heard of judges insisting the original brake lines were stainless steel, the rear diff cover was bare aluminum and fuel hoses were not the 'cloth wrap' style. I am sure that I am just hitting a very small portion of the errors as I am only familiar with the cars that I have been involved with and what I can remember off the top of my head. Anyway, just had to rant a bit about the judging issue. Don't even get me started on the non-Z show judging. Regarding the Exhaust manifold finish, that is an interesting discussion. For most of my restorations, I have always consulted Les Cannady at Classic Datsun Motorsports and never questioned his advice (He was just 10 miles down the road) . If I am not mistaken, I think only his shop and Pierre Z were the only shops approved to build the Restoration Z's. Because of that, I have always used the gray powdercoat that he recommended as the default finish. However, given the current discussion and comments, sounds like there are several other options out there that might be more true to form. After looking at a number of different options and comments regarding the color, I am happy with the graphite finish option. Two of the items that lead me in that direction are pics from the Nissan engine service manual and pics of my own motor disassembly that are pictured below. Both pics show a dark cast iron finish, not a light gray finish. So, I am sticking with the graphite and will probably go with that in the future as well. I installed the exhaust manifold and intake assembly to the engine. Pics below. (Also looking for a correct rear engine hoist bracket) I finished up the steering column, and replaced the connector on the turn signal assembly. The main shaft was sanded and re-painted and all the electronics cleaned up. I re-finished the steering wheel that now looks much better, but not sure I will stick with this. The wood finish should be more redish. Problem is that the wood veneer is very thin and I am not sure how much was removed in the restoration attempt from the previous owner. Previously, the nubs on the opposite side were sanded through unfortunately. I will let it be for now, but may revisit it. The center metal portion looks good though. I cleaned up the brake and cluth pedal box. Ready for install. I have no idea what is written on that silver can below.
-
BobAtasc joined the community
-
240z 4 speed manual
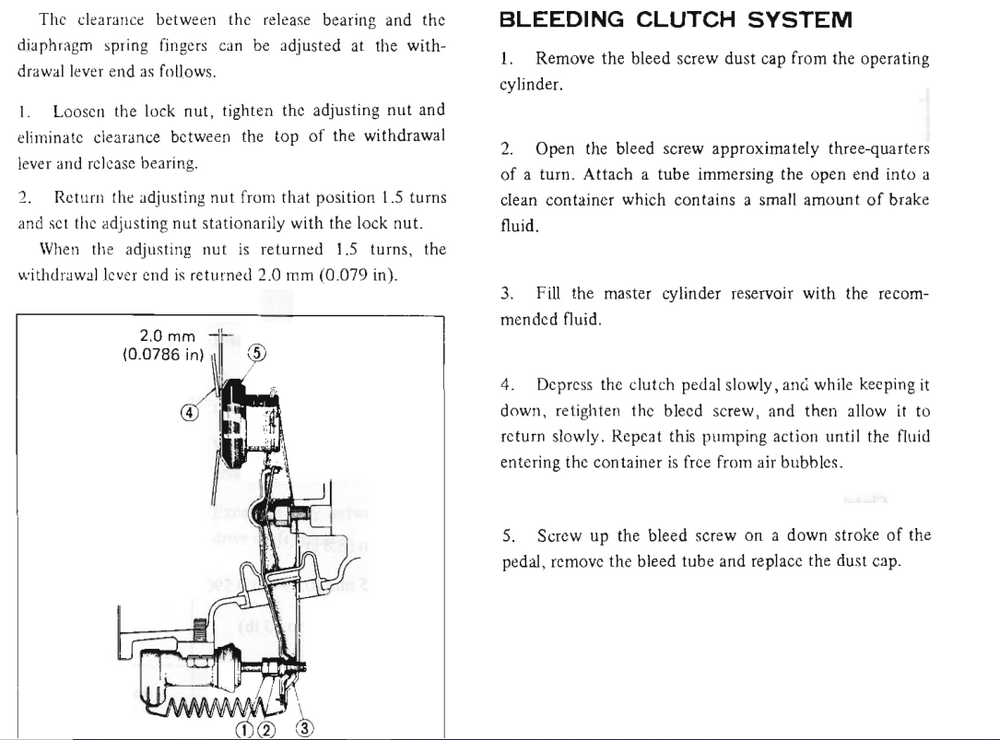
If it was mine I'd watch the play at the adjusting nut on the rod. Press the fork against the pressure plate fingers using one hand and run the nut in until you have contact with the fork with the other one. That would be zero play. Then back it off 1.5 turns. Easier to do the adjustment without the spring attached, since you'll be able to feel when you're on the pressure plate fingers. I've never done one but I think I understand what they're trying to accomplish. 2 mm of play between bearing and pressure plate when the slave clyinder is at the start of its stroke. Don't forget to check the pedal adjustment at the MC also. I've adjusted play there in the same way. Just max out the adjustment rod, being careful not to press the piston in to the MC bore, then back it off a bit. Another feel by finger job. And you don't need to remove the clevis you can turn the rod with a pair of pliers or a strong grip while everything is assembled.
- Yesterday
-
240z 4 speed manual
I missed the part on returning 1.5 turns, I’ll check that in the morning. This might be a dumb question but with the transmission in the car are you able to see the release bearing from underneath or is it more of a tighten until there is no play in the release lever and then back off 1.5 turns?
-
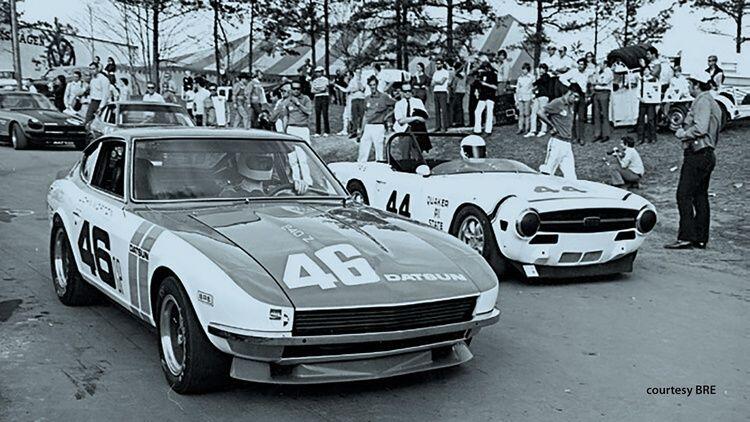
Let's show vintage racing pictures. I'll start.
-
240z 4 speed manual
Did you follow the instructions? Don't know why they show the measurement since most people will just tighten until play is gone and loosen 1.5 turns. Nobody's going to stick a feeler gauge in that hole. Don't forget to bleed.
-
Z's on BAT and other places collection
-
240z 4 speed manual
I have a 71 240z that I’ve recently got driving again. It was having some trouble going into gear so I changed out the clutch master and slave cylinder. Now the car has no problem shifting up but seems to not want to shift down easily and grinds when I try to put it in reverse. Any thoughts? I’ve attached a video that shows the slave cylinder actuating when the clutch is engaged. Do I need to adjust the slave cylinder to actuate farther? When the clutch is pressed engine goes into neutral fine. IMG_1808.mov
-
gtb2006 started following 240z 4 speed manual
-
Odd Bolts in Balance Tube
dzcg might be having seller's regret. 🤢 Everyone knows about ad blockers. They work. Good luck.
-
Odd Bolts in Balance Tube
FWIW.. subscribing to a VPN like Surfshark or Nord, etc... eliminates at least 90% of the ads.
-
A Nissan (NISMO) DOHC Kit for the L Series is Officially Available
@Derek makes something similar. https://forums.hybridz.org/topic/119641-twin-cam-head-for-the-l6-from-derek-at-datsunworks/?do=findComment&comment=1249401
-
Parts for Sale: 280zx Turbo Hood Vent
Thank you, Buddy.
-
Parts for Sale: 280zx Turbo Hood Vent
He hasn't been around lately that I'm aware of but he may get an e-mail if I "tag" him @S30Driver Good luck!
-
Odd Bolts in Balance Tube
A few dollars a month will eliminate the ads. Well worth it IMO.
-
Salvageable?
There's one on FB marketplace in Indiana for $100 that looks to be in a little better shape in my opinion. It's out of a '77.
-
Salvageable?
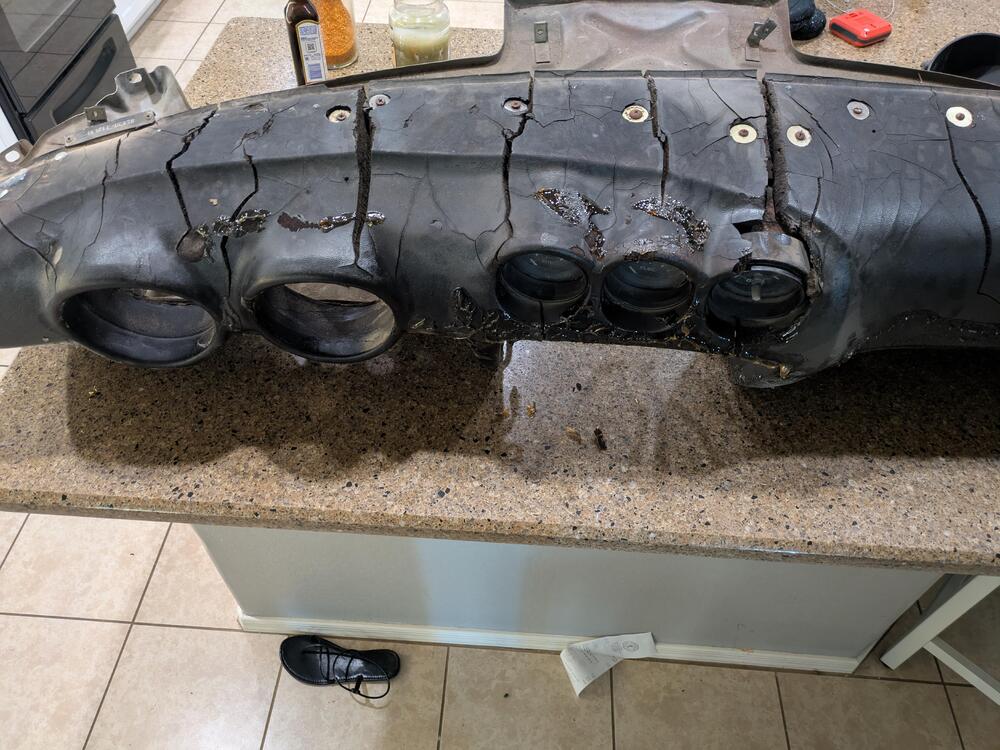
I'm pretty confident I can fill most the cracks... But one of the previous owners glued on a cover and there's a lot of rubber style glue everywhere
-
Toiletduck34 started following Salvageable?
-
A Nissan (NISMO) DOHC Kit for the L Series is Officially Available
While this is newsworthy, it may not be available outside of Japan... or if it is, will have tariffs added to its already high $25000 dollar price (plus you need more parts to make it work). https://www.theautopian.com/nismos-old-school-hot-rodding-kit-for-its-straight-six-costs-more-than-some-whole-nissans/ https://www.nismo.co.jp/products/web_catalogue/engine_parts/dohc_conversion_kit_l-series_inline-six_engine.html https://www.youtube.com/watch?v=7Es-4hnZH5Q&t https://www.youtube.com/watch?v=CFKIAe952dc
-
inline6 started following A Nissan (NISMO) DOHC Kit for the L Series is Officially Available
-
Odd Bolts in Balance Tube
oh yeah.. As i'm getting fludded with commercials and other sh*t, i'm thinking of leaving this shi tty site.. sorry but i'm verry tired of all that commercials s h i t !!
-
Odd Bolts in Balance Tube
Years ago i discovered that the plug under the fueltank.. is also NOT Metric. So don't try to put a metric in there.. If you have a old tank save those plugs as they are rare.
-
dutchzcarguy started following Odd Bolts in Balance Tube
-
Parts for Sale: 280zx Turbo Hood Vent
Is this vent still around? THX
-
borini63 started following Parts for Sale: 280zx Turbo Hood Vent
-
Dsun619 joined the community
-
Chris_Aus joined the community
-
Odd Bolts in Balance Tube
I mentioned that somebody plugged holes in the 240z balance tube. I was able to run a 1/8-27 pipe tap into the holes, there was enough metal there to get some good threads. I then sealed the holes with 1/8" brass pipe plugs (which I made) and a turn of teflon tape. What's interesting is that I took off a fitting from a 160z flat top balance tube, a barb to male taper fitting. The threads on my 27tpi pipe tap were exactly the same pitch as the fitting from the 260z balance tube. So perhaps Nissan used different thread standards? On to the next problem, vacuum leak. Jim
-
SN 00042 Restoration; The Older Twin
Too dark, black really. I looked again of my pix of the Franklin Mint manifold above and the true, not light distorted, color is at the extreme ends.
-
SN 00042 Restoration; The Older Twin
Quite the contrast in colors This is a later manifold testing colors….same material as motorman7 with tubes in place… looks much darker with contrast…
- Last week
-
Need a welder in Seattle
Hi Bob: If you are still looking for a welder I would recommend Elhot Metal Fabrication. He is working inhouse at the Shop club on 6th Ave S. He has done rust repair on 3 of my cars over the last 20 years and he is top notch. Of course with 30 years of experience, he's not cheap. Cheers, Mark G


