


All Activity
- Past hour
-
 Danhettes joined the community
 - Today
-
 Steve, I don’t think there is any confusion on the wiring. I was teasing my brother Yarb…
 -
I wonder. Do we need the Bosch brake pedal as well? I’m inclined to do this if it doesn’t require the pedal modification as well…
-
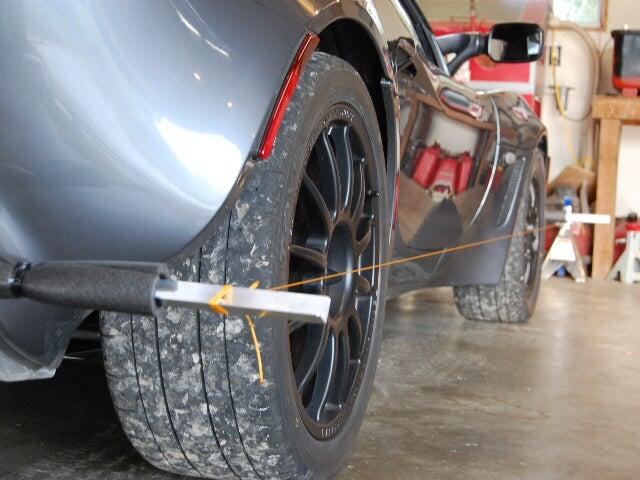
 Well, it should be no surprise really, but we are all (well most of us) carrying a little device that is more spatially aware than we ever dreamed. The humble iPhone has considerable power to know where it in space, what is level and what is plumb, which way is north and how far away you are from the sales at Best Buy…. Built in apps already expose those powers. Check out Level and Measure. I’m not going to go to great lengths to describe what I found, I’m just going to leave a web link here to an company that has developed an app and some simple hardware that I think is incredibly good at what it does. Read their story and see what you think. It’s called: Gyraline https://gyraline.com/products/the-case It consists of a little flat 3D printed plate that you mount your iPhone into. The plate has nubbins that let you place it against your wheel’s rim lip in a dependable way so you can align your phone to the rim correctly. Fire up the app, place the phone in a few key spots, push buttons, BOOM. Out spits your alignment. I will say I have their version 1, been using it for about a year, and that it works. I can get a toe in and camber measurement in literally 1 minute. All four wheels. Yeah…… I’ve compared it to “Real” alignments and it’s very very close. I just had my Mazda cx70 done at the dealership and I plan on comparing it to what they said as well. Anyway, read, study, you decide. The thing is not cheap, they know what they have. They are challenging the big guys with their marketing materials. No more string for me…..
 Wheel alignments. Never has there been such anguish in my car world surrounding a technical topic as with wheel alignments and how to do them “at home”. Strings, tape measures, levels, gadgets, do-dad’s, fads, etc etc. Check the aftermarket for all the gadgets you can buy. Nearly infinite. Never has there been such a technology gap between the professional whole-bay devouring laser powered machines you’ve seen at the dealers and auto shops and the home guy with a couple of sticks, a dirty string and a tape measure trying to get his toe-in vaguely correct. Well, I may have discovered a truly better way to do this. Read on.
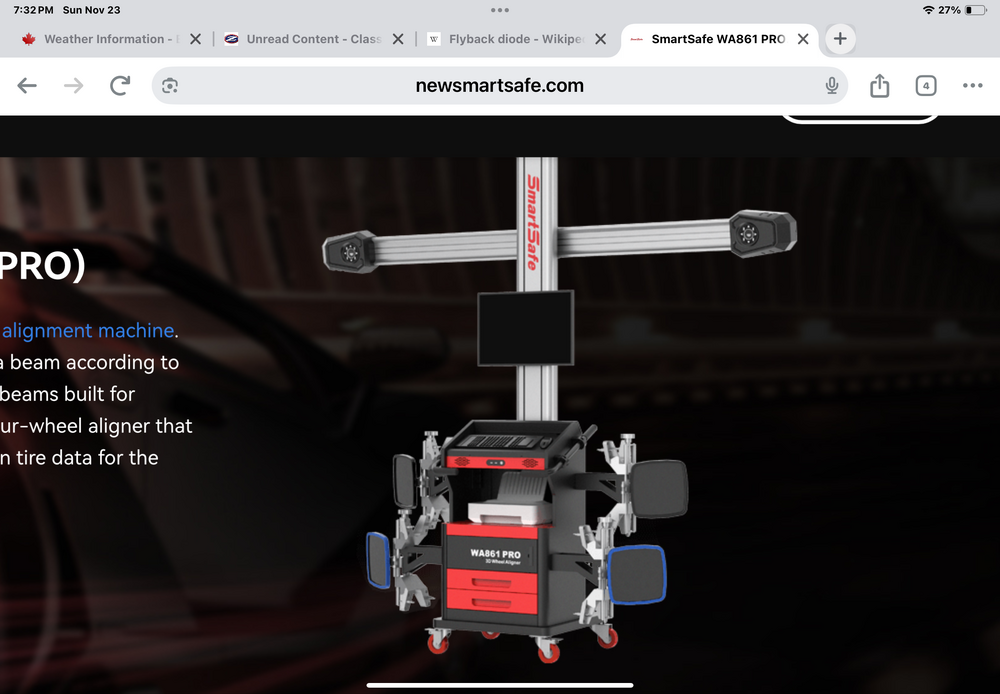
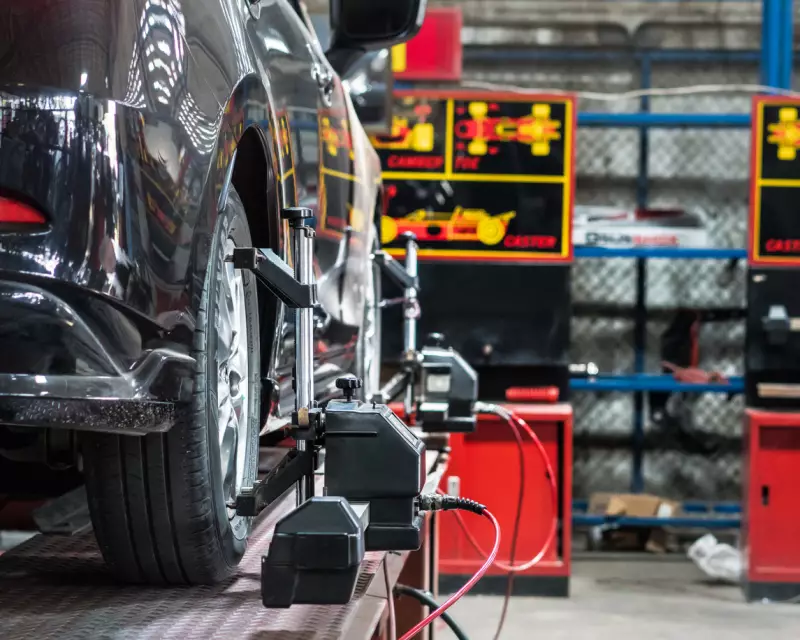
 https://en.wikipedia.org/wiki/Flyback_diode
 I recognize the beat, never saw the video or heard the whole song. A song about drugs, with a "don't do it" disclaimer in the middle. They even shout freebase, and (co)ca(i)ne... sugar. Drugs. rang dang diggity da rang da dang Of course, Eric Clapton turned an old blues song about cocaine in to a big hit. Rock and roll...
Somebody must have done this one since the thread started.
A video by an electronics teacher explaining why some relays have extra stuff inside. Uses some words I've wondered about in the past. I don't know much about it but it's kind of interesting.
I recognize the beat, never saw the video or heard the whole song. A song about drugs, with a "don't do it" disclaimer in the middle. They even shout freebase, and (co)ca(i)ne... sugar. Drugs. rang dang diggity da rang da dang Of course, Eric Clapton turned an old blues song about cocaine in to a big hit. Rock and roll...
Somebody must have done this one since the thread started.
A video by an electronics teacher explaining why some relays have extra stuff inside. Uses some words I've wondered about in the past. I don't know much about it but it's kind of interesting.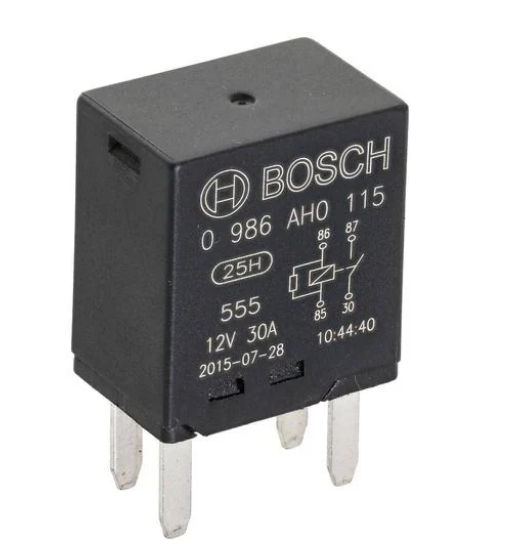

 Anybody remember this one? White Lines
- Yesterday
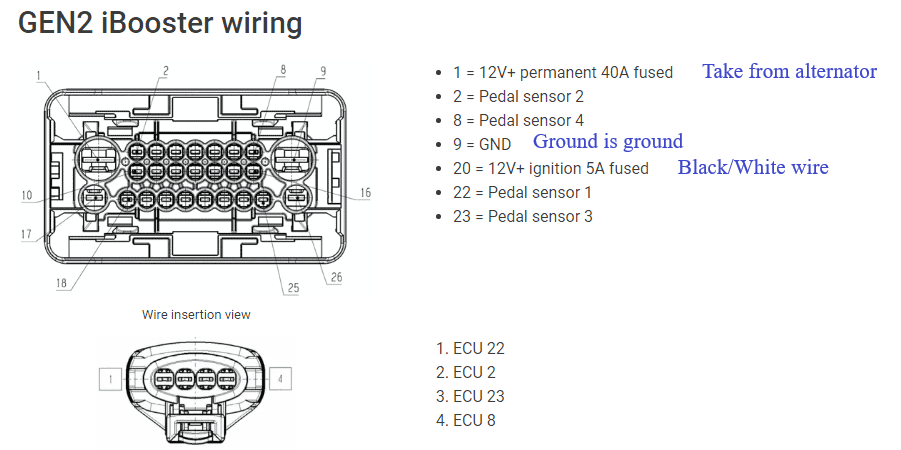
The other connections are just as listed in the drawing. The other 19 pins in the big connector are left blank. Connector kit: https://www.ebay.com/itm/267047224965?chn=ps&mkevt=1&mkcid=28&google_free_listing_action=view_item&srsltid=AfmBOooPV5nflCm9OG4z_qtvTPN_DJ6ObmXrBJVU3X80I3uMTYxV2QYHG0Y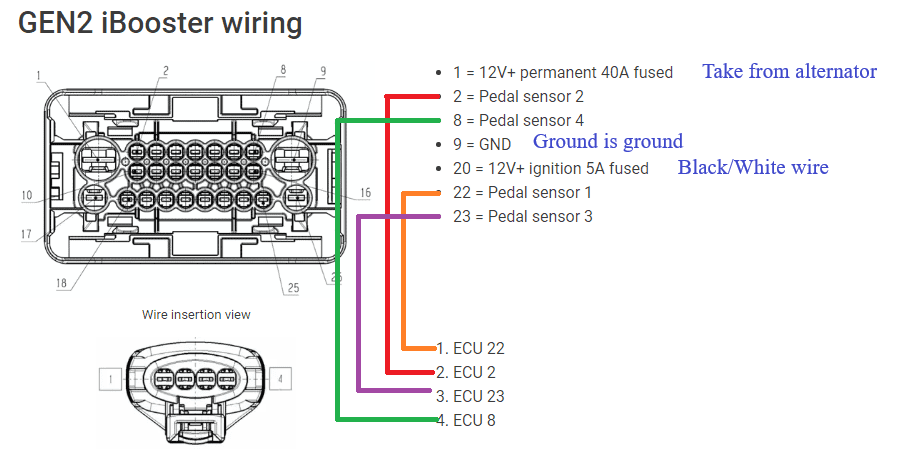
 @SteveJ Are you suggesting the sensor connections aren’t needed because abs etc is not a factor?
To share a YT video, there should be buttons underneath it, one of those being share. Click on the Share button, click on the Copy button, and paste the link in a post here. If it's an embedded video, right click on it, and choose Copy video URL I'm not sure what is causing the confusion with the wiring. It seems straightforward to me. I said to take the power for Pin 1 from the alternator so if your Z has an ammeter, it doesn't indicate a drain when the booster is boosting. The black/white wire should be the one that goes to the ballast resistor (pre 78). Am I missing something?
@SteveJ Are you suggesting the sensor connections aren’t needed because abs etc is not a factor?
To share a YT video, there should be buttons underneath it, one of those being share. Click on the Share button, click on the Copy button, and paste the link in a post here. If it's an embedded video, right click on it, and choose Copy video URL I'm not sure what is causing the confusion with the wiring. It seems straightforward to me. I said to take the power for Pin 1 from the alternator so if your Z has an ammeter, it doesn't indicate a drain when the booster is boosting. The black/white wire should be the one that goes to the ballast resistor (pre 78). Am I missing something?

 Might have to consult @SteveJ . The sensors involved is what worries me a bit.
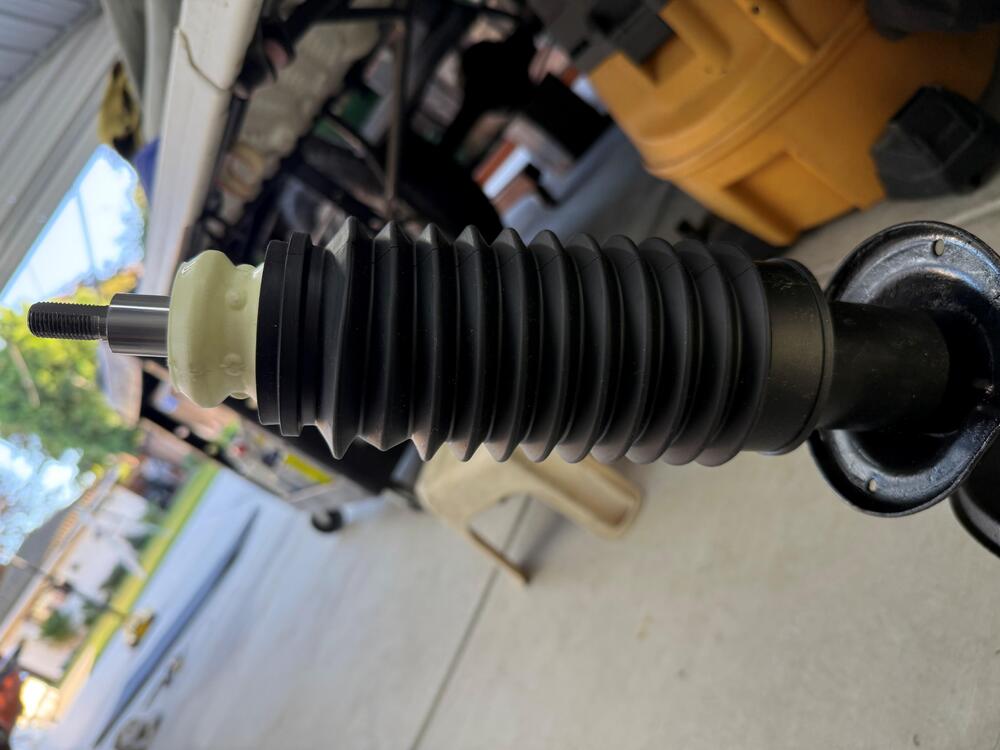
 Installing KYB Struts with KYB dust cover and bump stop. I noticed a fairly significant gap between the housing tube and the bellow. I thought it needed to be sealed to the housing. Is that true? Opinions welcome.
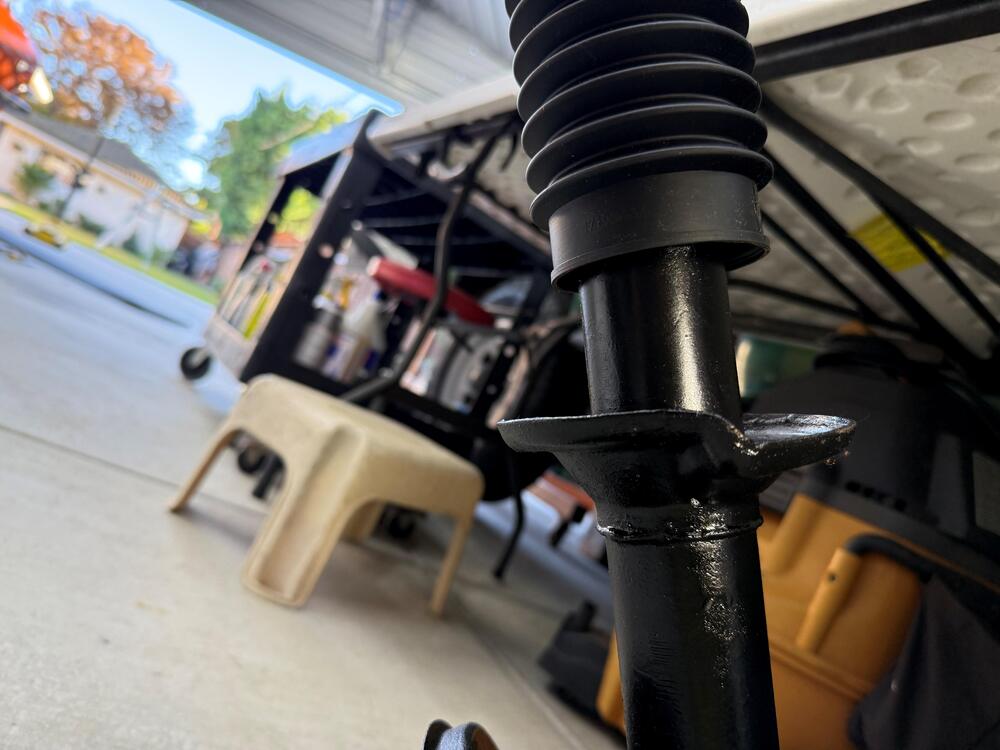
 Oops! Hurt some feelings. So, the @Yarbinator will tell us where the three wires go. One is battery +, one is battery -. But I just can’t figure out what to do with the third wire??? John? Can you help? 🤓 This thing apparently boosts effort by 500#! Which makes sense. It’s made to stop 5000# cars and trucks. You’ll hear it referred to as a Tesla booster. It’s not. Tesla buys it from Bosch. Other ICE cars were using it two years before Tesla. It would be interesting to see what this booster could do with stock calipers… physics tells us not to put too much weight close to the dancing shoes.
 And, as I noted in 2023, that NAPA kit seems to be NLA. But do your own checks. You might just get lucky and find one sitting on some NAPA shop's shelves. I just re-checked my old files. The NAPA kit (PN 6601000) was described as a 'RANCO HTR-100' rebuild kit. It was evidently applicable to the heaters used in the Studebaker Avanti, so it's conceivable that it was used across the entire Studebaker line (Lark, Hawk, etc). A little snooping around a Studebaker owners club website might turn up a lead. RANCO appears to have been swallowed up by Robertshaw. Most of the focus for the RANCO product line these days appears to be in electronic temperature controllers used for commercial/industrial heating systems. I suspect that the 'RANCO' of 2025 may be nothing more than a brand name (i.e. it's unlikely you'll find a RANCO factory with a parts desk). Just one thing, though: I see that NAPA Canada lists something called a 'URO Parts Heater Valve Repair Kit'. A little checking indicates that URO Parts is a brand marketed by A.P.A. Industries (Simi Valley, CA). A.P.A. provides aftermarket parts (incl. cooling system parts) for a variety of European, Asian and North American cars and trucks. In their website, they say: "A.P.A. specializes in accurate reproduction parts for classic vehicles, including a wide variety of items that are no longer available from the dealer". Maybe there might be some leads there. The heater control valve design used in the 510 and Z probably wasn't unique to Nissan. In fact, the Nissan heater design bears certain resemblances to the British 'Smiths' unit that was used in so many UK cars back in the 1950's and 60's. A little investigation along these lines might turn up a British shop that specializes in heater restorations and has a back room filled with obscure parts like a little rubber washer that will fit your 510's control valve. Try this link for a starting point... The MG Experience - Smith's Heater Restoration
 It was just due to the shoes pushing outward and me unable to find the gear to bring the shoes in. That said, after looking at the gear's position and the hole location in the drums, they don't line up at all so I'm not sure how people are accessing the gear...
 A friend of mine has a smoke machine, good for finding air and vacuum leaks, if my intake gasket is not leaking, I'm not going to touch it. Jim
 Could the braided hoss that goes to the brake booster have a leak? How do you check for leaks? Carb cleaner?
 What he said. Just cap off the brake booster and the transmission vacuum lines for now. As for the intake/exhaust gasket, yes they are cheap and readily available. Only problem is in order to replace it, you need to pull both the intake and the exhaust off the head. And that extra trouble step is why sometimes people try to reuse the old gasket. If yours was in good enough condition to maybe reuse, then some silicone would probably make it leak free. But if half of your old gasket peeled off the head and stayed with you original flat top intake manifolds.... Well then, you're asking for trouble.
Oh, that was no accident. That was desperation and frustration right there!! Cutting wheel on a 4 1/2 angle grinder, and then a BFH to crack through the center portion that I only cut through partway (so I didn't cut into the axle flanges).
Glad you got it off. Now that it's off, can you tell why it wouldn't come off in the first place? In the past, I've encountered a thin "unswept" ridge of friction surface on the inside of the drums that would catch the edge of the brake shoes. Is that what was happening with yours?
What he said. Just cap off the brake booster and the transmission vacuum lines for now. As for the intake/exhaust gasket, yes they are cheap and readily available. Only problem is in order to replace it, you need to pull both the intake and the exhaust off the head. And that extra trouble step is why sometimes people try to reuse the old gasket. If yours was in good enough condition to maybe reuse, then some silicone would probably make it leak free. But if half of your old gasket peeled off the head and stayed with you original flat top intake manifolds.... Well then, you're asking for trouble.
Oh, that was no accident. That was desperation and frustration right there!! Cutting wheel on a 4 1/2 angle grinder, and then a BFH to crack through the center portion that I only cut through partway (so I didn't cut into the axle flanges).
Glad you got it off. Now that it's off, can you tell why it wouldn't come off in the first place? In the past, I've encountered a thin "unswept" ridge of friction surface on the inside of the drums that would catch the edge of the brake shoes. Is that what was happening with yours?


Important Information
By using this site, you agree to our Privacy Policy and Guidelines. We have placed cookies on your device to help make this website better. You can adjust your cookie settings, otherwise we'll assume you're okay to continue.