


All Activity
- Past hour
-
 Thanks for the replies! I tested the wire to the small spade connection on the solenoid, and it is getting power. Picked up a remote starter switch and when hooked up to small spade connection on the solenoid the starter turns over nicely. The black switch I mentioned, that is under the passenger side dash is no longer clicking but still doesn't work. Is there something else I am missing? After spending a lot of time trying to trace wires and unable to accomplish anything (with my limited electrical knowledge) I'm thinking of giving up and installing a starter relay as mentioned by cgsheen1. I couldn't find anything on the forum; can anyone provide a procedure for this?
 - Today
-
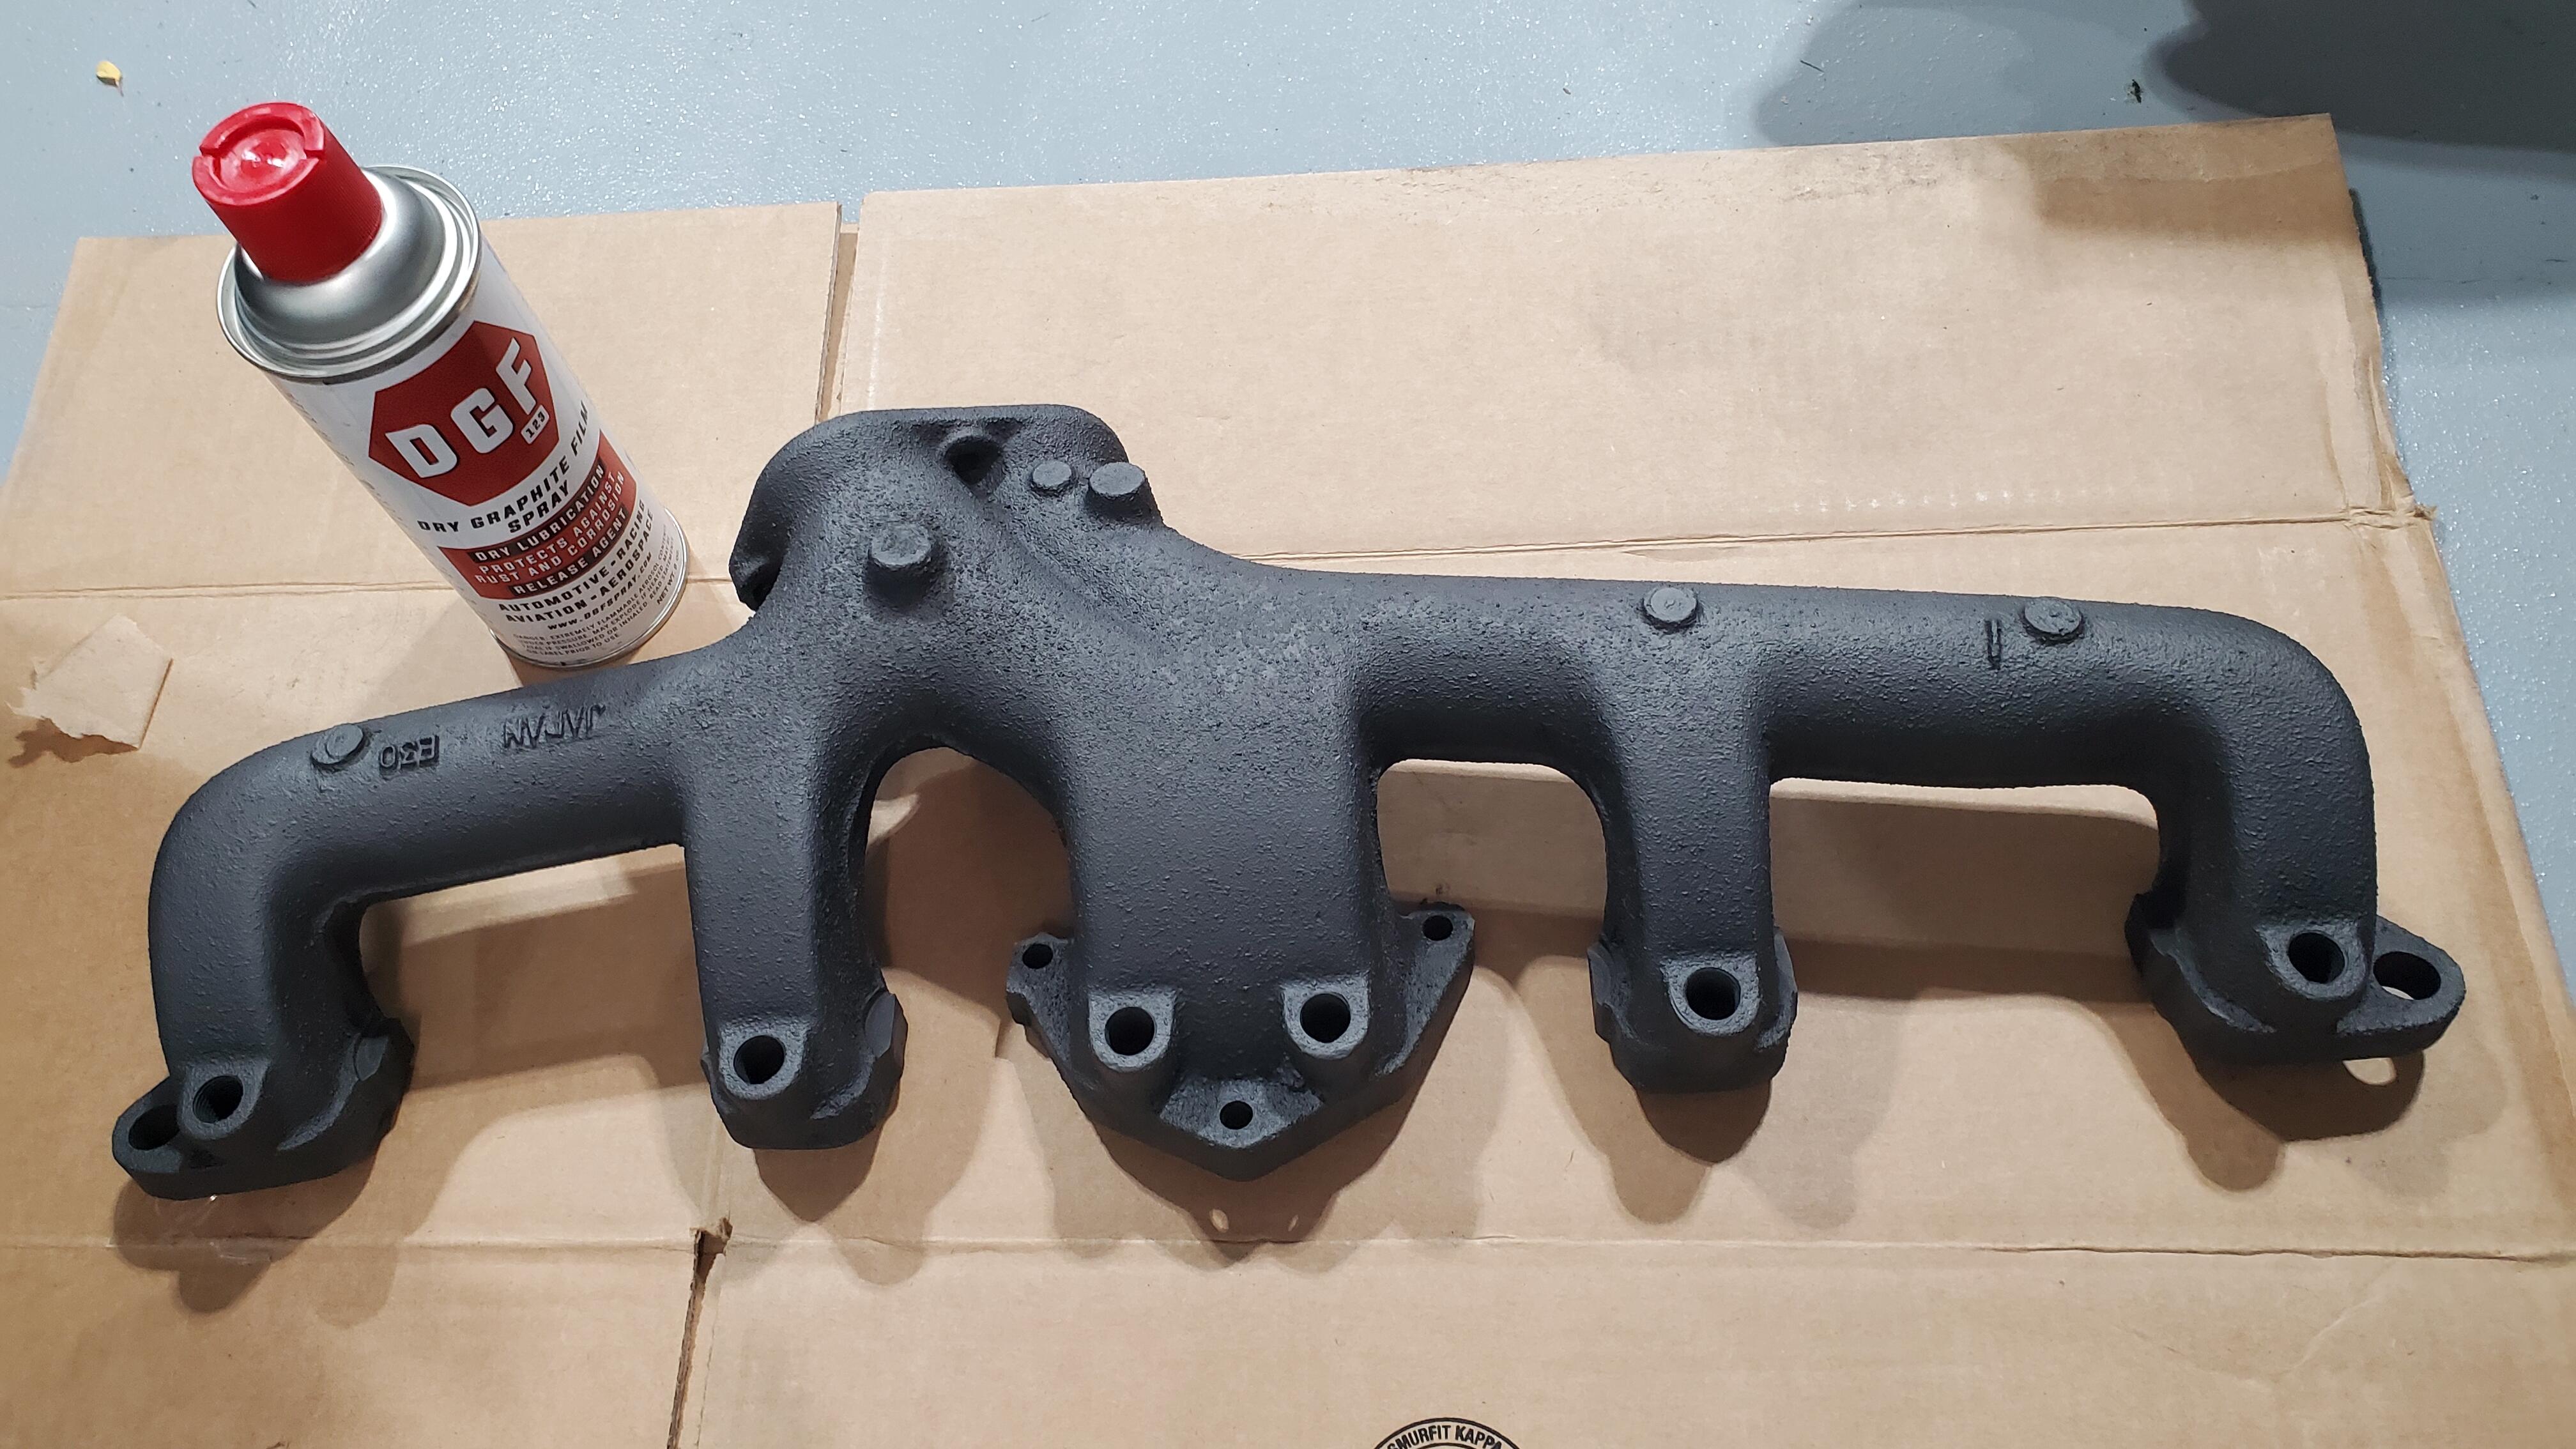
 Pretty happy with how this looks. Sprays on very nicely.
-
 What an amazing build thread! I just spent a few days reading it. What a journey! How is your car running? Did you figure out the rich carb running condition?
 -
 BOT.... btw.. Matt have you finished your car?
 -
 Thanks for information!
 -
 Haha!! Not sure. Who would I ask for confirmation? ☺️
 -
 Odd story. Purchased and restored to street form by a dentist. " : in the garage of a dentist who had purchased it in ’73 and returned it to its somewhat original street-legal state. " The show is next Sunday in Florida. Ponte Vedra Auto ShowPonte Vedra Auto ShowThe Ponte Vedra Auto Show | Sunday, November 2nd 2025. Presented by O'Steen Automotive Group, Art 'n Motion, & St. Johns Chamber of Commerce.
 - Yesterday
-
 https://www.pontevedrarecorder.com/stories/73-nissan-z-race-car-to-be-exhibited-at-ponte-vedra-auto-show,150339
-

 jsuydam joined the community
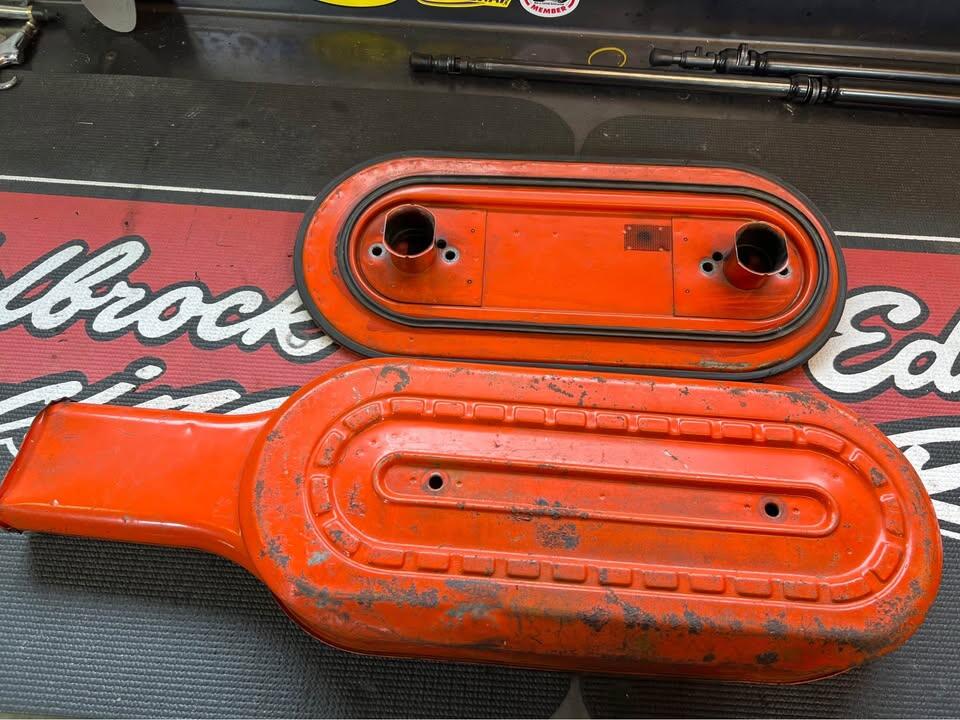
 With that air filter the way it is I wonder where the float bowl vents went? The one that's there should be connected to the hose from the valve cover.
- Last week
 @siteunseen Our “Forum Librarian Guru” Strikes again!!
 I just ordered a pair from Z, I've used silicon rubber hoses before for other gas-related things, they would eventually get soft, but I'm told their's is made for gasoline. I'll do a visual again, looking for vacuum leaks can be difficult, if the engine was running one can use propane that gets sucked up from the leaks and you can hear it in the engine, but this guy won't start yet, oh forgot, need to use new fuel to be supplied directly to the fuel bowls. I'll keep you posted, hopefully getting close. Jim
 I agree, that's what I used on all the vinyl and firewall pads. I don't know why I didn't use it on the weatherstrip......I was amazed after 50 years, it just peeled right up and didn't harm the vinyl in any way, still pliable.
I did clean it! First with alcohol, then the 2nd attempt I even roughed up the surface of the weatherstrip with sandpaper, then cleaned it. I even bought another small tube of the 3M super weatherstrip adhesive from Walmart and got the same results. The fact that the adhesive adhered to the paint so good, made me think that it was still good. The hatch weatherstrip I got from Australia had a totally different feel to it. The rubber was more "sticky". It required 100% talc powder to be applied to it after it was glued on, so the painted hatch surface would slide over it when you closed the hatch, until the seal bedded in.
I agree, that's what I used on all the vinyl and firewall pads. I don't know why I didn't use it on the weatherstrip......I was amazed after 50 years, it just peeled right up and didn't harm the vinyl in any way, still pliable.
I did clean it! First with alcohol, then the 2nd attempt I even roughed up the surface of the weatherstrip with sandpaper, then cleaned it. I even bought another small tube of the 3M super weatherstrip adhesive from Walmart and got the same results. The fact that the adhesive adhered to the paint so good, made me think that it was still good. The hatch weatherstrip I got from Australia had a totally different feel to it. The rubber was more "sticky". It required 100% talc powder to be applied to it after it was glued on, so the painted hatch surface would slide over it when you closed the hatch, until the seal bedded in. ZTherapy uses silicone nozzle hoses.
 Thanks for the link! The one I pictured appears to be the same as the one on the far right of the three pictured by 26th-z. It only has one "hose barb" connection. Thanks Again!
 Geo26 joined the community
Thanks, Parman. I will be heading out to Menards to get the automotive Goop tube. I don't know what 3M was thinking designing a glue which is black. Clear one makes perfect sense.
I really like this stuff for all adhesive needs: 1 Gal. DAP Weldwood HHR Contact Cement You may have to clean some weatherstrip of its "mold release" before trying to glue it in. A little lacquer thinner on a rag and a few wipes on the surface to be glued is all that is needed. For door weather strips, I use an acid brush, start in the sharp corner at the top, back of the door. You can do it in sections about 18 inches long. Just apply adhesive to both surfaces, wait about 3 minutes, and then press and stick. It is going nowhere after that.
Geo26 joined the community
Thanks, Parman. I will be heading out to Menards to get the automotive Goop tube. I don't know what 3M was thinking designing a glue which is black. Clear one makes perfect sense.
I really like this stuff for all adhesive needs: 1 Gal. DAP Weldwood HHR Contact Cement You may have to clean some weatherstrip of its "mold release" before trying to glue it in. A little lacquer thinner on a rag and a few wipes on the surface to be glued is all that is needed. For door weather strips, I use an acid brush, start in the sharp corner at the top, back of the door. You can do it in sections about 18 inches long. Just apply adhesive to both surfaces, wait about 3 minutes, and then press and stick. It is going nowhere after that. Did you clean the bonding surface of the weatherstrip samples with alcohol (or similar) before applying the adhesive?
Spot The Bot!! ☺️
Did you clean the bonding surface of the weatherstrip samples with alcohol (or similar) before applying the adhesive?
Spot The Bot!! ☺️ tom25 joined the community
Hi, I used the automotive version. I cut that precision weatherstrip into short pieces, and did some tests gluing them to a painted license plate. I tried permatex, 3M, and goop. Clamped them down, let sit overnight, the goop was the winner. It could be something in the rubber weatherstrip itself, like silicone or something that did not adhere to the 3M. Or, my tube of 3M was old....but the 3M super weatherstrip adhesive sure adhered to the paint good, I mean really really good, but absolutely did not stick to the rubber. I should have known, the same thing happened to me 6 months earlier when I glued an aftermarket door weatherstrip seal to a 57 ford pickup door I was working on. It fell off the next morning 😆.
Can anyone confirm that this is air filter assembly is from an early 240Z? It looks similar, but is missing some of the inlet/outlet barbs that I think it should have? Could it be from a different Datsun model altogether? I'm looking to purchase these, but want to make sure they are for a Z before pulling the trigger. Thanks in advance for any input!
tom25 joined the community
Hi, I used the automotive version. I cut that precision weatherstrip into short pieces, and did some tests gluing them to a painted license plate. I tried permatex, 3M, and goop. Clamped them down, let sit overnight, the goop was the winner. It could be something in the rubber weatherstrip itself, like silicone or something that did not adhere to the 3M. Or, my tube of 3M was old....but the 3M super weatherstrip adhesive sure adhered to the paint good, I mean really really good, but absolutely did not stick to the rubber. I should have known, the same thing happened to me 6 months earlier when I glued an aftermarket door weatherstrip seal to a 57 ford pickup door I was working on. It fell off the next morning 😆.
Can anyone confirm that this is air filter assembly is from an early 240Z? It looks similar, but is missing some of the inlet/outlet barbs that I think it should have? Could it be from a different Datsun model altogether? I'm looking to purchase these, but want to make sure they are for a Z before pulling the trigger. Thanks in advance for any input!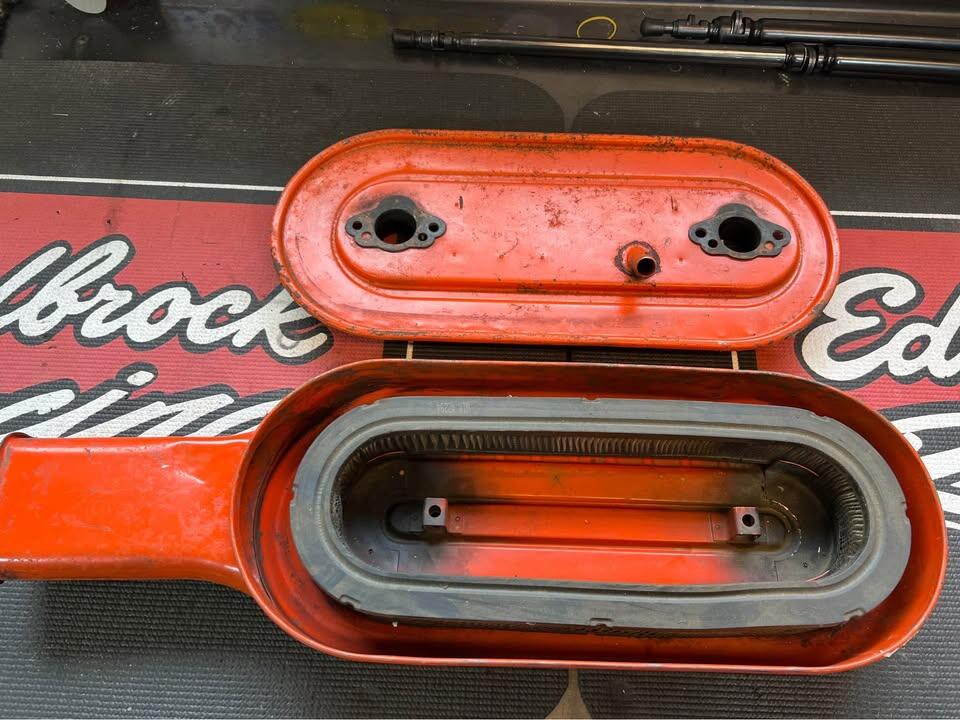
 In all seriousness, I alllllllmost flagged him earlier today before he even ever posted. I think there was about an hour between him joining the forum and his first post. I should have followed my gut and done it. Would have looked like a master bot—spotter. Bonus points for those who see what I did there. Hahaha!


Important Information
By using this site, you agree to our Privacy Policy and Guidelines. We have placed cookies on your device to help make this website better. You can adjust your cookie settings, otherwise we'll assume you're okay to continue.
Account
Search
Configure browser push notifications
Chrome (Android)
- Tap the lock icon next to the address bar.
- Tap Permissions → Notifications.
- Adjust your preference.
Chrome (Desktop)
- Click the padlock icon in the address bar.
- Select Site settings.
- Find Notifications and adjust your preference.
Safari (iOS 16.4+)
- Ensure the site is installed via Add to Home Screen.
- Open Settings App → Notifications.
- Find your app name and adjust your preference.
Safari (macOS)
- Go to Safari → Preferences.
- Click the Websites tab.
- Select Notifications in the sidebar.
- Find this website and adjust your preference.
Edge (Android)
- Tap the lock icon next to the address bar.
- Tap Permissions.
- Find Notifications and adjust your preference.
Edge (Desktop)
- Click the padlock icon in the address bar.
- Click Permissions for this site.
- Find Notifications and adjust your preference.
Firefox (Android)
- Go to Settings → Site permissions.
- Tap Notifications.
- Find this site in the list and adjust your preference.
Firefox (Desktop)
- Open Firefox Settings.
- Search for Notifications.
- Find this site in the list and adjust your preference.