


All Activity
- Past hour
-
 Fresh air intakes for the vents controlled by pull/push knobs under the dash near the driver and passenger kick panels.
 - Today
-
 240 or 260 manual wanted to trade for 1969 Plymouth GTX 440 4-speed
 -
-
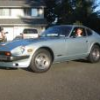
 I'm really impressed with the carburetor set-up. That's a very valuable car, and with some provenance, perhaps? That should be worth at least one year of med school!
 - Yesterday
-
 Delay is due to paperwork-related logistics issues. A lot of my own work involves international shipments, so I have some sympathy when I hear of paperwork going missing in transit. And as someone who mistook a movement docket for a 'Factory Build Sheet', I trust you'll have just as much sympathy for 'Lost In Transit' as 'Lost In Translation'...
 -
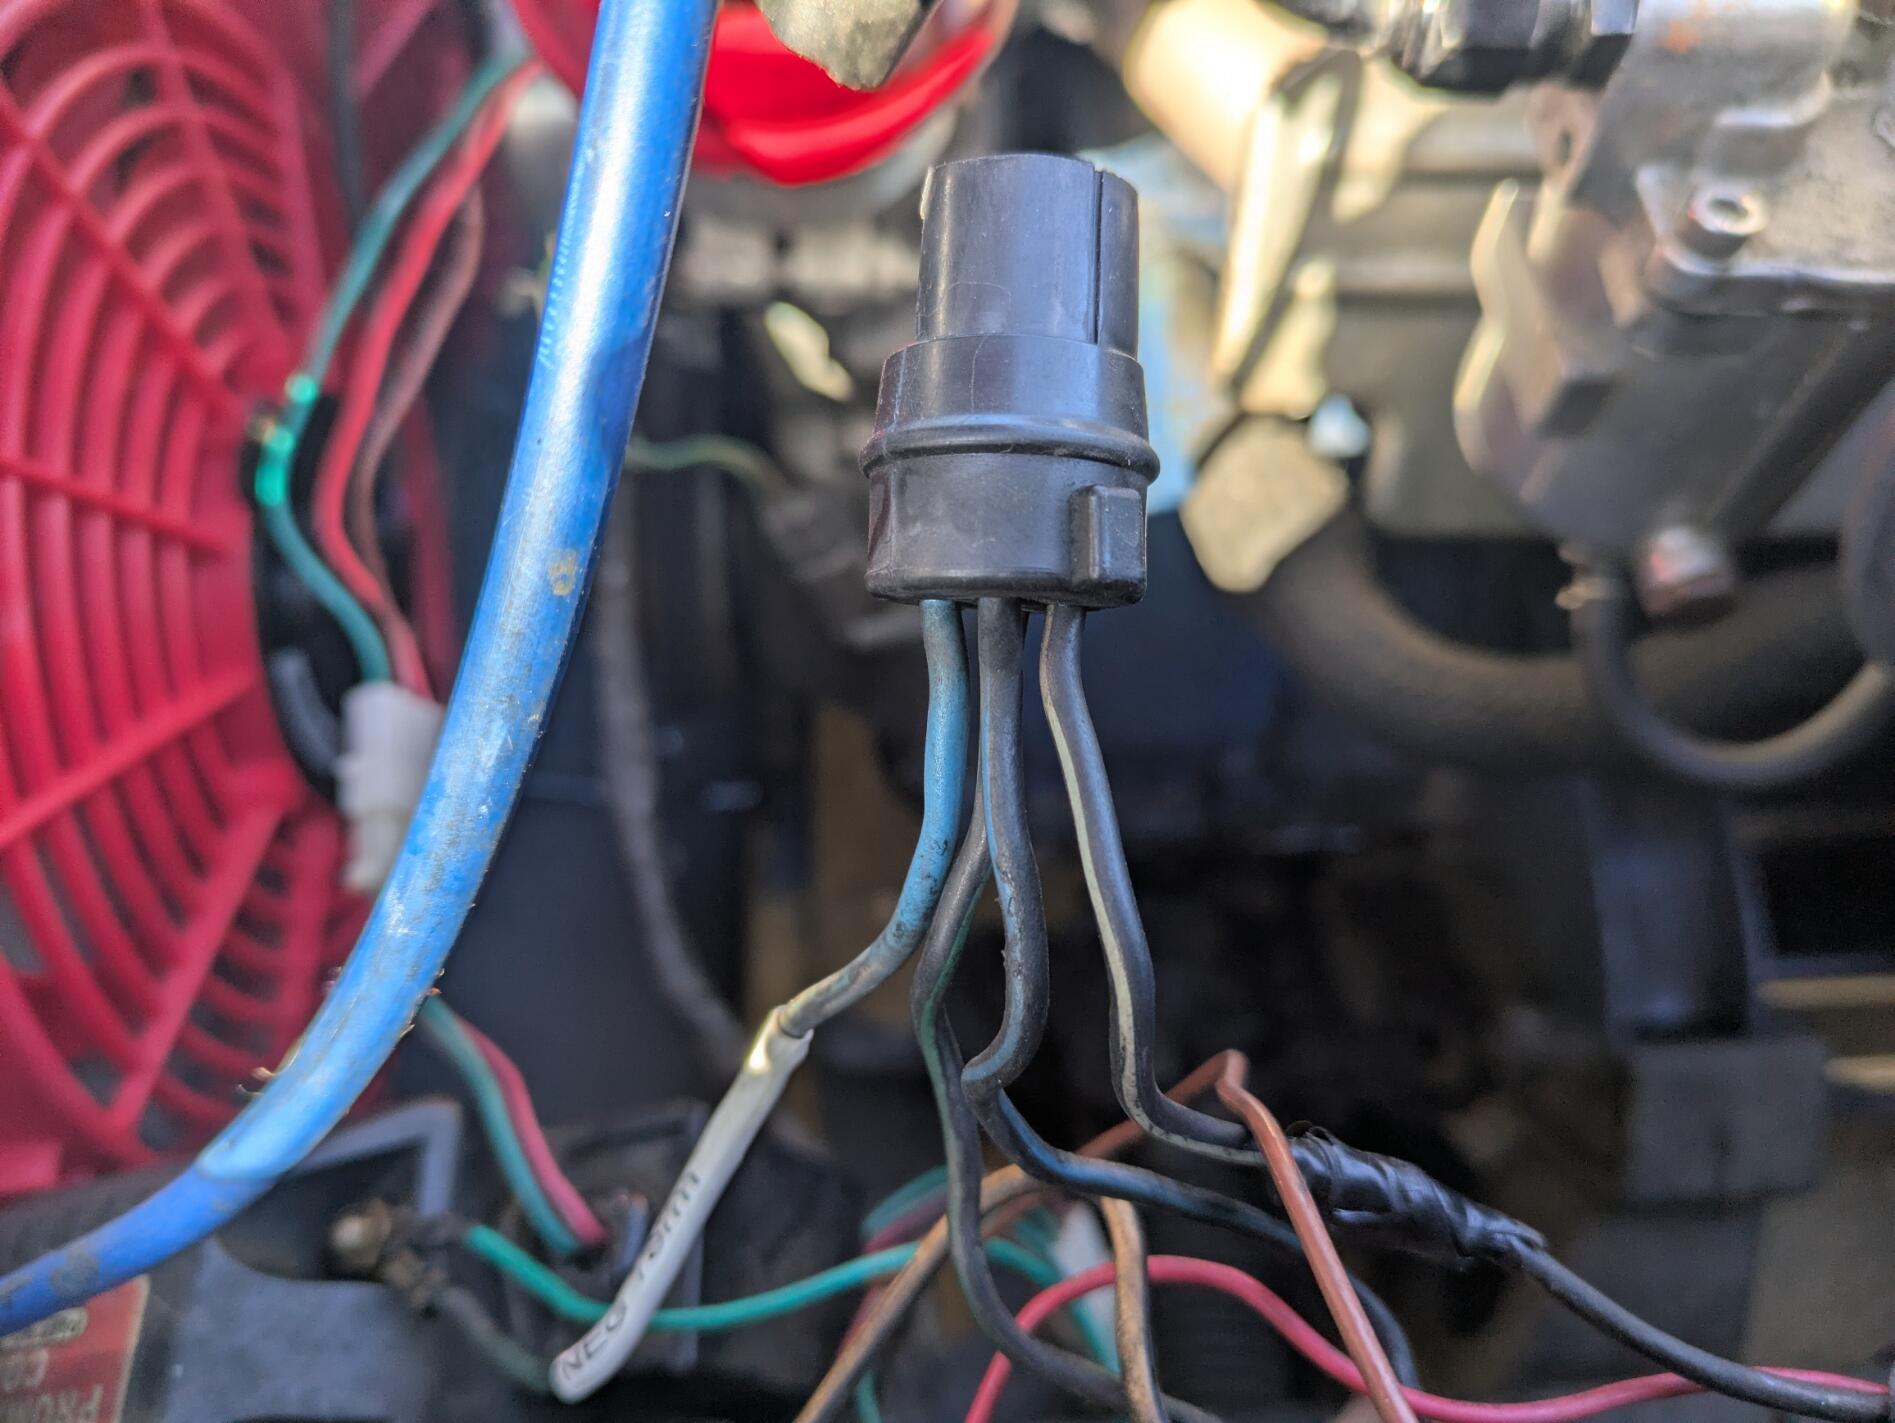
 Light. Console. I think G/W is clearance, gauge lighting, and etc. but I'll look... 72_dash_2.pdf The 240Z dash I have has that same connector - the entire dash and harness is unconnected so... But - the G/W on that connector traces to the small 6-pin Body Harness connector shown in that .pdf - G/W in the upper right corner of the connector. The body harness G/W goes back to the clearance lighting in the tail. Trace that Red - I think it may well go to the front (engine bay harness) and the two hidden Fog Lamp connectors in the harness as it spans the radiator core support. And as you know the US model did not come with a Fog Lamp Switch from the factory so that would be an unused connector if what I said is true. Oh, if you look at the first wiring diagram in the FSM (not the "US and Canada Only" schematic) you'll see Fog Lamps and the connector for the Fog Lamp Switch. BUT, it'll confuse you because it shows a R and an RG wire to the switch. If you trace the RG, you'll see that it "tees" off a GW. So maybe the schematic doesn't follow the harness build exactly or vise-versa...
 -
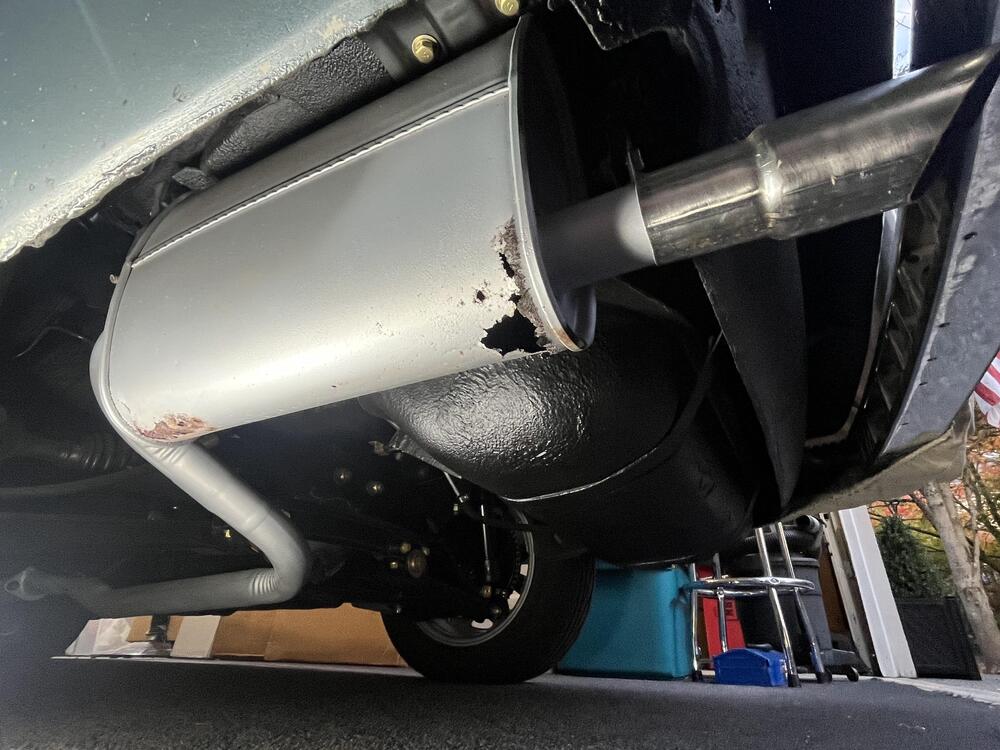
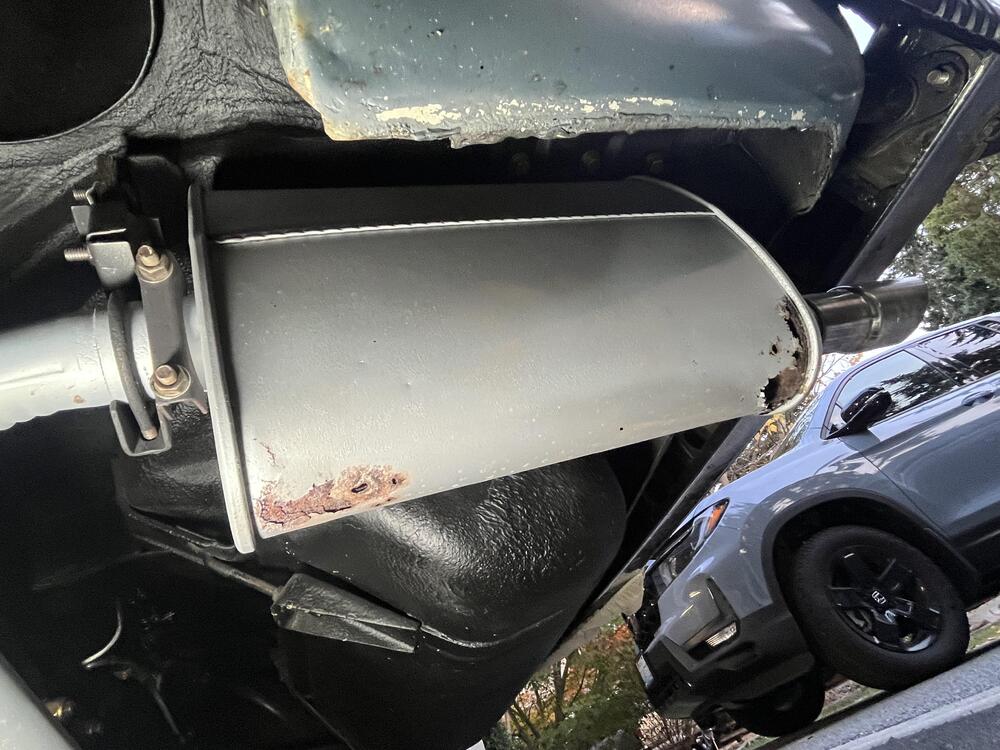
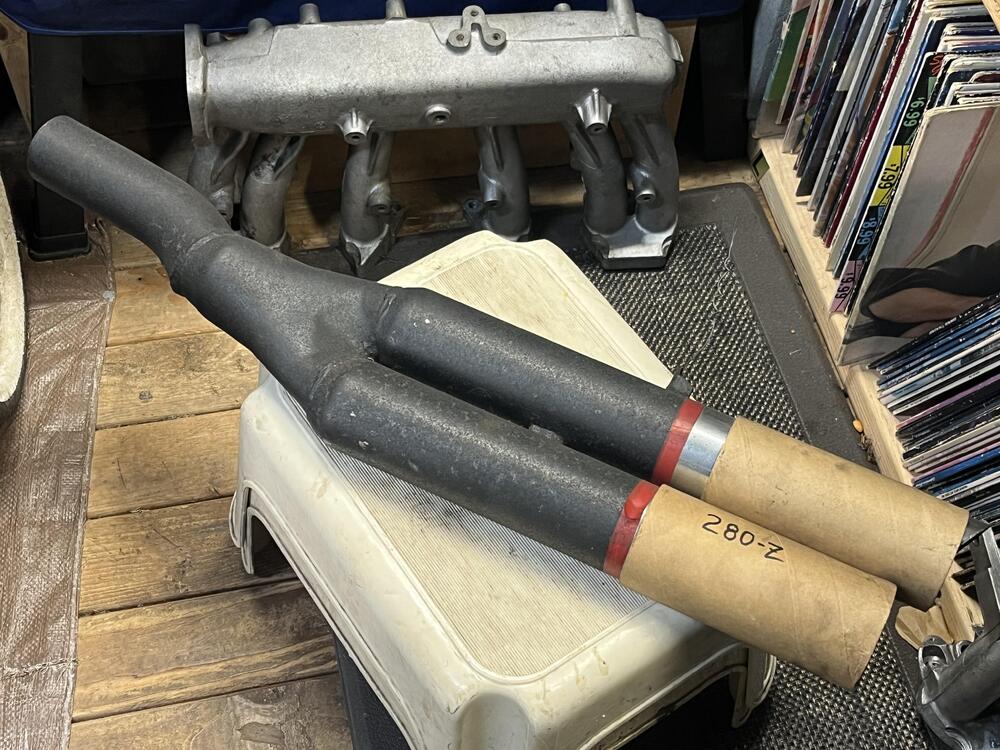
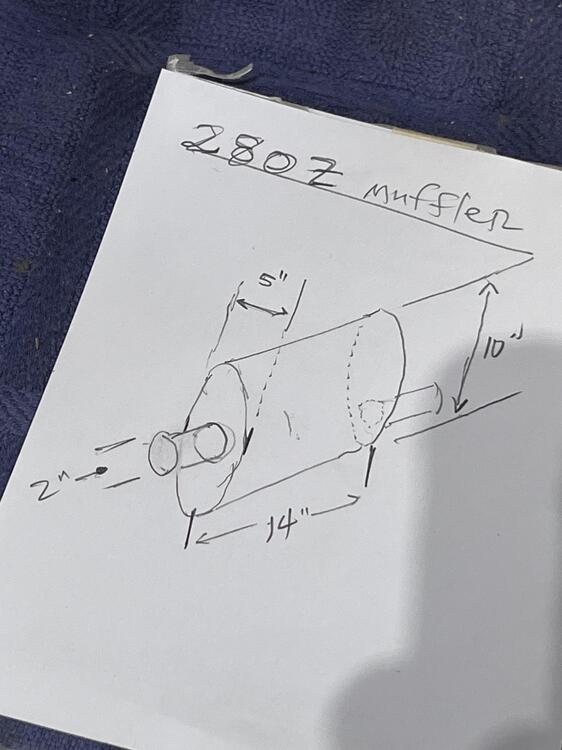
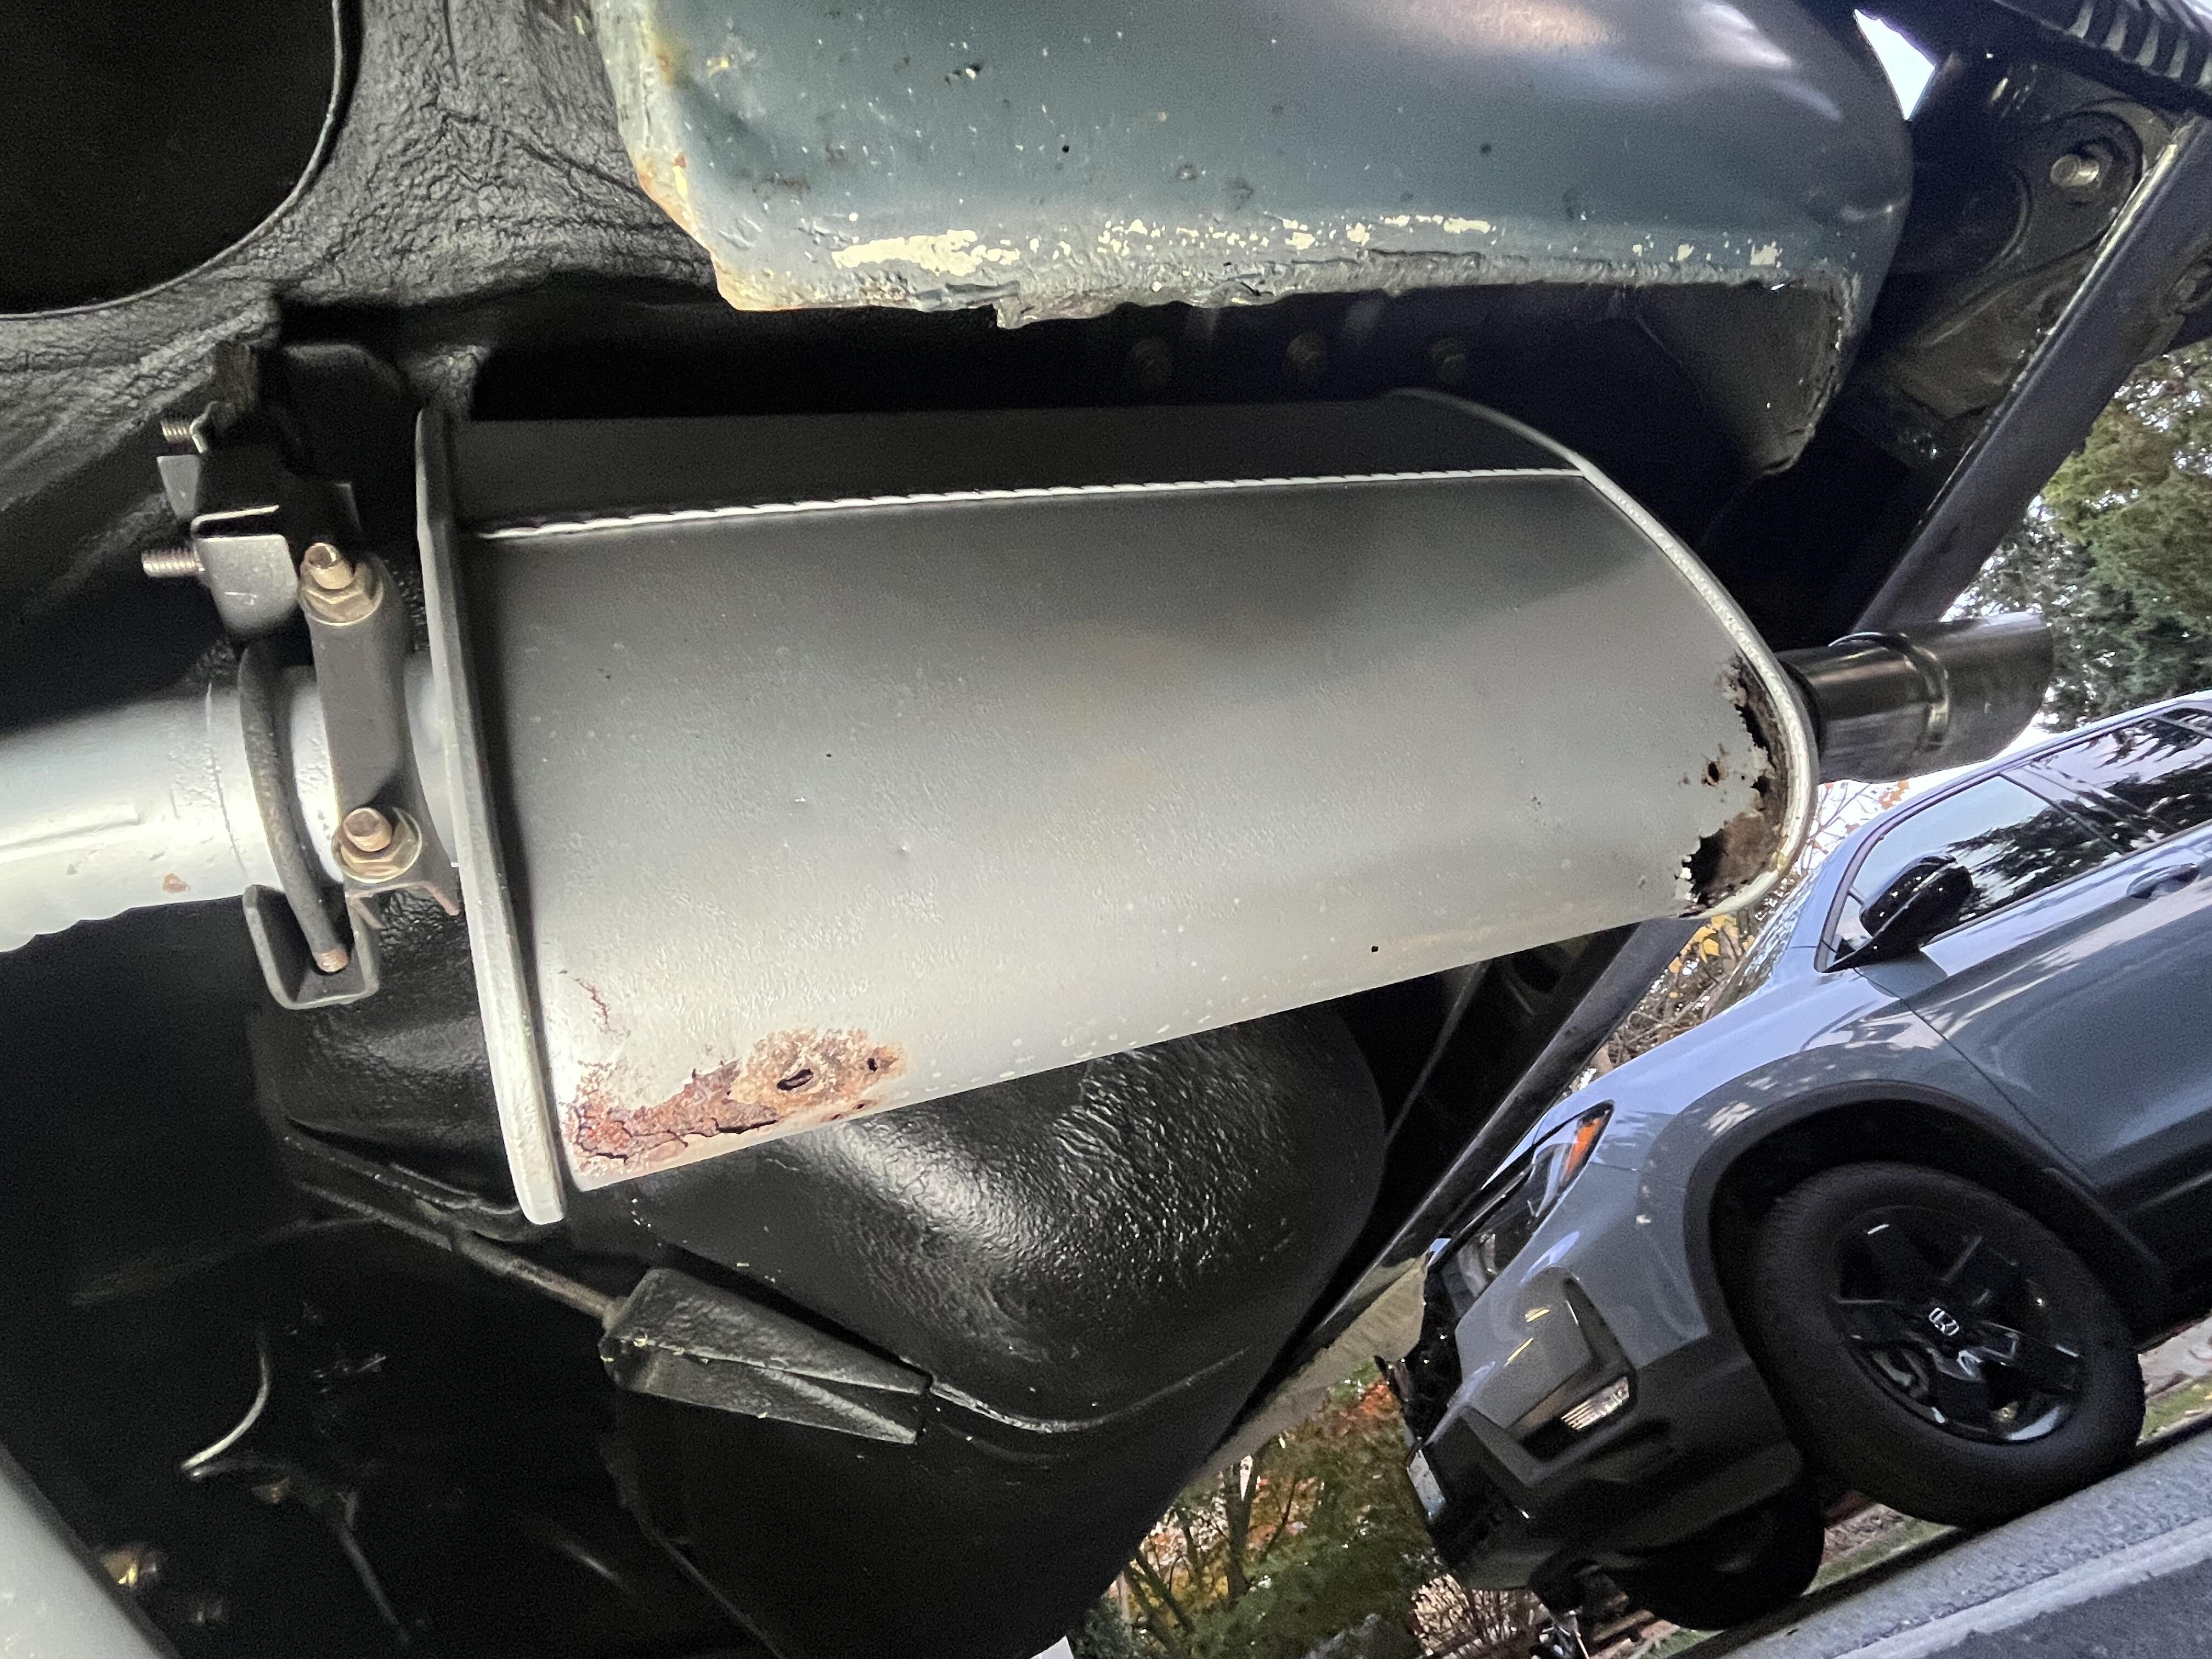
 If you're going to have a muffler shop do it why not them look at it and use their database to find one. If you're going to do it yourself, then trying the no muffler twin stack should be easy. If the dimensions are correct. Looks like what you have is clamped on, not welded. So trying some things should be easy.
 -
 Hmmmm.
 -
 zed2...thanks for replying...I'm in Oak Harbor, WA (it's in my signature)...I'll keep that in mind, but I think I'm gonna do a little more research before I'd consider buying an entire exhaust...my system seems to be in great shape except for the muffler...give me some time to eliminate all the other possibilities.
 -
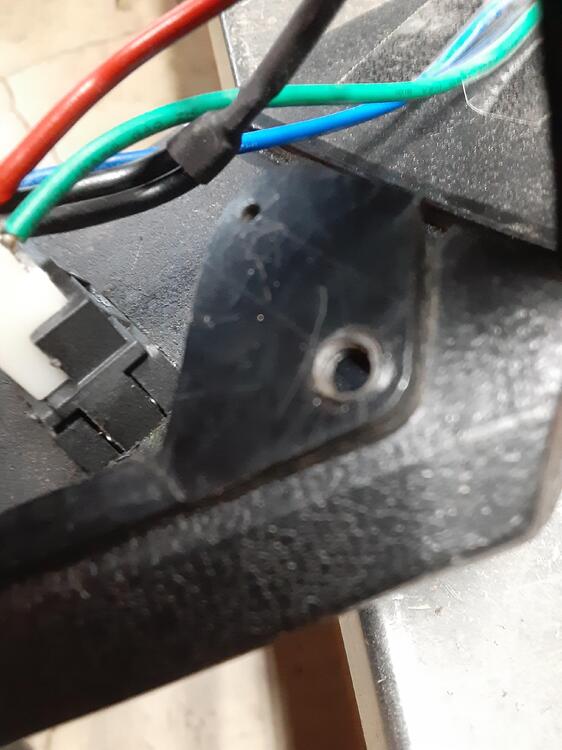
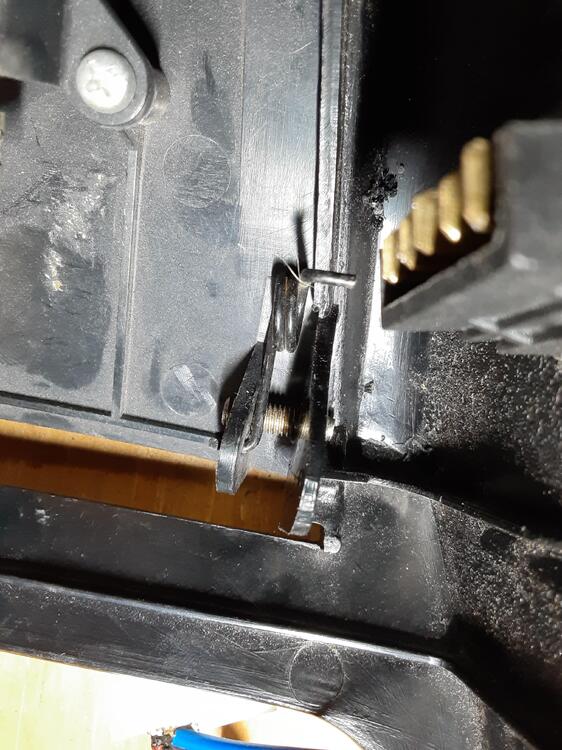
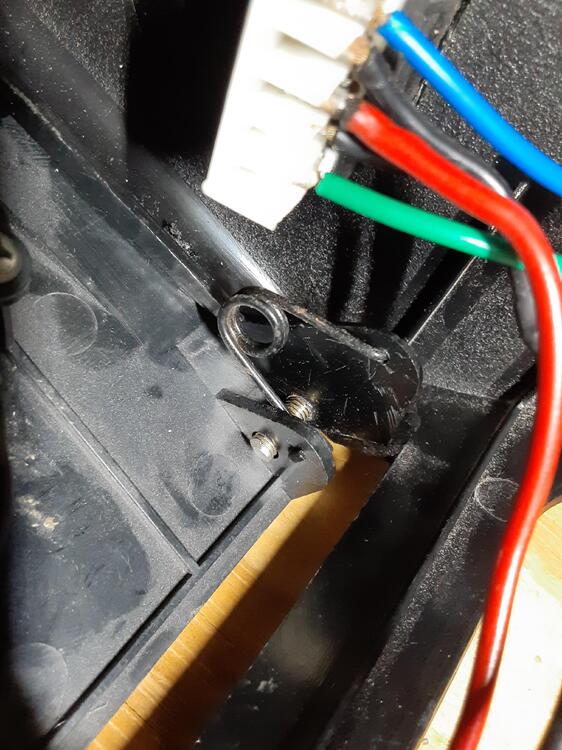
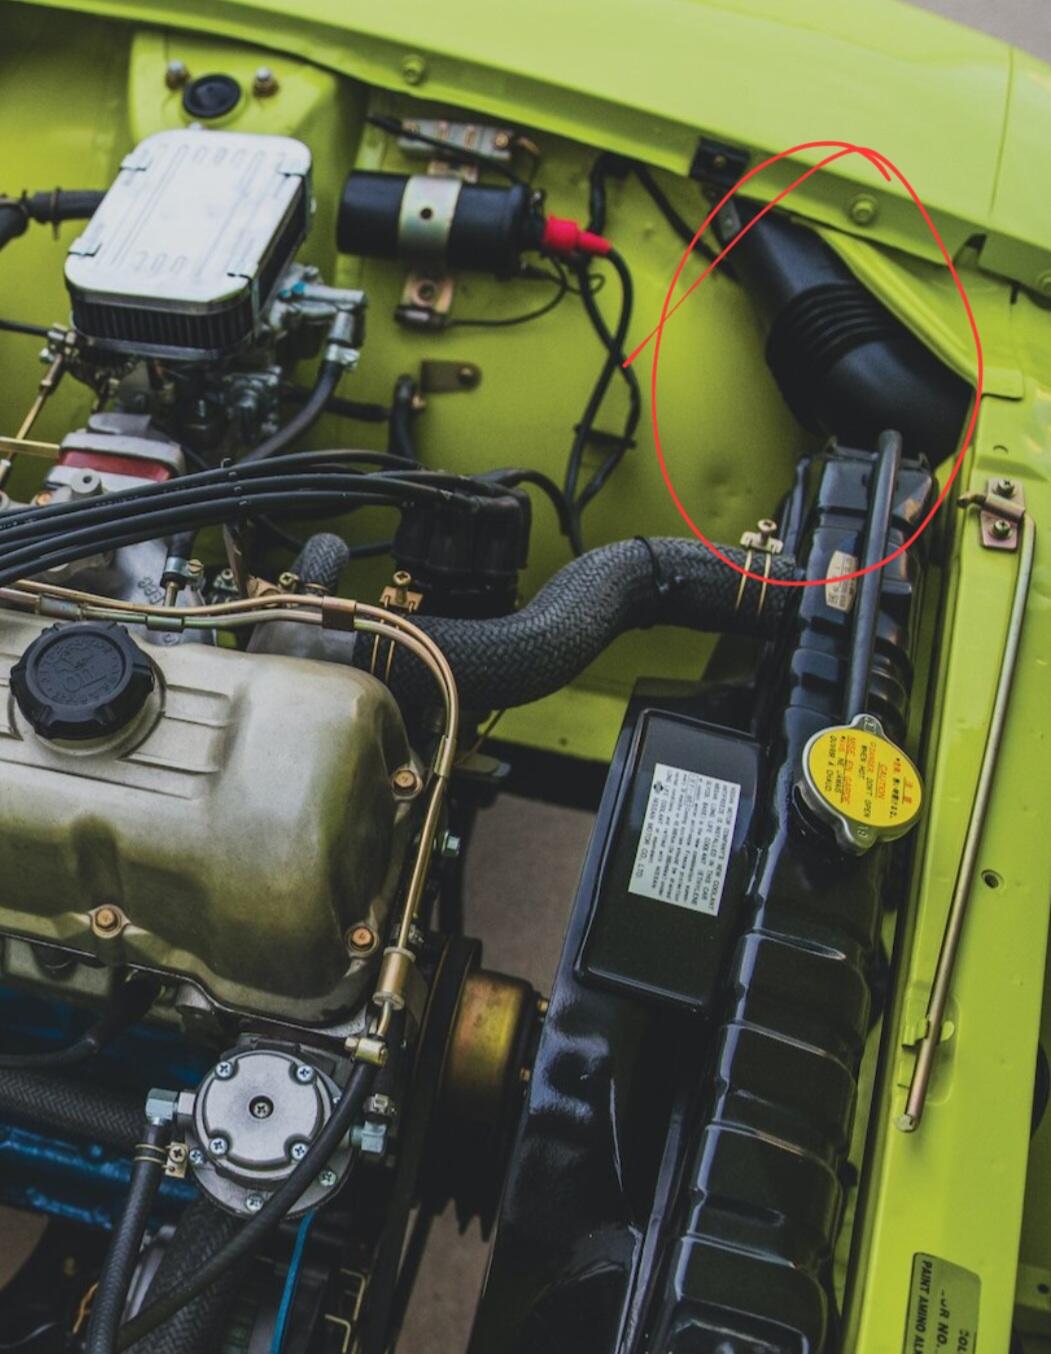
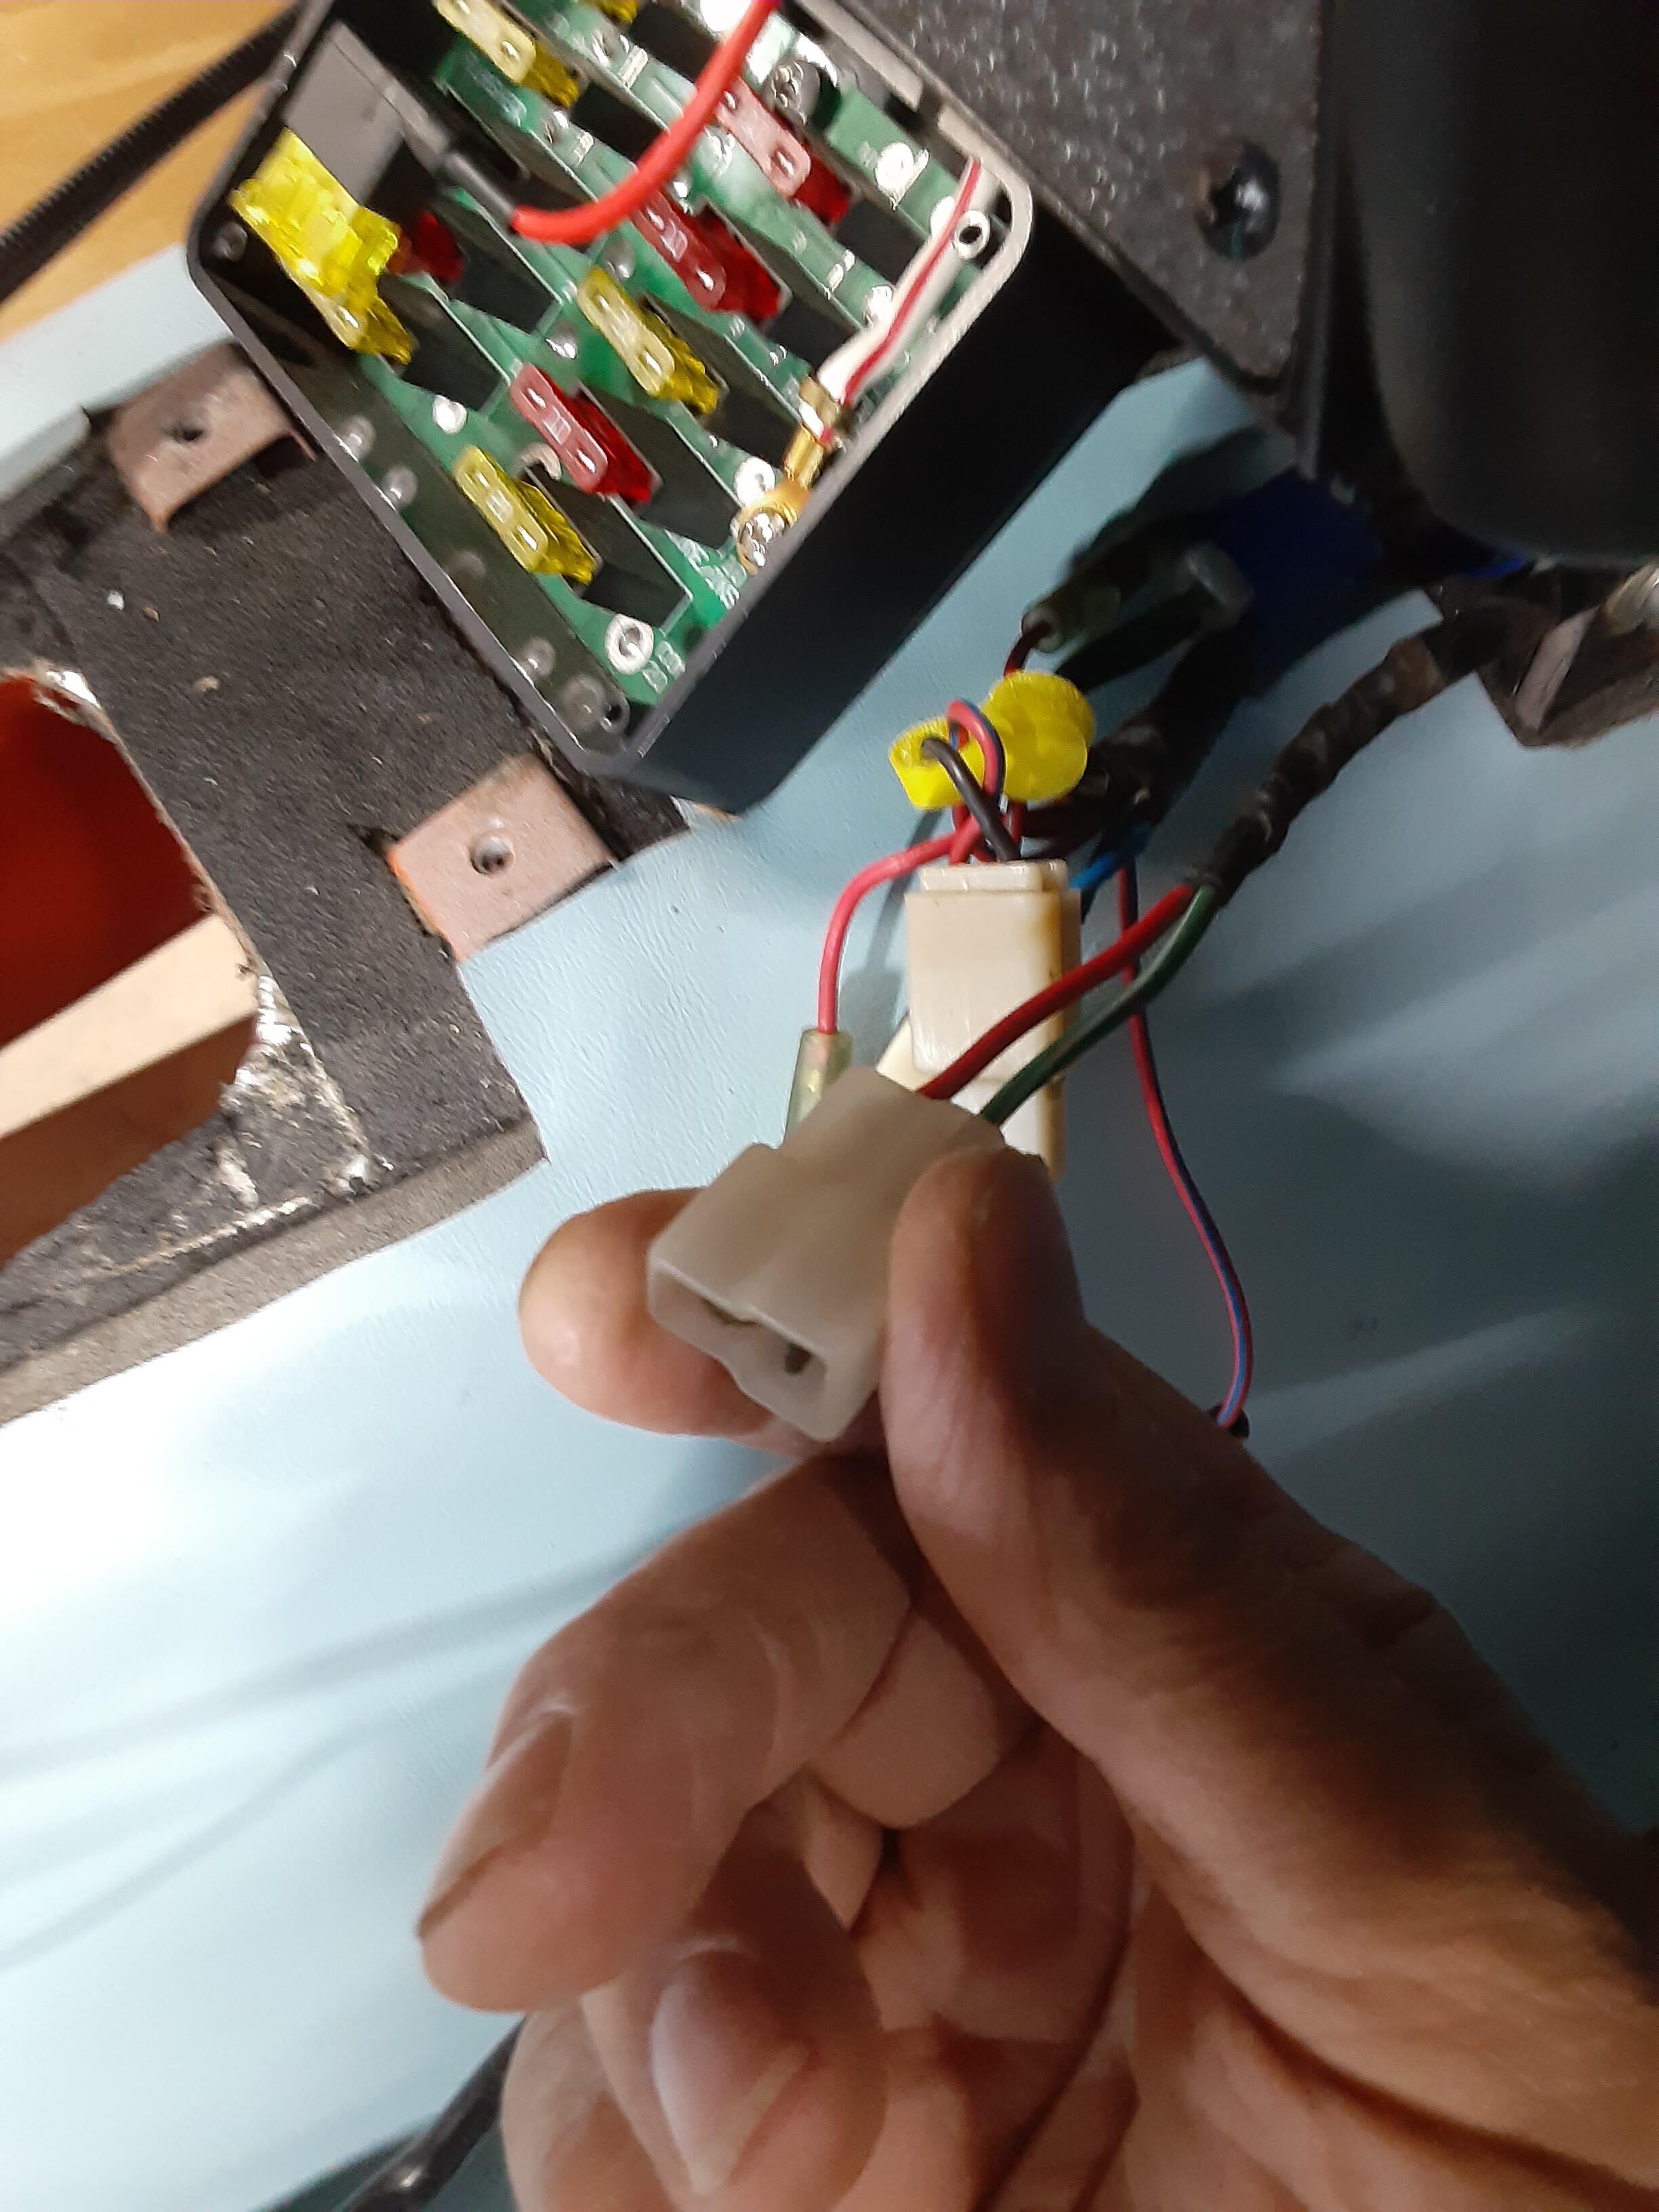
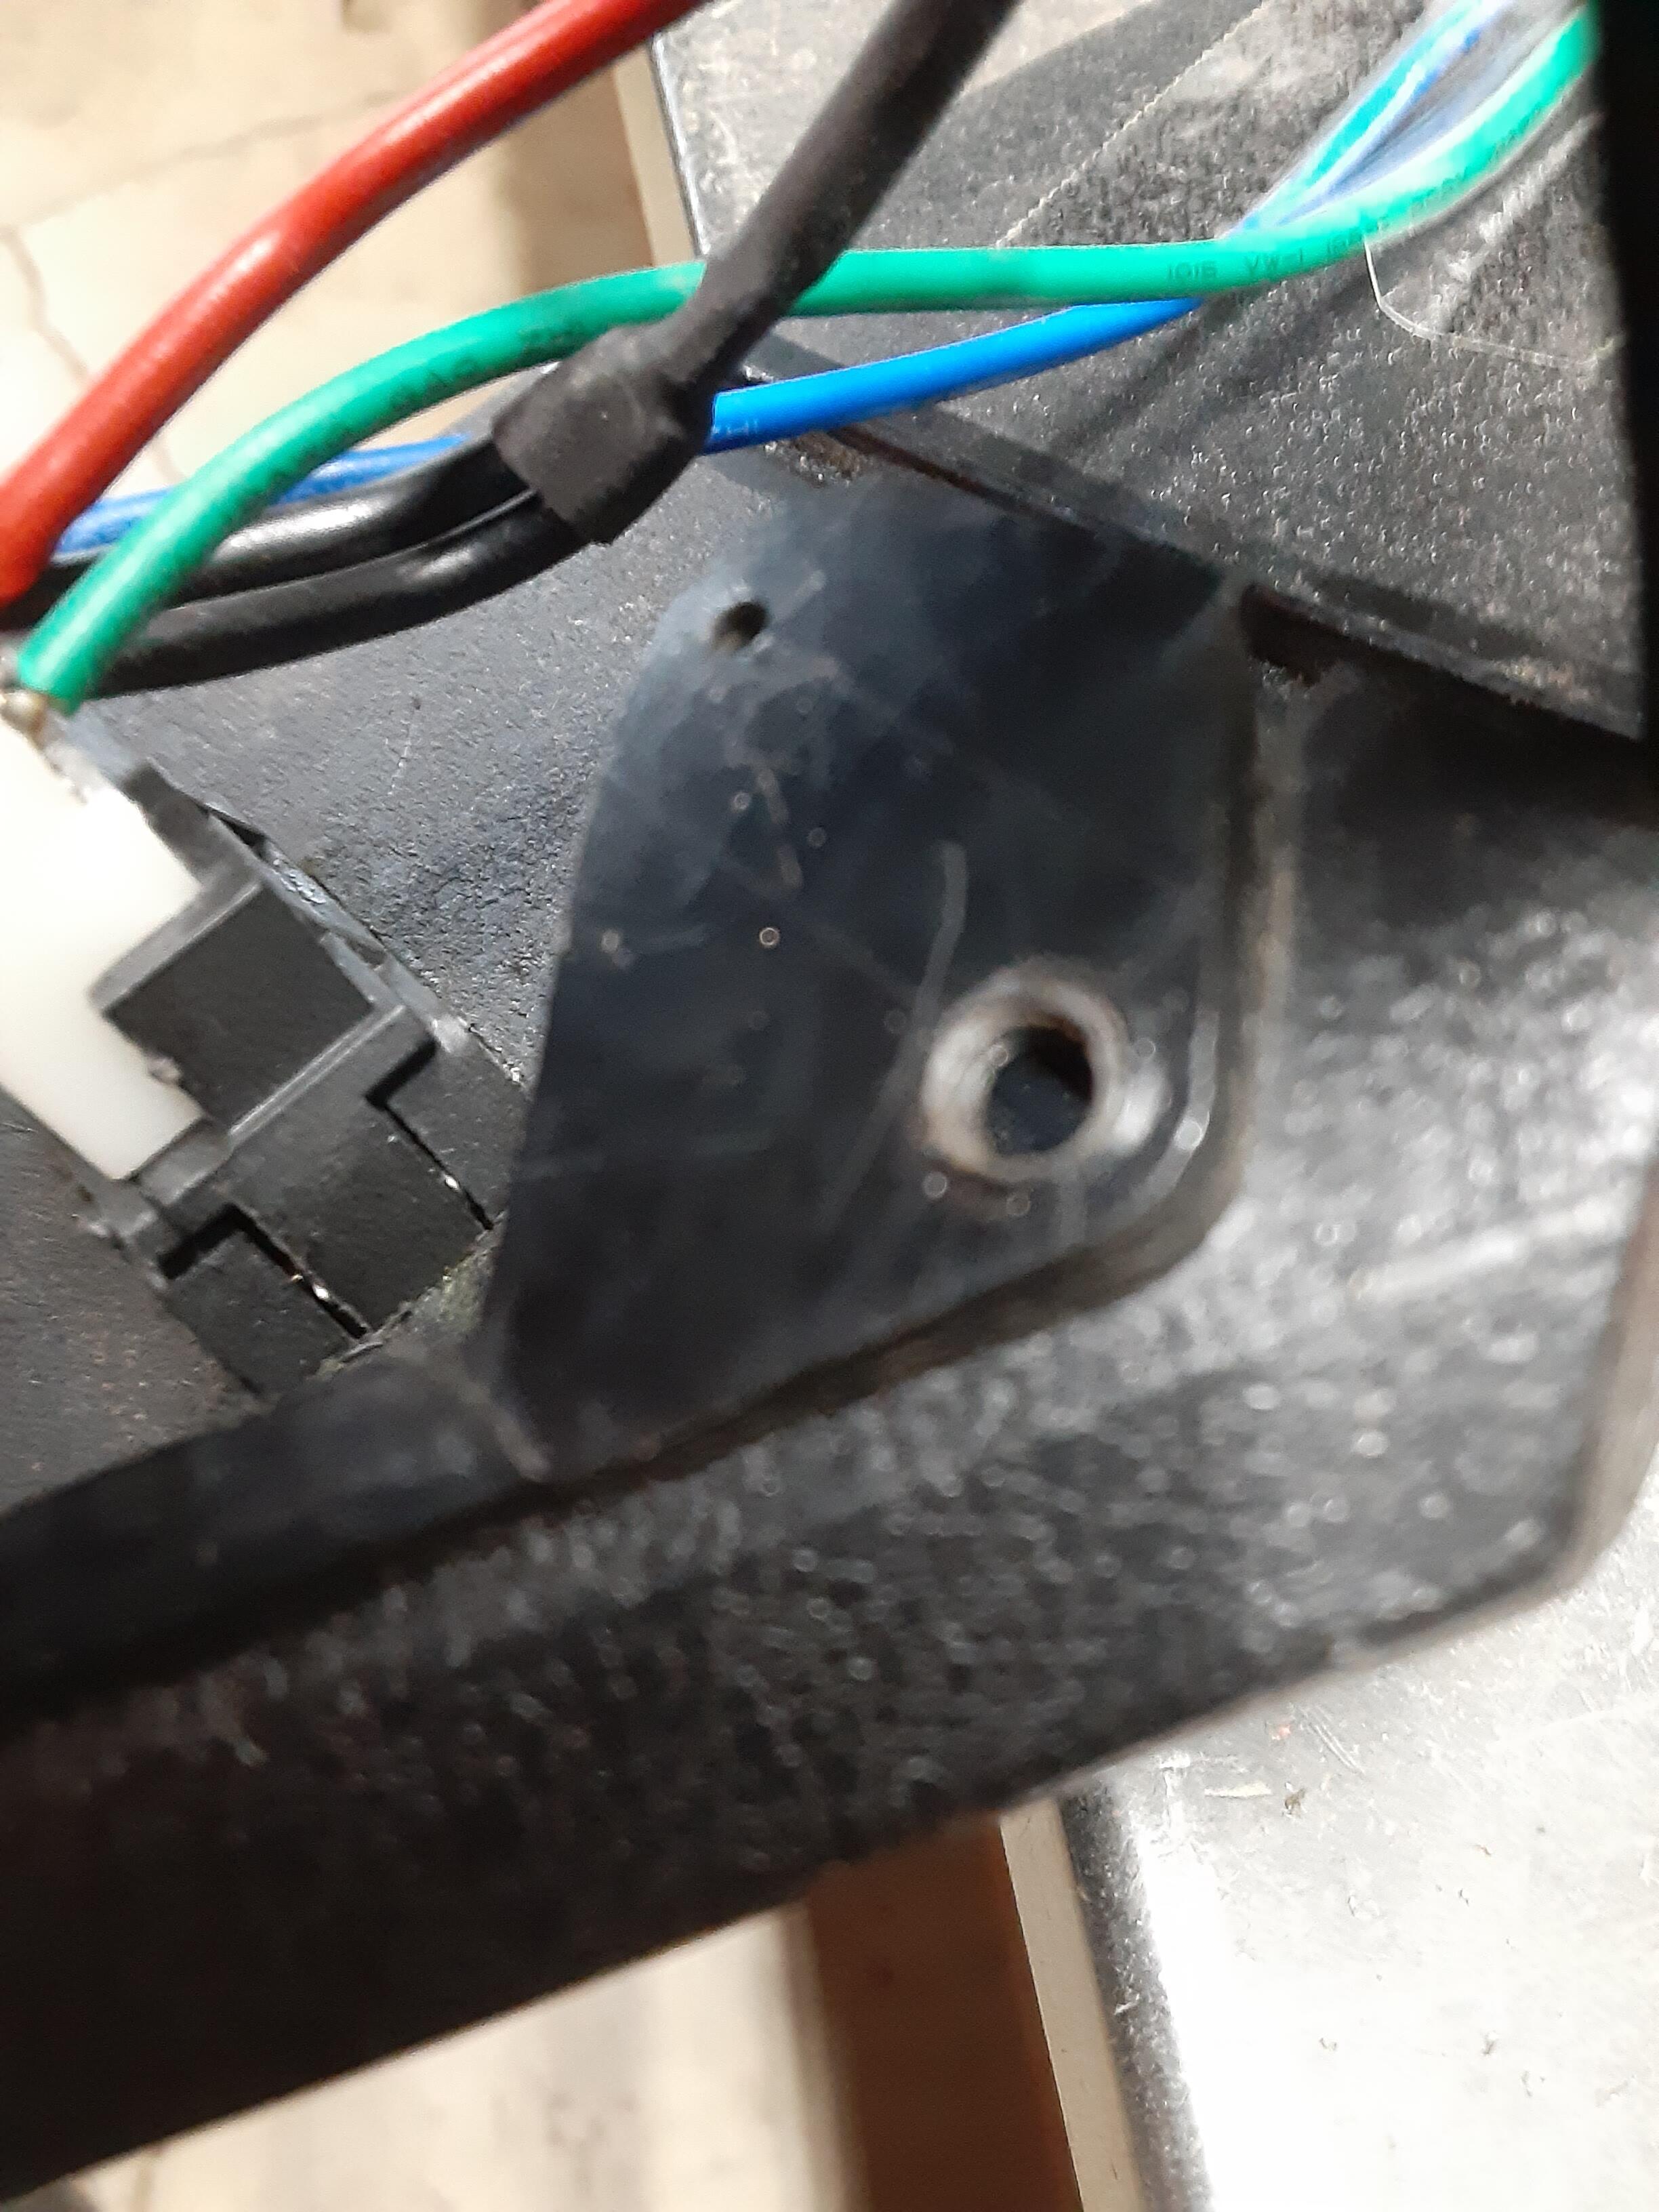
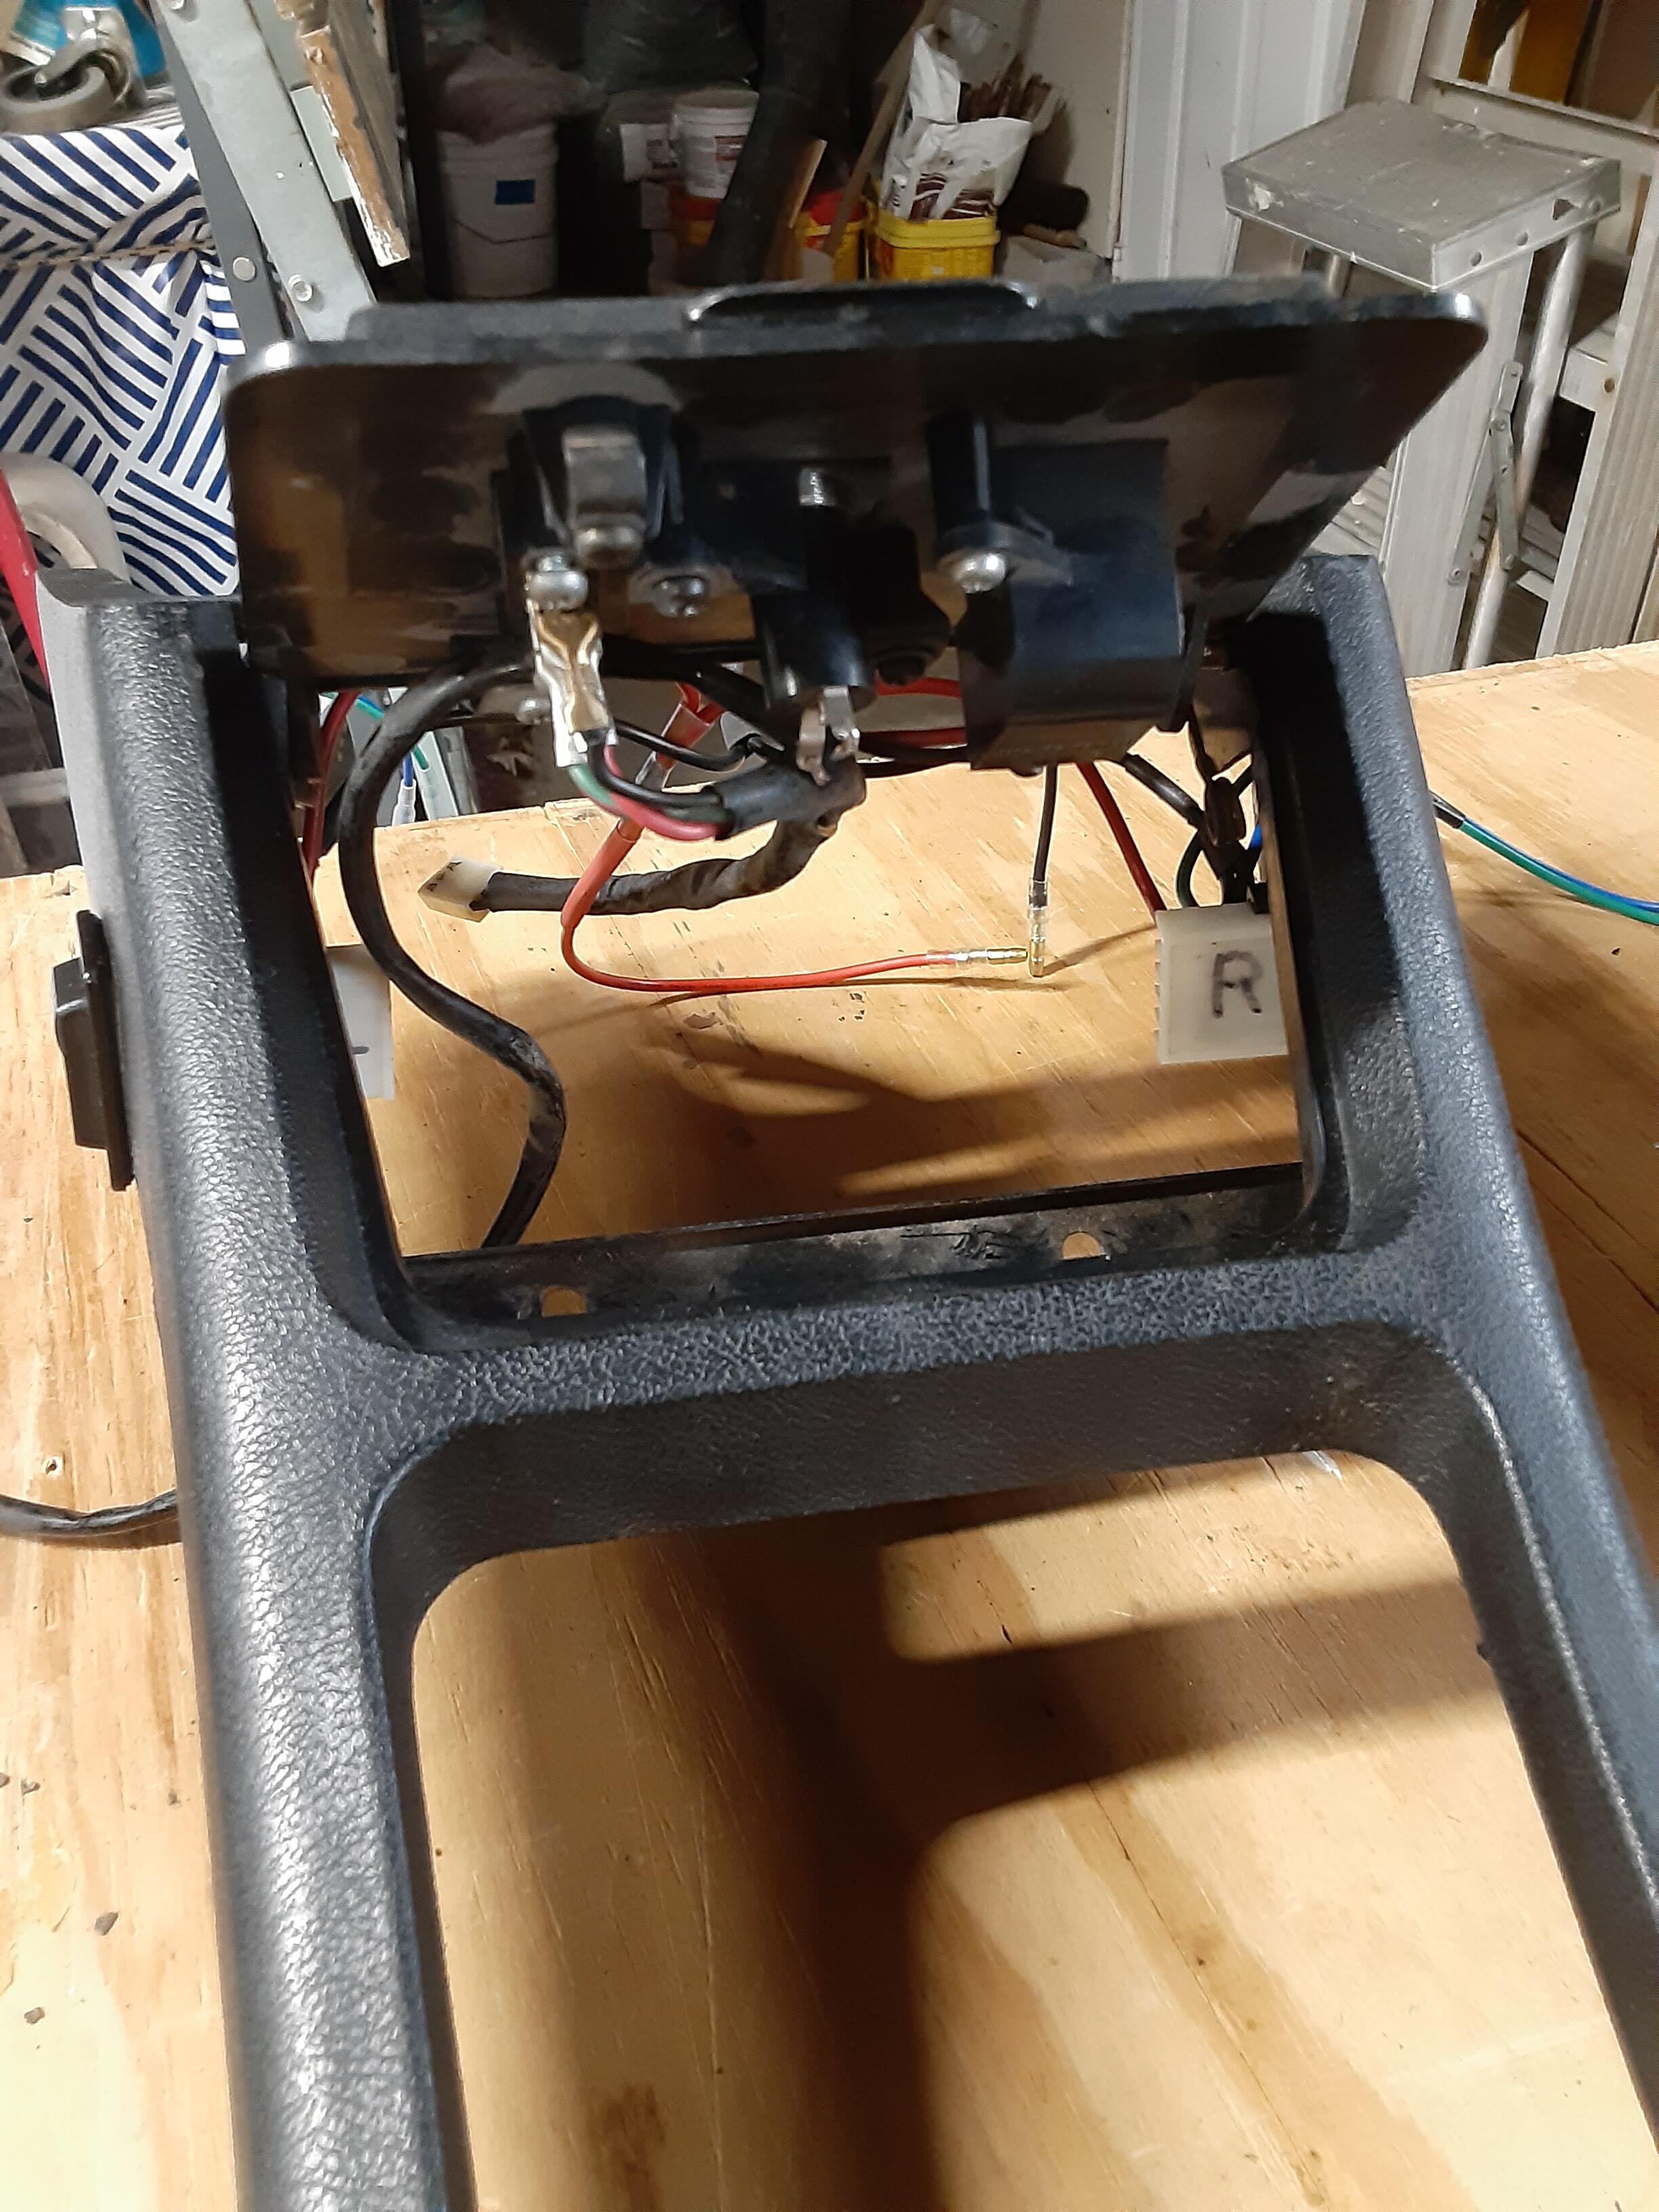
 On my early 1972 car (HLS30-46372), this two-wire connector extends from one of the wire bundles that connect with the fuse box. However, I cannot figure out what it's supposed to connect with. It has a red and a green/white wire and I've not seen that combo on any wiring diagram or harness illustration. Any thoughts are welcomed. I do have a later-run '72 car (HLS30-81416) that I could tear into to see what's up there but I'd prefer to not do that if at all possible.
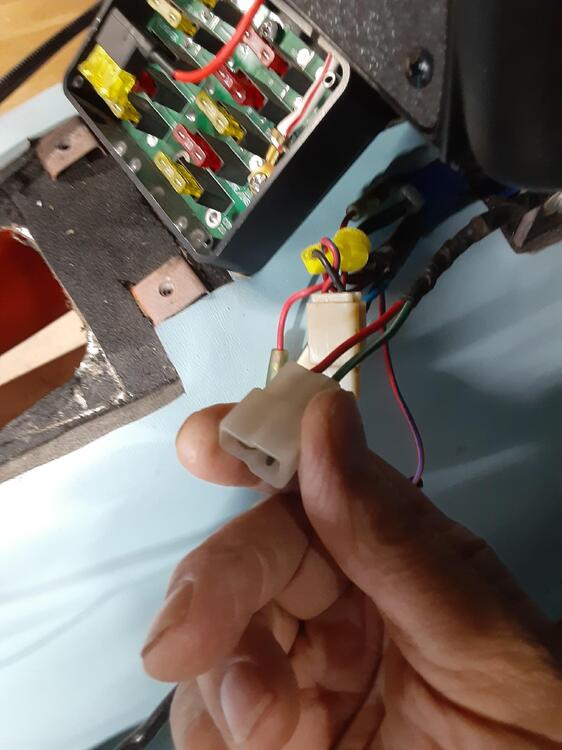
-
 Hey, @Mike the car’s paid for and trying to build another today will definitely be difficult than the era you built that beauty. Just sayin!
 -
The S30-World BaT auction has been delayed. S30.worldS30.world - The Masterpieces programThe Masterpieces program

-
 Nope, I still have it. ;)
 -
 ea6driver, Where are you located? I have a OEM exhaust system with resonator (not catalytic converter) that may be a good solution for you. Keith
 -
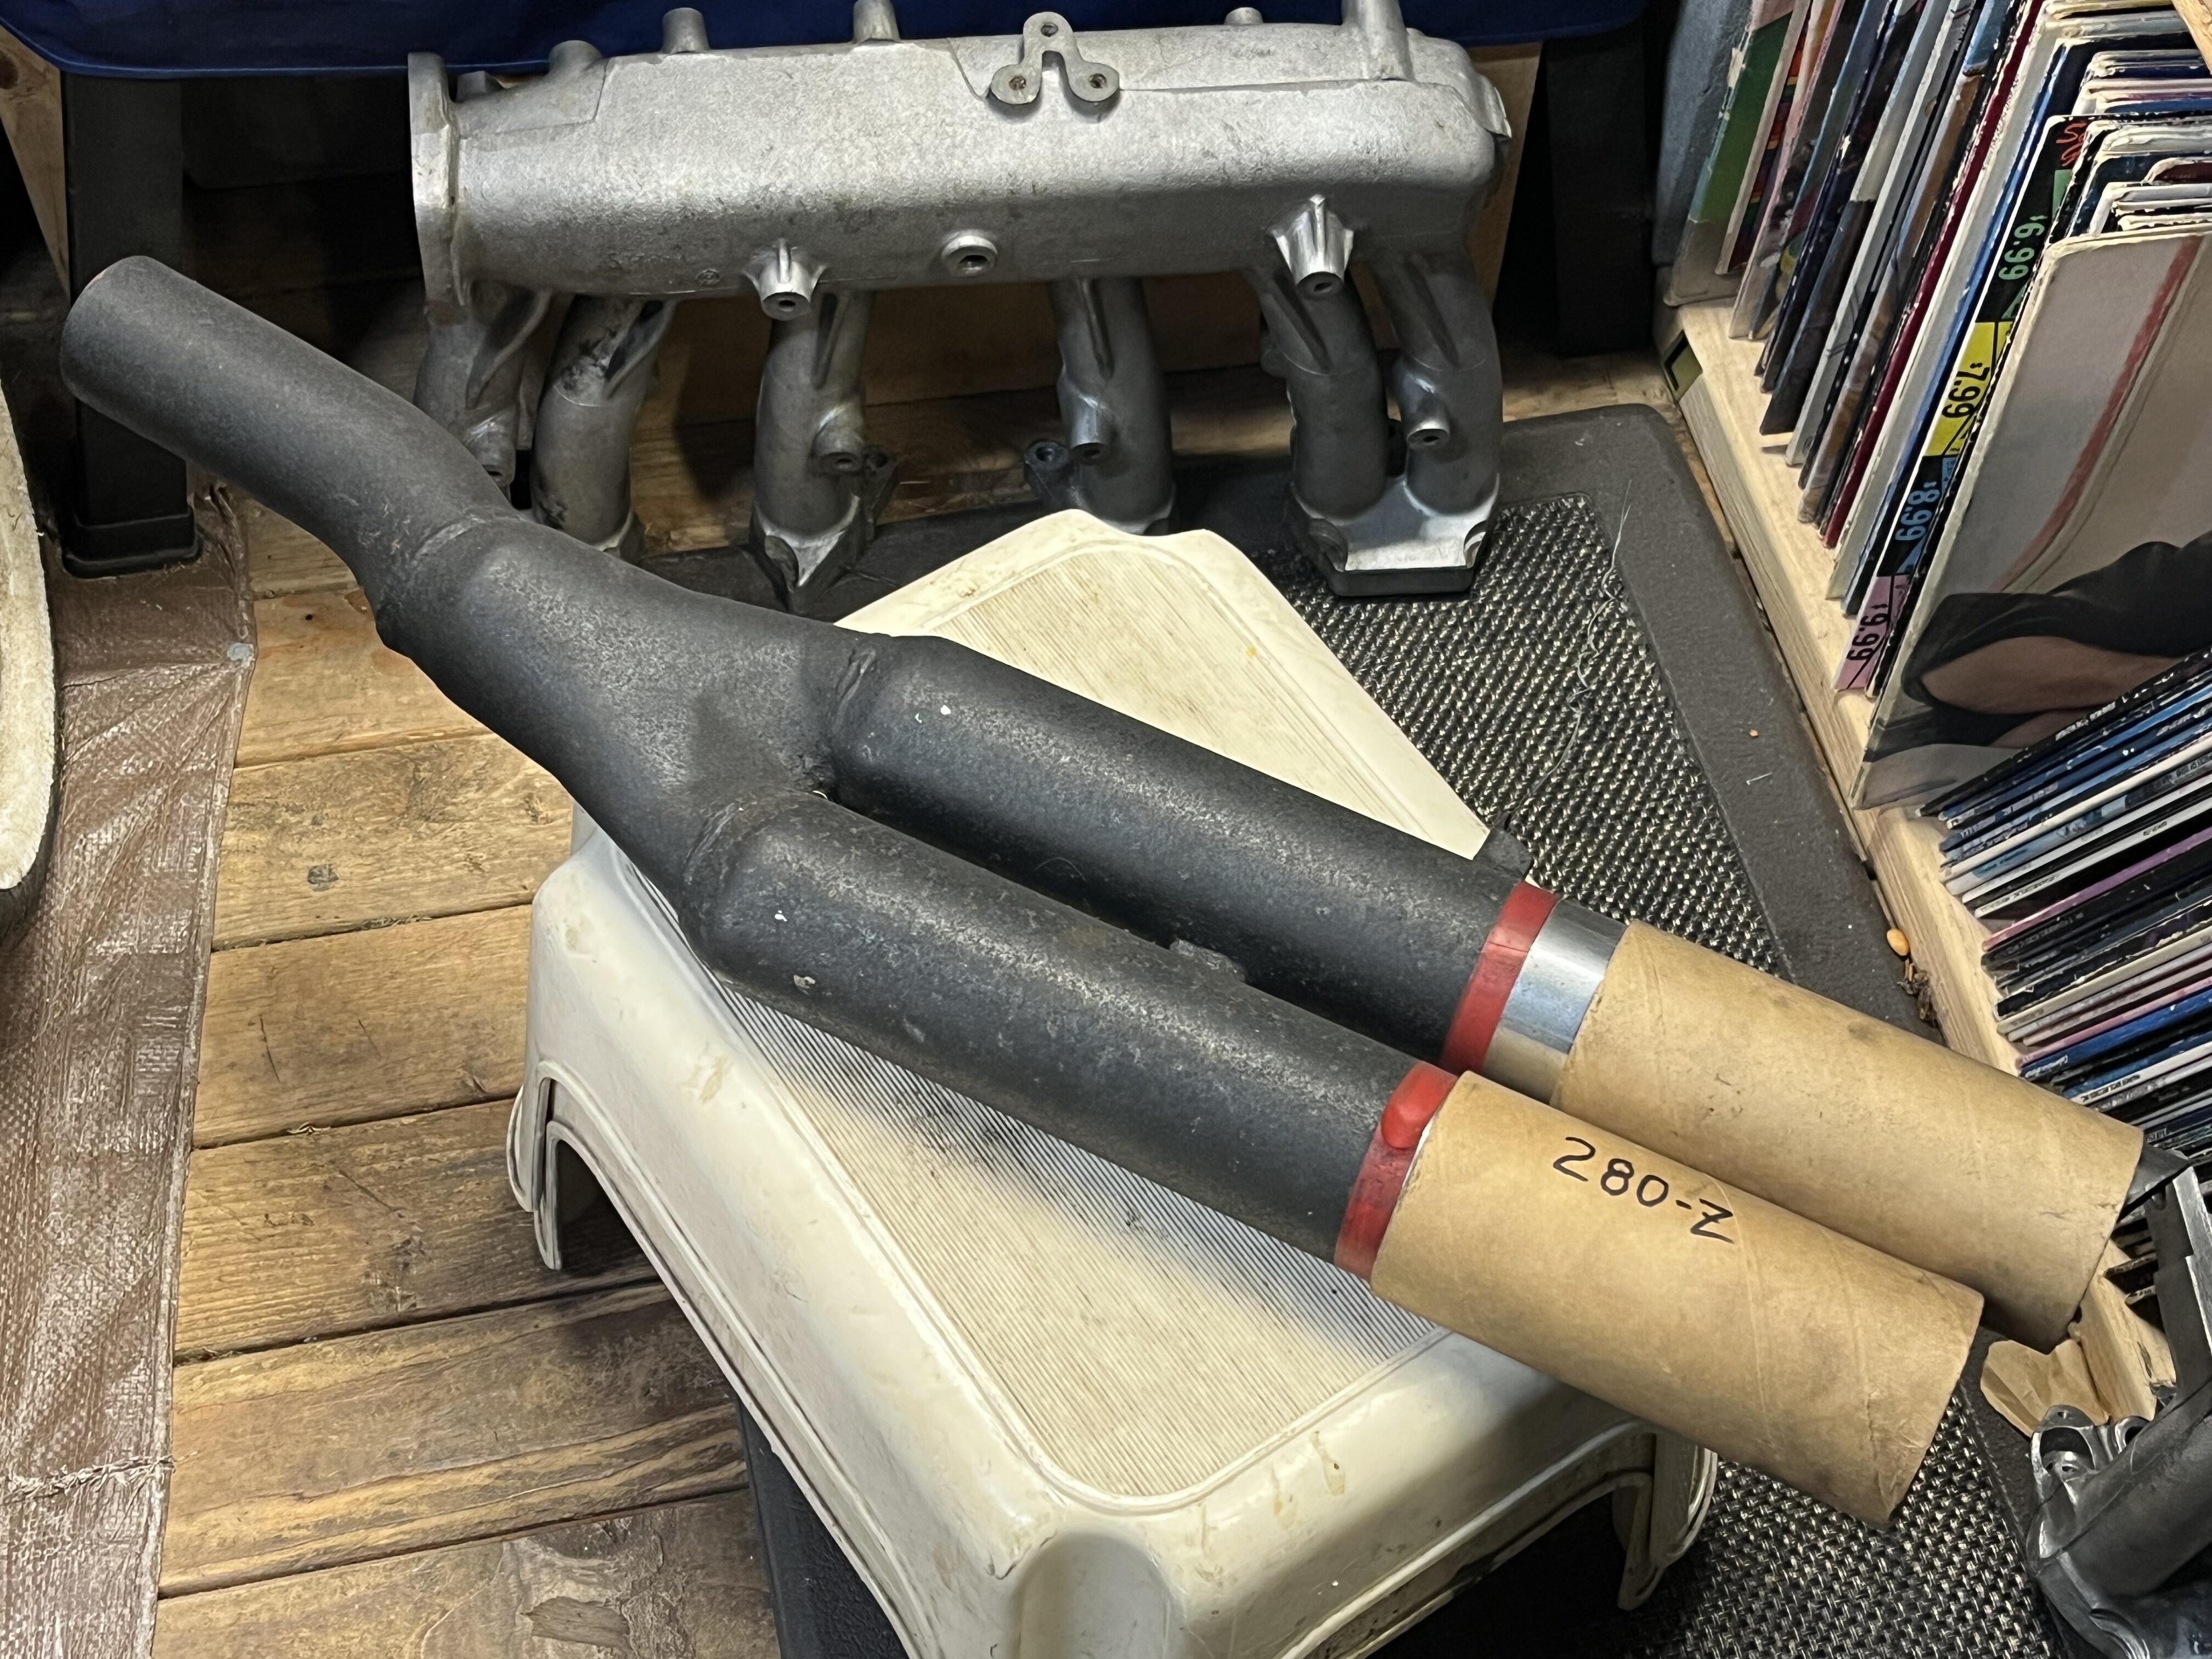
I had a twin stack on a 240 many years ago. I don’t remember it being that loud. Your car should have a resonator already. Put it on and try it. No cost involved.
-
 Sorry, but I kinda lost sight of the moving target... Can you make up a fresh picture sketch schematic of how you have things connected right now? Make sure to show both sides of the stock original four pin (not three?) connector. And include wire colors on everything?
 -
 I think that twin stack muffler will be way to loud without a serious resonator behind it. I do like loud cars and the Z’s sound awesome with some more noise but I think that muffler would be to much. But seeing as you already have it I would say it doesn’t hurt to just throw it on and see how she sounds. As for repairing the old muffler I wouldn’t really recommend it. You could try but the steel usually isn’t the best quality which makes welding hard and it won’t look that good. So if you can spare it I would suggest looking at a new one, maybe a JDM dual stake muffler? I know Zstory from France has some nice option for stock US and JDM look. I haven’t used anything from Zstory but I do find them very interesting. First up is getting my 280z on the road and then I can slowly move towards engine work for which I’m highly considering them.
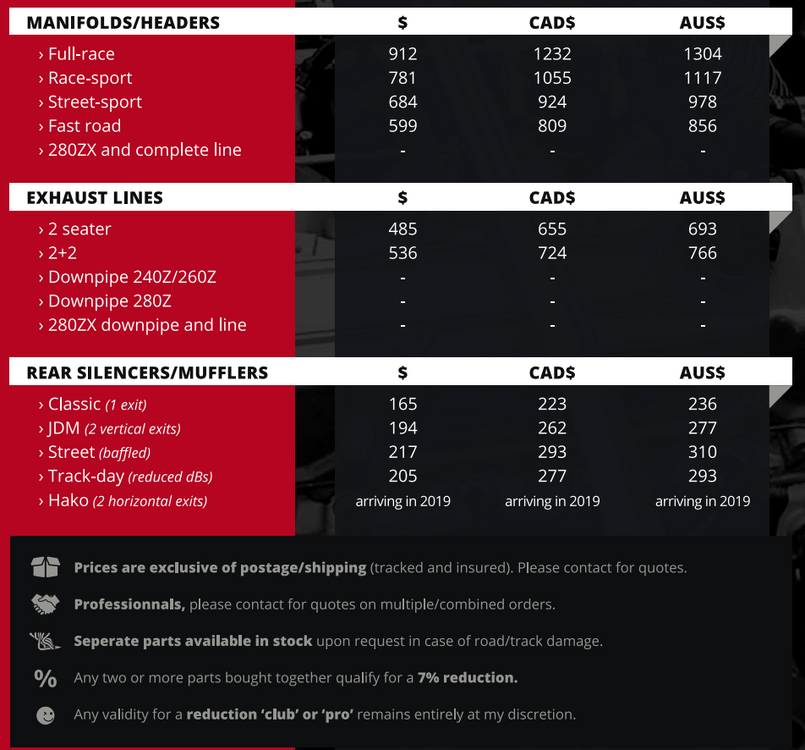
-
 did you sell the car?
 -
78 280Z...stock exhaust system...muffler is rusting from the bottom... would like to solicit the forum expertise on the best way to proceed. The rest of the exhaust system is in great shape. I'm considering 3 options... 1) Repair the muffler. Maybe use a couple of screen mesh patches along with a JB weld type product. A quick, easy, but only temporary repair. Car is garaged and is only driven a few hundred miles per year...never driven in adverse conditions...given that, repair would prolly last quite a while. 2) Replace the muffler with a similar (exact) sized replacement muffler....Internet search has revealed that OEM-sized replacement muffler options are limited...if I could find the correct sized replacement muffler, I think this would be my preferred option. 3) Install a "twin stack exhaust resonator" that I've had stored for over 30 years...see photo...not sure how loud this would be compared to "stock" noise levels....if it's not too loud, I'd be happy to go this route too.
- Last week
-
Well, no one came to my aid on this matter so I've solved it as best I could using a metric bolt to replace the missing plastic pin. I measured the left side plastic pin diameter as approximately 4.7 mm. This is close to the 4.7 mm diameter that I measured on a 5M bolt's threads. The hole on the tab on that side of the cover comes in at 5.3 mm so there is about 0.6 mm of "slop" when the pin is in the hole. The hole on the right side tab measured 5.8 mm, almost exactly the diameter I measured for the threads on an M6 bolt. I was a bit squeamish about using an M6 bolt as there would little, if any, of the kind of slop as exists on the other side. So, an M5 bolt it was. But I do have the option of swapping in an M6 if I feel the need. I started by creating a small divot in the middle of the broken pin's location. Then, starting with a 1/16" drill bit (Hey, I ain't got metric drill bits), I gradually increased the hole size step-by-step using the next larger drill bit until i finished with 5/32" bit. I then slowly tapped the hole with a 5 mm-0.8 tap. Note that my tap and die set says to use an 11/64" drill for this but I wanted to have plenty of plastic "meat" for the tap to bite into. With that done, I took a 5M-0.8 x 30 bolt and cut off the hex head to give me a crude stud. I threaded this into my hole so that just a little tip of the stud showed on the side where the tab would eventually be. I then put the cover on the remaining plastic pin and, using needle-nose pliers, rotated the M5 stud so it engaged with the tab hole and then a bit more for good measure. I was going to epoxy the M5 stud into place but decided to not do so now at least because things are working well and it will be easy to retract the stud if I need to remove the cover at some point. I LOVE field engineering.
-
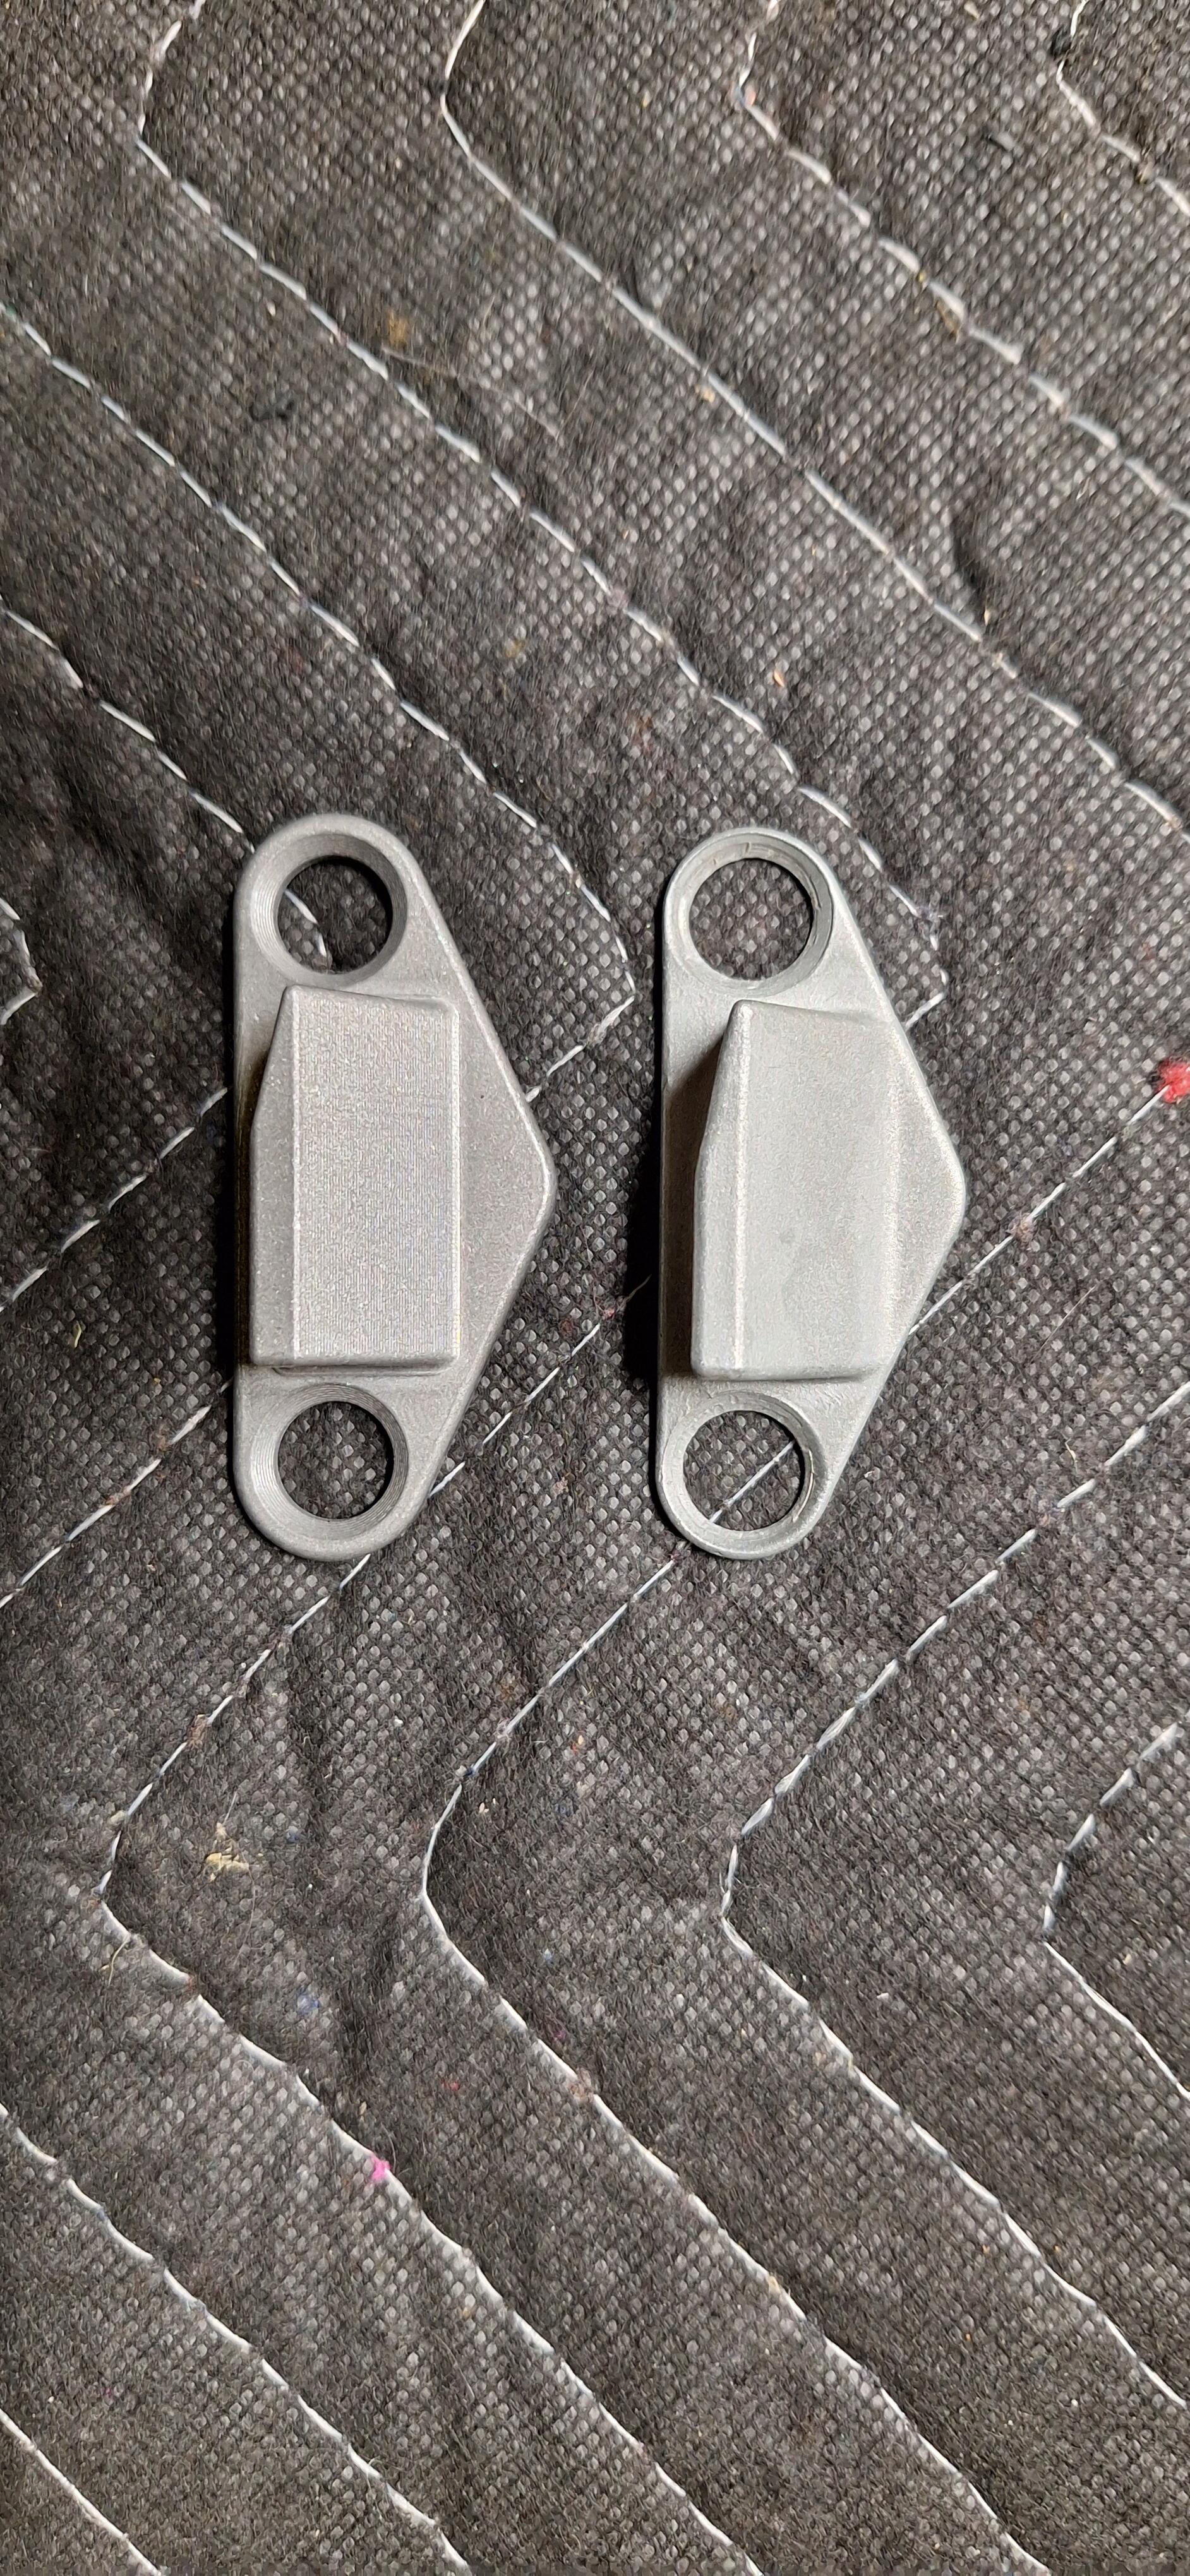
 The early 240Z had handed dove tails for the doors, a left and right sided fitting were required. Part numbers R 80530-E4101 and L 80531-E4101. https://www.carpartsmanual.com/datsun/Z-1969-1978/body-240z/body-side-trim-side-window/62 On later cars there were replaced with a symmetrical part that fit on either side. 80530-N3400 Biggest problems with the early ones were the tabs where the screws went through breaking off. Replacement factory parts haven't been available for years. Fortunately I have a set of unbroken originals which we modelled up and reproduced in aluminum. We added an extra 1mm around the screw holes to prevent the cracking and breaking. Just picked up the first samples to fit check and they work just like the originals. The original one is on the right, you can see the slight increase in thickness around the screw holes on the left one. Also modelled up and replicated the original plastic grease reservoir for the steering rack. I'll post details in a separate thread.
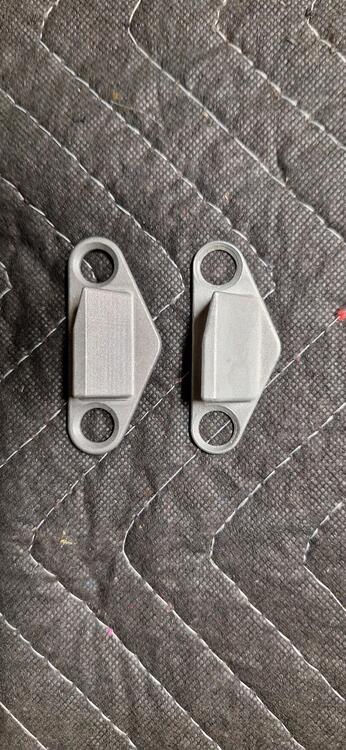
-
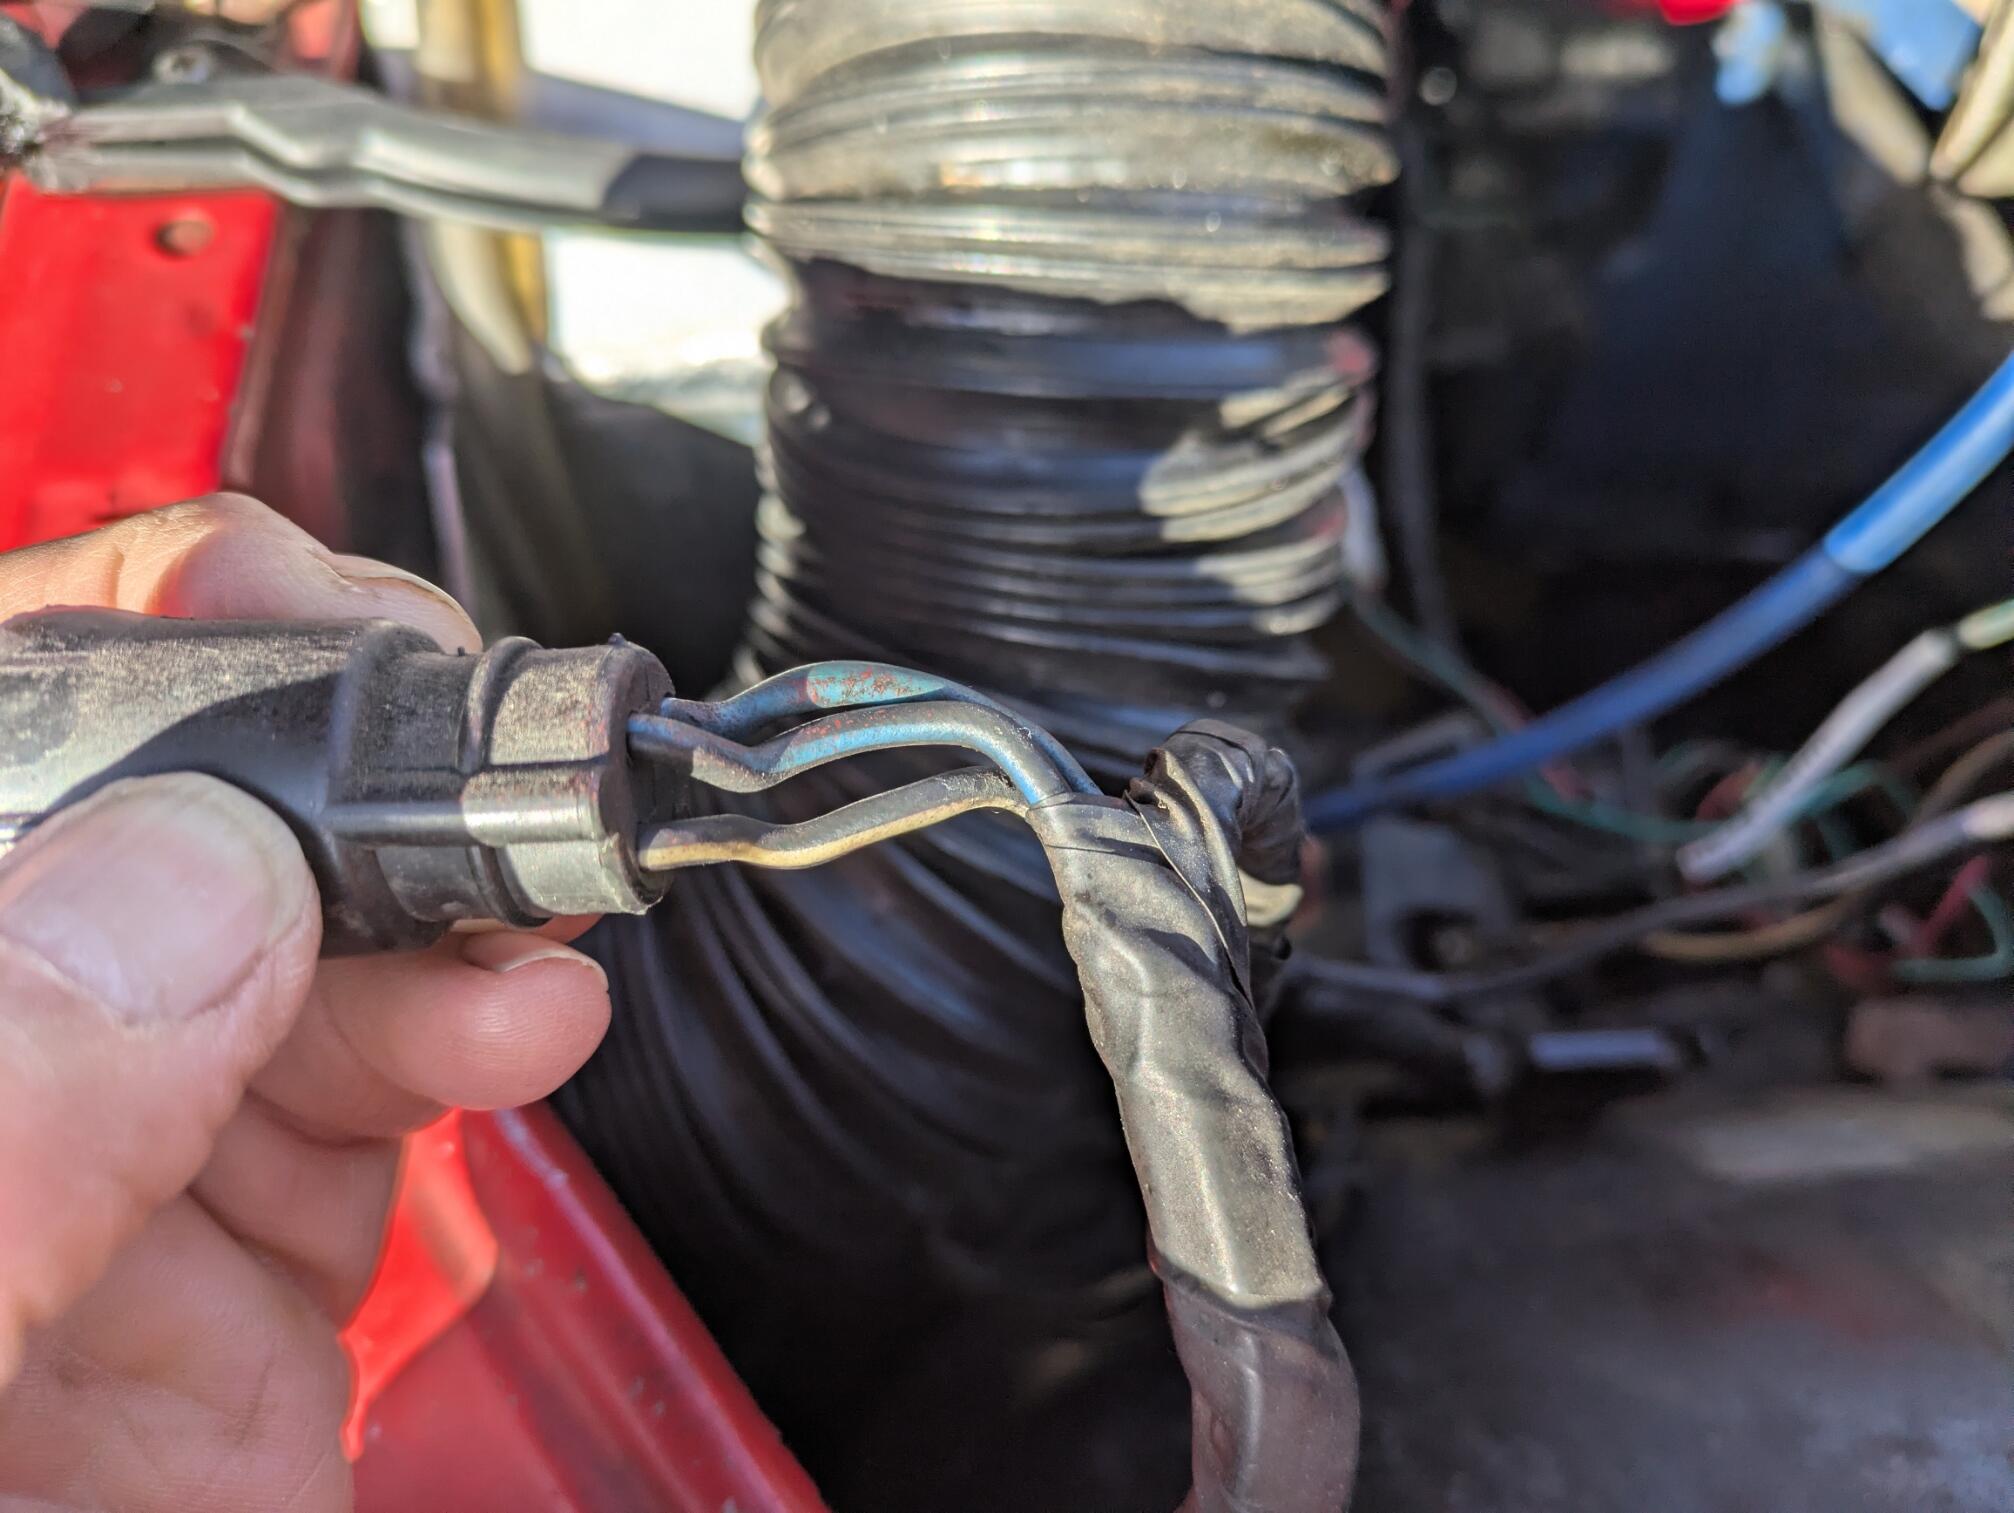
 I have a correction to the wiring diagram I provided after I cleaned things up a bit and stripped off some electrical tape. The round connection has 3 wires on the harness side and 4 on the ballast/coil side. I've also found that the BW wire that attaches to the + terminal on the ballast had been cut, then twisted back together and taped. I removed the redundant ballast resistor, and soldered the wire splice so it's making better contact. I'm holding off on the suggestion to disconnect the blue wire since I'm trying to minimize the variables when I make a change. In other words, removing the second ballast resistor and improving the wire splice is enough for now. If the problem persists, I'll disconnect the blue wire. I find it odd that the connector eliminated one of the wires. Note: I have a few blank field books from work lying around that I am finding useful for keeping track of issues and updates to the Z. I wish I thought of this sooner. I also found a source of Brother shrink tube that works in a standard Brother labeler. It's great for labeling wires and holds up better than adhesive labels.
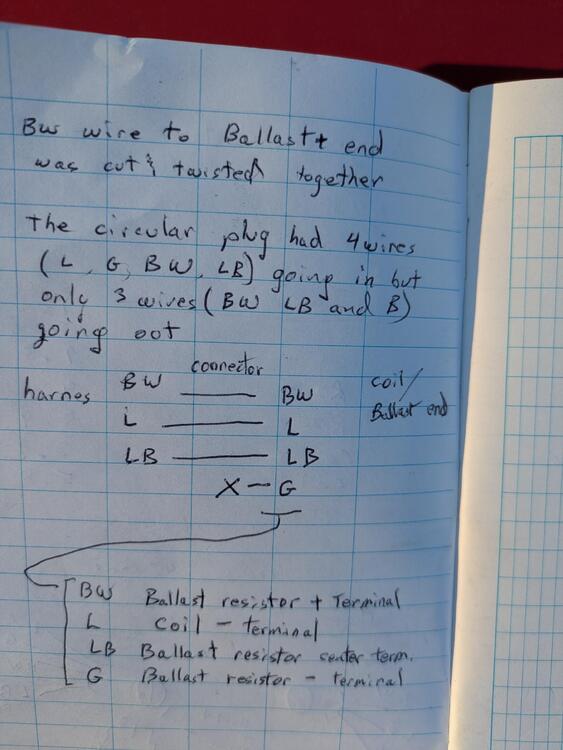


-
-
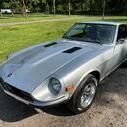
 I was busy with sorting out some things in life, recently, so no big progress on the Car project side, aside from changing all family cars to winter tires. To keep my spirits up, the postal guy brought new stuff almost daily. The first was a nice delivery of an EU-spec front spoiler and a set of EU-spec front lower corner valances. Thanks a lot @HS30-H for your support, once again! One of them was even a NOS item with the Nissan stickers on it: Then, I also got a small delivery from 240Zrubberparts.com. I was looking for that KM-1520ZC replacement faceplates and I have to say it looks quite good. I was even gifted a set of label stickers for the radio, which I really appreciate. This will come in very handy when come to the planned restoration of the Radio. I hope to be back on the car project again soon. I've discussed a few next steps with a specialist and I hope the project gets a big boost next year, but I also hope to be able to finish a few things in the coming weeks.


Important Information
By using this site, you agree to our Privacy Policy and Guidelines. We have placed cookies on your device to help make this website better. You can adjust your cookie settings, otherwise we'll assume you're okay to continue.