RIP260Z
Community Member
-
Joined
-
Last visited
Everything posted by RIP260Z
-
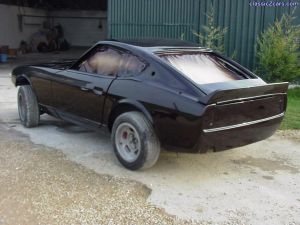
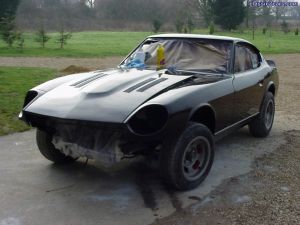 Thanks for the comments, but its not black!! Its a TVR clour called Chianti Starmist. A cross between dark red wine, dark chocolate and a hint of aubergine. A heavy metallic too. The photos don't really show the colour greatly. The best one is the pic of the rear quarter for an idea of the clour. Rick260, if you are meaning that the front is missing, the MSA type 2 spoiler was painted separately. I am in the process of fitting the car up, stripping and uprating the suspension, and I have the engine to put together, and loads of bits and pieces to do.
 -
I used the method mlc240z says, with chisels. Worked easily, give it a go.
-
NCZ, I had a bit of trouble taking one of those clips off on mine, just not much room to work. I tried using the 90 degree tab, pulling on that, but that broke. I got it out by using an old srewdriver to lever the tops (prongs) down and once moved it enough, placed the screwdriver in the base of the prongs when that came into view from around the cable end.
-
I thought it was a bad idea to use silicone for engine use, as it is degraded by the oil and you can end up with bits of sealant inside the oil system? Only use RTV sealant, which is what is recommended when sealing in the rear mains to the block. Cheers Ian
-
I broke a 280zx up (1979) over here in England and they came with the car. I like them, very handy. Cheers Ian
-
I agree with both previous posters. Your are not doomed with having carbs from Alfa and Lancia. I have a set of triple Dellorto 48's (going on 3.1 ltr) that I stripped totally. These carbs were most probably from a Lotus engine (pair of carbs) and then they were put on a L series engine with another carb. The jetting when I stripped them was not even right for the 2.4 they came from to me, let alone mine. As mentioned before totally strip, make notes of numbers of the parts and do some homework. With the proper jets and setup they will run fine.
-
26th, Thank you for sharing what you are doing/ going to your body shell. I read this with great interest, and look forward to reading any full article/thread. Cheers Ian
-
HS30-H and Abas, Yes this pic came from a thread on the uk Zwebsite. I emailed the starter of the thread 2-3 months after the thread started, just to see what was happening, heres the reply "Hi Ian, Sorry for the delay in replying,just got back from holiday,As far as I am aware the guy was not intending to sell and was moving it to a friend,s garage to restore.I spoke to the owner personally,a pleasant chap, but got the feeling the car would never go for restoring. Funnily enough I passed by just before I went away on holiday and the car hadn,t moved.He did want to meet with me though but as yet I haven,t spoke to him since. Thanks Jim." As for motorsport history, hillclimbing (to what level?) was mentioned on the thread, but I get the feeling there could be a bit more. Eric Neyerlin replied to the thread, which is http://www.zclub.net/forum/showthread.php?t=2000&page=1&pp=15 and yes, it has a sunroof. Ian
-
If I remember rightly from my service manual, there is a "hole" on the special tool so you can attach a 1/2 inch torque wrench. The spec is up to 94lbs, but there was an equation where the length of the torque wrench was taken into consideration, so you got the required setting. Can't remembr what that is, but can look it up when I get home, or someone can look it up before I get back on here tomorrow. Ian
-
I just took my strut down to my local machine shop, they had a spanner to fit the gland nut size (55mm) and broke them loose for nothing. No chewed up nut.
-
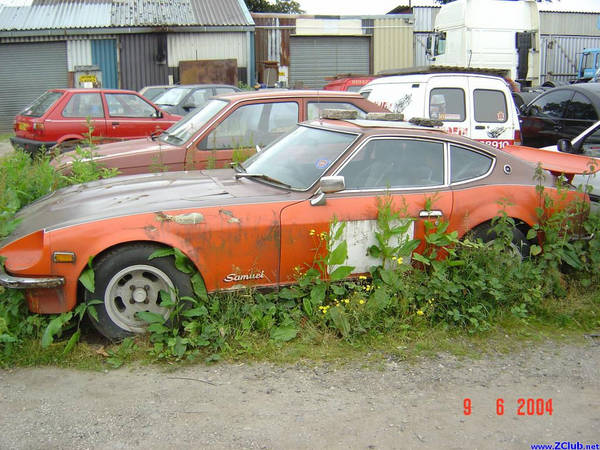
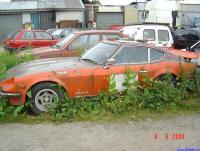
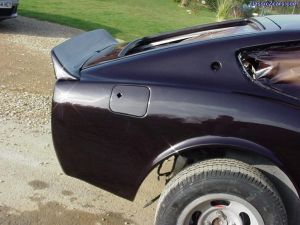
I agree with building a replica, esp. if it still exists. To see (and hear) Big Sam doing what it was meant to do....hmmmm. You could get hold of an original Samuri 240, which were prepared by the same people who built Big Sam. Though these are rather rare now, attached is one that was found with motorsport history, been sitting 12 years, I think it a real shame just sitting there rotting away....
-
-
-
-
There are some people say not to remove them, but e.g. in Frank Horowitz (spelling?) How to build your Nissan/Datsun L series engine it tells you how to. I think there would be a lot of scrap heads if you could not fit cam towers/head saver shims. In Franks book he does mention that Nissan recommends a certain small amount (can't remember the figure) can only be taken off the height of a head, but in practice, there will be quiet a few with Zeds have had more skimmed from our heads than what Nissan recommends and are using cam towers shims. In doing so have removed the cam towers.
-
Gav240, Sorry for the late reply, but my only access to the internet is at work. If you still require the info. I brought them is July '04, shock boot from MSA (PART NO. 23-4090) front and rear, I paid $39.83 each. The part no. for the clip, just for the heck of it is 54057-N3700, even though on a previous threads they are no longer avail. and your going for cable ties. As for bump stops try www.suspension.com, they are $8 each, rather than the $19.95 each from VB or MSA. I hope I have helped in some small way. Ian
-
Jason, My standard cam was internally oiled, but the performance cam I got required external oiling. I removed a set of cam towers from a external oiled engine and swapped the cam towers over on my head. Punch mark them before removing, so you know what went where. I would clean the threads out on the head if you are going to do this, as it does not take much to mess up the thread. Just follow the instructions in a manual, with regards to installing the cam and tightening the cam tower bolts down. I don't know if there is a way modifying the internal oiling cam towers, is there? My internal oiling cam towers did not have any holes to attach a spray bar to, let alone a oil passage. You could see on the casting where they would go. Cheers Ian
-
Gav240z, I got mine under a year ago from MSA, genuine Nissan ones, I can't remember the price or the part number. I can look if you want? Just for your info, the rubber boot slips on the rim of the top spring plate, and on the bottom there is a metal clip that holds the boot to the strut. I would think you would need this clip too. Cheers Ian
-
These numbers are the second part of the Nissan part number. I have the LD28 crank which has V07 and I used this against the listed part no. in my Motorsports catalogue to make sure I got the right part. Though on my one, the ***40 part was different. Having V07 is how you make sure you have a LD28 crank. The crank part number on Carfiche.com for a ZX is P3000, it differs slightly from what Phred has, but he knows where his came from. I think its the same as having a N42 head or a E36 intake manifold, these are the first 3 characters of the second part of a part number. I hope that makes sense. Ian
-
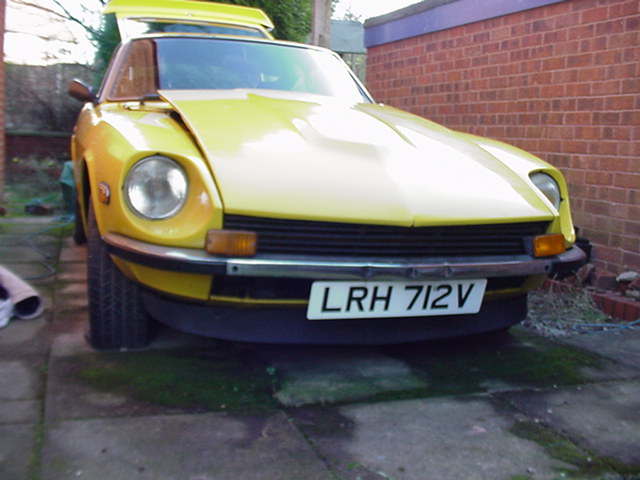
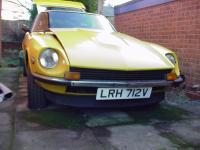
Mr Camouflage and others, You mentioned the front indicators, but somewhere along the lines when the car was rebuilt for Nissan UK, were put on wrong. The front indicators should be on the top of the bumper, not below. See attachment. Cheers Ian
-
The books I have read (e.g. Wick Humbles How to restore your Datsun Z) say put the window door frame in first, then the glass. I tried this (260 '78) and the parts that go into the guides (inside the door) for the window would not go into the top of the door. I was starting to chip the paint, so I took the window frame out and put the glass in first. With the frame out, you can use the wider parts on the tops of the doors (which were bit obsured by the frame. Once the glass is in, put in the frame (when the glass is sitting inside the door). I am not saying Wicks way was wrong, just the way I found was sooo much easier.
-
Texasz, I am using wiring loom tape, it has no sticky side to it, when you are wrapping it around, just keep it taut. I unwound my old tape rather than wrapping over the top. Just unwrap some old tape to a good point (like when wires go off the main loom) wrap new stuff on and working my way down the loom. Also cleaning my connectors too, just covered in crud. Scrapping the biggest of it off then using some solvent. Over here, you can buy antiseptic wipes (general use) in a plastic container (the wipes pull out the top). I poured the excess water out and poured some solvent in instead. Now I have solvent wipes, very handy indeed. Cheers Ian
-
Texasz, A small detail I know, but what about recovering the wiring loom with fresh wiring loom tape? I am doing mine at the moment (bare metal respray inc. engine bay) as the engine is out, my wiring loom is dirty, overspray, underseal, and looks bad against fresh paint. I don't know whats yours is like. Just a thought. Ian
-
It does help, thank you. RIP260Z
-
Hi, I am putting new weatherstrips purchased from MSA for my recently painted 1978 260Z. They have been going on fine, but I just want to confirm how the weatherstrips go on the hatch (tailgate) apperature. My Wick Humble book just could not confirm. The inner is on, and there is a top outer and two sides. Both seals are roughly "L" shaped with a slot in the upright to fix to the lip of the apperture. Now, does the flat part of the L go in the bodywork channel, or does it float in the apperature space. I think it is glued in the channel, but I just wanted to ask (maybe stupidly).I did not want to have to try and remove it and glue it in properly. Thanks