.JPG.cfcada9cf1c1b502df3f5f2f2ca3ff36.JPG)

SteveJ
Community Member
-
Joined
-
Last visited
Everything posted by SteveJ
-
Not really.
-
By the way, if you haven't done so already, go to https://www.classiczcars.com/files/ and download the factory service manual for the 260Z. Yes, your car has been modified, but the FSM will help you identify how it looked from the factory.
-
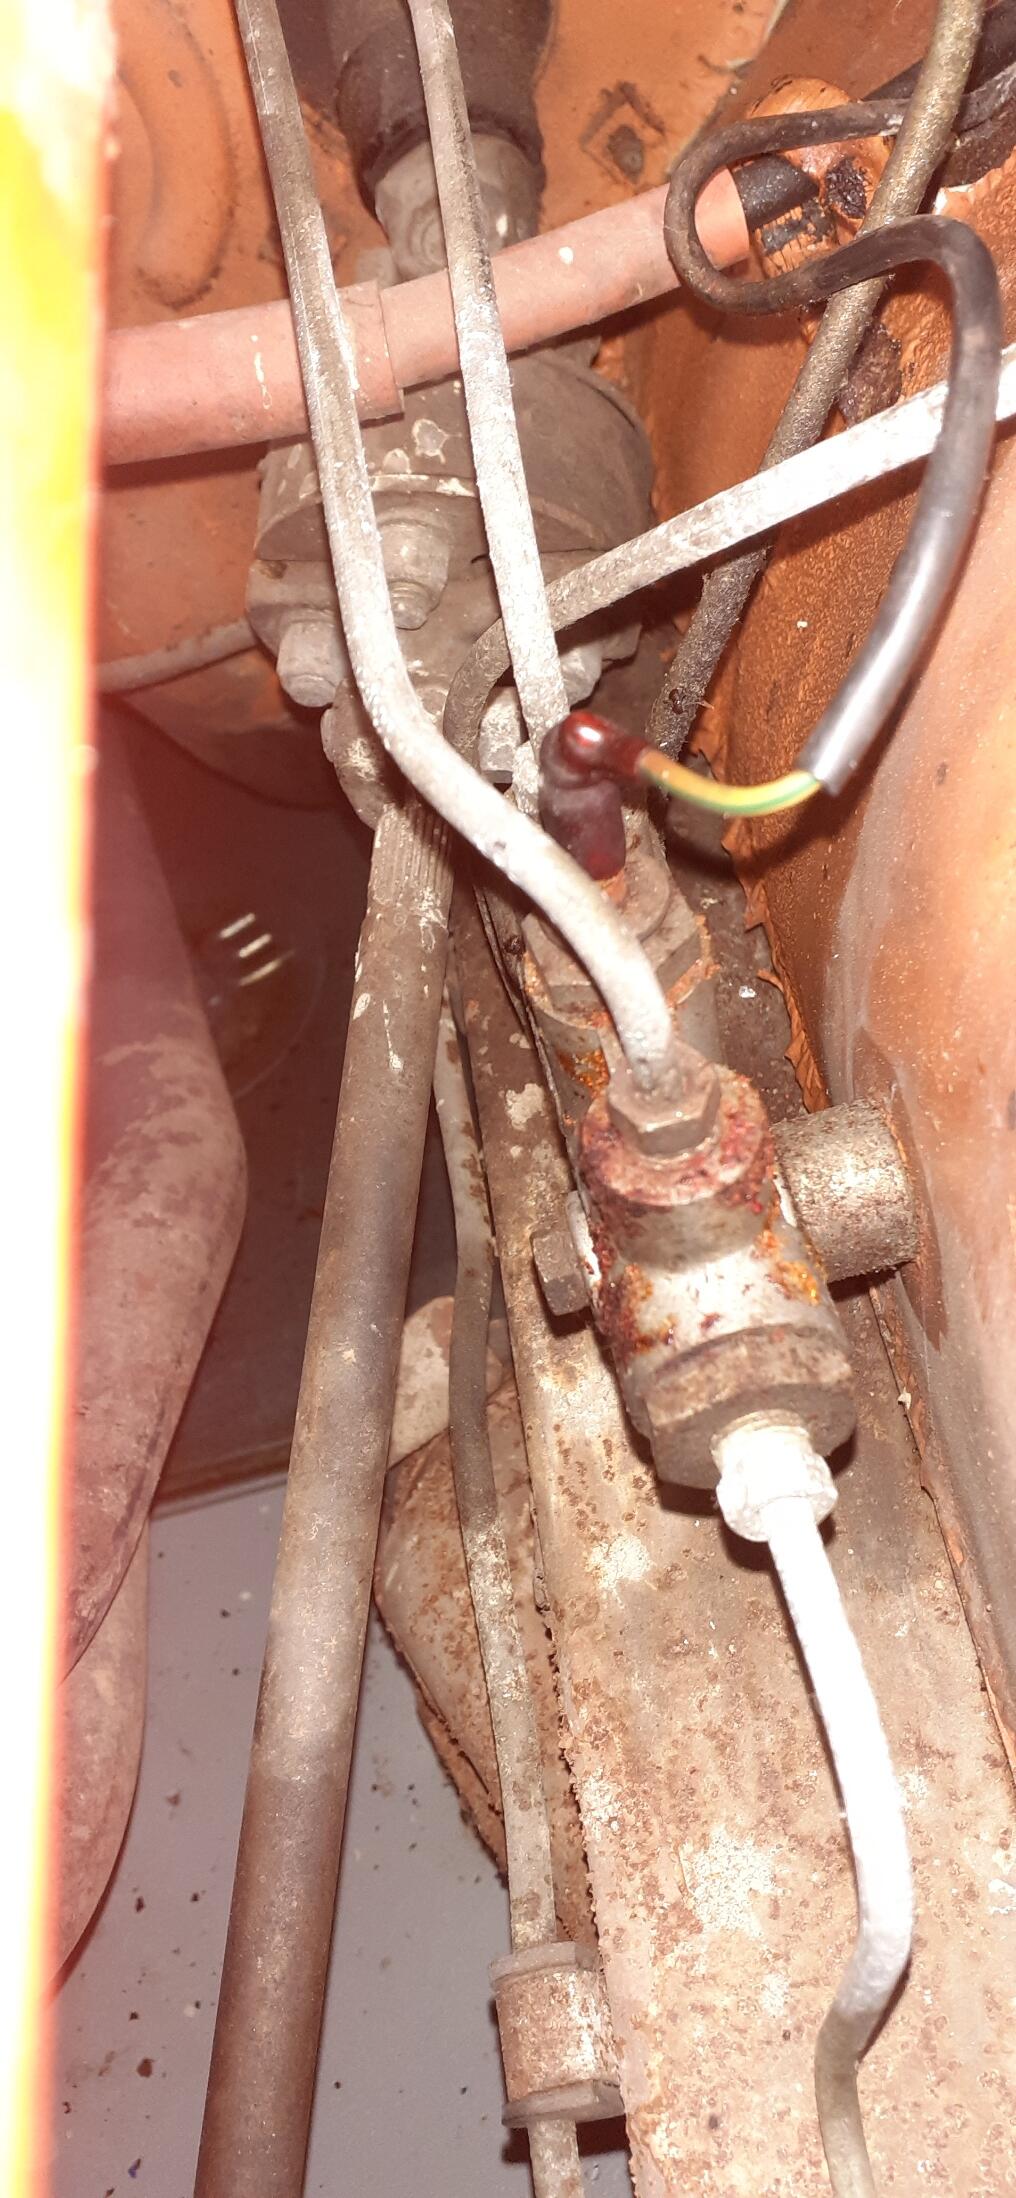
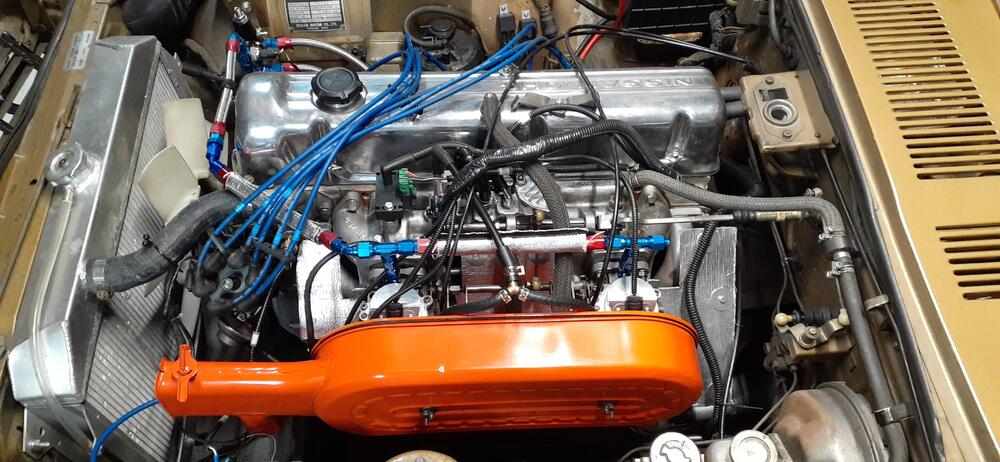
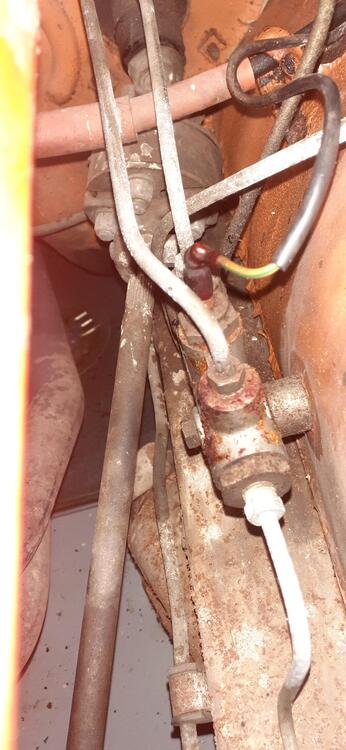
The capped off hard line is the return to the tank. The smaller hard line is the tank vent. In stock configuration, it would go to a carbon cannister. The plastic bottle is the vacuum reservoir for the AC. My guess is that the AC has been removed. You may want to consider re-routing the fuel line. It will pick up a lot of heat hanging out over the engine. Of course, the stock fuel rail could pick up plenty of heat from the exhaust manifold. Here's how I routed the fuel lines after I converted the carburetors into throttle bodies.
-
That's a good observation, @w3wilkes. @DadAndLadZ, you should probably check your fuel pressure. With not having the stock fuel rail, you lack the fuel pressure regulation afforded by the orifice in the return line.
-
We knew what you meant. I knew the Falkens were smaller than the Radial TAs I pulled off the wheels, and the visual did surprise me at first. However, when I'm behind the wheel with tires that grip well, I don't worry about it in the least. 🙂
-
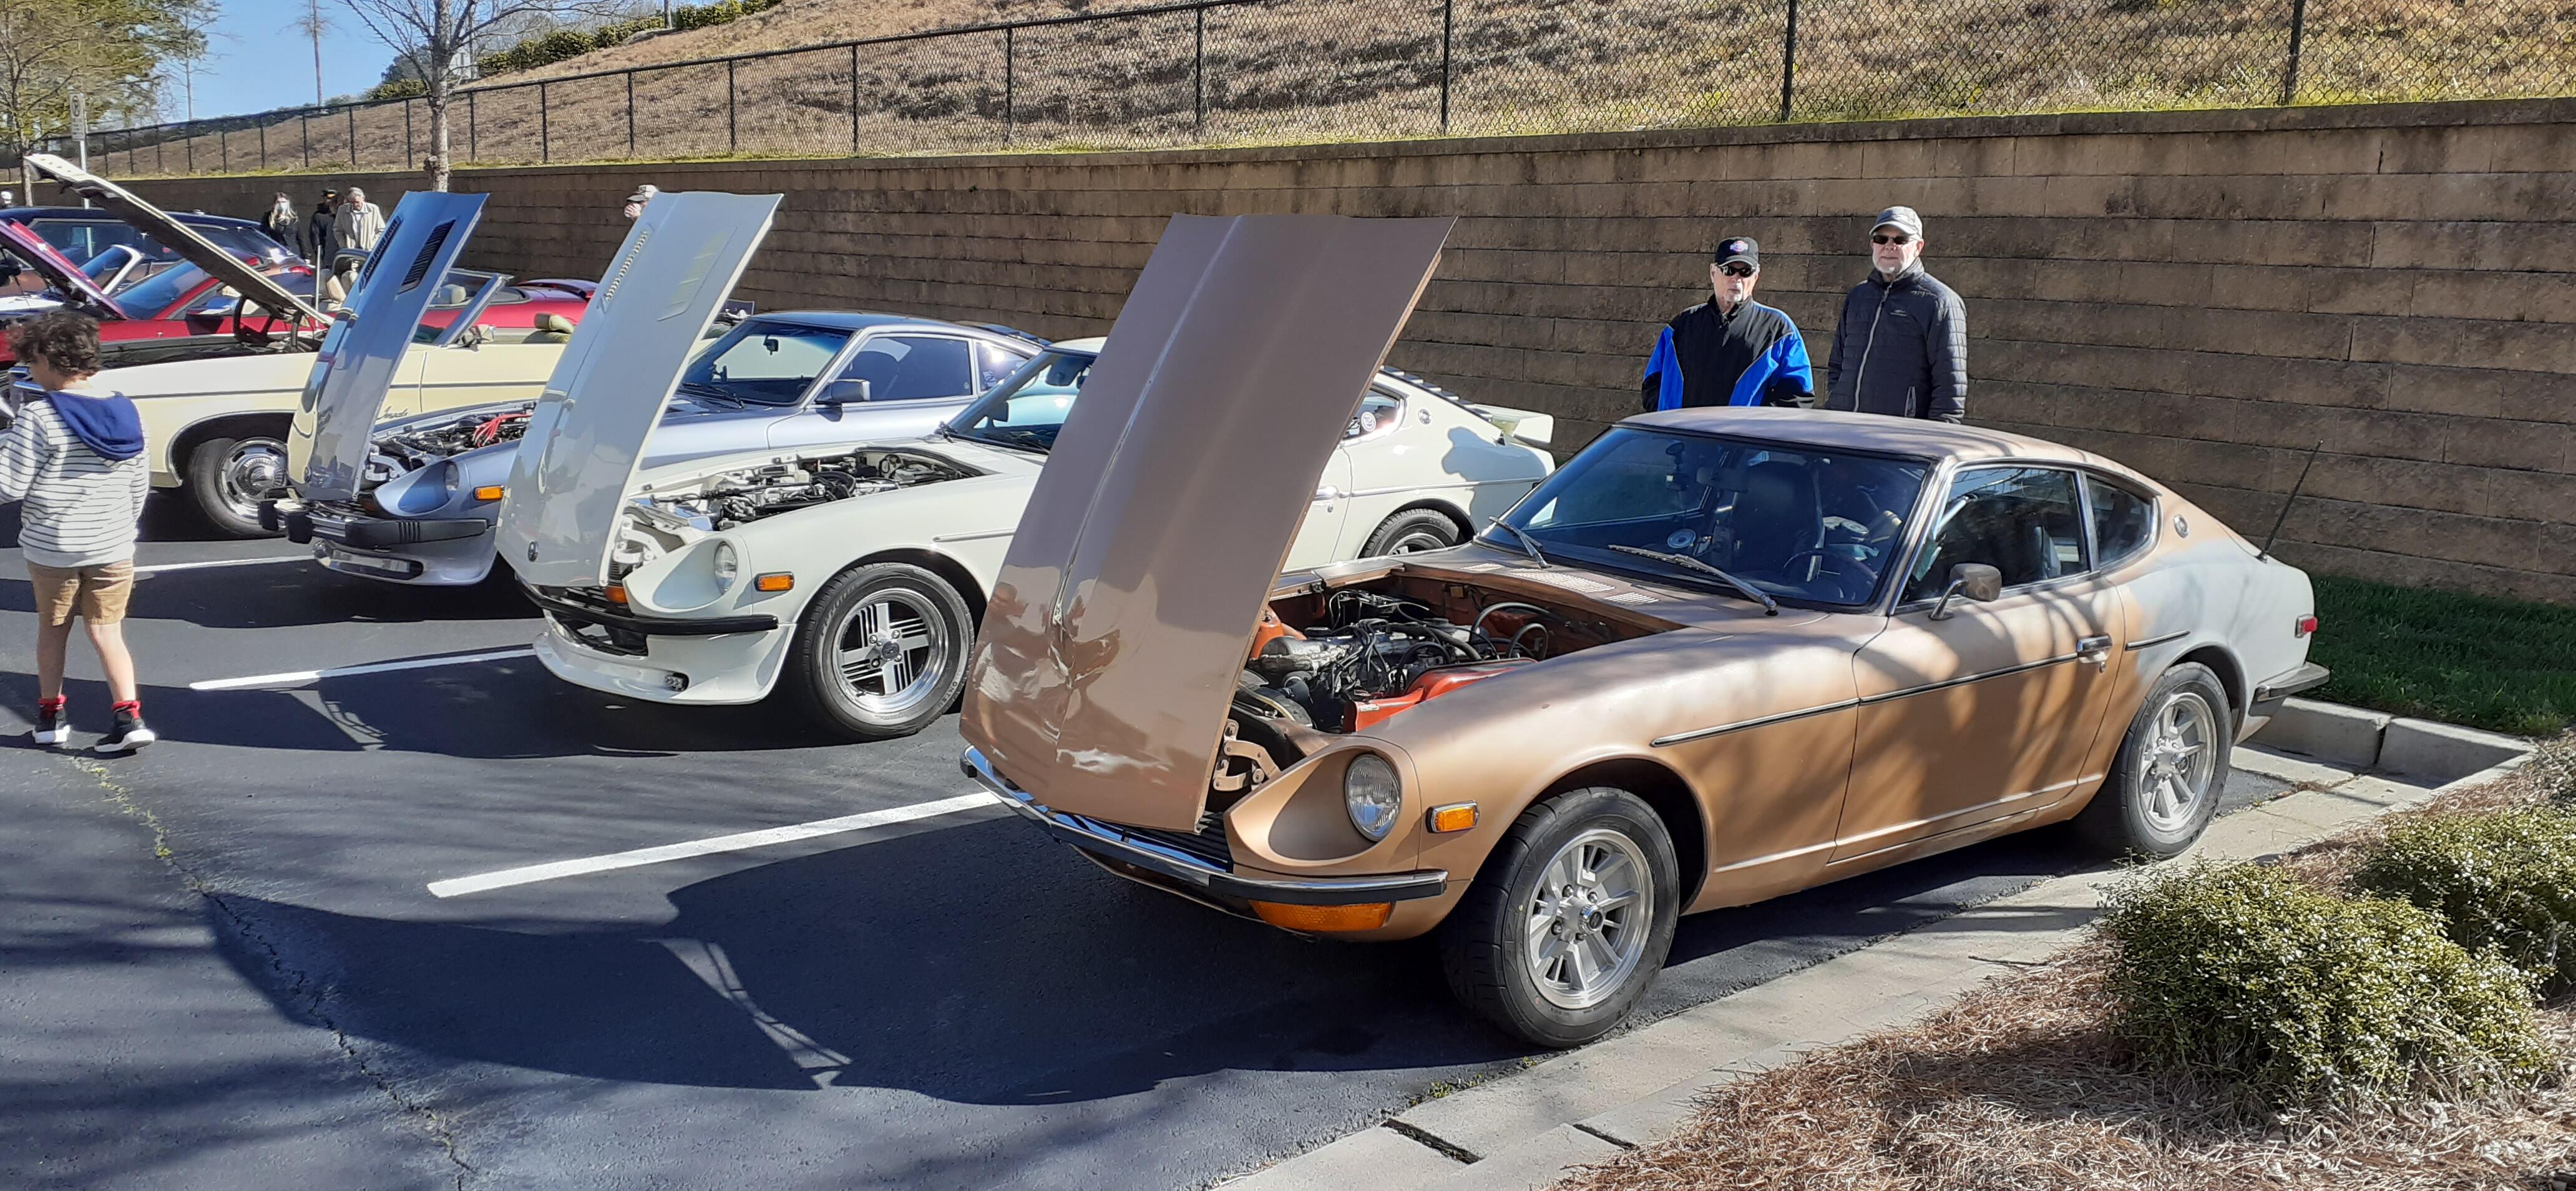
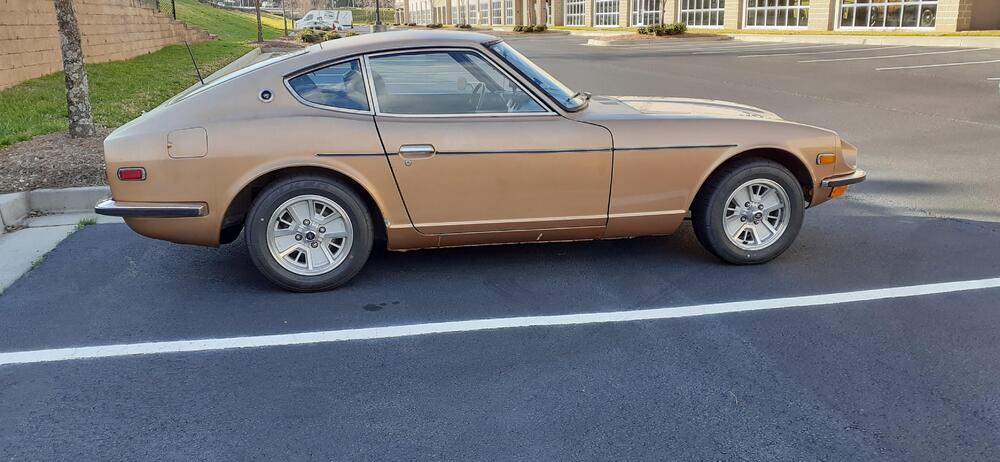
I have 195/60 R14 in the Falkens. That would be close to the same size as the 205/50 R15. My car is on the left. It has stock springs and very old struts. Here is more of a side view. Last photo While the gap may seem big, the traction is very good.


-
I think someone on this forum made an emergency pull for the hood latch that is still accessed from below but easier than using a pry bar. Here's one thread where @beandip and @Bonzi Lon describe their emergency release: In post #11 on this thread @mjr45 describes how he fashioned an emergency release.
-
While the Radial TAs are available in that size, they really aren't performance tires.
-
I run the Falken Azenis RT615K+ in 14" on my 240Z. https://www.falkentire.com/tires/passenger-car-tires/azenis-rt615k-tire There is also the Azenis RT660. https://www.falkentire.com/tires/passenger-car-tires/azenis-rt660-tire Both are available as 205/50R15, so they are slightly smaller than your current tires. From doing a search on Tire Rack, I would say that going with a slightly smaller tire is your best option.
-
Try reaching out to the Cleveland Z Club to see if there is anybody with S30 expertise who could help you. http://clevelandzclub.com/contact-us/
-
If you want to, you can send me the turn signal switch to evaluate and advise.
-
You should see continuity at the two wires with the turn signal stalk in the down position. If you don't, it is likely that there is too much build-up on the contacts. Other possible issues: Bad solder joints where the wires are mated to the contacts Broken wire for the left turn circuit Contact is not in the board for the left turn signal (low probability) Corrosion at the connector.
-
I have the number for the current owner of the 46. 🙂
-
The construction of the 280Z turn signal switch is quite different from the 240Z switch. Inside the switch there is a "bridge" that will connect the contact for the power wire to the contact for the left and right signals. As you can see, there is a spring to press the rounded side down. Here is a picture of the contact pads for the turn signals. This is before I clean up this switch. When the stalk is in the neutral position, the bridge rests on the brown areas between the contact pads. You can take apart the switch and clean it up to make it nice and shiny! If you don't feel comfortable taking apart the switch, send me a PM, and we can discuss my cleaning services. Here's a brief description of what I did with that switch: https://fiddlingwithzcars.wordpress.com/2013/07/11/late-280z-turn-signal-switch/
-
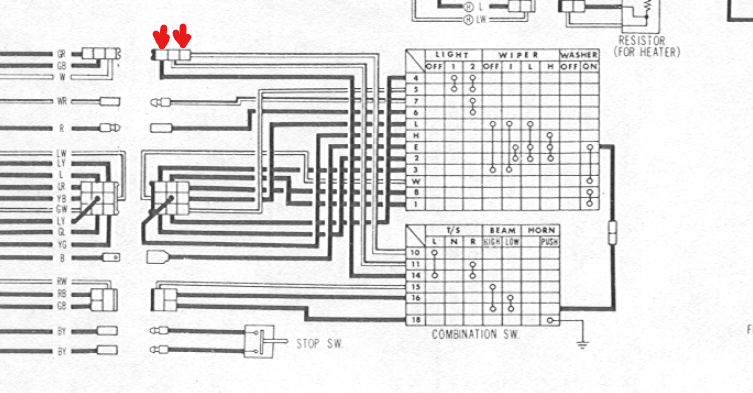
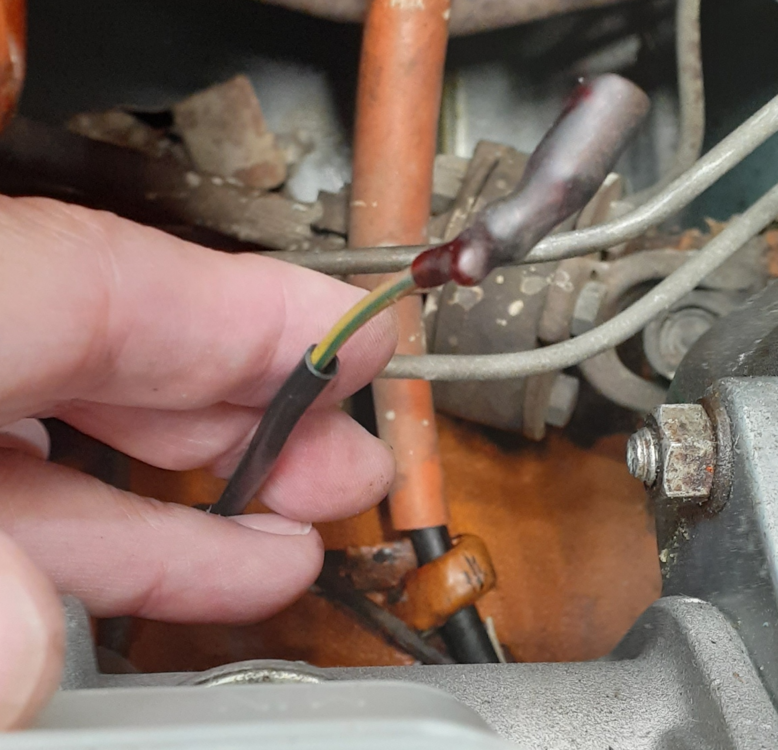
The interesting thing is the wiring diagram lists it as yellow/blue. The stripe sure looks green to me. Maybe it just really faded.
-
I went to my car to verify and cleaned up the wire. Confirmed! Good sleuthing!
-
Not sure if there was a reason or just Chinesium. I would be wary of getting junk in the filter from drilling, though.
-
Rockauto seems to have the Fram filters in stock. I bought some as "just in case" for the 260Z since I recently had an issue that seemed to be resolved with replacing the fuel filter.
-
So I did a little more digging. The black/yellow is shown toward the bottom left of the wiring diagram. This shows the green wire. There might be a black/white wire hiding around there, too.

-
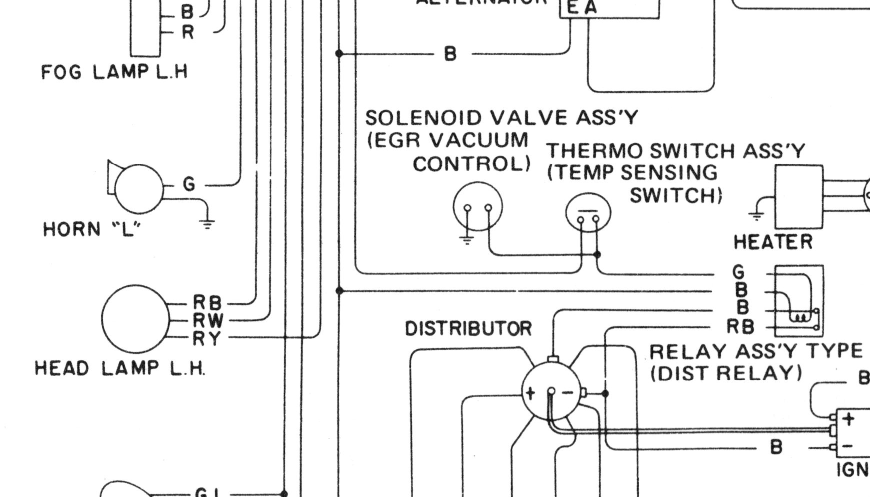
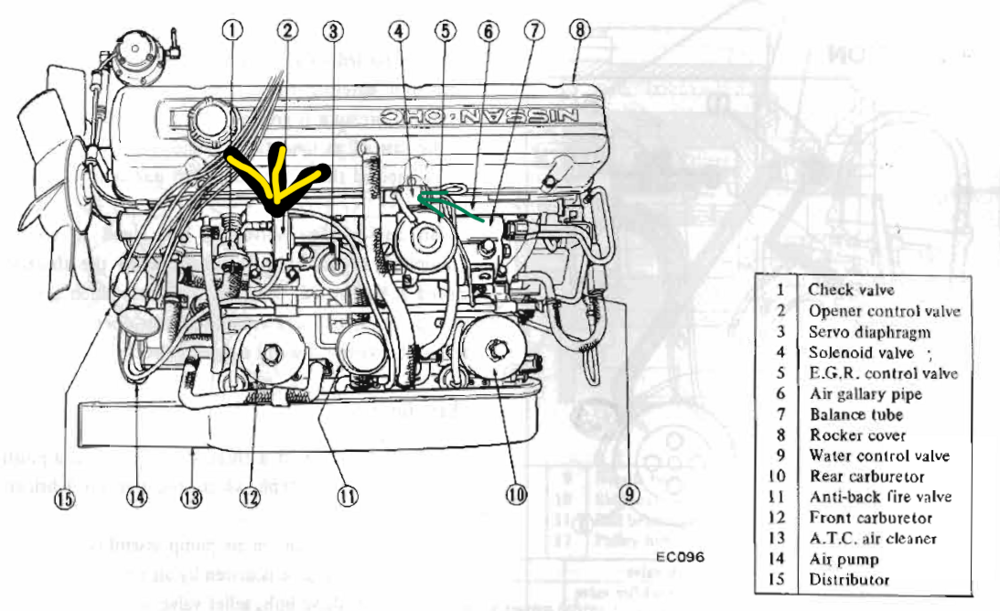
Okay, so I went down to my car to take a look to see what I could match up. The black/yellow and green wire are for emissions controls. Matching wire lengths helps, even if the controls have been removed. The black/yellow is for the opener control valve, and the green is for the solenoid valve. Look through the EC section of the FSM for more info. In my car, a previous owner had cut the wires and spliced them back in. I'm not sure why. In looking at the washer motor, my car does not have a yellow/green running to the washer motor. I believe it was black/yellow. I could not find a single yellow/green, only the one in the 3 wire connector for the wiper amplifier. Of course, there's only so much time I'll spend contorted in the footwell to look at the wiring. As for why someone would cut off a body ground...well, I don't use the term IPO (idiot previous owner) for fun.
-
Yellow - connects to the temp sender Black - goes from the distributor to coil negative Green/white - from ballast resistor to tachometer Black/white - from key switch (ignition power) to ballast resistor Black/white with shroud - from tachometer to coil positive Black/yellow & black - washer motor Green - typically horn Red/black - reverse light switch on transmission Black/yellow - neutral safety switch for solenoid power The black was probably a ground - maybe the chassis ground? Black/yellow - solenoid power Yellow/green - not sure why this would be alone. It could be associated with the intermittent wiper relay. Page BE-2 does show the Y/G wire as a pin on a 3 wire connector. The mystery is that BE-2 shows 2 Y/G wires for the engine harness. One is on the blue connector, and the other is on the white connector. However, I only can find the destination of one Y/G wire at the 3 wire connector.
-
If you're getting one brake light to work, but not the other, things to consider: It's still the turn signal switch. Sometimes the tabs are not bent at the correct angle to make contact. Bad/wrong bulb Wiring issues You should try to check the voltage at the white/red (right) and white/black (left) wires at the 6 pin connector at the steering column. I suggest using a t-pin to allow you to monitor the voltage with the connector put together. Stick the t-pin into the back side of the connector, and touch the positive probe of your voltmeter to the t-pin and the negative probe to a good ground. Step on the brakes to see if you have voltage. You can also see if you have continuity between the green/yellow wire at that connector to both the white/red and white/black wires. If either of those tests fail, your turn signal switch may need to be tweaked to adjust the contacts.
-
That would indicate you're guessing wrong. If the resistor was removed from the tach circuit, there would probably be issues.
-
Yellow and black = Fuel sending unit. Green = fuel pump power.
-
Is the resistor still in the circuit? Measure from the wire at the tach to the coil negative. It should be about 2.2K Ohm.