


Captain Obvious
Community Member
-
Joined
-
Last visited
Everything posted by Captain Obvious
-
At that level of detail, my stainless plate is (nominally) four thousandths (.004 in) thinner than the plated original. So I guess it's a performance increase too. Not sure how much weight difference that would result in, however.
-
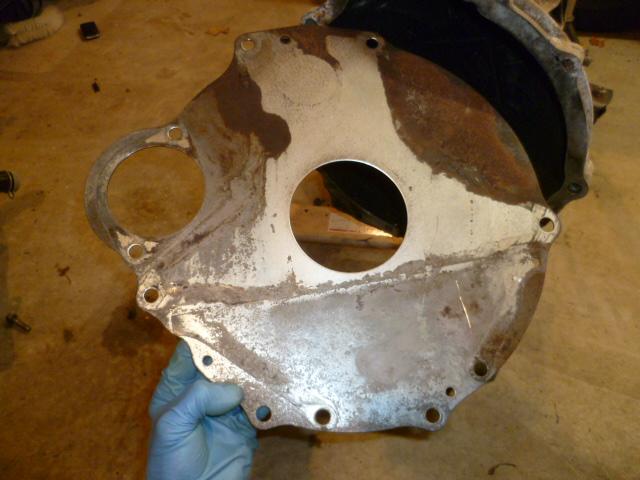
Hmmm. As simple as the question seems, I'm not sure what you're asking. Are you asking "Is there a weight difference between my new stainless piece and the old triangular holed carbon steel piece? If so, then (ignoring miniscule differences in density between stainless steel and carbon steel) the answer is "No, they are the same." But if you are asking "Is there a weight difference between my new stainless piece and the older 240 version with the round hole?", then the answer is "Yes, mine is lighter because the hole is larger." Here's a pic of a rusted up older 240 design with the round hole in the middle:
-
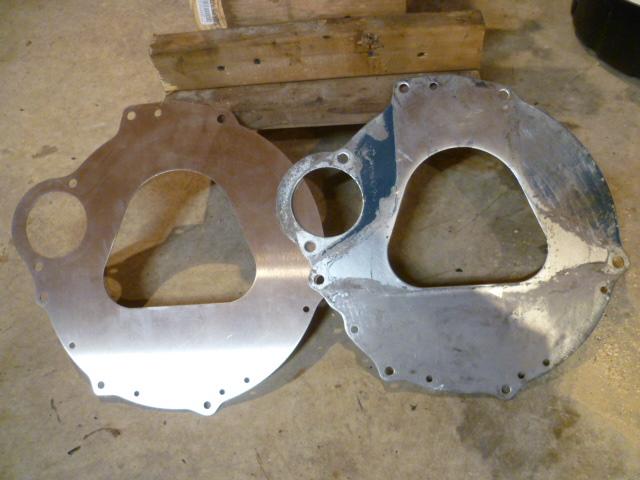
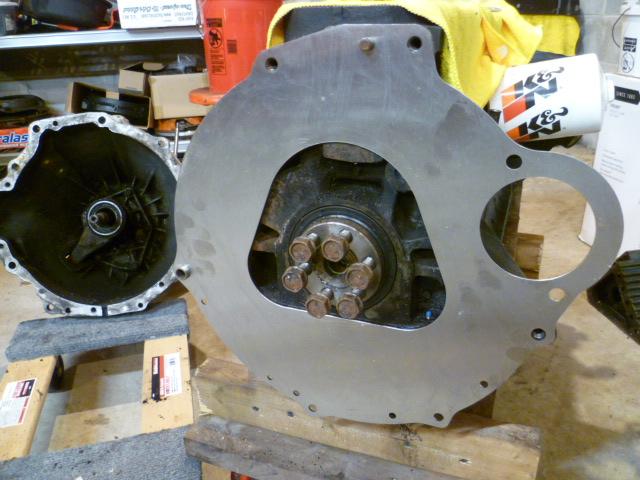
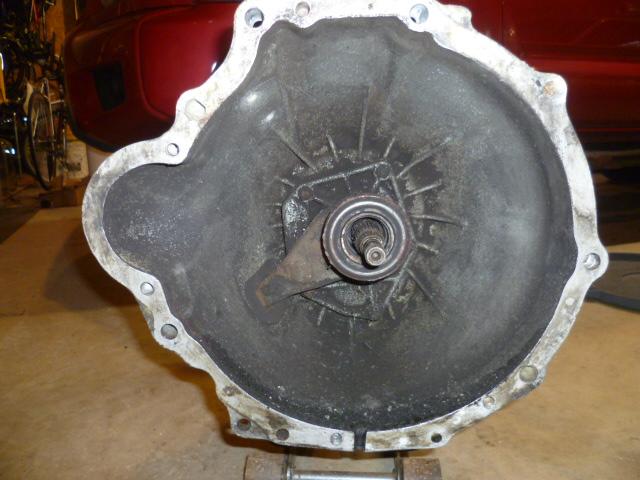
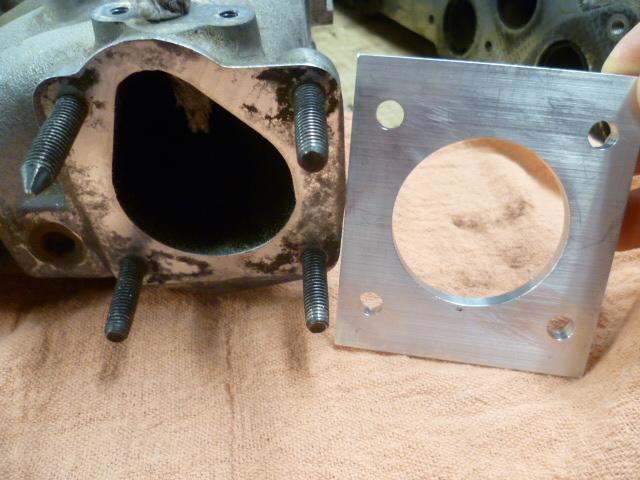
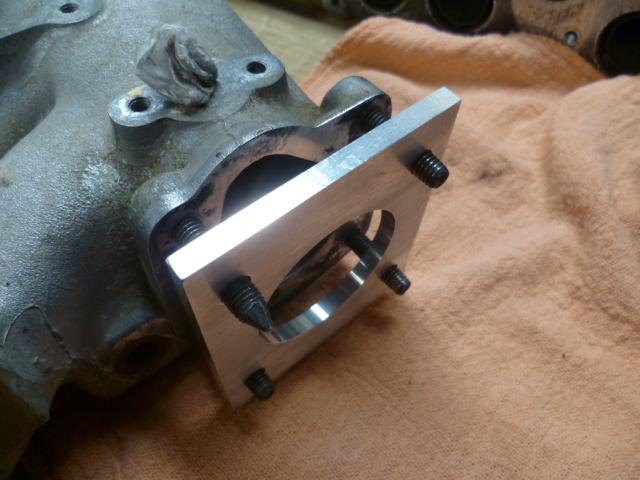
As a recent project, I had a new rear plate made for between the engine and the transmission. It's laser cut out of 304 stainless, and it turned out fantastic! Just the thing for bling! Since I'm putting it on a 280, I modeled it after the later version with the triangular shaped hole instead of the earlier 240 version with the round hole in the middle. The parts fische says the manual trans 240s used P/N 30411-E3000, while everything after that used P/N 30411-A8600. Also note that the 240 version was superseded by the 280 version, so according to that documentation, they are interchangeable. Here's the new shiny stainless bling plate next to the original with the failing plating: Mounted on the back of the motor: Pic of the front of the transmission to see where the holes are: And here's the plate up against the tranny face. Just hanging in place with bolts and drill bits: Any interest in having more of these made and offering for sale?

-
I'm saying that I don't remember the exact locations of all the parts involved and it's possible that the throttle opener may be mounted lower on the 240 balance tube. If that's the case, the throttle opener device itself may be identical between 240 and 260, but they may have put it in a different spot between the two. Same goes for the throttle stop you're hovering above on the balance tube. That little stub of throttle linkage may be significantly different between the two. I just don't remember. I know lots of people have done flat top to round top conversions and have overcome these hurdles and I bet there are pictures out there on this forum that would answer some of those questions.
-
Glad to help. Hope it saves some time. You may find that the holes in my plate are a tight fit on the mounting bolts with the geometries and tolerances involved. The holes in the throttle bodies I've messed with here use larger holes than what I put in that plate. In fact, they used two different hole sizes on the diagonal. Two of them are really sloppy, and the other two are tighter, but still not as tight as what I did. Anyway, you may find that you need to open those holes up a little bit to get it to fit without interference on the mounting bolts. Depends on the accuracies of all the parts involved. On the factory floor, they just want things to fit without a fight and they made the mounting holes sloppier to guarantee that happened.
-
Well if you're going to make it two pieces, you really don't have to clock the throttle body if you don't want to. You can use flat head screws or counterbored bolts to hold one piece to the manifold. Screw that into place first. Then use flat head screws to hold another plate to the first and have threaded holes in the new pattern on the second plate. Not really a good description..... Anyway, here's my sketch of the original throttle body mount. Let me know if you can't read the dimensions and I'll edit the sketch to make them more readable: I made a spacer plate for the Sentra throttle body. The mounting pattern is the same, but the linkage interfered, so I had to move the throttle body out away from the intake by 1/4 inch. Here's a spacer plate made to the dimensions above: And here it is next to the intake hole:


-
That vacuum servo that is giving you troubles is called the "throttle opener", and it's job is to hold the carbs open a tiny bit under very high intake manifold vacuum conditions. Essentially it is supposed to prevent the manifold vacuum from going above a certain level. It's in the same category as the anti-backfire valve. And to answer the question about the linkage... No, that adjustment screw is not supposed to be floating in air a half inch away from the linkage. I assume that it's all caused by incompatibilities between the 260 bits on the balance tube and the 240 bits below. Last answer... Yes, that is a round top style piece between the two carbs. So for now, you can just leave the throttle opener disconnected and get the car running well. Then once you're over the basic hurdle, you can get yourself a round top balance tube and throttle opener maybe.
-
Did the car run reasonably well with the flat tops on it? First thing would be to make sure it's a decent running motor in the first place. Start by getting rid of the vacuum leaks. Just to test things, you can cap off the entire anti-backfire system. You can also pull and plate off the EGR just in case it is sticking open a little. Other things maybe? You've got a rubber vacuum line connected to the front manifold right behind the carb. This is the line that splits and goes to your throttle opener and AB valve. Well there's another nipple (broken off) right next to that one. What's up with that? Is that a leak? And the throttle linkage doesn't look quite right to me. The stop up by the EGR valve is nowhere near making contact. And the connection nut on the rear carb looks like it's bent and/or loose? Is that an attempt to mitigate the "too short" linkage piece between the two carbs?
-
Describes me too, so I guess it fits. Haha!! Seriously though, about the only time I miss having a more highly featured phone is when I travel. For finding local attractions like food or entertainment, and directions to such places. Other than that, I'm still satisfied. It makes and receives calls and rudimentary texts. I'm good. And yes... I only have to charge it every couple of days. I see people sitting in public places huddled around the wall outlets charging their devices and sometimes quarrelling about the use of the outlet. My criteria for my phone goes like this: Makes and receives calls and texts. Small as possible. Long battery life. No external call activating buttons and cannot (not just "unlikely", but CANNOT) pocket dial by accident, even if I'm in there playing with myself and push a couple buttons by accident. That's about it.
-
OK, I'll look for my sketch. So I've got some questions about this adapter plate you're planning... With the mounting holes being "close, but not close enough", there is significant overlap between the original pattern and the scheme for the 350Z. That overlap presents a set of difficulties in making an adapter plate. It would actually be easier if the patterns were radically different instead of just a little different. Are you planning to make this thing from multiple pieces and sandwich them together? Are you planning to spin the 350Z throttle body a little (clock it 45 degrees or something) so that none of the holes interfere with each other? Something else? Sorry... I'm just having trouble picturing this plate.
-
Glad you quieted it down and got it running better. So you didn't mention it, but I'm assuming you also fixed the injector O-ring leak while you were in there? Yes, vacuum leaks large and small are the cause of many of the problems with the fuel injection system.
-
We have a "somethingCast" (Chrome maybe) and something else newer. Two dongles hanging off the back of the TV. Someone in the house surely knows how to use them. I don't use either of them because my flip phone won't talk to them.
-
Haha! Nice glitch. So this 2-D drawing for inlet face of the stock plenum... I don't have anything in electronic form, but I have a pencil sketch around here somewhere. Would that help?
-
Not sure why it would do that, but I think it's just the idle air whistling. What happens if you close off your idle air screw completely? You might have to keep it running by manually holding the throttle open a little bit while testing. The reason I ask is because I've messed around with a couple different throttle body options and one of them would whistle like that if the idle air passage was being worked too hard. I made the noise go away by opening the throttle plate a little, which allowed me to close down the idle air passage. More air past the butterfly and less through the idle bypass and it quieted down.
-
And thanks for the pics Jim!
-
Congratulations Jim!!
-
Haha!! I remember that scene (now that you mentioned it). I wonder if one of the TV systems we have in the house will get that for me... I think I need to watch that movie again to refresh my memory. If only I knew how to work the TV systems. We have Netfax and Disney Puss or something like that? I'll need a navigator.
-
If you find any good info on the butterfly sizes, let us know. And good luck with the project.
-
Gotcha. Of course it's impossible for me to tell from just the pics, but from my end of the screen it doesn't look like there's enough meat. But do you really need 75mm? Is there any downside for "too big"? I'm thinking that because of the inherent non-linear nature of butterfly valves, that it could be twitchy at low throttle positions or something?
-
The engineer didn't do anything wrong with that pic. If that pin and hole it fits into are clean and well lubed and aren't deformed from mis-treatment... It will slip in and out with two fingers. The problem is 1) They didn't lube it at the factory when they put it in the first time so many of them have rusted up, and 2) Many of the pins have been deformed by people working on the cars after they left the factory. Kicking up burrs on either the pin or the strut housing.
-
I've seen many spacers with that sag. Probably just a shrinkage phenomenon from the molding process.
-
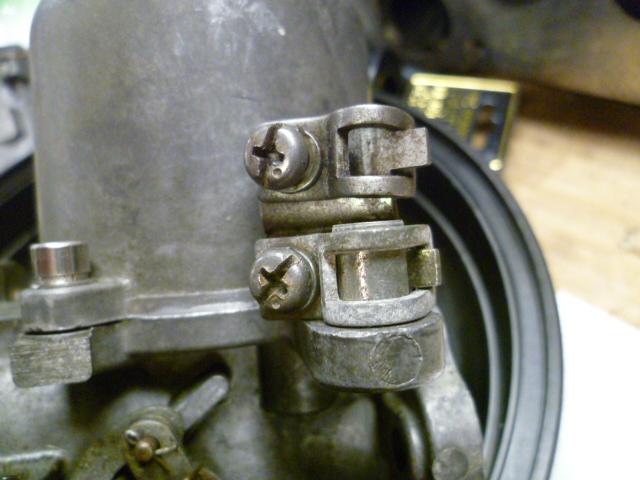
Forgot. Your mention of the choke cables reminds me... Unless they are loose in the box somewhere, you don't have the clamps that fasten the ends of the choke cables on the round tops. The flat top clamps are different and won't transfer over. Edit - Found a pic. They look like this:
-
Wow. Shiny. Yes, all the EGR stuff can go away. Not that it matters to the discussion, but the control for the EGR doesn't actually come from the distributor. It comes from a relay mounted to the front right engine compartment, under the coil (I think). But whatever. Haha! You don't currently have any water passages between the carbs and the manifolds. And you still won't after you put the new stuff on. They're four screw round tops and there are no water passages through the carb faces. I'm sure there will be some small gotchas along the way, but let's deal with them as they come up.
-
Wow wow wow... I haven't thought about that movie in forever! I've seen it a bunch times, but unfortunately don't remember any good lines or situations. All I remember is a dead guy and one guy was very afraid to drive a certain color car. Yellow maybe? Red? Saw himself in a mirror on the highway? @Pilgrim, I just watched that clip you posted. I remembered it as it played. That was excellent! Disappointed I didn't remember that without the hint.
-
LOL! So the mounting pattern is not the same. Bummer. I was trying to dig into that for you, but didn't come up with anything concrete in time. So is there enough meat to file the holes on the TB so you can get it to mount? Or is it just too far off?


