Leaderboard
-
Patcon
 Subscriber
 7Points11,111Posts
 -
Captain Obvious
Free Member4Points10,060Posts -
Yarb
Subscriber2Points1,922Posts -
.JPG.cfcada9cf1c1b502df3f5f2f2ca3ff36.JPG)
SteveJ
Free Member2Points9,645Posts


Popular Content
Showing content with the highest reputation on 10/13/2025 in all areas
-
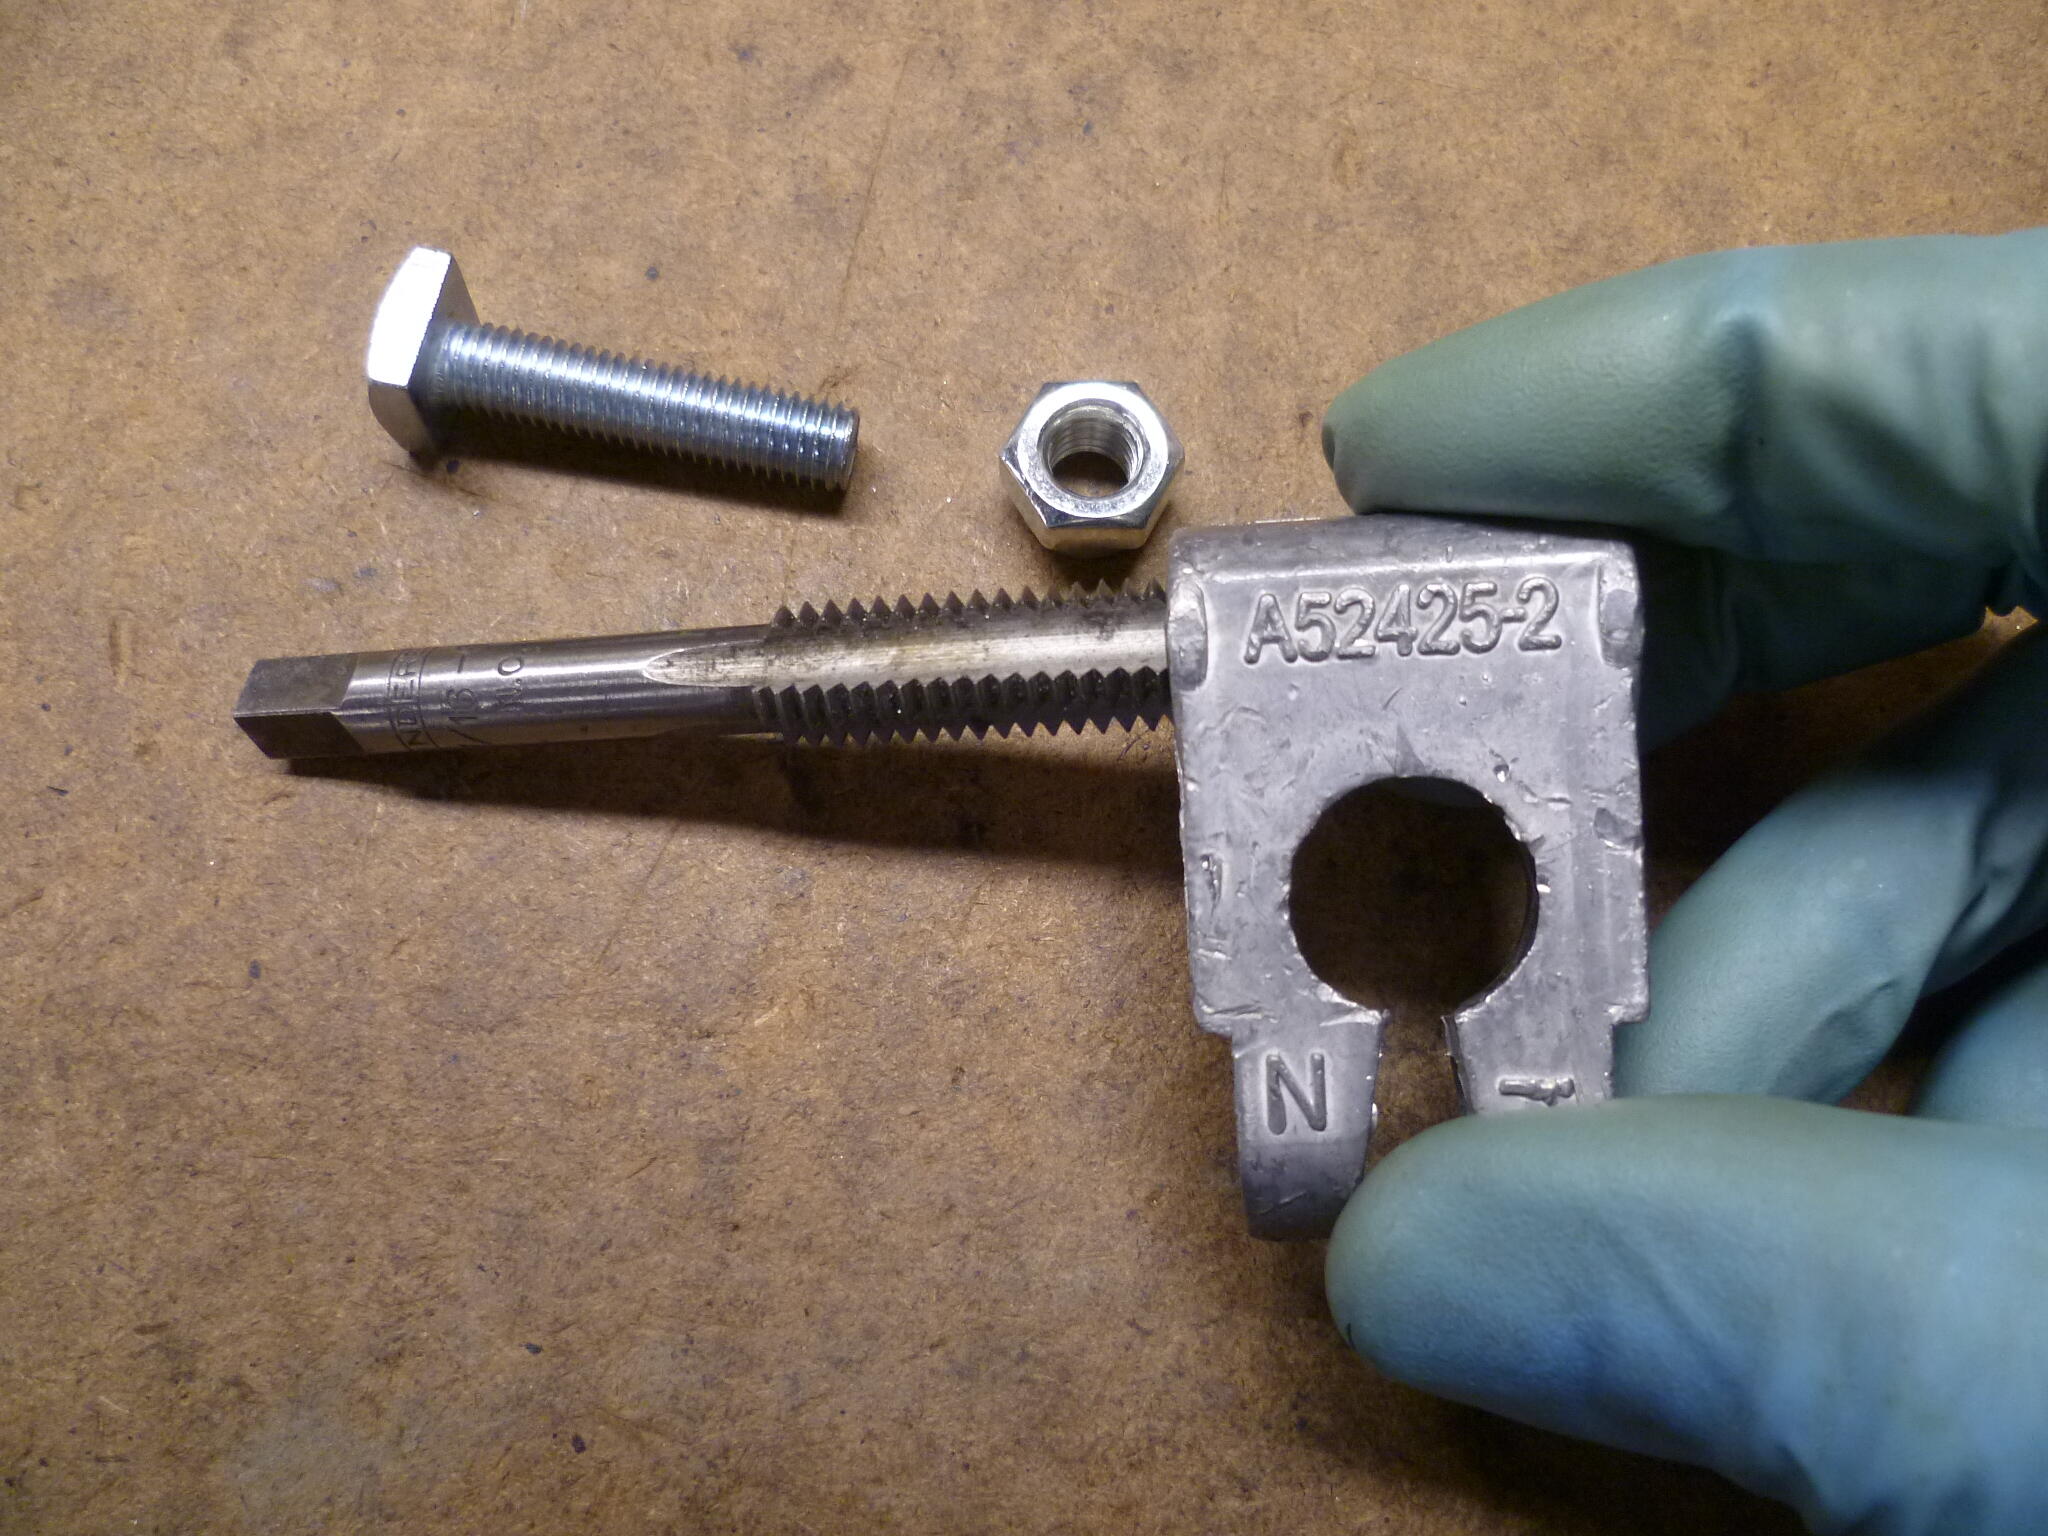
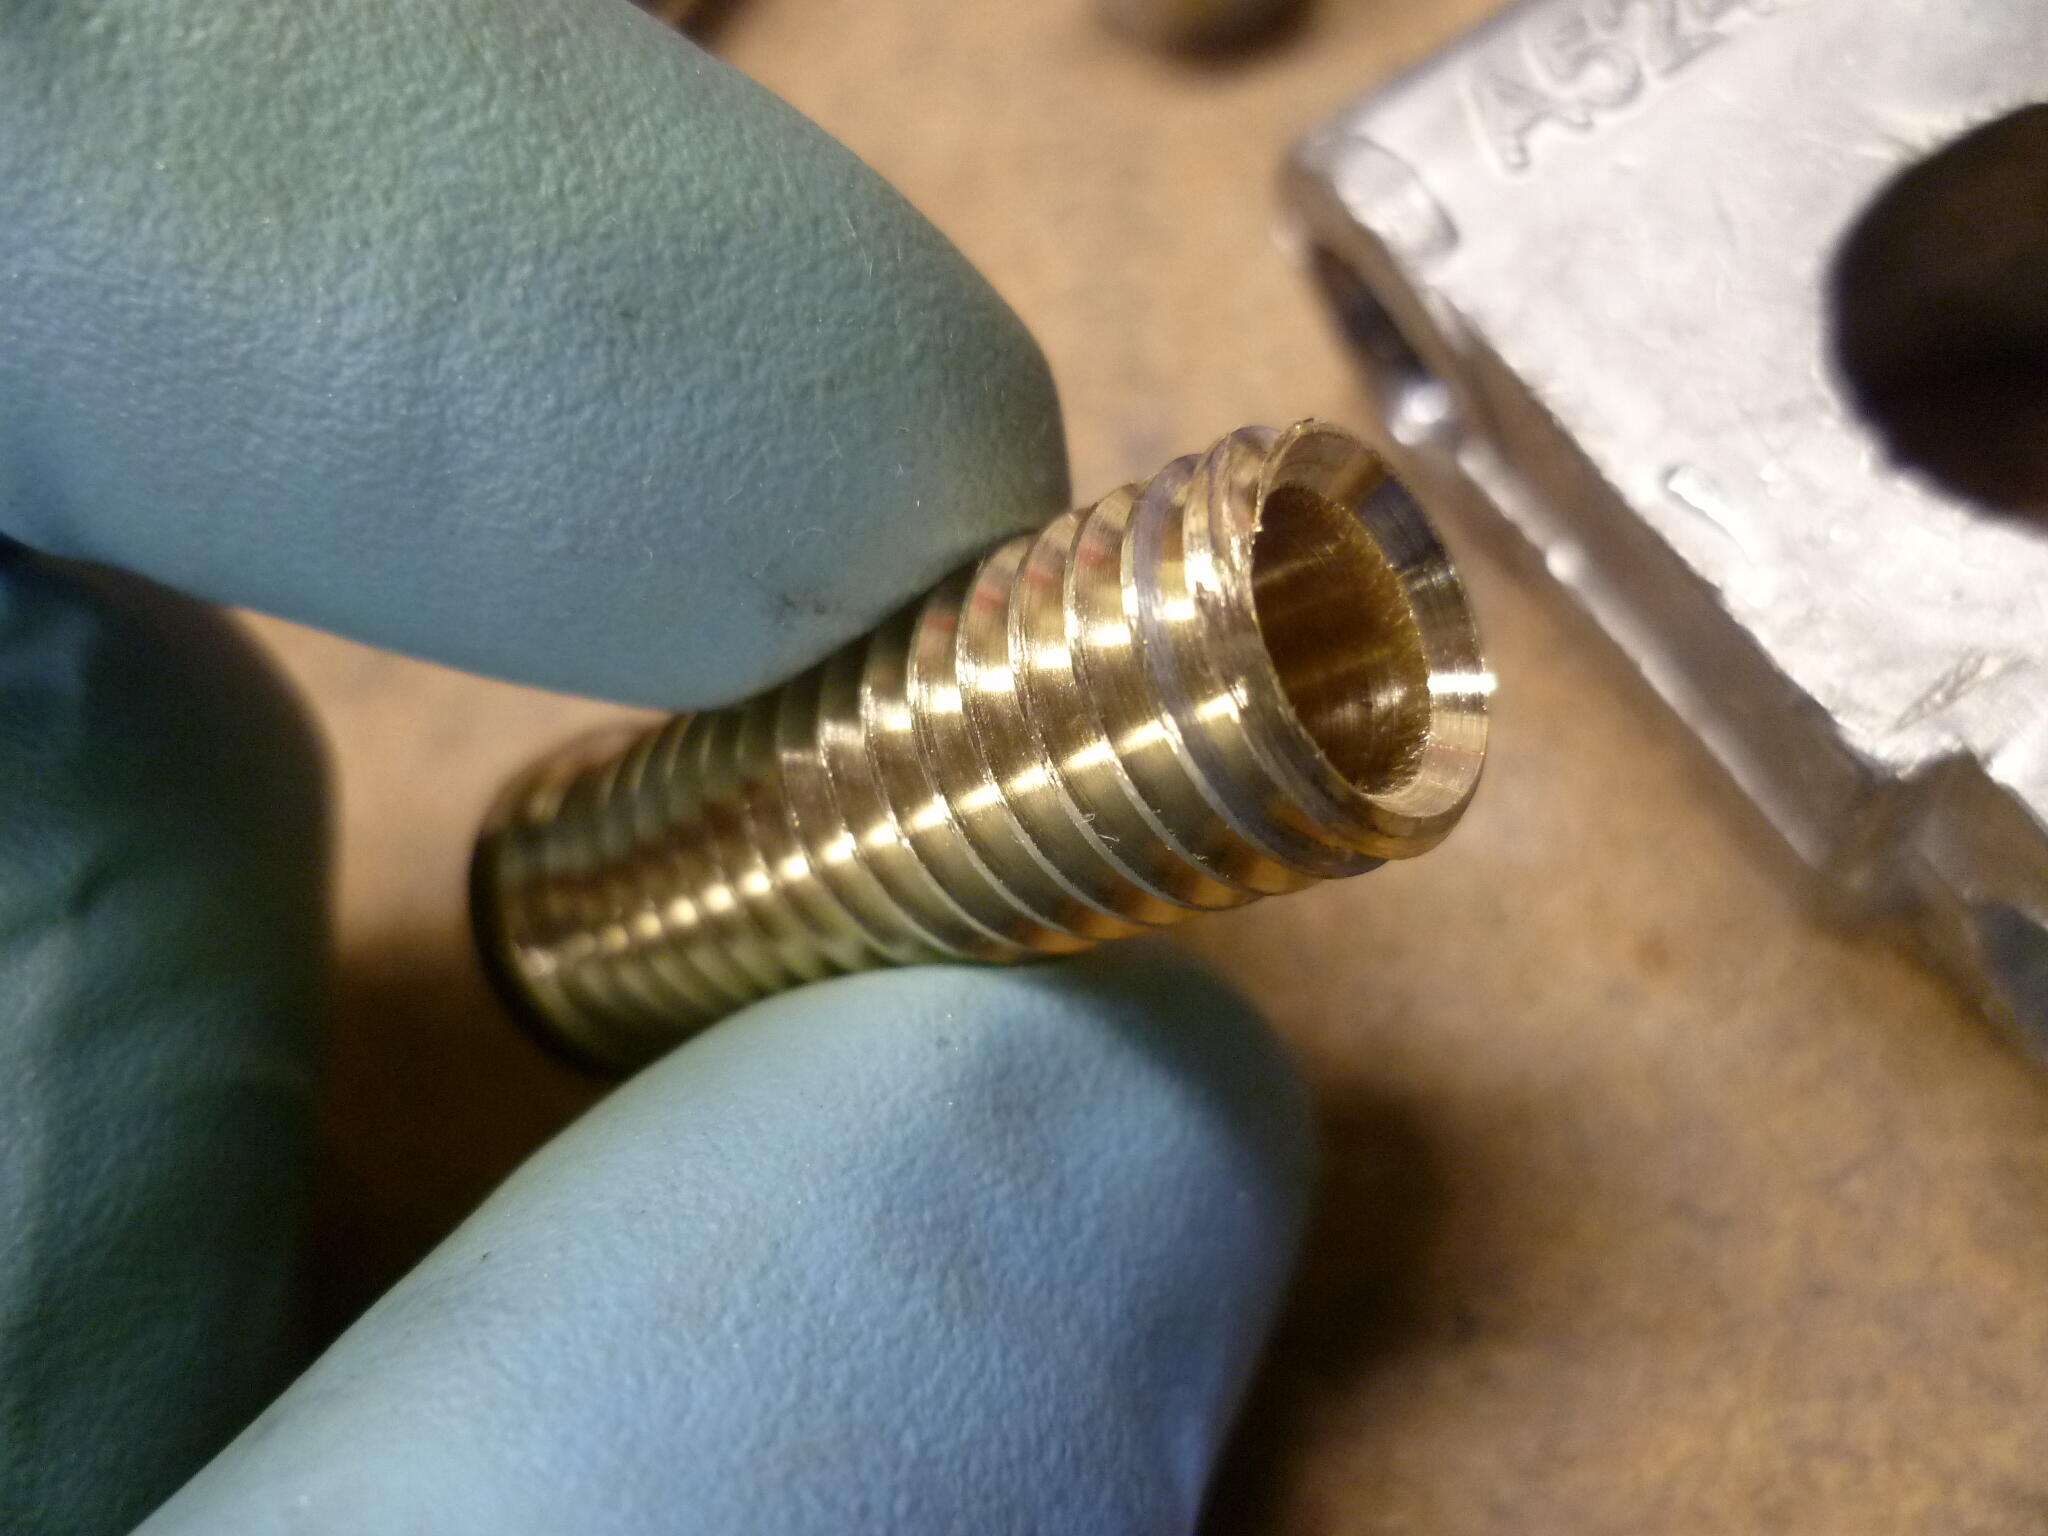
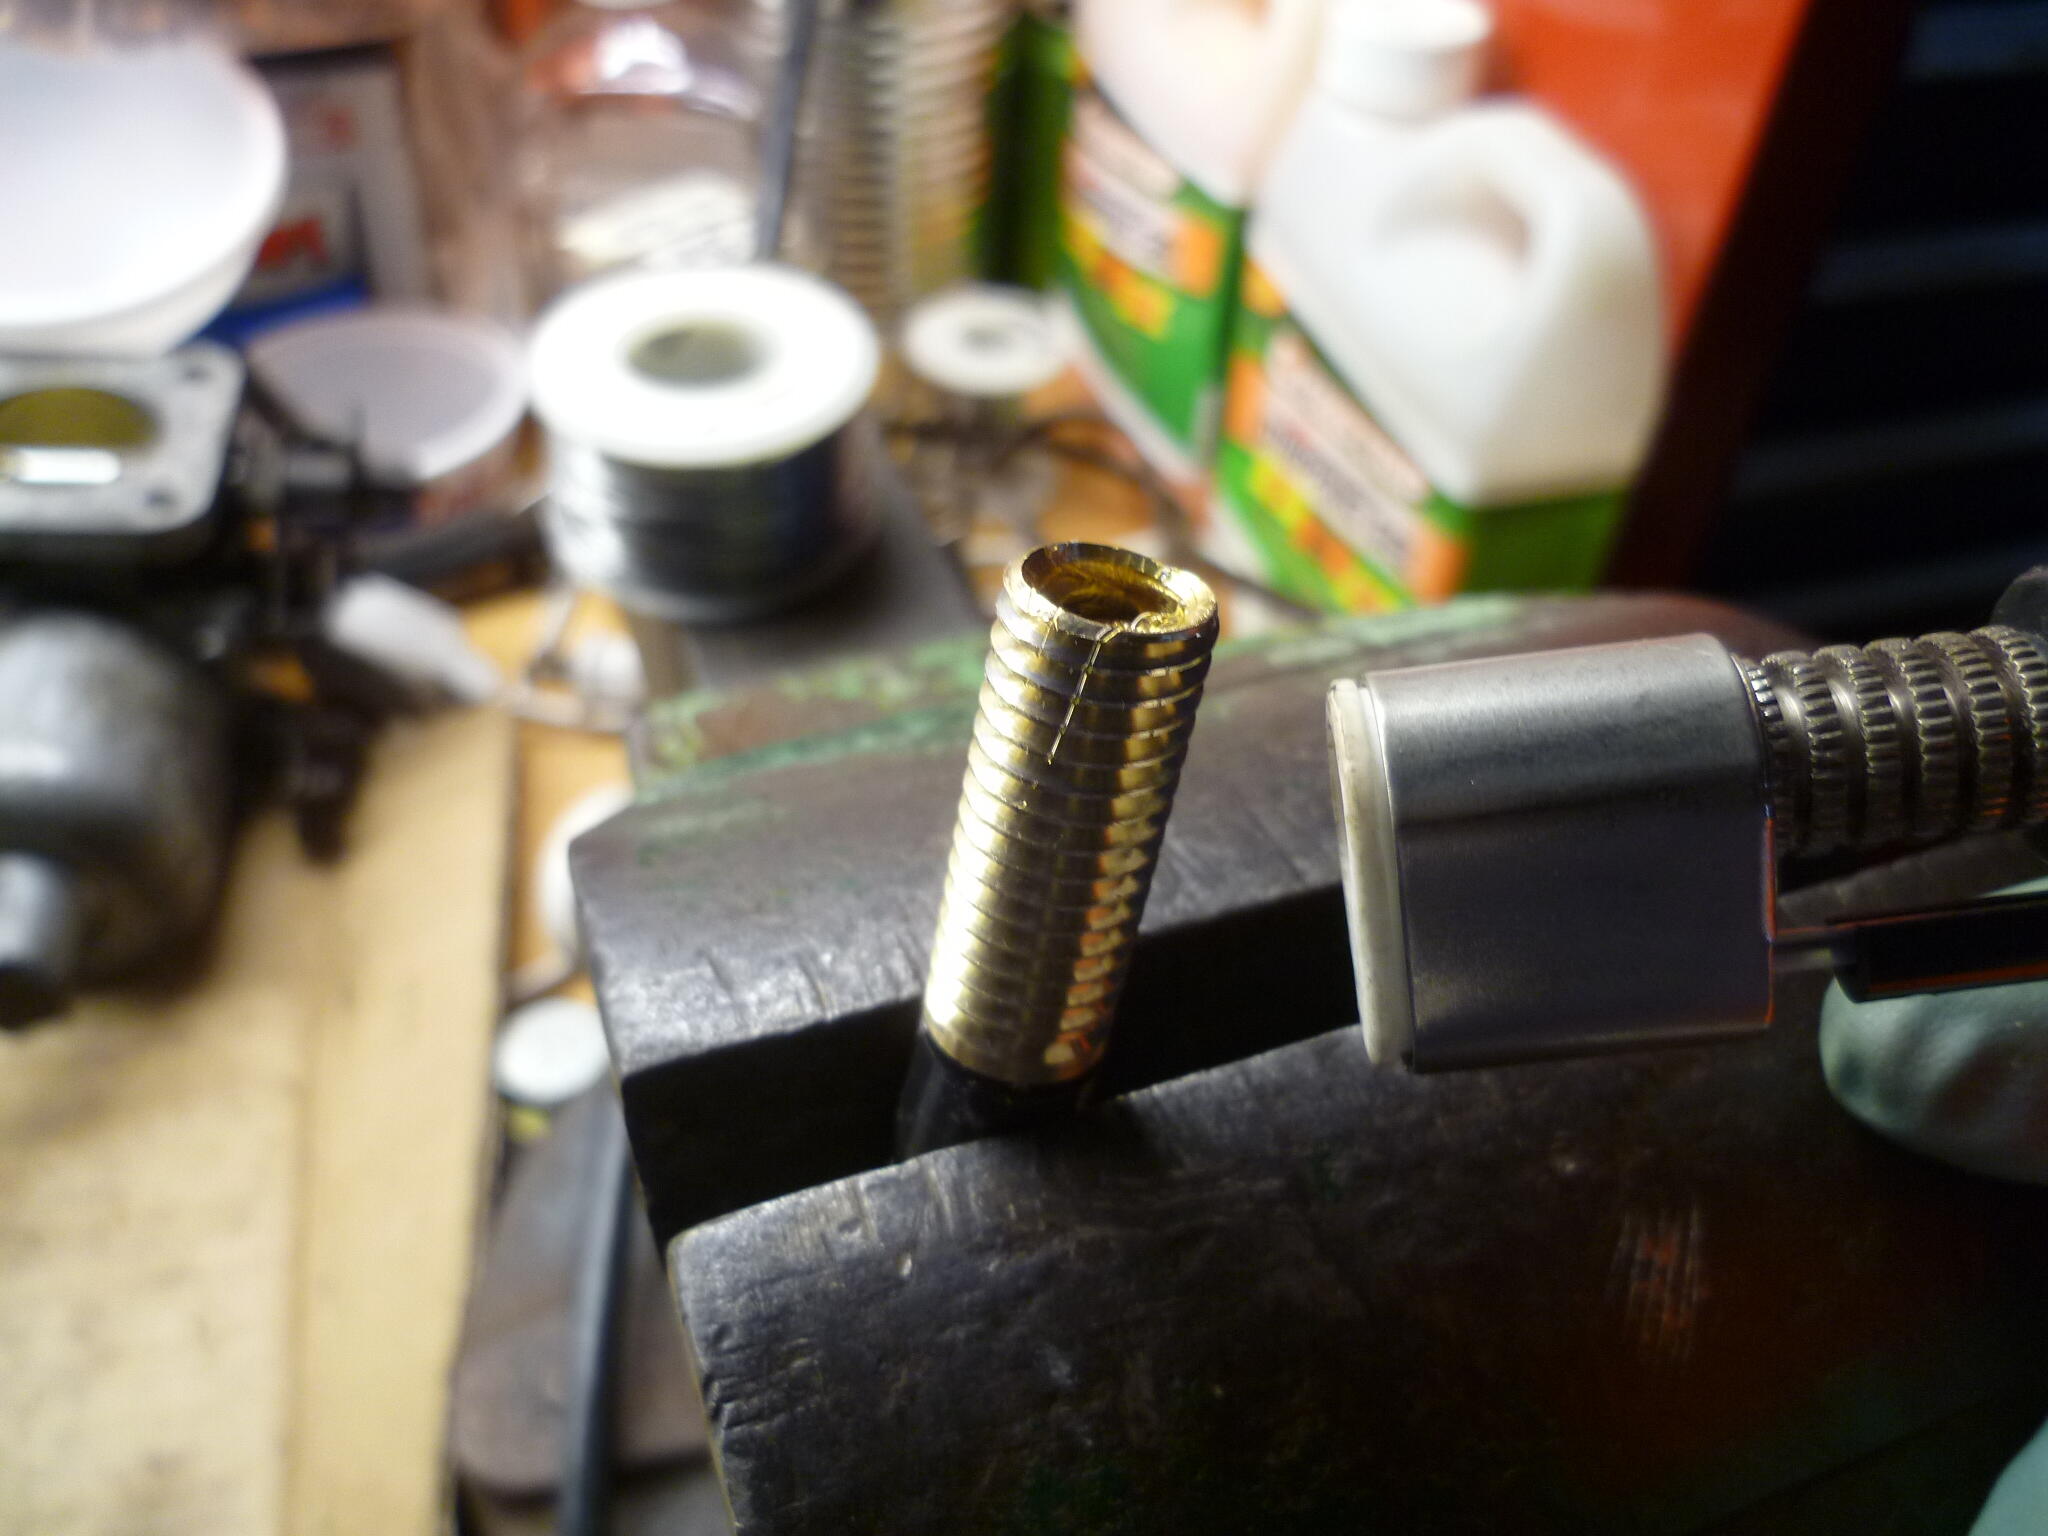
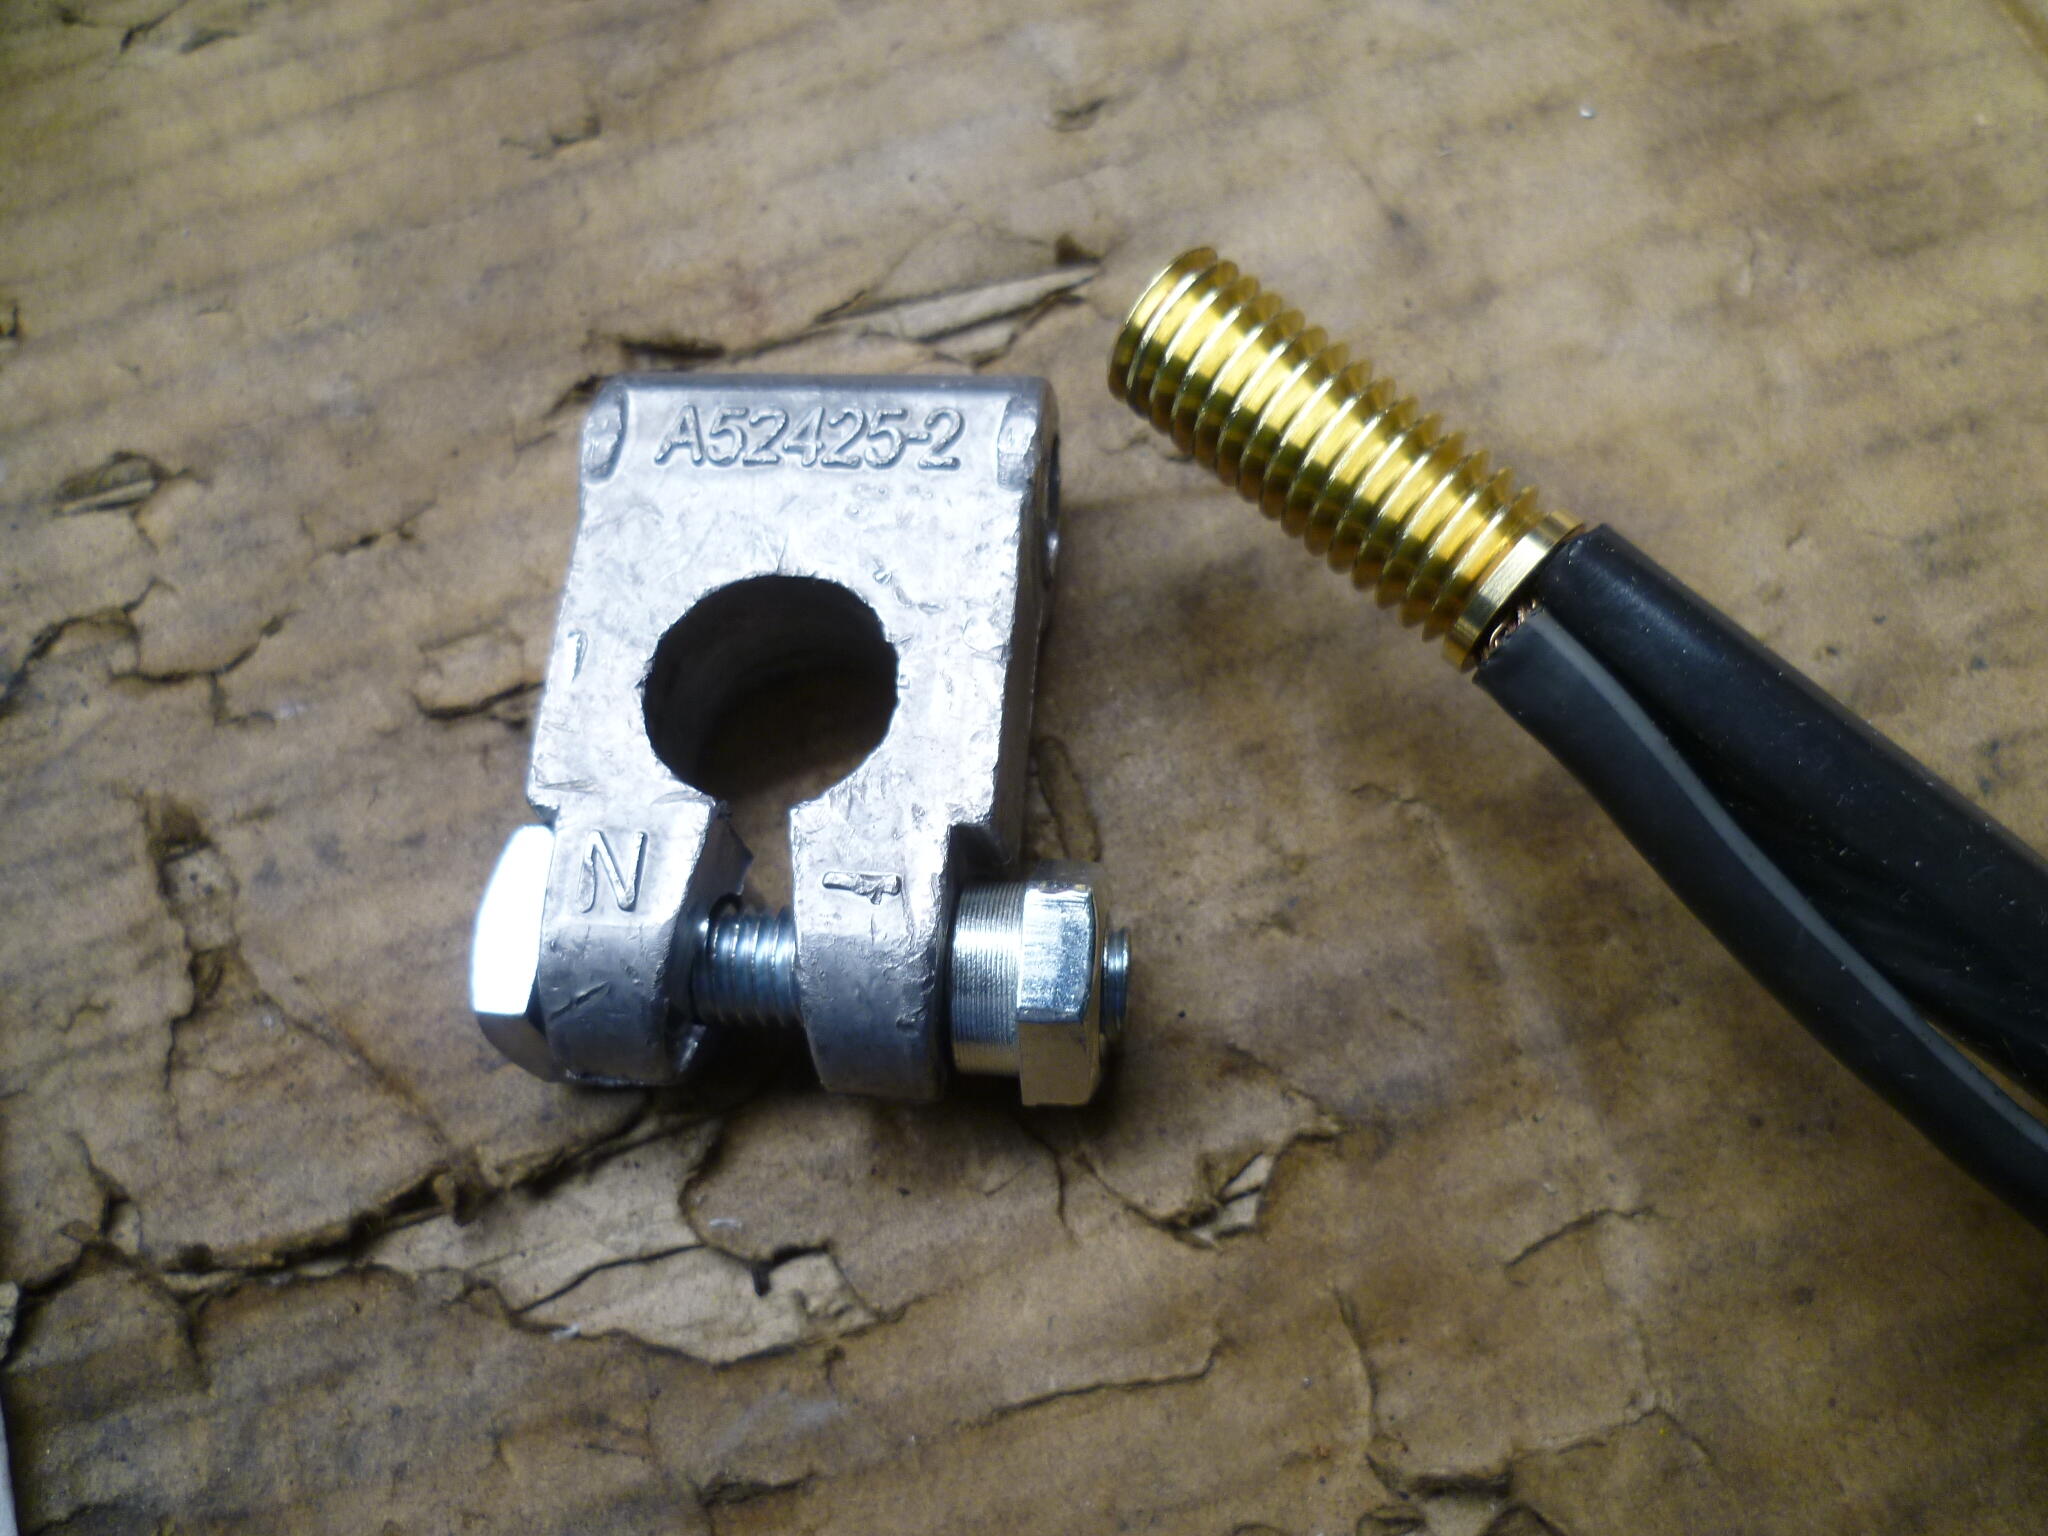
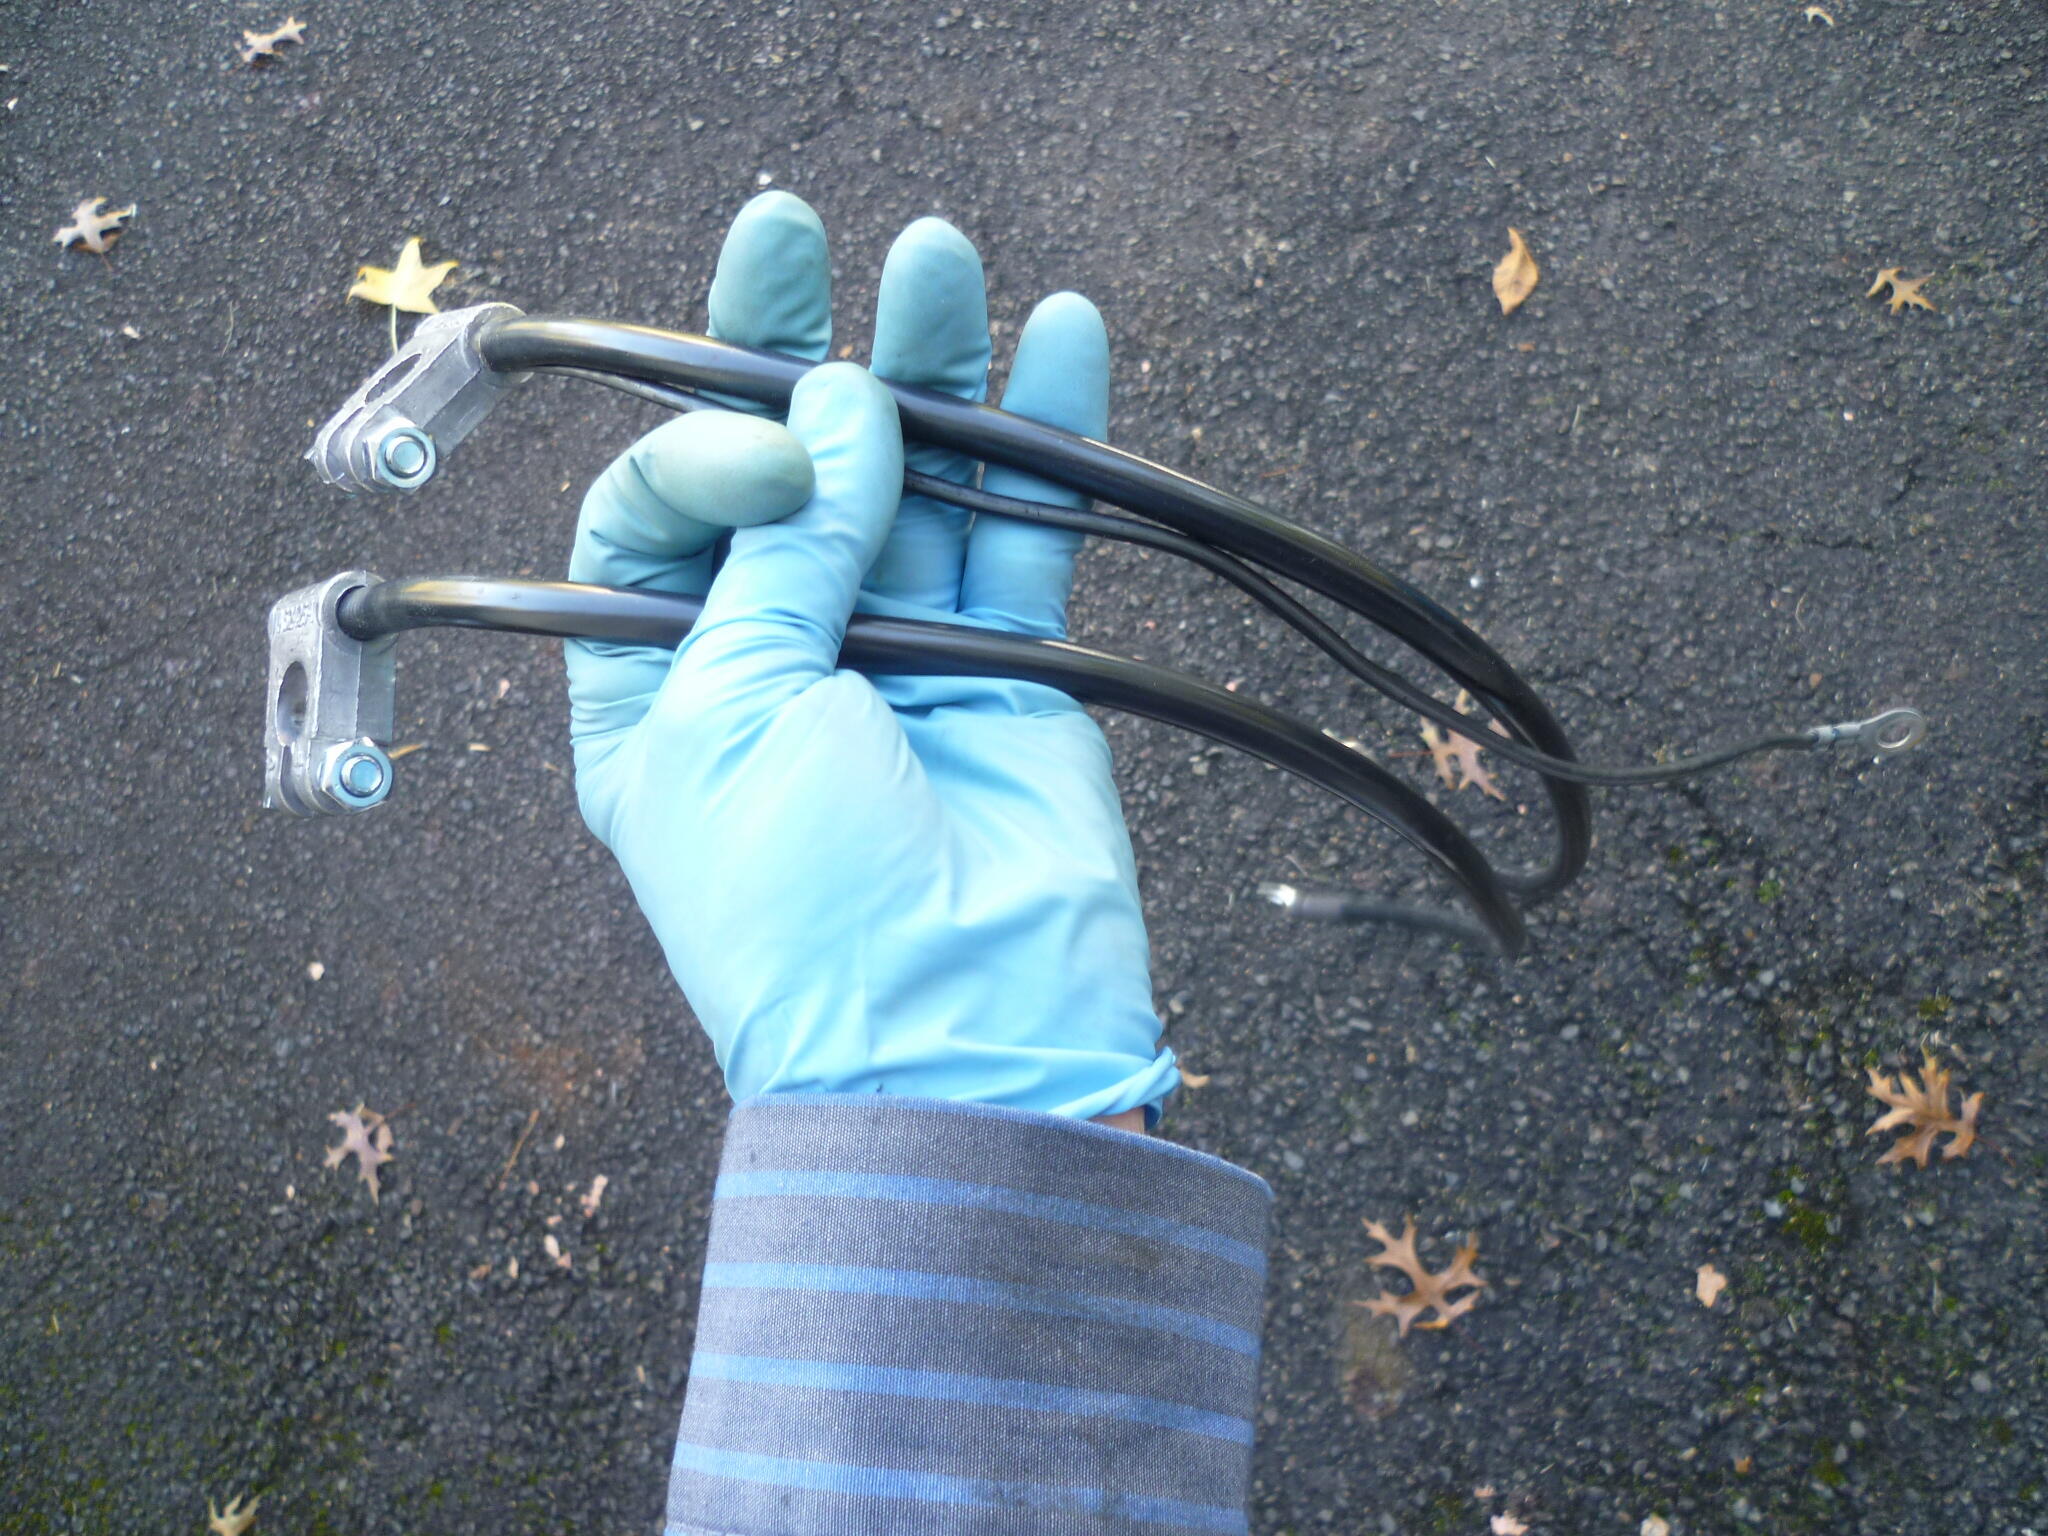
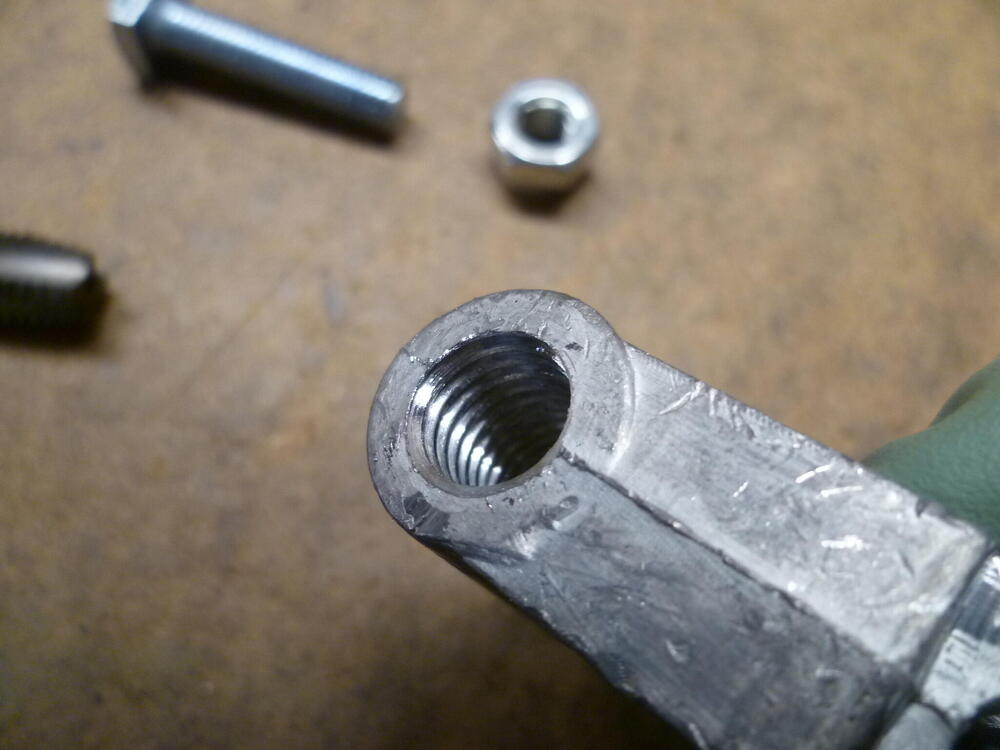
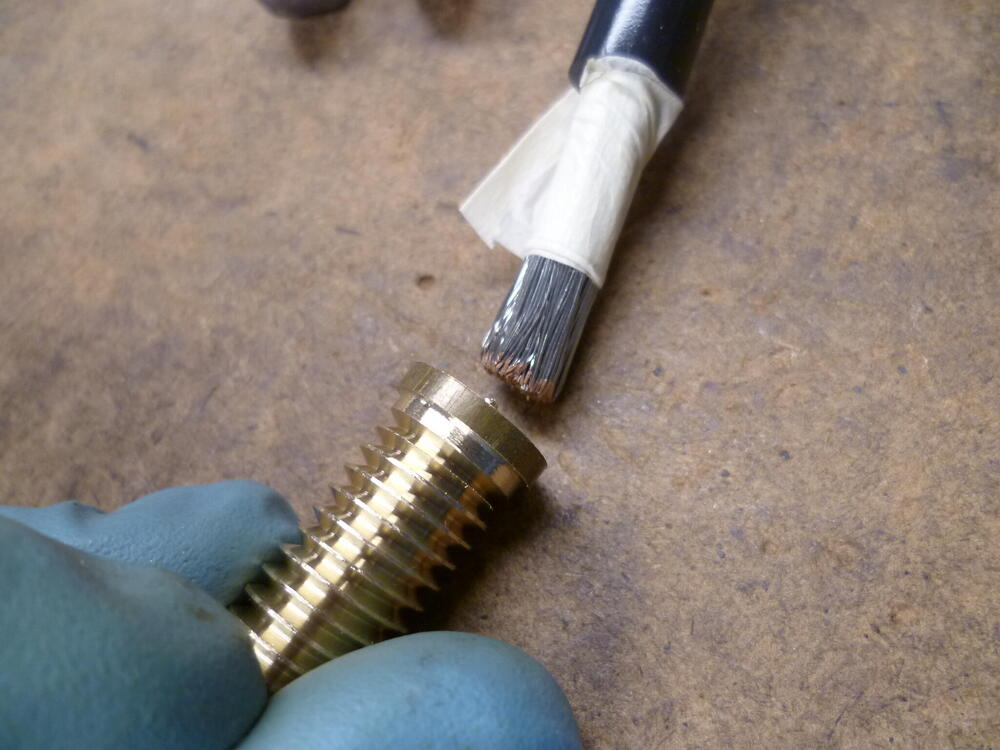
3 pointsMy battery cables? I was poking around online and discovered these things called "military battery terminals". Sometimes also called "Marine". The neat part is the basic shape is similar to the OEM lugs, so on a whim, I bought a cheap set off Amazon. So the shape is similar to OEM, but they use a bolt/nut to hold a cable onto the lug. They look like this: Then I removed the original bolt and threaded the hole that the bolt goes through. My first experience tapping lead. Went OK and I learned some about the process. 1) Easiest if you don't have to reverse the tap, and if you DO reverse the tap, do it often, like every half turn or so. 2) It's much easier on a (shallow) through hole because you don't have to reverse the tap, just run the tap all the way through. If the part you're tapping isn't shallow enough to do in one pass without packing the flutes and binding, then you're going to have to reverse the tap, which is a PITA because you have to do it so often. So, all that said... I took the bolt out and tapped the hole: Then I made a brass threaded insert on the lathe: I bought a length of battery wire off ebay. Came with lugs crimped on both ends. I got 5/16 hole on one end and 3/8 on the other. Cut that piece of wire in half (so now I have two lengths with different holes on the ends. Larger for the starter mounting bolt, and smaller for the starter solenoid connection. Stripped back the insulation on the ends, and inserted the cable strands into the brass piece I made: I used a small torch to solder the cable into the threaded insert: Looks like this after sodering: Screwed the threaded brass into the lead lug, and a completely unprofitable amount of time later, I have this: It's not OEM or one of the aftermarket replicas, but it cost a grand total of maybe thirty bucks in parts*. *And at least six hundred dollars in unrealized labor cost. Hahahaha!!!


 3 points
 -
3 points320 In the tunnel there is a threaded rod that attaches the cable yoke to the handle. There are actually two threaded connections if you need it. You need to thread it out to get enough slack. Then you can adjust it to where it holds in about 5 or 6 clicks Datsun Z Hand Brake & Hand Brake Cable#20 and #11 both have threads and locknuts3 points
-
2 pointsIt should be a wire coming off the Accessory Relay. In the 73, it's a blue wire. YMMV according to discussions I've seen on this board in the past. Look at where the Accessory Relay plugs into the wiring harness. One of those wires should be going to the center stack with a bullet connector.
 2 points
 -
2 points
-
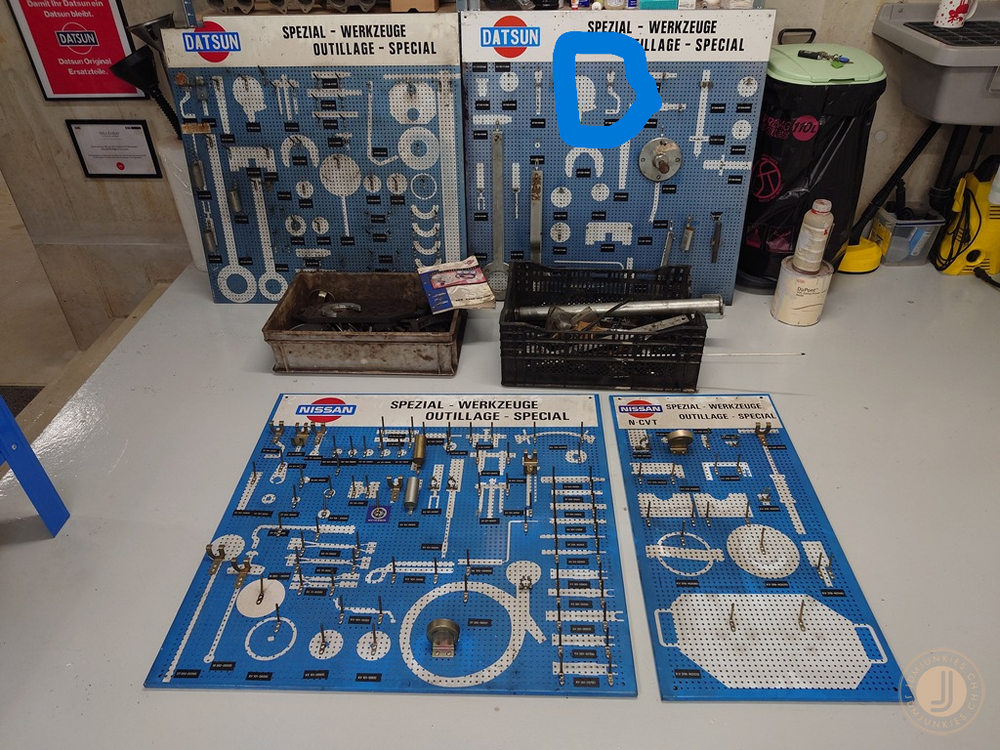
I believe, the unusual shaped wrench about halfway down on the right side is for valve adjustment to tighten and loosen the lock nuts. The other below it may be for holding the adjusting nut while tightening2 points
-
1 pointI have a number of cars that sit for long periods of time. I use non ethanol fuel and Stabil. Typically keep the tanks full, to help with condensation. Rare for me to have a fuel issue and some may sit for 2 or more years, but I try to get fresh fuel in them yearly.1 point
-
1 pointDo you have so little $^!# to do in life that you sit and talk to yourself on some shabby forum?1 point
-
I used #4 gauge cable. Bought a 60 inch length off ebay with 5/16 lug on one end and 3/8 on the other. Cut it in half* to make two cables. Was cheapest that way. I don't know if this is the exact vendor I used or not, but here's an example: https://www.ebay.com/itm/141679228250 Today's price for the cable(s) is about $16, and the military lugs were $10. So my out of pocket for my two original-ish looking cables was $26 for the pair. *After having been through this once, I would skew the cut point maybe two inches towards the positive side. In other words, I would steal two inches of cable from the negative and add that length to the positive making the positive four inches longer than the negative.1 point
-
It may well be, but this is a homemade example. The correct tool follows the same rough design, the "cut-out" on the board show the shape and has provision to fit a 3/8 or 1/2 socket drive. The was one on Yahoo auctions a week or two ago...
 1 point
 -
@captainobvious Nice work Bruce, What gauge cable did you use?1 point
-
1 point
-
1 pointYes on the White/Red. Through the hole in the back, attach to the screw lug in the middle right.1 point