


Leaderboard
-
conedodger
Community Member7Points13,006Posts -
darom
Supporting Member3Points202Posts -

Zed Head
Community Member3Points19,555Posts -
HS30-H
Supporting Member2Points5,558Posts


Popular Content
Showing content with the highest reputation on 08/15/2025 in all areas
-
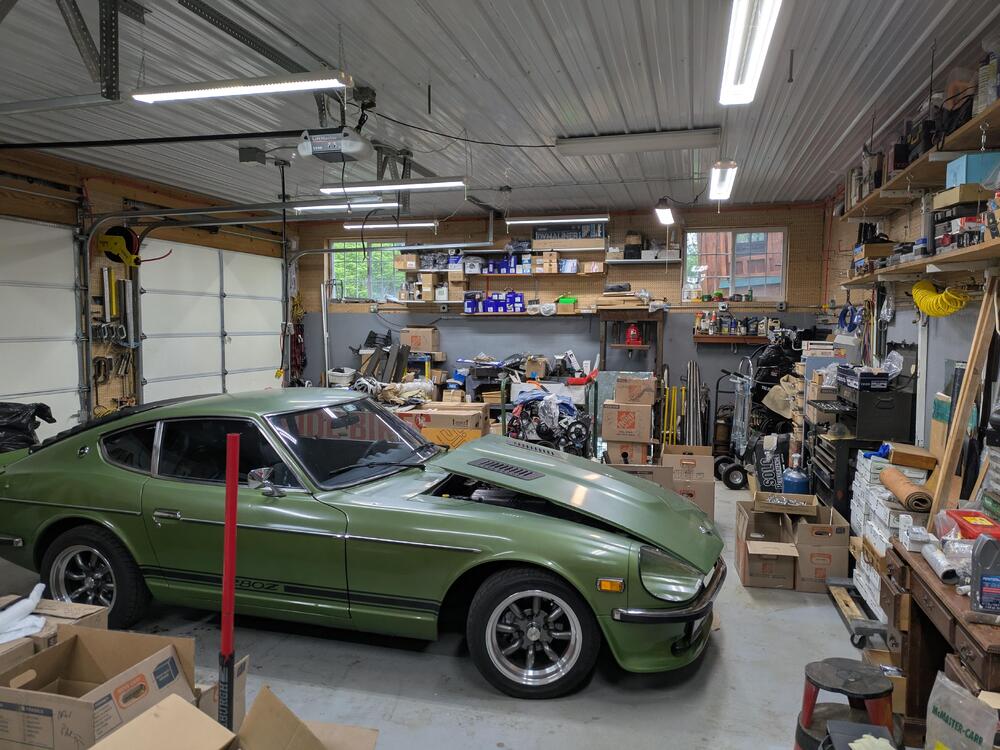
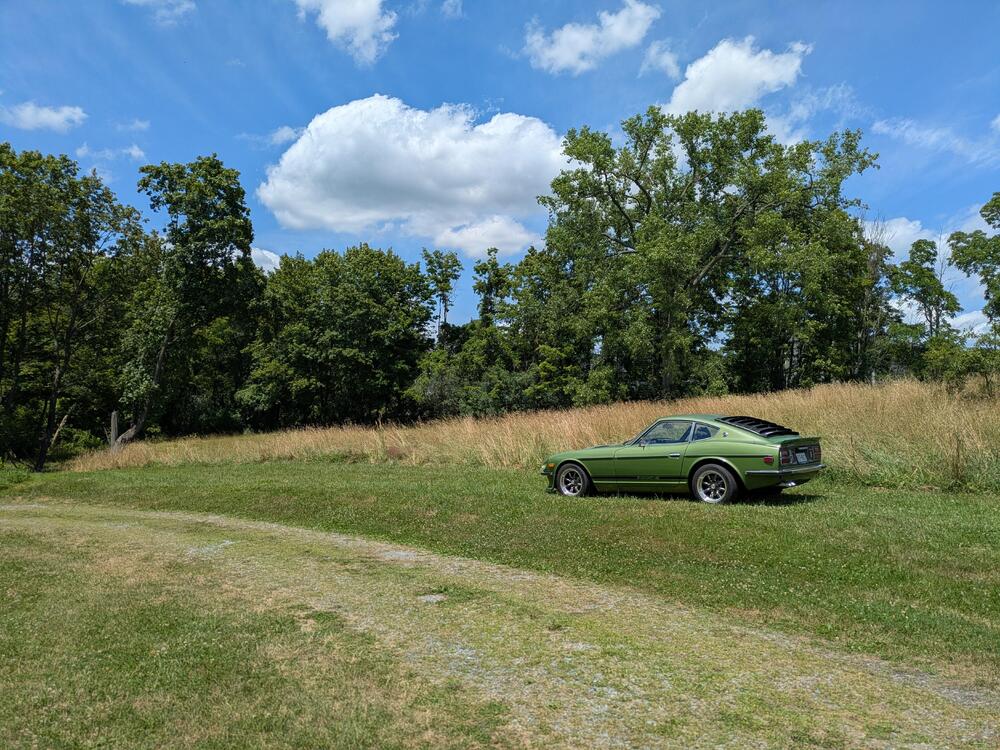
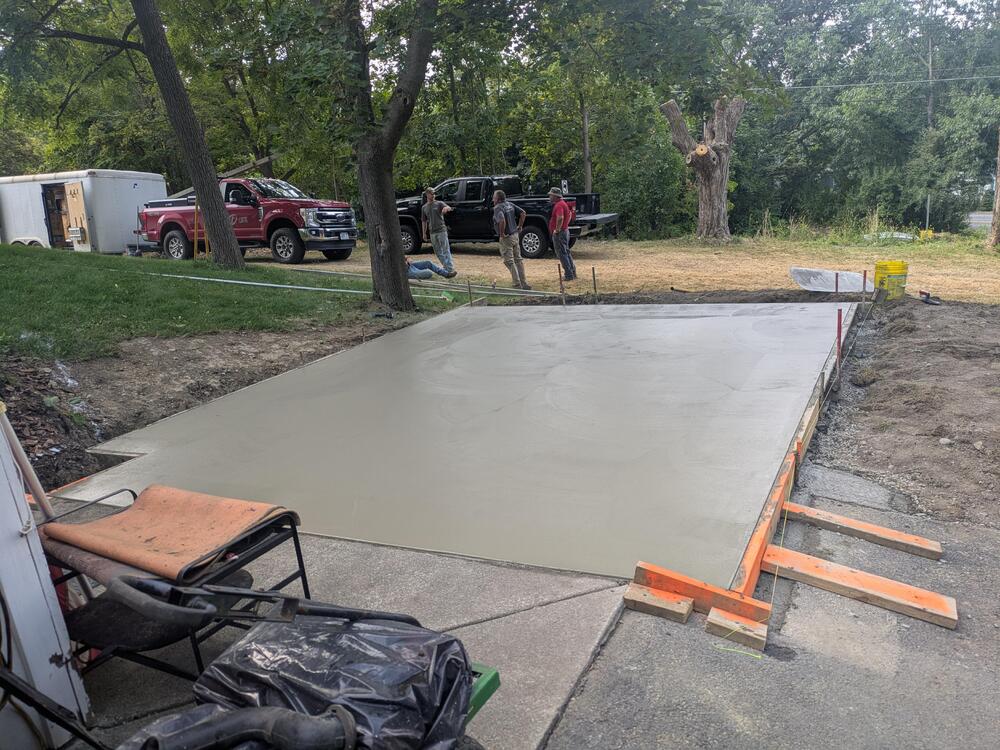
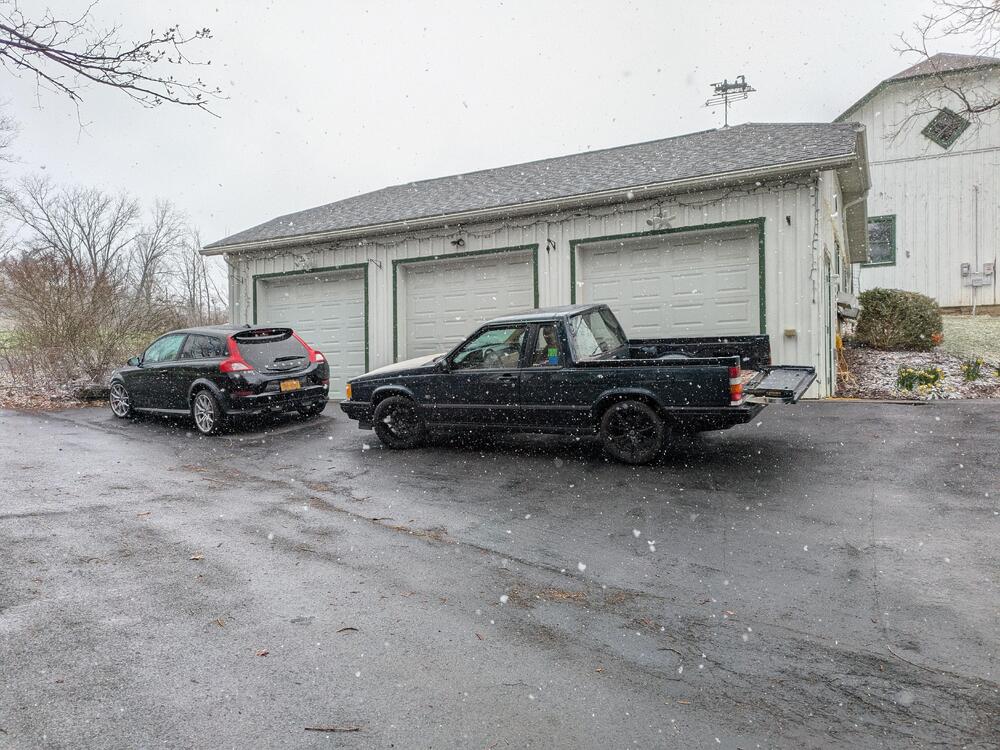
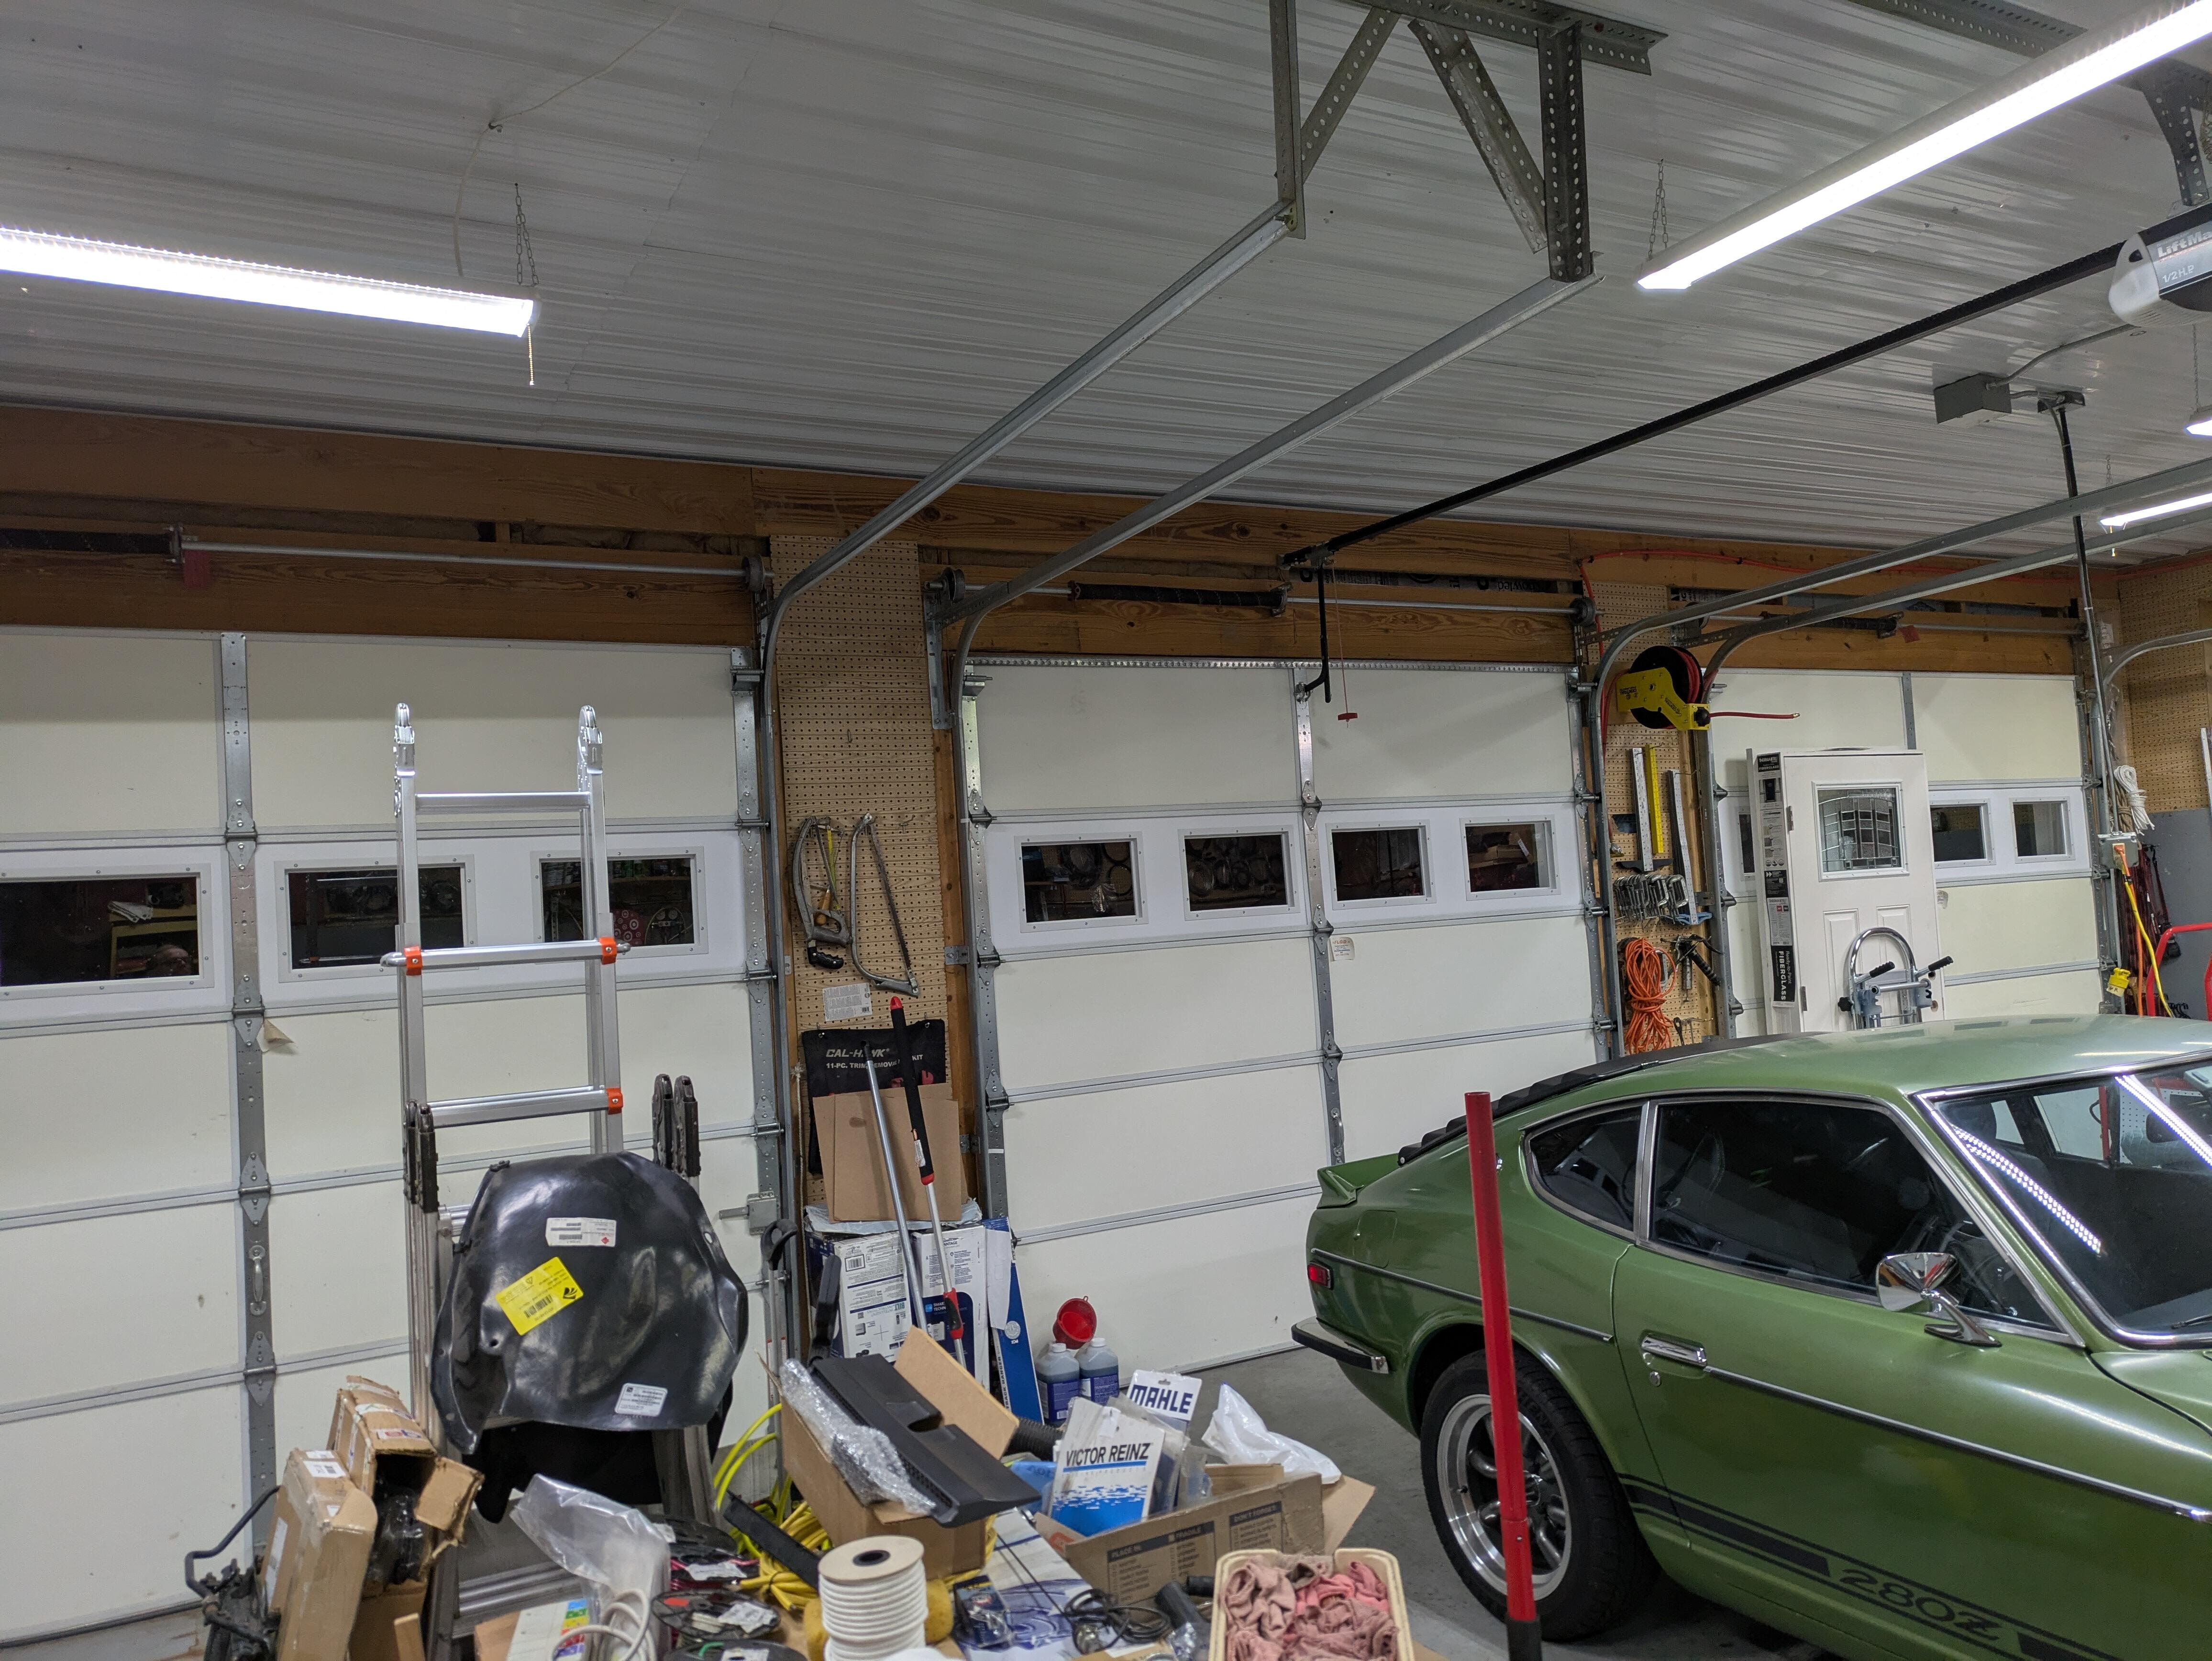
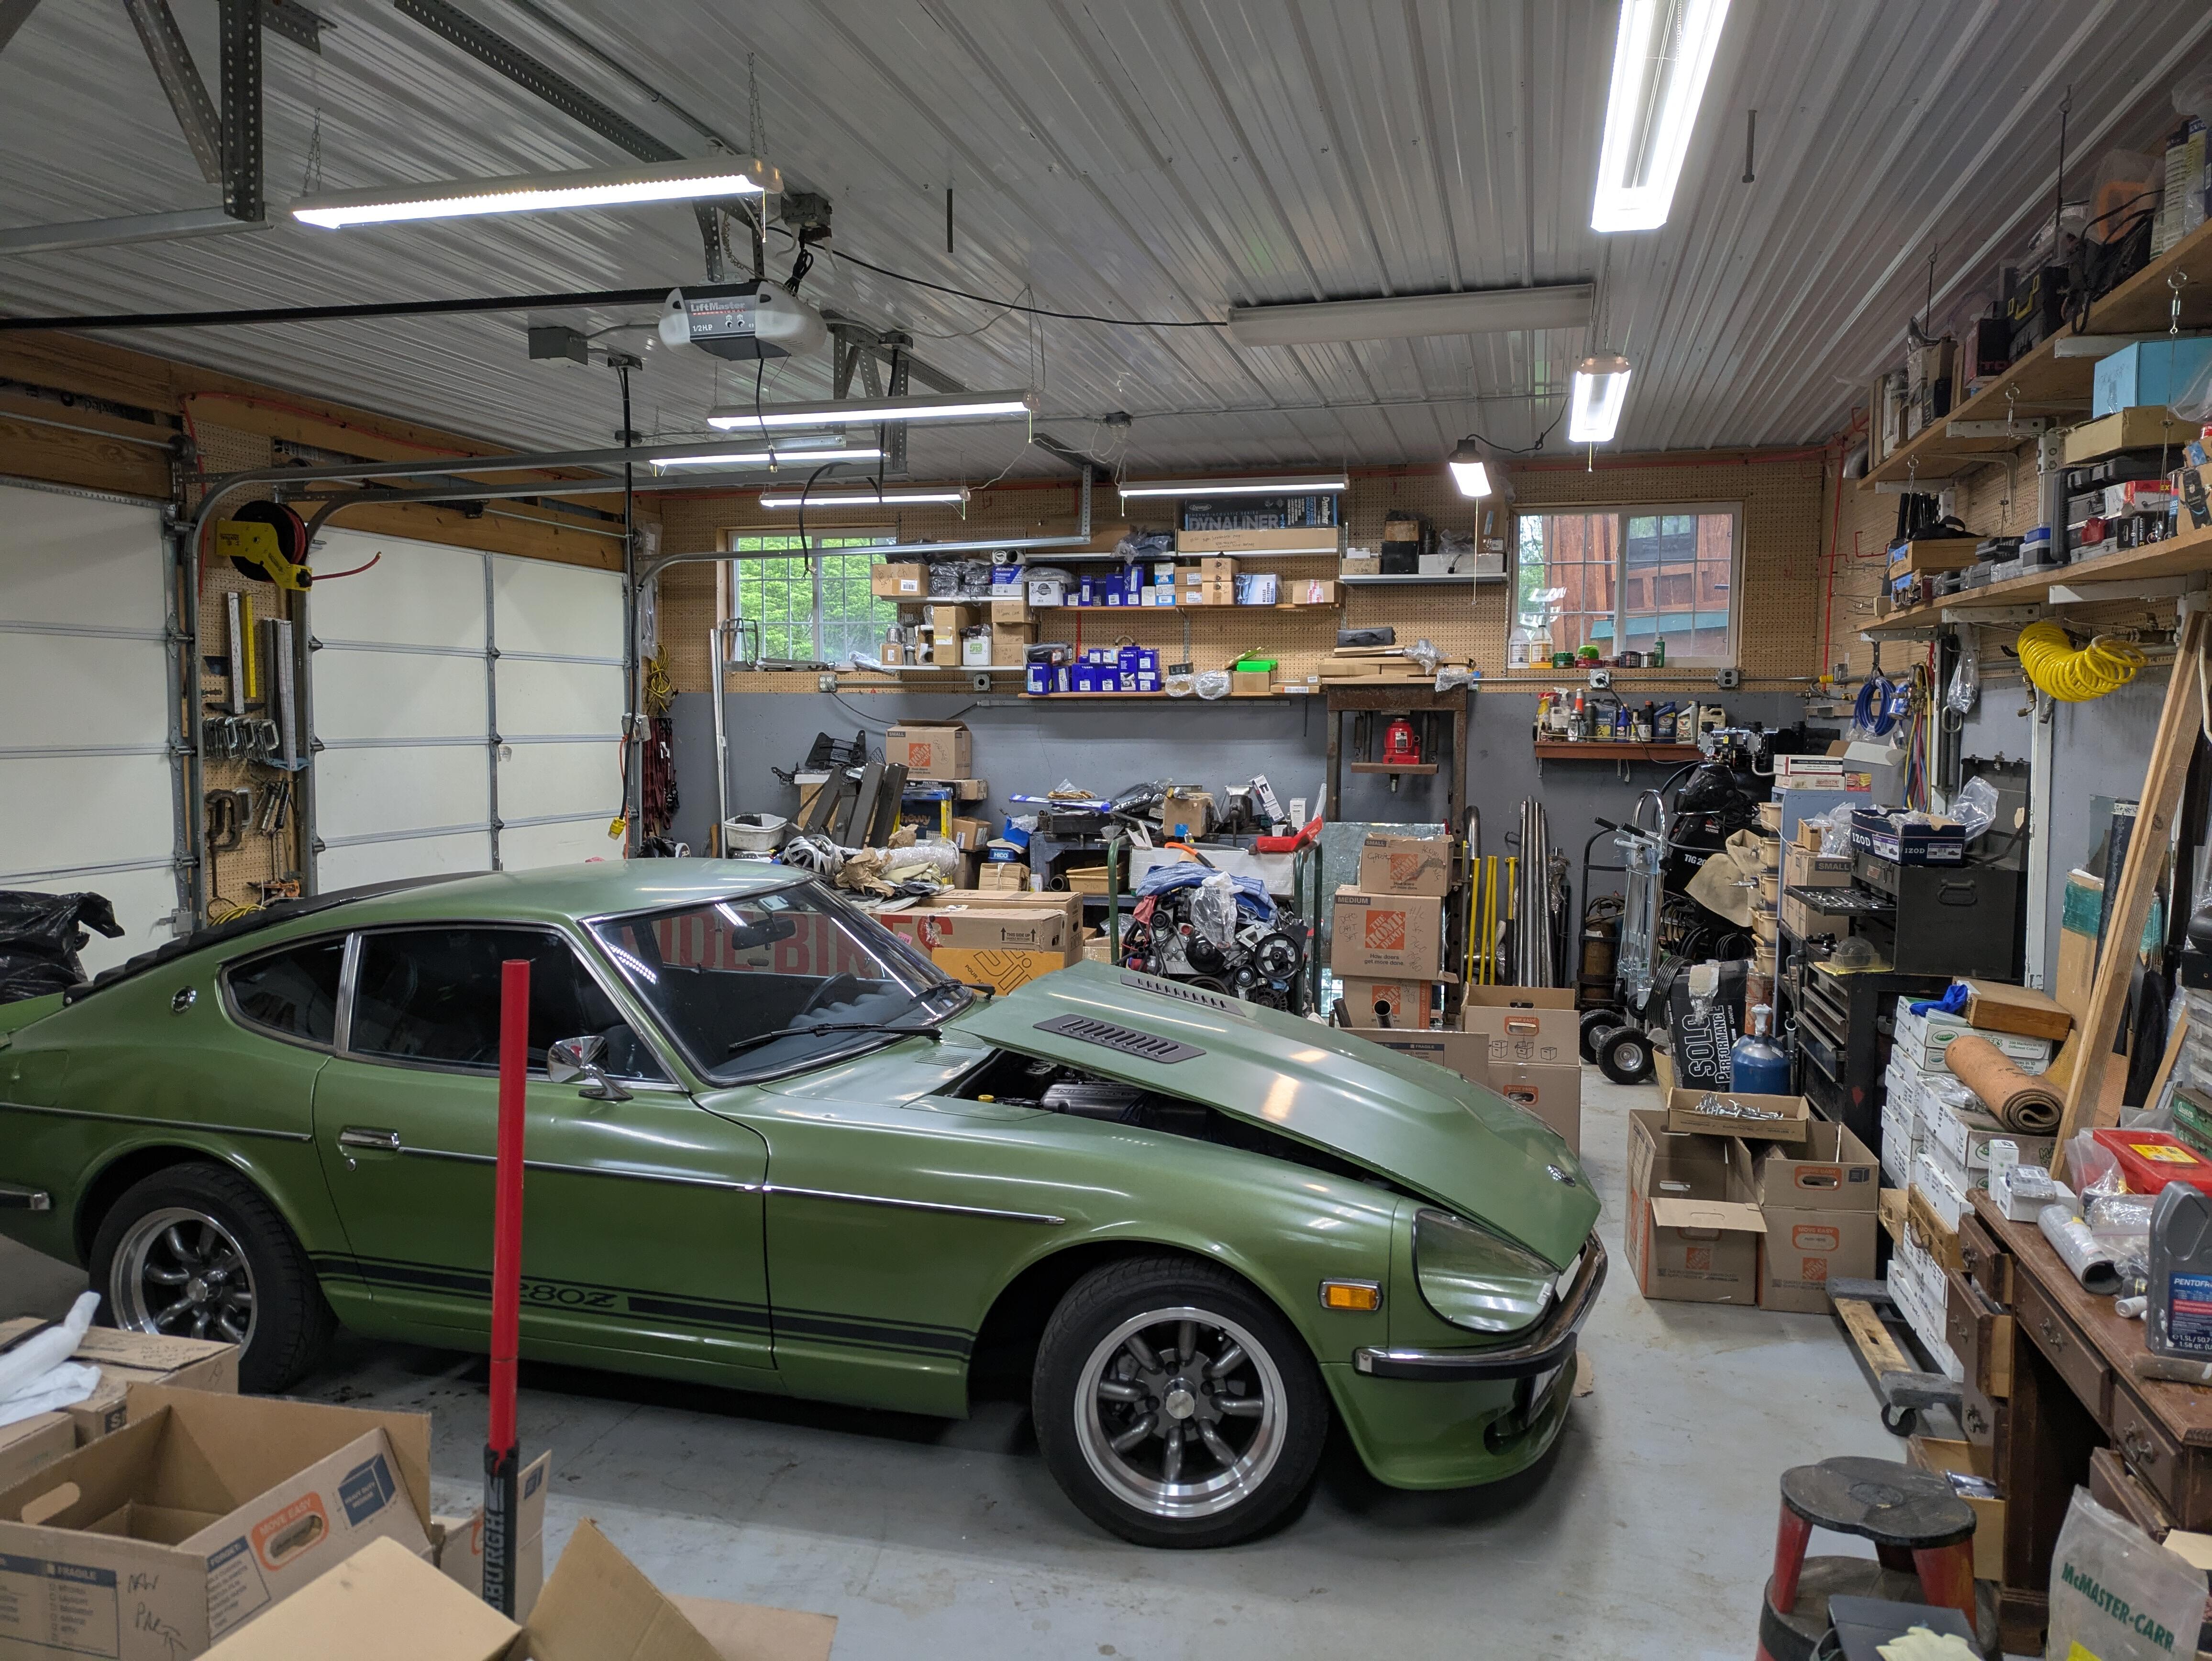
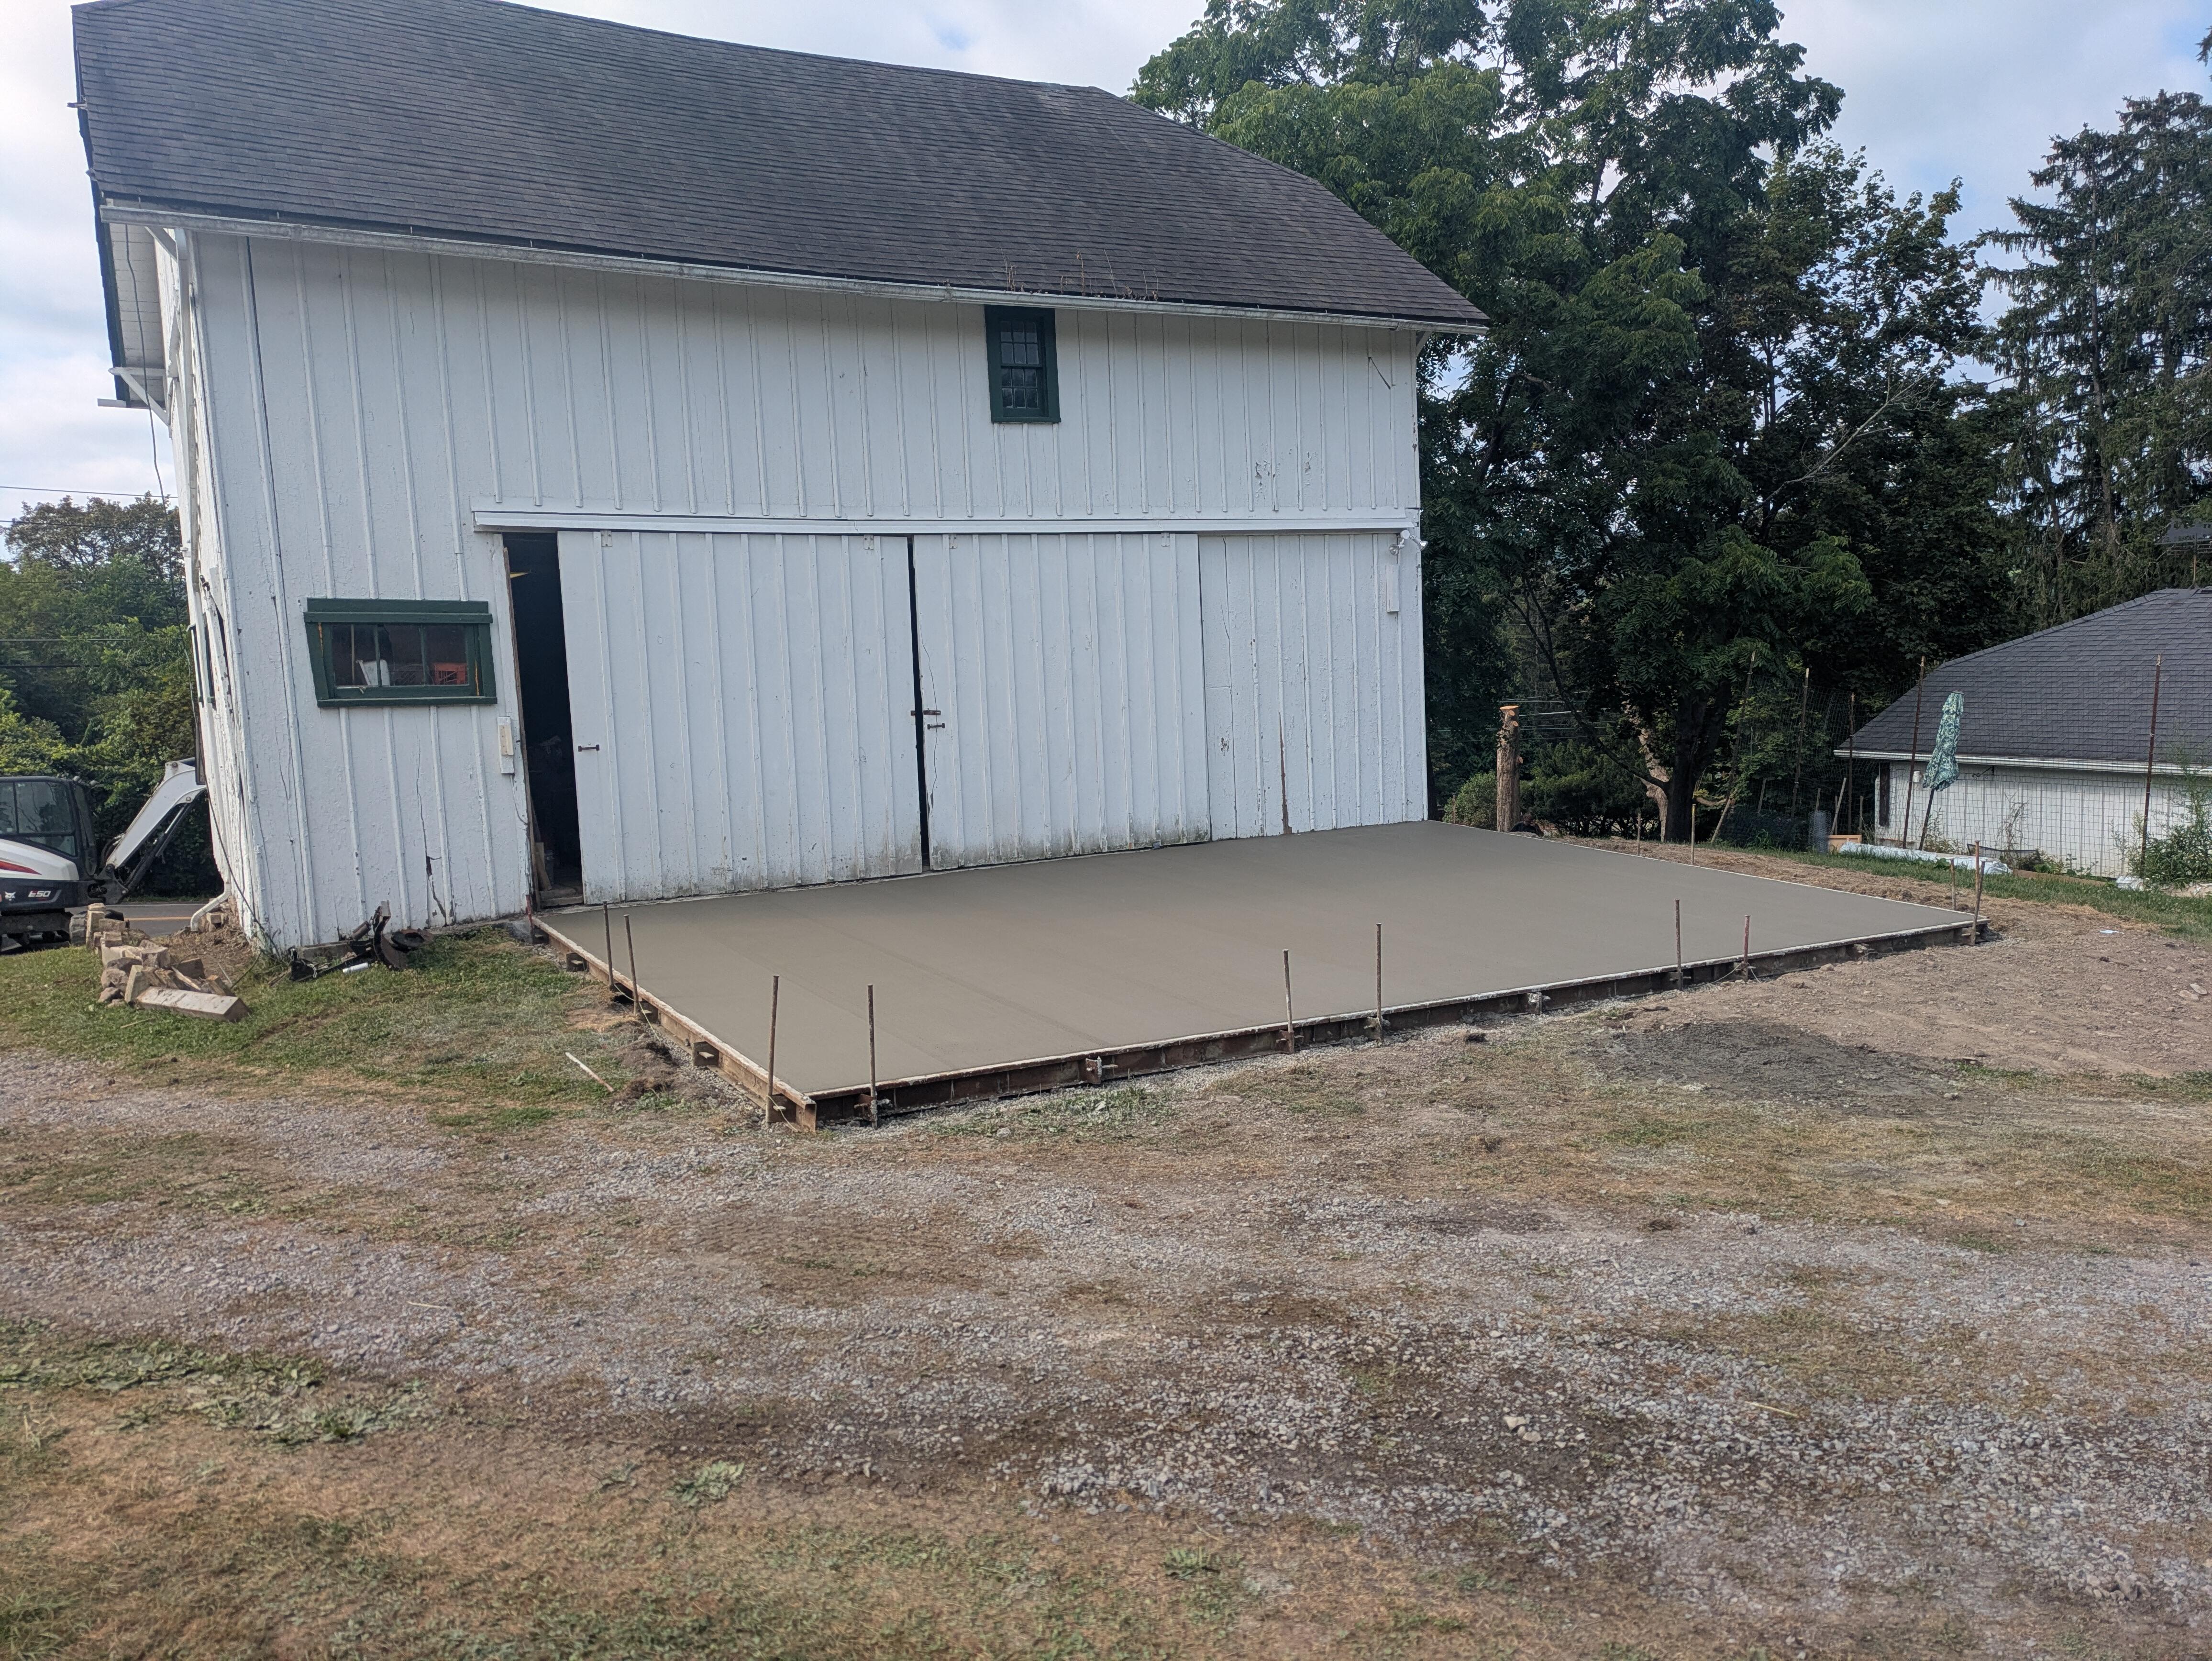
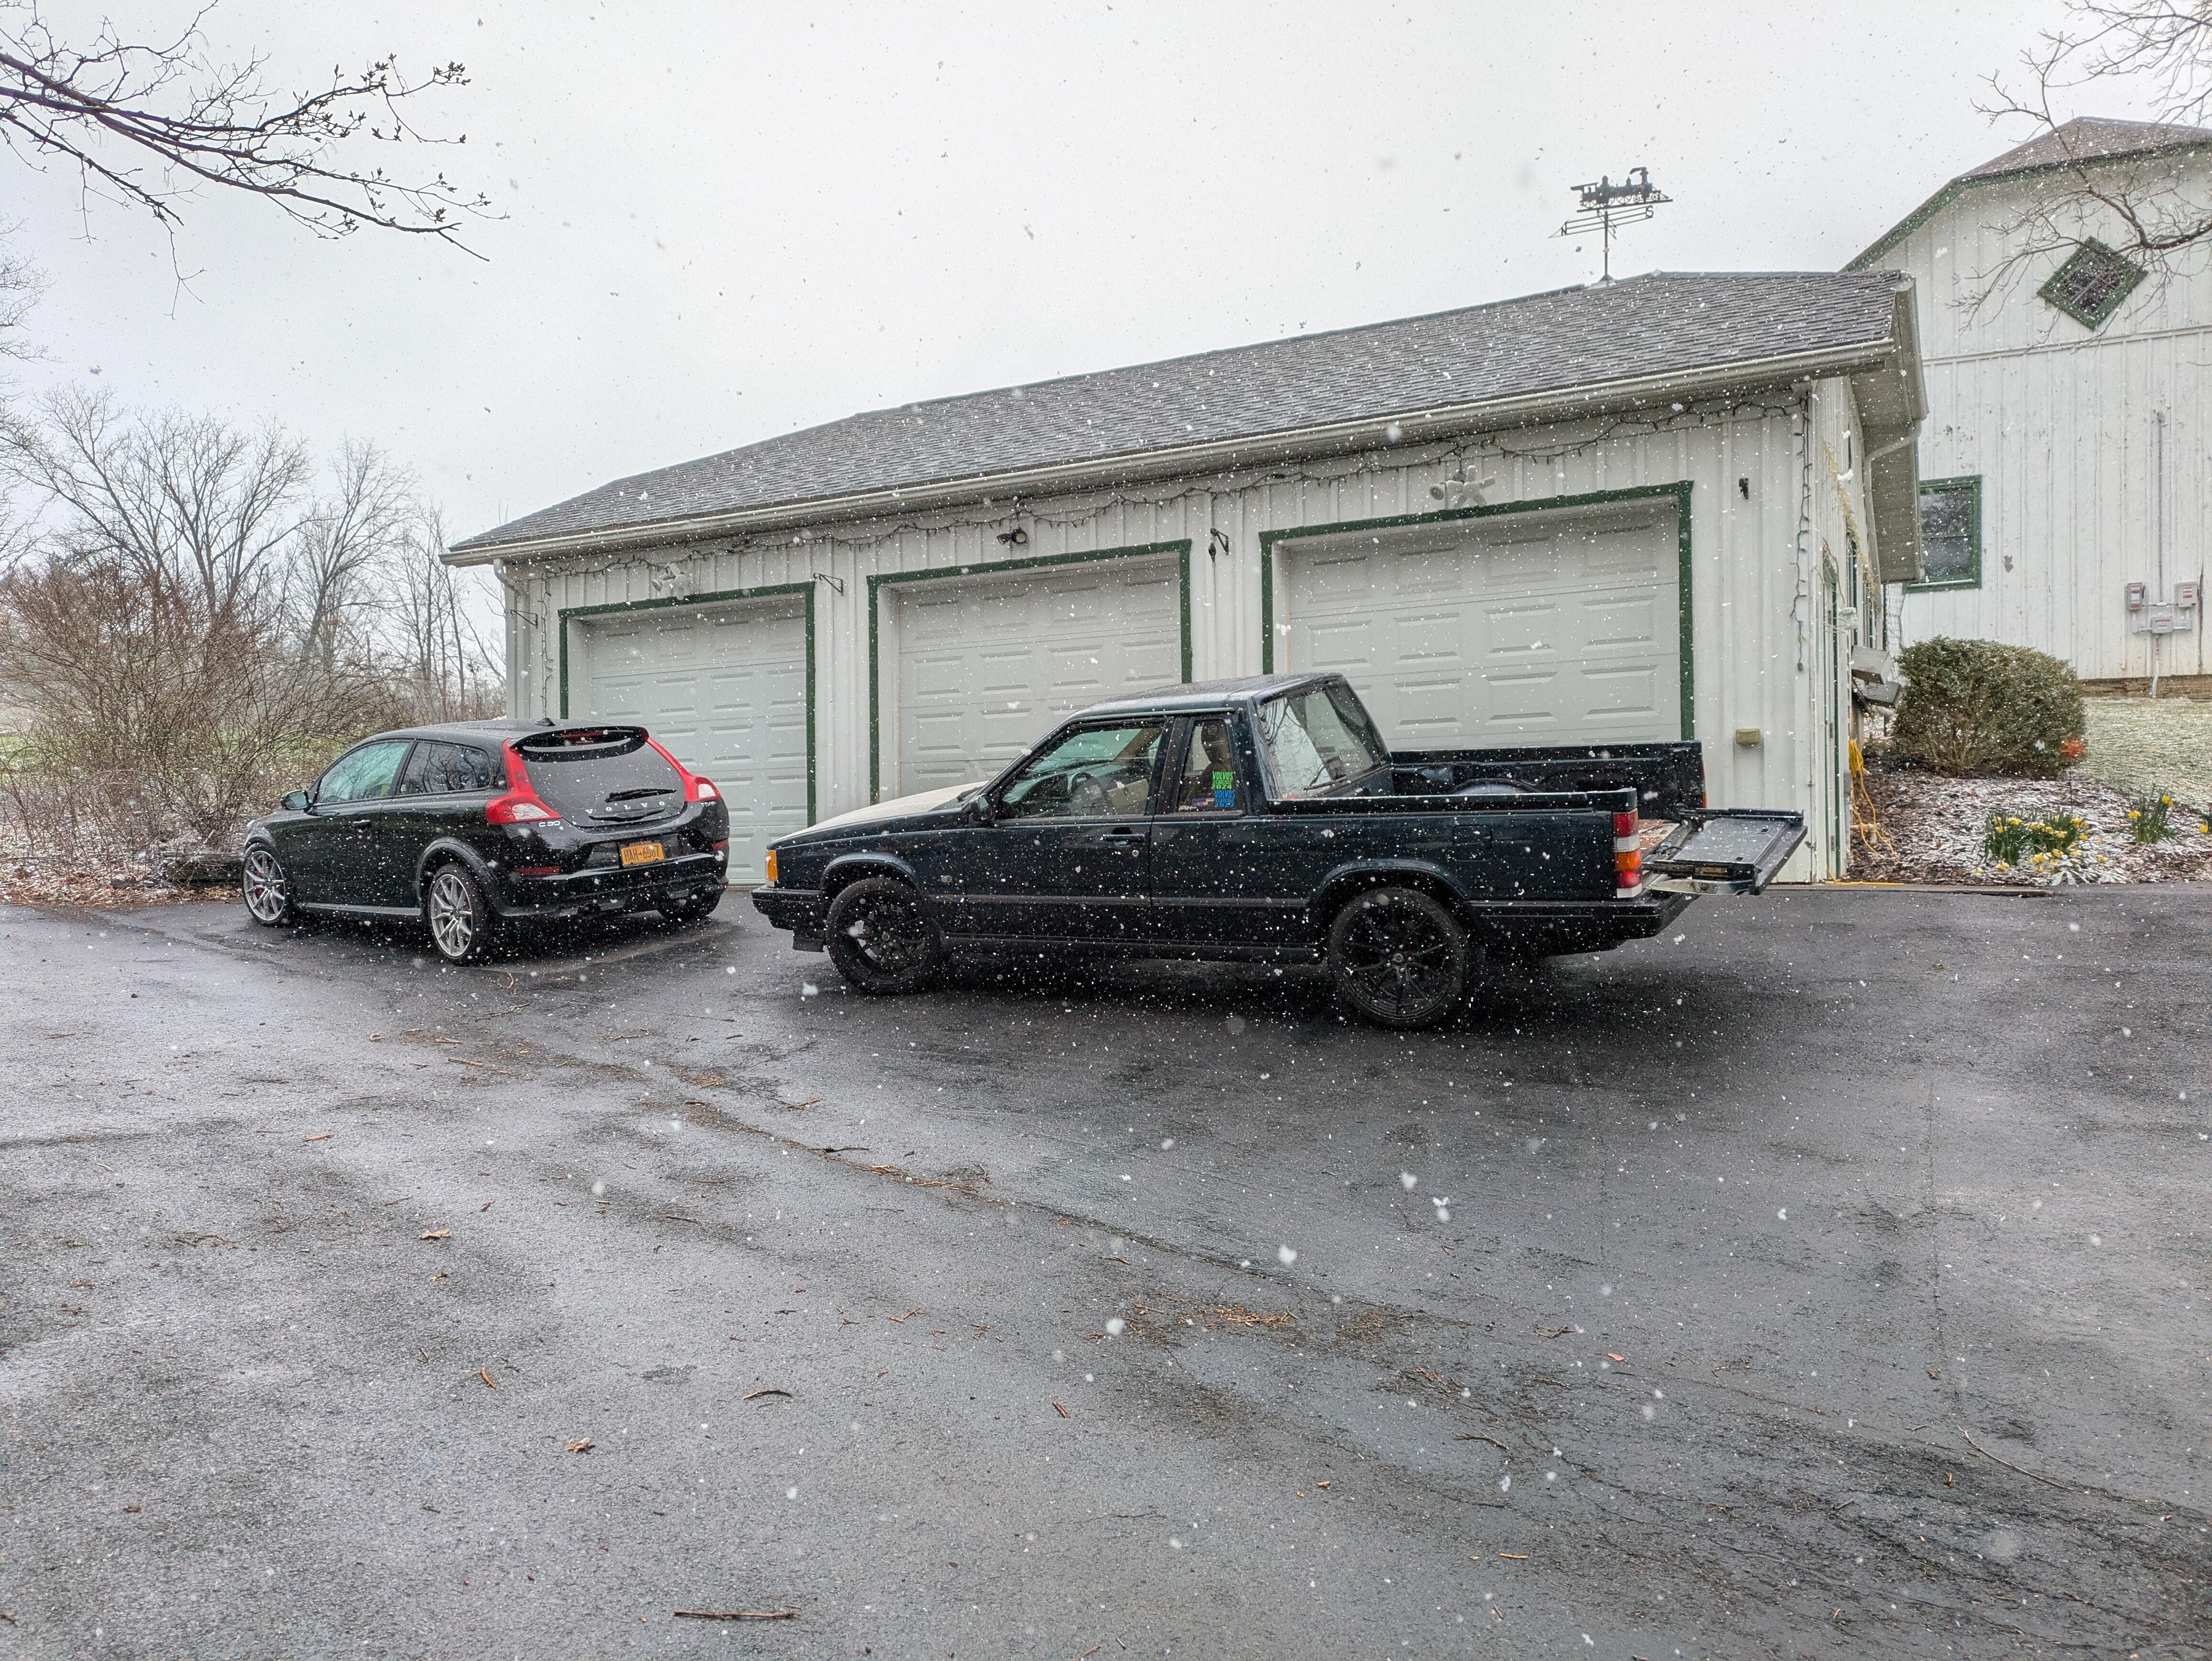
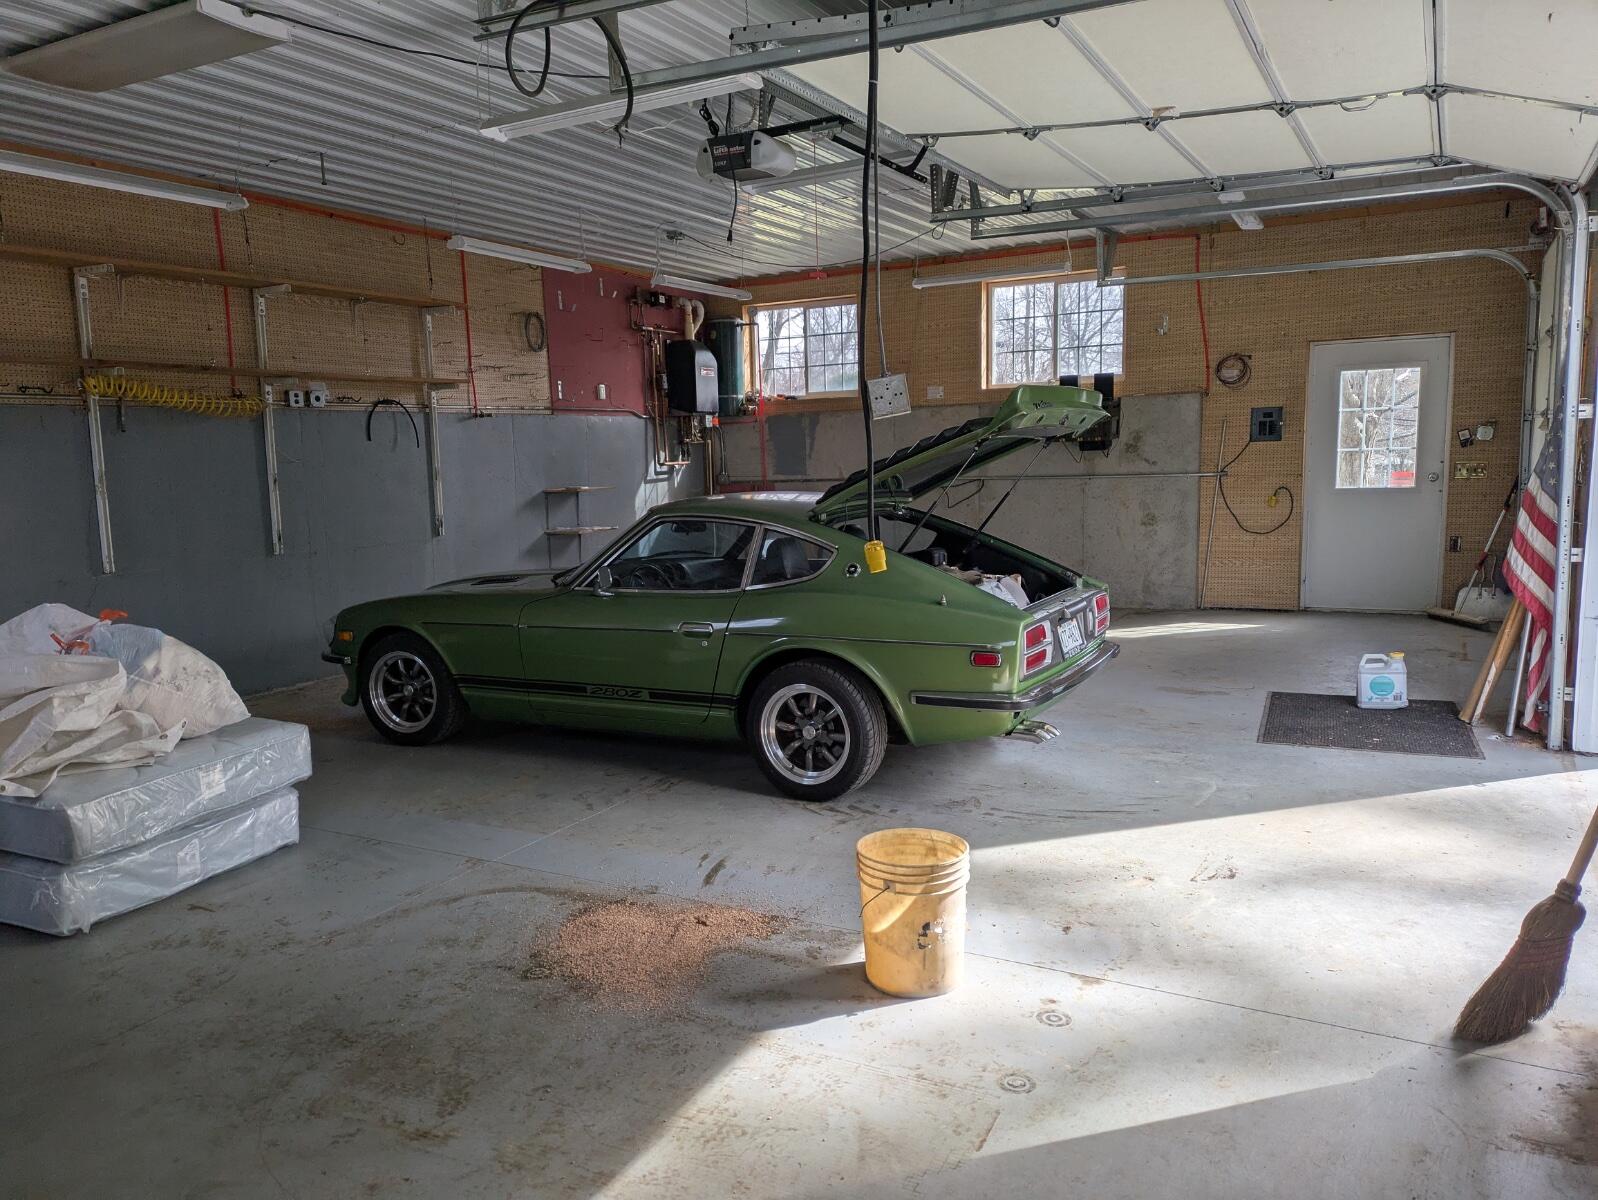
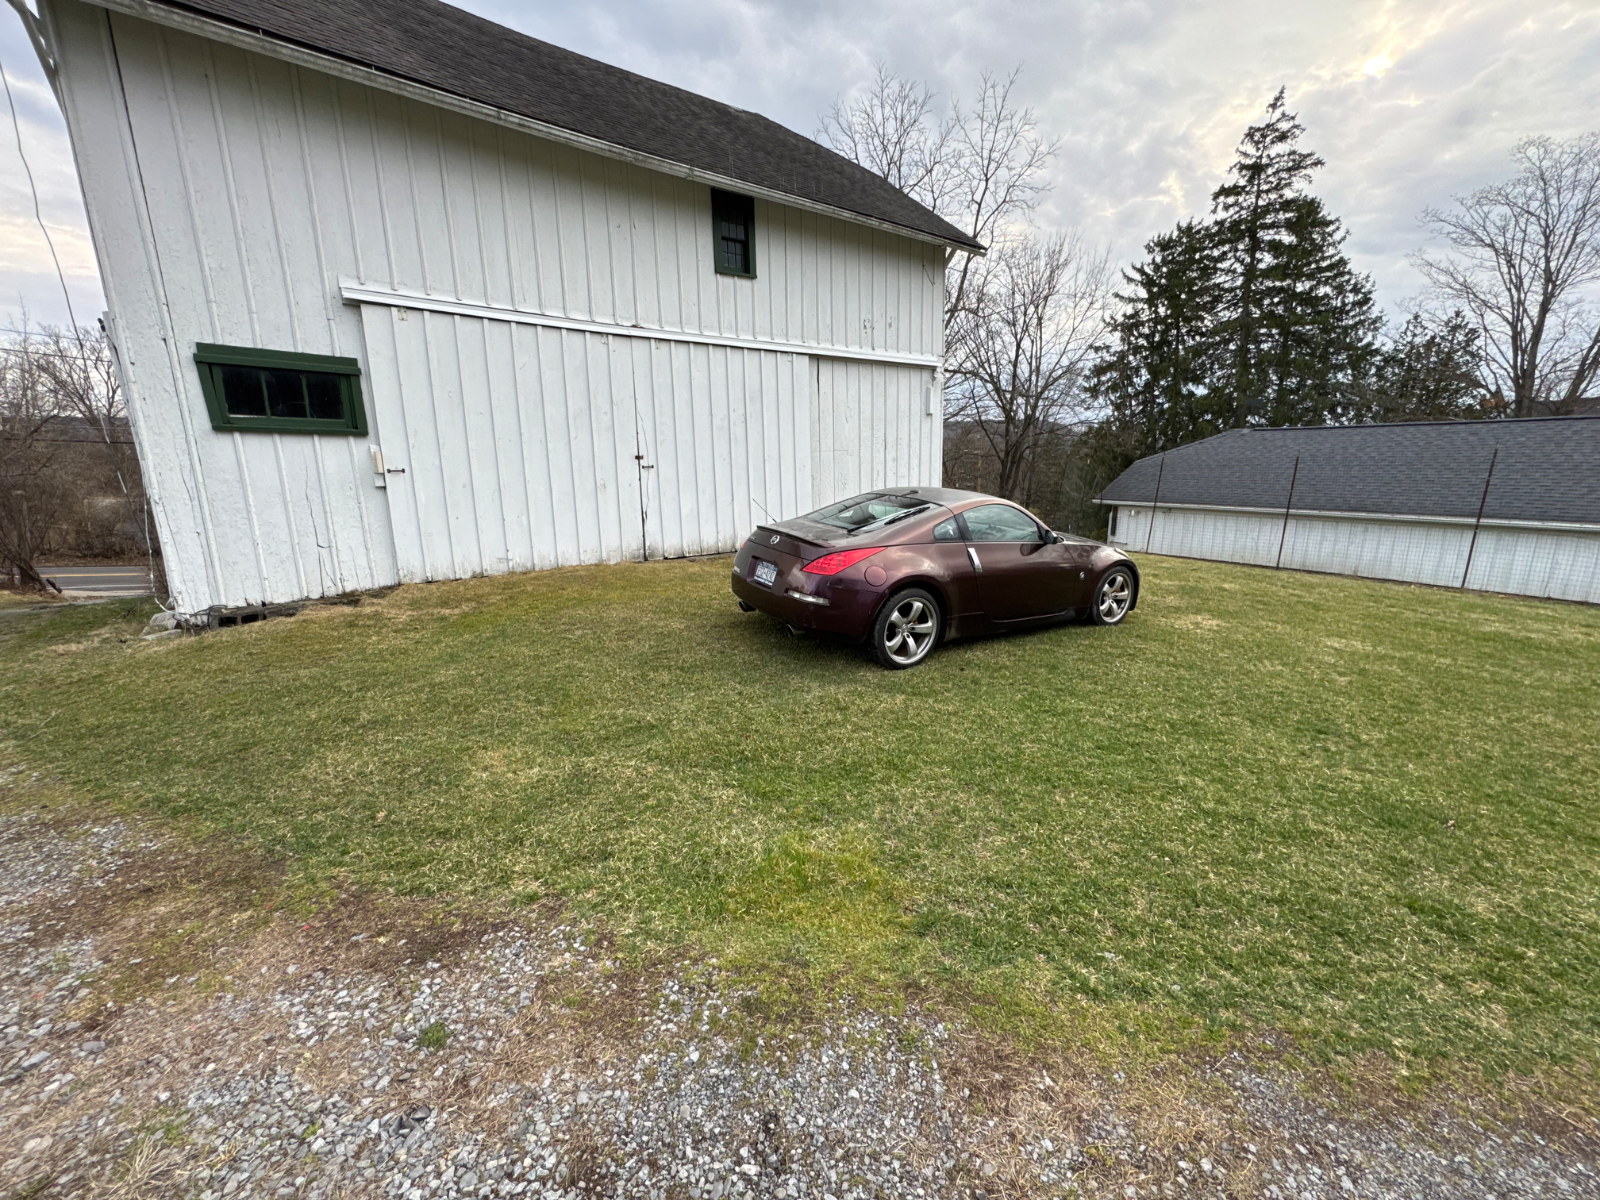
Moved upstate to Ithaca NY back in April. Had the 350Z shipped up ahead of us, then took the 280Z on. a clear day. Still no work on the cars yet, still setting up the grounds, garage & house Garage was used as. workshop, so it has a couple of 240 circuits, air compressor lines & ports, and radiant heat. Little more cluttered now, still working on setting it up Added glass panels to each door for more light Outside garage back in April: Better weather Adding slabs outside the barn & garage for me to work on - there are no flat/level/safe areas on the property outside of the garage


 2 points
 -
1 pointI installed the AZC pan, very nice piece. No leaks yet - I used a cork gasket with a few small blobs of black RTV in the areas suggested by the FSM. It might be in my head, but the engine noise had quietened down since the pan installation.1 point
-
Thanks, Yarb. I am on hybridz too, I joined it when I started exploring the Megasquirt/turbo upgrade (I was getting fed up with the AFM/running lean etc lol). There is less traffic now as it used to be.1 point
-
Glad to see you back.1 point
-
Very cool! Looks like the new shop is a nice upgrade. Looks like you might have more acreage too...1 point
-
I think Yarb's thought might be it needs surfacing.. There are some chatter marks and possibly some blue hot spots too. Yarb, be me to it by seconds...1 point
-
1 pointAbout 35 years ago, I was in the process of restoring a 240Z, as well as parting out another for spares. I took an assorted group of 10 or 15 nuts, bolts, washers and couple small parts off the Z's to our Materials Lab. "Our" being Honeywell Space and Strategic Systems Lab. A Materials Lab with men and equipment that supported putting men on the moon and probes on other planets. I ask the guys to tell me what was used for plating and corrosion protection, as I intended to have them re-plated. After testing them, they told me they were Cad. plated and given a yellow chromate conversion bath- and to be sure to wear a mask if I used a wire wheel ((bench grinder) to clean them up. Cadmium is very toxic and you don't want to breath any in. Given that the OEM fasteners on a now 50+ year old 240Z, treated with a little penetrating oil will break free and unscrew, without twisting off, is witness to me of Cadmiums use. That doesn’t happen with zinc plated fasteners in automotive use. In addition to Cad. plating having three to four times the durability of Zinc, Cadmium offers increased lubricity, so threaded fasteners release and unscrew. If you are not absolutely certain - best advice is to treat them as having Cadmium Platting..and be careful how you handle and clean them up.1 point
-
1 pointWell done Ken. Perseverance par excellence! Dashboards are not fund to work on.1 point
-
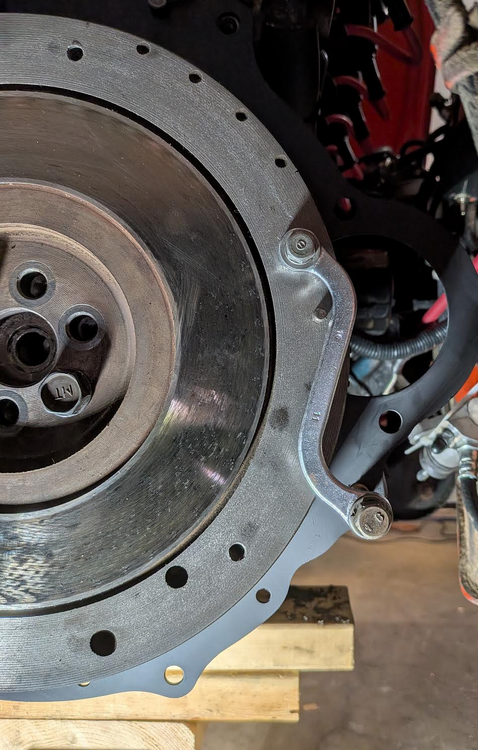
Update: put the transmission back with the Dorman $6 clutch alignment tool for 24 splines. Installed 2 guide bolts (don't forget to put slots into them, otherwise you won't be able to remove them). The transmission was in 1st gear, I moved the rear shaft a little to help it ease into the clutch splines. It took 10 minutes. Here is my improvised flywheel hold tool (saw some guys on youtube doing this): Next is the driveshaft, refill the tranny and exhaust mounting.
 1 point
 -
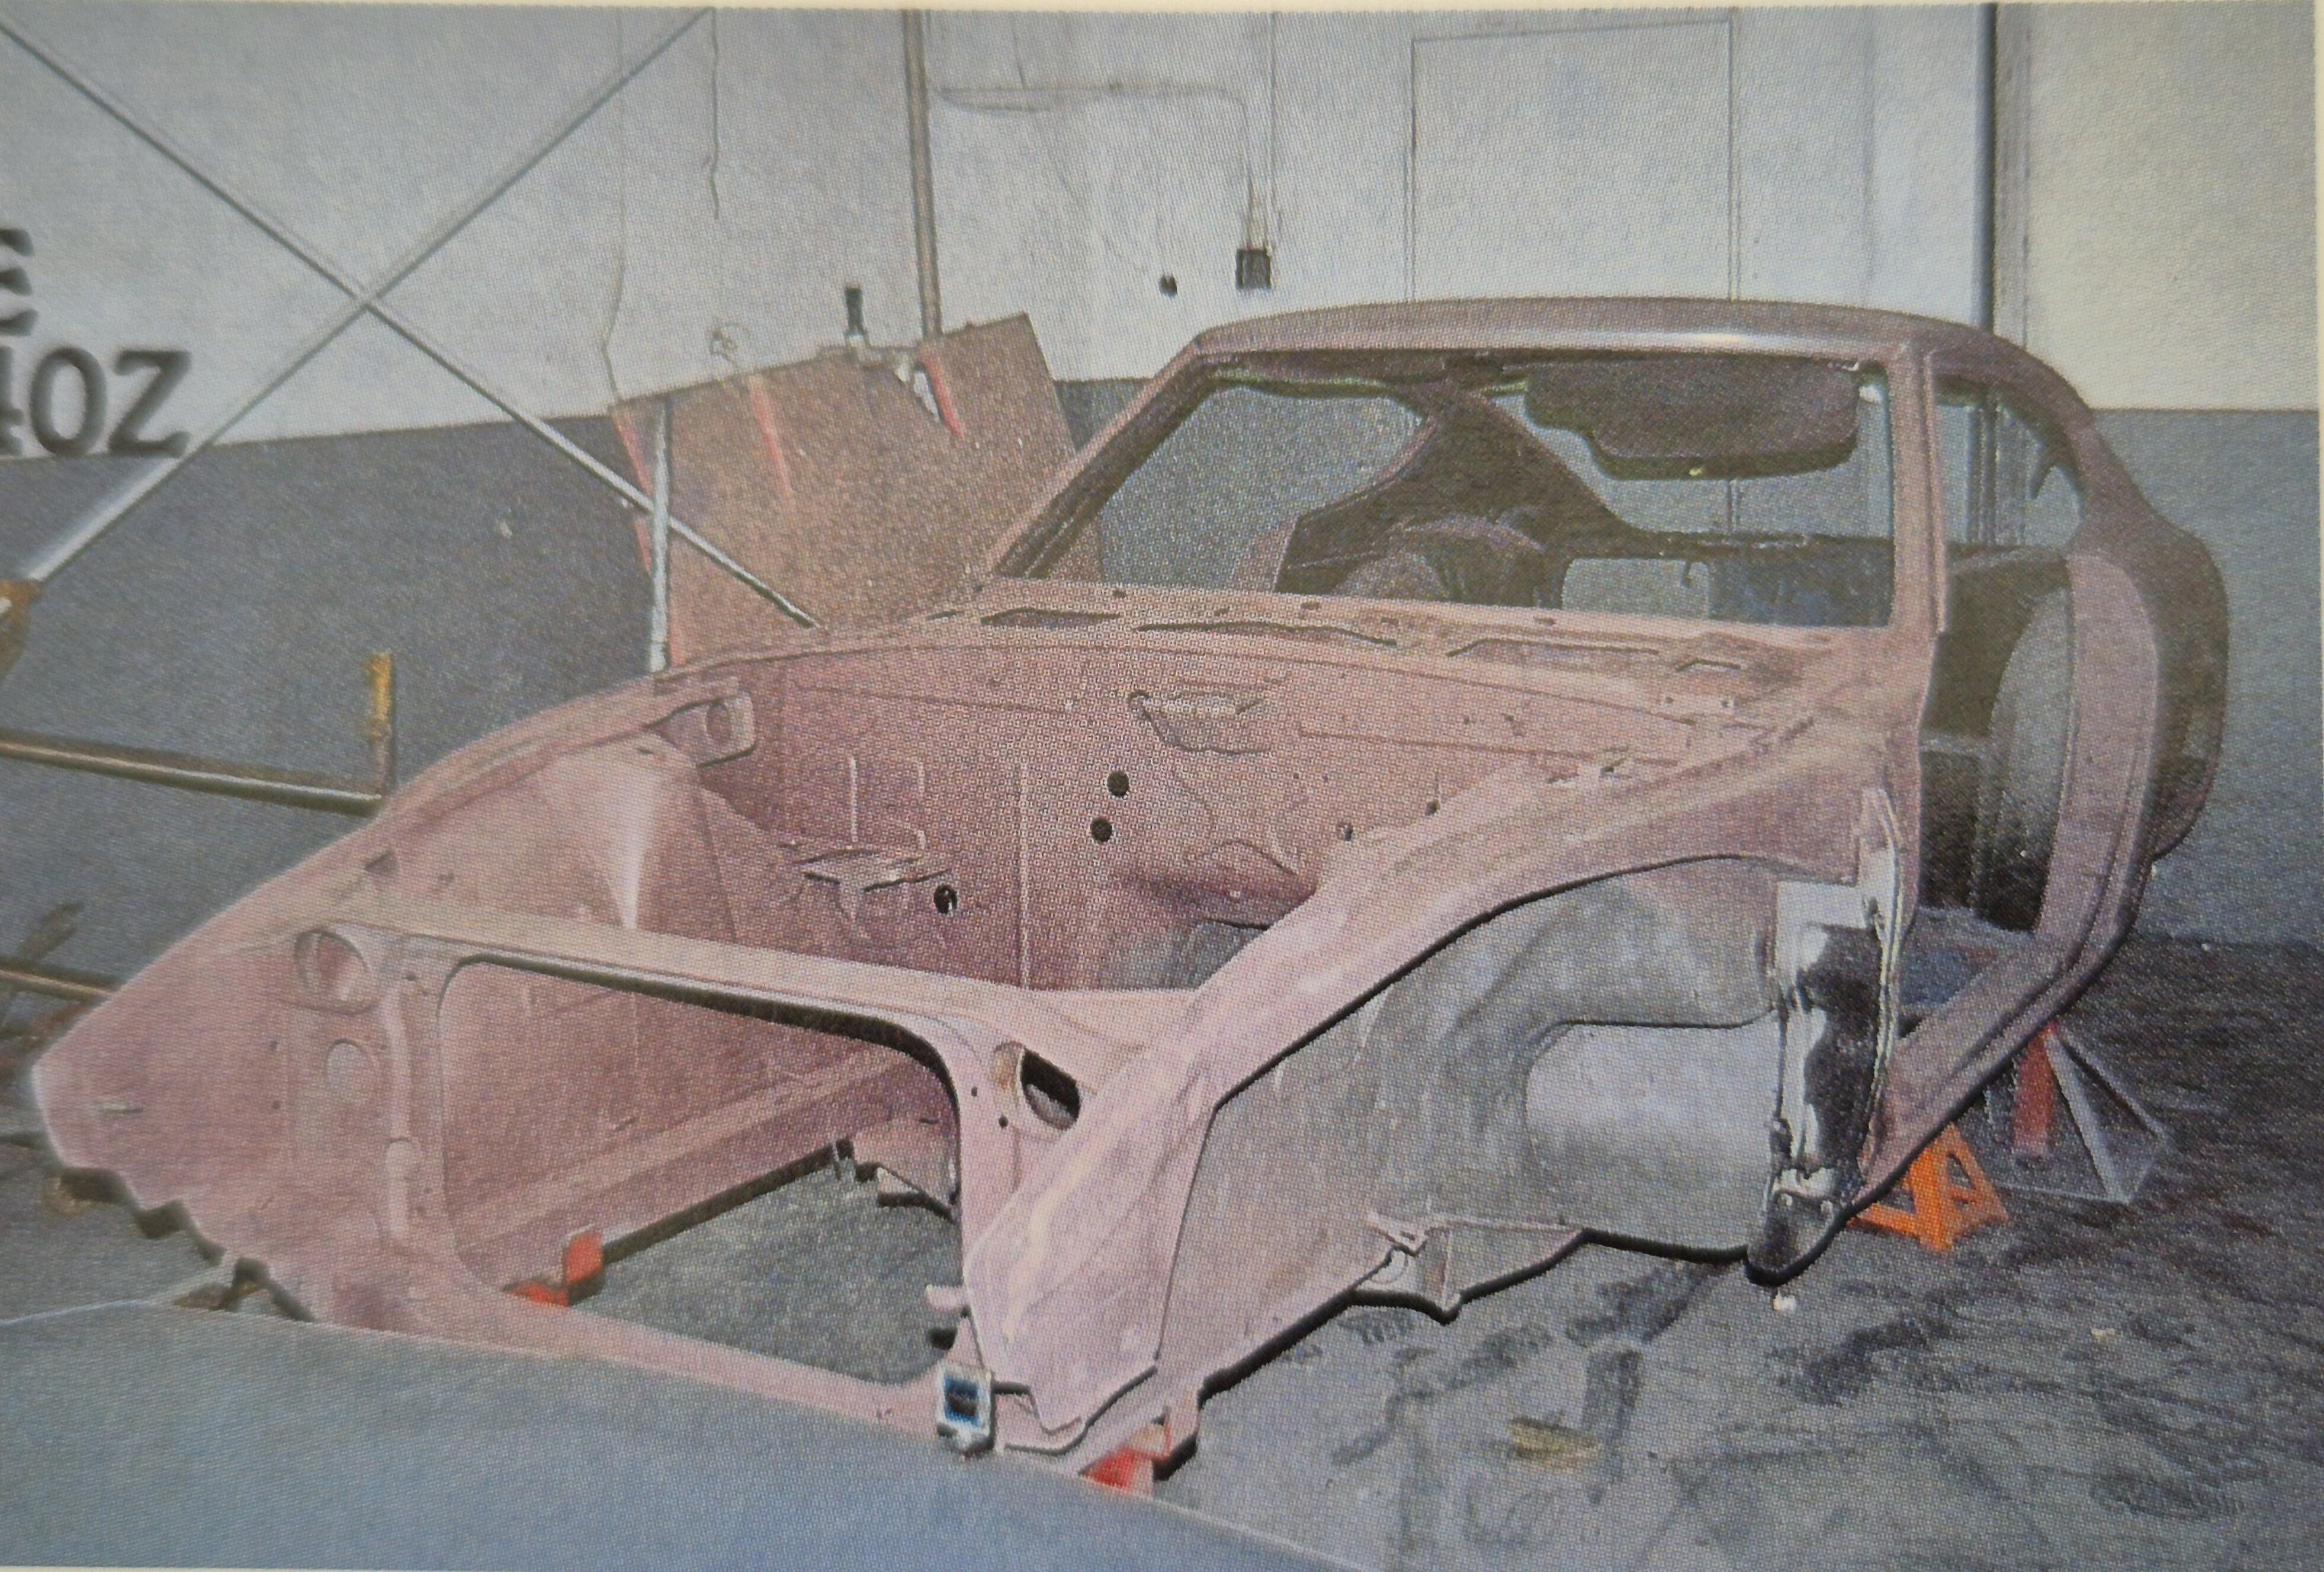
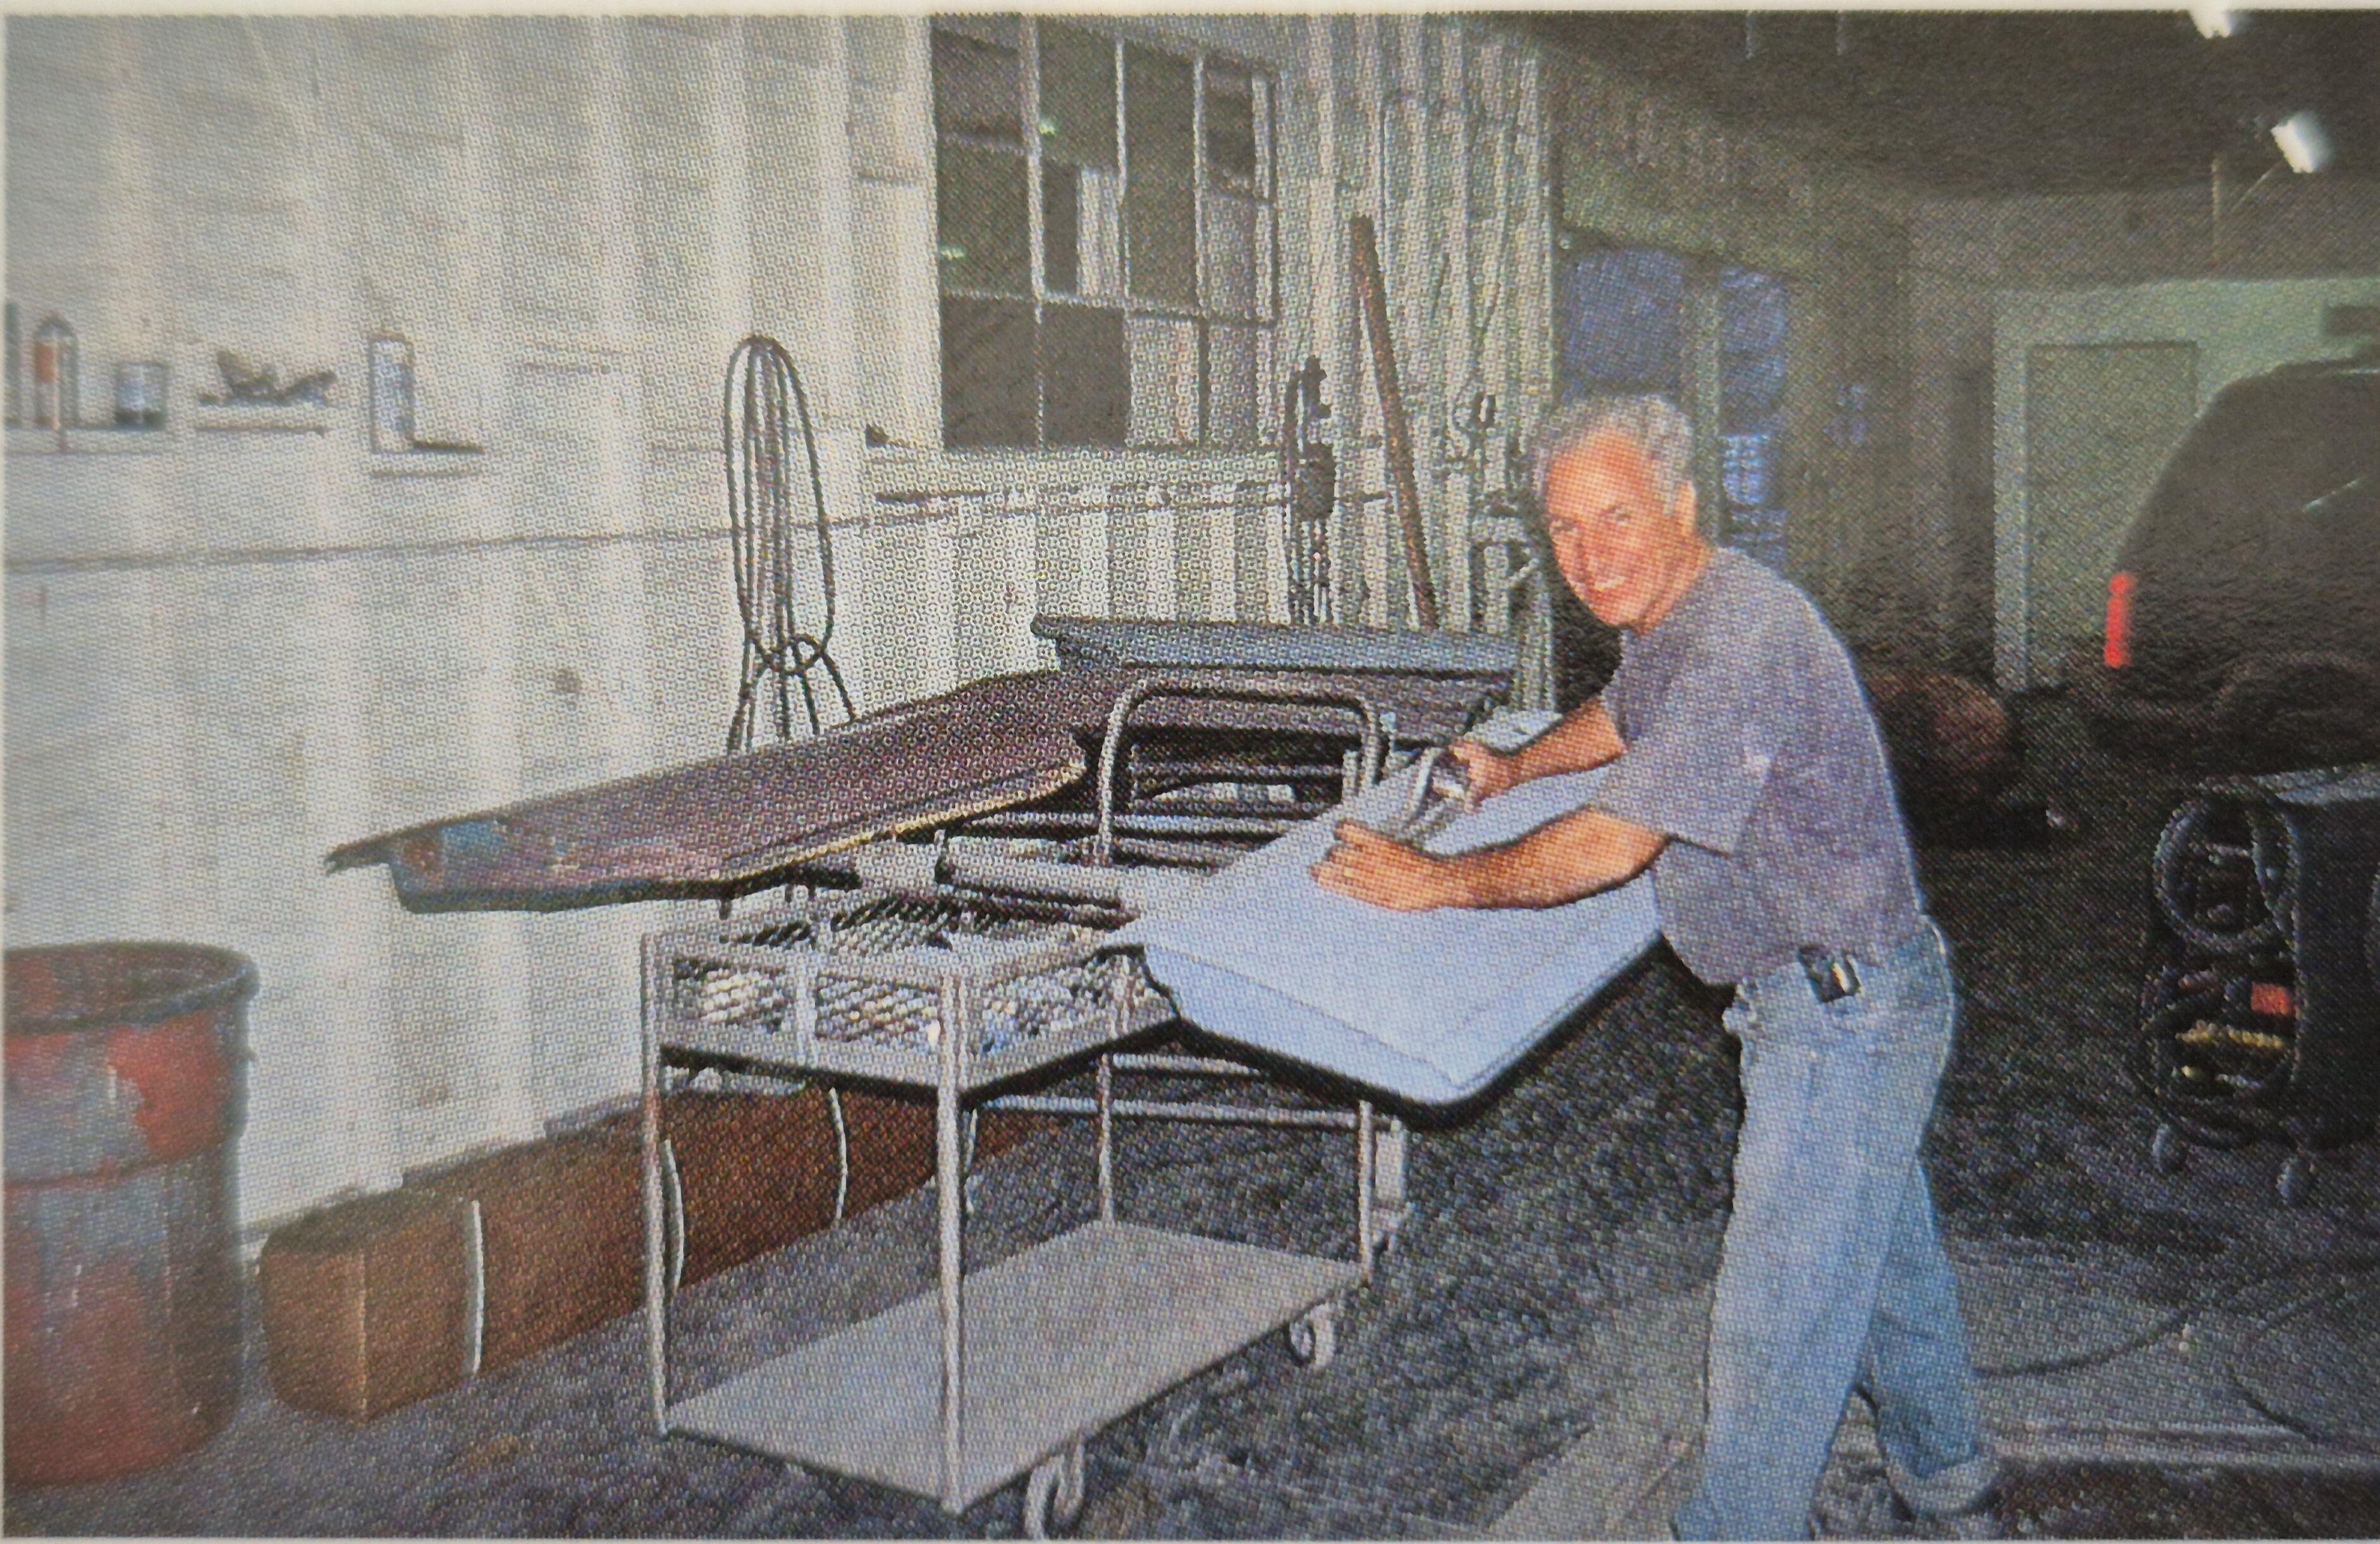
1 pointA few more: Caption for the above photo says that the guy working on the door is an Armenian, and that Armenians are historically renowned as being skilled metalworkers ("in their DNA").


 1 point
 -
1 pointThe Japanese caption specifically says powder coat, but that could easily have been a miscommunication (or, heaven help us, an assumption...) between reporter and the people at Pierres. I would think it much more likely that they were in fact painted, as per the original factory finish.1 point
-
And be sure it's a high pressure pump for EFI. The fuel line going into the fuel filter should be as hard a rock with pump on. Also the hose coming out of the filter will be hard from pressure. The fuel pressure regulator is what brings it down a little, 32psi IIRC. You can get the metal fuel filter for $10 to $20. Good luck!1 point
-
Forgot to say - don't neglect putting the return line end in the can if you try to use a portable can to see if it runs.
 1 point
 -
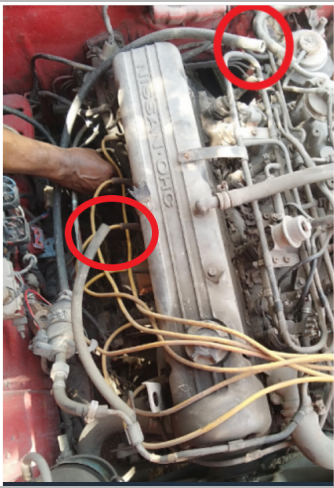
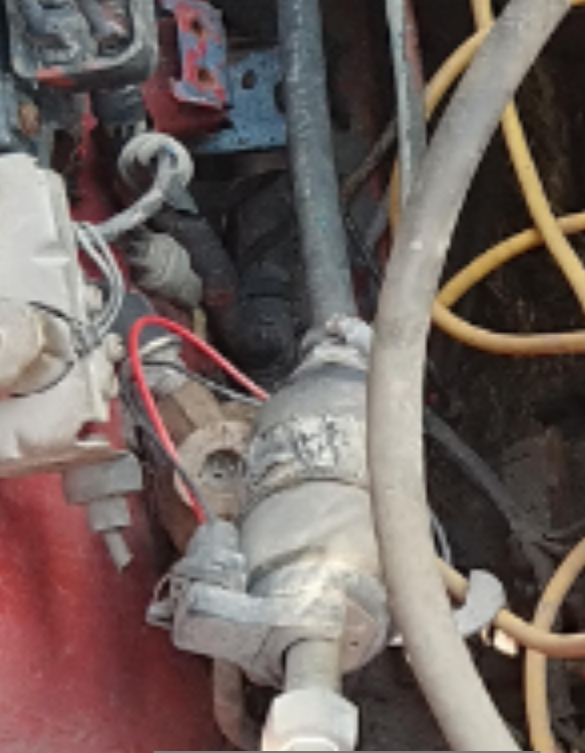
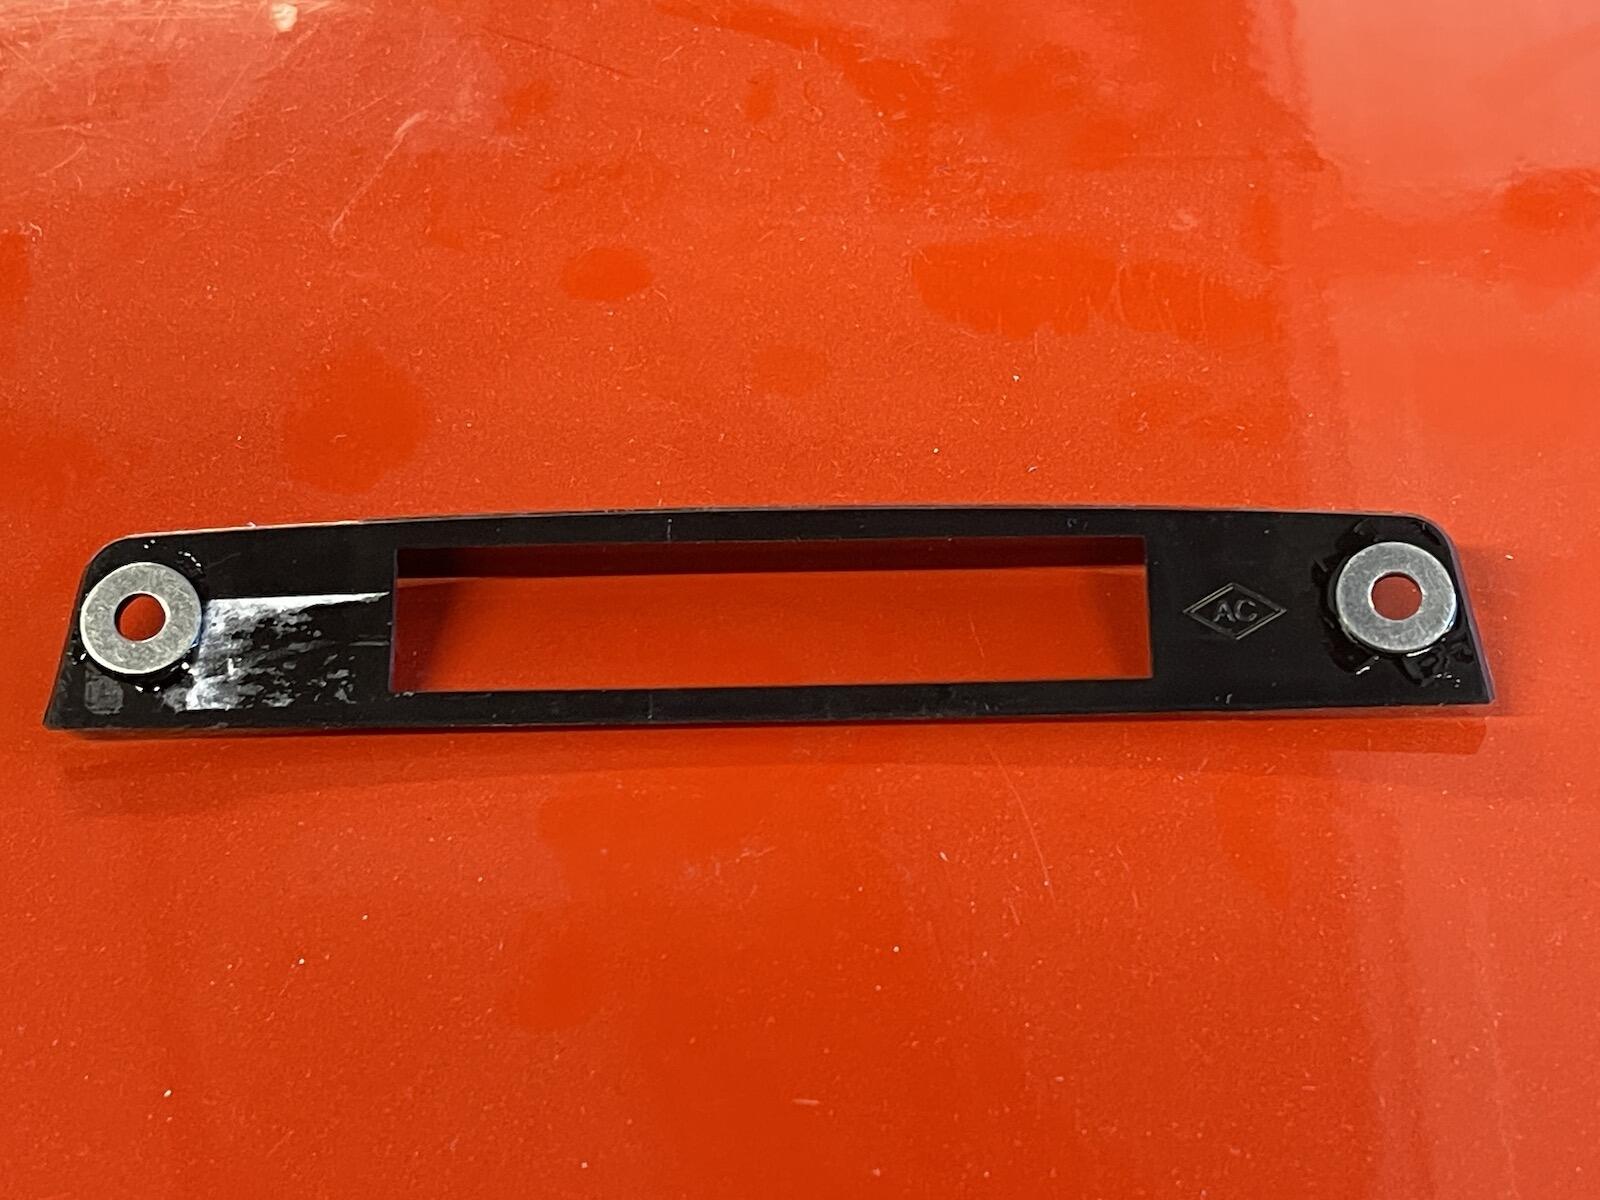
1 pointThat's a 1978 280Z. The fuel rail and other parts tell the story. Somebody has installed a fuel pump in the engine bay, and it is not connected a to a tank. of the type that don't like to pull fuel. That fuel pump should be moved back to the original area by the fuel tank (if it still works) so that it can self-prime with fuel. Download the FSM if you want to go deeper. https://www.classiczcars.com/files/category/13-280z/
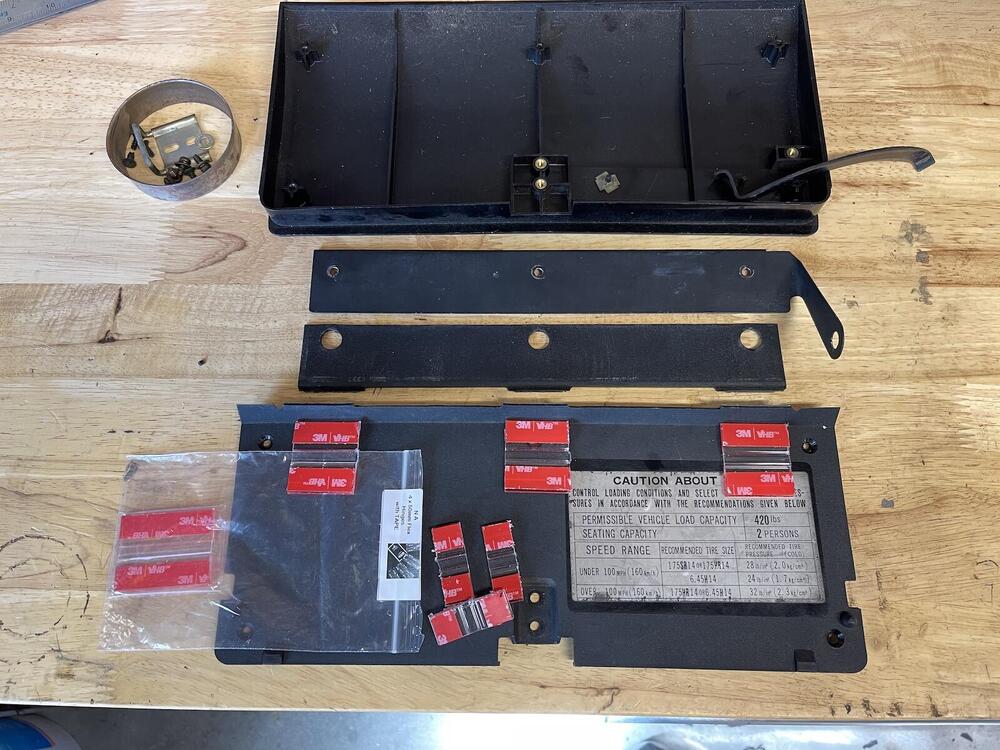
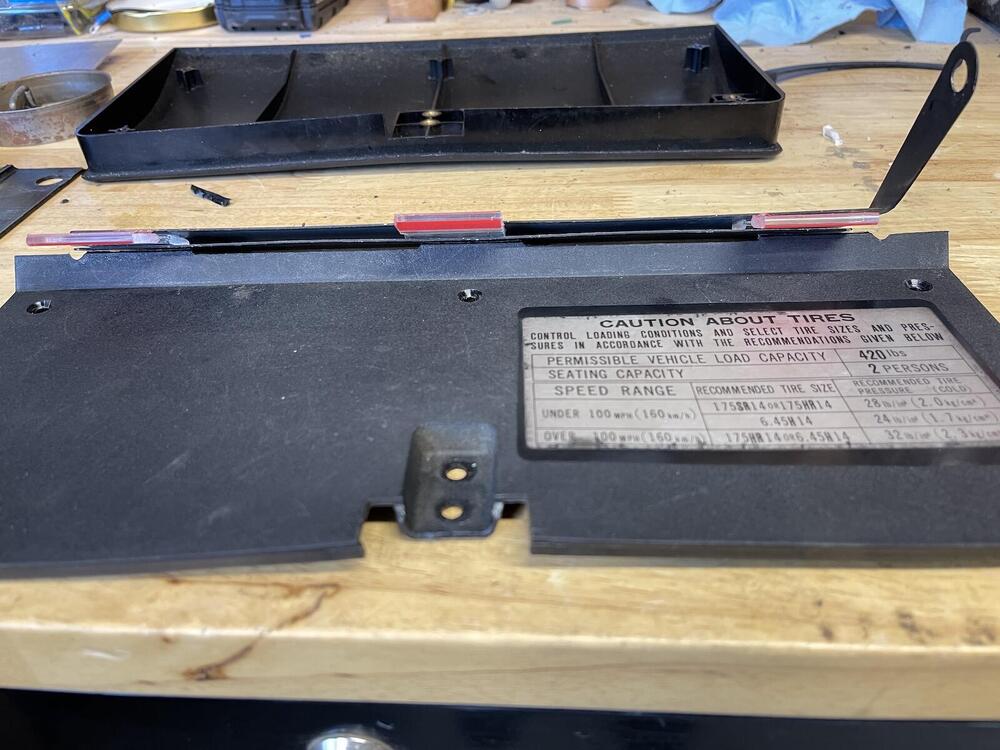
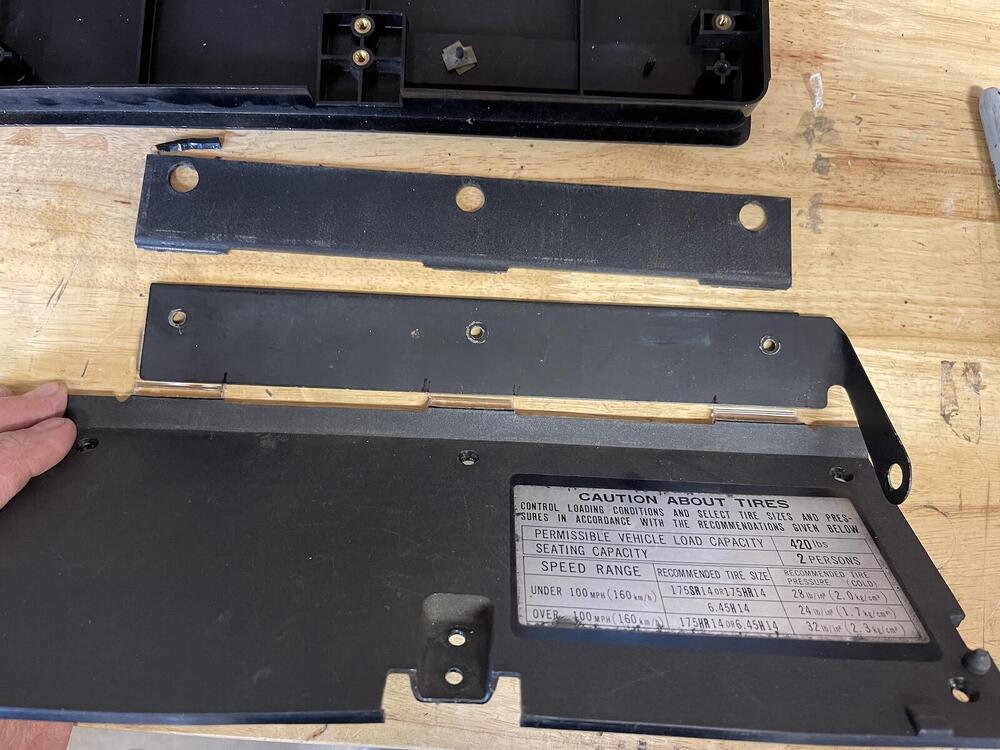
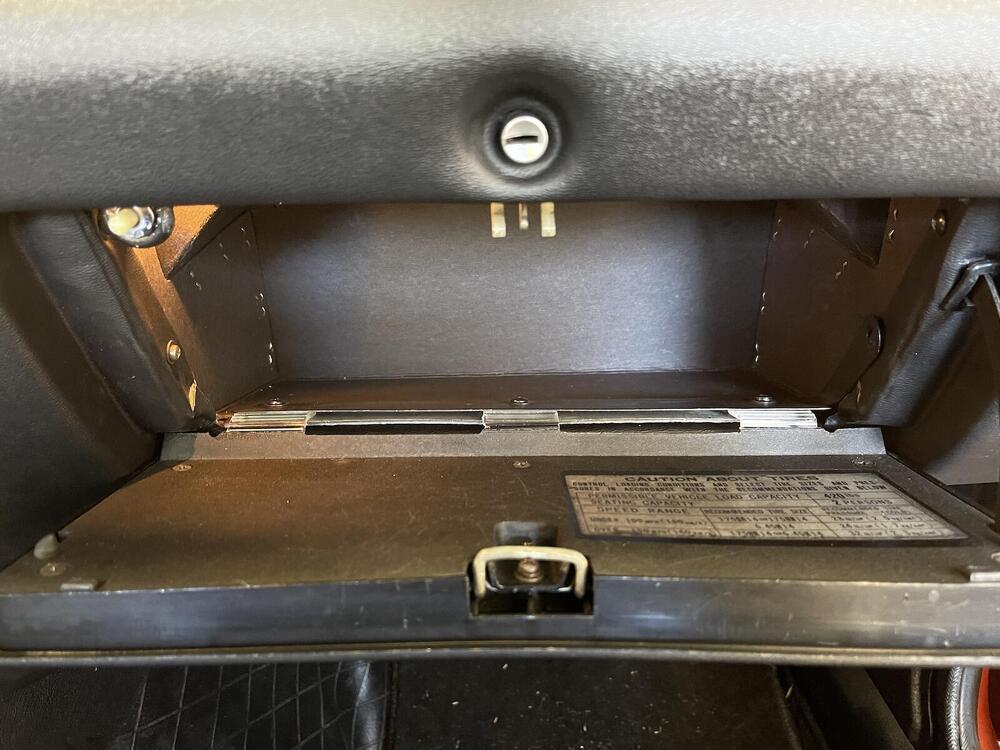
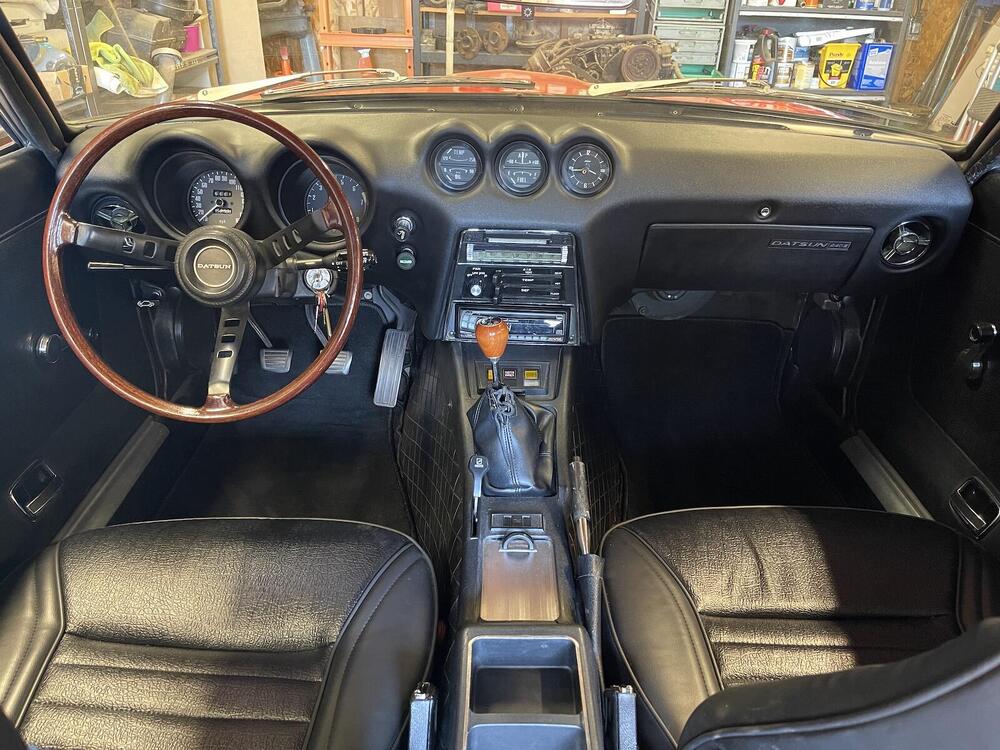
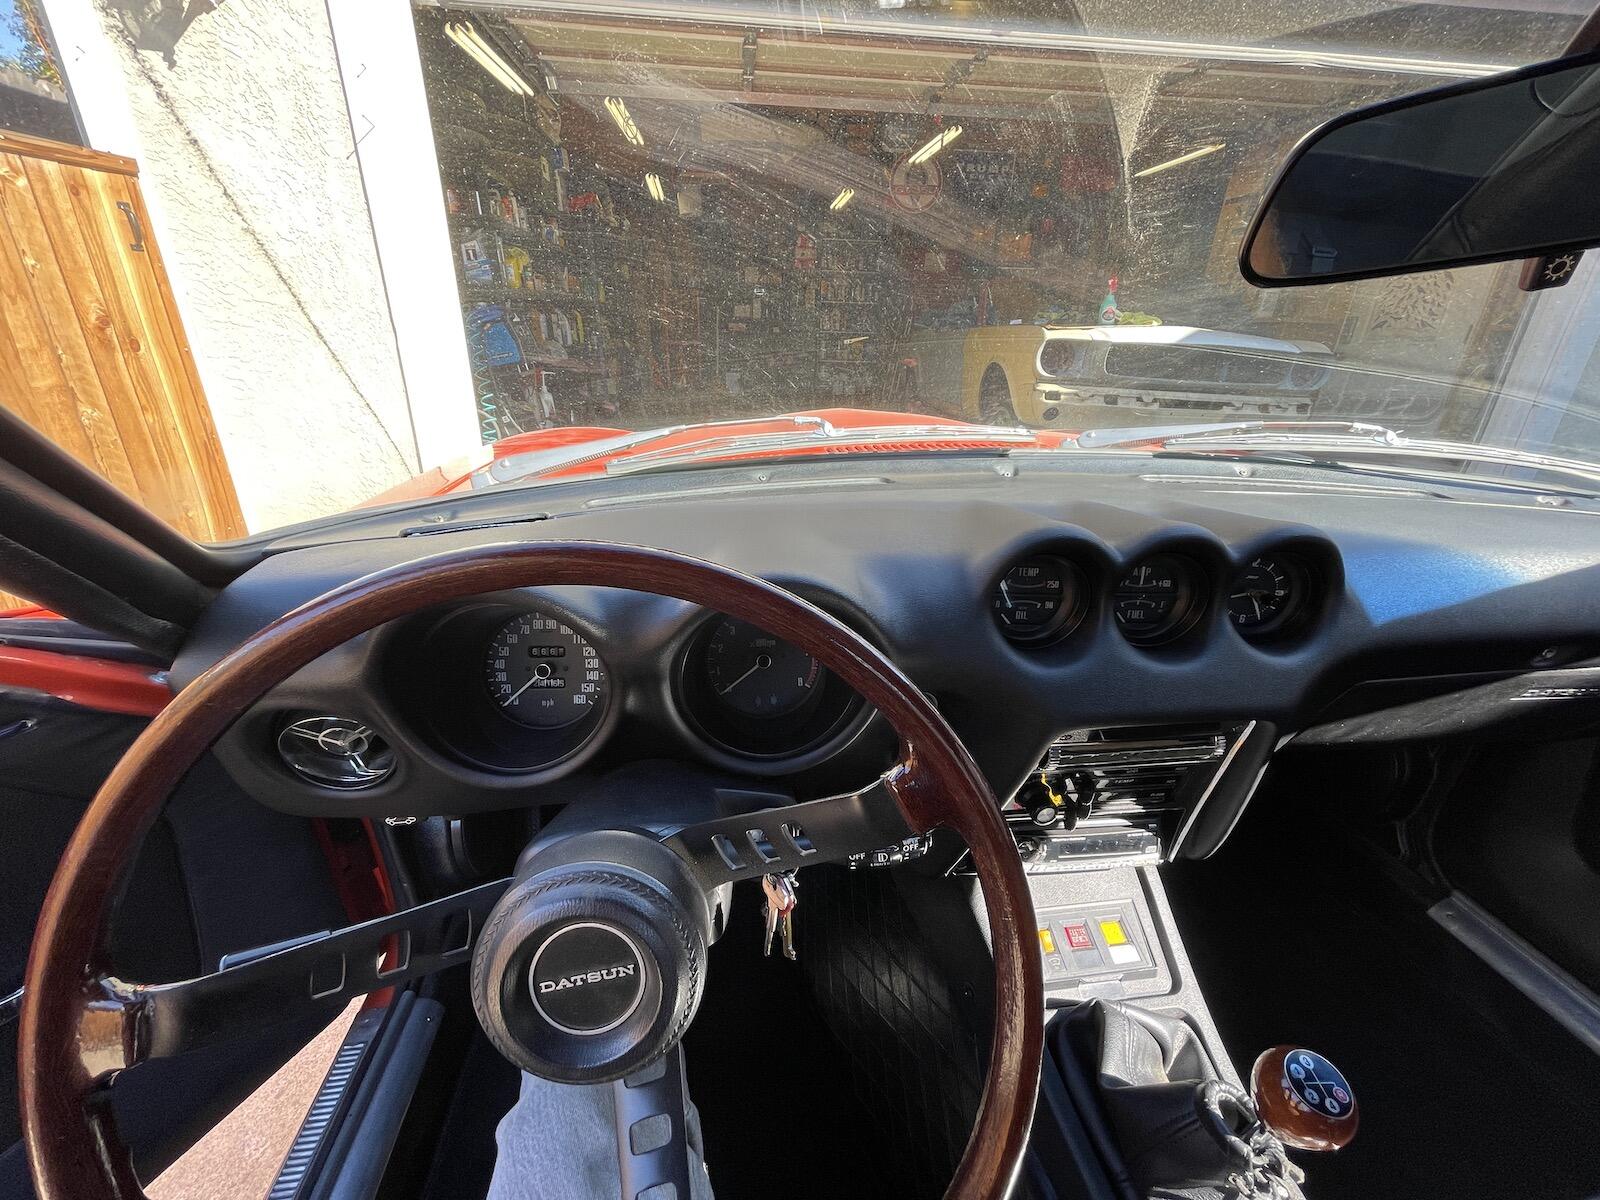
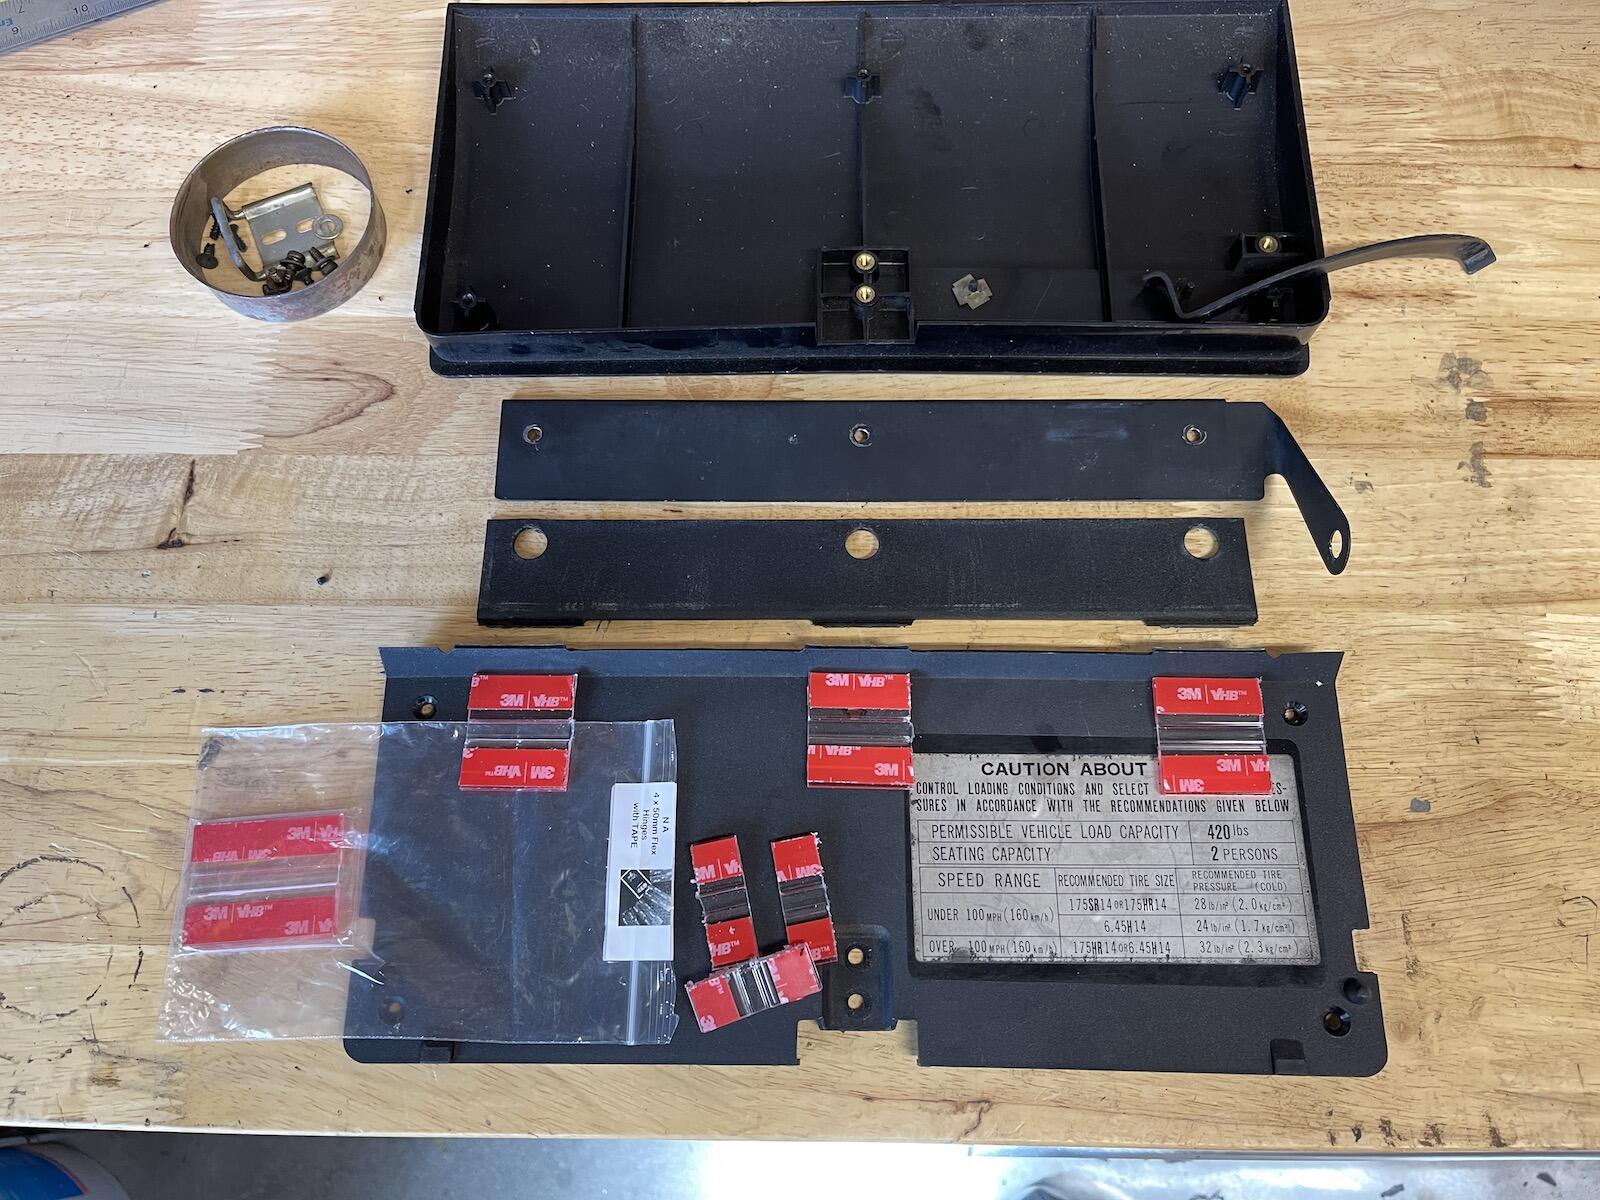
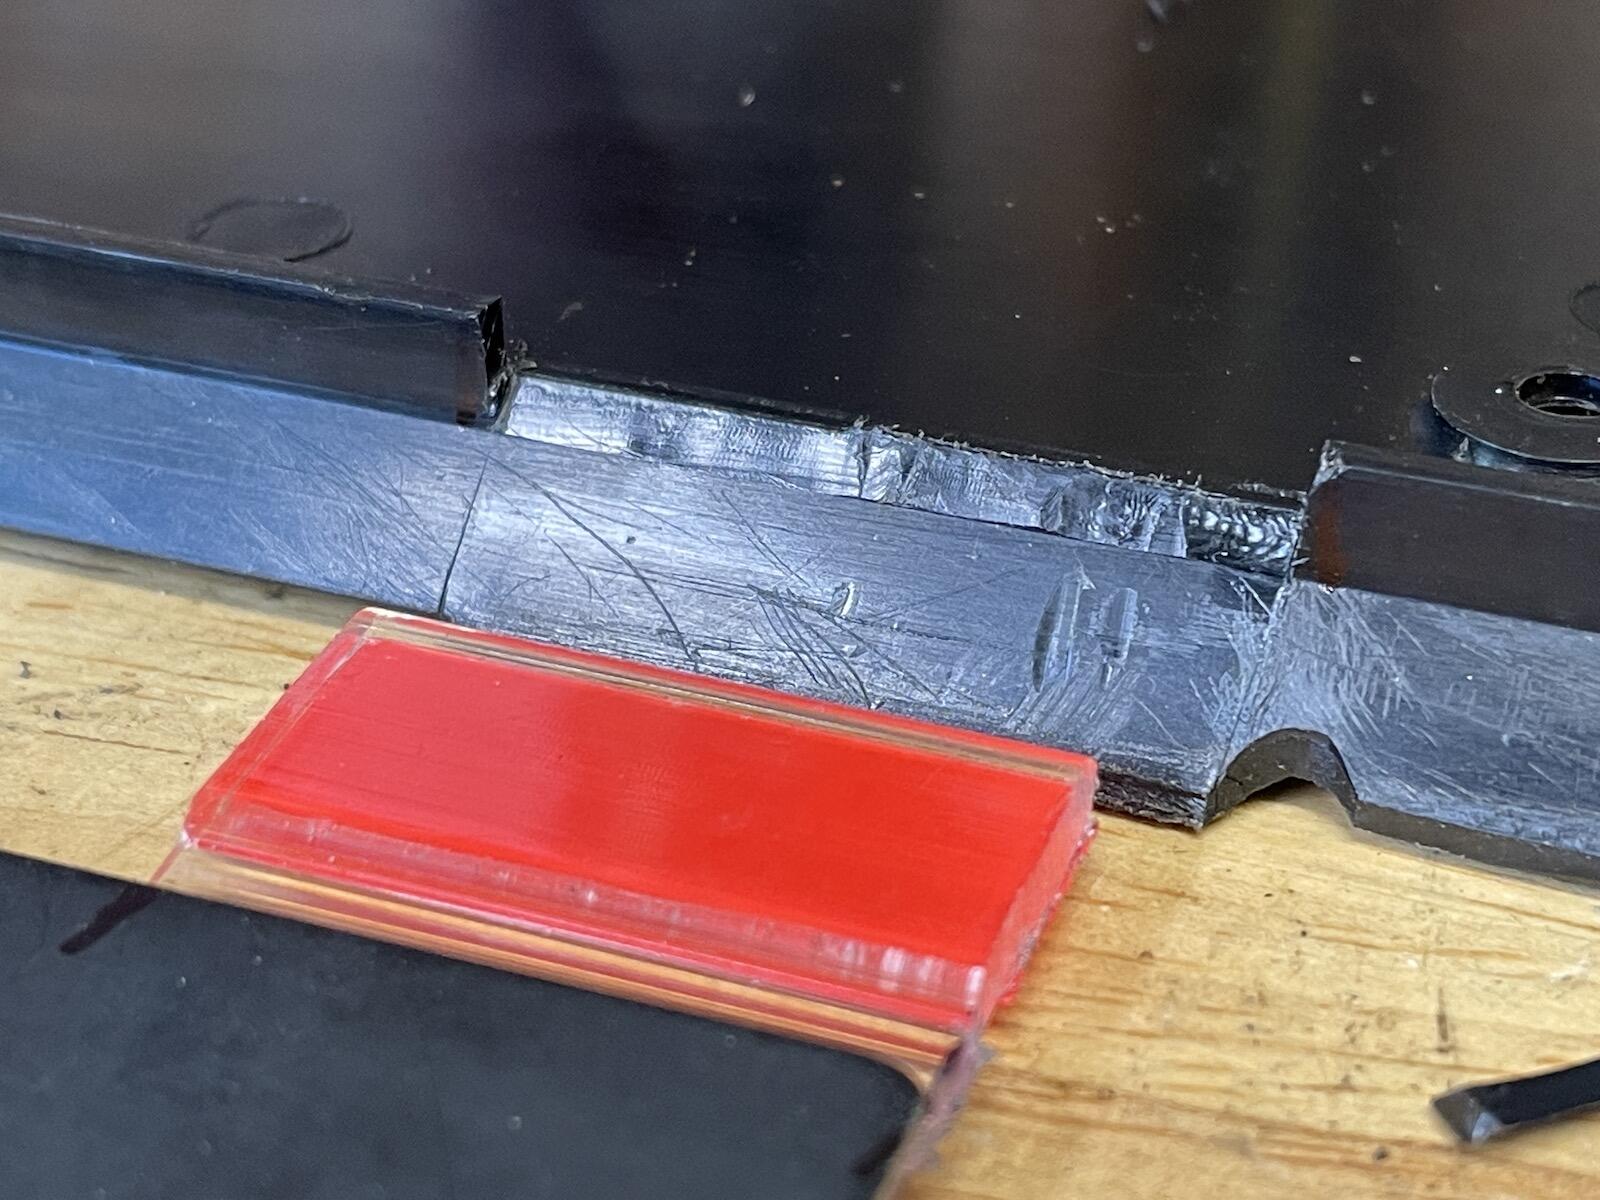
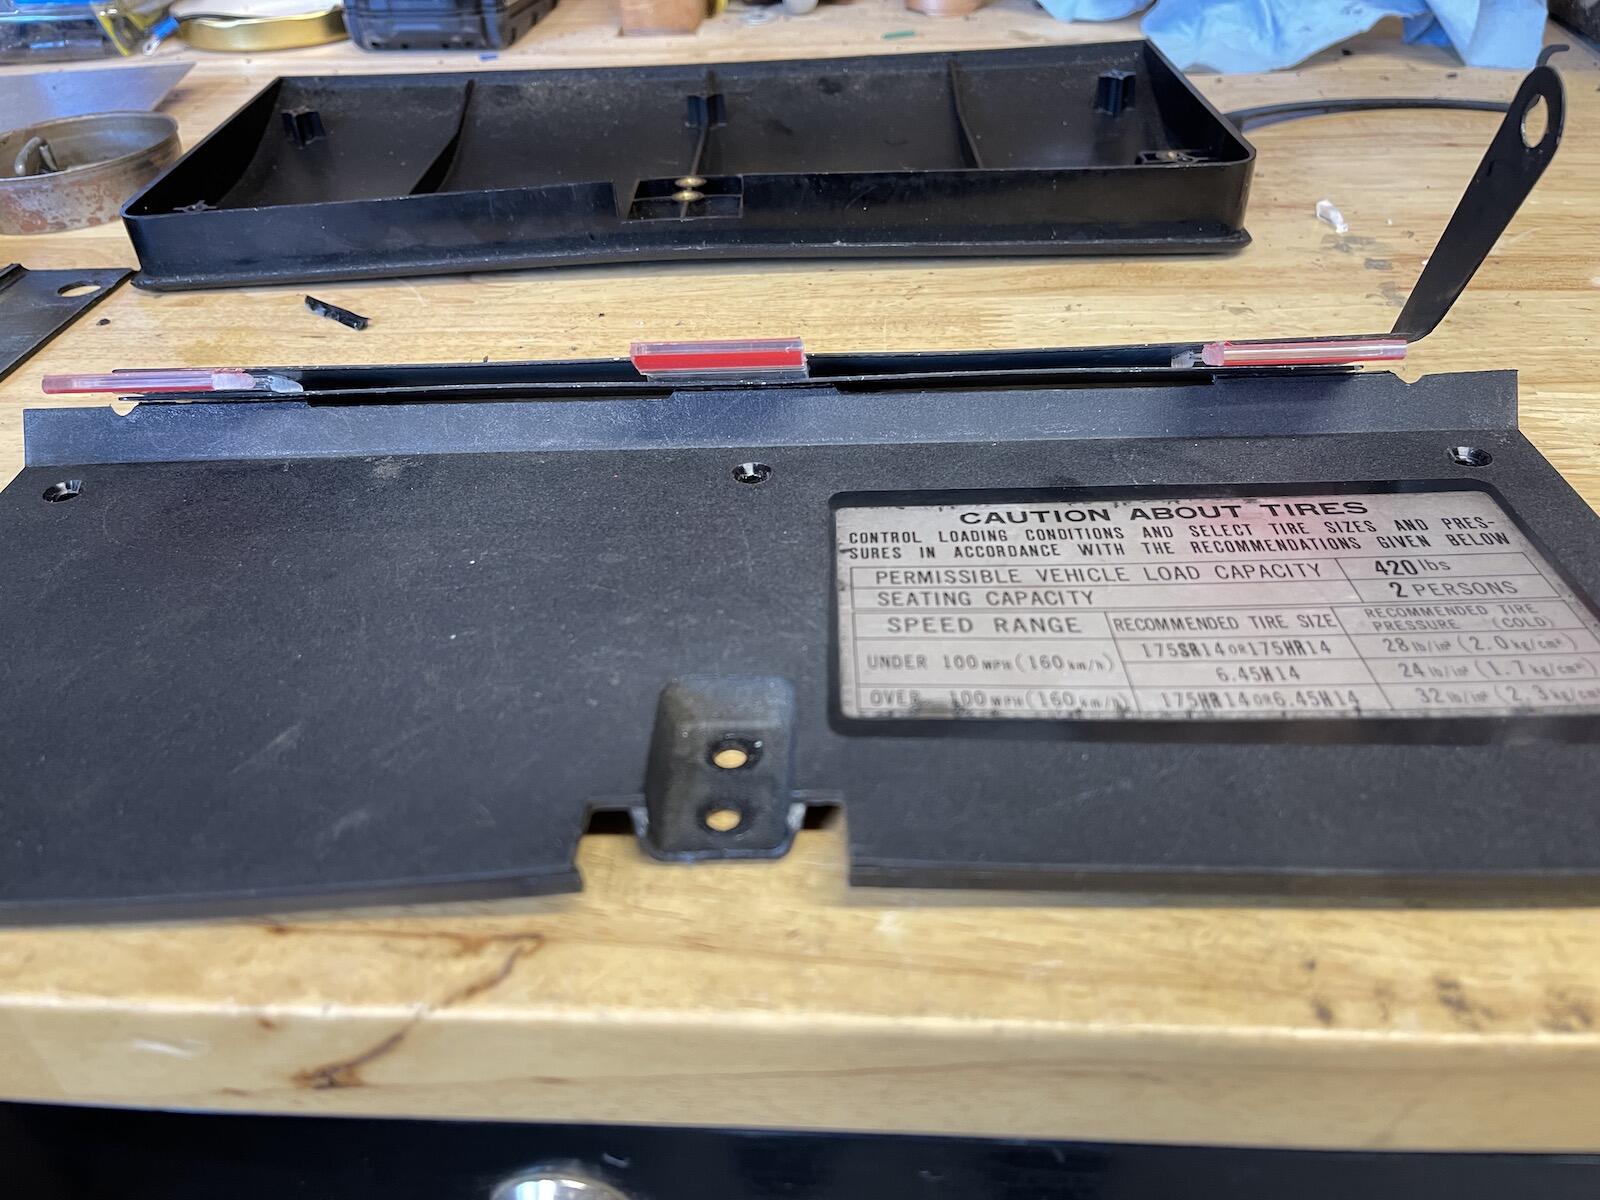
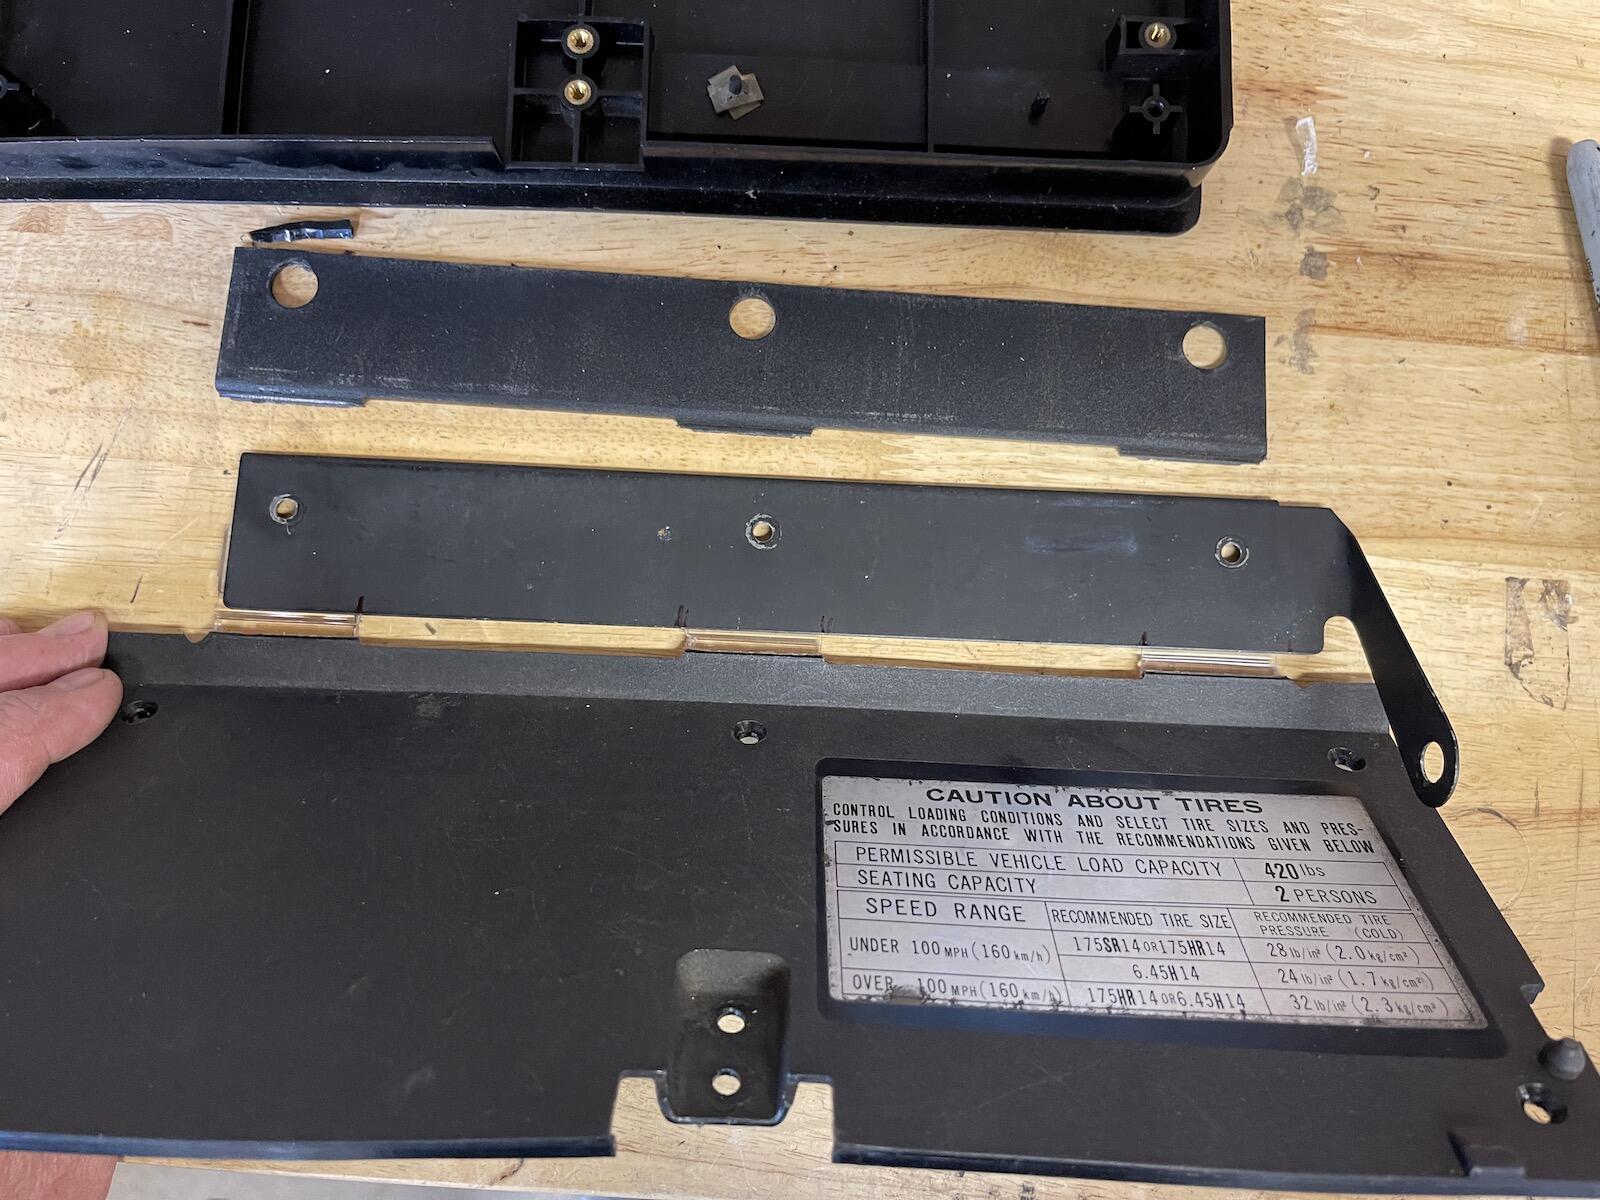
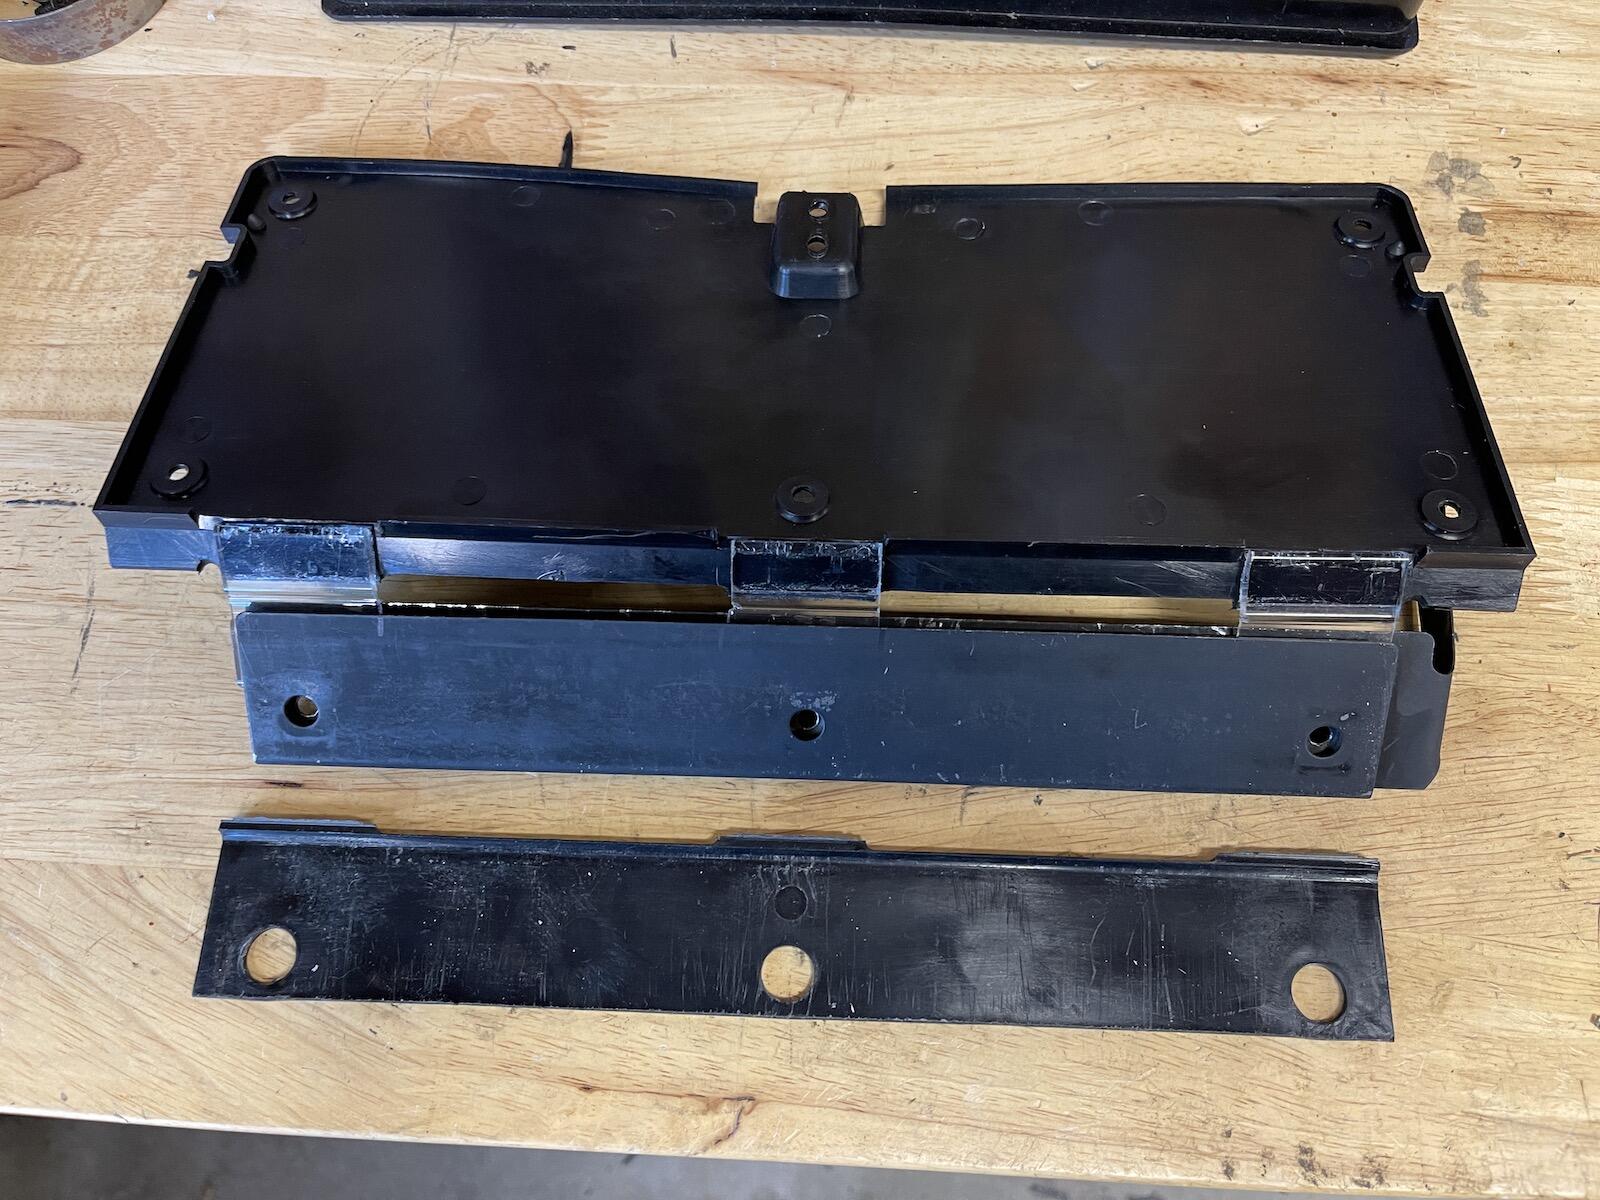
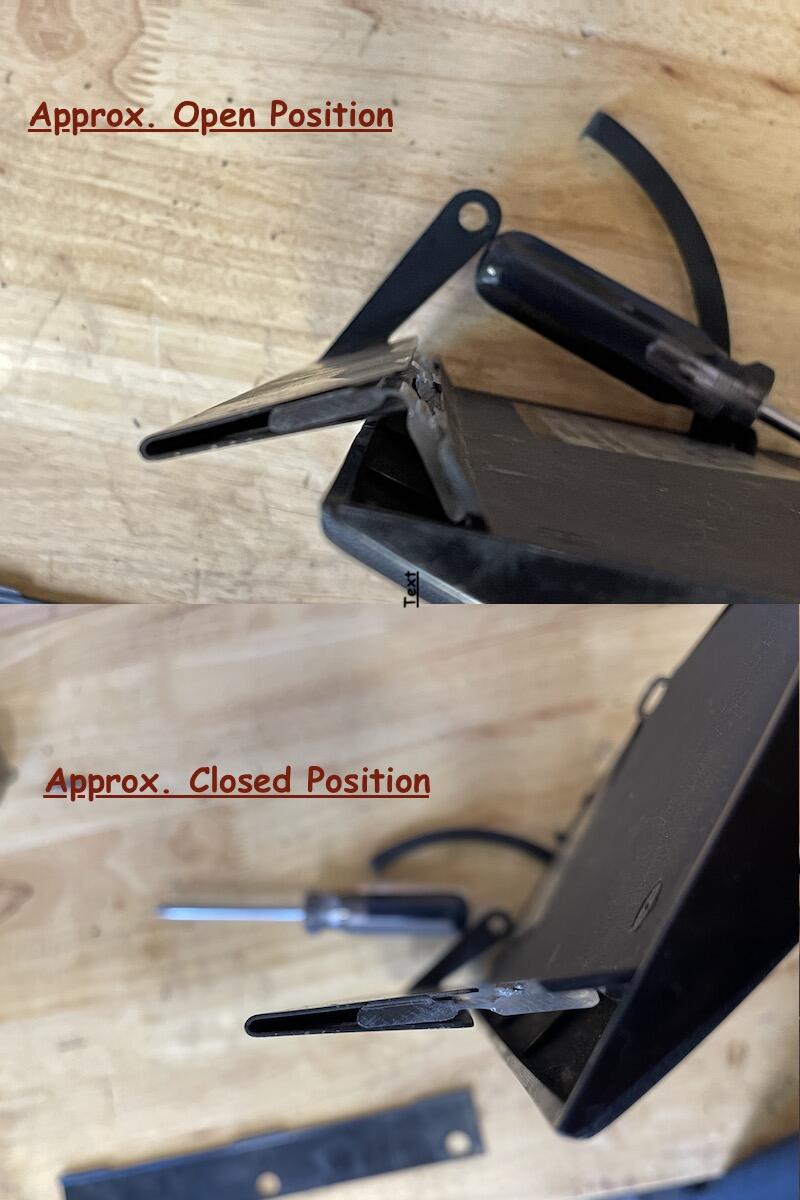
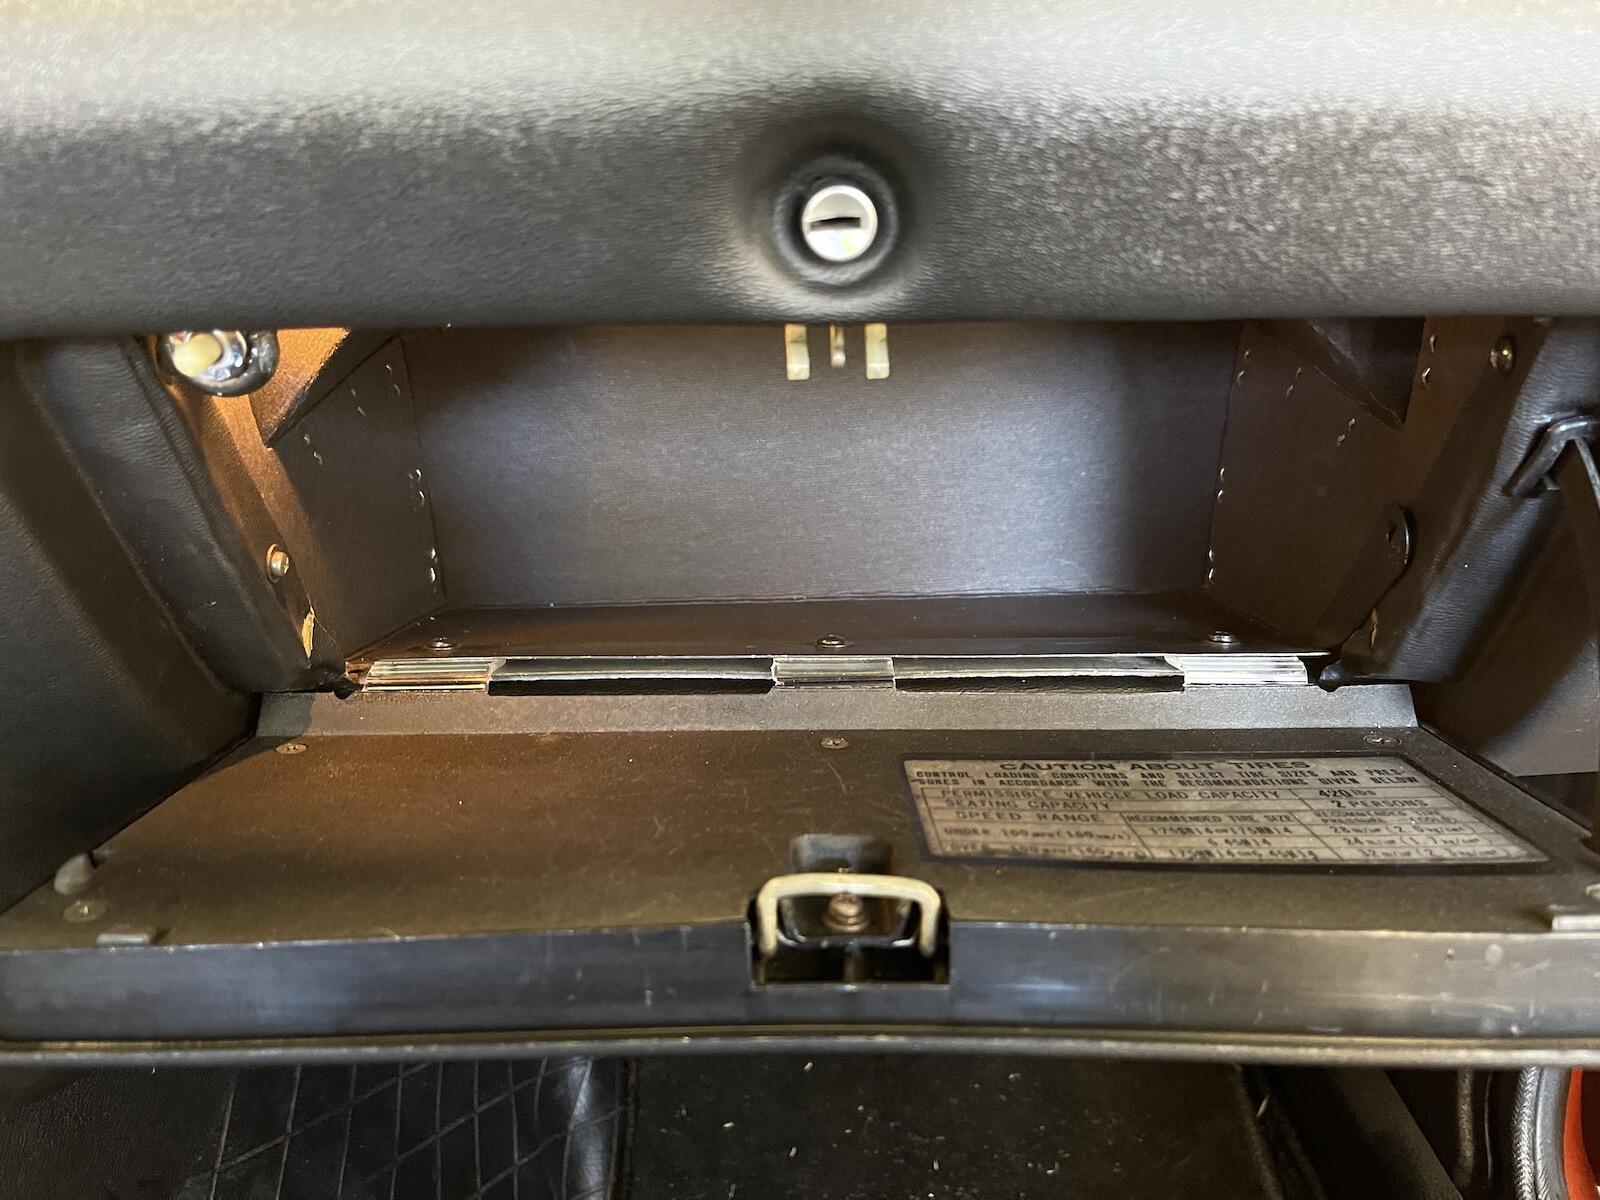
 1 point1 pointFinally got it all back together! Had a few issues, nothing serious. My horn and dome light aren't working, I'll try to fix those later. I did have to run a new separate wire for the tach out to the coil, so tach works fine now. And I broke my glove box door! 😡 While installing I latched it close without taking the time to adjust the latch correctly. Of course it got stuck and I had to resort to prying it open with some plastic pry tools. As soon as it popped open it promptly broke those plastic flex hinges. I figure I could just get another off eBay, or order a 3rd party metal replacement inner door, until I saw the prices. My first thought was to use some small steel hinges to fix, but that seemed a bit heavy-handed. So, I ordered some plastic flex hinges off of Amazon. Original is also a flexible plastic hinge, which I'm surprised lasted ~50 years. I cut new hinges to approximate length of the original hinge. Used a utility blade to flatten out the area where the door side hinge adhesive will stick, 3 places. I pried open the channel so the hinges would fit inside, but not too far that it won't act like a vice when removing tape from adhesive and installed. This will make the channel about 1/16" thicker than original, and I did use slightly longer screws when installing on the dash. I removed the tape over the hinge adhesive and assembled. I did pry open the channel so I could slide hinge into position. And I marked the horizontal alignment to match old position, then glued door in place. Here's the back side. The old broken side of the hinge, which use to fit inside the channel, is not used, on the shelf. Side view of hinge. Installed. Too bad those hinges don't come in black. One other thing I did was epoxy a washer on the back side of my new map light bezel, so hopefully it gives the screw something to push against and won't crack again. Done, except for the dome light and horn. I'm very happy with the way new da$h fit, although it was quite a project to install it. Car has collected a lot of dust while sitting, time to go blow the dust off it!


 1 point


Important Information
By using this site, you agree to our Privacy Policy and Guidelines. We have placed cookies on your device to help make this website better. You can adjust your cookie settings, otherwise we'll assume you're okay to continue.