Leaderboard
-
conedodger
Free Member7Points12,513Posts -
JDMjunkies.ch
Free Member3Points637Posts -
motorman7
 Subscriber
 2Points2,228Posts
 -
Patcon
Subscriber2Points11,142Posts


Popular Content
Showing content with the highest reputation on 12/19/2024 in all areas
-
Recently i acquired two pieces of Nissan sports option aka Datsun Competition aka the Triple Mikuni carb heat shields from Japan. One was in a good, used condition. the other one seemed to be restored on the first sight. But after i received it and inspected it closer, i quickly realized that they just sprayed it with some silver paint that came off upon touching it. After looking at it again, i also saw that it was not straight and had a few cheap weld repairs. Here is the "good" side, which only needed a bit of flattening with the hammer (probably from wiggling it off the previous installation): And here is the bad side from the inside You can see the corners and the holes have some weld leftovers and do not look nice: And this is the outside (after i already started to work on it). You can see some rough remaints of the welds: And this is how it all looked after an hour of filing and straightening everything with my recently bought bodyshop hammer and file set: Now it's Much better than before. Everything is straight and the surface even, and the curvatures / holes are round again. After i took the picture i sprayed it with some rust primer, but i will have to have the whole thing resprayed once it's going to be installed. I also finally managed to get the car back on the lift again and hope i find some time during the christmas holidays to get some stuff from my to-do list checked off!3 points
-
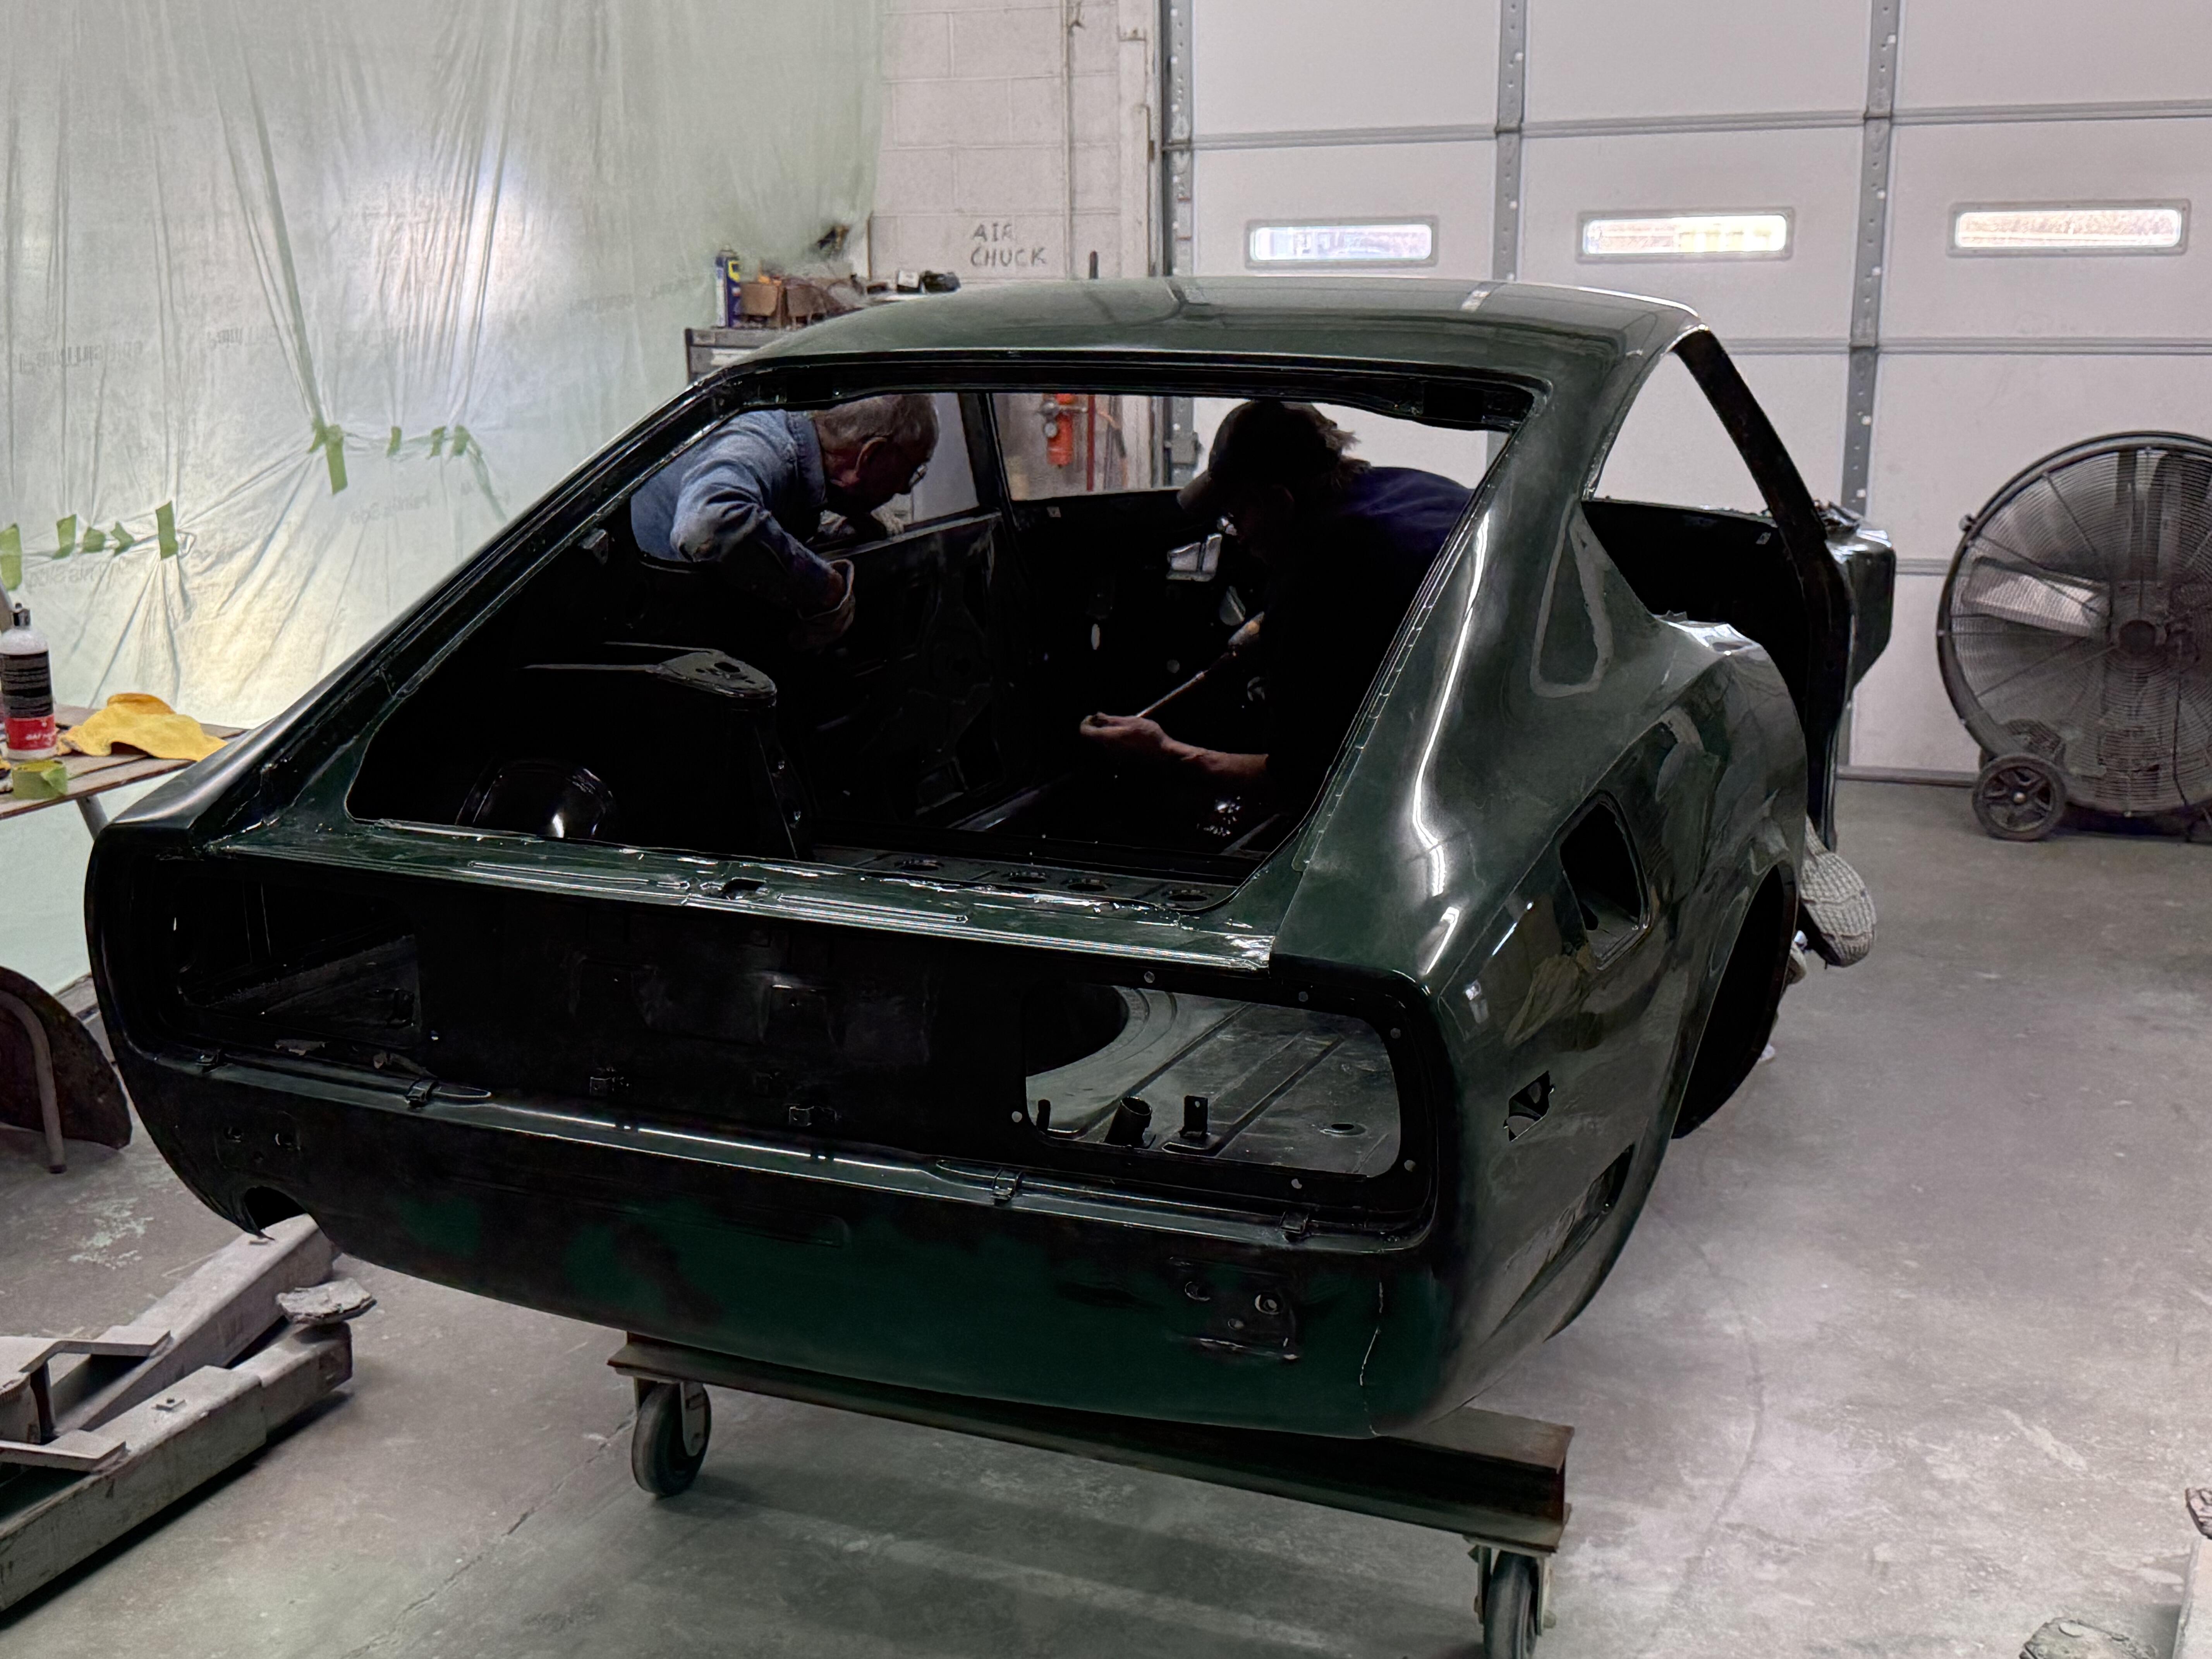
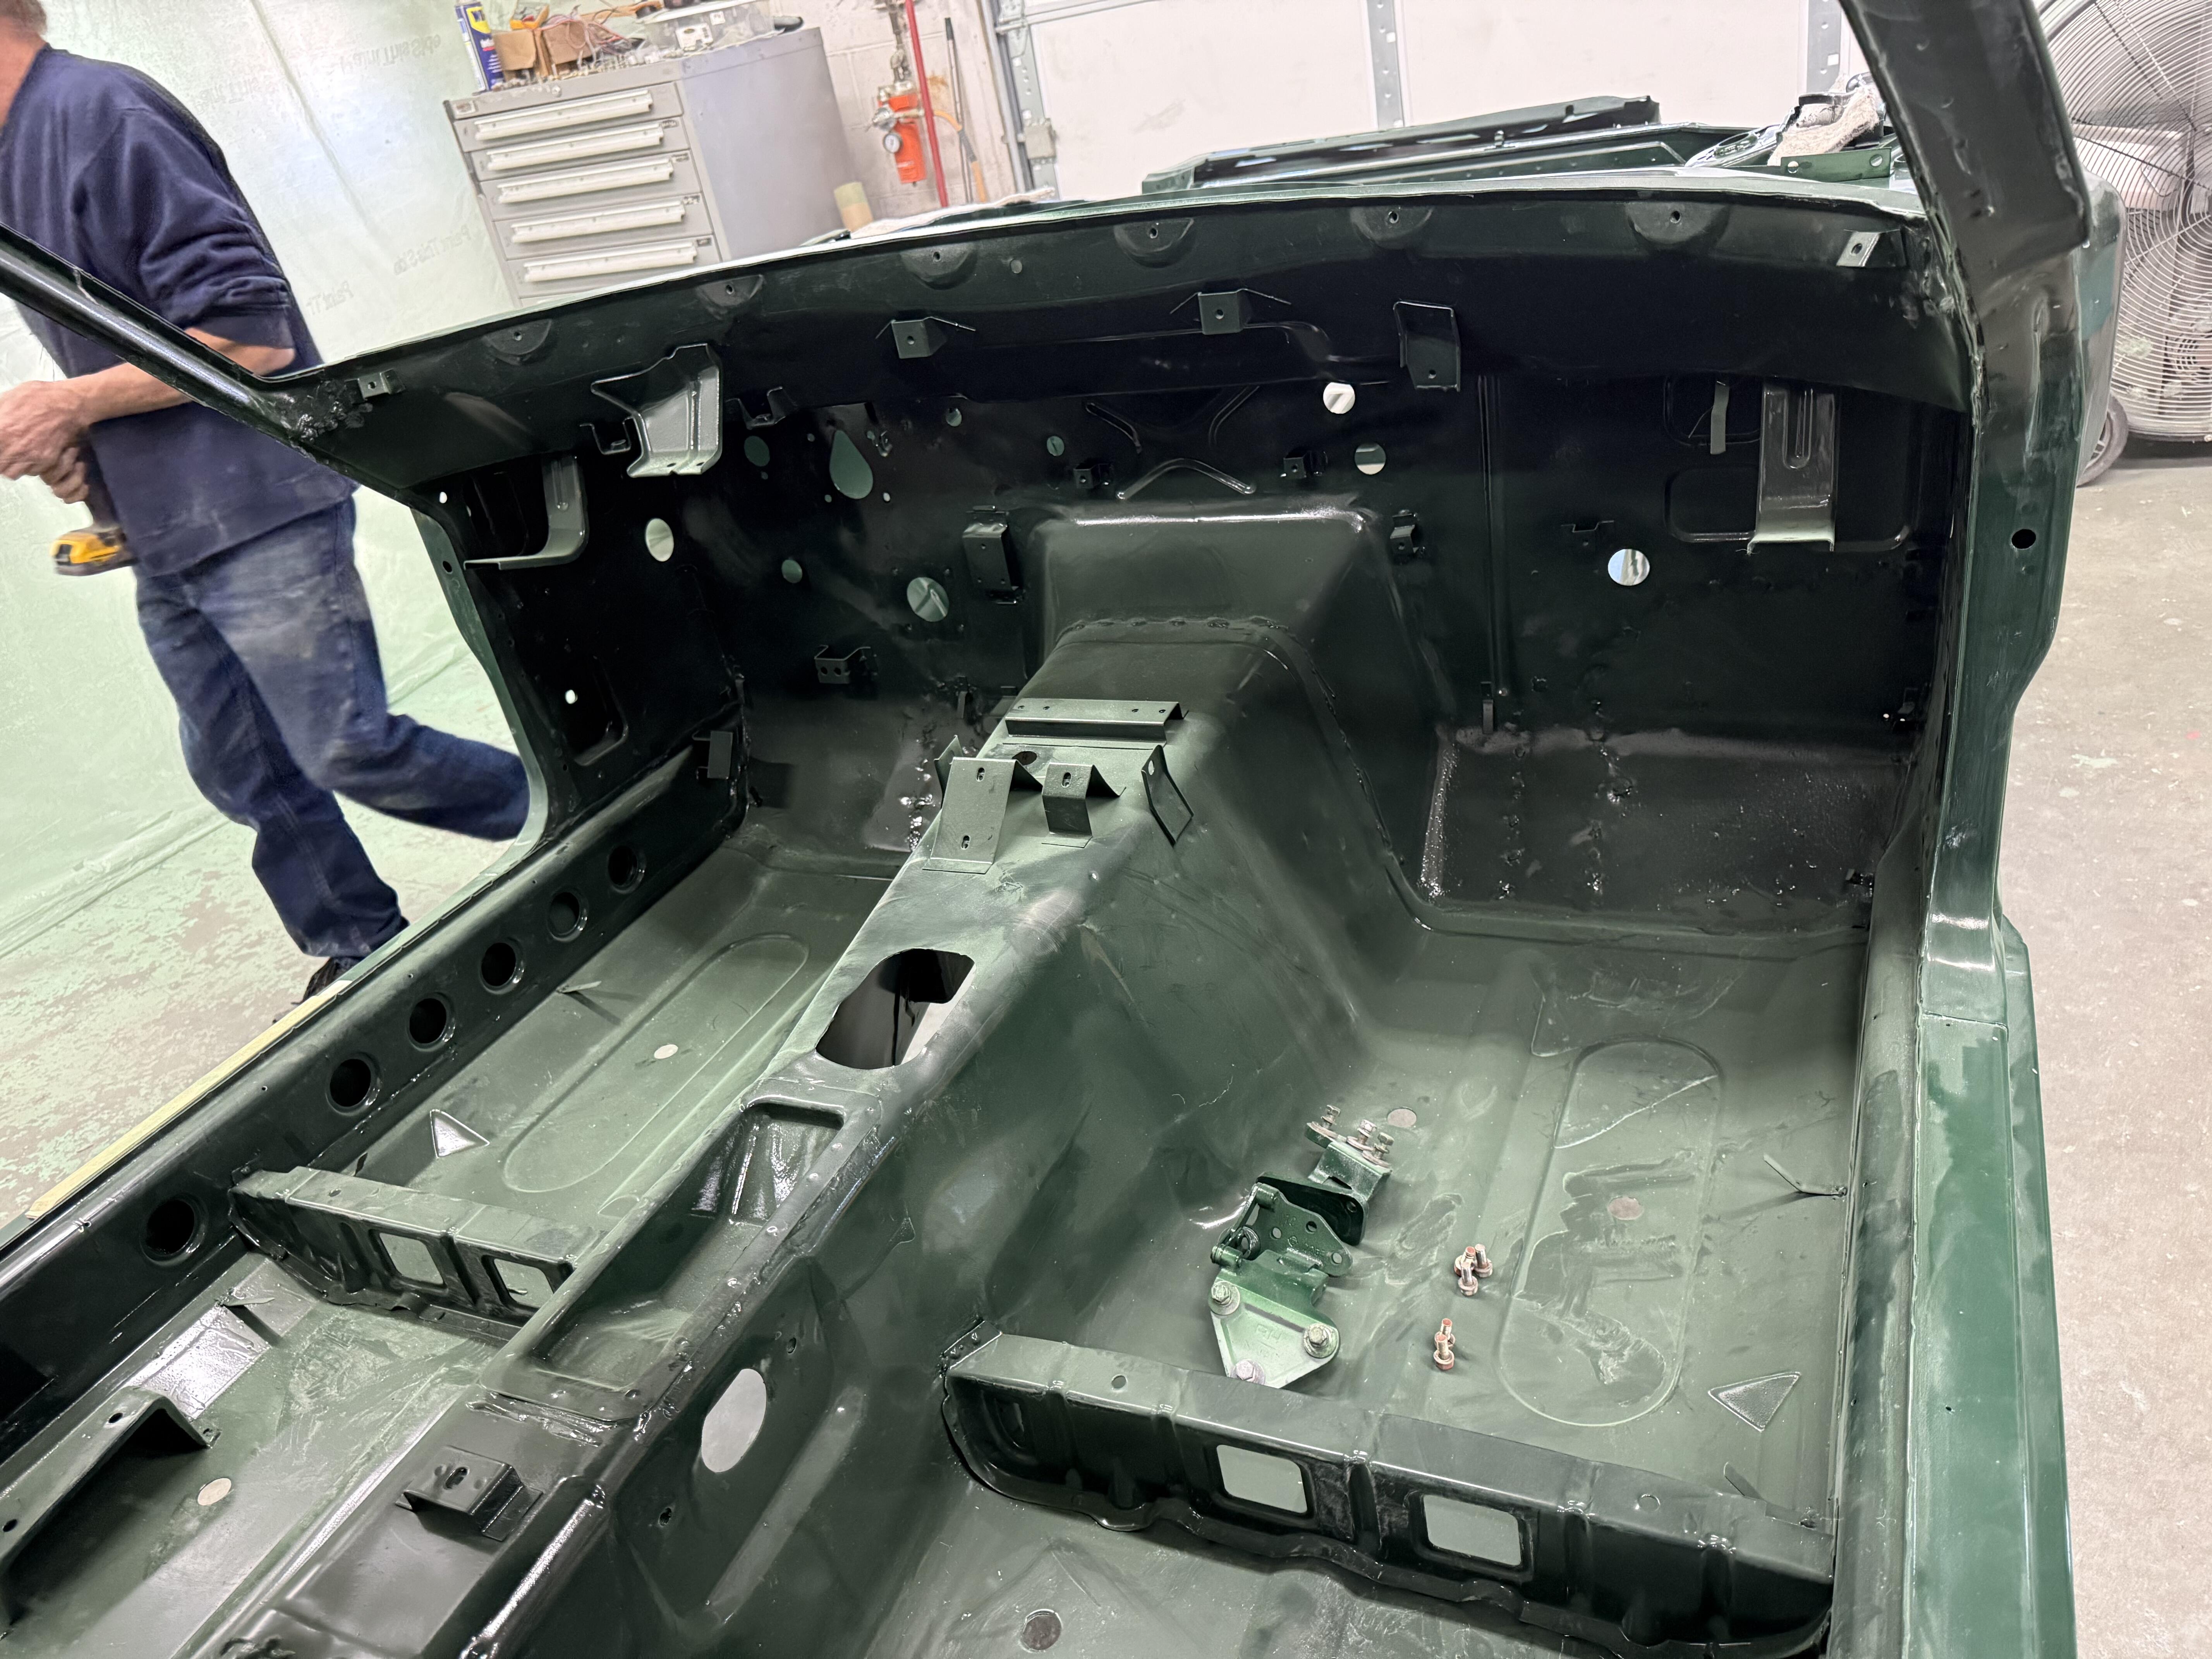
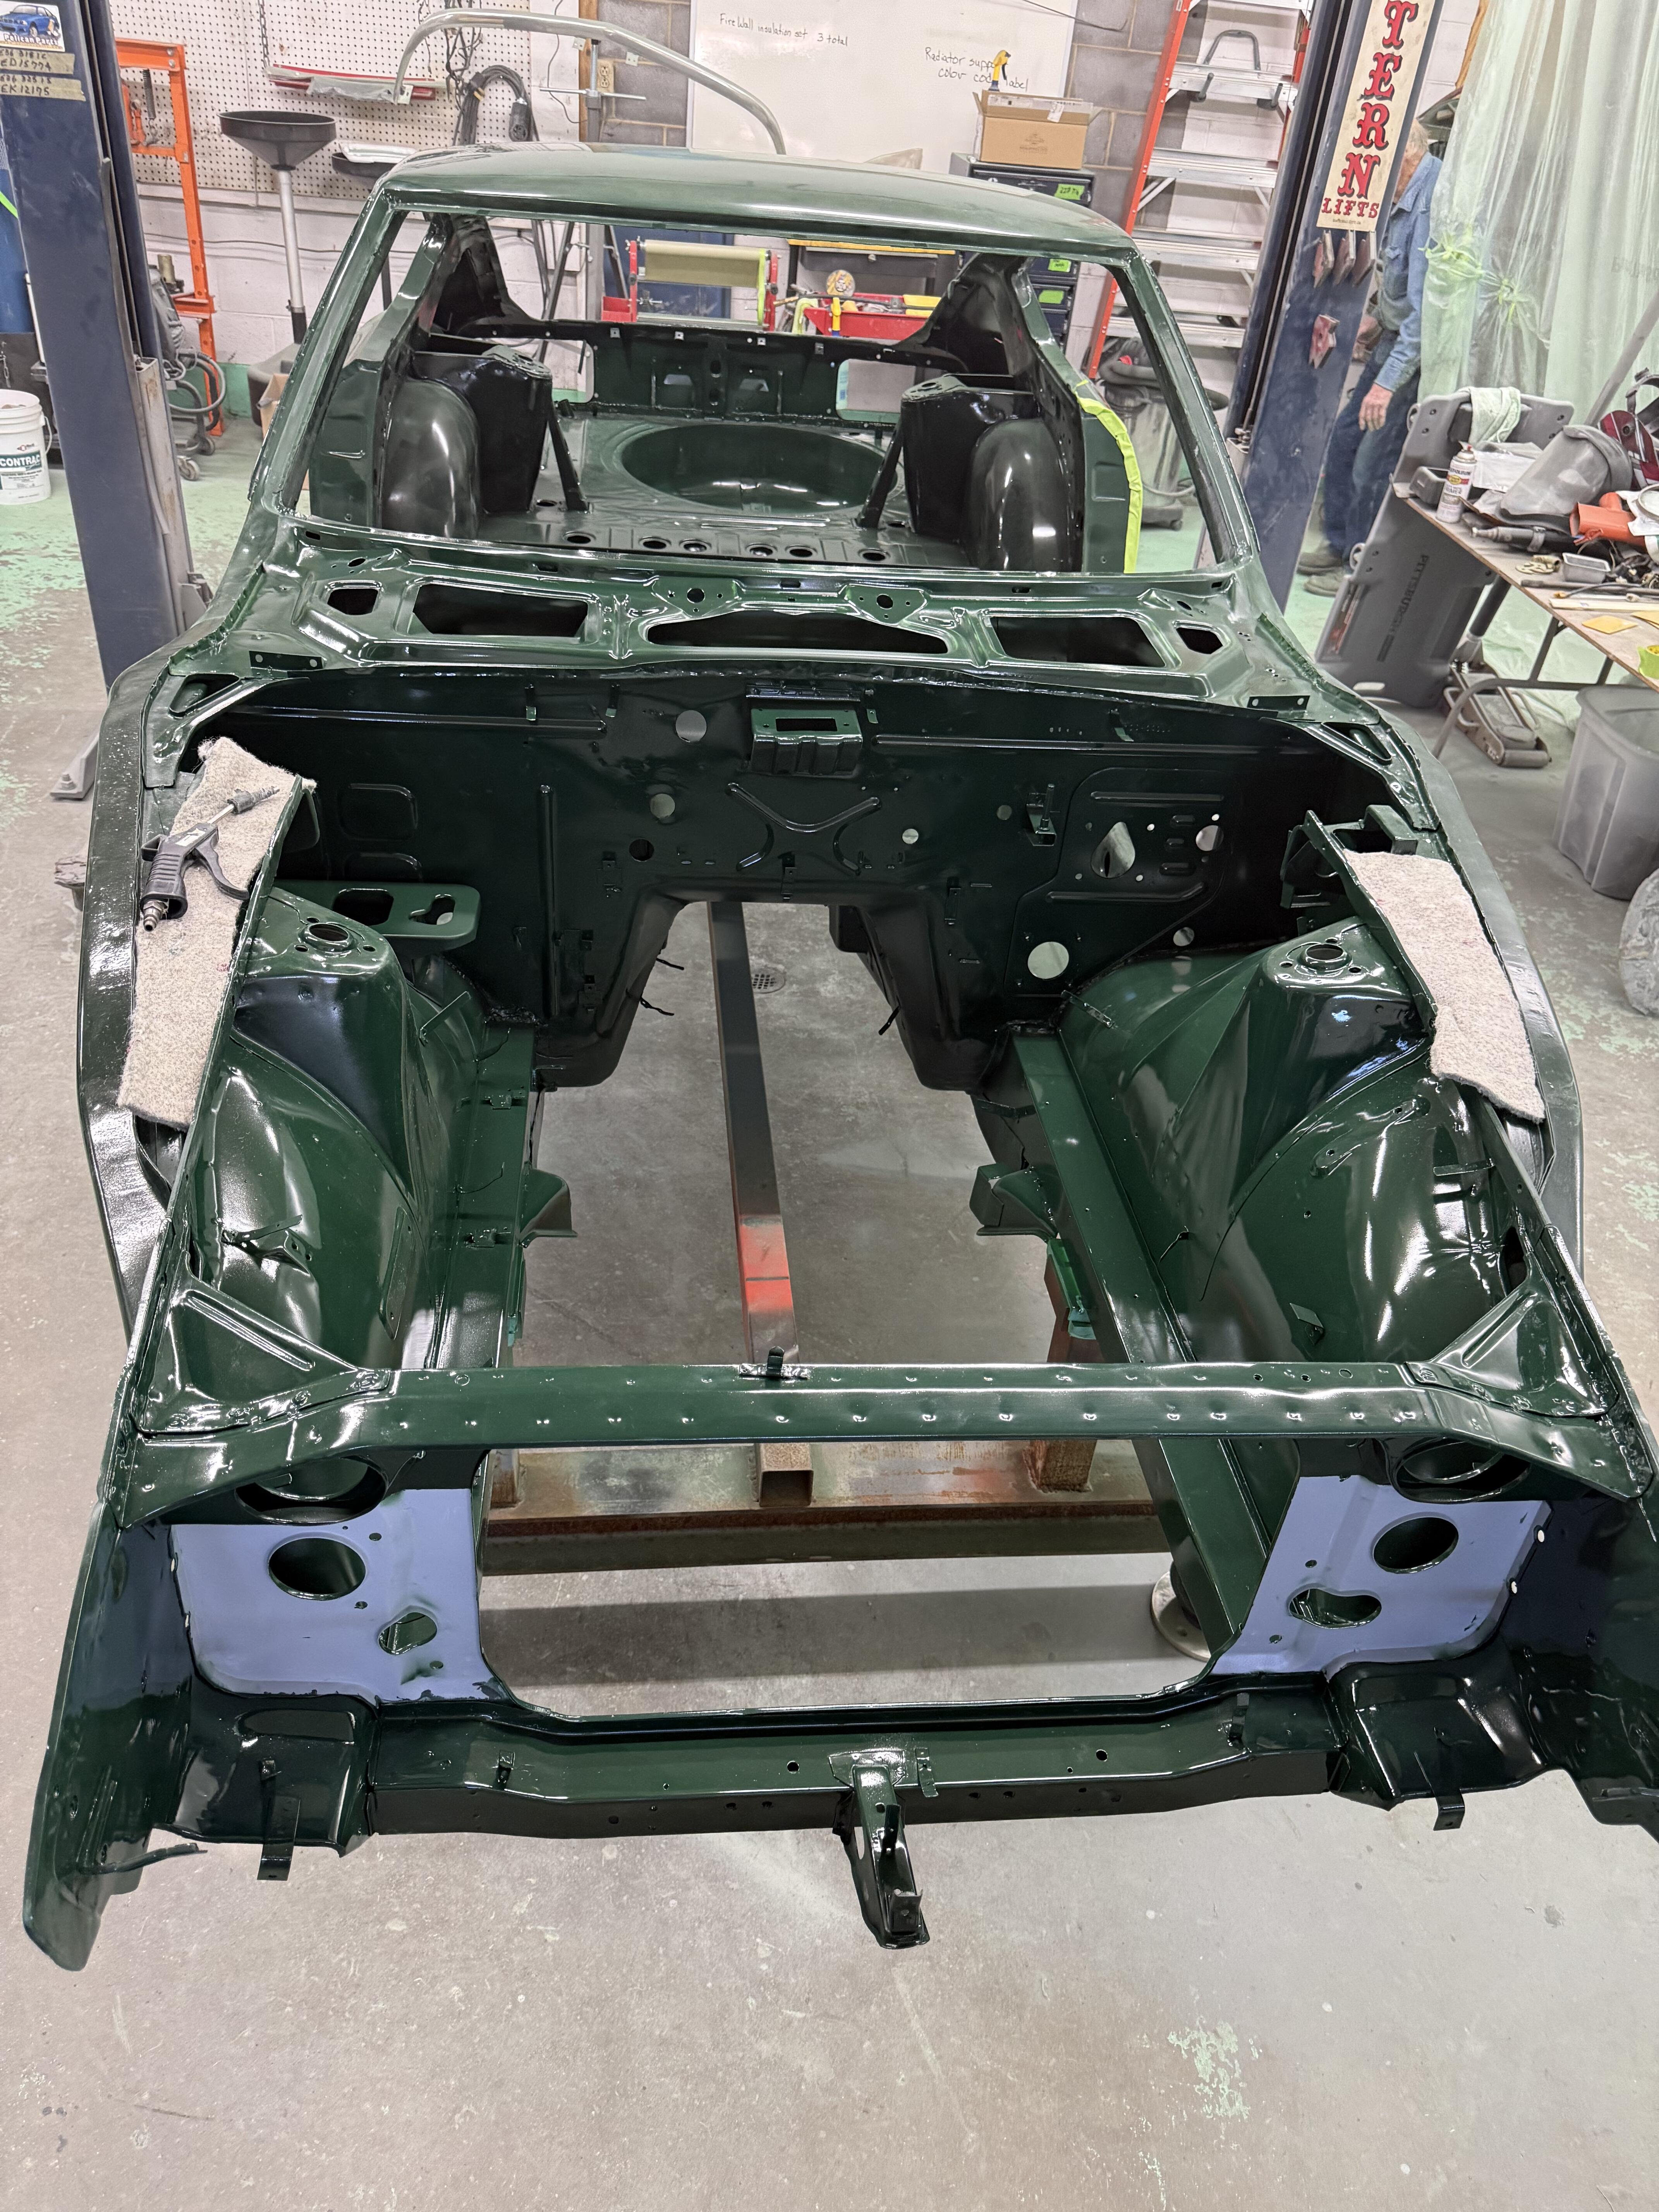
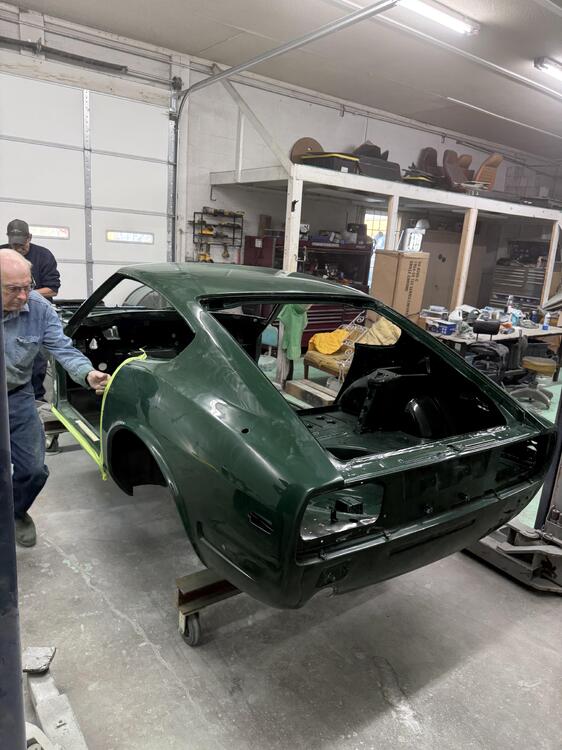
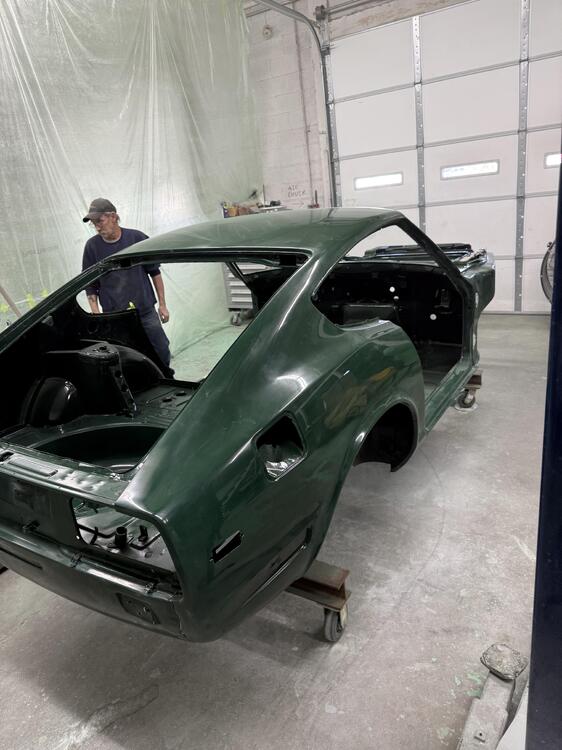
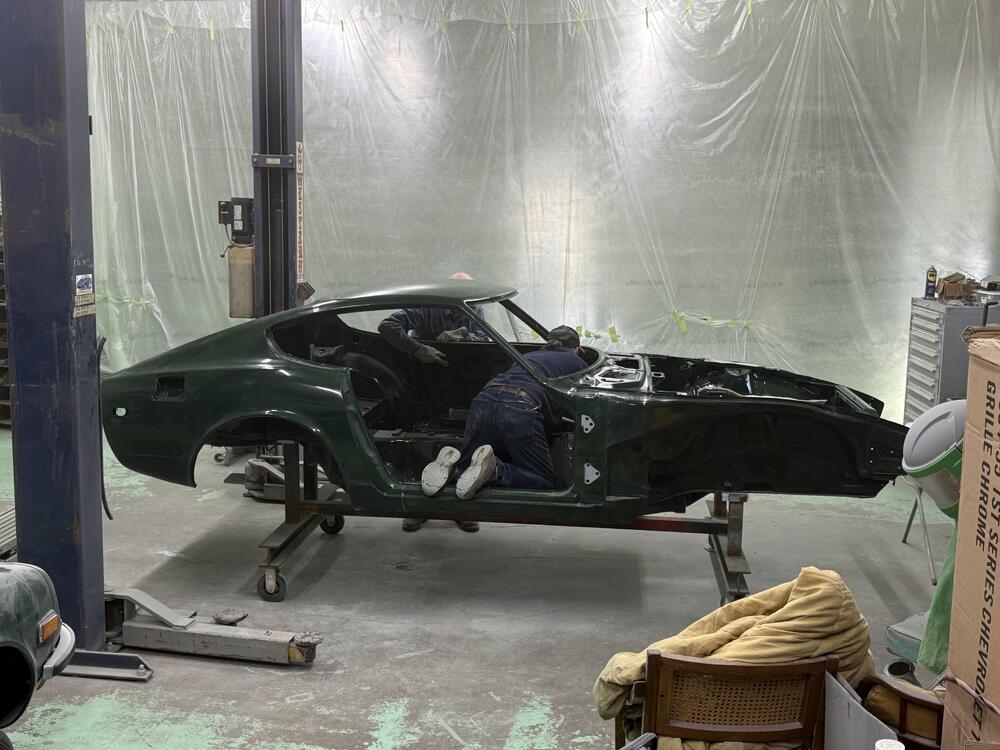
Some early “beauty” shots…. Taking shape, It’s looking more like a classy lady everyday. Thanks to Earl and Kim for their efforts!!


 2 points
 -
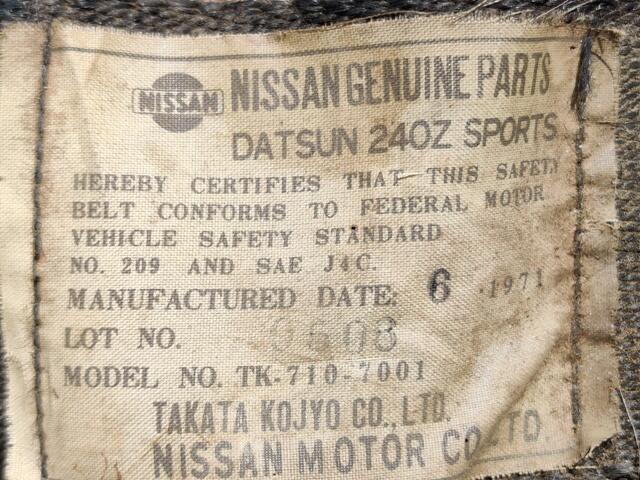
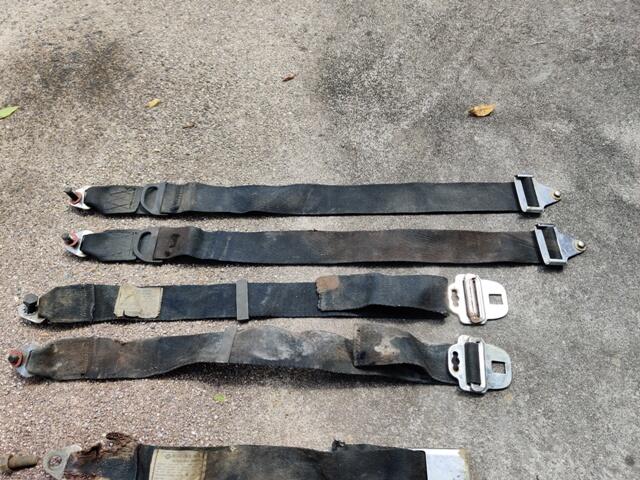
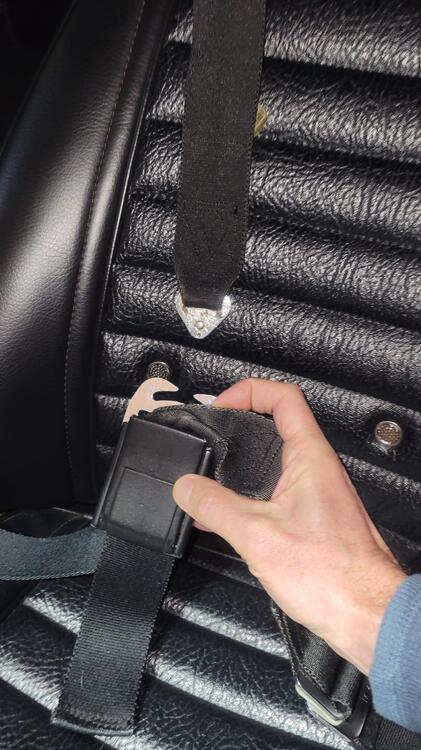
Thanks for the info and pics. I found it odd that the parts book doesn't have the correct info for seat belts for my car. Here are pictures of my belts before I sent them off to have them redone: The original tags with lot numbers and date of manufacture were on two of the 6 belts. The buckle is the push button type. And the tab portion on the lap belt works with the "later" style shoulder belts.
 2 points
 -
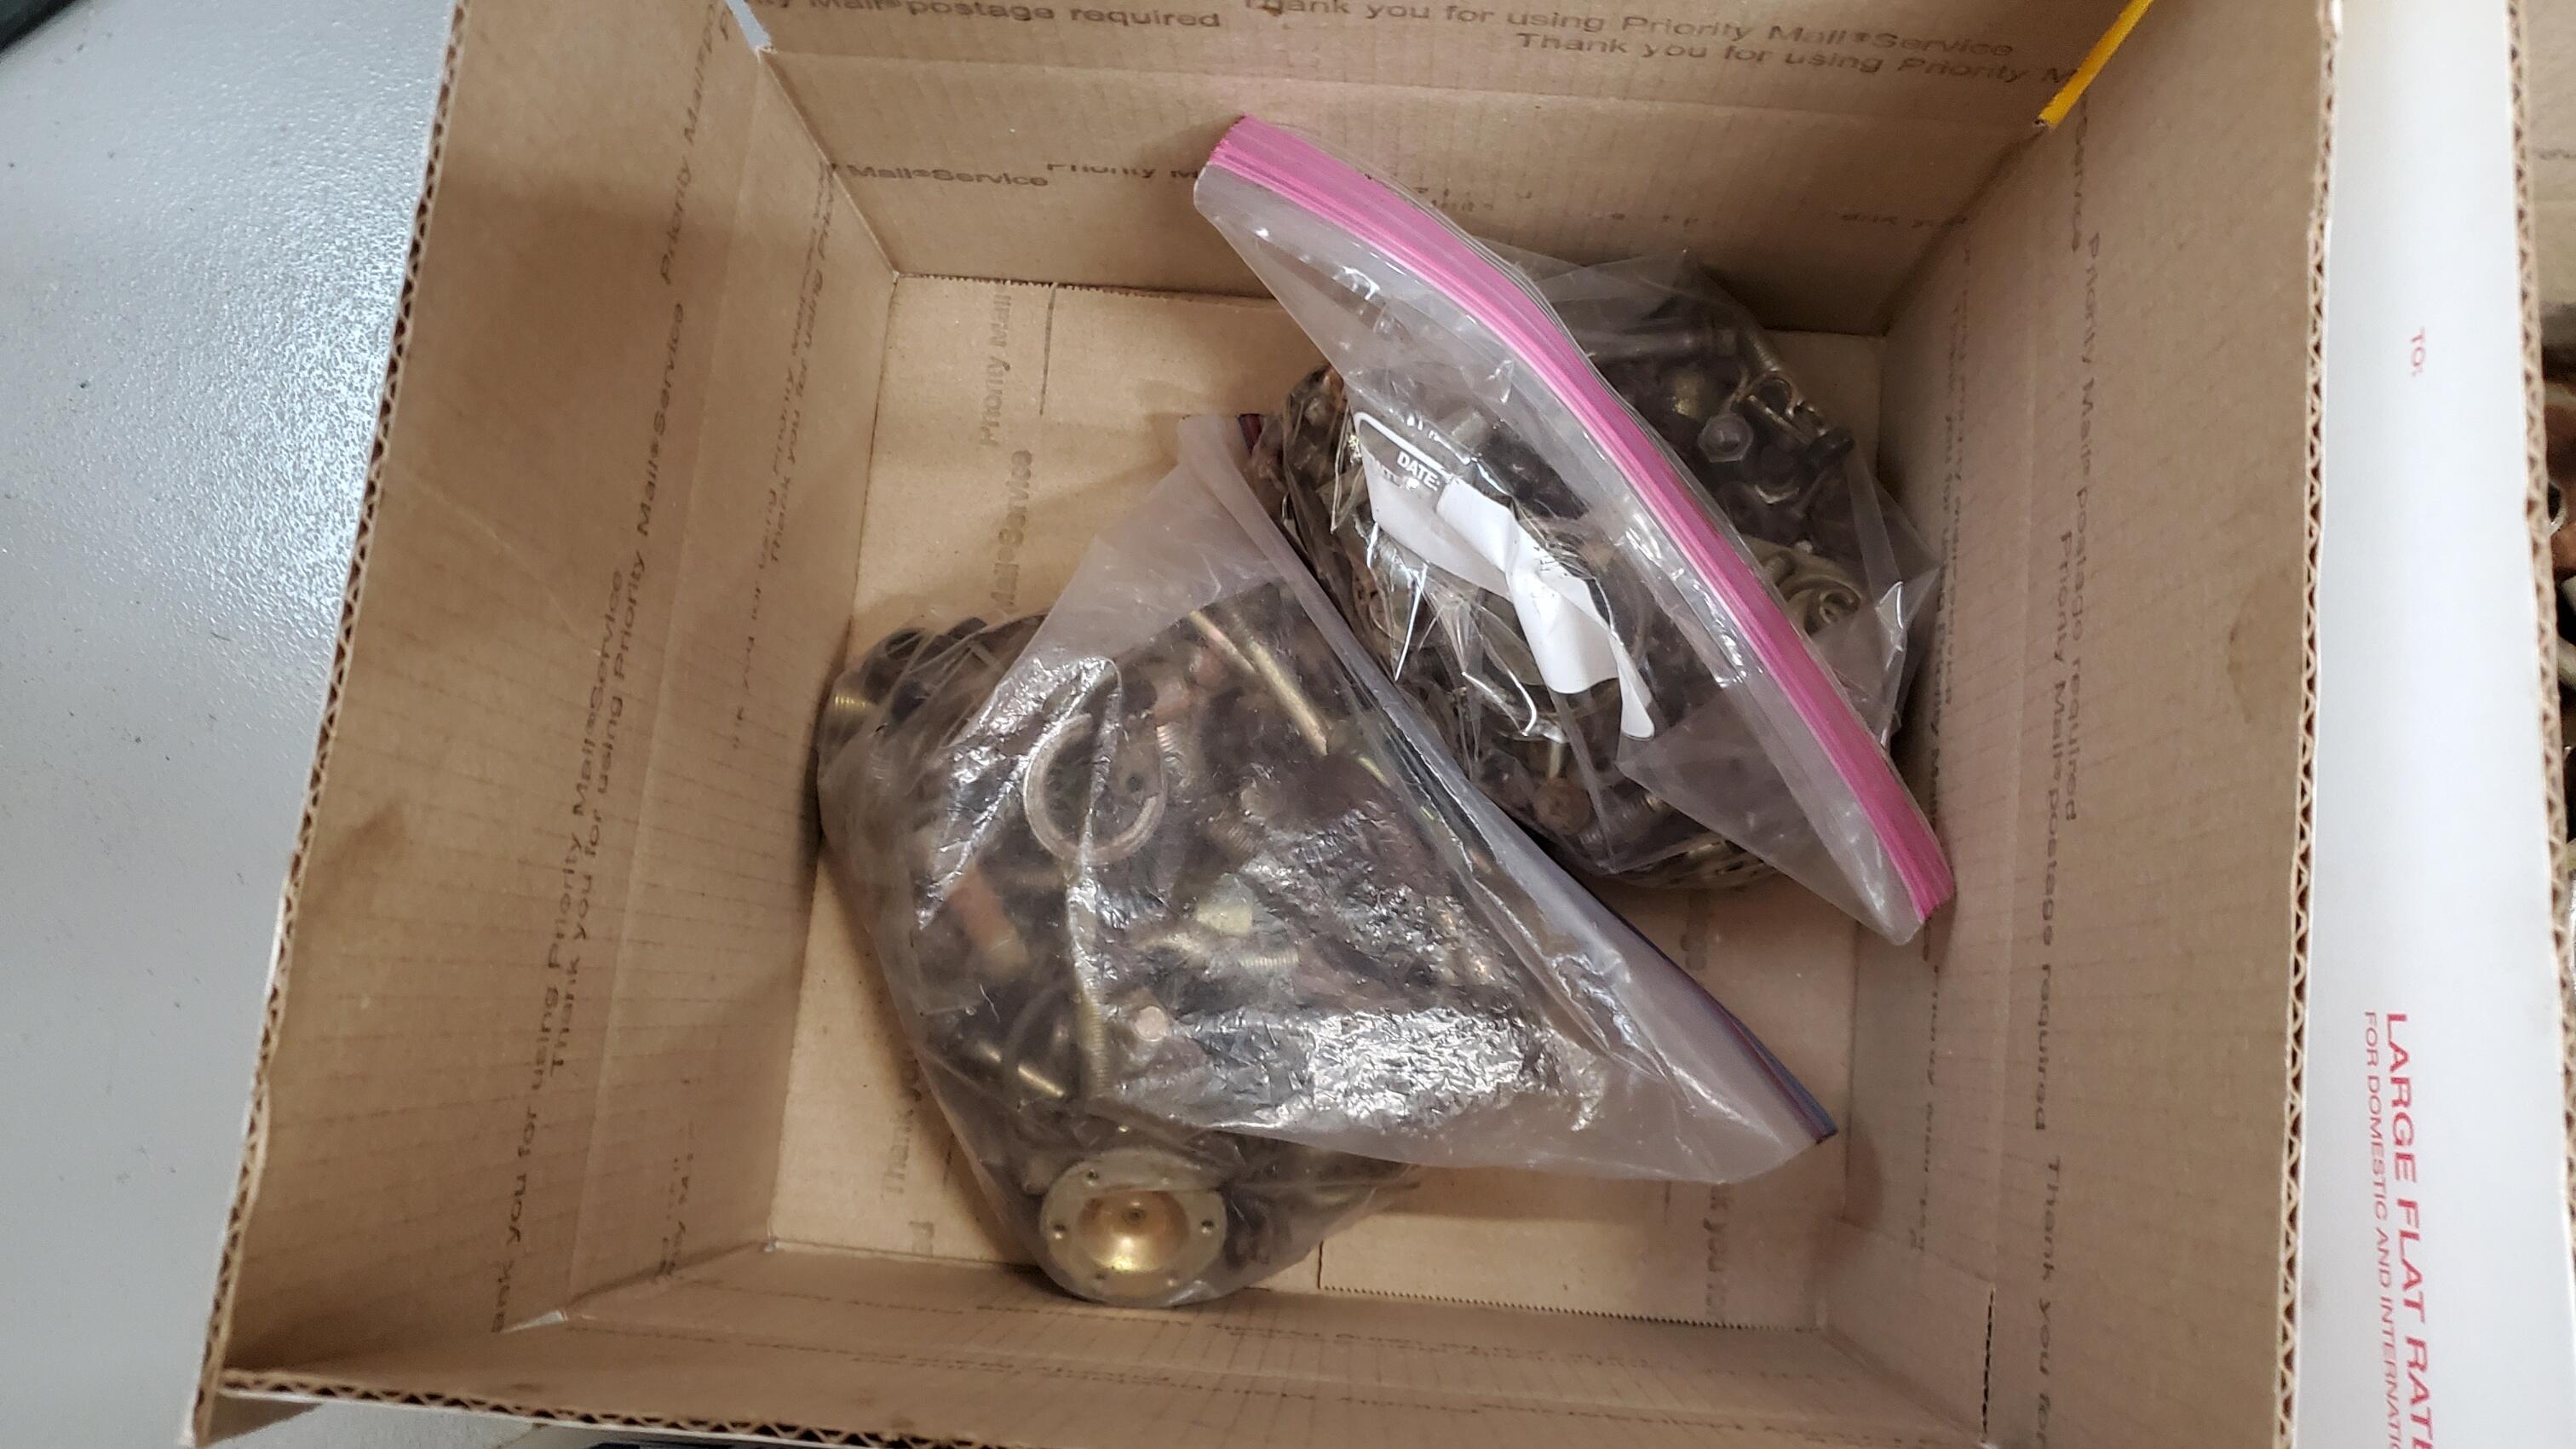
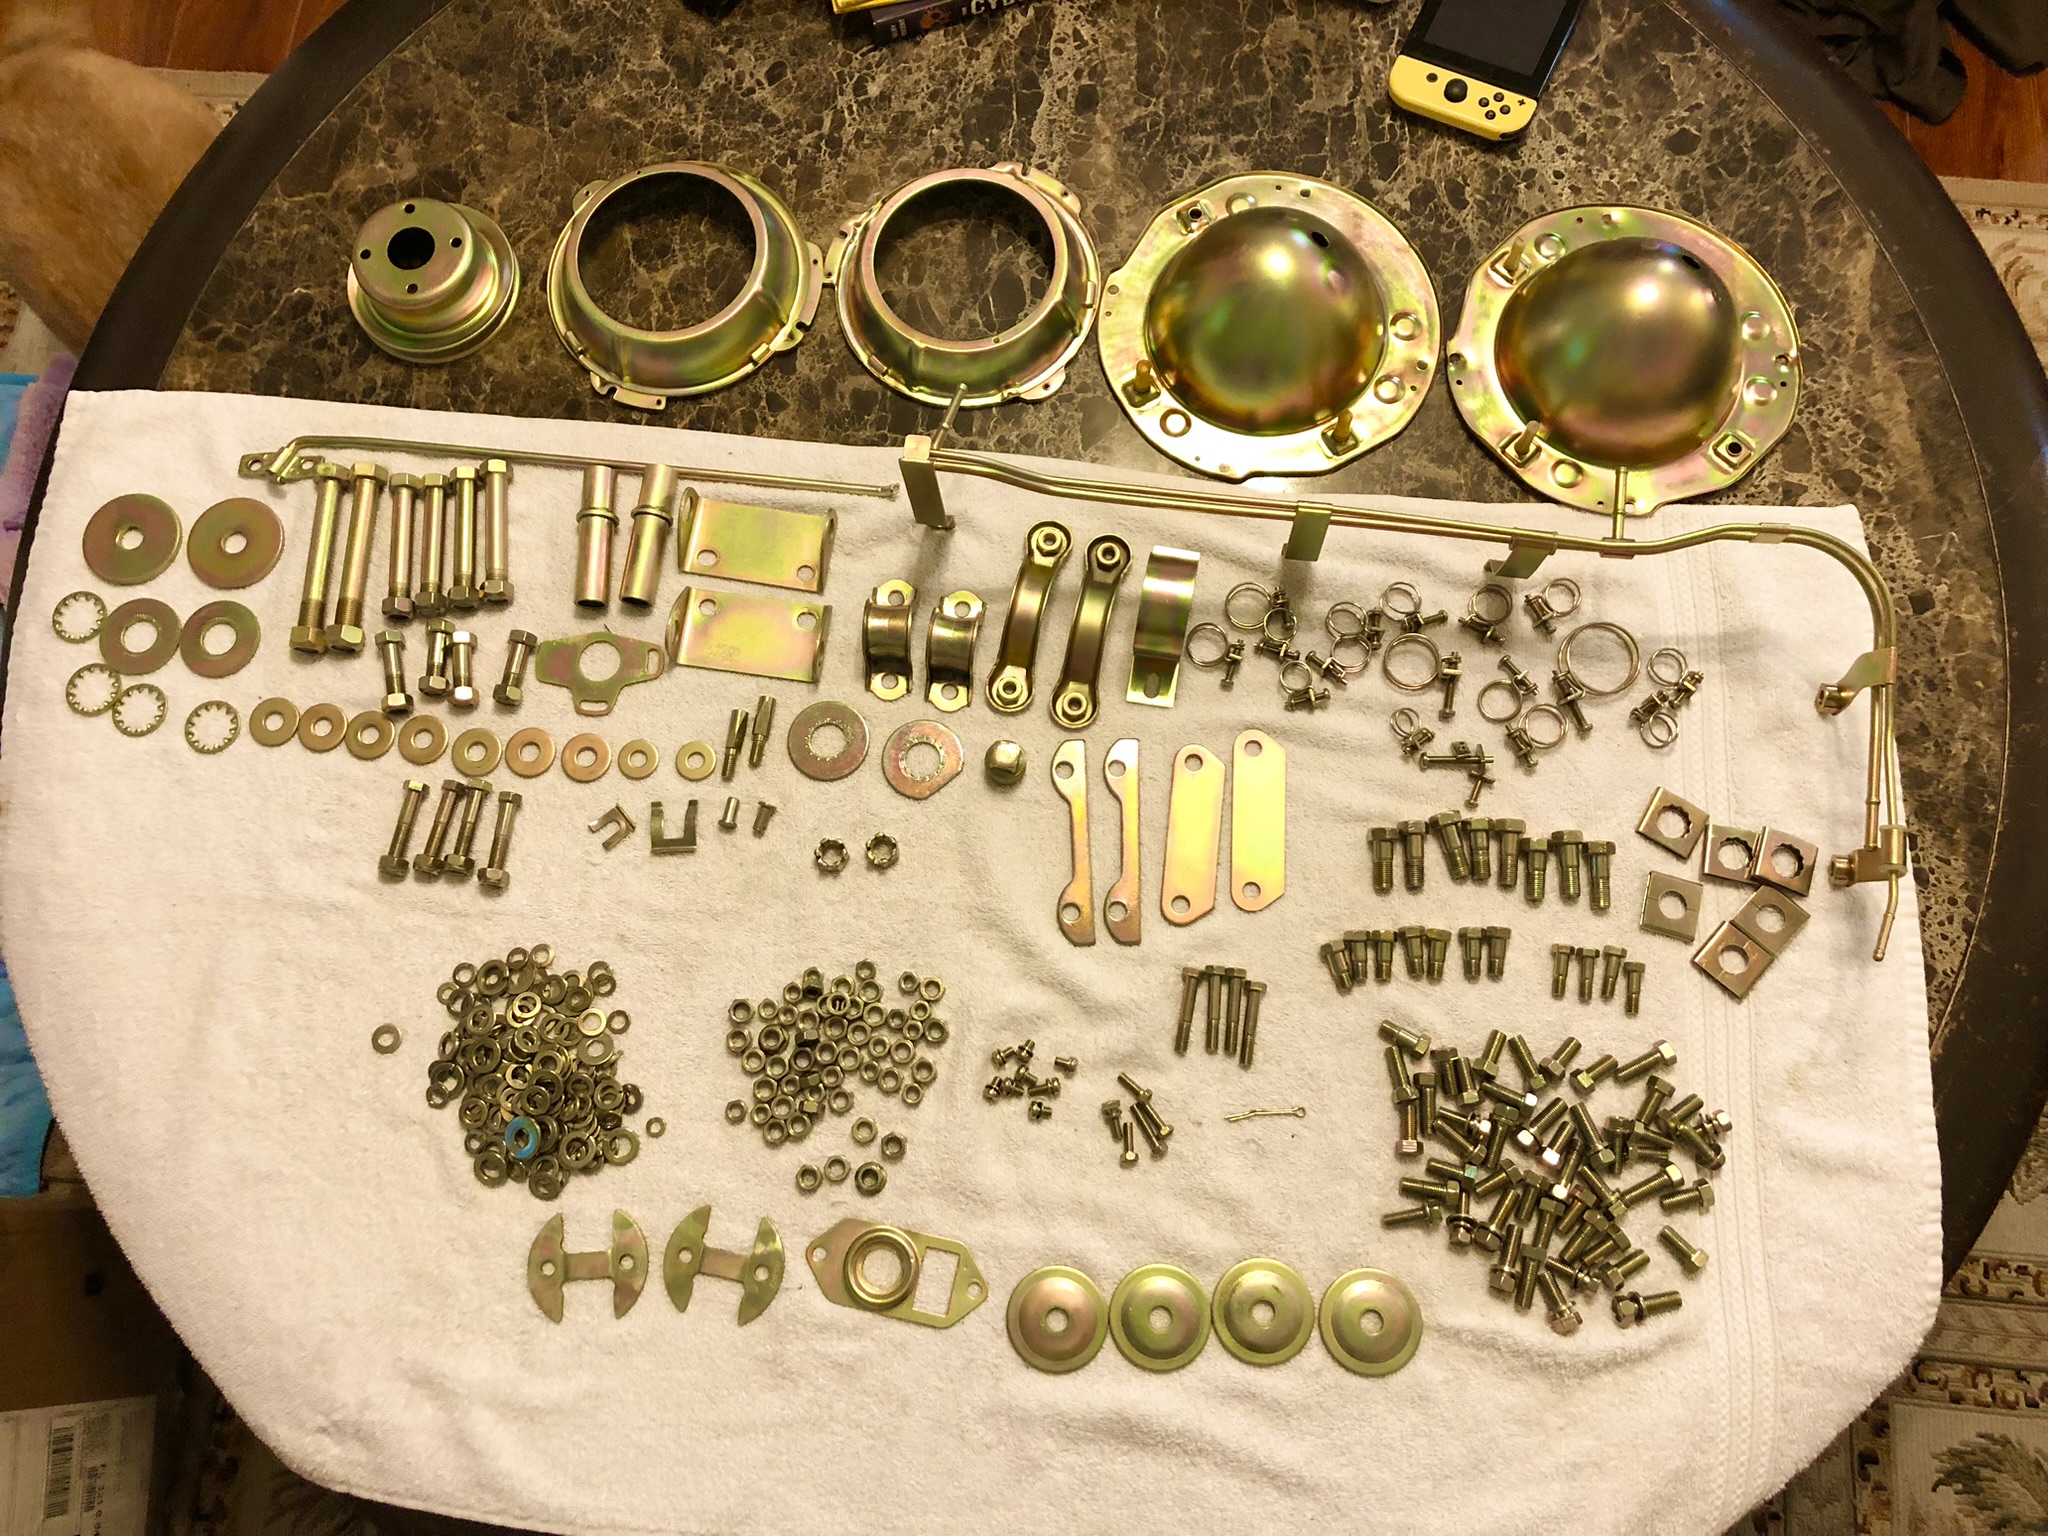
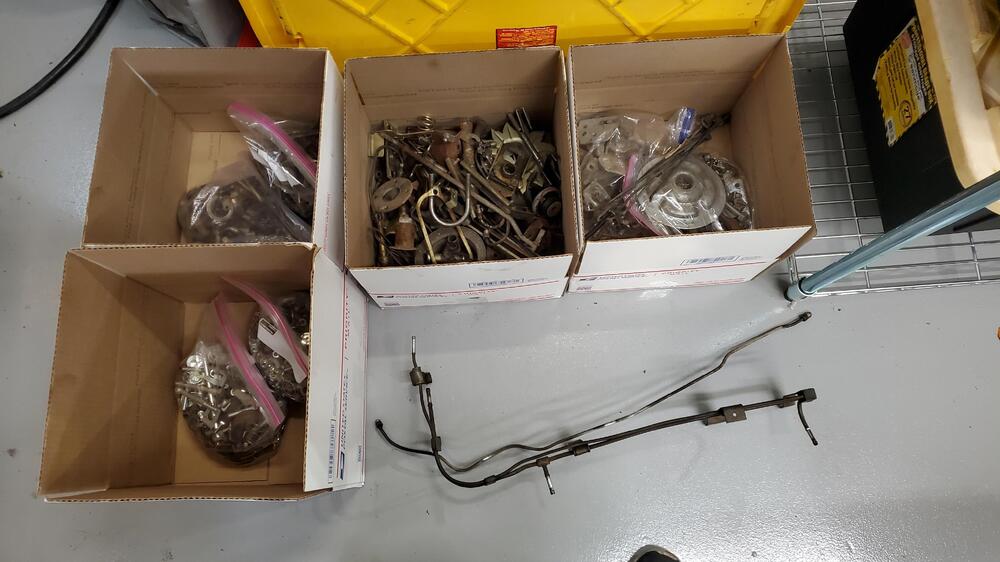
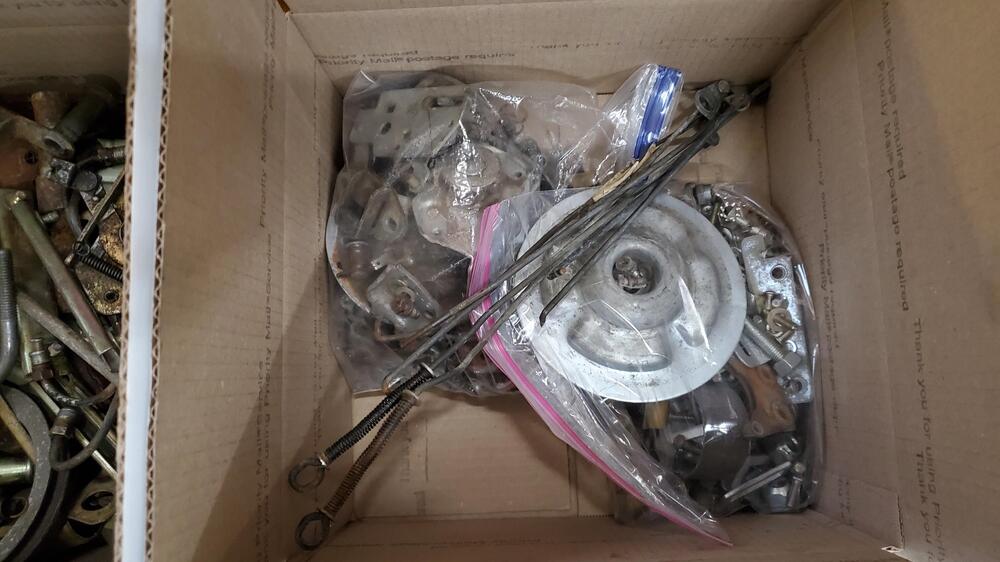
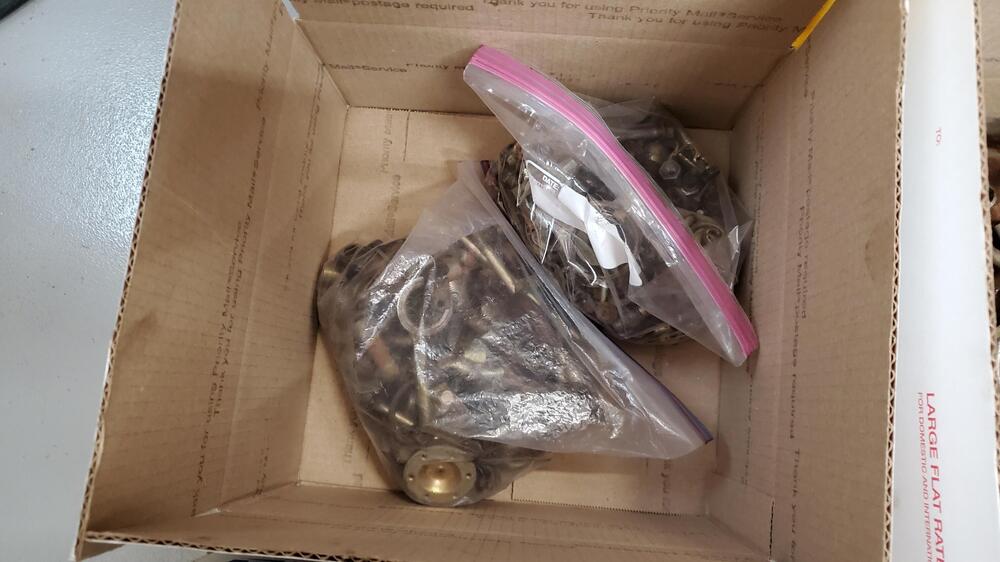
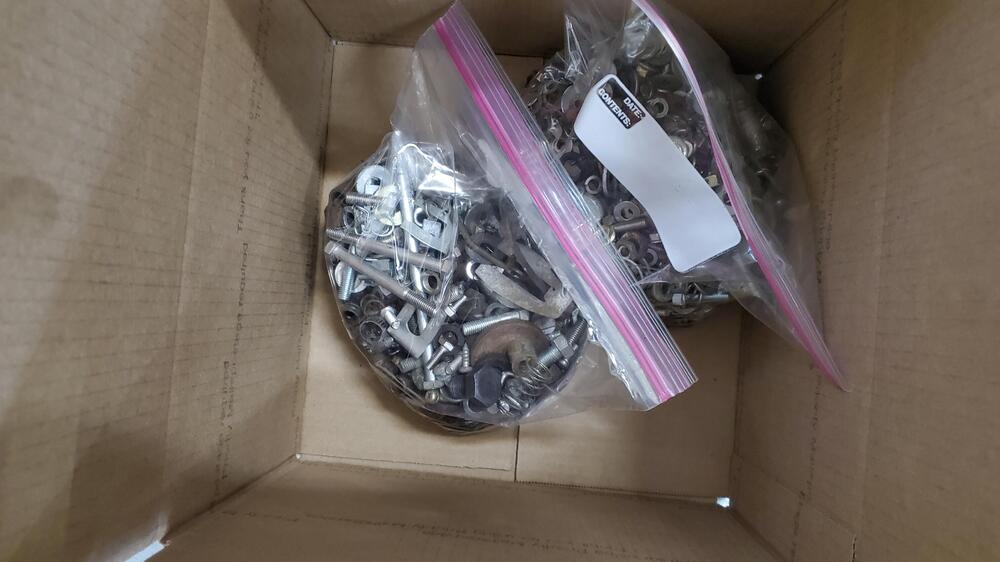
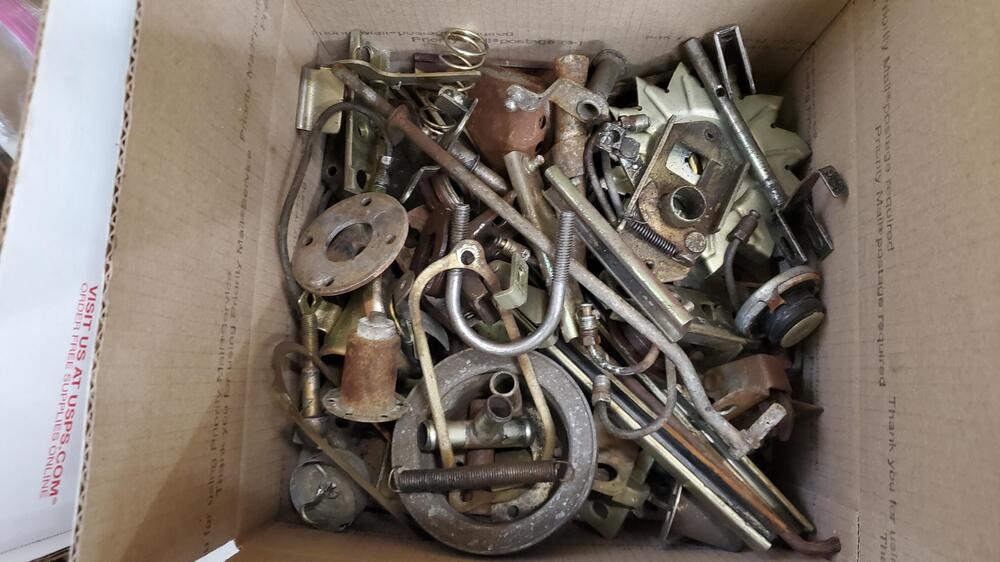
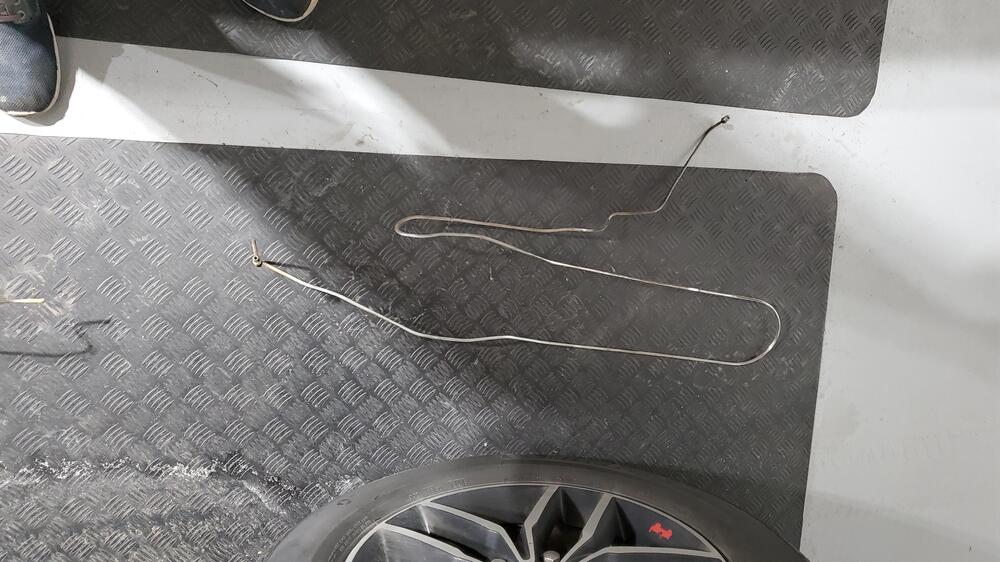
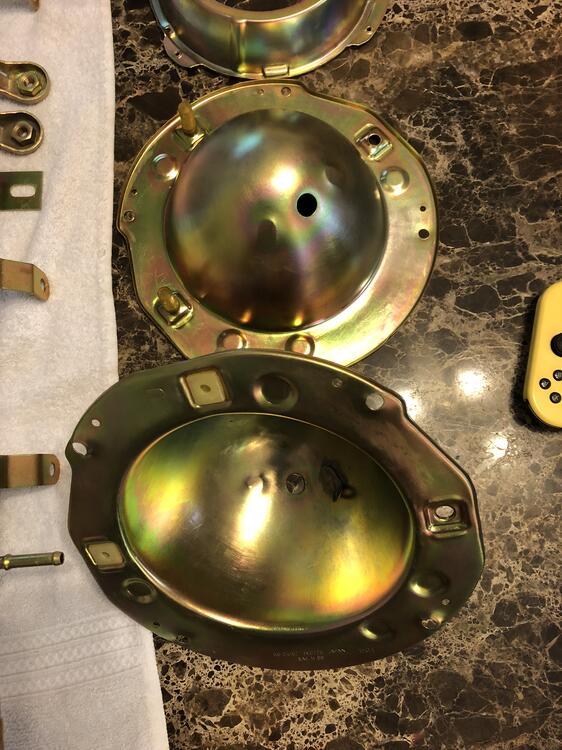
2 pointsI sorted the parts that need to be re-plated by color, yellow zinc or clear zinc. I did a quick clean to knock off excess dirt and wire wheeled the areas where there was paint overspray from the previous paint job. I put some shrink sleeve over the plastic portion of the carb linkage to protect them during the cleaning process. I also plugged the holes of the carb and smog accessories to prevent the fluids from entering inside. I then put the small parts in gallon zip lock bags. I had one box of the clear/silver zinc parts, and 3 boxes of the yellow/gold zinc parts. I used three boxes for the yellow zinc because of the excess weight (USPS flat rate shipping box). Each box weighed approximately 20 pounds For the plating process, the 3 yellow/gold zinc parts will be thrown into a single barrel, so the charge will be for just one yellow zinc barrel plate. The plating company does a good job of cleaning the smaller parts in their prep process. I am guessing it is either a vibe or tumble process along with a chemical clean that they use to clean the parts to remove dirt and rust. I spent a bit more time cleaning the long tubes and larger parts as they will be rack plated and I do not think they get cleaned as well. On the long tubes I put in a large diameter bend in order get the parts to fit in my 4 foot shipping box. They said they can accomodate parts up to 6 feet in length. All plating is done by Sav-On plating in Phoenix, AZ. They have done a great job with my parts on previous restorations. Pics Below2 points
-
2 pointsI sorted the parts that need to be re-plated by color, yellow zinc or clear zinc. I did a quick clean to knock off excess dirt and wire wheeled the areas where there was paint overspray from the previous paint job. I put some shrink sleeve over the plastic portion of the carb linkage to protect them during the cleaning process. I also plugged the holes of the carb and smog accessories to prevent the fluids from entering inside. I then put the small parts in gallon zip lock bags. I had one box of the clear/silver zinc parts, and 3 boxes of the yellow/gold zinc parts. I used three boxes for the yellow zinc because of the excess weight (USPS flat rate shipping box). Each box weighed approximately 20 pounds For the plating process, the 3 yellow/gold zinc parts will be thrown into a single barrel, so the charge will be for just one yellow zinc barrel plate. The plating company does a good job of cleaning the smaller parts in their prep process. I am guessing it is either a vibe or tumble process along with a chemical clean that they use to clean the parts to remove dirt and rust. I spent a bit more time cleaning the long tubes and larger parts as they will be rack plated and I do not think they get cleaned as well. On the long tubes I put in a large diameter bend in order get the parts to fit in my 4 foot shipping box. They said they can accomodate parts up to 6 feet in length. All plating is done by Sav-On plating in Phoenix, AZ. They have done a great job with my parts on previous restorations. Pics Below

 2 points
 -
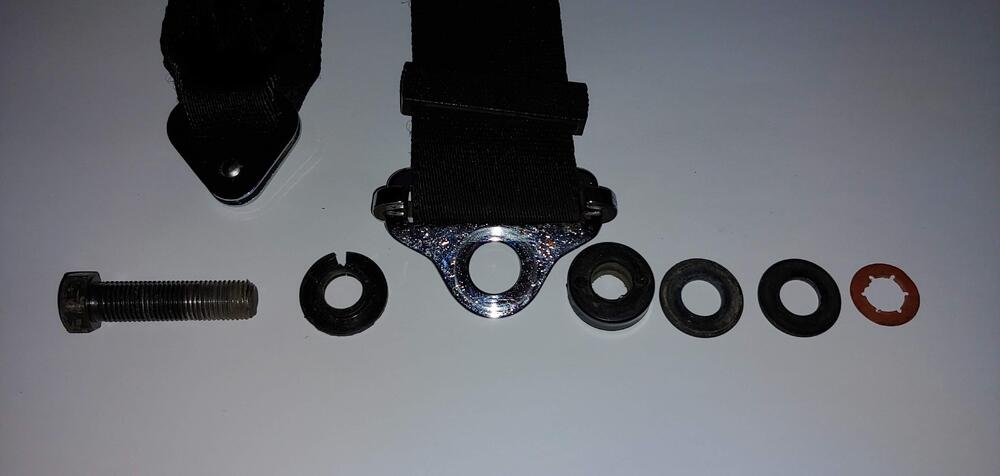
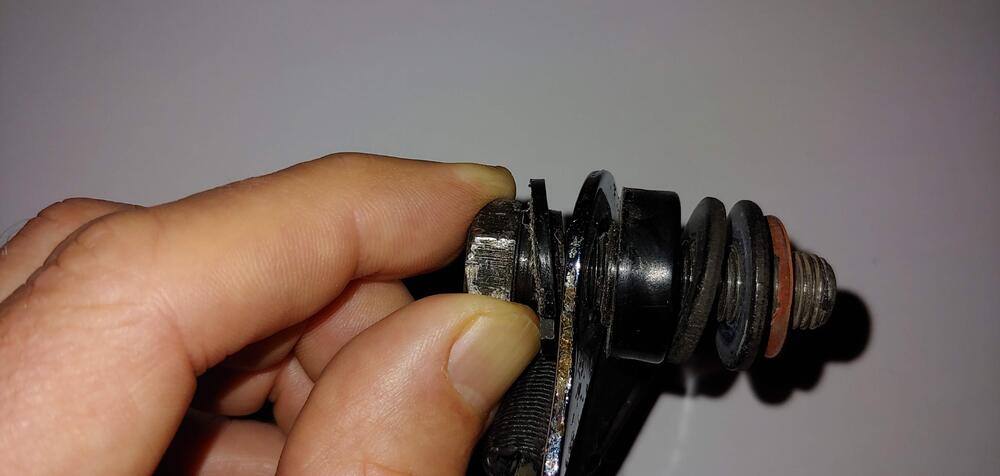
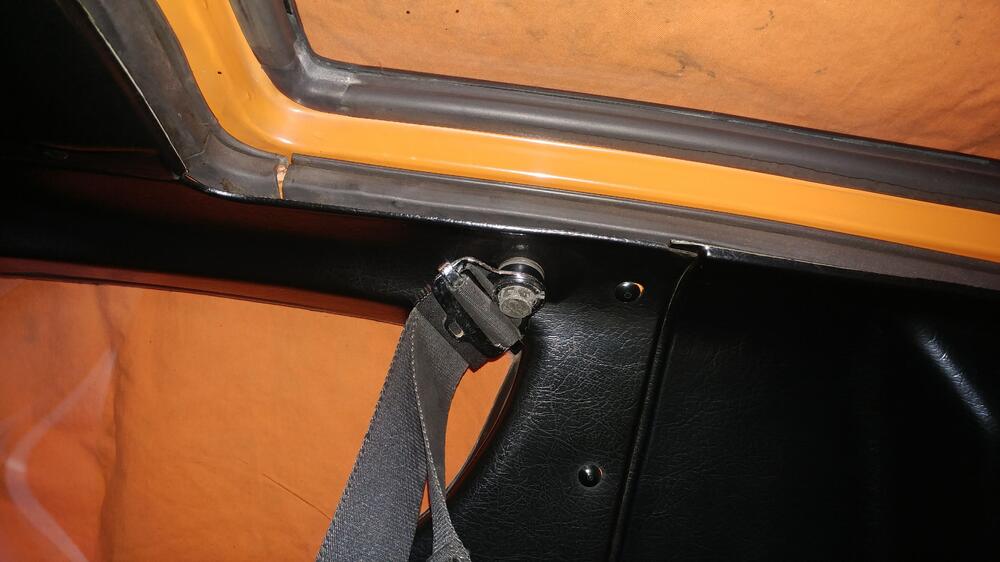
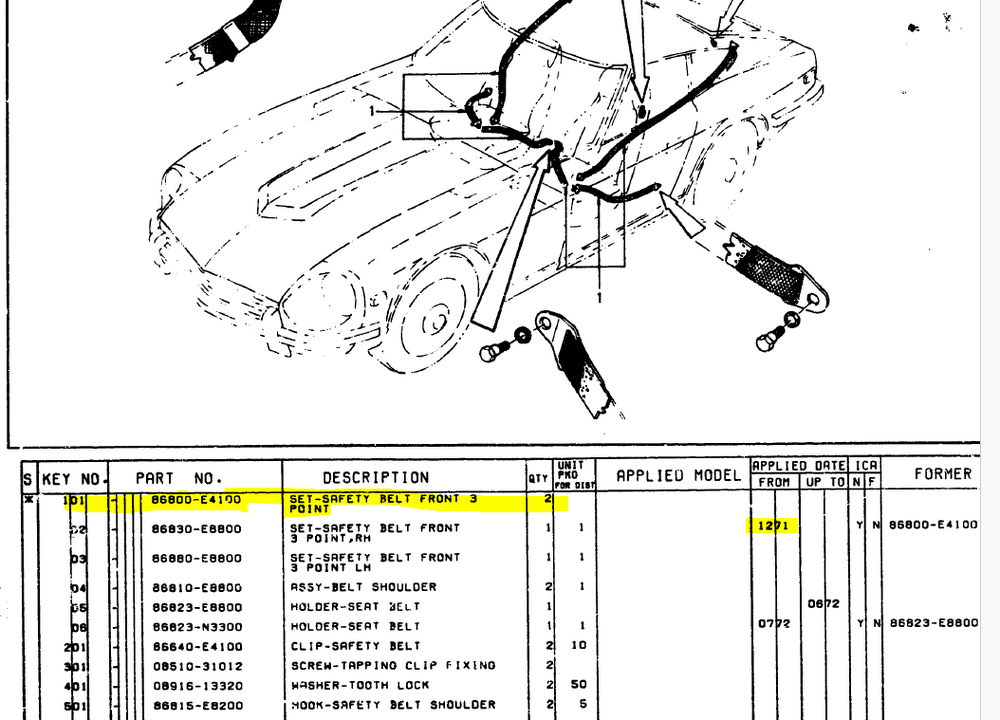
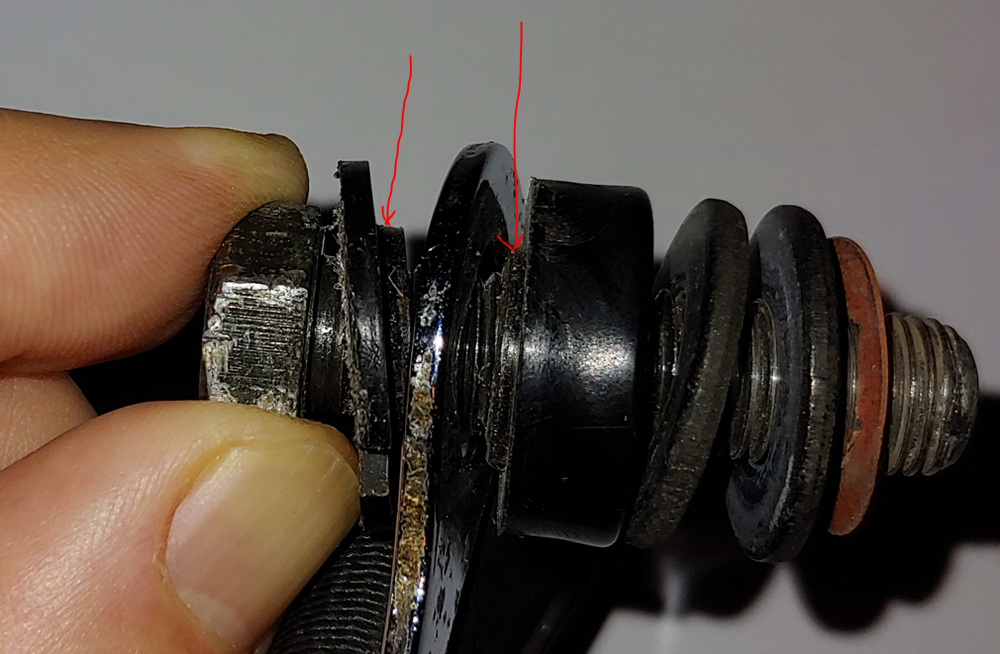
My Nissan parts book shows that the same seat belt assemblies were used until 12/71. Do your seat belts have a push button to release, or a lift latch similar to that used on aircraft. The early style is the lift latch type, which I believe your car should have. If I'm mistaken, hopefully others will chime in. The clip in your hand, in your last picture, is for the lower end of the shoulder belt where it would attach to the lap belt as in this picture from my 1970 with the early style. Here are a few pictures from my 7/70 showing how the upper end of the shoulder belt was fastened. It did swivel, but with some effort, not freely, when the bolt is tight. I hope they might help. Notice the step on two of the plastic washers, they are what allows the swivel to happen,
 1 point
 -
1 pointMy 04/71 build date 240 came with D hubcaps. I always thought all '71 Datsun 240Zs came with the D caps and the Z caps were on later model years. Unless I am misunderstanding the question....which seems to be happening more the older I get.1 point
-
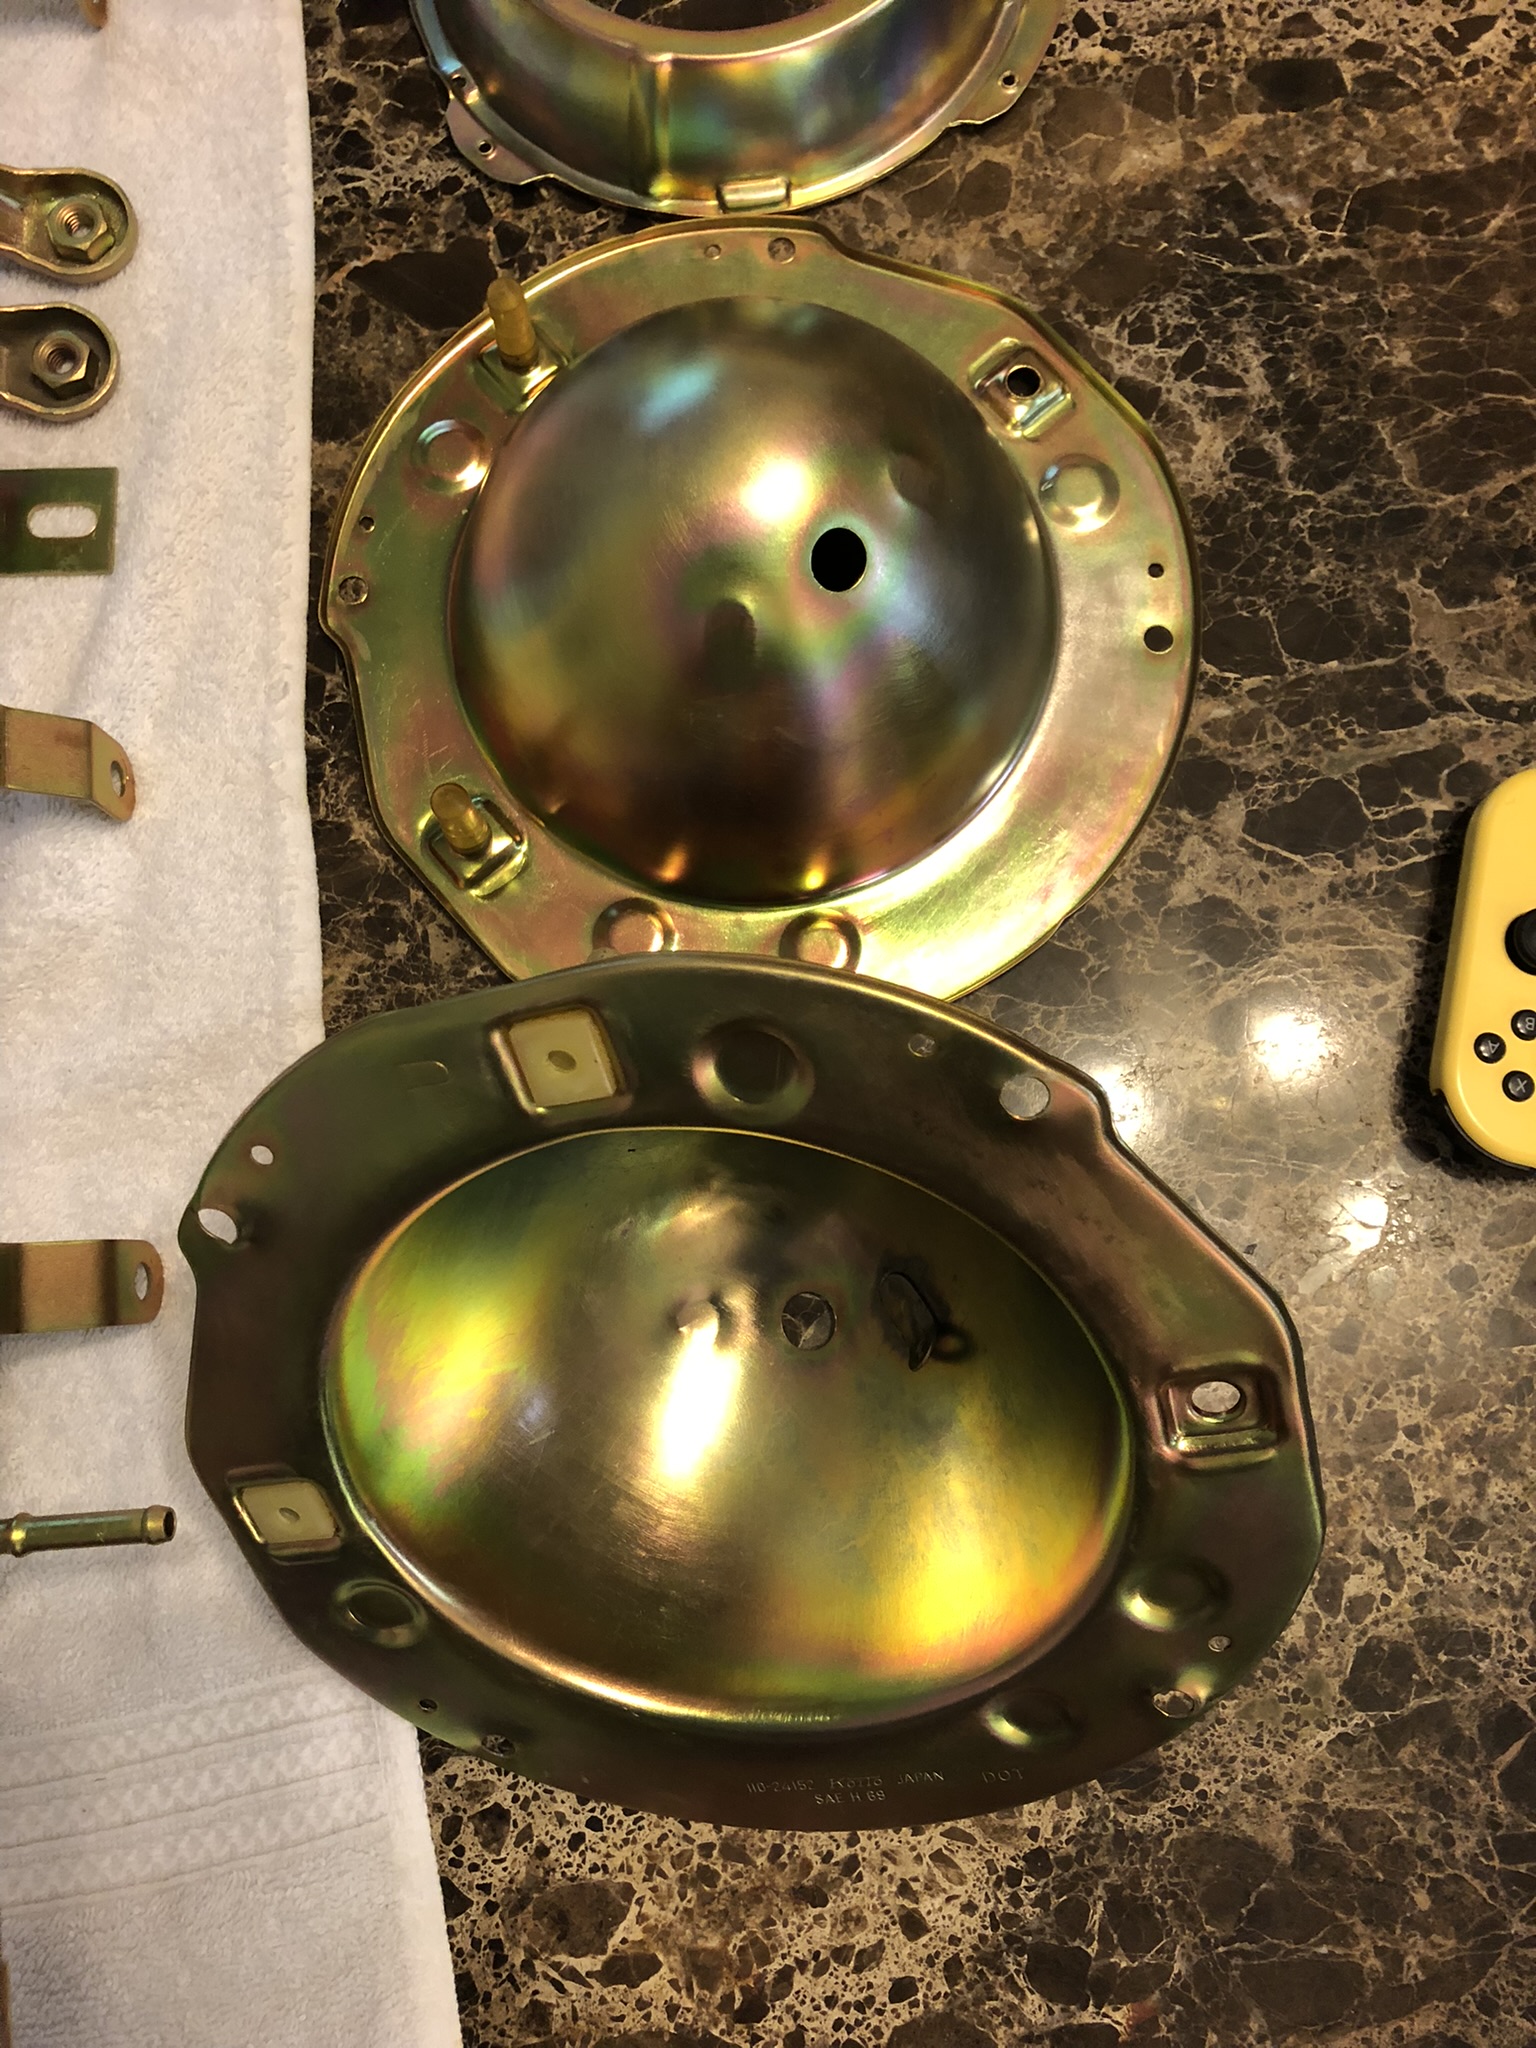
1 pointJust remember it’s all about prep. For small parts I use a Harbor Freight tumbler with water and Dawn soap. If I have some parts that are stubborn, I will throw in a small handful of sheet rock screws into the tumbler. It’s amazing how much crap comes off after tumbling for a few hours. On the larger parts I use a dremel with the little scotch bright heads which can be purchased in bulk off EBay or Amazon. Dremel also makes what looks like a small rotary buffer that uses scotch bright pads and these can cover the larger parts like head light buckets.
 1 point