Leaderboard
-
conedodger
Free Member6Points12,513Posts -
inline6
 Subscriber
 4Points1,282Posts
 -
HusseinHolland
Free Member2Points1,031Posts -
HS30-H
Free Member2Points5,509Posts


Popular Content
Showing content with the highest reputation on 02/20/2024 in all areas
-
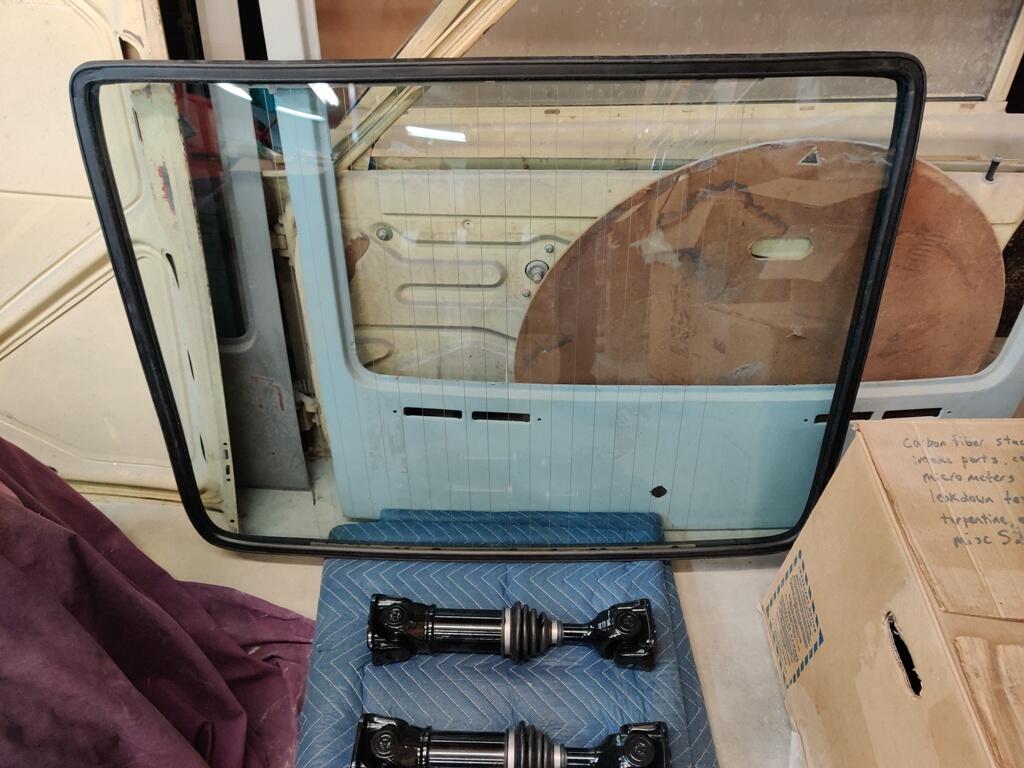
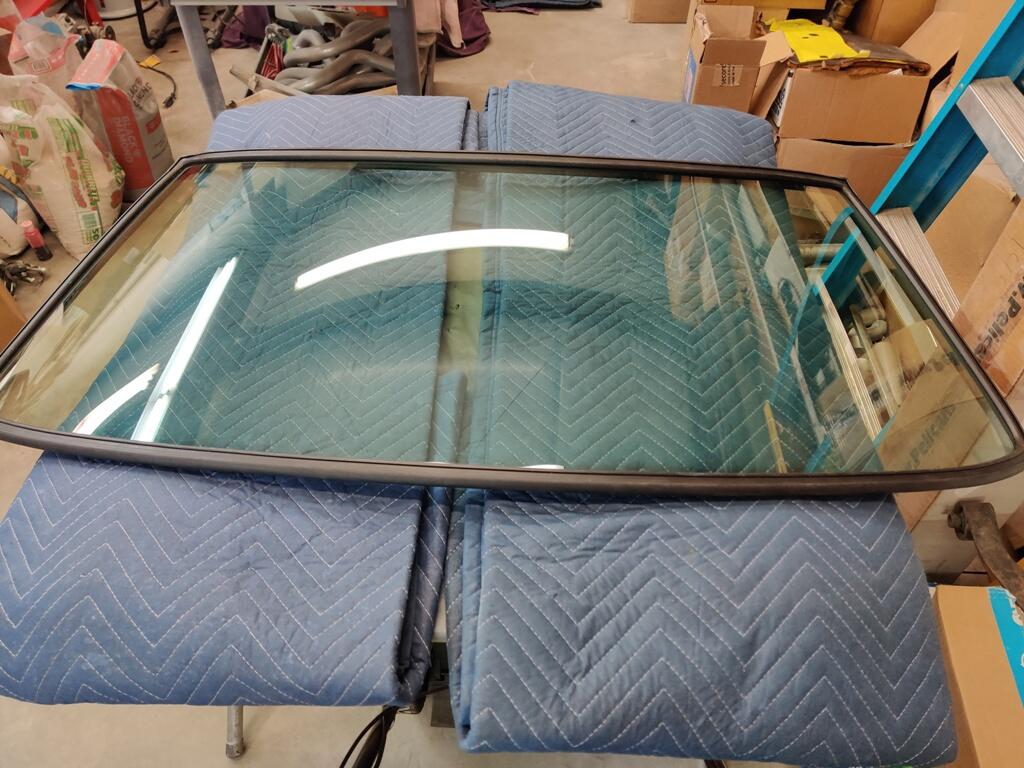
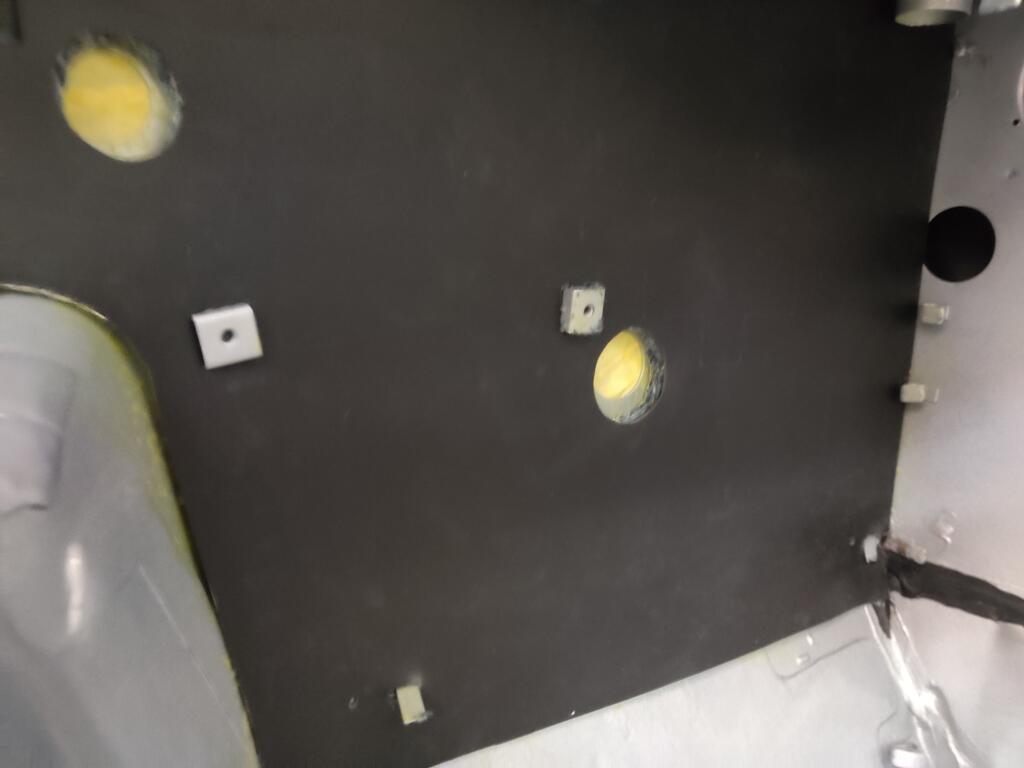
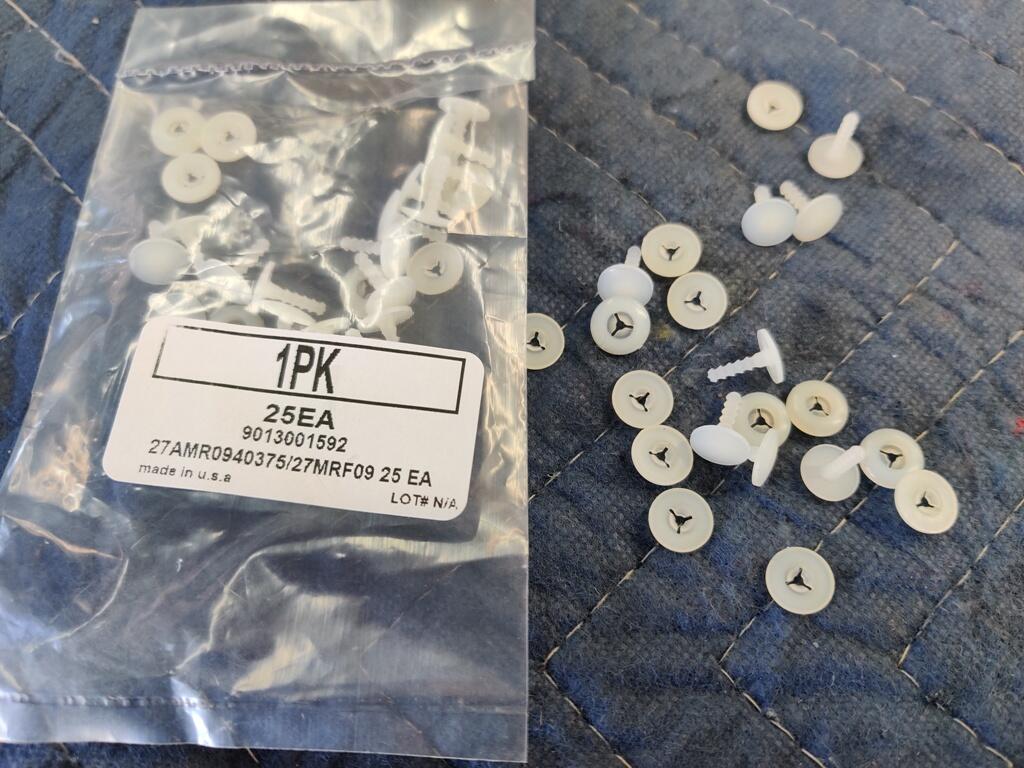
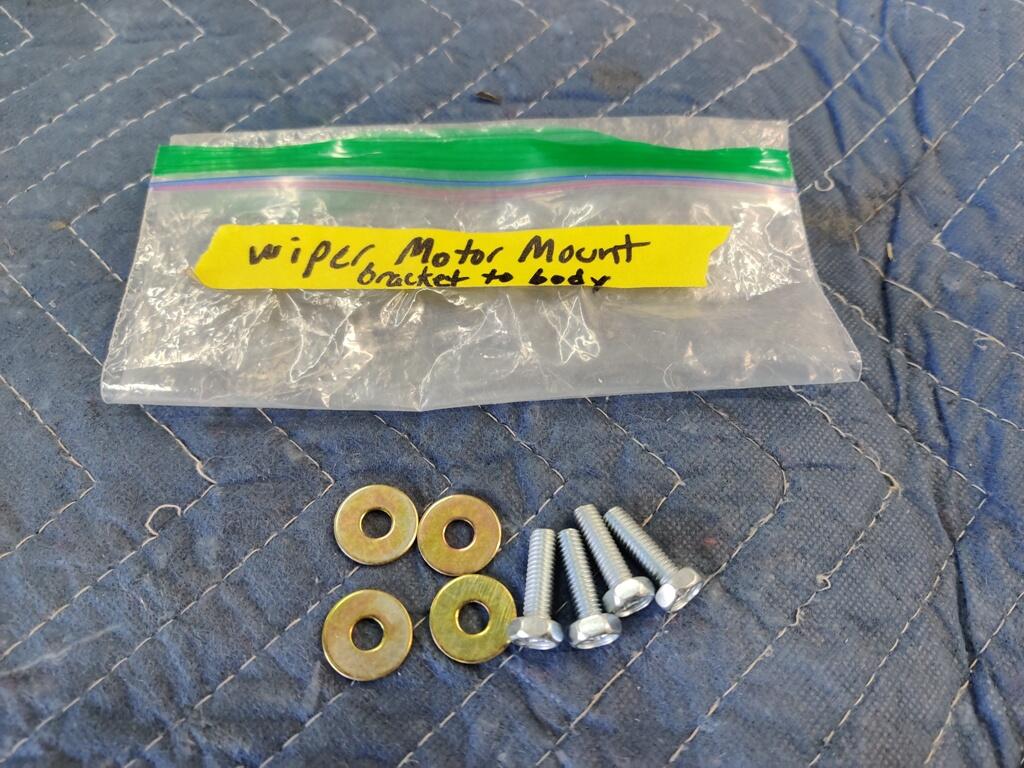
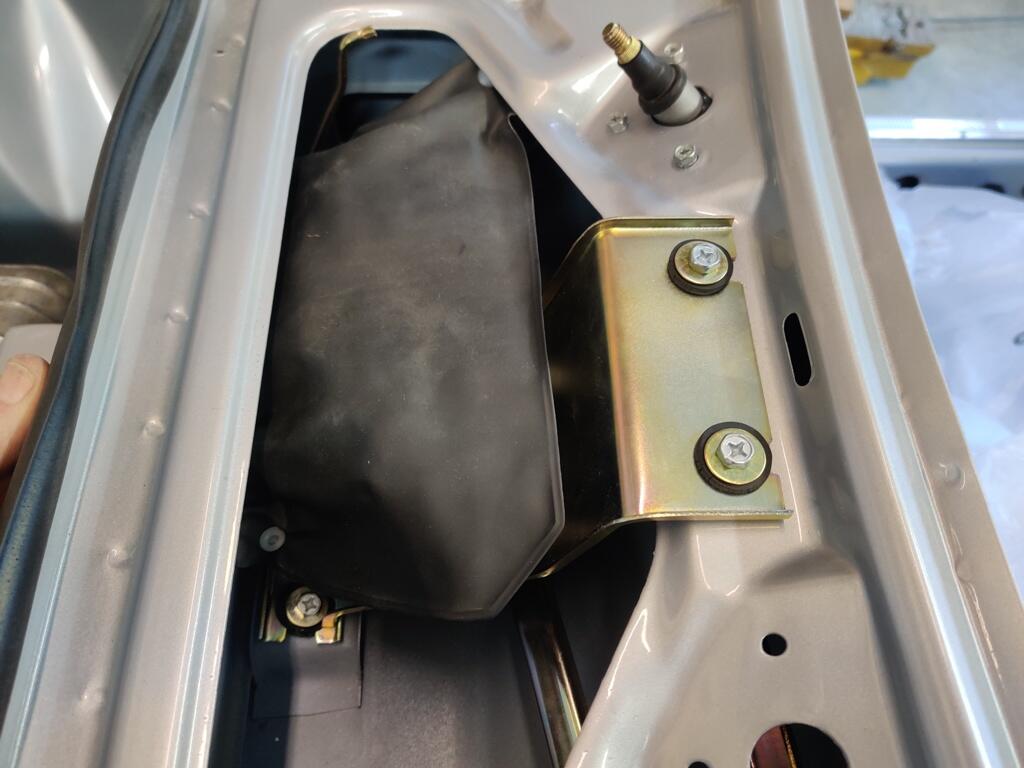
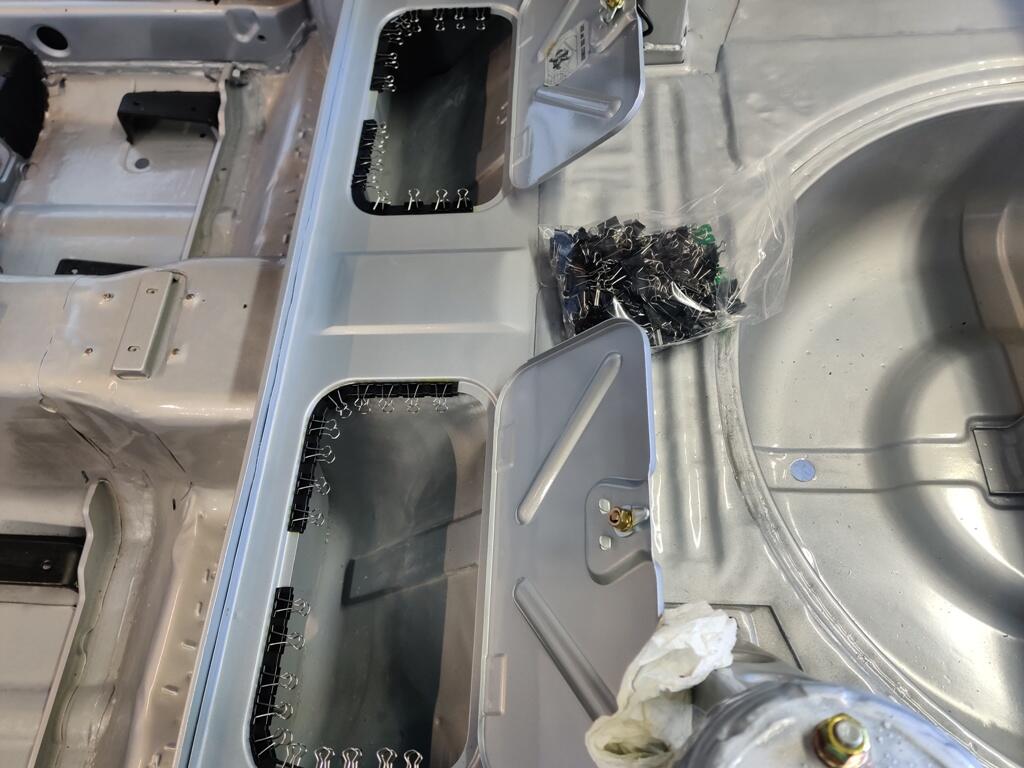
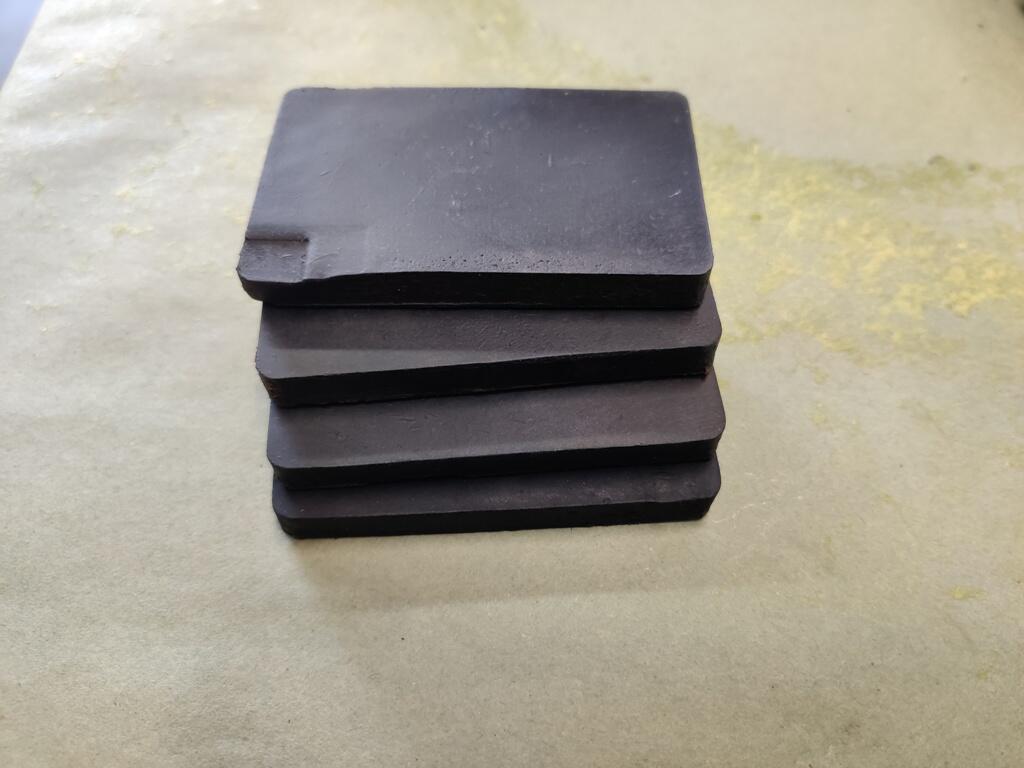
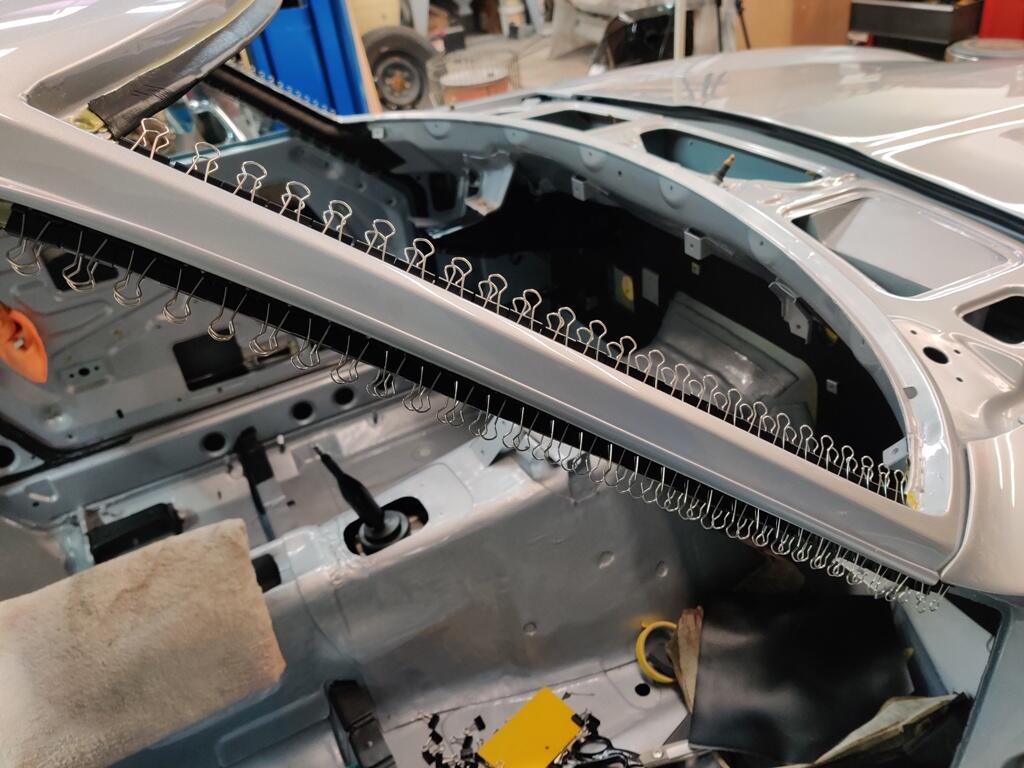
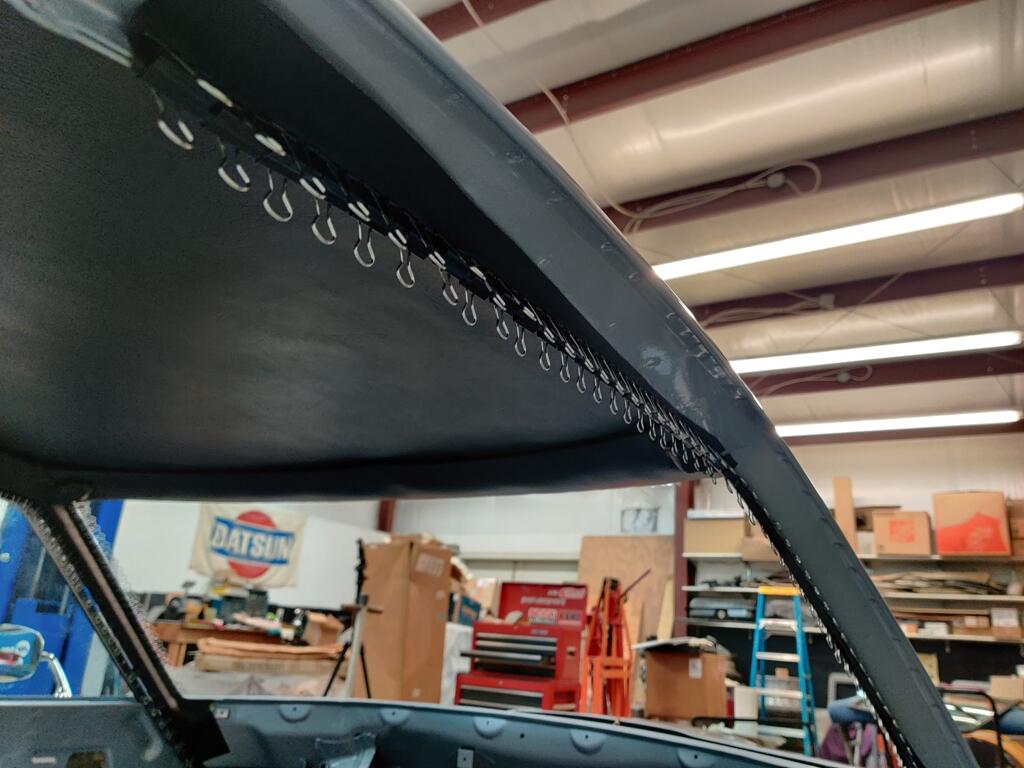
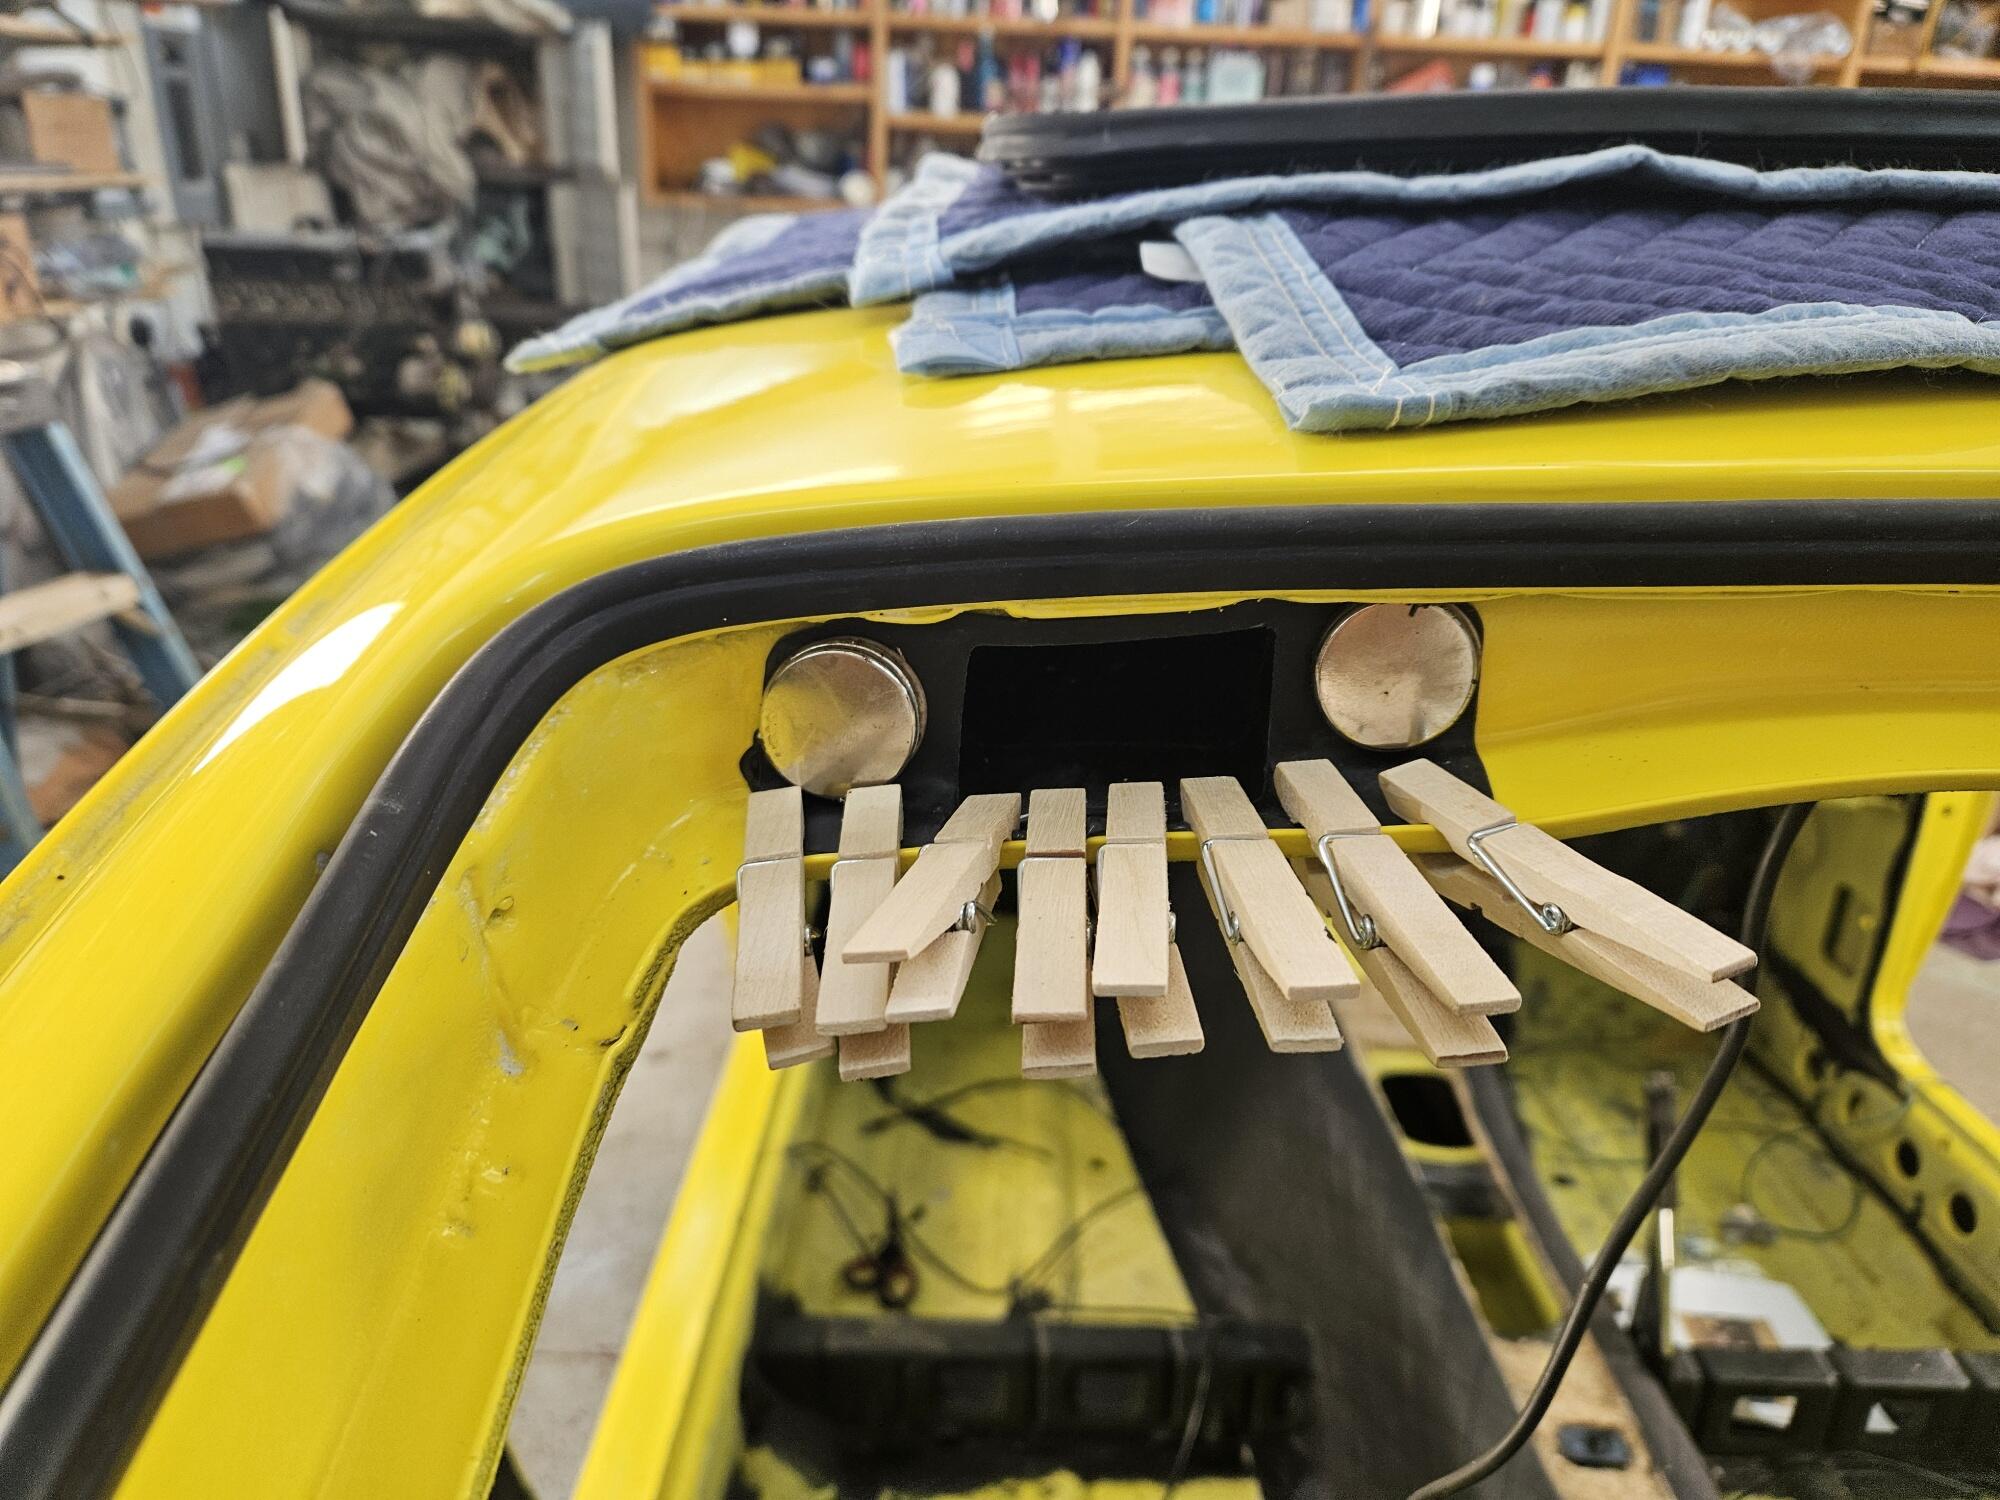
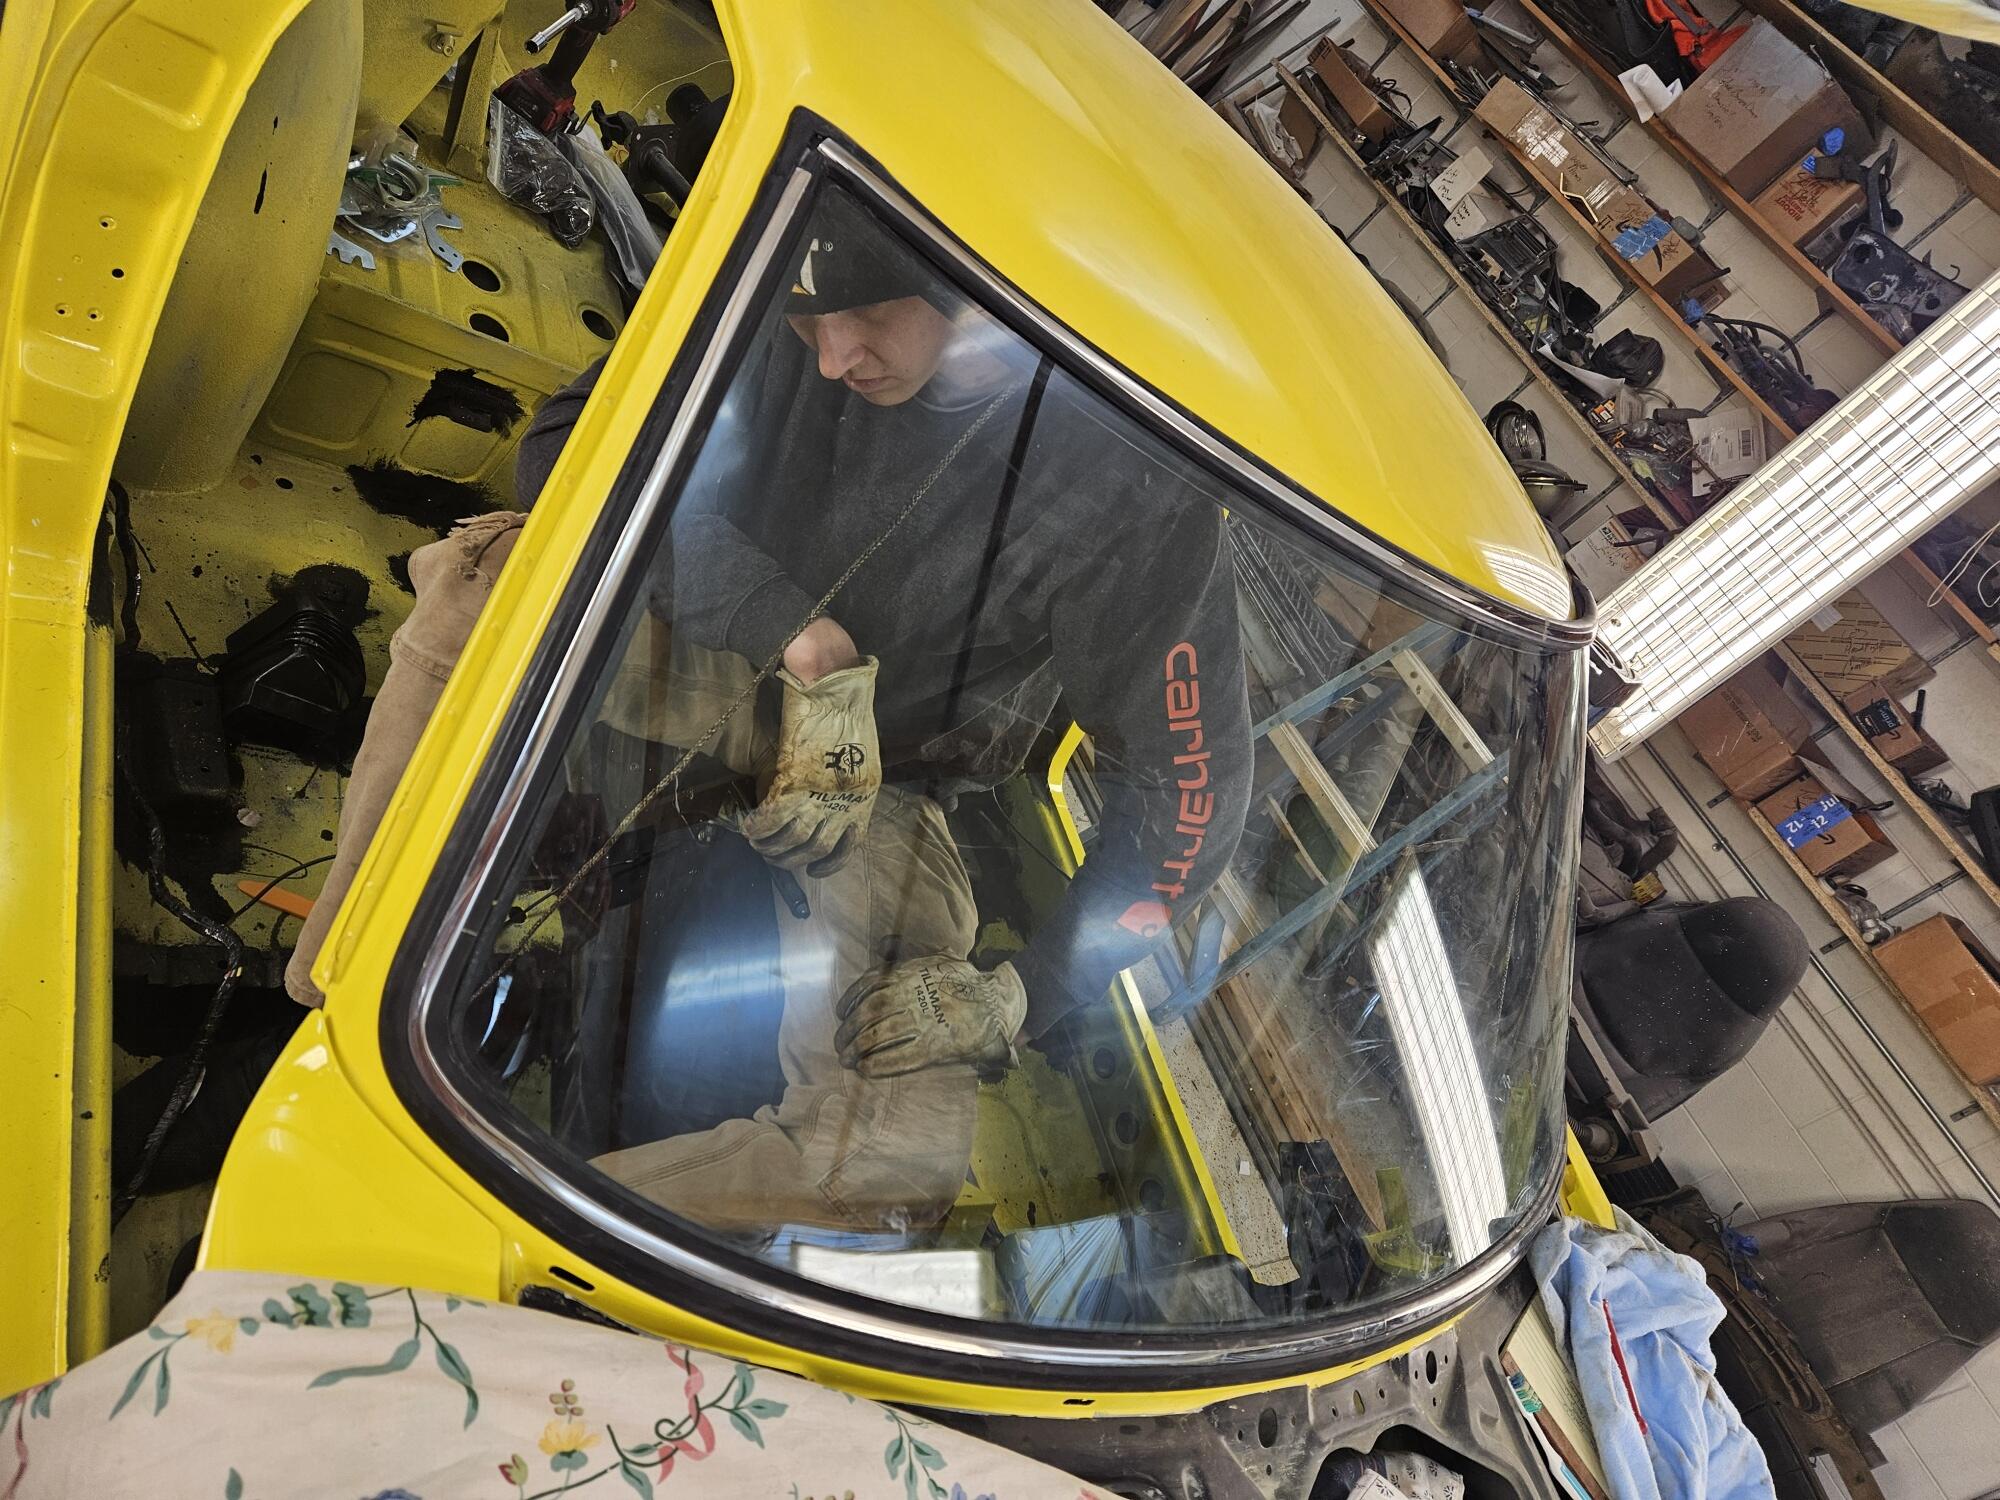
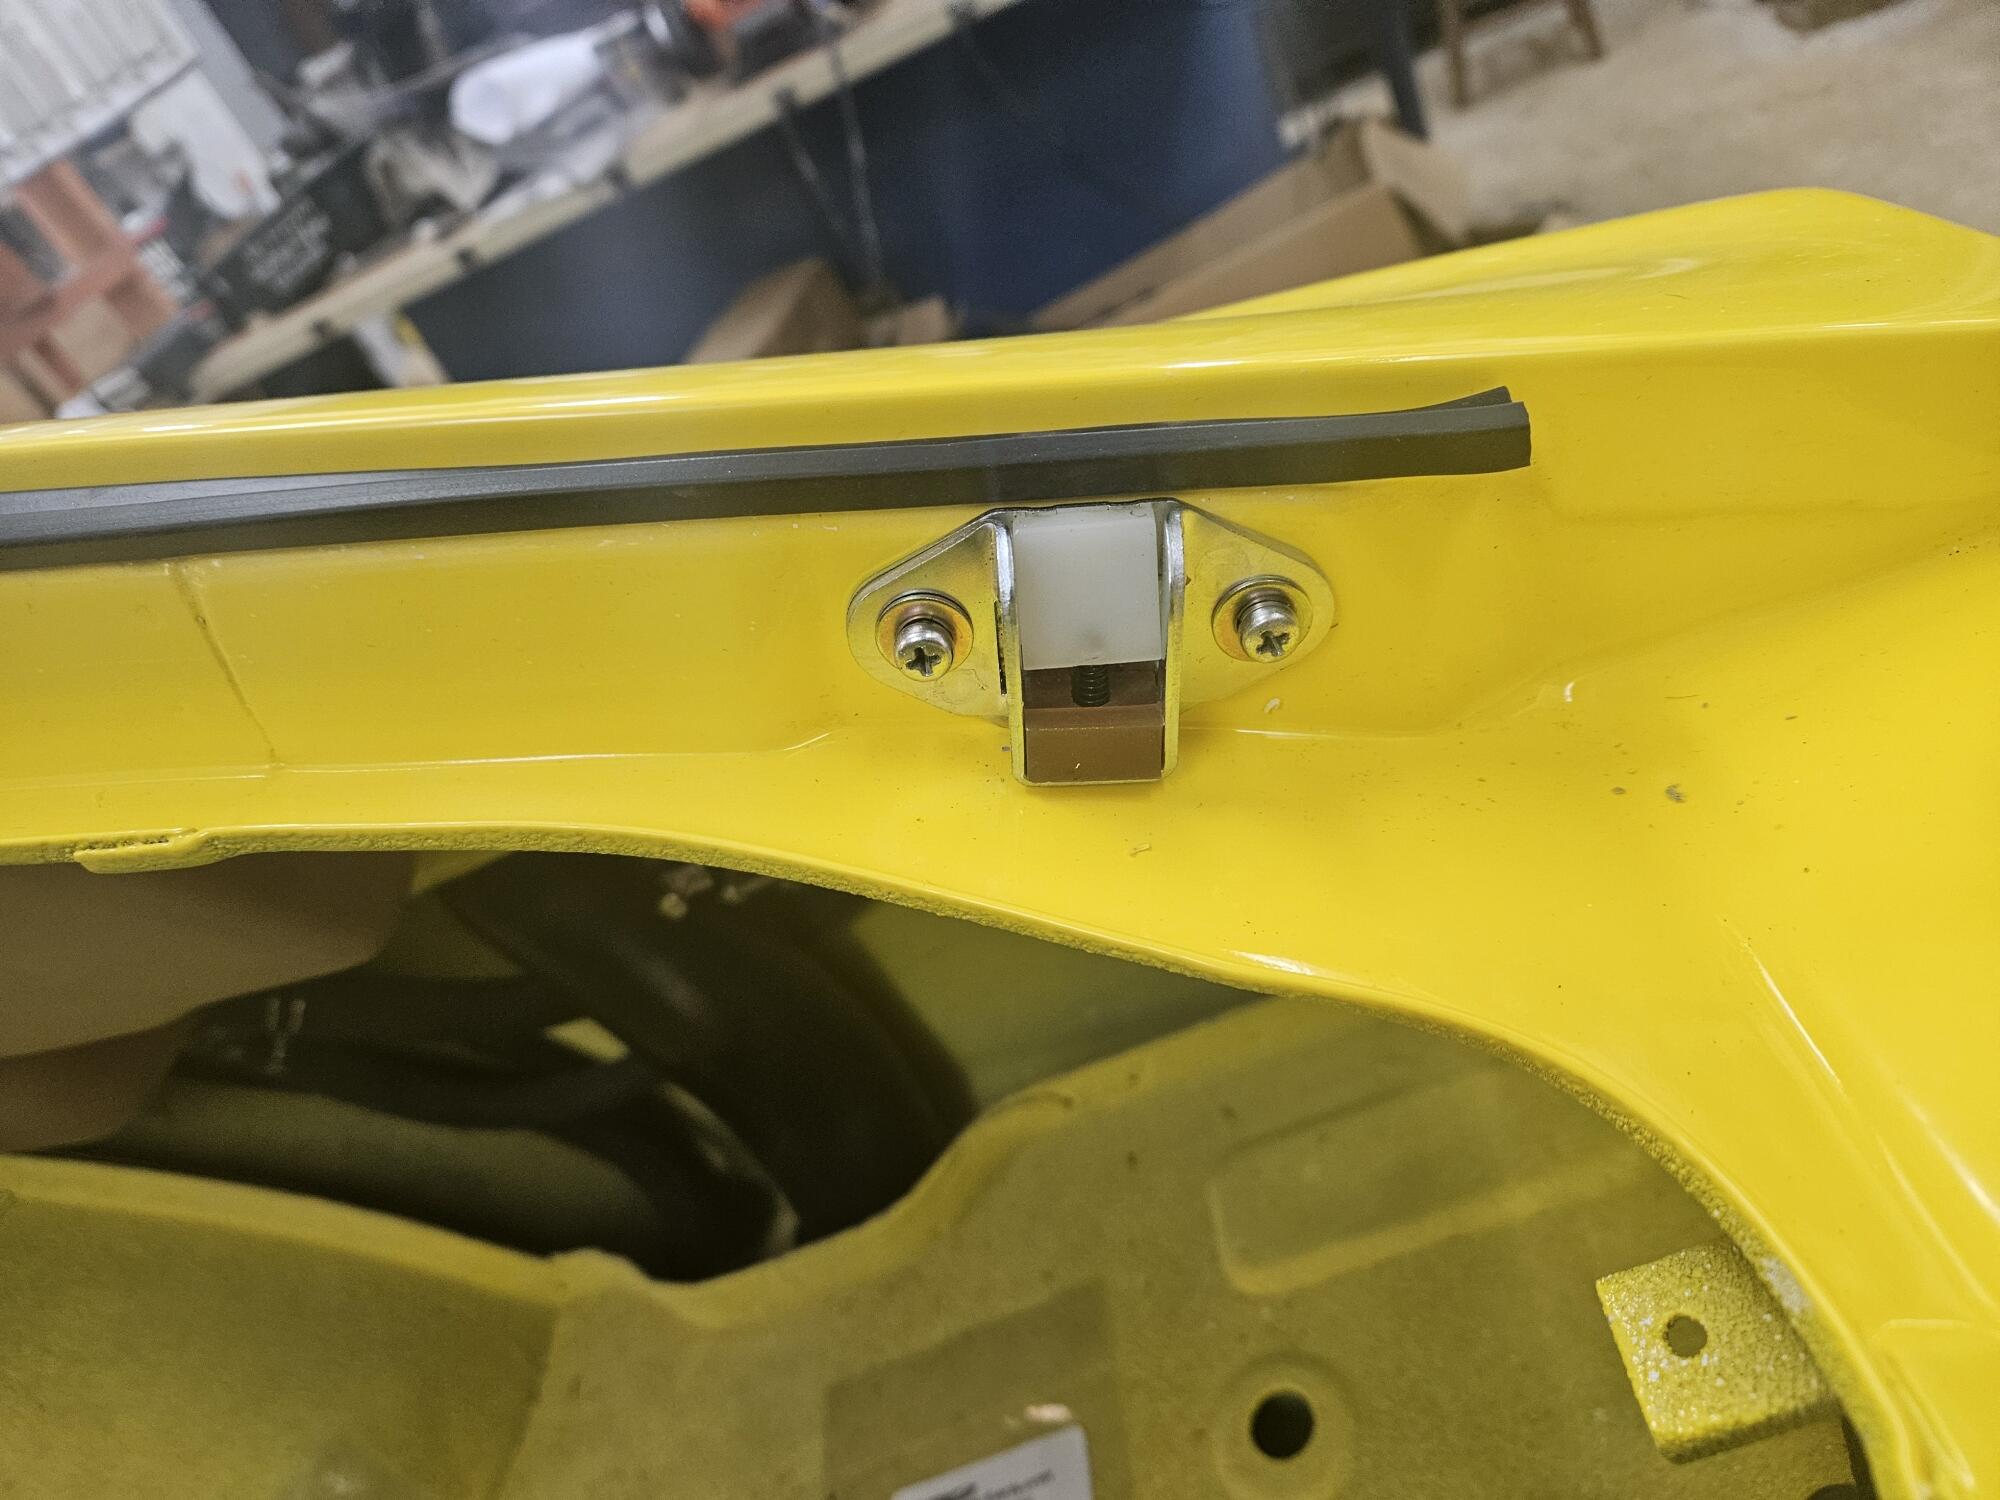
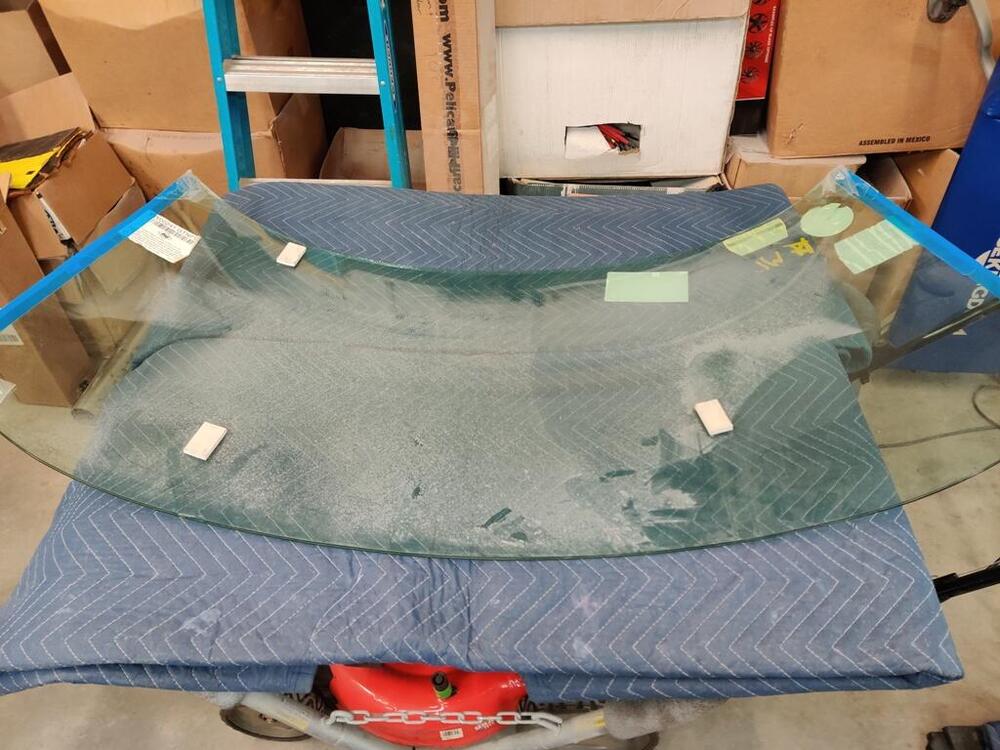
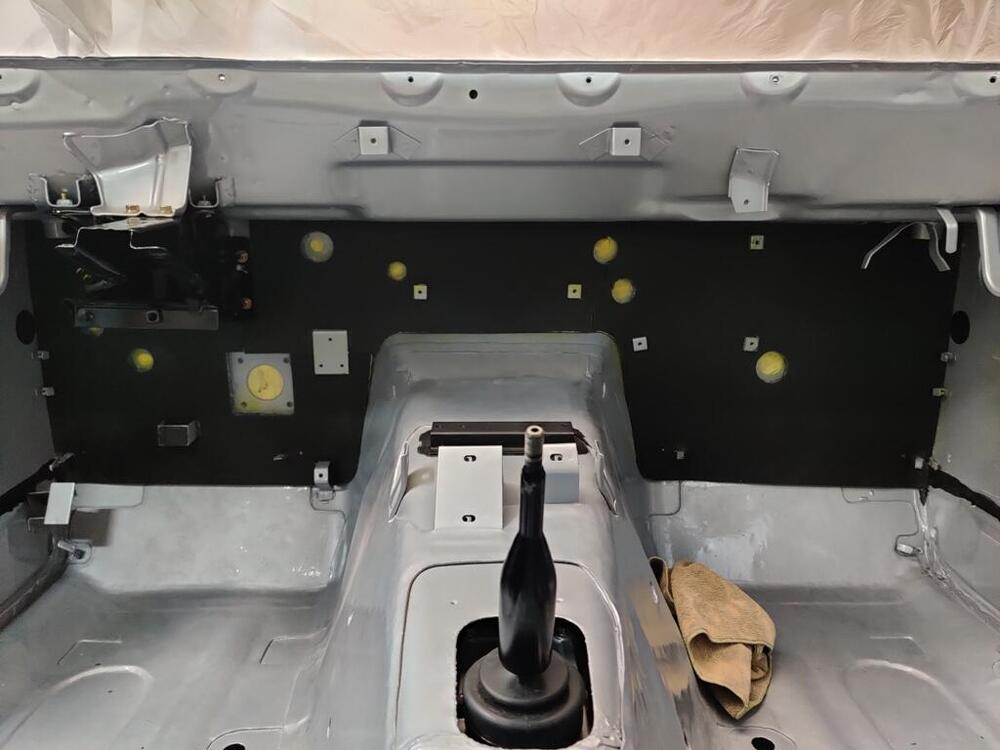
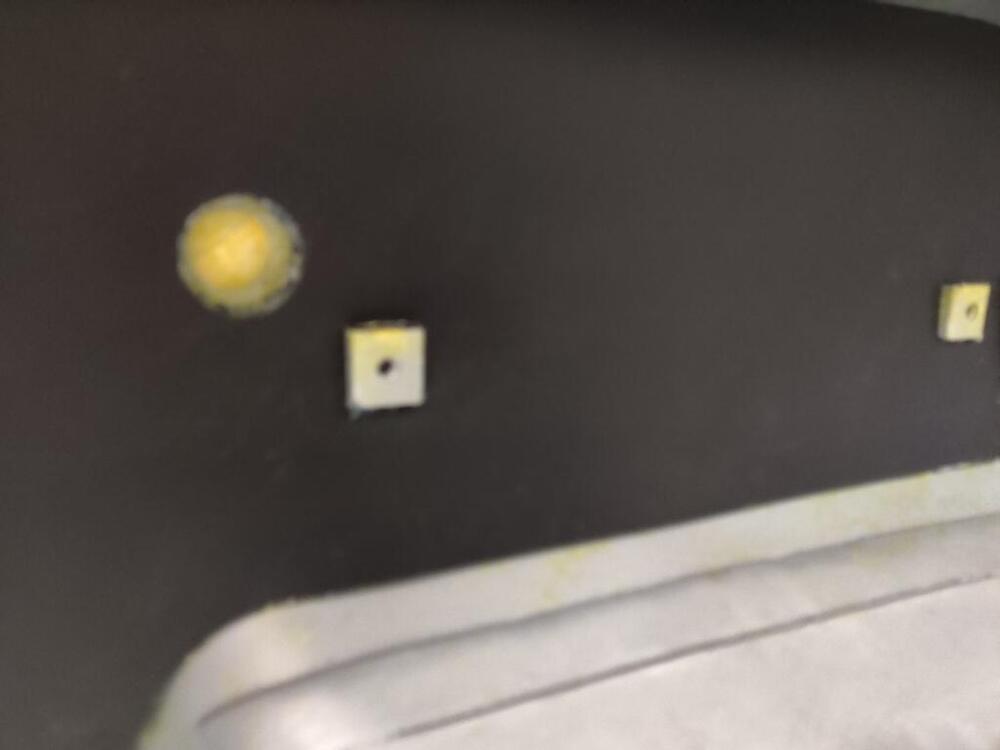
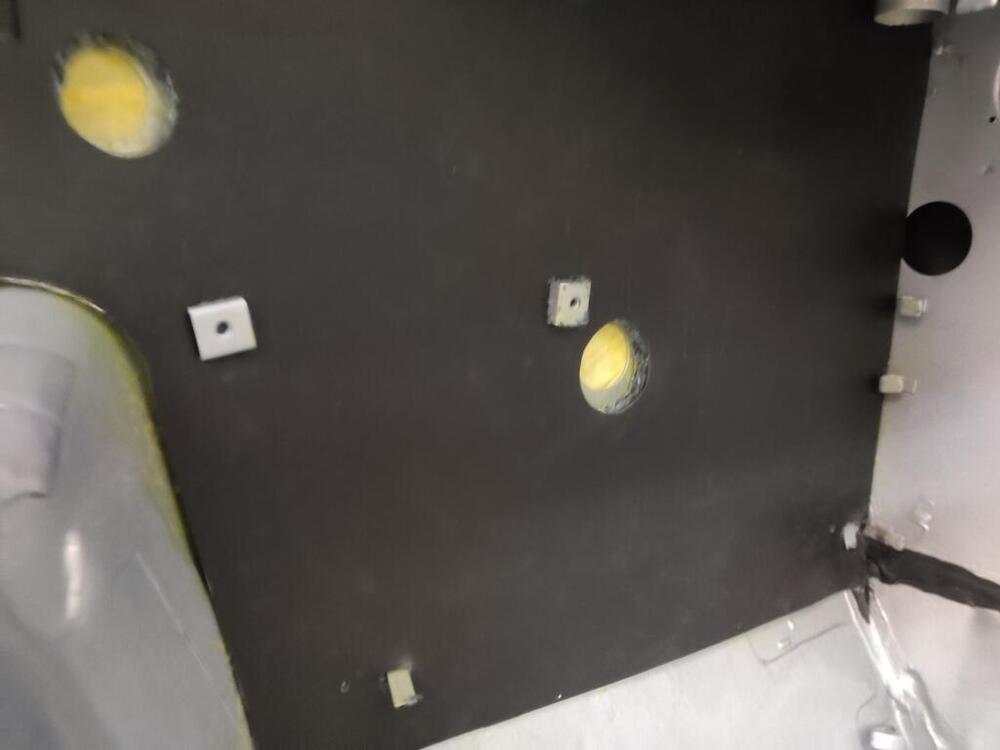
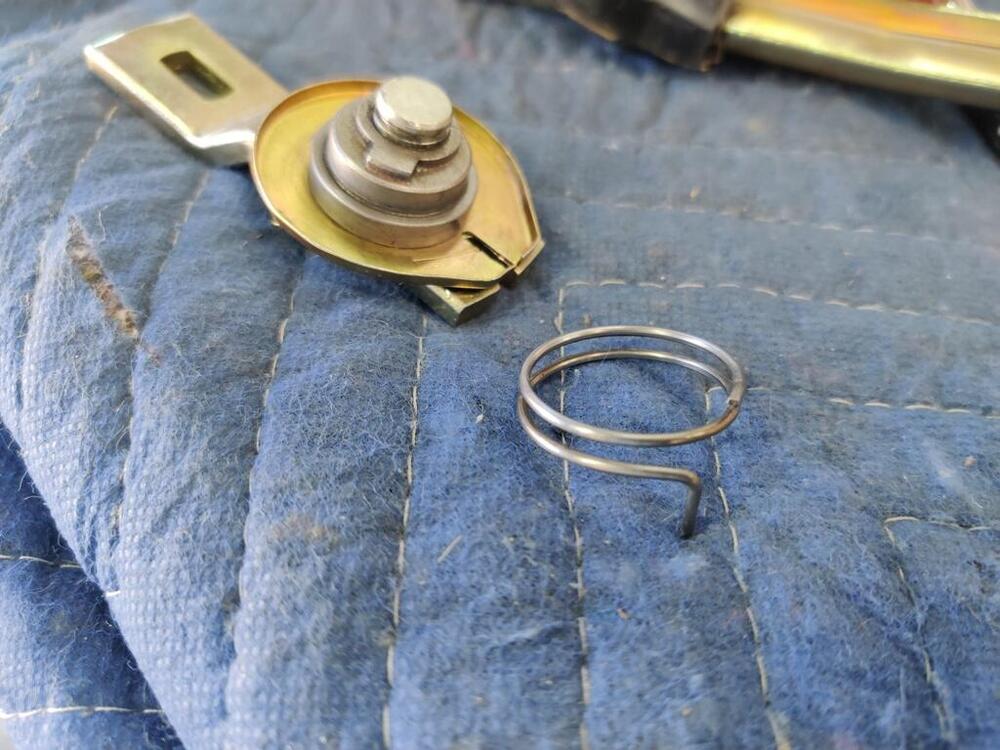
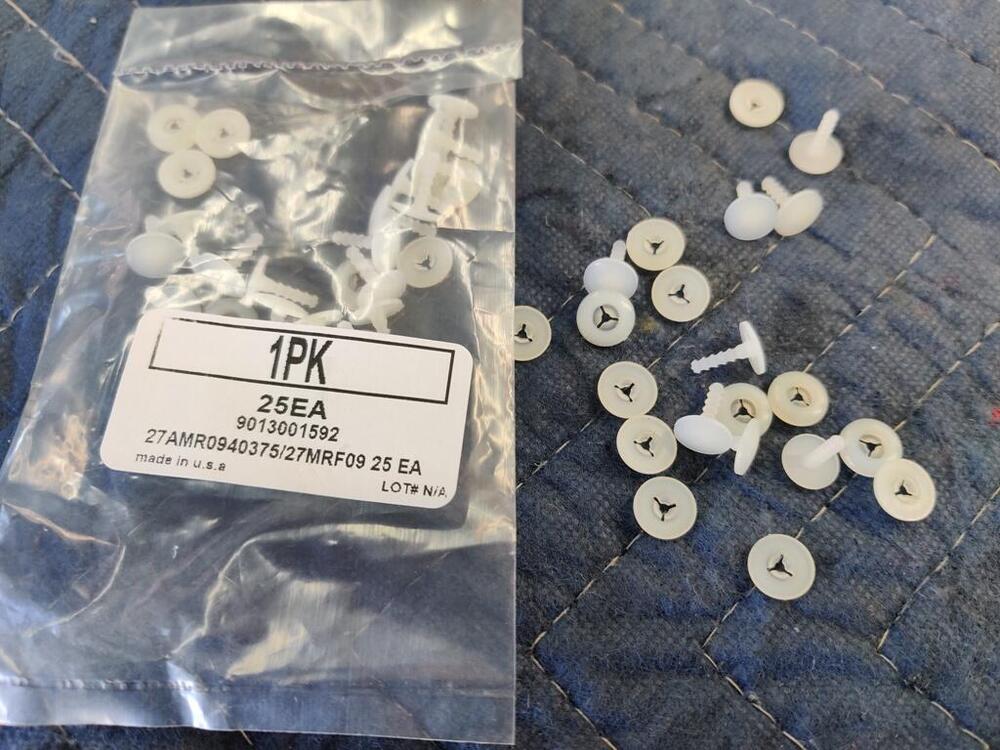
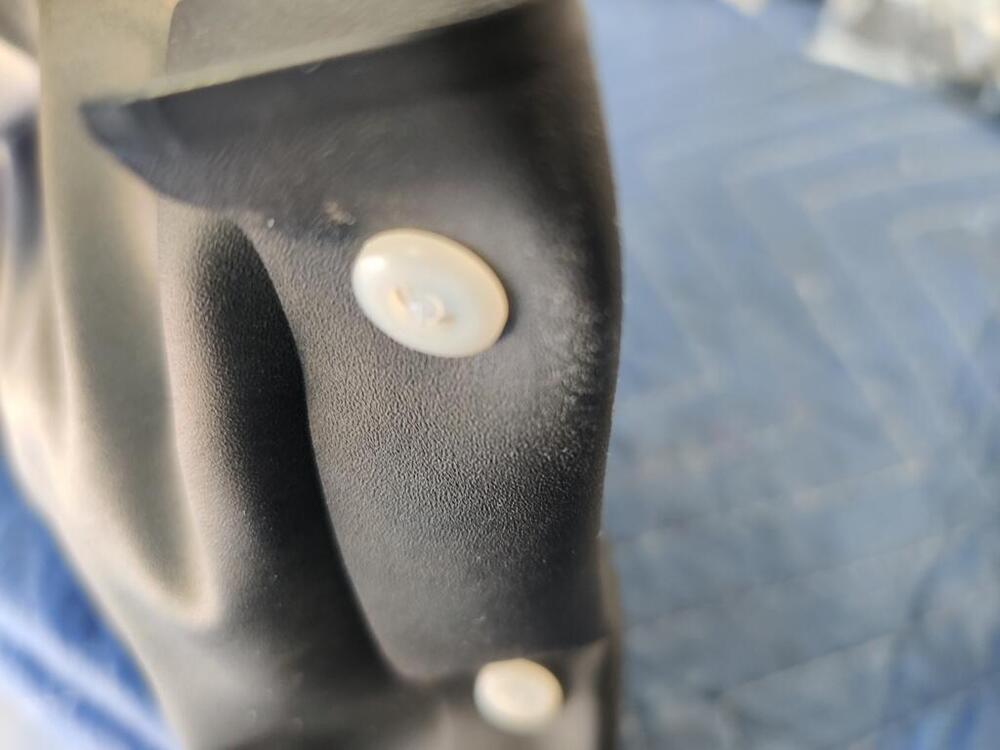
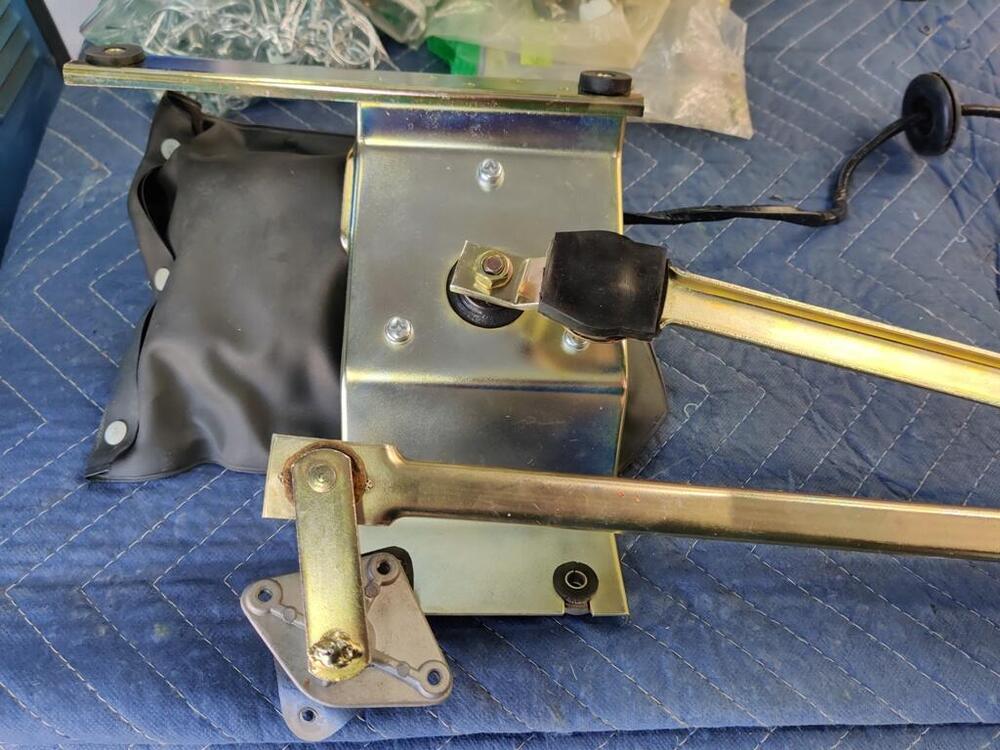
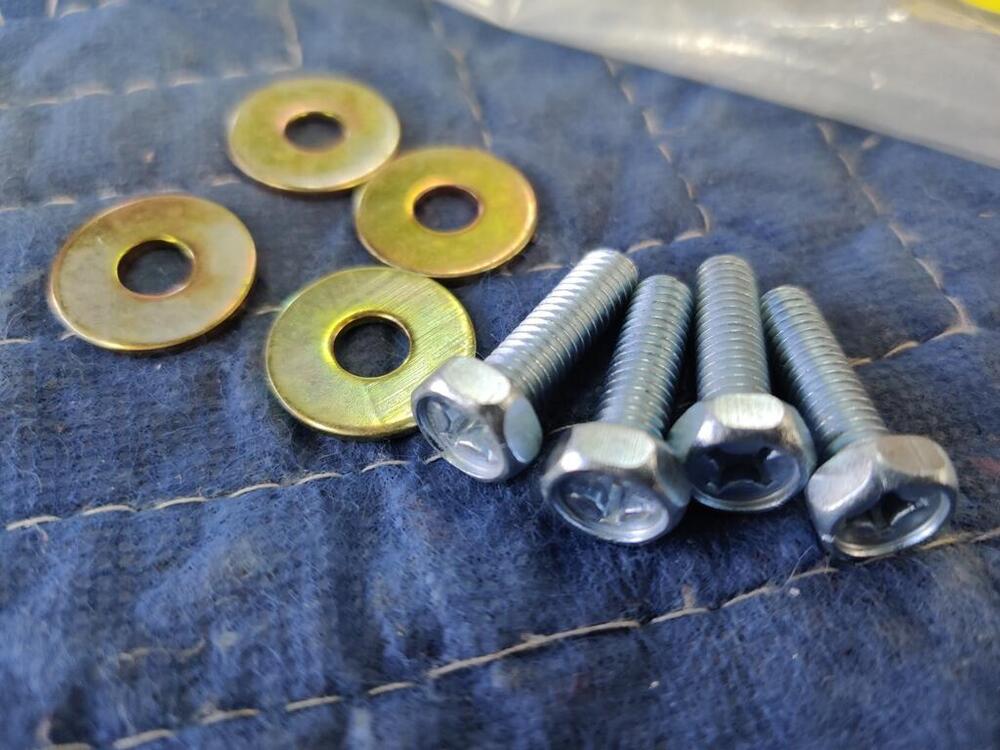
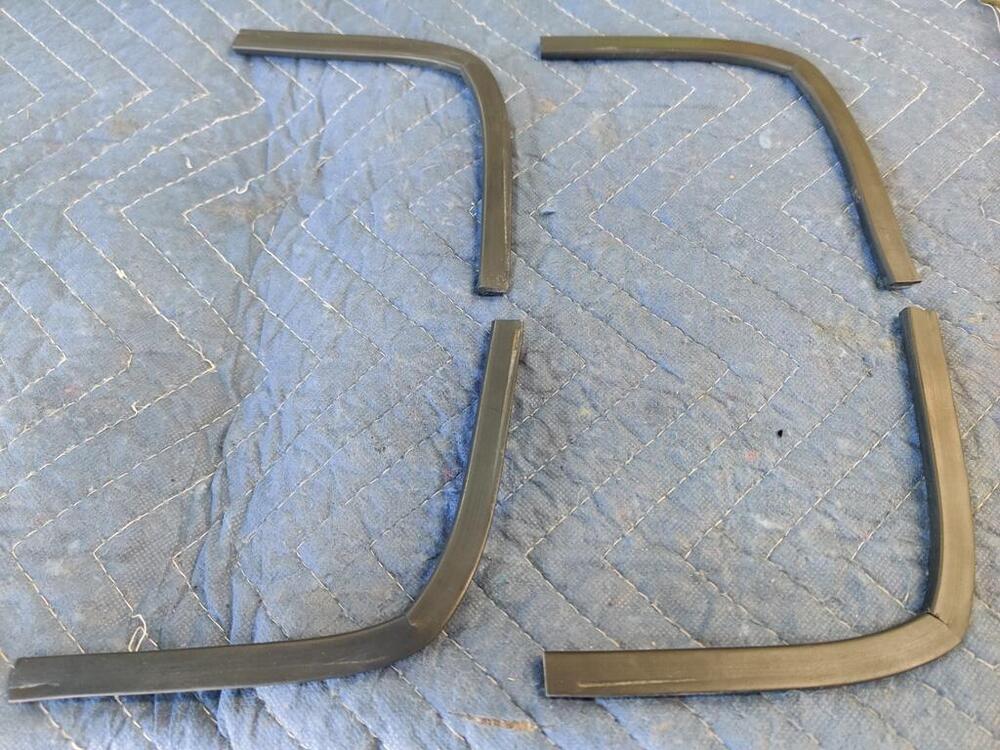
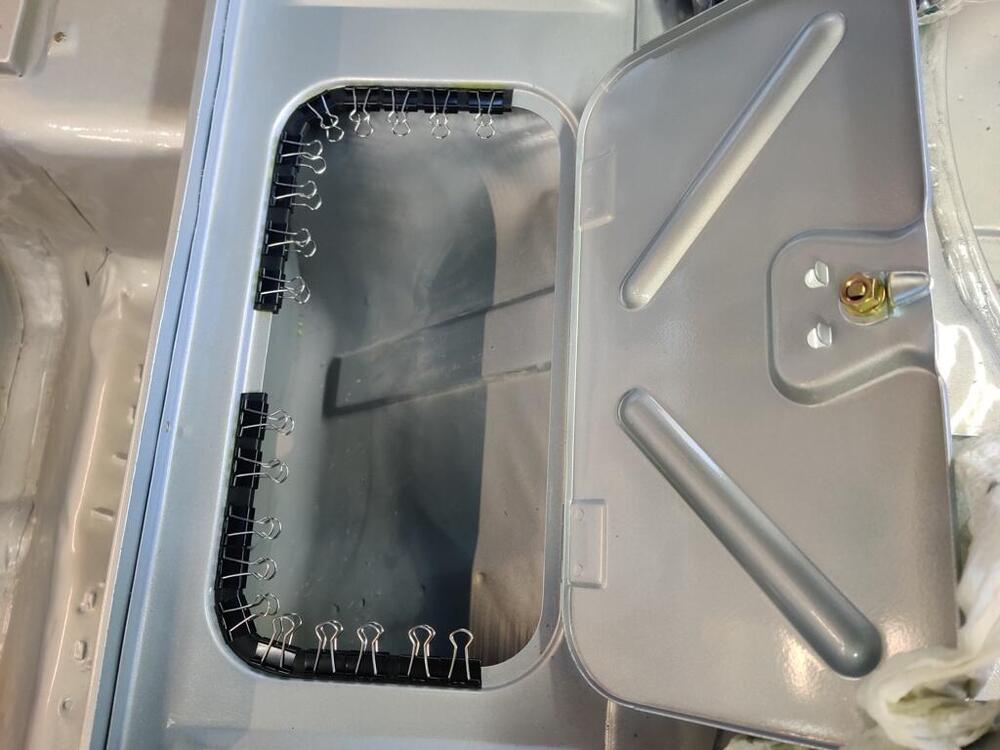
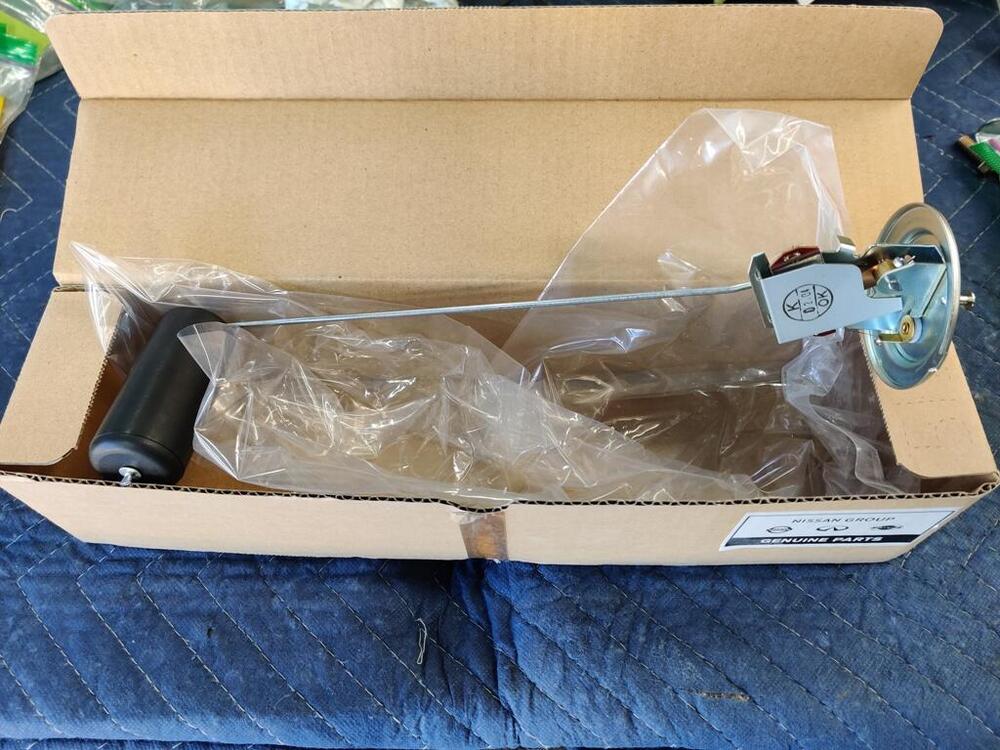
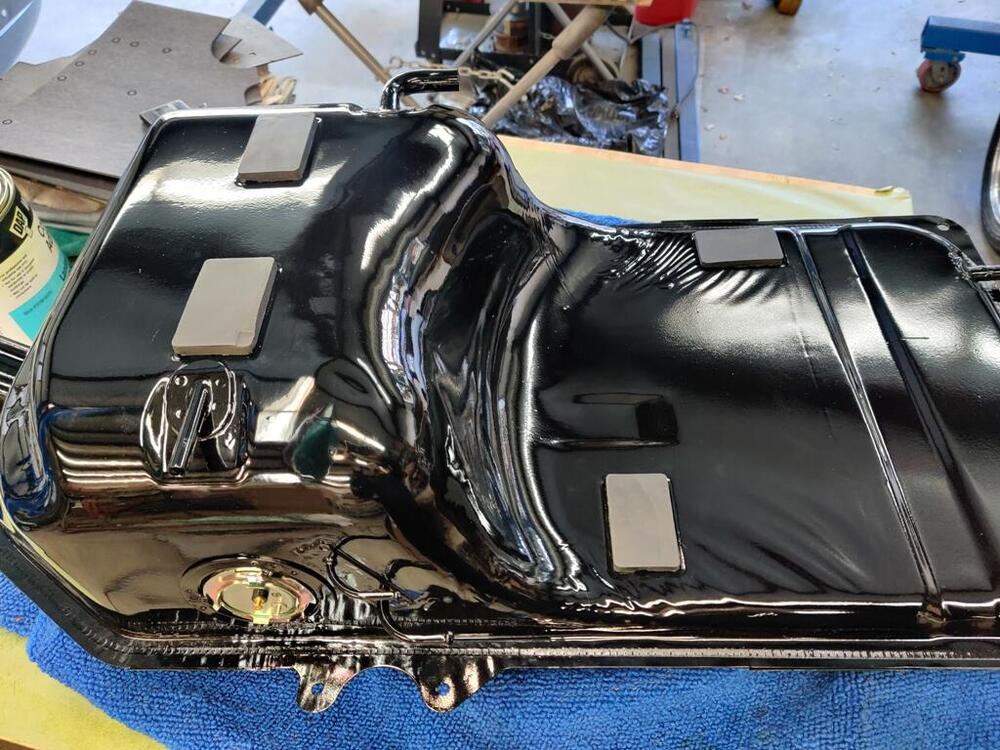
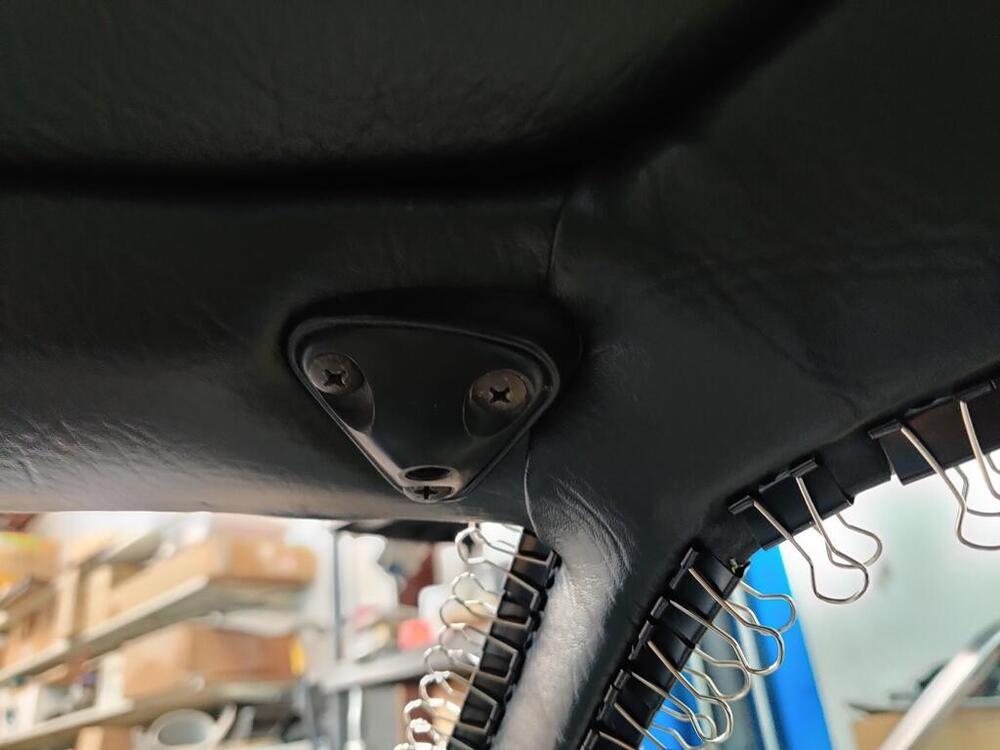
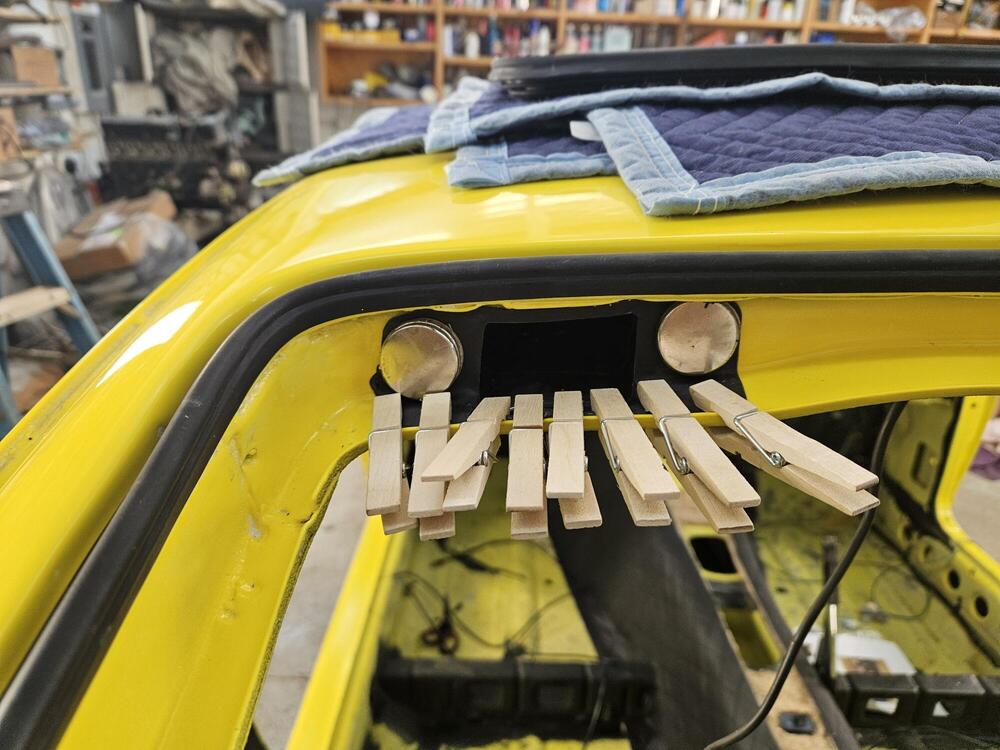
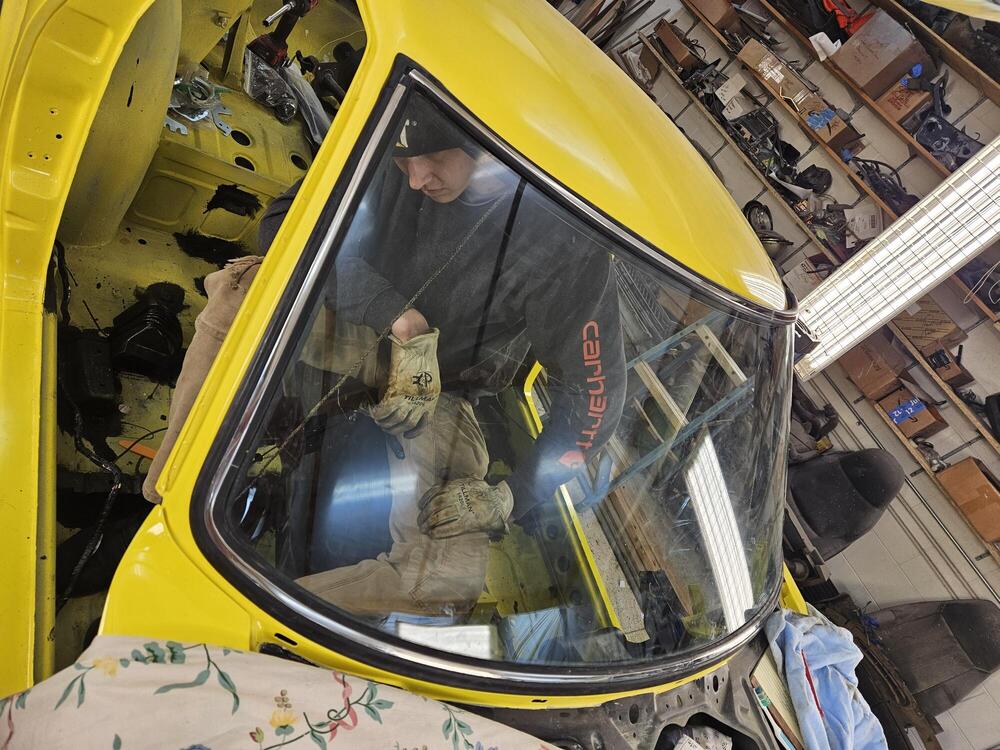
Yesterday, I completed the very difficult task of installing the vinyl A-pillar/side trims. I took my time. I found it helpful to examine the old ones very carefully while trying to get the new ones installed properly. I discovered that the quarter windows have to be out to install these properly. So, I had to take those back out temporarily. Like many things, it is a whole lot easier when you have done one. The second one was much easier and took much less time to install. The only part that didn't turn out perfect is where the side welting butts up against the header. I left a bit more vinyl material there than I should have. If I could do them again, I could get them perfect. But, it isn't worth spending all the time and effort to rip out these, cut new ones and do another install. I found the clips to be more useful with these because I wanted the vinyl to stick to the inside of the weld flange too. It sticks perfectly to the outside of the weld flange without the assistance of the clips. But on the inside, the vinyl is at an angle pulling away from the flange. The clips help it seat there. I had today off from work, so in addition to the usual weekend hours, I was able to spend another 6.5 hours on the car. 🙂 The rear hatch glass has been sitting in a corner waiting... for the scratch remover kit I ordered to show up, and for me to devote time to removing the scratches. The kit has arrived: I found out about it on Youtube. I was intrigued when I saw a video that showed removal of a deep scratch. I had used Eastwood's kit, and found that it was barely adequate to remove some light wiper marks from my BWM M3 windshield. That is not a fault of the product, but I did not realize until I saw this video that there was a product that could remove deep scratches. But, I did not choose to work on that today. Like the rear hatch glass, I cleaned my windshield and installed the NOS rubber weather strip on it. I bought the windshield a few years ago when I was finding it hard to source a windshield without the blue "stripe" of tint across the top. It was made in China, but appears to be a decent quality one. I am going to wait for a warm day and put the windshield out in the sun. I want the weather strip to heat up and relax in the sun before I attempt the install. I will do the same for the hatch glass. I had not yet shared pictures of the new firewall insulation installed. When I applied the vinyl to the foam for the new headliner, and while the contact adhesive was in the spray gun, I installed them. I think they turned out to be very nice. I was held up on finishing the installation of the windshield wiper motor and mechanism because I was searching for a suitable replacement for the plastic "push clips" that hold the wiper bag end together. I found these at McMaster-Carr and they turned out to work nicely. After snapping them together, I just use small clippers to clip the extra portion of the post off. Additionally, I came across a forum thread in which @Captain Obvious described the proper function of the wiper arms. I had no idea that the round spring that always breaks was responsible for changing the off/resting position. I saw where some had bent the end of the existing, broken spring, so that it has a new "tang" to fit into the slot. I modified my spring today (third pic). It works perfectly - I can rotate it with ease in one direction and when I rotate in the reverse direction, I can feel the spring acting like a "one-way clutch". It grabs the eccentric piece you see and rotates it, which because of the offset, changes the length of the wiper arm assembly just a touch. This is what alters the "parked" position of the wipers to something just a bit lower than that of in operation mode. Cool! I believe this is the correct way to assemble the linkage to the motor, but I will leave the wiper off when I turn on the wipers to test them. Thanks for the tip @emccallum! Next, I moved over to gluing some more parts. Wiping the tool door cushions with lacquer thinner cleaned them up nicely. Then, I used a small brush and the same contact adhesive to install them. In this case, I didn't put adhesive inside the groove of the rubber cushions, as that would have been difficult and would have made a mess. Because I only put adhesive on the metal, I used the file clips to hold the cushions in place until the glue could set. While I had the adhesive out, I also glued the rubber blocks to the gas tank and installed the new gas tank sender unit:


 4 points
 -
2 points
-
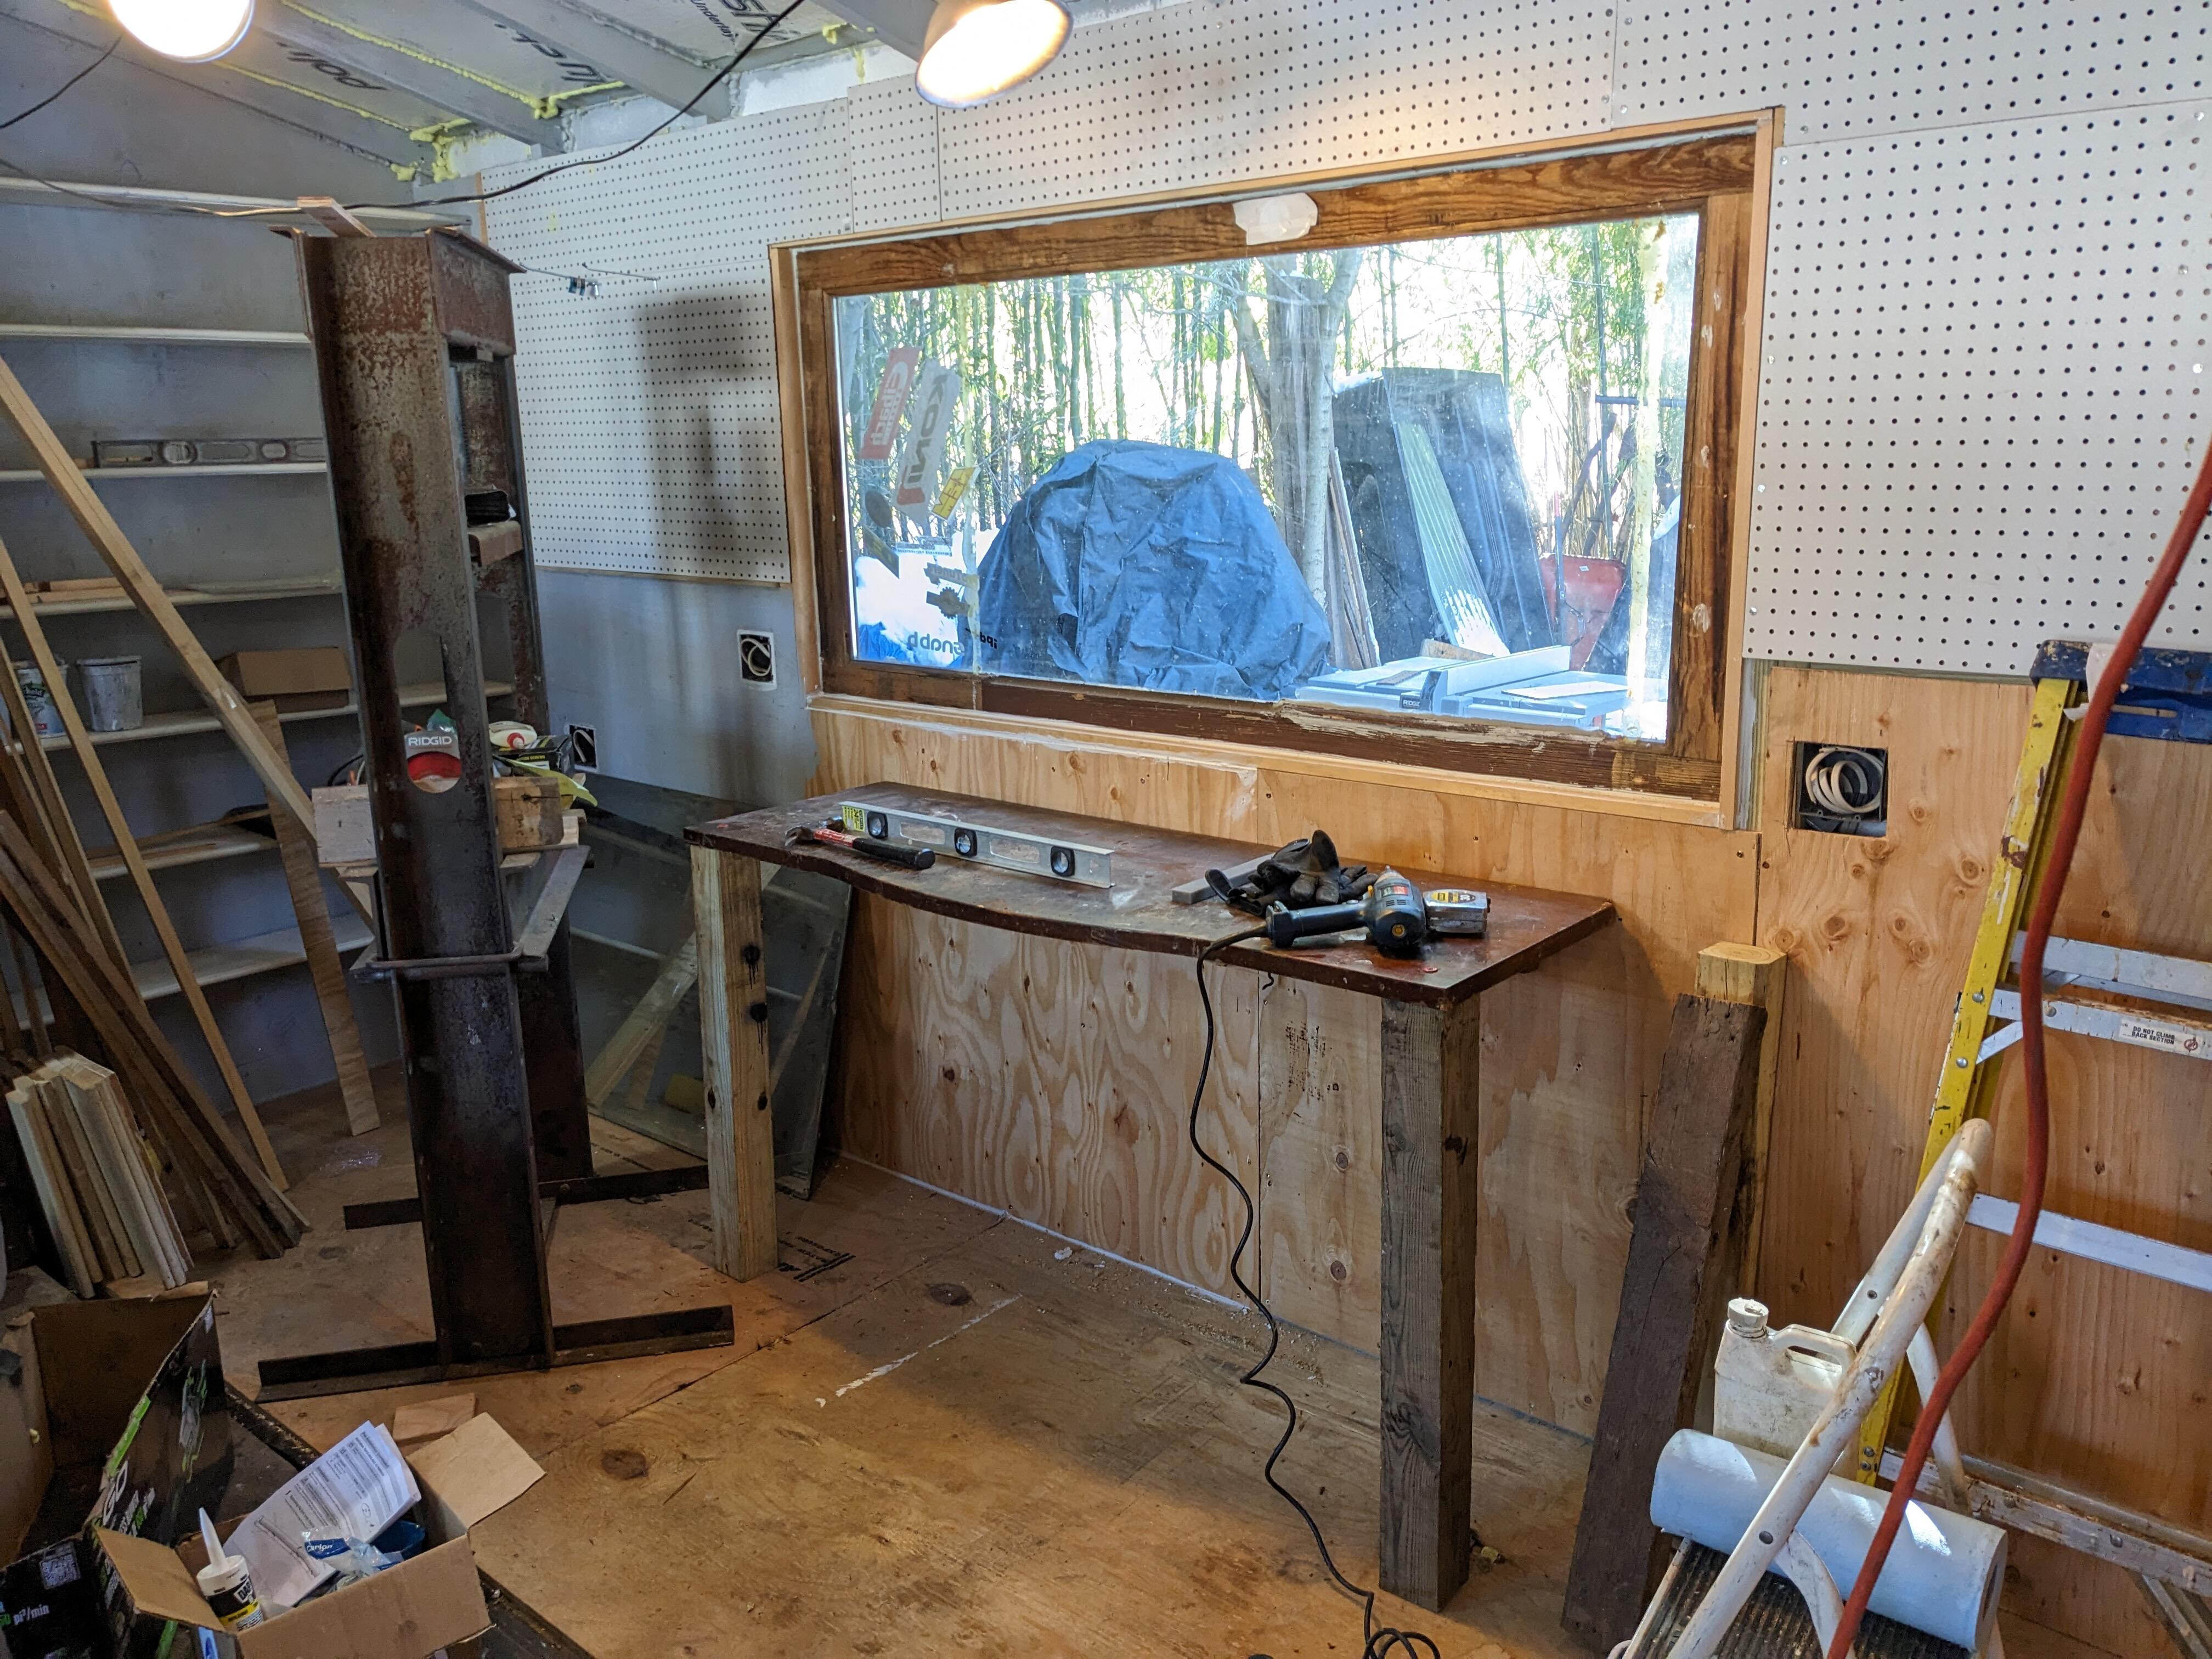
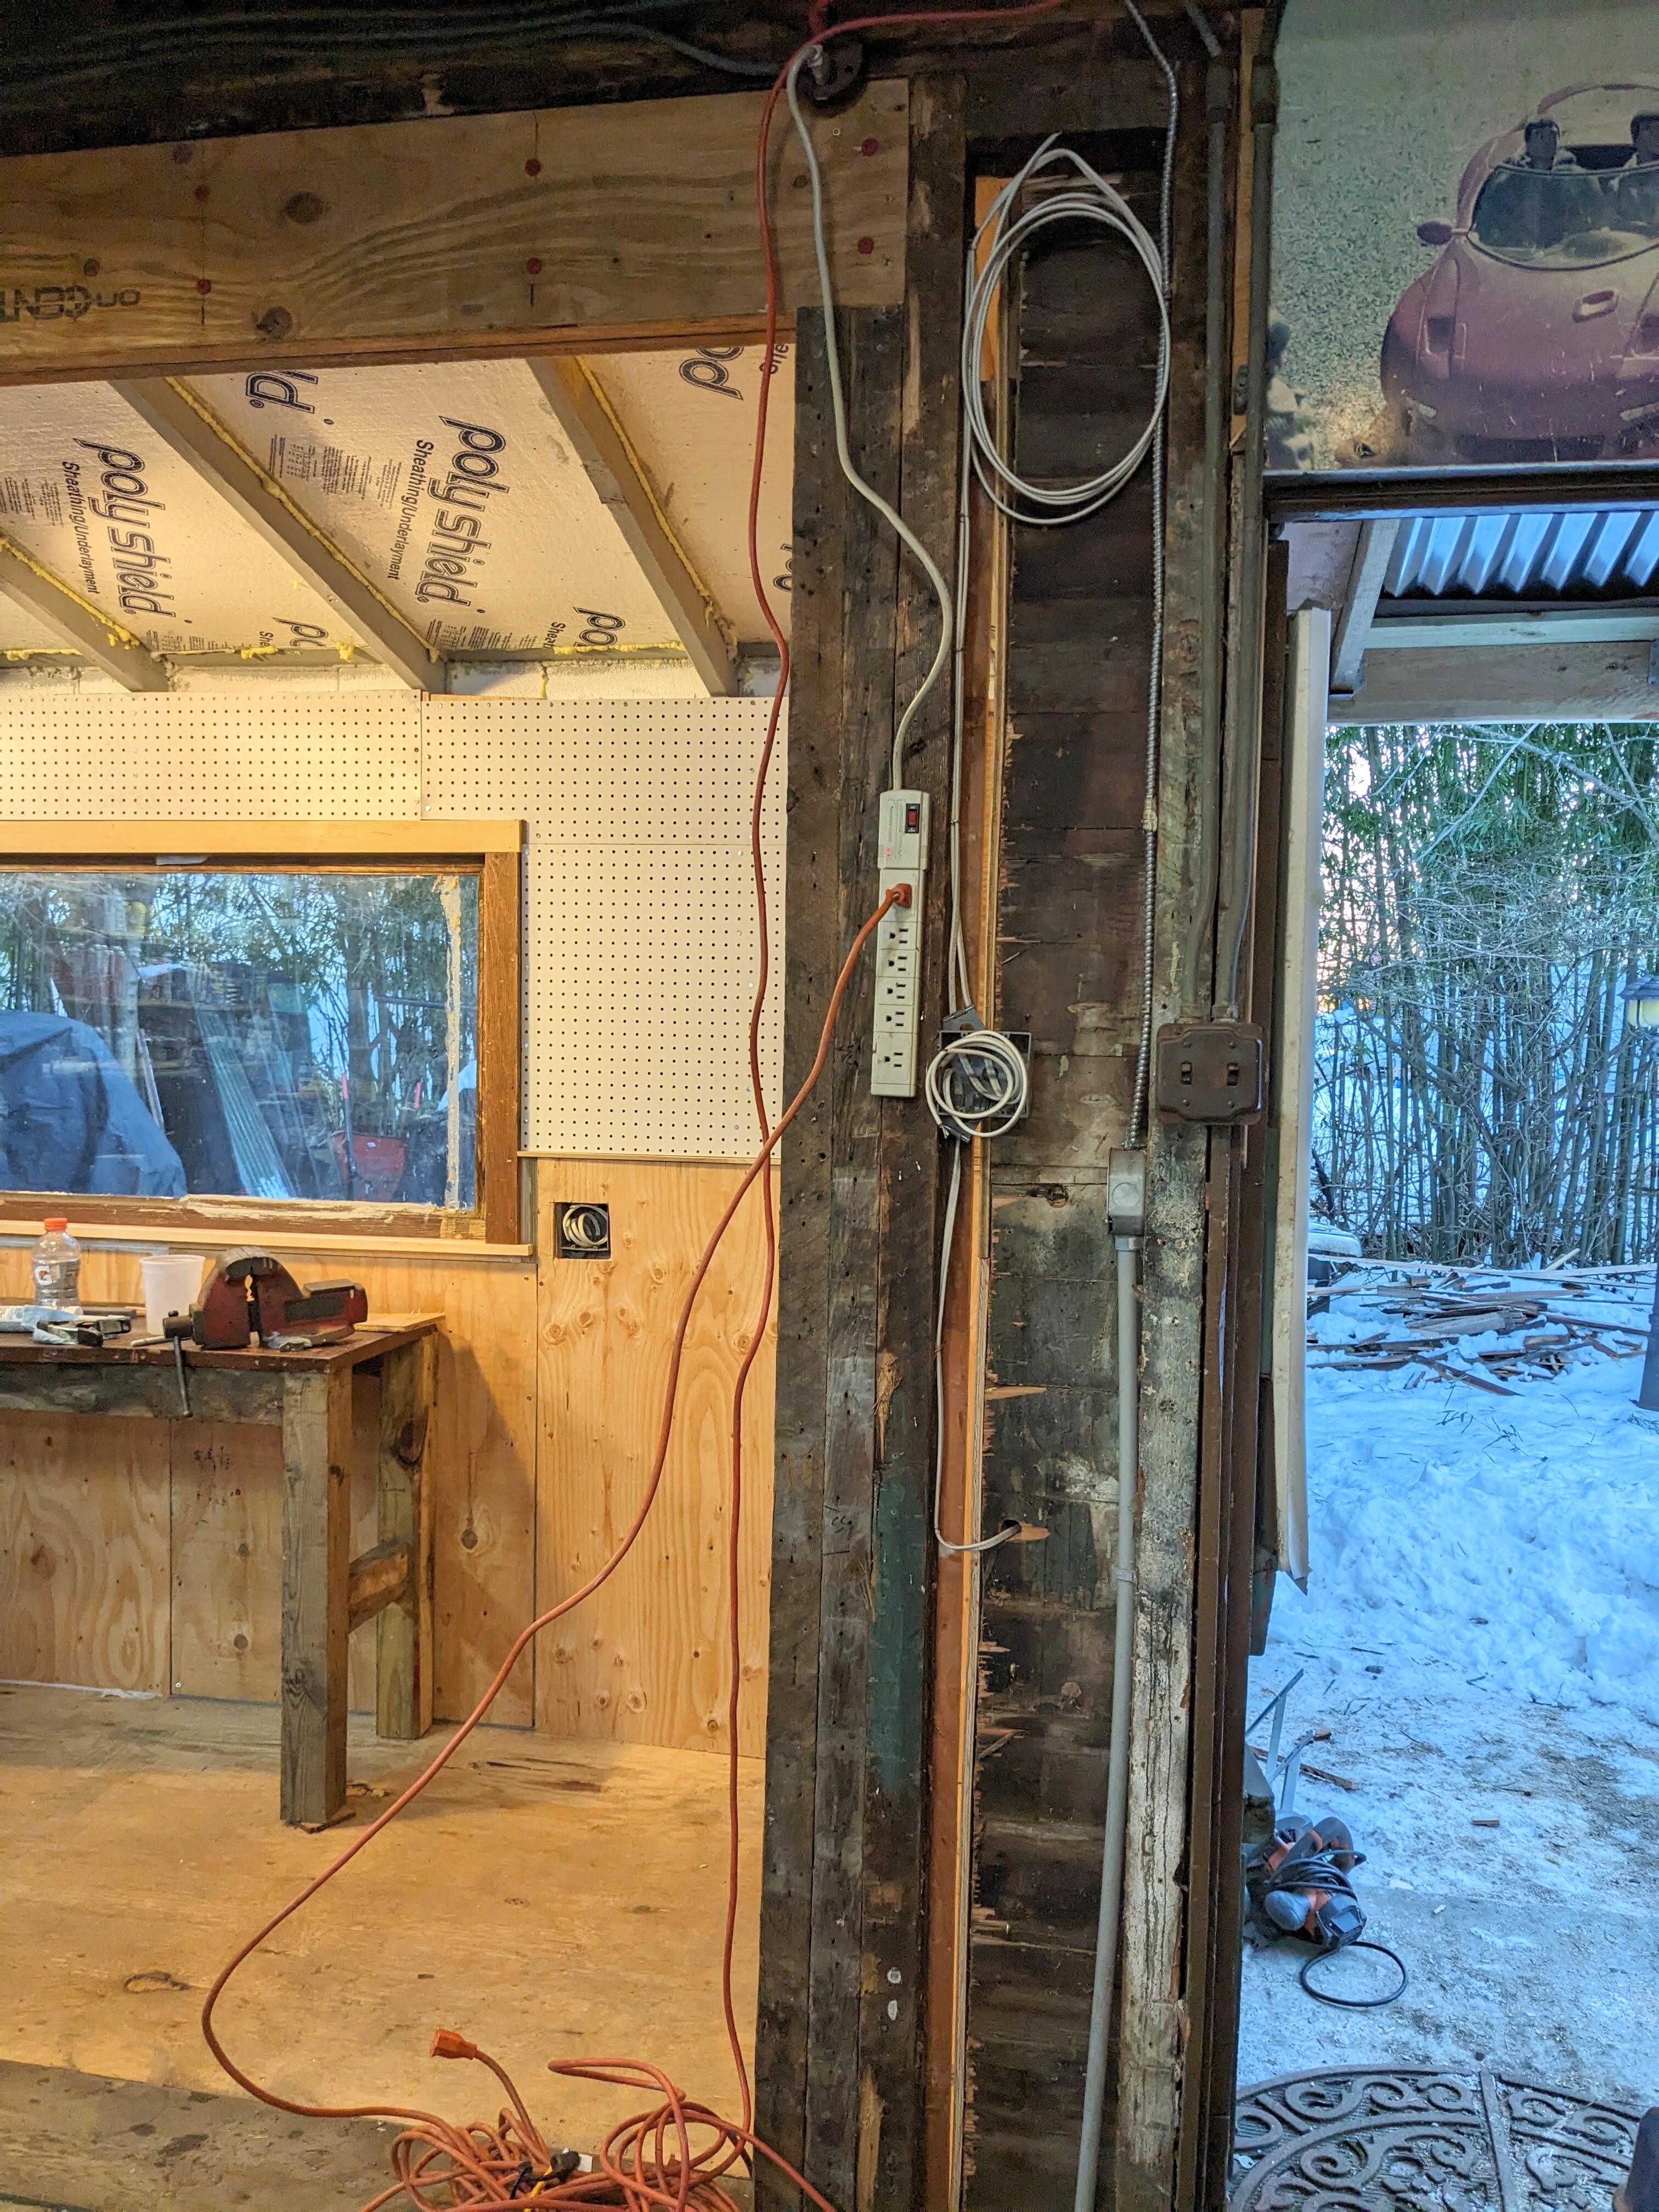
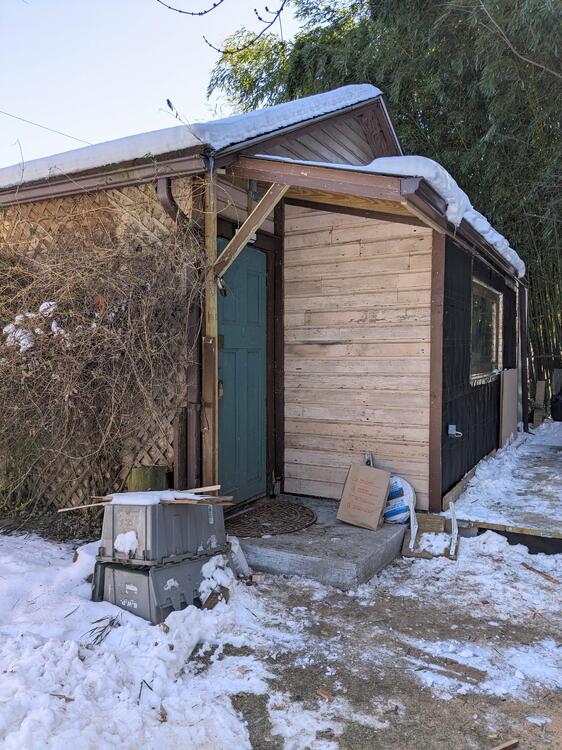
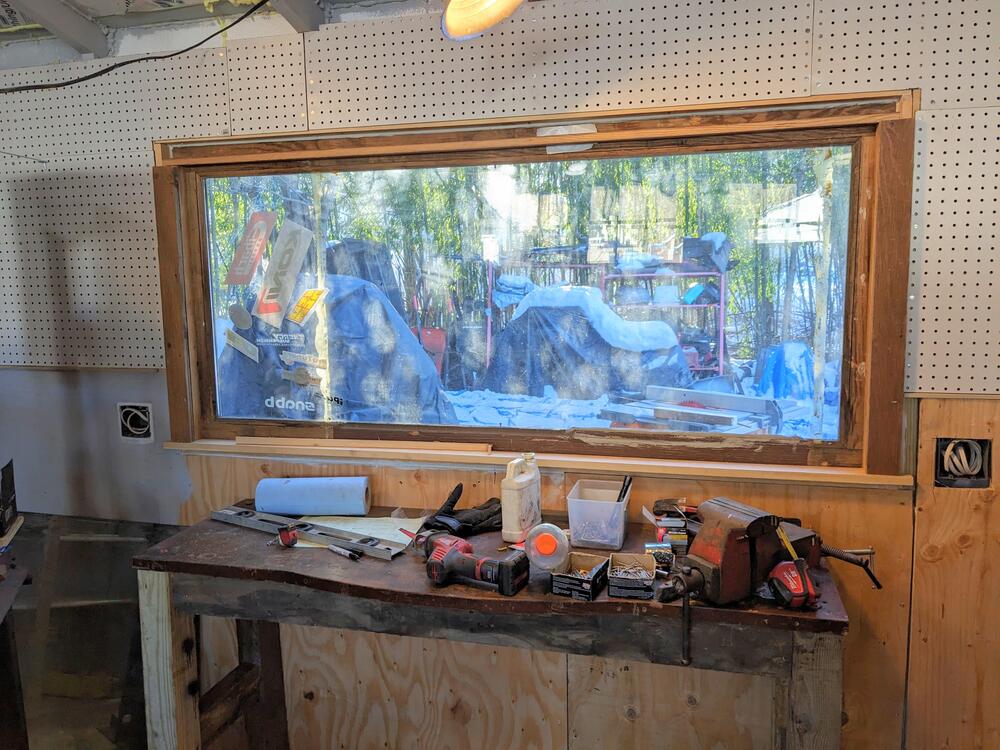
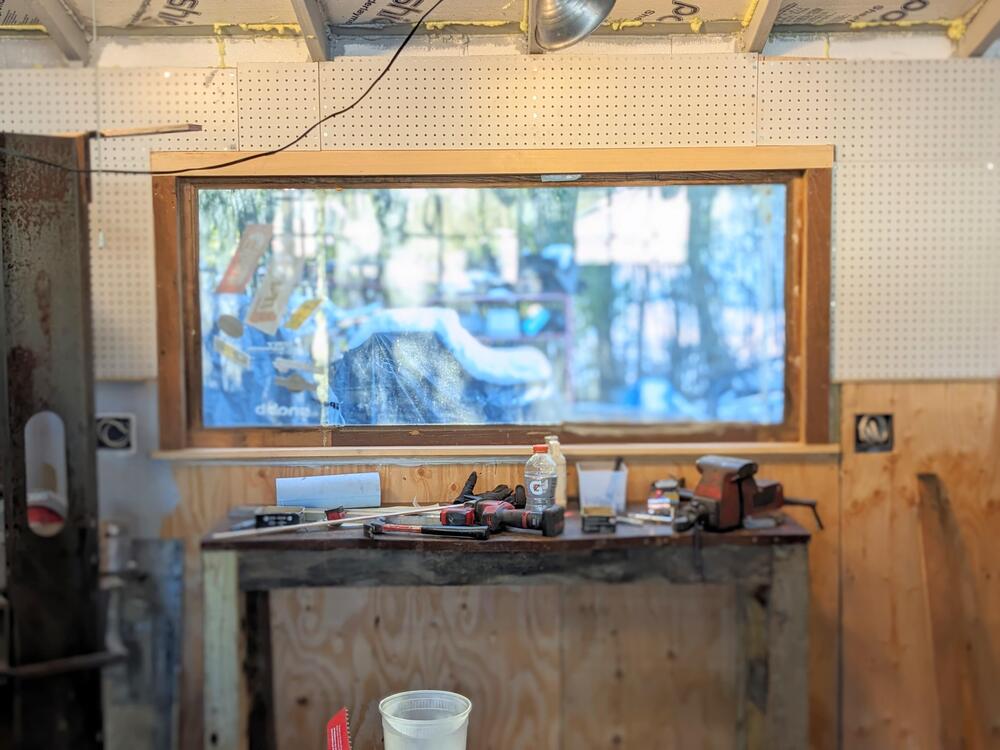
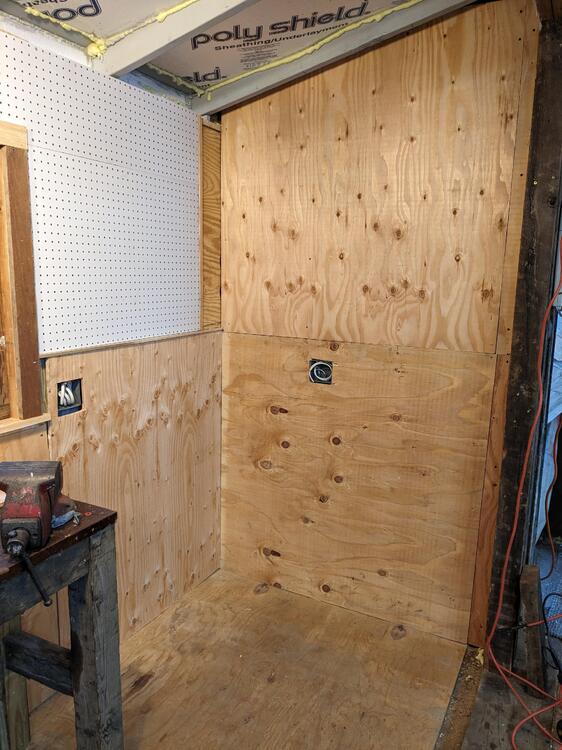
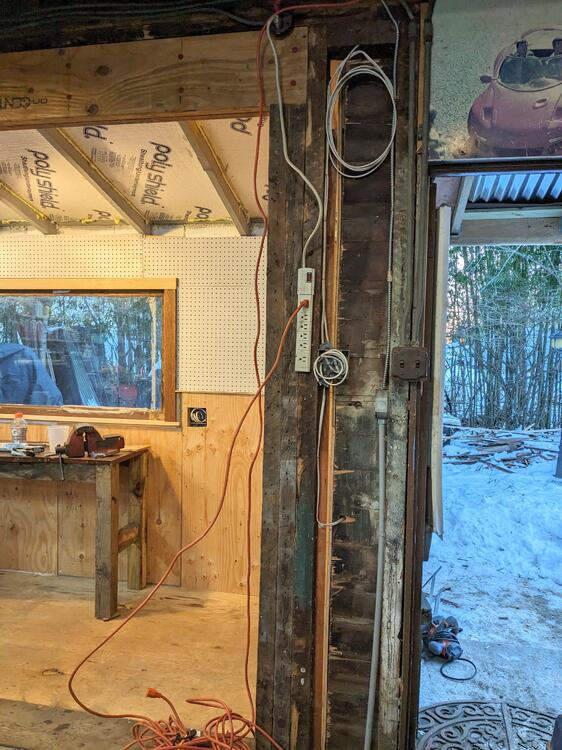
Added some more trim to the exterior framing Started on making the bench. setting it at 32", so that the added vice height will be around 40" or so framing for the window trim, sill cut, side sections cut from old 1x3 1x3 top plate installed cut & fitted the north end wall plywood. I'll make shelves for this side, 9" deep to edge of pegboard new wiring box (next to power strip) for power supply & switch that feeds the new outlets and ceiling light fixture, have to decide where to tie it into existing circuitry. At some point I need to install a new mains panel, with 240v supply.

 2 points
 -
1 pointI dont know of a way to do it on Install without making a mess. Everybody I've seen do it, have put it under the flap after Install.1 point
-
This is a perfect replacement for the button or clip on the cover.
 1 point
 -
1 point
-
1 point
-
1 point
-
I don't see what any of this has to do with the 'Series' discussion. The conversation was about the term 'Series' being used to define content and specs when - clearly - it isn't suitable for that purpose. Now we have the term 'Model' being thrown into the mix. The crux of the posts over the last few days was that terms such as 'Series 1' and 'Series 2' etc are being used as though they can define details on cars which were undergoing rolling changes. Yes, Nissan gave ranges of body serial numbers for specific prefixes as cut-offs for major changes, but applying 'Series 1' etc to them can be misleading. Your own writings on zhome.com link 'Series' numbers and ranges of chassis numbers to spec and equipment changes for 'HLS30' prefixed body serial numbers when that prefix was not unique to the variant you are applying them to. You are also calling the 'HLS30' a 'Model'. How can it be a 'Model'?1 point
-
1 point
-
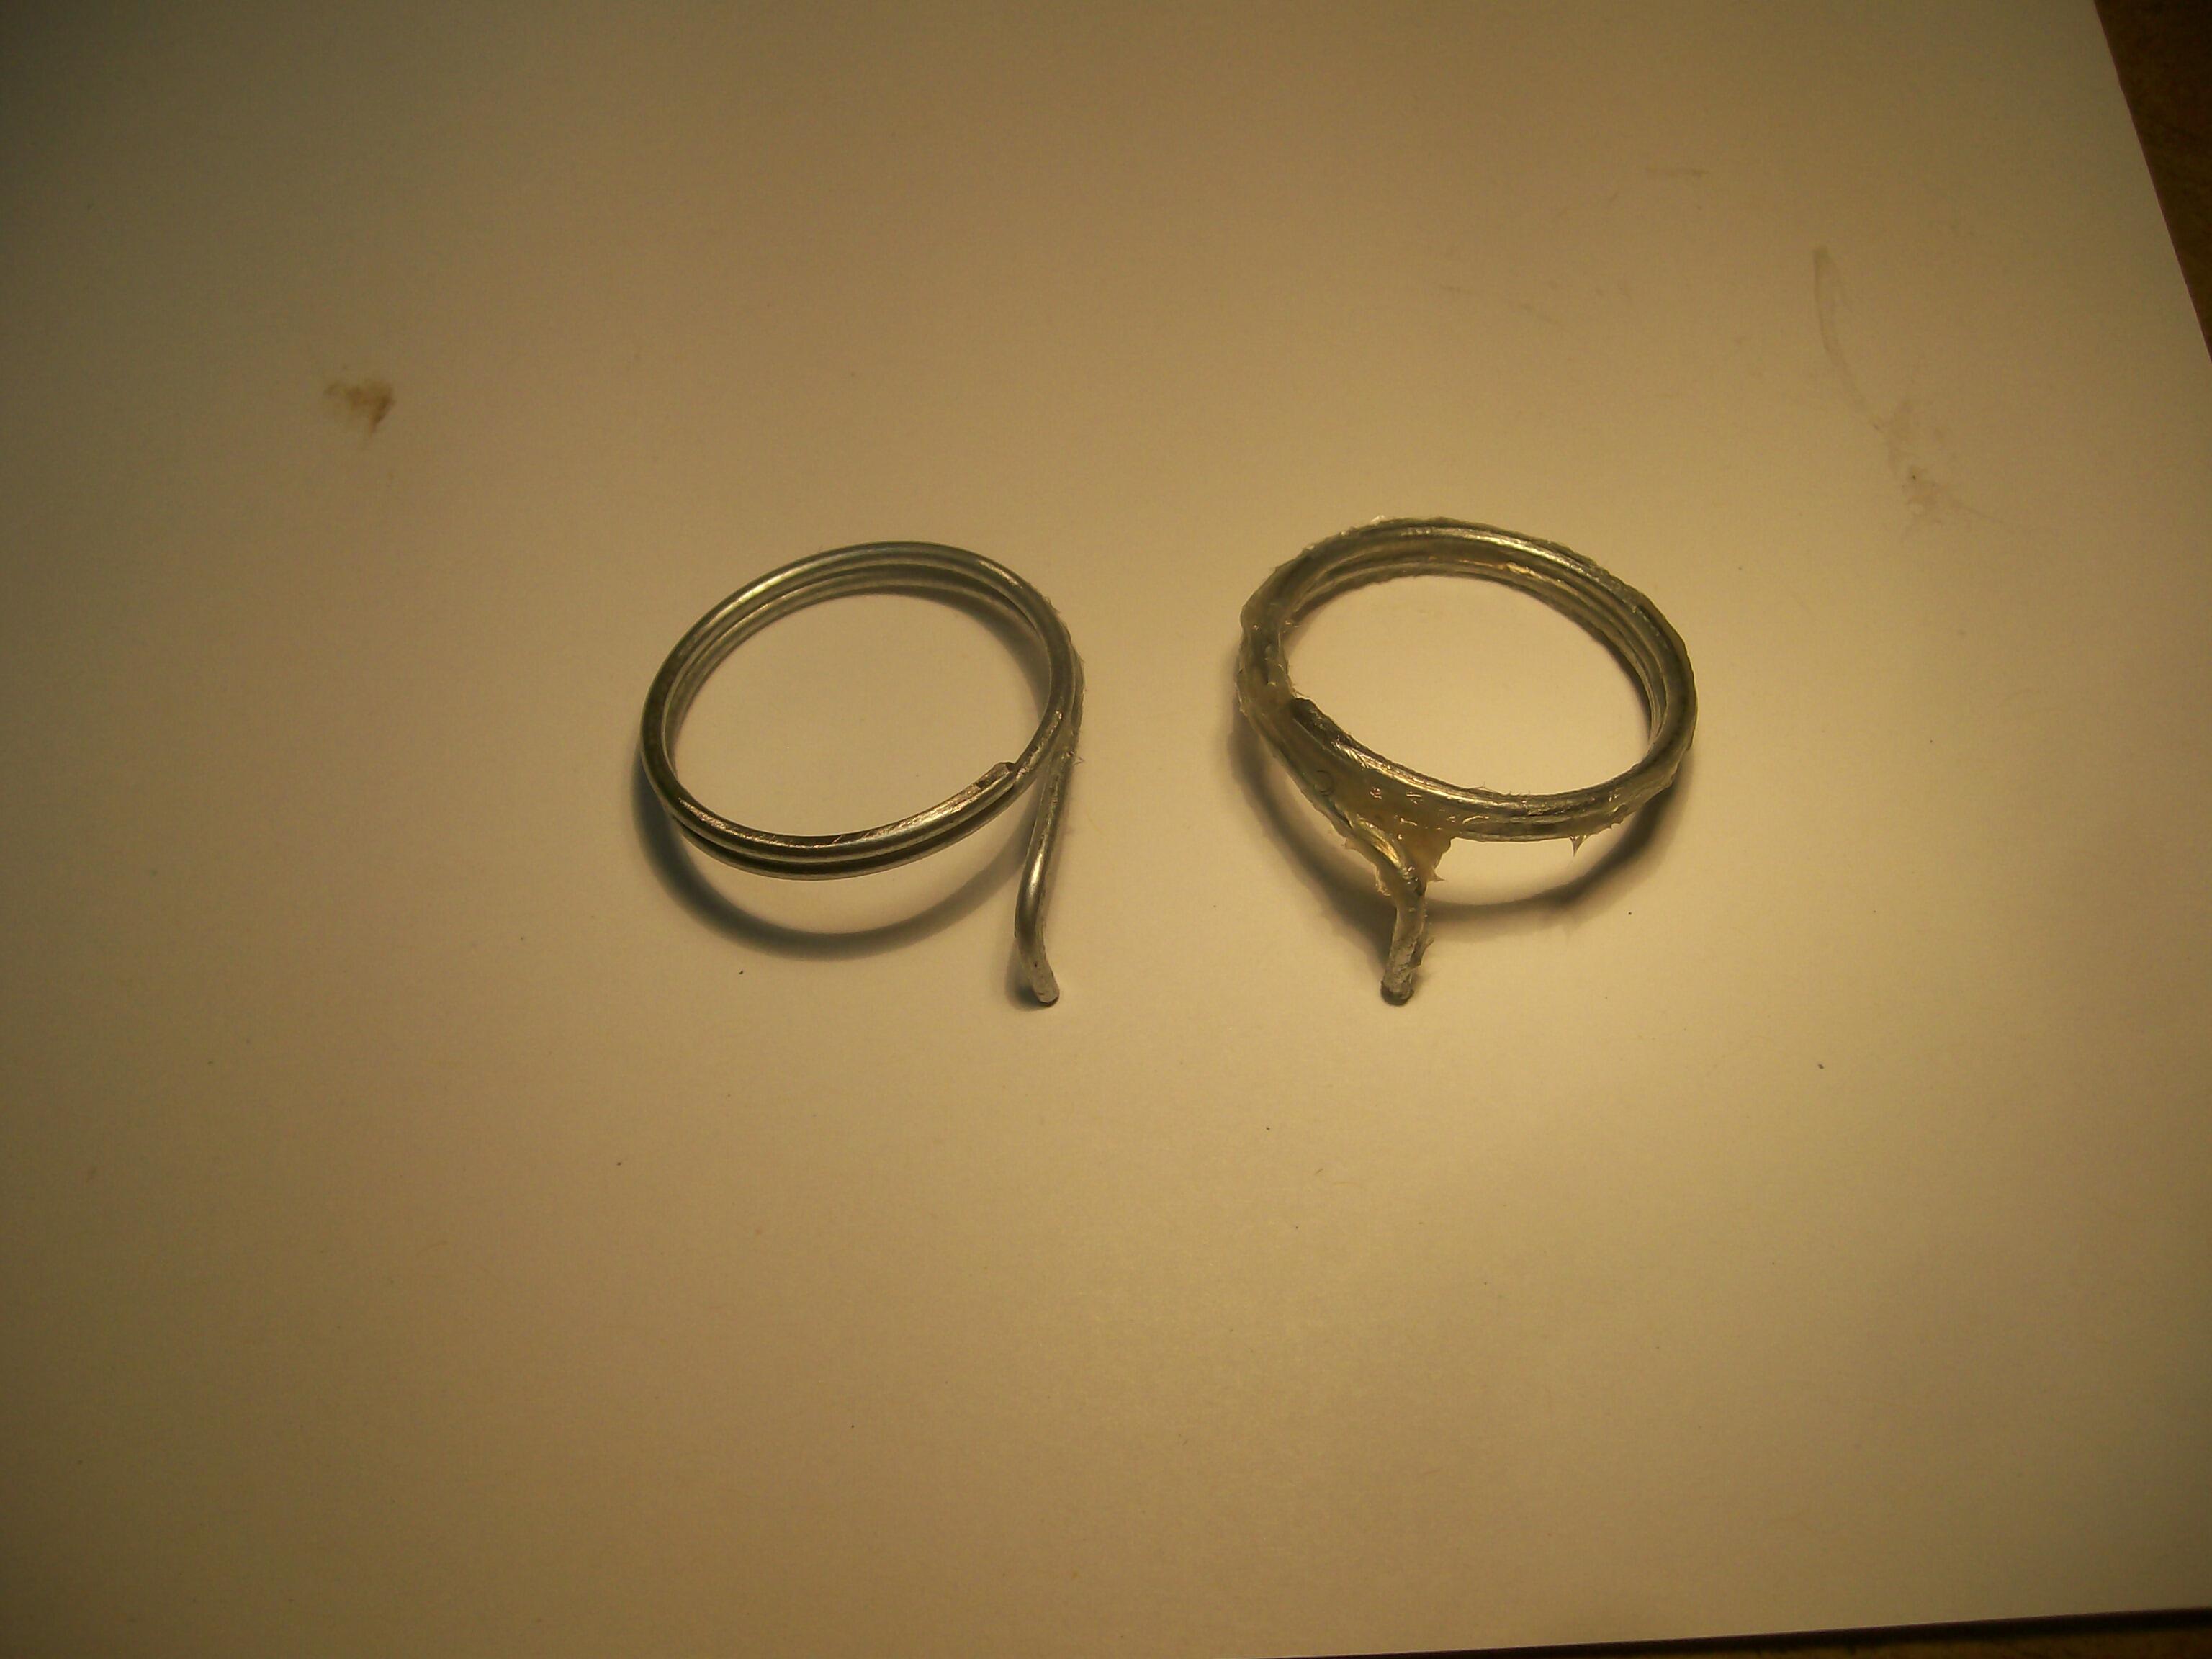
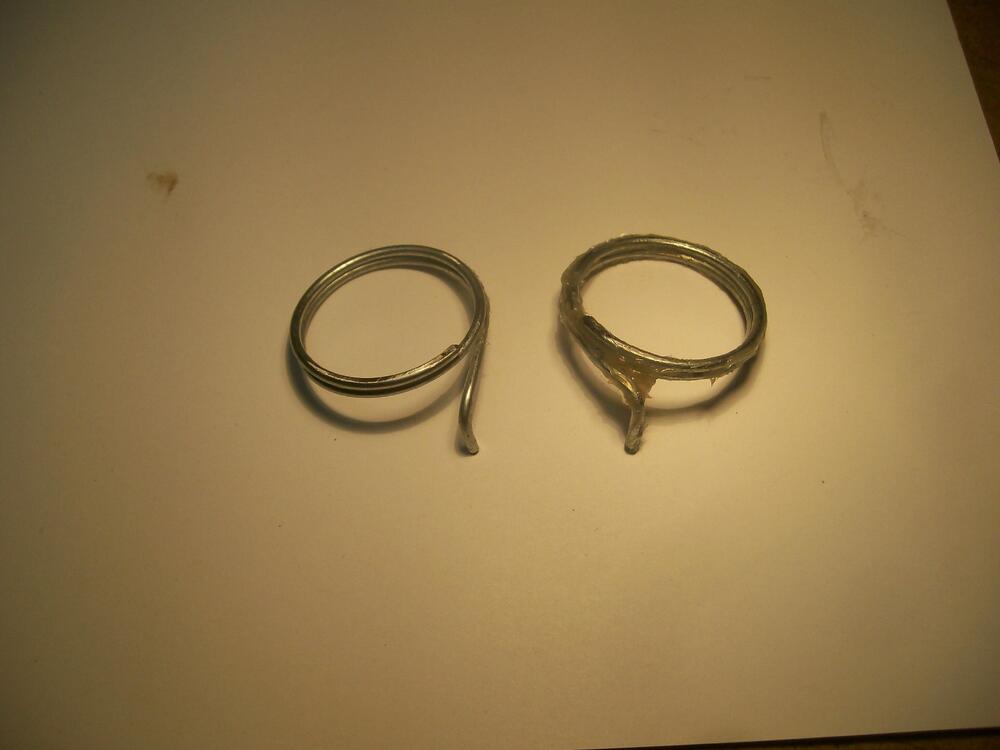
1 pointAlthough a bit finicky, but it's really not that hard to make a new spring from scratch. Start by finding a socket wrench with an OD that's roughly 75% of the OE spring. Clamp it vertically in a bench vise and then, using plain galvanized wire of ~ the same gauge as the OE spring, wind two turns around the socket. When relaxed, your coils will expand a bit. If the resulting OD is too big, you need to use a smaller socket (or vice versa). It takes a bit of trial-and-error. Fortunately, wire is cheap. Once you get the spring OD about right, cut it back to one coil, leaving enough to bend a 90-degree dogleg at one end. Cut the dogleg to length. Now heat your new spring with a torch to get it red hot and then quench it in a small jar of motor oil. Here's a pair of my homemade springs...
 1 point
 -
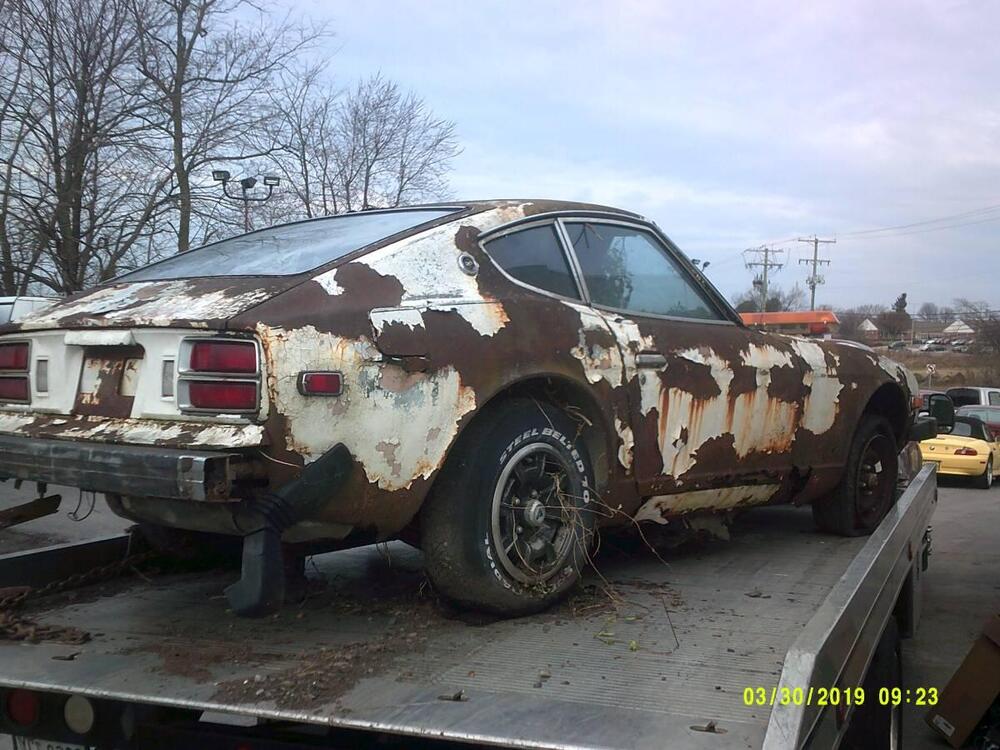
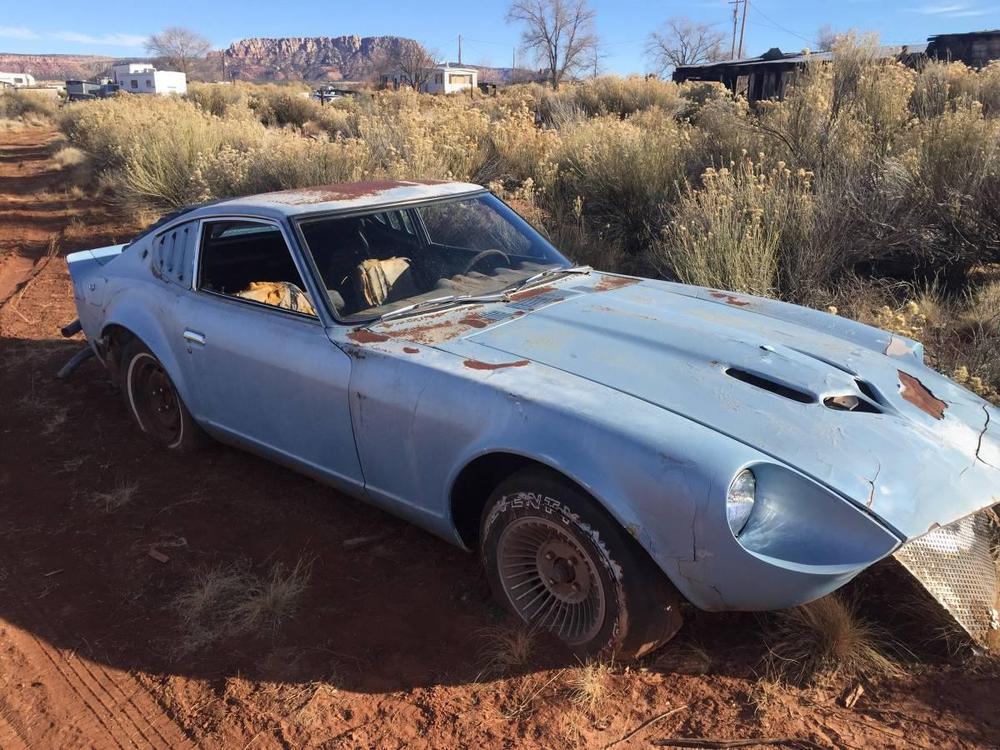
0 points😬 You might be able to save the SS trim on that one. I have been collecting pics like these for yrs so I'm going to empty out my files, some of these have been posted before so please forgive the double posting. Not a Z but still worthy of a mothers love,


 0 points
 -
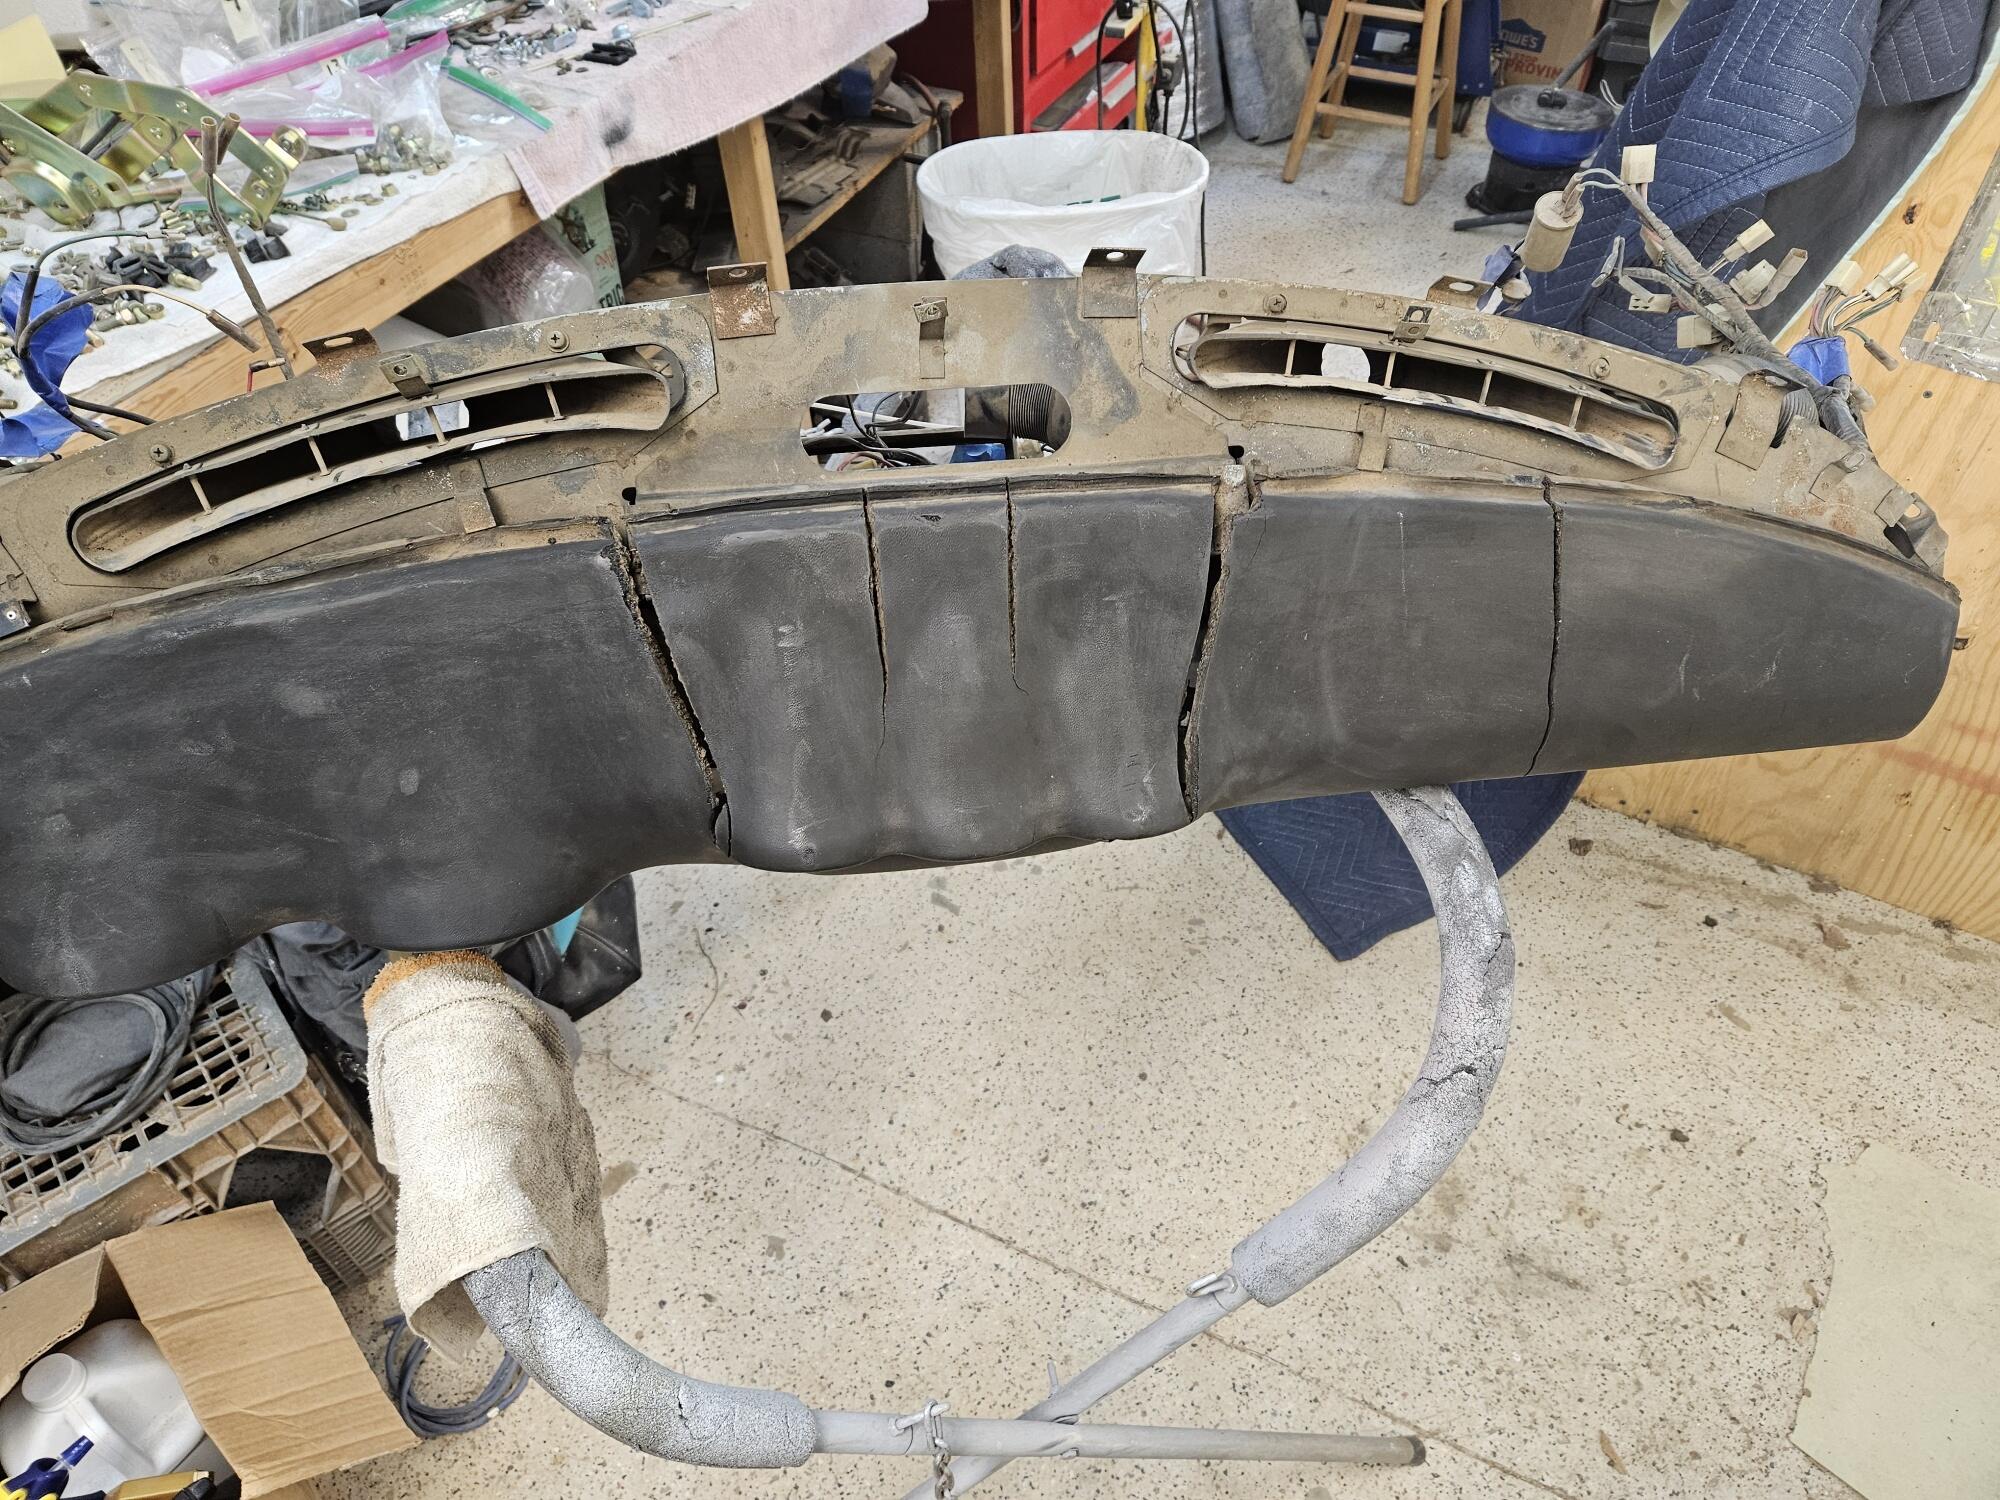
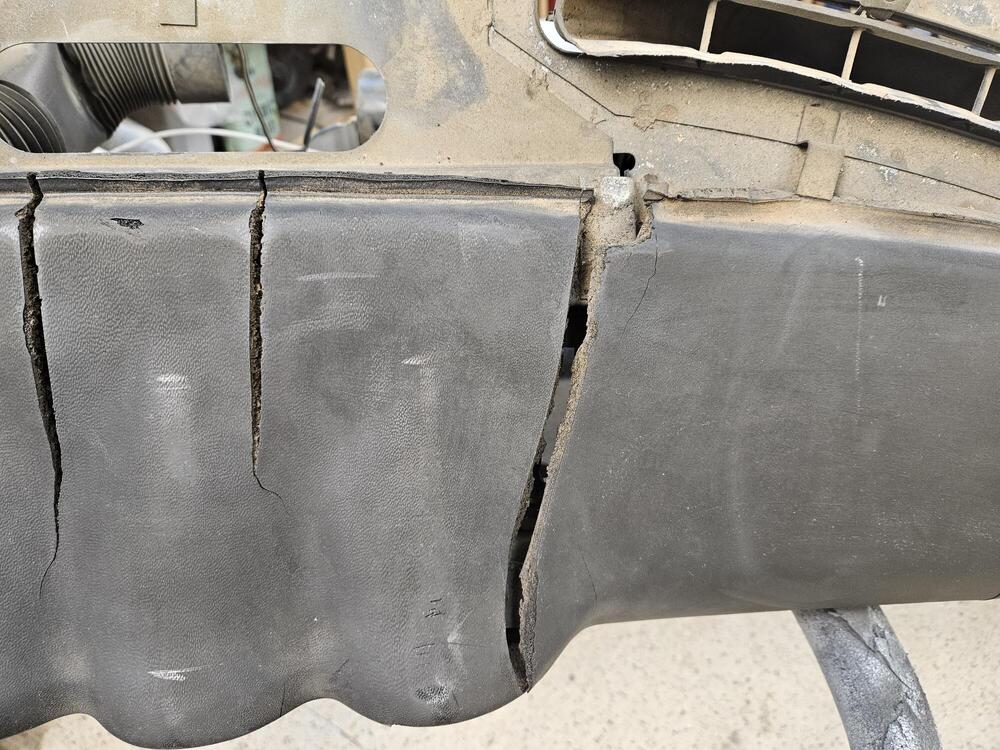
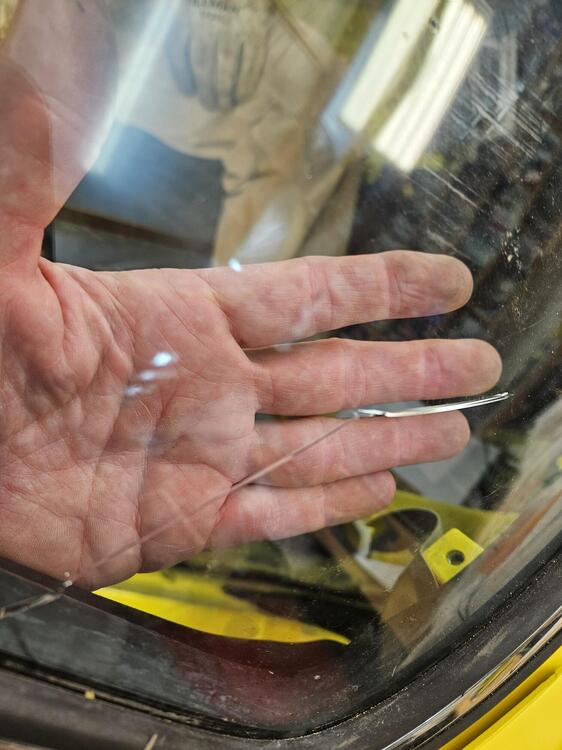
0 pointsWas a frustrating day in the shop today! Can't work on the heater because I'm waiting on a valve. Can't install the fender because the weather strip I had for fender sealing panel is not thick enough. I also need to touch up the engine bay paint. Can't install the hatch because I am gluing the hatch boots in... on and on So I piddled some I did get the catch down stoppers in. They are available new from Nissan currently I found the bolts for the hatch but two are the wrong finish. So I will need to redo them. I did glue the hinge boots in. I used a black latex caulk. I didn't want to use anything more tenacious in case I need to get them out I pulled the dash out and was going to clean it up. Wow, is it rough!! I guess I will see about getting a new dash. Where is the best place to source the reproduction dashes? I had thought I would try repairing this one but I didn't realize it was totally broken through in a couple of places The real pisser of the day was the windshield!!! We had it most of the way in, up around the passenger top corner and up to the other top corner and I pushed on the lower passenger corner to seat it and broke it... Zcar depot has them but the freight quote was like $400+ I will call my local auto glass company and see if they can get one. I plan on seeing if they will install it too. We'll see what they say. Many times they won't guarantee they won't break it. I obviously can break them on my own... All in all, a wizz poor day in the shop!!


 0 points