Leaderboard
-
HusseinHolland
Free Member5Points1,031Posts -
grannyknot
Free Member4Points5,158Posts -

CanTechZ
Free Member3Points1,311Posts -
Pat Carr
Free Member3Points102Posts


Popular Content
Showing content with the highest reputation on 11/06/2023 in all areas
-
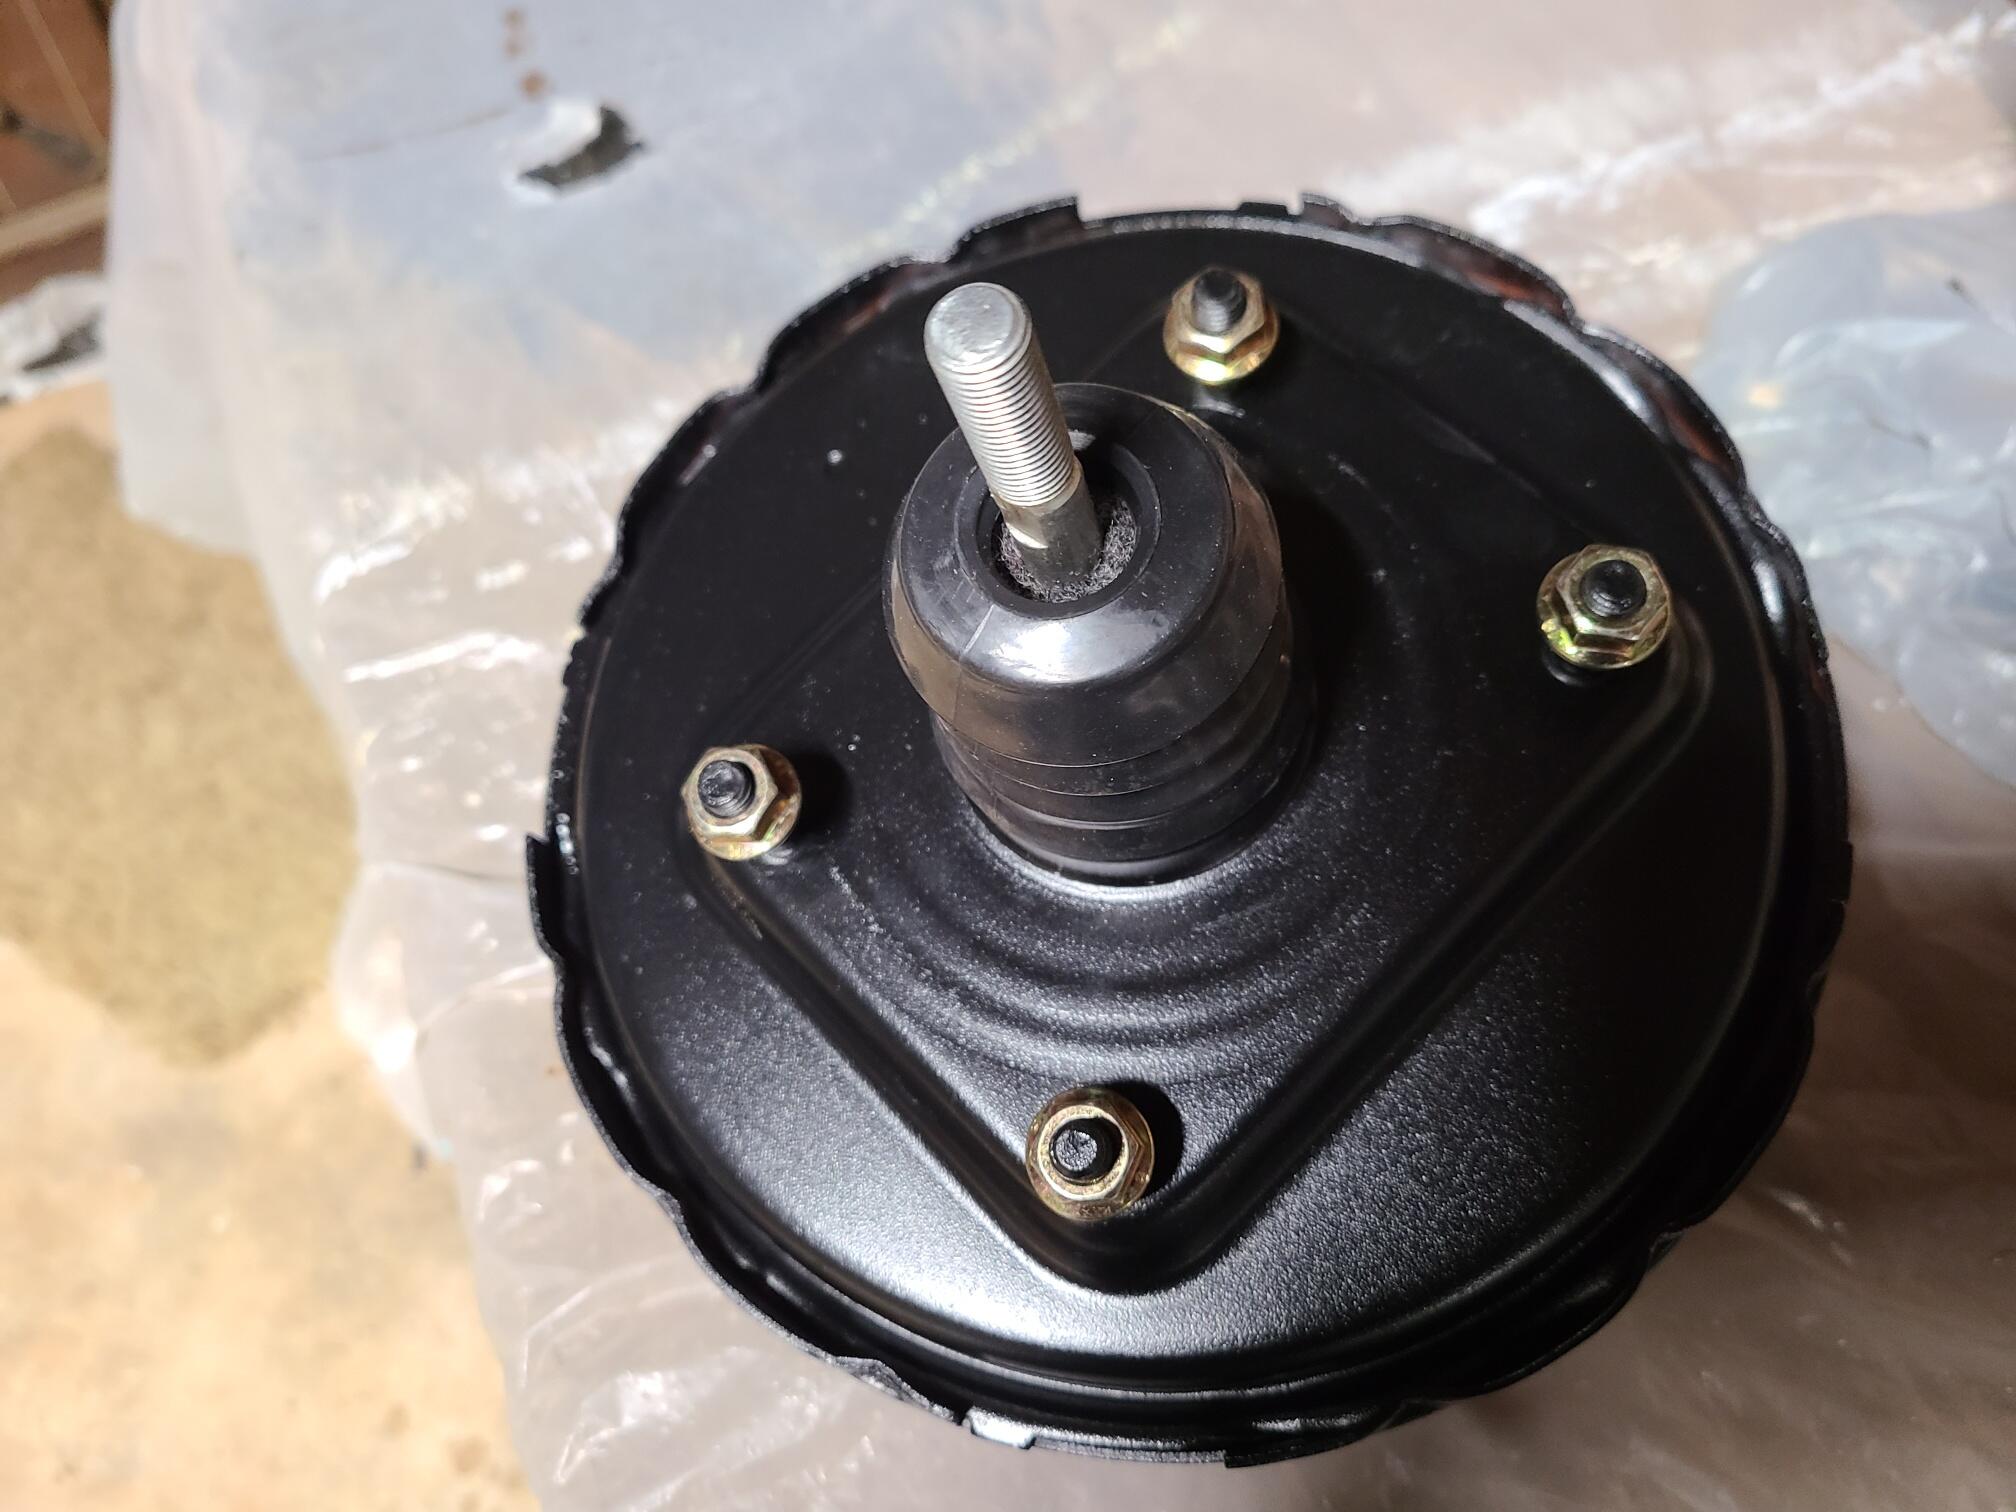
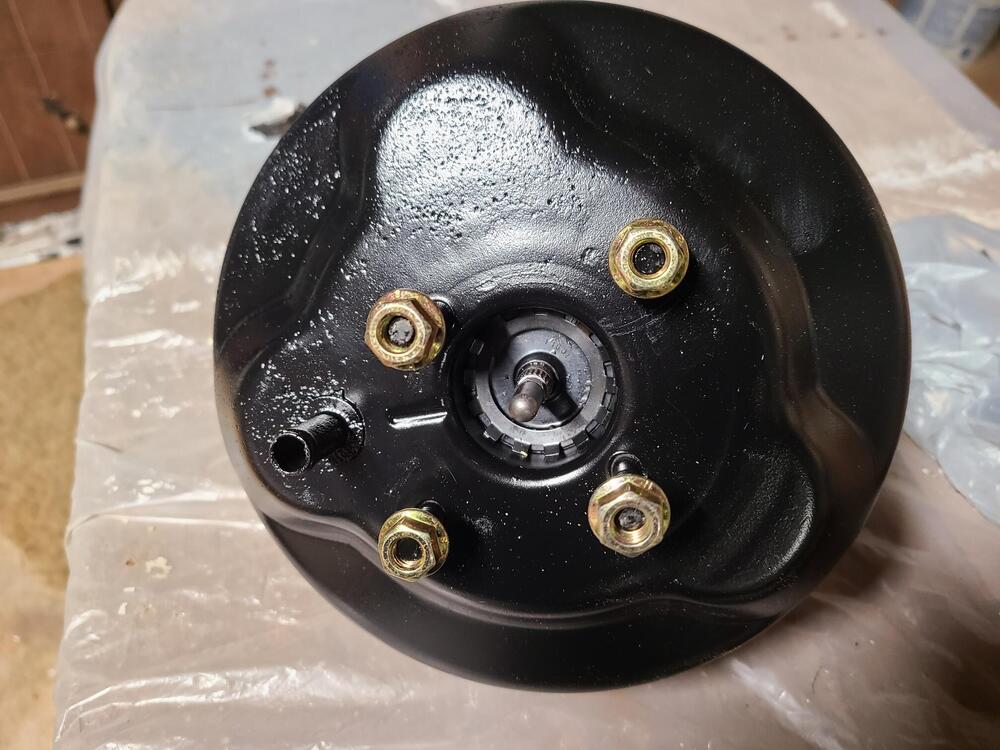
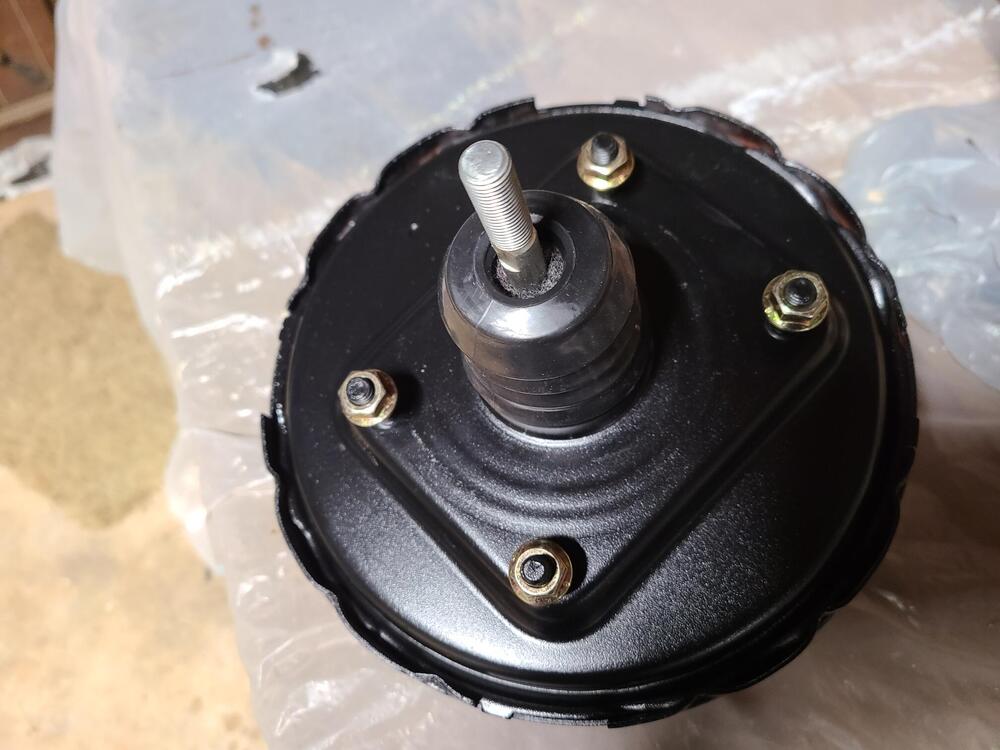
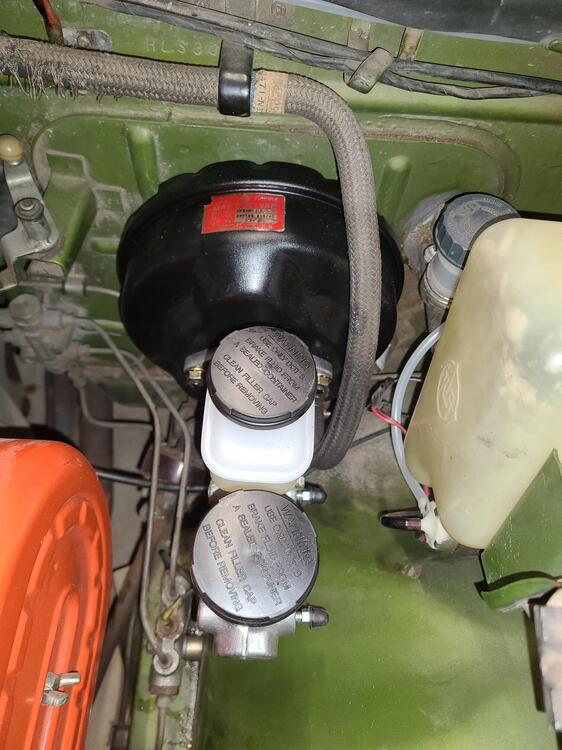
Installed the rebuilt brake booster and new master cylinder today. Booster was rebuilt by Harmon Classic Brakes. They sent back the parts they replaced, and surprisingly they look pretty good for 51 years old. It was time for a rebuild, as brakes needed too much effort and stepping on the brake peddle at a stop light caused the engine RPMs to increase. Also flushed out the old brake fluid.
 3 points
 -
2 pointsTo prevent those cracks from growing (esp. after the dash begins to see solar loads and high cabin temperatures during the summer), you might consider drilling a hole (at least 1/8" dia) at the peak of each crack. Not sure how the owner would feel about the aesthetics, though.2 points
-
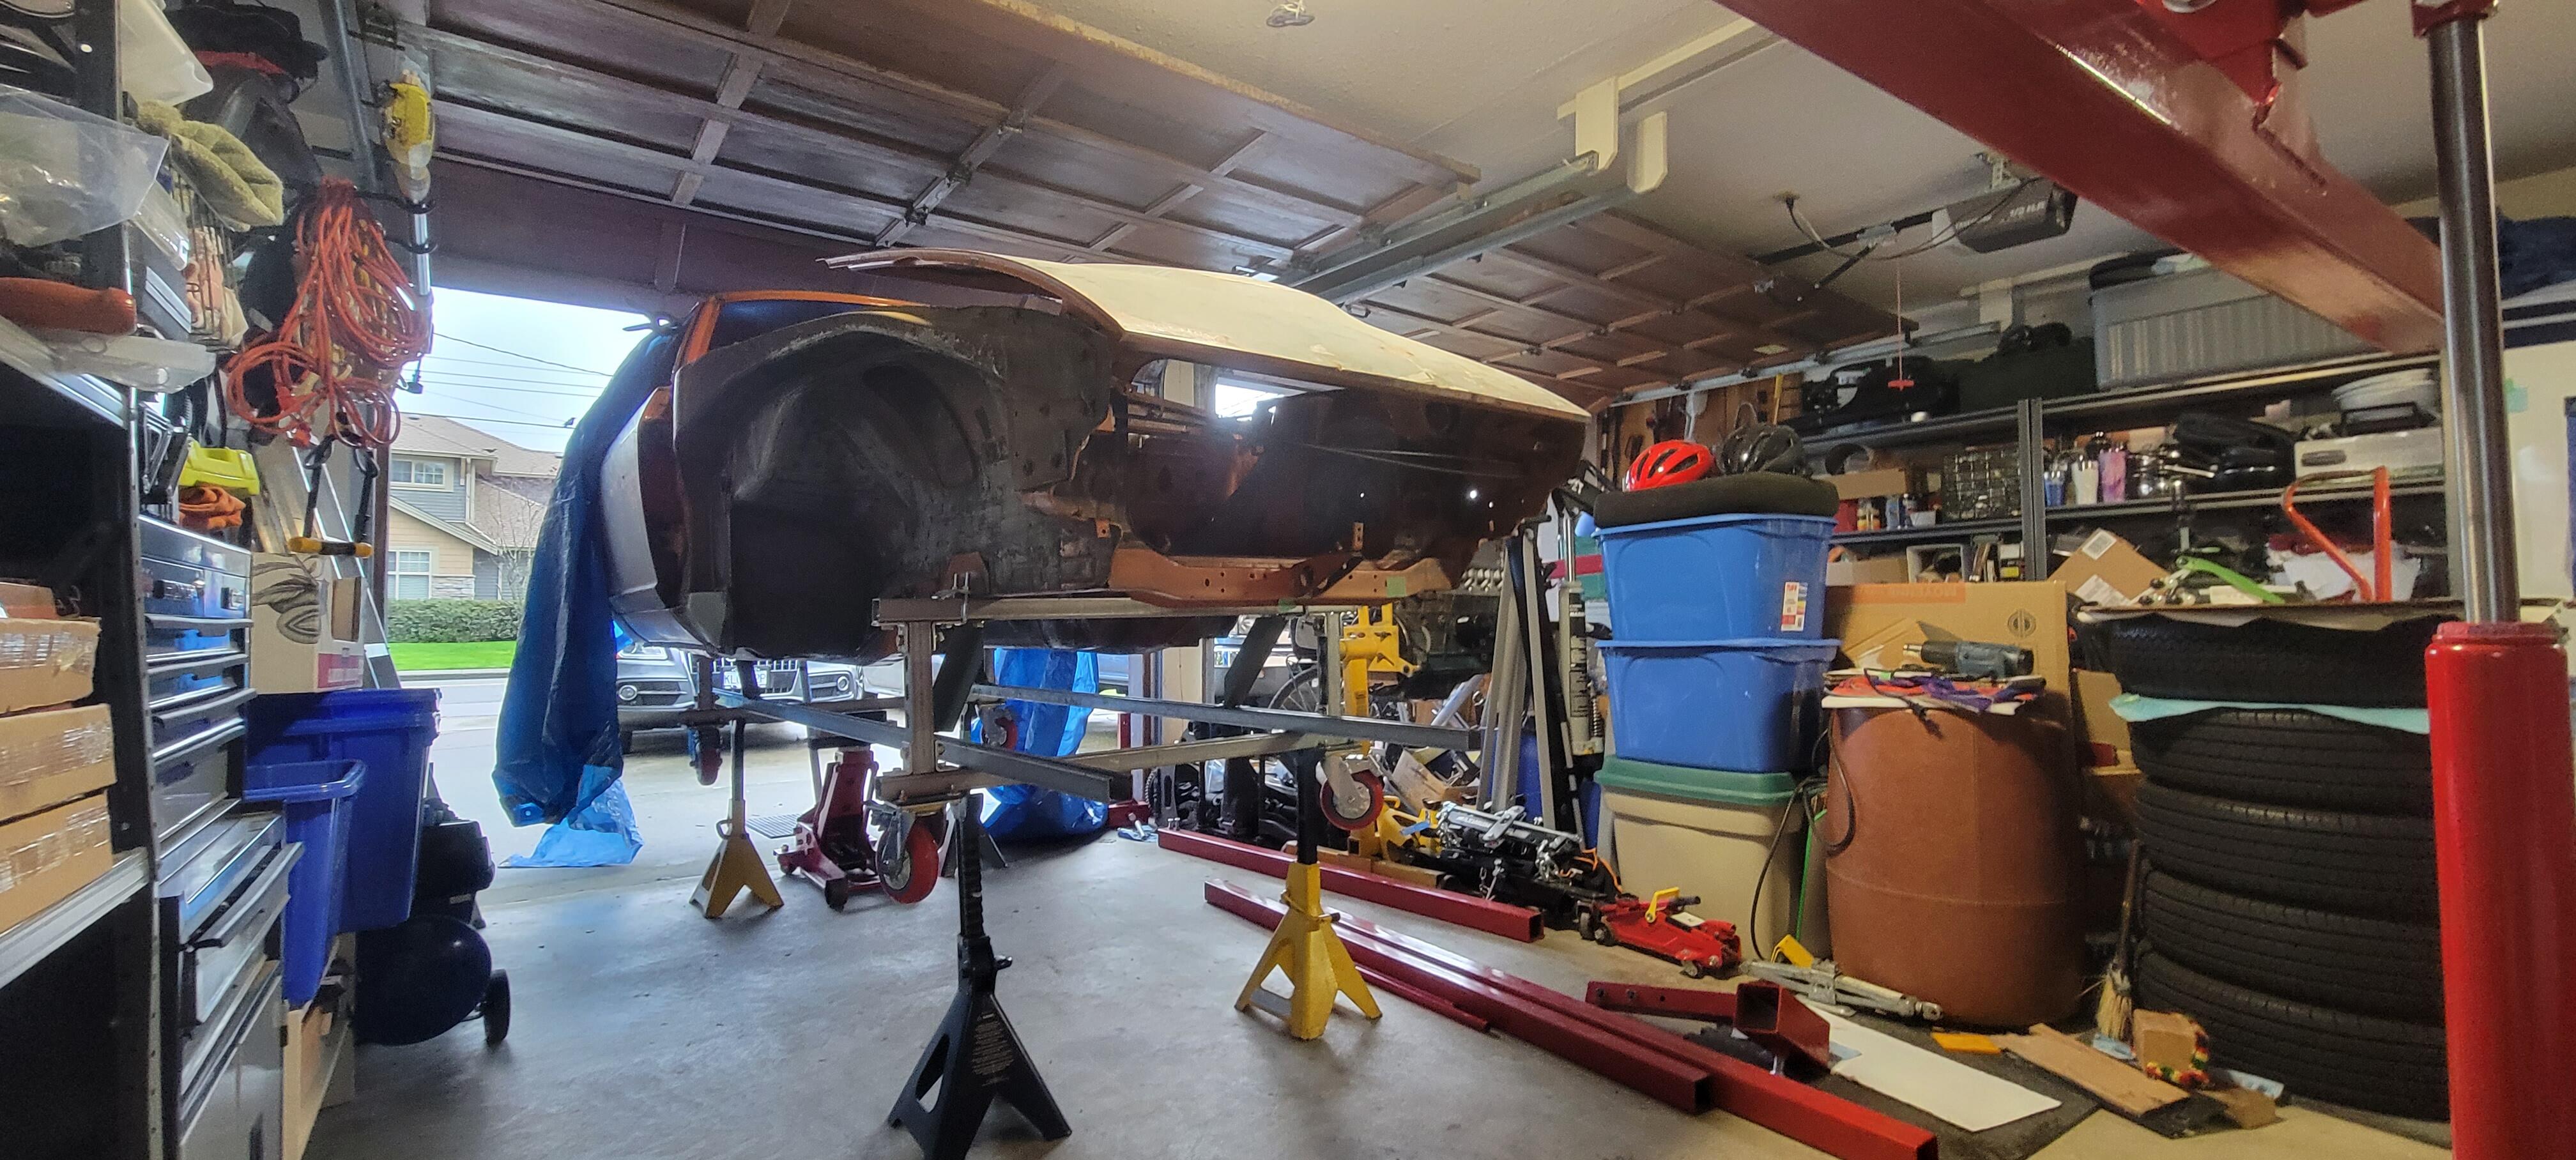
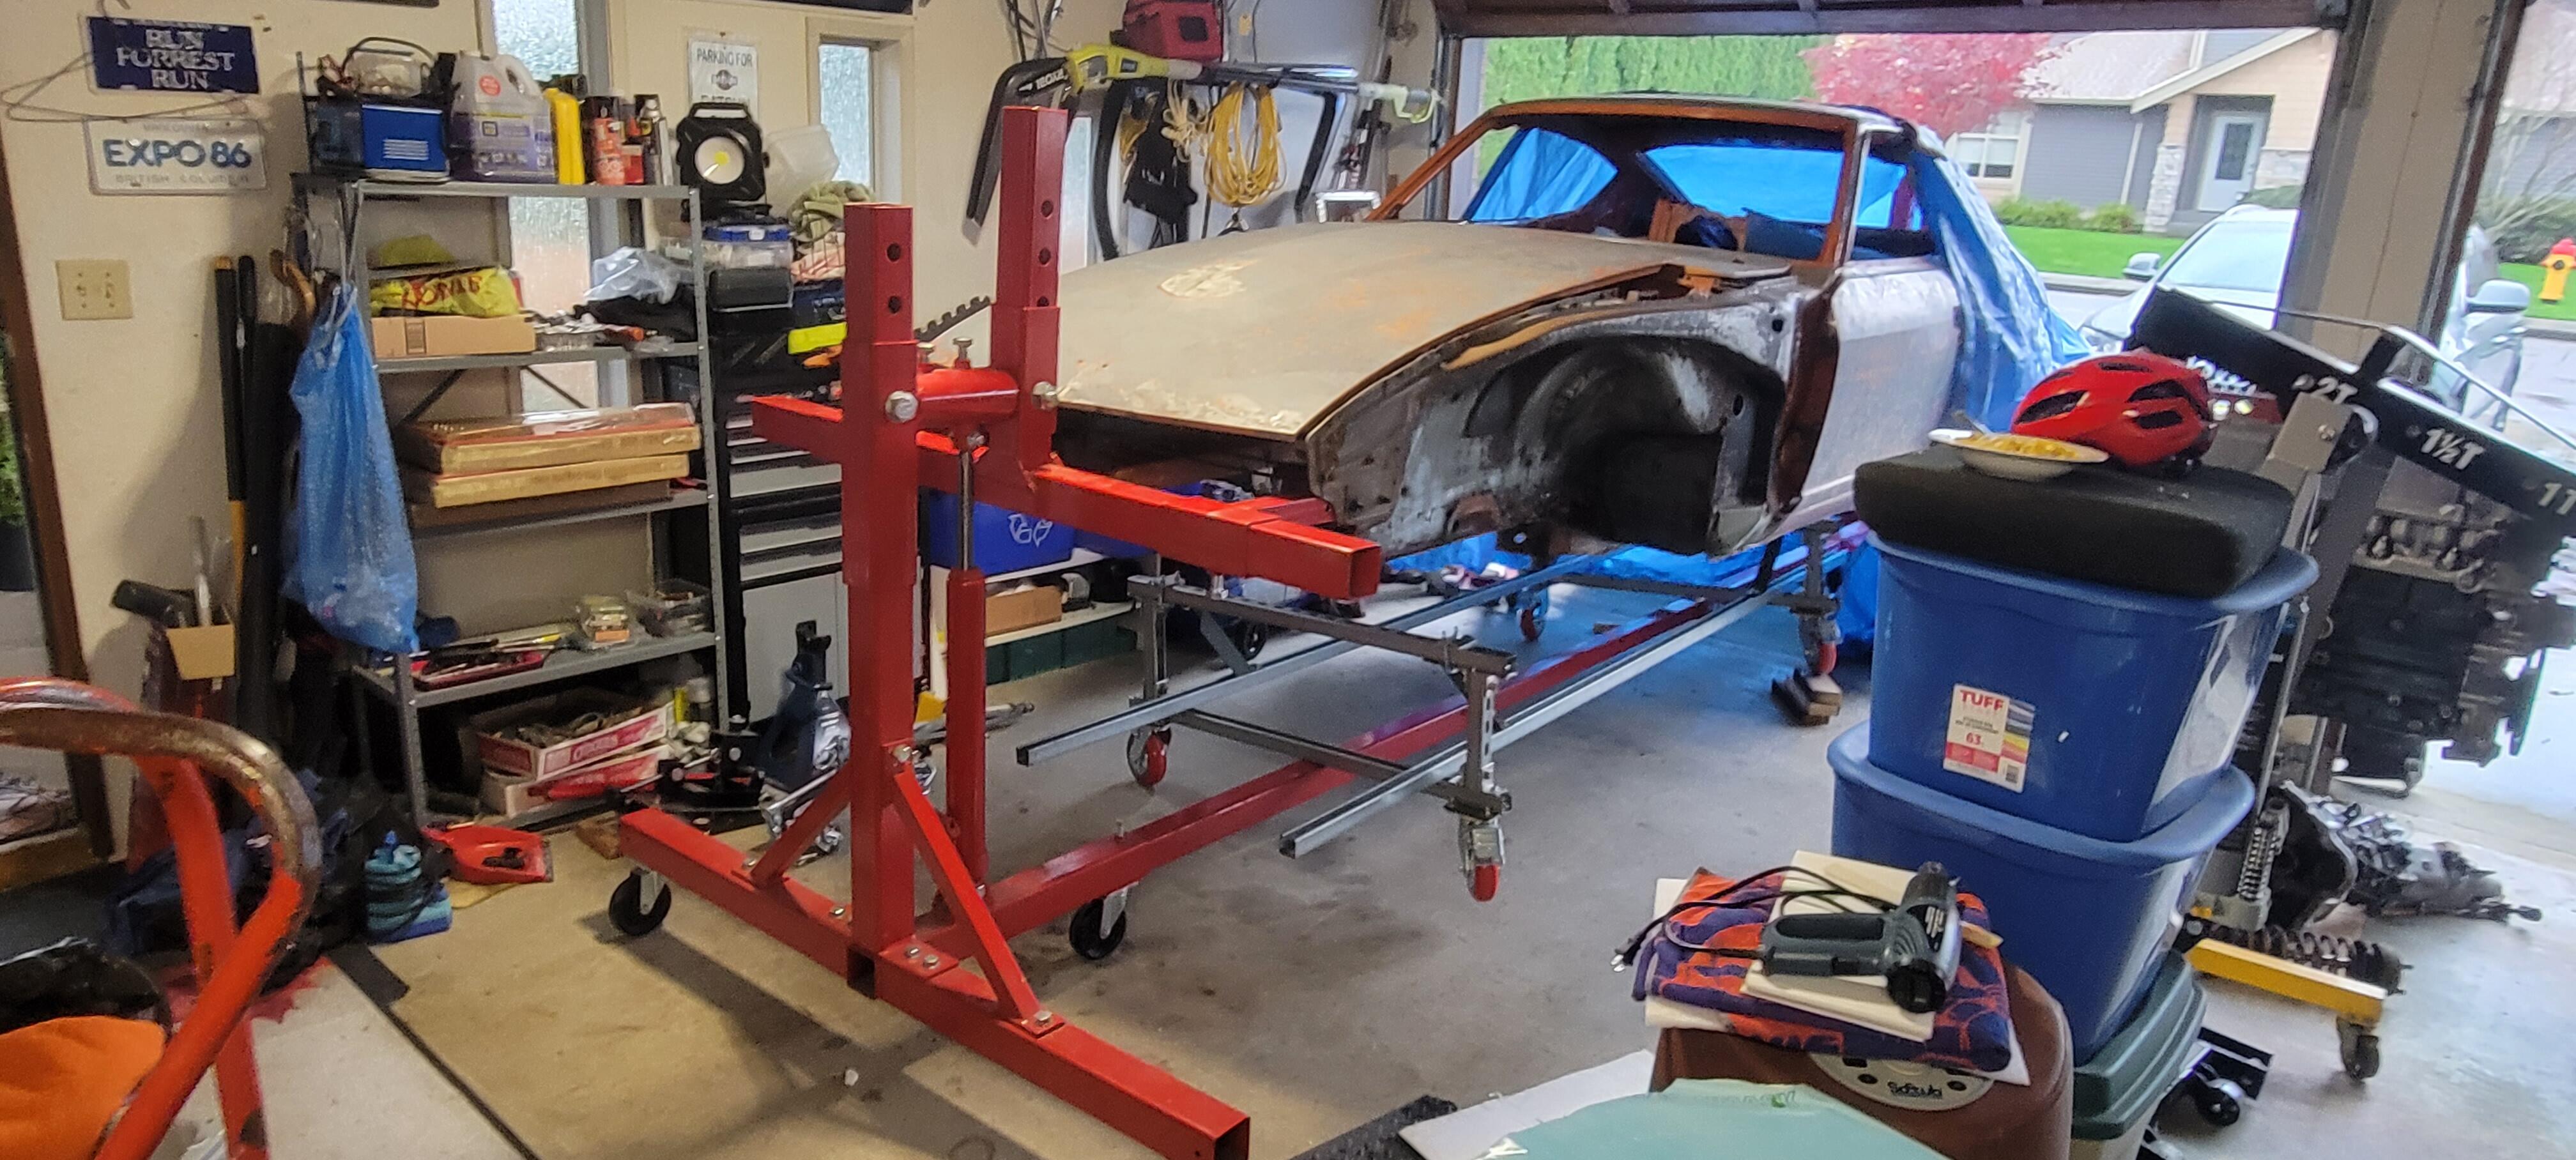
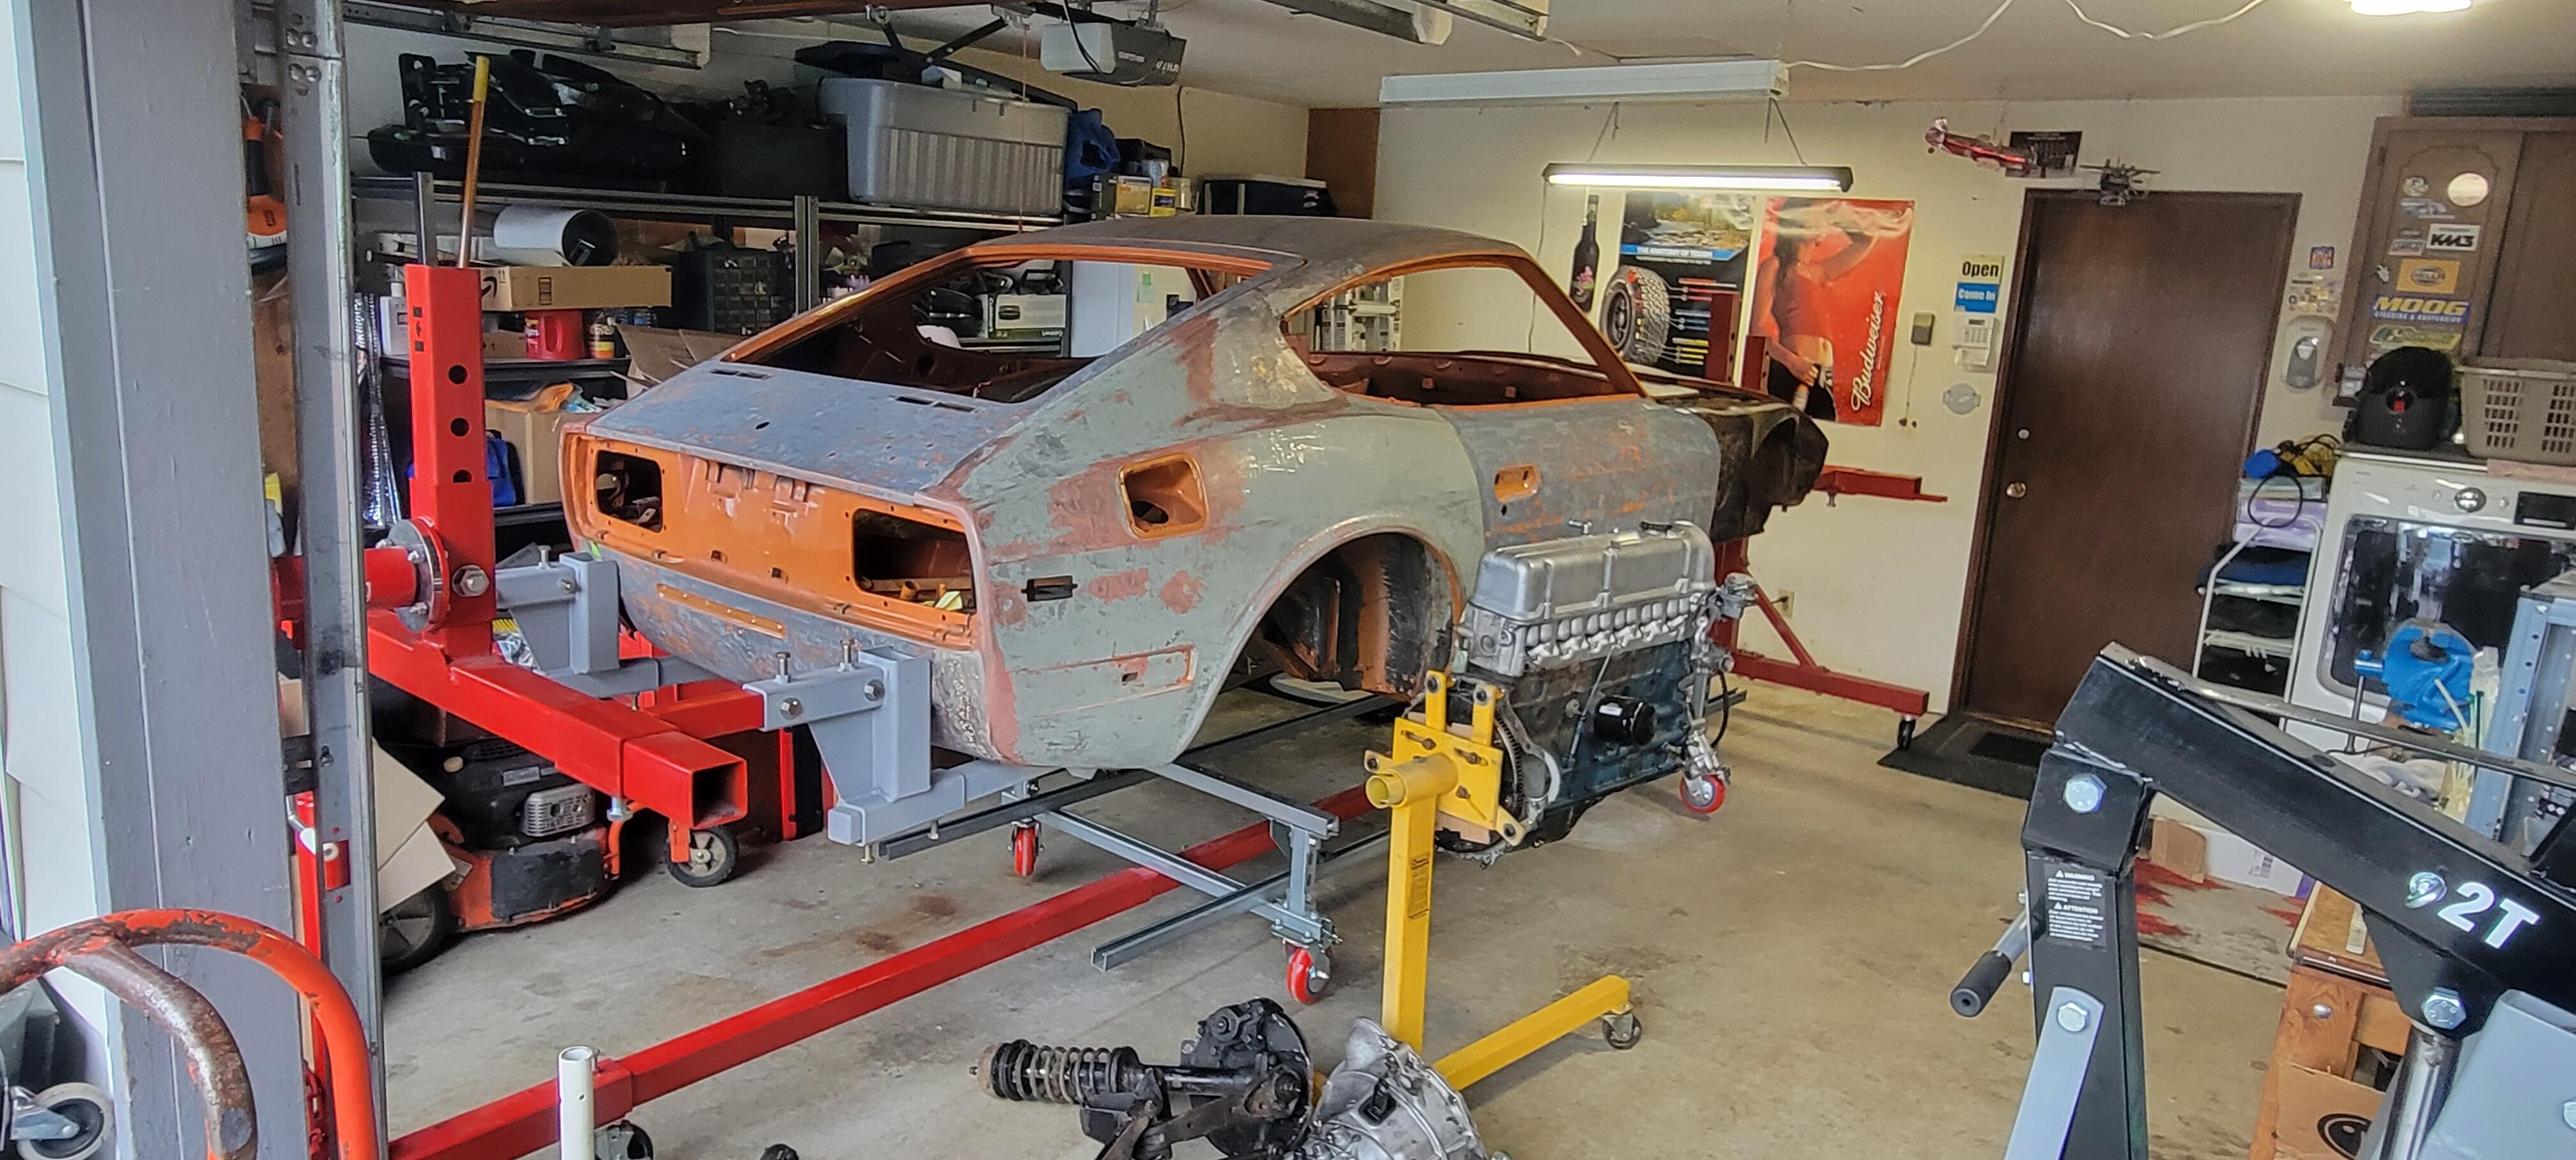
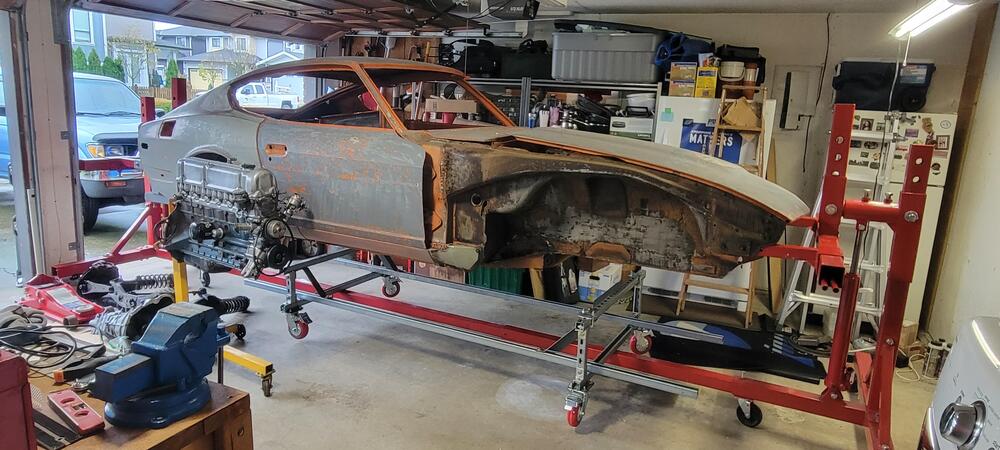
2 pointsYesterday, with the help of my son we completed getting the car on the rotisserie. It went very well. Now on to the bigger task of re-organizing my garage. Here's a few pics.


 2 points
 -
1 pointShiny is what it's all about! I'm not keen on that pollution control stuff getting in the way of my driving! It mostly looks like a bunch of vacuum leaks waiting to happen anyway!1 point
-
1 pointHey man, I just work here. If it's on the car I take it off and make it look shiny and put it back where it was, if you got a problem with the way the hoses are routed, you'll have to take it up with the owner.😉 I'm just talking about trying to polish out the minor scratches on the back glass, that streaking you see in the pic. Polishing won't do much to the sand pits on the front windshield. To get a pitted windshield clear again you would have to go down to 60 grit and grind the glass to the depth of the deepest pit then work your way up through 120, 220, 320, 420, 600, 800, 1200 then Cerium Oxide for polishing, just like making a telescope mirror. Not worth it, however, with an aggressive pad and heavy compound you can round off the sharp edges of the millions of pits and end up with a windshield that doesn't scatter as much light as it did before. It won't do anything to the depth of the pits but it can decrease the amount of scattered light/glare, most of that happens right around the edges of each pit. I did that procedure on the windshield of my first Z, I still had some Cerium Oxide left over from my telescope making days, glass is much harder than clearcoat so it took many hrs of hard work (I would never do it again) I could see the difference, there was less glare, but a new windshield is a lot less work.1 point
-
Apparently the rear subframe attachment points are rusted to the extent that they would not expect it to last 2 years - which is the duration of the RI safety inspection.1 point
-
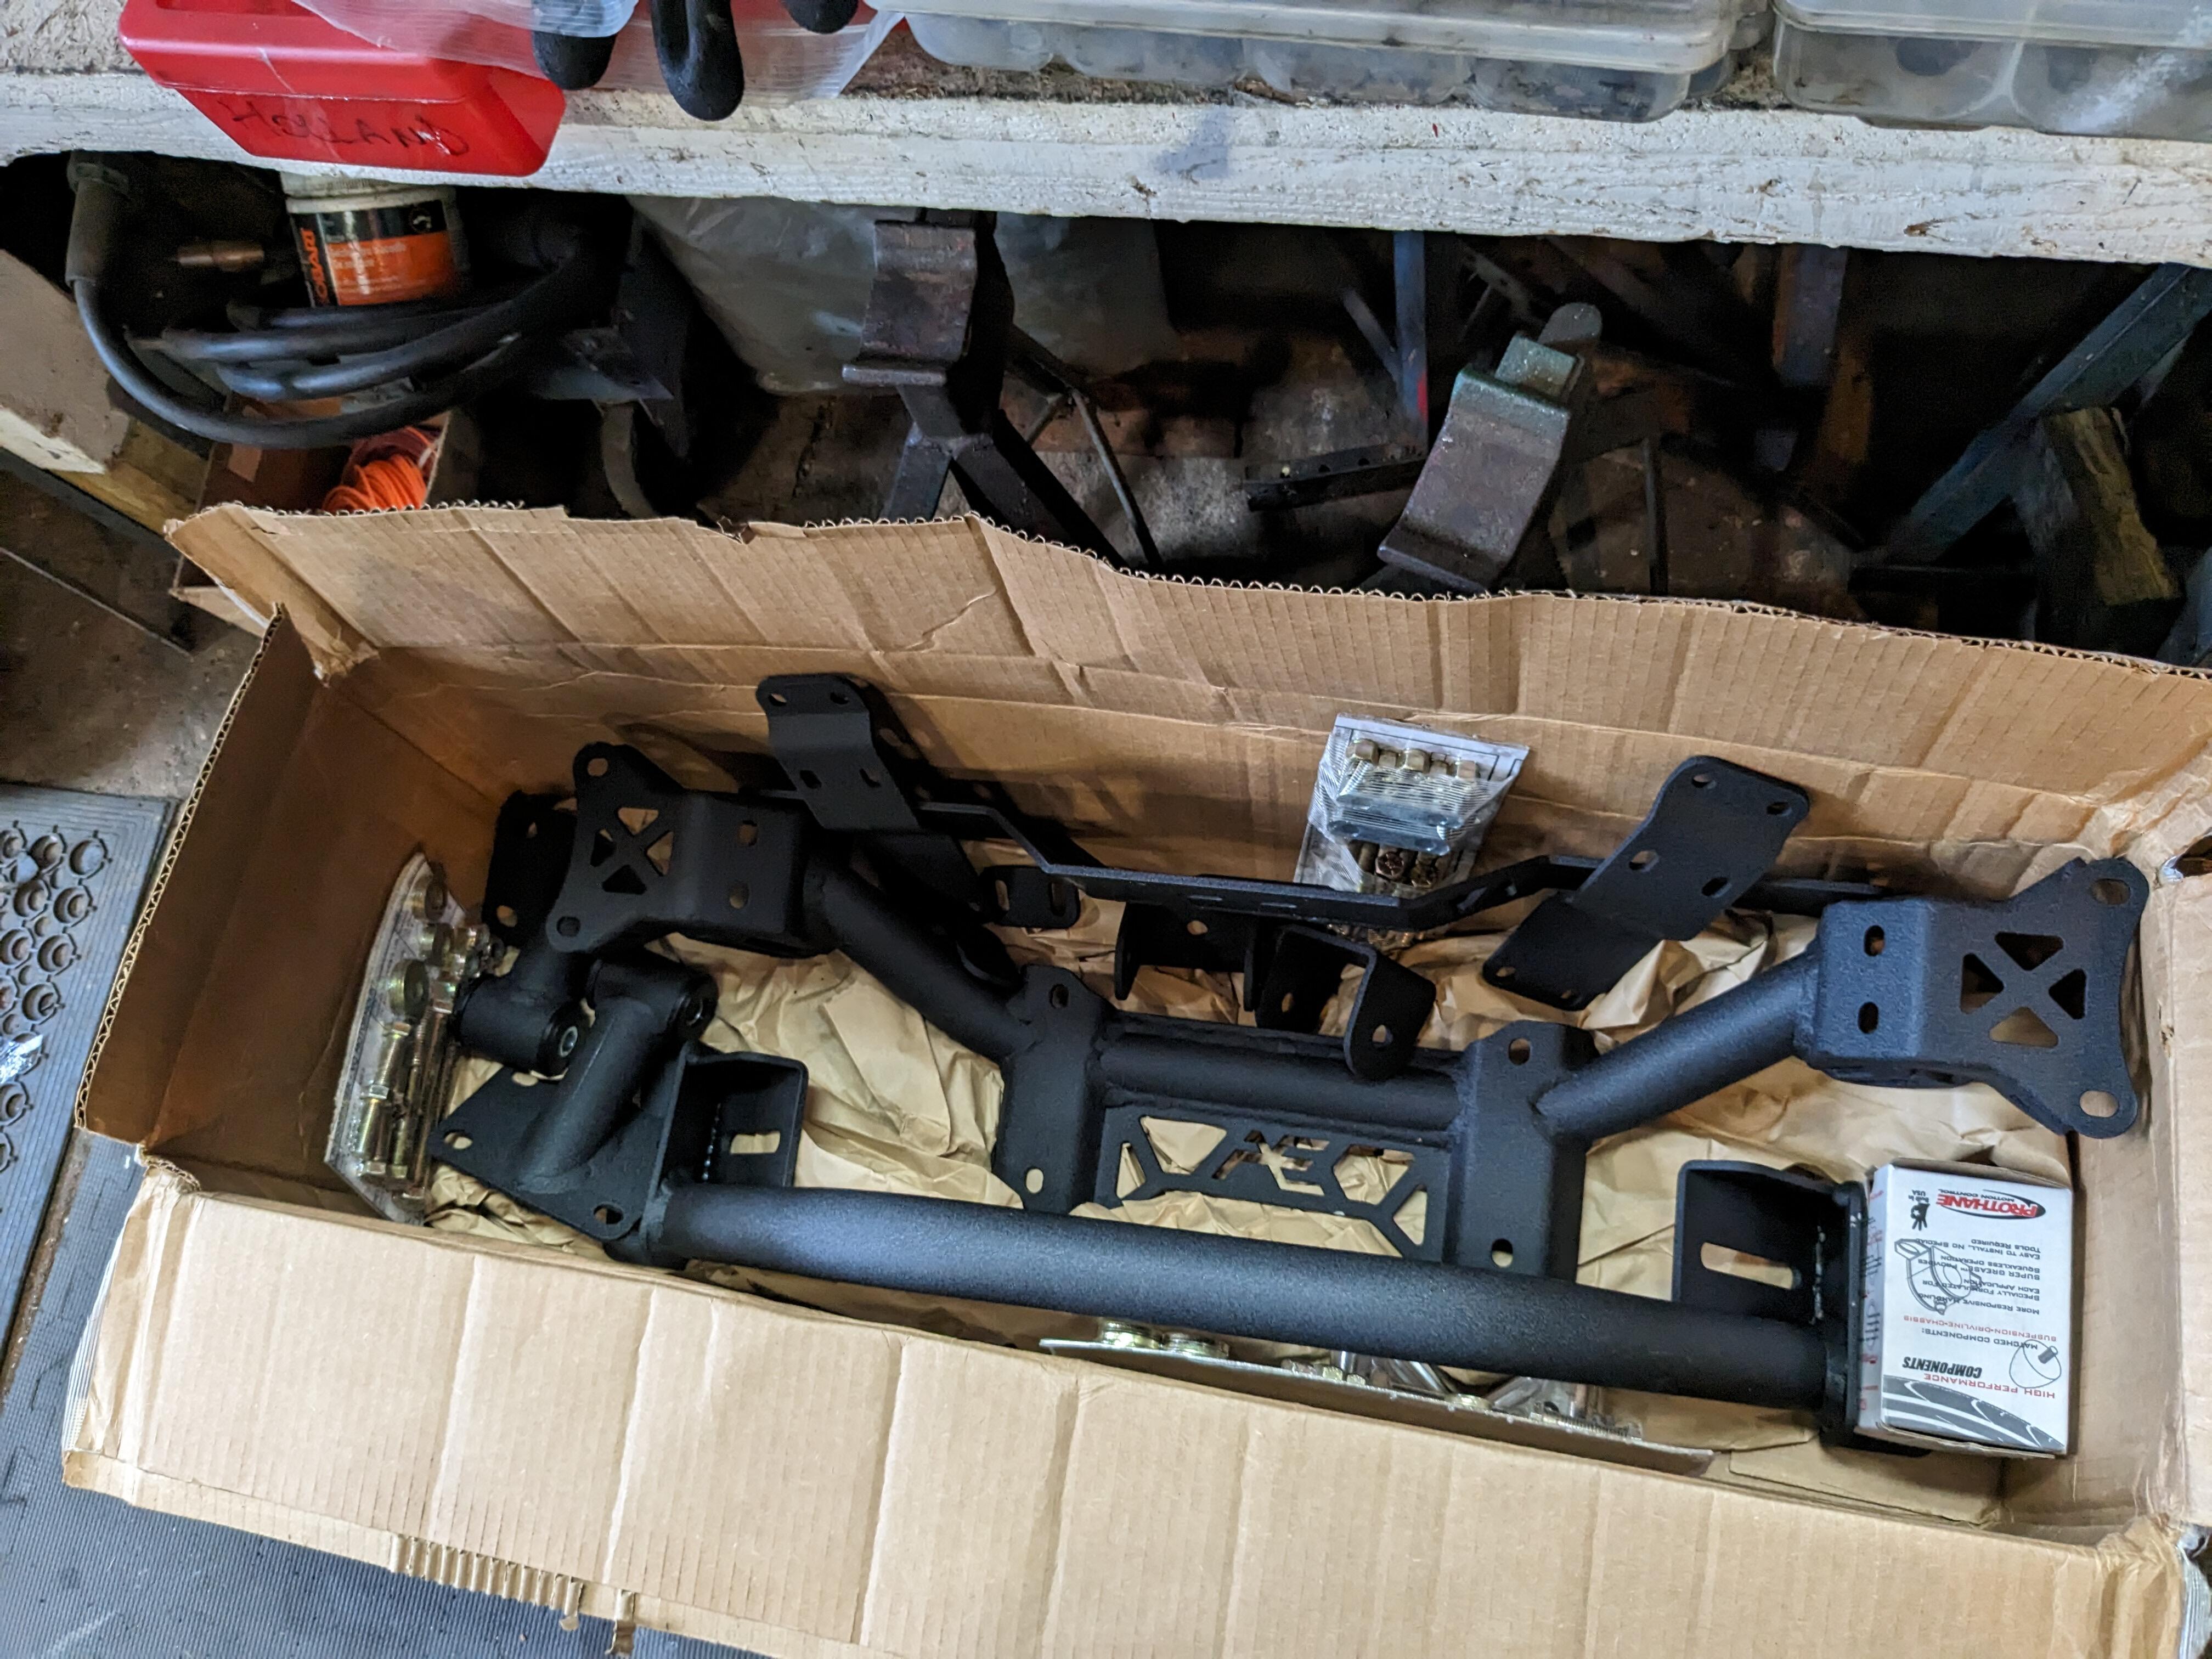
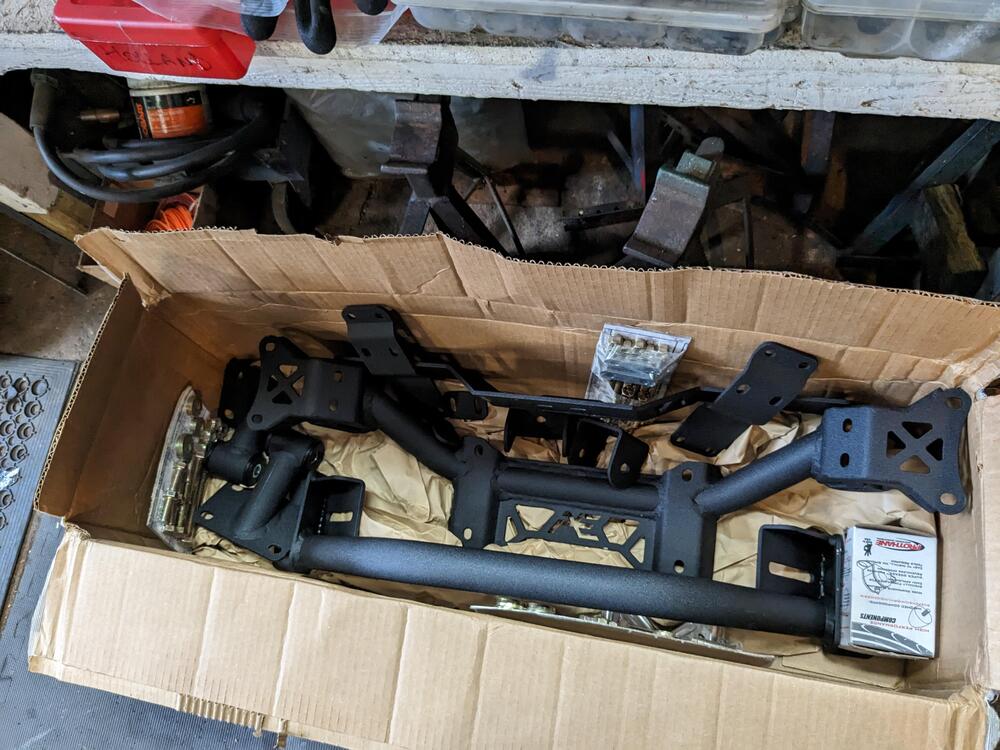
Notes - 2006 VQ35DE is the "revup" motor. Need to figure out how to increase plenum volume - stock plenum is tapered to fit under the cross brace. Forgot to post this some time back. Apex Engineered VQ35DE crossmember, Engine mounts, Trans crossmember & subframe kit 370Z aftermarket (cheap) header - has to be modded, however apparently this version is a better base to work off
 1 point
 -
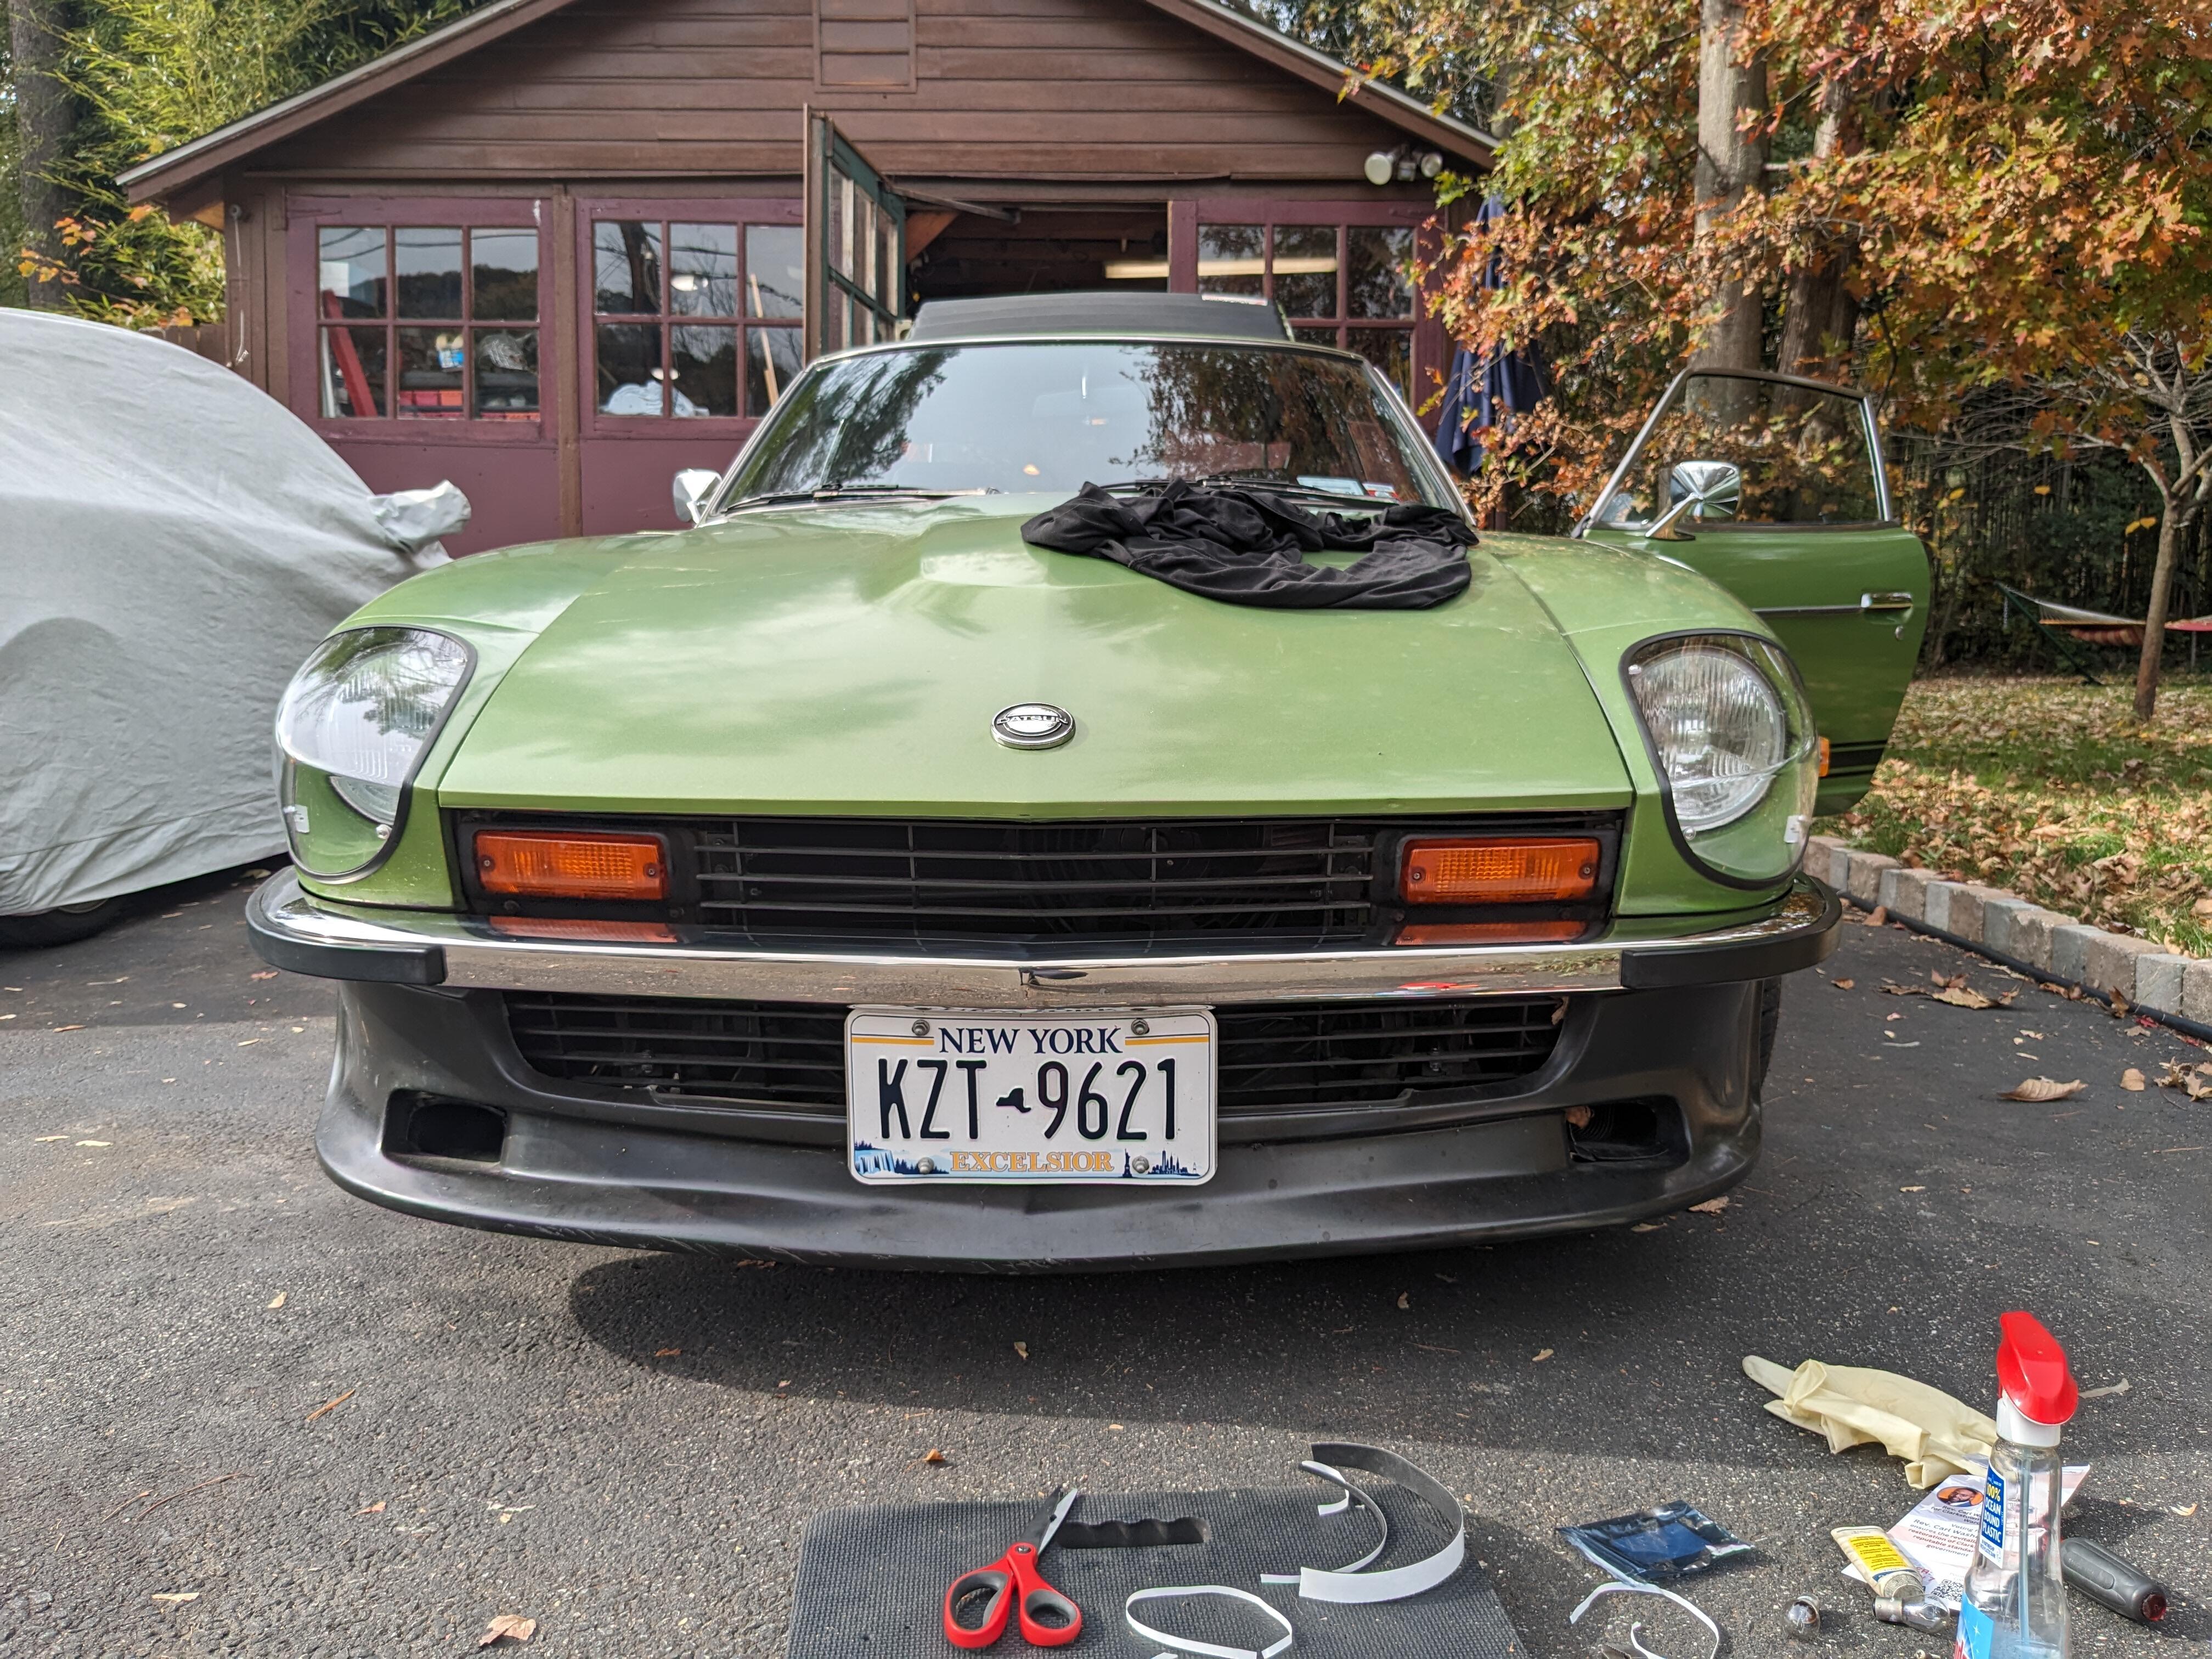
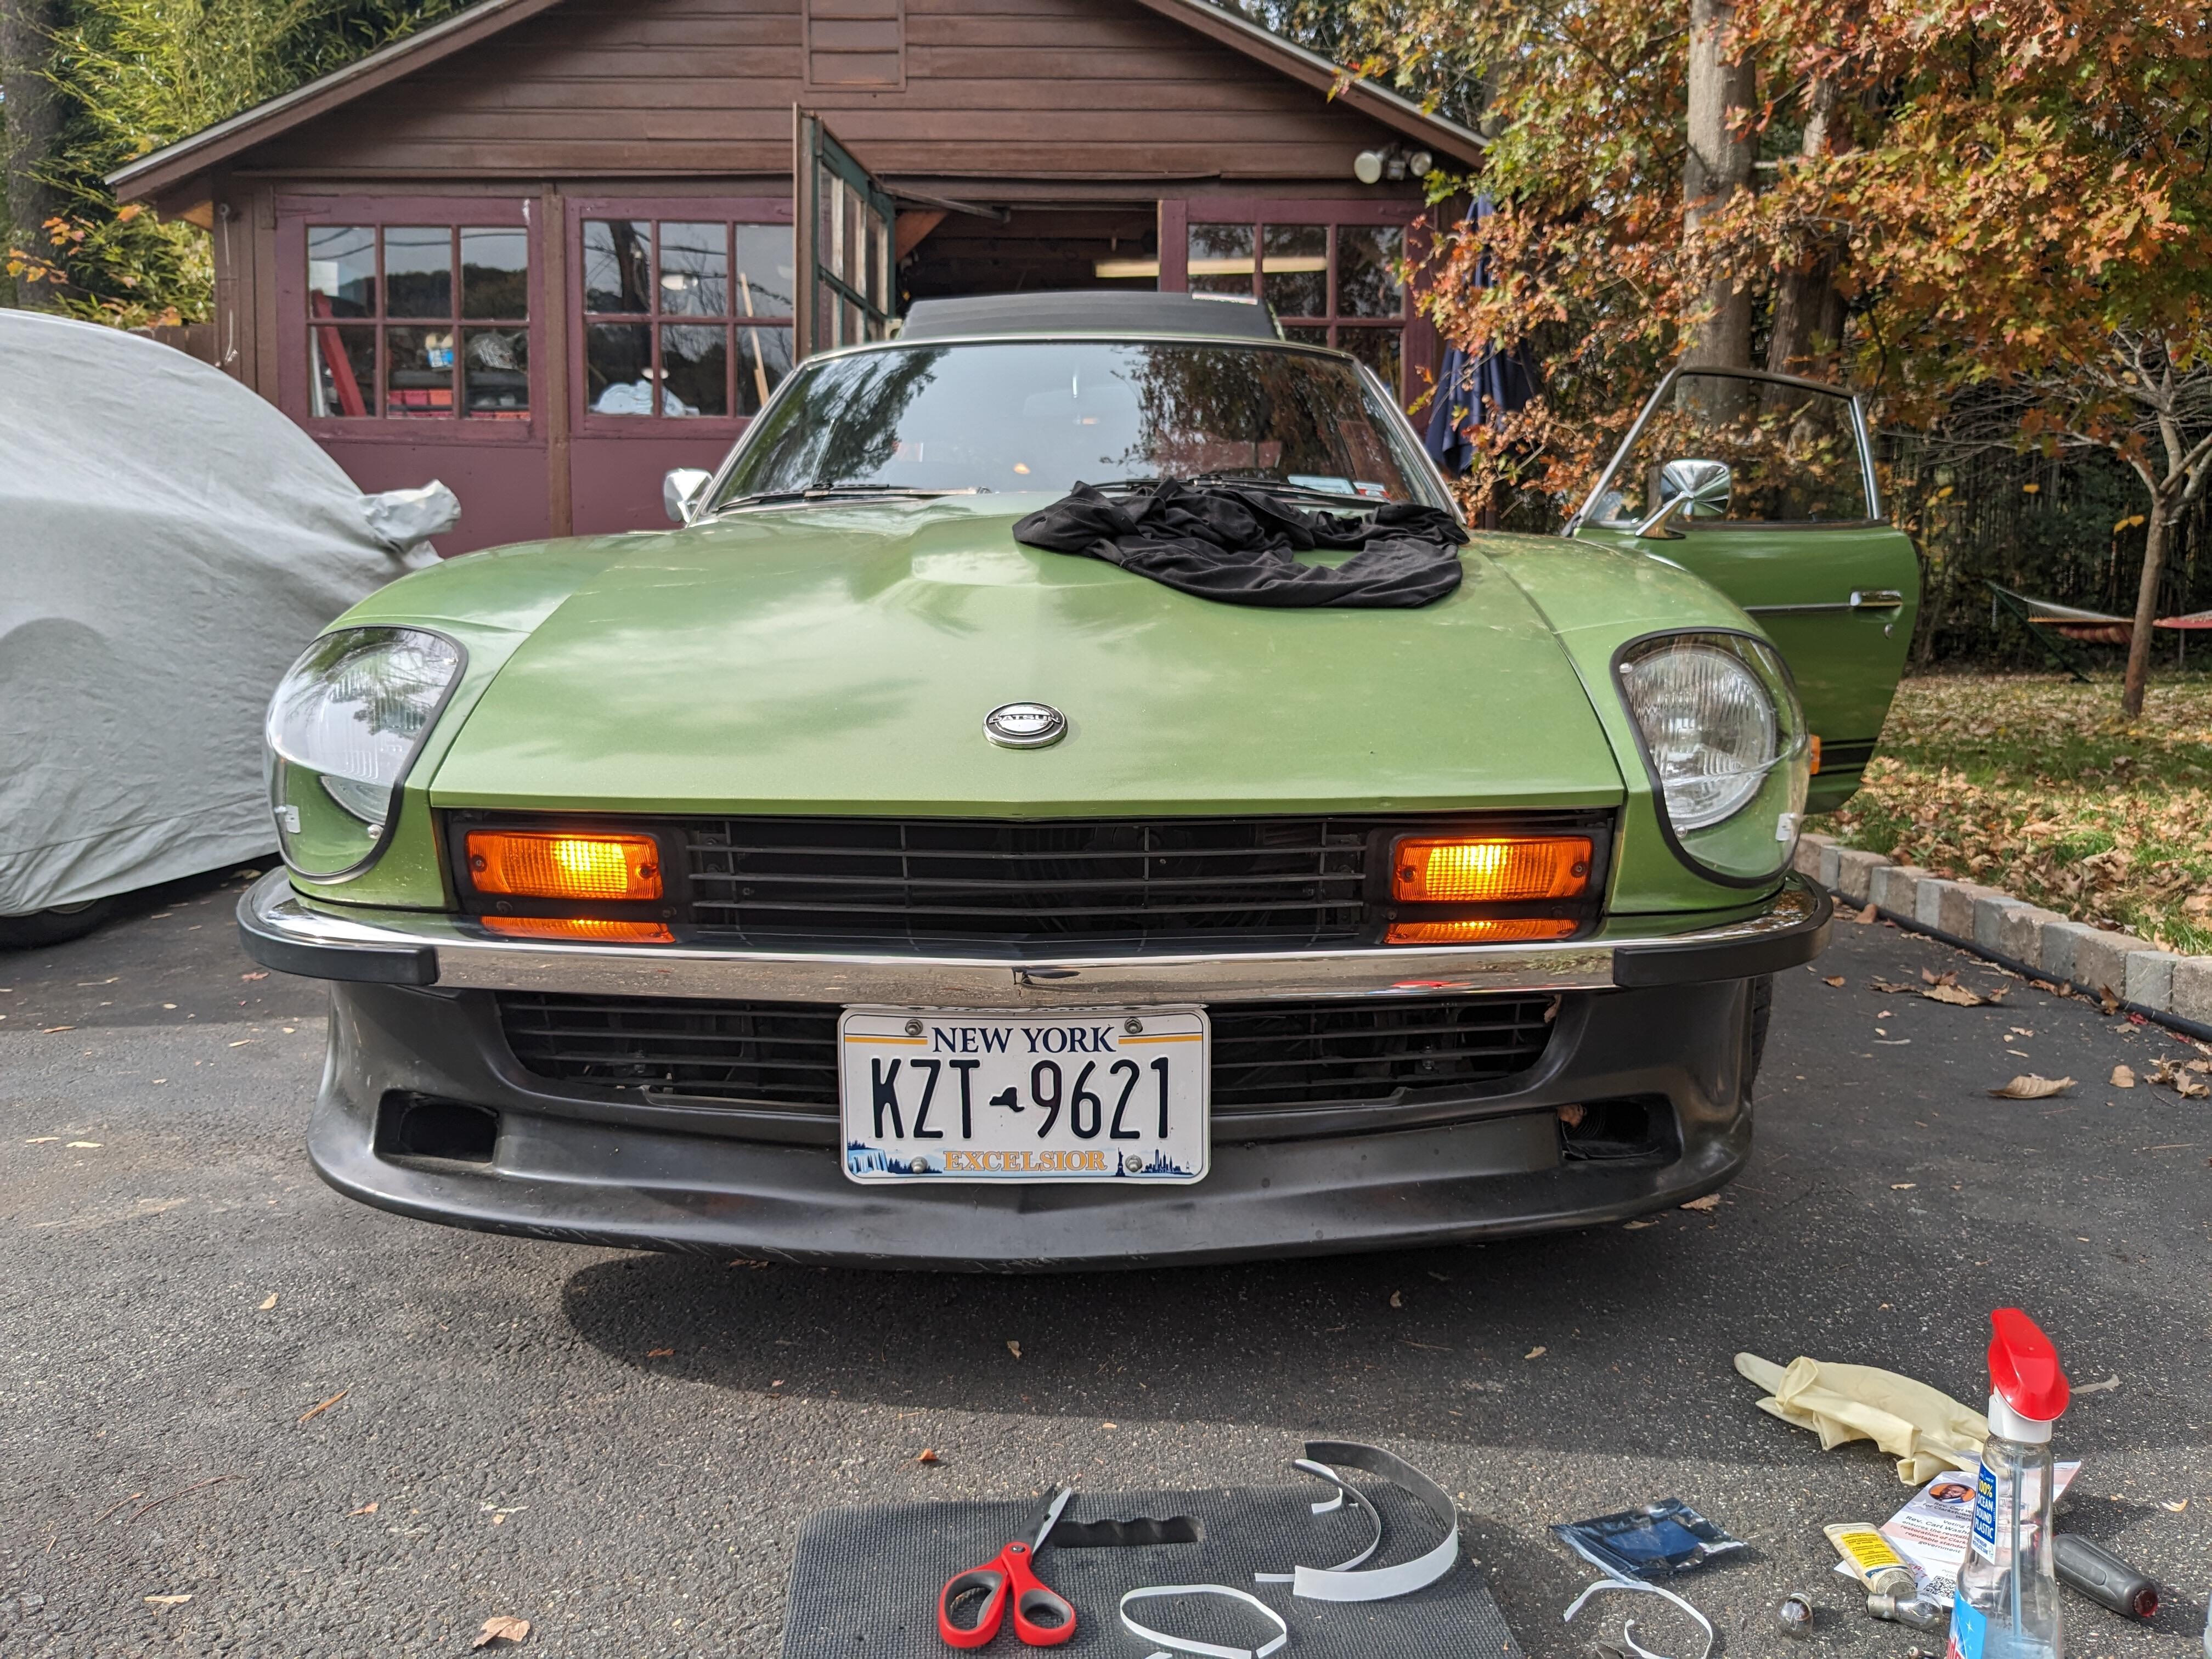
1 point@HusseinHolland I decided to get some empirical data on the headlight housing temperature rise when using the LED headlights. I drove the 260Z to a car meet. The lights were on for about 50 minutes. Ambient temperature was about 49 degrees, and the outside of the metal housings were 50 degrees according to my IR thermometer. I didn't try to get an IR reading on the front of the housings.1 point
-
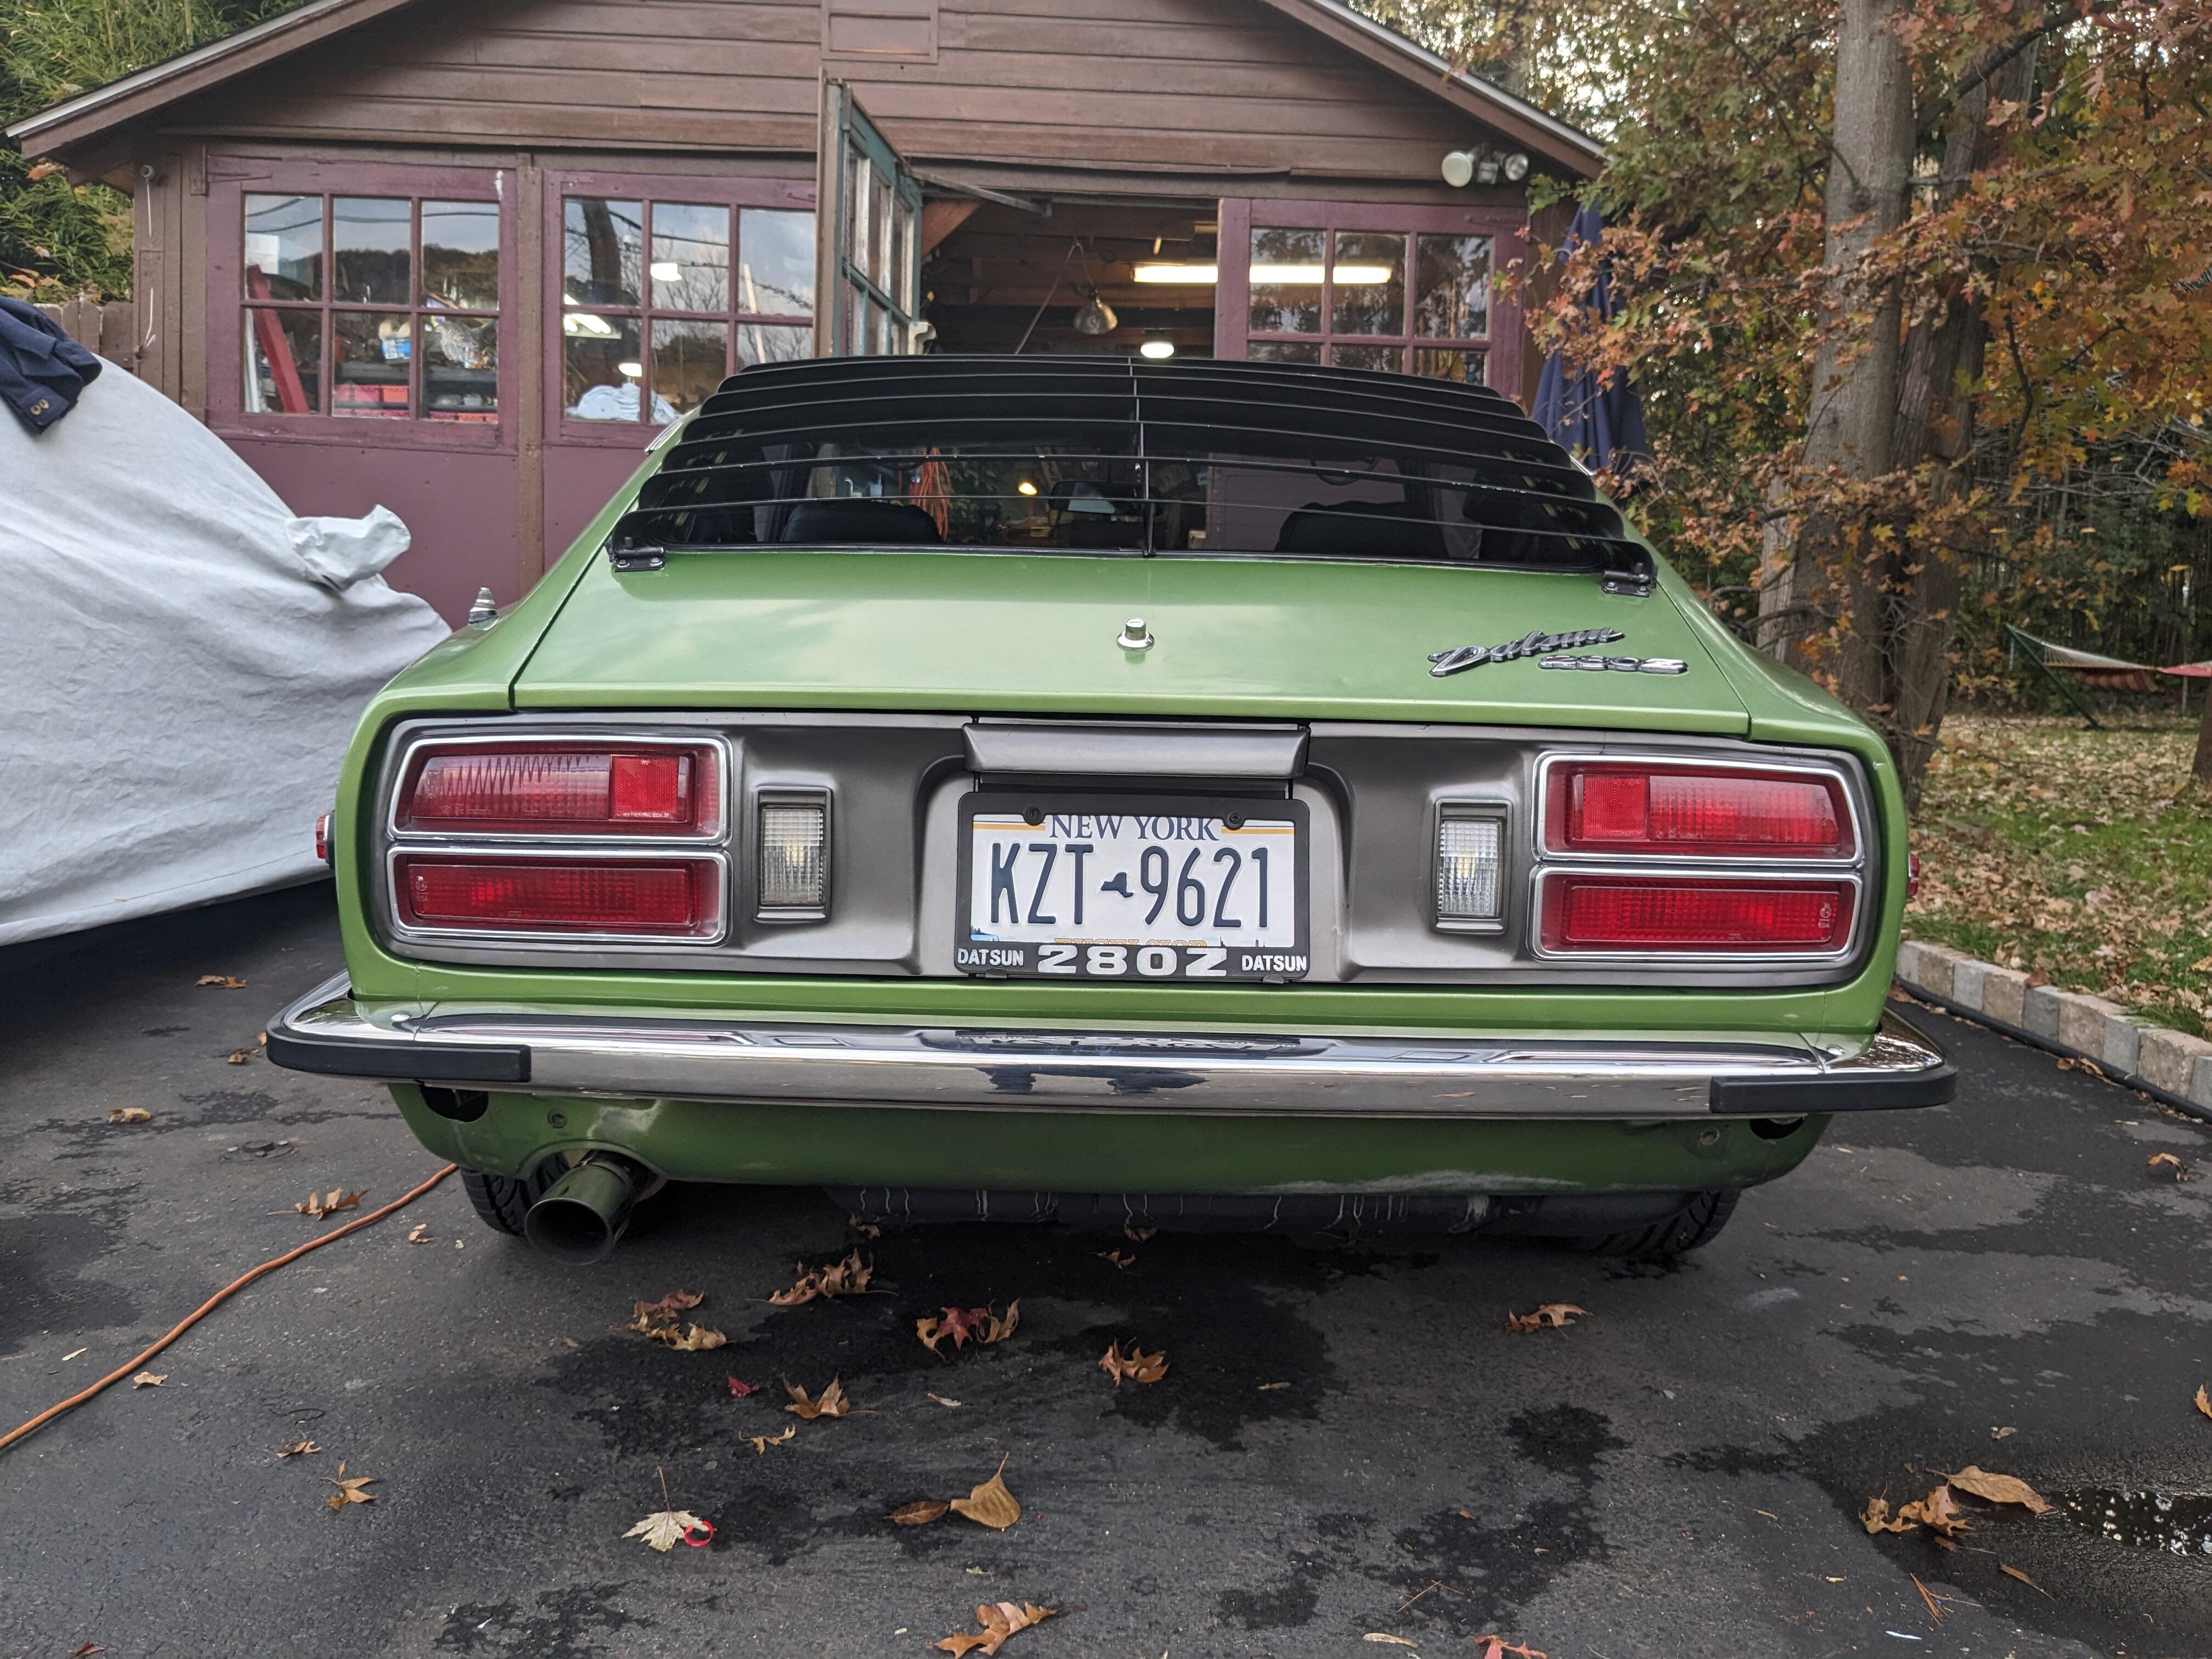
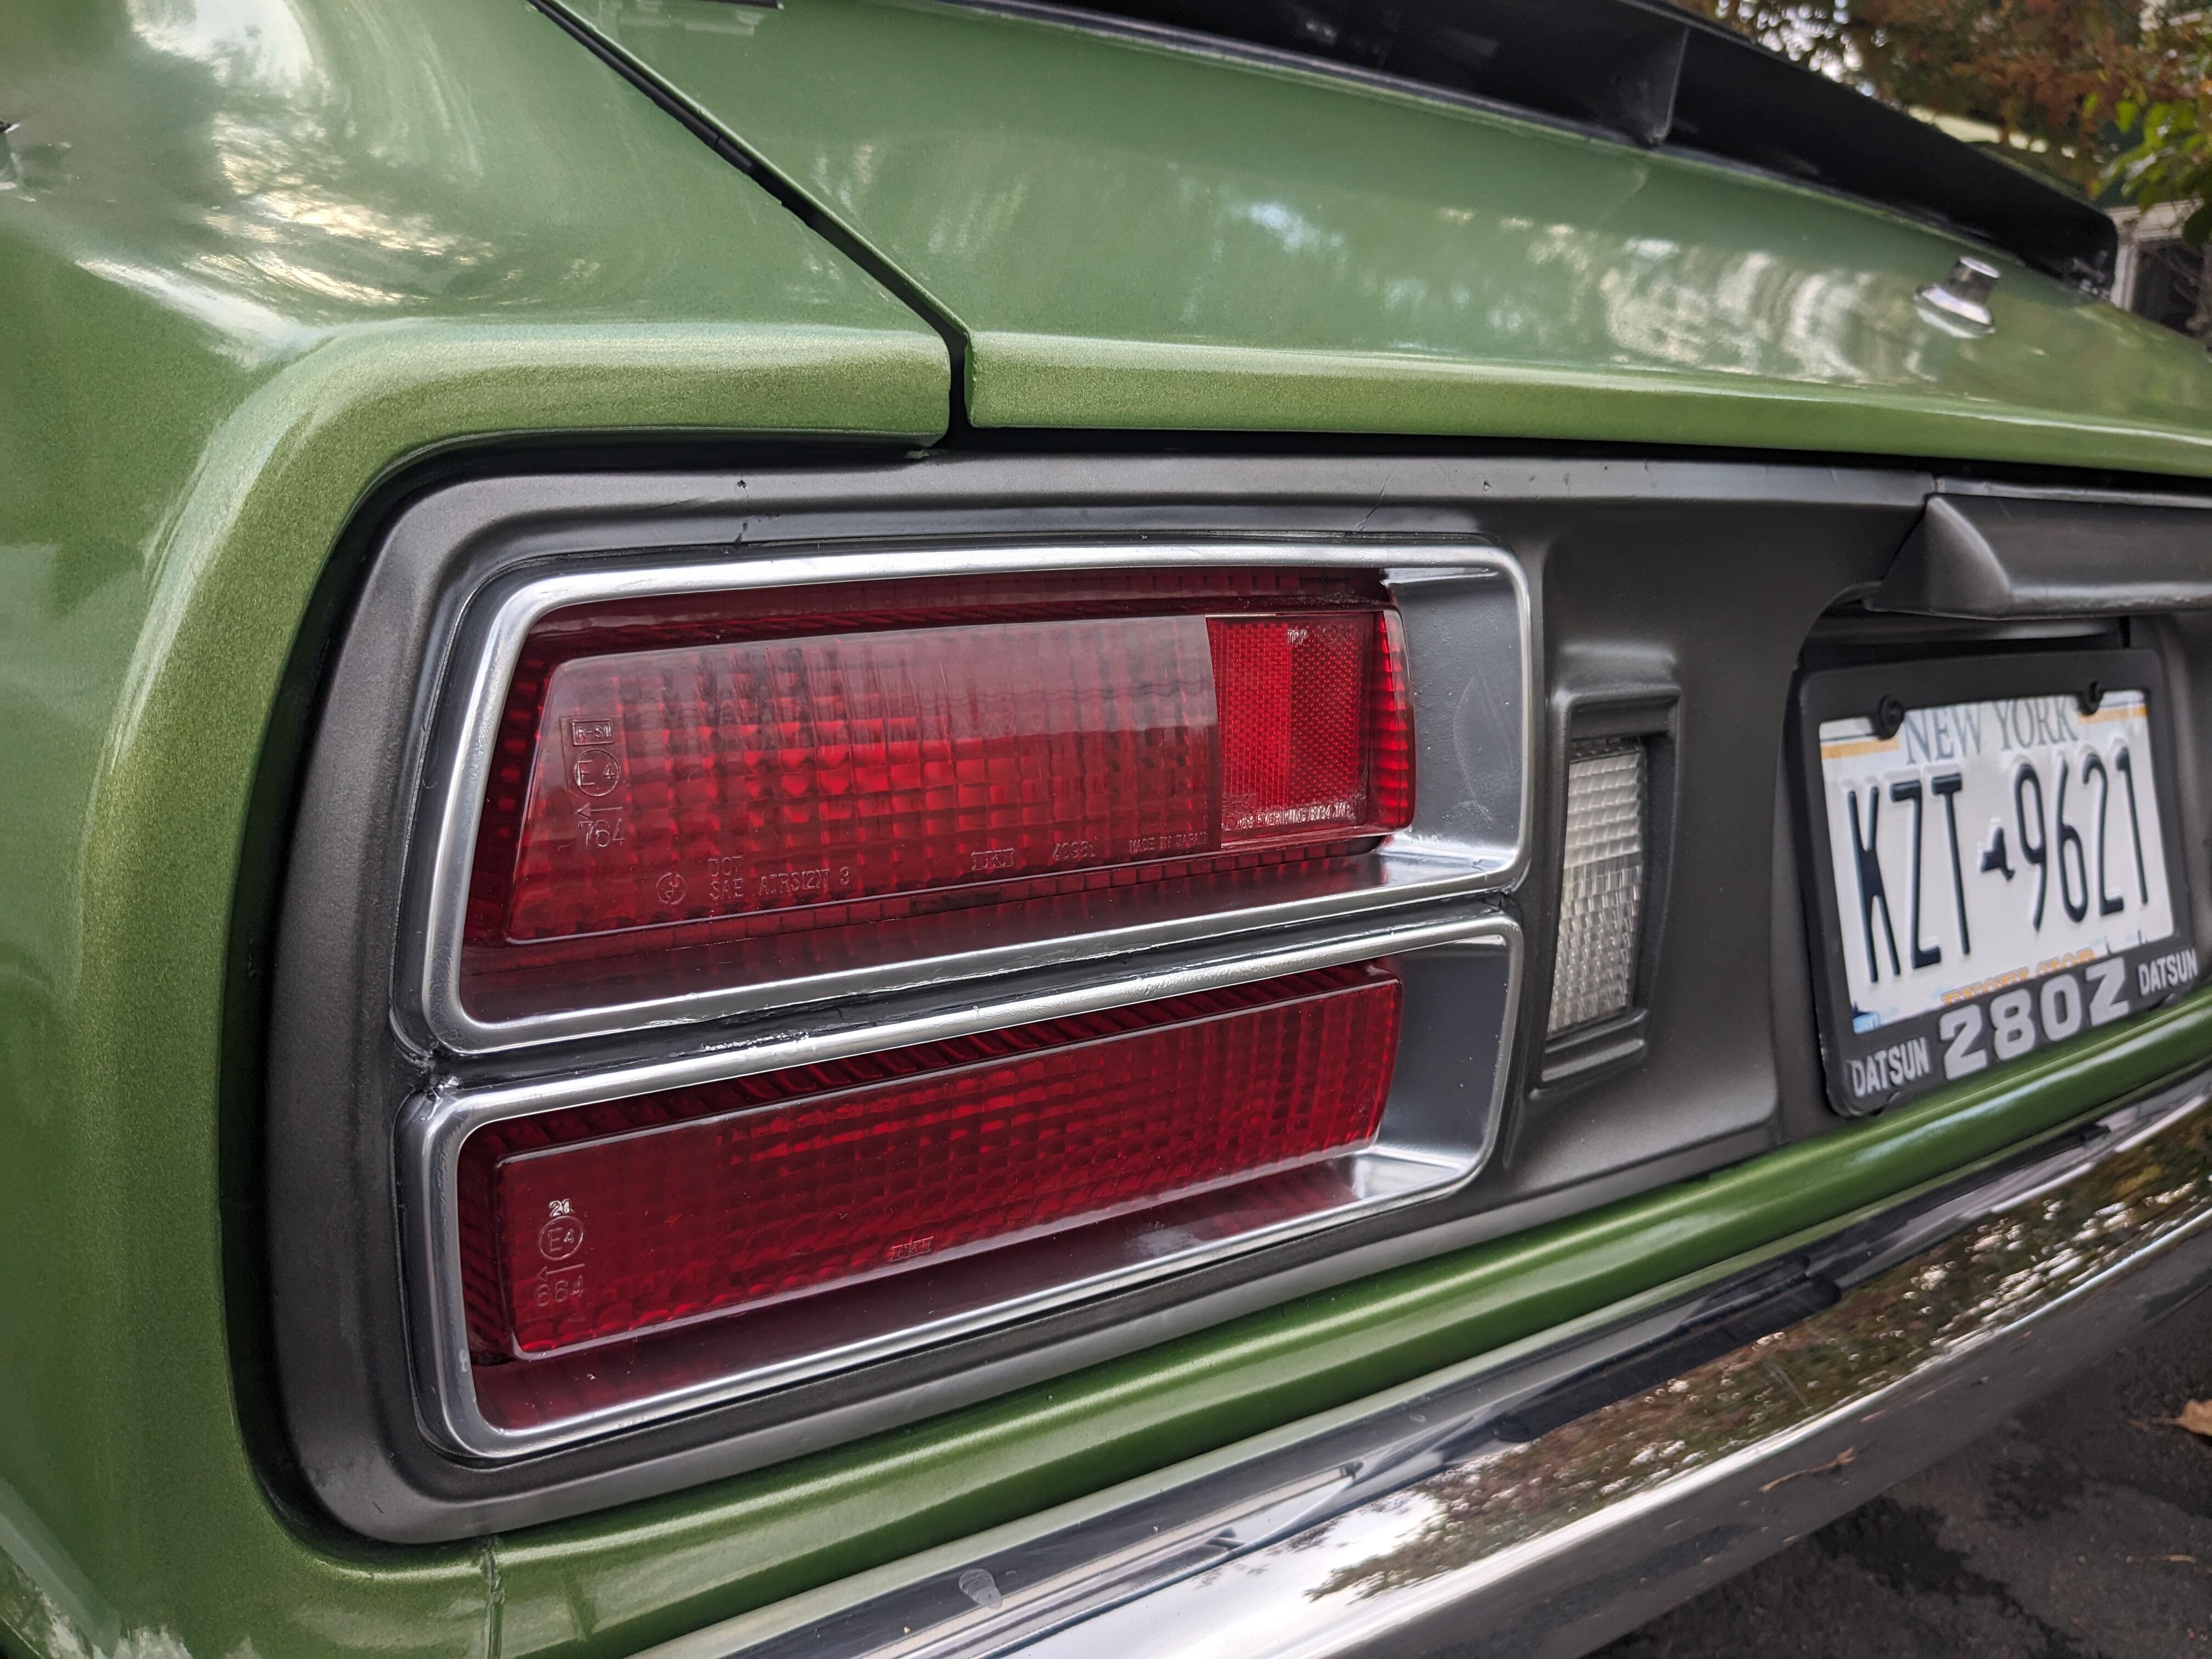
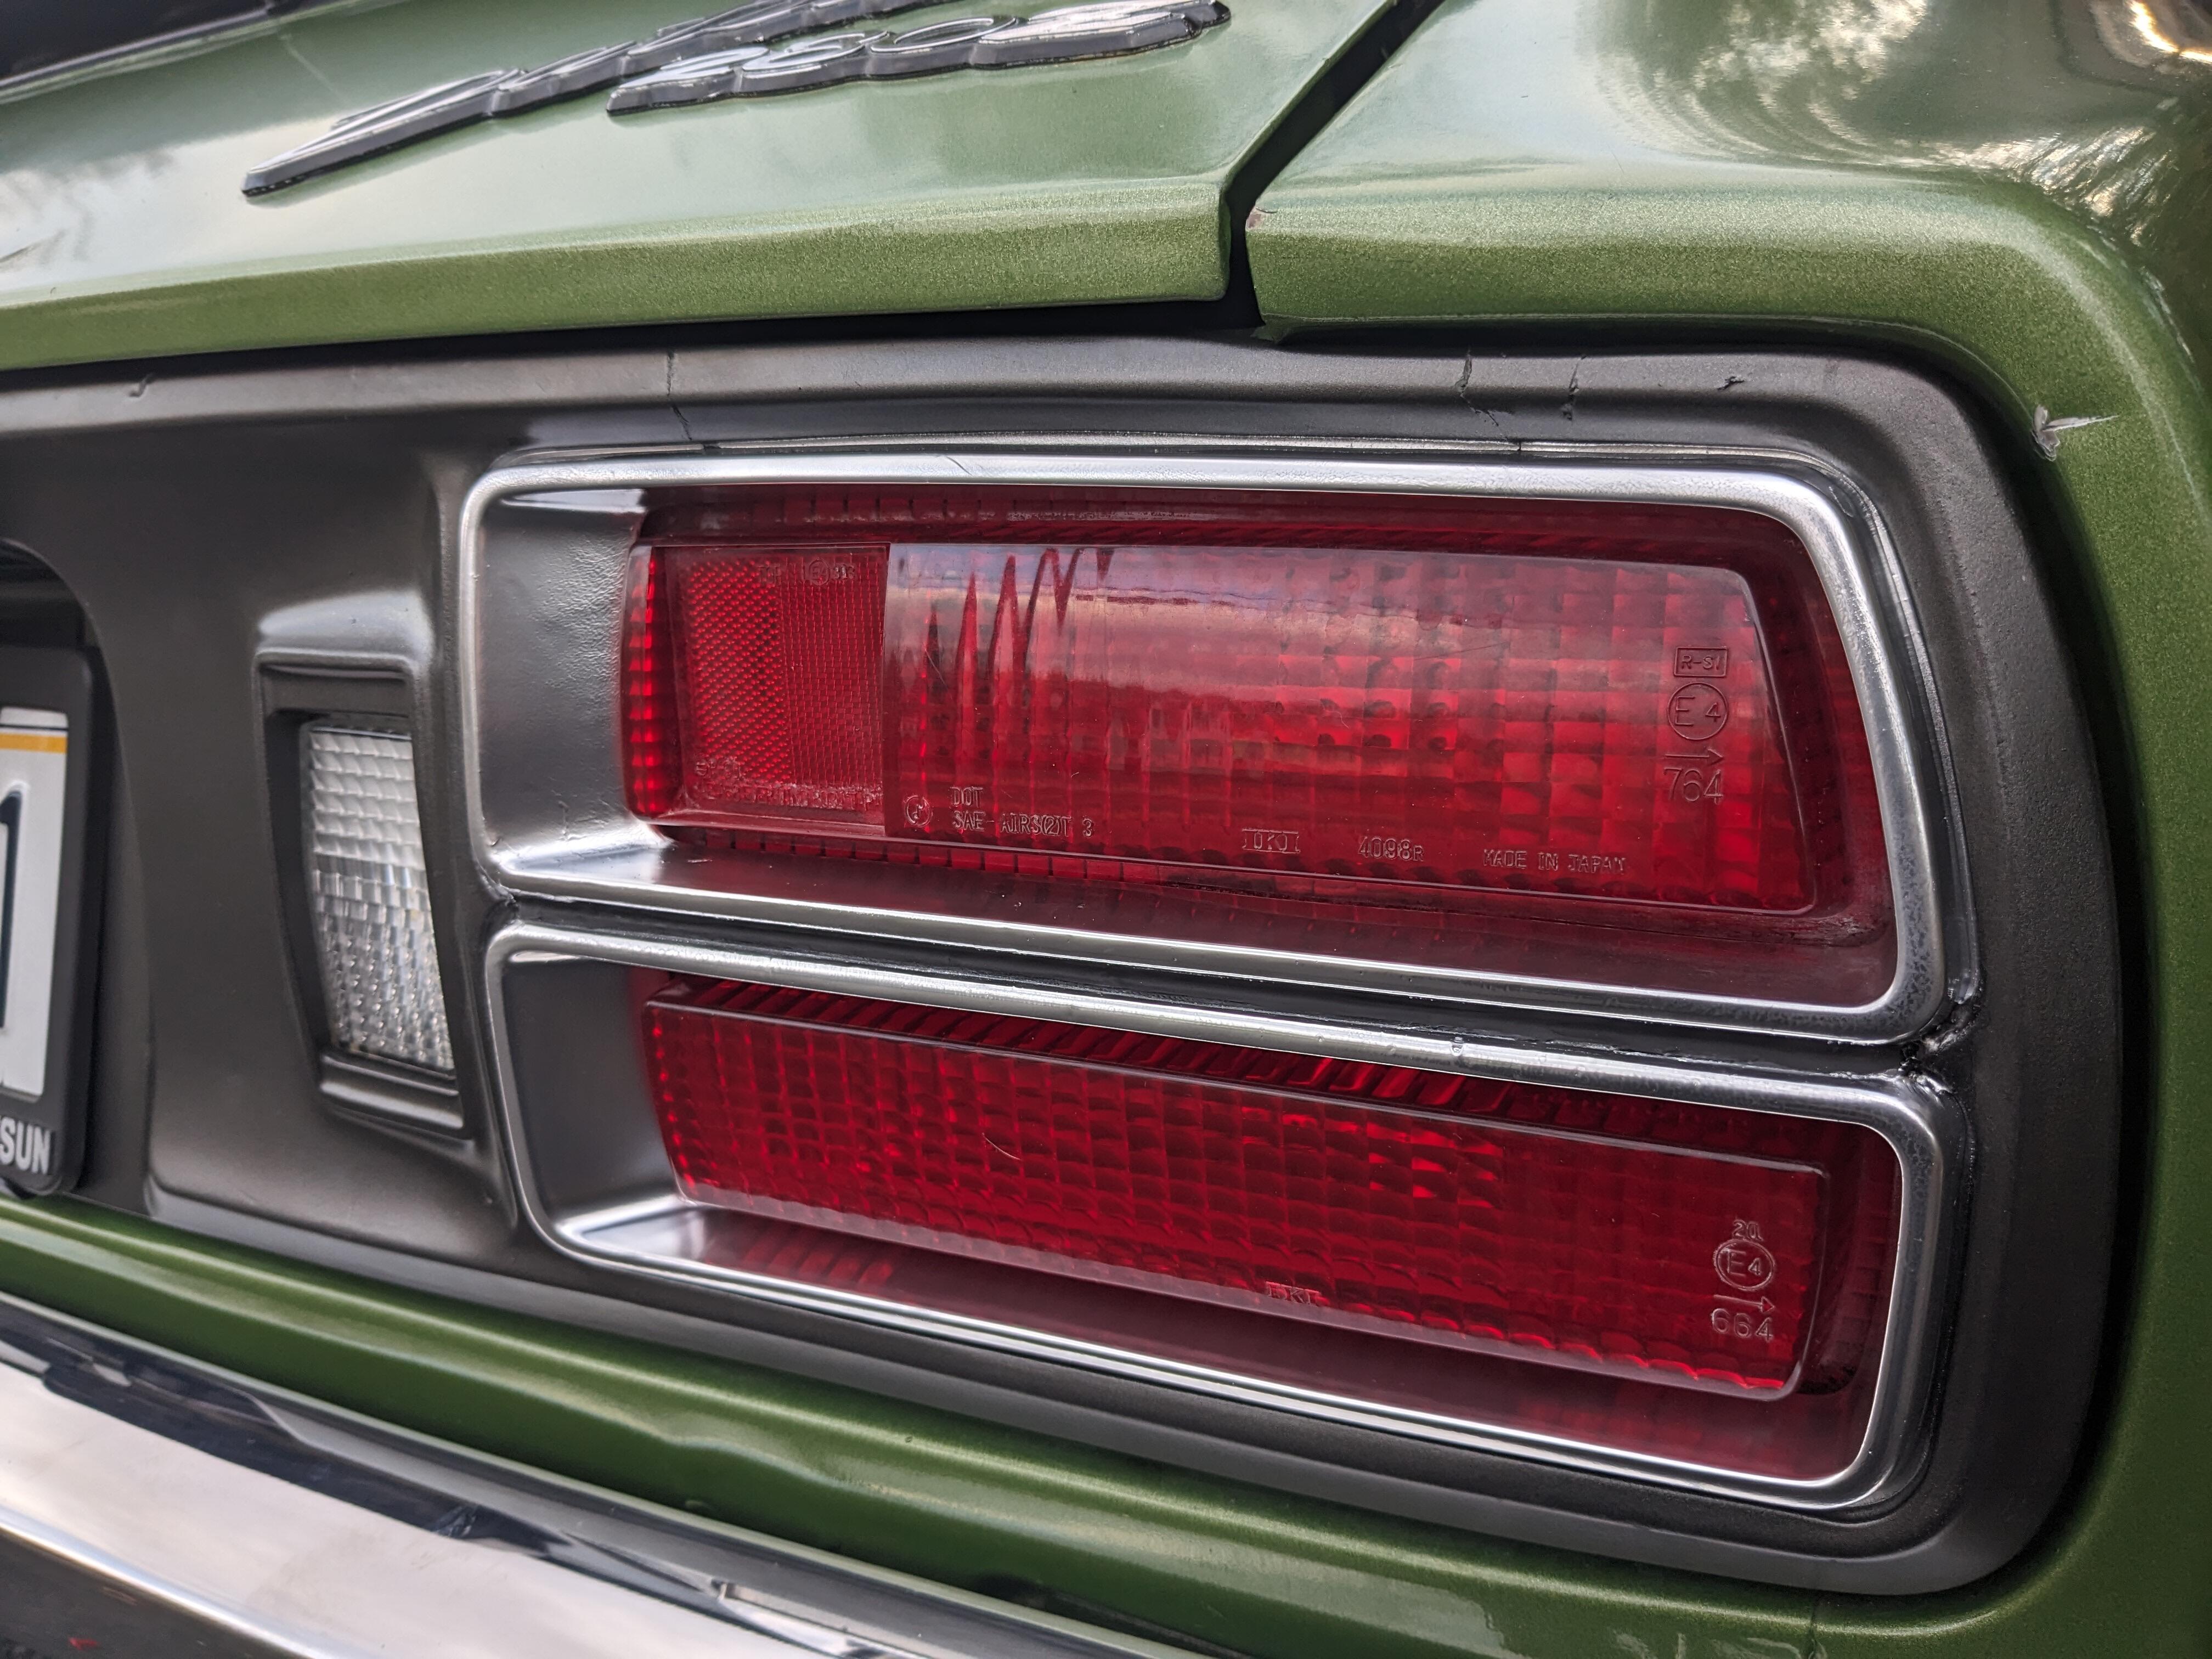
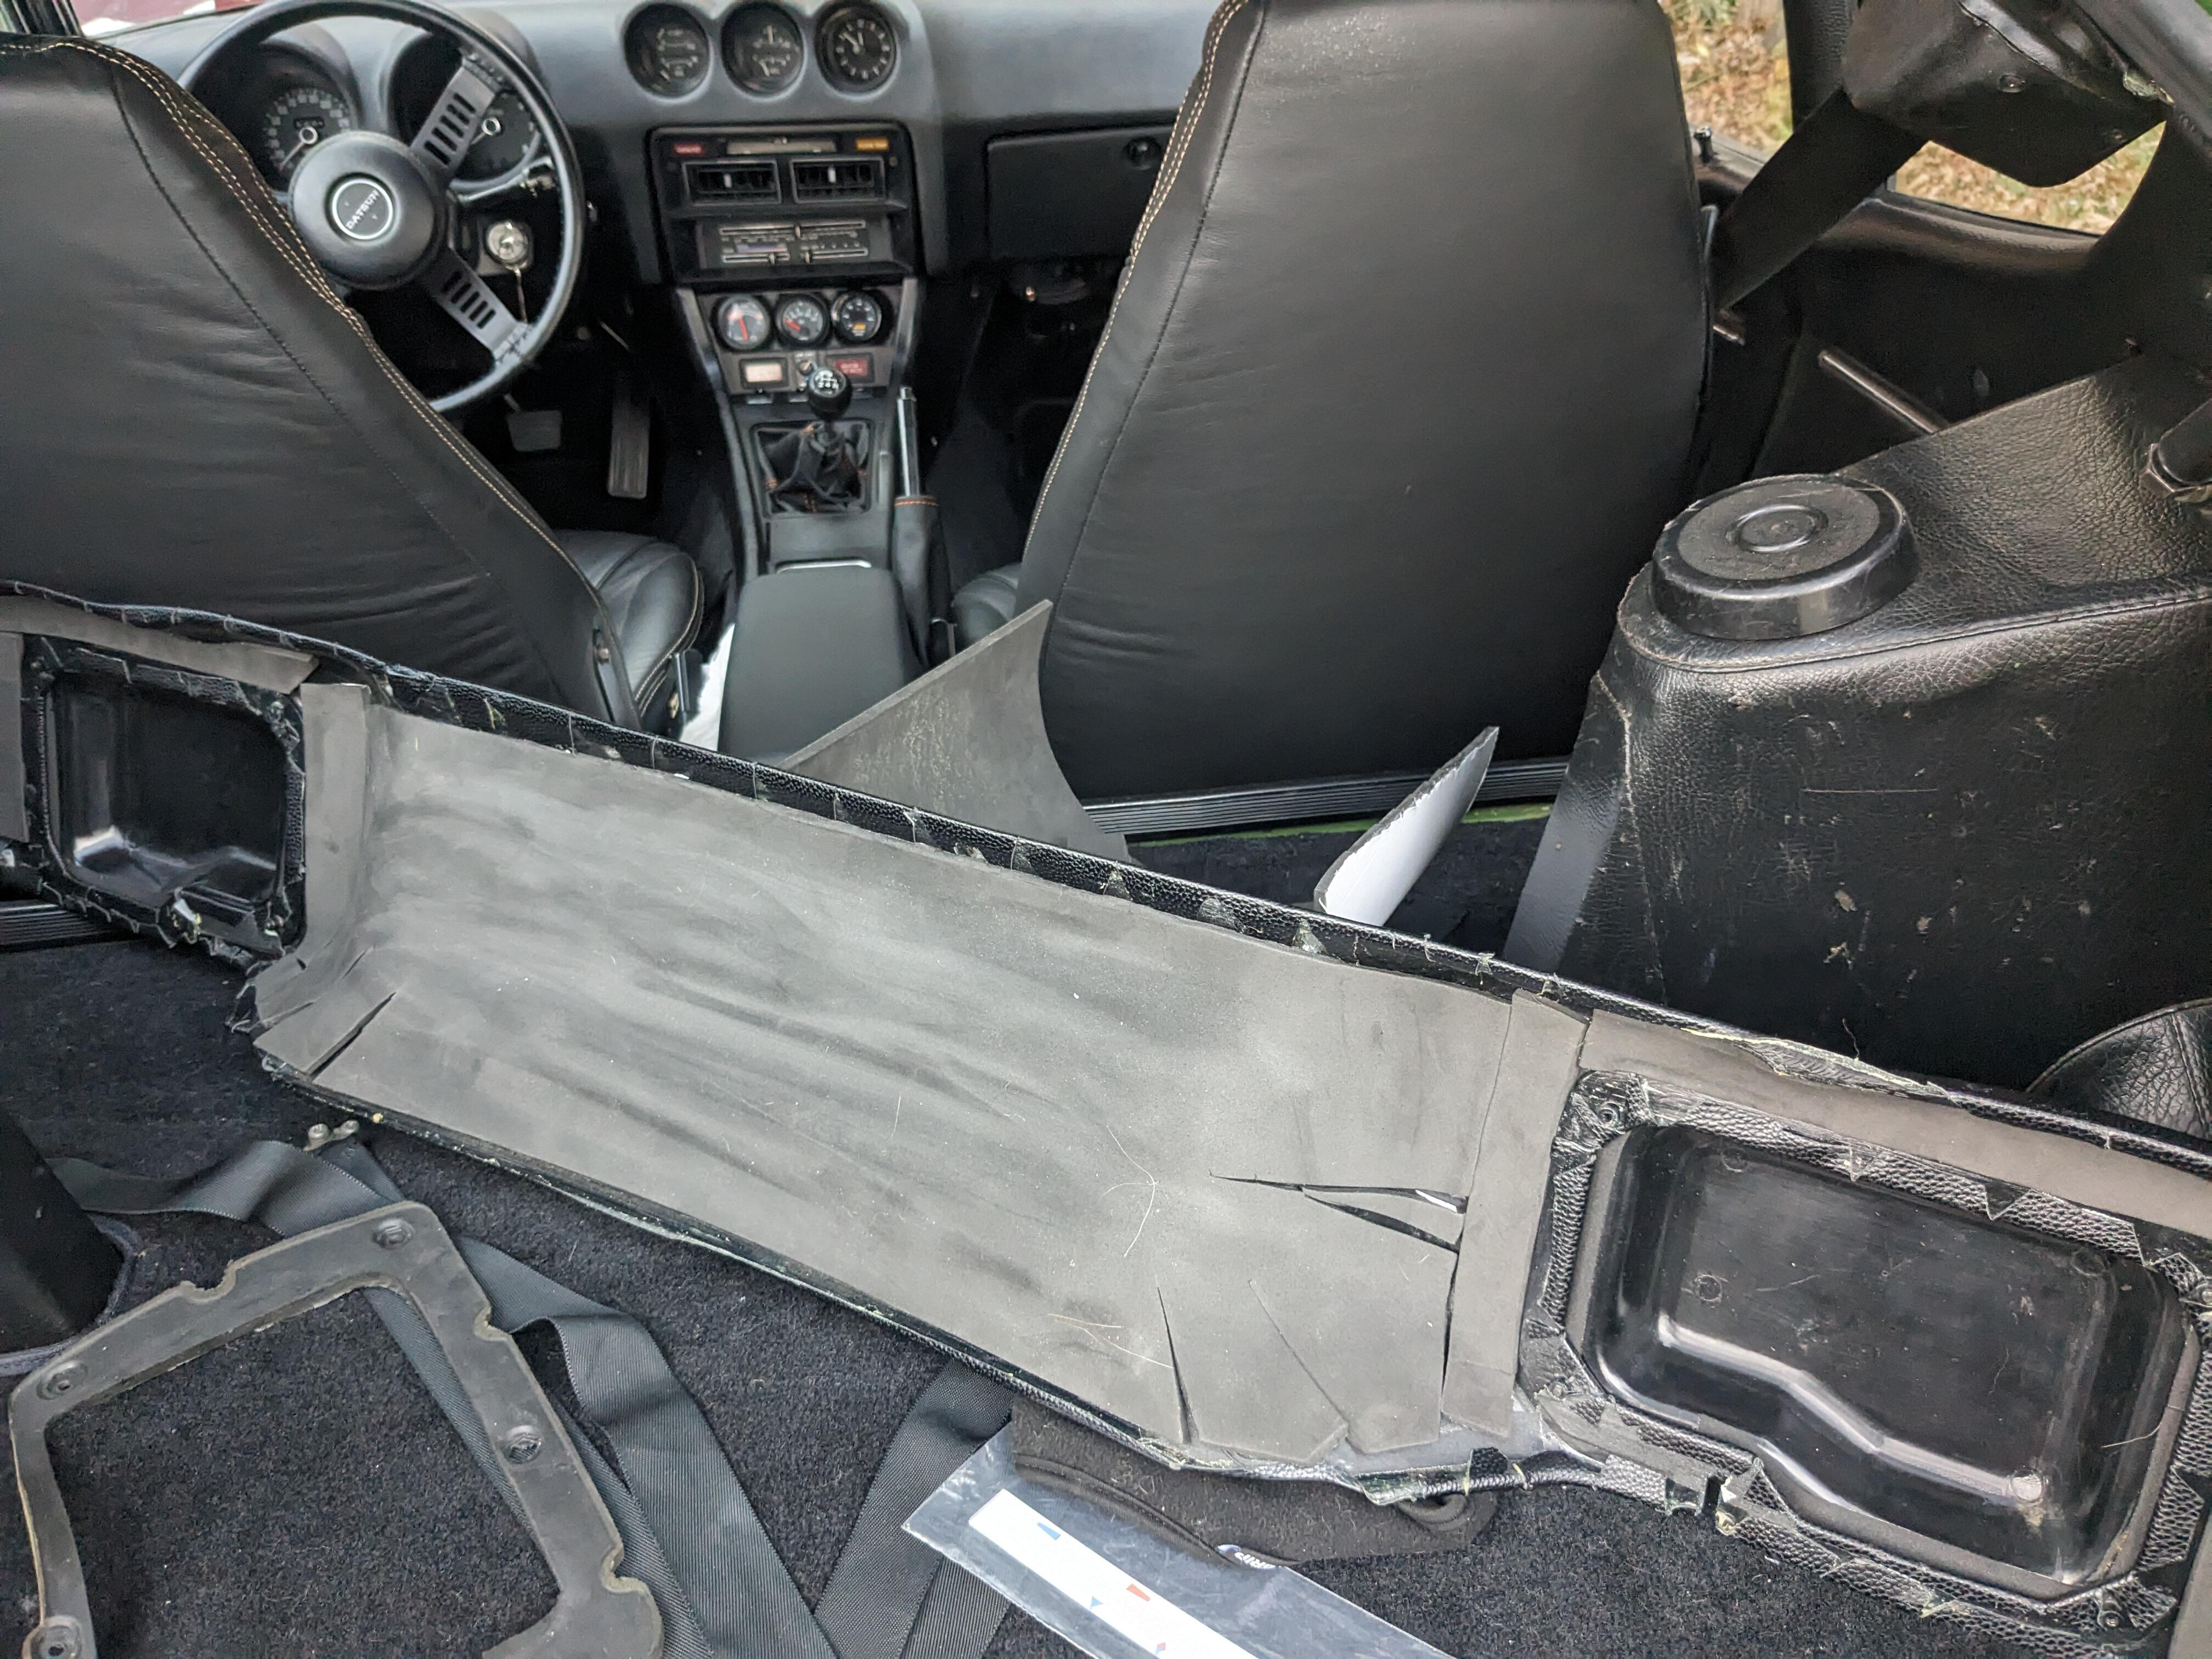
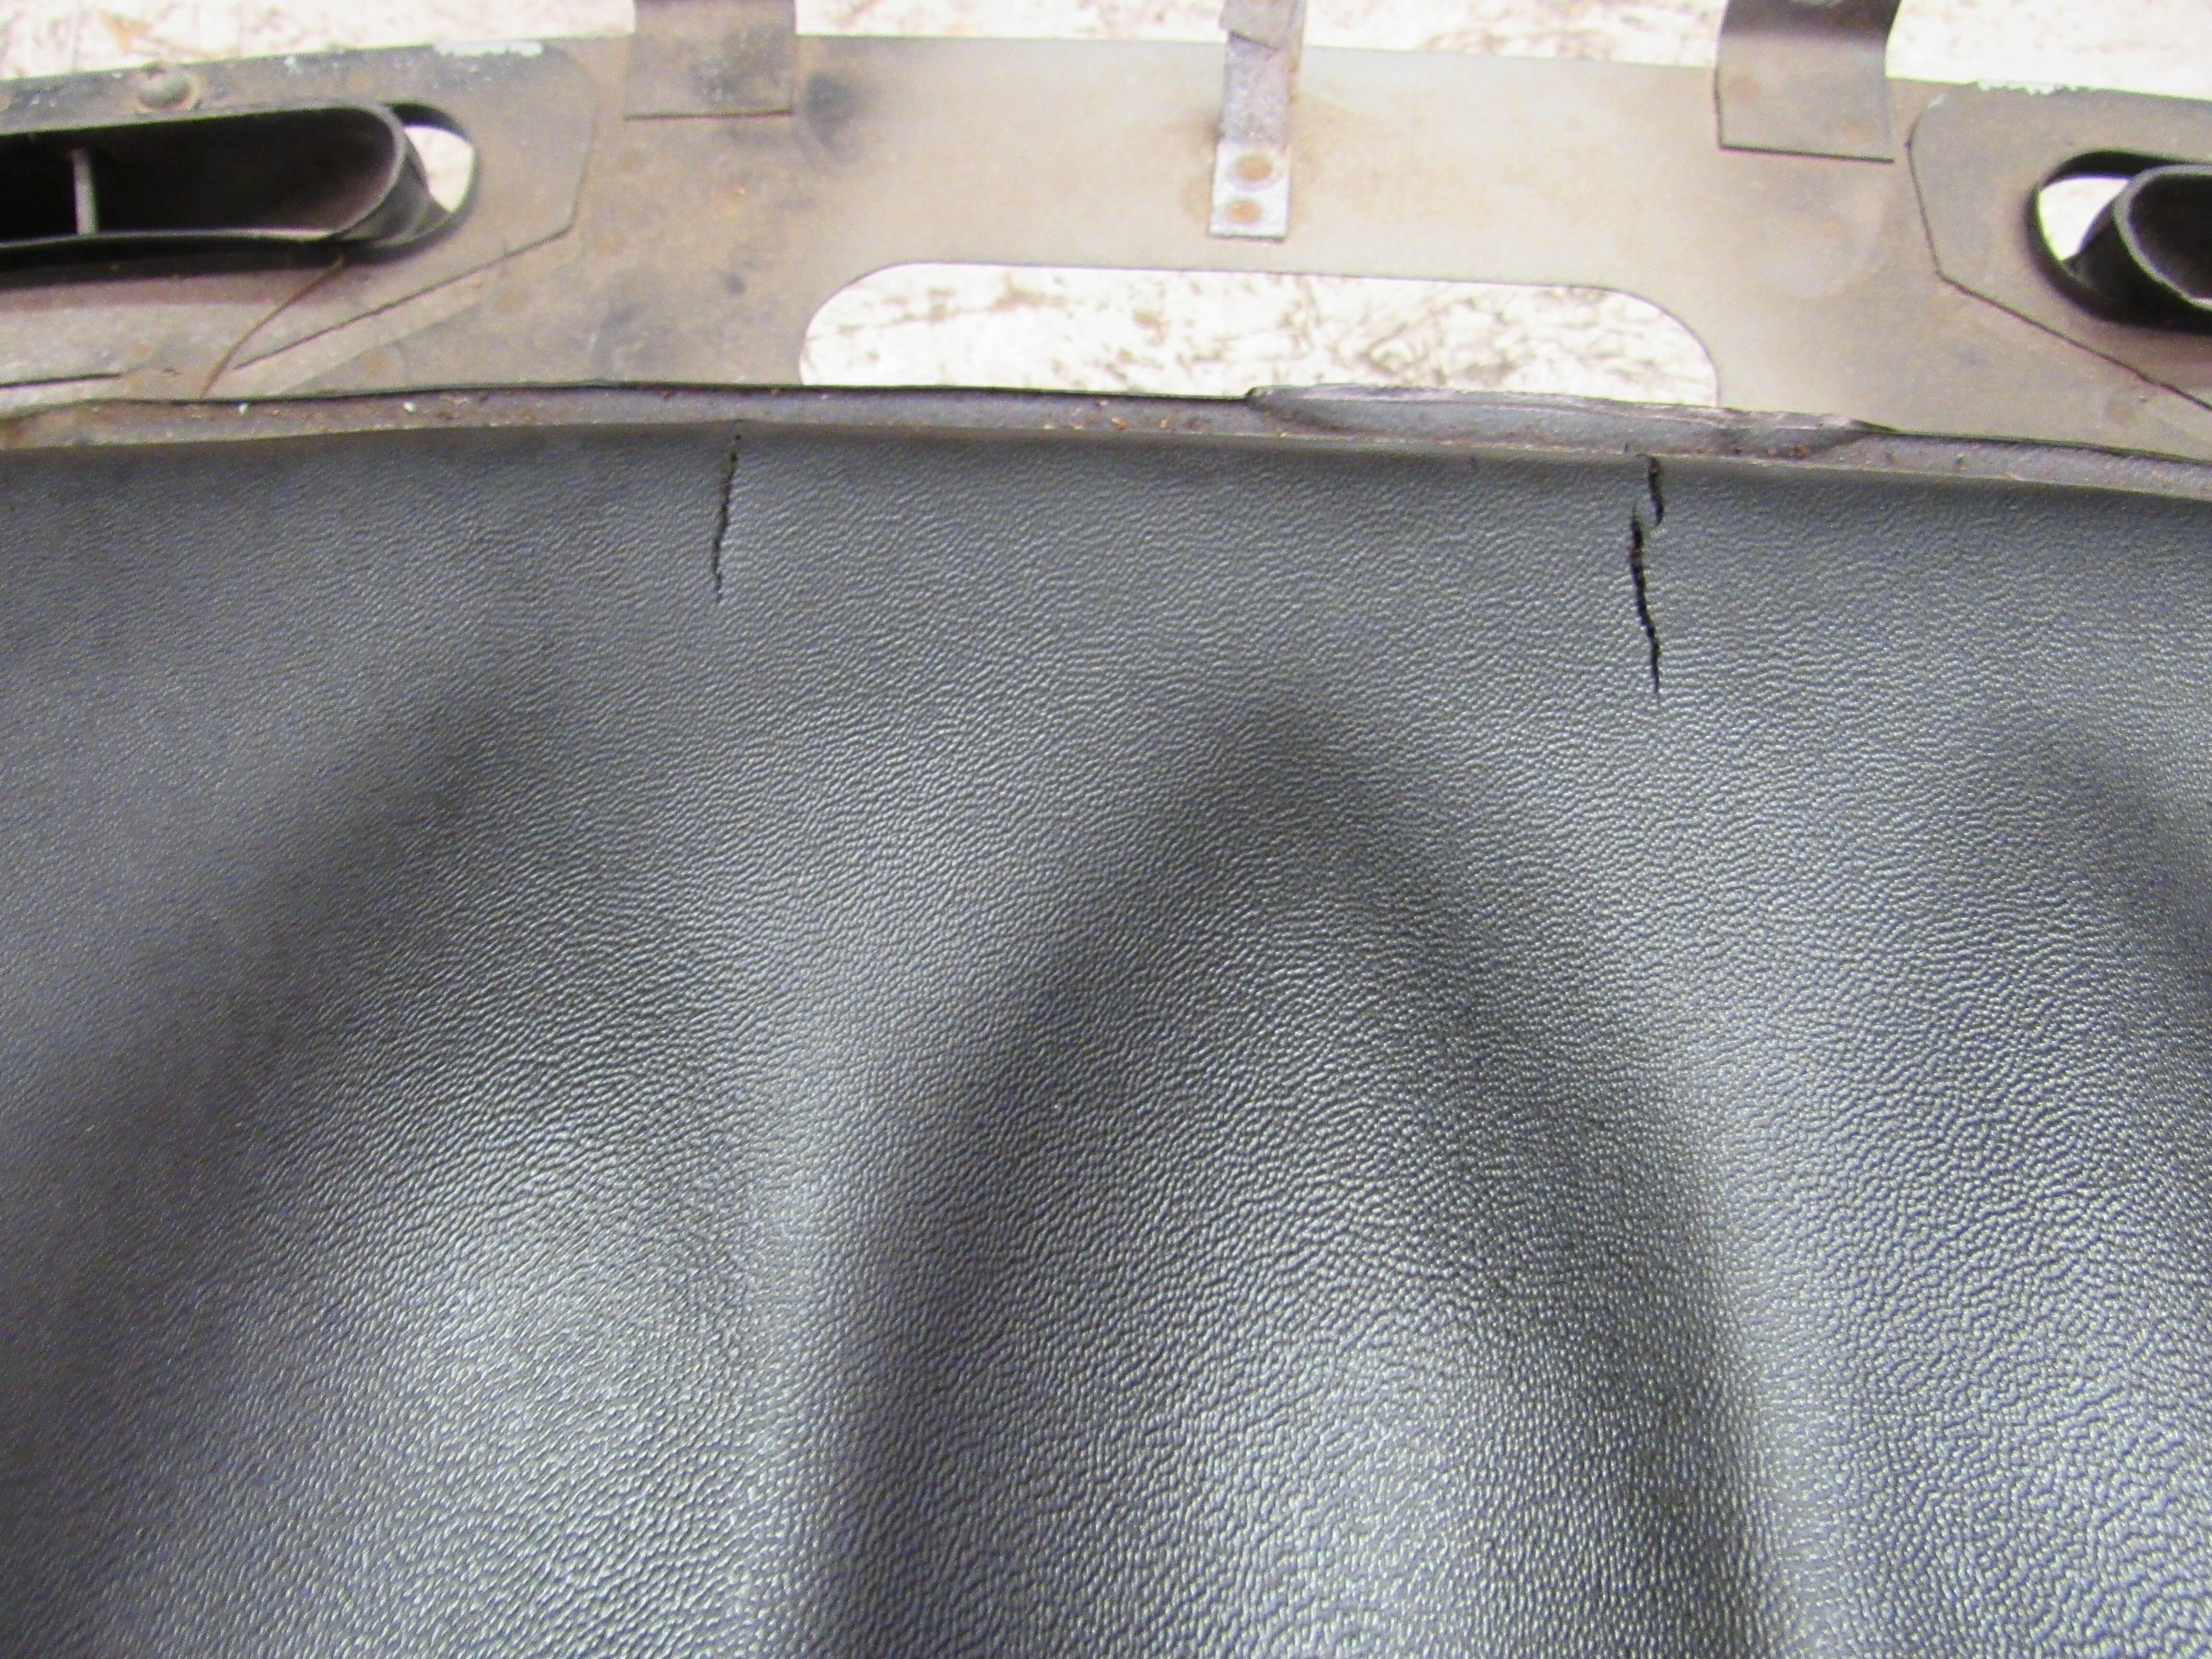
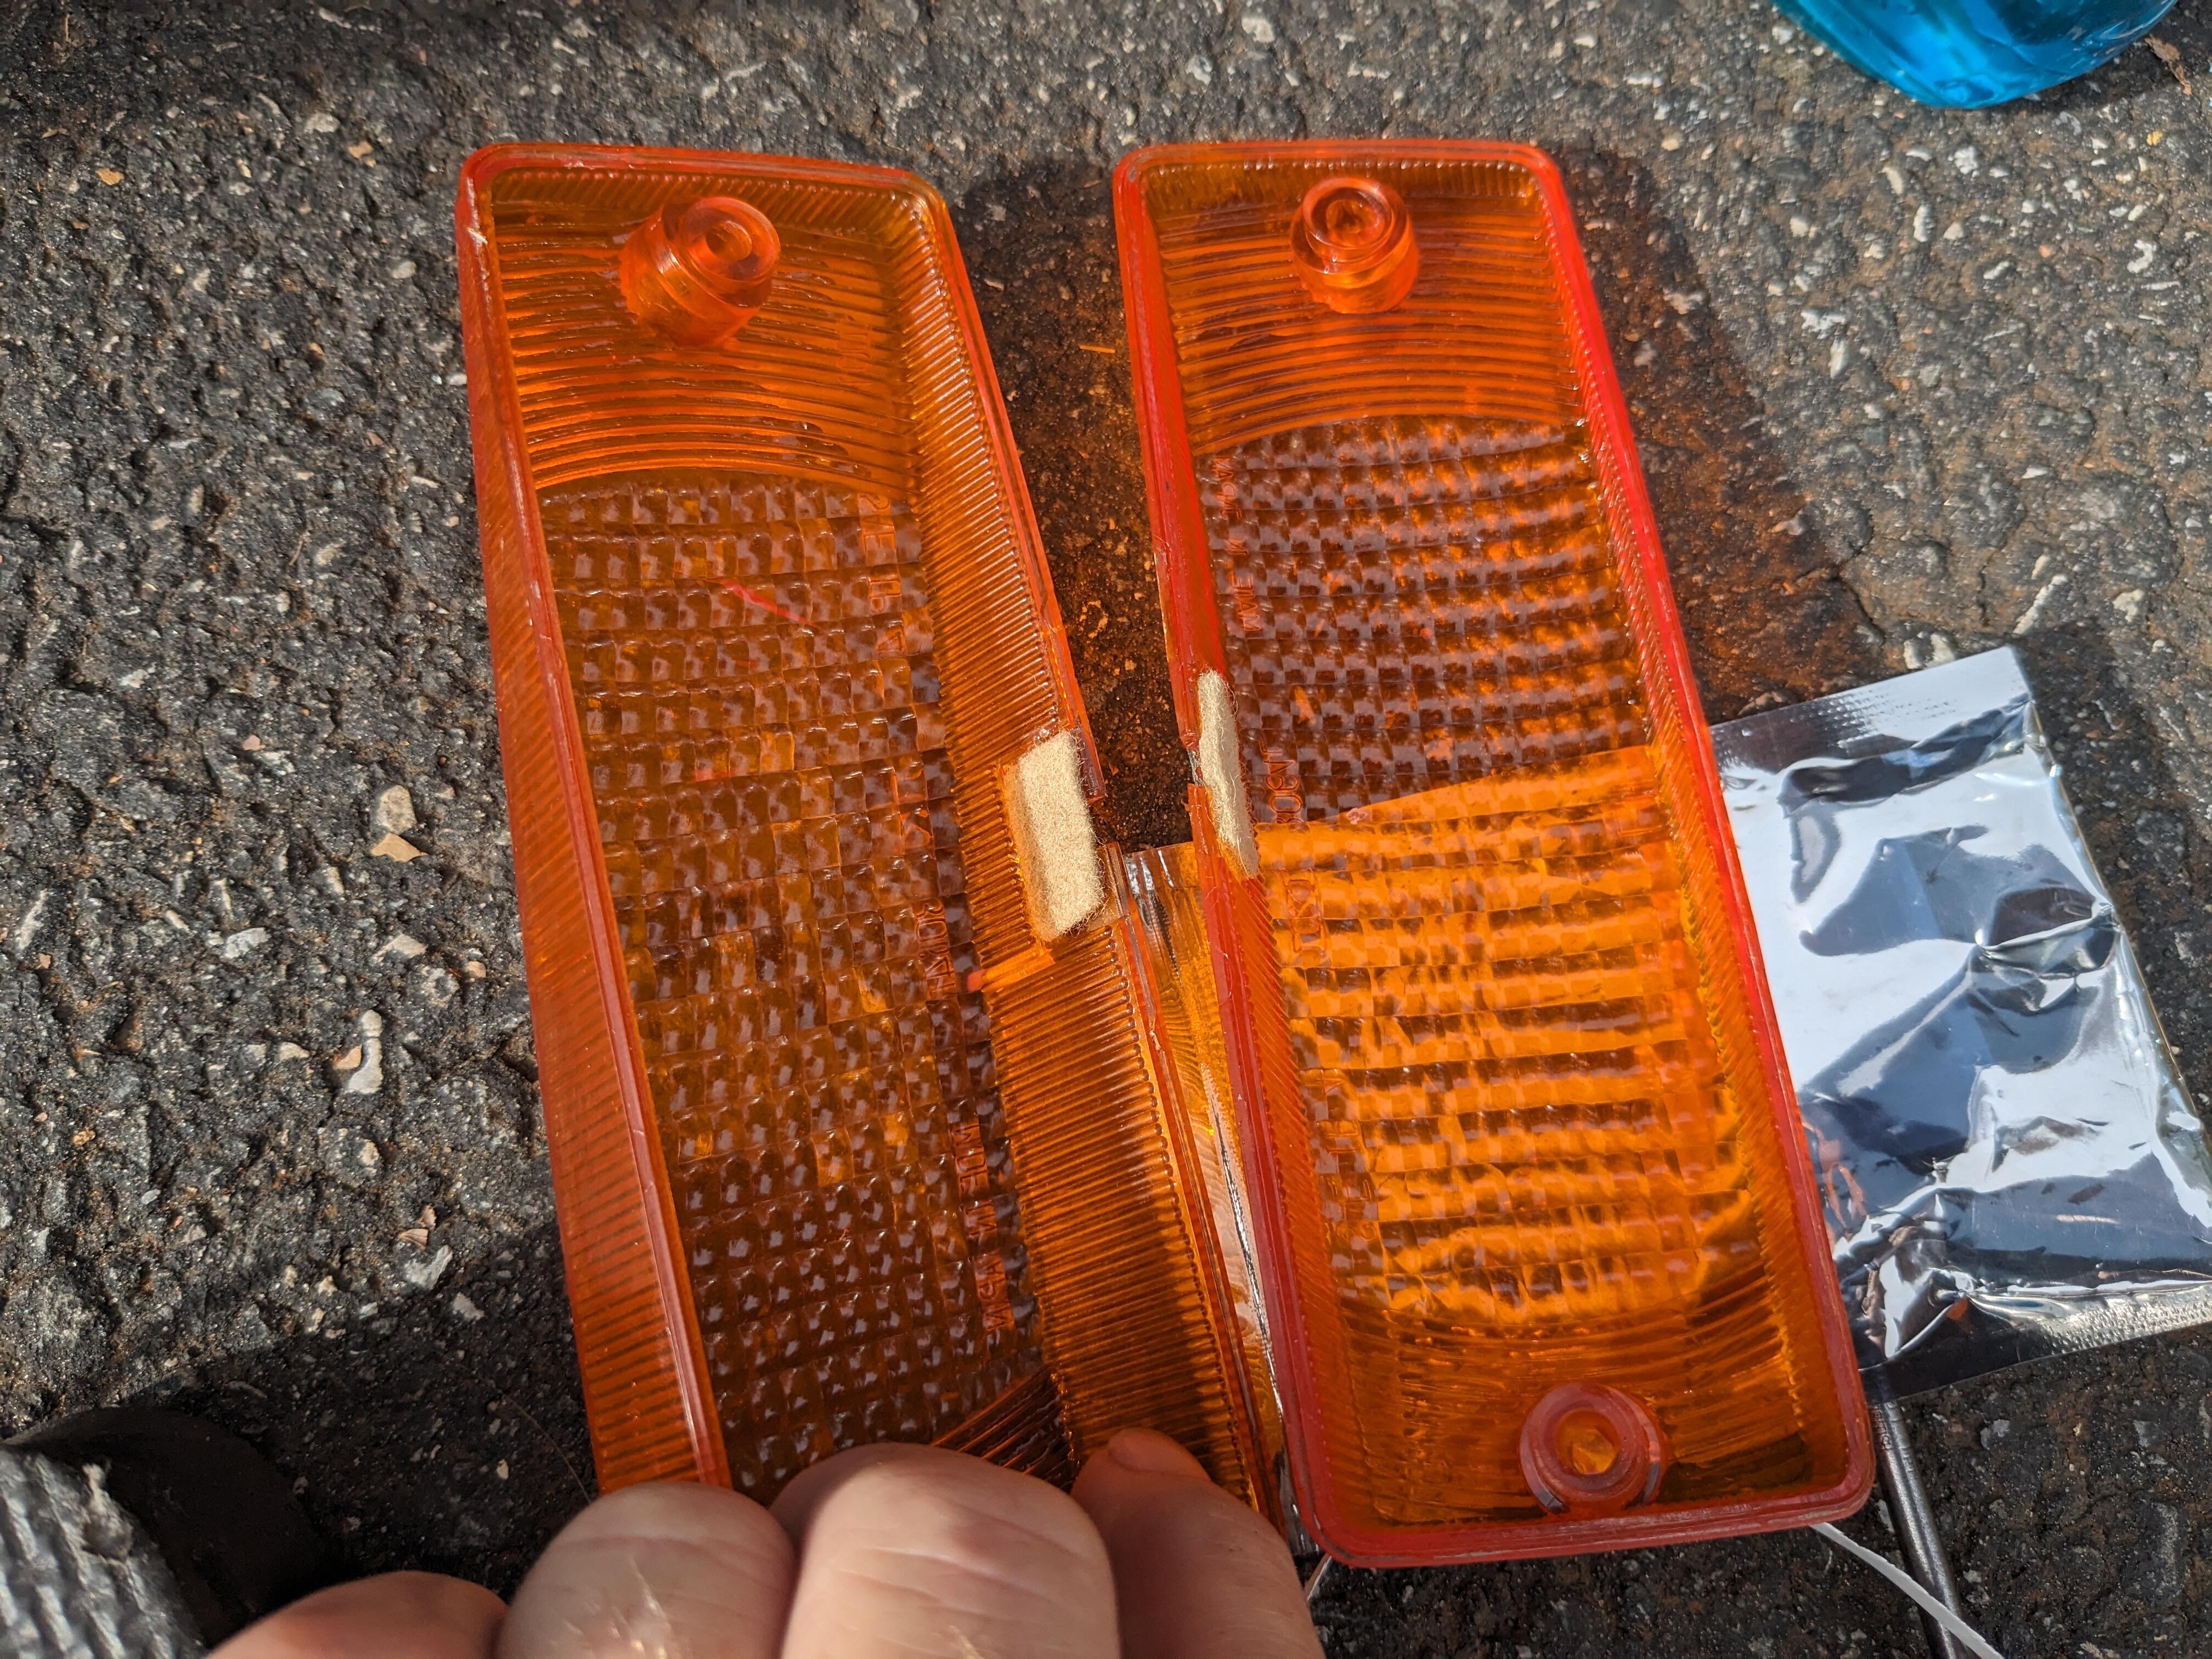
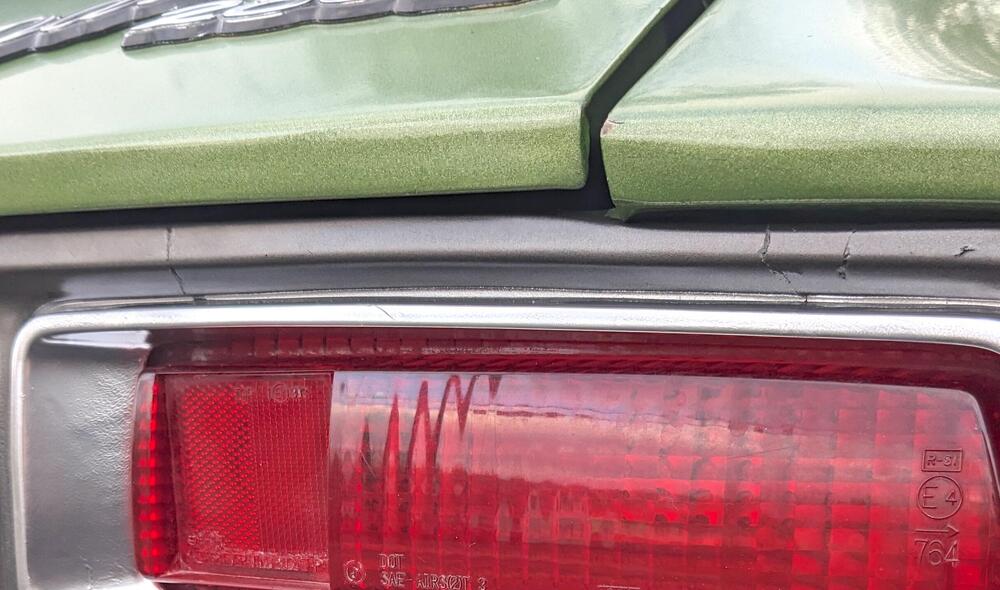
1 pointThanks for the tip Richie. I should have clarified - the tail lamp mounts to body are perfect - on the 280Z the trim panel is secured to the tail lamp first, then the assembly is bolted to the body. The trim panel has short hollow cylinders that the panel screws locate in - those are all gone. I tried reinforcing them with JB weld, all that happened was the panel cracked outside of the epoxy instead. The entire panel is brittle, any flexing (which happened when I made the mistake of picking one up with one hand) and entire sections of the panel snap off. The last piece that I super-glued back is the top section of the right panel - you can see the vertical breaks here:
 1 point
 -
1 pointI believe it may have been used until mid 1972 when they changed to a version with a shorter round section.1 point
-
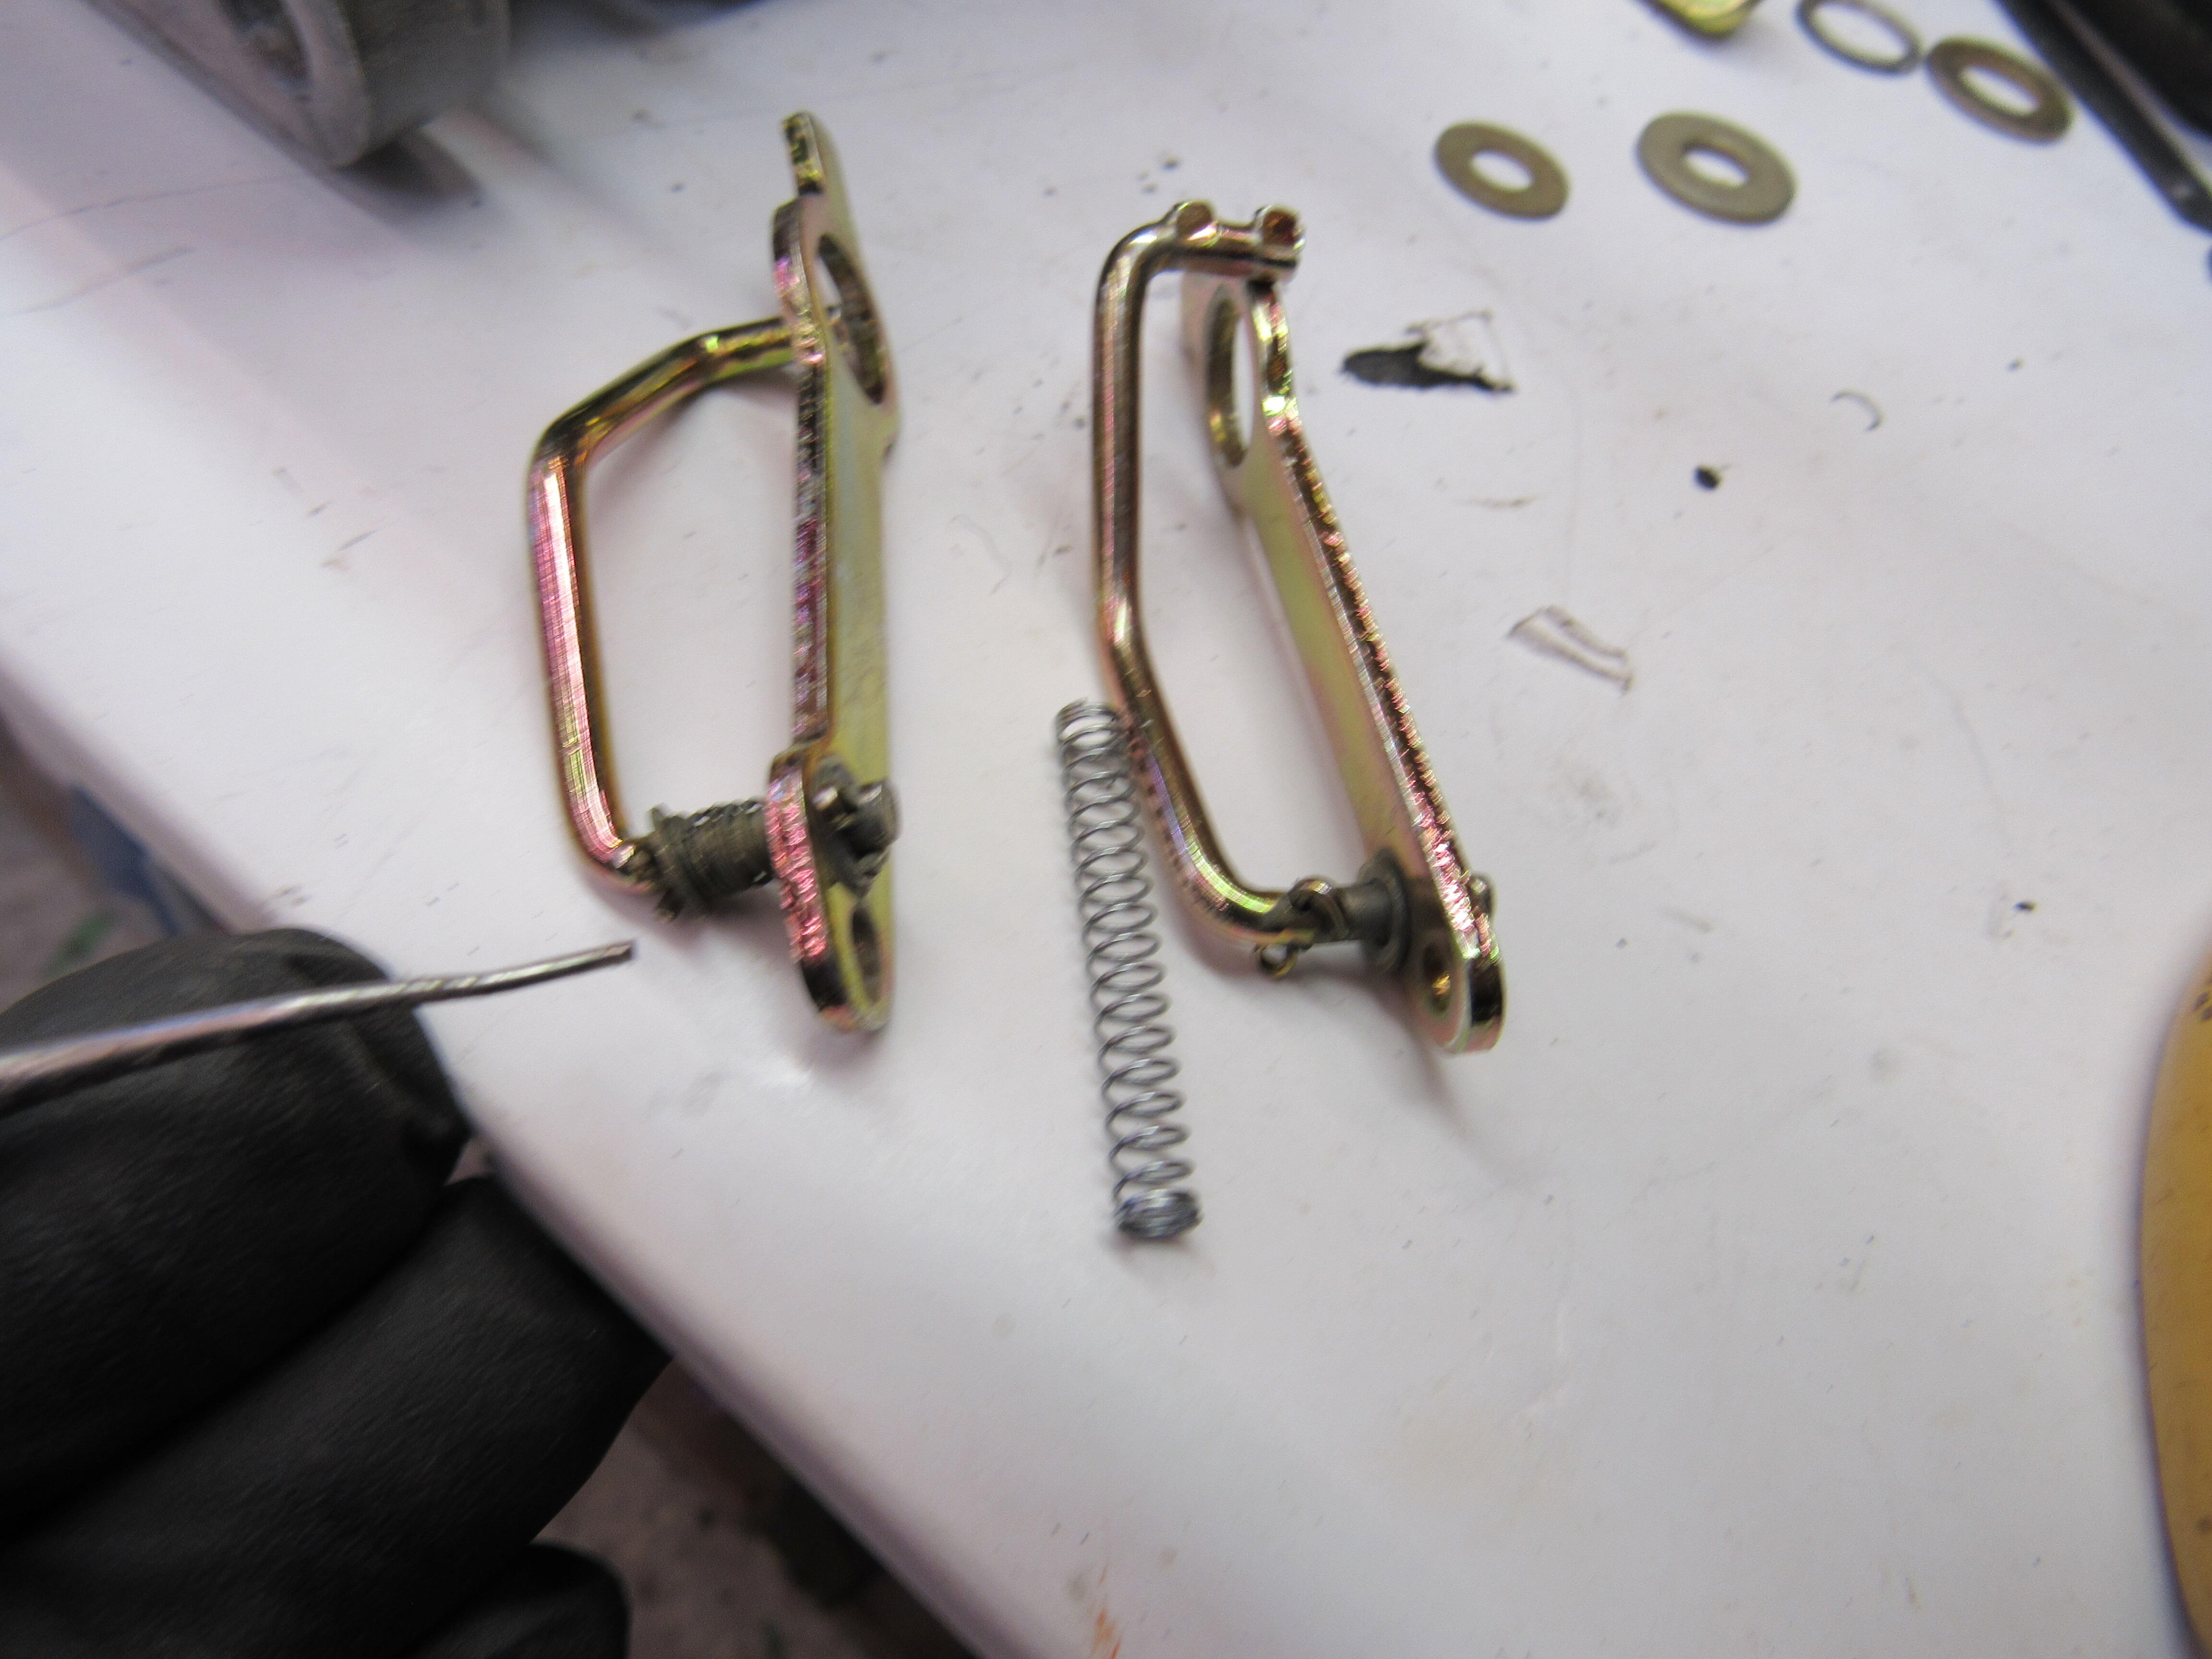
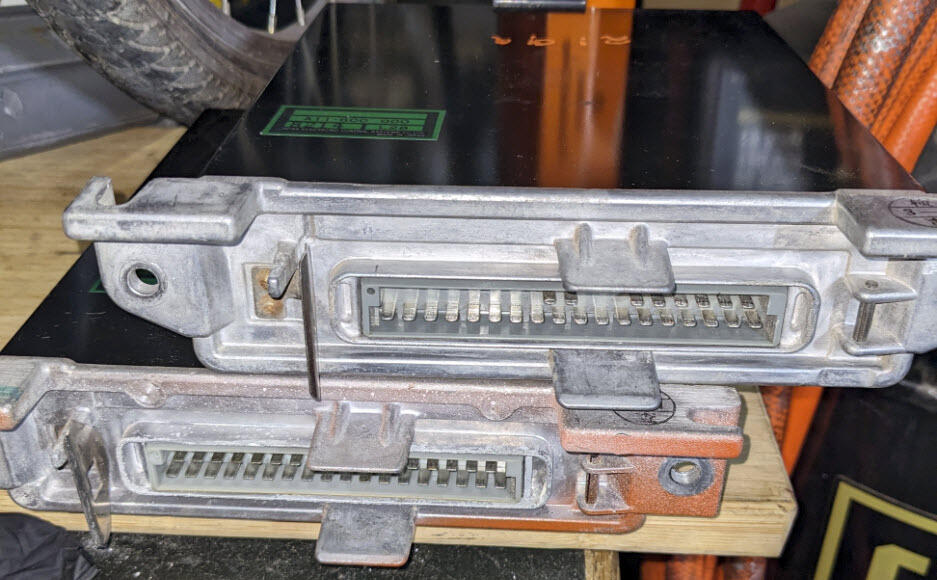
1 pointI ran the engine with the potentiometer on max (I might have a 5K unit), the engine ran on fast idle at 1500 RPMs. I couldn't kill it. Tomorrow I'd lower my idle speed to check for any vacuum leaks. Thanks, this is a good idea. Just for laughs I swapped my ECU with 1 spare unit I had. Same part number as my stock unit, A11-600 000, it has less pins than the one that was in my car. The can ran rich (I could tell by the exhaust smell), I turned off the potentiometer completely since it didn't make any changes. The fuel pressure at idle was 32 psi (vs 30 psi before), the vacuum was 12 (vs 14 before). No more popping through the exhaust when I was revving the engine. (in the picture: the bottom is my stock unit). It is good to know that if a problem doesn't go away with a potentiometer, an AFM adjustment won't help much. I'd hate opening it up and messing it up even worse. I put my old ECU back to look for vacuum leaks tomorrow. Appreciate your help.
 1 point
 -
1 pointMore ohms. You should be able to kill the engine with the potentiometer. Although, "bogs down" doesn't sound like the lean problem. The lean problem is usually popping back through the intake manifold. And bucking like a horse when you ease in to the throttle. If you can't fix it with the potentiometer you won't be able to fix it via the AFM. This part, below, makes me thing that you might have a vacuum leak. A simple test that I found for vacuum leaks, after I got my engine all figured out, was that I could kill the engine by closing off the idle speed screw. Just drop idle speed until the engine dies. If it never dies then you have a vacuum leak somewhere. Not the AFM idle mixture screw, the throttle body idle speed adjustment screw. The one with the big head that you can turn by hand. Besides that, the screw in the hole on the AFM is only for low air flow adjustments. It shouldn't do much once the engine starts pulling a lot of air. It's just a screw in a small vane bypass port.1 point
-
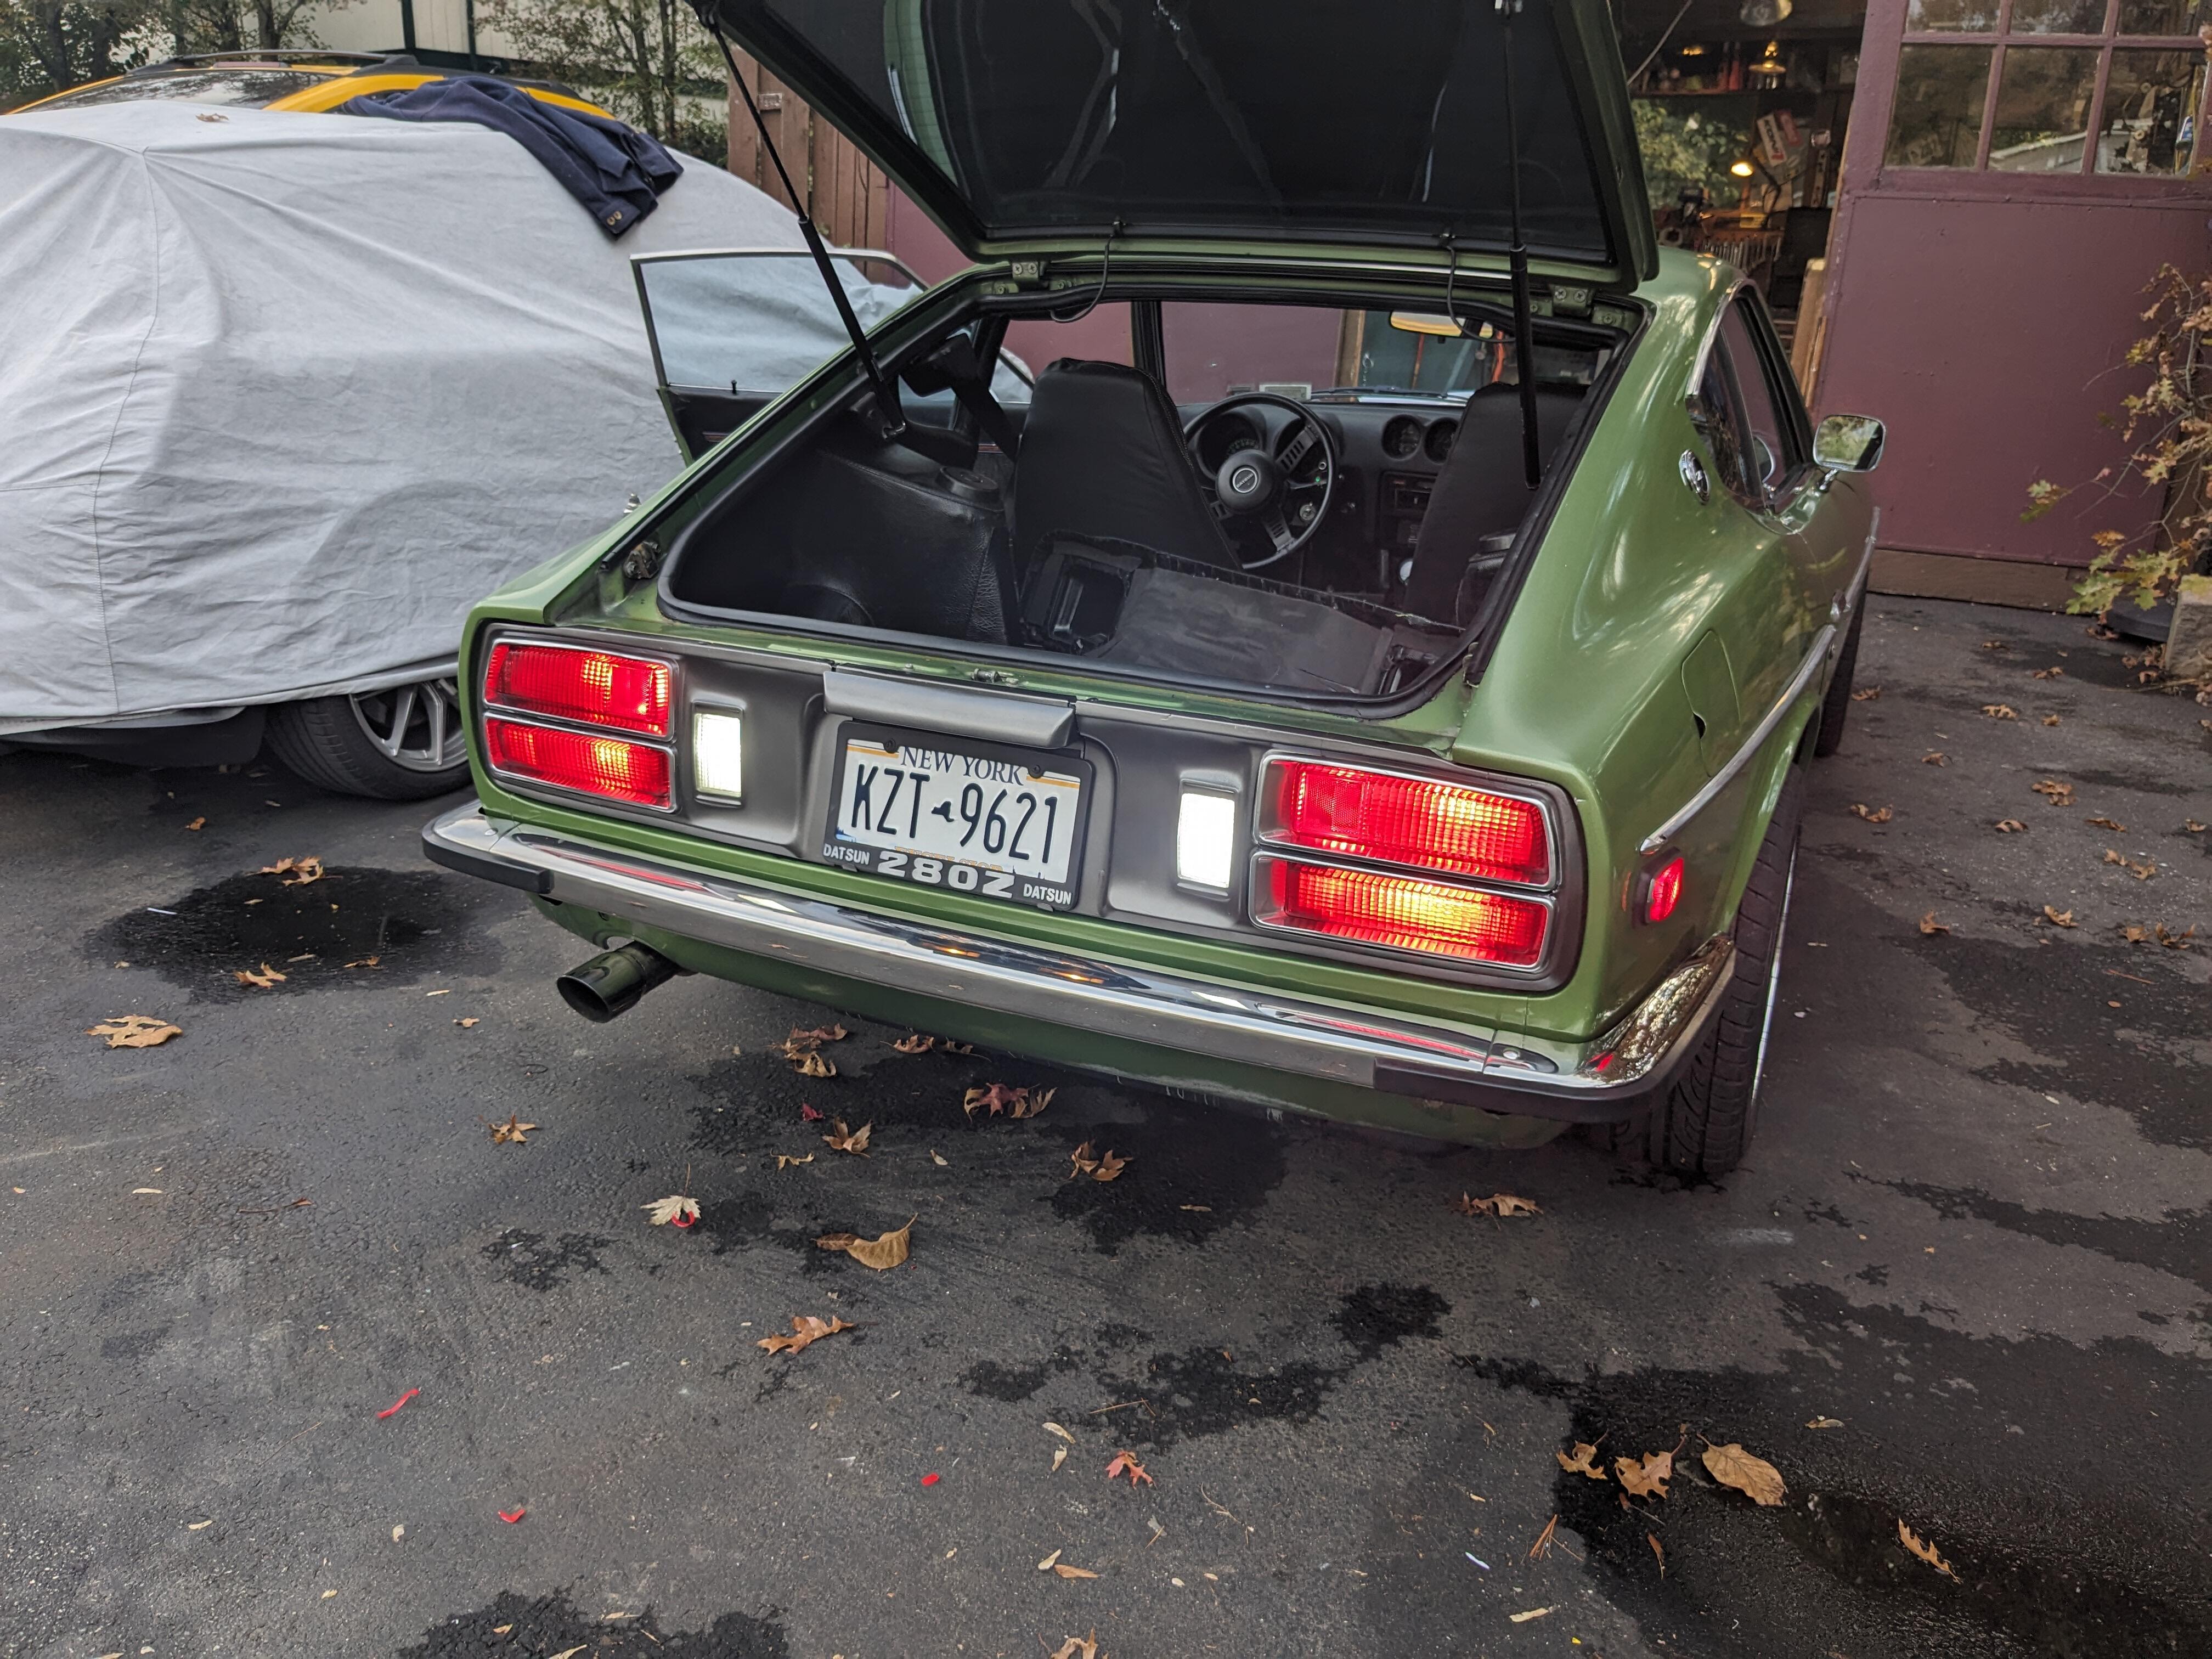
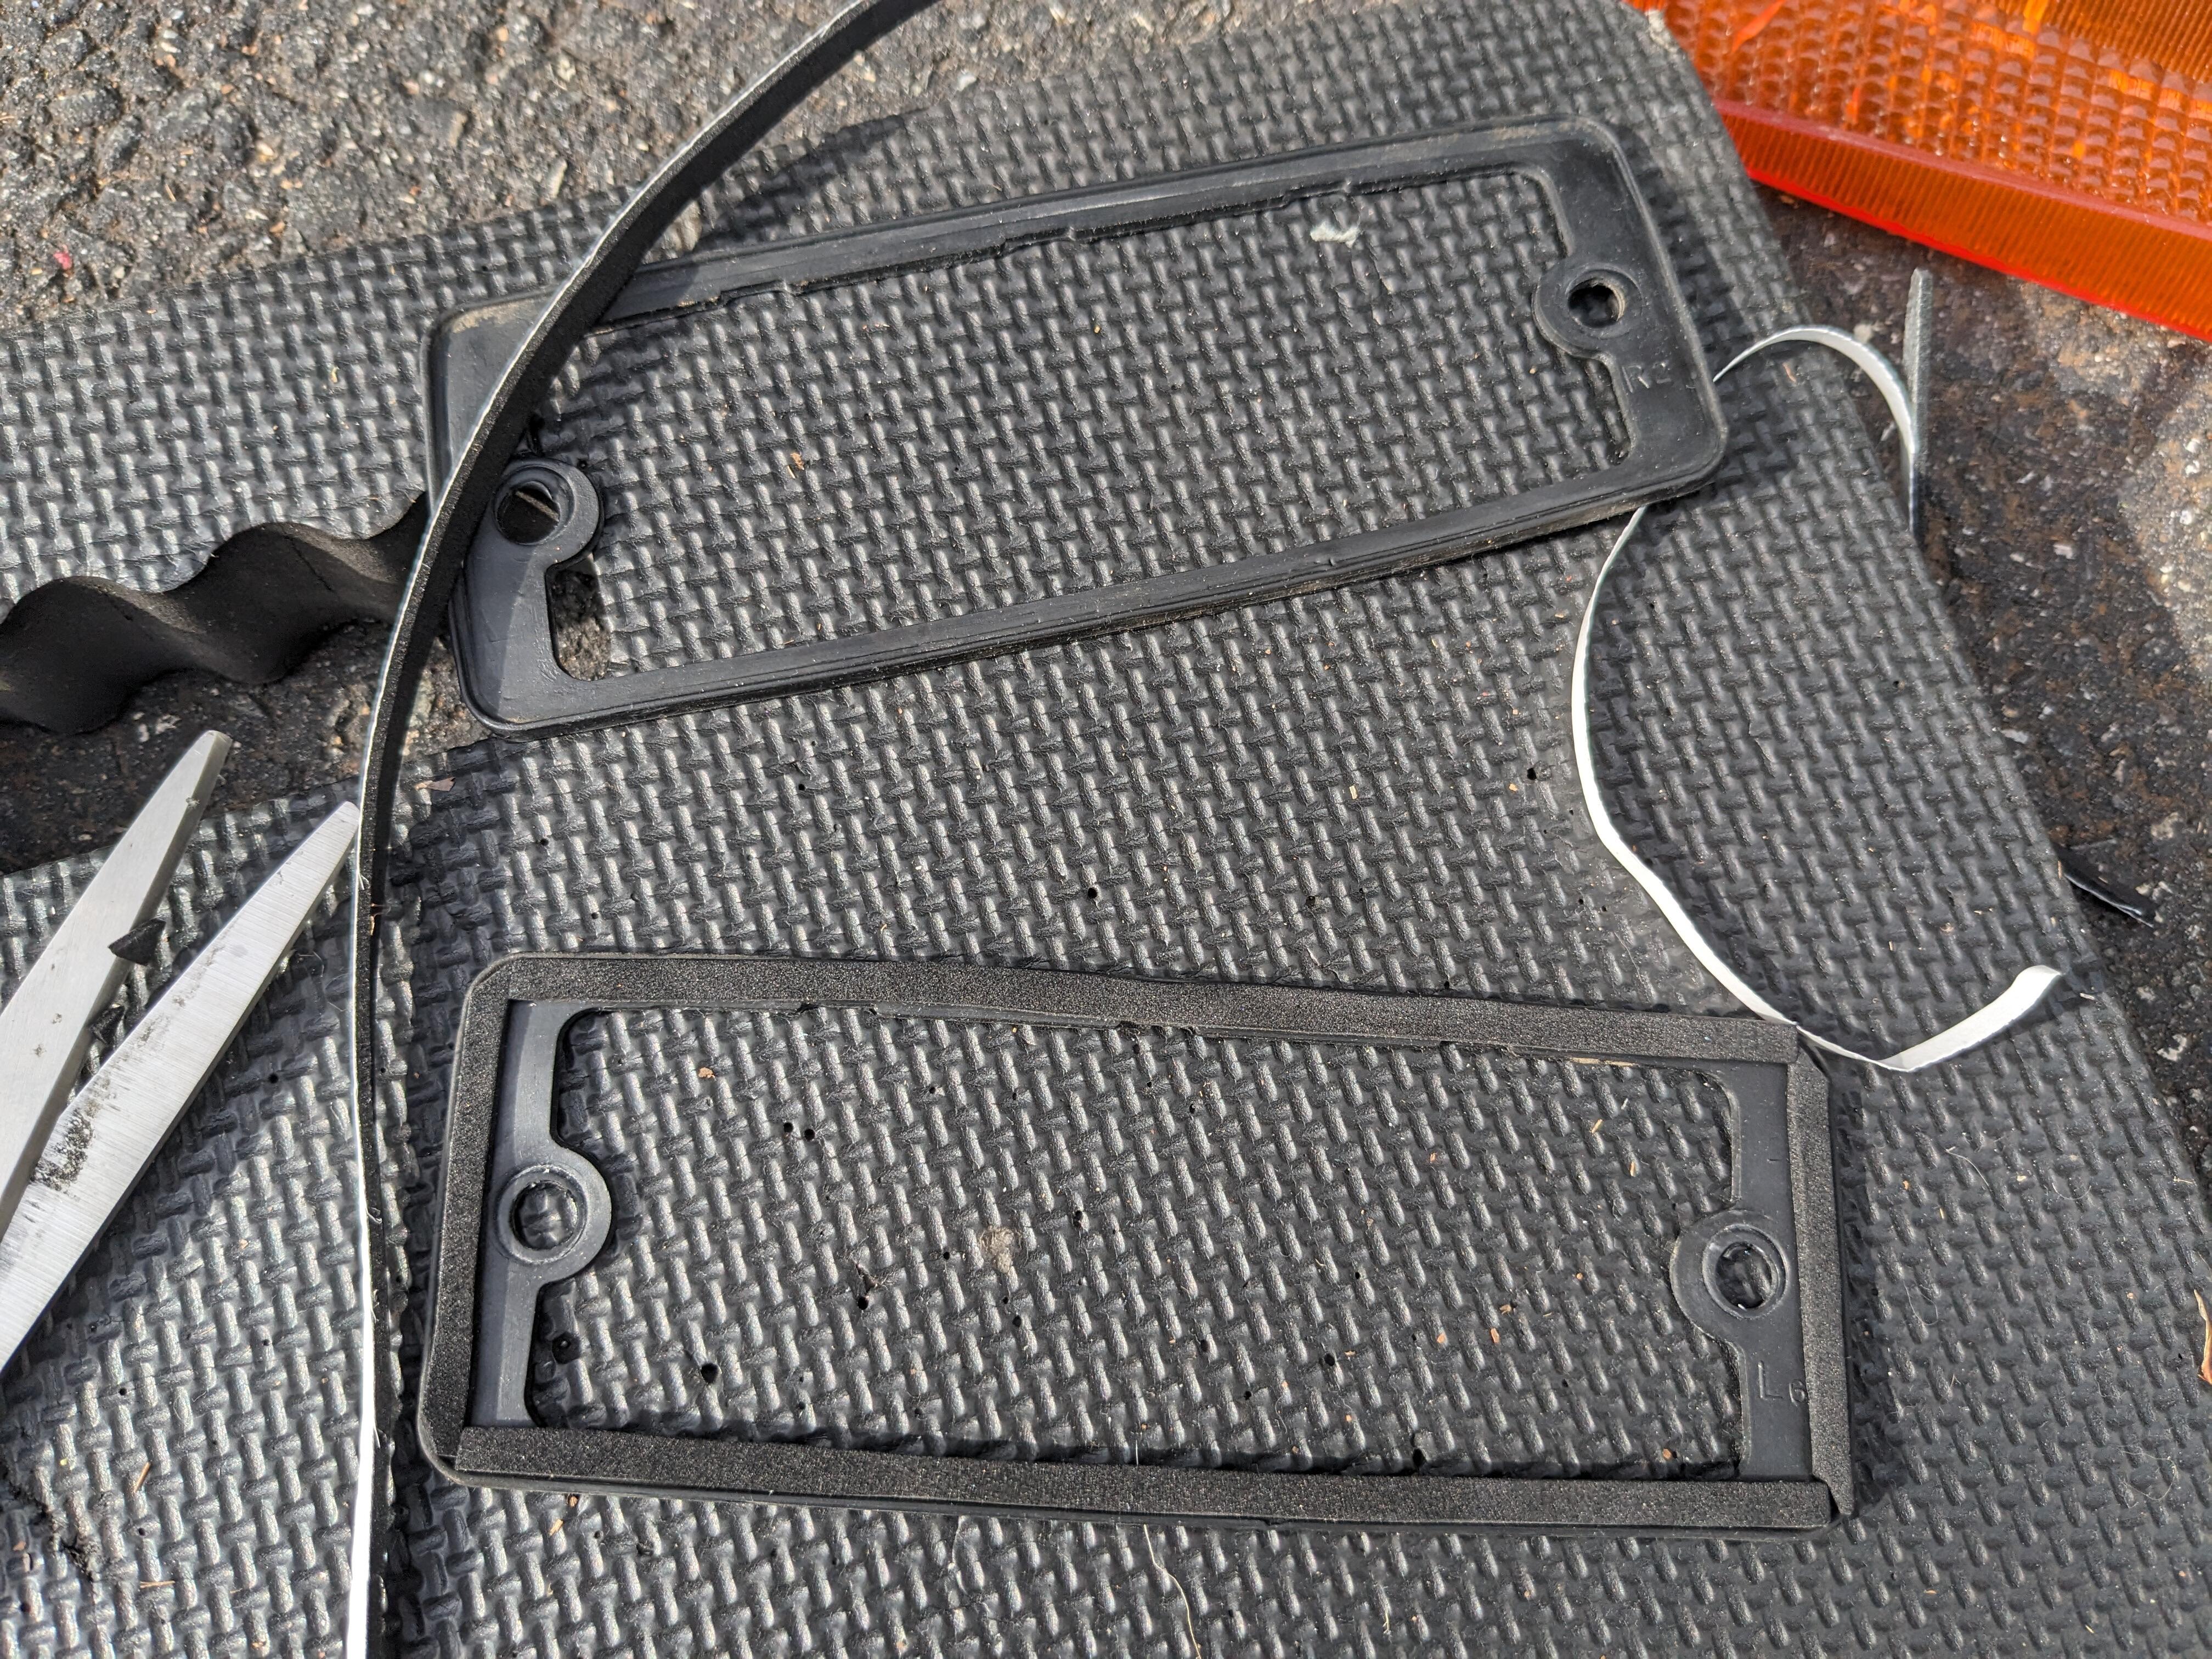
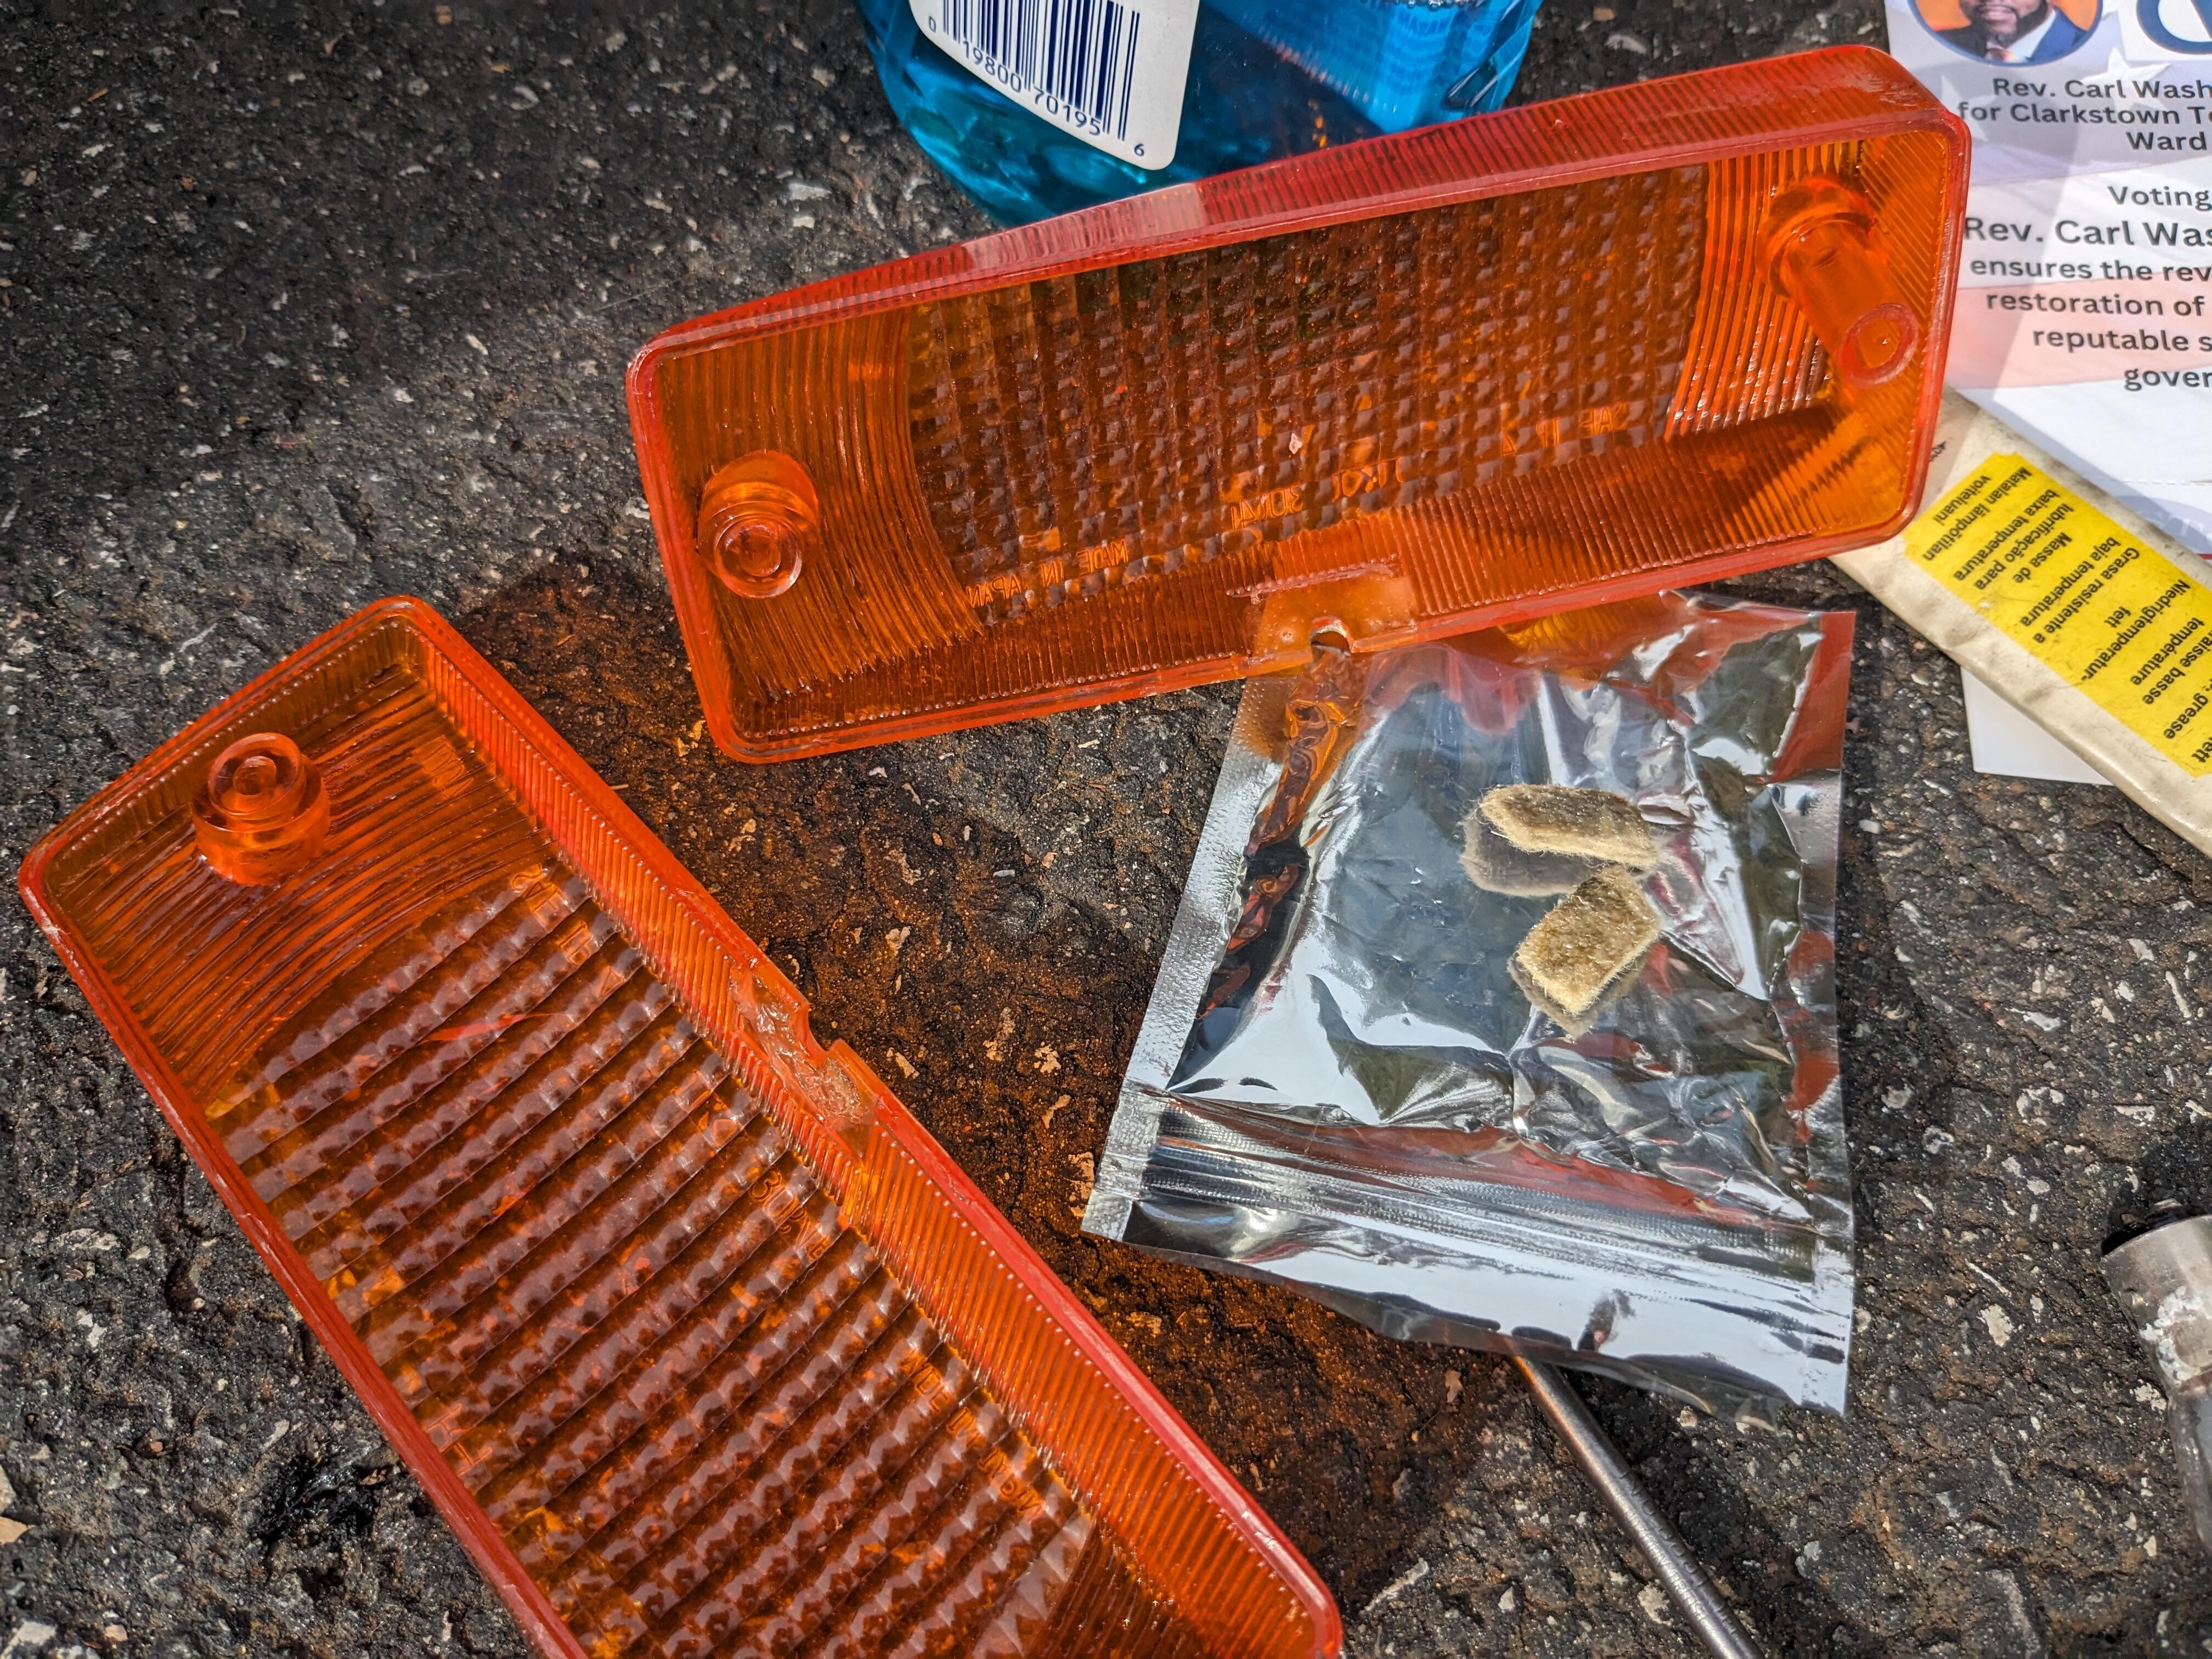
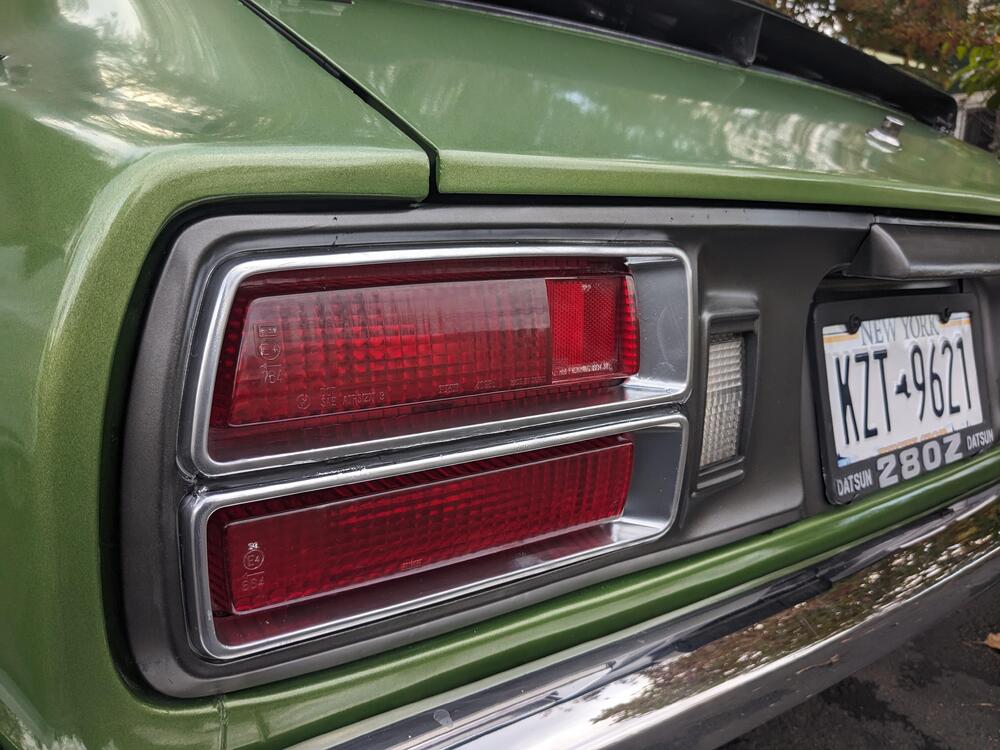
1 pointNew lamp gaskets finally arrived, so I reinstalled my tail light panels. I will need to source new ones DTR, they are so brittle, they keep cracking when I handle them. Also had to use 3M VHB tape to glue the panels the lamps, as most of the screw mount posts are so brittle they snapped & crumbled when I tried to reinstall them. with those installed, I was able to put the rear panel back in. I added closed cell foam to give some more density .


 1 point
 -
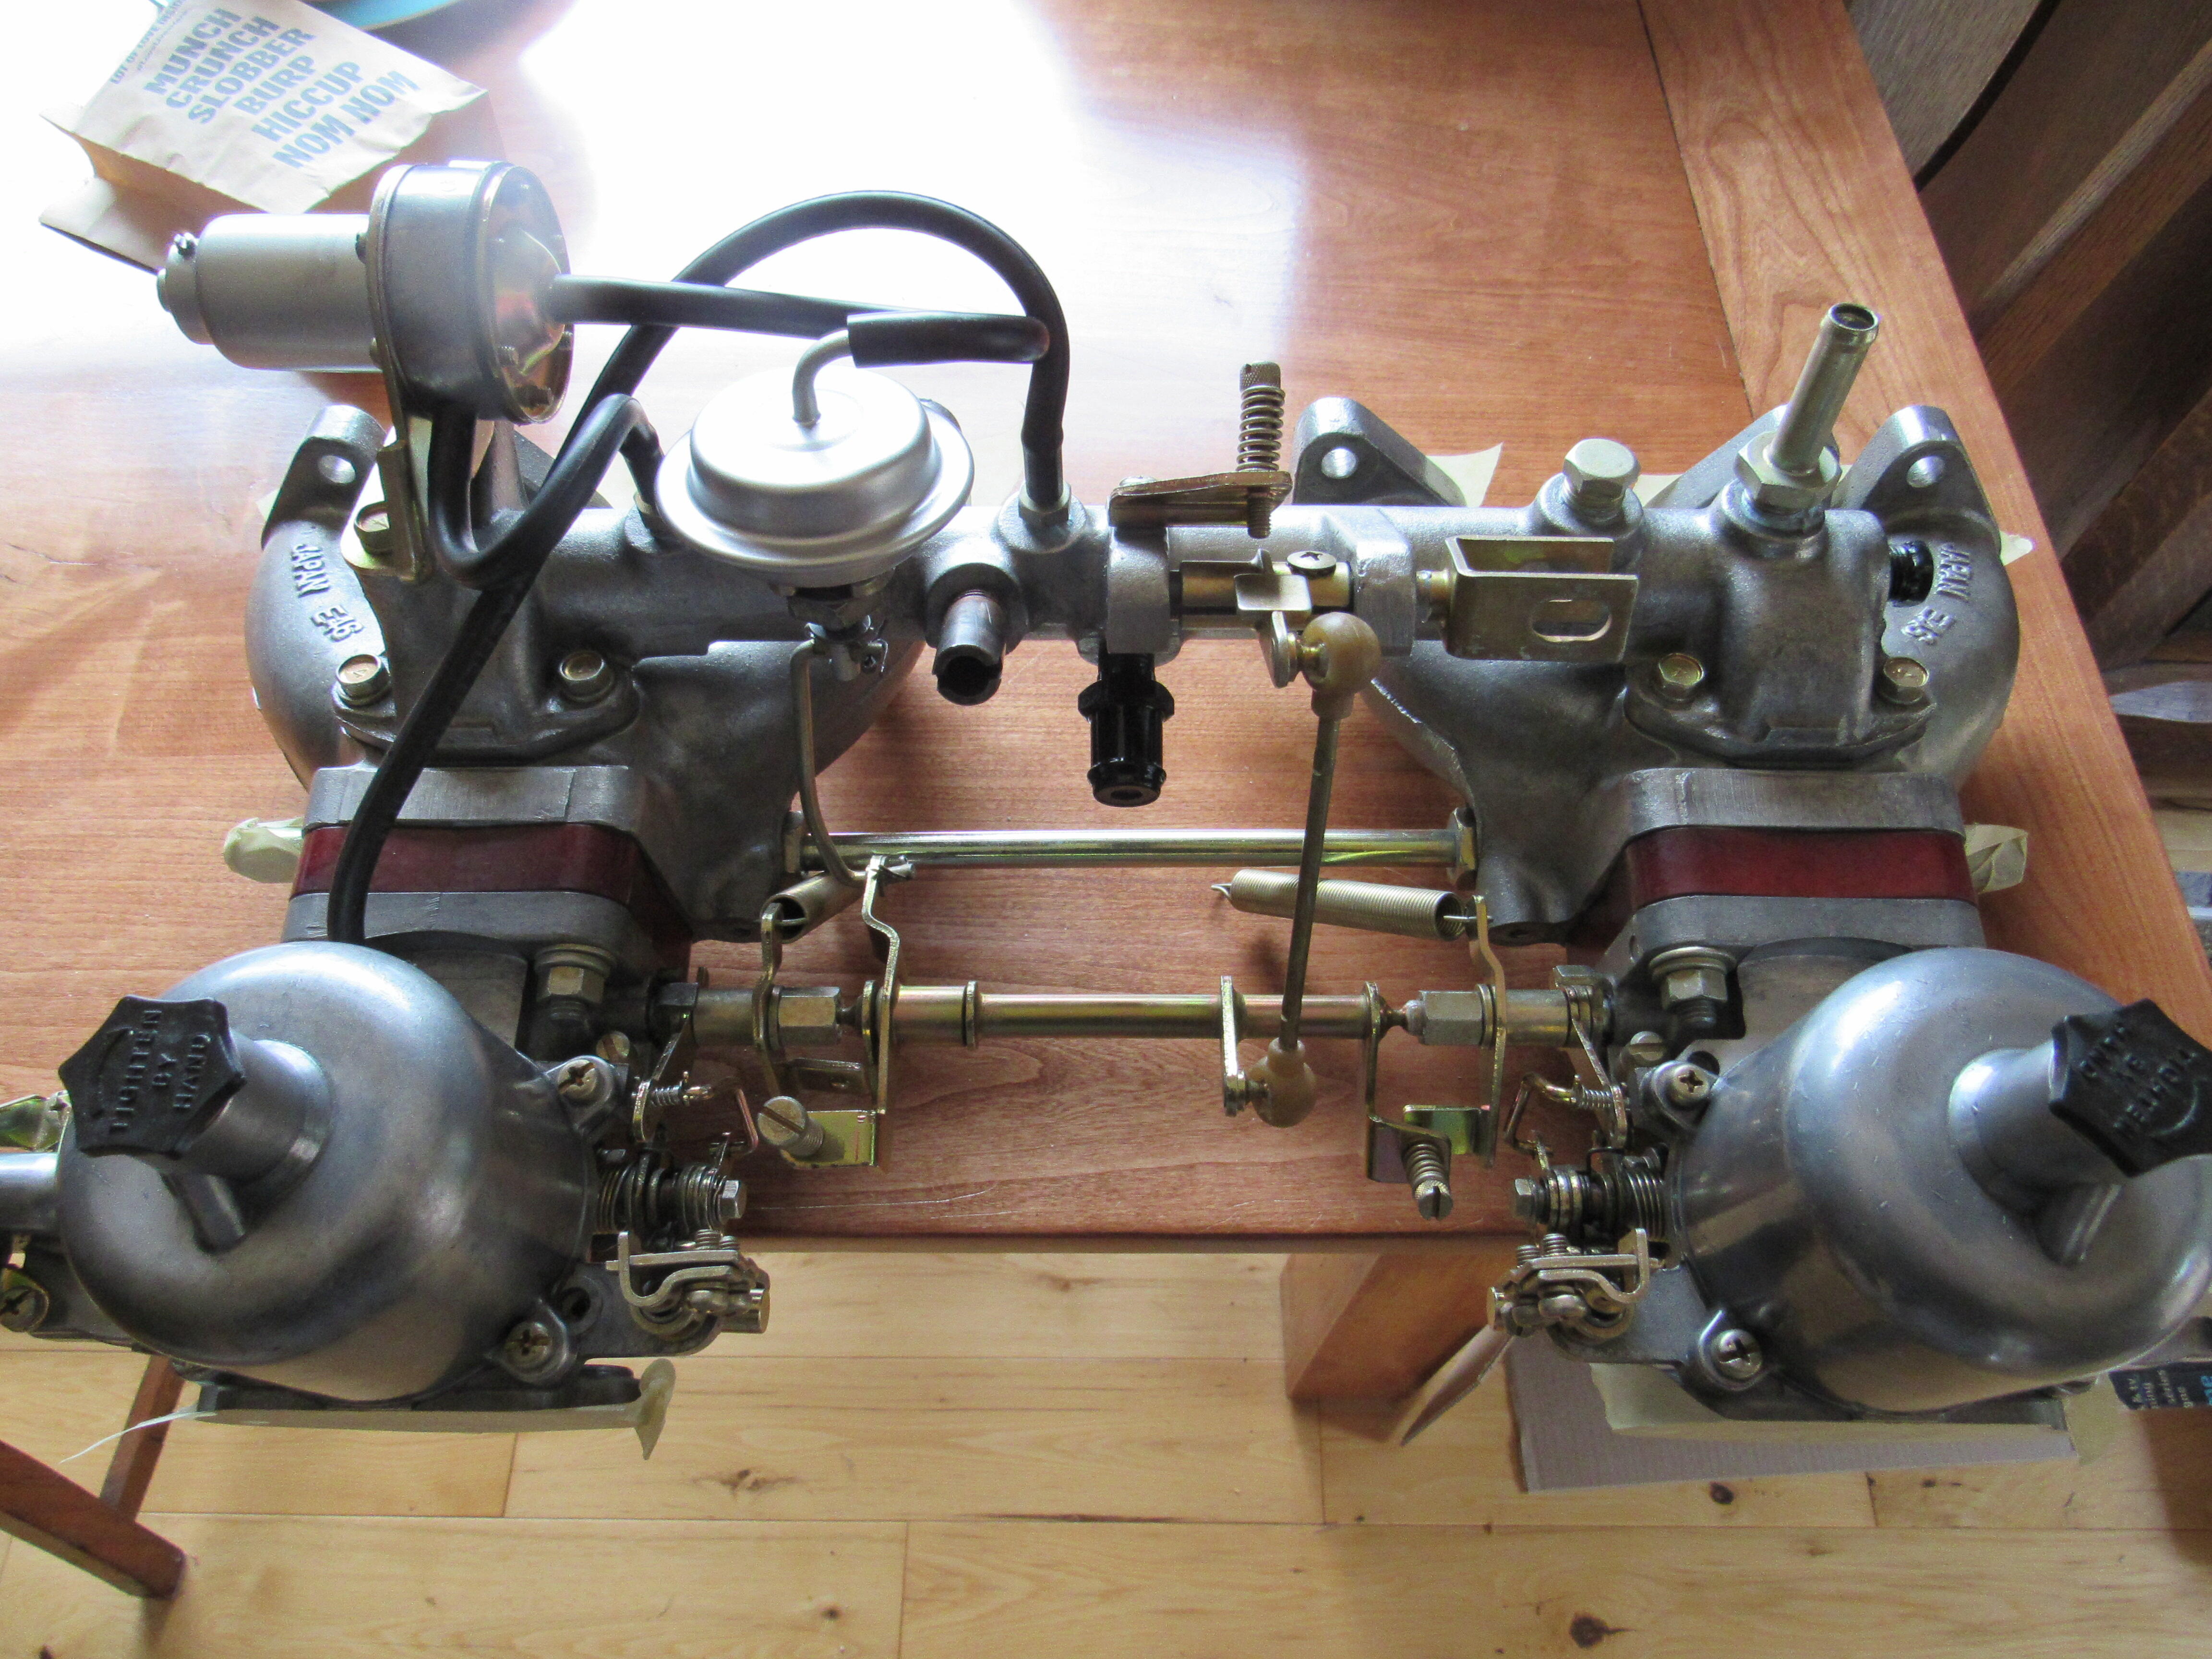
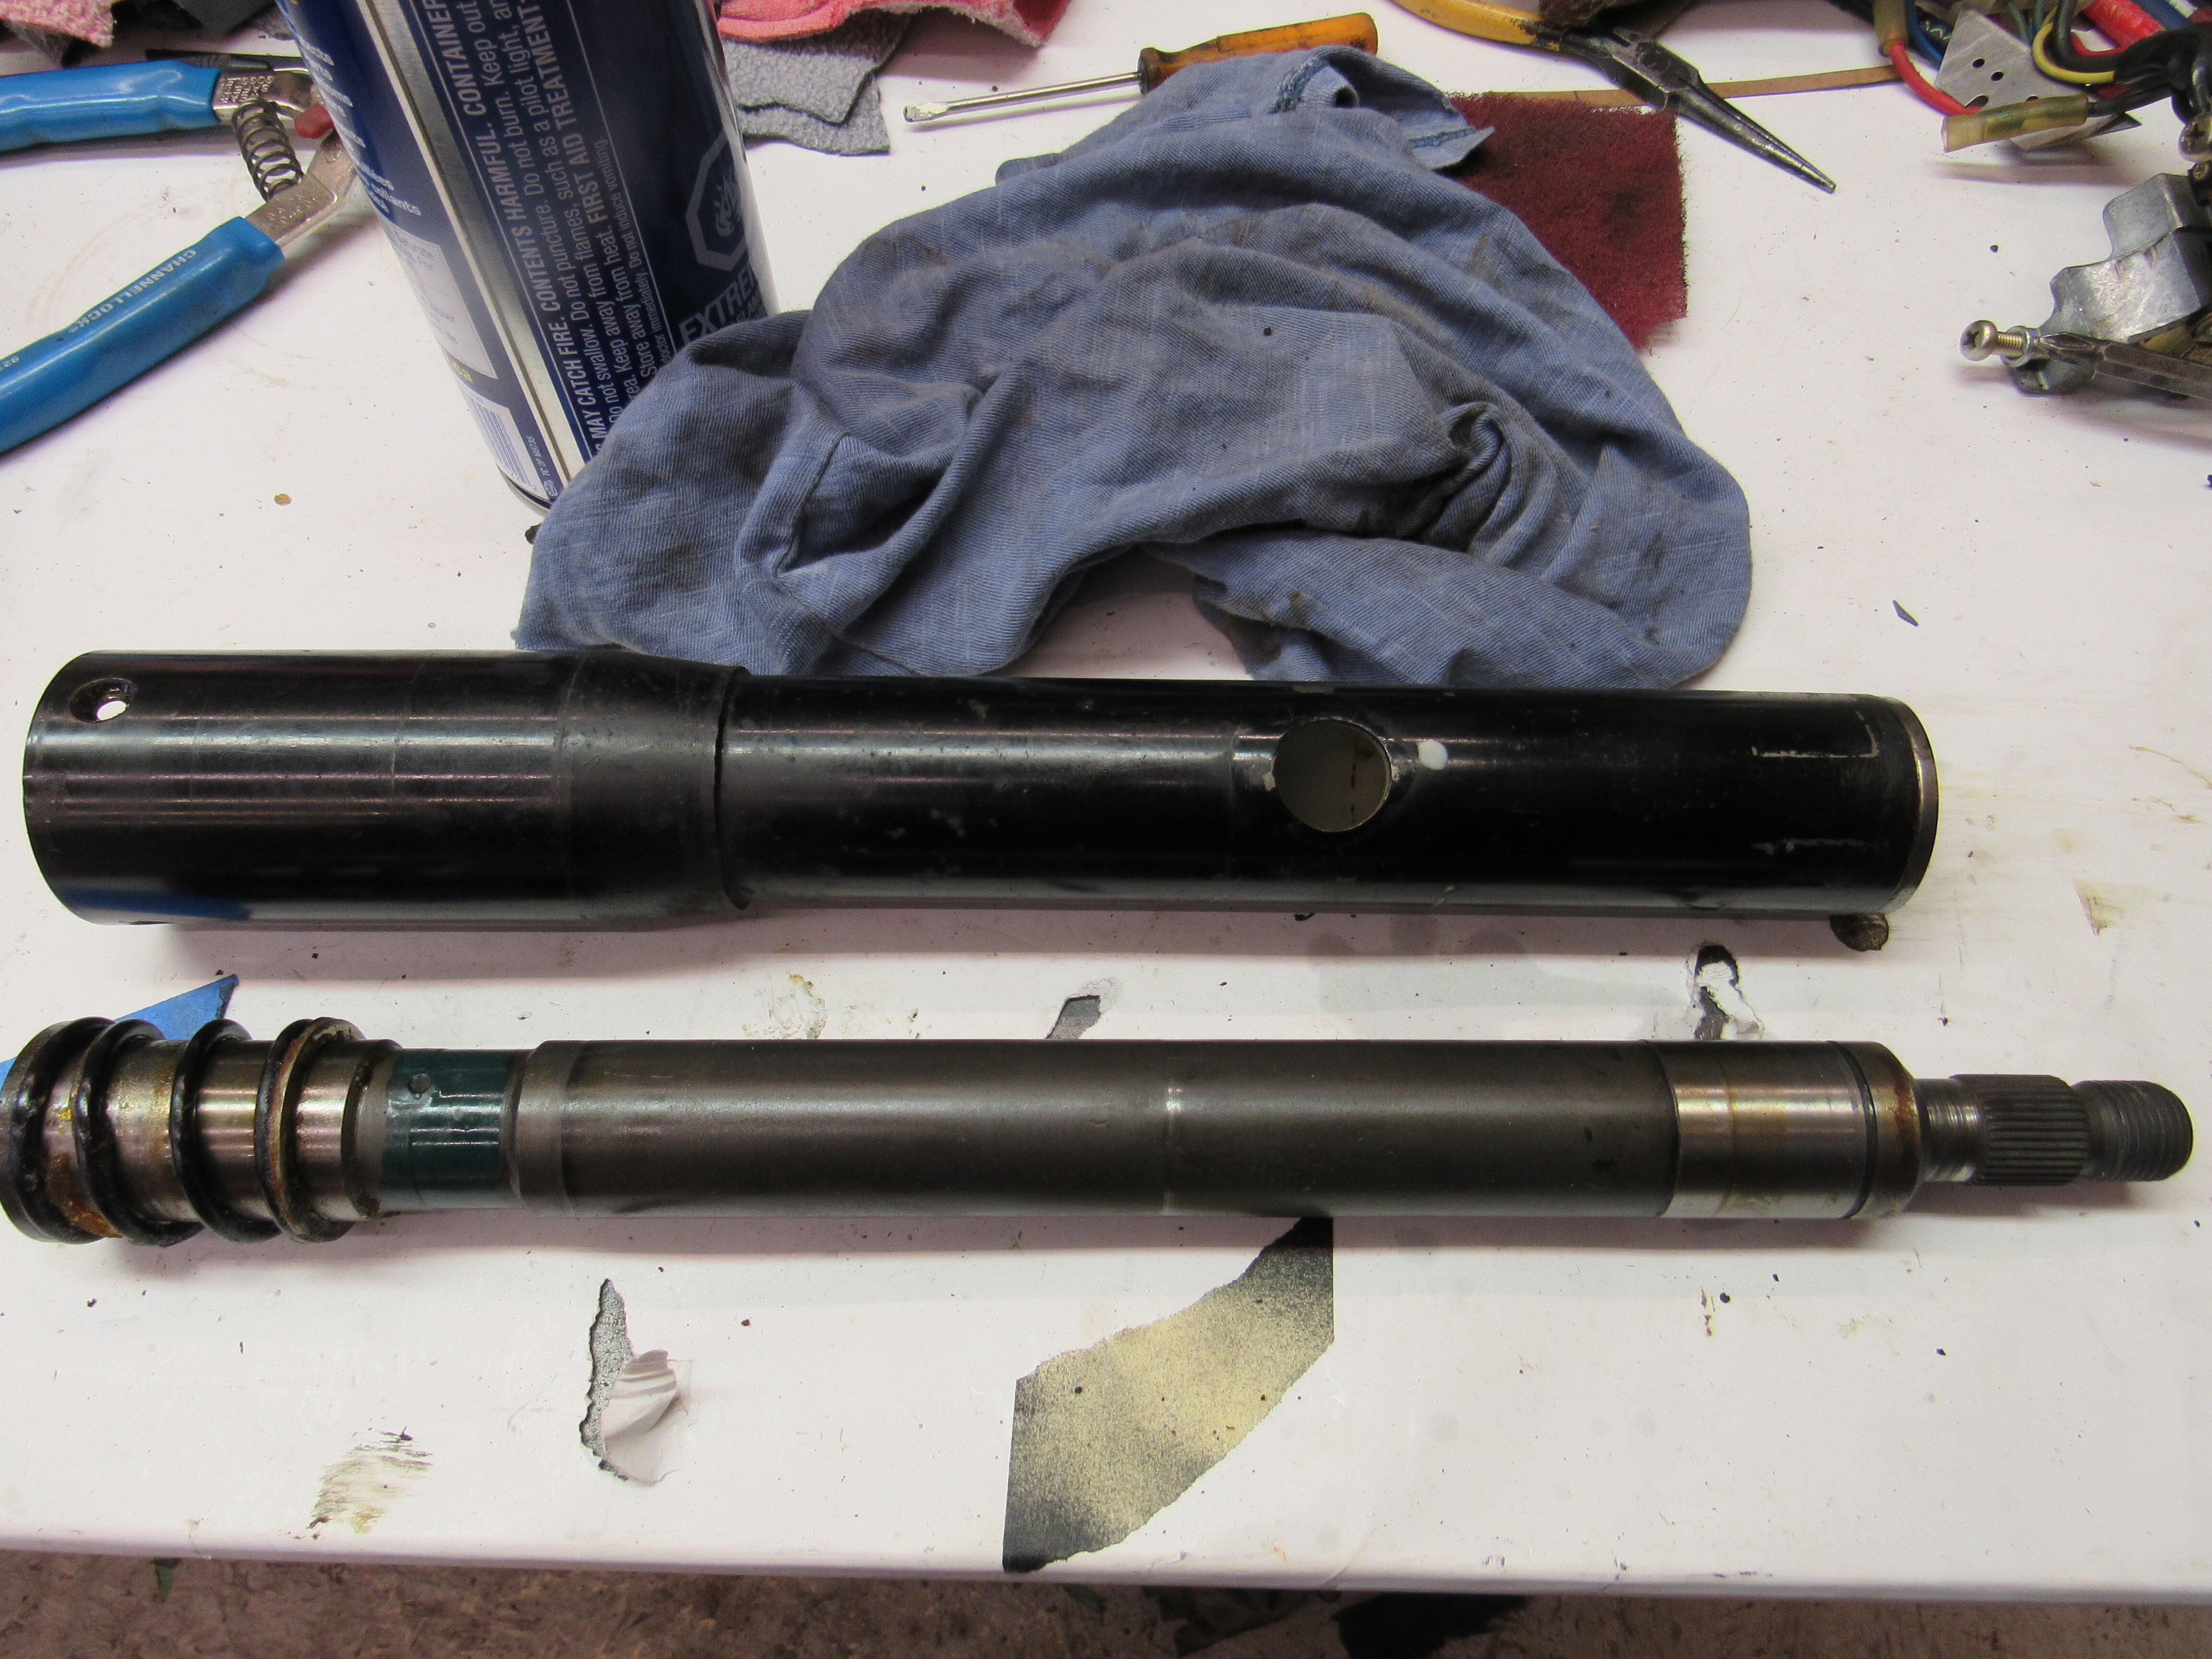
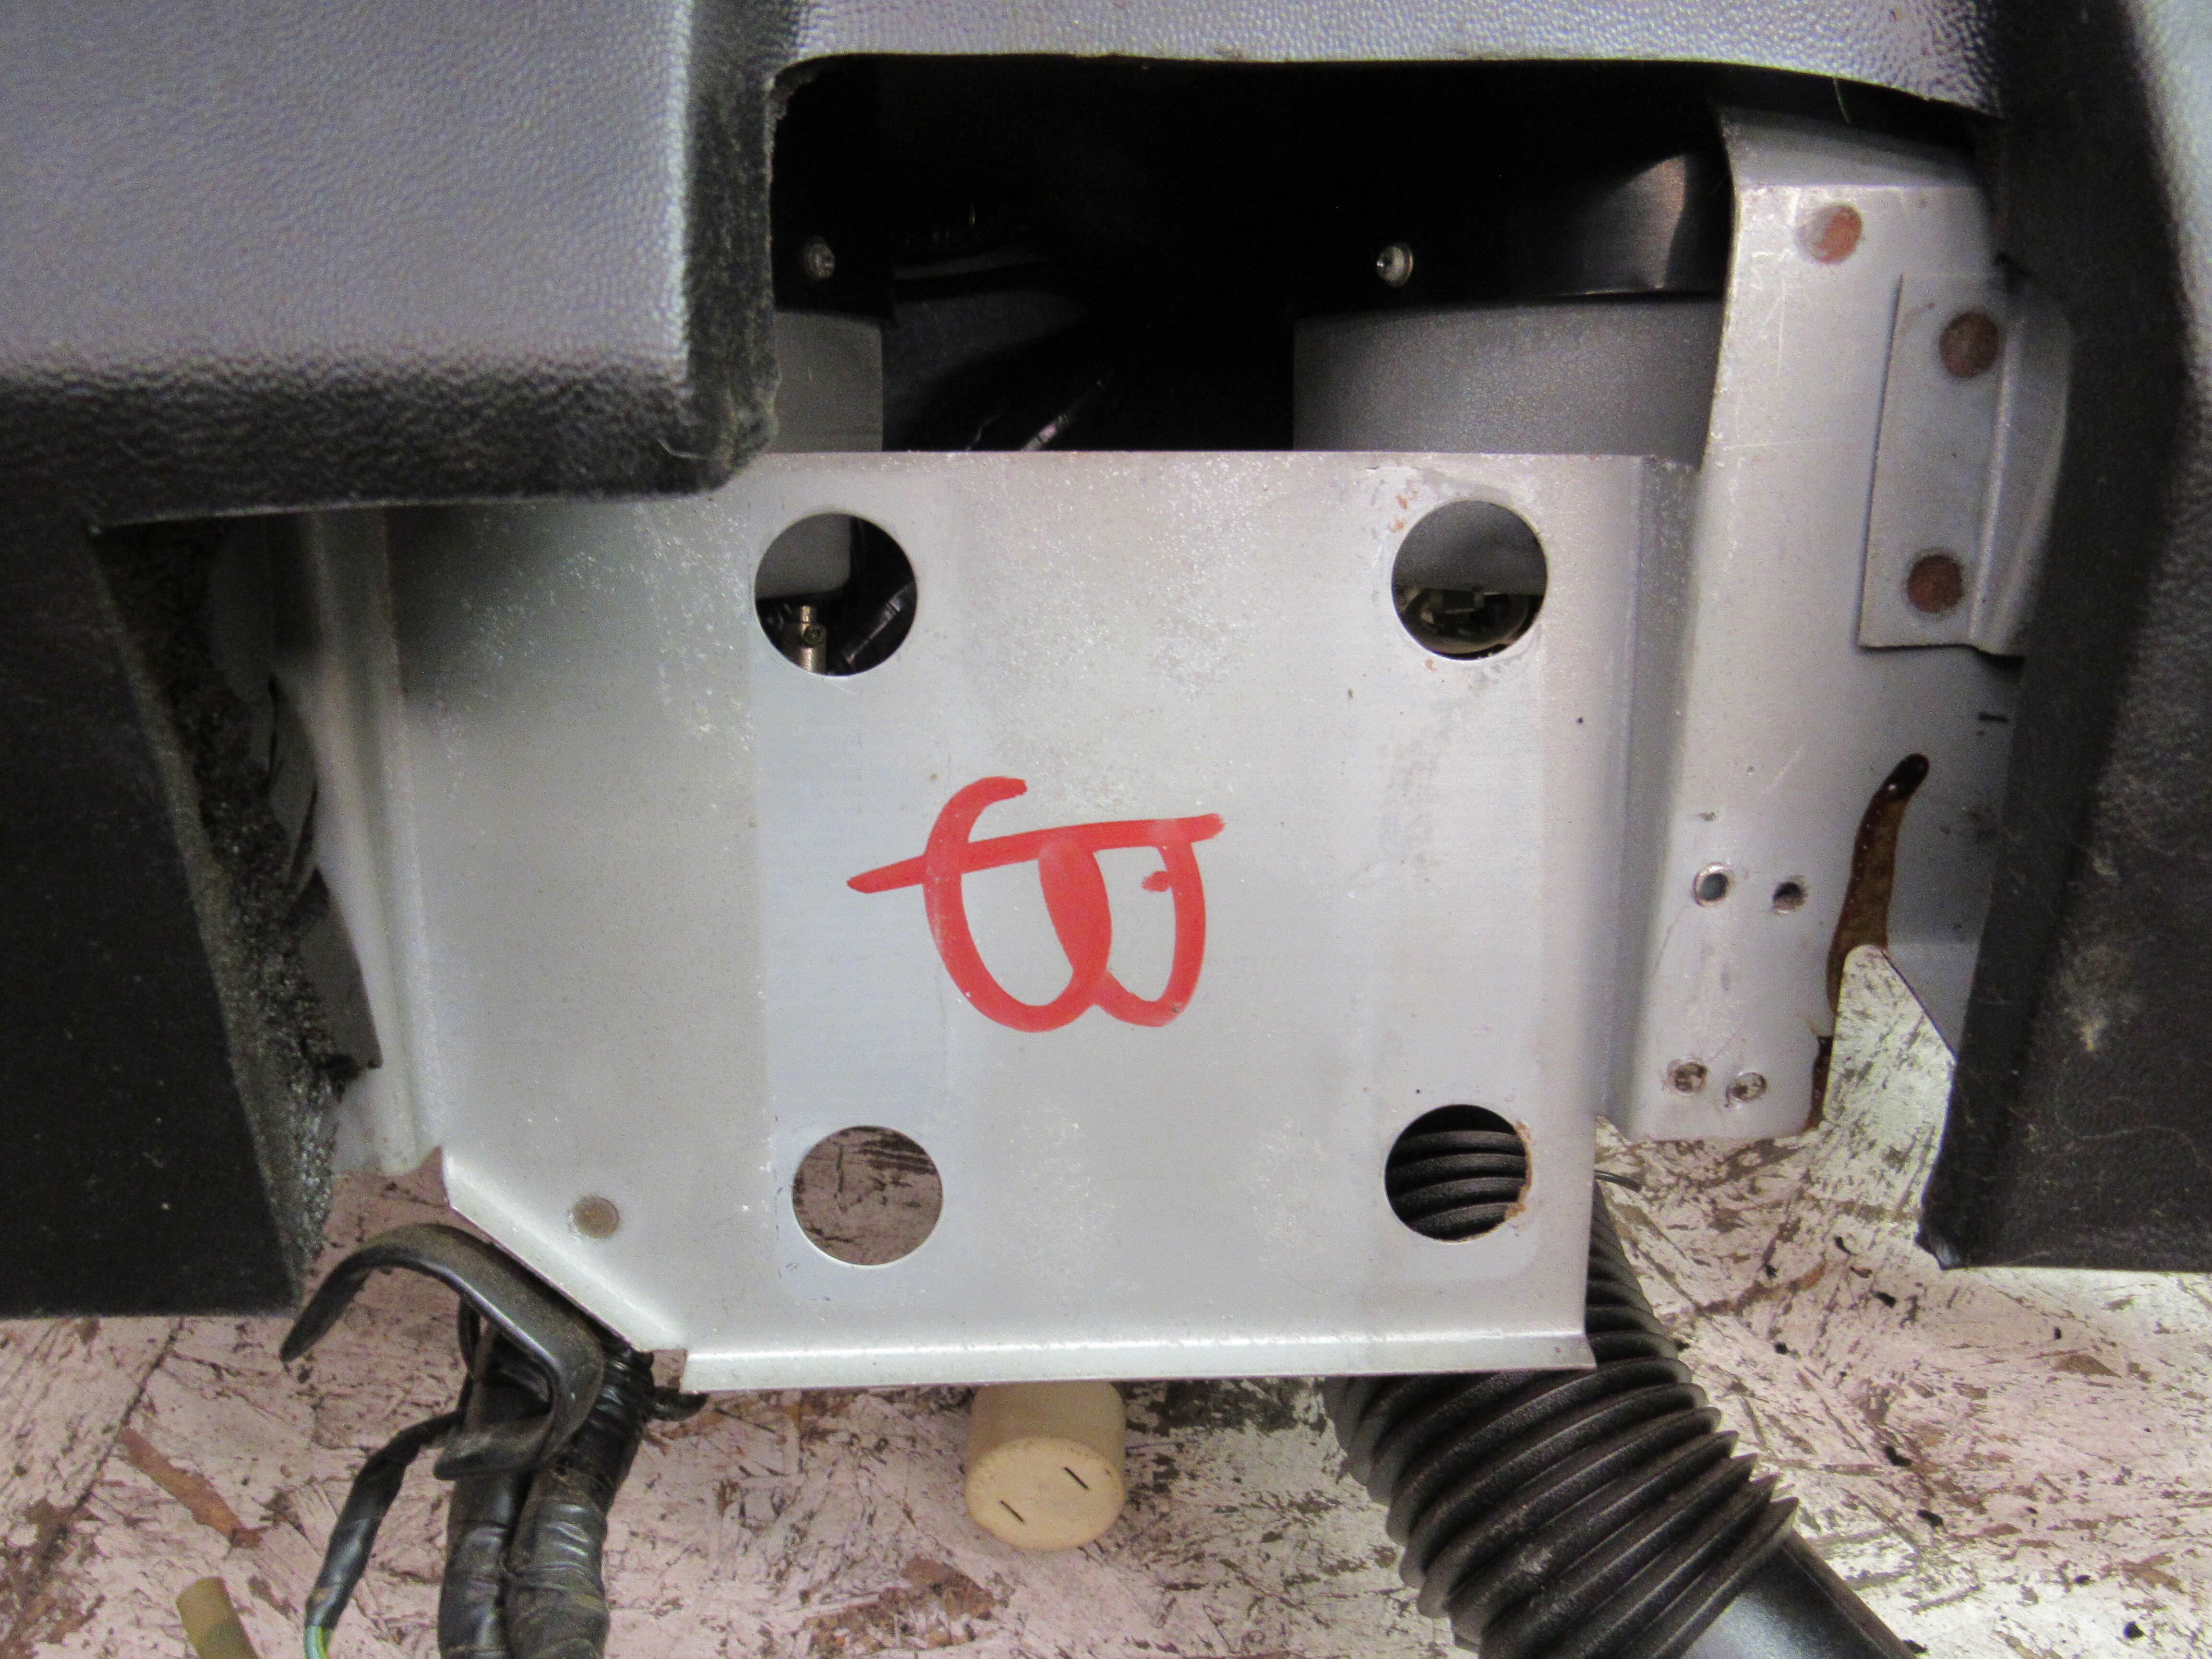
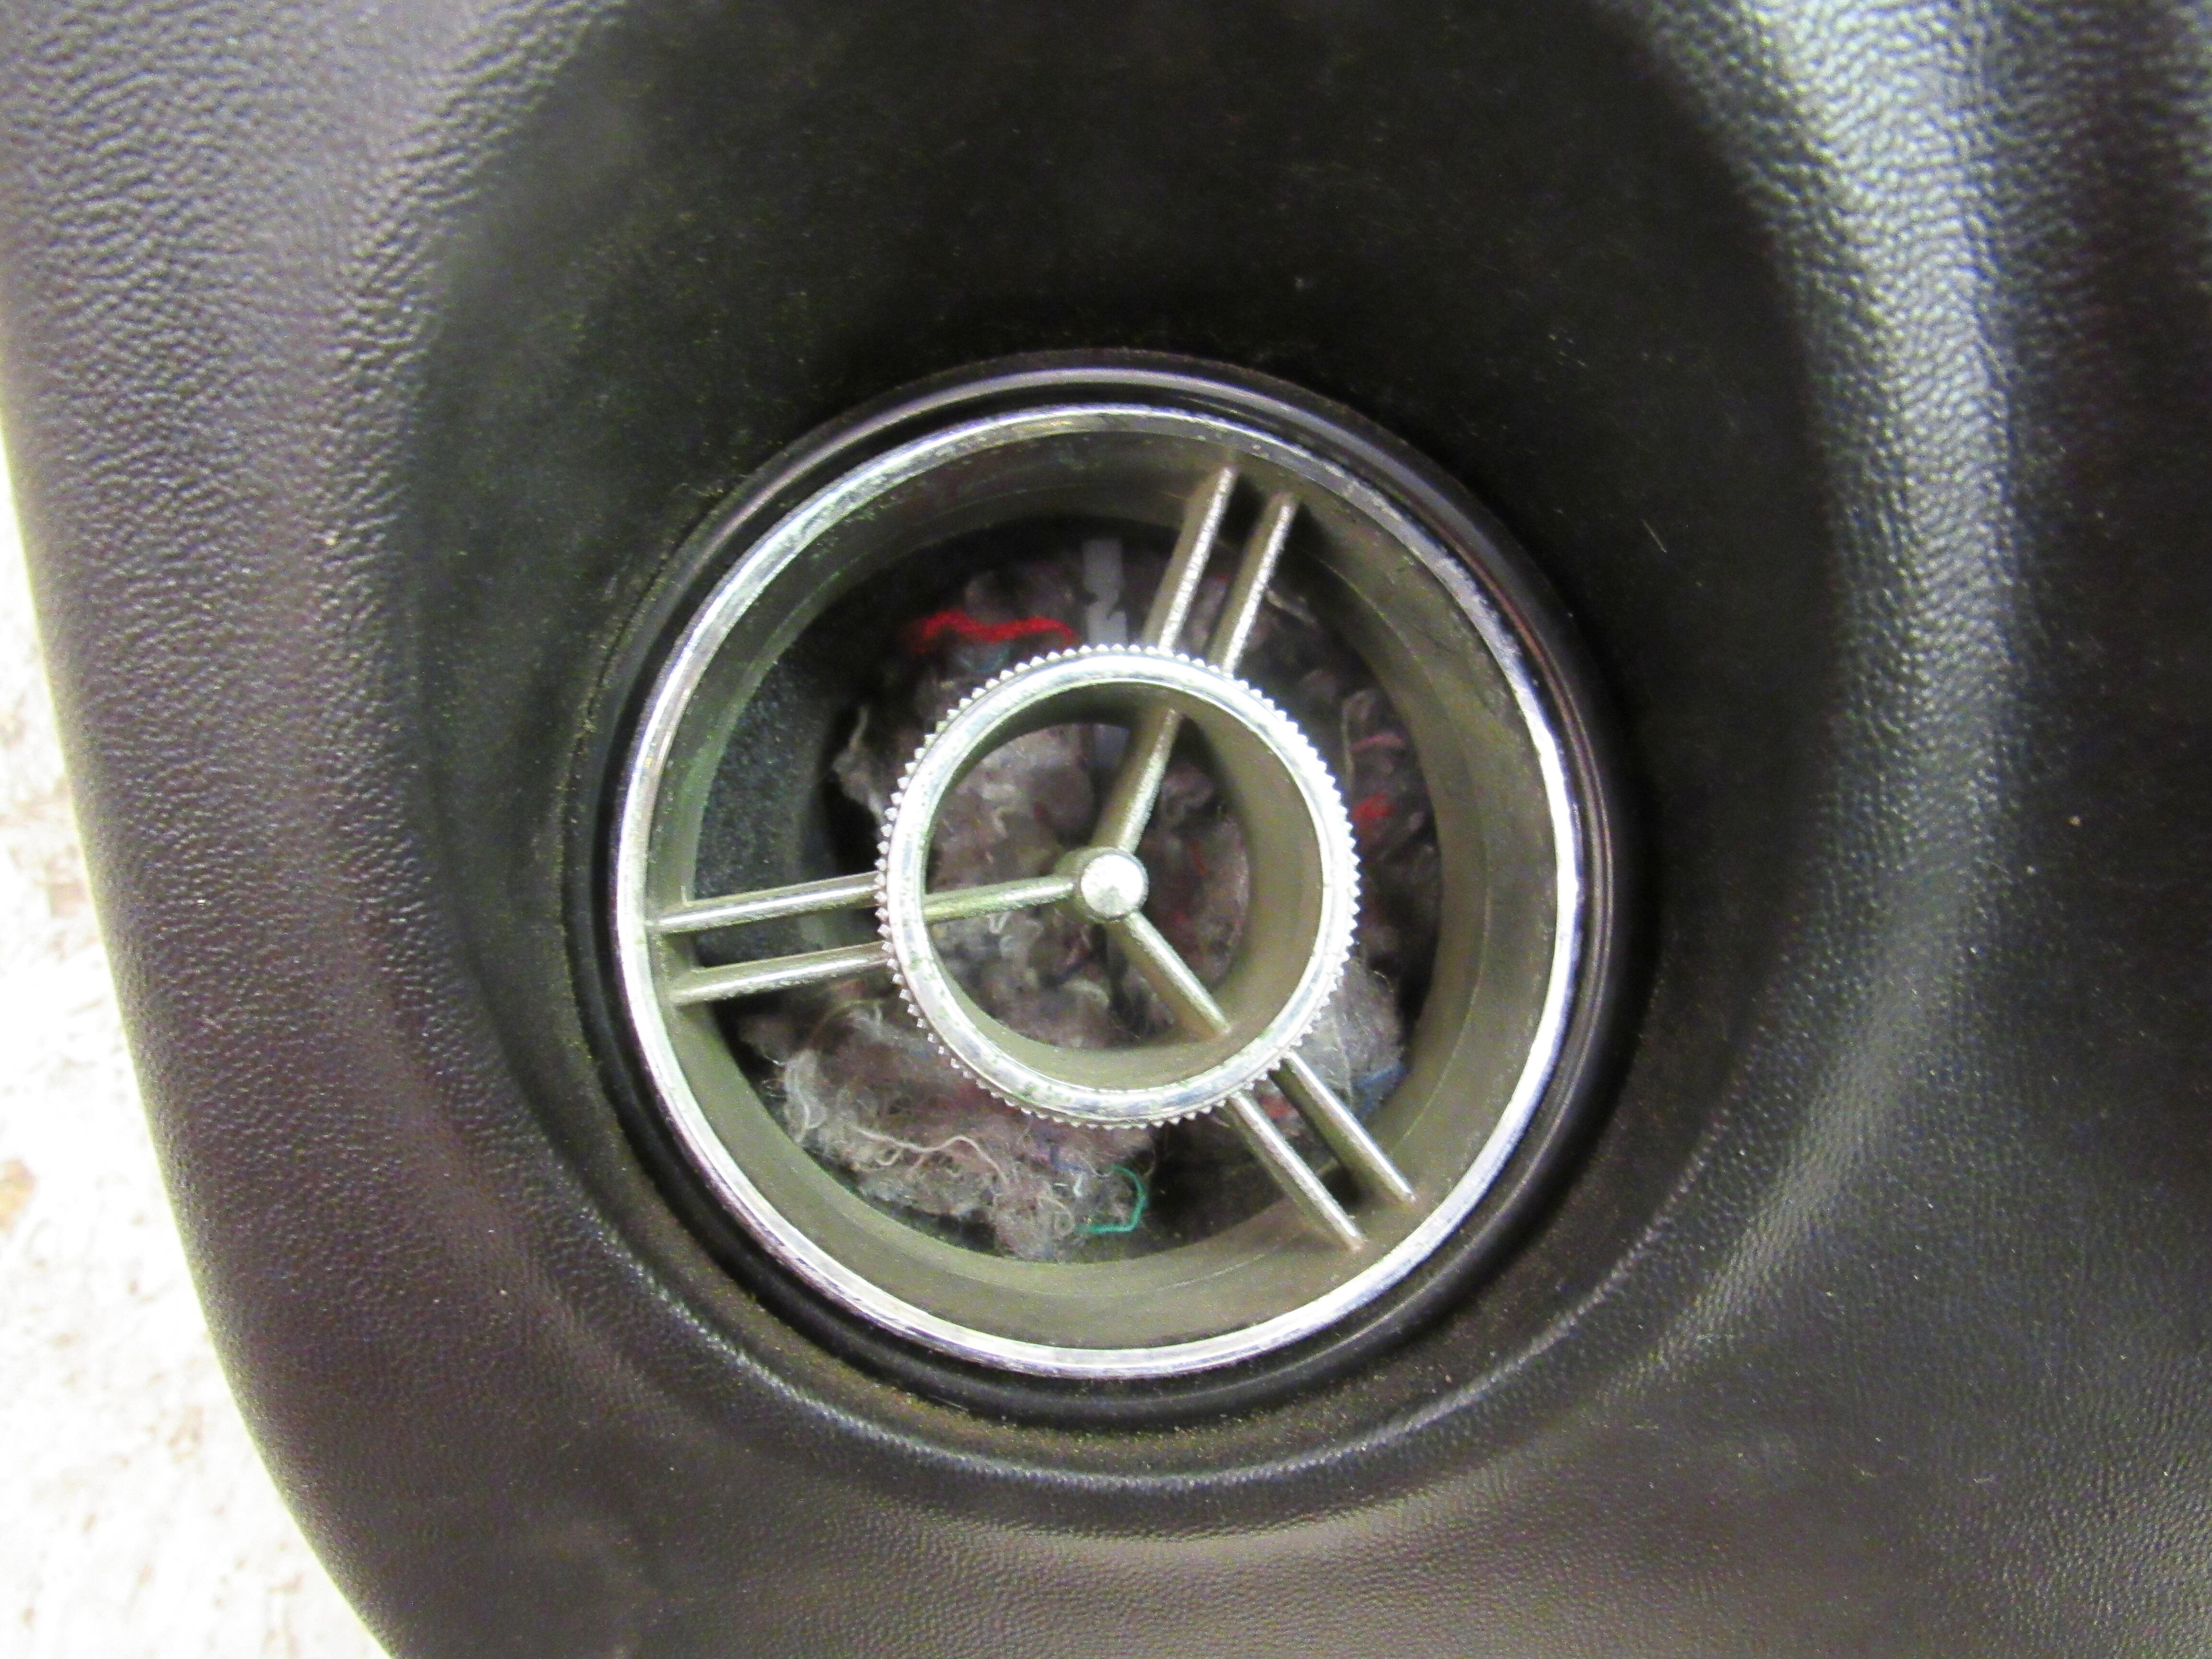
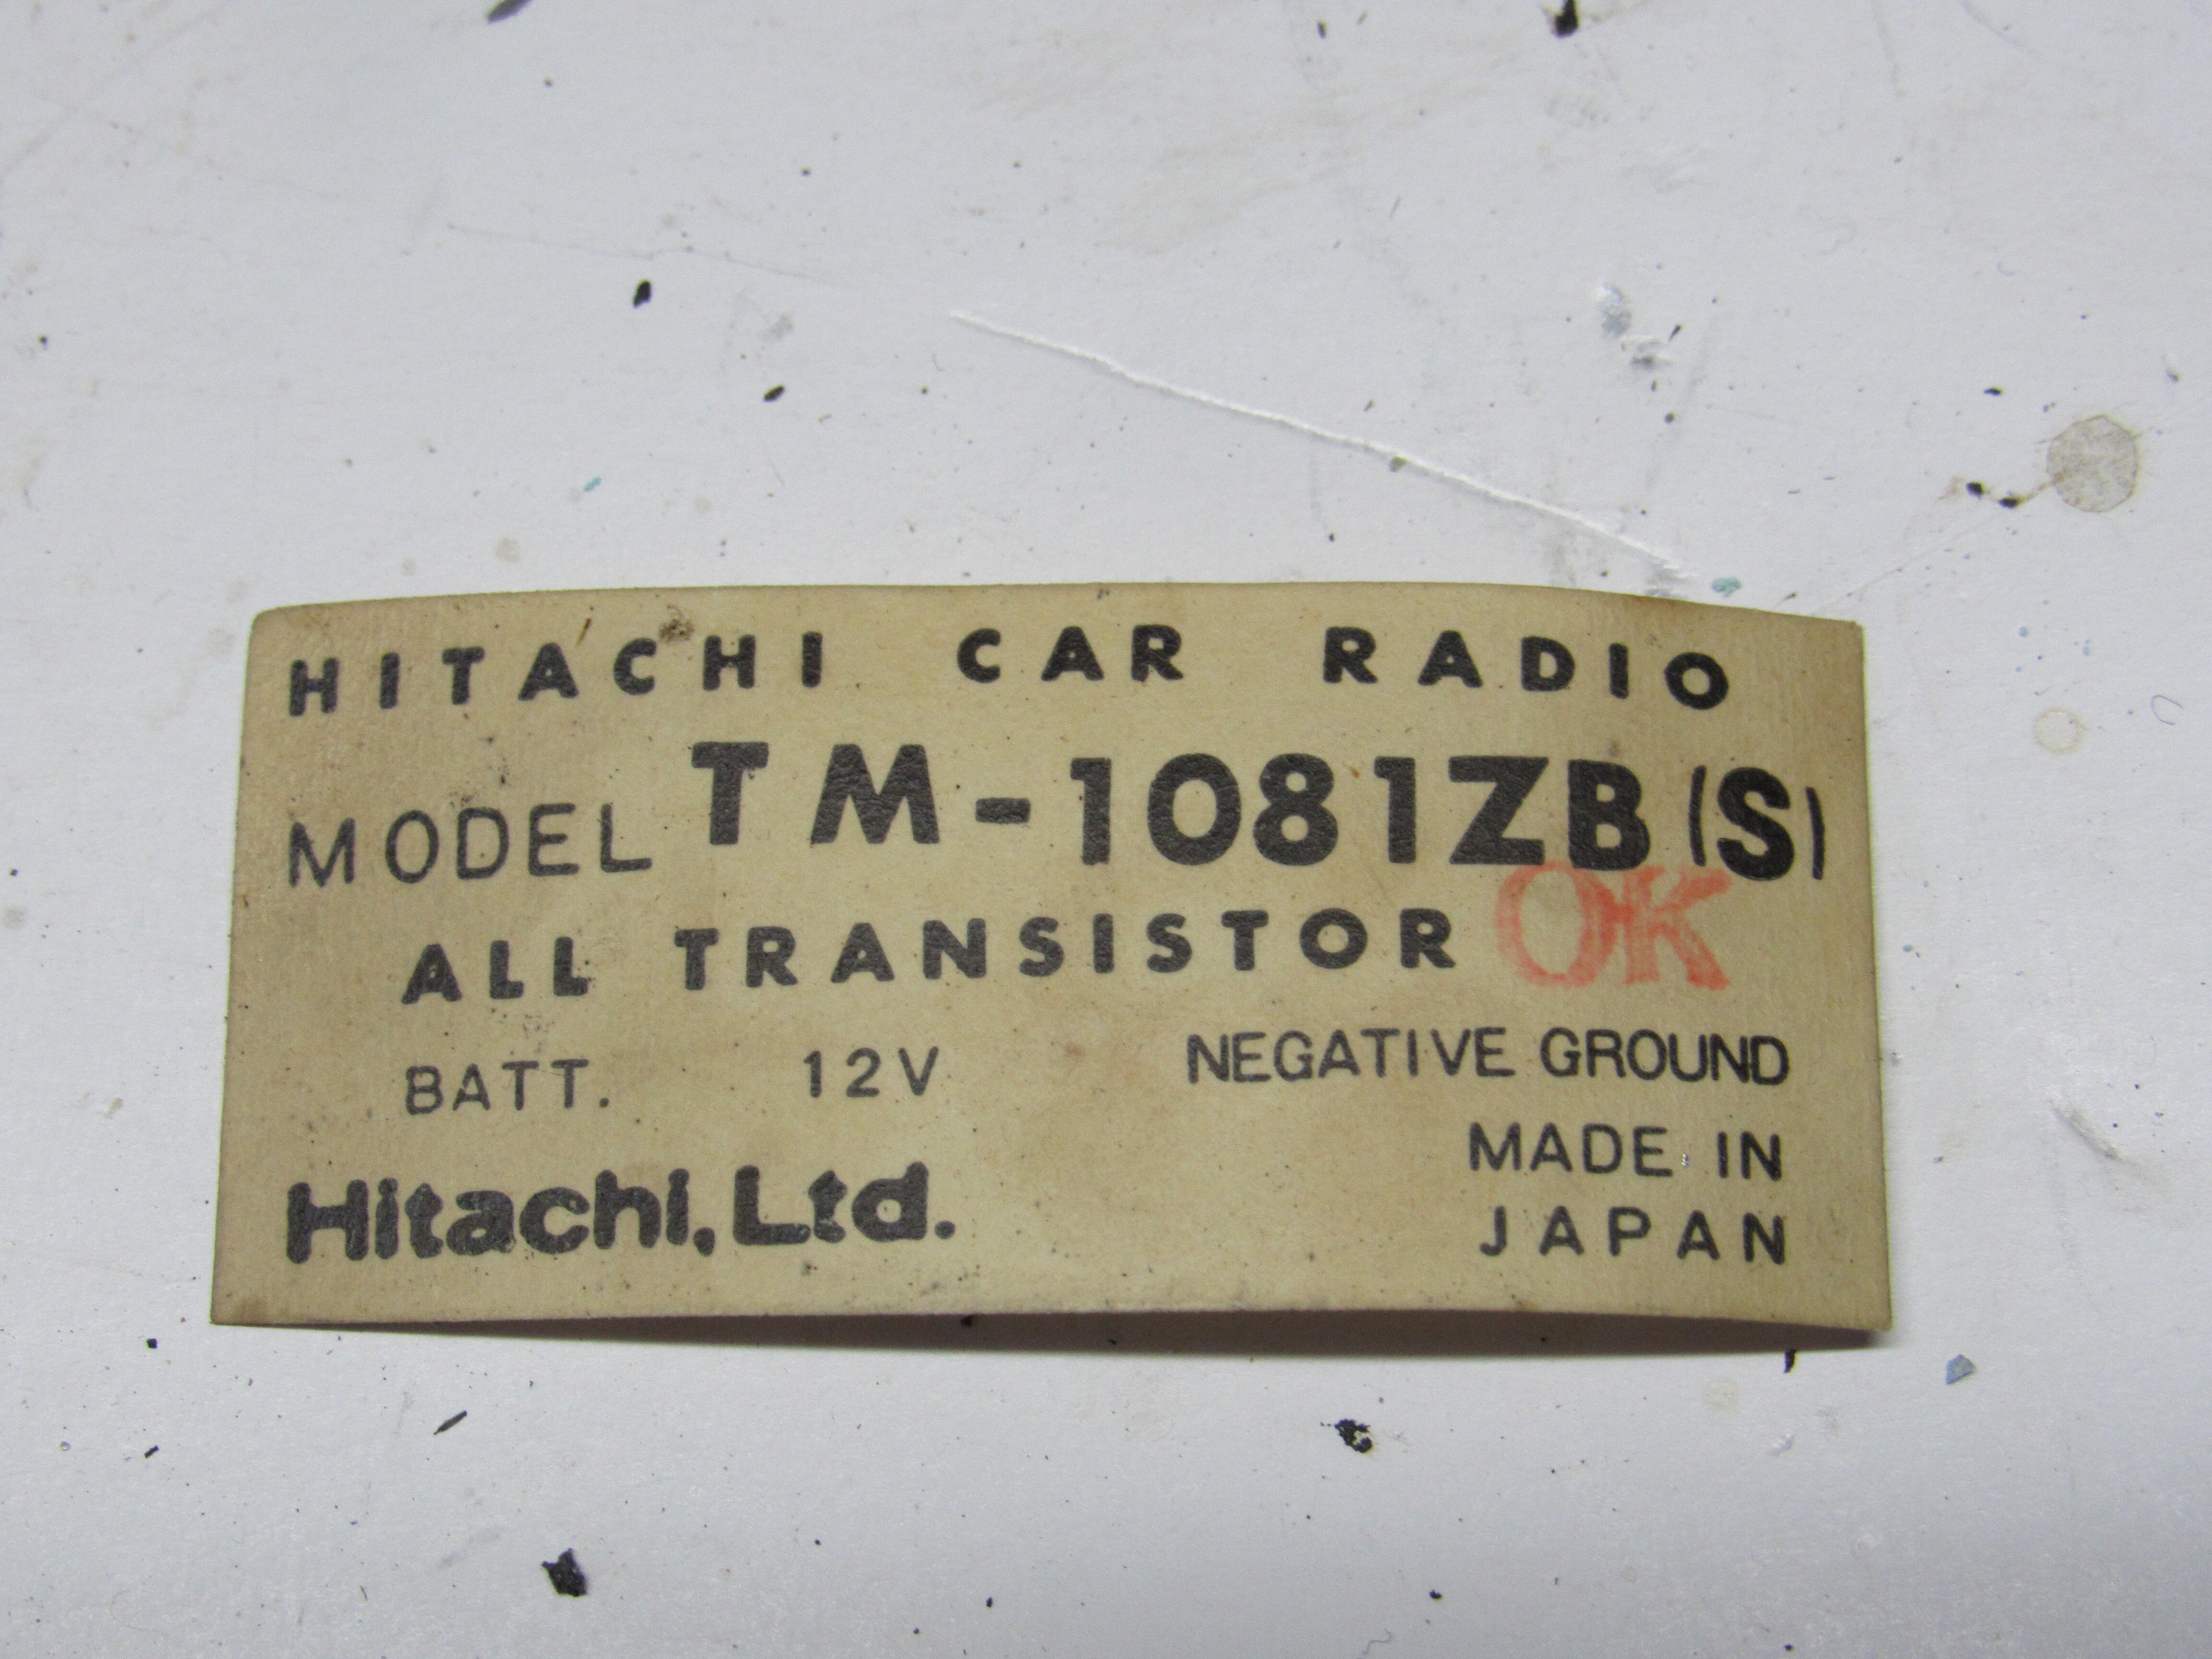
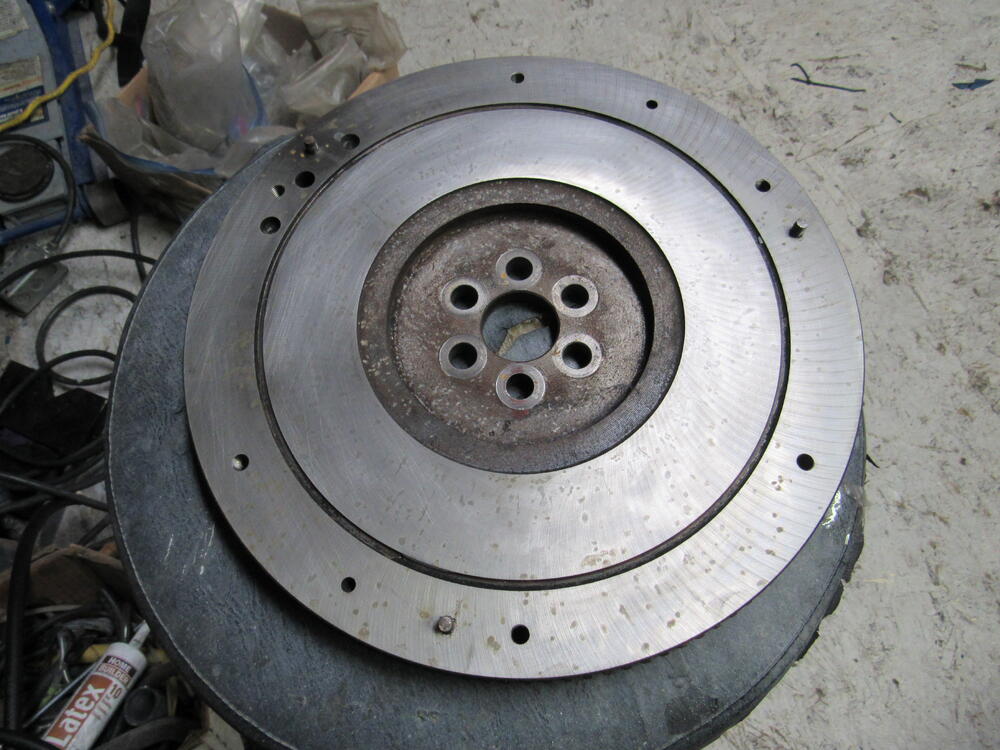
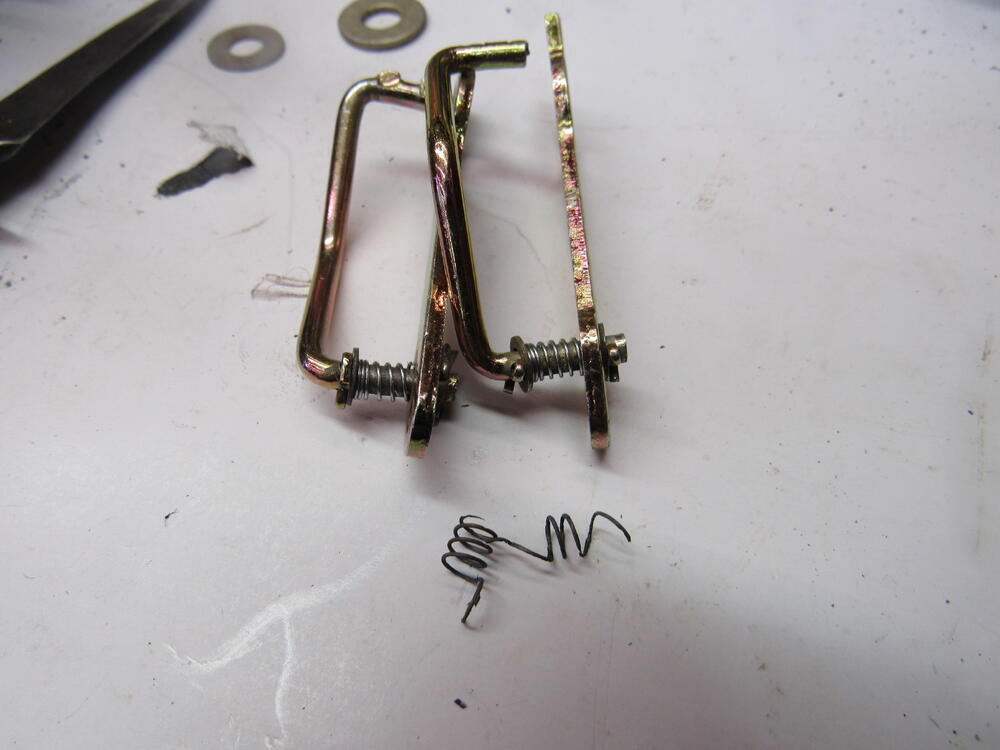
1 pointDave and I looked for a couple of months to find a new stock flywheel, couldn't be found so I took the old one in to the machinist, there is still a few heat cracks that he couldn't get out but I don't think it will make a difference the way it will be driven from now on. The plating acid disintegrated a couple of small springs on the carb linkage so I sacrificed a cheap ball point pen for a replacement. Carbs are finished now and up on the shelf. Disassembled the steering column, flushed out all the old grease with brake cleaner and compressed air and repacked the grease. The dash is in nice shape except for a couple of cracks, here is the Kanji. I found a squatter living in the air duct and this label was in the glove box, I'm guessing from the original radio.


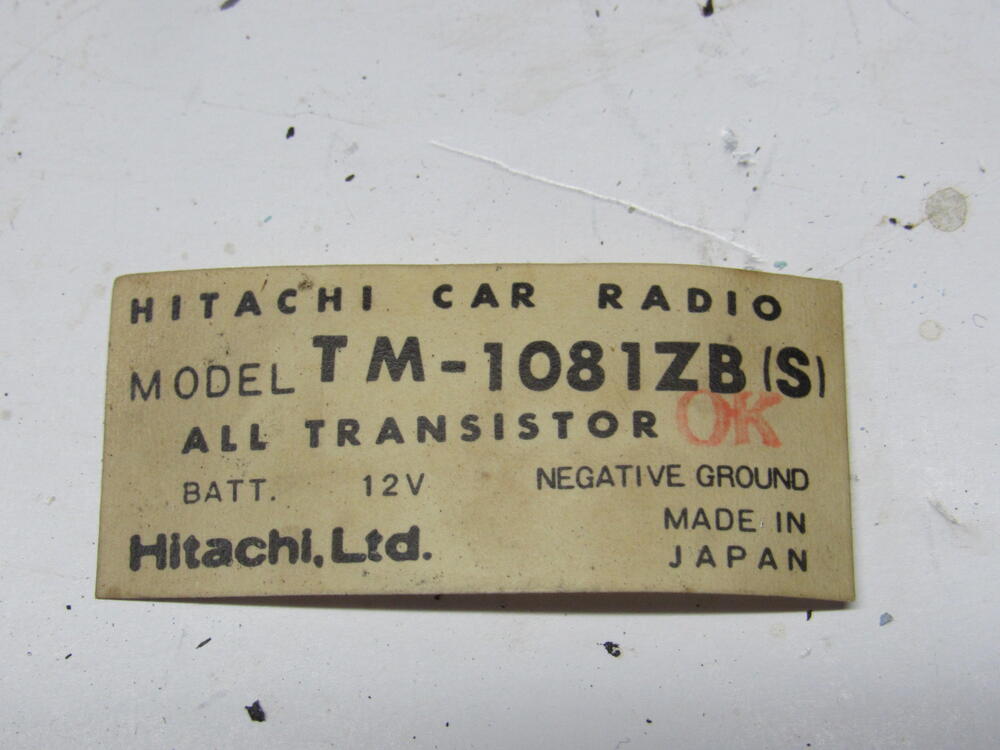 1 point
 -
1 pointLuckily I have already removed most of the undercoating, so hopefully there won't be much mess. As far as rotating it, I've only turned it about 30 degrees with my son holding the door closed. Still need to empty some parts out, like fenders and misc light items. It's been a bit of a storage bin. Also I will need to tie the doors, hood and hatch closed. It will likely be a fee days before I can do the full spin. I will most definitely report back when I get to it.1 point
-
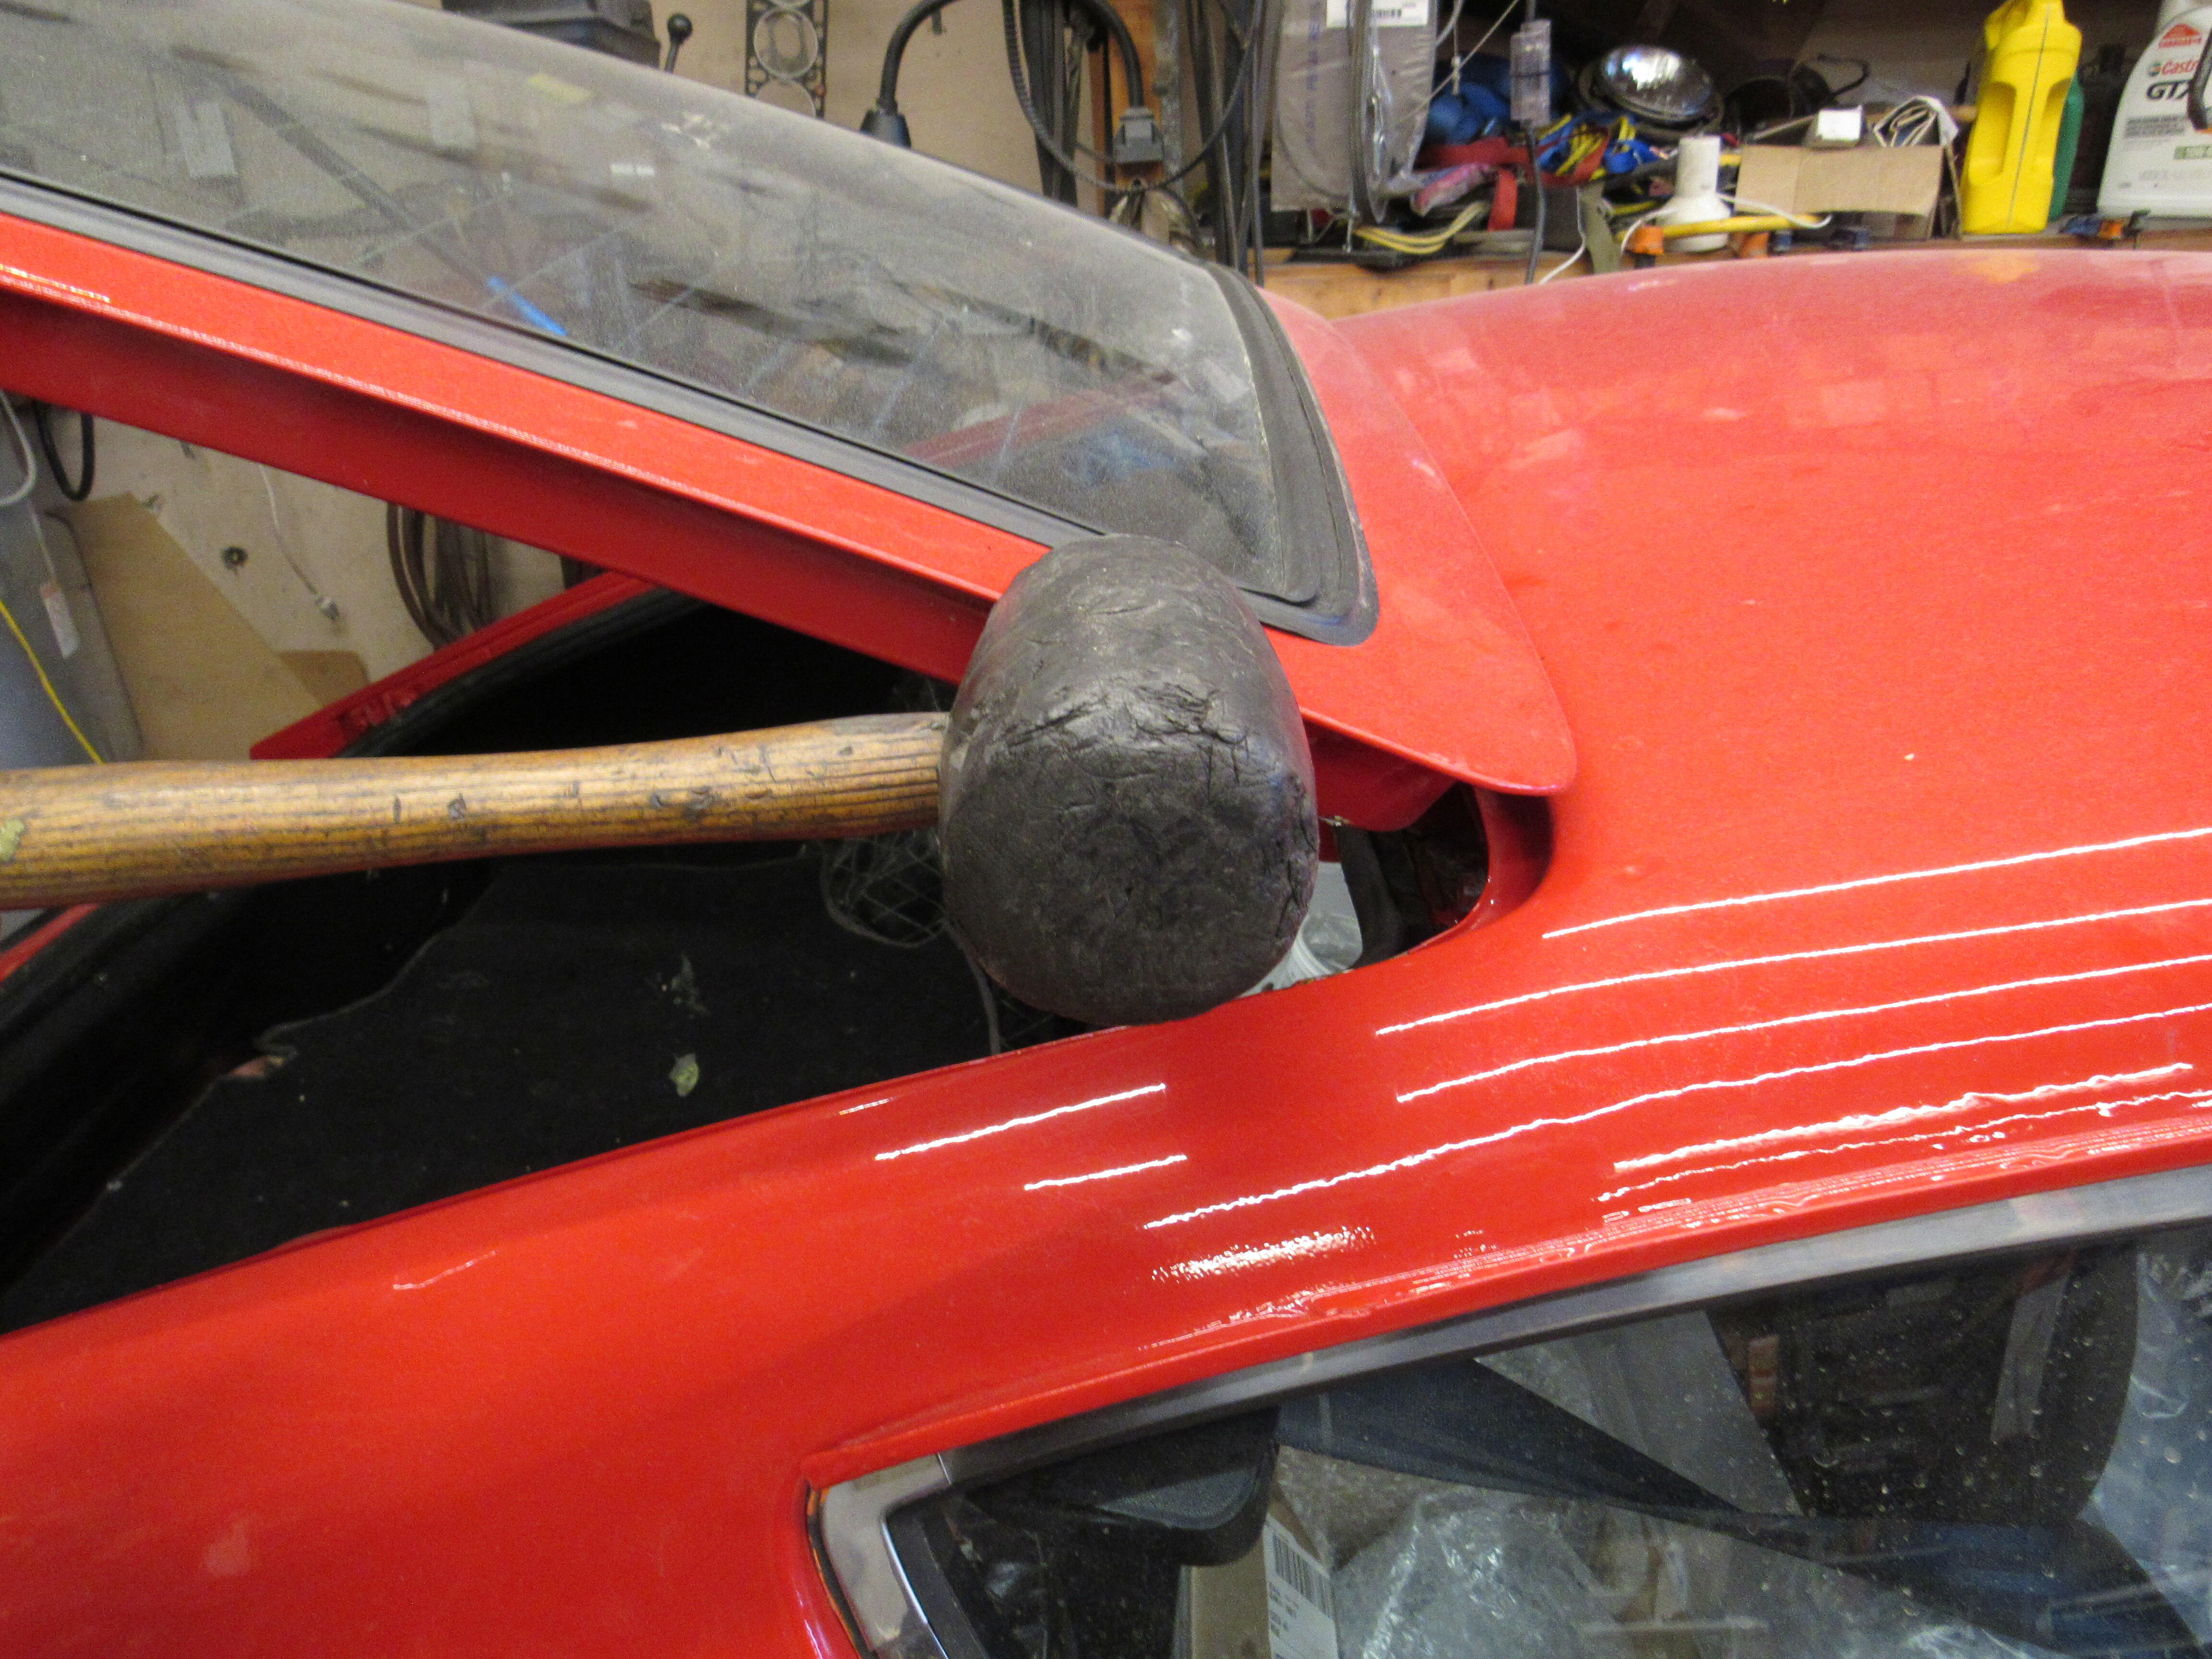
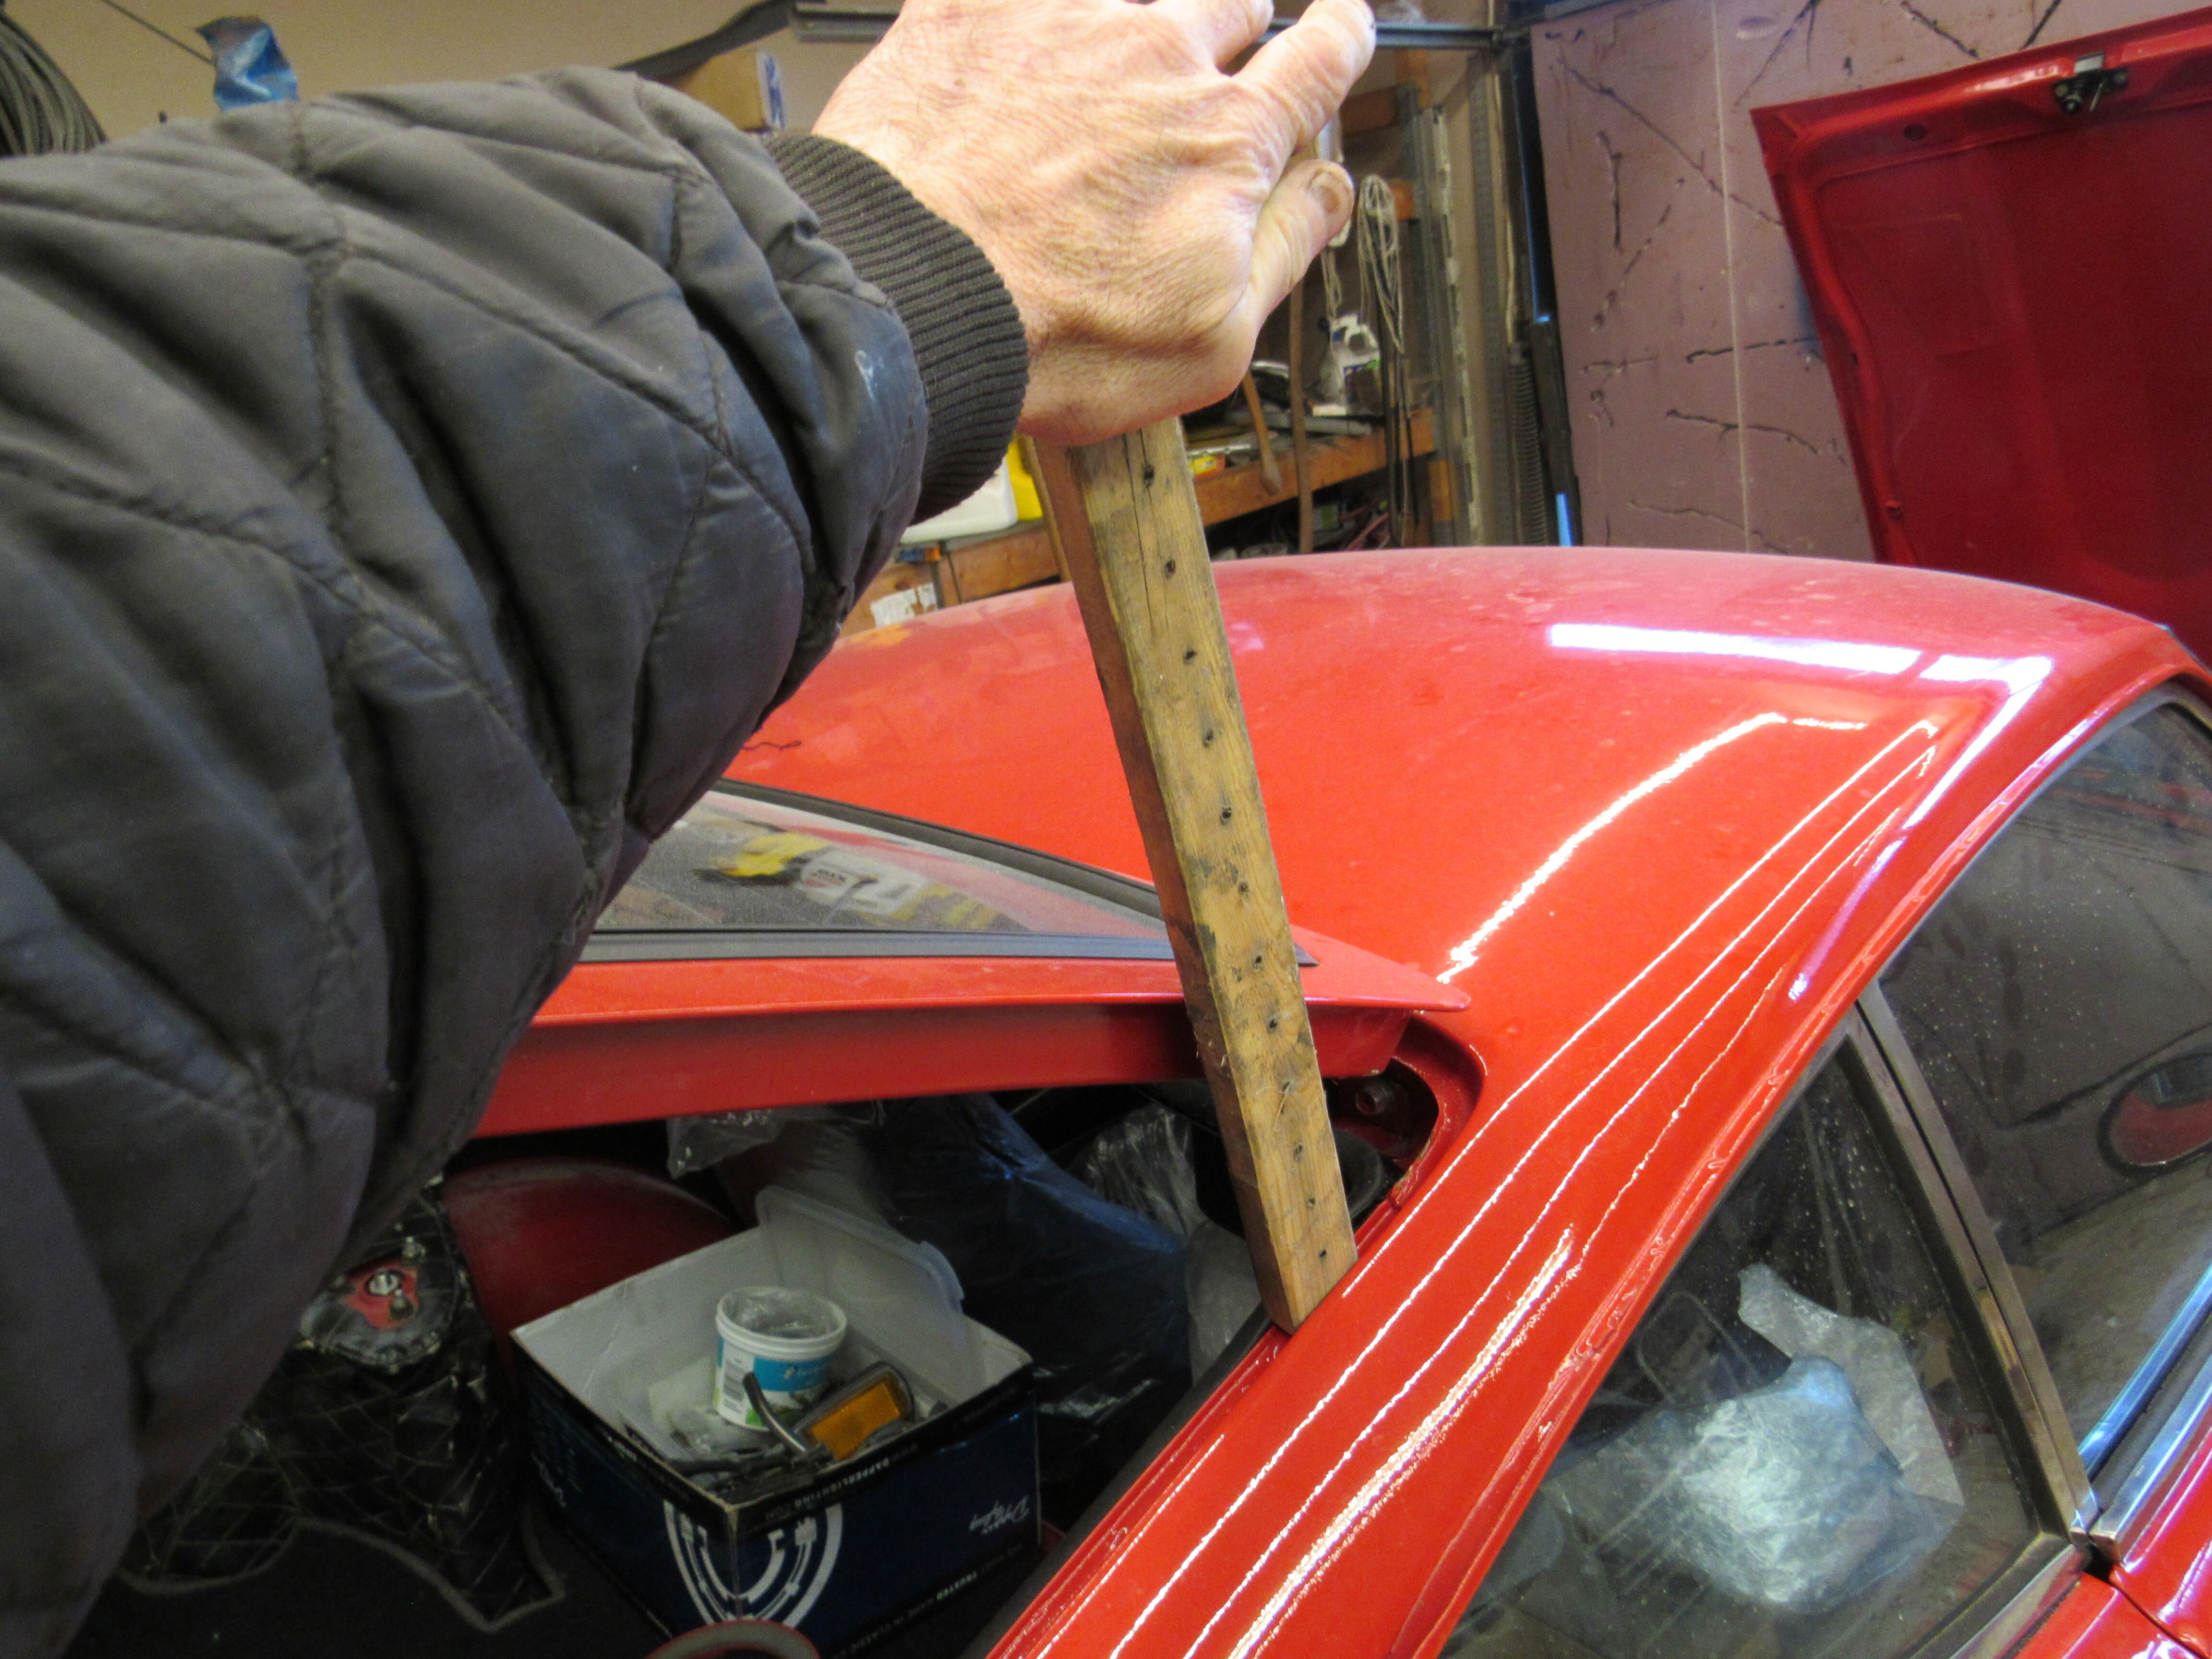
1 pointAlthough the gaps are different, they are parallel which is good. You'll need to open the hatch, loosen off but don't remove the 4 bolts holding the hinges to the roof, then from the P/S up near the hinge you want to give the hatch a shove or sharp rap with a rubber mallet. If the hatch hasn't been removed before you may have to work hard to get any sideways movement, most of them are painted in place, keep lowering the hatch to see if you have shifted it enough, when you get it to where you want tighten each bolt a little bit at a time until all 4 are snug. Don't be surprised if the hatch has tightened down into the same spot it was before, repeat the process a use a wooden lever to hold the hatch in place as you tighten. If all of that seems like too much, you can rub down the side bumper with the end of a paraffin wax candle.

 1 point
 -
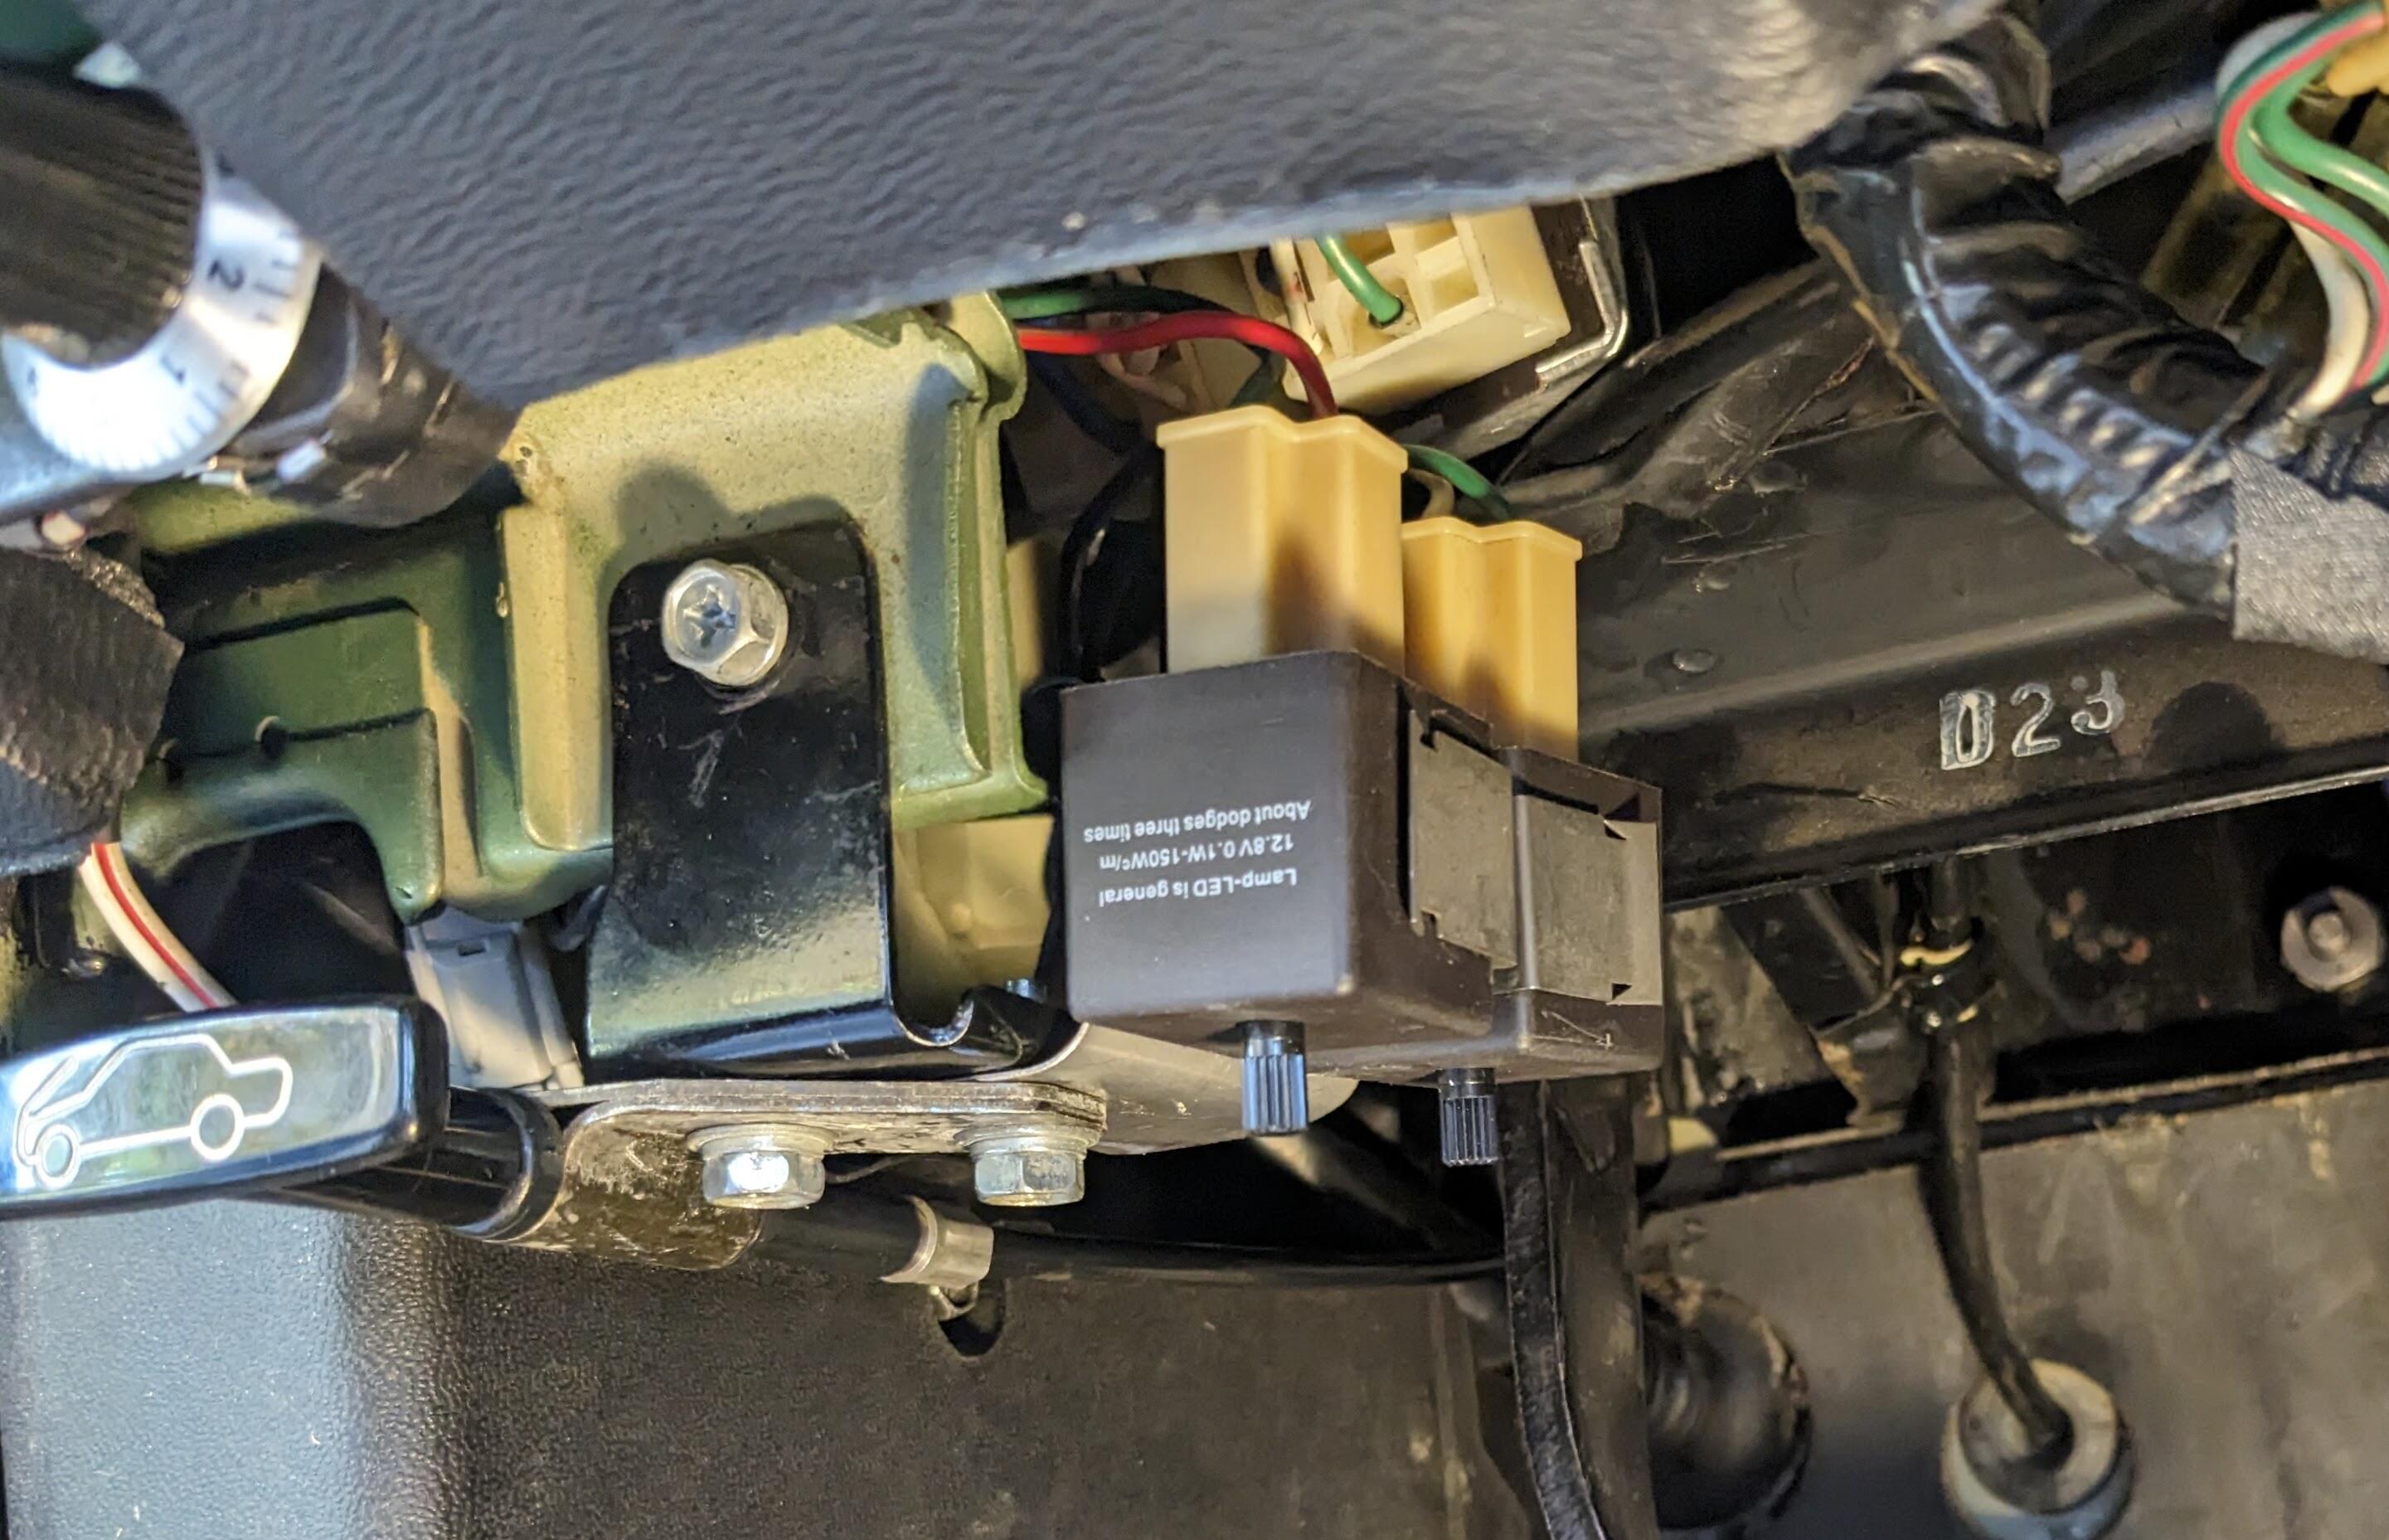
1 pointThe infamous Tony D clued me in on the existence of adjustable rate flashers. Once I tried them, I knew they were keepers.1 point
-
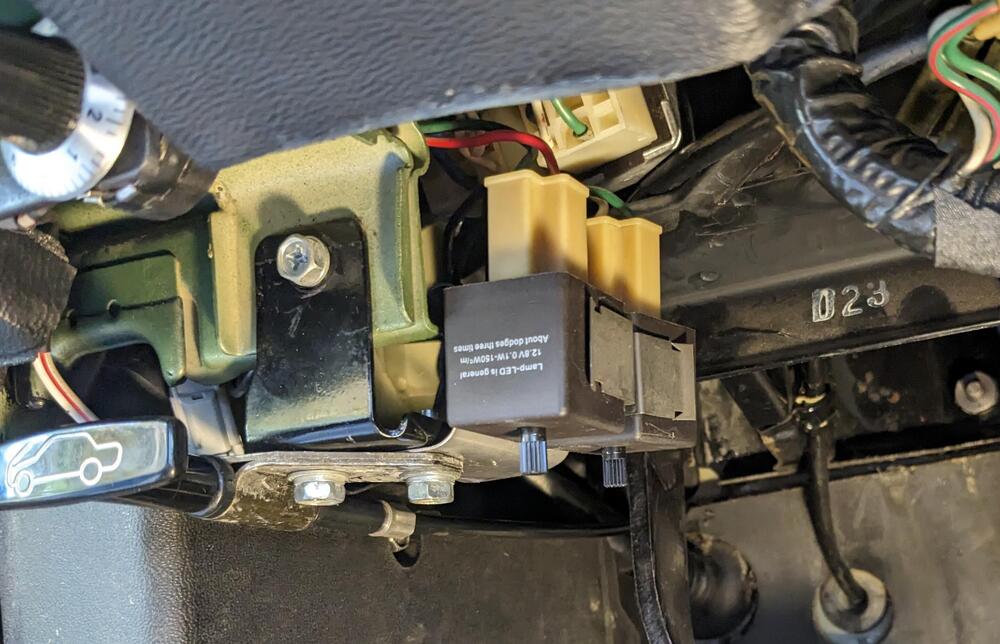
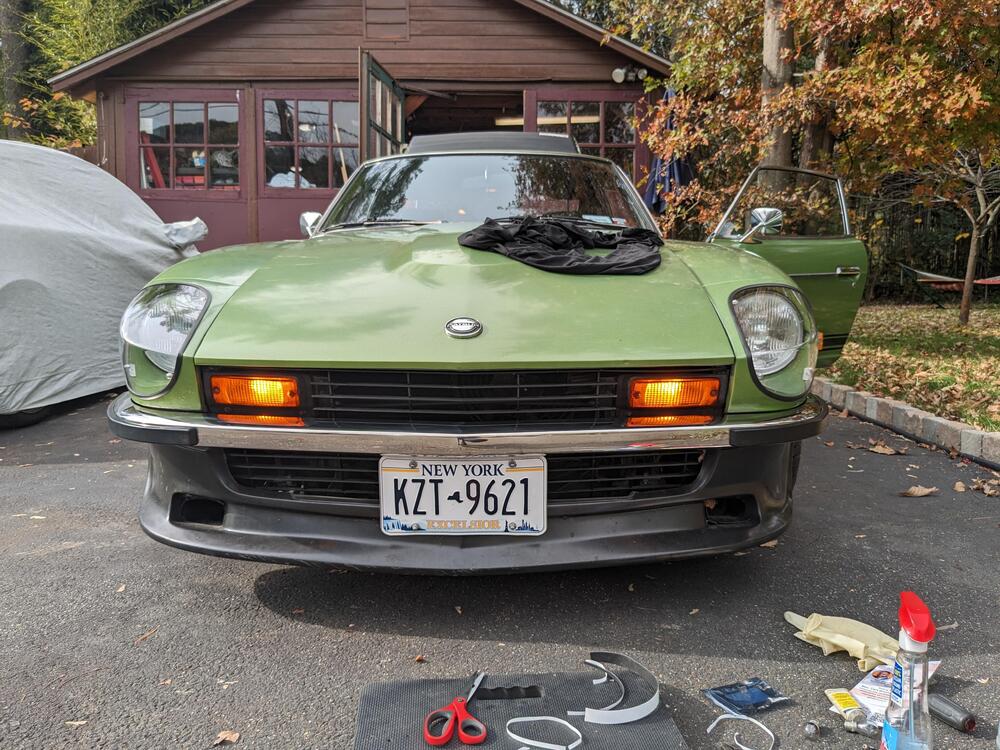
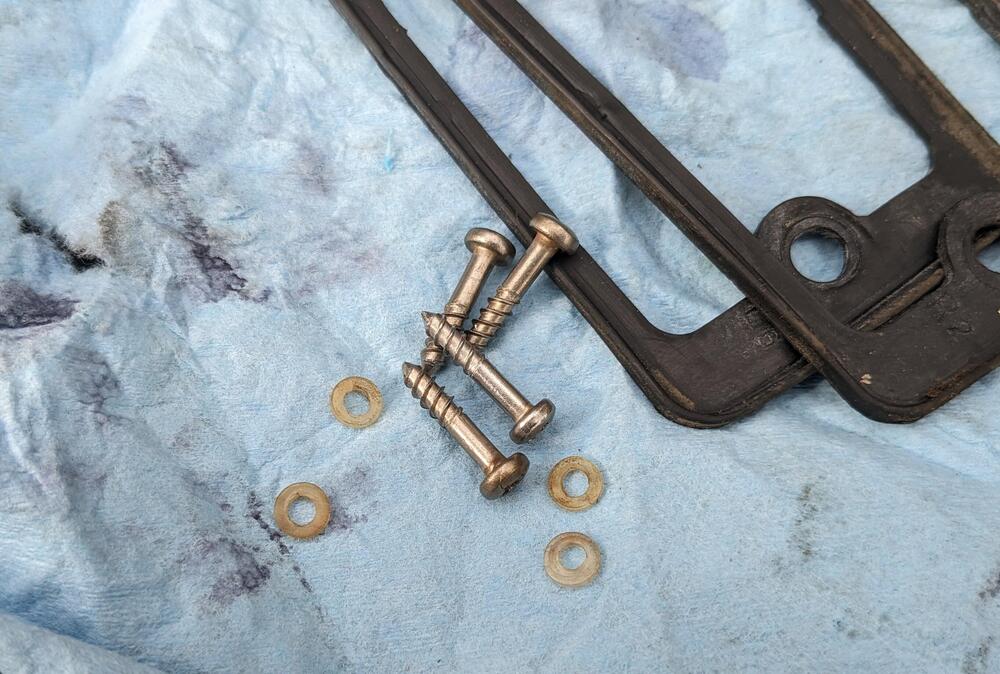
1 pointInstalled the LED-compatible flasher relays today & switched out the front & rear directional bulbs removed the two factory relays used the flasher relay mount point for the grounds made a stainless bracket to retain the relays. @SteveJ - It is nice to be able to adjust the flasher speed 🙂 Cleaned up the housings, and added a thin strip of closed cell foam to improve the seal. Also Volvo used nylon washers to help seal the screw holes, so I added those. cleaned up the foam moisture pads & re-glued them


 1 point
 -
1 point
-
1 point