Leaderboard


 Subscriber

Popular Content
Showing content with the highest reputation on 07/31/2023 in all areas
-
2 points
-
2 pointsWeber's have an accel pump jet that sprays fuel in the bore when you push the pedal. Little jet that sticks down in the bore from the top. You can get reversed weber choke mechanisms as well. I mean "inverted". One example https://www.mecatechnic.com/en-GB/choke-mechanism-for-weber-dcoe-and-idf-inverted_UC40223.htm2 points
-
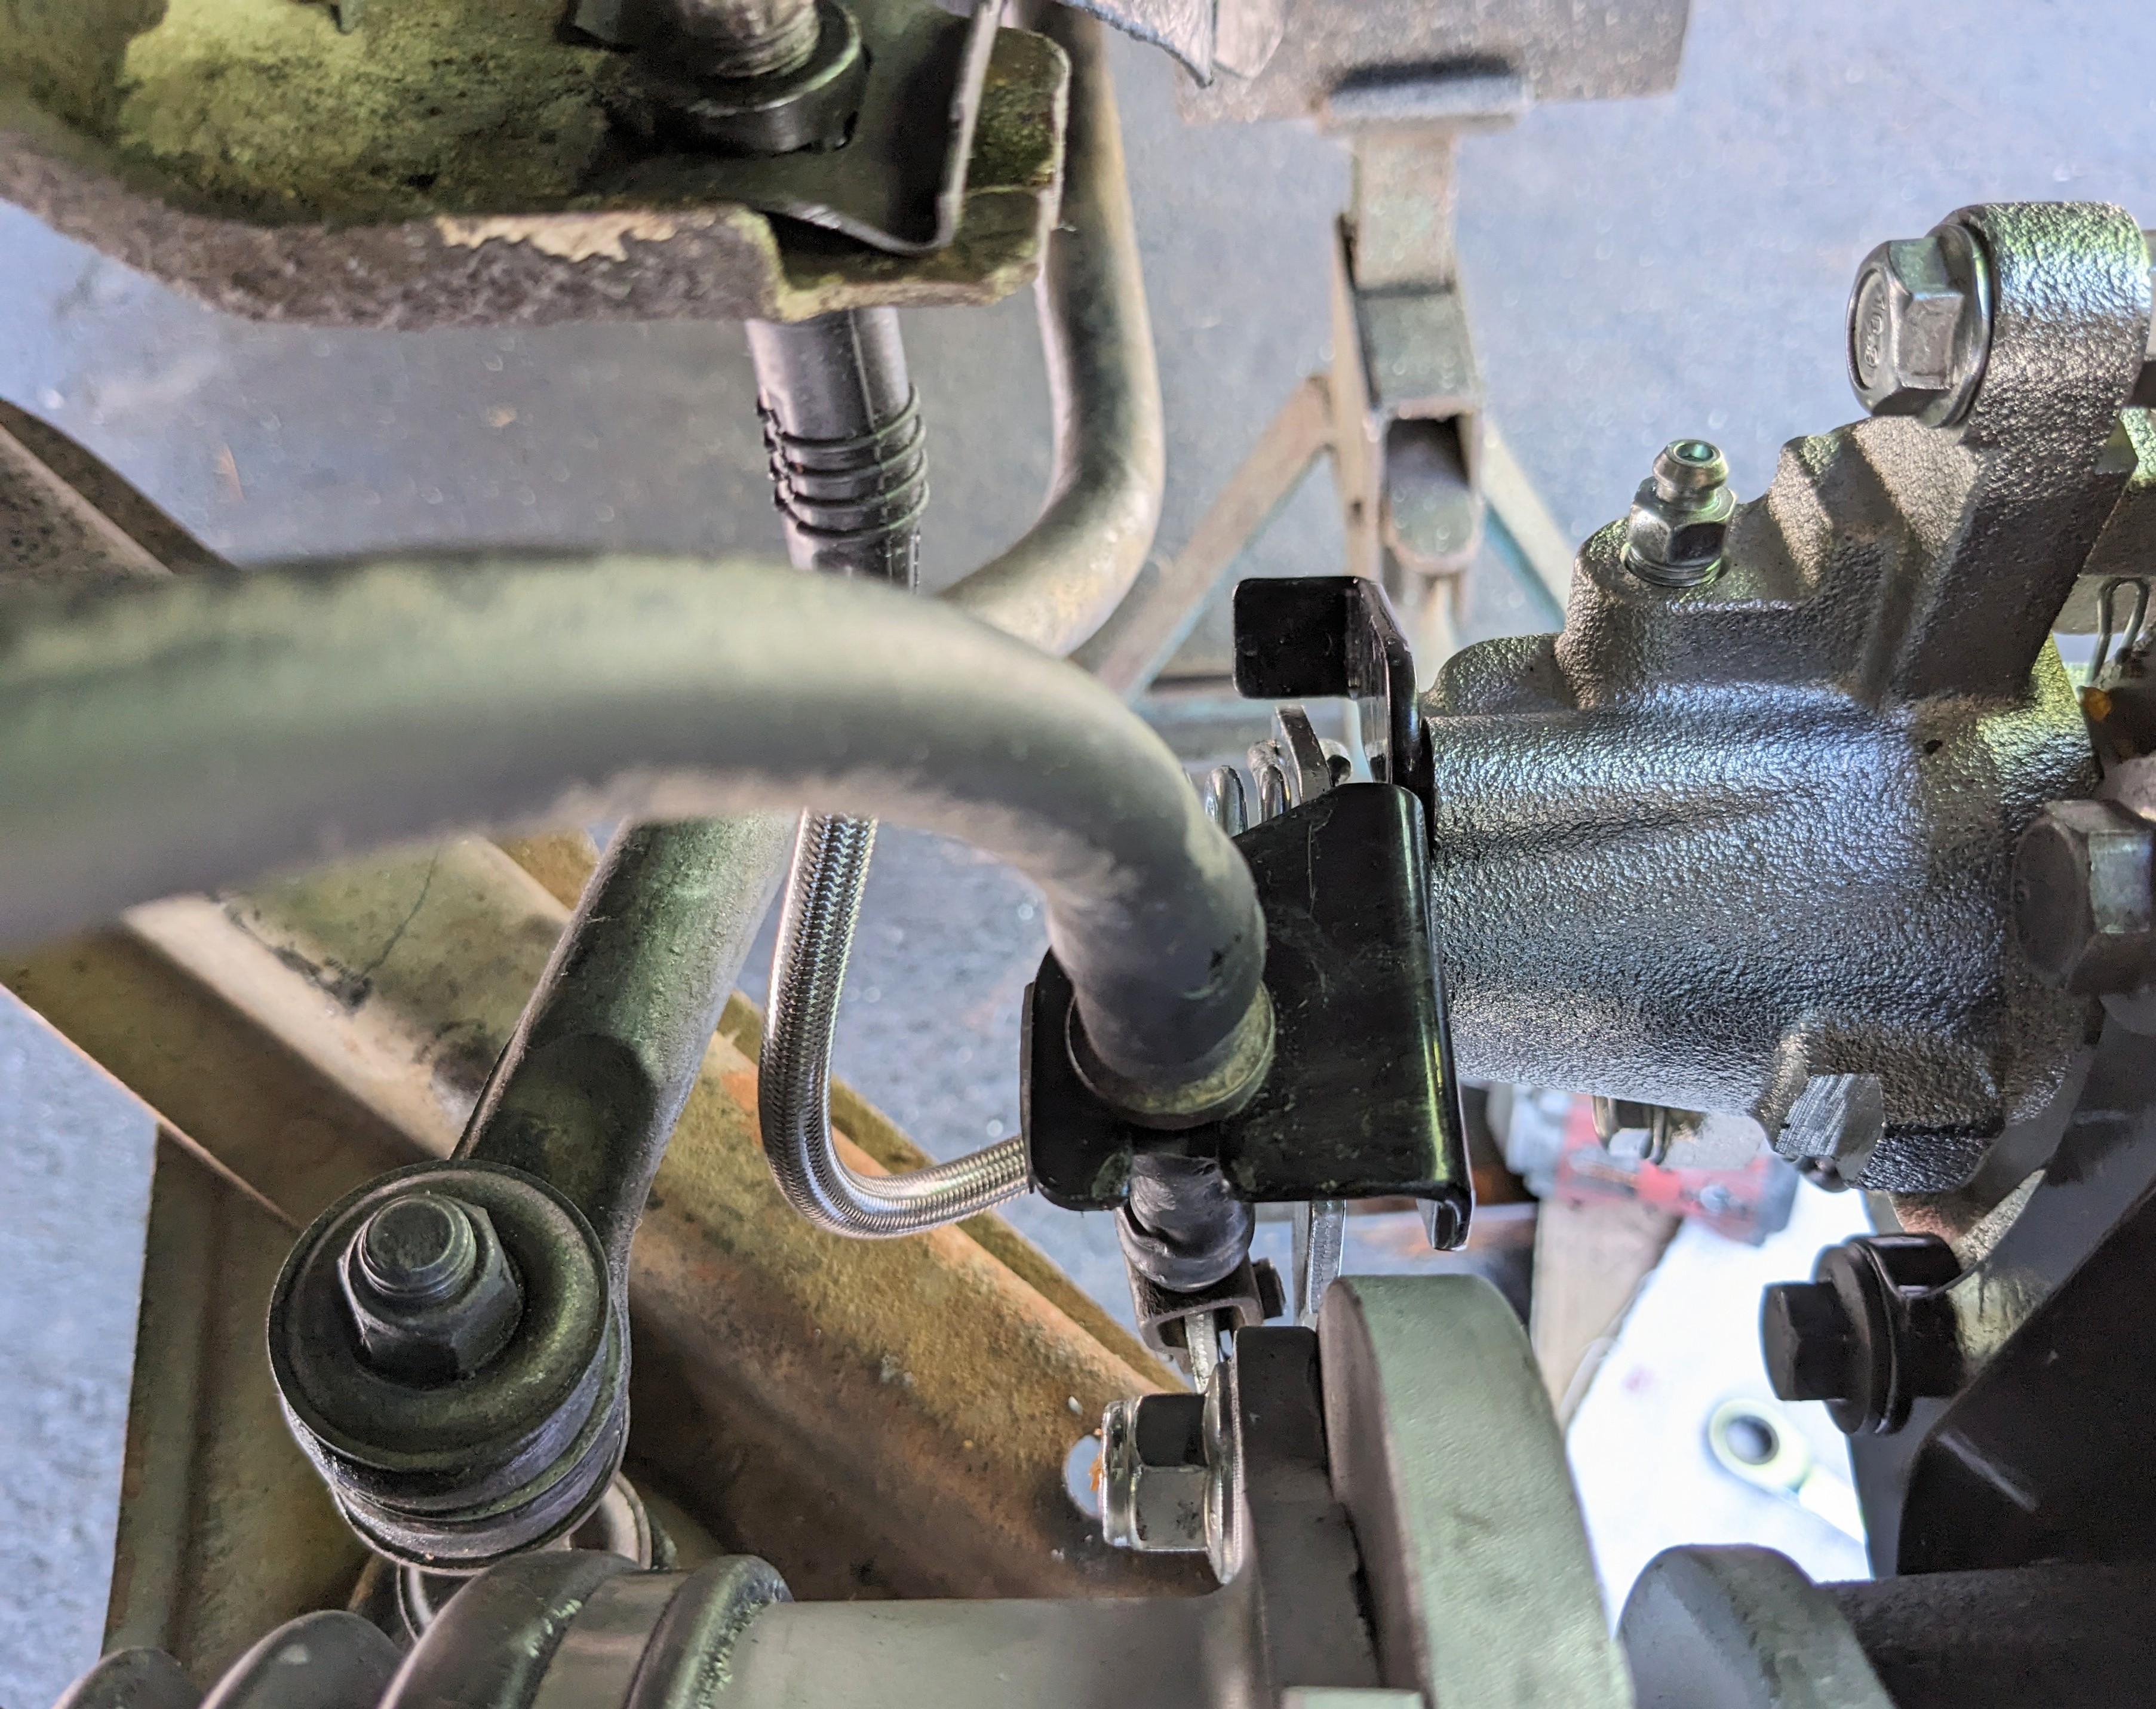
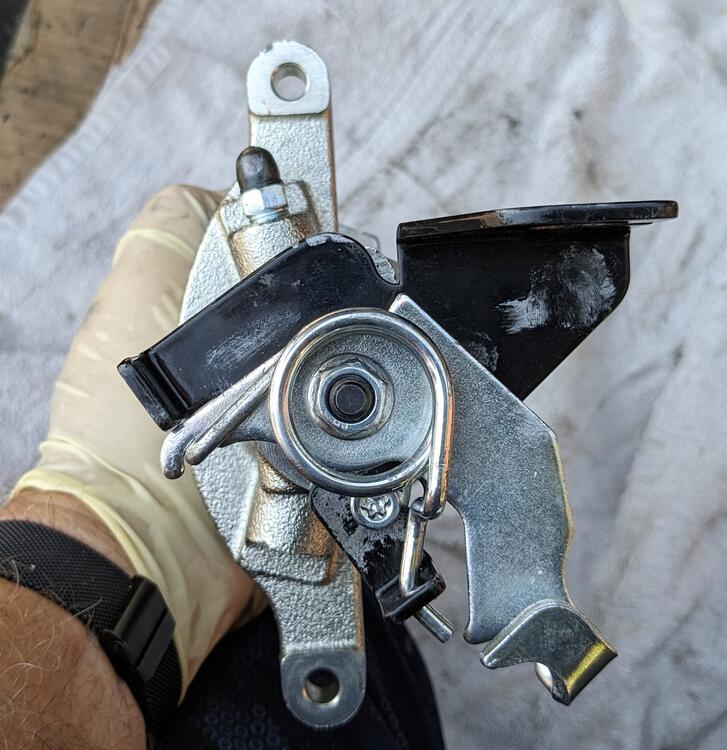
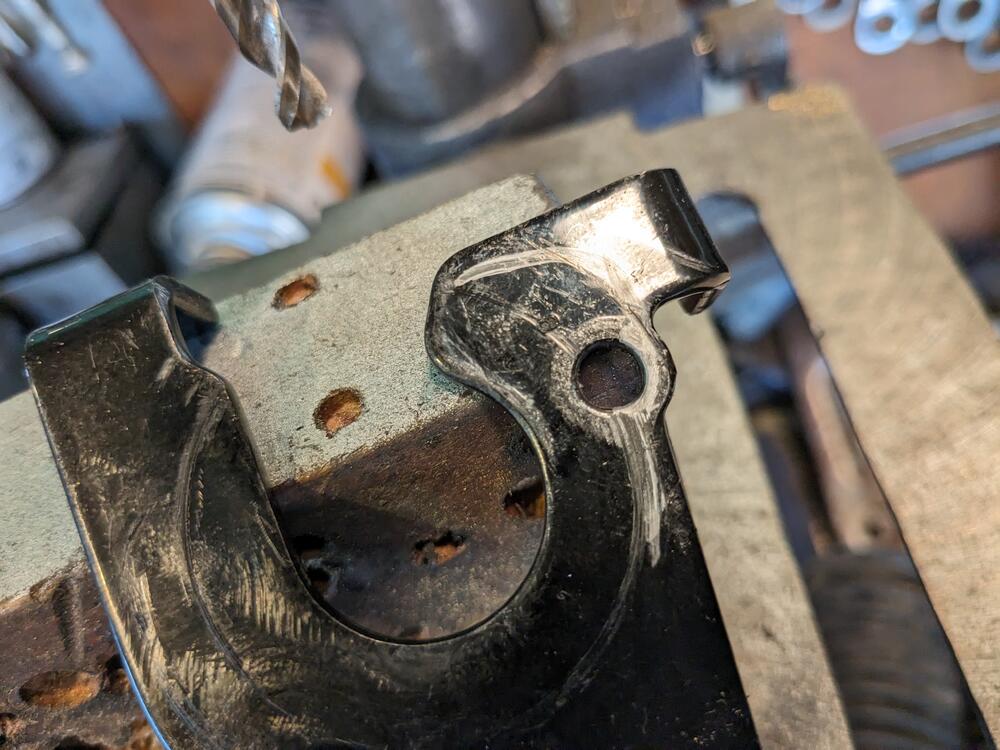
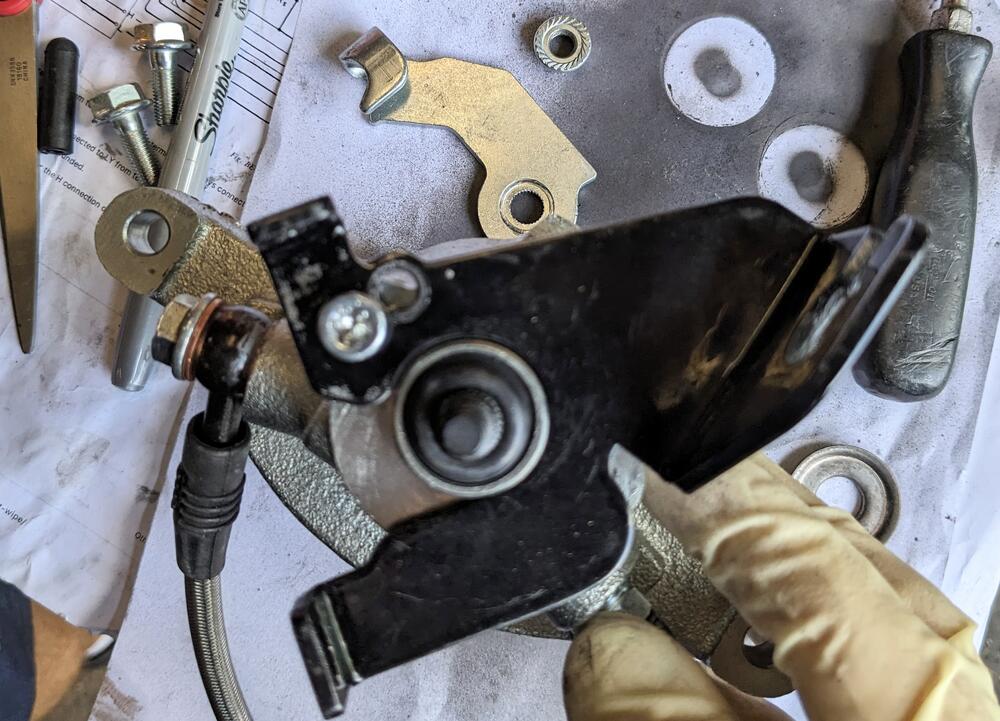
Resolved the eBrake lever issue. Figured out I could just redrill the axis point, and gain the necessary clearance off the flange Rotated the flange on the back of the caliper to mark the centerline, drilled a new 1/4" hole just outside the existing Reassembled after confirming offset clearance

 1 point
 -
Right, and I found the reason for the gas flooding, the idle mixture screws on the triple Webers are suppose to be somewhere between half to one and half turns open, if the carbs need more than that you have to start changing jets. On these carbs the idle mixture screws were turned out 5 1/2 turns, so the gas was just gushing in.1 point
-
The carb side is the thrust side so will always get the worst of any scuffing.1 point
-
Not an expert. But, barely lower is what you'd get if the valve head was bent on the stem. Since everything is back together it might be worthwhile to pull the spark plugs and spin the engine by hand to see what the valve is doing. Does it get stuck or does it move freely. Then, if you're brave, spin it with the starter with the plugs out. Don't forget to disconnect the coil, or use a remote starter with the key off. You could also measure cylinder pressures if it spins freely. If the valve is not closing completely you'll get a zero on that one.1 point
-
Looks like overheating and/or lack of oil. Are they all like that? p.s. I wouldn't call that piston "slap". Slap is from loose pistons. That one got too tight.1 point
-
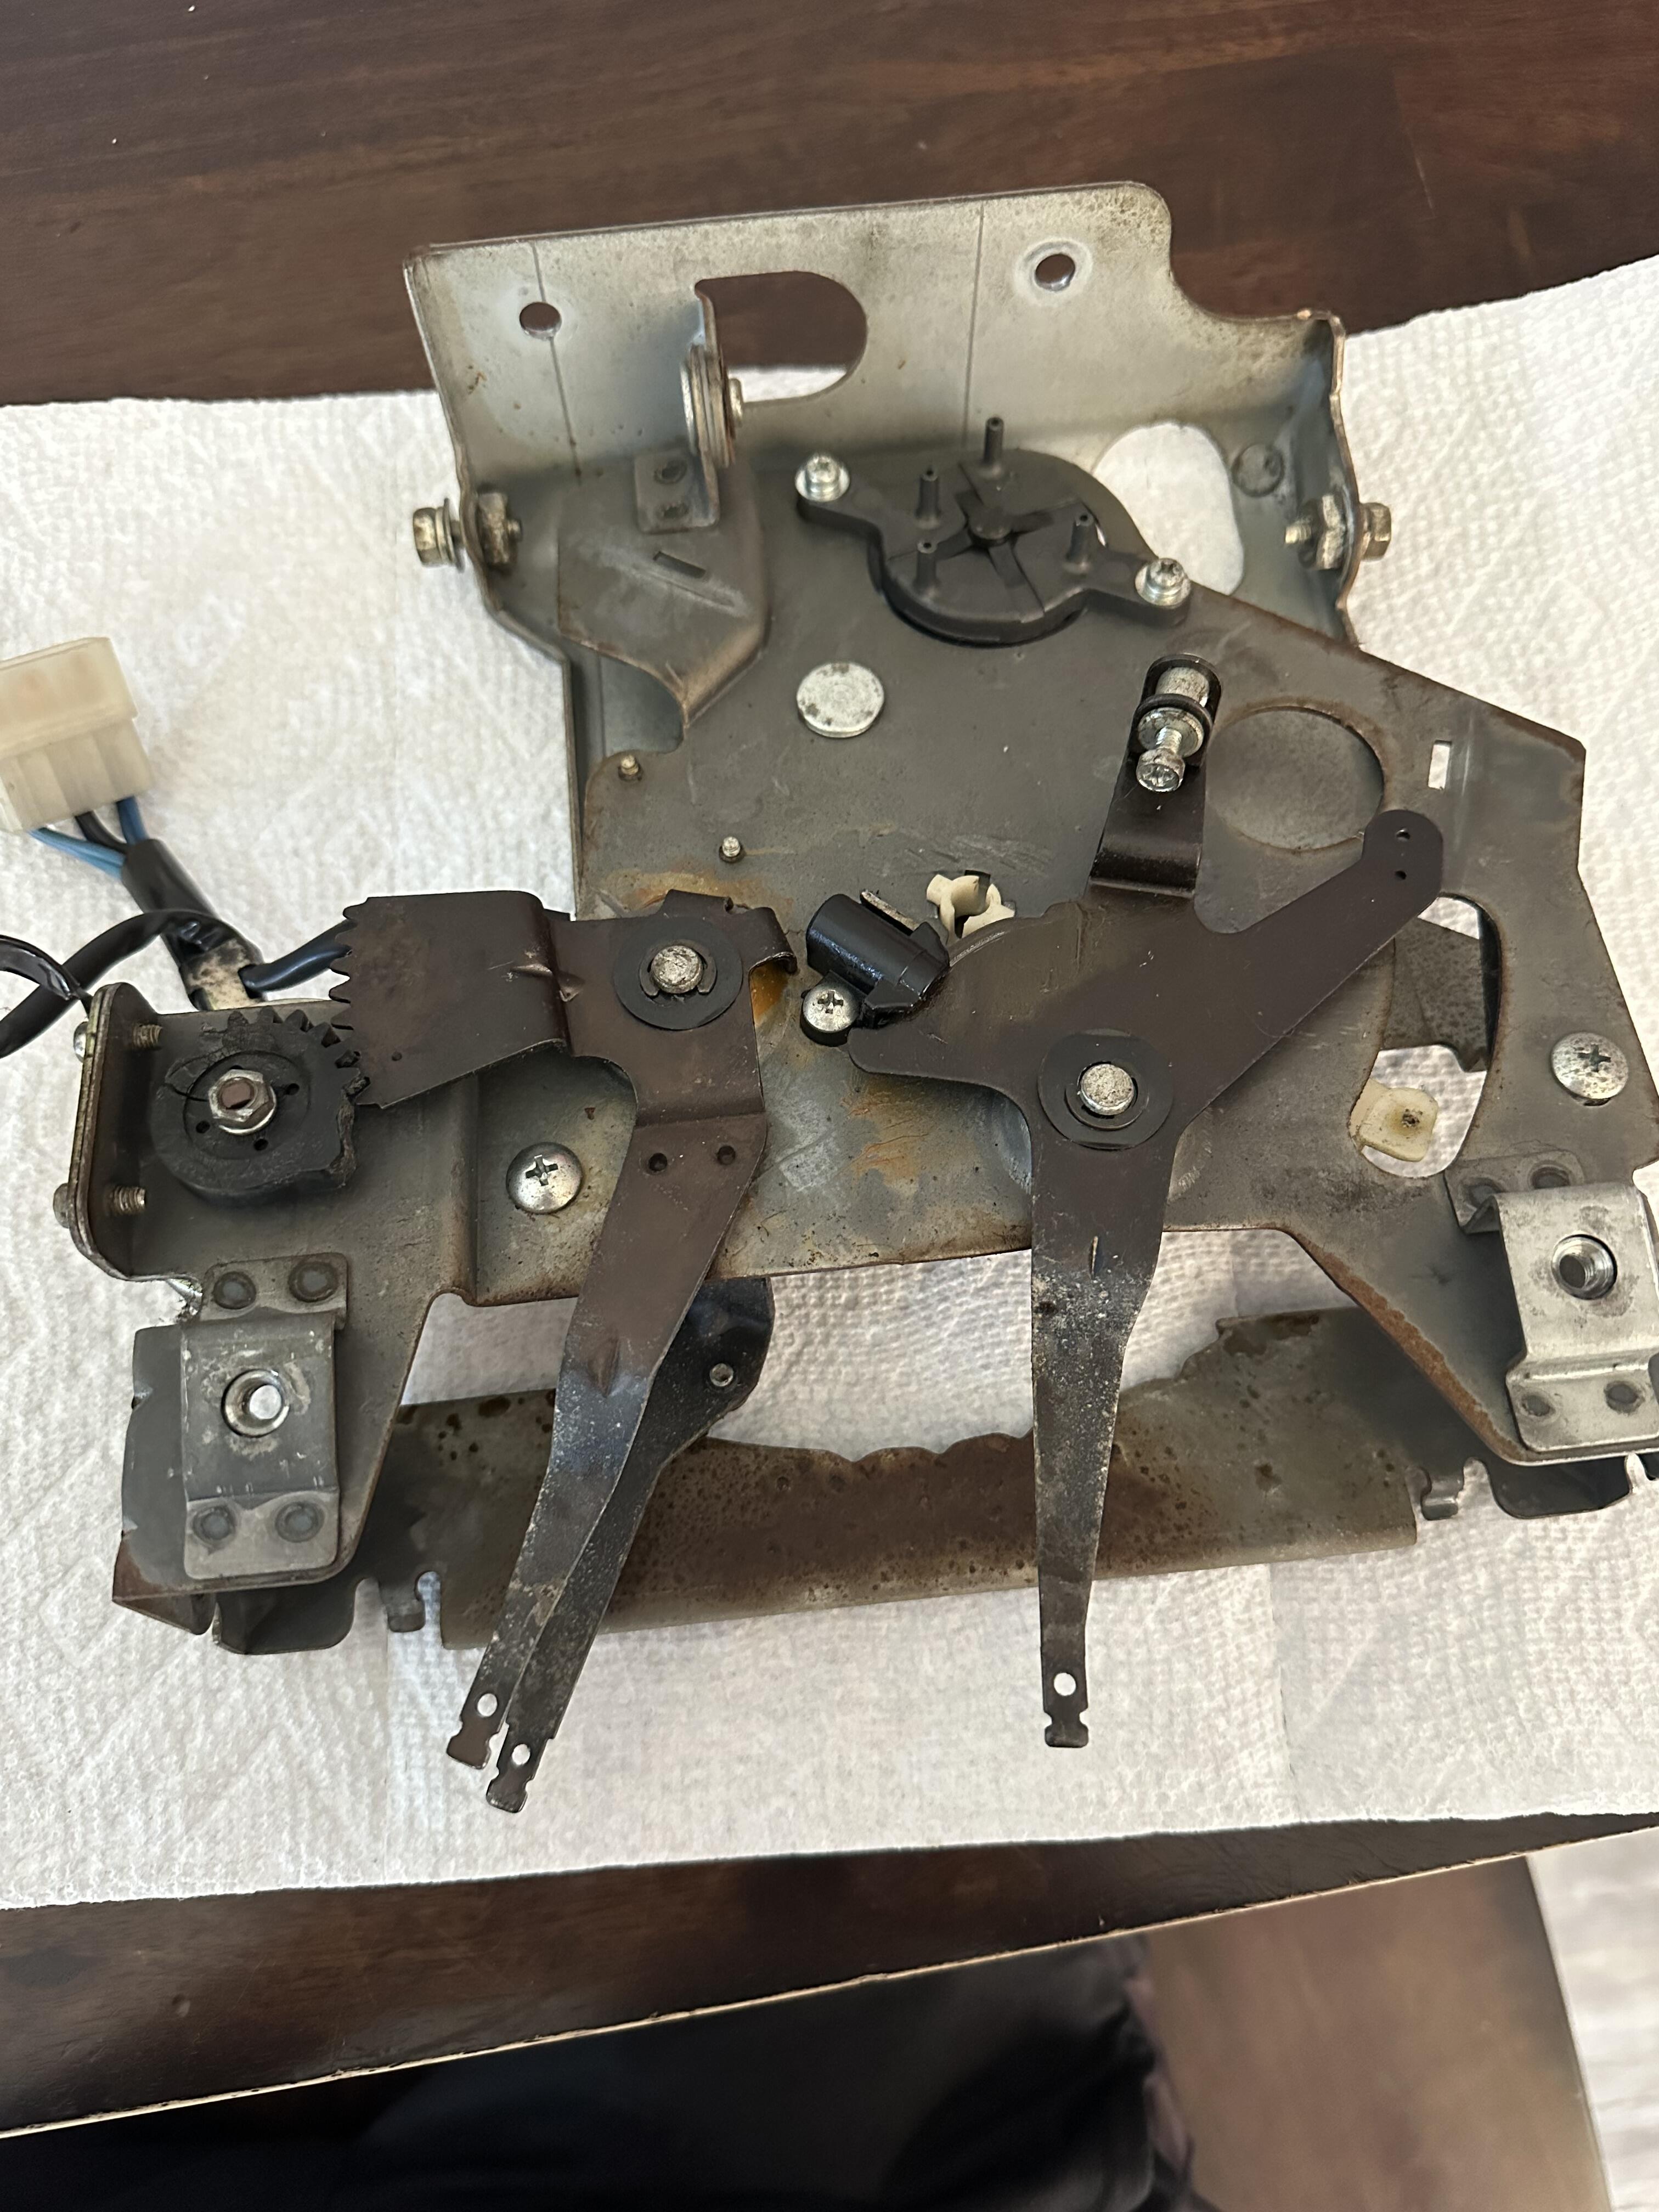
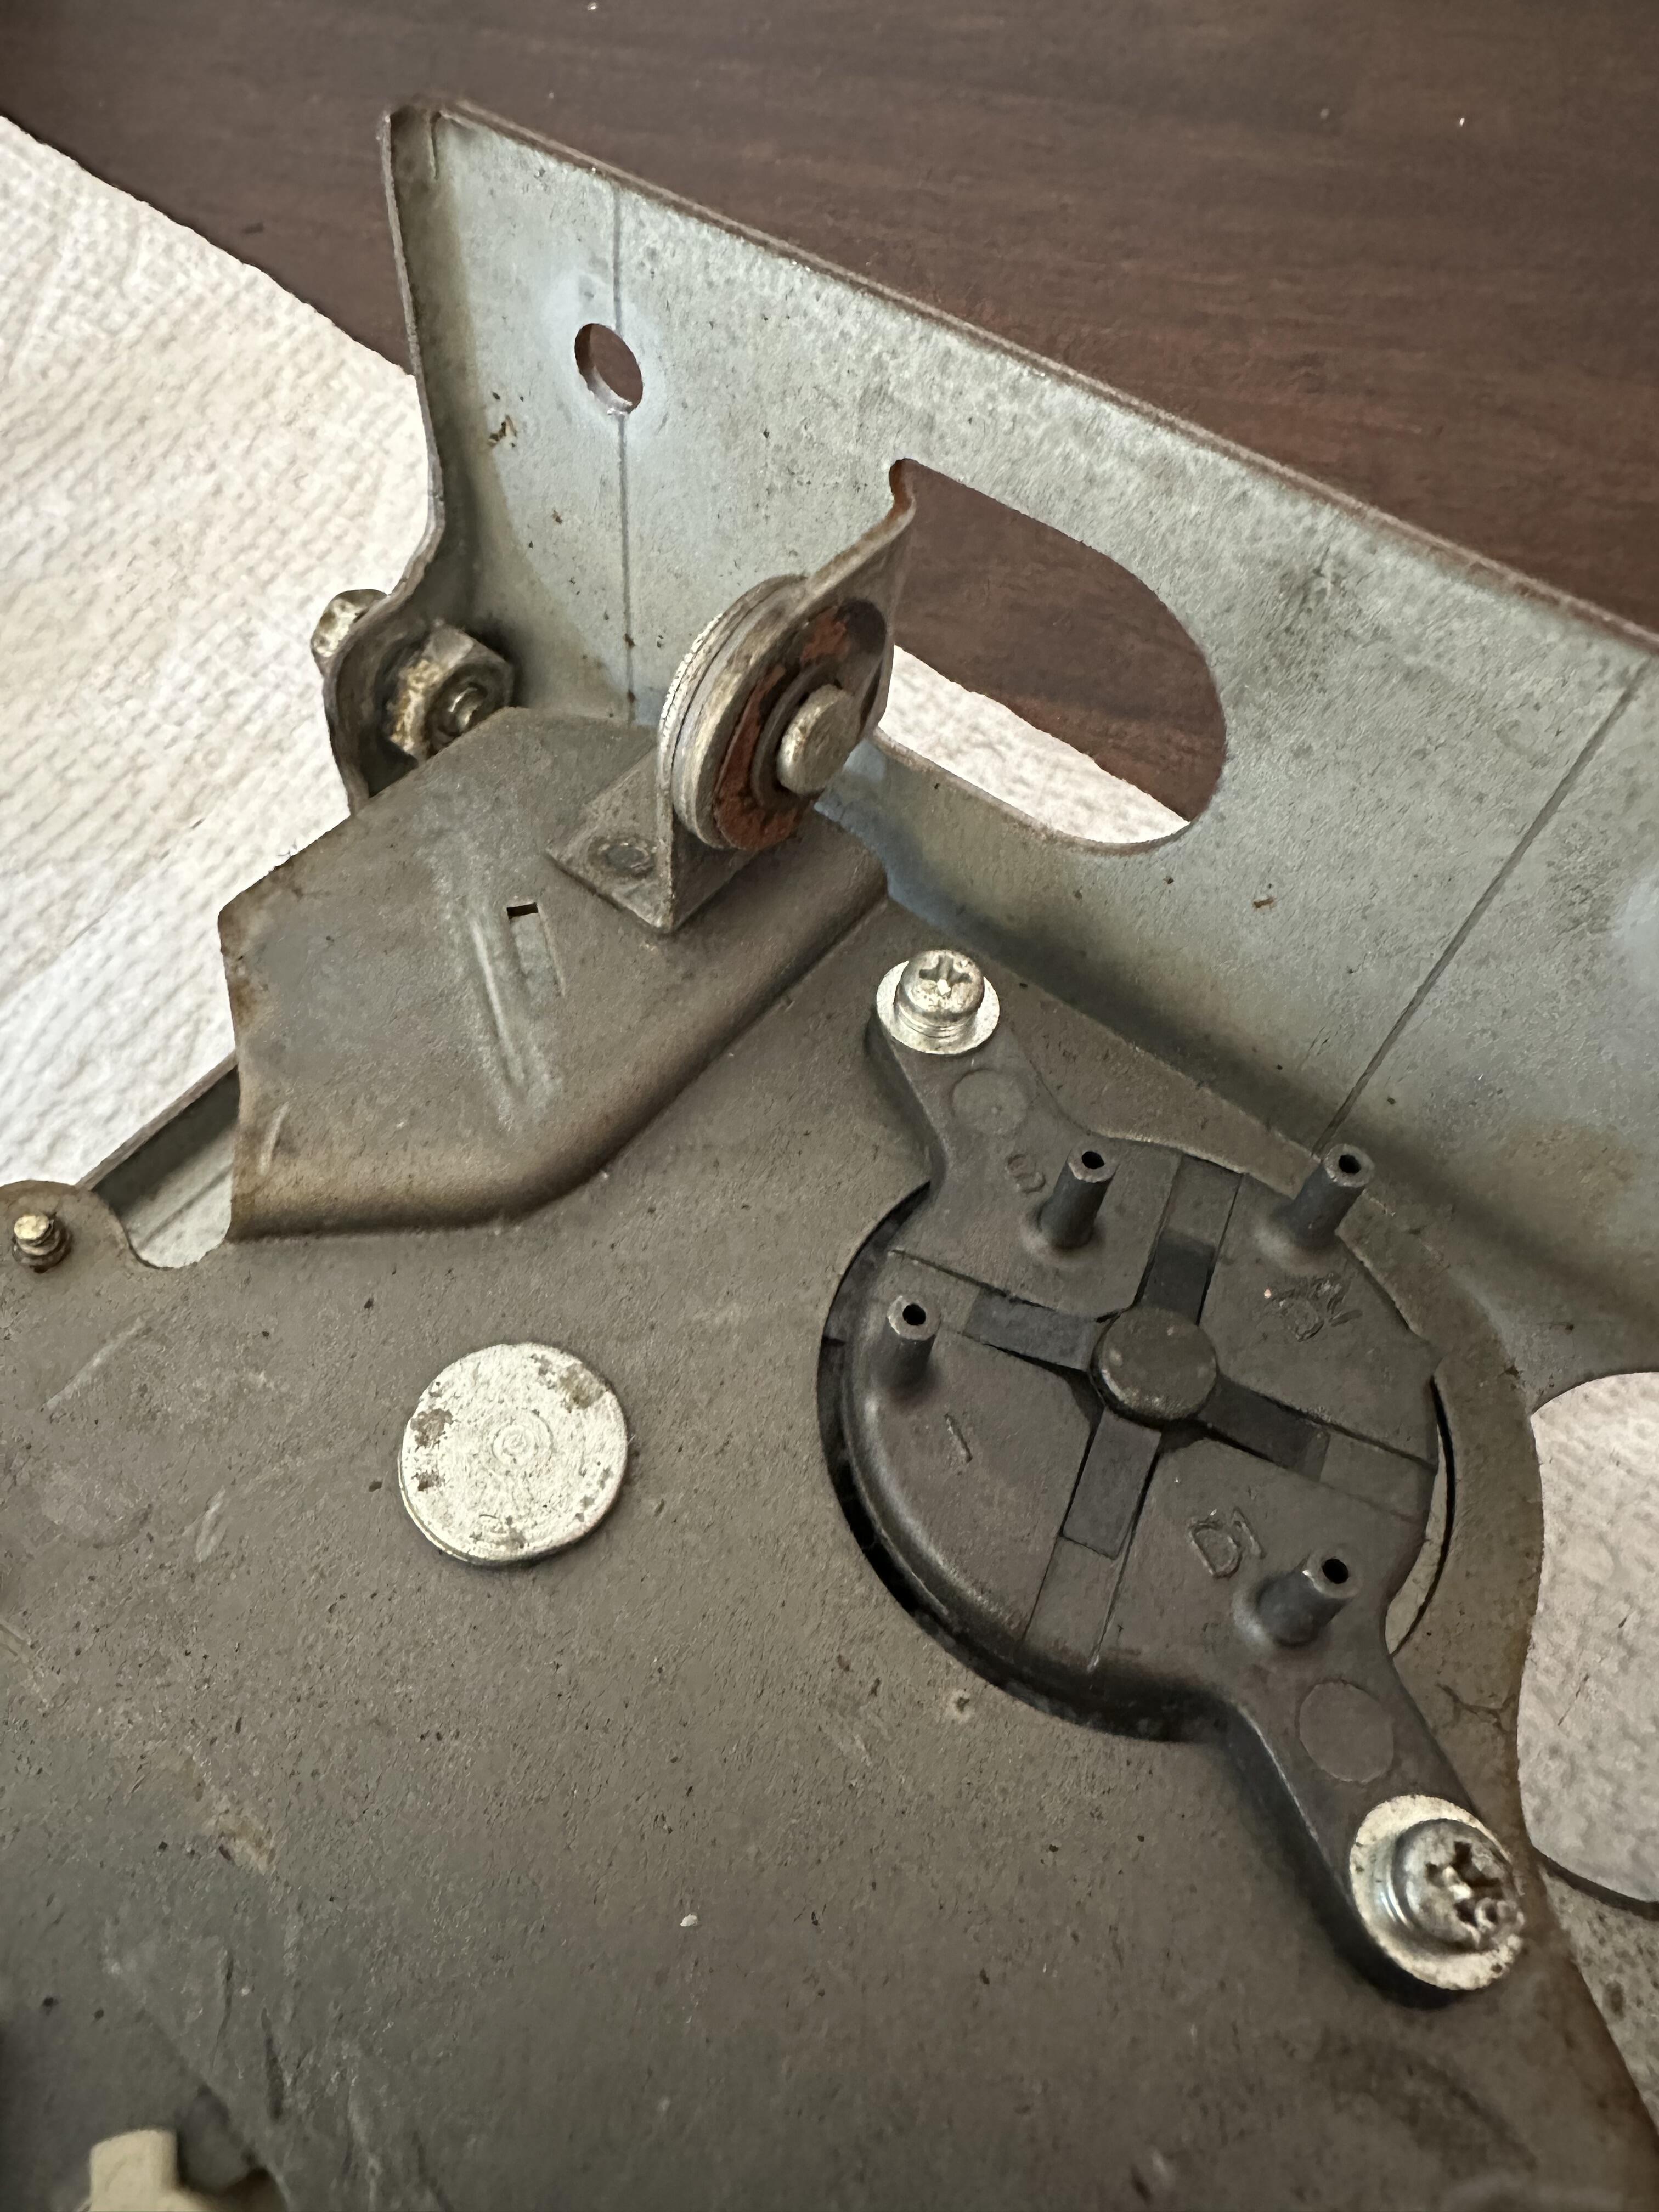
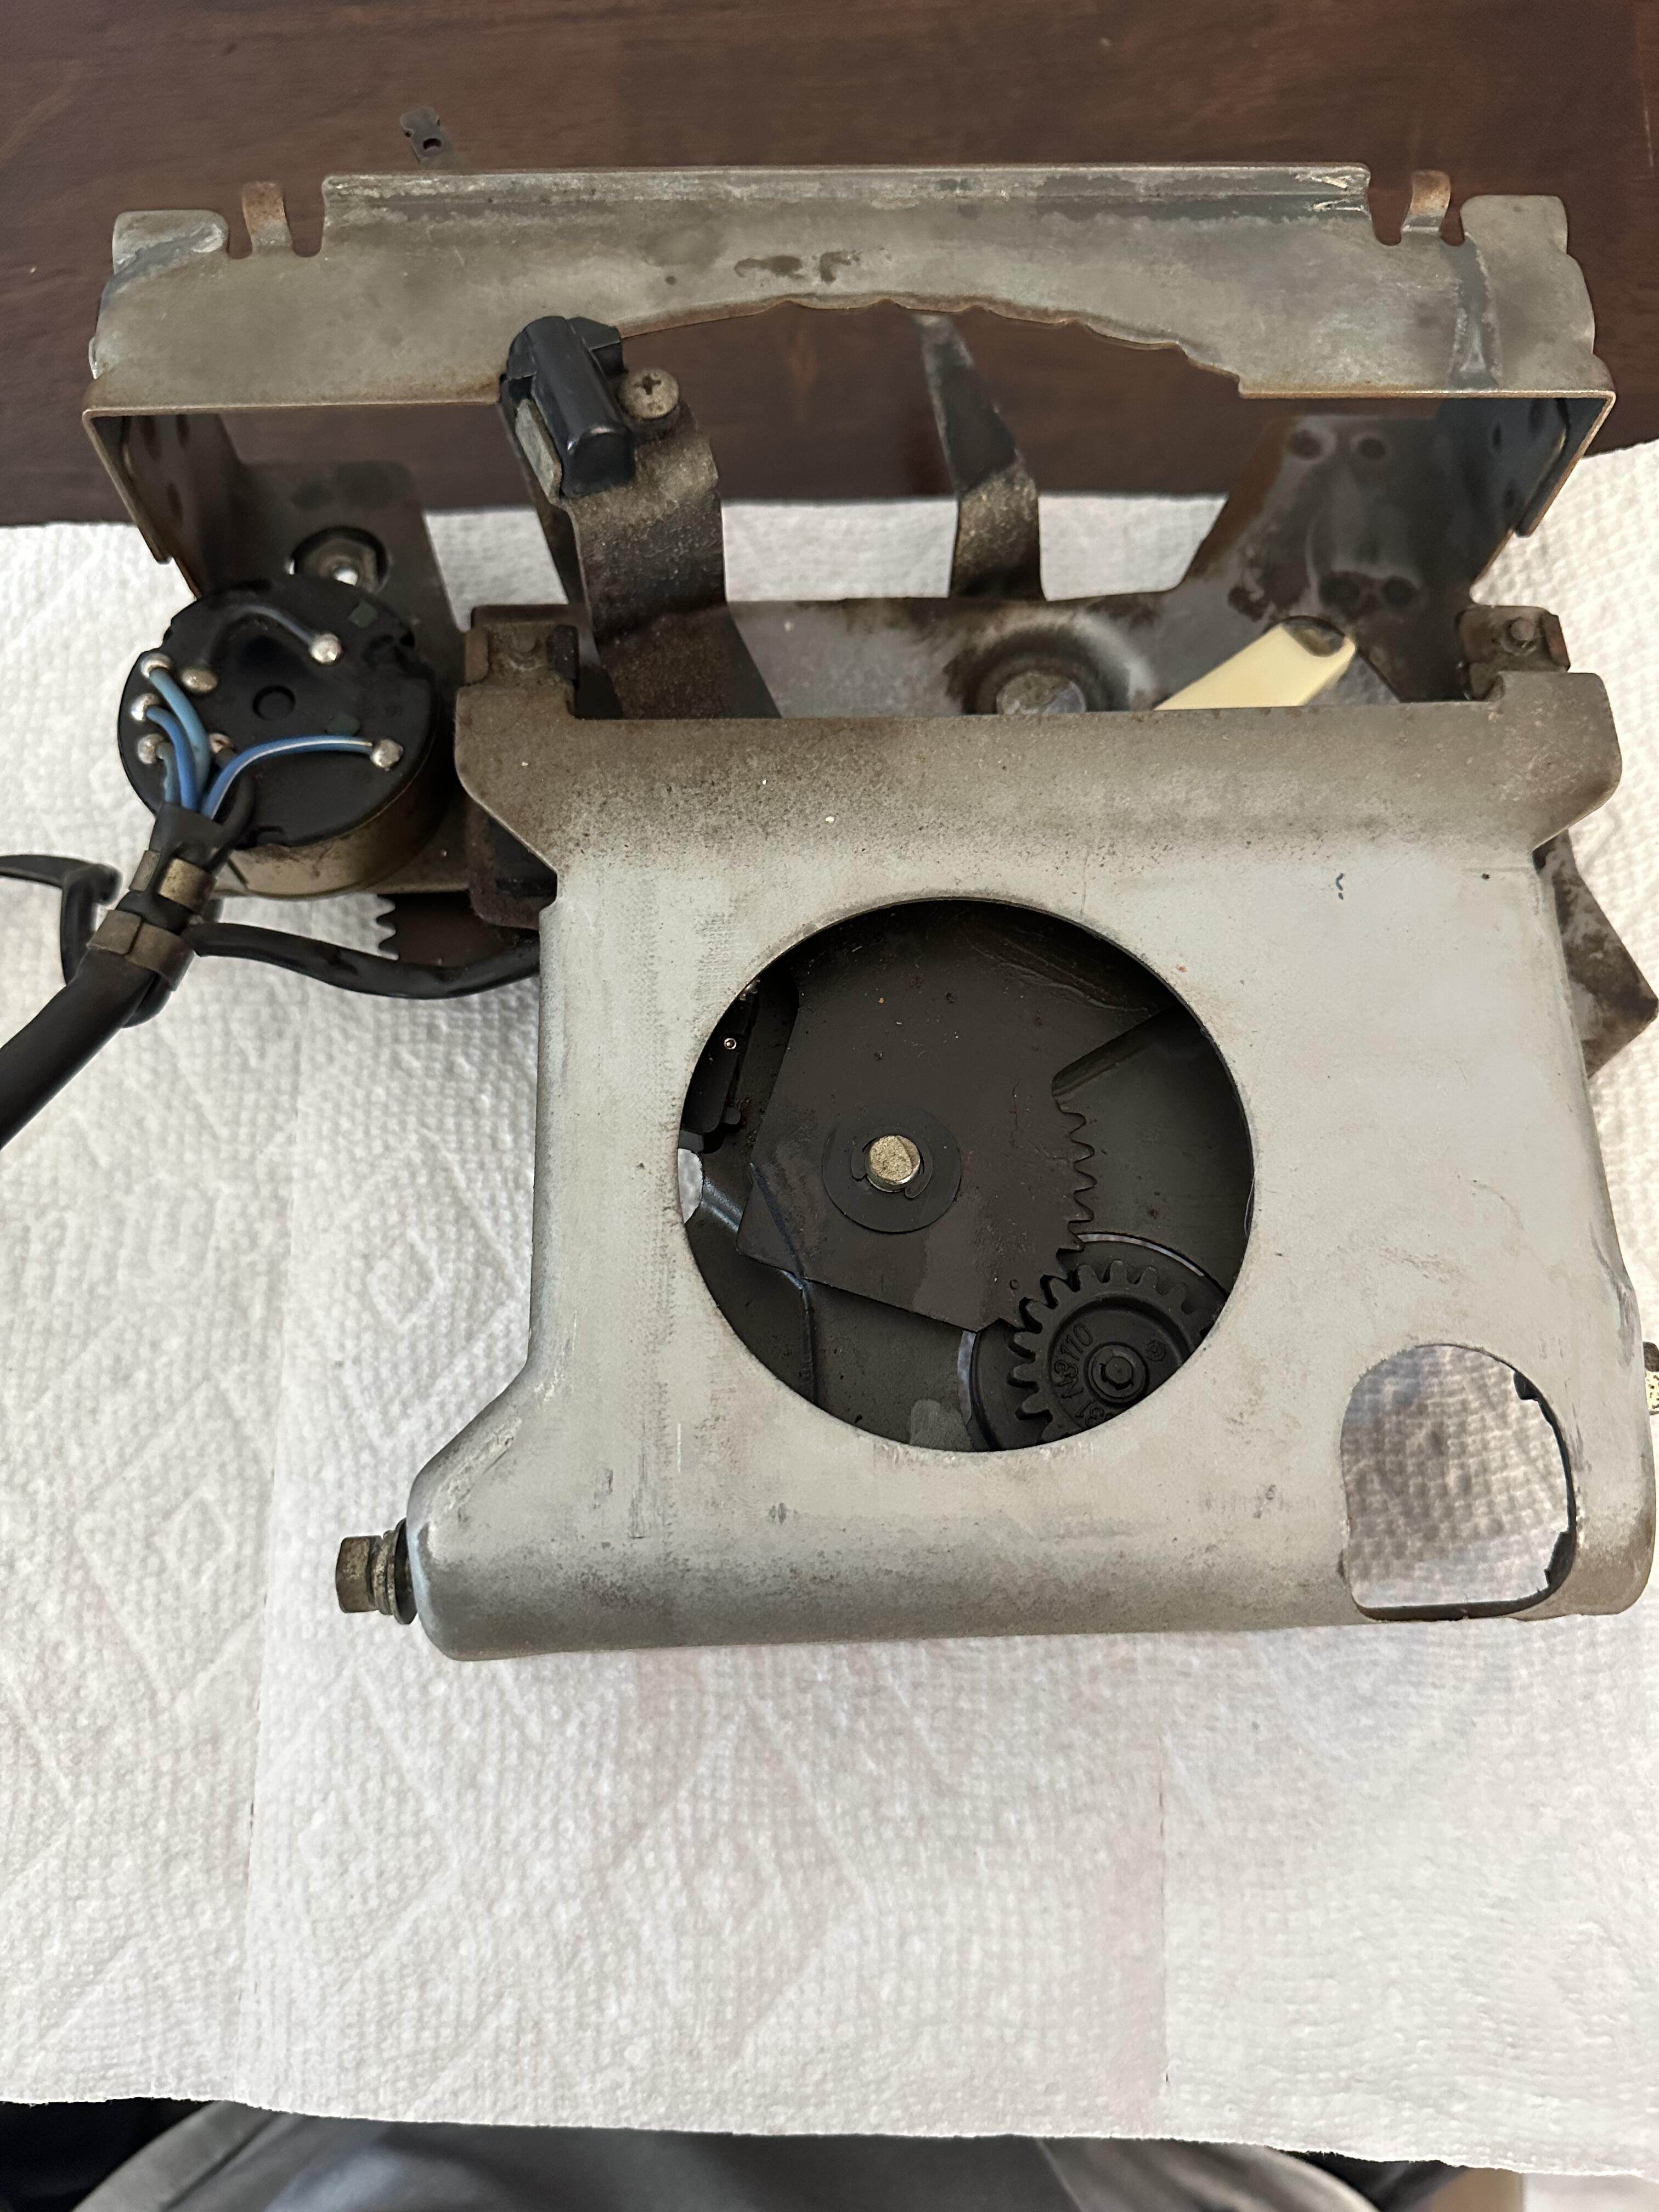
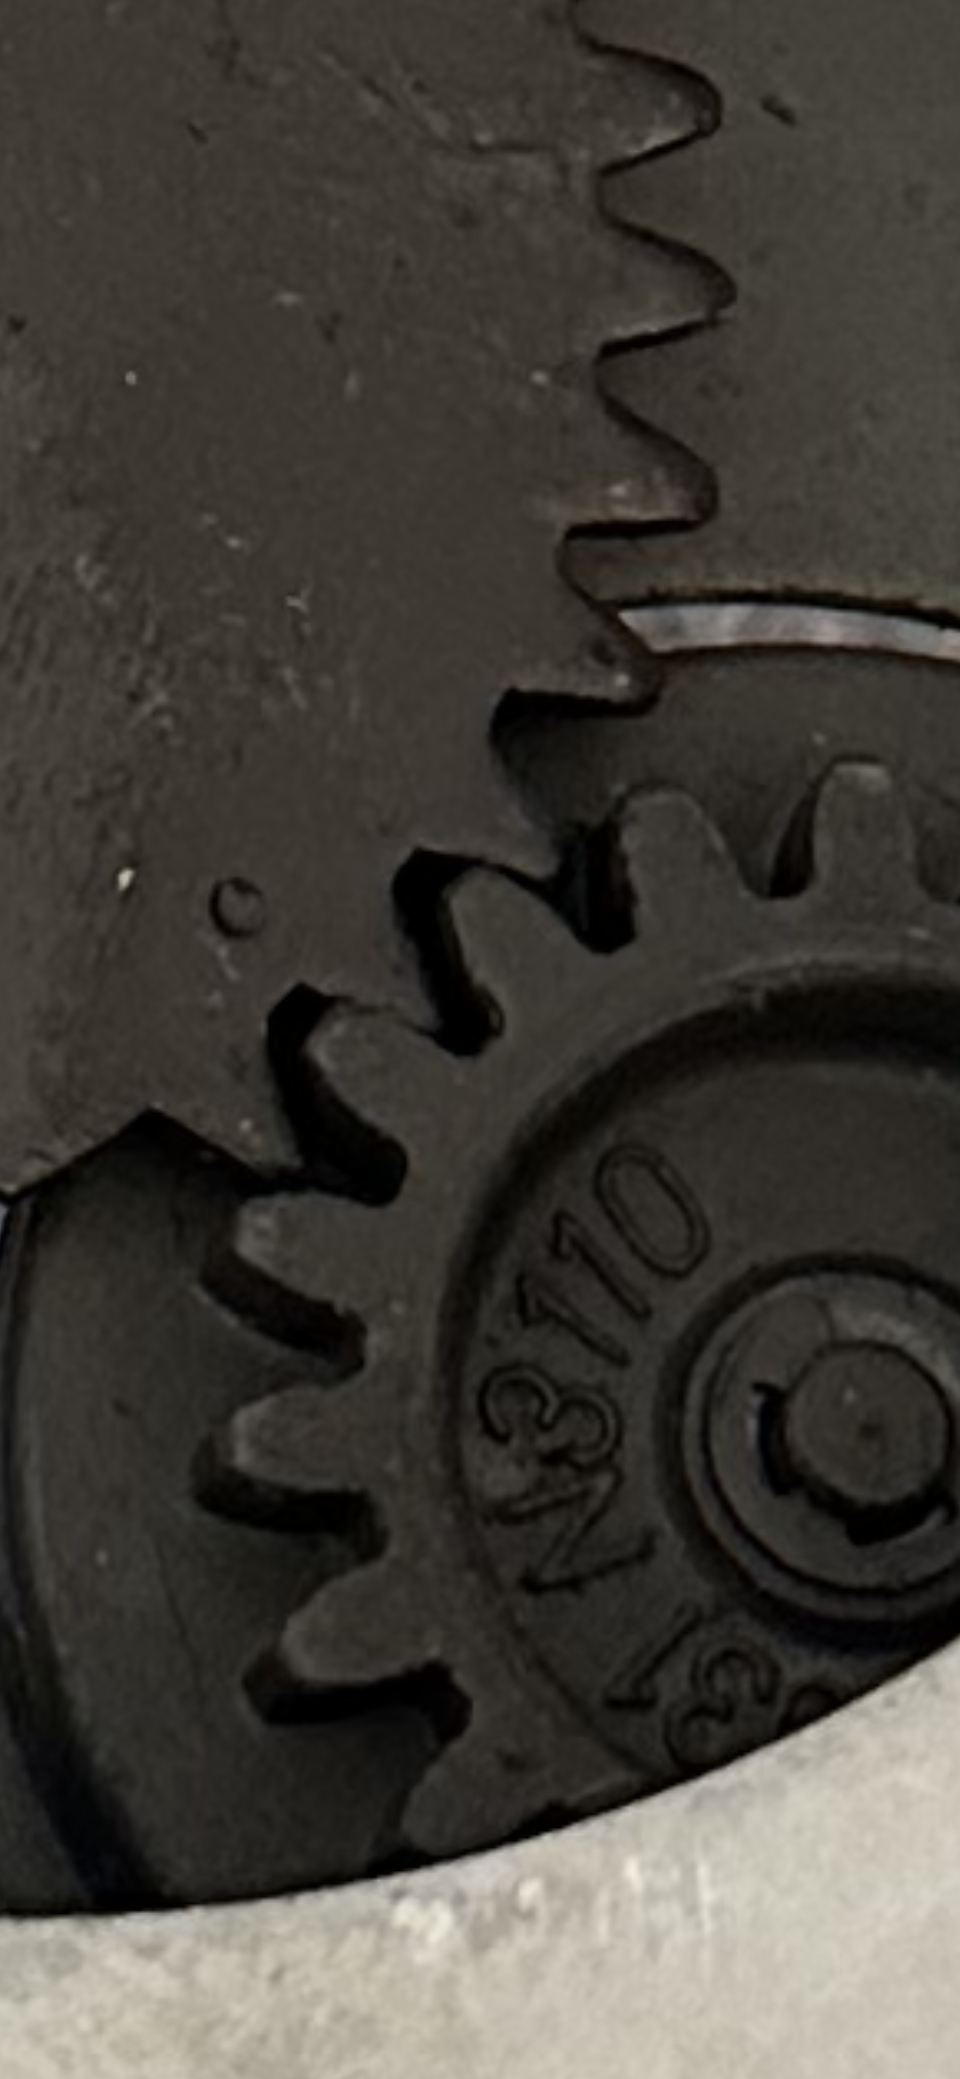
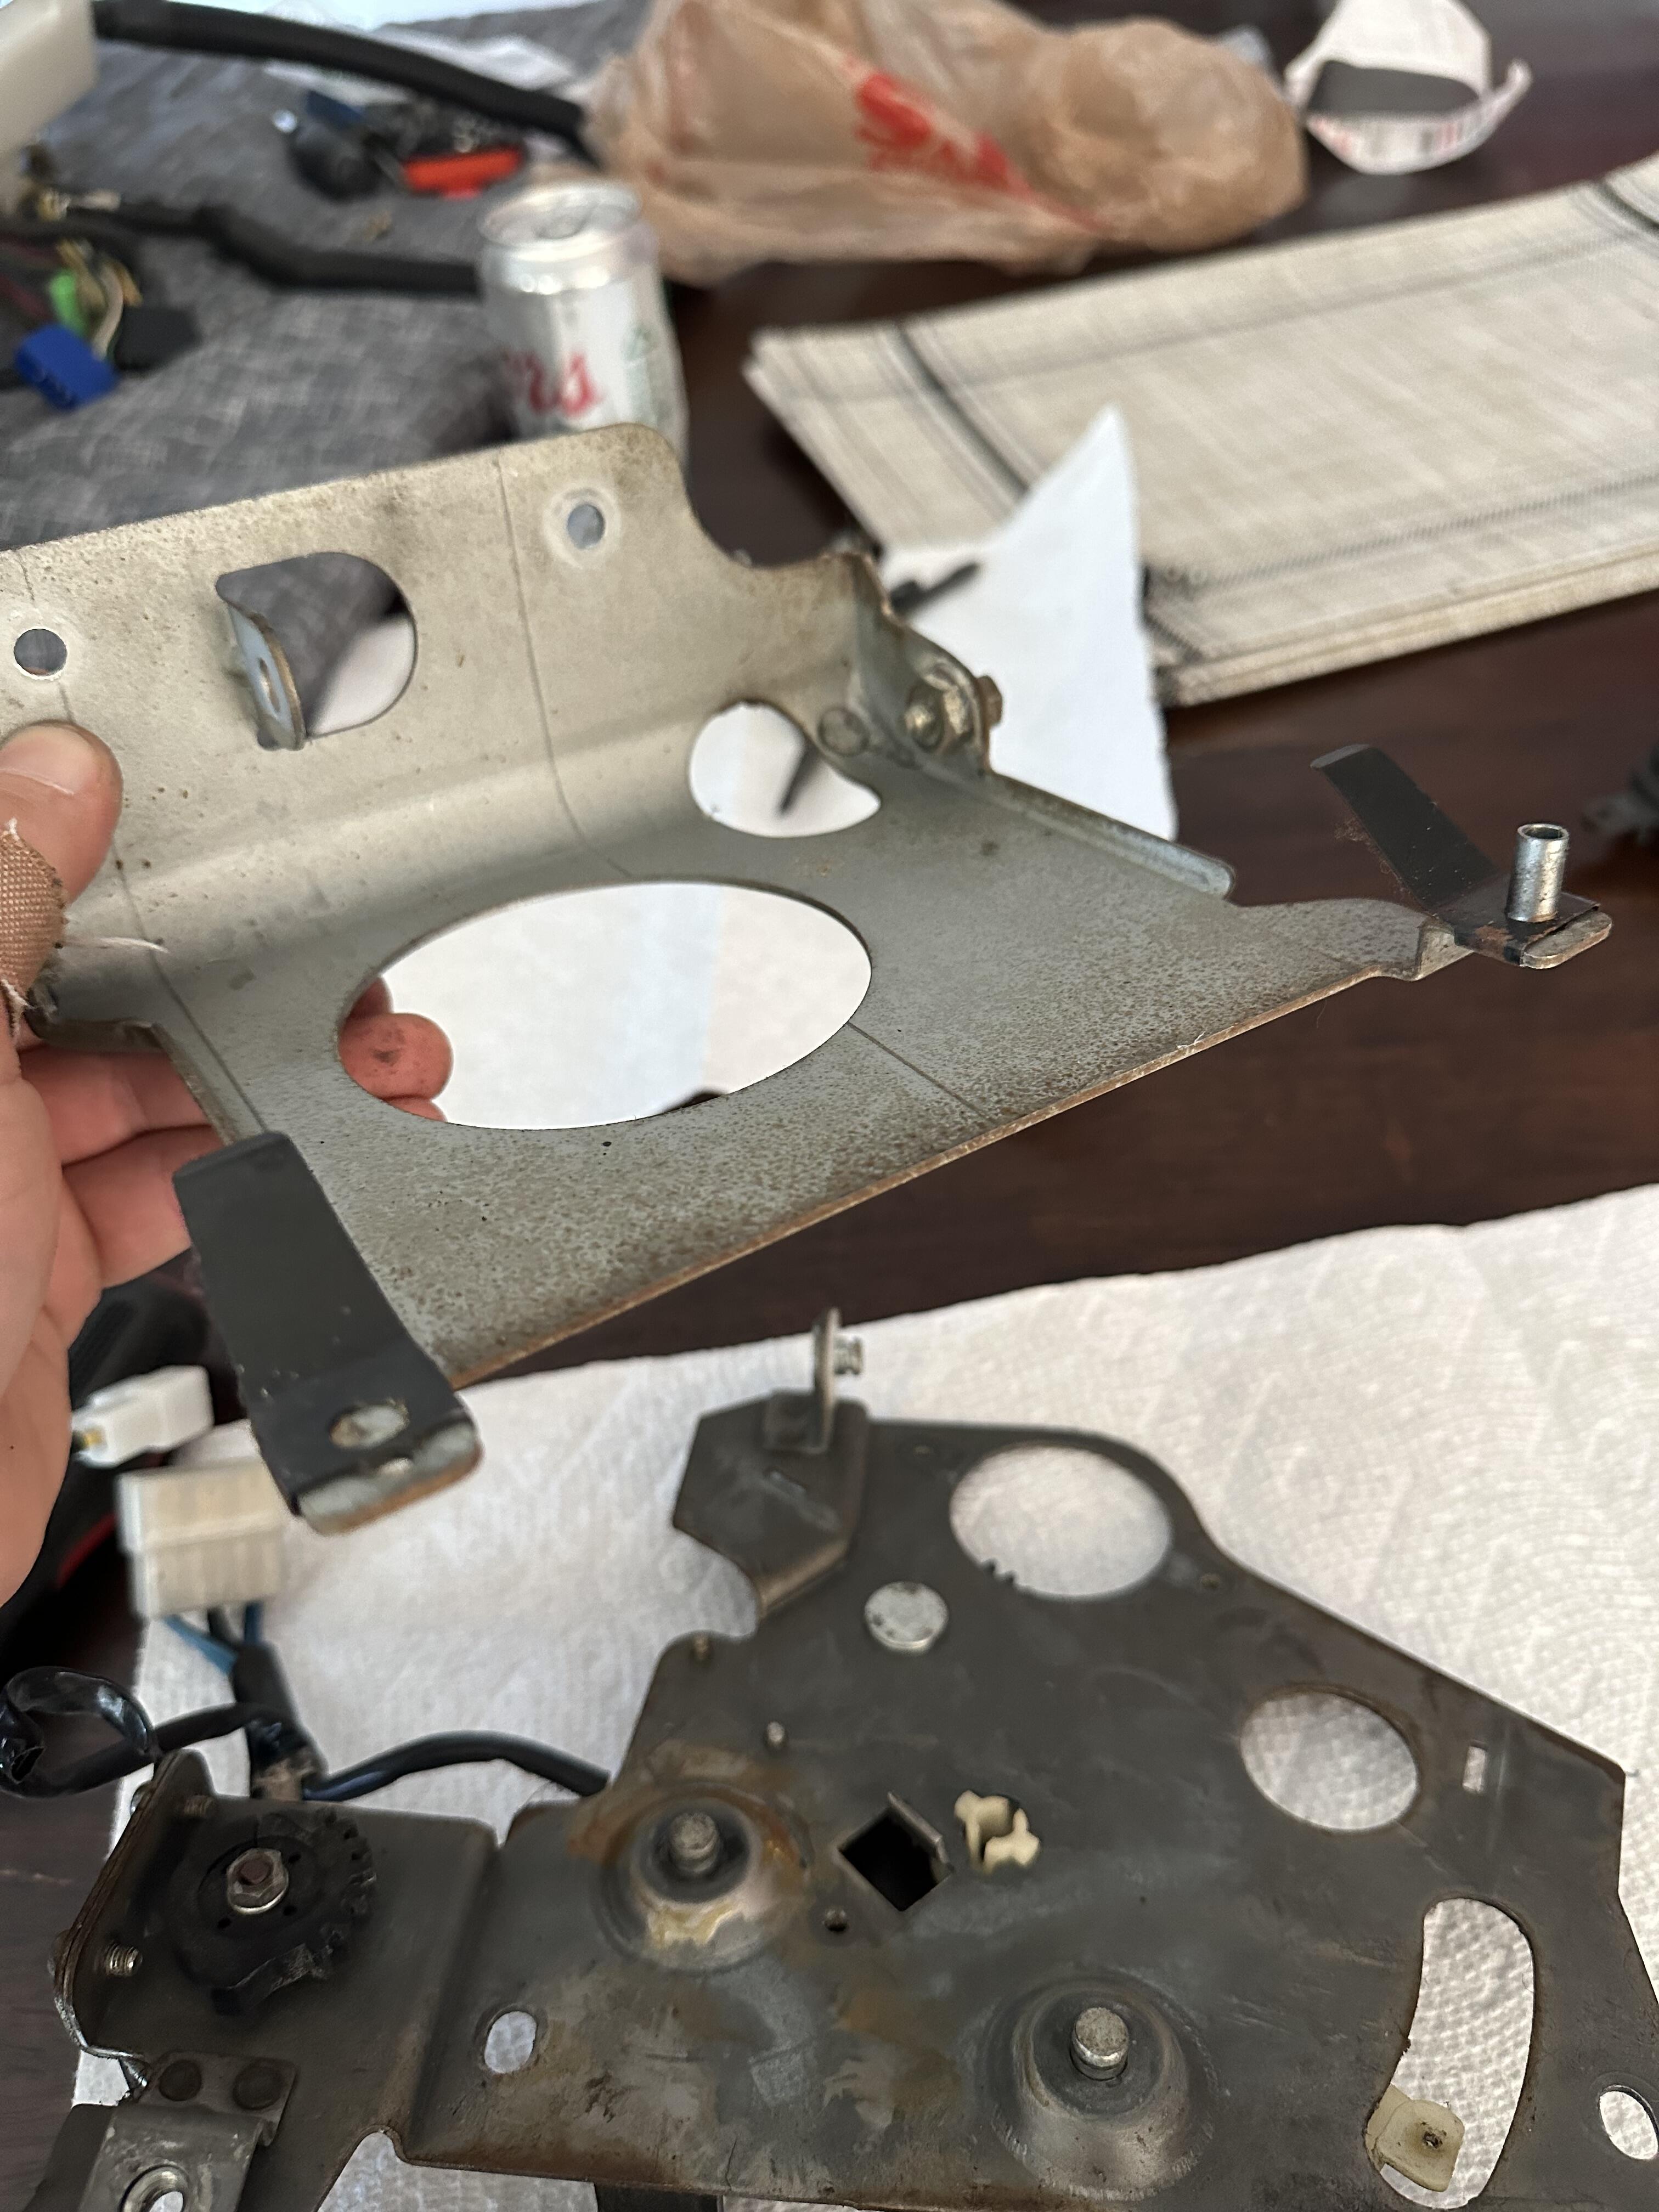
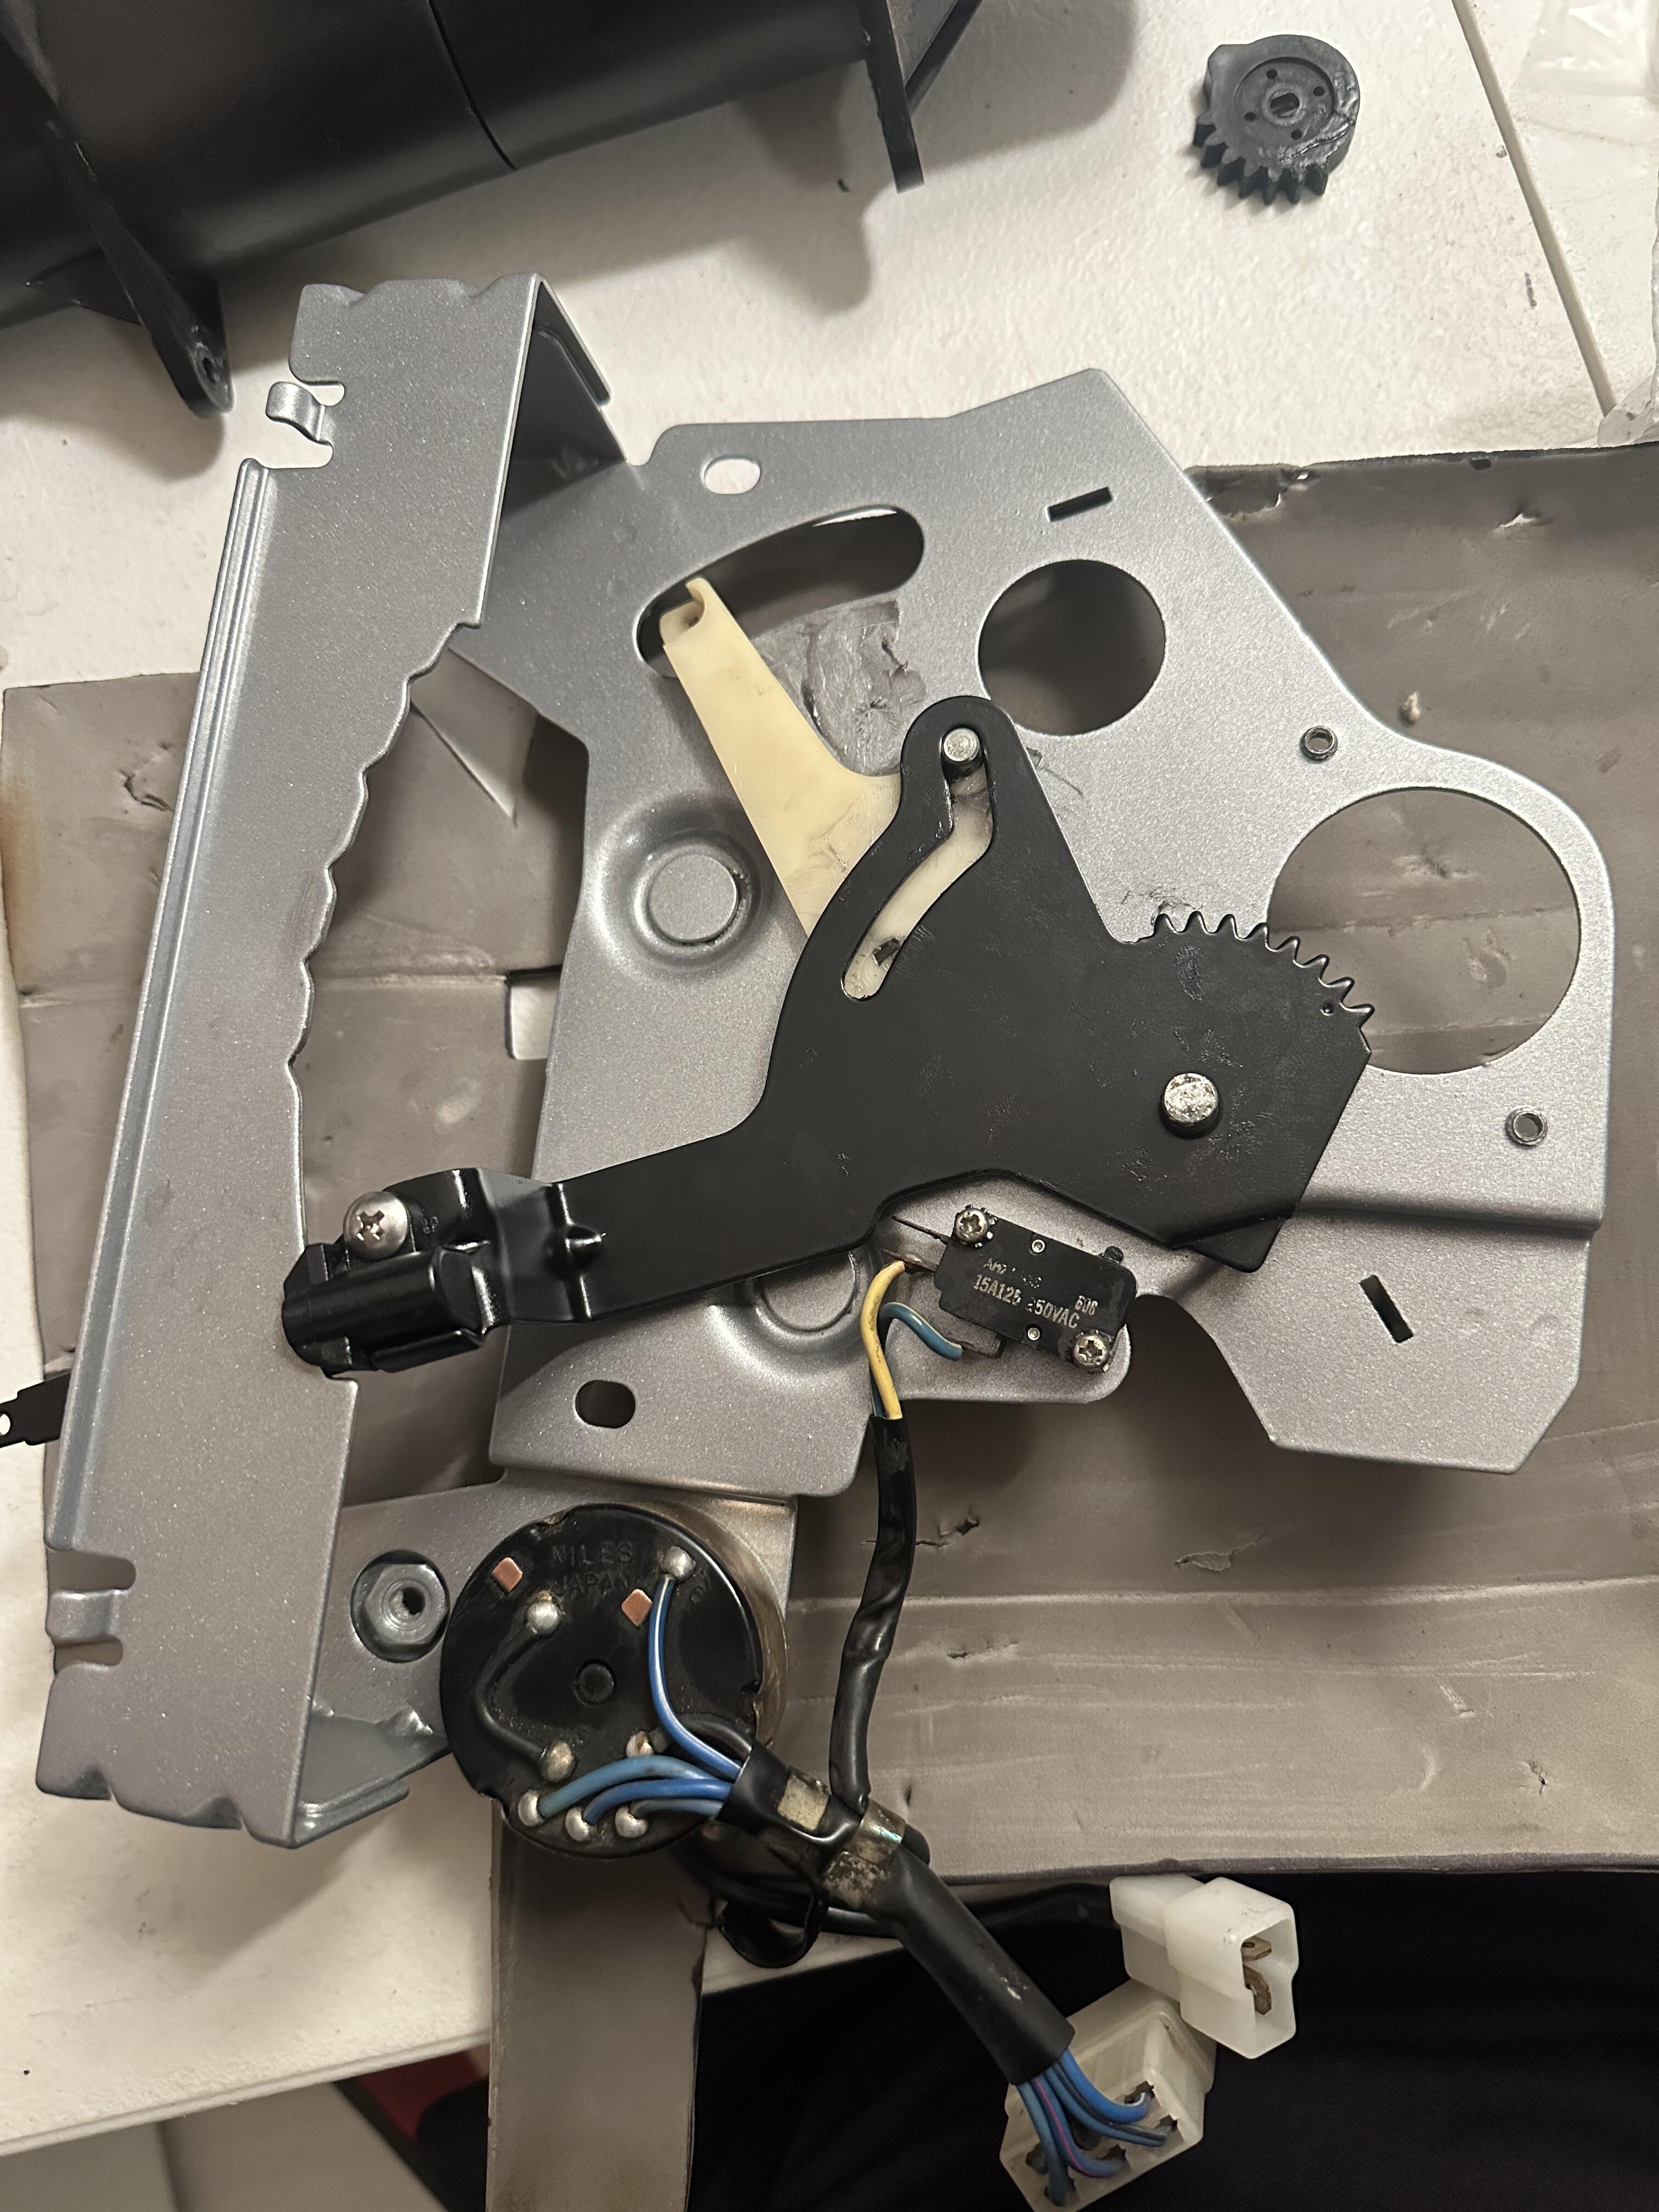
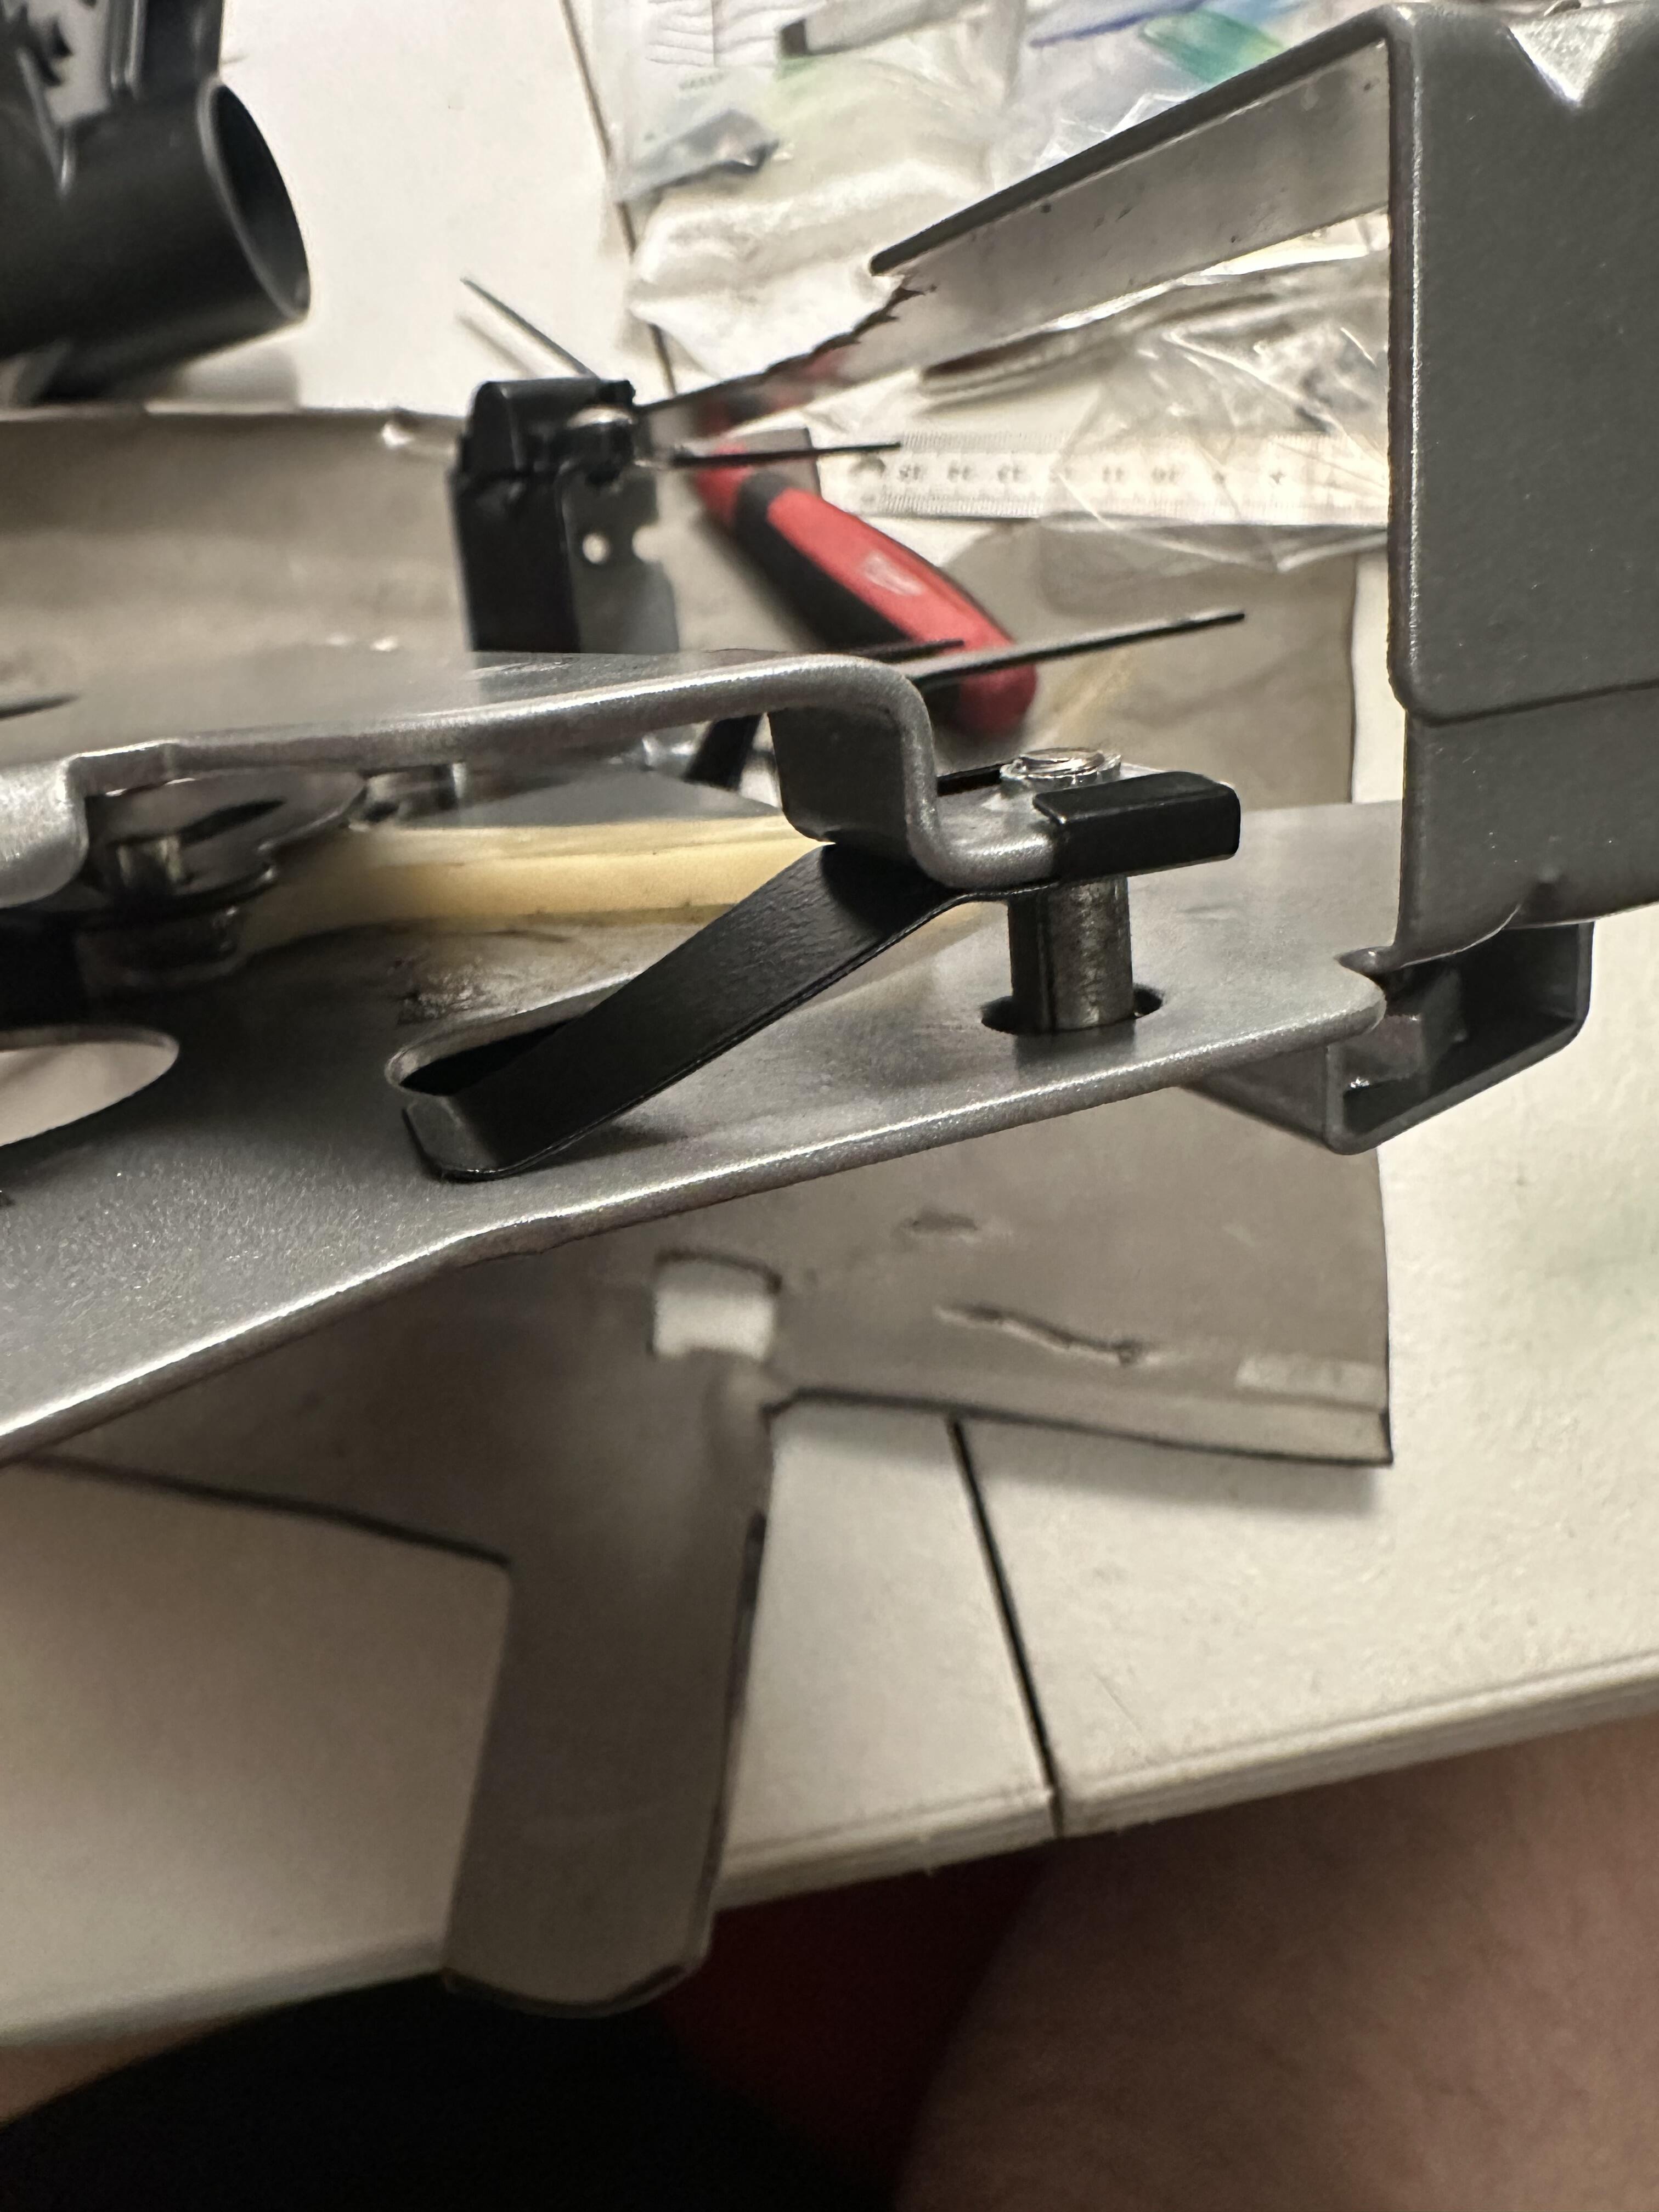
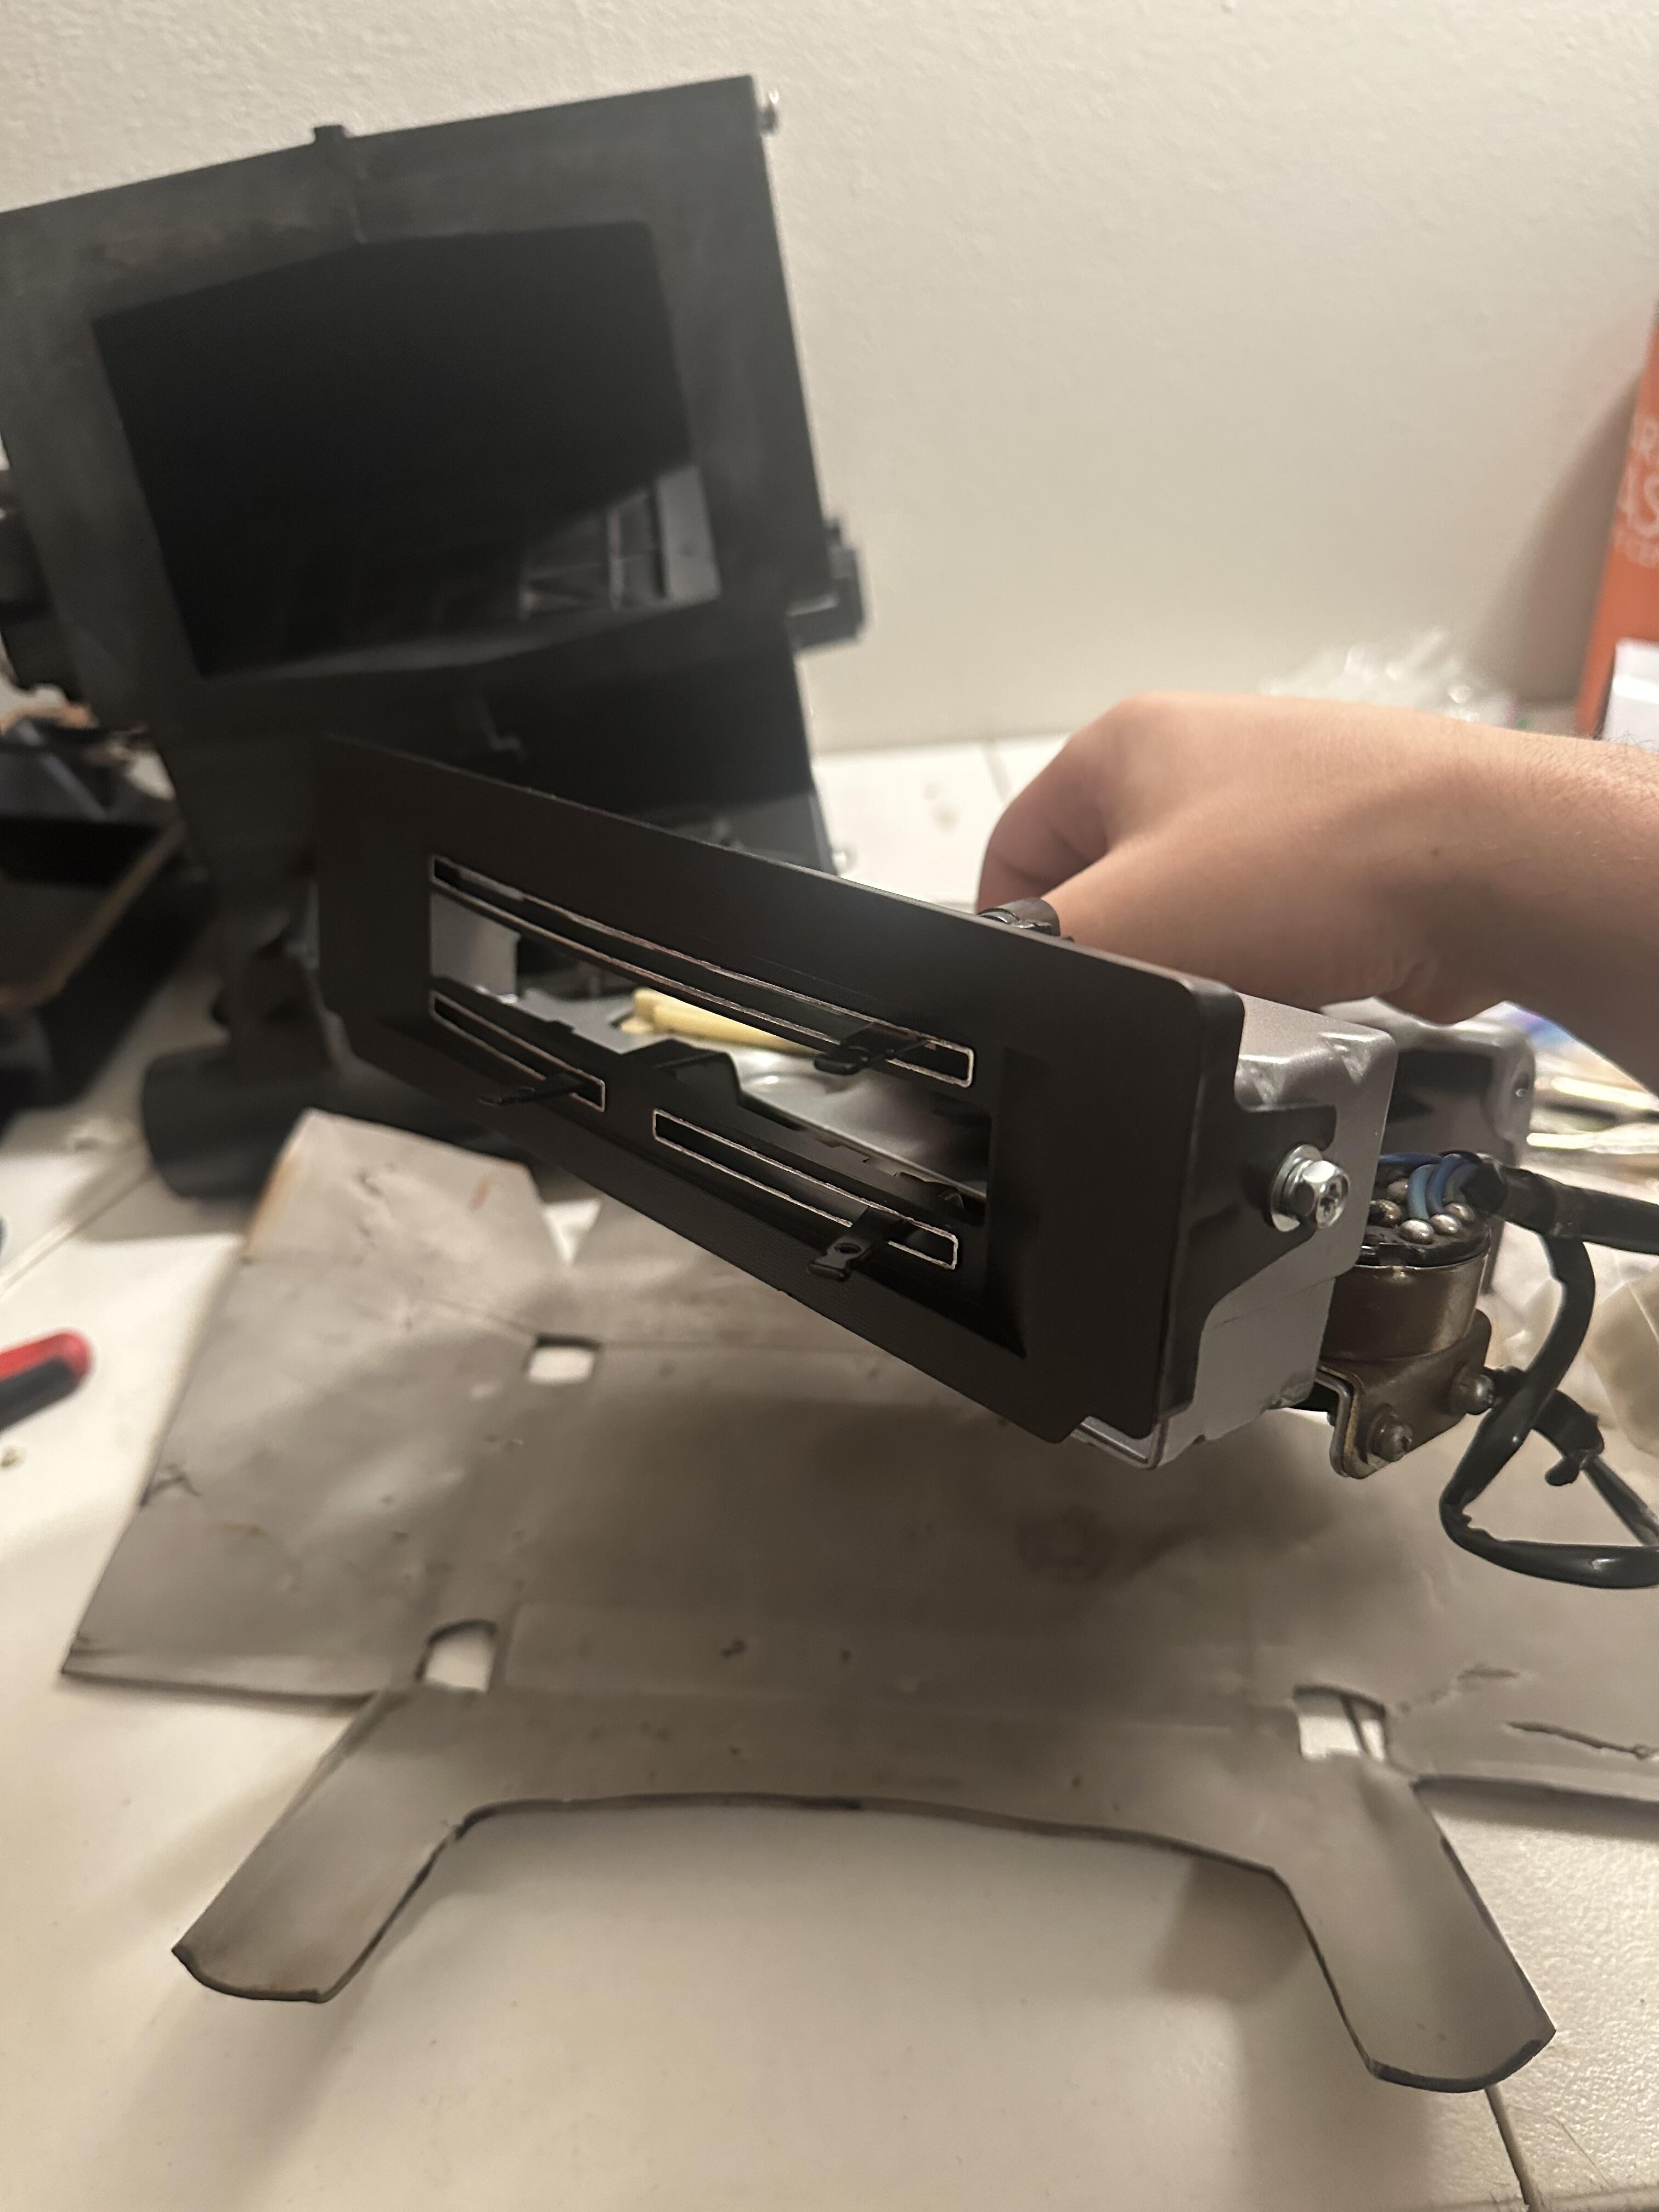
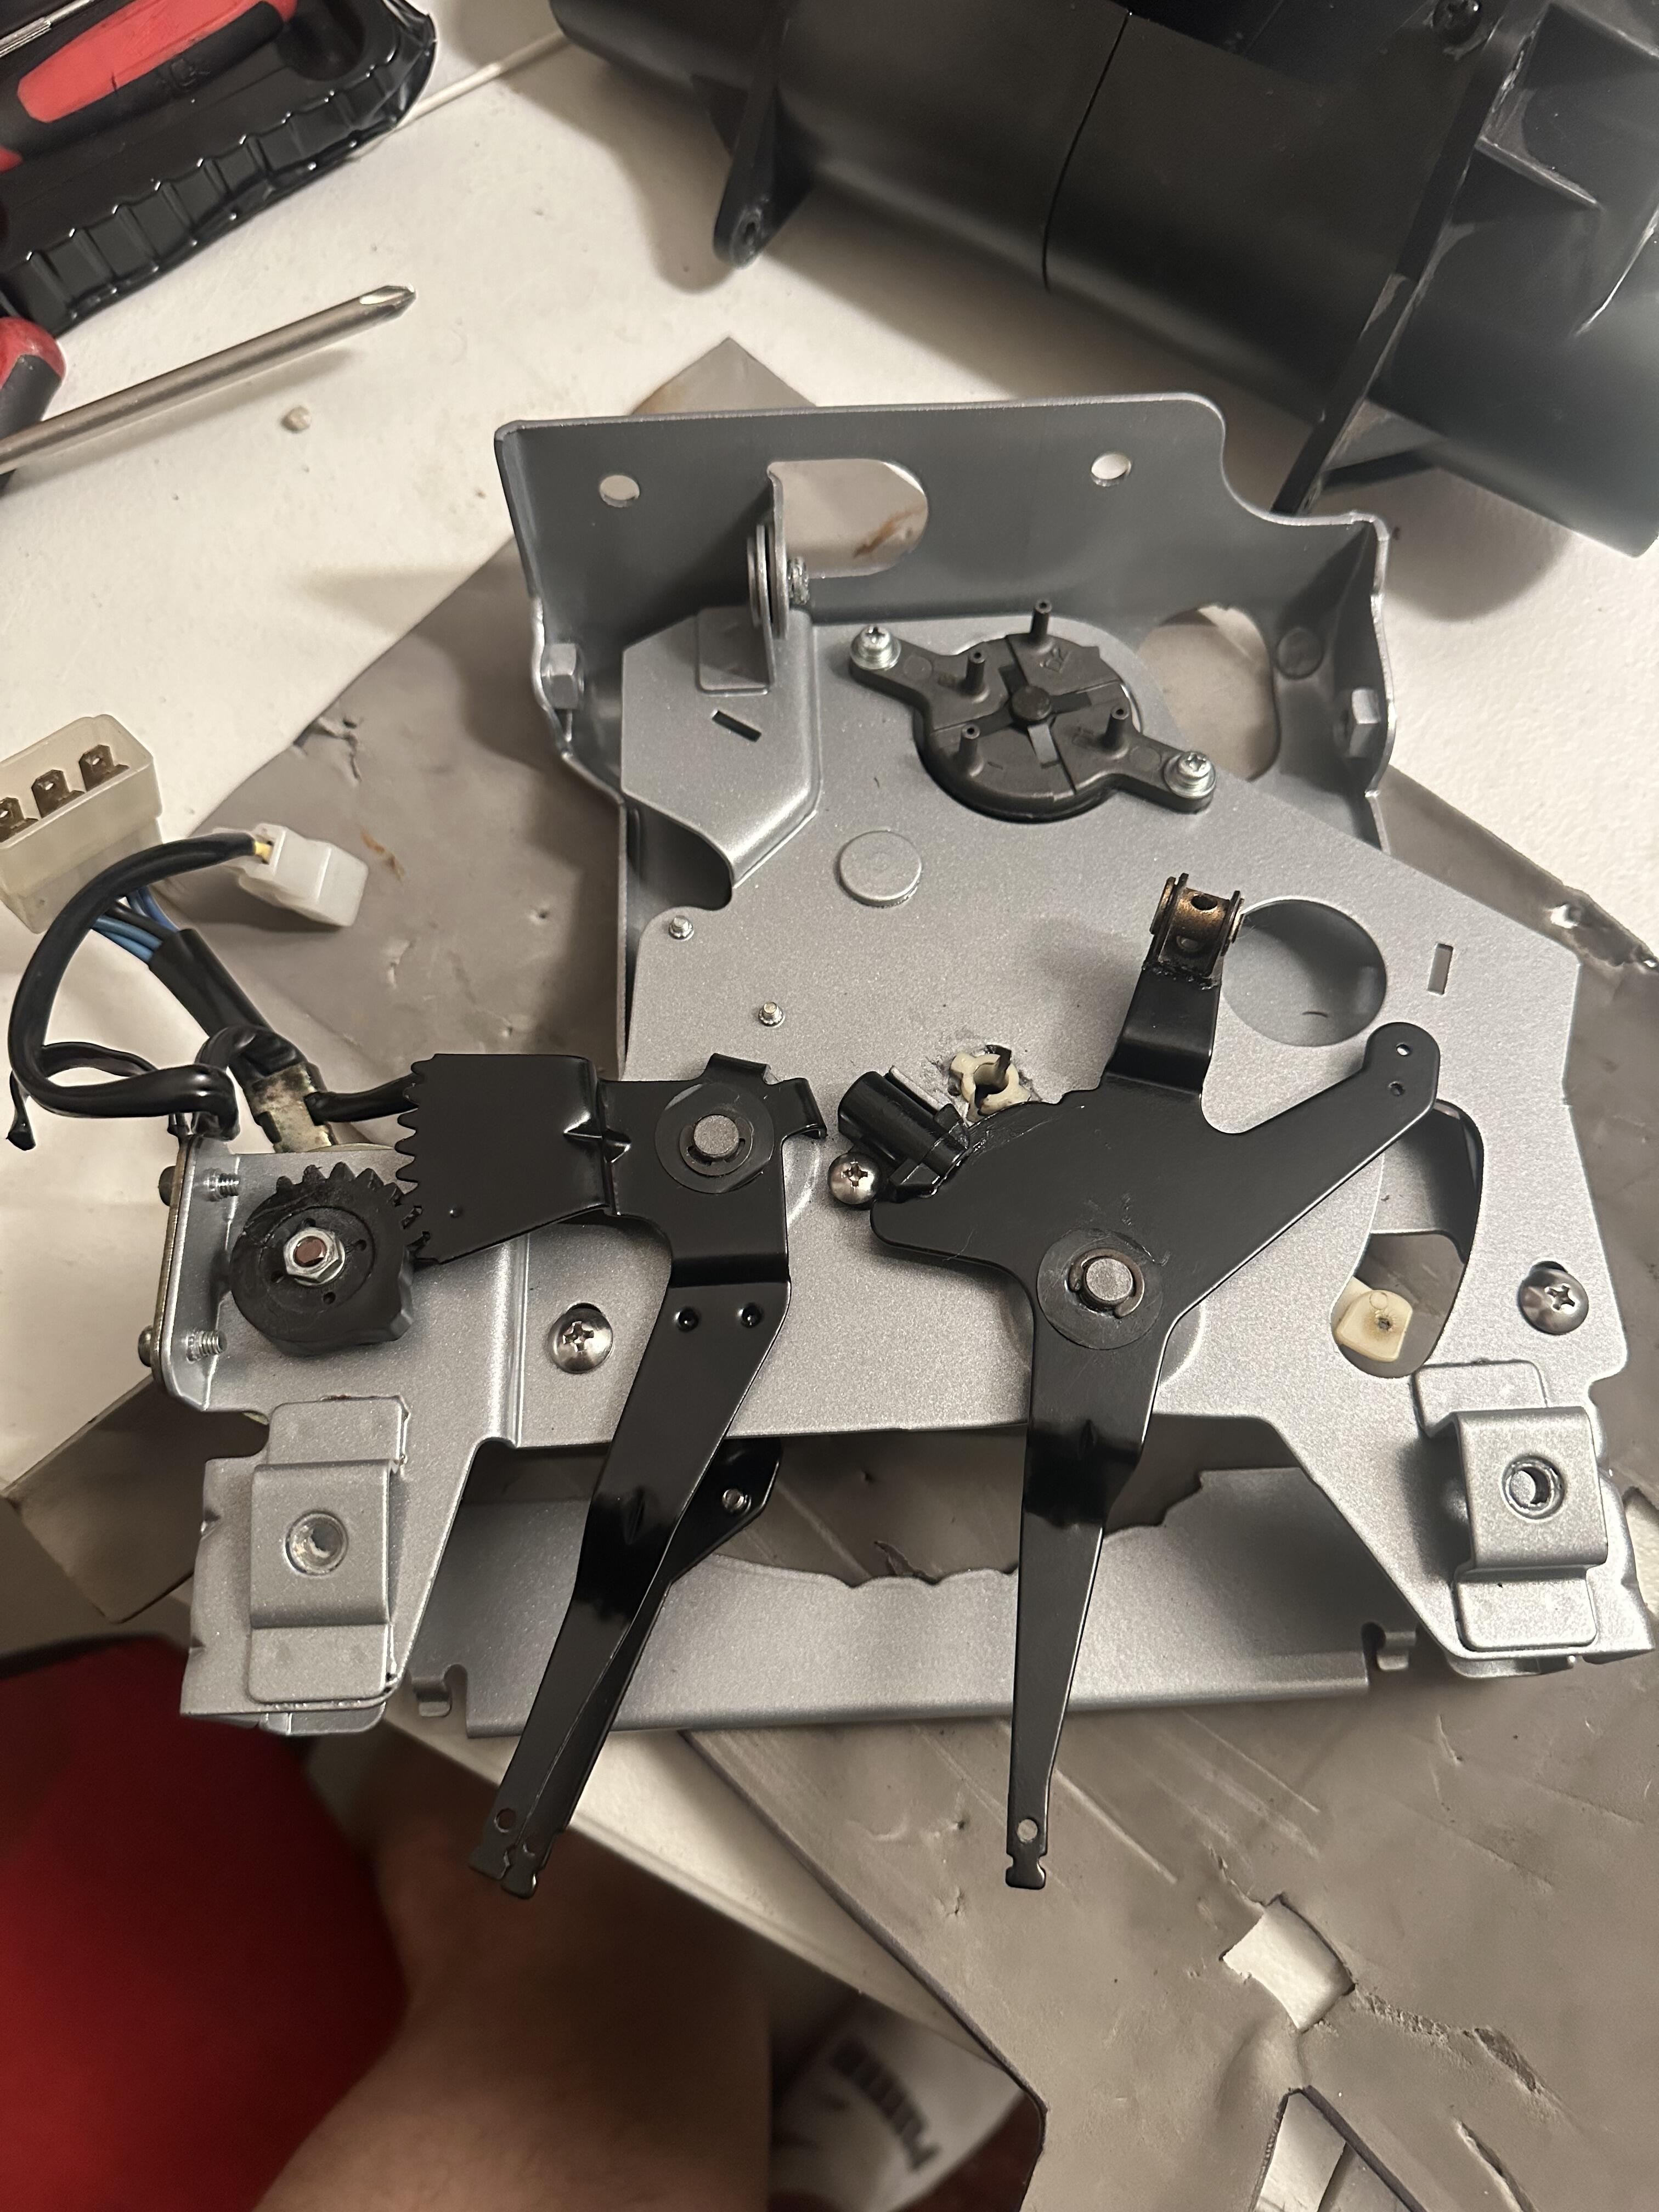
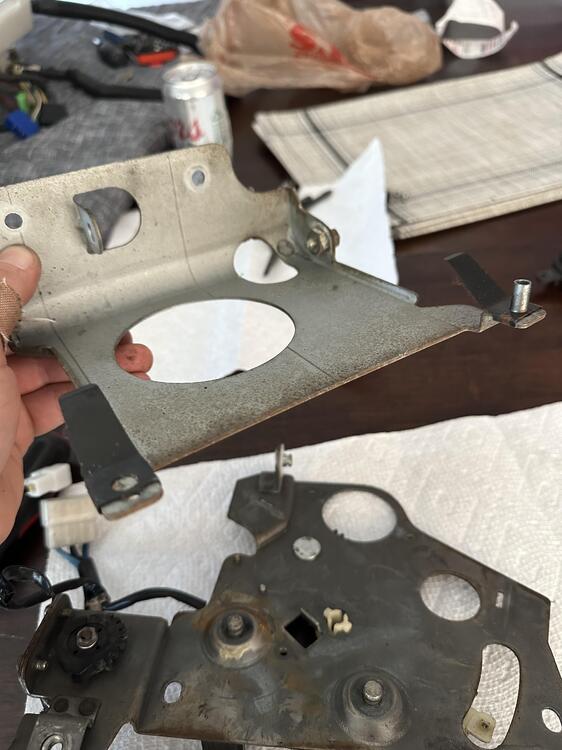
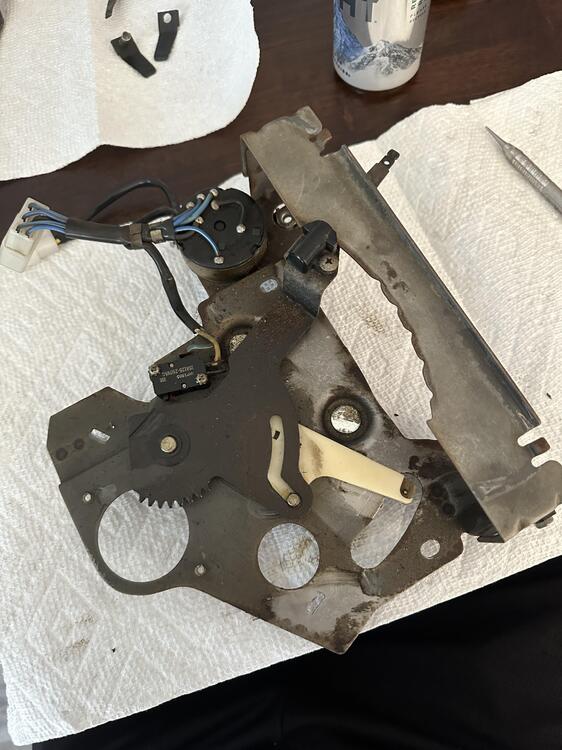
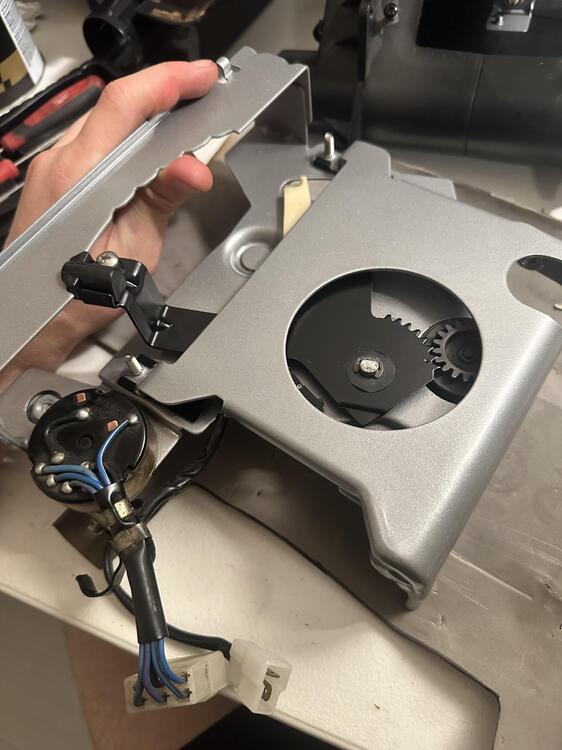
Hey guys, this was my take at restoring my old climate control box. Hopefully it helps someone in the future in case they didn't take good photos:) This is on a 77 280z. I am not sure if all years are the same. My module was really sticky, which was presumably caused by rust and lack of lubrication, so I went the extra mile and redid everything so as to never have to touch this box again. Here is the start take note that I swept every lever to the left so that everything is in sync. The module is upside down. Next is a close up photo of the Hot/Cold switch. It is held on by a pressure washer and snap ring. There is a black mechanism with a spring and ball bearing inside pressed against it. MAKE SURE NOT TO LOOSE THESE! The spring can cause the ball bearing to fly out and dissapear when removing, be careful. Although not in this photo, the Hot/Cold switch is connected to a mechanical wire that travels to the heater valve. The fan switch is removed by removing the nut that holds the black gear on, and two screws on the side of the module. You can then remove the arm by removing the pressure washer and ring. Torwards the rear on this side another pressure washer and snap ring are clipped (holds two halves of the module in place) you can also see the two screws to remove the vacuum selector valve. I will not cover how to rebuild this valve, however to do it you just need to pop it apart and put vacuum grease on the inside so it seals. Very simple mechanism. Here is the top side of the module. Take note of the relationship between the throm arm gear and the vacuum selection switch. This is its relationship with the throw arm pushed all the way left. Unscrew the two screws that hold the control module halves together. You can see them in my first photo. It pops off and you can see the two black spring tabs that hold it together with the metal spacers (0ne is missing from this photo). Take note of the coors in the background and follow suite. Here is a good view of the throw arm mechanism for the selector switch once the half is removed. The arm is attached by a snap ring and pressure washer. Although not in this photo, below the arm is also a plastic circular spacer. It is easy to forget during reassembly, but don't. The black arm also has a tab that controls the plastic throw arm. This plastic arm can crack, so if it is just fill it with epoxy or other strong glue. remove this arm, the plastic peice, and then unscrew the spring loaded pressurre tab from the arm making sure not to loose the spring and ball bearing. Next, Just remove the fan switch and its correlating electrical thing if you haven't already (sorry mine worked perfect before removal so I did not research its proper name. Simple as that. I then proceeded to powder coat all my parts and get new matching hardware. I found Misumi to be a good source for hard to find hardware that matches the original. Ace hardware didn't make the cut, haha. If you wan't you can also go more OEM and plate the parts, but I wanted a more permanent solution.... hopefully. Reassembly is just the reverse of this! Here are some helpful photos. Make sure to grease any areas the control arms pivot on. If you want a guide on how to restore the HVAC plastic faceplate a guide to do that is here (done on the radio bezel). Same principles apply. At some point in the future I will post heater and AC box restorations, and I will cover how this module connects to everything else then:)


 1 point
 -
There's a new clear film that installs like traditional window tint that supposedly blocks 99% of UV rays and up to 43% of the heat coming through the glass. Also supposedly, it is legal to put it on the windshield because it is almost completely transparent. I'm going to be looking into this, and if it is in fact legal I may have a tint shop do all my glass with this stuff. It's also anti glare. Might replace your towel solution.1 point
-
Here's a compressor kit with mounting bracket. https://nostalgicac.com/datsun-240z-260z-280z-compressor-upgrade-kit.html1 point